HOLIDAY DONATION DRIVE - SUPPORT MSW - DO YOUR PART TO KEEP THIS GREAT FORUM GOING!
×
Paul0367
-
Posts
512 -
Joined
-
Last visited
Content Type
Profiles
Forums
Gallery
Events
Everything posted by Paul0367
-
 Yeh toying with the use, there only on with blue tac for effect as they would need strapping down and metal bands added to them.
 -
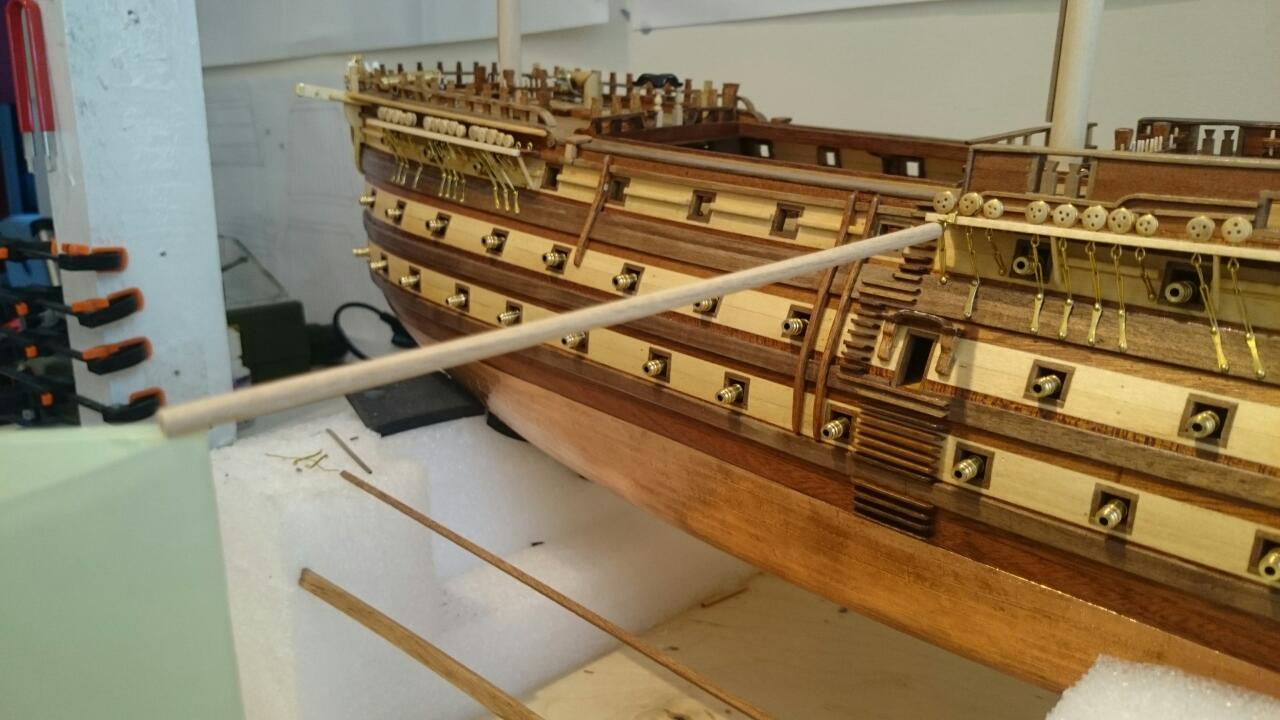
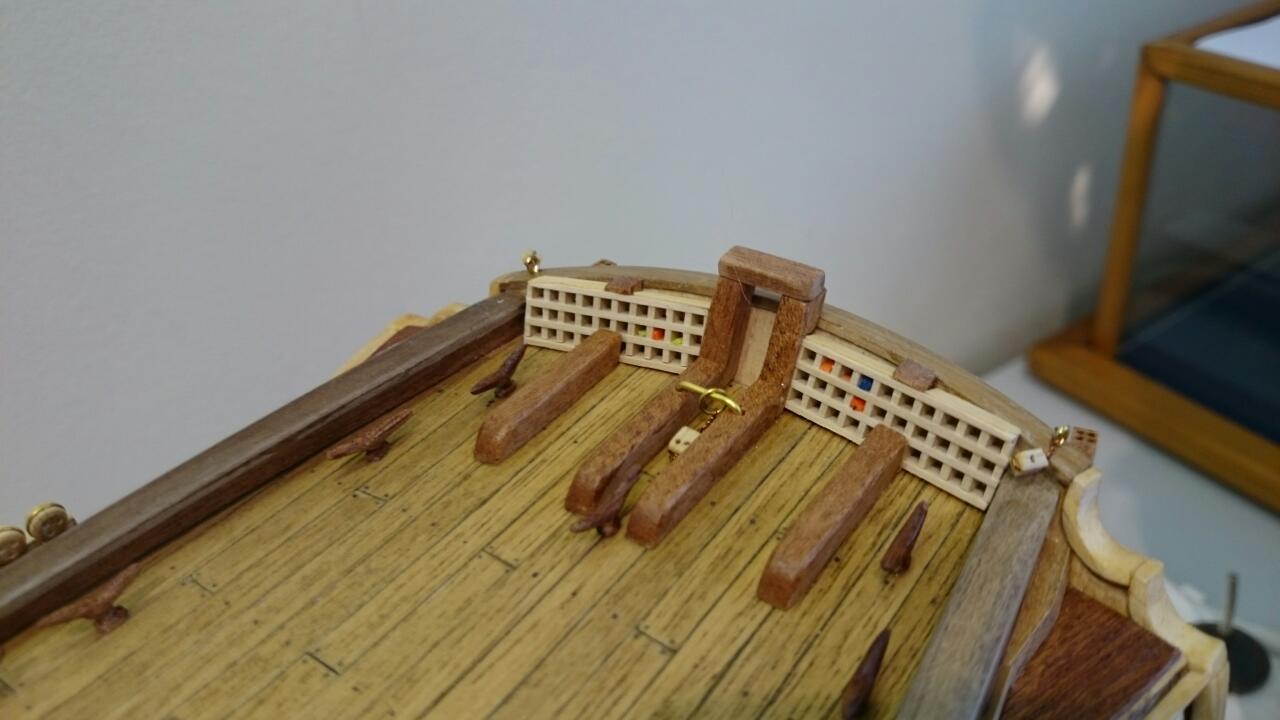
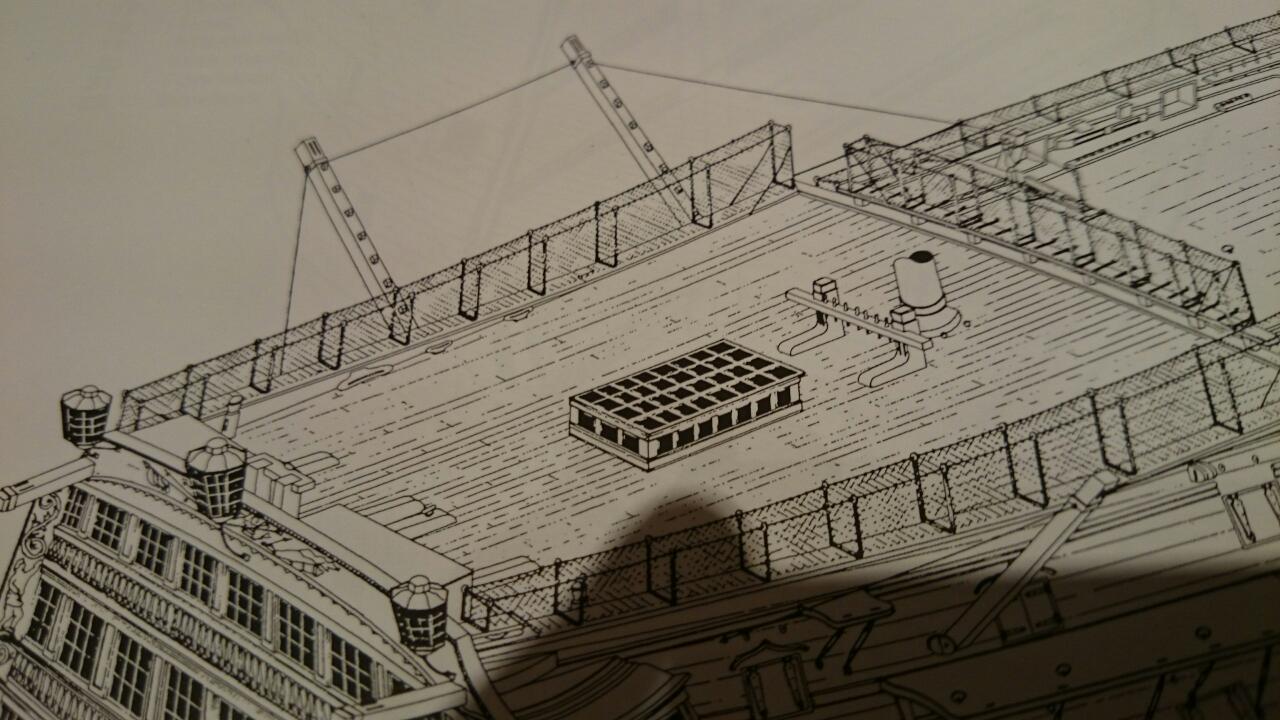
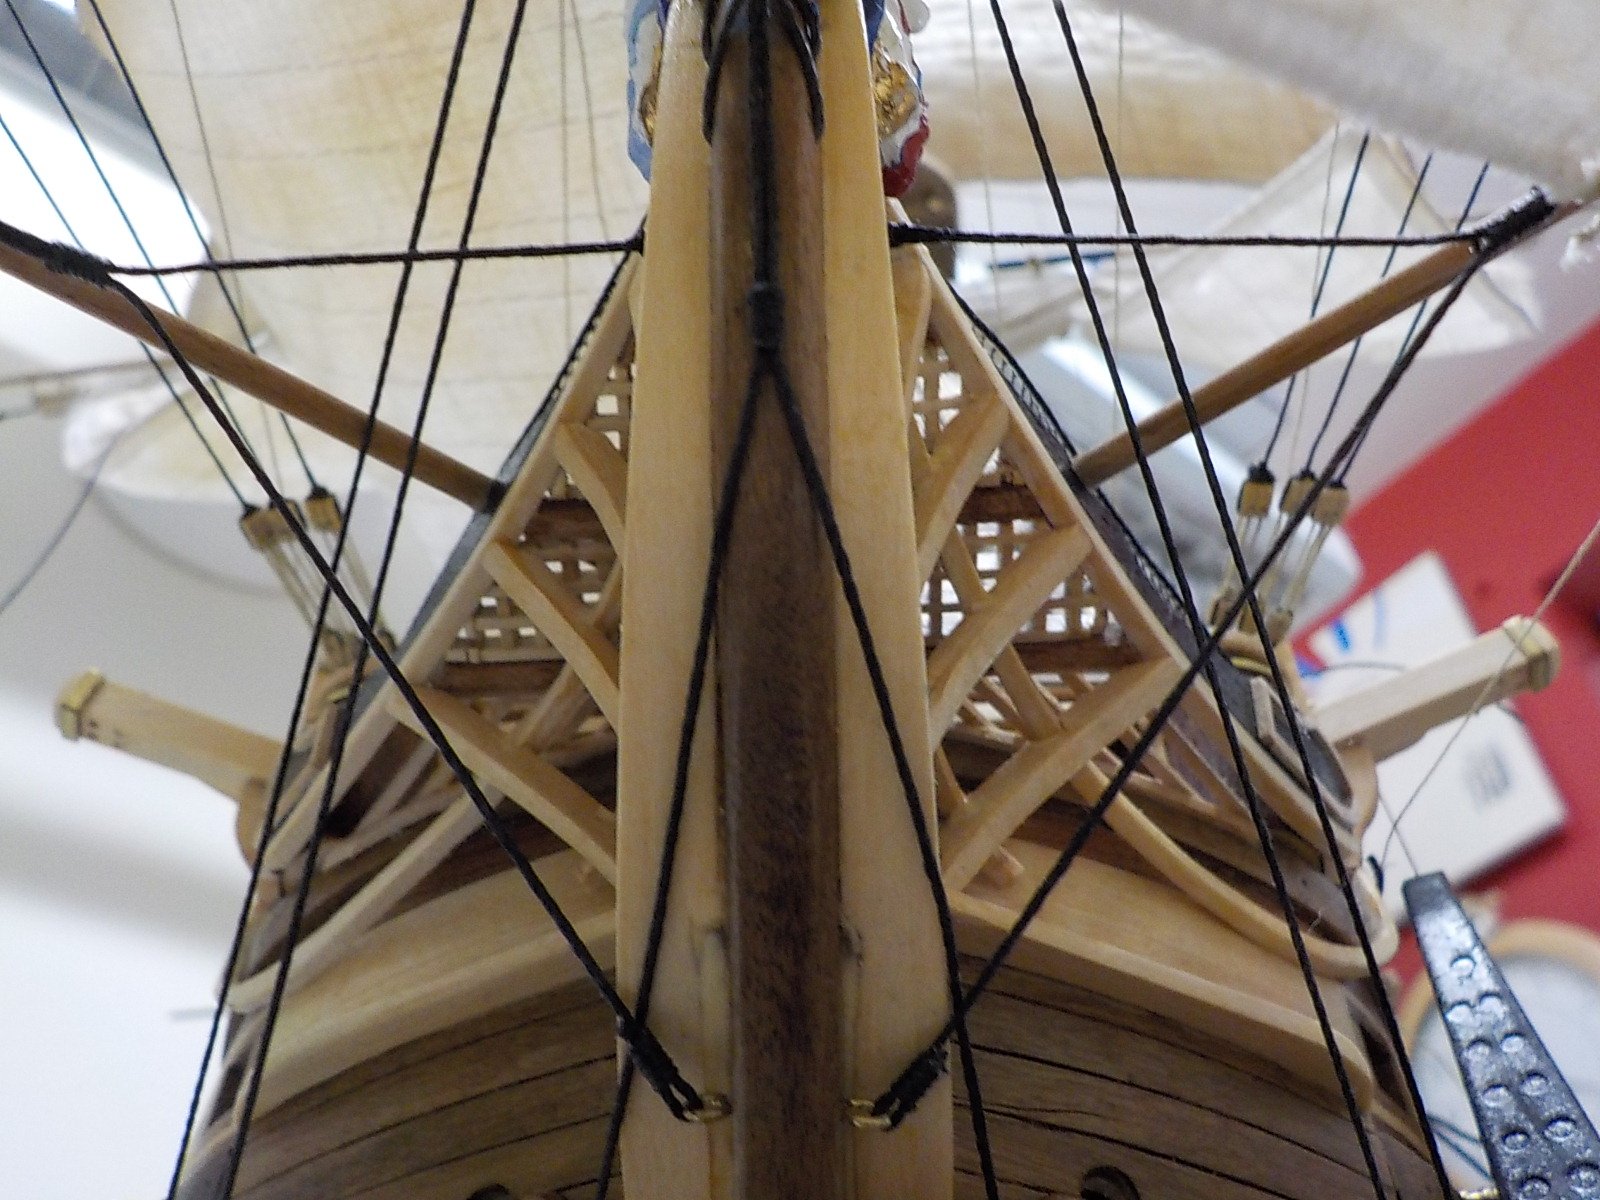
Yep im still going, no, I haven't rigged the canons. Instead I teated myself to another book. HMS Victory her construction career and restoration. This book has opened doors regards info, the brackets I made for what I thought were for spare sail spars, turns out there not spare there actually functional and are brought out when at full sail. Pictures demo this, I have also made the deadeyes for the platforms as close as the scale allows to the original, ok only one is positioned but I think you get the idea, Oh and I have made up the mast strengtheners too but forgot pictures but to be fair there only clamped in position at the moment. Canons still avoided at this time.


- 708 replies
-
- 4
-

-
- victory
- constructo
- (and 1 more)
-
Finally after receiving no more than six anchors I have the correct ones, ok,ok, I did order two and on receipt got two pairs, easily done when you don't read the description, that said there all the incorrect type. The timber for the new ones needs scratch building and could either be purchased ( good luck matching them ) or use what you have in the kit. I chose the latter, well we don't have the timber the diameter needed so a bit of fabrication is required by laminating three strips of Sapelly together and cutting to size (dieted size) Subject change warning :- Can I just say until recently i've become to realize how beautiful this kits supplied timber is and to be honest why I ended up staying natural.. I say this because I have purchased extra dowel for the sail spars that will be slung along the side of the hull in the brackets I made. These are not even close to the same standard. The wood quality alone would sway me to stick with Constructo for my future build unless I can have a mooch through the box first.

- 708 replies
-
- 4
-
-
- victory
- constructo
- (and 1 more)
-
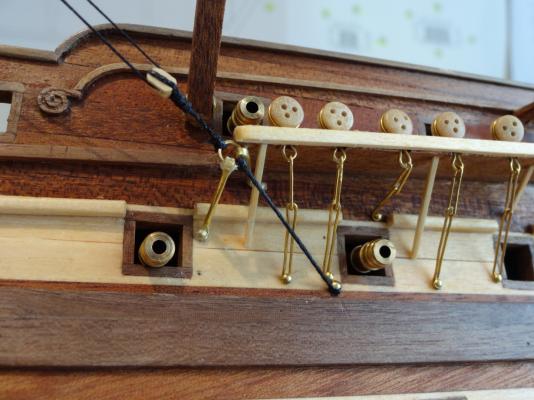
Ammendmen. Thanks to Andys information, this ring is only a line guide and not a fitting as I initially thought. This is difficult to find any info or images on, well it was for me. Andy you managed it, cheers. Brackets were repositioned to accept the ring at an angle where its used as a guide, well to be honest as it looks in the picture above. Progress is very slow now whilst I get to the point I am happy with the rigging for the canons, as yet i'm not, this is holding up the builds progress.

- 708 replies
-
- 4
-
-
- victory
- constructo
- (and 1 more)
-
Wow your case is now sorted, hey great idea regards mounting the masts, honestly I would not have thought of that, goes to show what experience gets you. It is a pinched idea already. I do like her painted and if the Caldercraft is destined to be a future build it will need to be. She is looking stunning and look forward to seeing the ship in situe.
- 230 replies
-
- 1
-
-
- victory
- artesania latina
- (and 1 more)
-
Oh mate, thats Stunning and one of my passions is the age of steam, I live local to Fred Dibnas empire. They are beautifully made and thats why so many survive, ok boilers are always a weak spot but for obvious reason. where are you taking the picture. Tell me thats not the back of your house Hey your a dark horse, do you own one yourself or just keep others going. Love it, seriously thats a talent
-
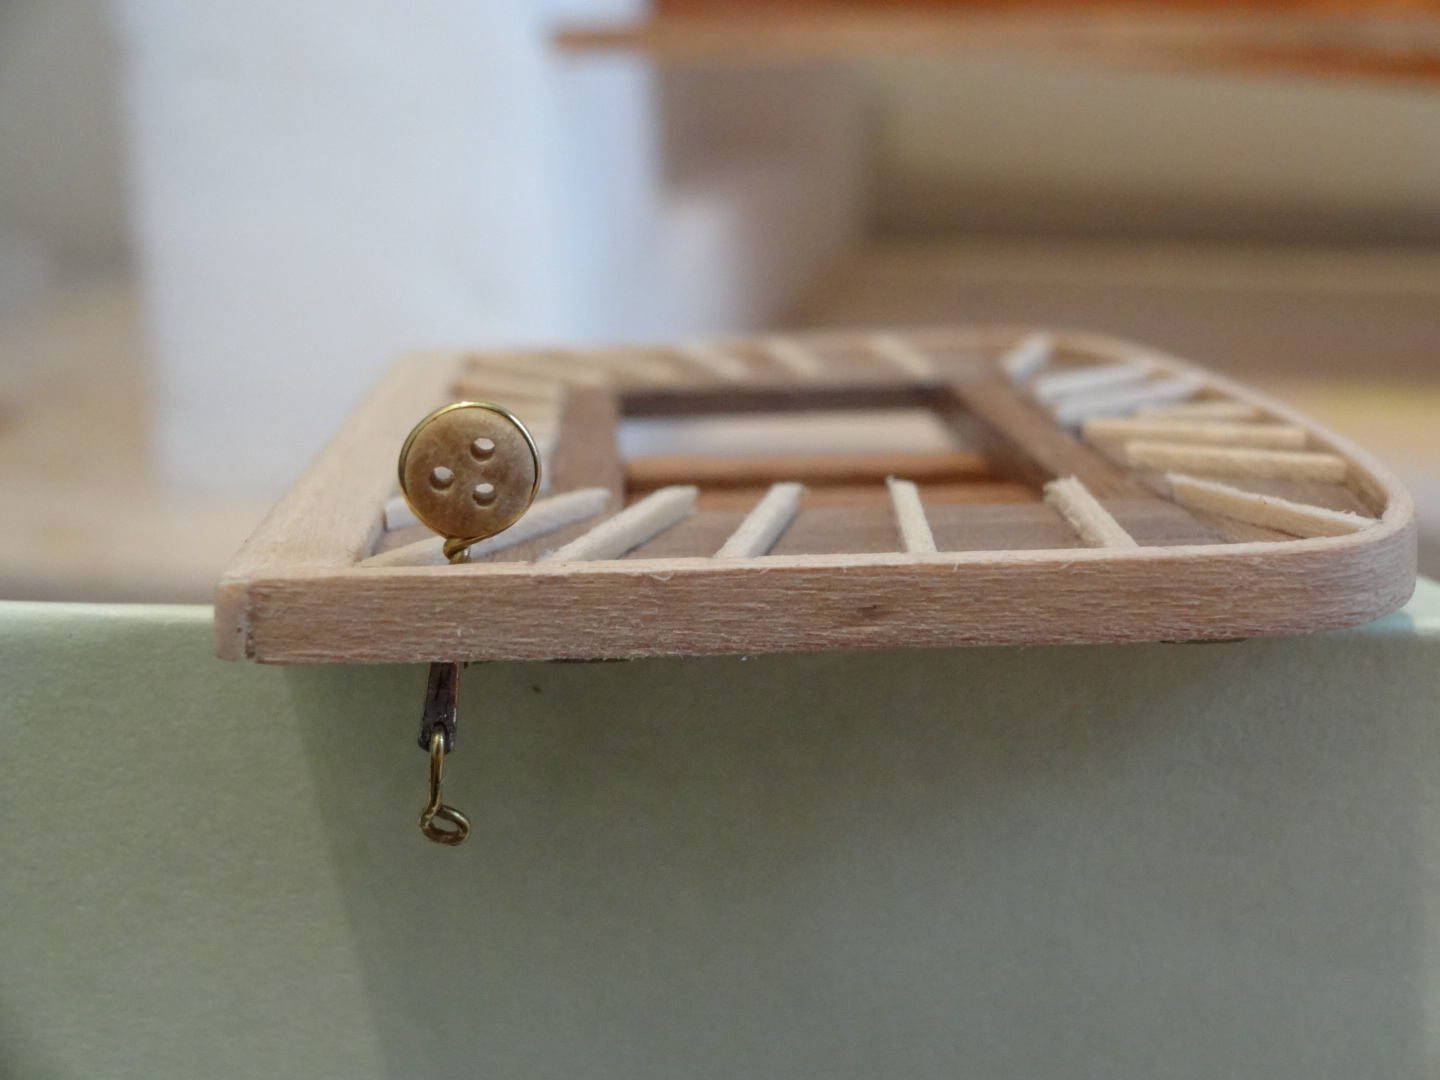
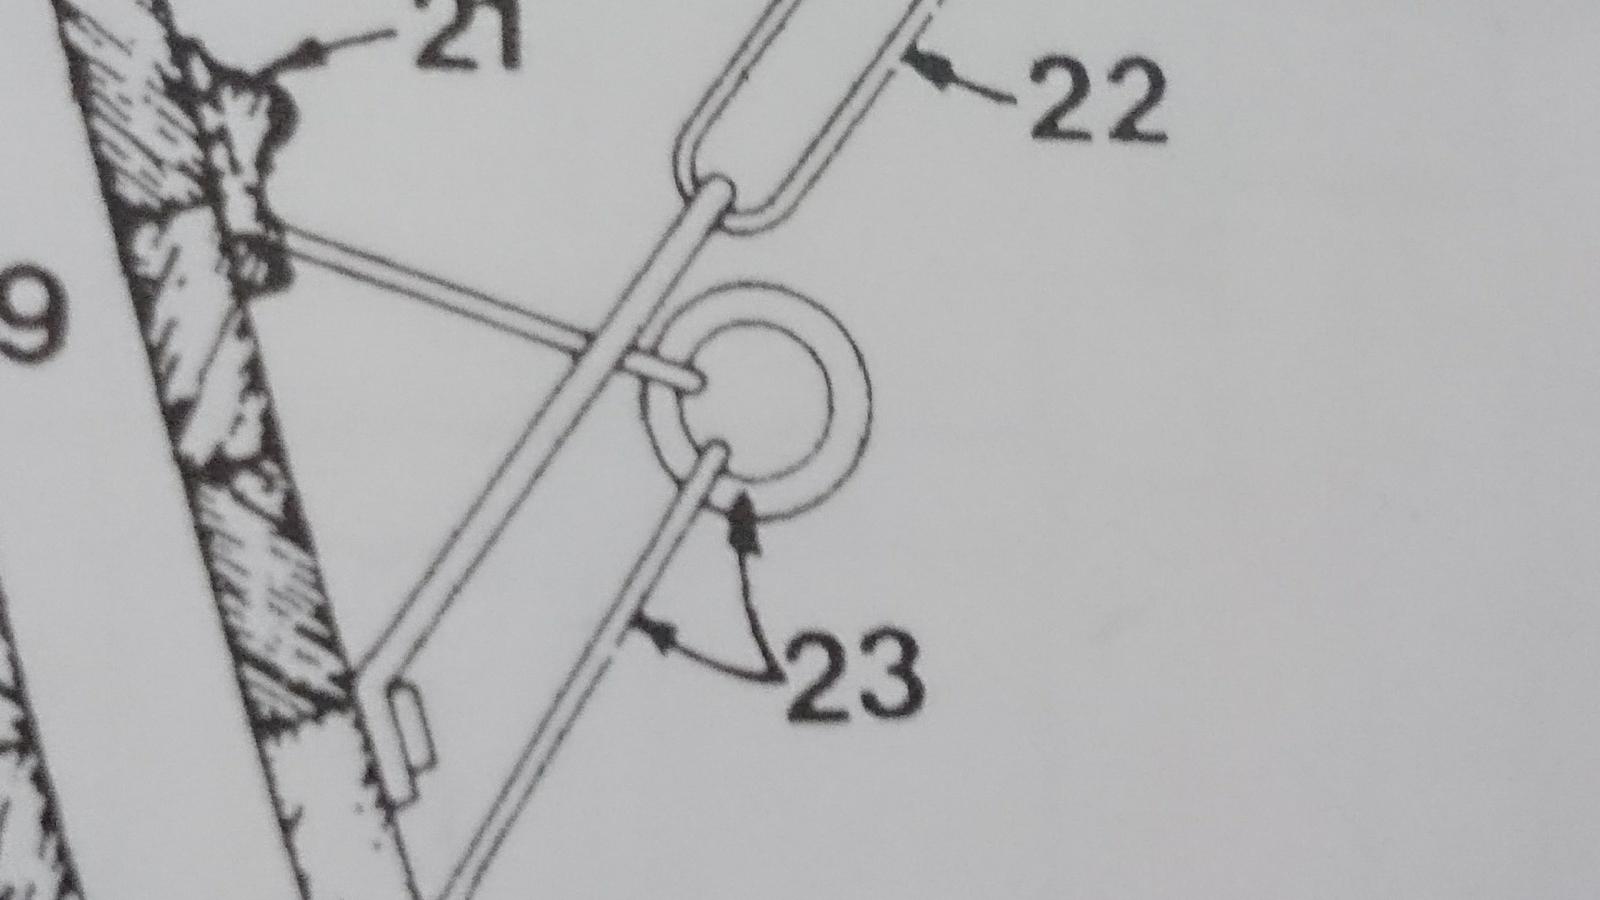
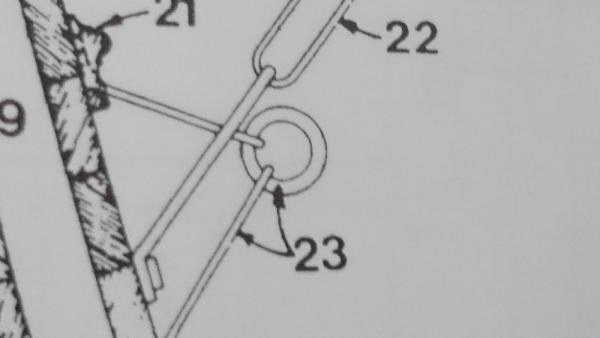
Thank you Ian, rain, thunder and ⚡ as I type this. I have been doing a bit of mooching in my book the anatomy of a ship and came across this. No 23 in the picture, whats this, well its a bracket and ring for the main sheet block of course but glad you asked all the same, oh and before you scramble to grab the Constructo manual, forget it, well they did. this is basics but again ommited from the kit. I'm supprissed its got steering wheels, oh silly me it only got one of them too.

- 708 replies
-
- 6
-
-
- victory
- constructo
- (and 1 more)
-
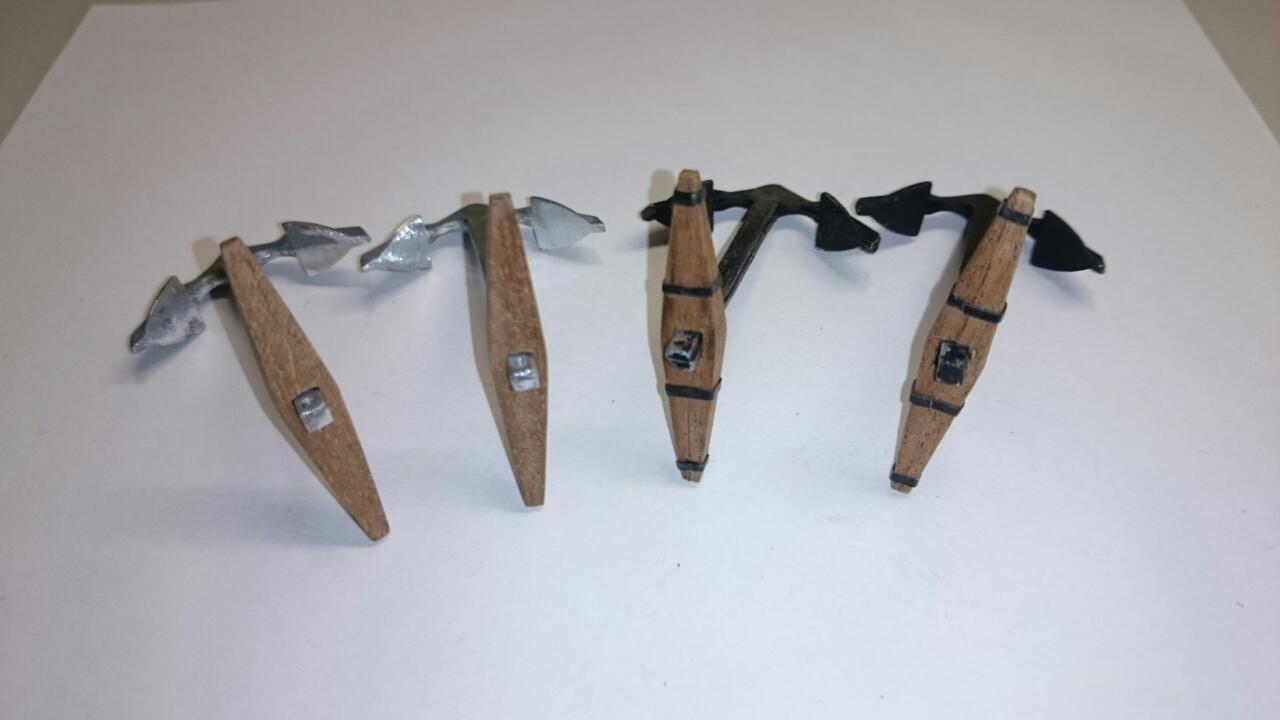
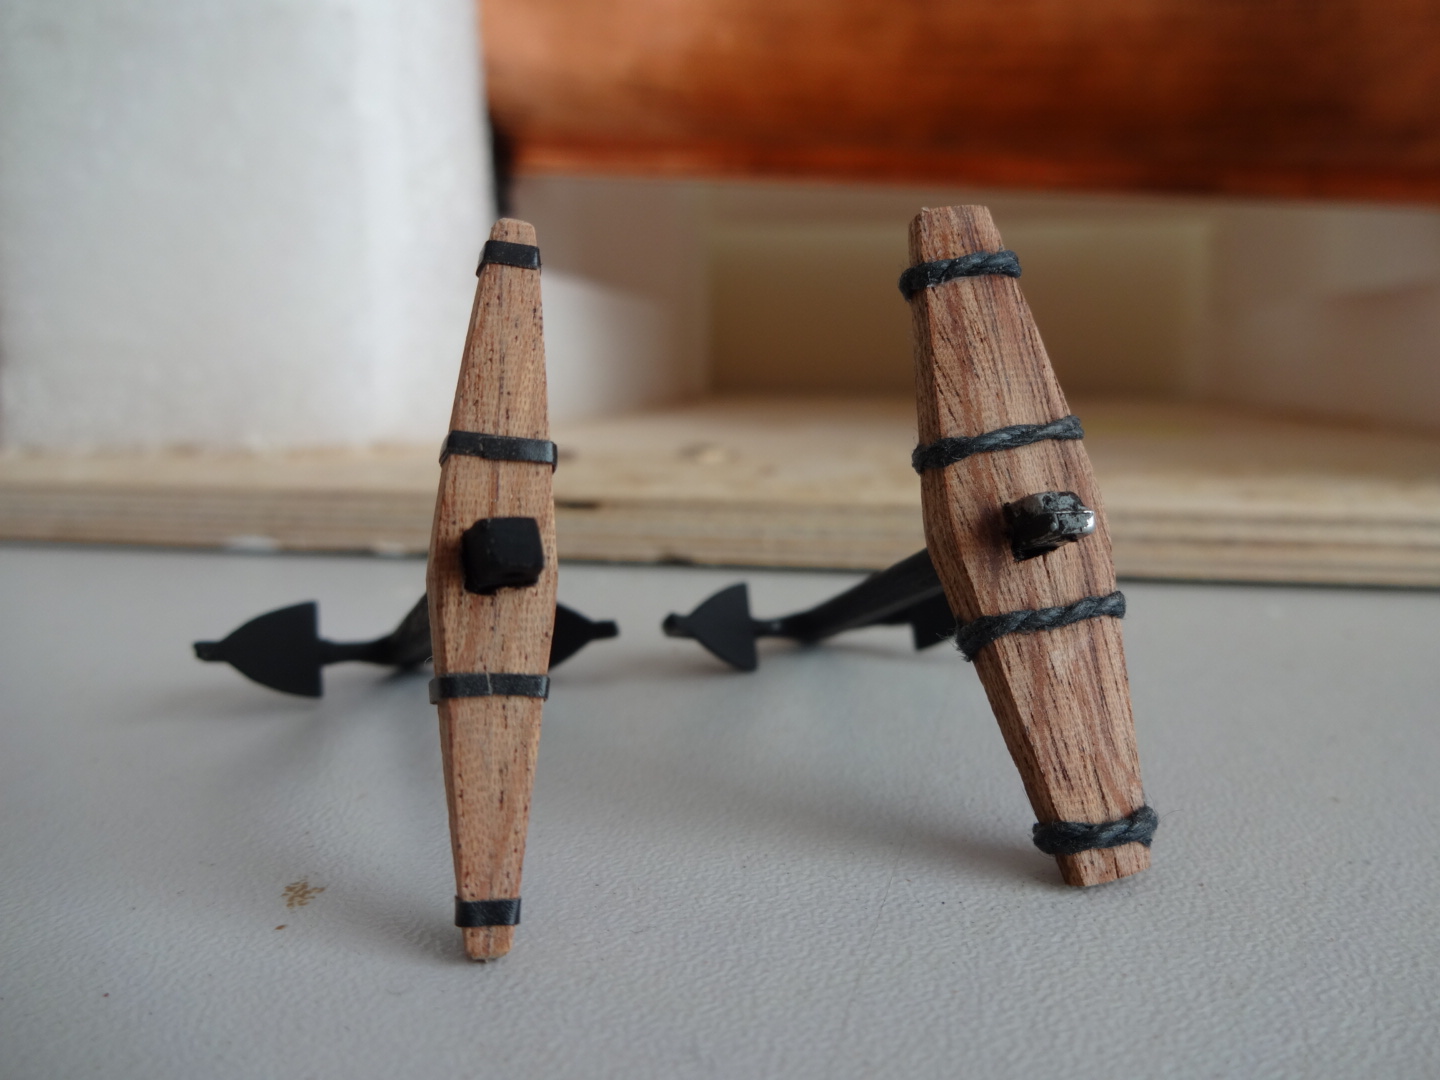
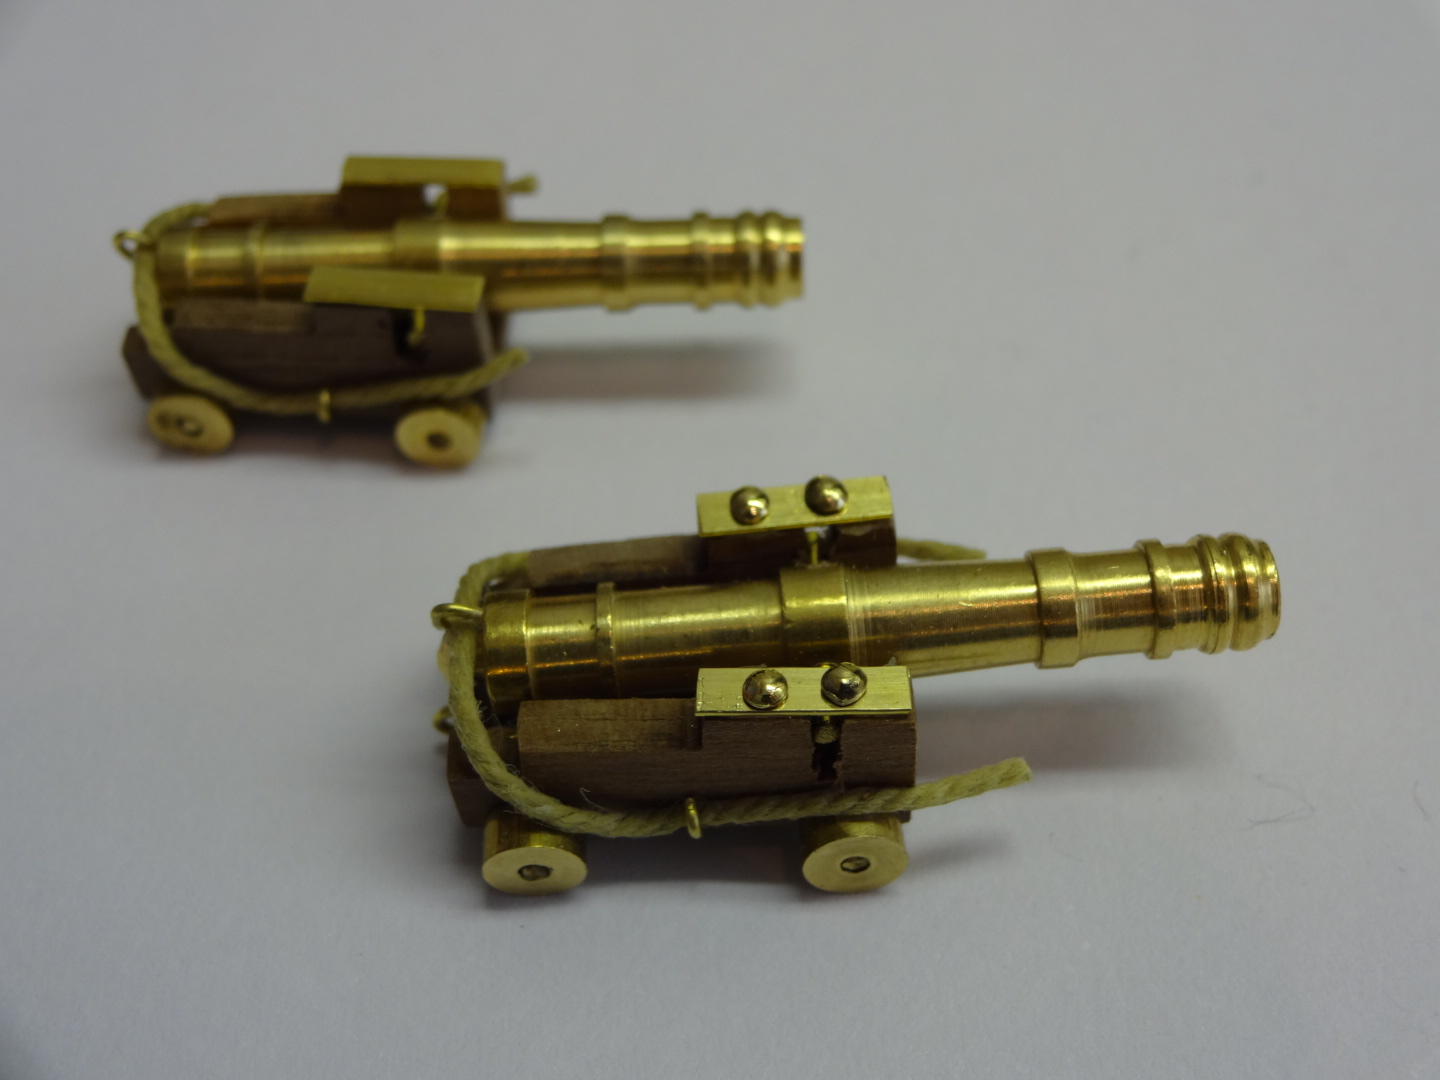
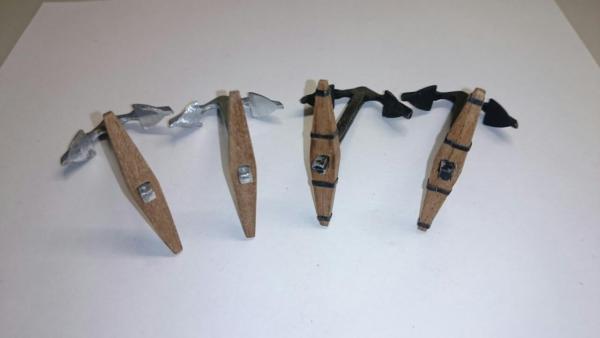
Anchor diet, oh also Constructo seam to think the victory was built in medieval times, the right anchor was made as per plans, rope supports, but the actual anchor has steel supports as ive replicated on the left version. The wood section on the anchor of the kit is huge if scaled up and needs dieting.

- 708 replies
-
- 5
-
-
- victory
- constructo
- (and 1 more)
-
Hi Dave. Your comment, I might have another go, sounds very familiar. Ive purchased a ton of wood for all my turn backs, although its never the quality of the wood provided in the kit. As for not using/ forgetting advice, that old saying comes to mind, you can lead a horse to water. Ha ha. Andy mentions the thread and lack off it, I hope his is the correct colour to start with and not like mine, GREEN.
-
Artistic licence but looks fine to me and let's face it whom going to know otherwise. The painting makes me think, should I have done, does look good painted.
-
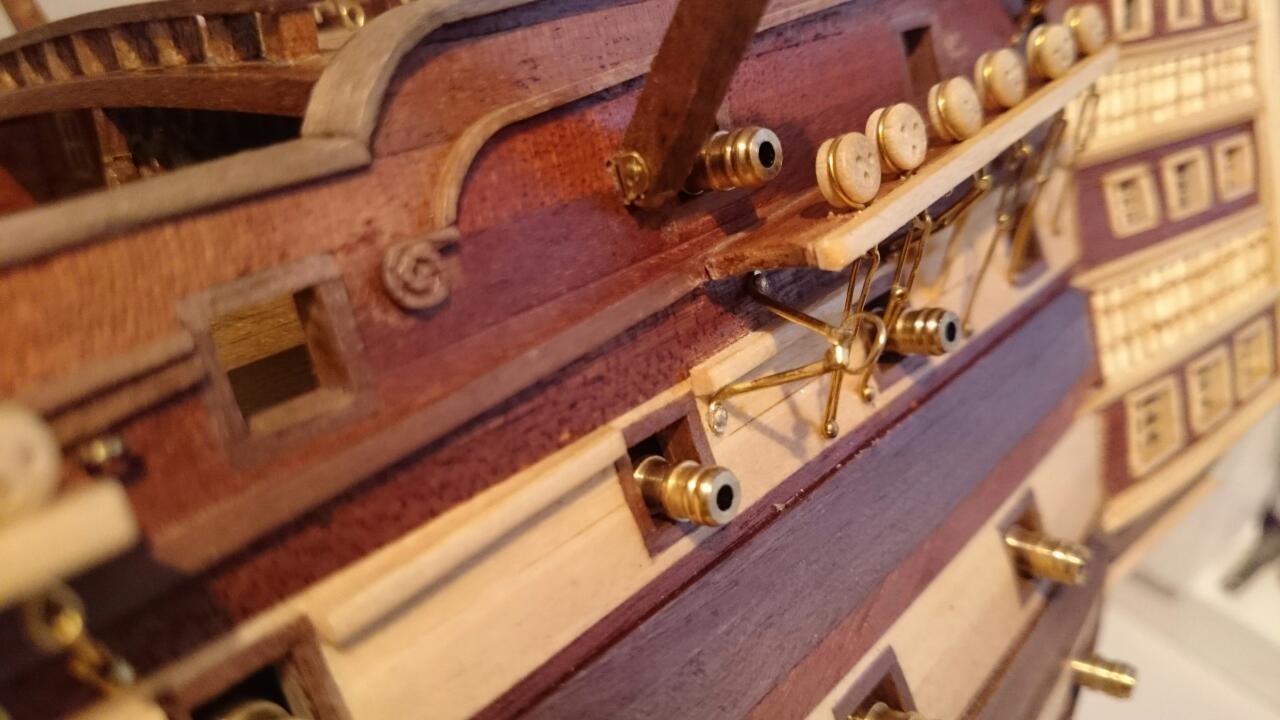
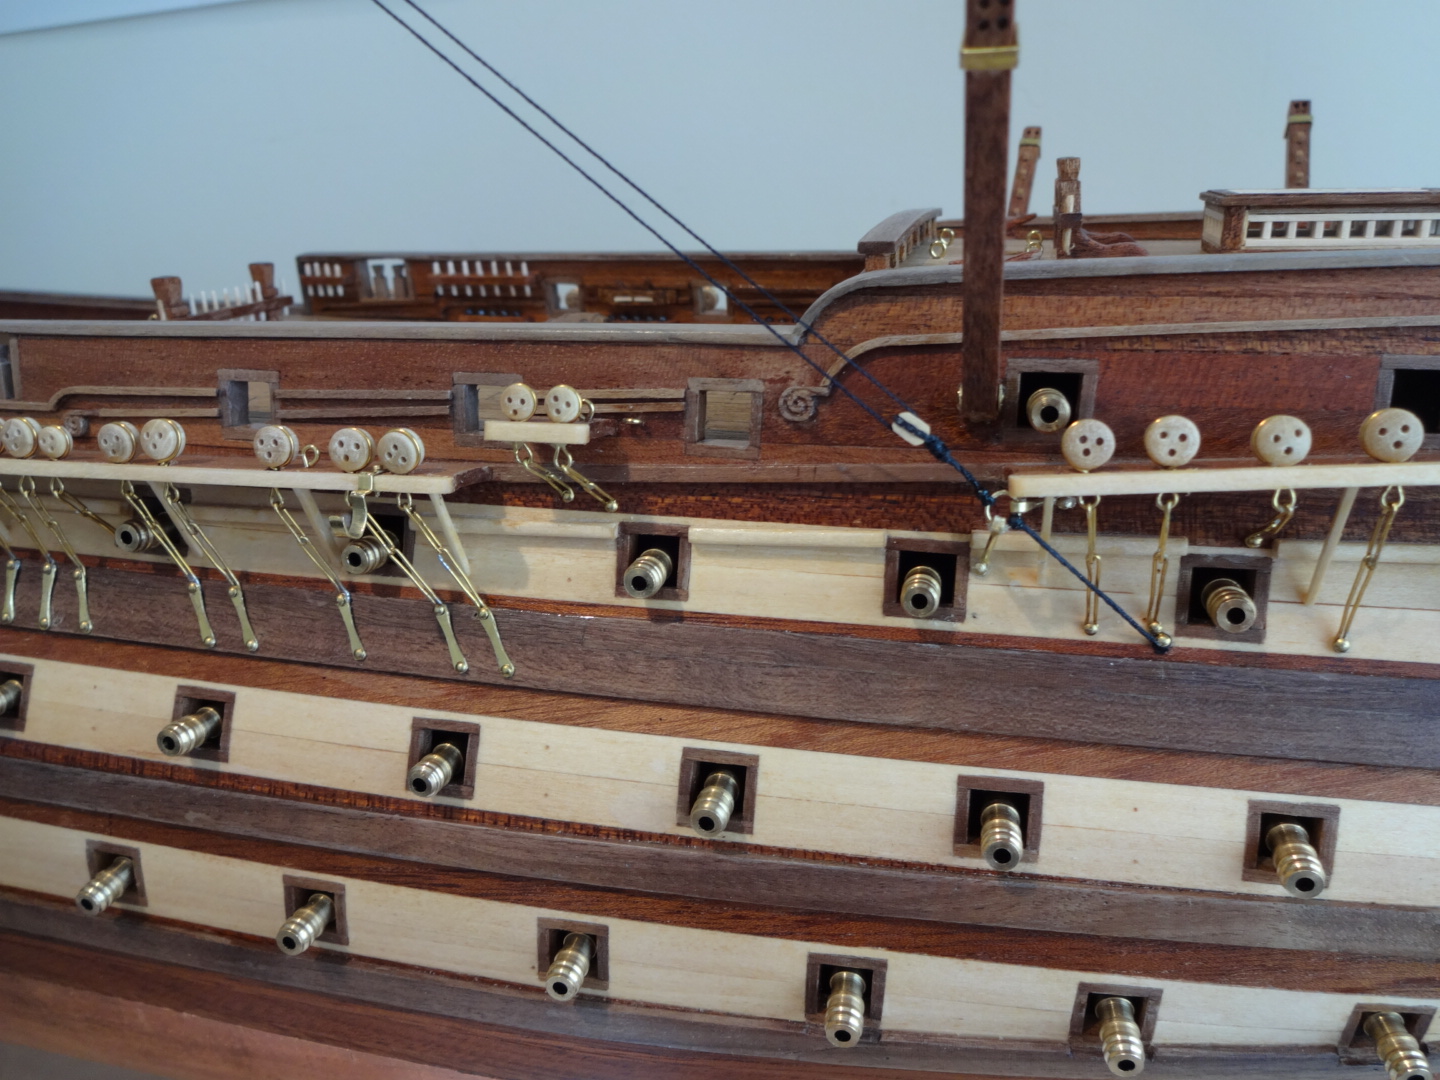
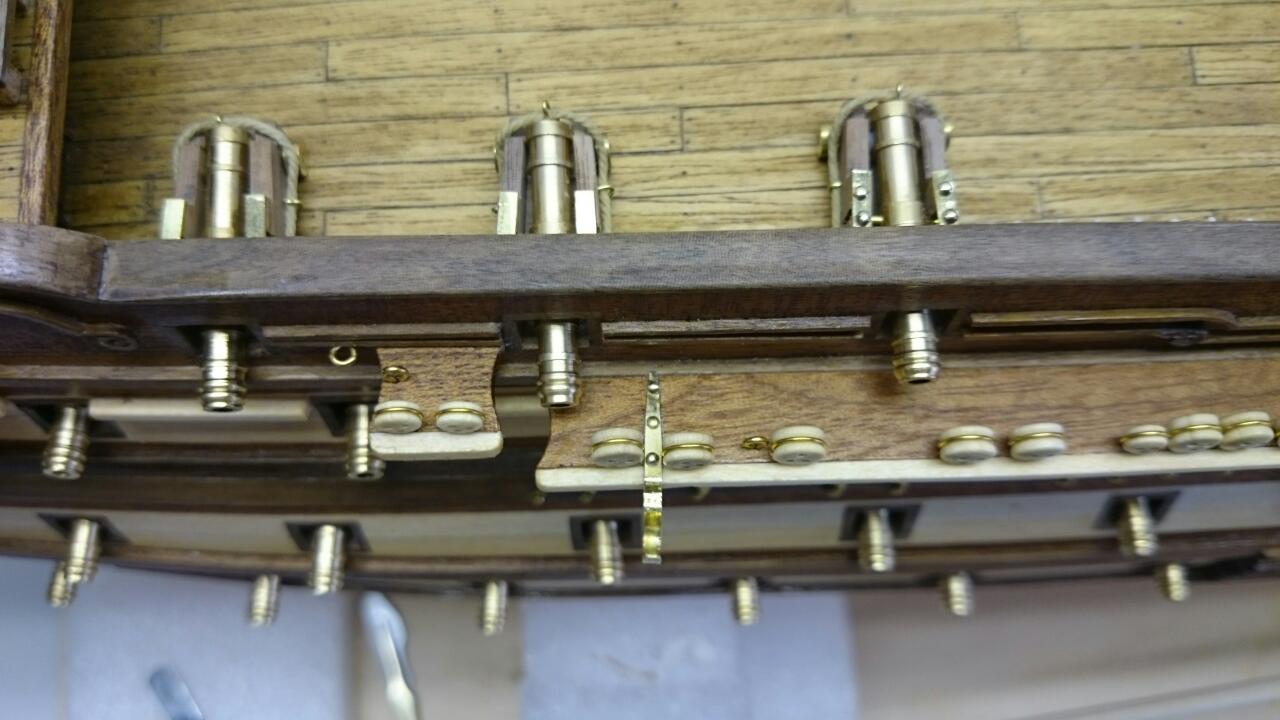
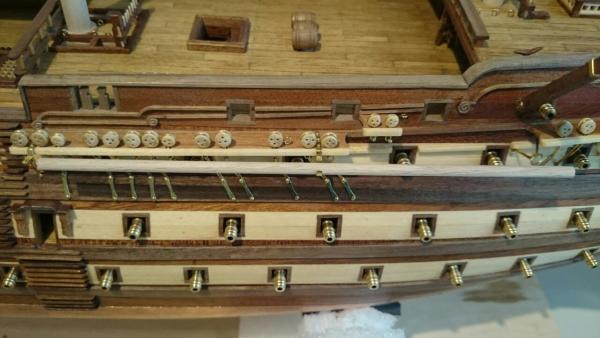
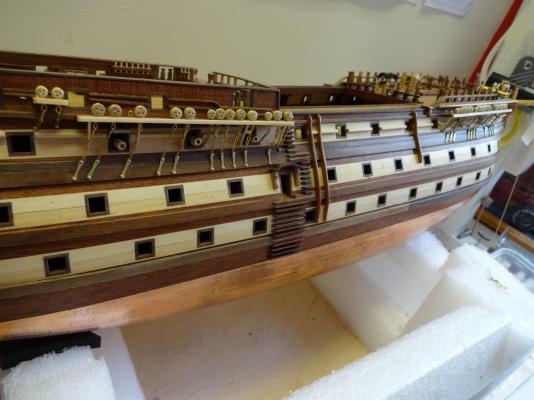
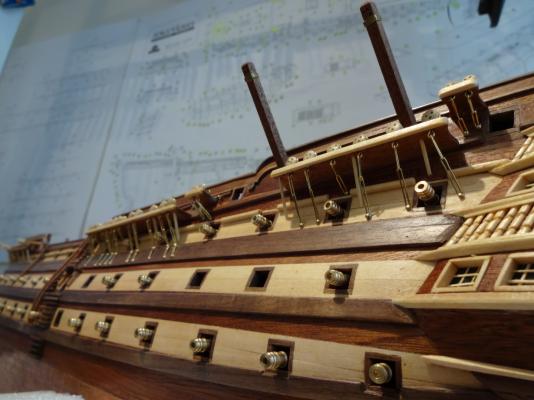
I have had to go back and tackle the canons and the ropes that are used to prevent them running around the decks. I have only fitted the main ropes so far. I have also decided on the 11th hour to add the bolts on top of the canons just to get rid of the flat look of the brass plates. Also i've made some brackets which carry the spare sail spars on the main channel.. Quickly eating up all the kit supplied brass strips with all the additions. One last picture of the hull, emblazoned with canons, yep still doors to fabricate.


- 708 replies
-
- 7
-
-
- victory
- constructo
- (and 1 more)
-
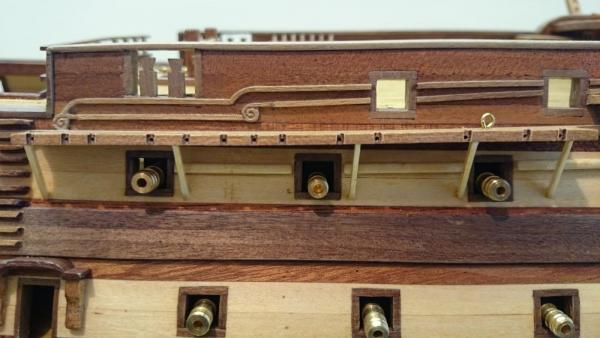
I did a canon count and lost 3, looked everywhere to no avail, even started to look at out sourcing some more, just couldn't understand how and where. look at the pictures above, yes they were in the hull at the top to see if the links got in the way.... Age i'm thinking
- 708 replies
-
- 3
-
-
- victory
- constructo
- (and 1 more)
-
I still haven't finished my side windows, its a nightmare job which if you remember I torn mine apart as I got a miss match with the side. cutting the strips so thin and even takes a long time and cursing.
-
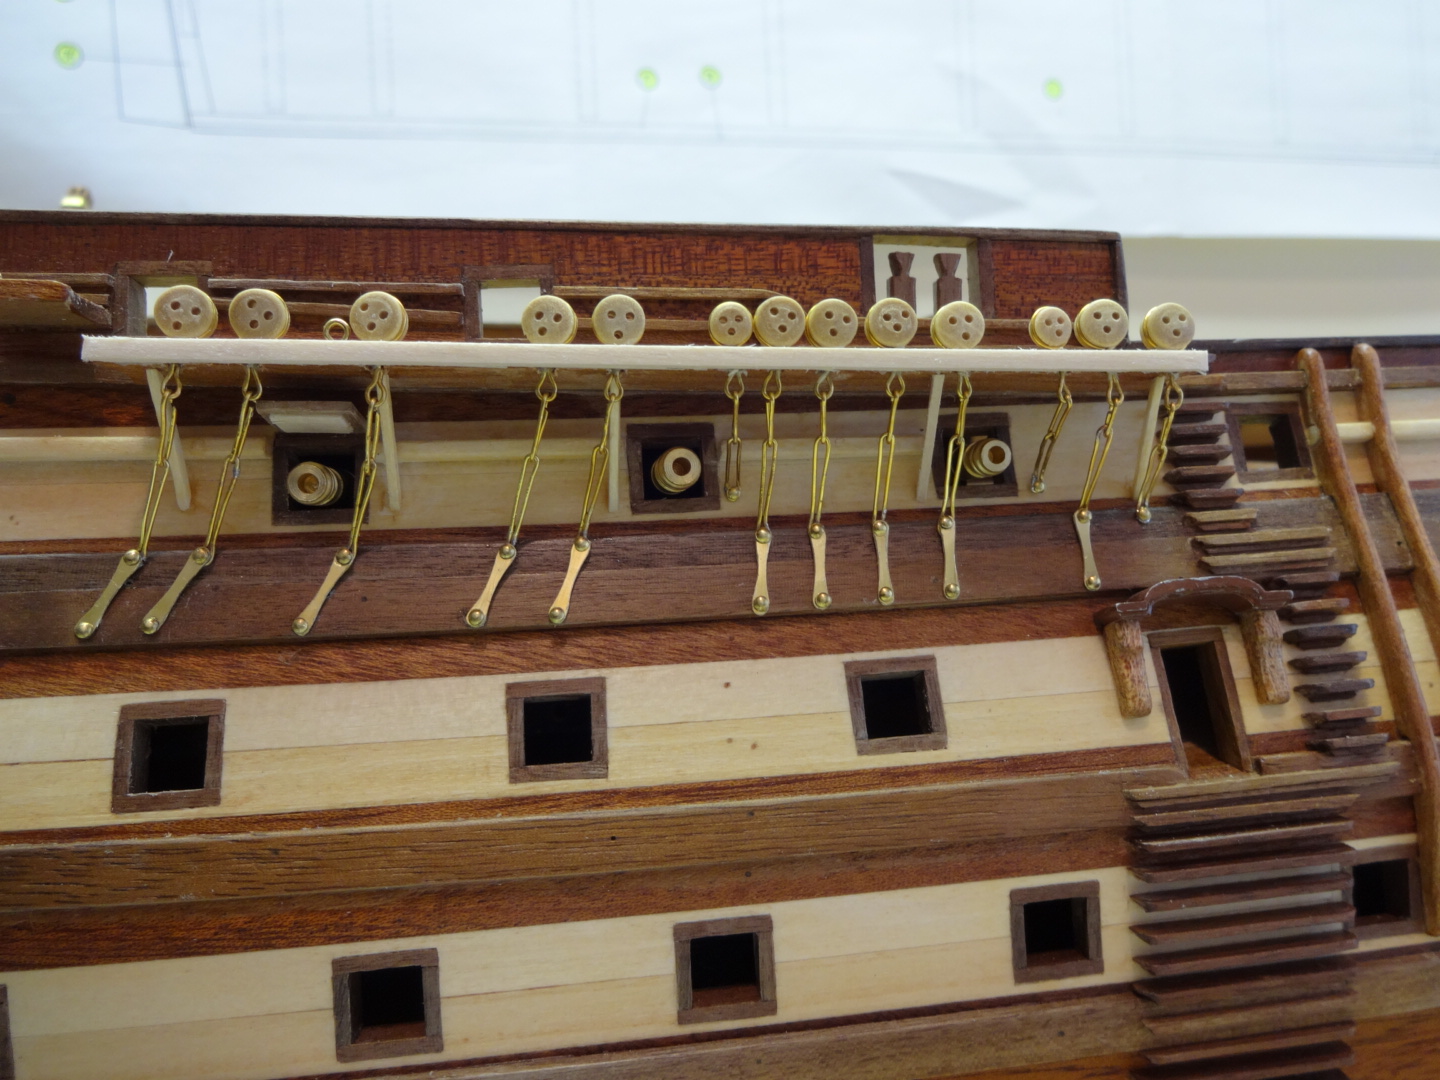
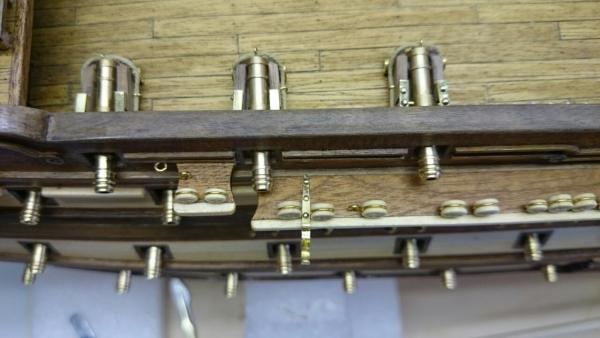
Hi Dave The chain links are not difficult just a bit taxing, made worse due to how many I will be hoovering up when I access behind the desks. They are small and blend into the carpet when they fall in full view but fall behind something and its start a new one time. Please note ! I copied my plans for positioning my forward rails, they were drilled, cut, then the deadeyes were all fitted before I realised the chain links were going to cross the path of two canons. Look carefully and remember some do not come straight down and are angled, this angle can cause them to cross the canons. I'm not sure if this becomes more of an issue following the book rather than the plans where the kit places the plates, well there aint no plates but places the links. Just keep an eye out you don't do the same
- 708 replies
-
- 1
-
-
- victory
- constructo
- (and 1 more)
-
Wow. Looking nice, takes me back seeing her like that. There is loads of small stuff to do with very little visual impact on the model, people look and say its not changed since I last saw it, after spending months on canon carriers and railings and deadeyes and linkages and grates and belay pins and the racks they reside on, never ends, that said you Keep it u, this is the fun part. Finding somewhere to put it afterwards is where the problem really start.
-
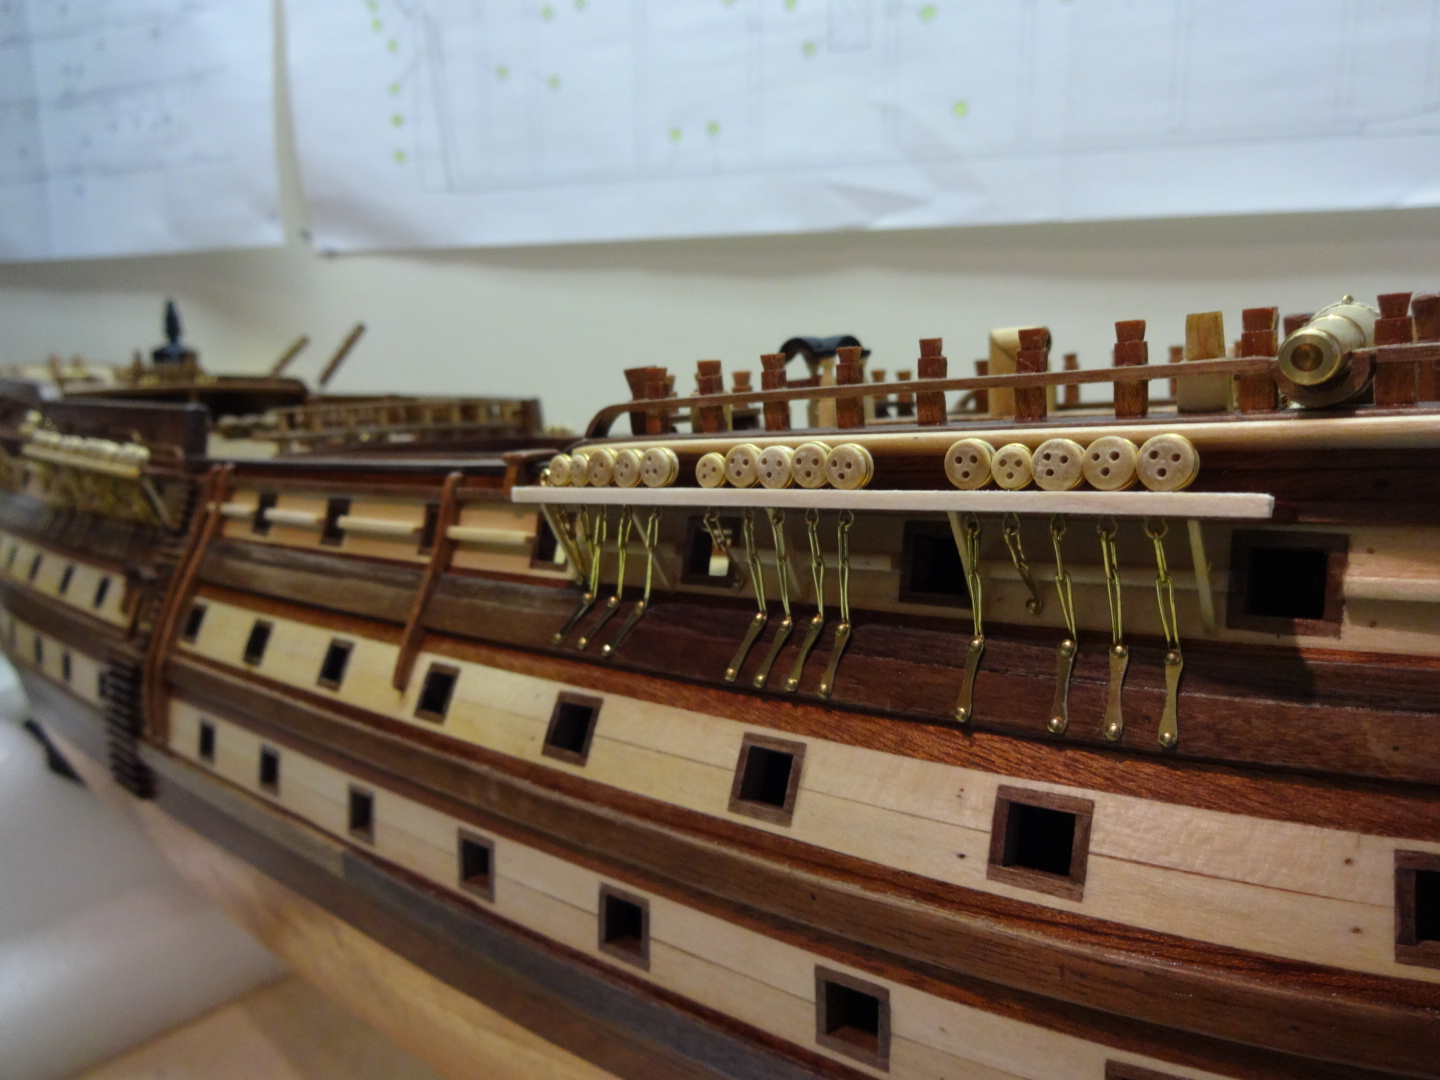
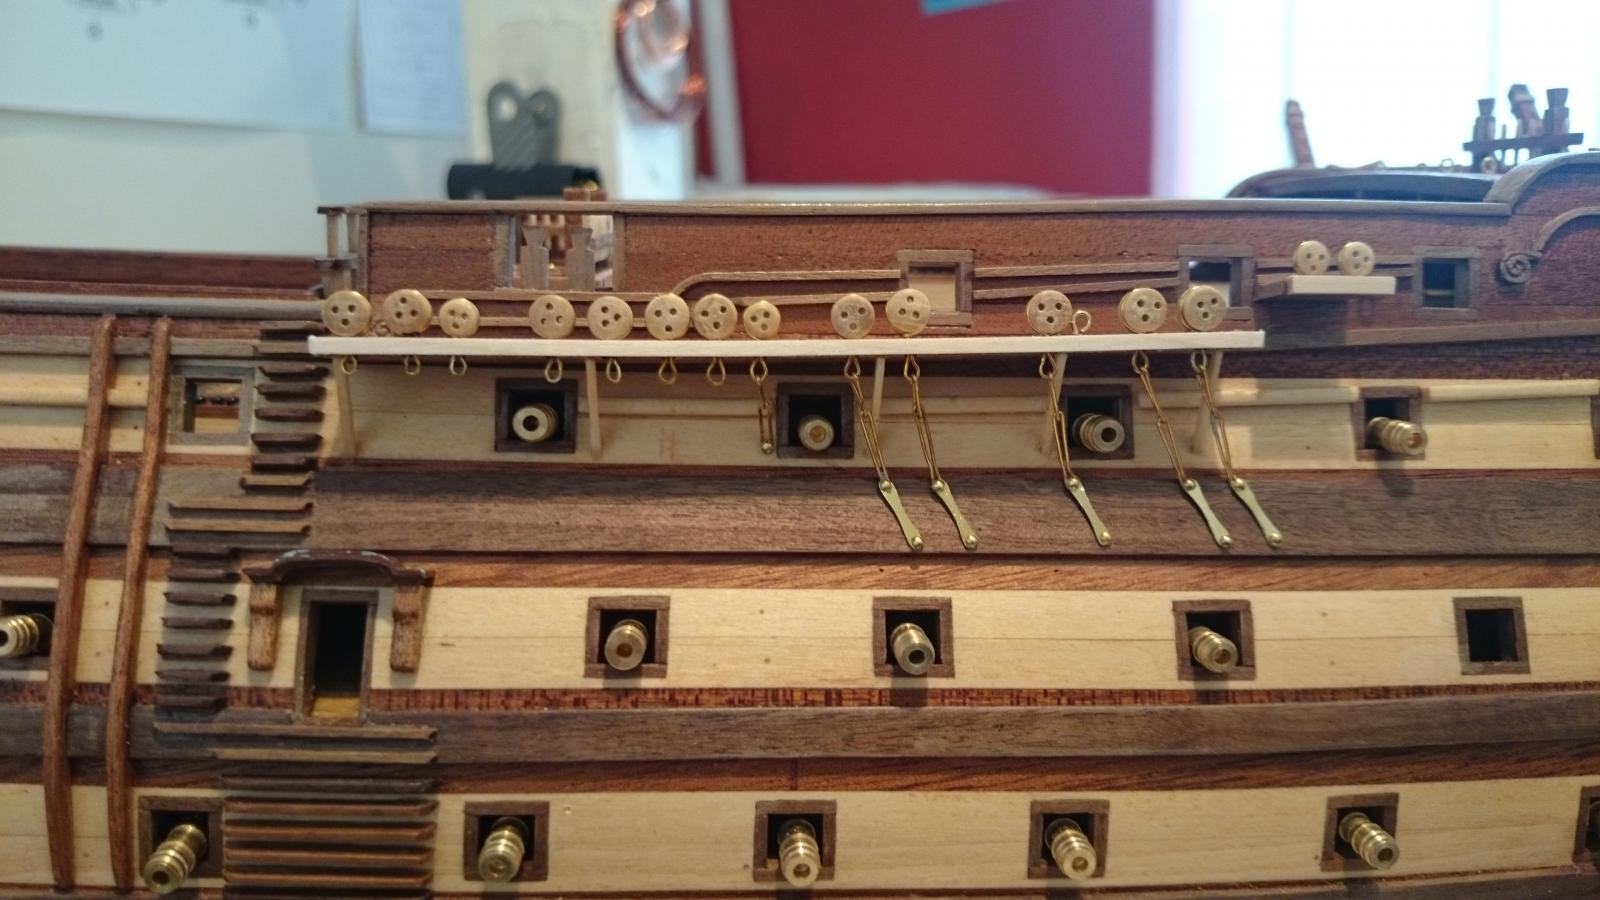
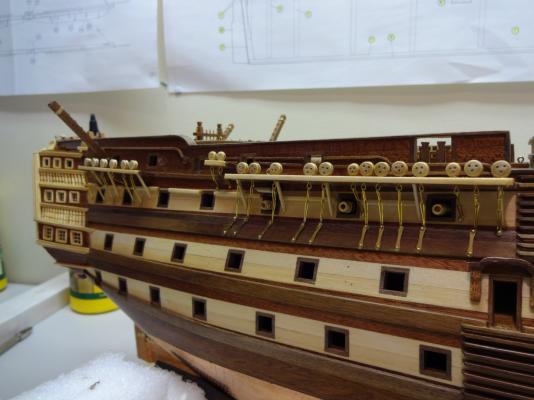
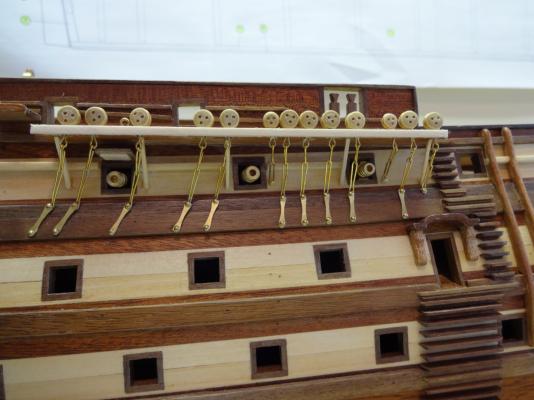
Its been a while since ive been posting my wears, I have had quite a few nights off from the link and preventer factory, I needed to, these need patience as always so the break helped. I have used the book, the anatomy of a ship, as a reference to position the chain links and preventers as close as possible to the real vessel

- 708 replies
-
- 6
-
-
- victory
- constructo
- (and 1 more)
-
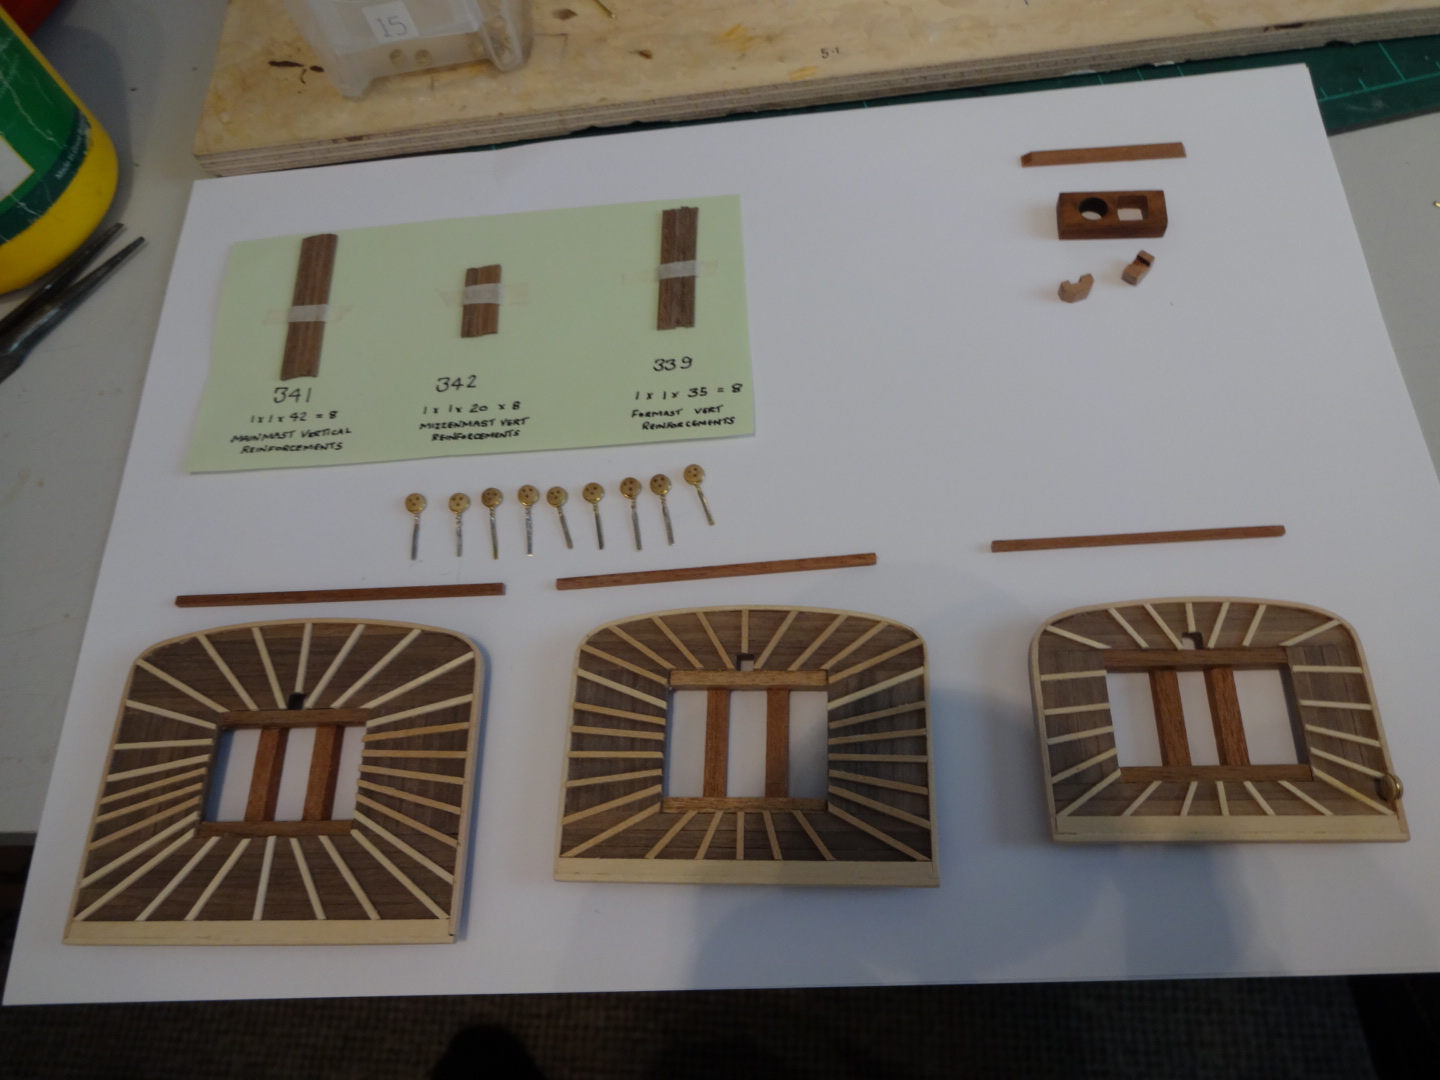
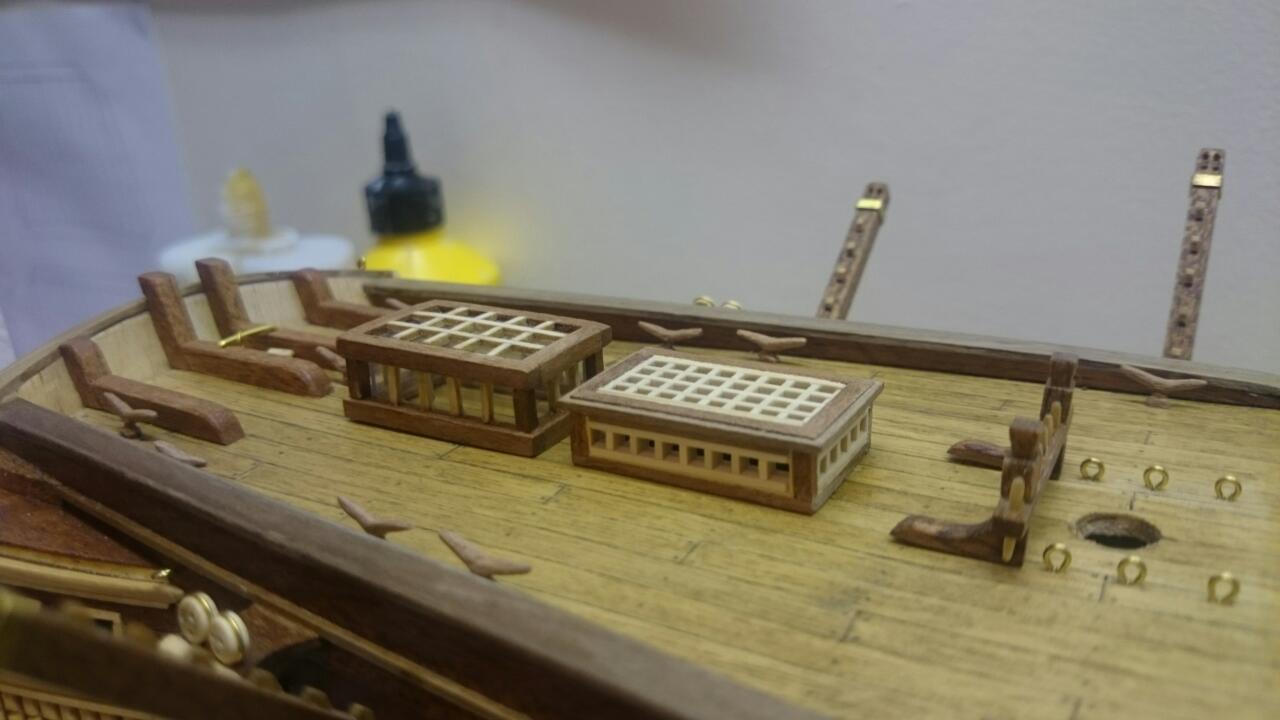
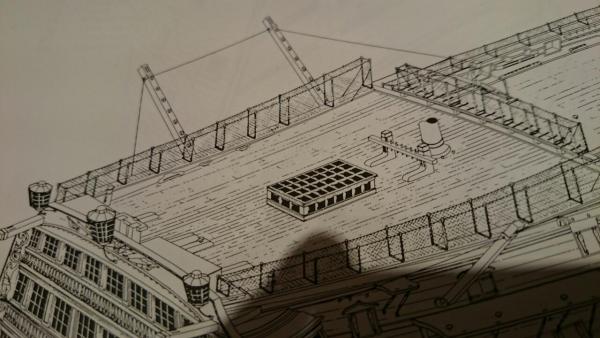
Well I have made another back track, I was just never happy with the sky light I made to the kit spec, to big and bulky. The old one is sat behind, this new one was modelled from the book, the Anatomy of a ship.

- 708 replies
-
- 6
-
-
- victory
- constructo
- (and 1 more)
-
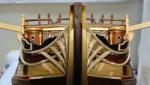
Ta Dar, just playing with software, get the images in the same place and bingo, effective
- 708 replies
-
- 3
-
-
- victory
- constructo
- (and 1 more)
-
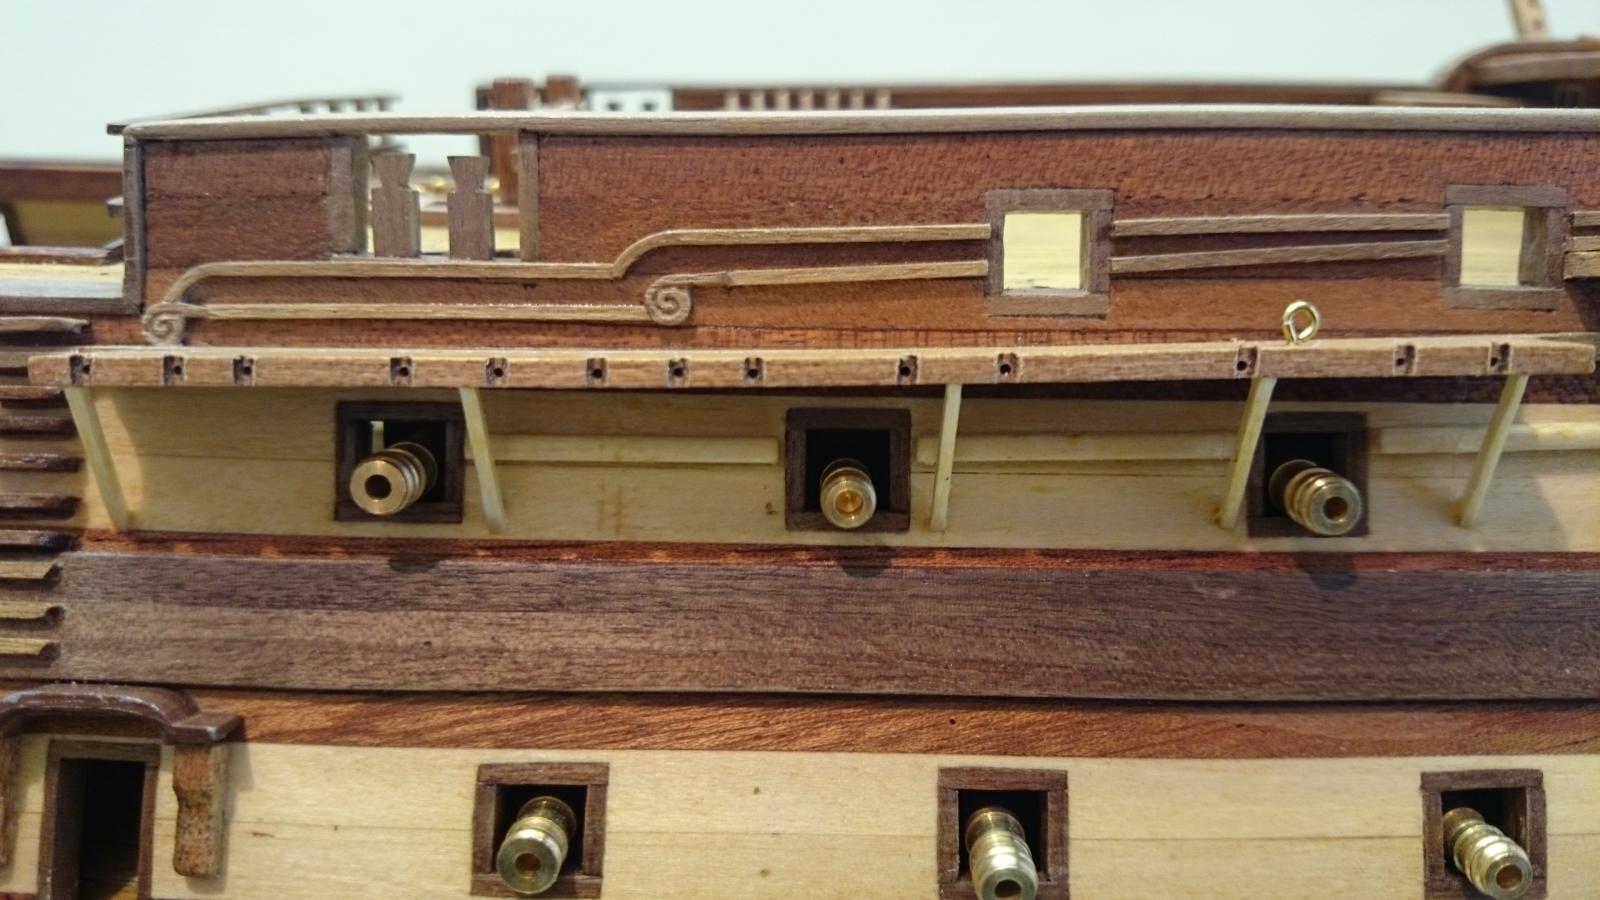
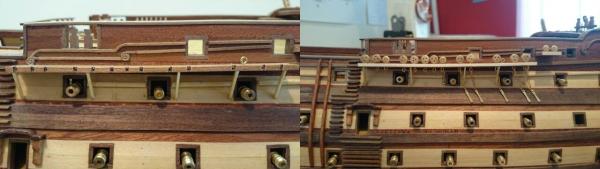
Portside deadeyes ready for the chains and preventer links.
- 708 replies
-
- 5
-
-
- victory
- constructo
- (and 1 more)
-
Yes, I'm still going at the chain links and preventer plates. This is a job that needs many, many measurements prior to cutting and drilling. Only another 30 to install and I'm ready to move on, many whom are building this kit may notice that the kit doesn't have the links on the smallest two sets of boards at the aft of the ship , as always this is an error. These small boards have chain links as there larger neighbours do. Please note. Looking back It looks like I blanked the questions above made by Andy but I emailed the reply.
- 708 replies
-
- 4
-
-
- victory
- constructo
- (and 1 more)
-
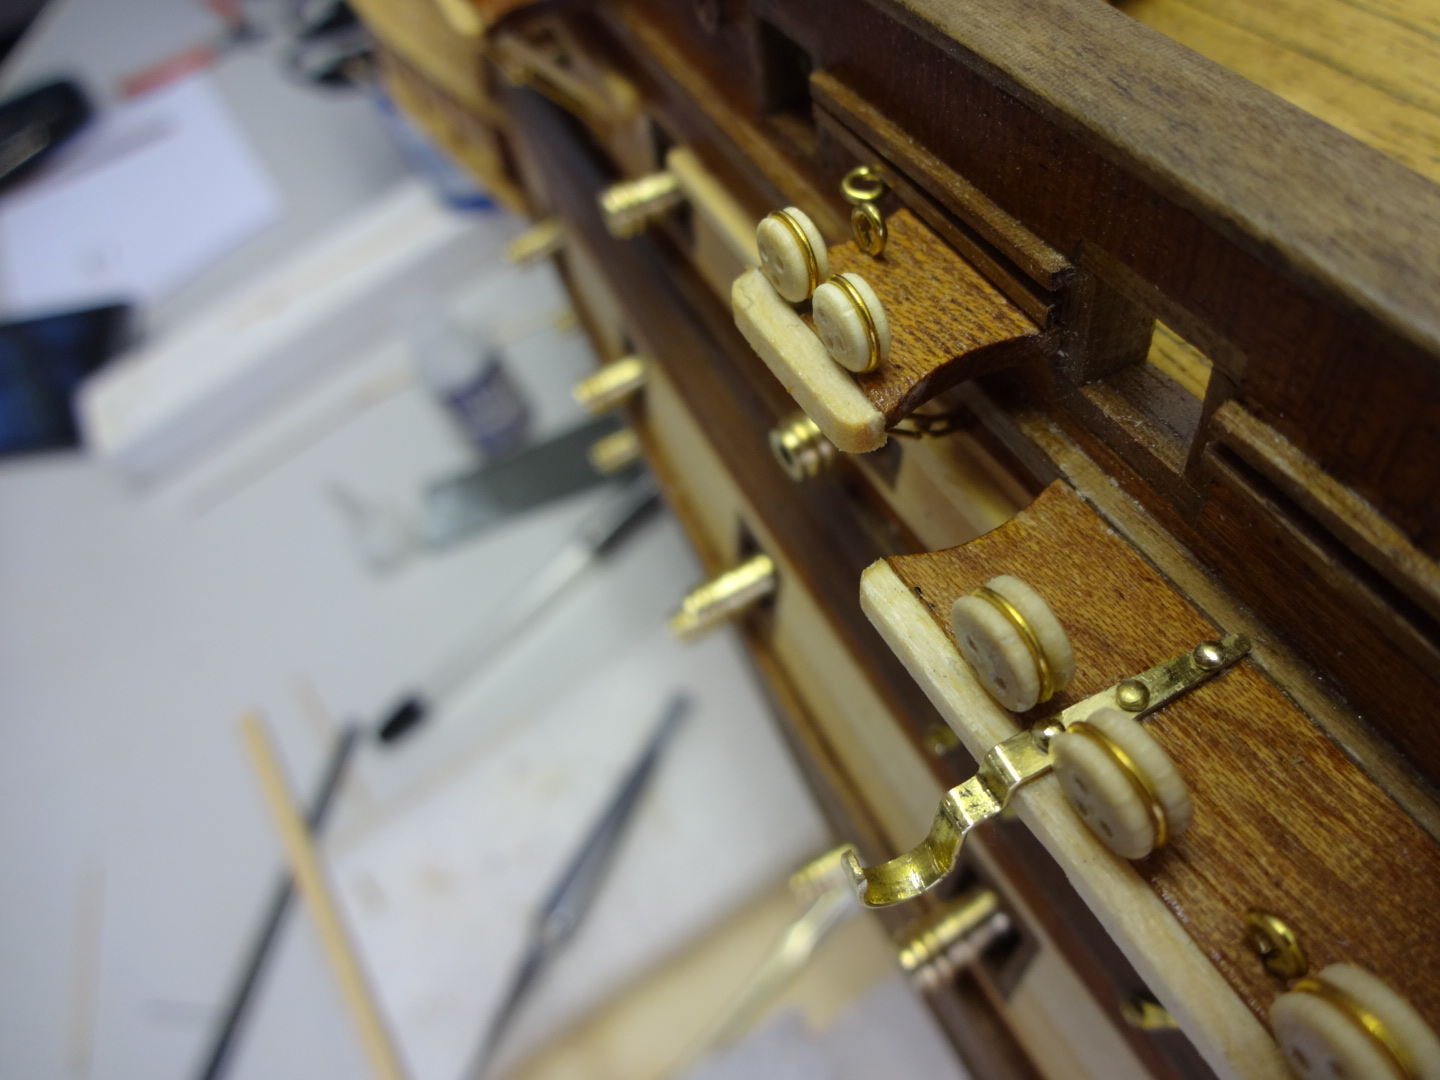
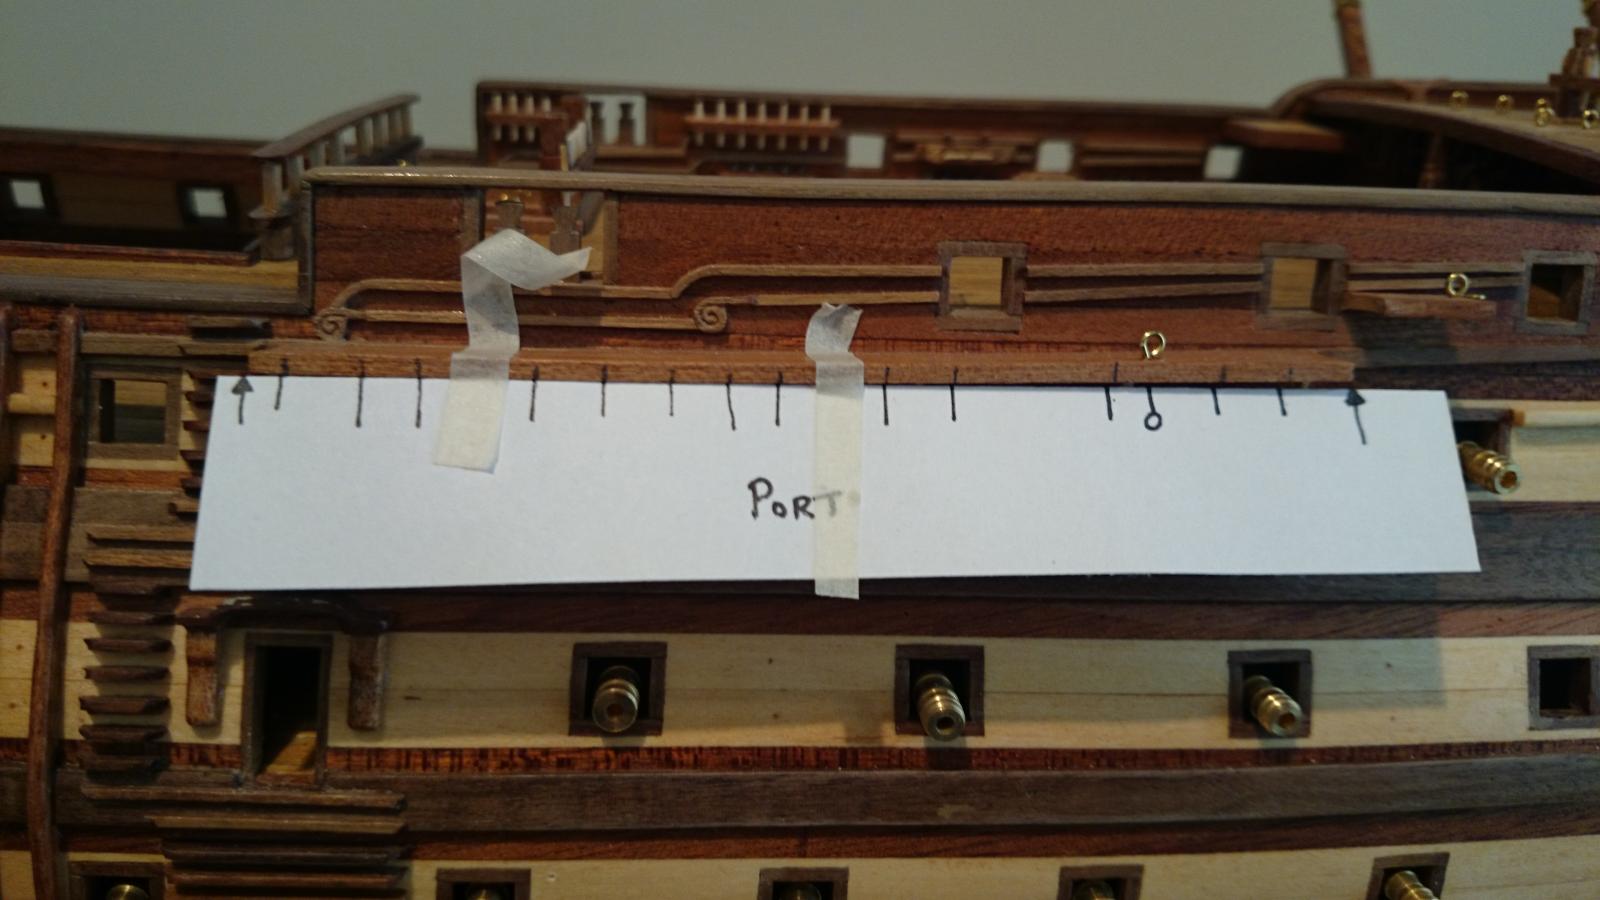
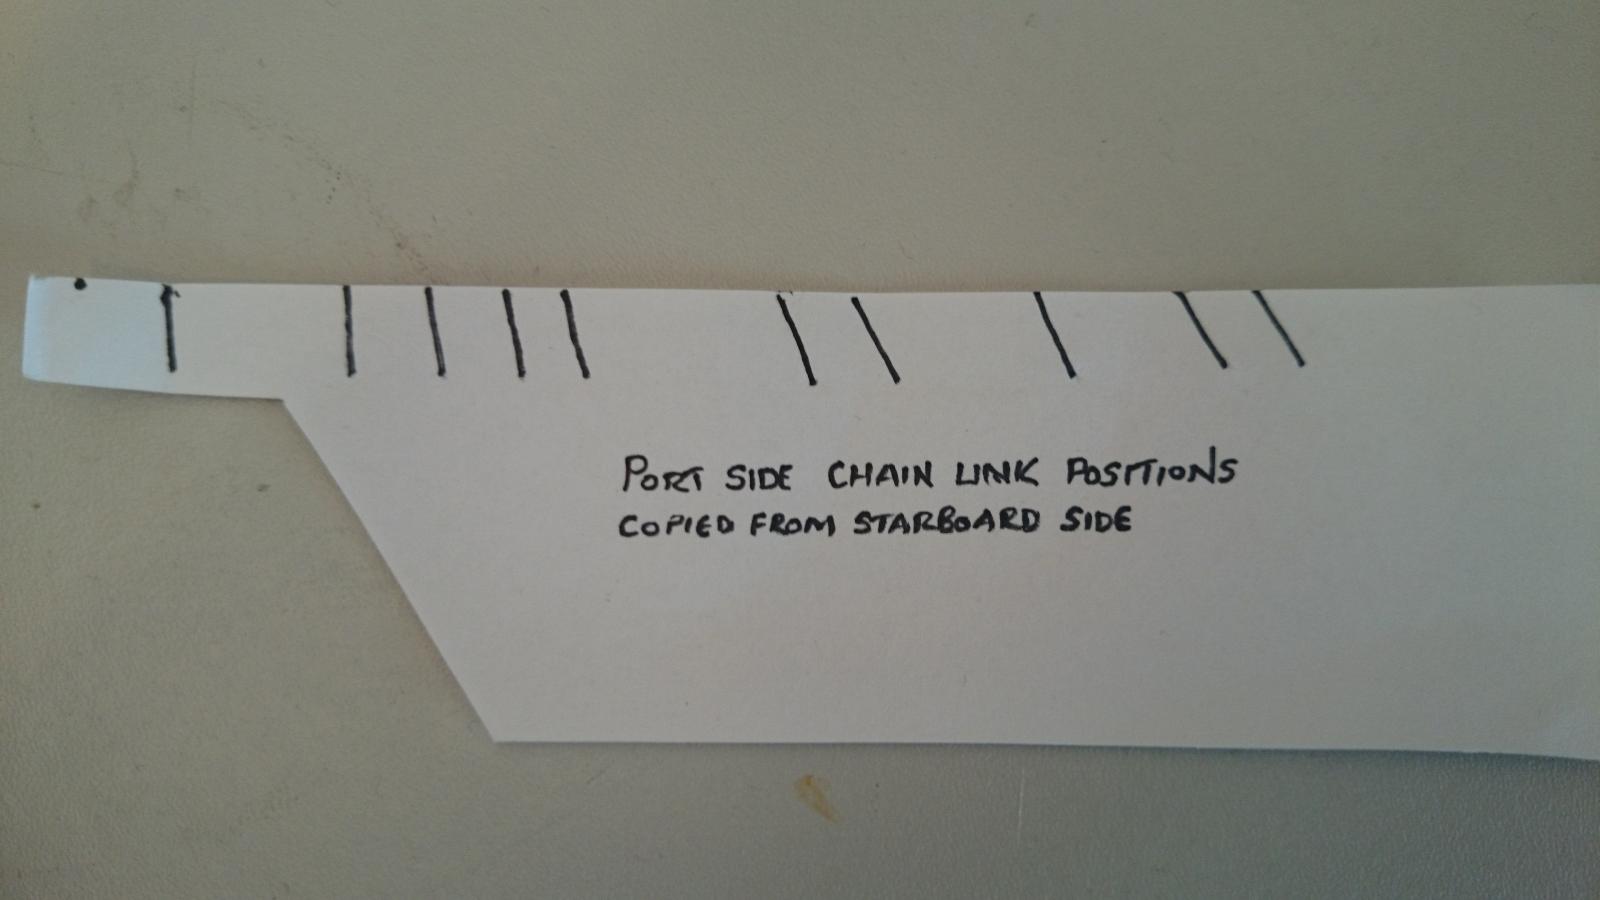
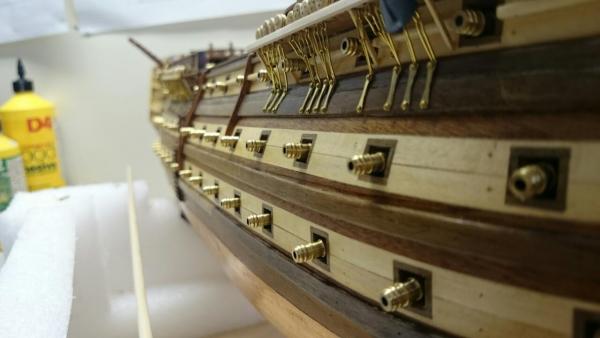
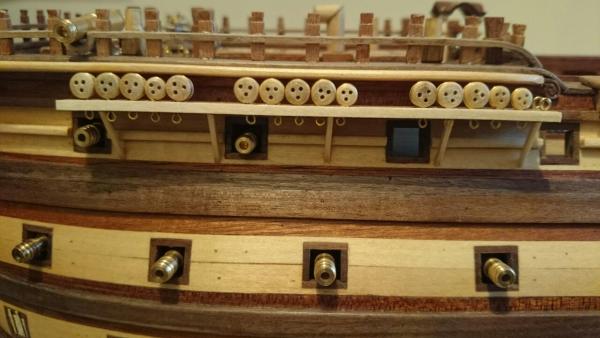
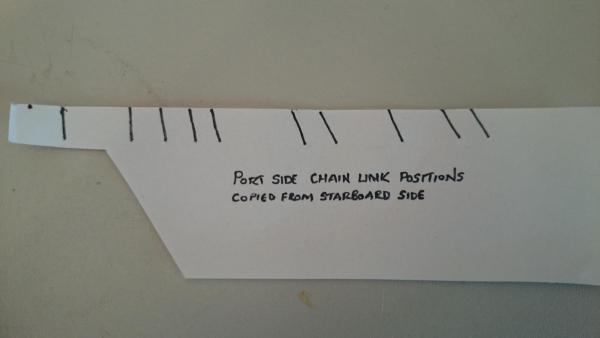
I have now moved to the port side and the same centre section of dead eyes rather than do all one side first. I made a paper template to tranfer the position accurately to the opposite side, I also have done the same with the preventer links to ensure the angles match. These chains are not as the kit intended but as the real vessel has been done. If your to do the same, order some brass wire, this method uses more and also for the inevitable waste as you make your links and are not happy with them. OH! Buy brass, unlike me who was ensuring I got 0.5mm but didn't pay attention to what I actually ordered, yes I got copper.


- 708 replies
-
- 4
-
-
- victory
- constructo
- (and 1 more)
-
Rich (Fxitgood) emailed you pictures and tips, hope they help
-
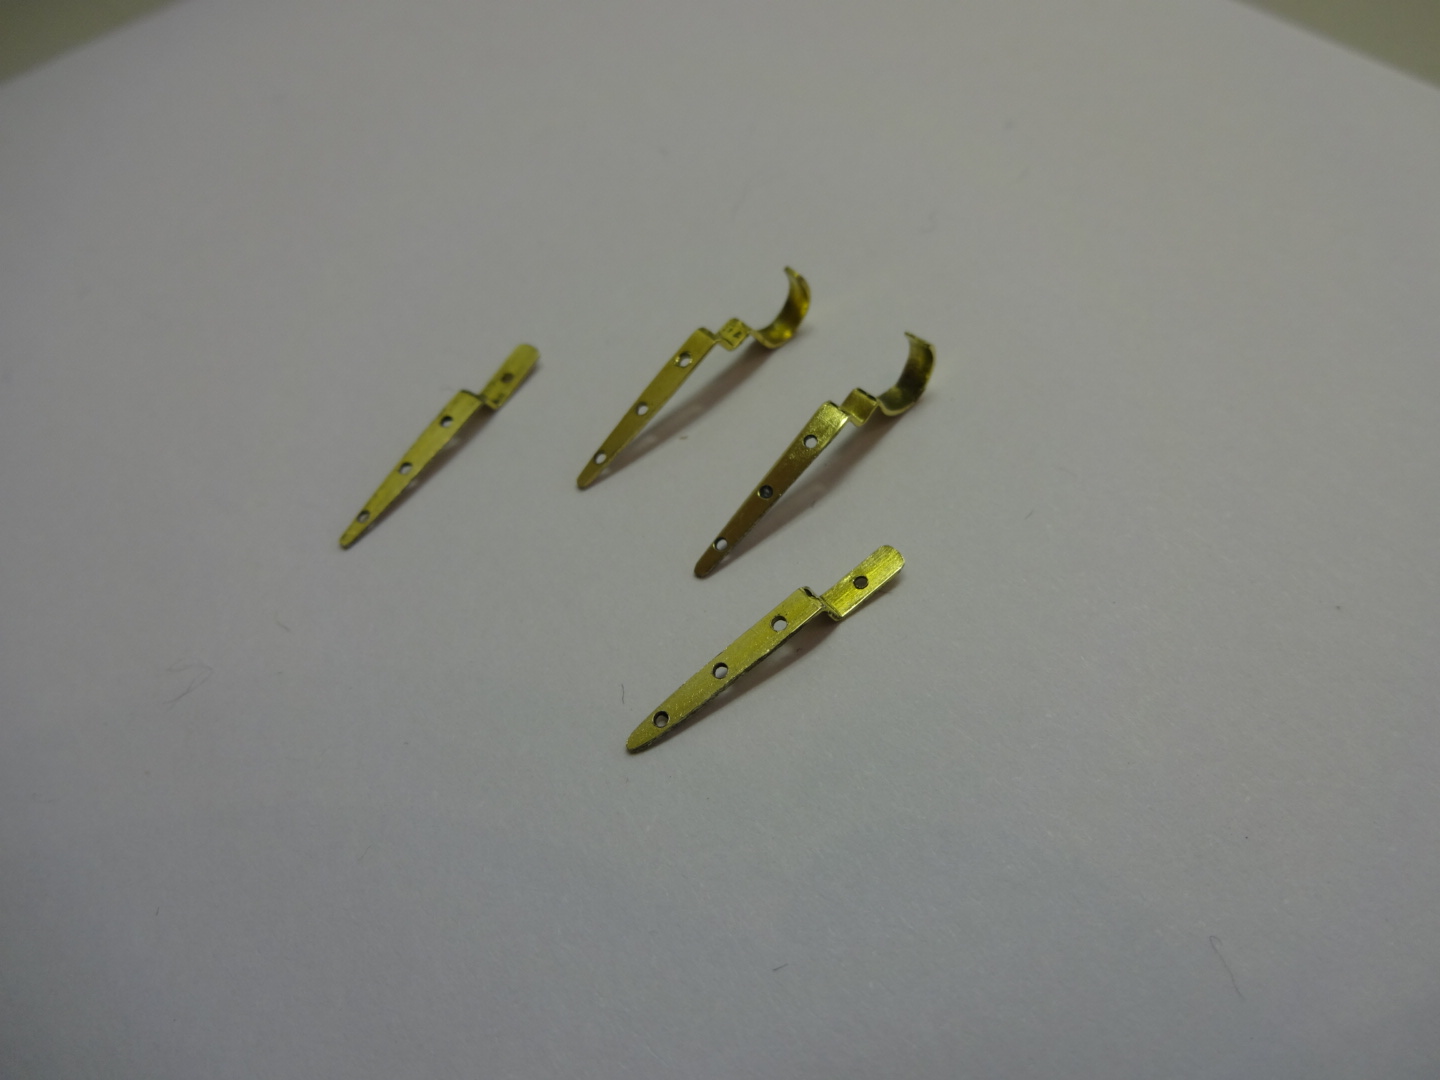
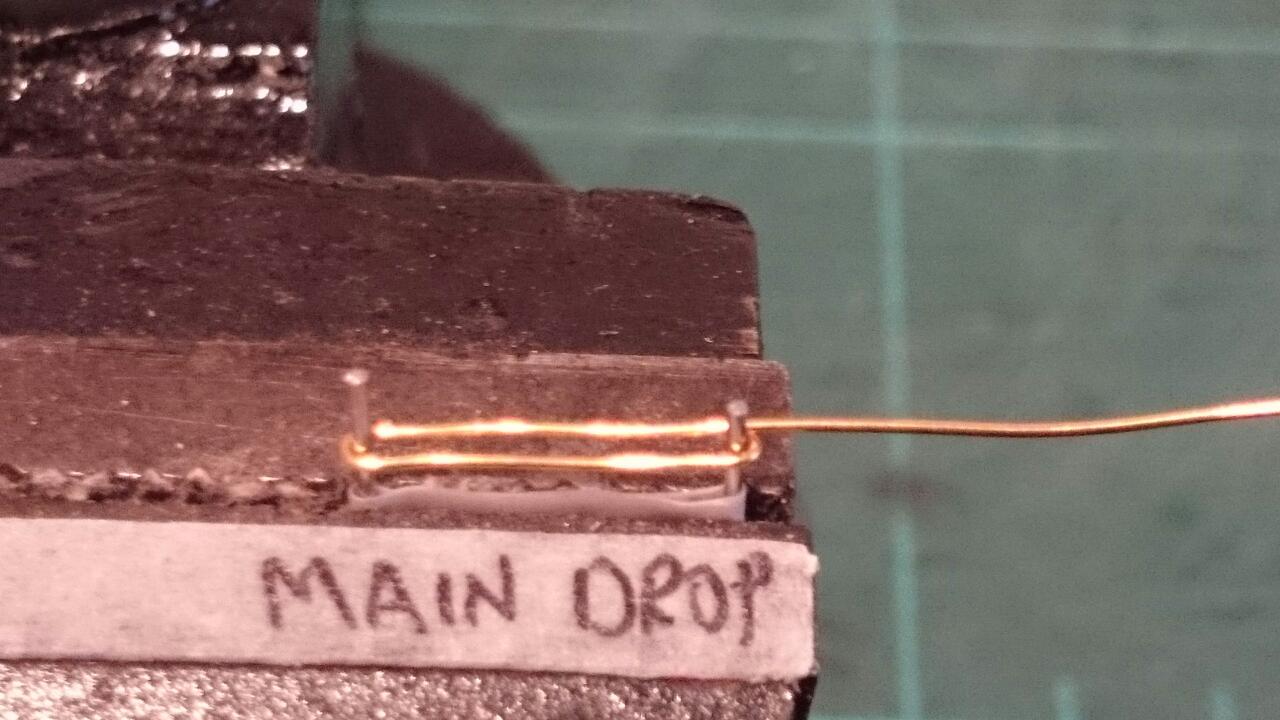
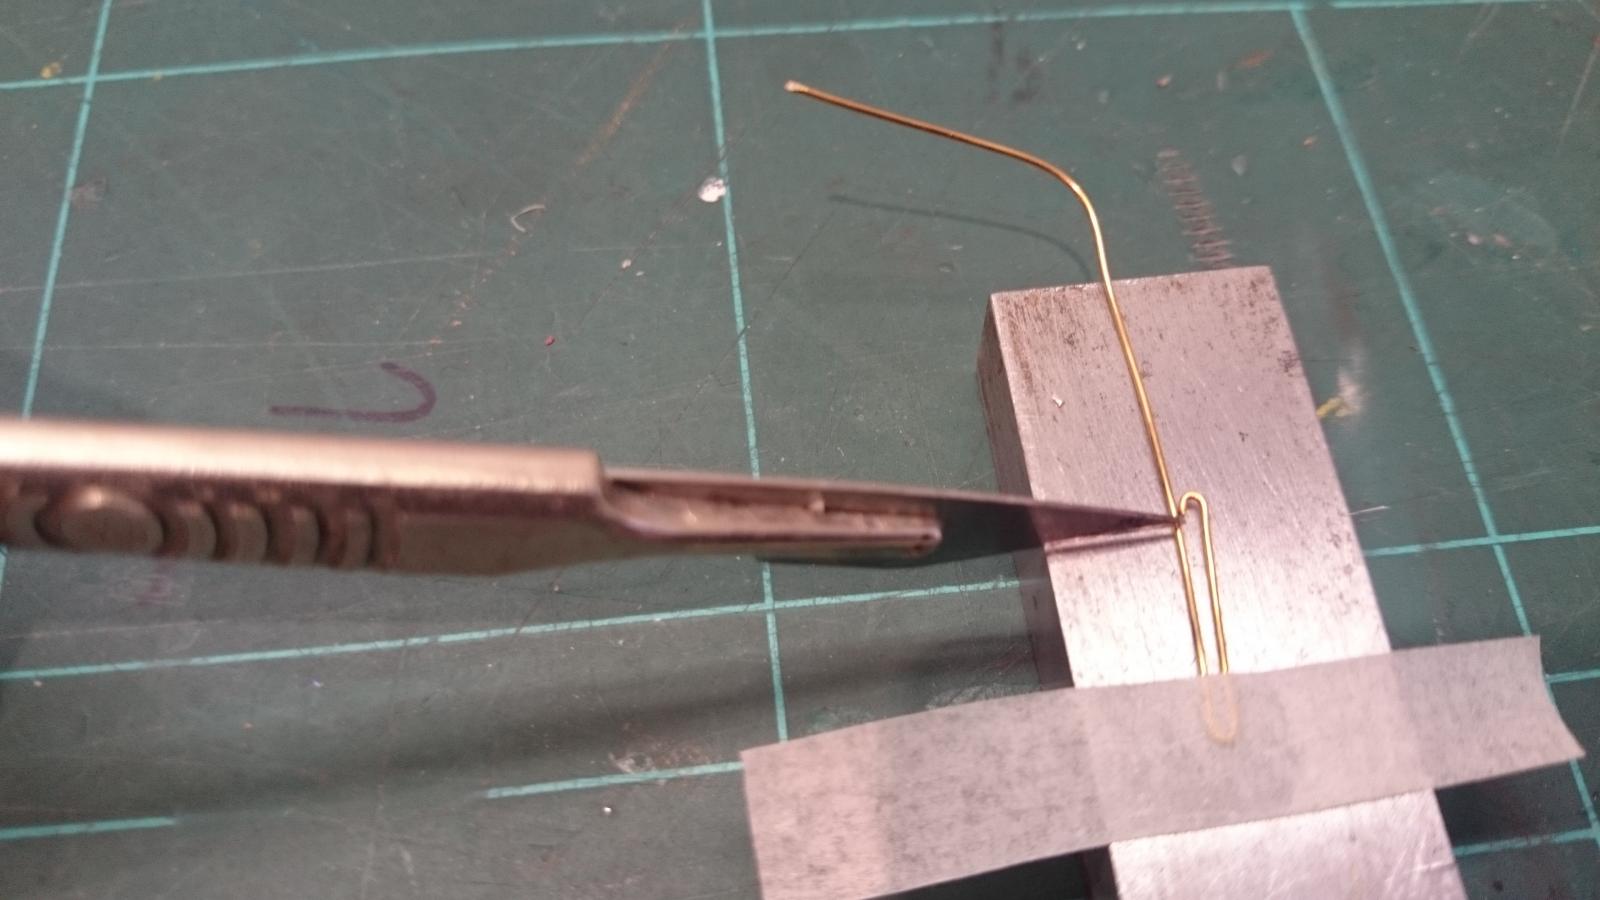
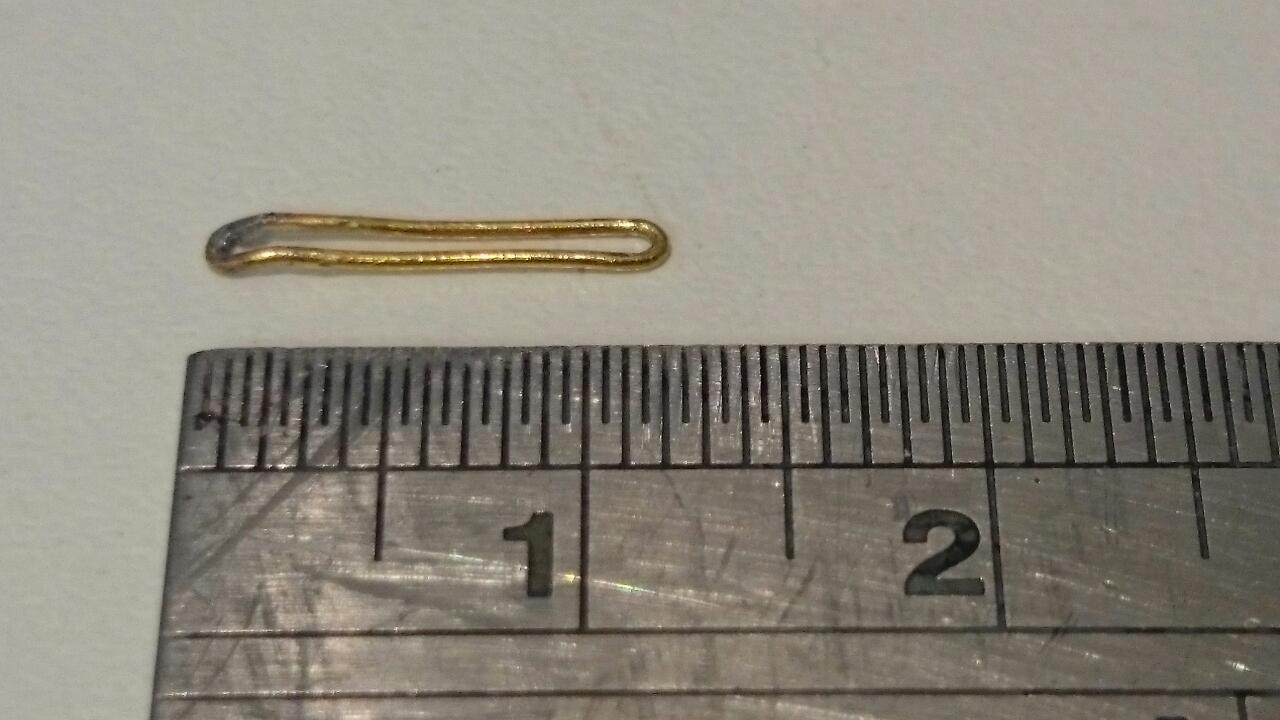
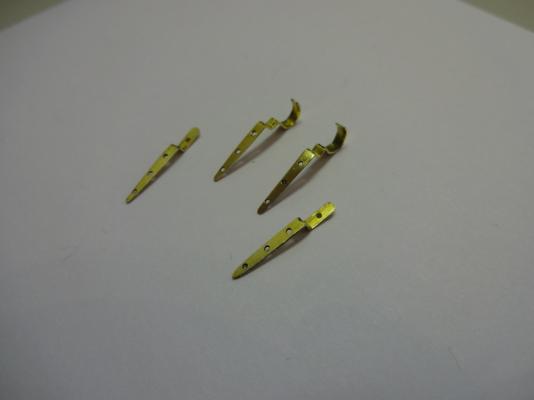
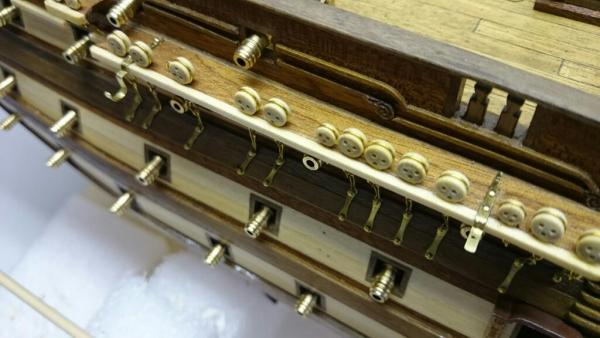
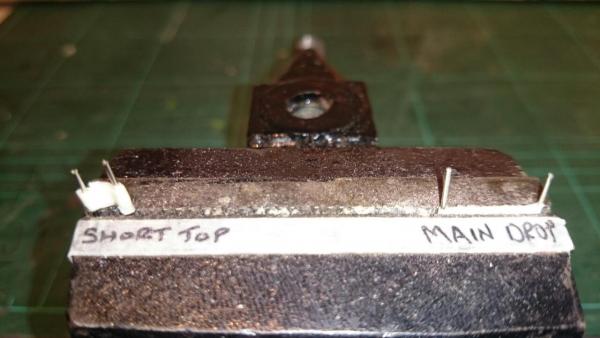
First attempt at chain links and preventer links, time consuming but hey what isn't on these models. An image of one of my several chain link rigs I use consisting of pins ( several scratches down my arms as I catch them as I reach over. I'm no professional by any means but I'll post my methods 1/ Small pliers to make a tiny loop at the very end, loop it around the first pin and wrap it around the second pin and Back to the first loop. 2/ Remove from the pins, tape to a metal surface to prevent loosing the piece. (metal as you need to hammer it). 3/ Don't use snips, however small, mine are, they still cause a flair effect as the crush the wire. We need it flat. Use a blade where the loop meets the returning wire ( see Pic) and tap it with a pin hammer, hence metal surface and taping it down. It would be gone into carpet land otherwise. 4/ Tiny dot of solder, I didn't braze, it's so small and on the bend you really don't see it. You painters have no such issues. (I STOPPED BRAZING THEM VERY EARLY ON AS I GOT THE JOINT AT THE REAR AND SMALLER AS I GOT USED TO DOING THEM. ALSO THE VERY SMALL HEAT DOES CAUSE THE BRASS TO TARNISH ) 5/ Bend the hull touching edge to angle the piece to the dead eyes. 6/ Use a hand pin drill, feed the tiny drill bit through your link, check all is the correct length where the chain plate will fit. Twist away. 7/ Fit your preventer link to your required angle for that particular dead eye and pin drill your lower hole. Ok, many will say, we know, but every little helps ****** Please note the three nails on the chain links nearest the centre of the ship need cutting down so they don't show on the inside as they will be seen from the deck, trust me, mine did and I only noticed days later. This is not a problem for those fitting the links as per kit instructions as there fitted lower.****** Hope this does


- 708 replies
-
- 4
-
-
- victory
- constructo
- (and 1 more)
-
That's the very site, I purchased the Artesania ones, ( they look the same ) there quite wide but short @ 6mm lengths which renders them useless for me, (ref AL8834). I saw the page you are referring too, It explains to me now why some finished models have just one main solid link marrying two smaller loops at either end ( these must be purchased ones rather than scratch built ) these would work out quite expensive and would still require tweaks for your particular model on some links. The Victory though actually has one loop at the top on the dead eye and two main links, one at the top looping the dead eye and the other directly onto the hull with a preventer link or bolt only on some under less stressed. Regards the preventer links being wider than mine, look at the image above post 364, the top image shows the purchased link on the far left hand side ( like a bicycle link ) and the difference to mine. Making your own plates maybe the best route.