


Landlubber Mike
-
Posts
4,541 -
Joined
-
Last visited
Content Type
Profiles
Forums
Gallery
Events
Everything posted by Landlubber Mike
-
 Hey Steve, glad the pictures helped. Building that stern counter block gave me a lot of angst for sure. If I remember correctly, I made multiple photocopies of the block on the plans and cut them out to test fit things with all the compound curves. Was hours of work! I'm not looking forward to building the special pieces to fit along the transom/counter sides. Have you figured out what you are doing to do with the lettering? That had me mothball the build as I couldn't find a good solution. The easiest is probably to reverse print the lettering so it comes up as white against the black ink background, but I didn't want to go that way given that I was using ebony and was worried the blacks wouldn't match up. I ultimately found someone who created custom decals for me of the white lettering and cold lettering on the sides. I didn't realize this, but you need an Alps printer or other special printer to be able to print white colors for decals. I haven't tried the decals out yet, but fingers crossed that it will work. There was some back and forth as the nameplate on the stern actually has a slight curvature to it, but the vendor was cool in sending me proofs as we slowly worked out the spacing and curves. Seemed a lot easier than trying to use dry transfer letters given how long the name of the ship was. Wow, just realized I built the counter block almost seven years ago. Time flies 😳 Maybe I should finish the build sometime this decade.
 -
Oh cool, that's good to know thanks! I'll have to look into these Montex combo decals/masks then. I've been mostly busy with kid stuff this summer, but have been working on finishing up some of the models on my bench. Not much to report - doing the NeOmega catapult for my Walrus has monopolized a good week plus, but I'm finally on the home stretch 👍 Thanks for asking!
-
Fantastic work Chris! I'm getting PTSD from seeing pictures of your landing gear - it was a pain, to say the least, on my Tamiya build!
-
Barncave Shipyard by mbp521 - Scale 1:1
Landlubber Mike replied to mbp521's topic in Non-ship/categorised builds
Wow, that looks amazing. Even more impressive that you're building it yourself. Add a big screen TV and a kegerator and I don't think my family would see me ever again. -
That's looking really great Kevin. I used the Montex masks for the insignia/numbering on my Buffalo and was really happy with how things came out. A lot of stress in making sure that the mask went on in the right place - decals in this regard are a lot easier of course - but no potential issue of silvering, etc. that you get with decals. Did the Sigma Nu Girl decal have the brown background behind the lettering, or was it clear? If it was brown, you did a fantastic job matching the colors together.
-
Another beauty Kevin! Great job!
-
Wow that's beautiful! Nicely done!
-
This engine detailing looks amazing Rob. I'm usually not as much a fan of open engine car models as the kit engines generally look soft or not very detailed to me. This one, especially with your upgrades, looks amazing. Great job!
-
Looks great Alan. Way to stick with it! 5500 blocks! 😳
-
Looking really good Scott! You're moving quickly!
-
Really nice job on the yellow paint job. Looks amazing Rob!
-
Nice job Craig. Do you think you need to use all the screws in the kit? Can't some pieces be glued together? I have a few Pocher kits in the stash and heard about the fit problems, especially with the screws, but had always wondered whether you can bypass screws with glue.
-
It was a nice tour. Interesting seeing and learning about lightships. It was there that I learned about the terrible accident of LV117 with the RMS Olympic, sister ship of the Titanic. https://en.wikipedia.org/wiki/United_States_lightship_LV-117
-
Hey Steve, just found your Morgan log. You're doing a great job! I'm not too much further than you, but can say doing all the planksheer, stanchions, log and top rails, etc. is pretty complicated work. I got some PTSD flashbacks seeing your pictures with the spacers, tons of clamps, etc. Hang in there - I think you're past probably the trickiest part of the build. I've been thinking about dusting off my wooden ship builds, and your Morgan is giving me inspiration to turn back to mine.
-
Very cool project Jon! I took a morning to visit the Lightship Overfalls in Lewes Delaware on a beach trip with my family a few years ago. Those ships were very interesting with some neat history. I always thought they would make for a fun build. Good luck with the build!
-
Awesome! More aftermarket the better in my book
-
Hey Alan, hope you have enough blocks! Nice haul on the new kits by the way. I've always loved the looks of the Ryuho.
-
Wow, so well done Grant!! Congratulations on a wonderful diorama.
-
Great start Kevin! Looks fantastic!
-
Great start Craig. I have a couple of these in the stash - you're right that you can really pimp these old Pocher kits with sweet aftermarket, but at a very steep cost. Looking forward to seeing this come along.
-
Looking forward to watching this one come along Rob. Nice looking kit and subject - and cool larger scale!
-
Wow OC, I didn't realize you had bit the bullet so to speak last year and broke up the ship. Looks really good!
-
Thanks Alan! I’m not sure there is any more difficulty per se in a resin kit versus an injected molded plastic kit when it comes to these 1/700 ship kits (probably different story when it comes to 1/32 plane kits for example). I think you can get crisper details in resin versus plastic, and there may be flash just like with plastic kits. Resin kits could have pin hole air bubbles, but these are easy to fill and sand. You also supposedly have to be more careful with resin dust, but I haven’t found much dust working with these 1/700 kits. I think a big benefit with the resin kits is that they tend to be all-in-one kits where you don’t need a separate PE details kit that requires you to remove plastic parts and details to replace them with PE. Instead, these kits and designed with the included PE and detail parts in mind, so there is less removal and replacement, and more just building. At least this is what I’ve found with this Niko kit as well as my FiveStar Yaeyama build that I’m just about done with. Try one out - these are pretty fun.
-
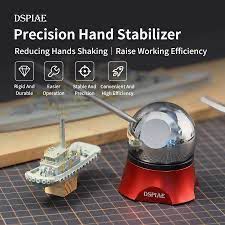
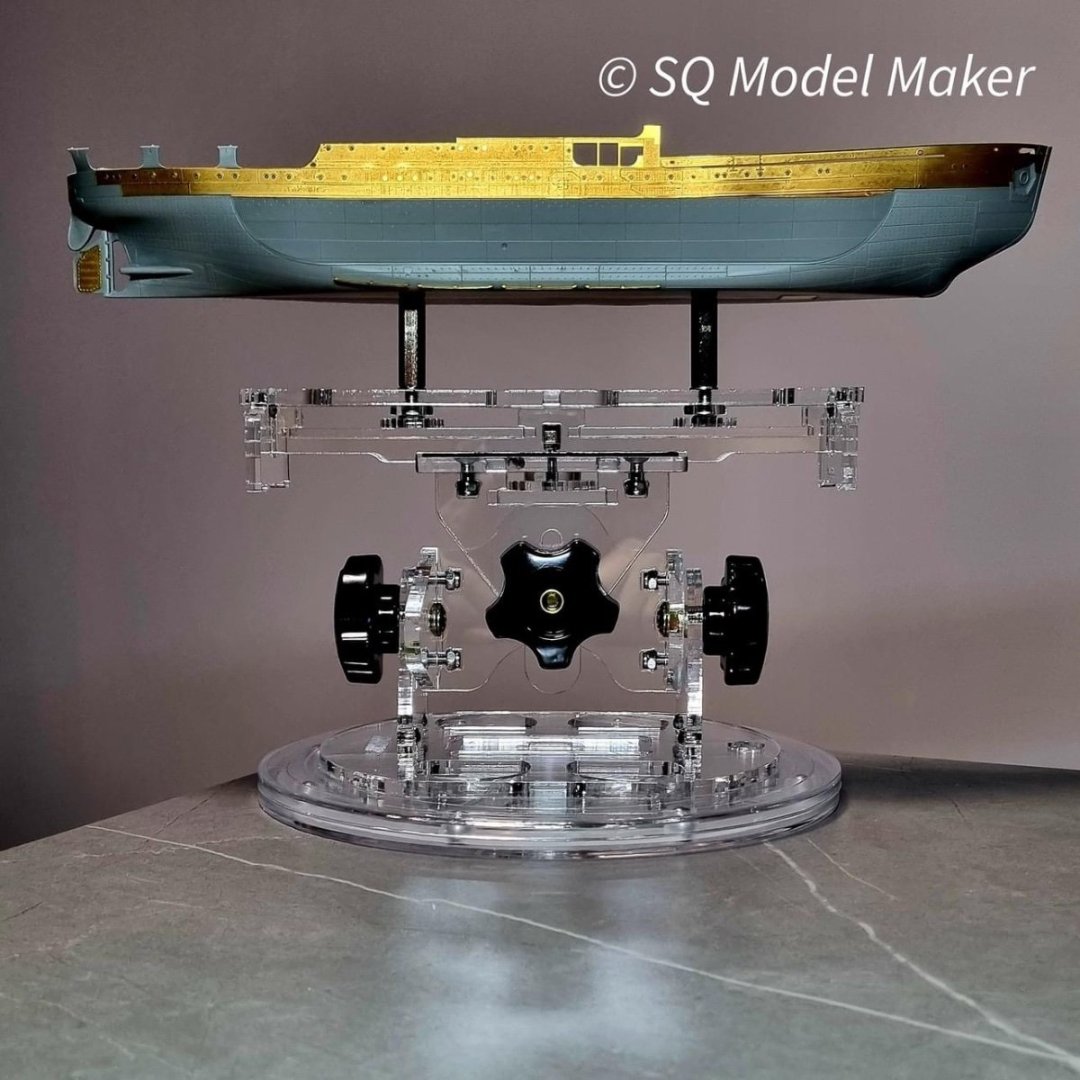
Thanks Dave! It's not as bad as it looks. My Optivisor with lighting element and very fine micro tweezers are my two main tools. A good hold and fold for the PE is worth getting as well. Physically, my eyesight isn't that great but with glasses, good lighting, and the Optivisor, it's doable. Thankfully, I have very steady hands at the moment - unless I drink too much coffee so I try not to drink more than one cup before any PE session. I did buy one of these just in case my finger dexterity changes - I haven't used it yet, but it is a really nice tool. Very stable and easy to use. One thing I've been looking to improve is how I hold the 1/700 model. Right now I just blue tack the base to a Tamiya paint jar. That works pretty well, but typically requires me to hold the jar/ship in my left hand and work with my right. There are times though that I've felt the need to have two hands available, so I've been considering alternatives. I could also put the jar in a vise, but on a Facebook 1/700 ship forum, I recently came across this item from CnCraft in Korea that I might try.
-
Thanks Kevin!!


