Landlubber Mike
-
Posts
4,548 -
Joined
-
Last visited
Content Type
Profiles
Forums
Gallery
Events
Everything posted by Landlubber Mike
-
 This kit is a short run kit from the early Sword kit from 20+ years ago. Some work to do on parts clean up, addressing fit issues, etc. I did start some building this week building the cockpit bulkhead with pilot seats. I went with the CMK bulkhead, which had a little more detail than the kit, and built up the pilot seats from the Eduard standalone PE set which I thought looked better than the kit seats.
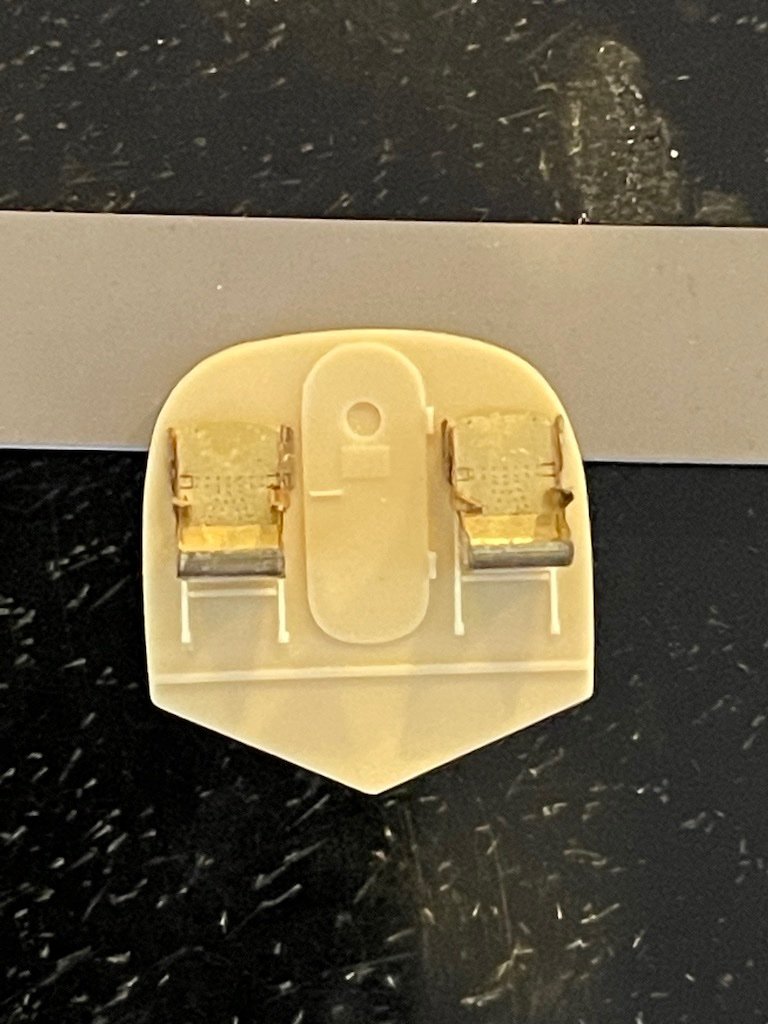

- 112 replies
-
- 11
-

-
Thanks Dan, great to have you along for the ride. I've got a bunch of pre-WW2 planes in the stash as I love the yellow wings scheme.
-
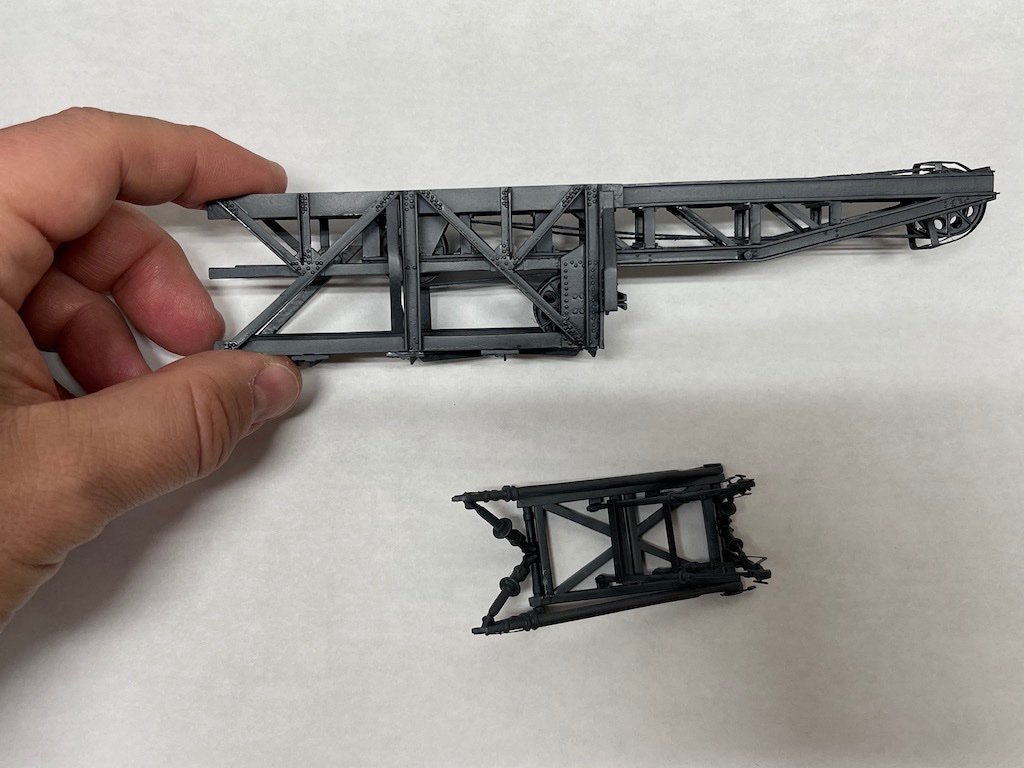
Base coat of paint on the catapult along with a start to the weathering and highlighting.

- 75 replies
-
- 11
-
-
Thanks Mike! Not too much progress yet but am liking the kit. This is what I use on all Mr. Color and Tamiya paints/primers:

- 40 replies
-
- 4
-
-
- Five Star
- Akitsu Maru
- (and 1 more)
-
Thanks for following Ken. The Japanese did have a number of converted vessels that are a bit quirky. Personally, I find their auxiliary ships more interesting than their warships.
- 40 replies
-
- 2
-
-
- Five Star
- Akitsu Maru
- (and 1 more)
-
Hey Ken, thanks for following. The Five Star set is really nice and ups the kit considerably. Maybe some accuracy questions, but the details are much improved over the kit parts.
-
Wow Alan, epic project! Looking forward to your next!
-
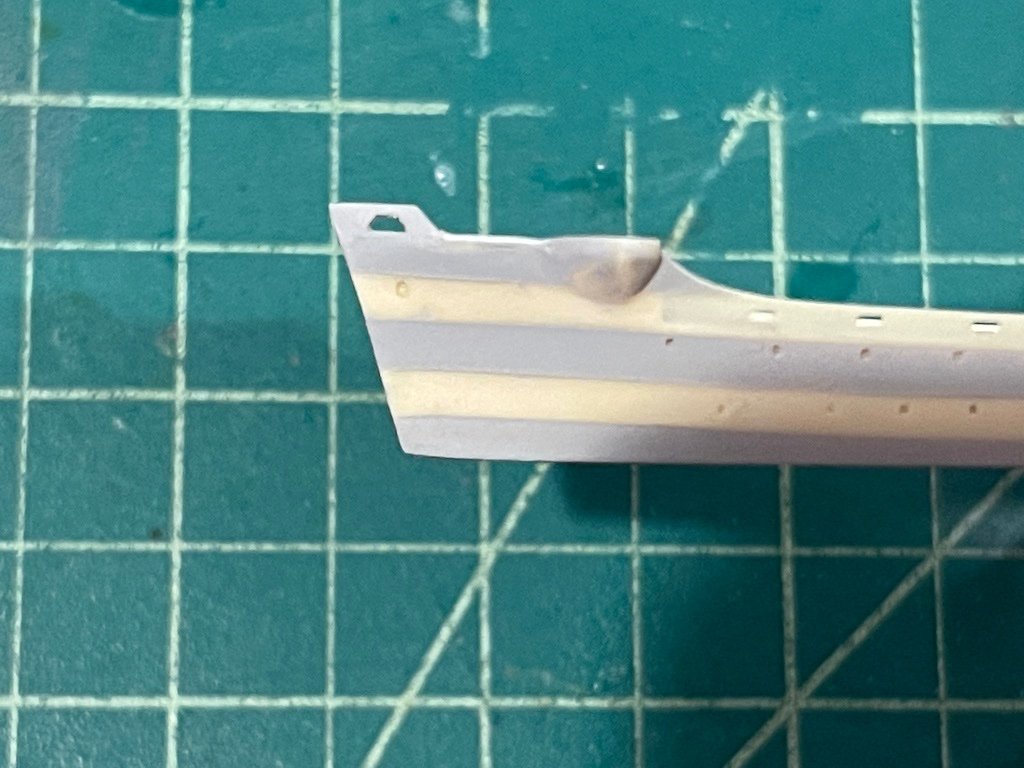
I haven't gotten too far on this one yet. The resin hull is really nicely done. It's very detailed, no pinholes, etc. The upper edges of the bow were broken off when I opened the kit, so I had to redo them in plastic card. I then taped off the hull plating lines, and sprayed then using Mr. Surfacer 500 to help delineate the plates. I don't have pictures yet, but I primed the hull, sprayed the lower portion in hull red, and have the PE sheets primed with Mr. Metal Primer. Instructions aren't too bad, but probably could be a little better. Thanks for looking in!
- 40 replies
-
- 12
-
-
- Five Star
- Akitsu Maru
- (and 1 more)
-
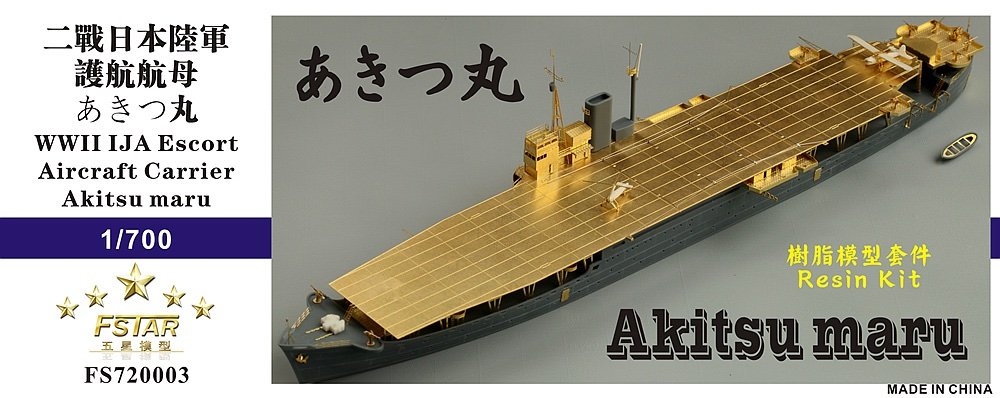
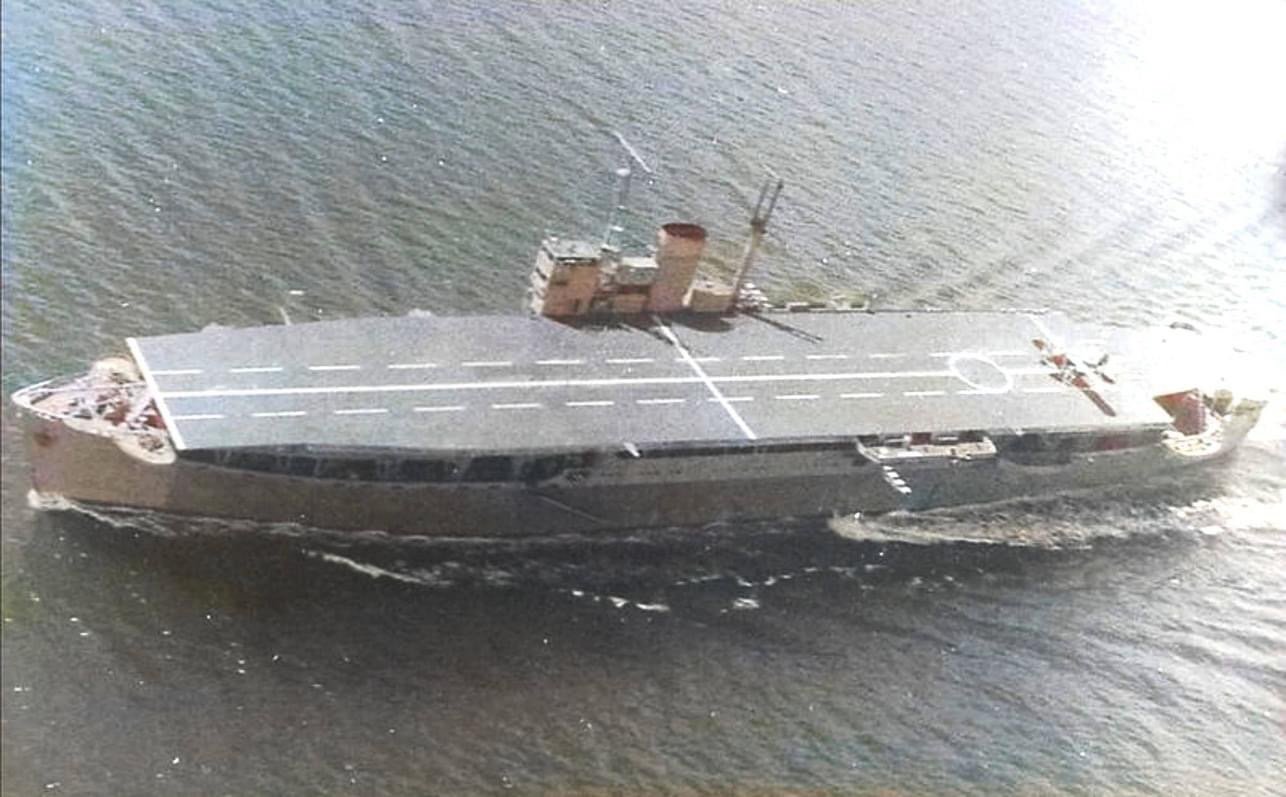
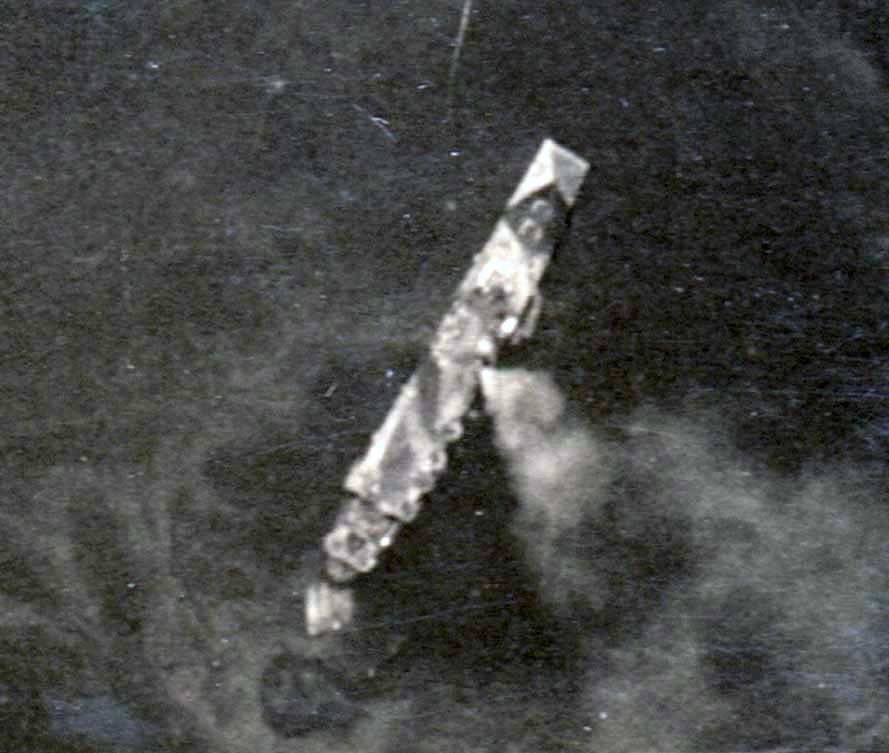
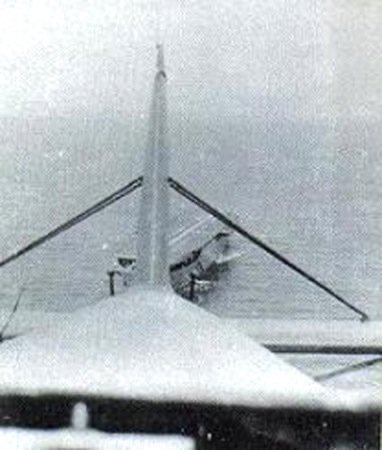
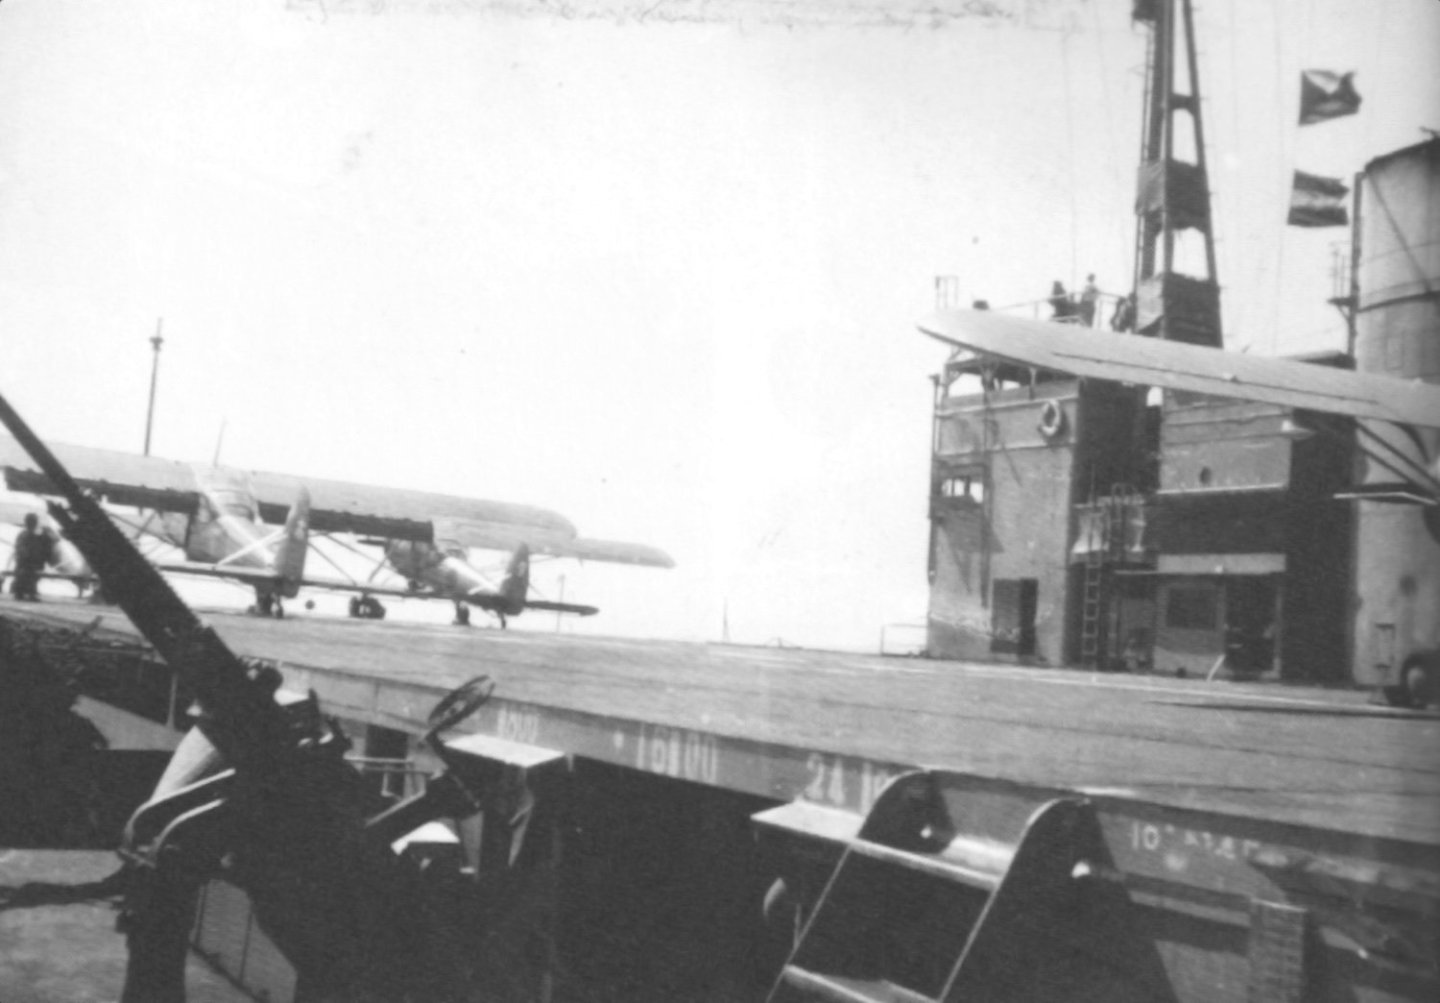
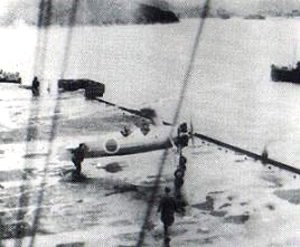
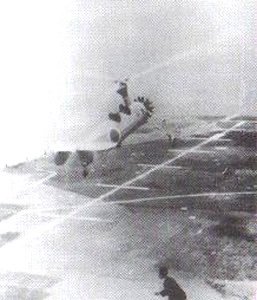
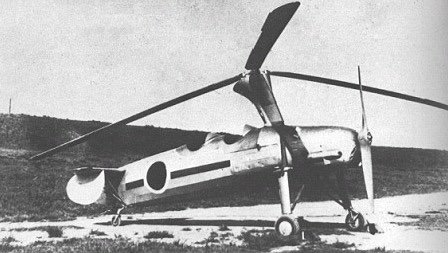
This is another kit I started after conversing with someone building this kit on one of the FB groups. This is the really nice multimedia kit (resin, PE, brass) from Five Star. One issue though is that the Instructions aren't as detailed as they could be. The Akitsu Maru was a Japanese landing craft depot ship and escort aircraft carrier operated by the Imperial Japanese Army. It was originally intended as a passenger liner until it was taken over by the Imperial Japanese Army before completion. It was completed on January 30, 1942 and sunk by the USS Queenfish on November 15, 1944. With the short flight deck, it carried Kokusai Ki-76 Type 3 (Stella) artillery spotter planes and Kayaba Ka-1 autogyro observation aircraft. The ship could also carry 27 Daihatsu-class landing craft, but I will model her with Ki-76 and Ka-1 aircraft. Interestingly, there is no hangar on this ship - aircraft were stored on the original deck under the flight deck. This kit is of the final stage of the ship, after the 1944 refit when the rear mast was moved to behind the funnel. As with other IJA ships, this will have a green camo scheme. Here is a colorized picture of the ship, along with a picture taken at Simpson Harbor Rabaul in 1942 and a picture from a plane with the Akitsu Maru off in the distance. There aren't many pictures of this ship out there. Ki-76 spotter planes on deck: Pictures of the Ka-1 autogyro:
- 40 replies
-
- 12
-
-
- Five Star
- Akitsu Maru
- (and 1 more)
-
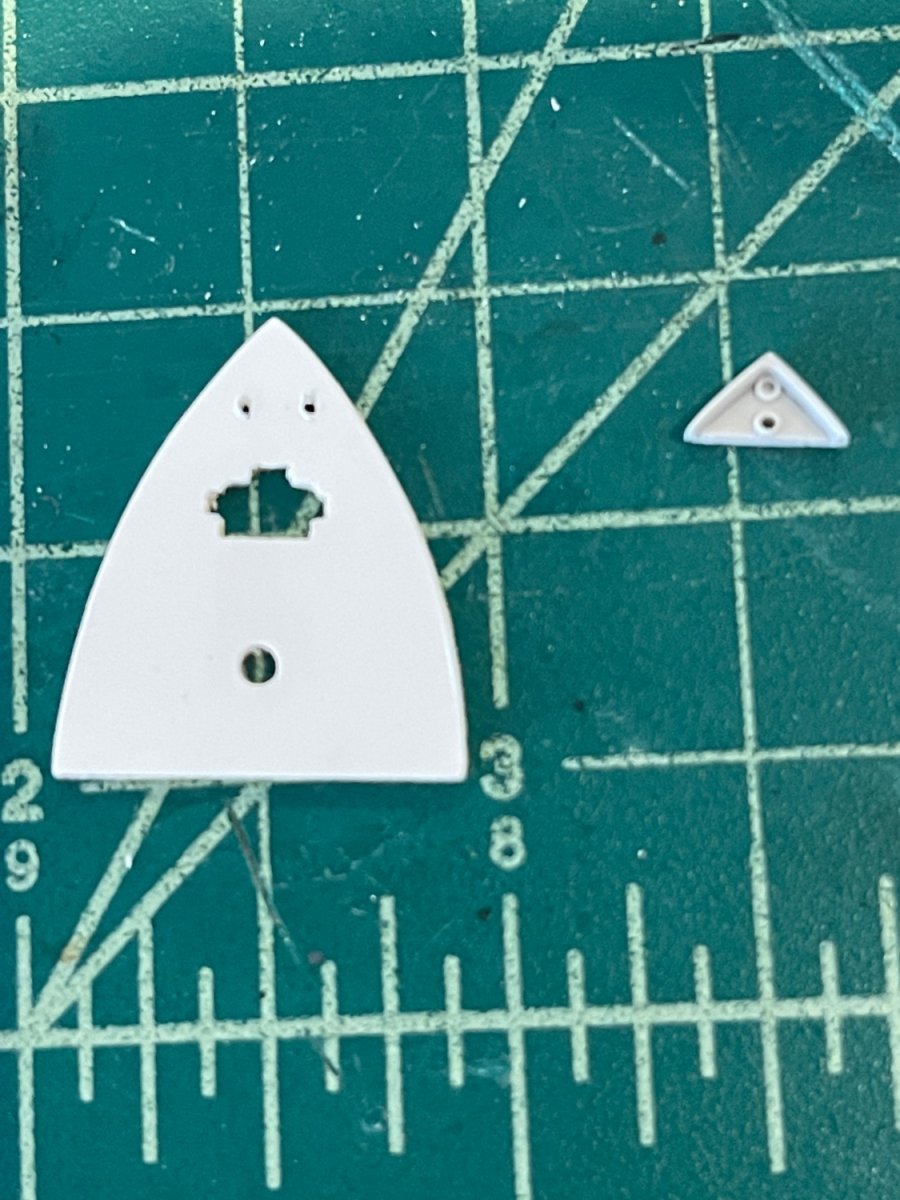
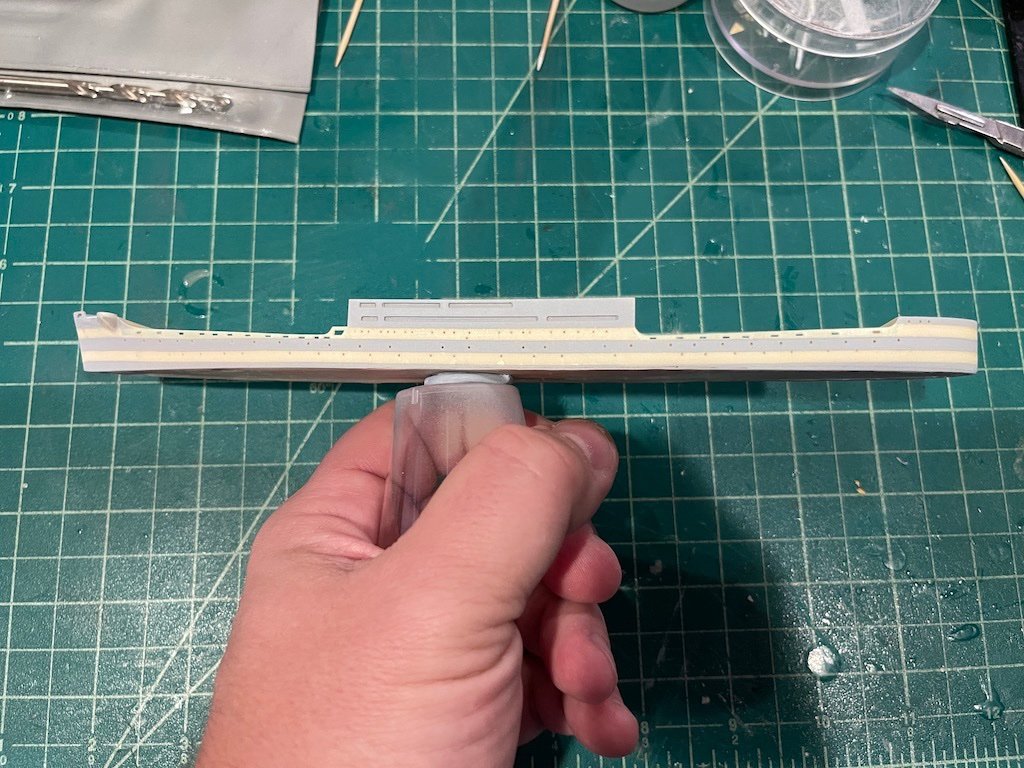
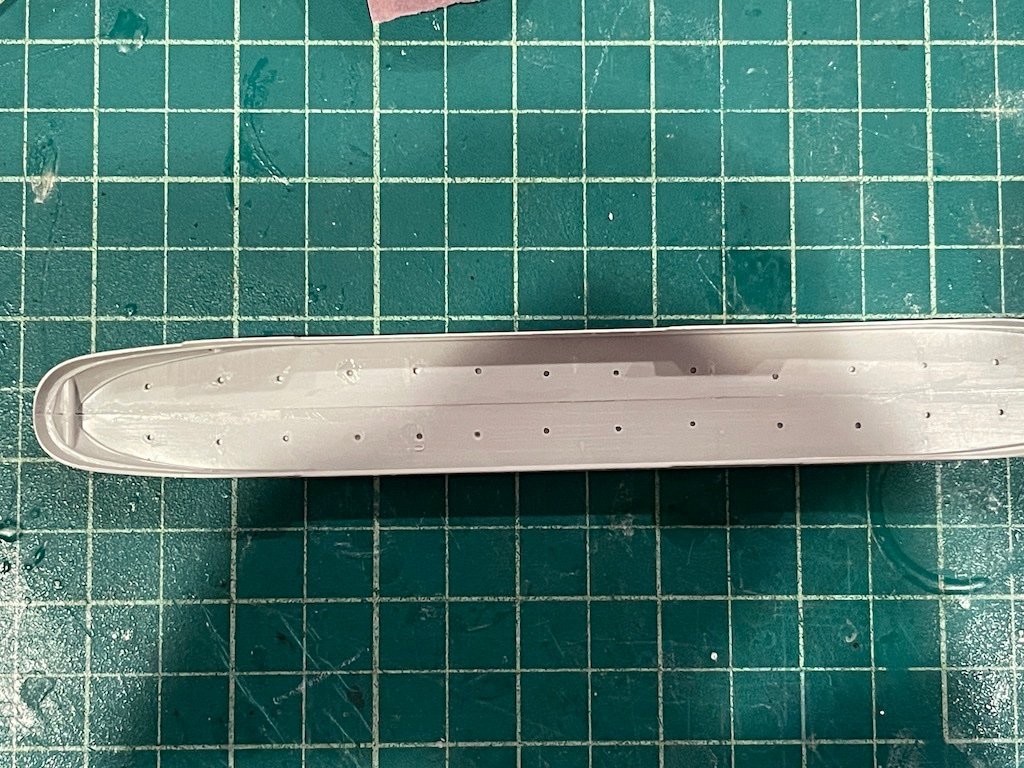
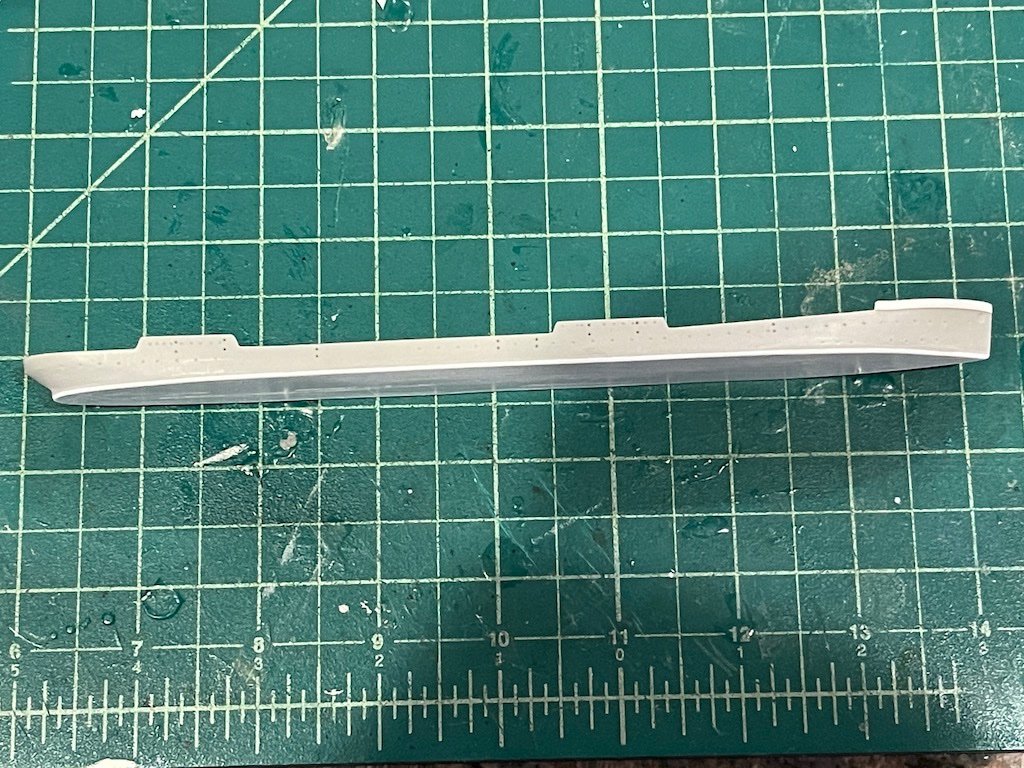
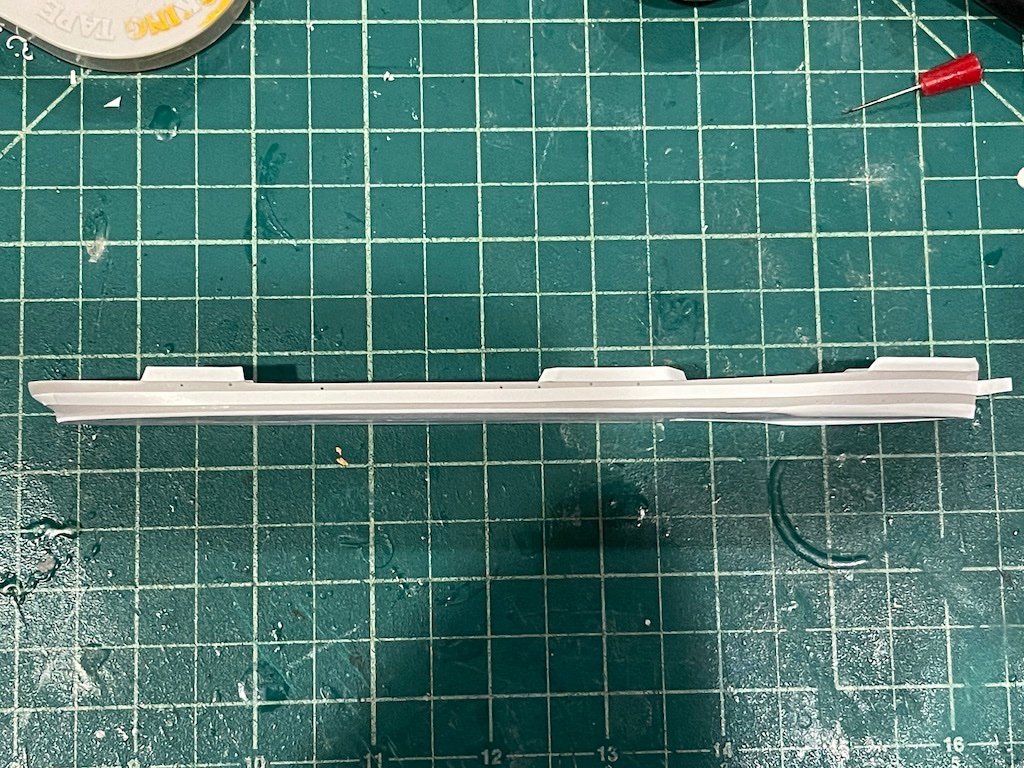
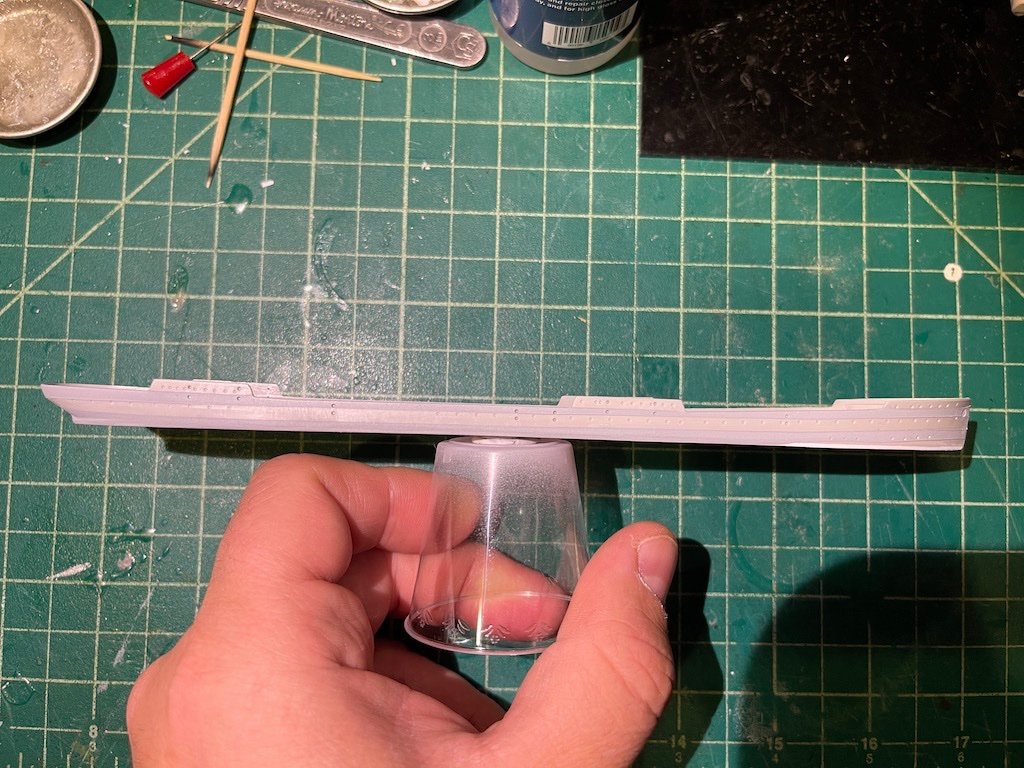
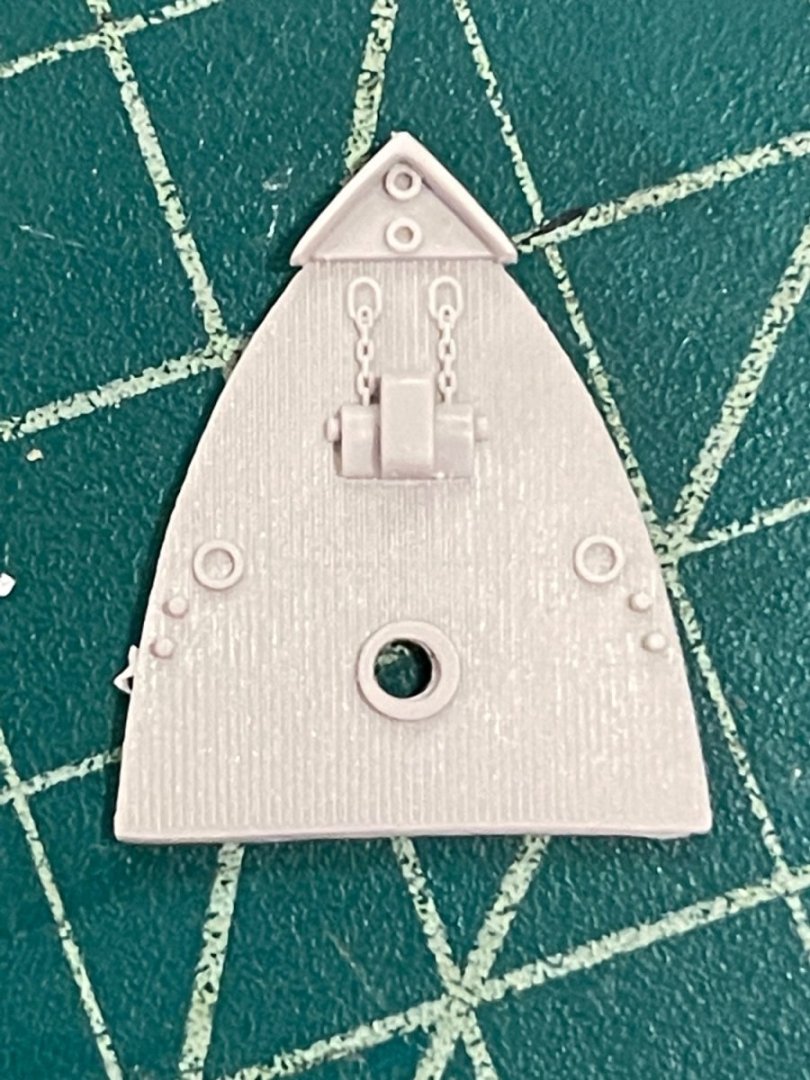
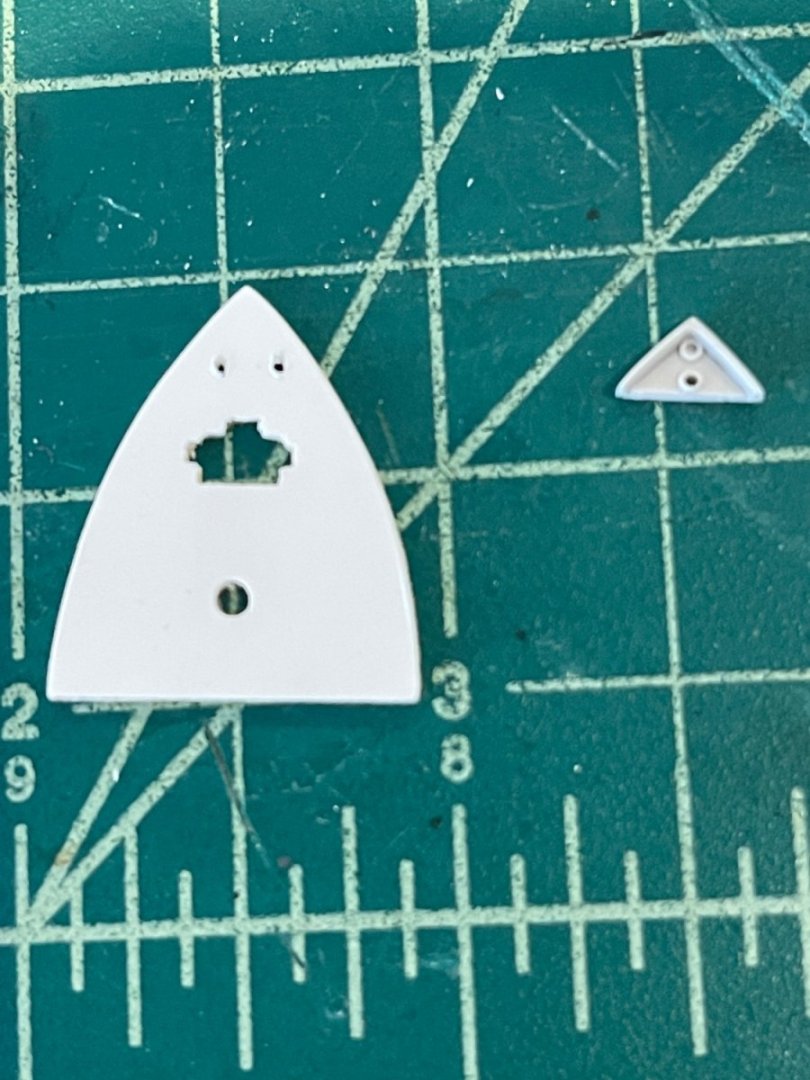
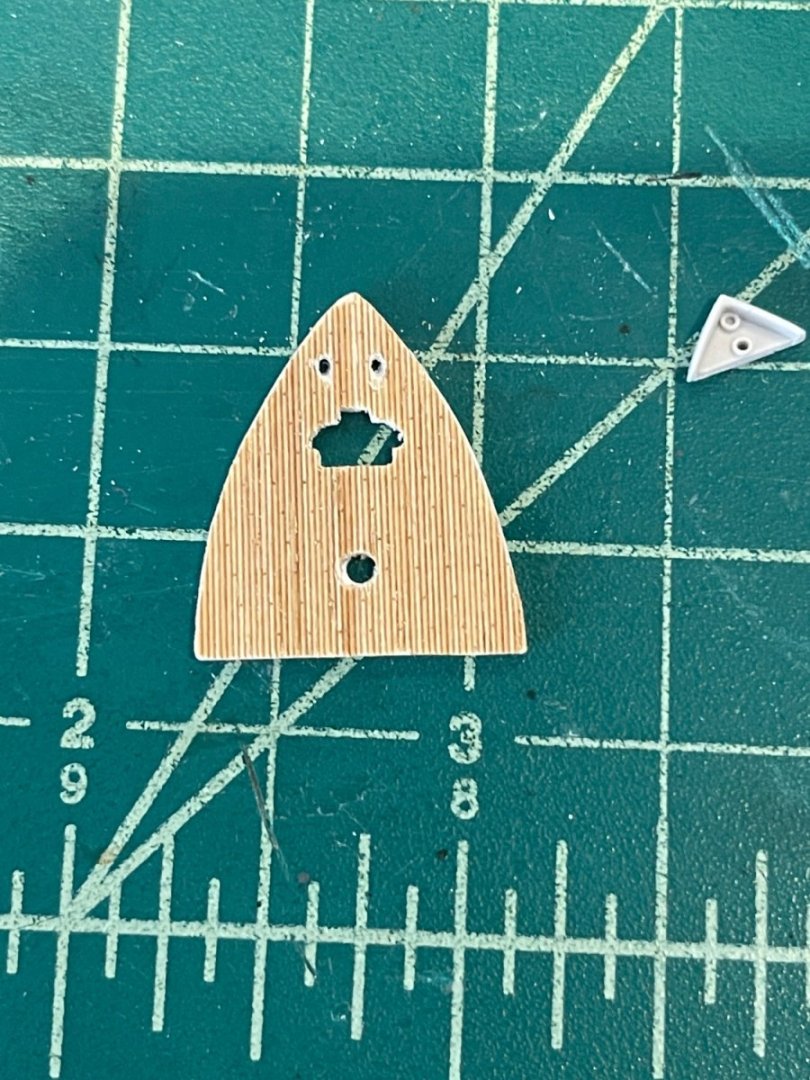
This project is going to be a little different from the other IJN ships I've build in that there is a combination of wood and linoleum decks, and multiple decks (and canopies) at that. The other ships I've built I was pretty much able to completely assemble the ship, paint the deck, mask it, and then paint the hull and above deck items in one pass. This is going to be trickier and will require painting and assembly in stages I think. To start, I glued the hull halves together. The bottom was very thin, almost to the point of the hull being too flexible for my liking. So, I ended up gluing a strip of plastic card underneath which made the hull more stable and helpfully raised the ship a little given that I'll put it in water diorama. I had pre-drilled some holes in the bottom of the kit hull so that when I glued the new bottom onto it, I could flow Tamiya extra thin cement into the holes and help secure the new bottom all along the base of the hull. Worked pretty well. Next I taped the hull plating lines, in preparation for spraying Mr. Surfacer 500 to help give definition to the plating runs: Next I worked on the small deck at the bow. The kit is correct in that the deck, from what I can tell from grainy black and white pictures, was wood. The Five Star set includes a PE deck that represents a metal deck which is probably incorrect. Since I am planning on using stick on wood decks to have some consistency throughout the ship, I decided to make my own deck out of plastic card with the cutouts for the winch, anchor chain holes, and pole for the elevated bow platform. Seemed to work out ok. I'll add the bollards, vents, etc. after. Thanks for looking in!
- 10 replies
-
- 11
-
-
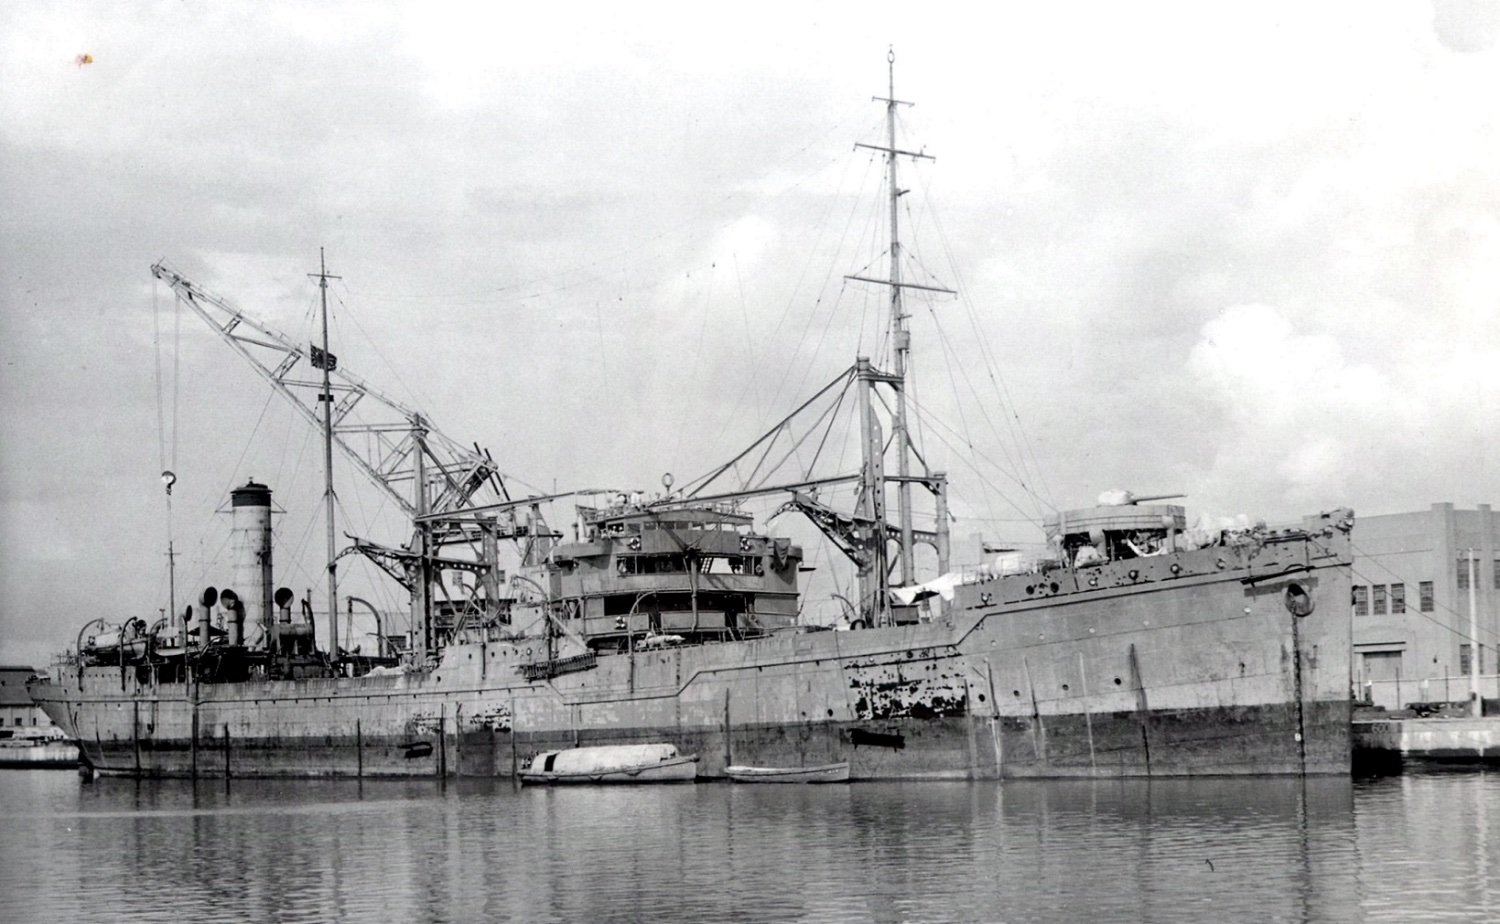
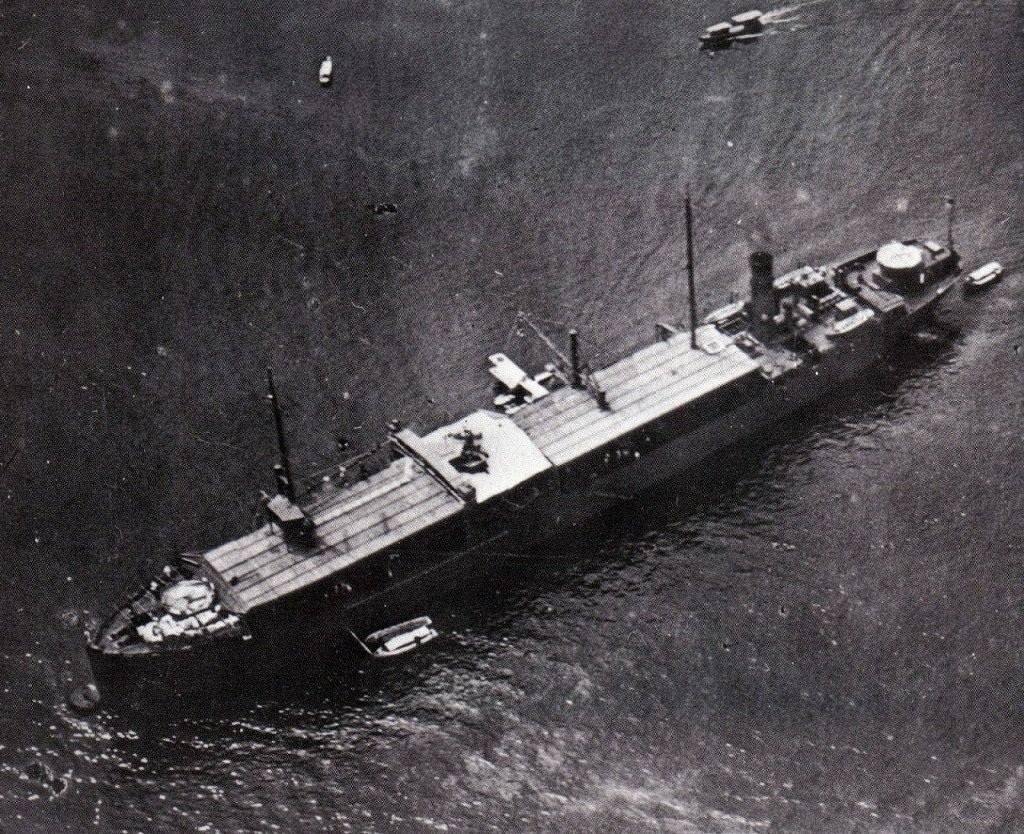
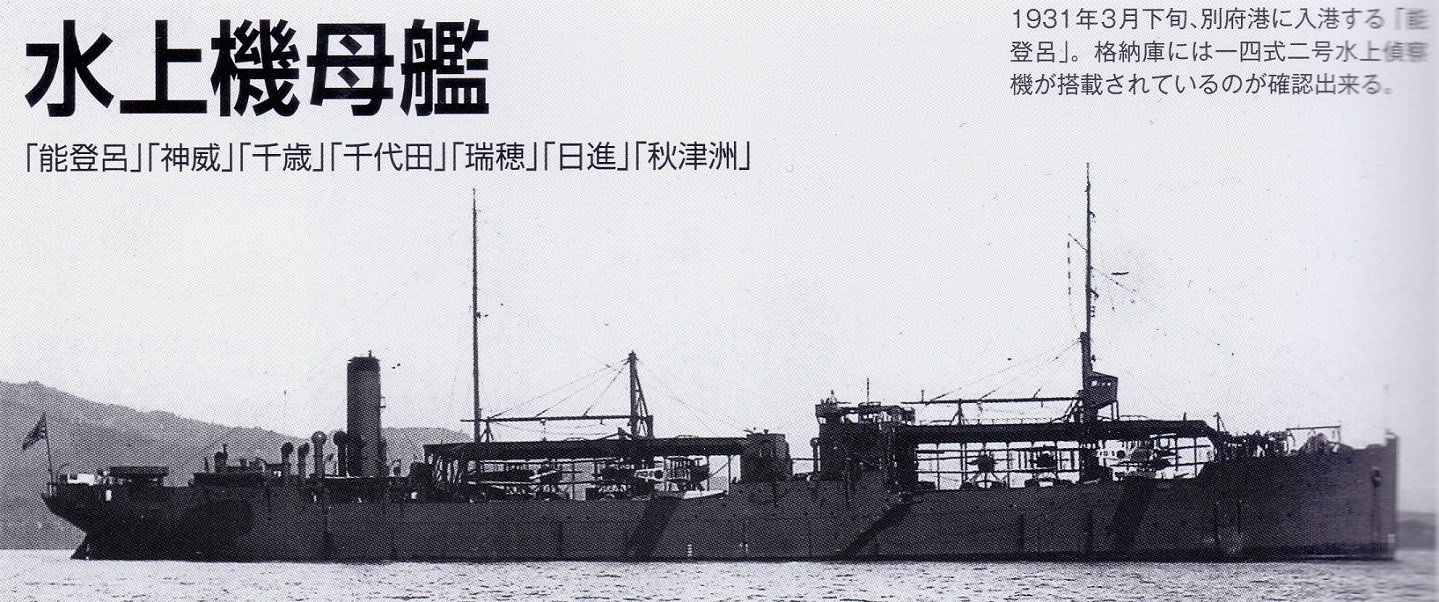
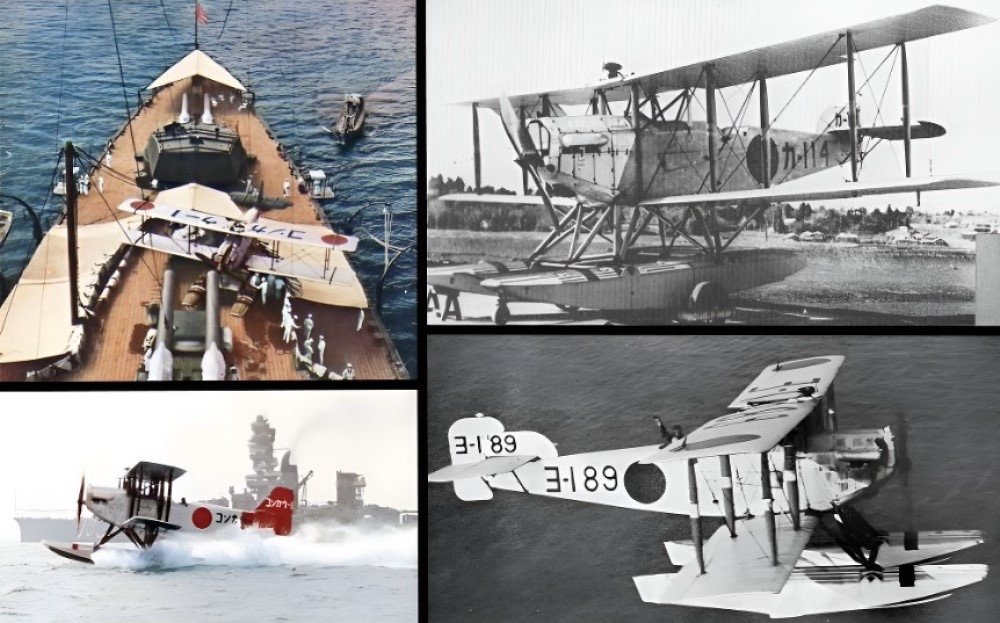
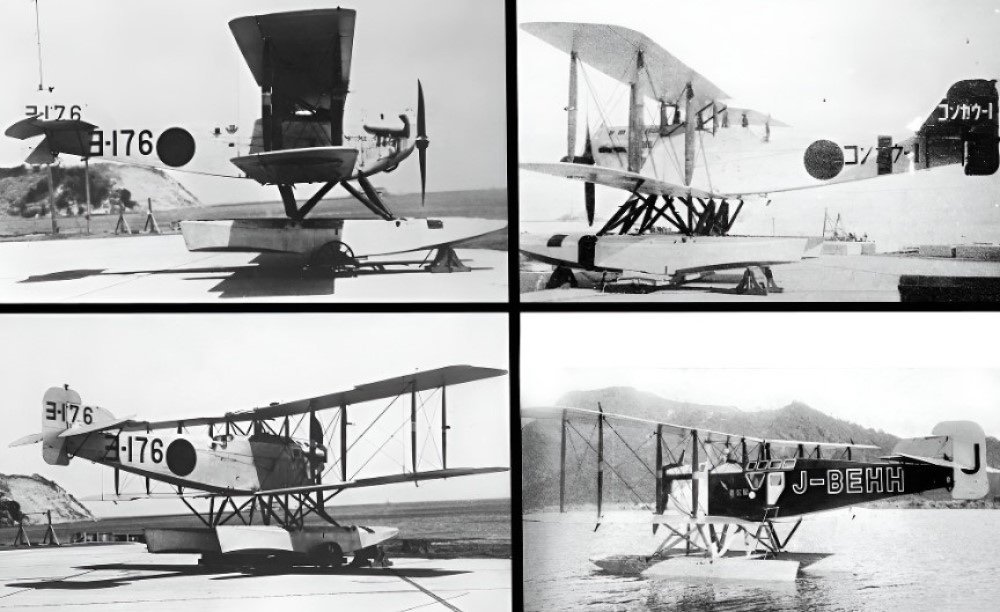
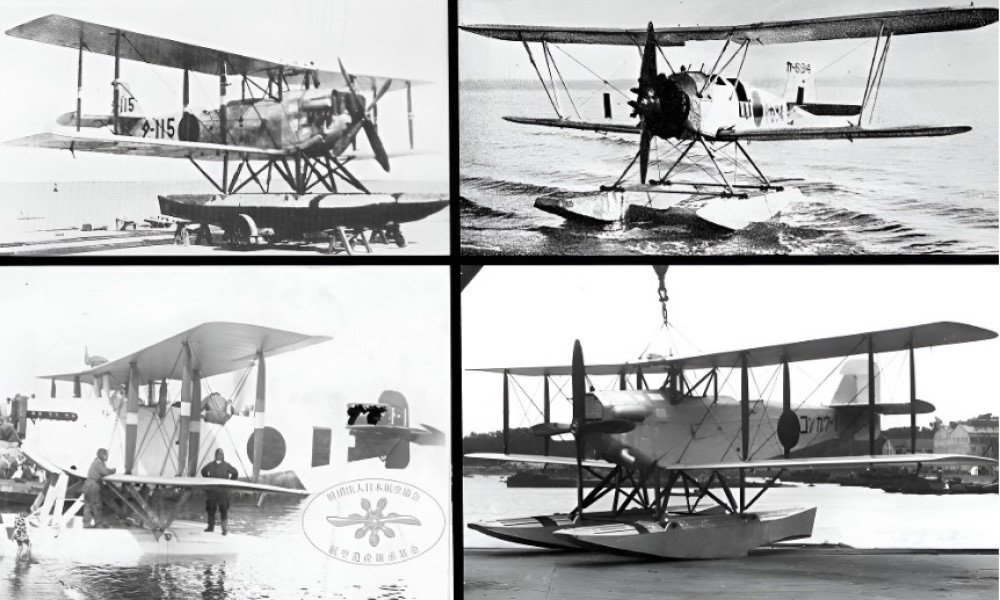
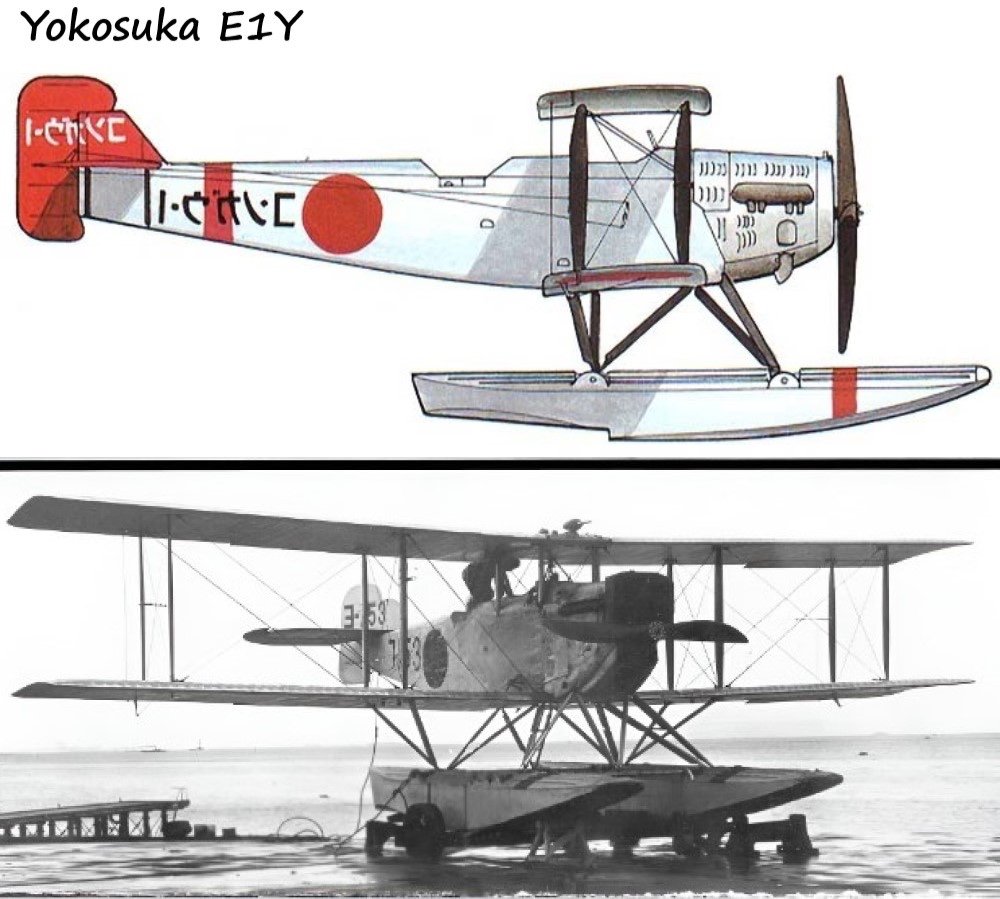
Some pictures of the ship over the years: 1930: 1931: 1934: 1937: 1938: 1944 (back as an oiler): The Yokosuka E1Y reconnaissance plane:

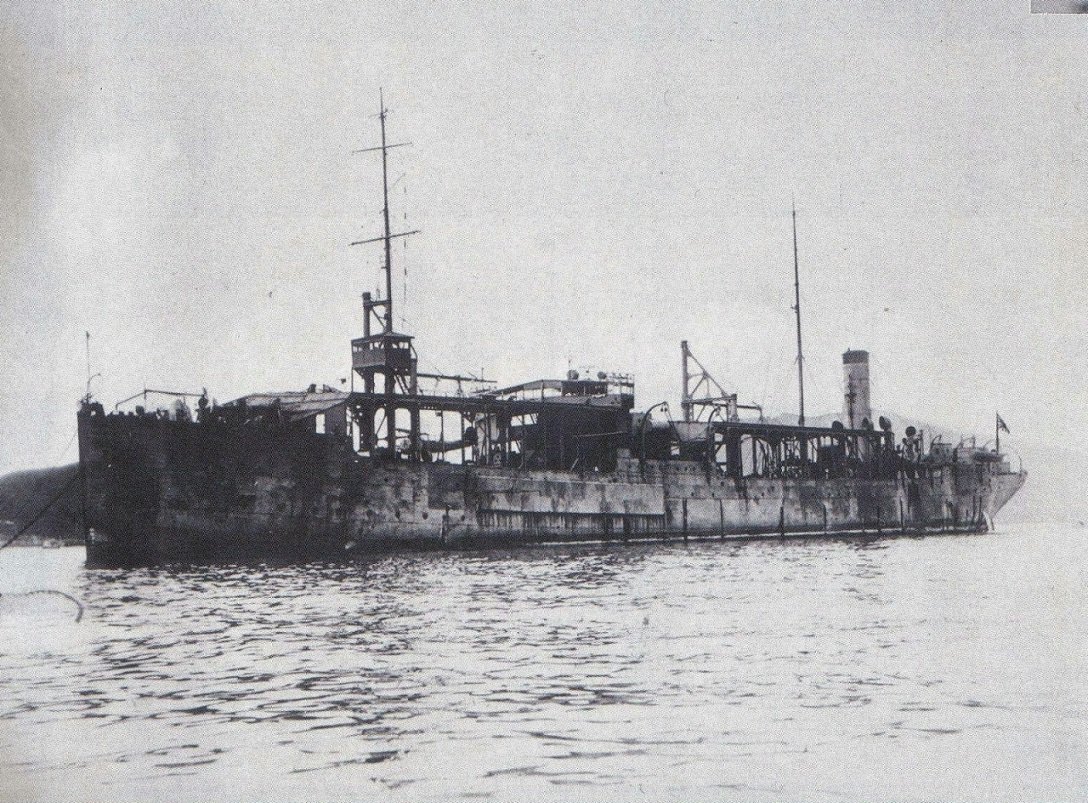
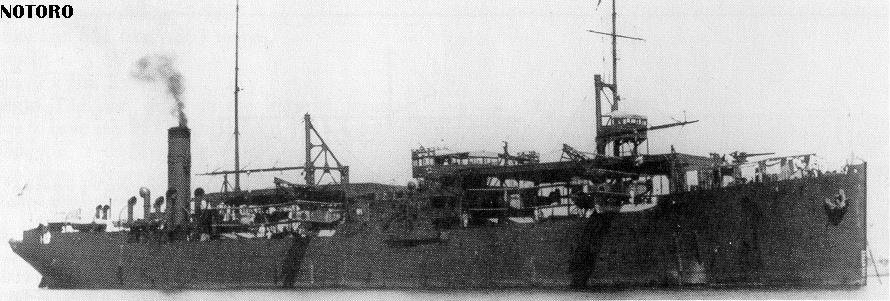
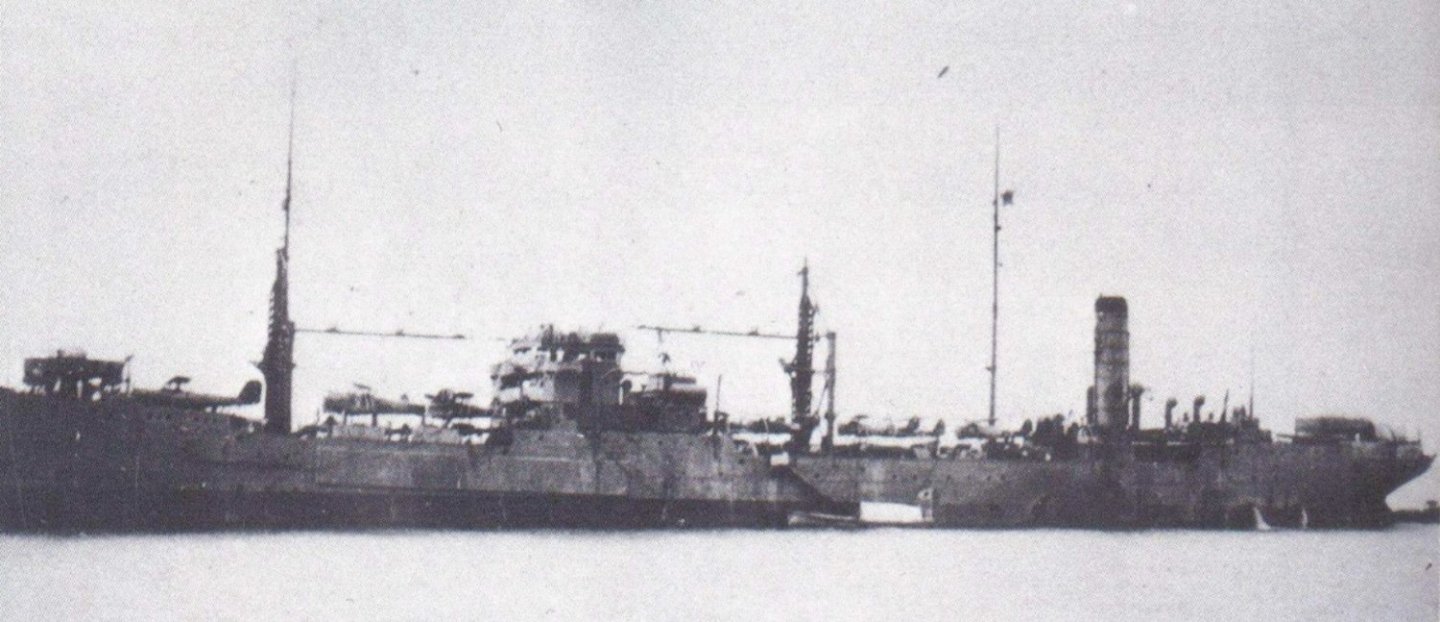
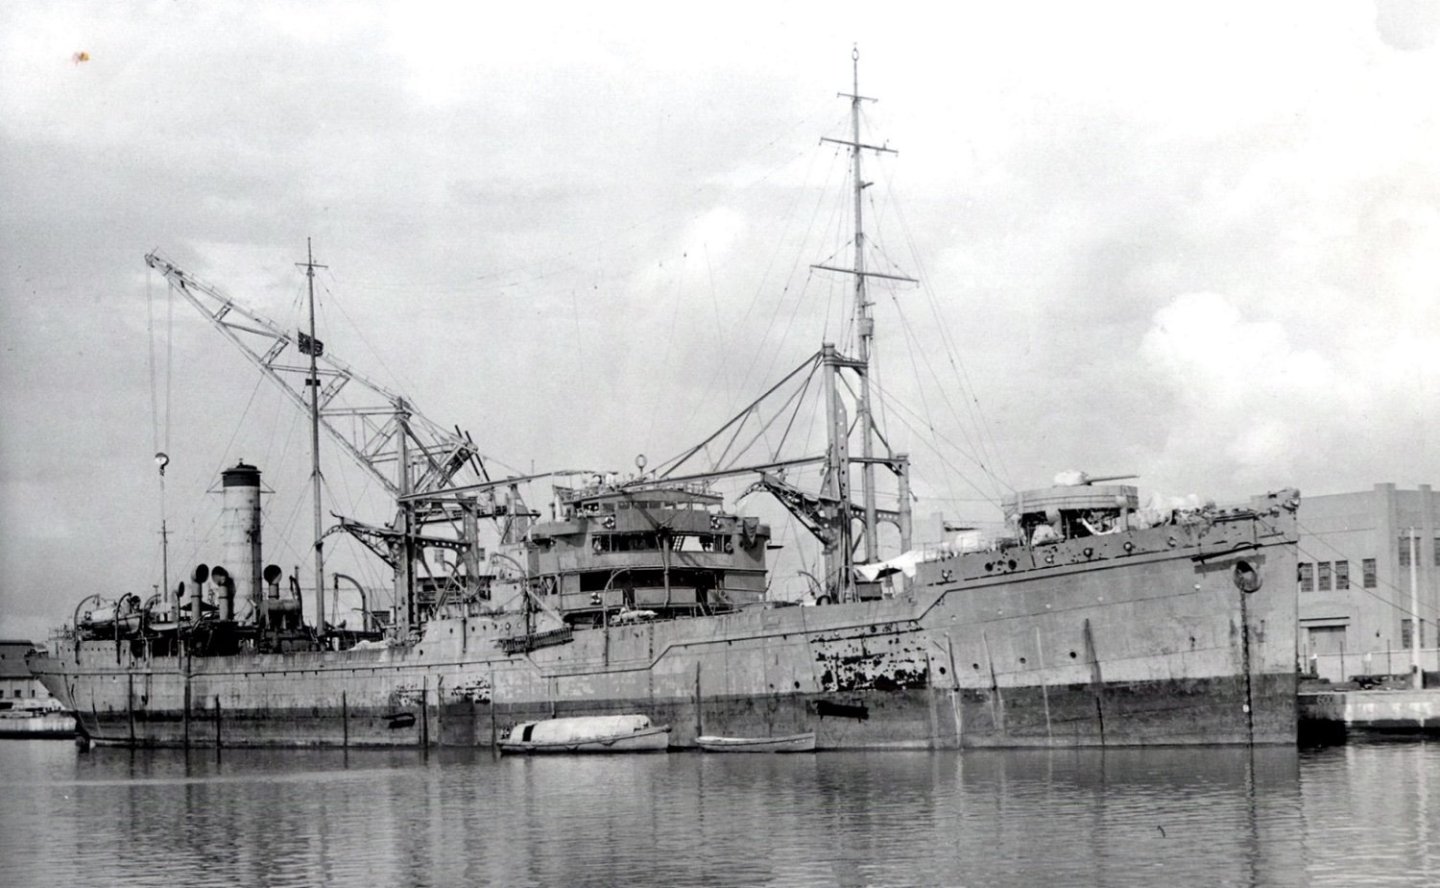
-
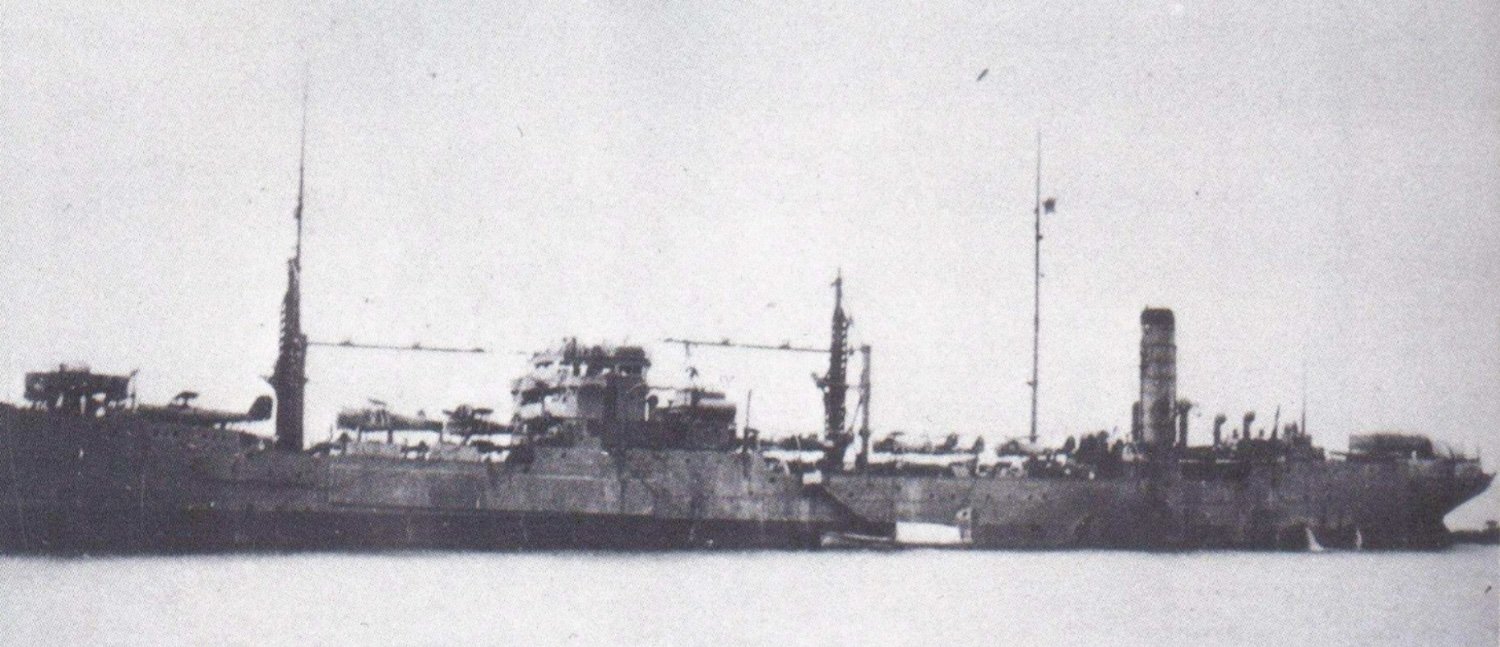
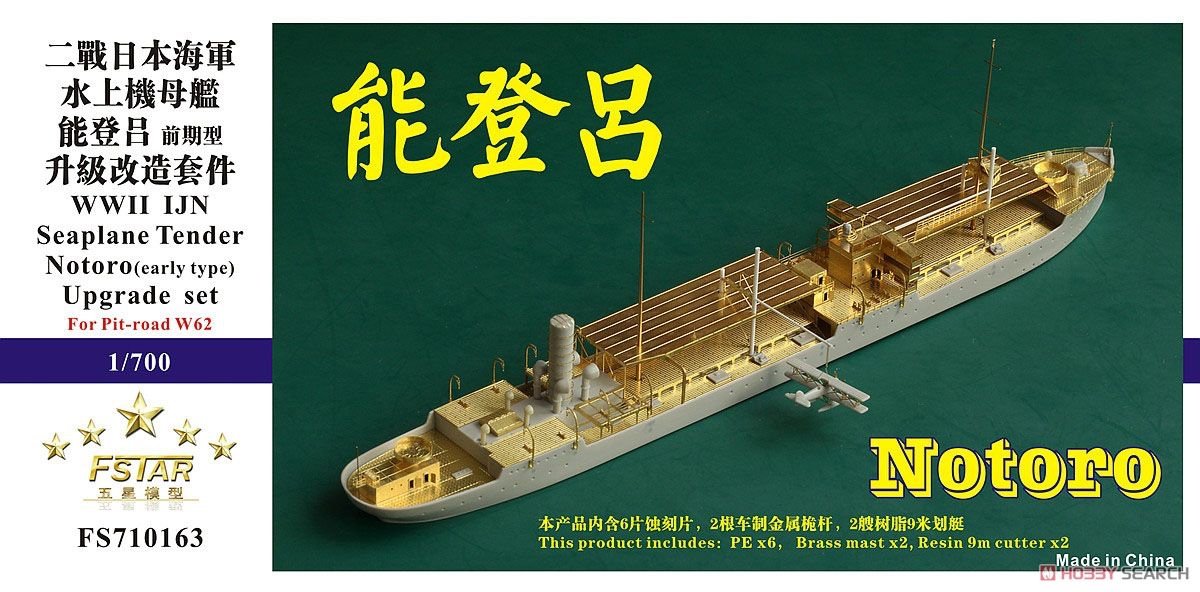
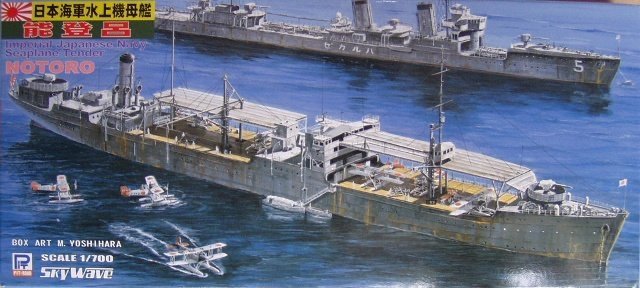
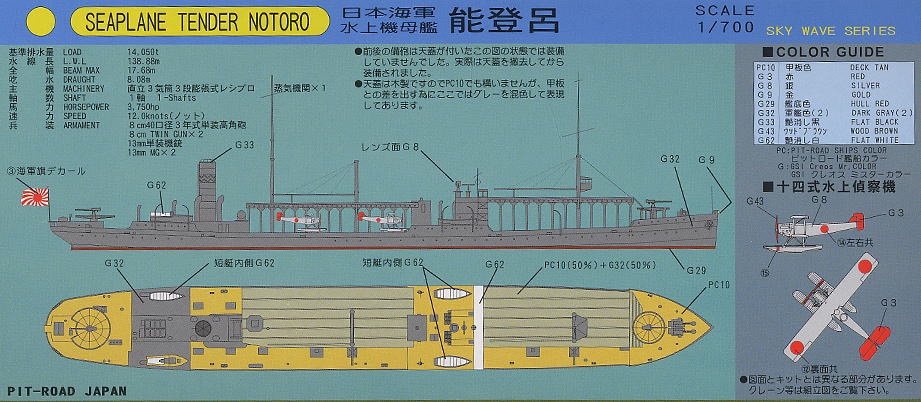
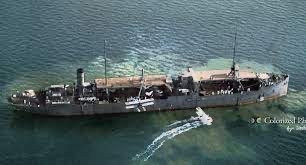
A month ago, I started conversing with someone who was building this kit on one of the FB groups, which led me to talking to someone who was researching the Notoro for an upcoming build. So I decided to start it while some of the discussions were fresh in my mind since there seem to be some minor inconsistencies in the kit and the Five Star set. This ship launched as an oiler in 1920, was converted into a seaplane tender in 1924, and then reconverted back into an oiler in 1941. This ship, though damaged on multiple occasions, ended up surviving the war and was scrapped in 1947. I will build the Notoro using the Pit Road kit and Five Star detail set as a seaplane tender from 1929 and I'll probably try to recreate the colorized picture in the picture below. During that time, the Notoro carried up to eight Yokosuka E1Y (Type 14) reconnaissance aircraft. I just need to come up with a few more aircraft as the kit only provides two of them. Thanks for looking in!
-
Wow, these came out great!
-
Looking good Ron. Loved your last one, looking forward to seeing this one come along.
-
This is looking really great, the vegetation really adds character to the whole composition. Looking forward to seeing the figures!
-
Thanks Craig and Elmer, looking forward to getting started on it! I had been itching to work on it for a while now but wanted to wait to see if I could find the discontinued CMK set. Took a while, but it fortunately turned up on eBay. The aftermarket control surfaces make it so much easier to show them in various positions, rather than cutting them out and then trying to rebuild them because of the saw's kerf, etc.
-
Thanks guys! I've always had a thing for seaplanes - or are they flying boats? Should be a fun build anyway.
-
I decided to join the current "twins" (as in two propulsion units) group build on LSM, so thought I'd post a parallel log here. Not like I don't have enough projects going at the moment, but this one shouldn't be too bad. The Sikorsky S-43 or "Baby Clipper" was a smaller version of the S-42 Clipper and first flew in 1935. The US Navy began buying the plane beginning in 1937, and redesignated the military version as the JRS-1. I'm building the Eduard kit, which is a limited edition repop that came out in 2016 of an older Sword kit from 2003. Special Hobby had also re-released the same kit in 2005. Nice thing about the Eduard release is the addition of PE and resin improvements to the old kit. In addition, Eduard released a separate PE aftermarket set, and I luckily somehow managed to find the old discontinued CMK set which has a lot of helpful improvements like wheels, control surfaces, etc. Kit contents: The kit has a large color instruction manual, as well as a really nice color pamphlet with lots of info on and pictures of the JRS-1 to help build the model: Last night I gave the sprues and resin parts a bath. Here you can see all the resin parts between the kit (in gray) and the CMK set (in yellow). A blade from each prop was broken off, so I'll need to reattach them. Lots of color schemes are included in this kit. I'll probably do the kit as one of the multi-colored yellow wings. I'm leaning towards the blue-banded 1193, but the red-banded 1063 is probably the more famous plane as I believe it is at the Smithsonian Air and Space Museum (near me, I'll have to see if it's on exhibition). Thanks for looking in!
- 112 replies
-
- 16
-
-
1966 Buick Riviera by CDW - FINISHED - AMT - 1:25 Scale
Landlubber Mike replied to CDW's topic in Non-ship/categorised builds
Good to know. Sounds like I was overthinking things -
1966 Buick Riviera by CDW - FINISHED - AMT - 1:25 Scale
Landlubber Mike replied to CDW's topic in Non-ship/categorised builds
Looks fantastic Craig! Did you foil the bumpers and wheels, or did you paint them? I'm sorta at a standstill on a car build because I was thinking of foiling one set of parts because it would be easier than painting, but then didn't want the chrome to look different from other places that were chromed. So, I've always wondered what people that foiled certain chrome parts did with other chrome parts. -
Square mandrels?
Landlubber Mike replied to Dcox's topic in Metal Work, Soldering and Metal Fittings
Have you tried something like these? https://umm-usa.com/onlinestore/product_info.php?cPath=21_225&products_id=2979&osCsid=681b510273022f061ca64a8ad6eb7195 https://umm-usa.com/onlinestore/product_info.php?cPath=21_225&products_id=6597&osCsid=681b510273022f061ca64a8ad6eb7195 Some of the photo etch benders also have squared off wire bending functions: https://umm-usa.com/onlinestore/product_info.php?cPath=21_225&products_id=7142&osCsid=681b510273022f061ca64a8ad6eb7195 -
1966 Buick Riviera by CDW - FINISHED - AMT - 1:25 Scale
Landlubber Mike replied to CDW's topic in Non-ship/categorised builds
Sweet work on the foiling!! Amazing job! -
Tiger 1 by Javlin - RFM - 1/35 - Early Version
Landlubber Mike replied to Javlin's topic in Non-ship/categorised builds
Looks great Kevin!! That's an insane level of detail - looks like a fantastic kit!