

MarisStella.hr
-
Posts
479 -
Joined
-
Last visited
Reputation Activity
-

 MarisStella.hr got a reaction from Elijah in Trajta by mikiek - FINISHED - Marisstella
Mr. Mike, it looks good to me...
Thes light blue is the right one ! ...
Yust go up to the topgallant rail (leave the topgallant rail unpainted, as well as the deck and everything inside the boat...
Would You make some example of a tiny bit lighter blue, just to compare it ... ??
The rudder needs to be finished with a strip at the bottom ...
then painted in the same colors as the model.
Under woterline green, up to the level of the topgallant rail light blue and unpainted to the top (the tiller unpainted)...
Regards, Zoran...
-
 MarisStella.hr got a reaction from robdurant in Trajta by mikiek - FINISHED - Marisstella
Mr. Mike, it looks good to me...
Thes light blue is the right one ! ...
Yust go up to the topgallant rail (leave the topgallant rail unpainted, as well as the deck and everything inside the boat...
Would You make some example of a tiny bit lighter blue, just to compare it ... ??
The rudder needs to be finished with a strip at the bottom ...
then painted in the same colors as the model.
Under woterline green, up to the level of the topgallant rail light blue and unpainted to the top (the tiller unpainted)...
Regards, Zoran...
-
MarisStella.hr got a reaction from Elijah in Trajta by mikiek - FINISHED - Marisstella
Hi Mr. Mike... May I suggest to color the hull, between the waterline and the topgallant rail, light (really light) blue ...
What is You opinion ?
Regards, Zoran
-
MarisStella.hr got a reaction from robdurant in News and Info from MarisStella Ship Model Kits
Hi Mr. Rick, thanks for stopping ...
These are challenging comments; I wish we had more time for developing the kits and to serve all of You with the new ones at some faster tempo...
Regards, Zoran
-
 MarisStella.hr reacted to matiz in French 74-gun ship by matiz - scale 1:56 - Tiziano Mainardi
Hi, another pictures:
-
MarisStella.hr reacted to matiz in French 74-gun ship by matiz - scale 1:56 - Tiziano Mainardi
Hi, and tanks, Alberto
-
MarisStella.hr reacted to EdT in Young America 1853 by EdT - FINISHED - extreme clipper
Young America - extreme clipper 1853
Part 267 – Halyard Gin blocks
In preparation for work on the upper topsail yard, I decided to make the iron gin blocks for the halyards for all three of these yards. These are suspended aft of each topmast from a chain tye shackled to the central band on the yard. The tye passes through the sheave just below the topmast hounds. There is one of these iron tye blocks for each of the three upper topsail yards. They allowed the load of these relatively heavy yards to be distributed to both sides of the ship by means of tackles that will be described later. The heavy stationary yards below are supported by iron trusses as previously described, while those above have simpler, lighter halyard rigging. The first picture shows the three finished gin blocks.
The blocks have inverted T frames that house iron sheaves and an eye at the top to attach the chain tye. Two have 12" diameter sheaves, one 10". The frames could be made from formed metal strips, but I chose to use flattened brass tube for these. The tube was flattened in a vise as shown in the next picture.
Pieces were then sawed off and given some shaping to form parts for the basic two-piece assembly shown in the picture. It was then a simple matter to silver-solder these using the setup shown below.
One side at a time was soldered. The frames were then further refined in size and shape as shown in the next two pictures.
The brass strip holding the frame in the above picture served as an anvil to impart some squareness to the frames and to straighten the sides. The strip also allowed the frames to be center-punched for drilling without deforming the shape. In the next picture the eyebolt has been soldered into a small hole in the top of the frame and the sheave pin holes are about to be marked for drilling.
A wooden spacer was inserted into each frame to avoid bending during rilling of the axle holes. The last picture shows the completed blocks before blackeneing.
The sheaves were turned and drilled in the lathe from brass rod, then secured with peened copper pins. The assemblies were then polished, cleaned, and blackened using Brass Black®. Meanwhile, work progressed on the upper yard itself – next post.
Ed
-
MarisStella.hr reacted to BANYAN in Young America 1853 by EdT - FINISHED - extreme clipper
Nice progress Ed, this little lady is looking great!
cheers
Pat
-
 MarisStella.hr got a reaction from tasmanian in News and Info from MarisStella Ship Model Kits
Then the sails : for the both of the masts...
-
MarisStella.hr got a reaction from tasmanian in News and Info from MarisStella Ship Model Kits
... so here She is, with the shrouds on ... after this She is going to be complete, some photographs still to come ...
-
MarisStella.hr got a reaction from robdurant in News and Info from MarisStella Ship Model Kits
and thet the rudder... it has a nose-the support on the bottom of the stern...
the rudder hinges are tipical for this type of Trabaccolo.... the rudder goes down the keel for about 1m. This has a purpose like the keel extension and makes the sailing to be more safe...
-
MarisStella.hr got a reaction from tasmanian in News and Info from MarisStella Ship Model Kits
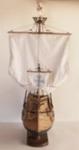
Hello Dear friends... Now I would like to corrupt this Trabaccolo presentation ... I just received the new photos: If You remember the Ragusian Cog model from the begining of this topic, You will know what is this about... Modeller Davorin has completed this model. He has done several good models by now, so here is his work, so you could see this ... The first photograph is a reminder from before, the other ones are the new ones :
-
MarisStella.hr got a reaction from tasmanian in News and Info from MarisStella Ship Model Kits
... then the freebord finish ... specialty part at the bow... there is a specific shape of this planks, this is the mark of the Brazzera and Trabaccolo ... It is not hard to make it, but it is one of the mandatory things at these models ...
-
MarisStella.hr got a reaction from tasmanian in News and Info from MarisStella Ship Model Kits
... Then some classical planking... the way to the keel and upwards from the keel ...
-
 MarisStella.hr got a reaction from mtaylor in News and Info from MarisStella Ship Model Kits
Hi Mr. Rick, thanks for stopping ...
These are challenging comments; I wish we had more time for developing the kits and to serve all of You with the new ones at some faster tempo...
Regards, Zoran
-
 MarisStella.hr got a reaction from coxswain in News and Info from MarisStella Ship Model Kits
So, the freeboard (the planking above the deck) is to be installed next. The tops of the bulkheads, the parts of the bulkheads that had the task to form the freeboard while planking, need to be cut off, removed… The inner walls of the freeboard are to be grind and polished next, the glue remains have to be removed completely… At this model the base for the deck have to be installed before placing the deck planks. There is a curvature of the deck that has to be followed when sanding the top edges of the bulkheads and the curvature is shown into the drawings (this cannot be seen here at the log)… The deck base is made of several wood pieces placed between the bulkheads’ tops. Pieces of some soft plywood are ideal for this purpose…
-
 MarisStella.hr got a reaction from JpR62 in News and Info from MarisStella Ship Model Kits
So, the freeboard (the planking above the deck) is to be installed next. The tops of the bulkheads, the parts of the bulkheads that had the task to form the freeboard while planking, need to be cut off, removed… The inner walls of the freeboard are to be grind and polished next, the glue remains have to be removed completely… At this model the base for the deck have to be installed before placing the deck planks. There is a curvature of the deck that has to be followed when sanding the top edges of the bulkheads and the curvature is shown into the drawings (this cannot be seen here at the log)… The deck base is made of several wood pieces placed between the bulkheads’ tops. Pieces of some soft plywood are ideal for this purpose…
-
 MarisStella.hr got a reaction from Charter33 in News and Info from MarisStella Ship Model Kits
So, the freeboard (the planking above the deck) is to be installed next. The tops of the bulkheads, the parts of the bulkheads that had the task to form the freeboard while planking, need to be cut off, removed… The inner walls of the freeboard are to be grind and polished next, the glue remains have to be removed completely… At this model the base for the deck have to be installed before placing the deck planks. There is a curvature of the deck that has to be followed when sanding the top edges of the bulkheads and the curvature is shown into the drawings (this cannot be seen here at the log)… The deck base is made of several wood pieces placed between the bulkheads’ tops. Pieces of some soft plywood are ideal for this purpose…
-
 MarisStella.hr got a reaction from Canute in News and Info from MarisStella Ship Model Kits
Thanks Ross, It is a pleasure to present the modelling techniques... This is the one I have been told to use, it is specific for the area at east Adriatic coast. The precision of making is great in this way and the planking is very easy to do... We recommend this way of making structures to the modellers from the beginning of their gaining experience, but as I mention before, the perfectionists experts do this very gladly because of the high precision...
Regards, Zoran
-
MarisStella.hr got a reaction from robdurant in Trajta by mikiek - FINISHED - Marisstella
Mr. Mike, Yes, the Leudo (Trajta is a type of Leudo) was painted dark green as well, so this is ok... But, under waterline there was used the tar in the beginning, but later on some other colours were in use: so the hull under water line could be painted dark red, dark green or brown (in this case the hull should be natural wood, matt black, light blue etc.)... The deck was natural wood because it was the working area (for handling the fishing tools, nets etc.)...
Regards,
Zoran
-
MarisStella.hr got a reaction from Canute in News and Info from MarisStella Ship Model Kits
So, the freeboard (the planking above the deck) is to be installed next. The tops of the bulkheads, the parts of the bulkheads that had the task to form the freeboard while planking, need to be cut off, removed… The inner walls of the freeboard are to be grind and polished next, the glue remains have to be removed completely… At this model the base for the deck have to be installed before placing the deck planks. There is a curvature of the deck that has to be followed when sanding the top edges of the bulkheads and the curvature is shown into the drawings (this cannot be seen here at the log)… The deck base is made of several wood pieces placed between the bulkheads’ tops. Pieces of some soft plywood are ideal for this purpose…
-
 MarisStella.hr got a reaction from marktiedens in News and Info from MarisStella Ship Model Kits
So, the freeboard (the planking above the deck) is to be installed next. The tops of the bulkheads, the parts of the bulkheads that had the task to form the freeboard while planking, need to be cut off, removed… The inner walls of the freeboard are to be grind and polished next, the glue remains have to be removed completely… At this model the base for the deck have to be installed before placing the deck planks. There is a curvature of the deck that has to be followed when sanding the top edges of the bulkheads and the curvature is shown into the drawings (this cannot be seen here at the log)… The deck base is made of several wood pieces placed between the bulkheads’ tops. Pieces of some soft plywood are ideal for this purpose…
-
MarisStella.hr got a reaction from mtaylor in News and Info from MarisStella Ship Model Kits
Thanks Ross, It is a pleasure to present the modelling techniques... This is the one I have been told to use, it is specific for the area at east Adriatic coast. The precision of making is great in this way and the planking is very easy to do... We recommend this way of making structures to the modellers from the beginning of their gaining experience, but as I mention before, the perfectionists experts do this very gladly because of the high precision...
Regards, Zoran
-
MarisStella.hr got a reaction from mtaylor in News and Info from MarisStella Ship Model Kits
So, the freeboard (the planking above the deck) is to be installed next. The tops of the bulkheads, the parts of the bulkheads that had the task to form the freeboard while planking, need to be cut off, removed… The inner walls of the freeboard are to be grind and polished next, the glue remains have to be removed completely… At this model the base for the deck have to be installed before placing the deck planks. There is a curvature of the deck that has to be followed when sanding the top edges of the bulkheads and the curvature is shown into the drawings (this cannot be seen here at the log)… The deck base is made of several wood pieces placed between the bulkheads’ tops. Pieces of some soft plywood are ideal for this purpose…
-
 MarisStella.hr got a reaction from Heronguy in News and Info from MarisStella Ship Model Kits
So, the freeboard (the planking above the deck) is to be installed next. The tops of the bulkheads, the parts of the bulkheads that had the task to form the freeboard while planking, need to be cut off, removed… The inner walls of the freeboard are to be grind and polished next, the glue remains have to be removed completely… At this model the base for the deck have to be installed before placing the deck planks. There is a curvature of the deck that has to be followed when sanding the top edges of the bulkheads and the curvature is shown into the drawings (this cannot be seen here at the log)… The deck base is made of several wood pieces placed between the bulkheads’ tops. Pieces of some soft plywood are ideal for this purpose…