HOLIDAY DONATION DRIVE - SUPPORT MSW - DO YOUR PART TO KEEP THIS GREAT FORUM GOING! (Only 13 donations so far - C'mon guys!)
×

Peta_V
-
Posts
351 -
Joined
-
Last visited
Content Type
Profiles
Forums
Gallery
Events
Everything posted by Peta_V
-
Hi, that was exactly my idea. Thanks!
-
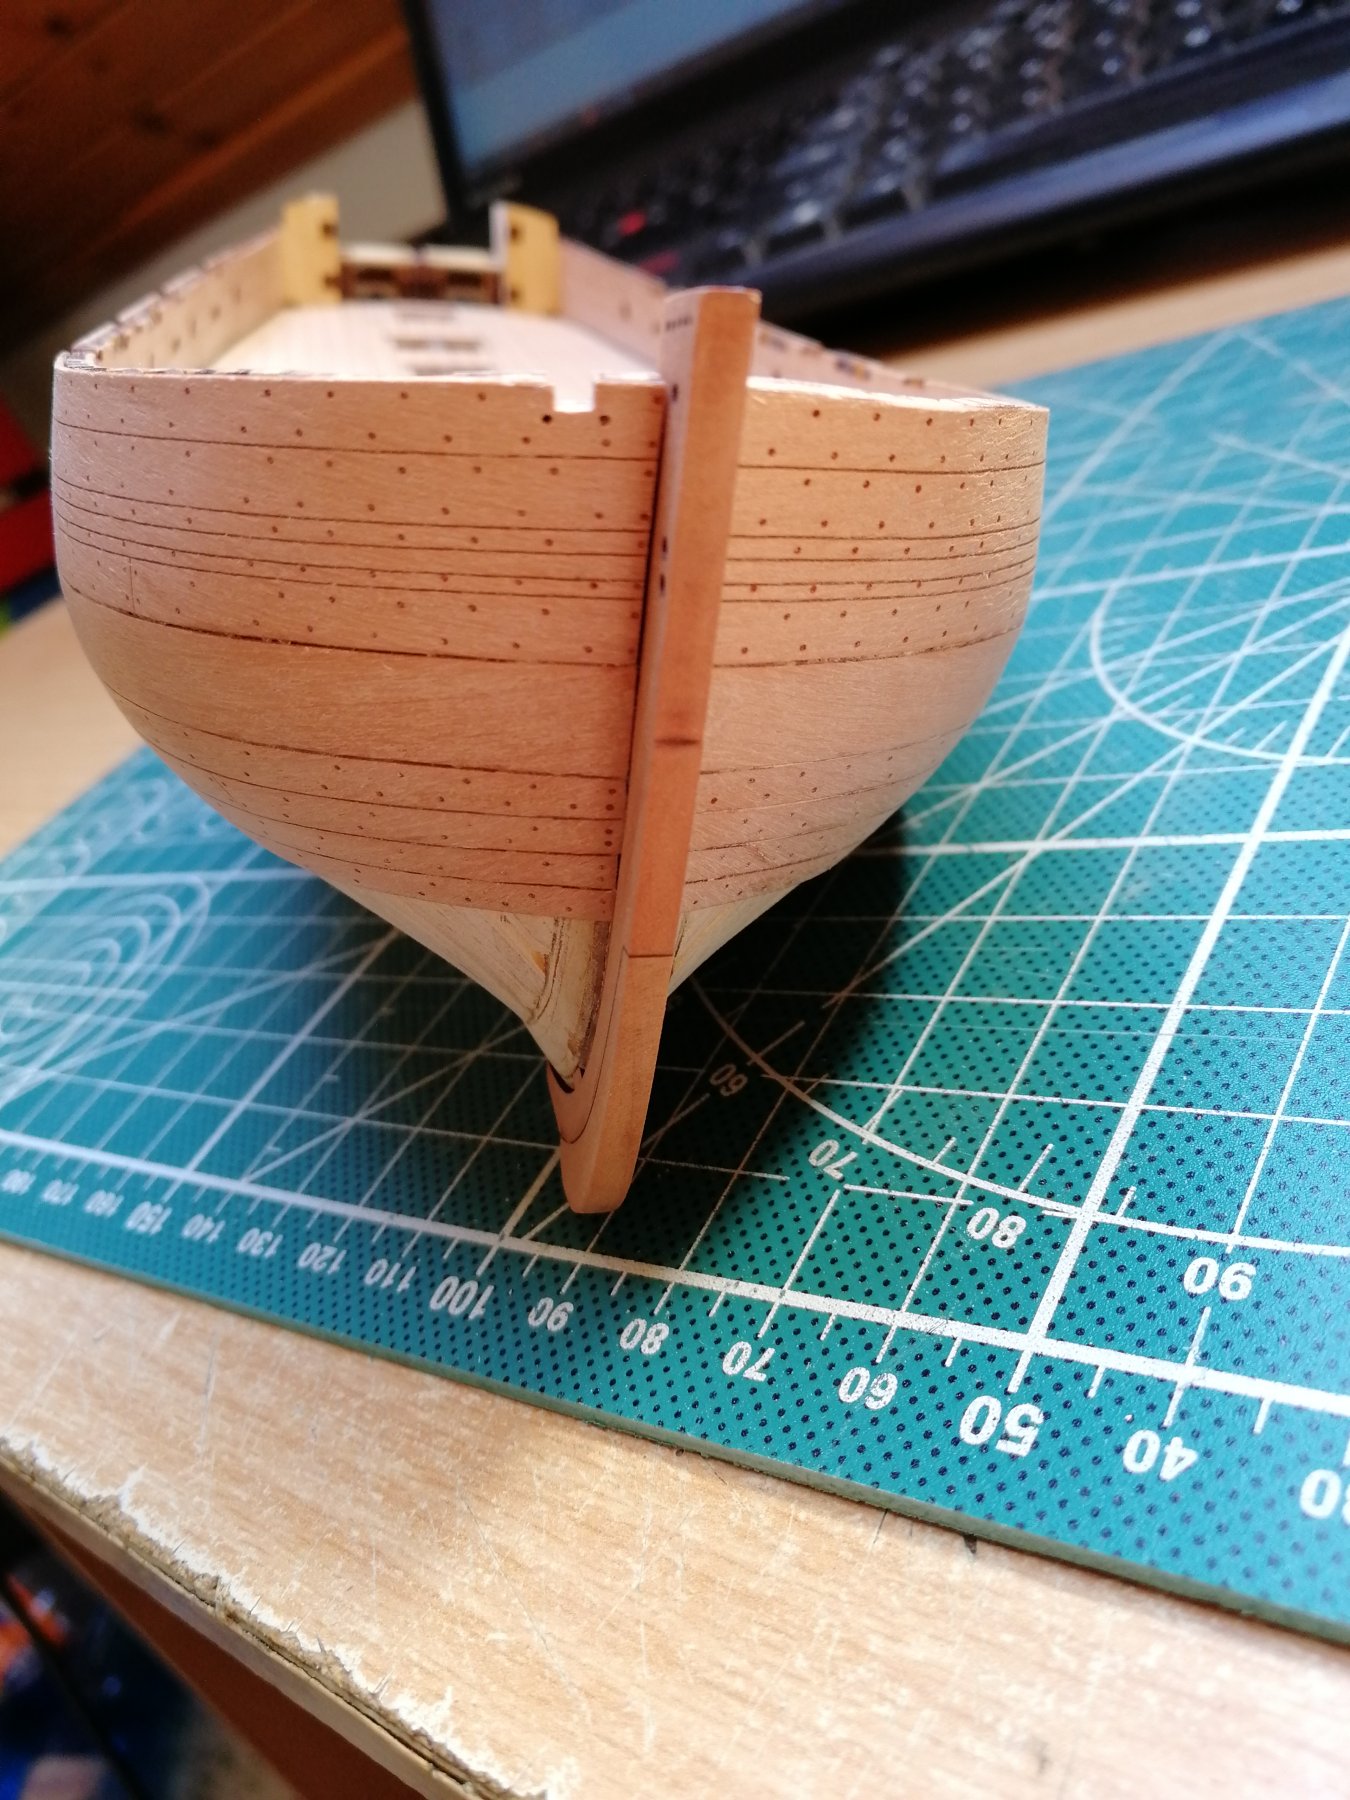
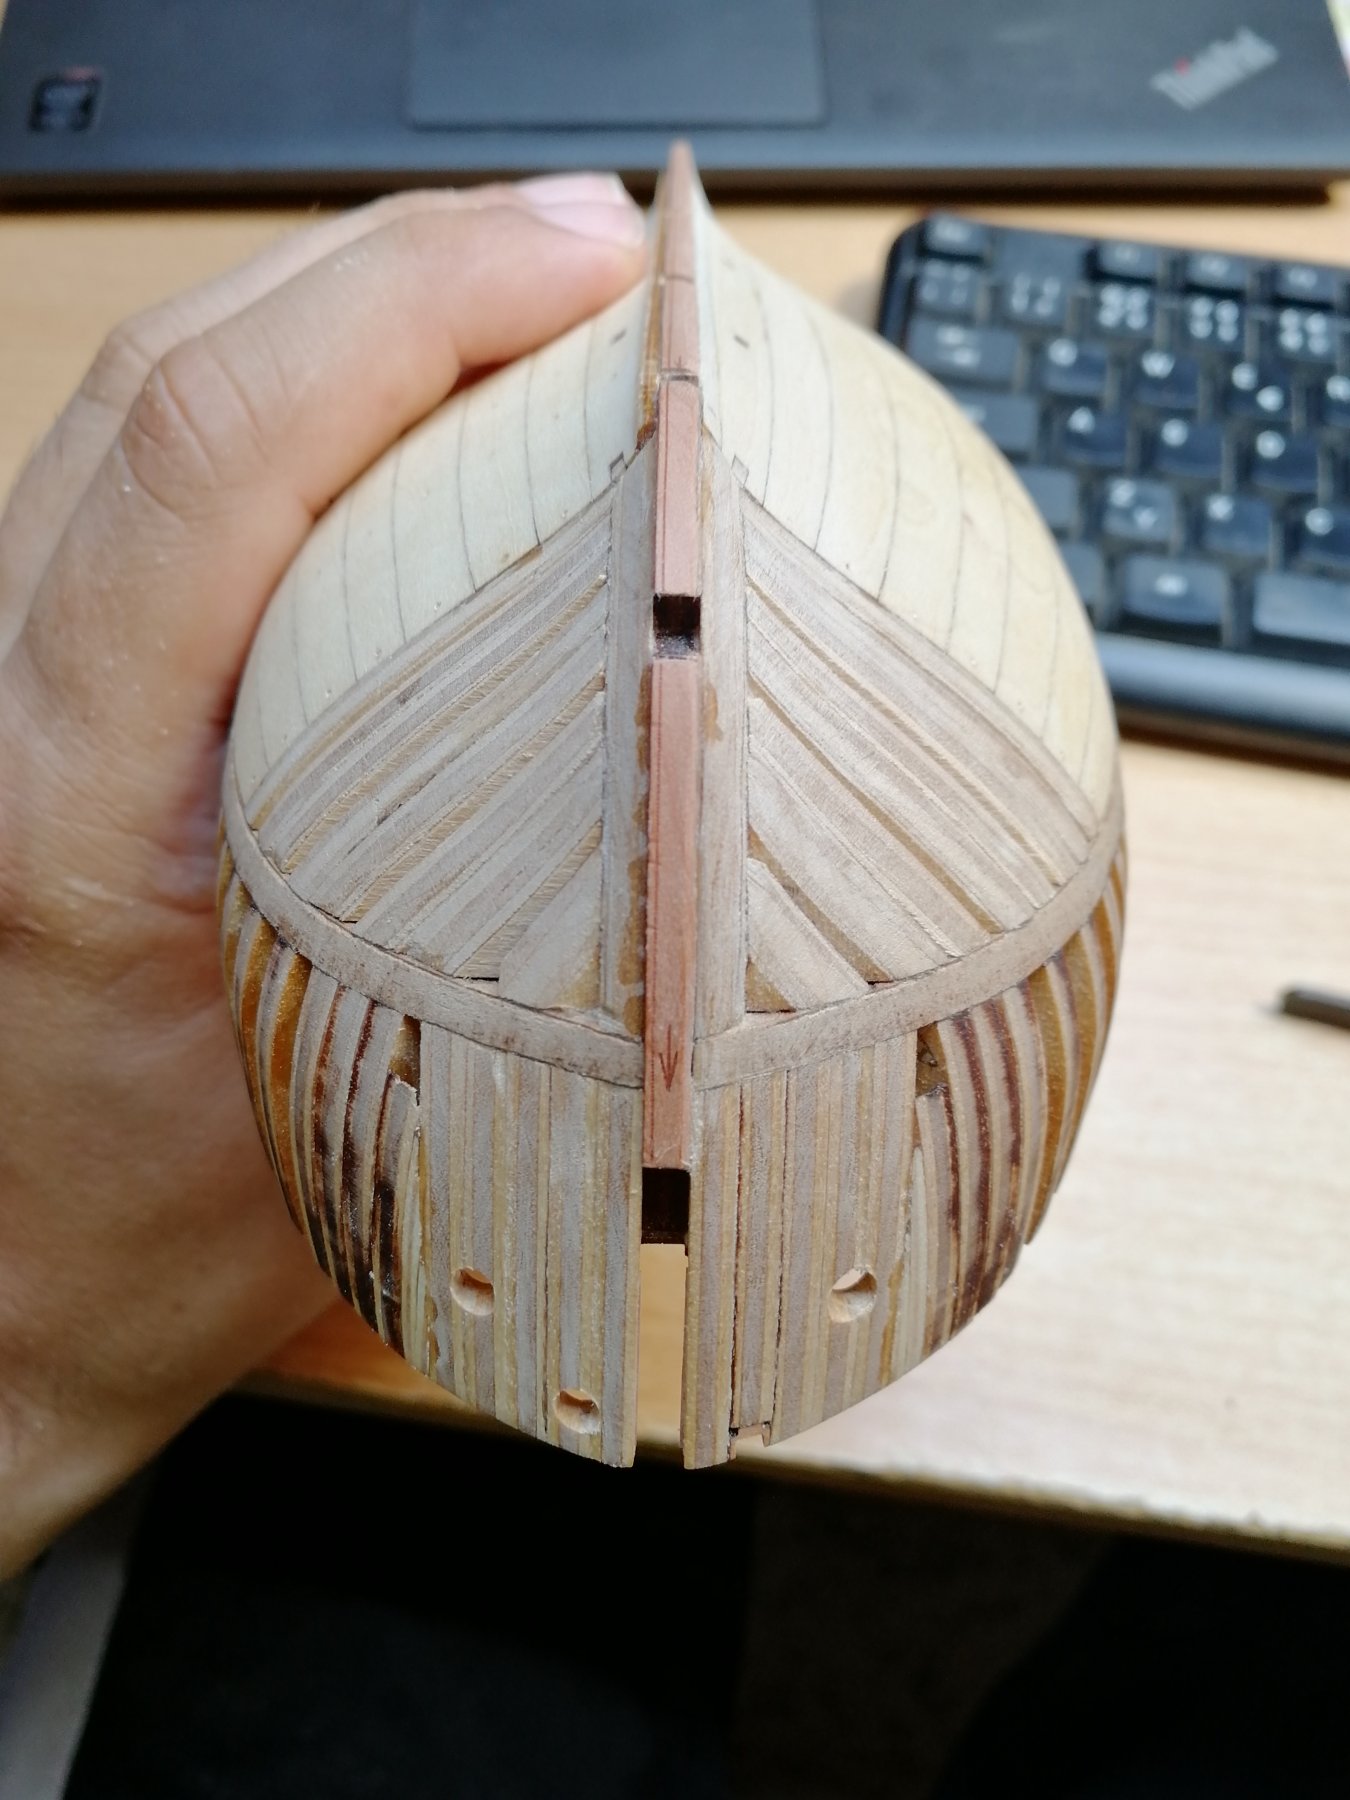
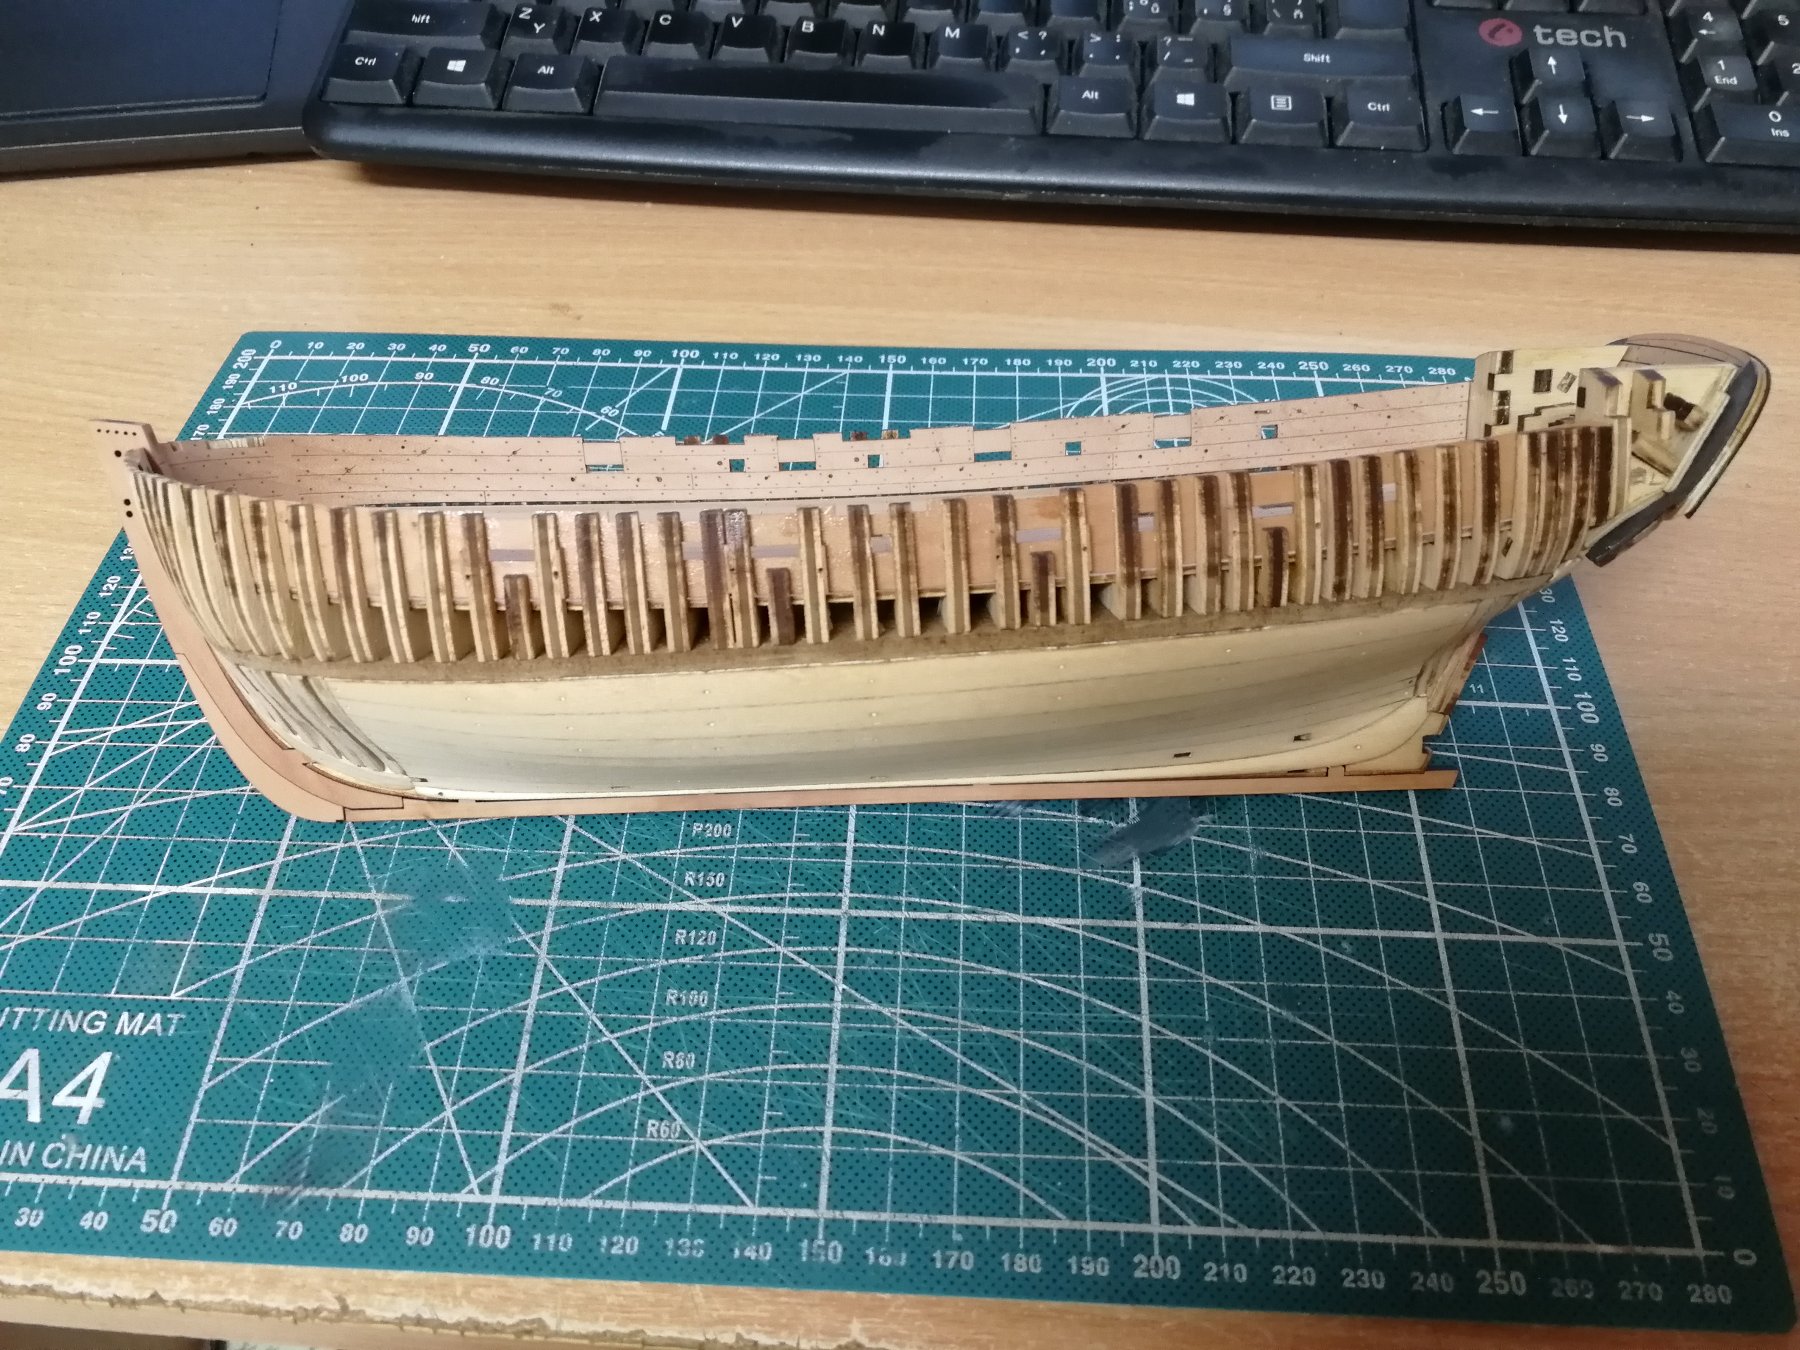
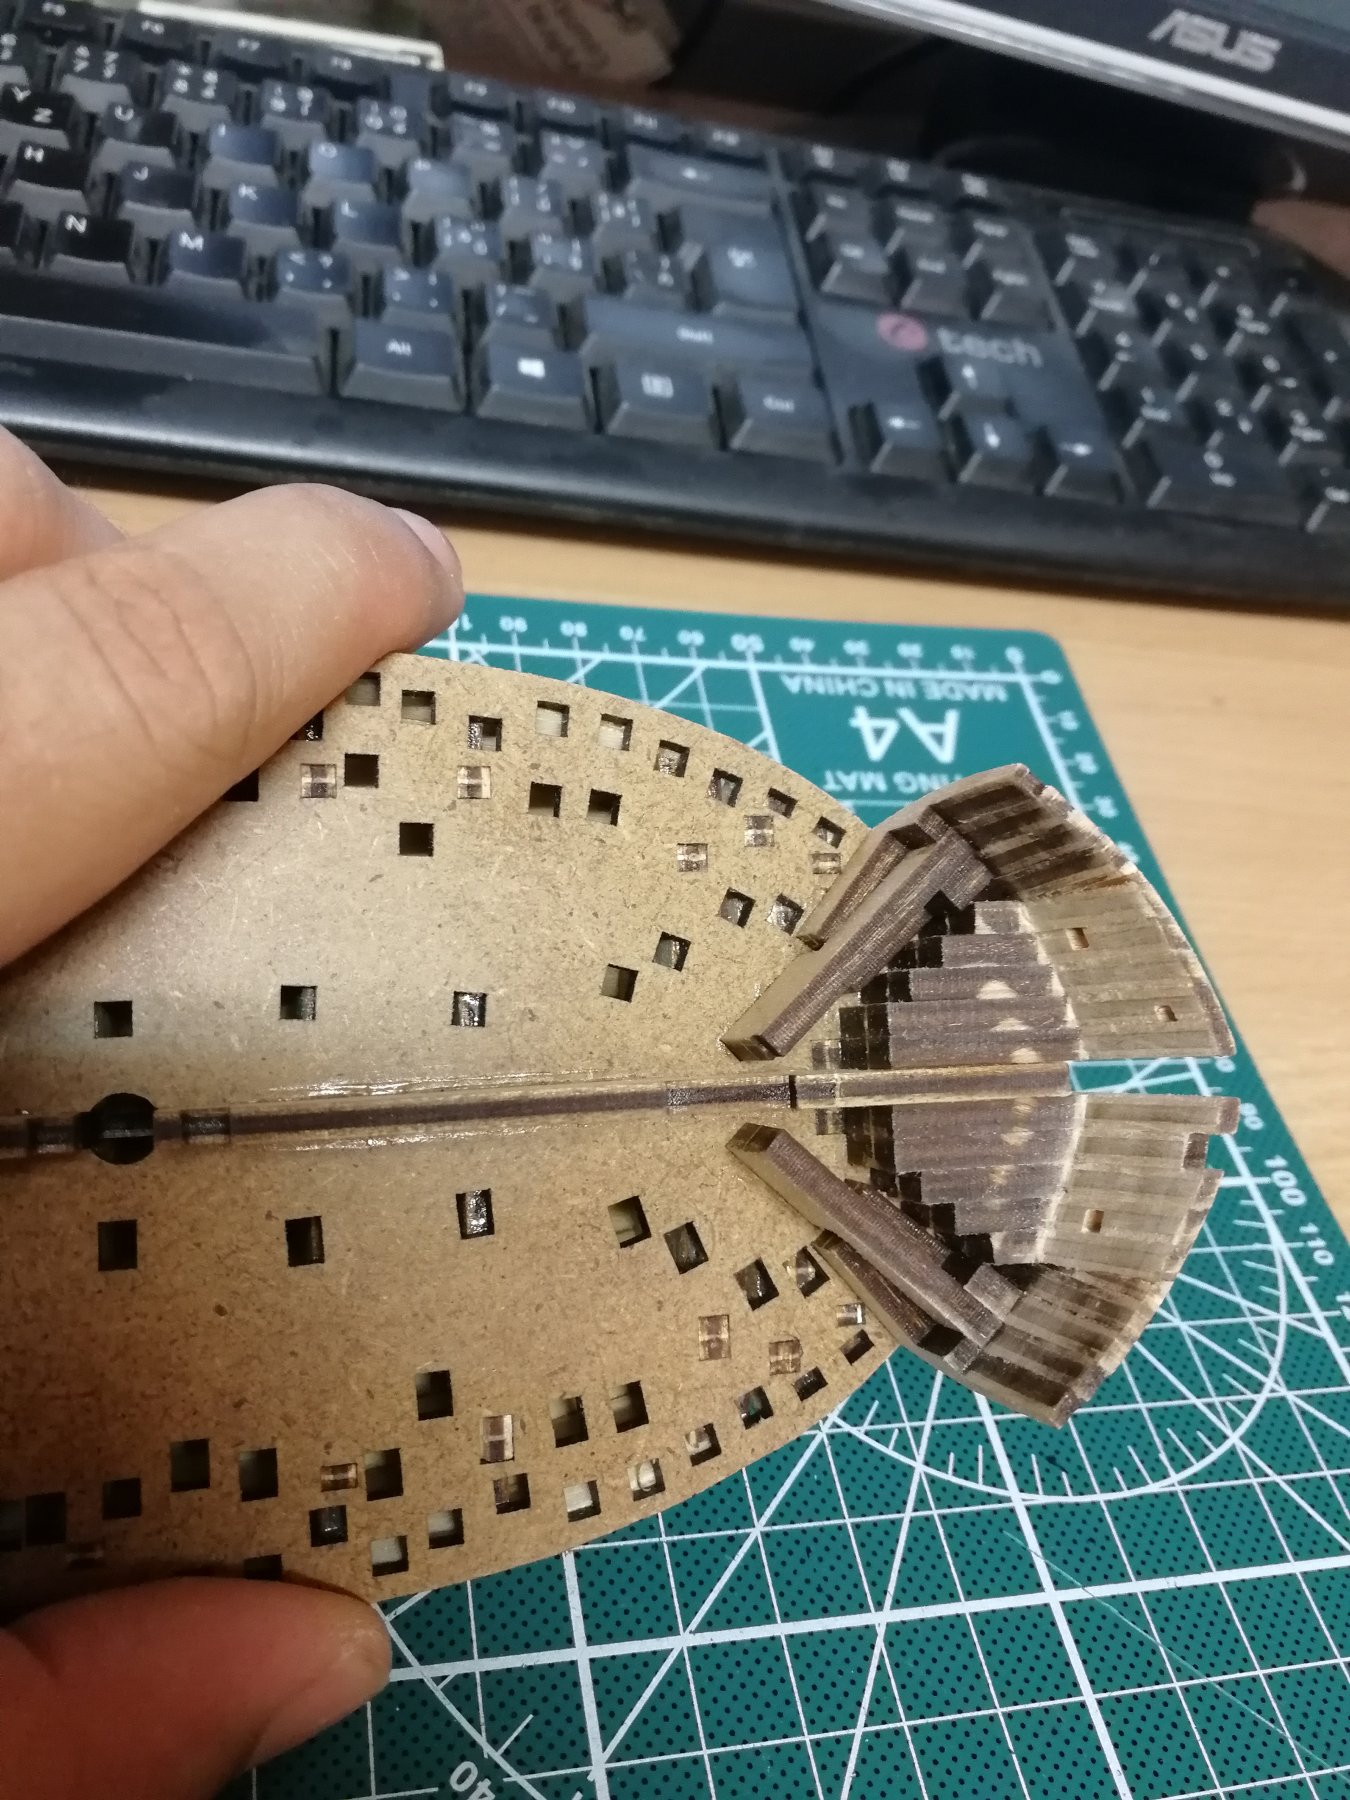
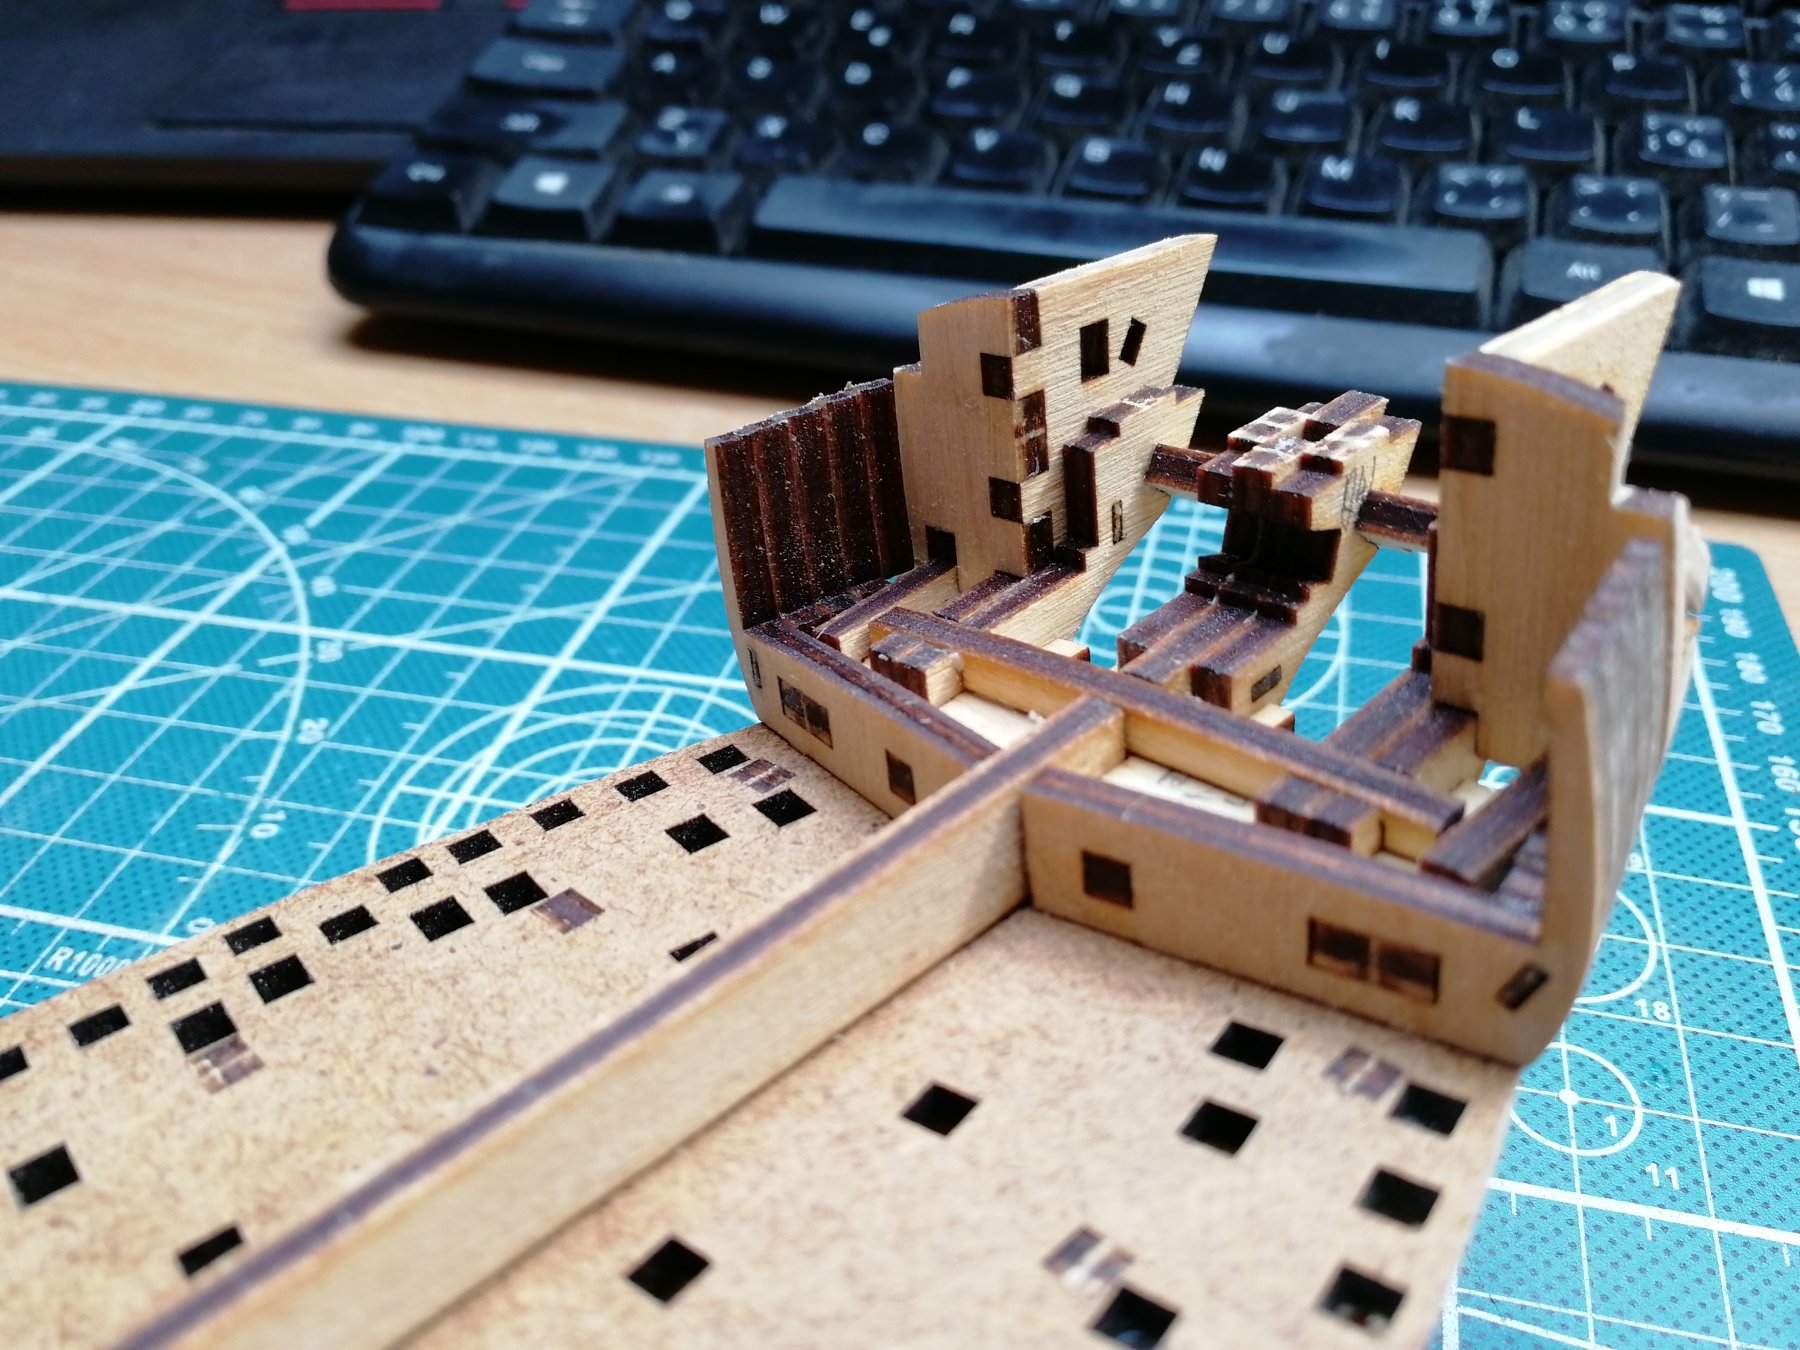
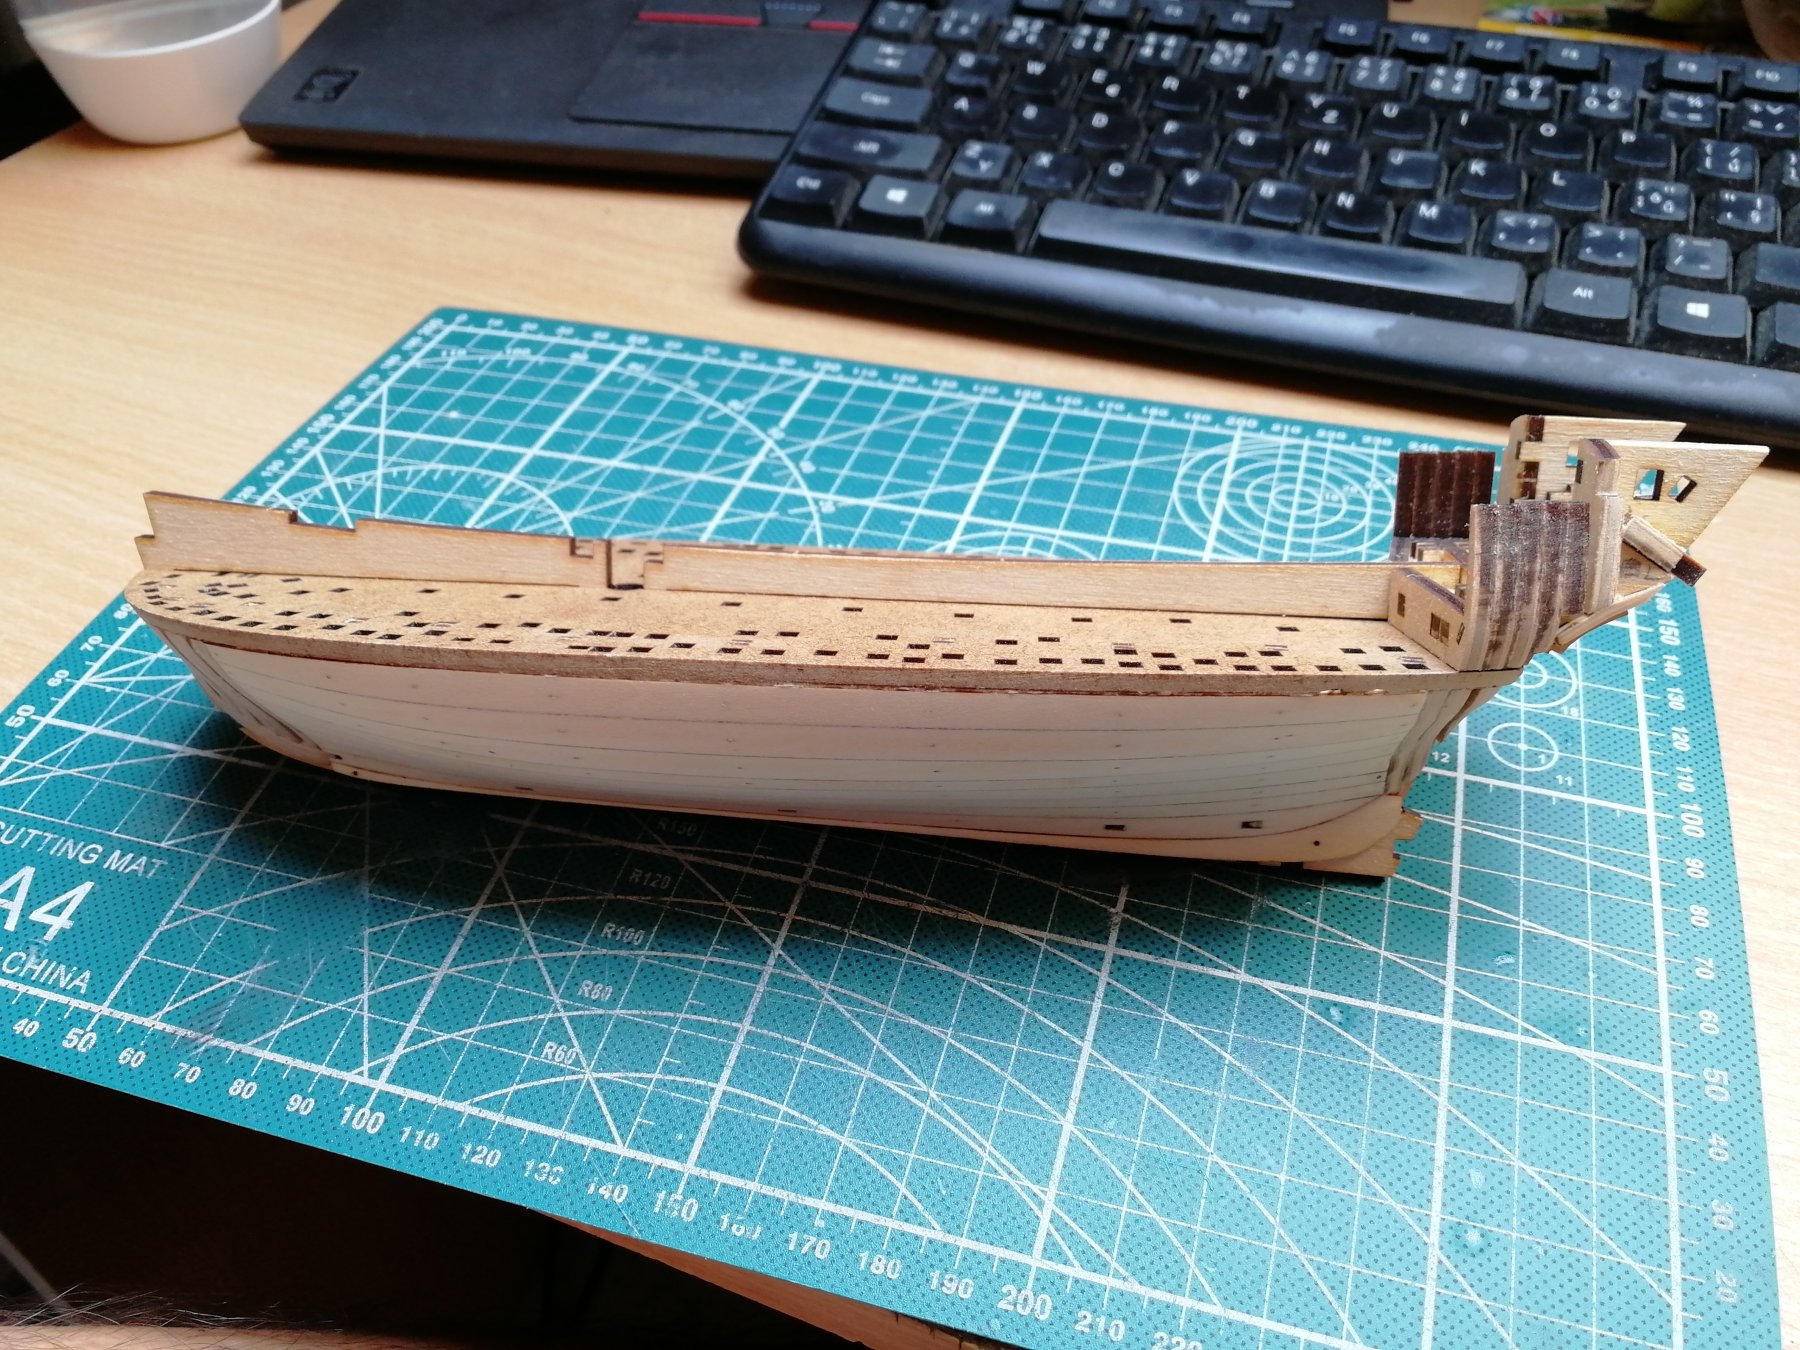
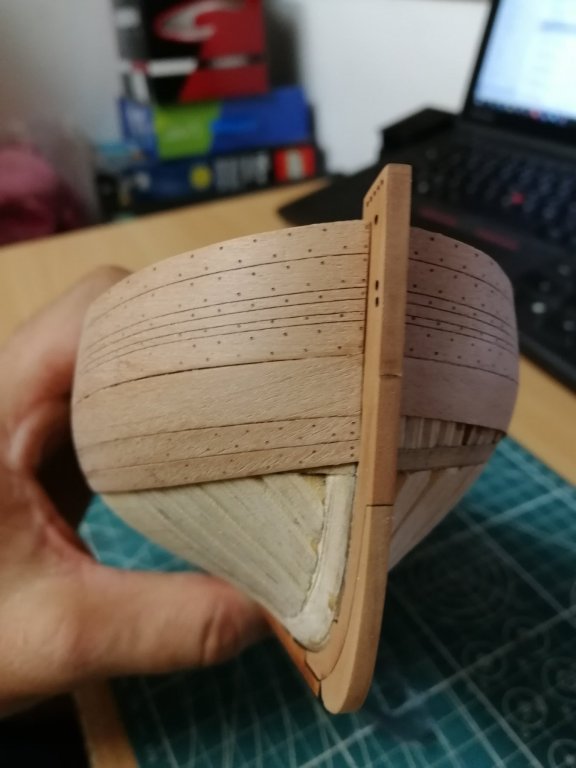
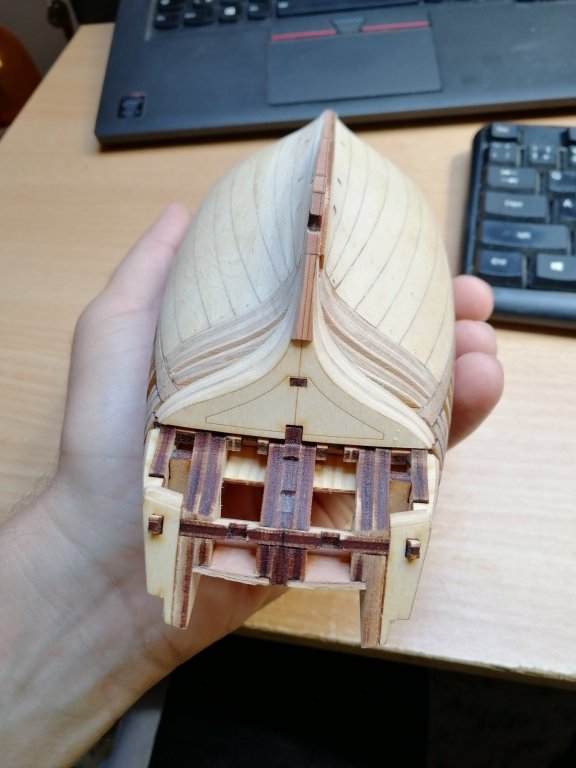
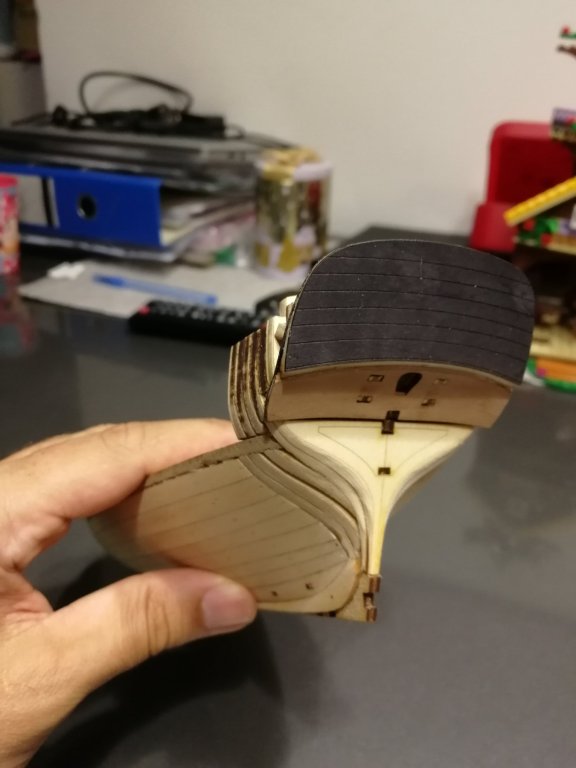
Few more layers of planks but before I can continue towards the keel it is needed to build the transom. It is build from several pieces and the shaping is necessary. Unfortunately to have a smooth transition between planks and transom I had to sacrificed laser cut nails at the stern. Anyway I had an idea how to renew them, hope it will work but that I leave until the hull is fully planked. The transom looks very nice!

- 315 replies
-
- 16
-

-
- master korabel
- avos
- (and 1 more)
-
Hi guys, Thanks a lot for your feedback. Planking was never job for me. I was always in hurry and that is bad. This time I try to 5x messure and than glue.... . Think it pays off. Thanks a lot for following my progress. Ship modeling never dies🍻 it is not for everybody, but for the people who got patience and love wood.,.....I'm So glad I studied EN and became member of this community. Thanks for having me guys!
- 315 replies
-
- 5
-
-
- master korabel
- avos
- (and 1 more)
-
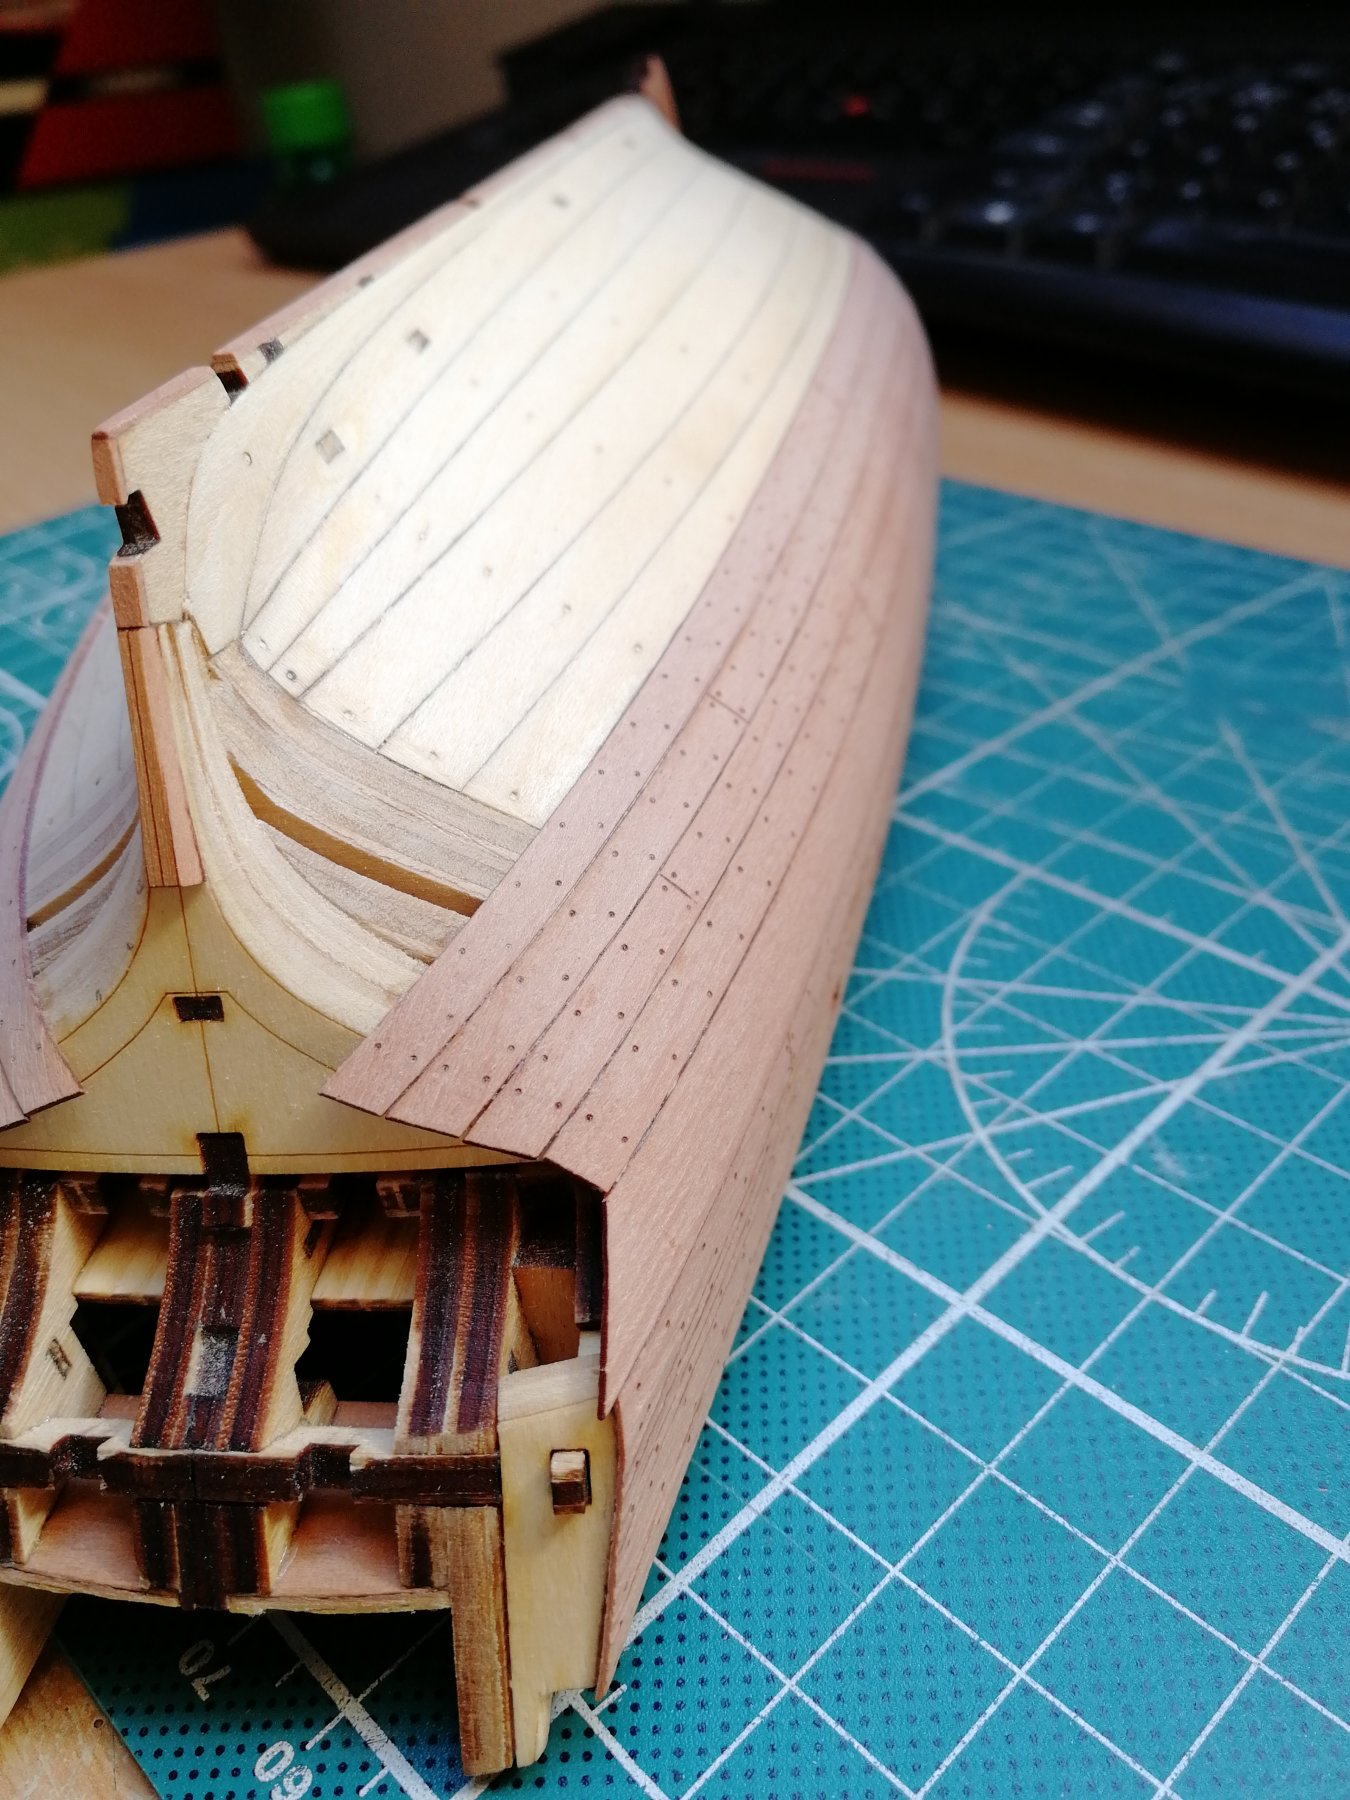
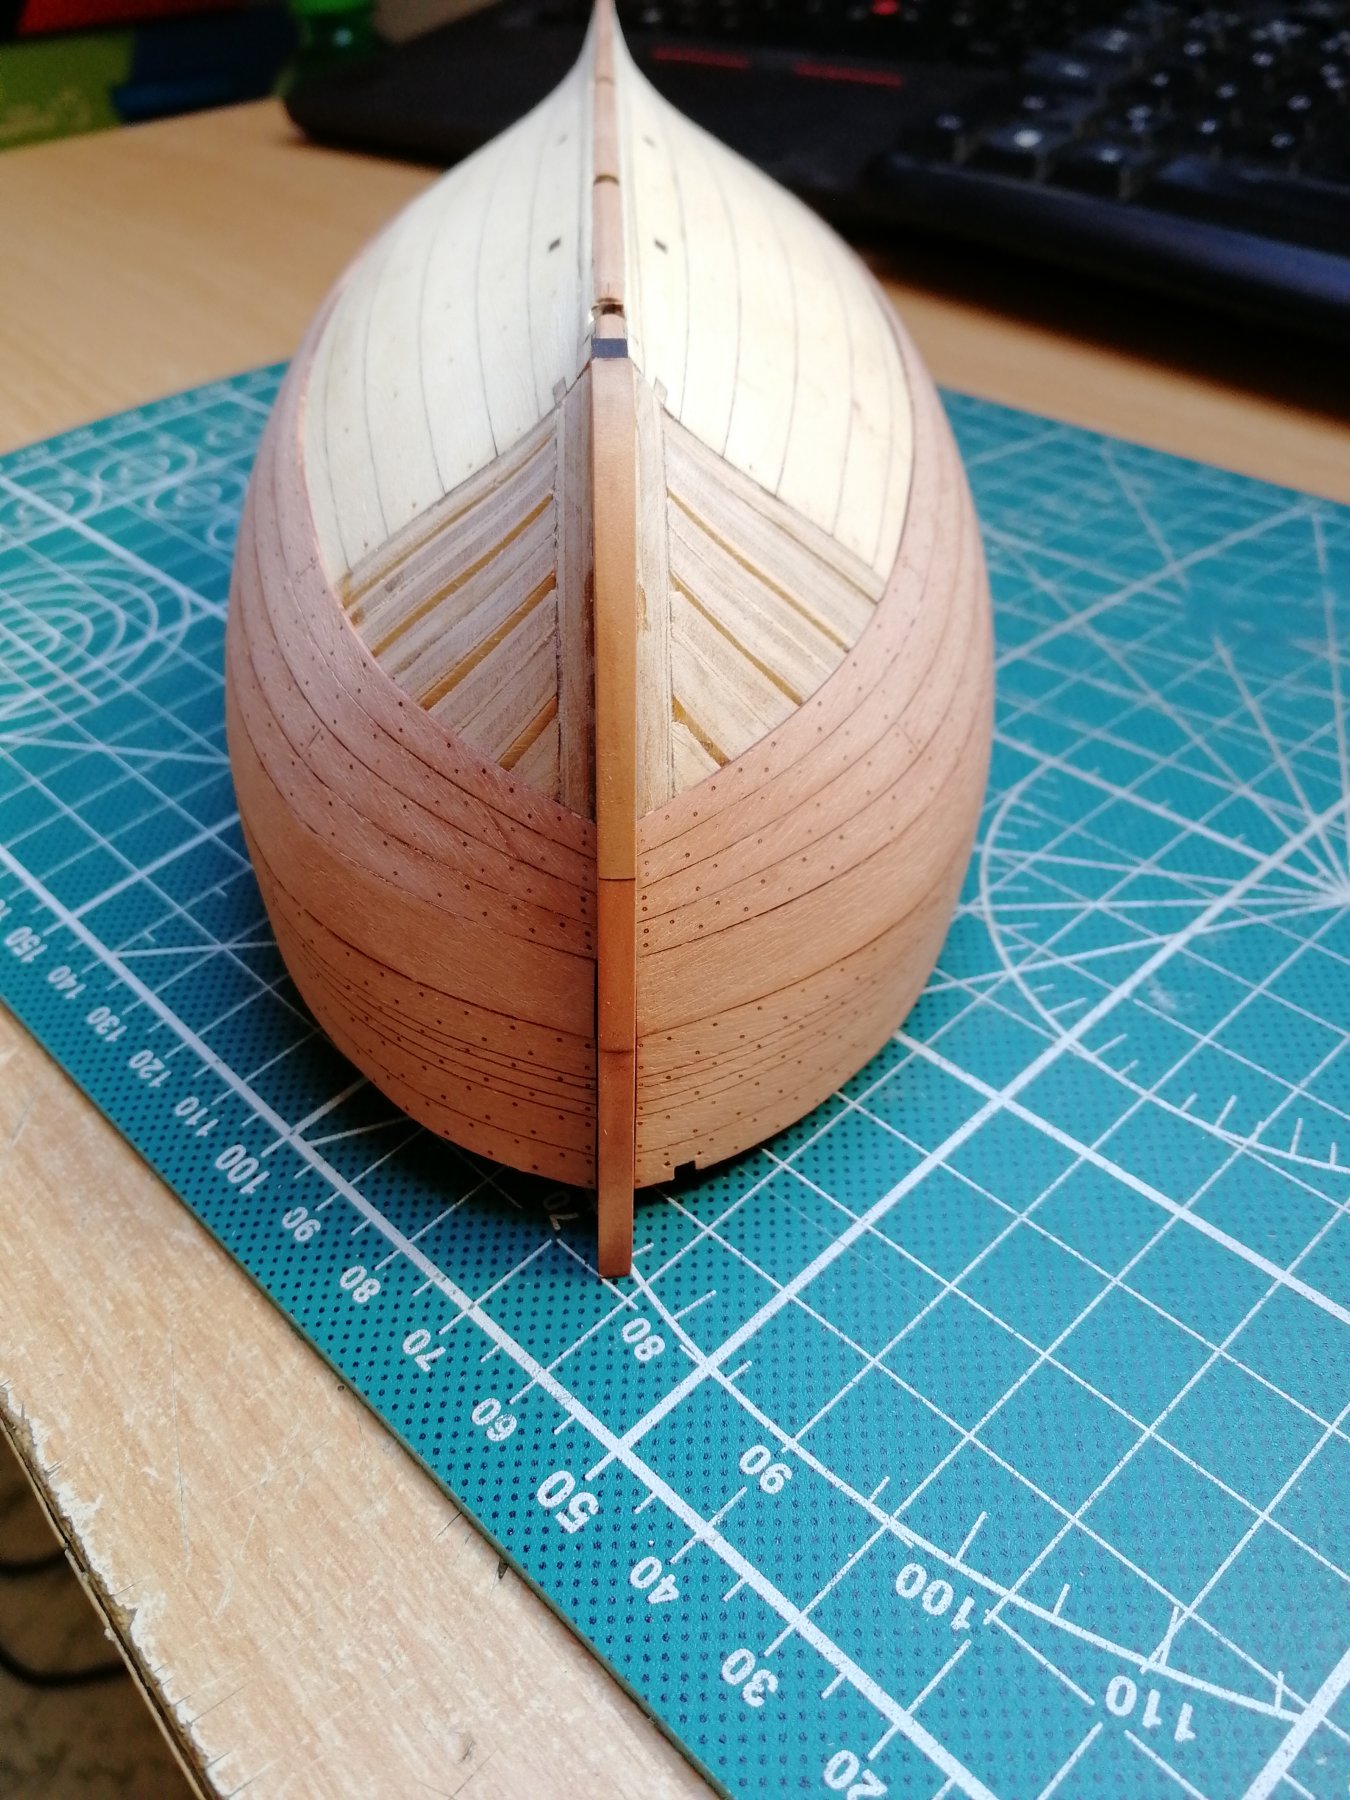
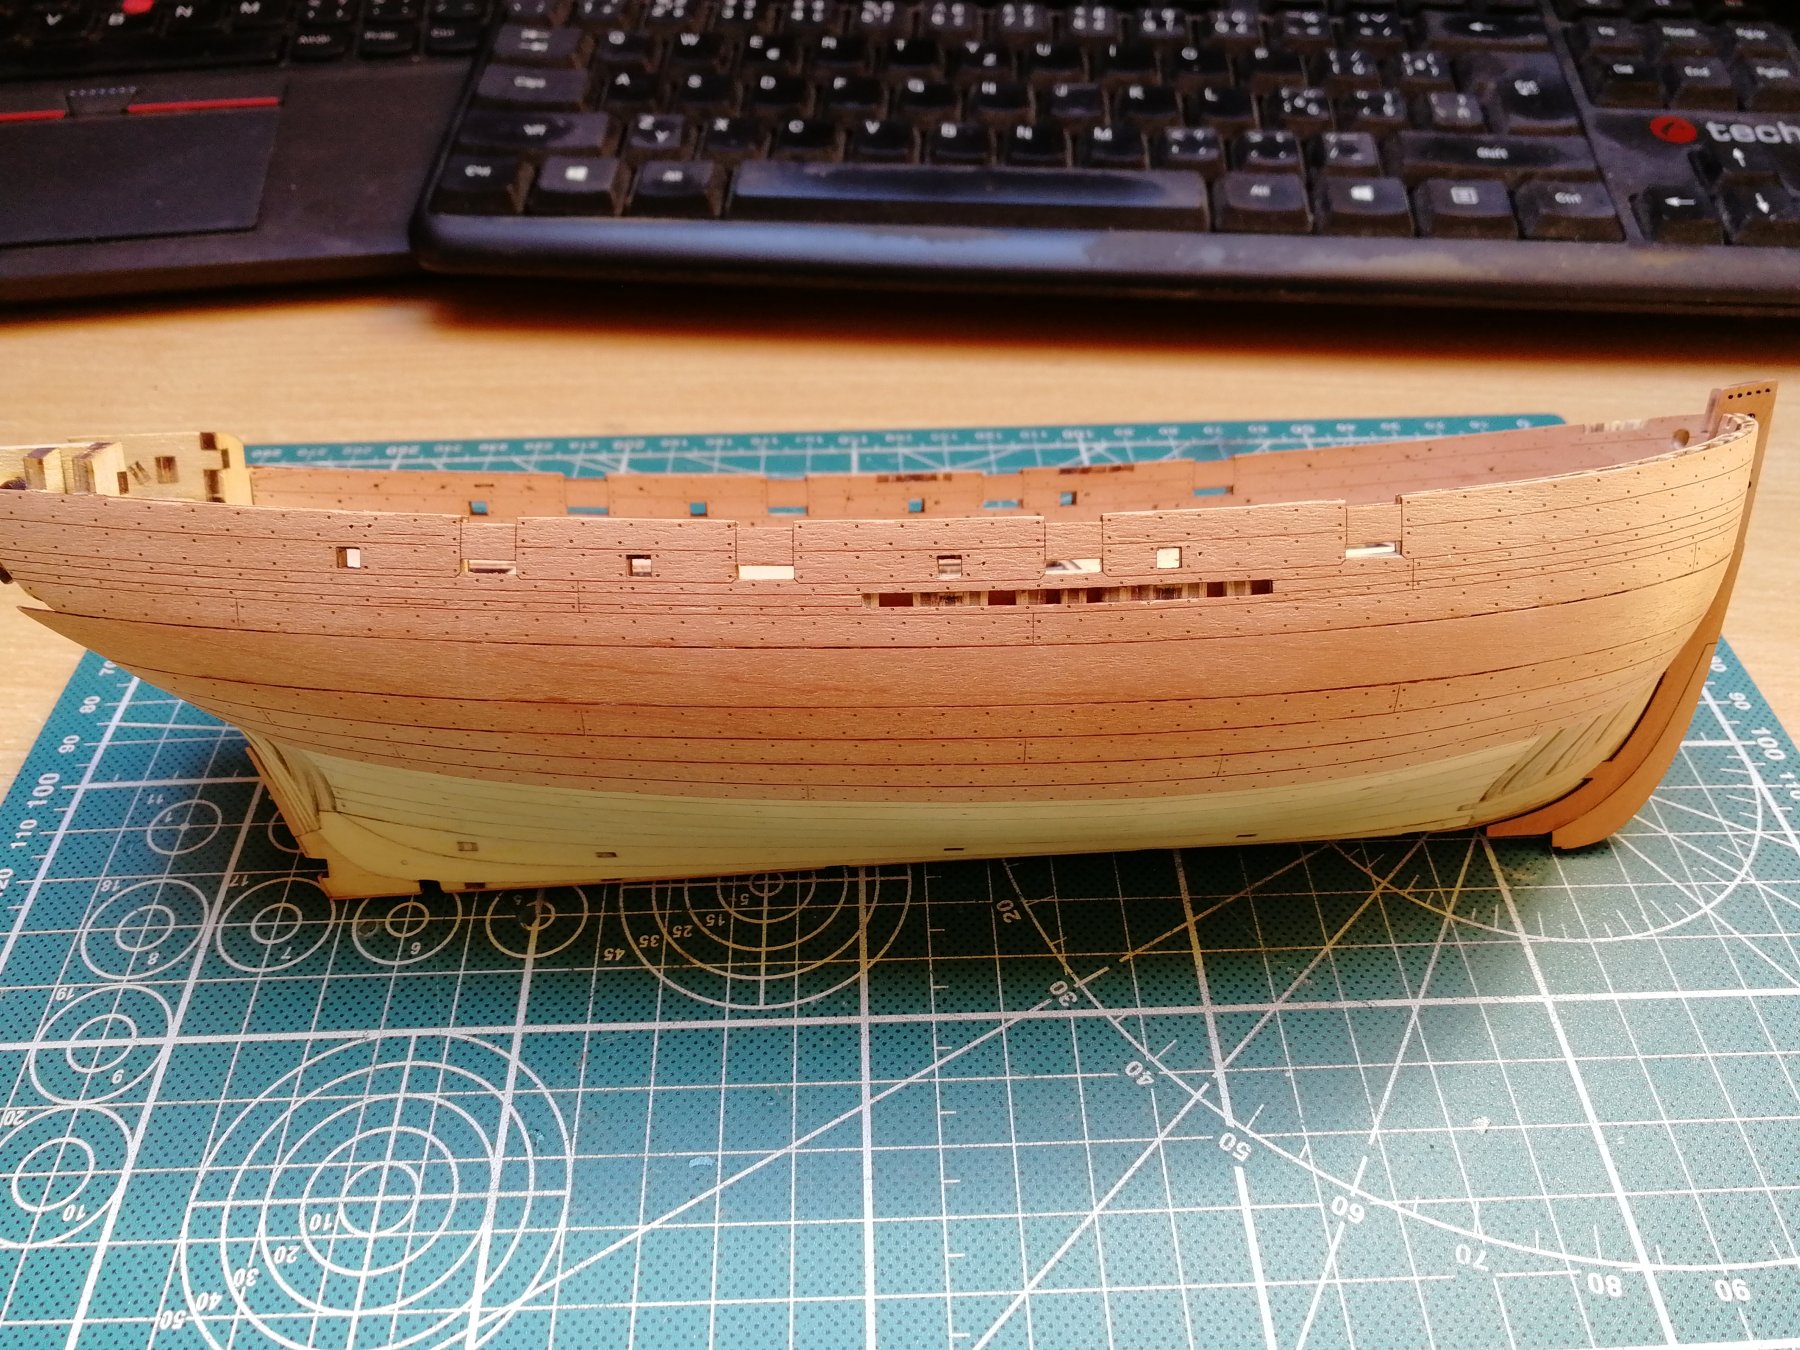
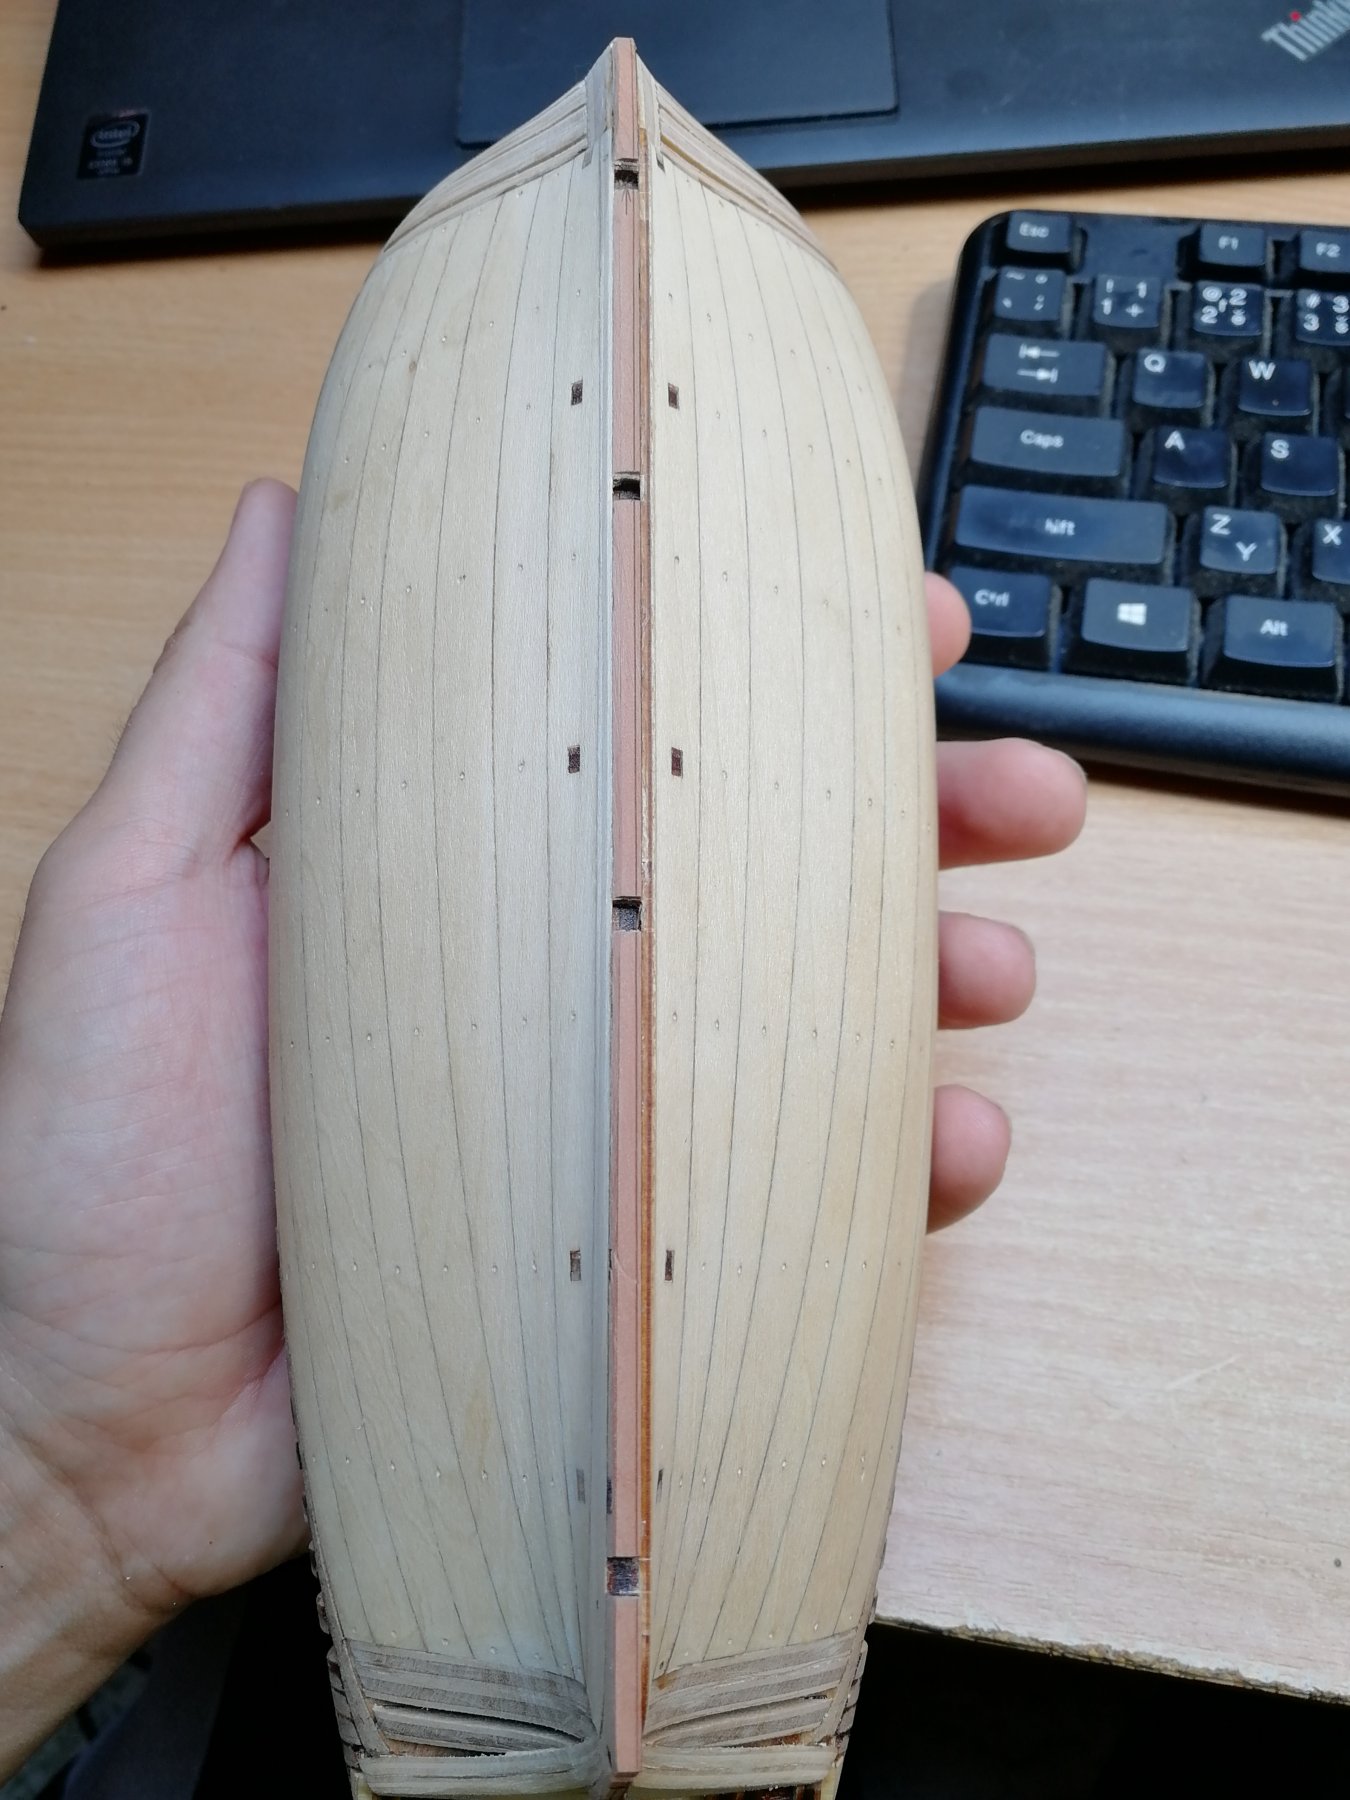
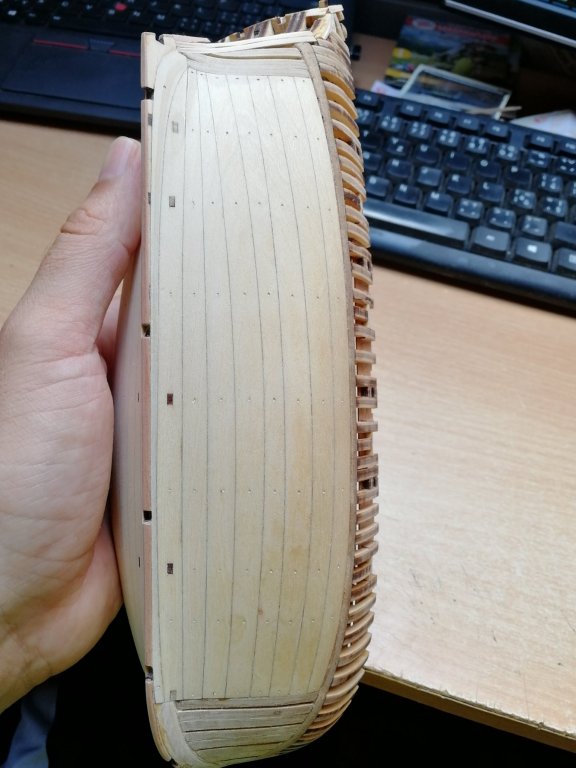
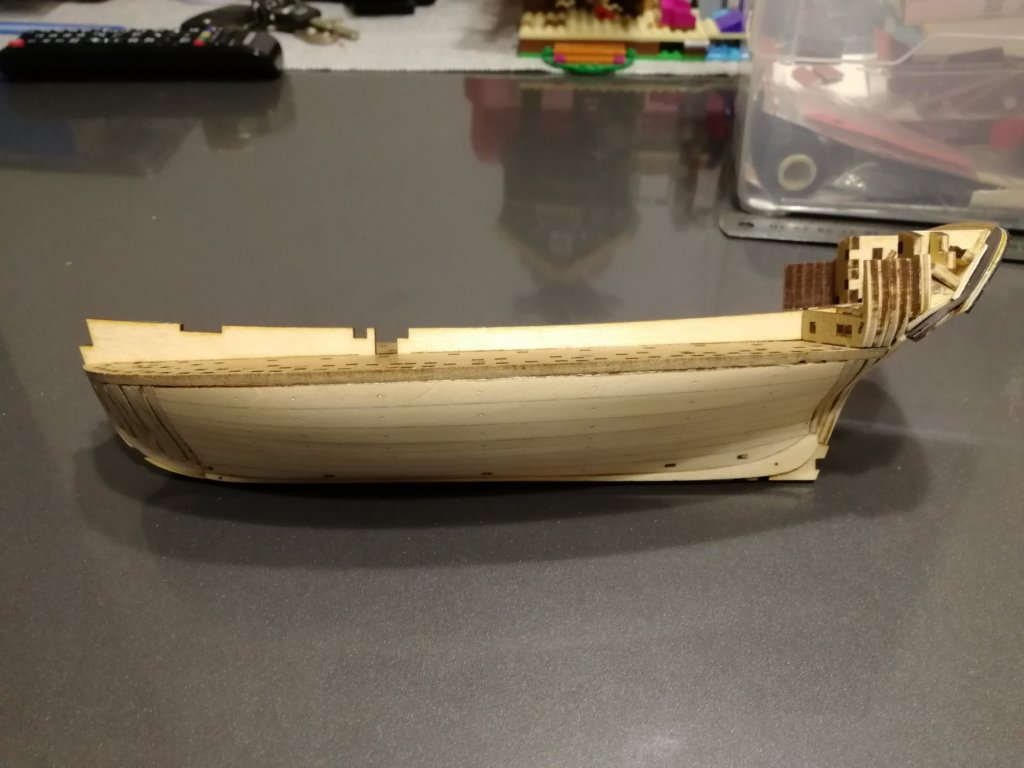
The hull is ready for the final planking. Second layer from pear


- 315 replies
-
- 16
-
-
- master korabel
- avos
- (and 1 more)
-
Preparing the hull for final planking. One side is ready. Also creating the rabbet. On the left side you can see the marks. Once sanded down to this line it will form the rabbet.


- 315 replies
-
- 15
-
-
- master korabel
- avos
- (and 1 more)
-
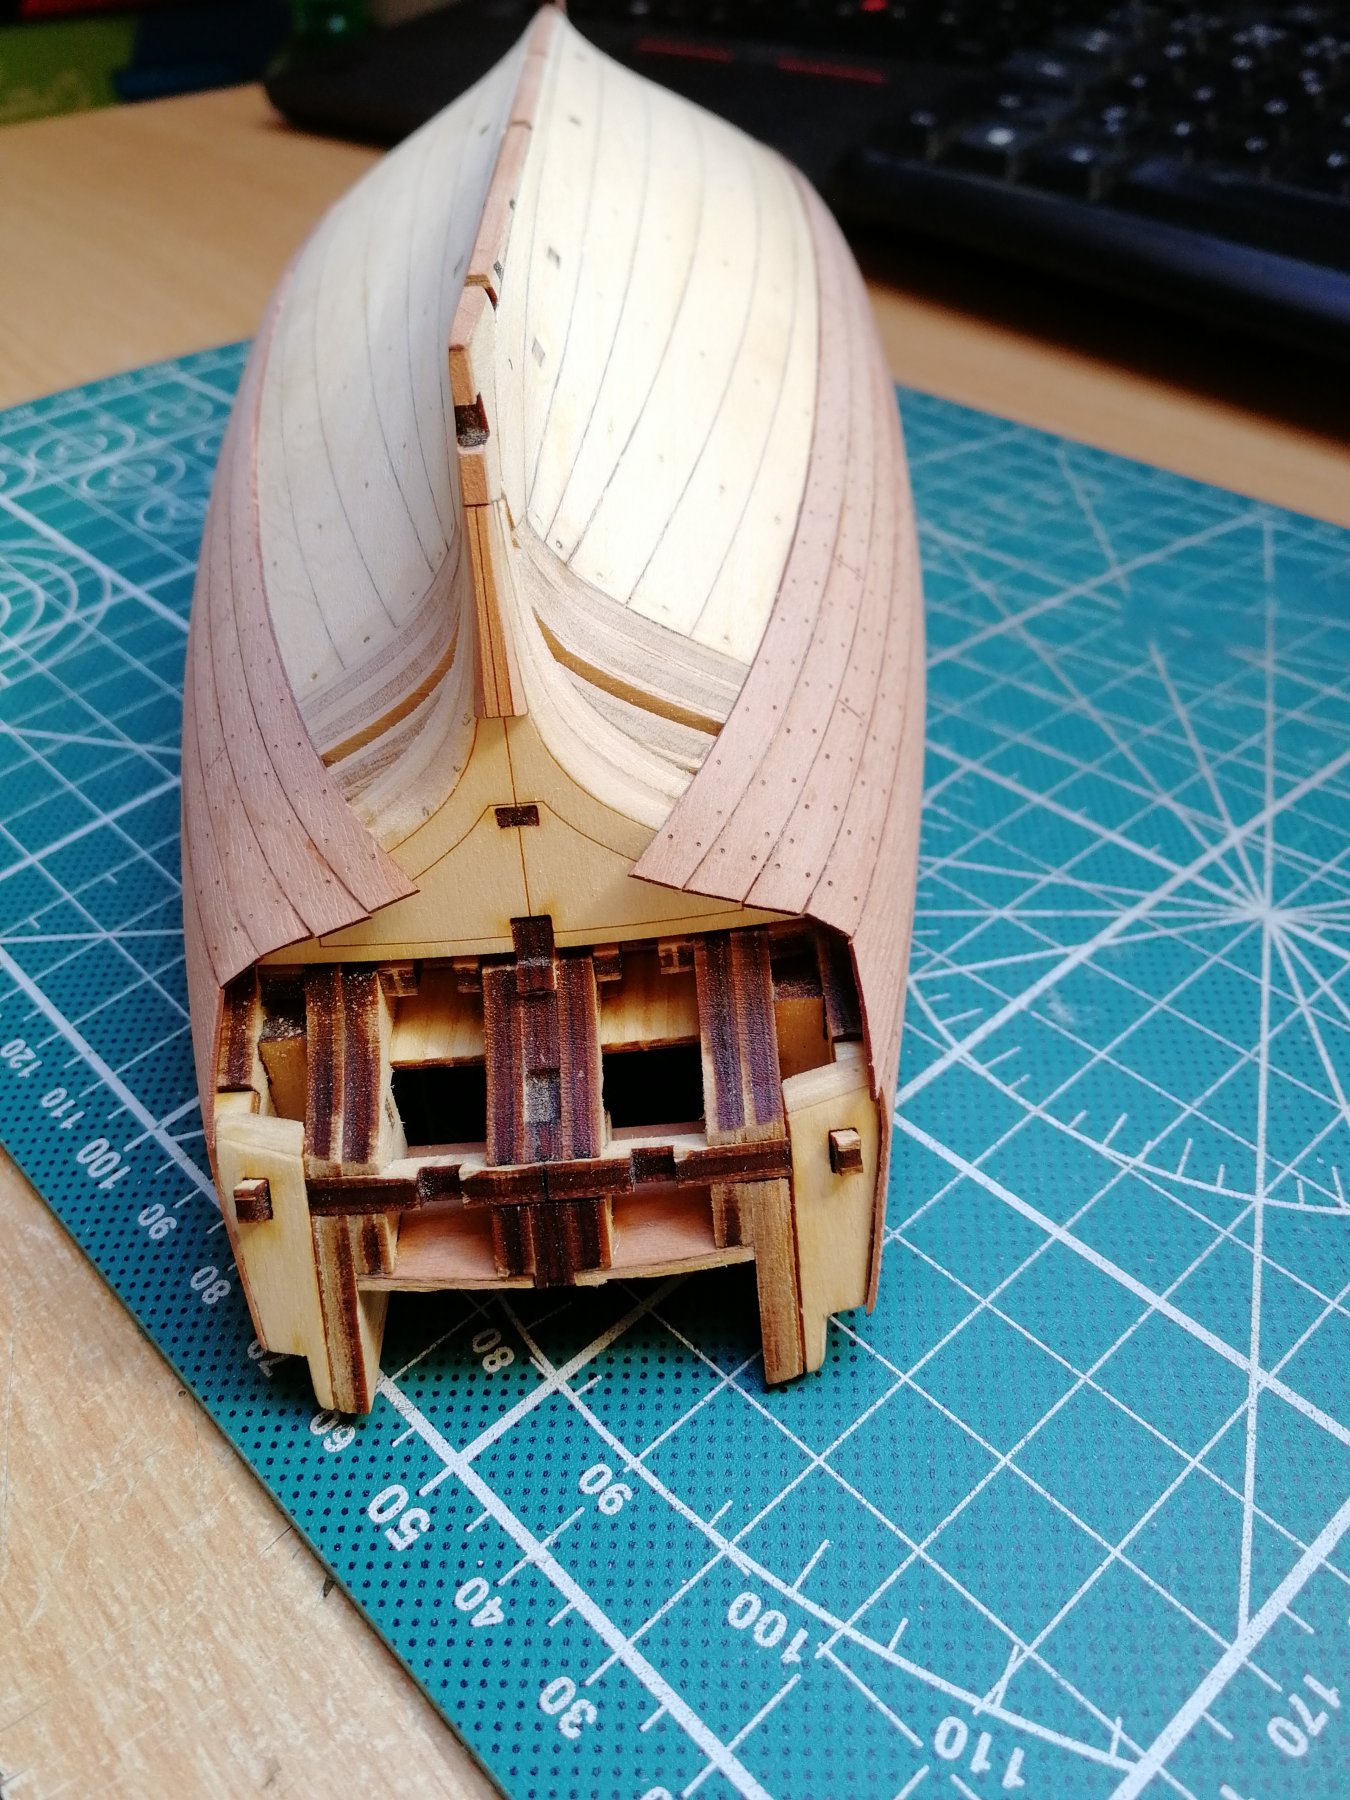
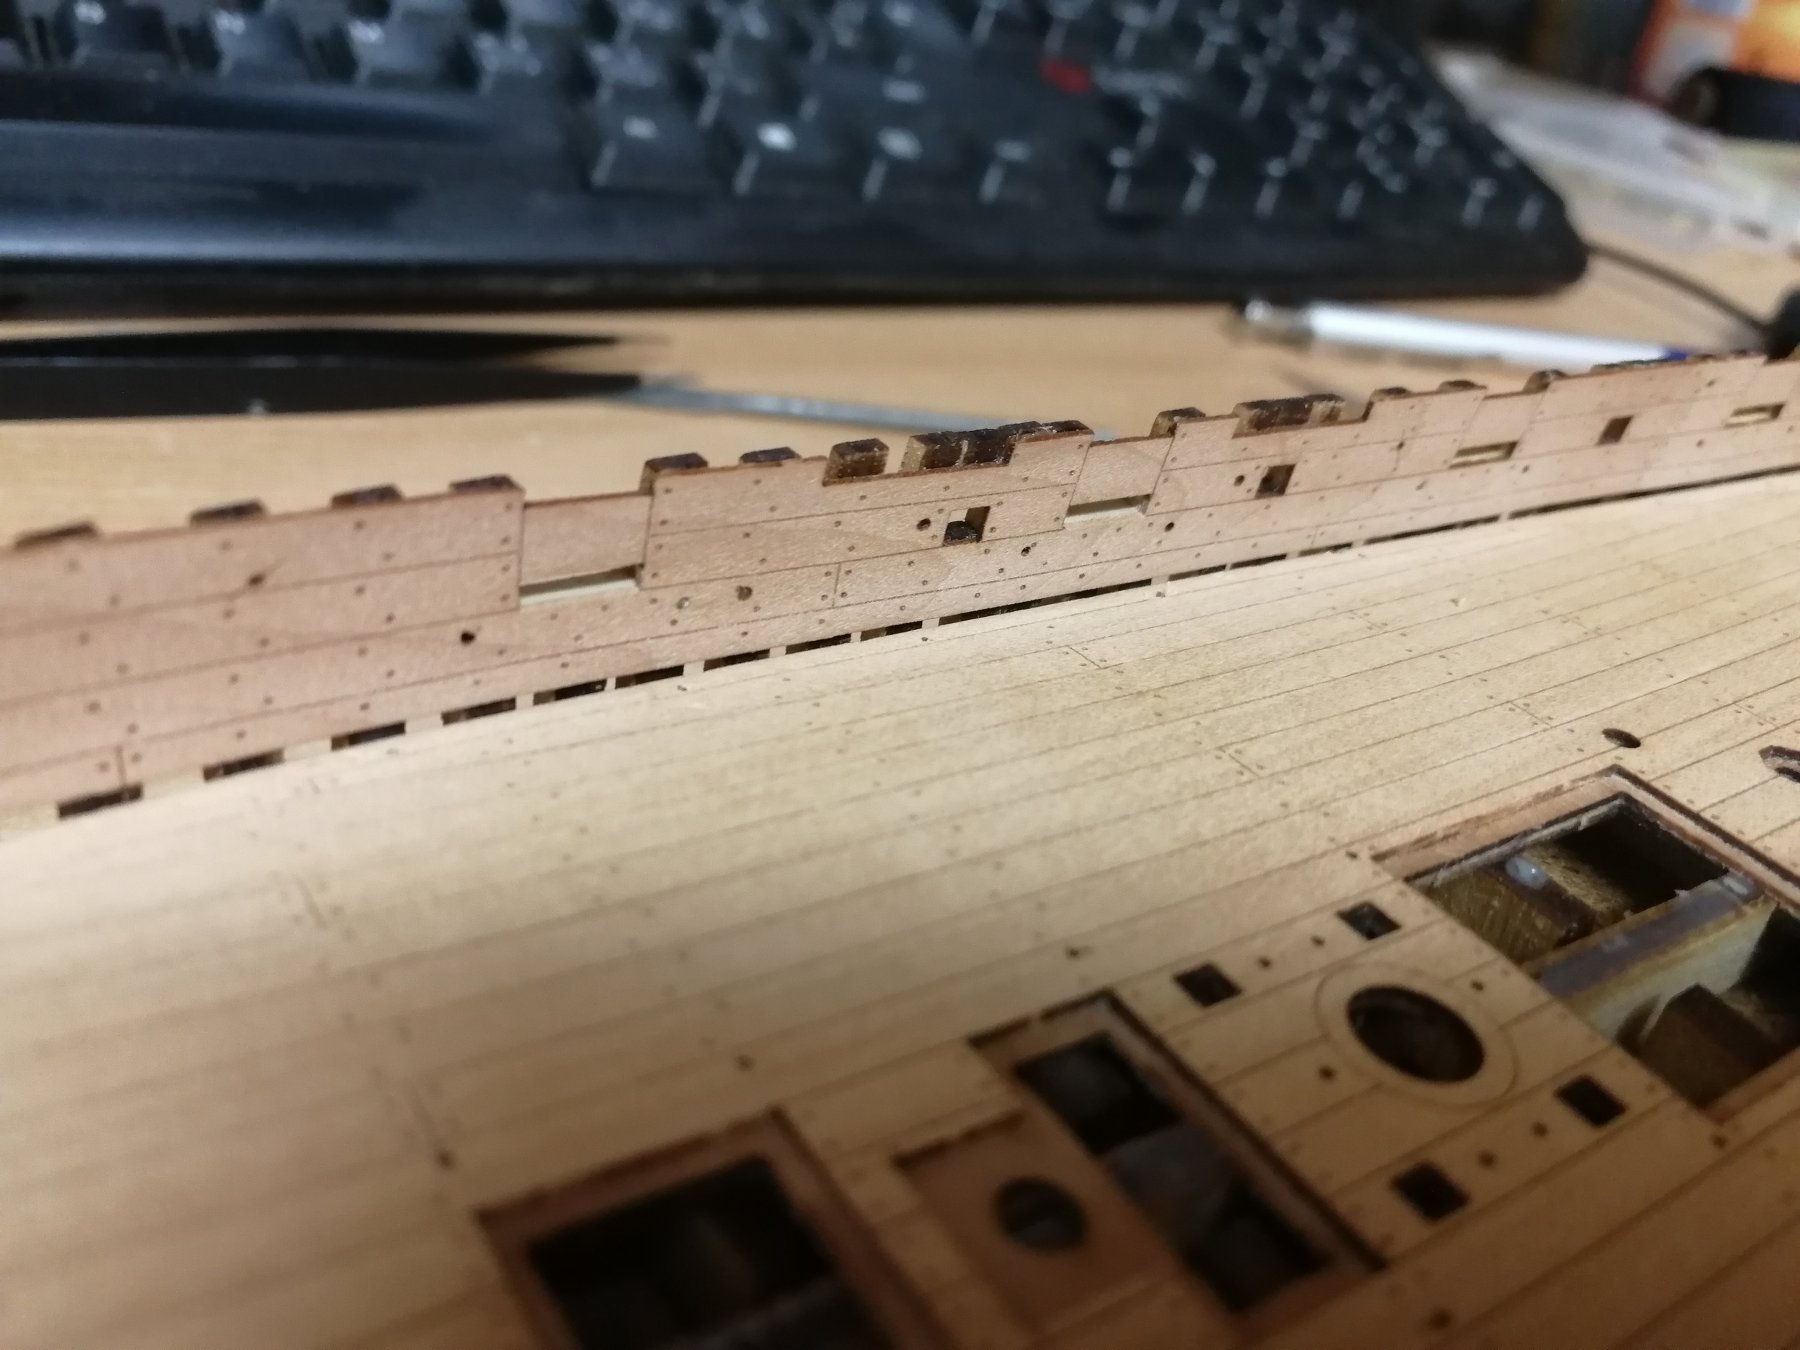
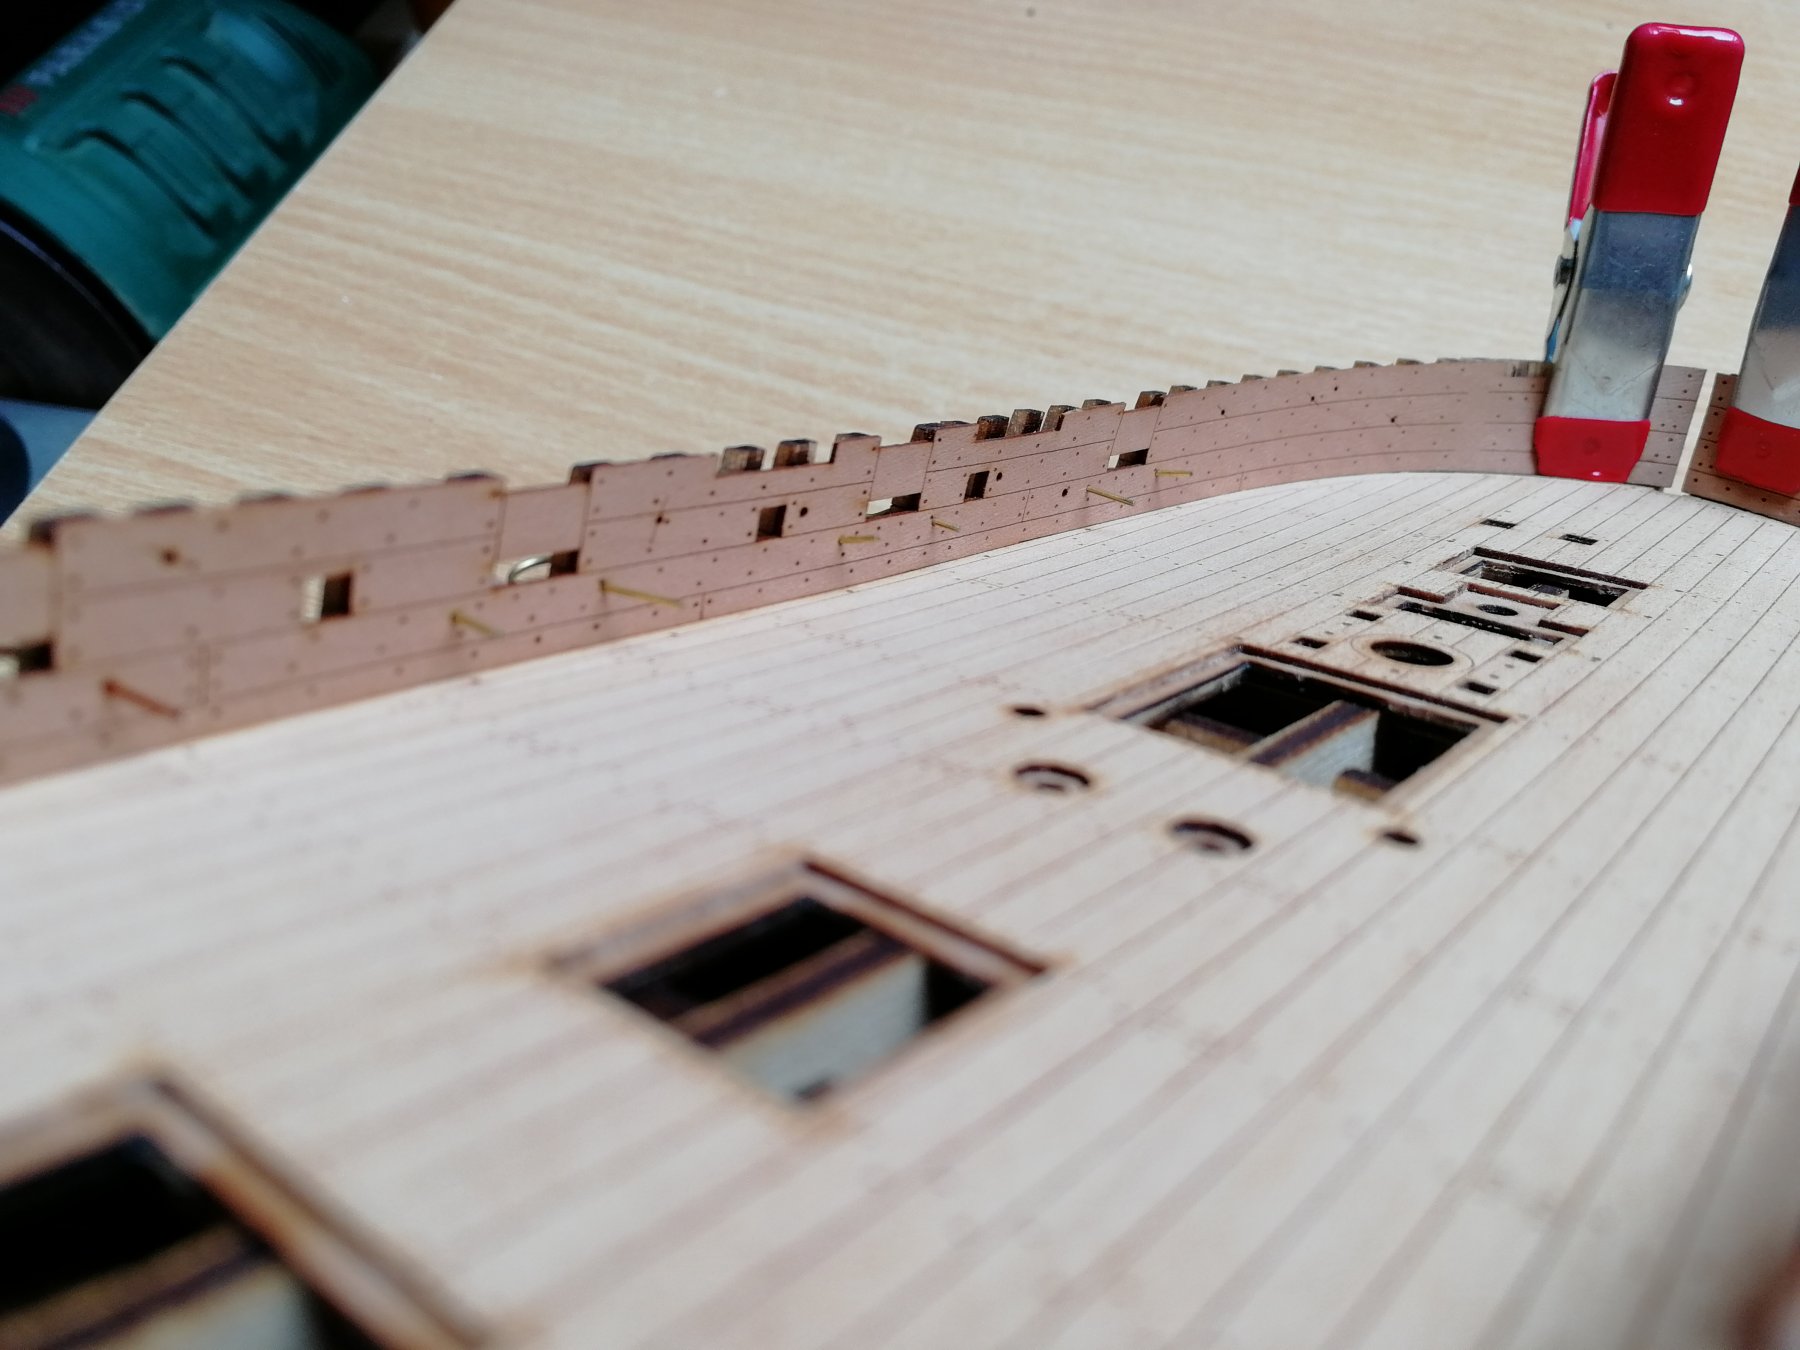
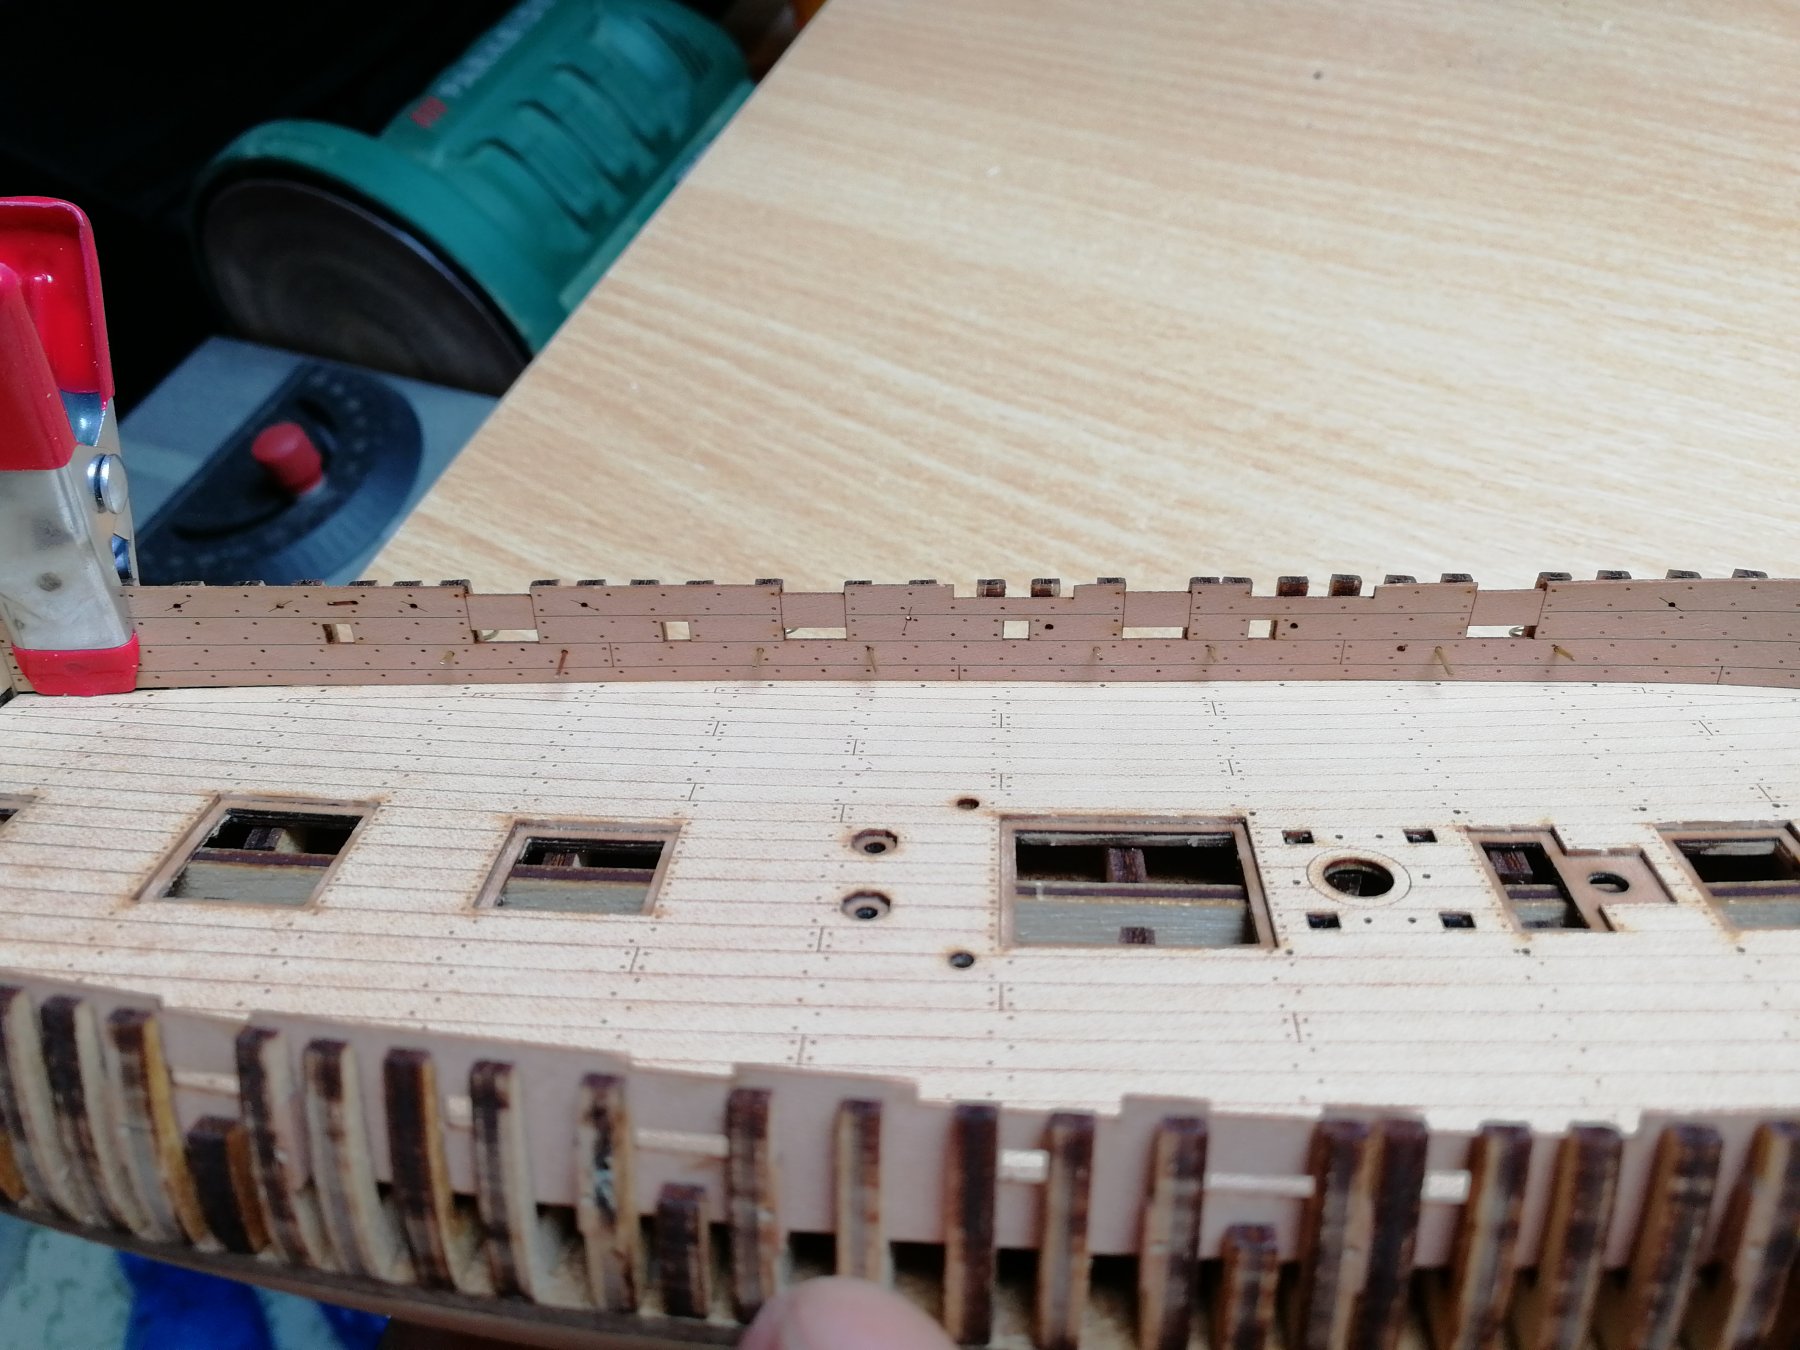
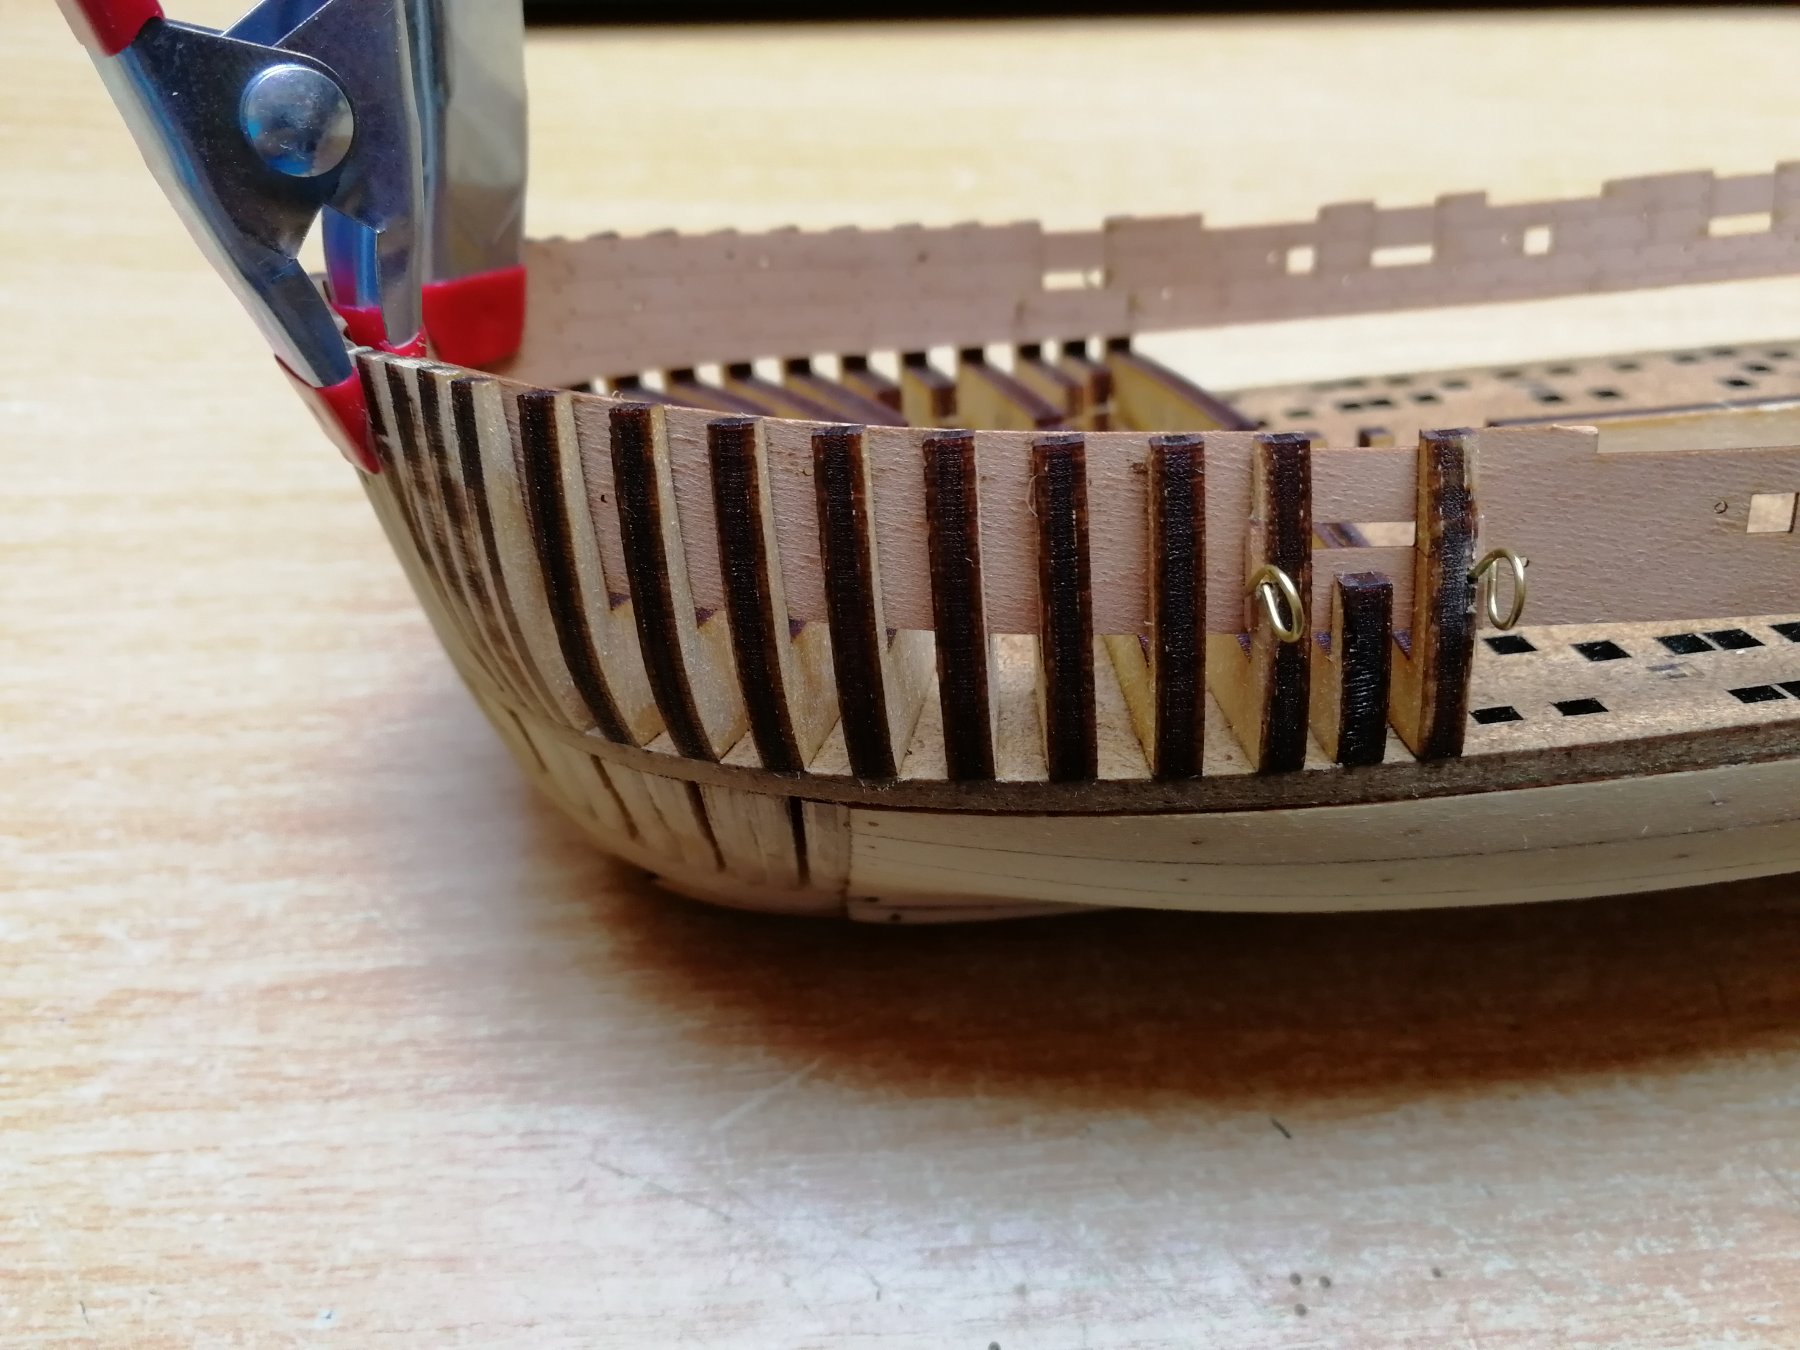
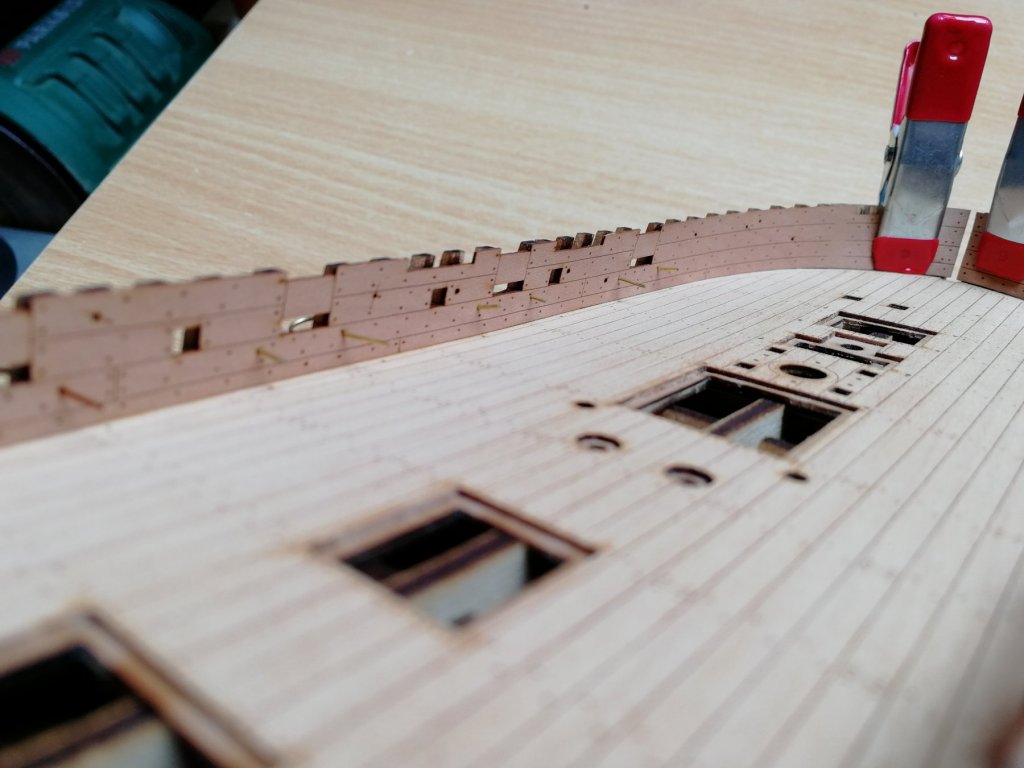
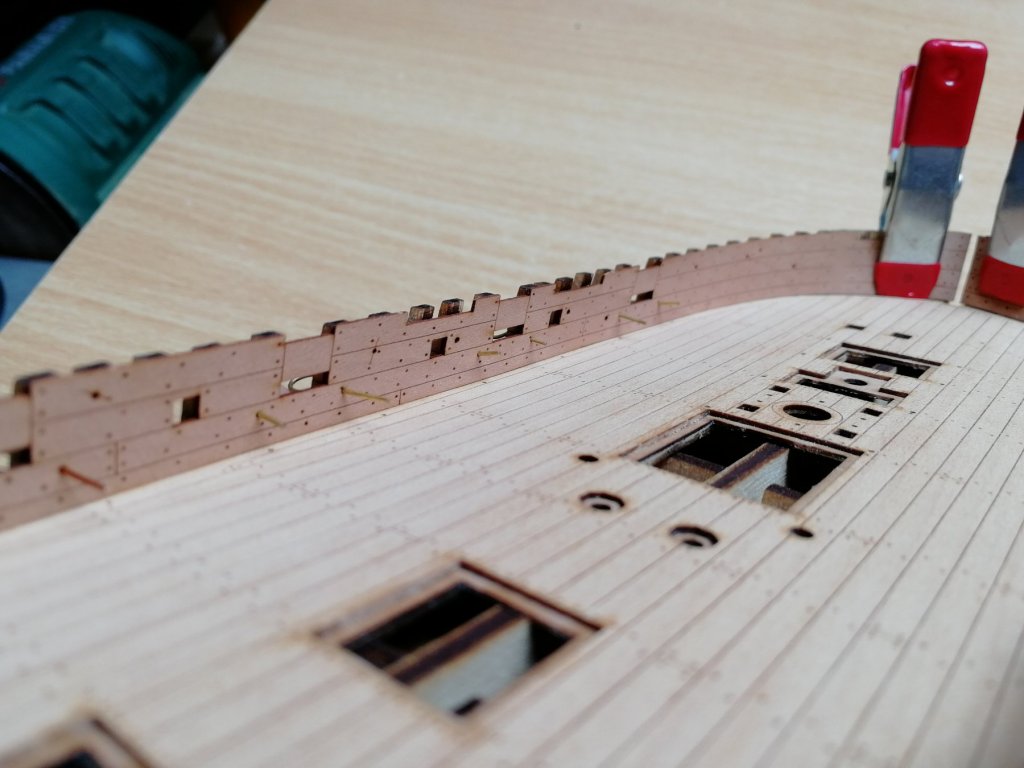
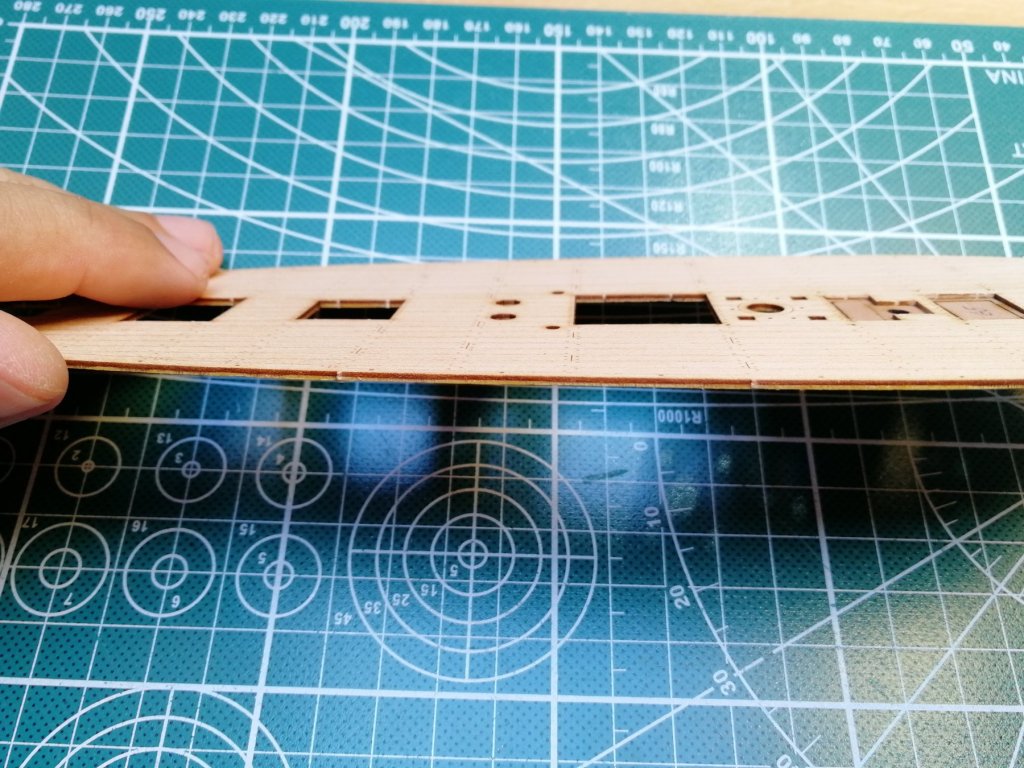
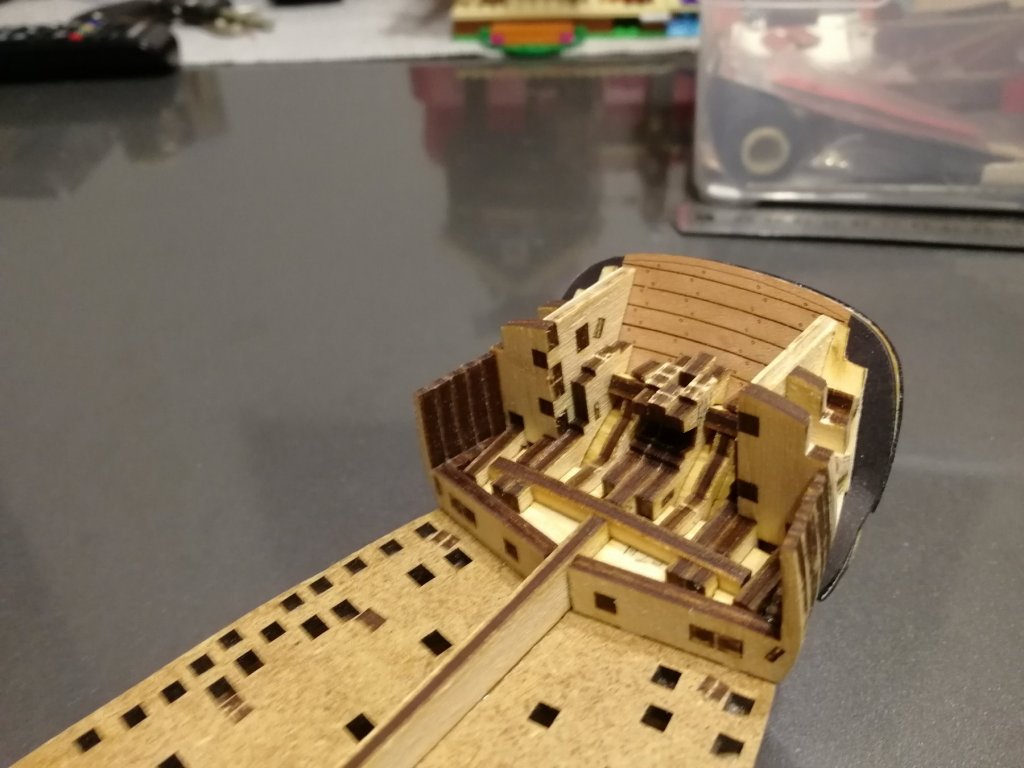
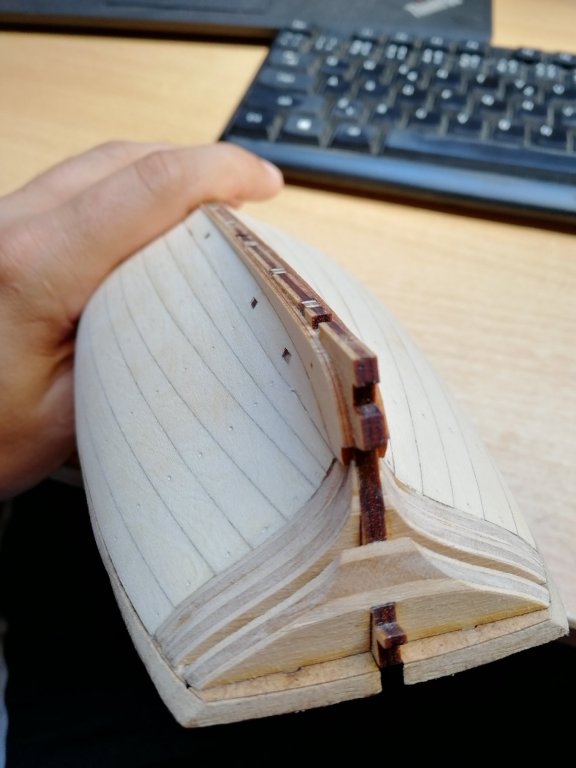
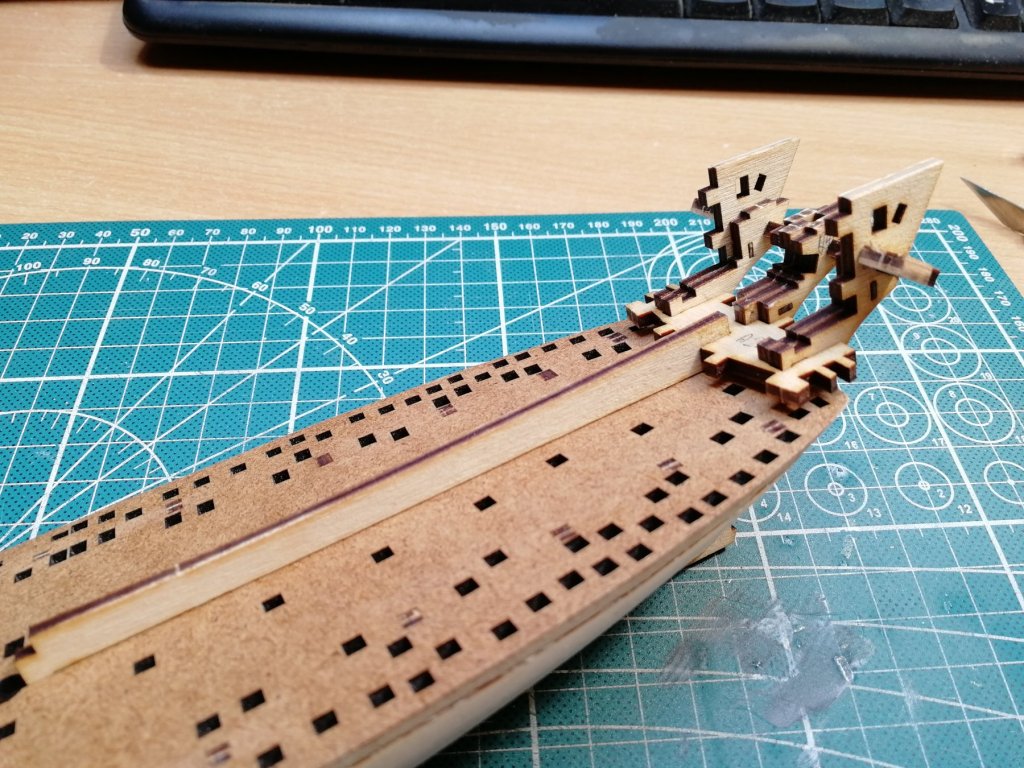
Today more framing work. I have finished the inner structure of gun ports and oar ports. The visible parts will be sanded so char will not be present.


- 315 replies
-
- 14
-
-
- master korabel
- avos
- (and 1 more)
-
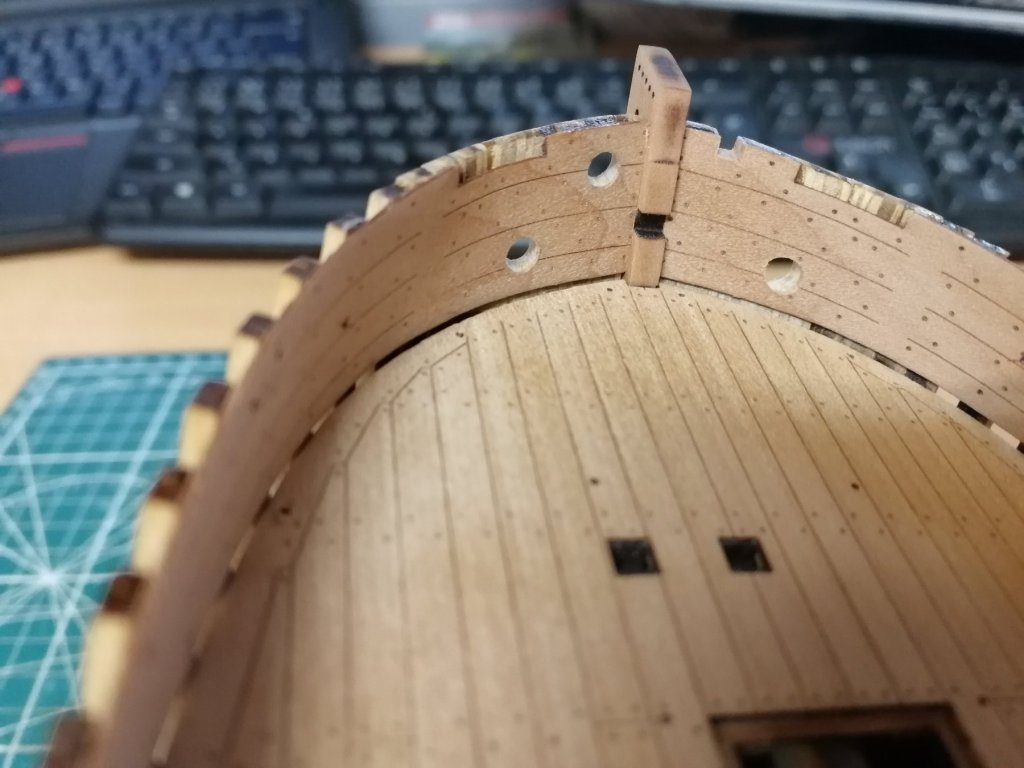
Yep, the gap is less than 1mm on its entire lenght so There should not be an issue covering it. I think the camera made it look bigger.
- 315 replies
-
- 1
-
-
- master korabel
- avos
- (and 1 more)
-
I believe it is ok. 1,5 should be enough to cover that gap but will double check that. Thanks for the comment 👍
-
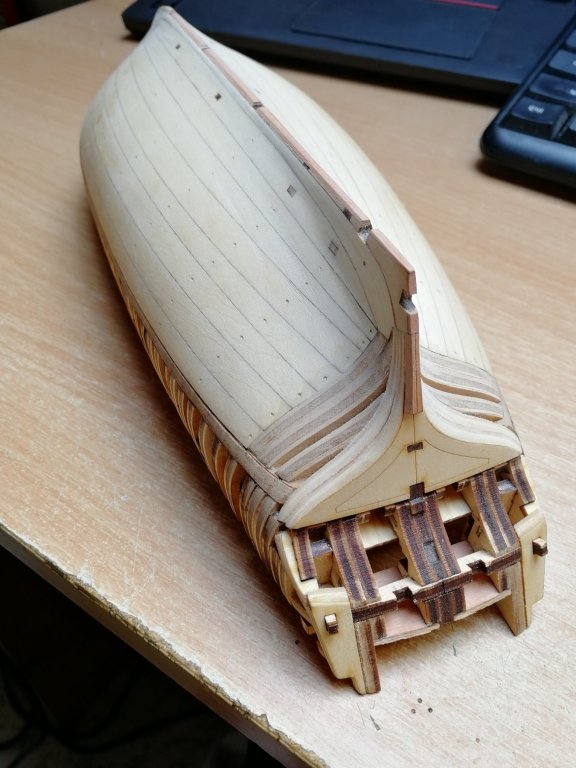
Hi Nils, thank you. I started with planking. Deck is glued and also inner planking. The pear looks gorgeous and it is pleasure to work with.


- 315 replies
-
- 14
-
-
- master korabel
- avos
- (and 1 more)
-
Time to start with interior 😎 I was little bit worried about gunport alignment but luckily it looks ok.


- 315 replies
-
- 15
-
-
- master korabel
- avos
- (and 1 more)
-
Hi Nils, thanks a lot. And also for all others likes All frames in place. Few pairs only dry fited. With a deck And this is...... My worry right now


- 315 replies
-
- 18
-
-
- master korabel
- avos
- (and 1 more)
-
Thanks James. The gunport alignment. Looks like I was precise enough when aligning the frames so far😲


- 315 replies
-
- 17
-
-
- master korabel
- avos
- (and 1 more)
-
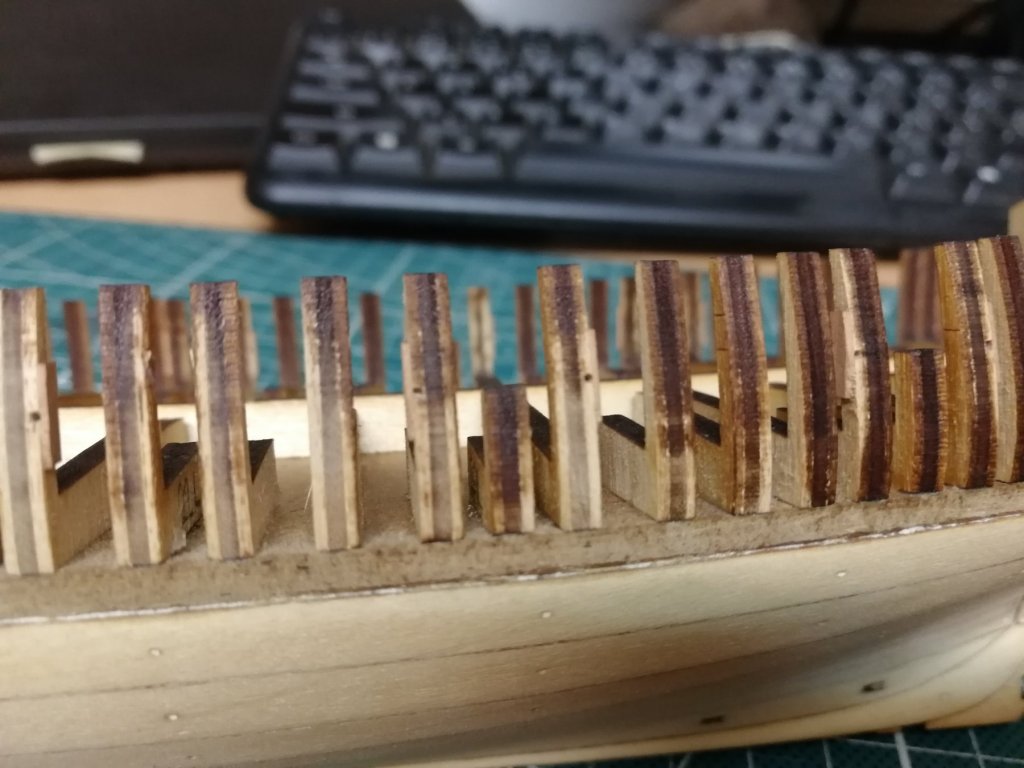
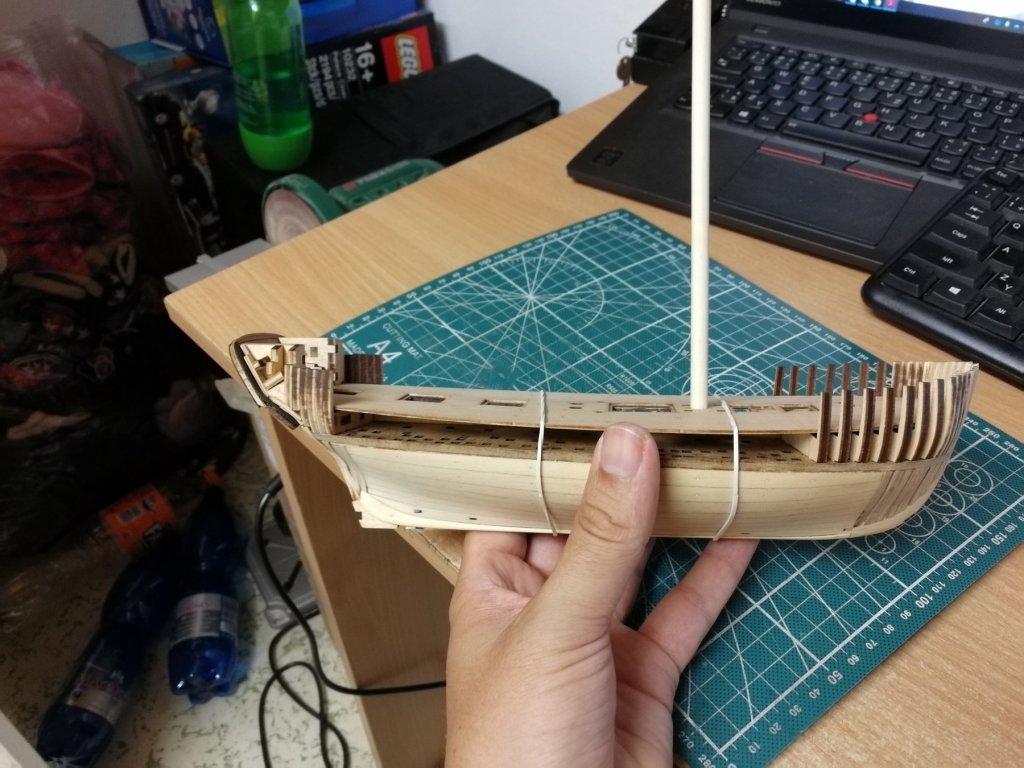
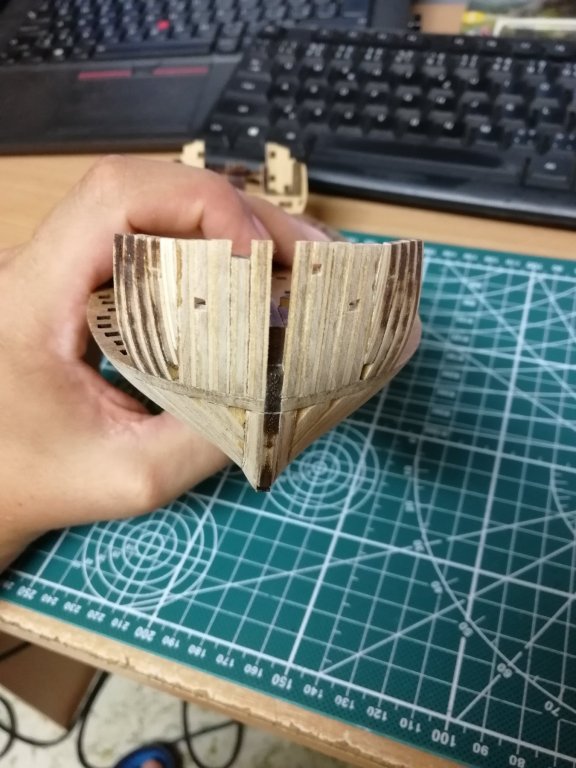
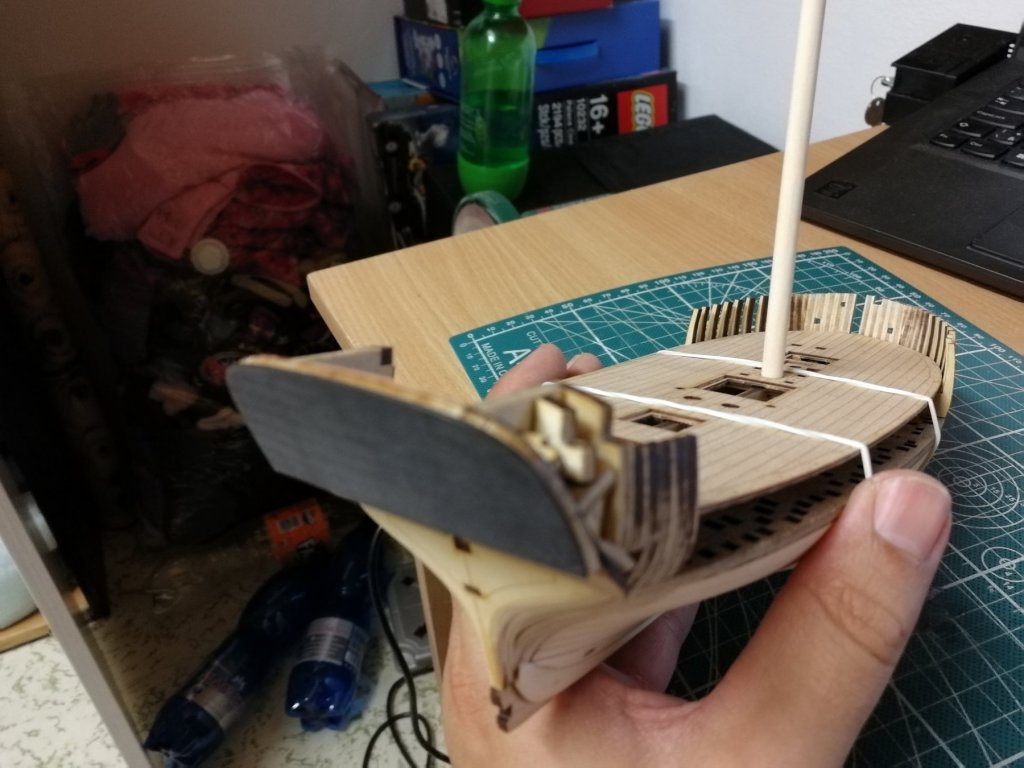
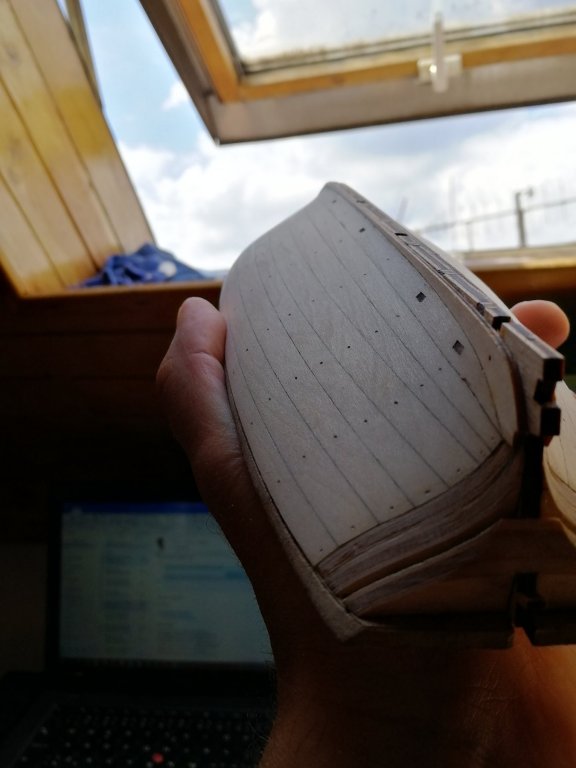
During the night I have complete left side of the bow. I do not have an experience with the POF scratch build but from the builds I see here the Construction is somehow similar (much more simple but some elements are close I think) So a good practice to move level up I Just dry fited few pairs of the next ribs and the shape is awesome.... And of course I could not resist and have to dry put all the prepared parts together


- 315 replies
-
- 14
-
-
- master korabel
- avos
- (and 1 more)
-
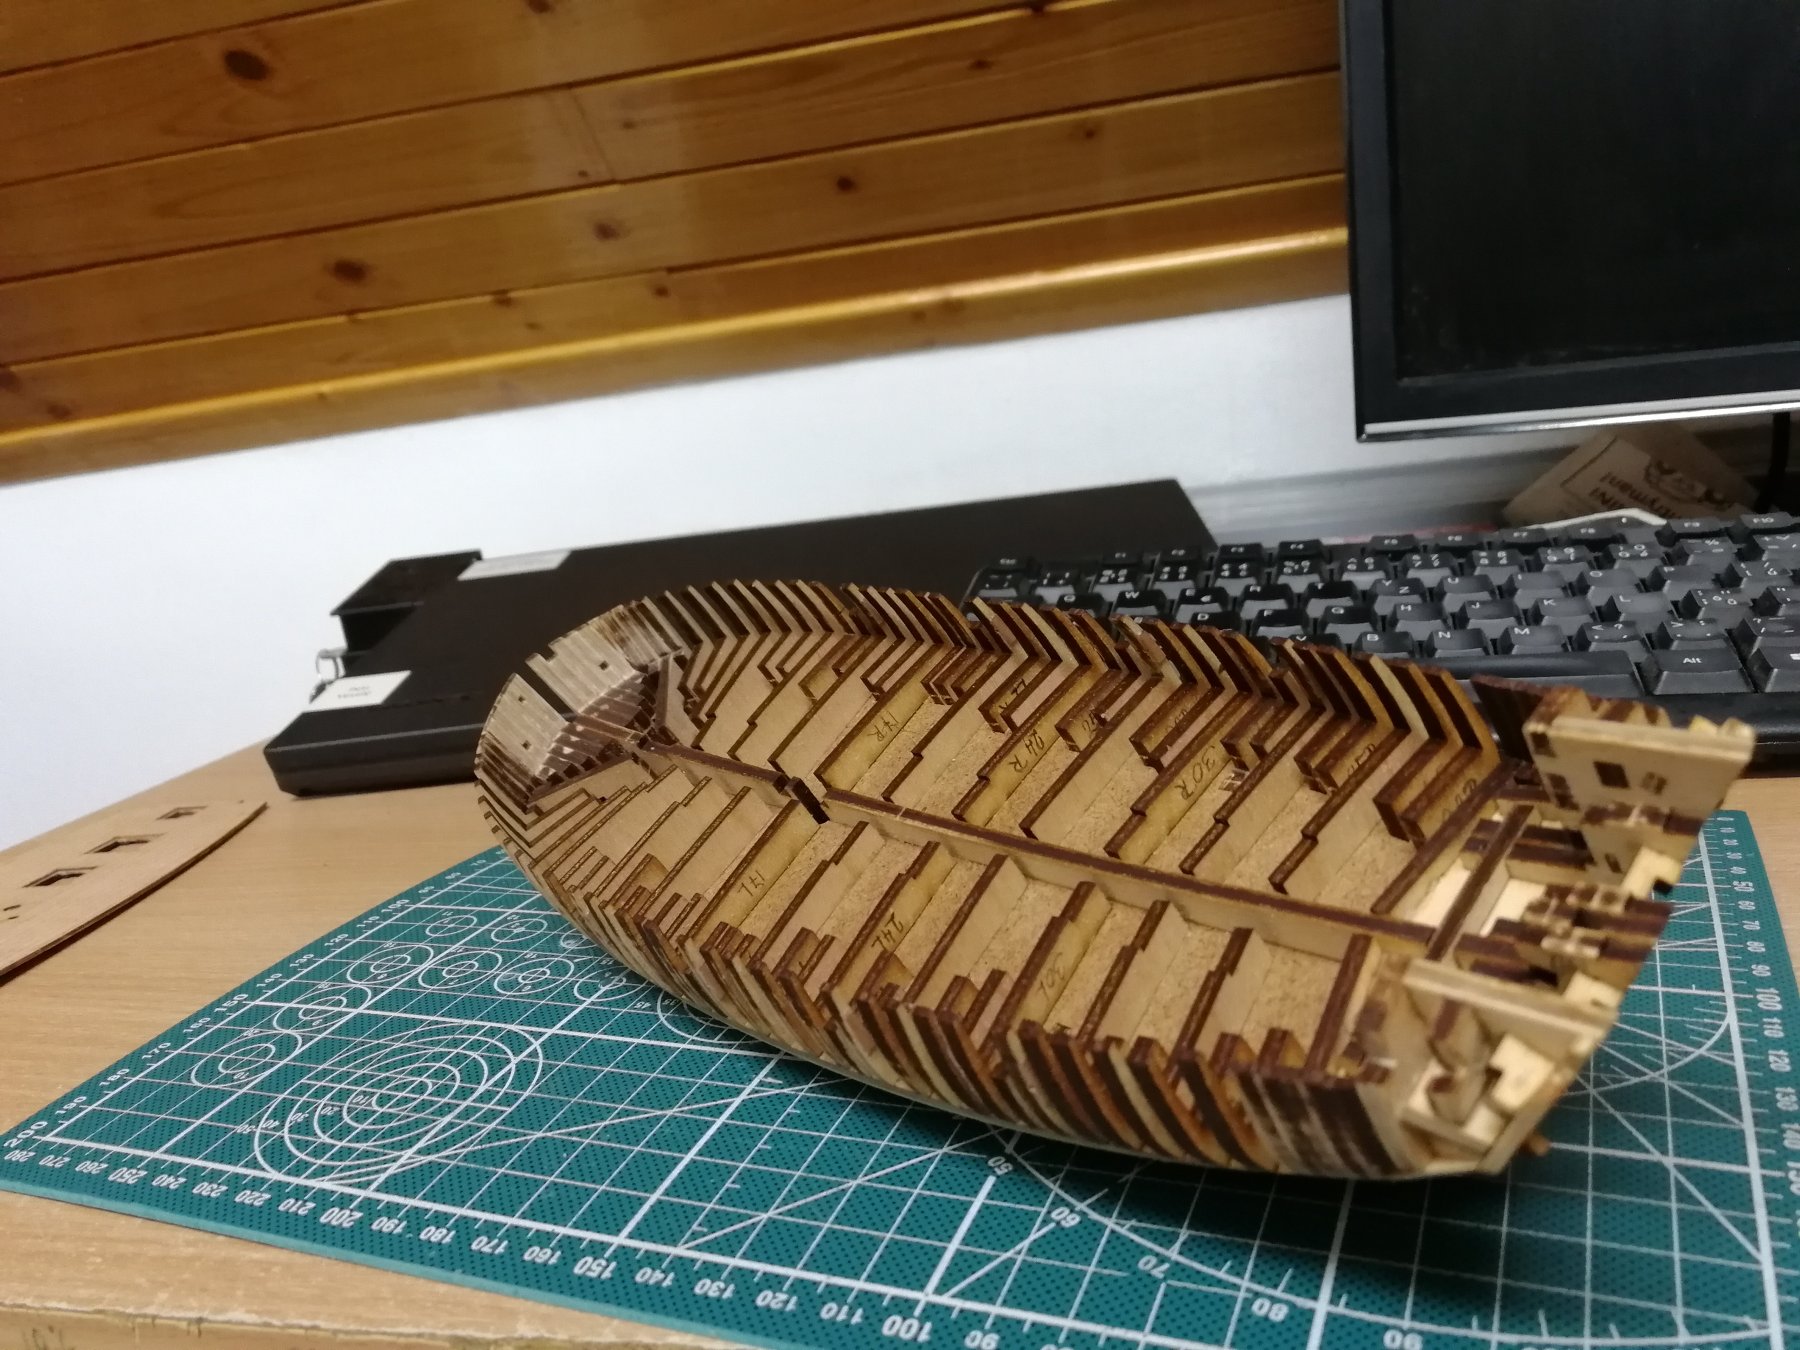
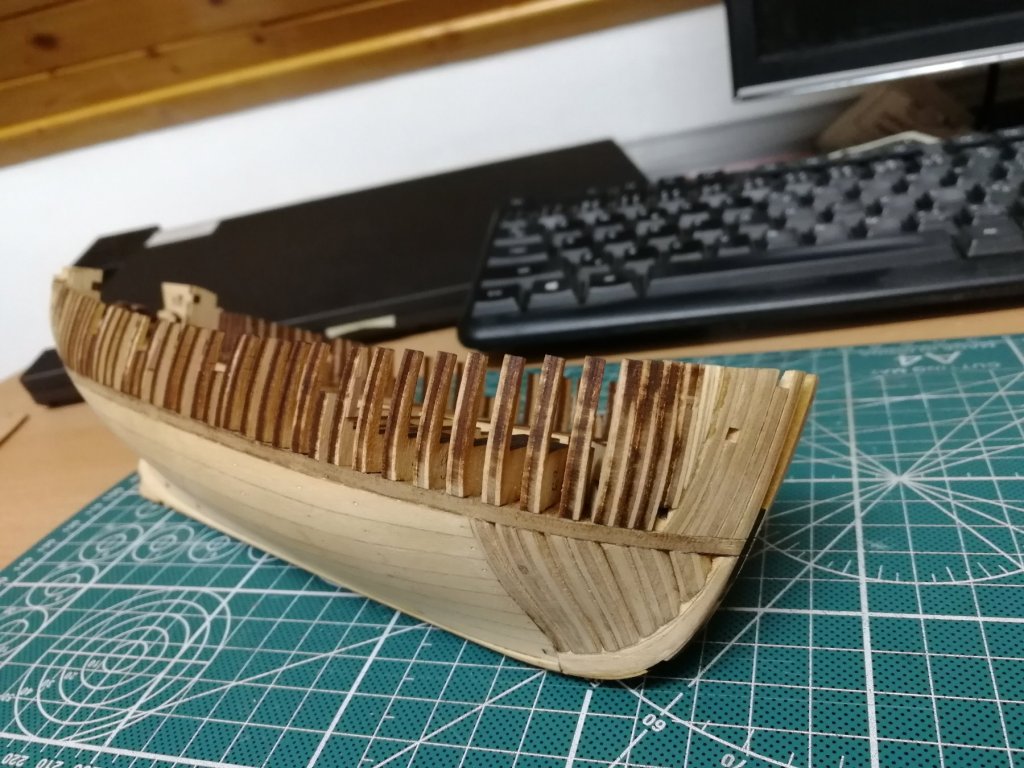
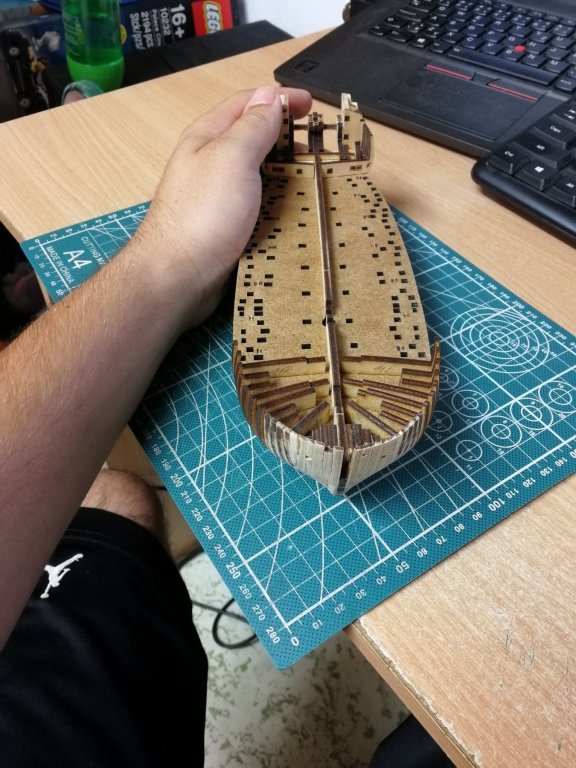
The bow is slowely forming. Many pieces and lot of sending but it starting showing the shape of the hull.

- 315 replies
-
- 12
-
-
- master korabel
- avos
- (and 1 more)
-
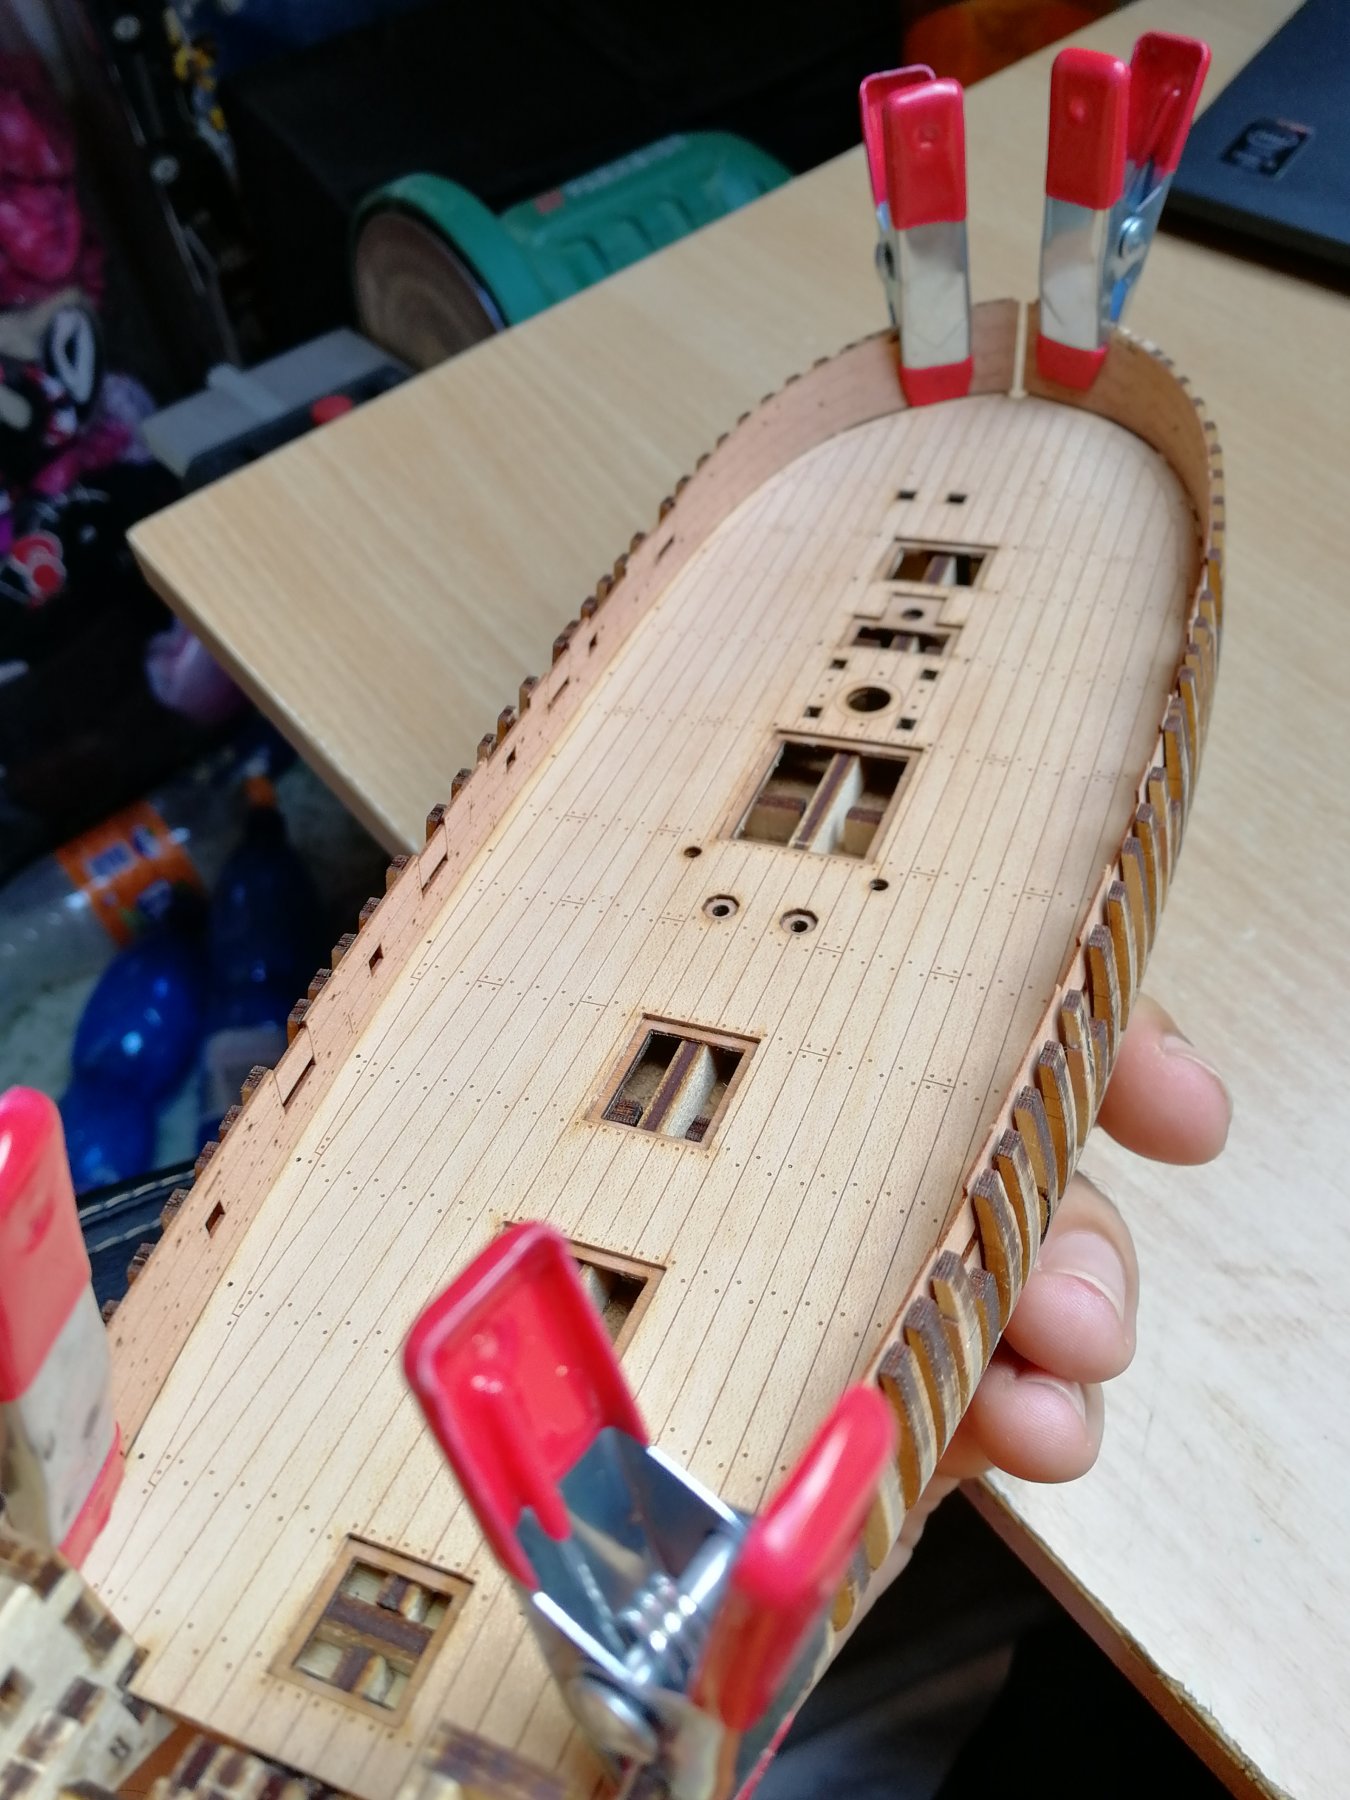
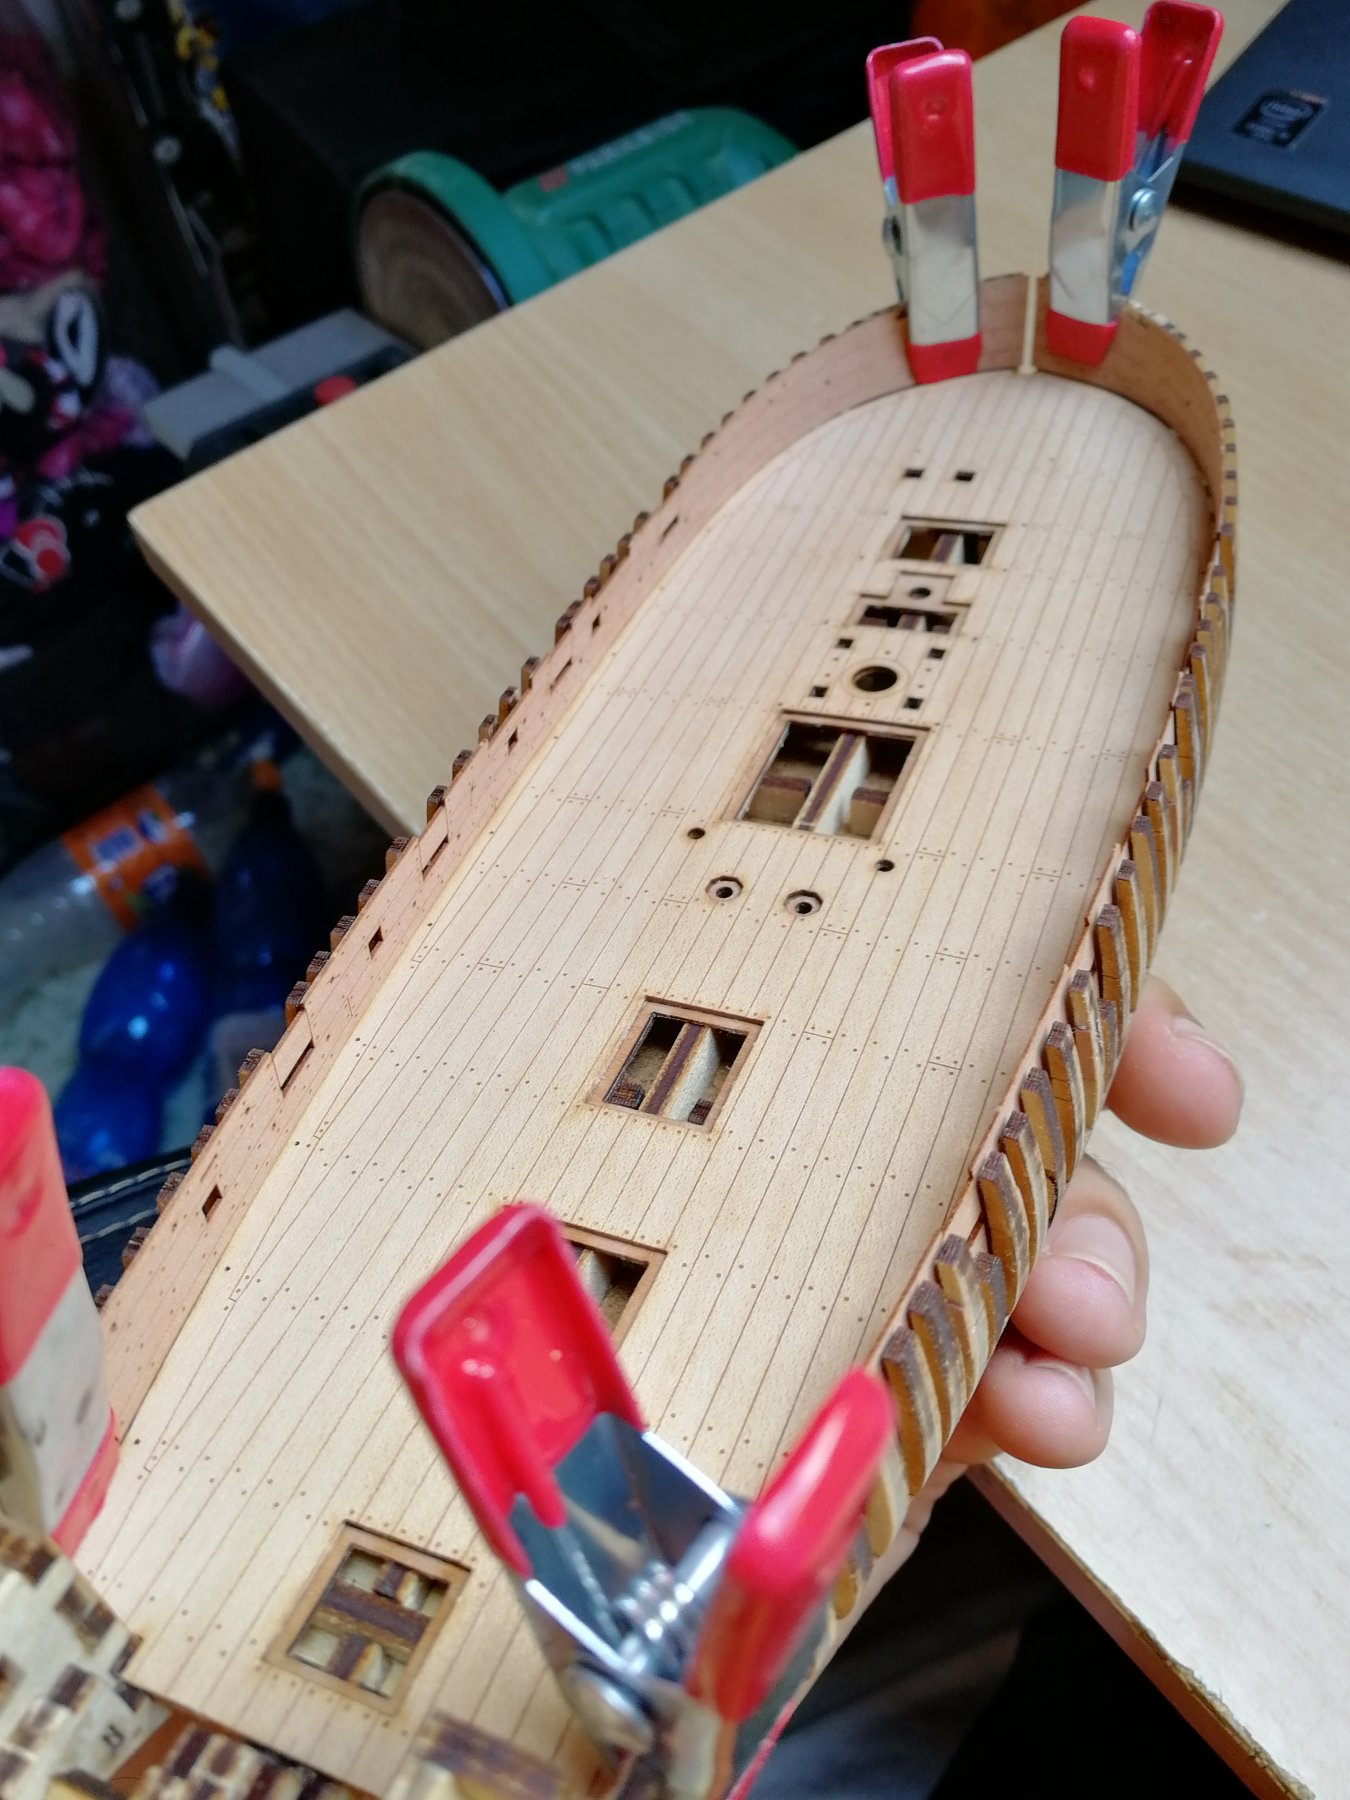
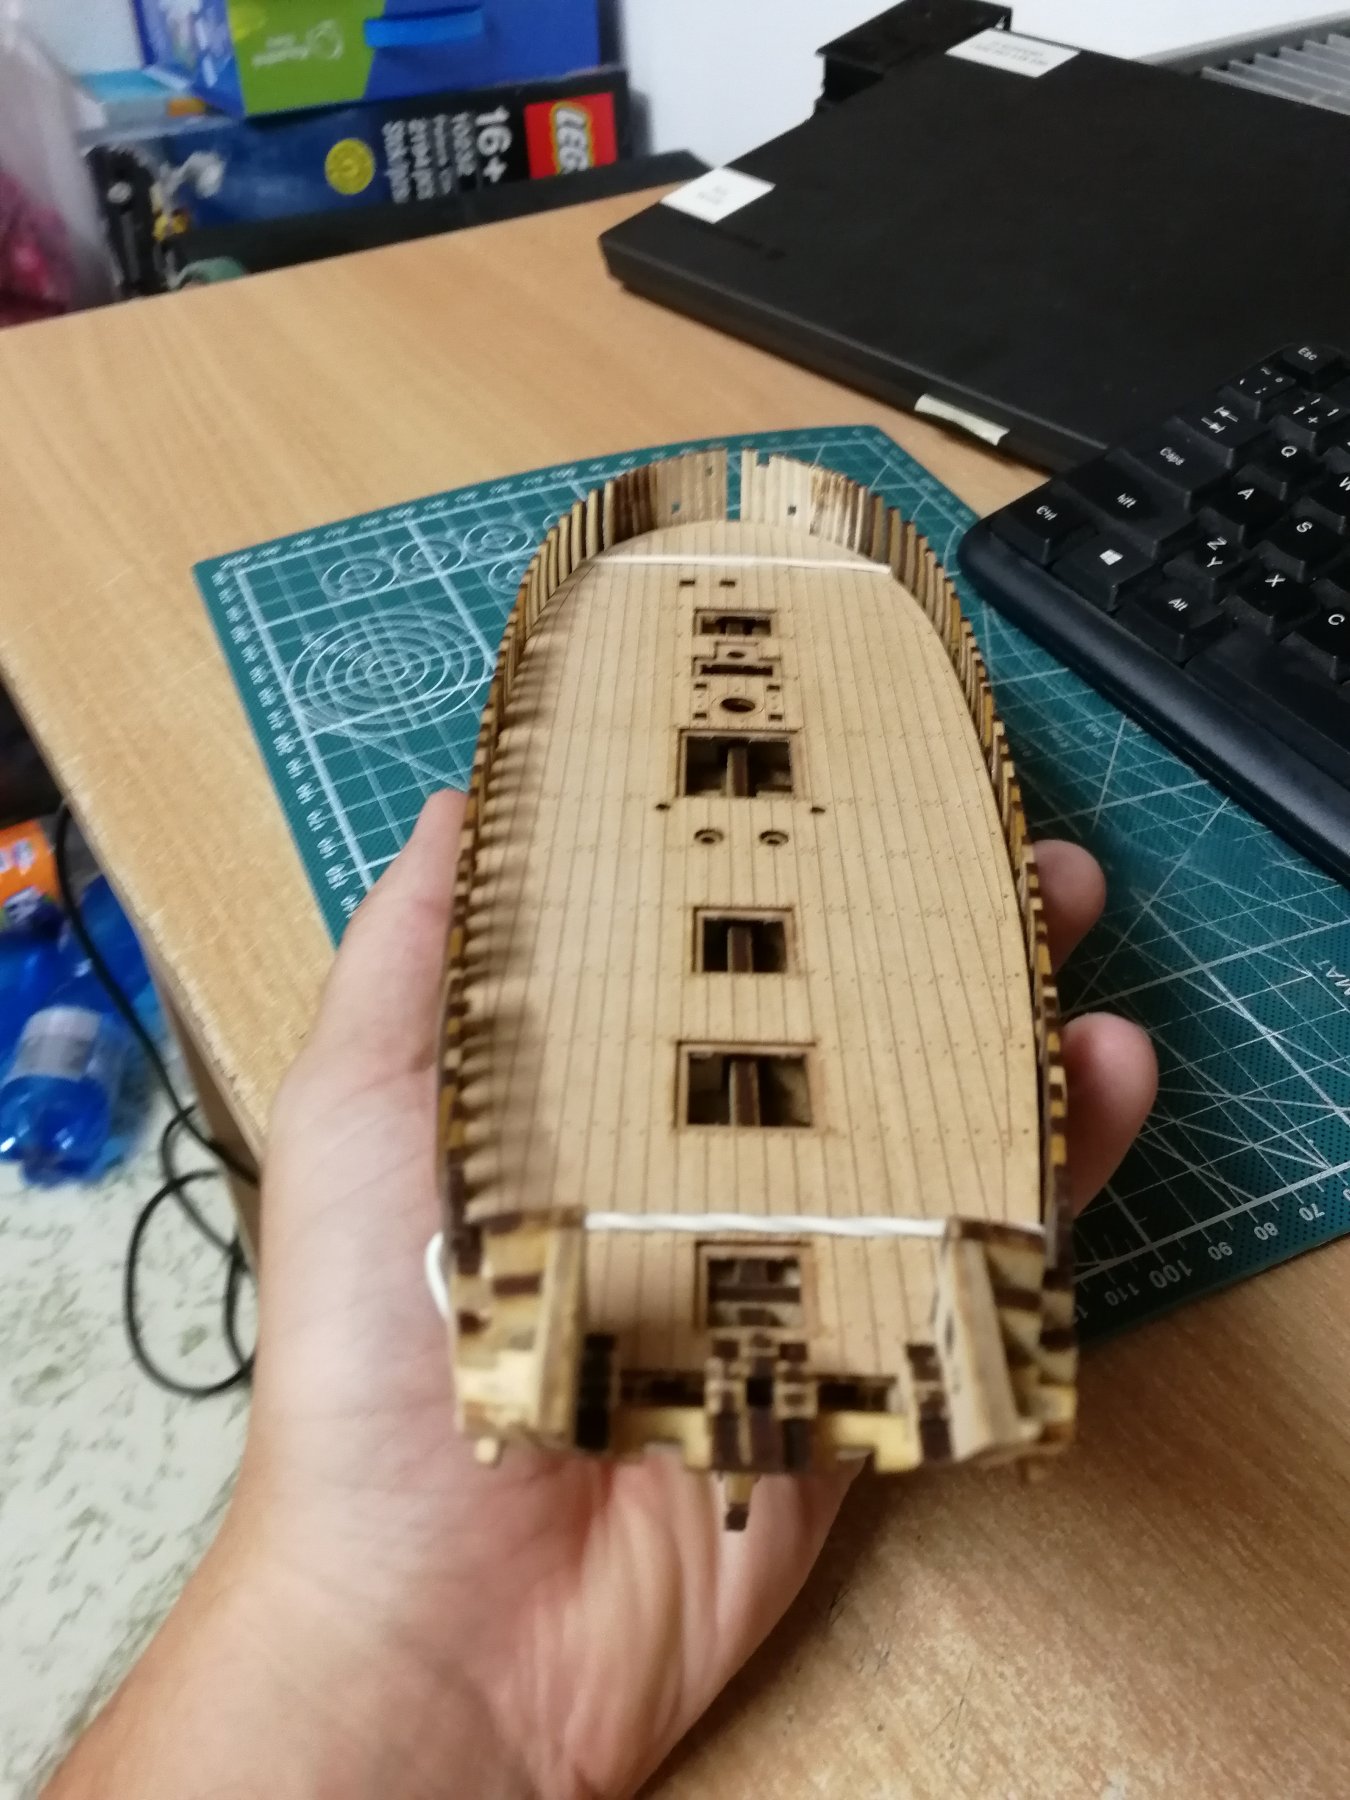
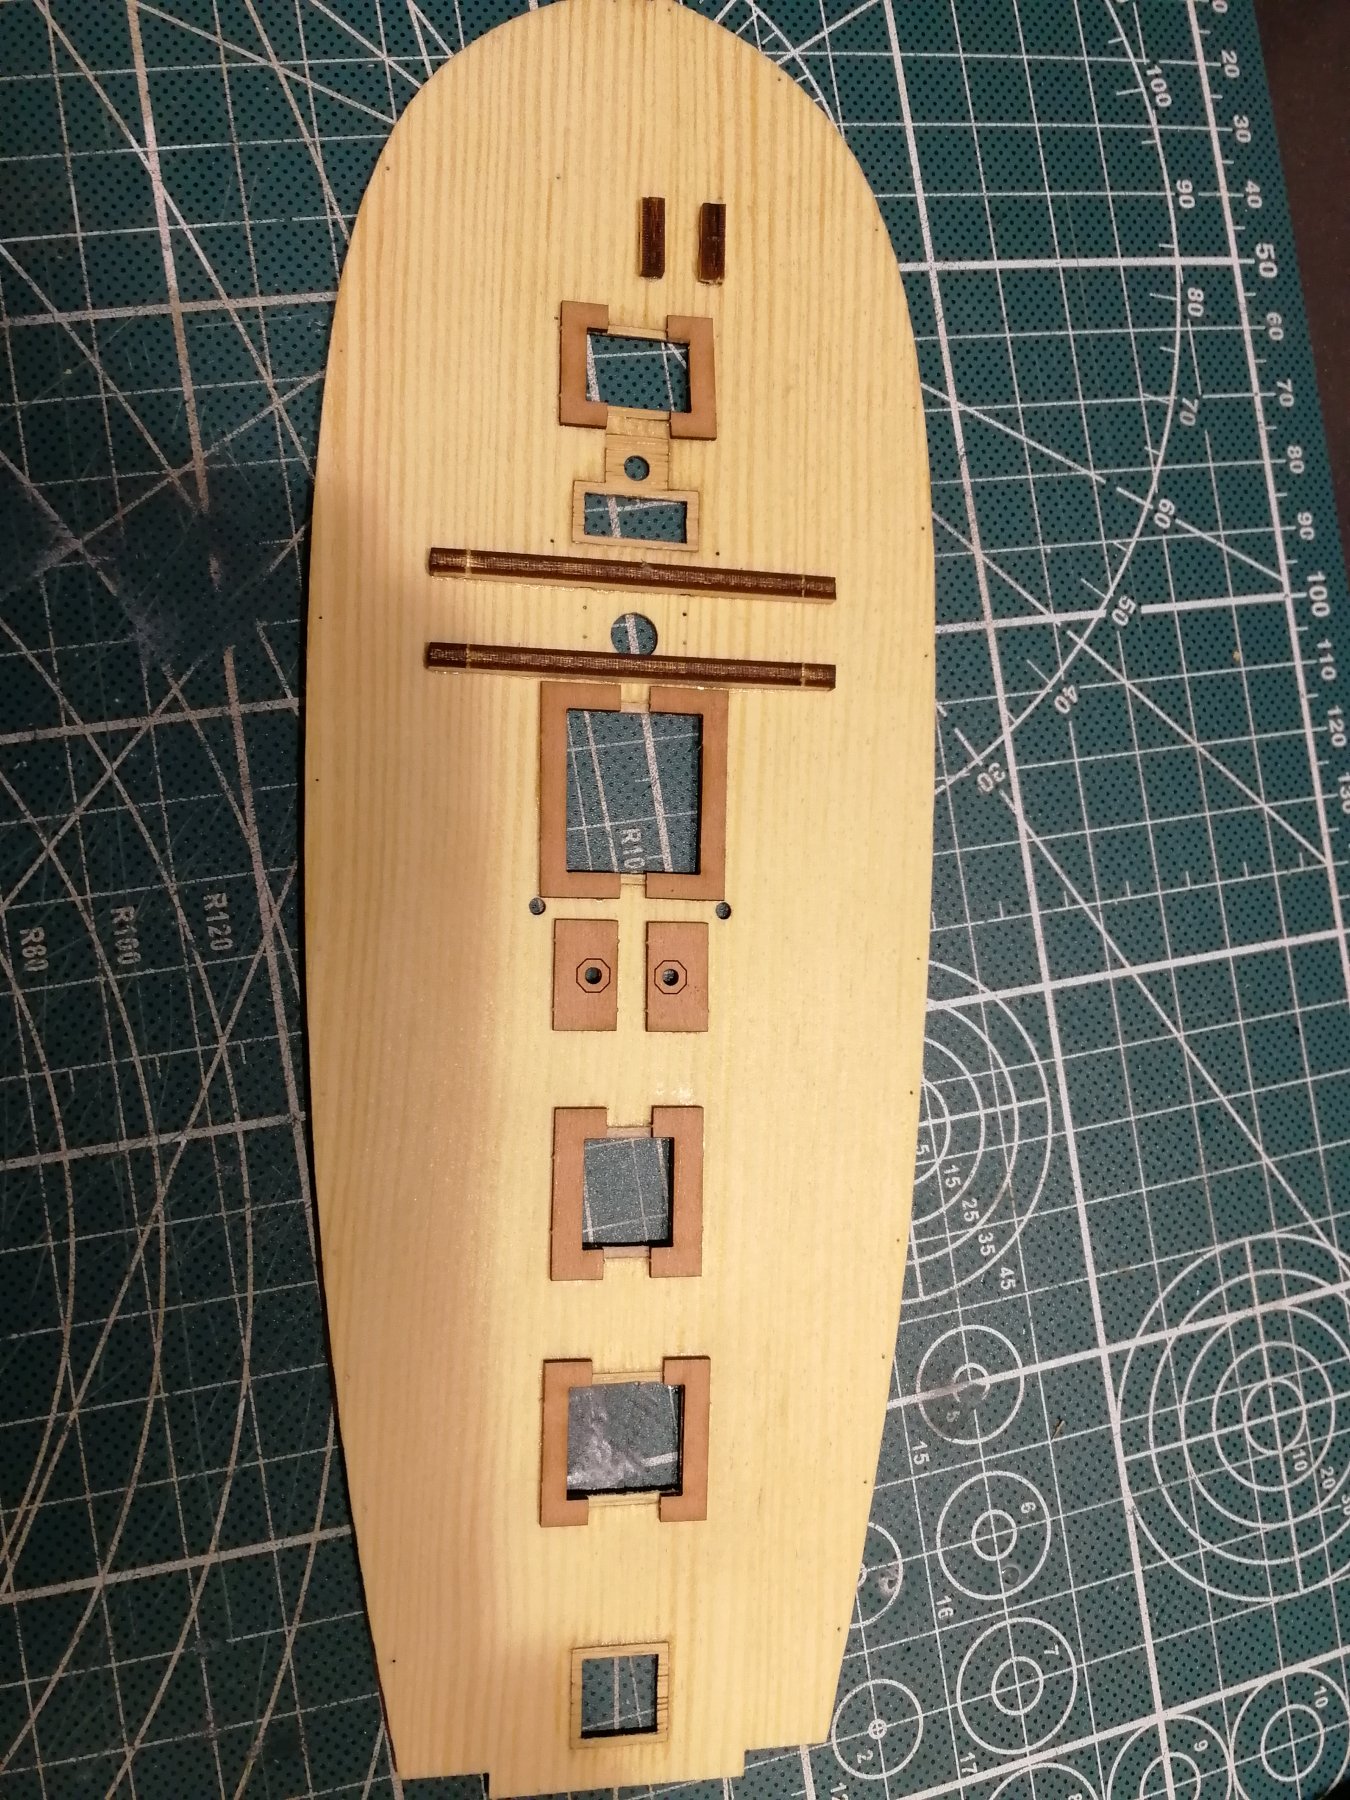
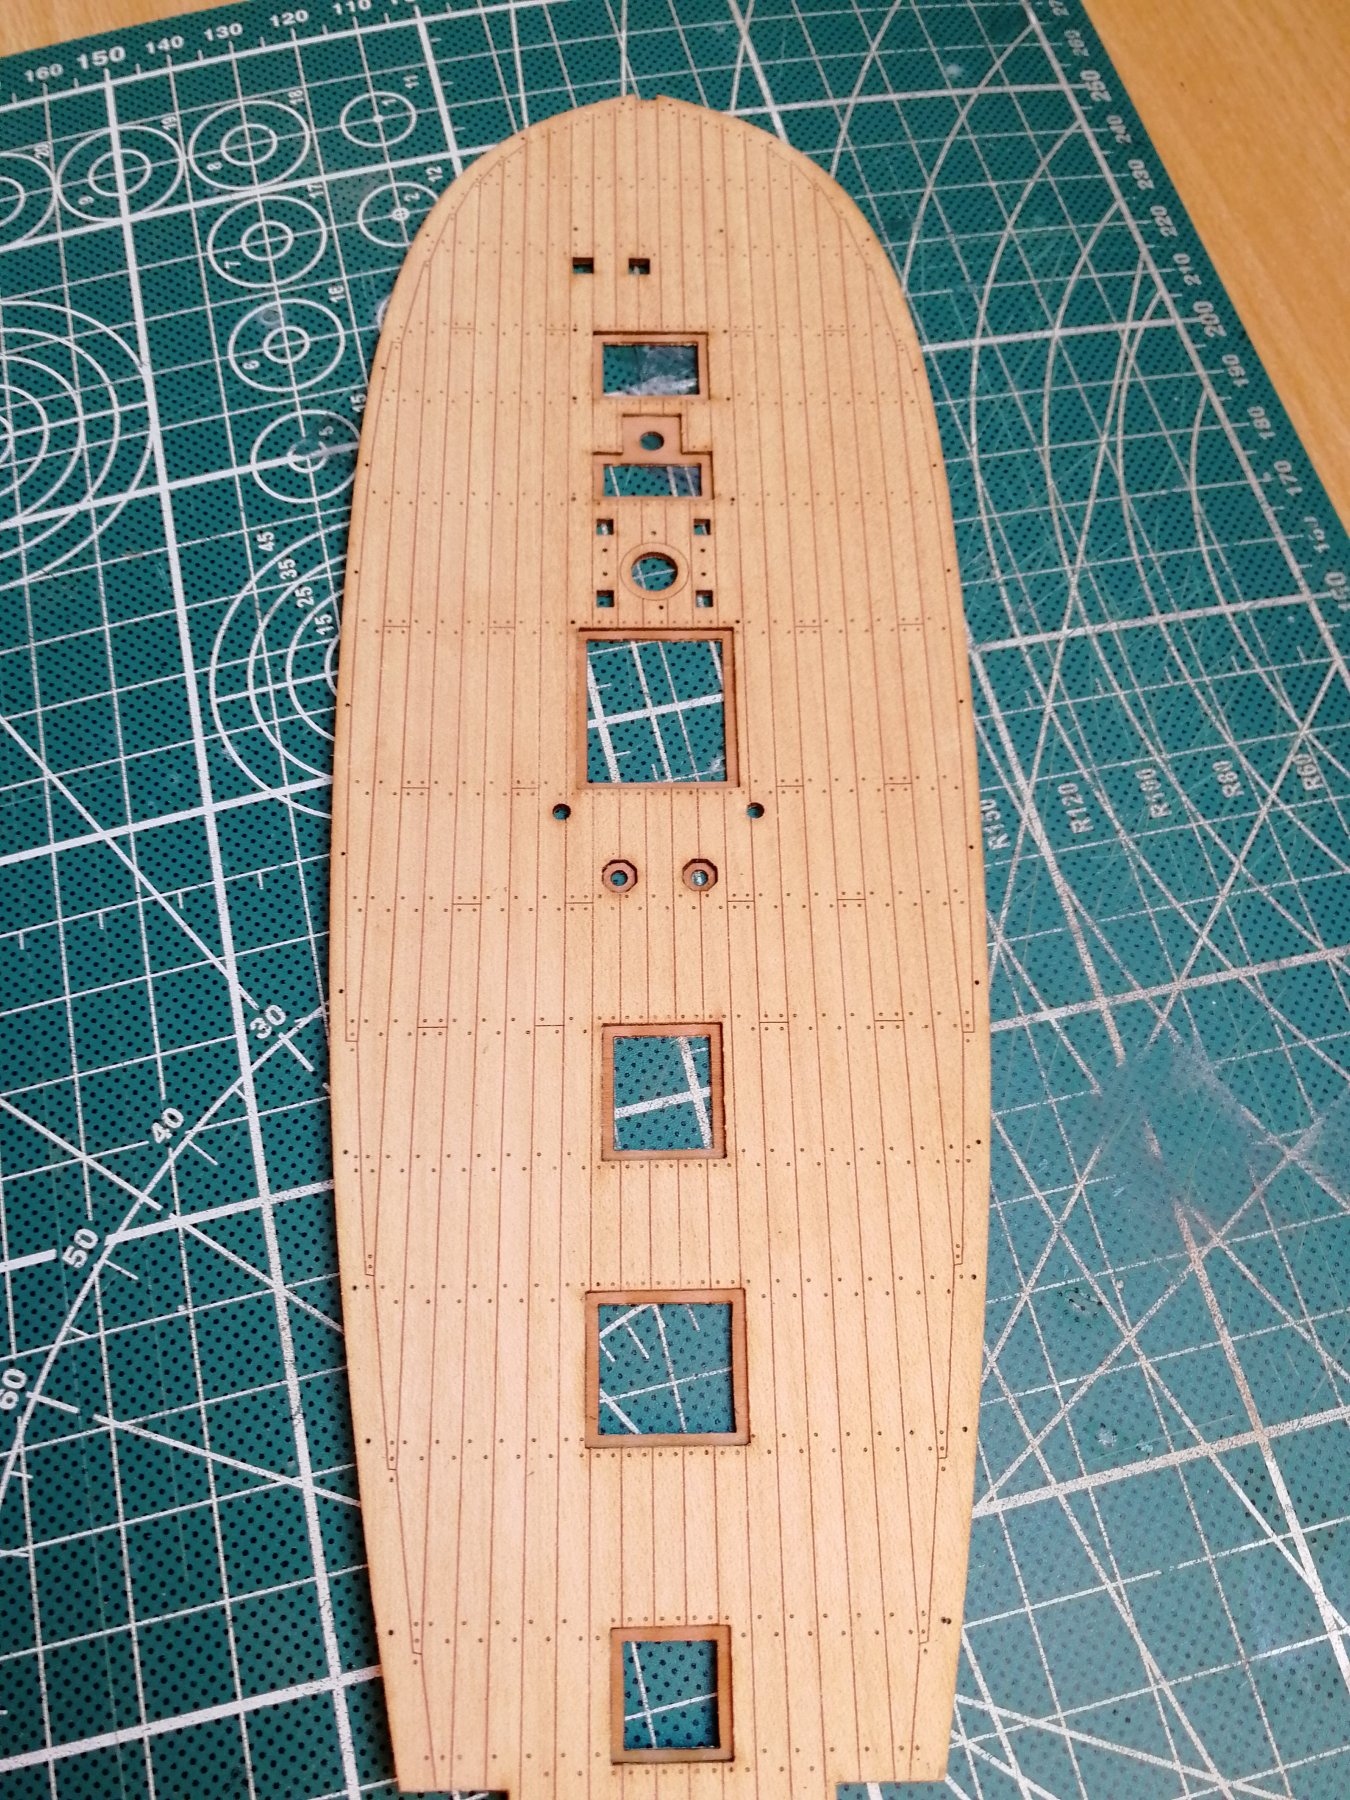
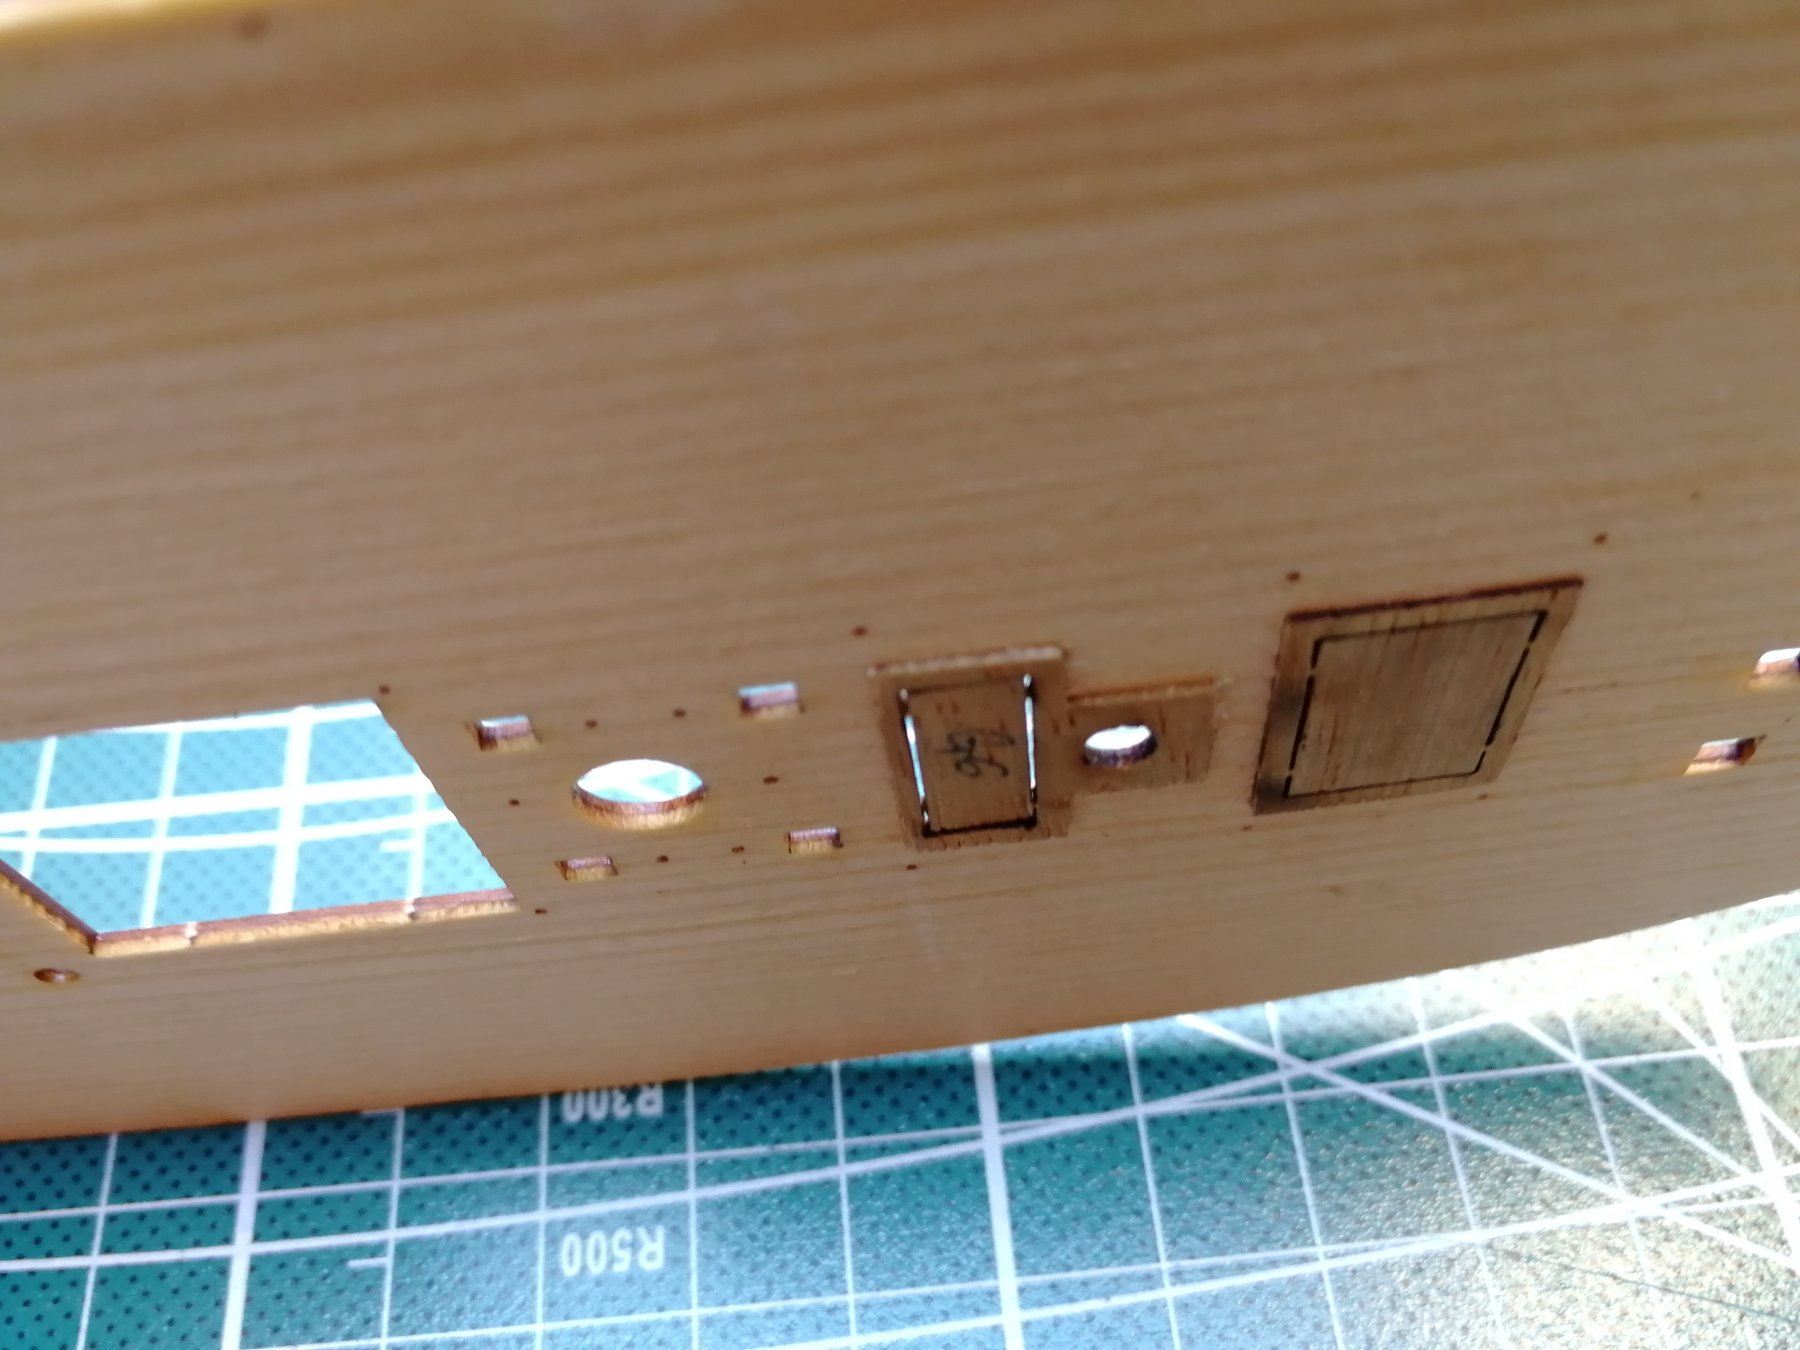
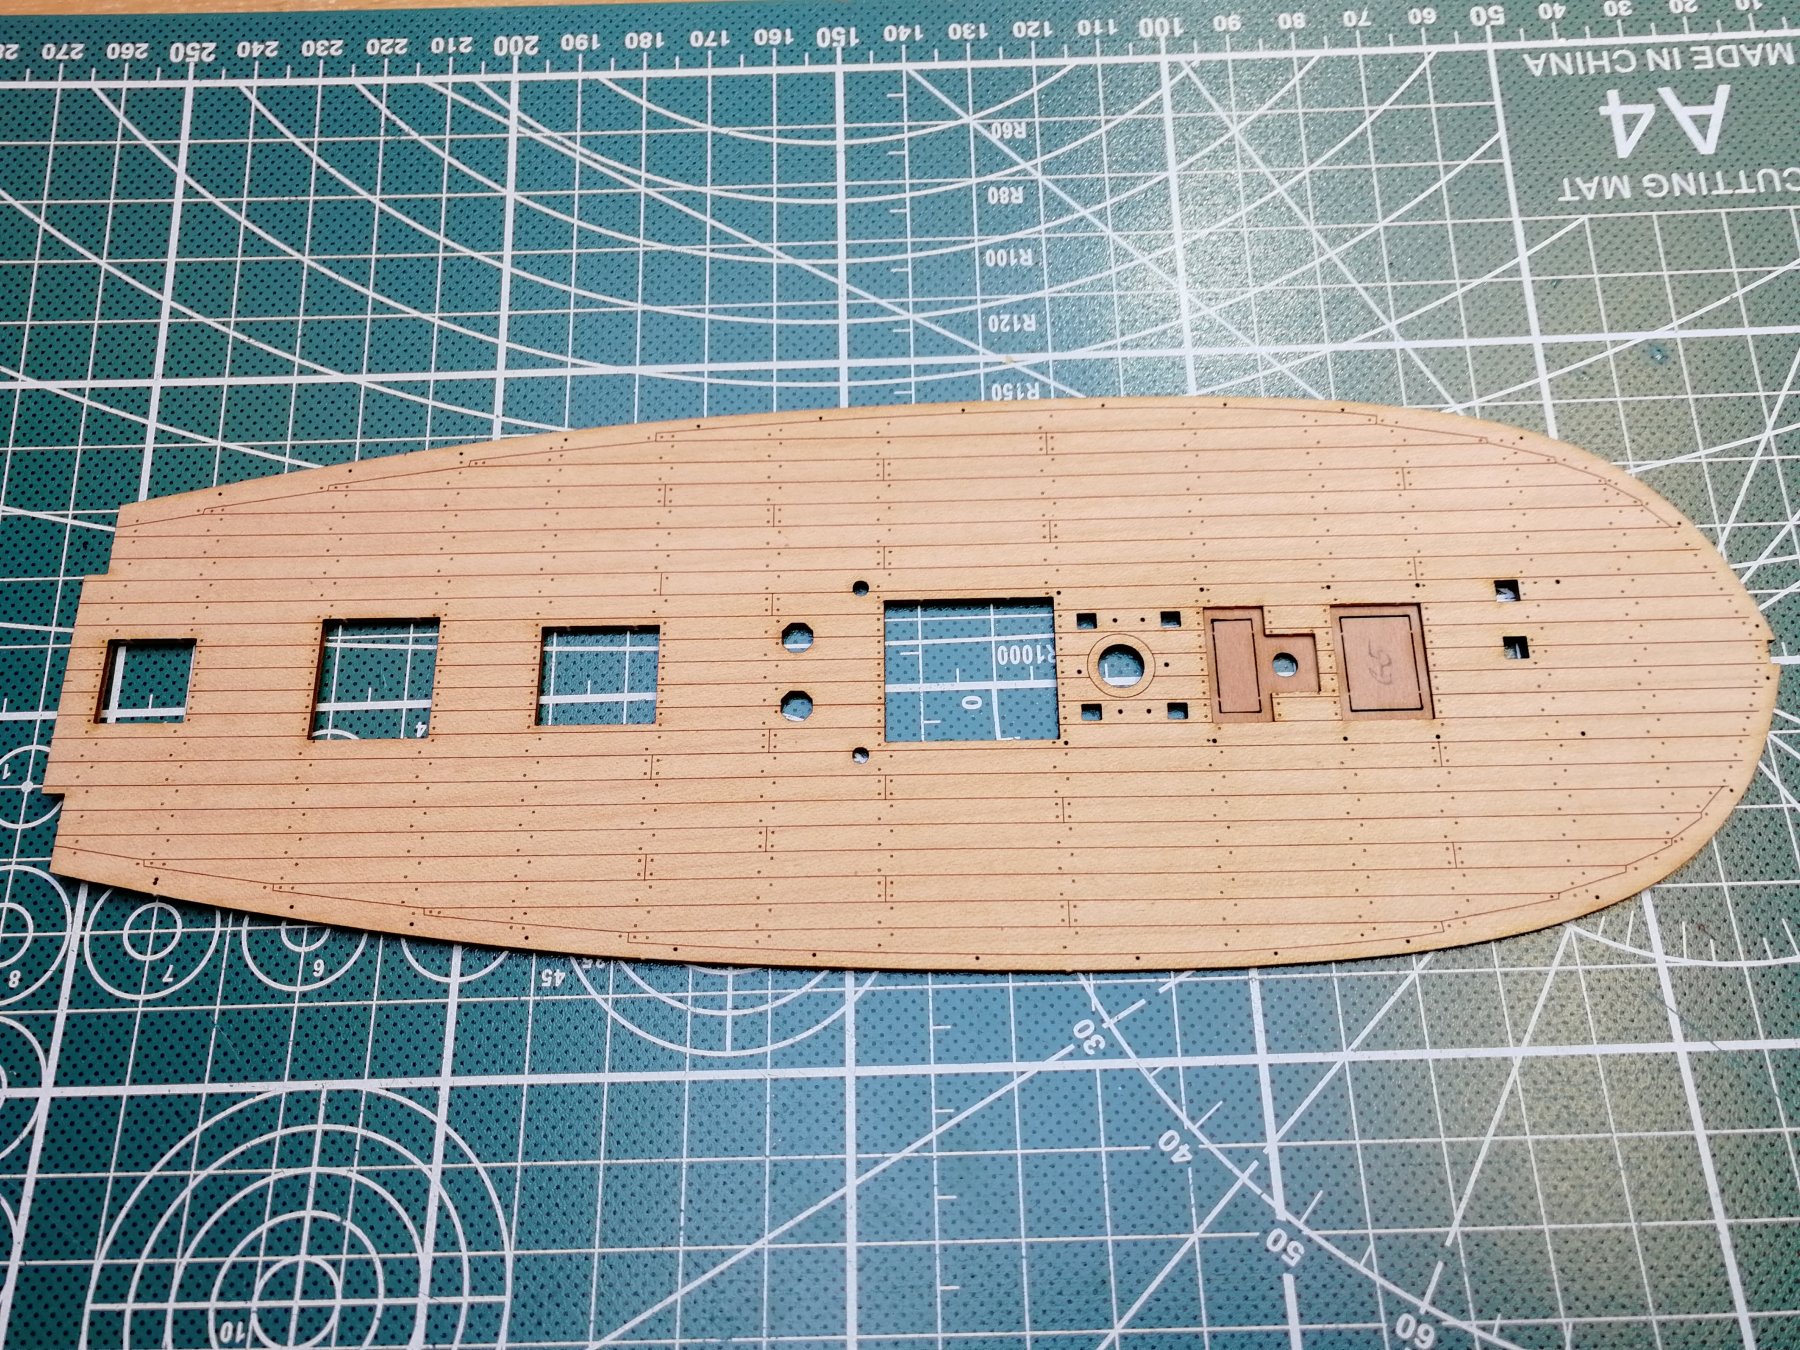
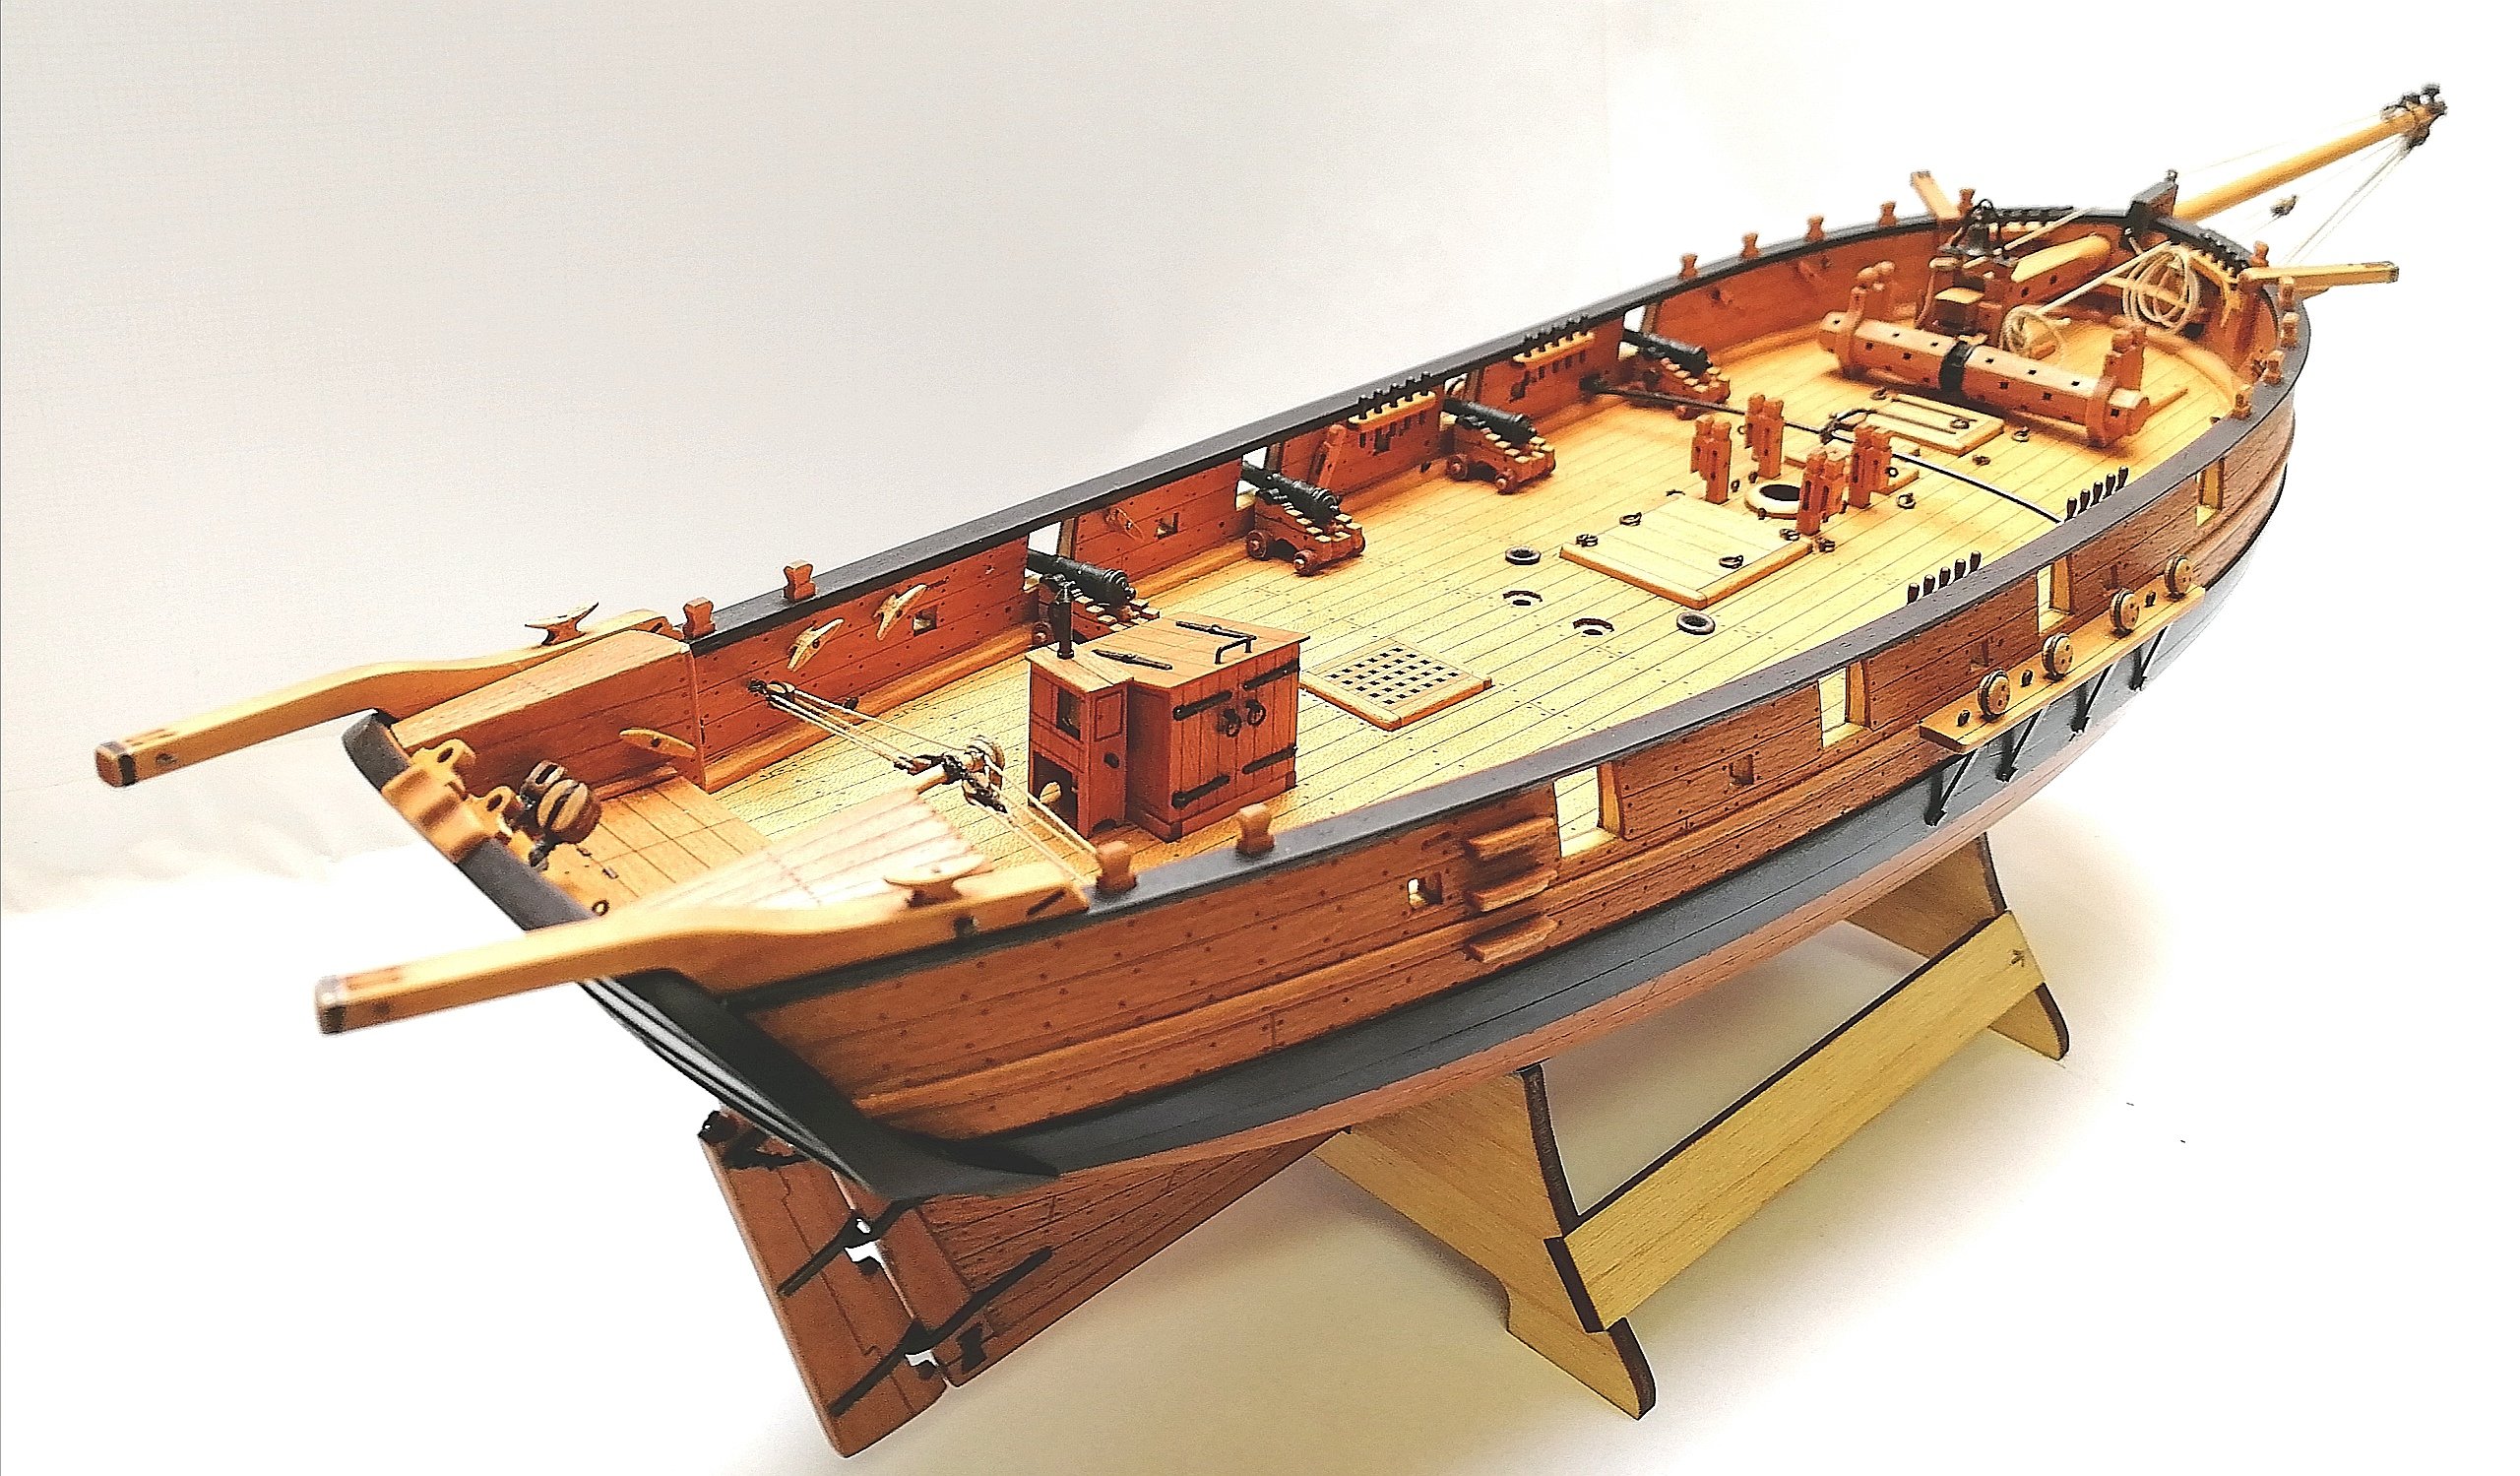
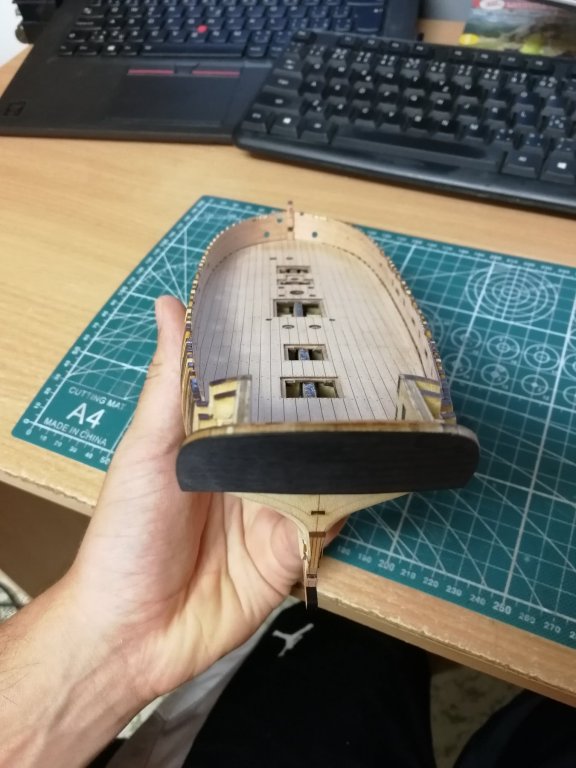
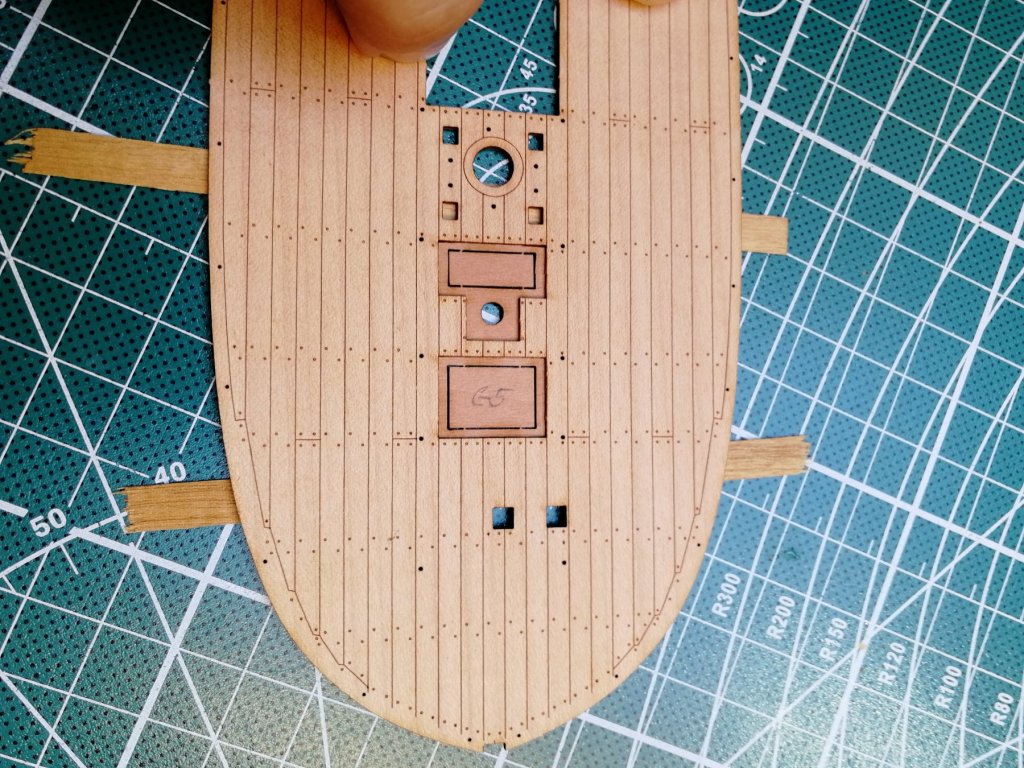
Deck preparation. The deck is made from one piece with laser engraved planking. The base of the deck is some lower quality wood on which is pear veneer. Several reinforcements has to be glued in to shape the correct curvature of the deck and support the deck furniture.


- 315 replies
-
- 10
-
-
- master korabel
- avos
- (and 1 more)
-
I have the new version in PDF as well. 👌
-
Then huge respect and big thank for your work. You guys created truly master piece. I agree, the instructions are OK and easy to follow so far. The only thing I found so far is wrong numbering in one paragraph in text instructions. I believe instead of A29 should be A59 as A29 is different part used during stern construction. It is OK in photo book as well as in list of parts but one can easily figure this out. I have the text version from May 2019 so I believe up to date? PetaV

-
Hi, No it is not! 😮 I'm following the instructions step by step. It just fits so well without any glue or any fixing jig. Great work from designers really!! btw are you one of them? Or did you already build AVOS? Just asking that you know the process............ thanks PetaV
-
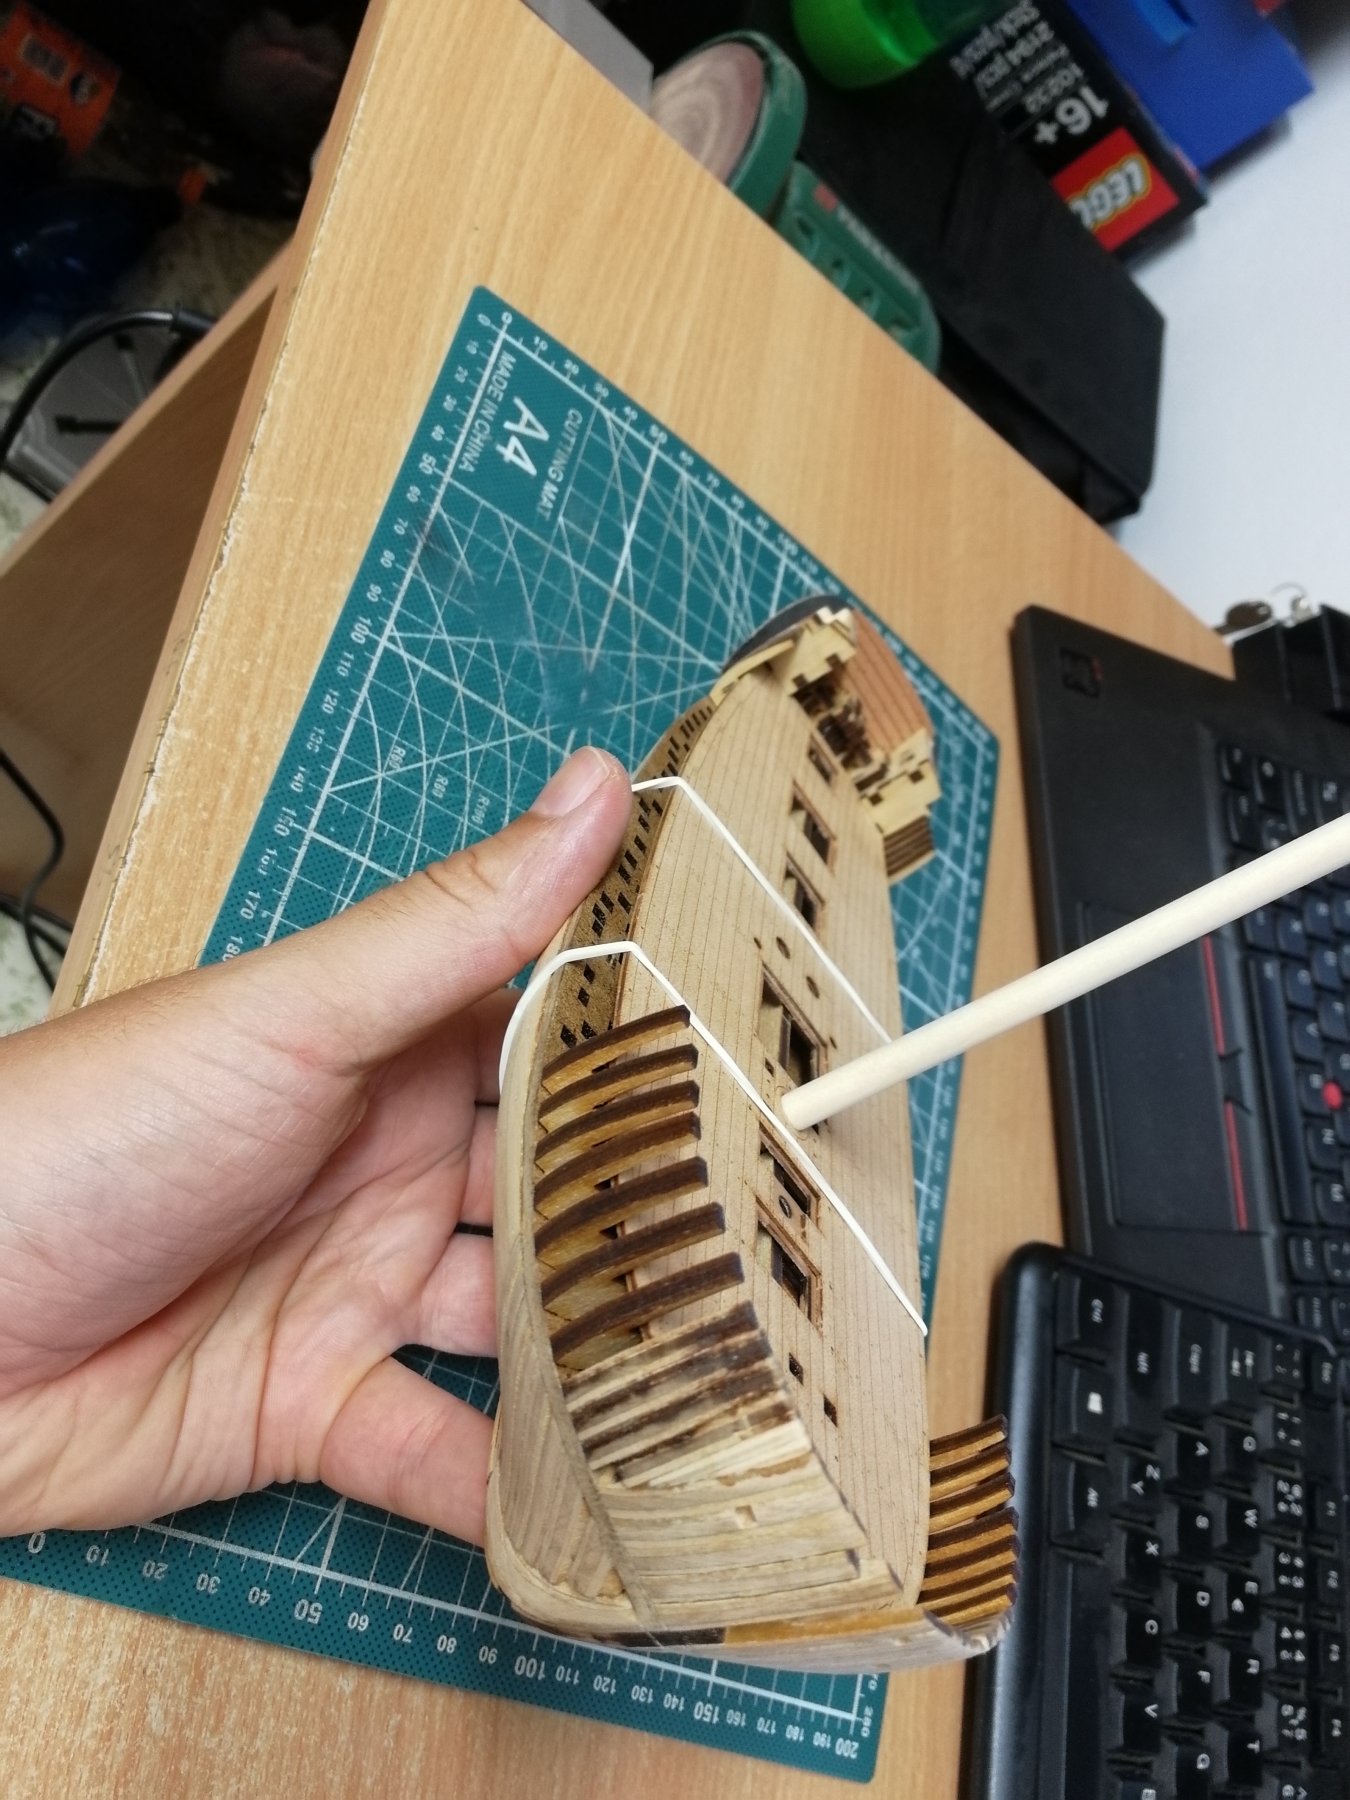
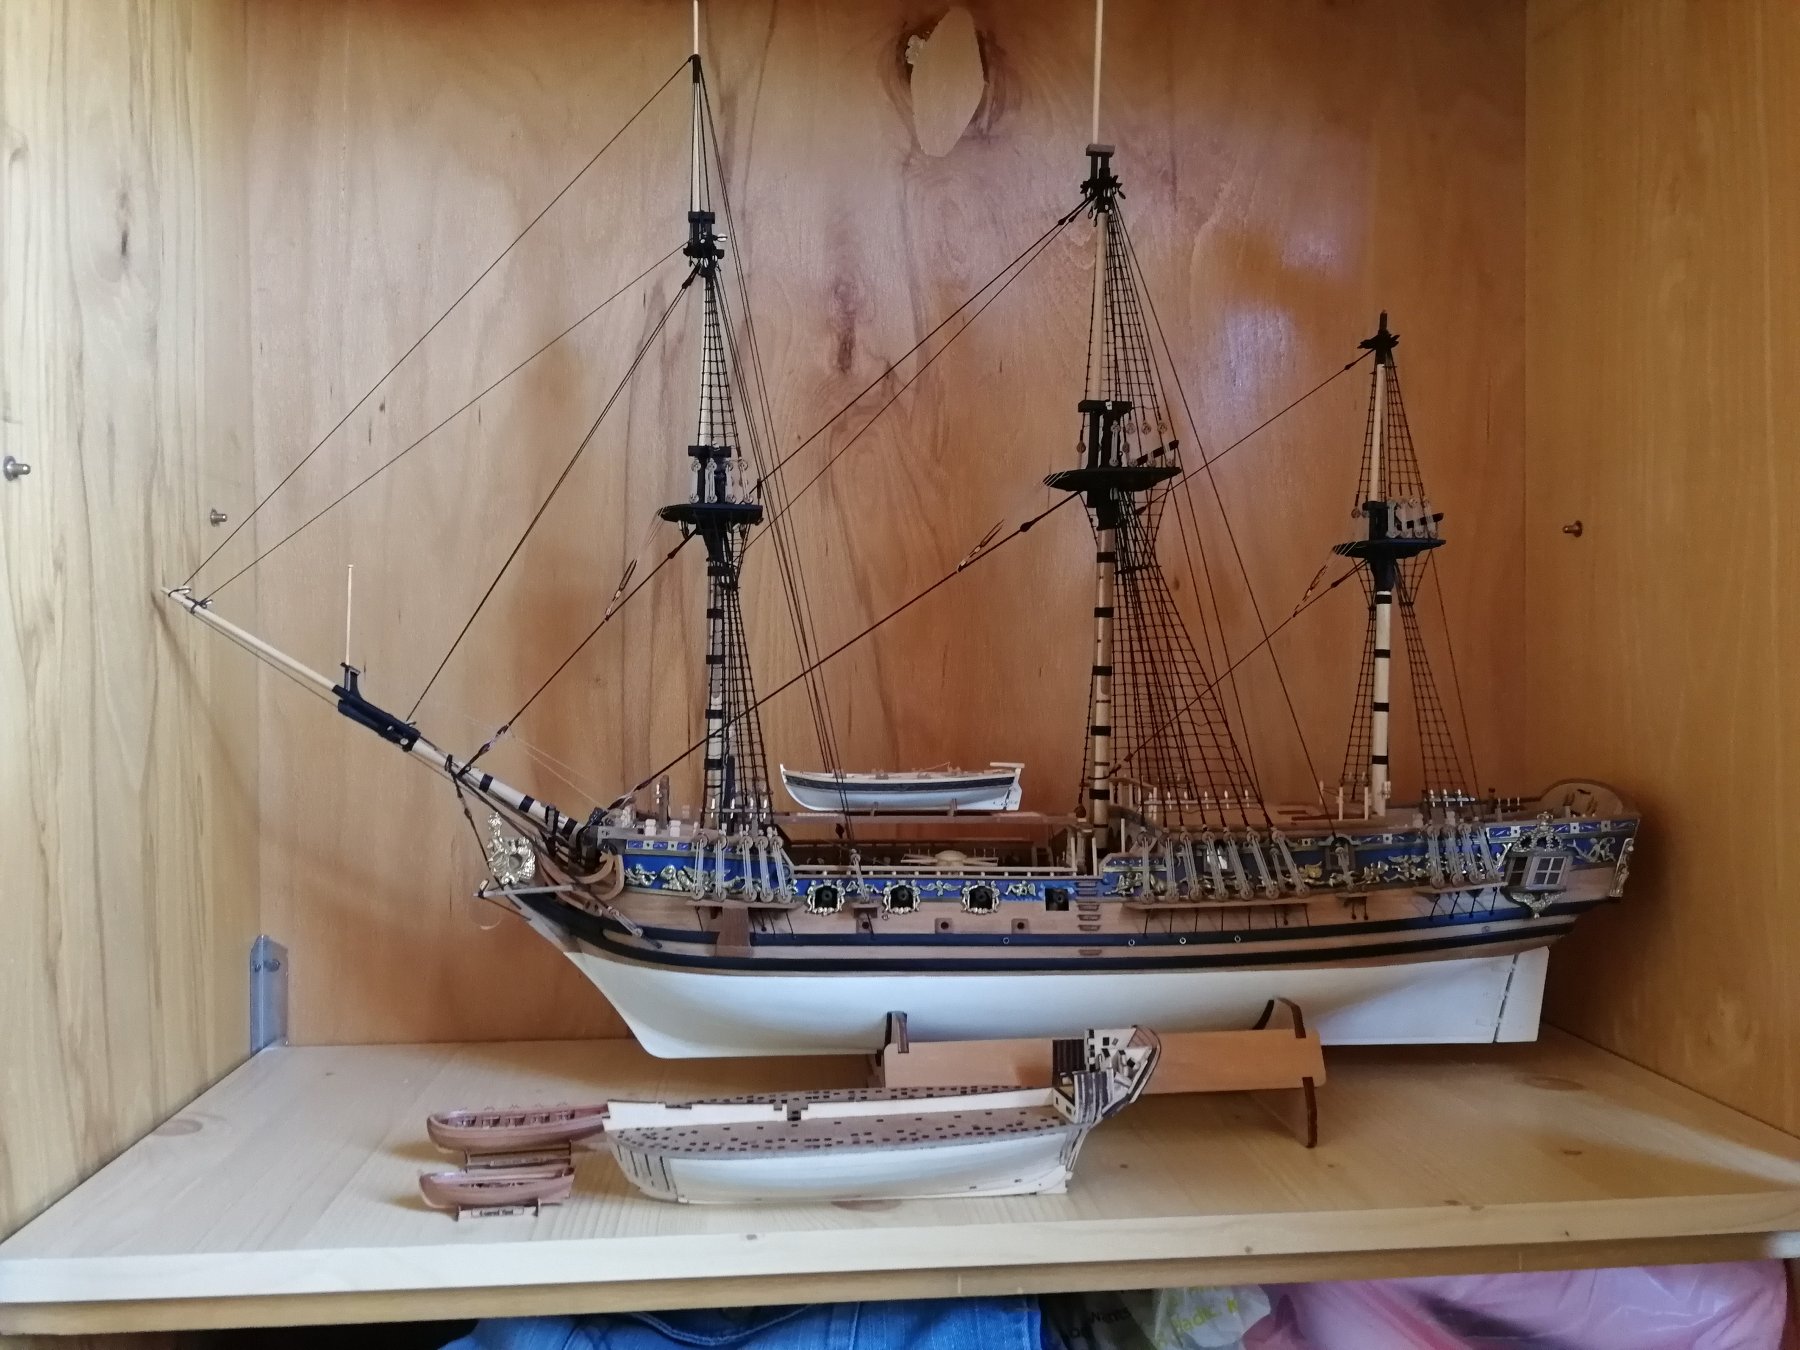
Hi Etsinko, Thanks fot the comment. I'm sure you will enjoy the build same as I do! And I'm looking forward to your building log! 🧐 Here I made a comparison with my Royal Caroline. It is different scale of course but it shows how small "cute" AVOS going to be. Still it will be impresive model (if I do not mess it up)

- 315 replies
-
- 10
-
-
- master korabel
- avos
- (and 1 more)
-
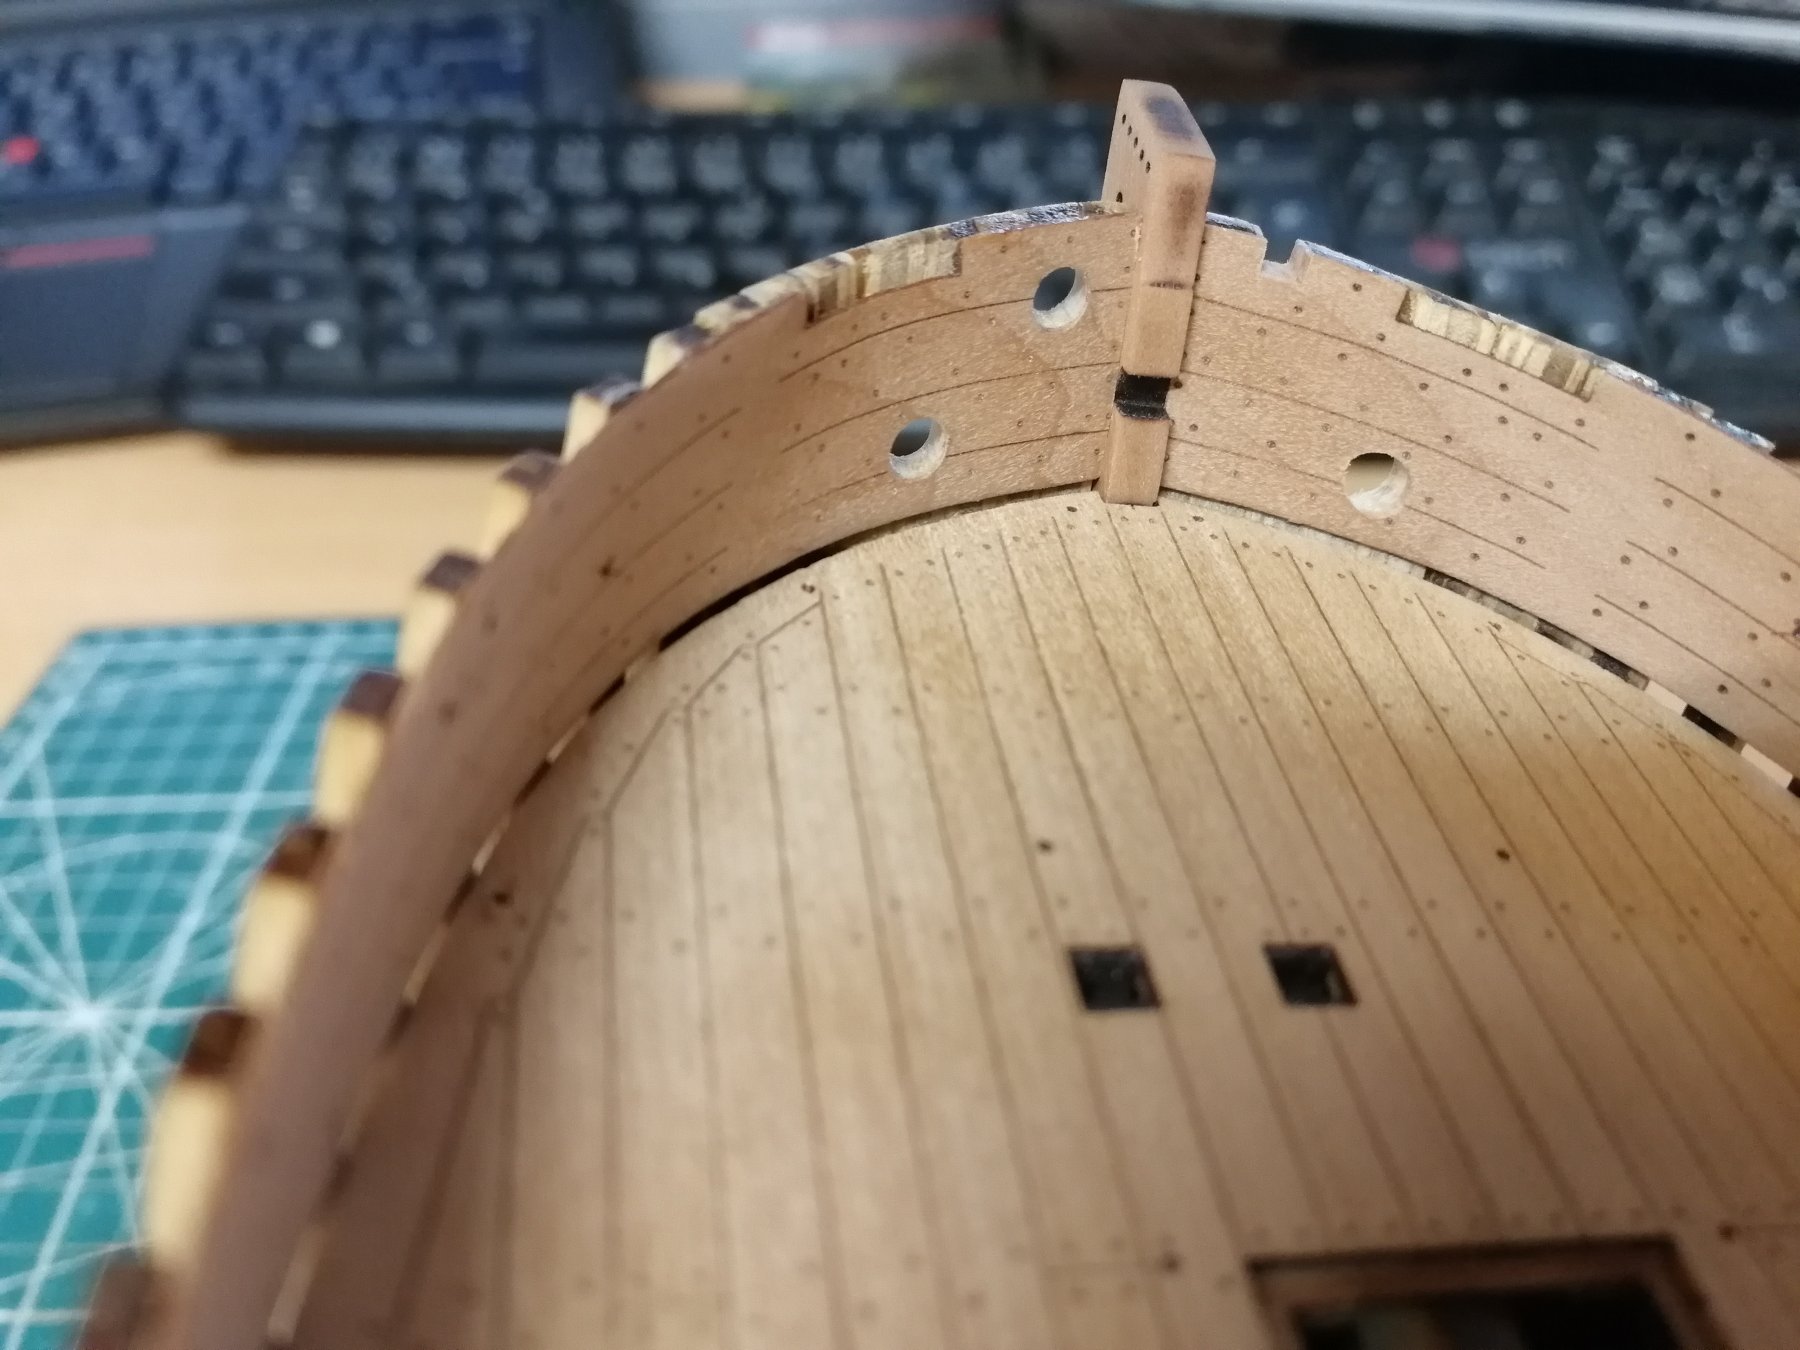
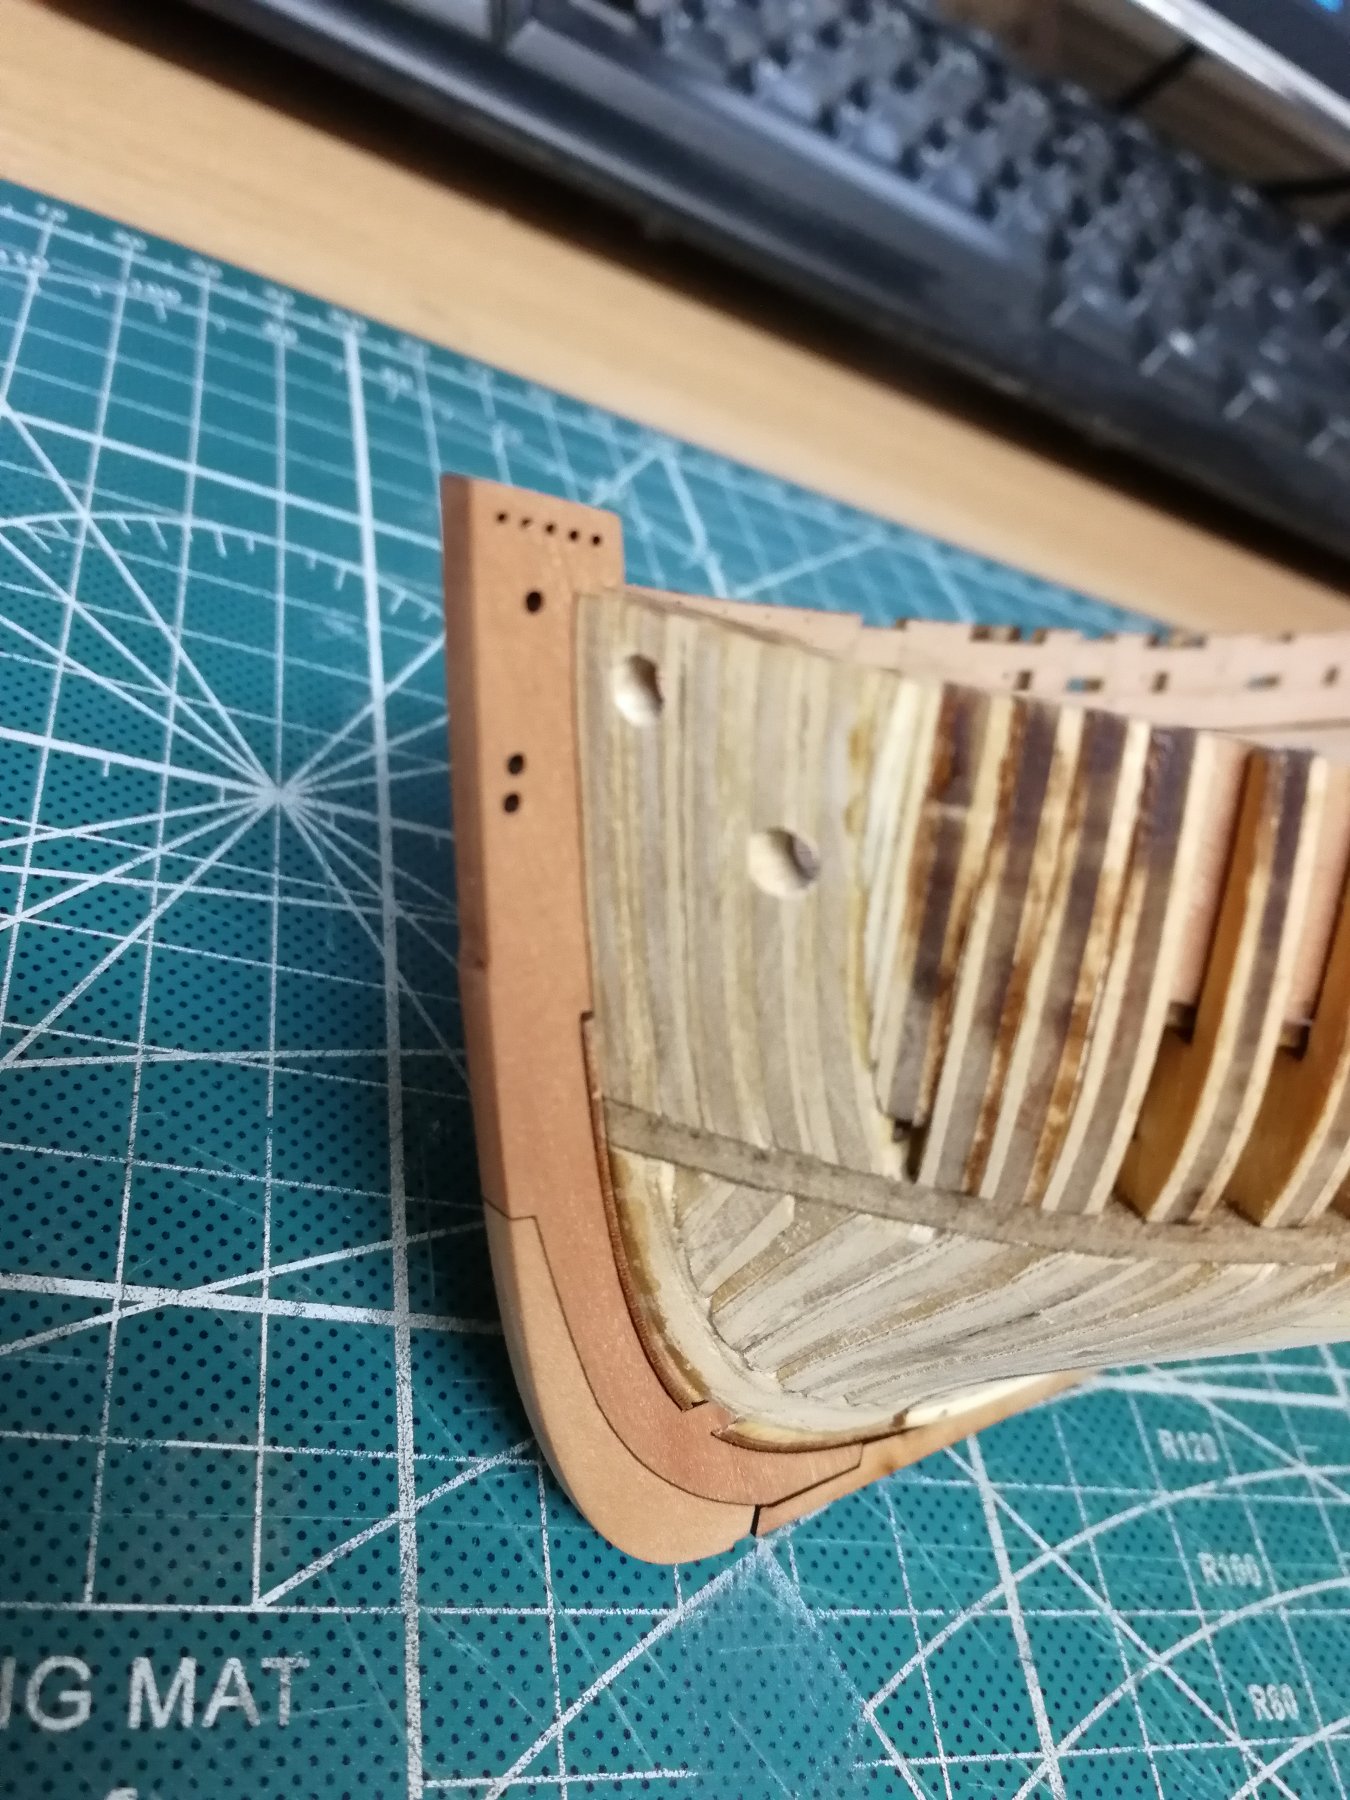
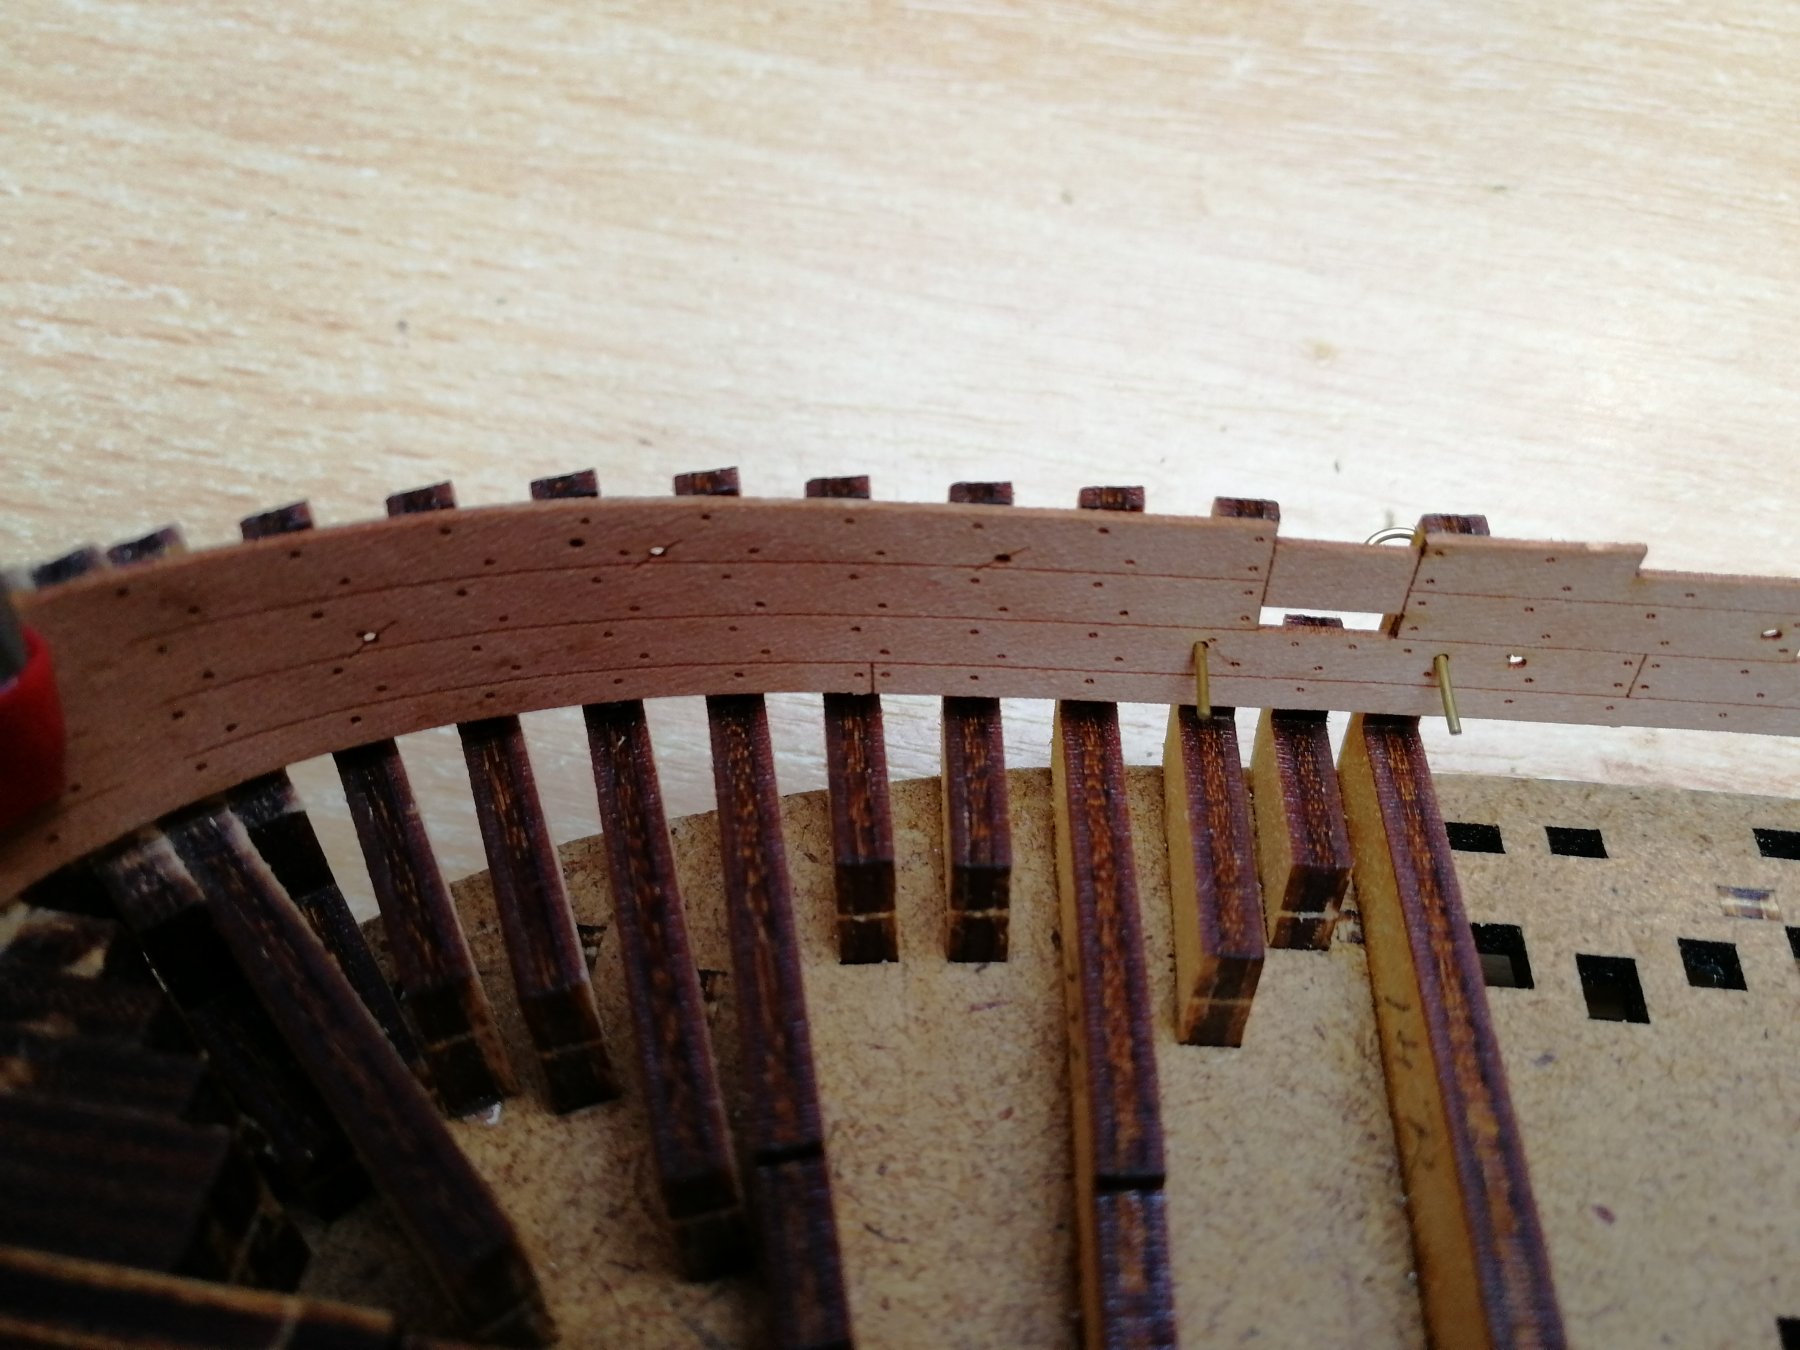
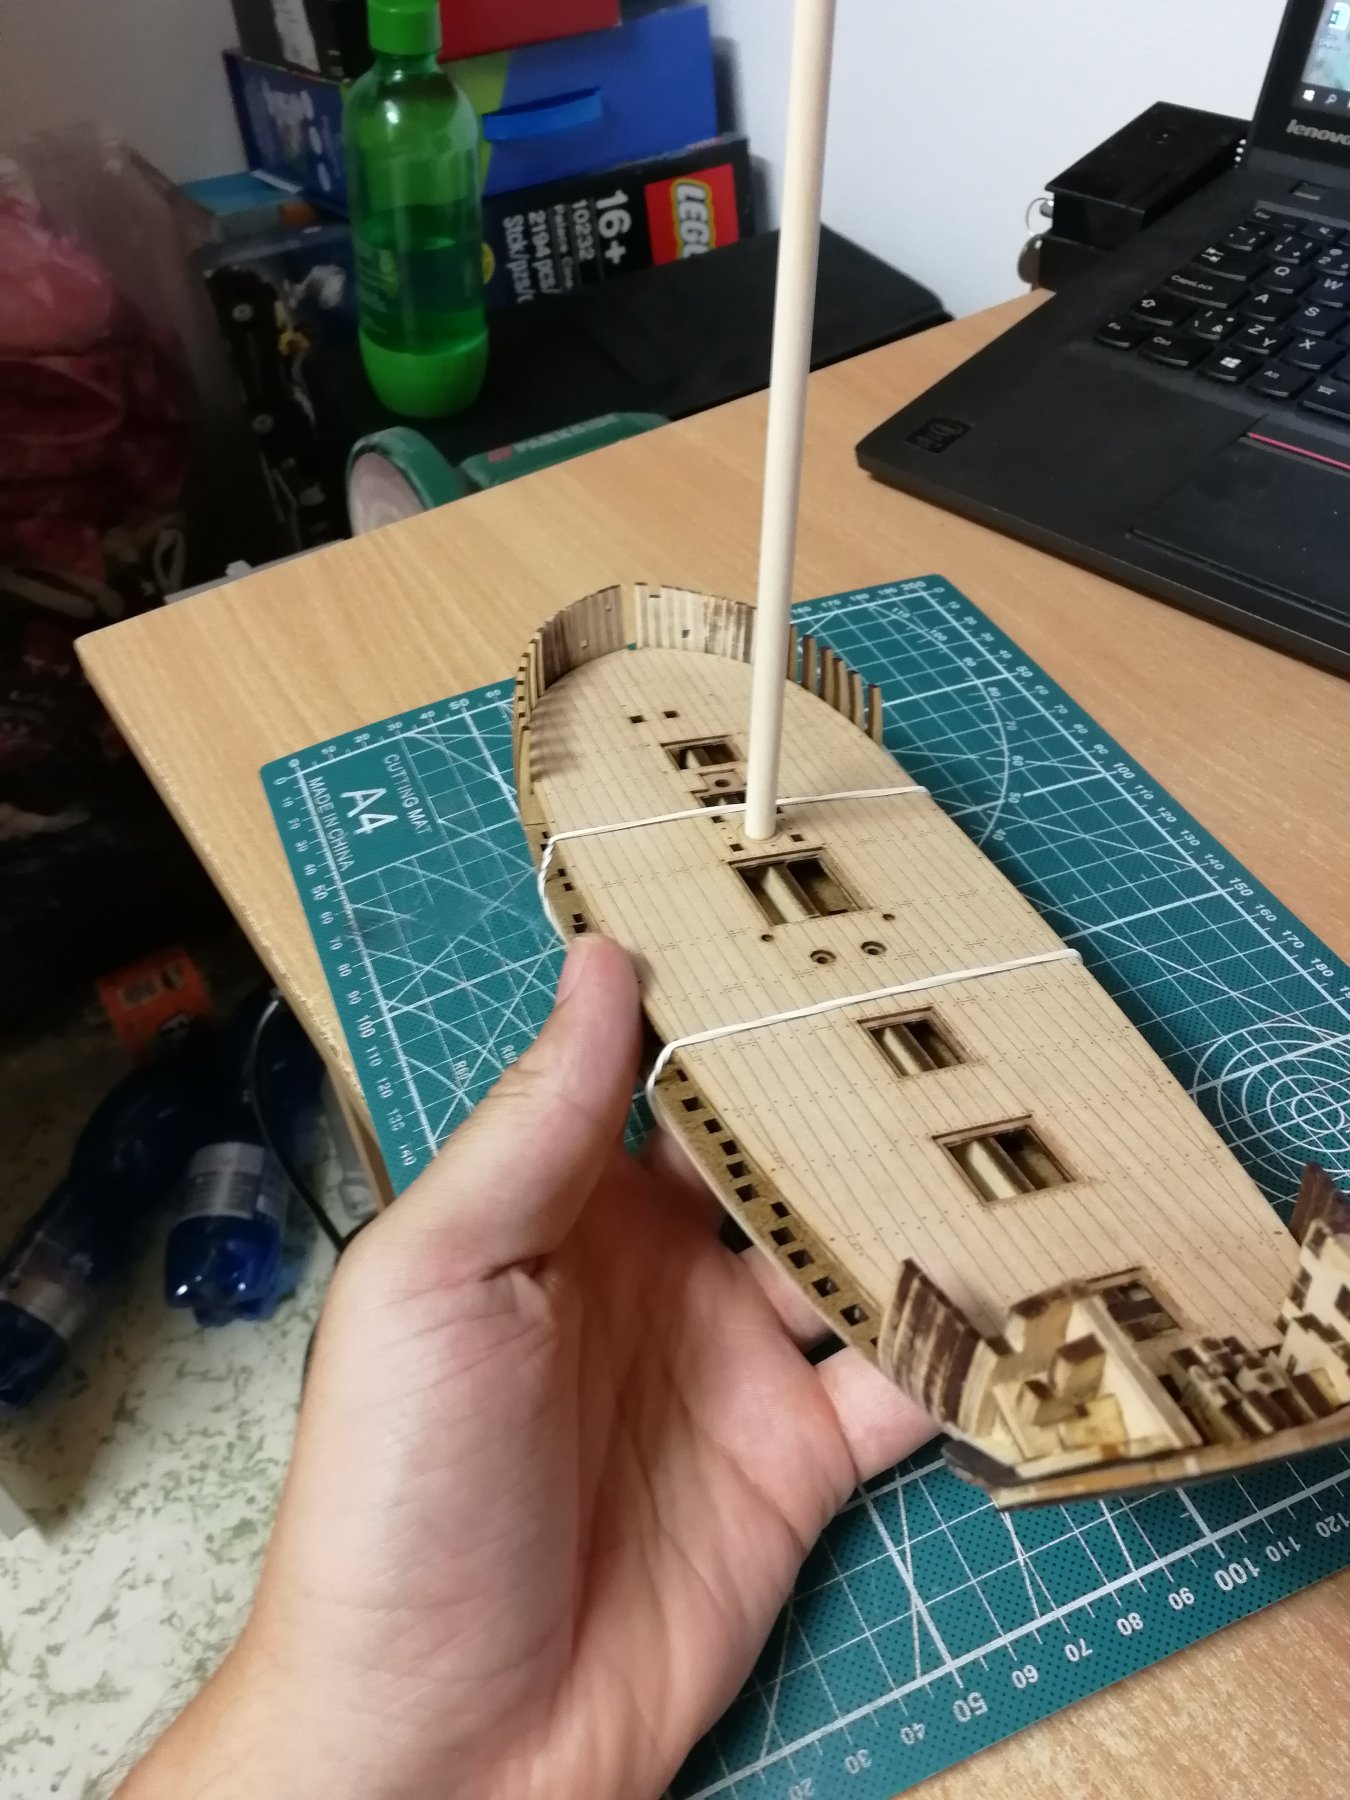
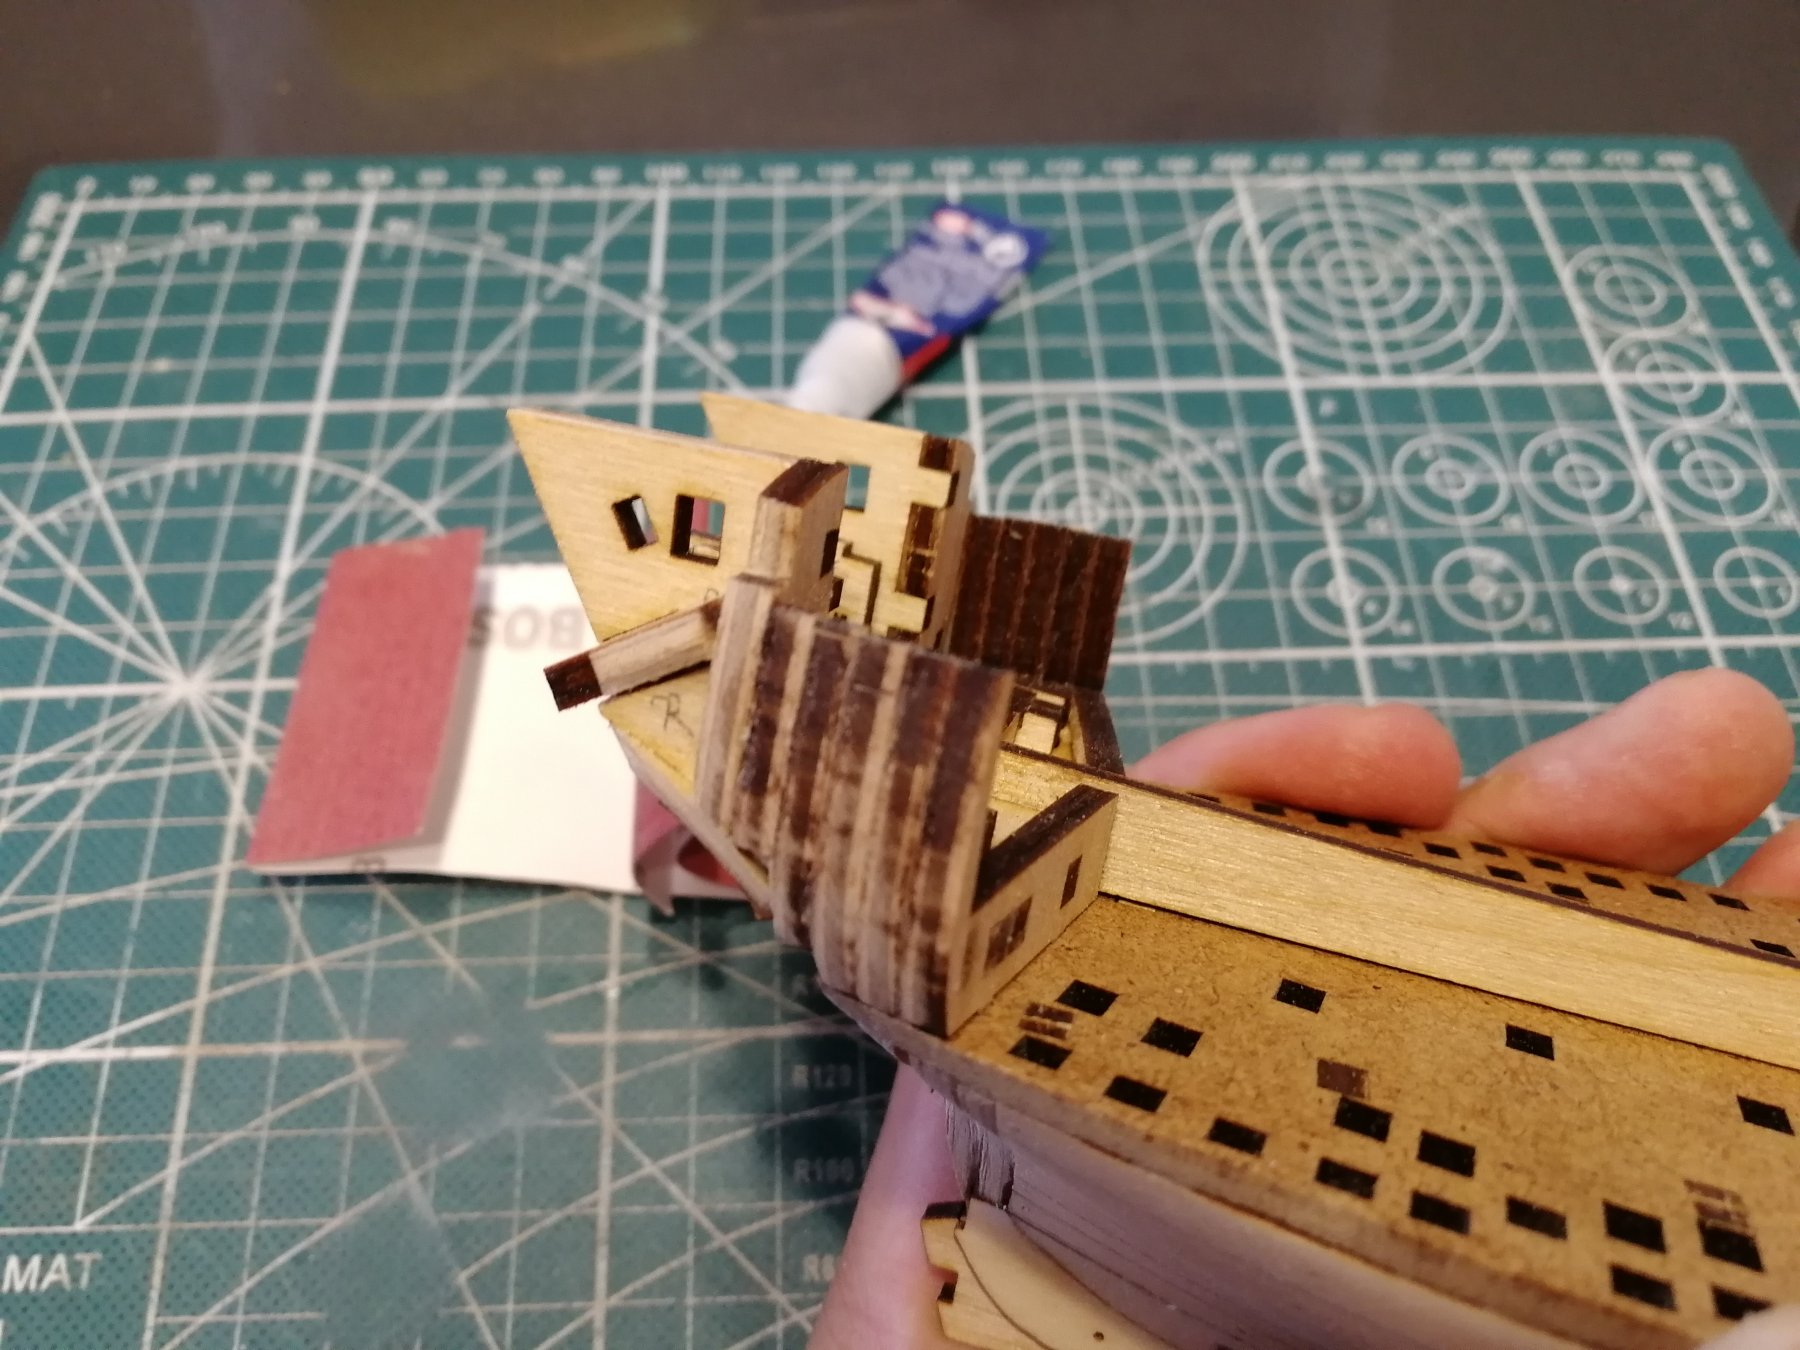
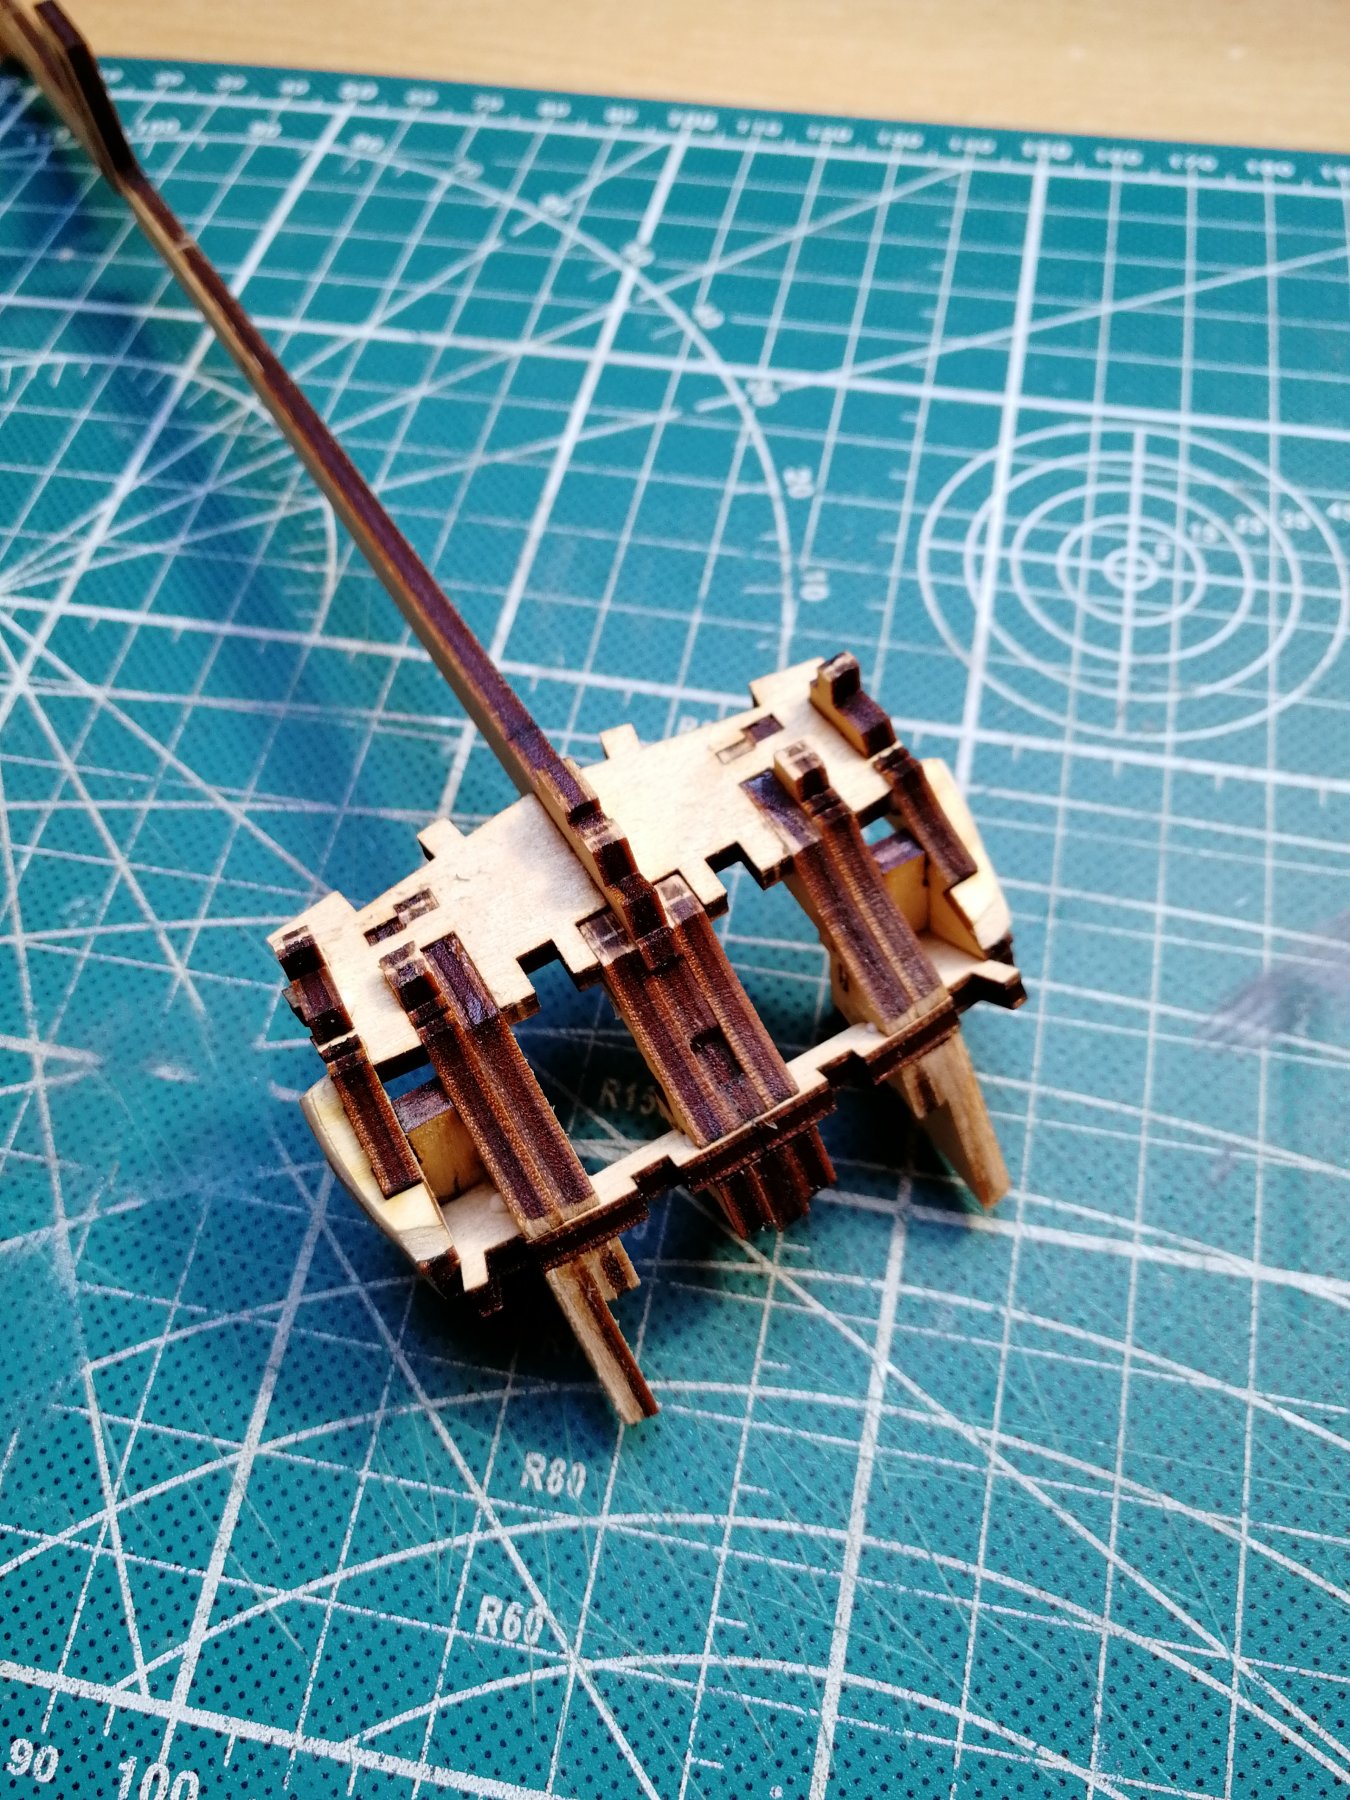
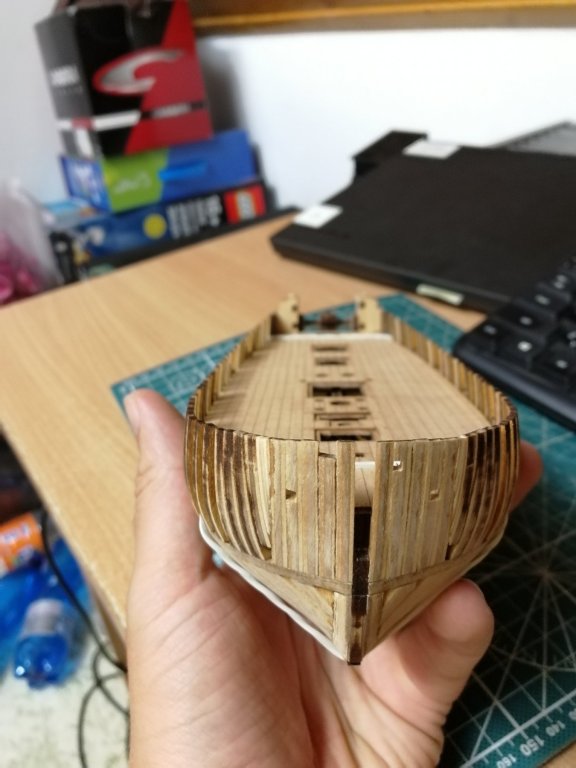
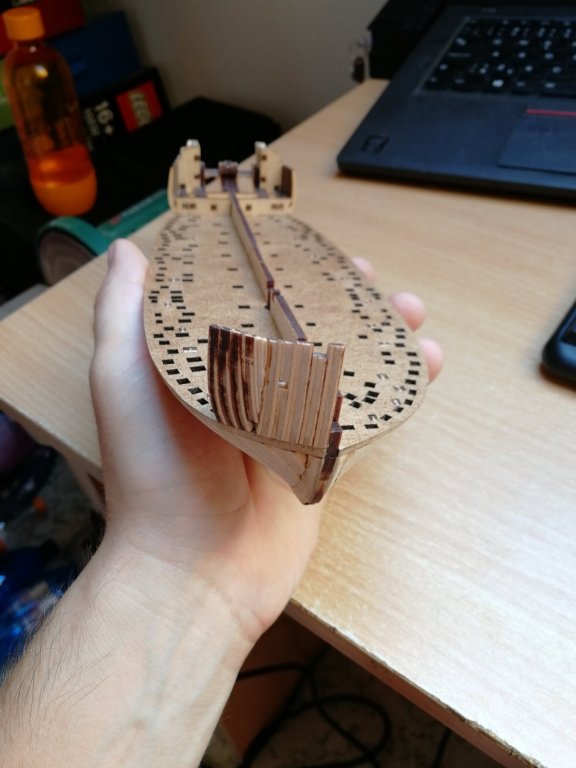
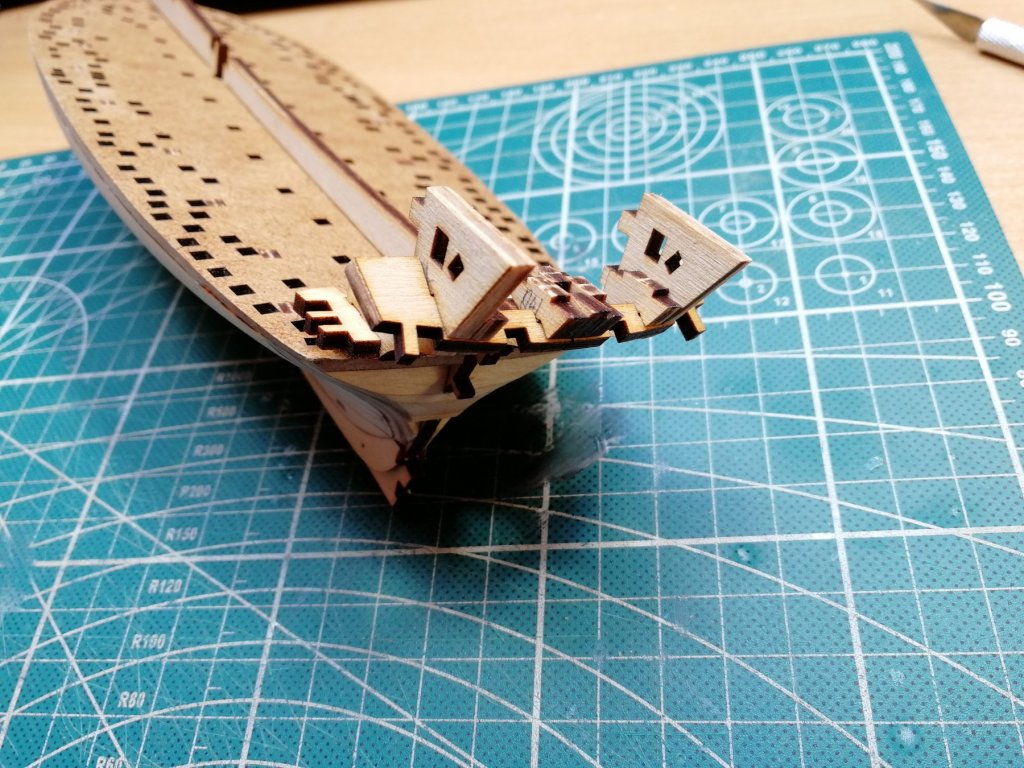
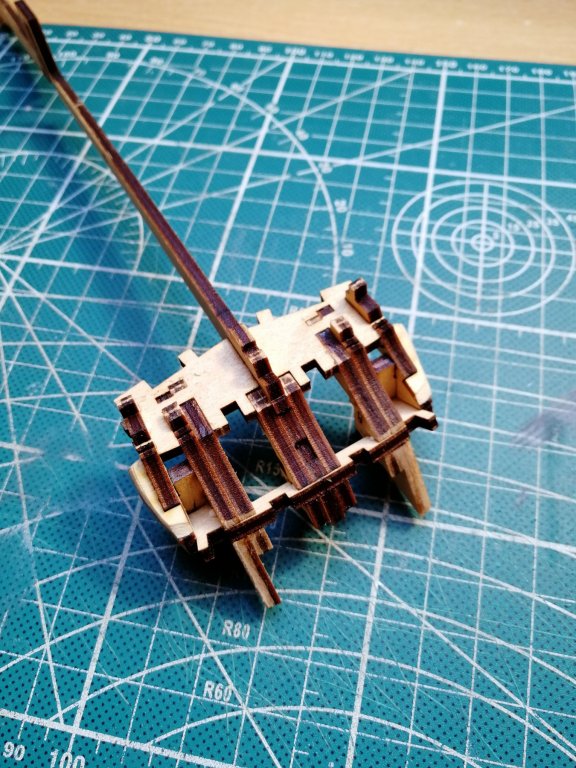
I see what you mean, loks like I glued the last timber little bit lower. But that should not be a big issue I hope. I can put there piece of plywood in case it will be necessary. Thanks for the note! Progressing with the stern. This one was tricky to fix the correct bended shape. I love how the pear wood works together with Black wood.
- 315 replies
-
- 11
-
-
- master korabel
- avos
- (and 1 more)
-
I think it is solved. It both (doors and timber) needed a small alignment. Thanks a lot pointing it out before it was late! 👍

- 315 replies
-
- 7
-
-
- master korabel
- avos
- (and 1 more)
-
Hmmmm..... Will double check that. I have noticed the Gap when I assembled that but I thought that it is ok. Not sure what is wrong 🤔
- 315 replies
-
- 2
-
-
- master korabel
- avos
- (and 1 more)
-
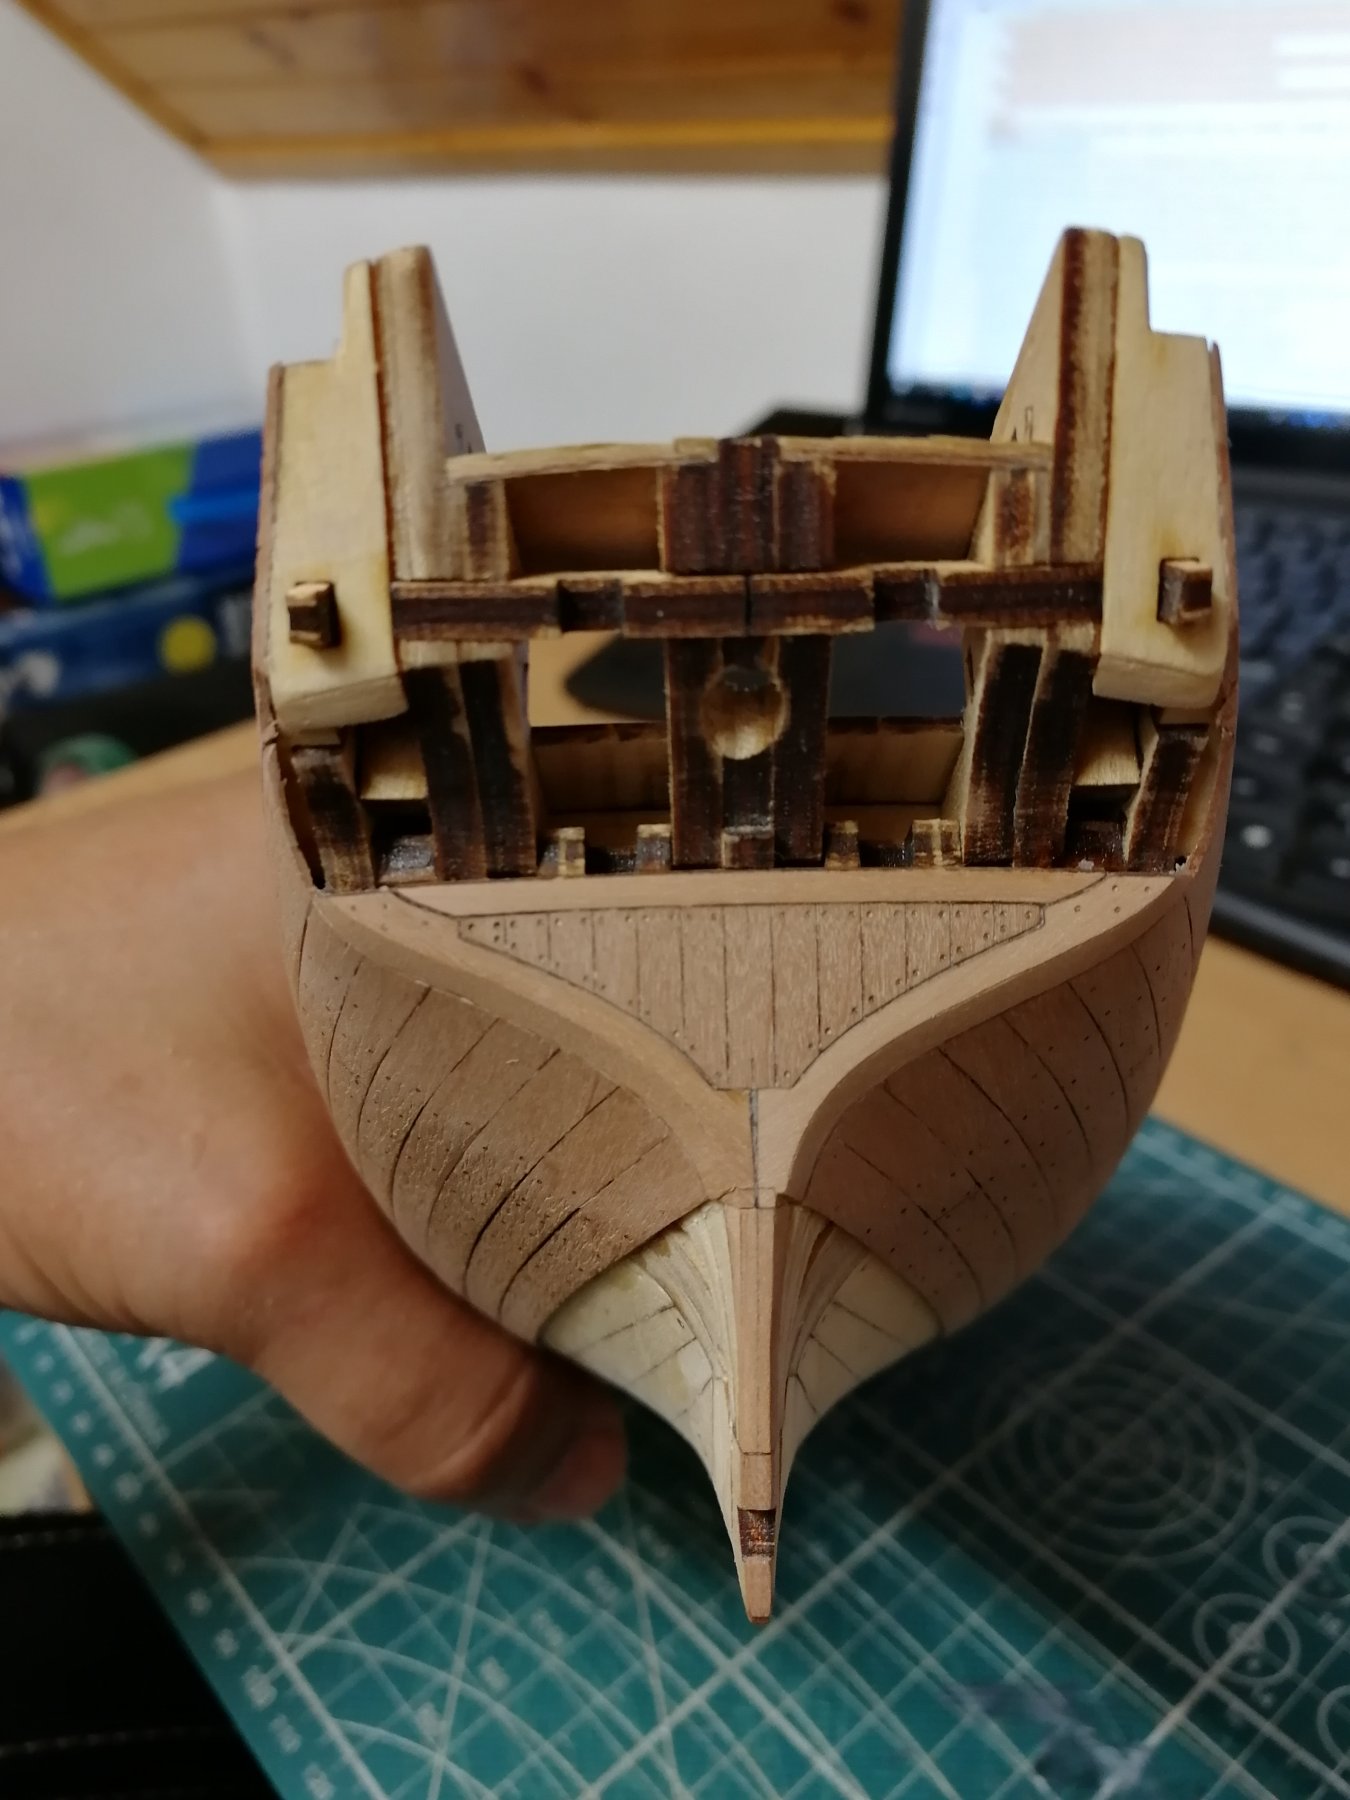
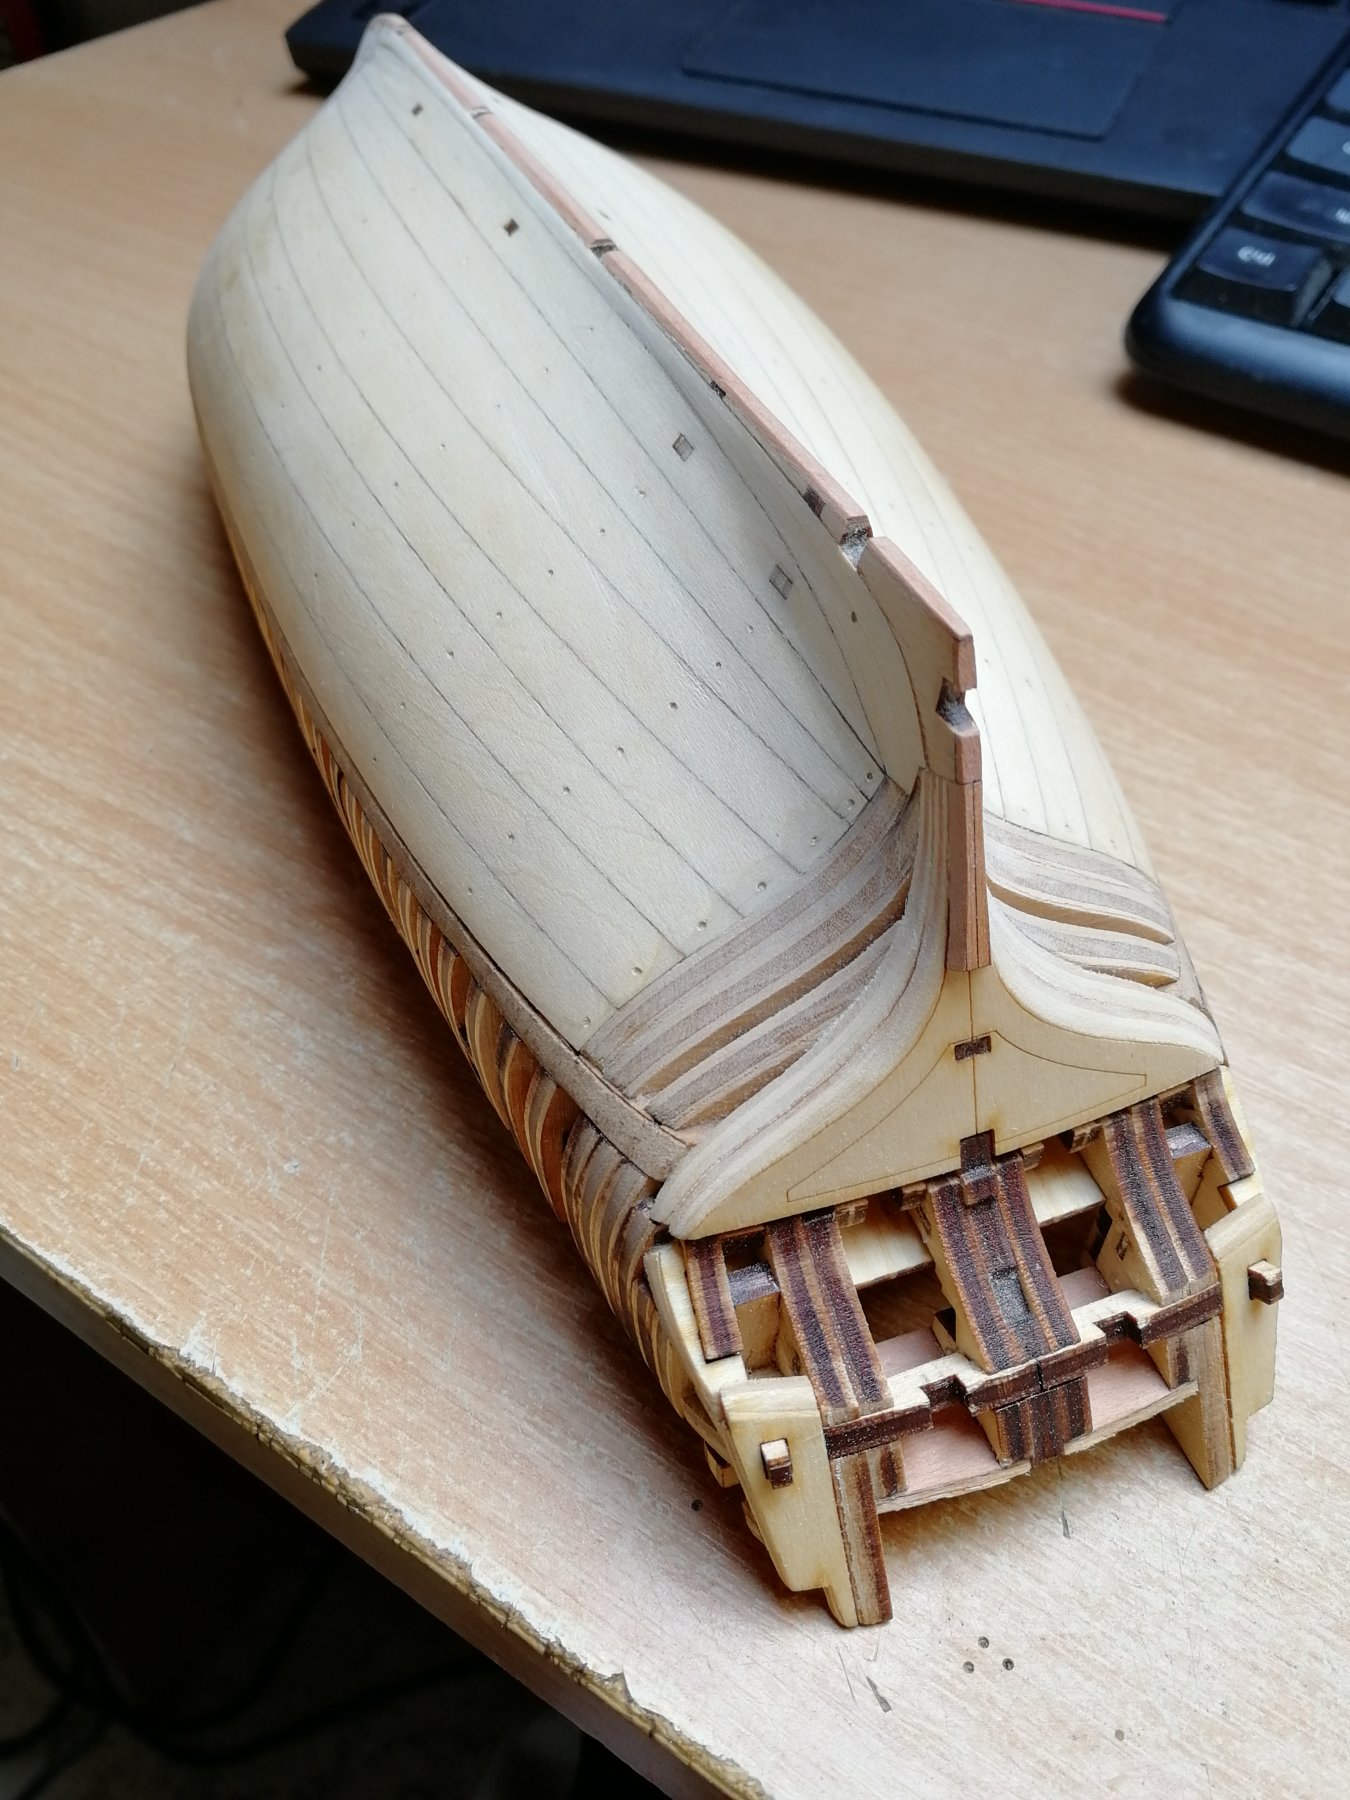
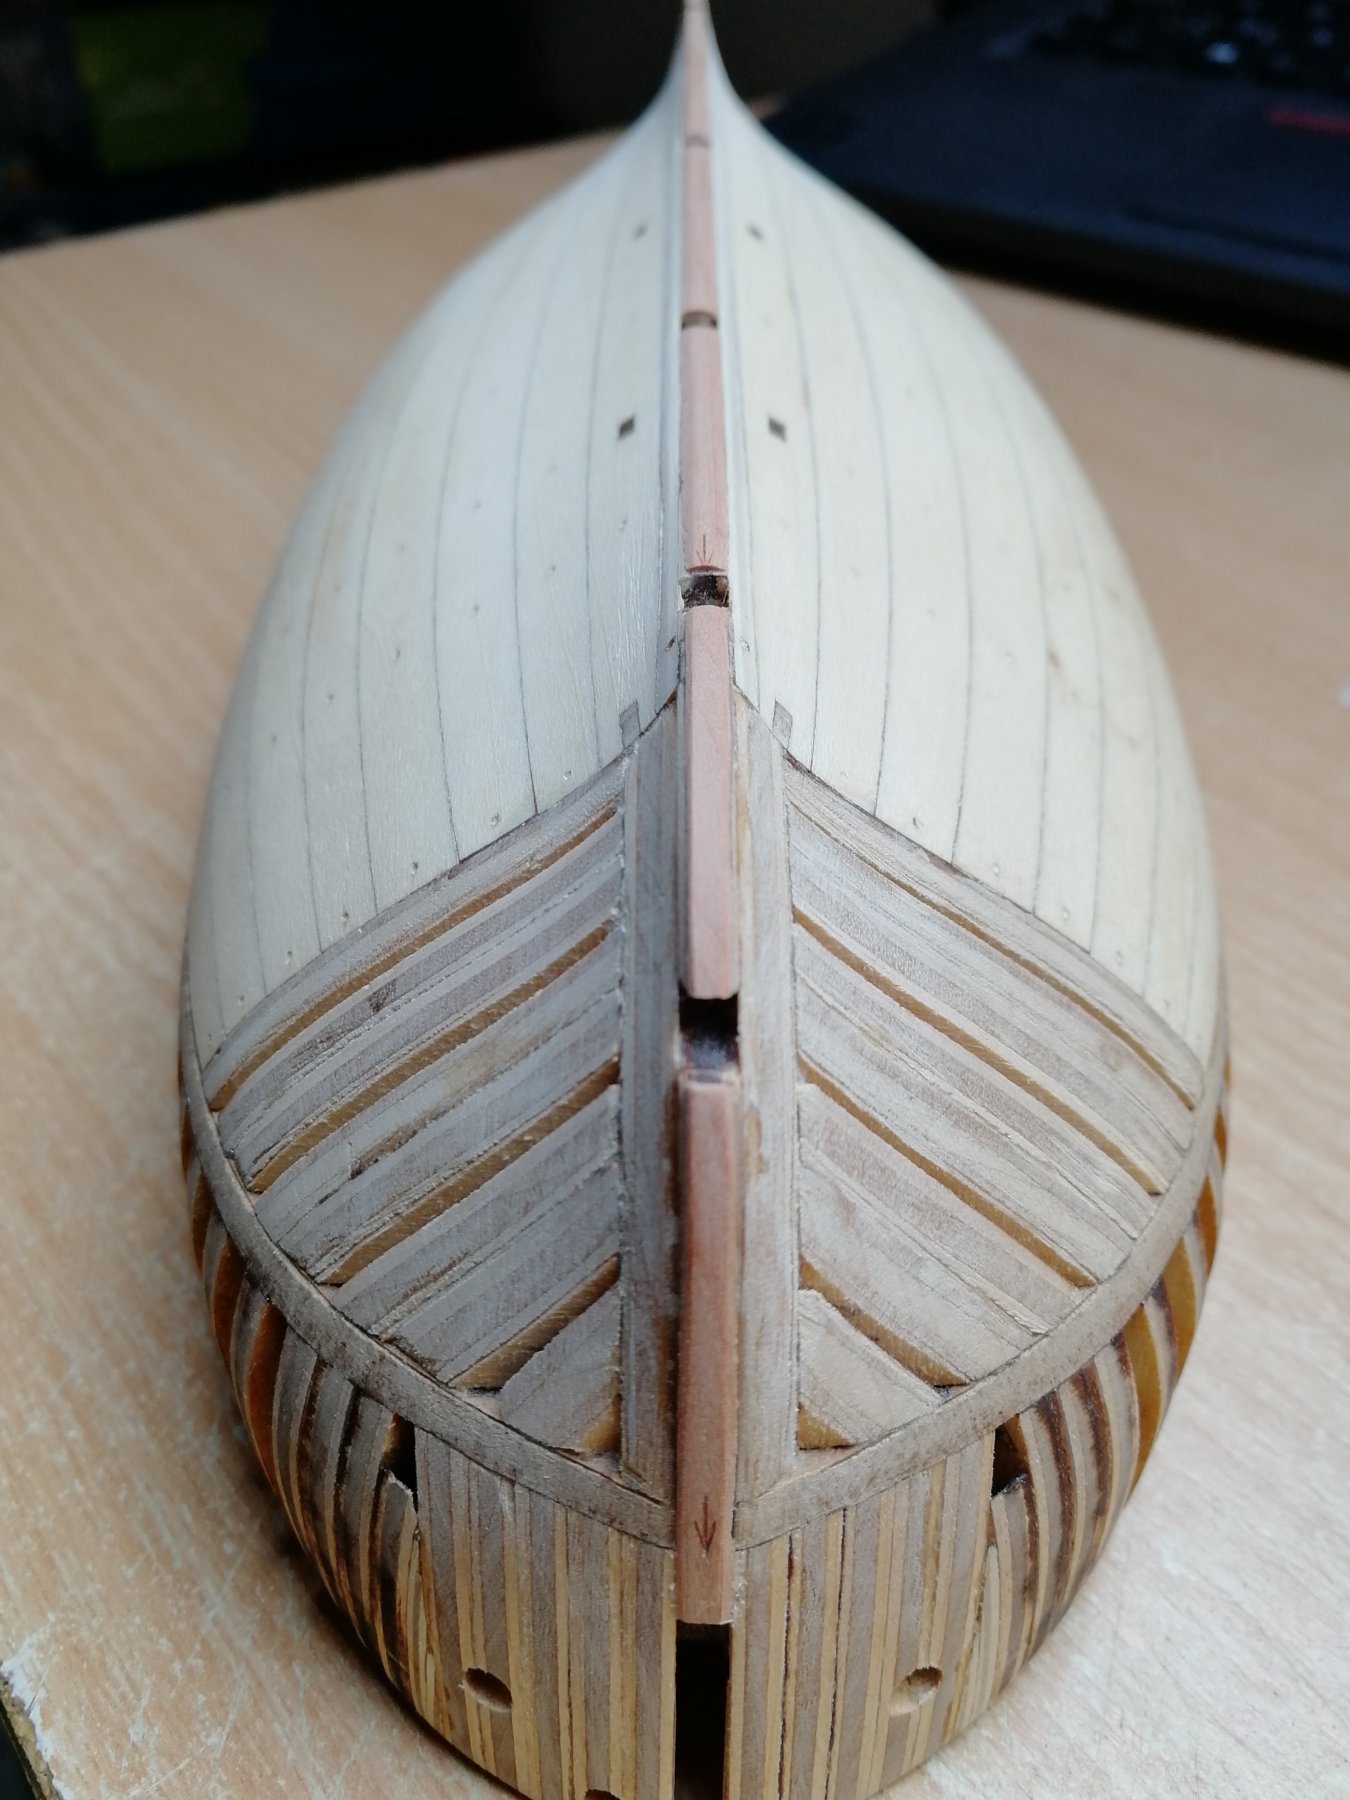
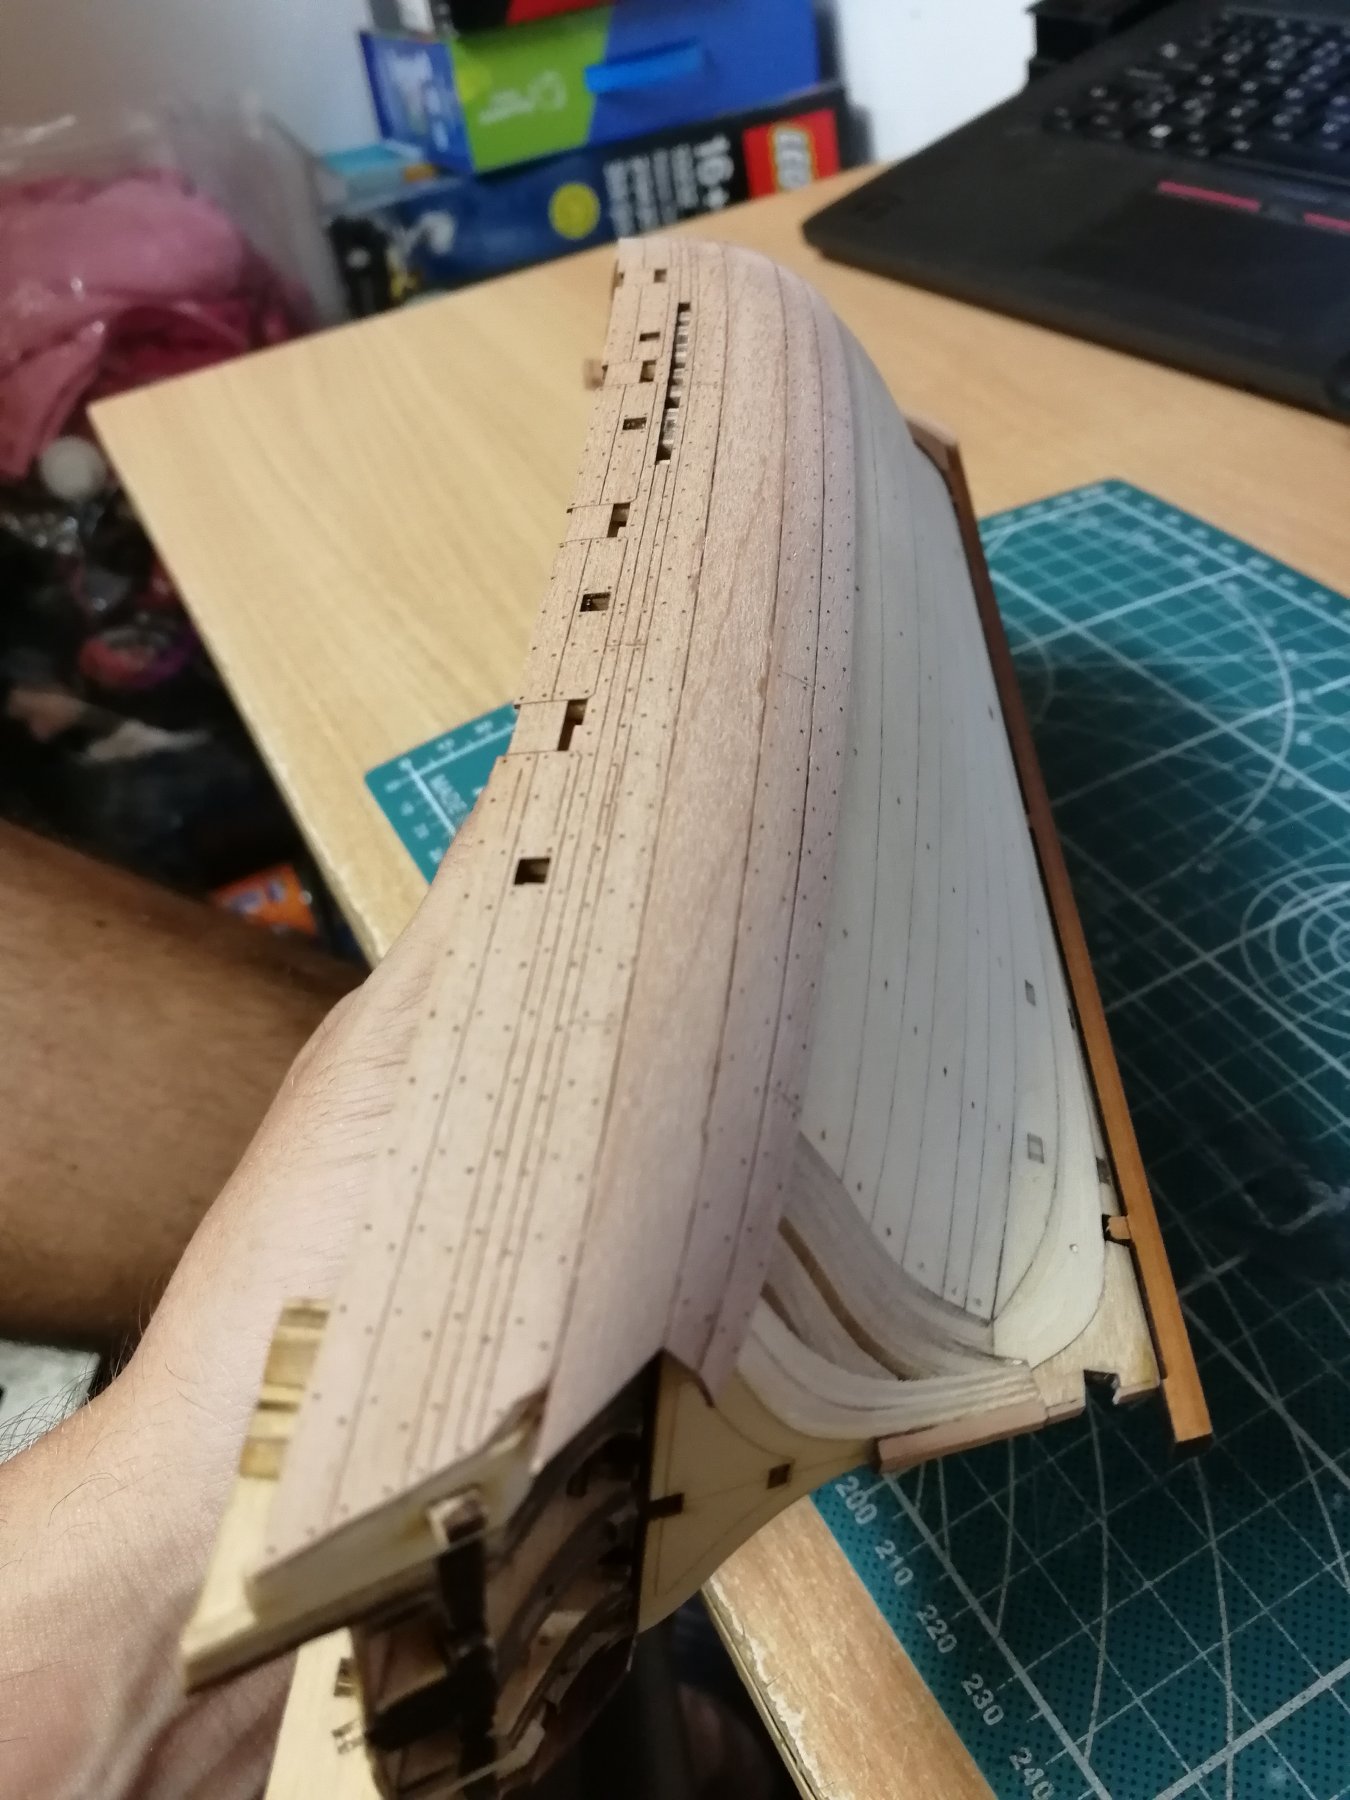
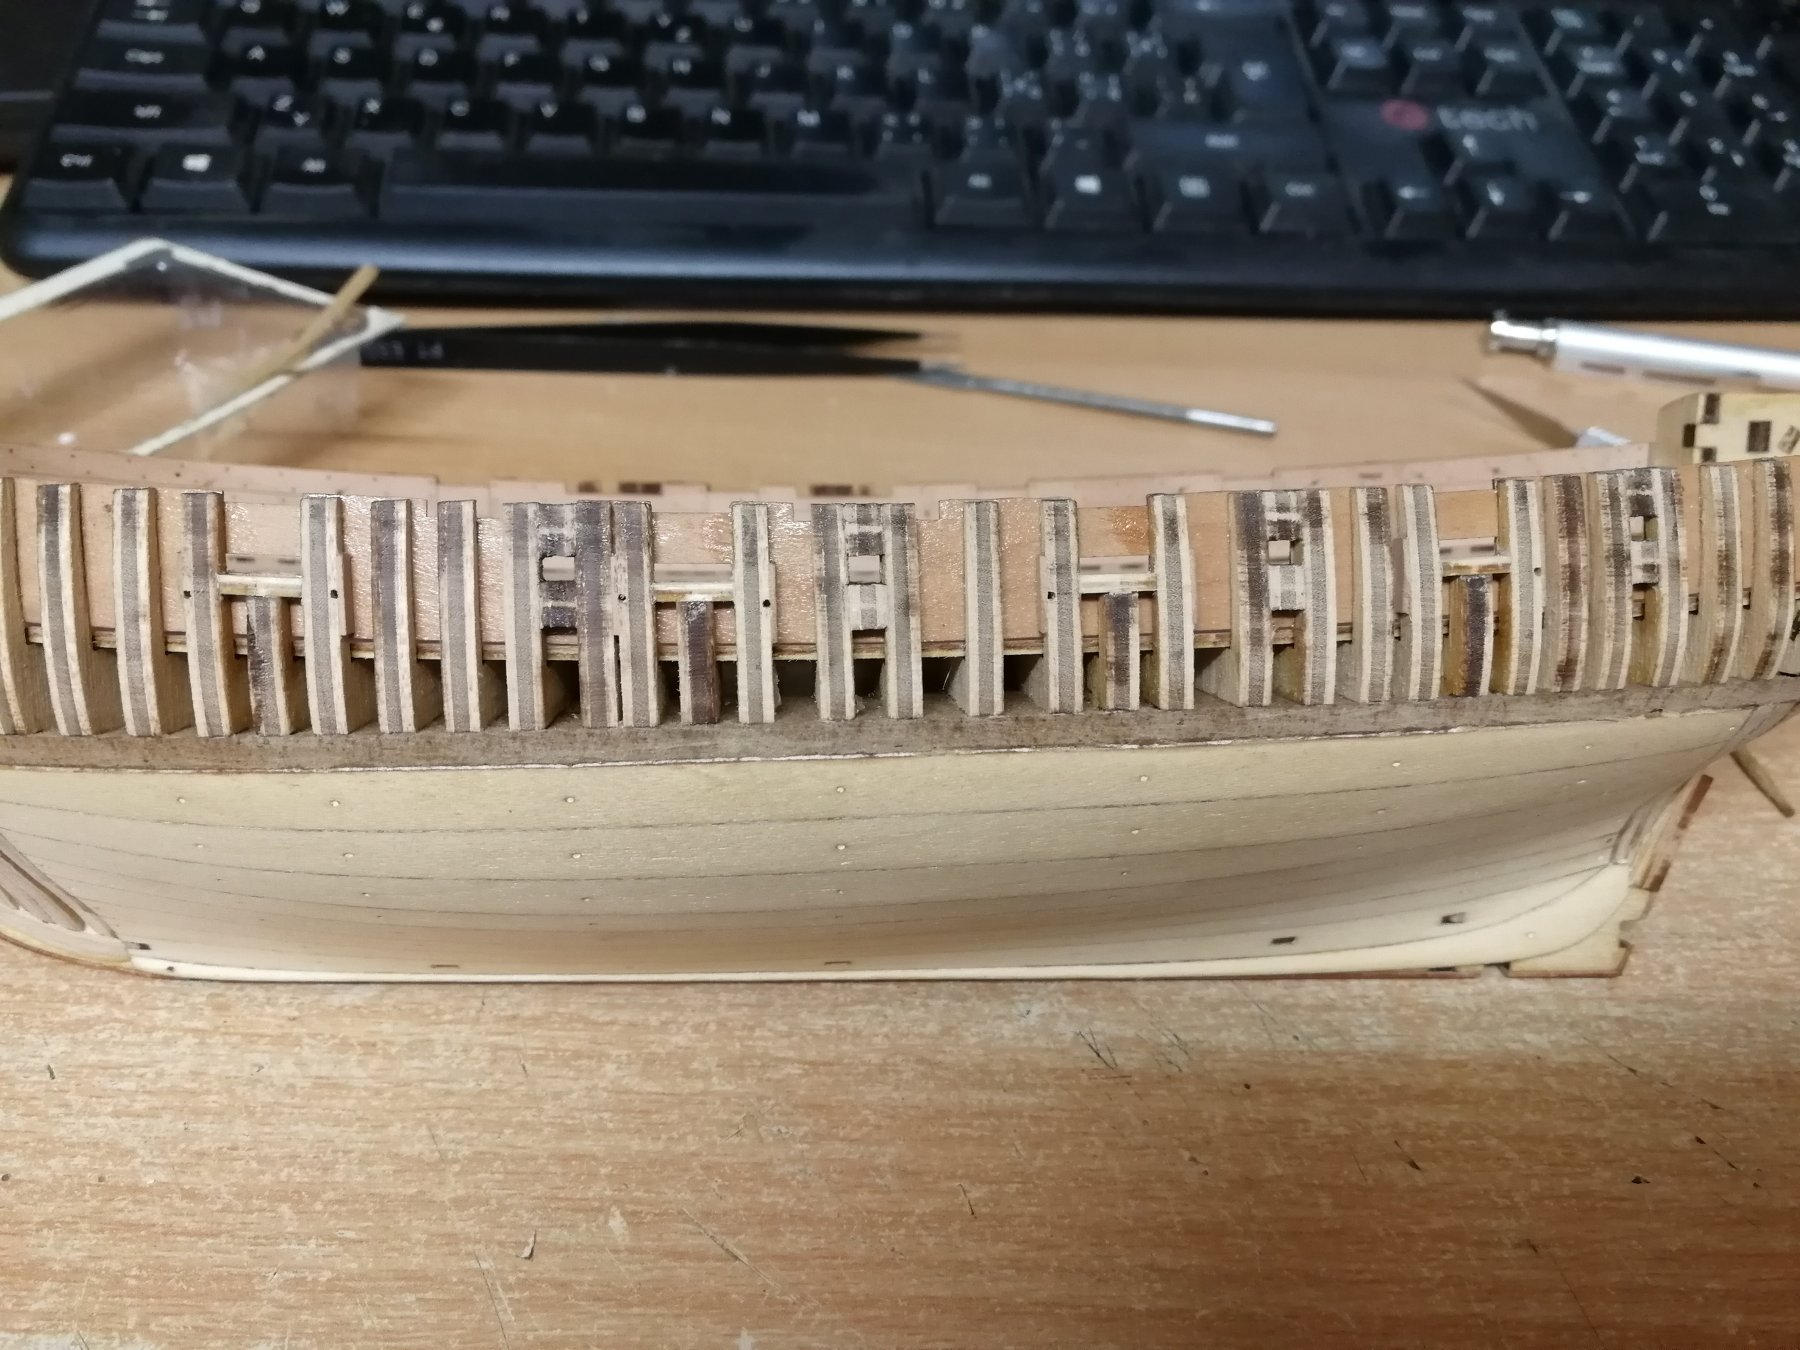
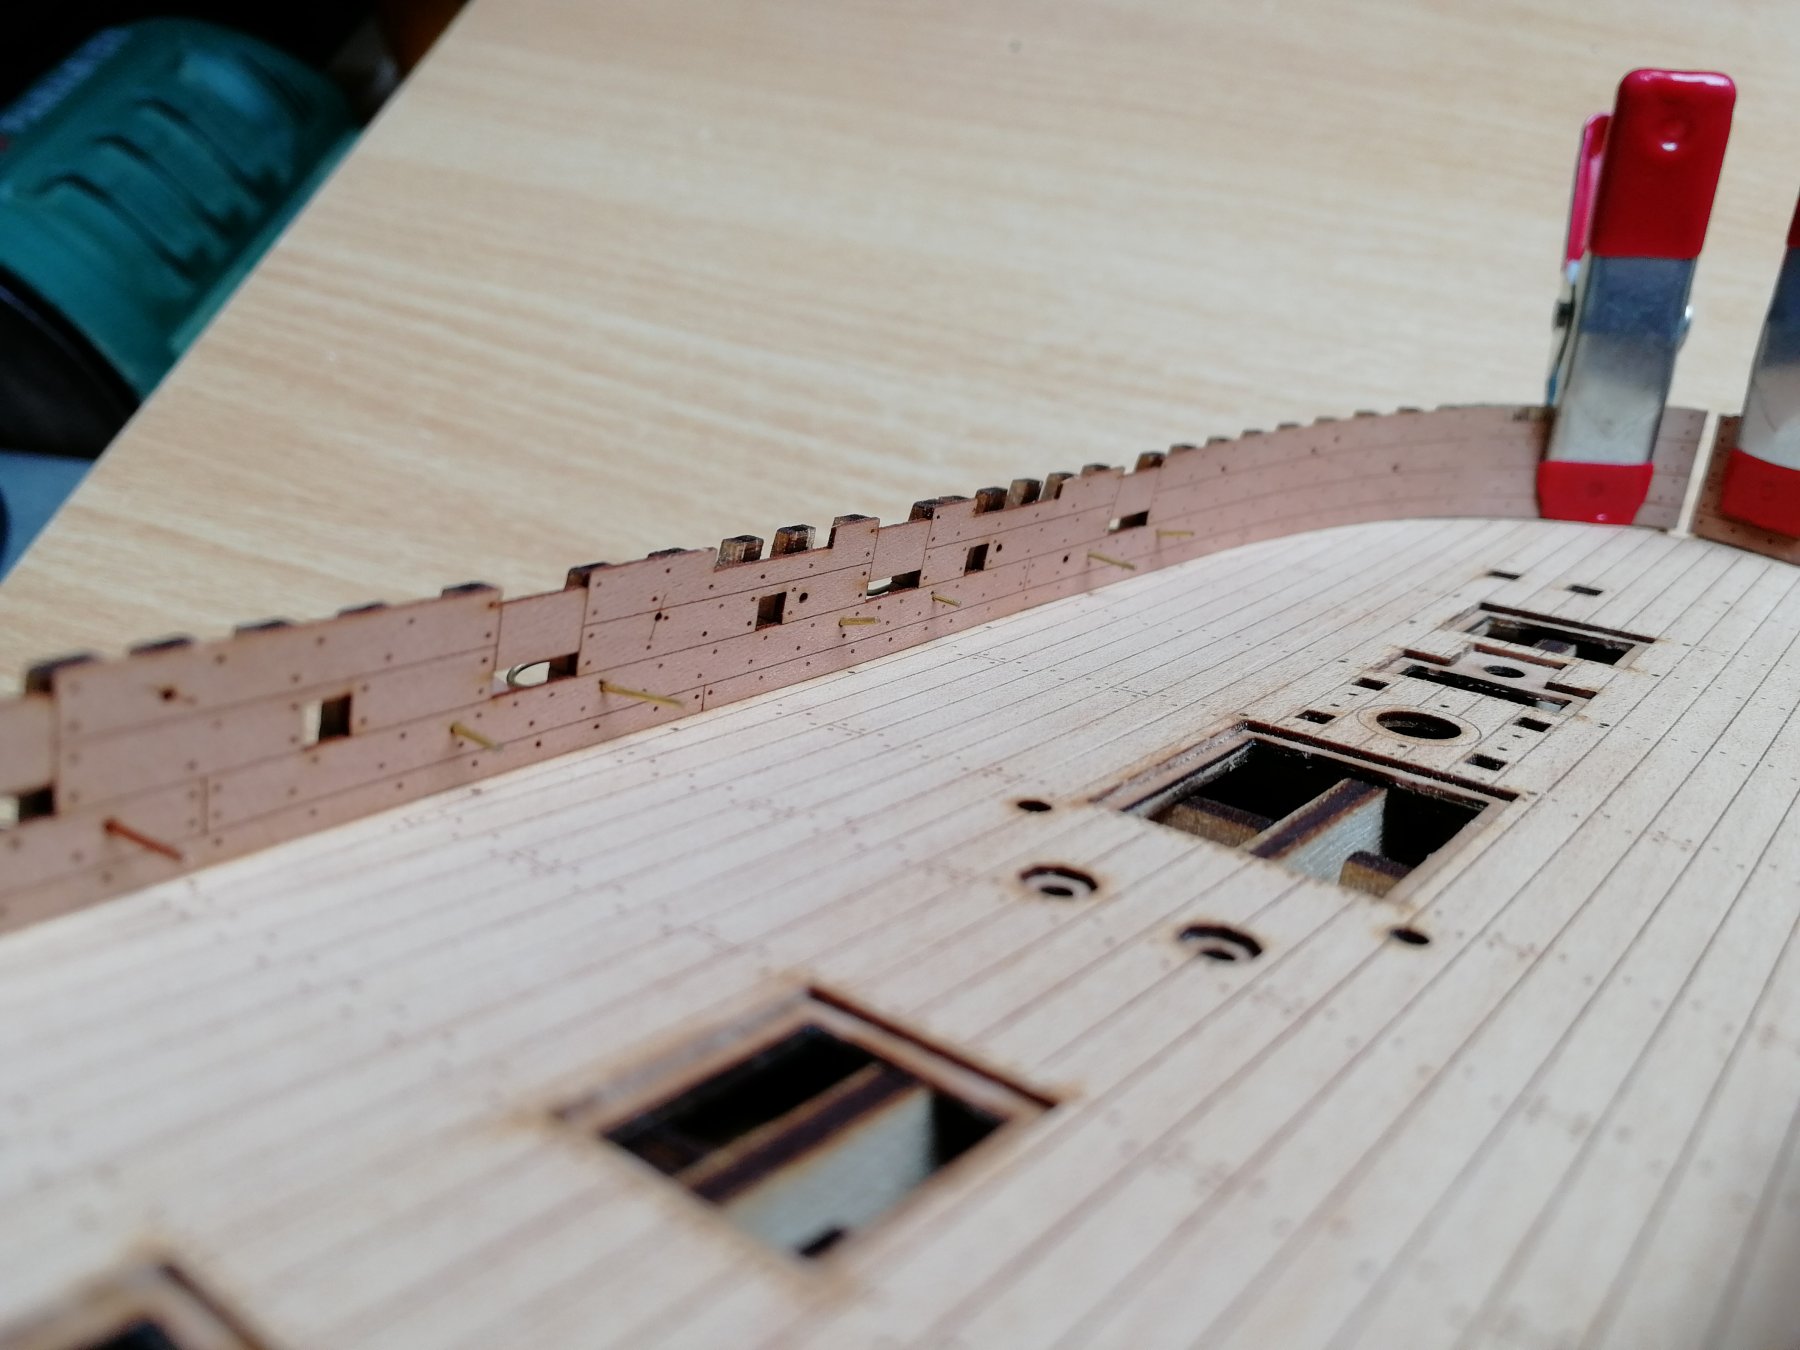
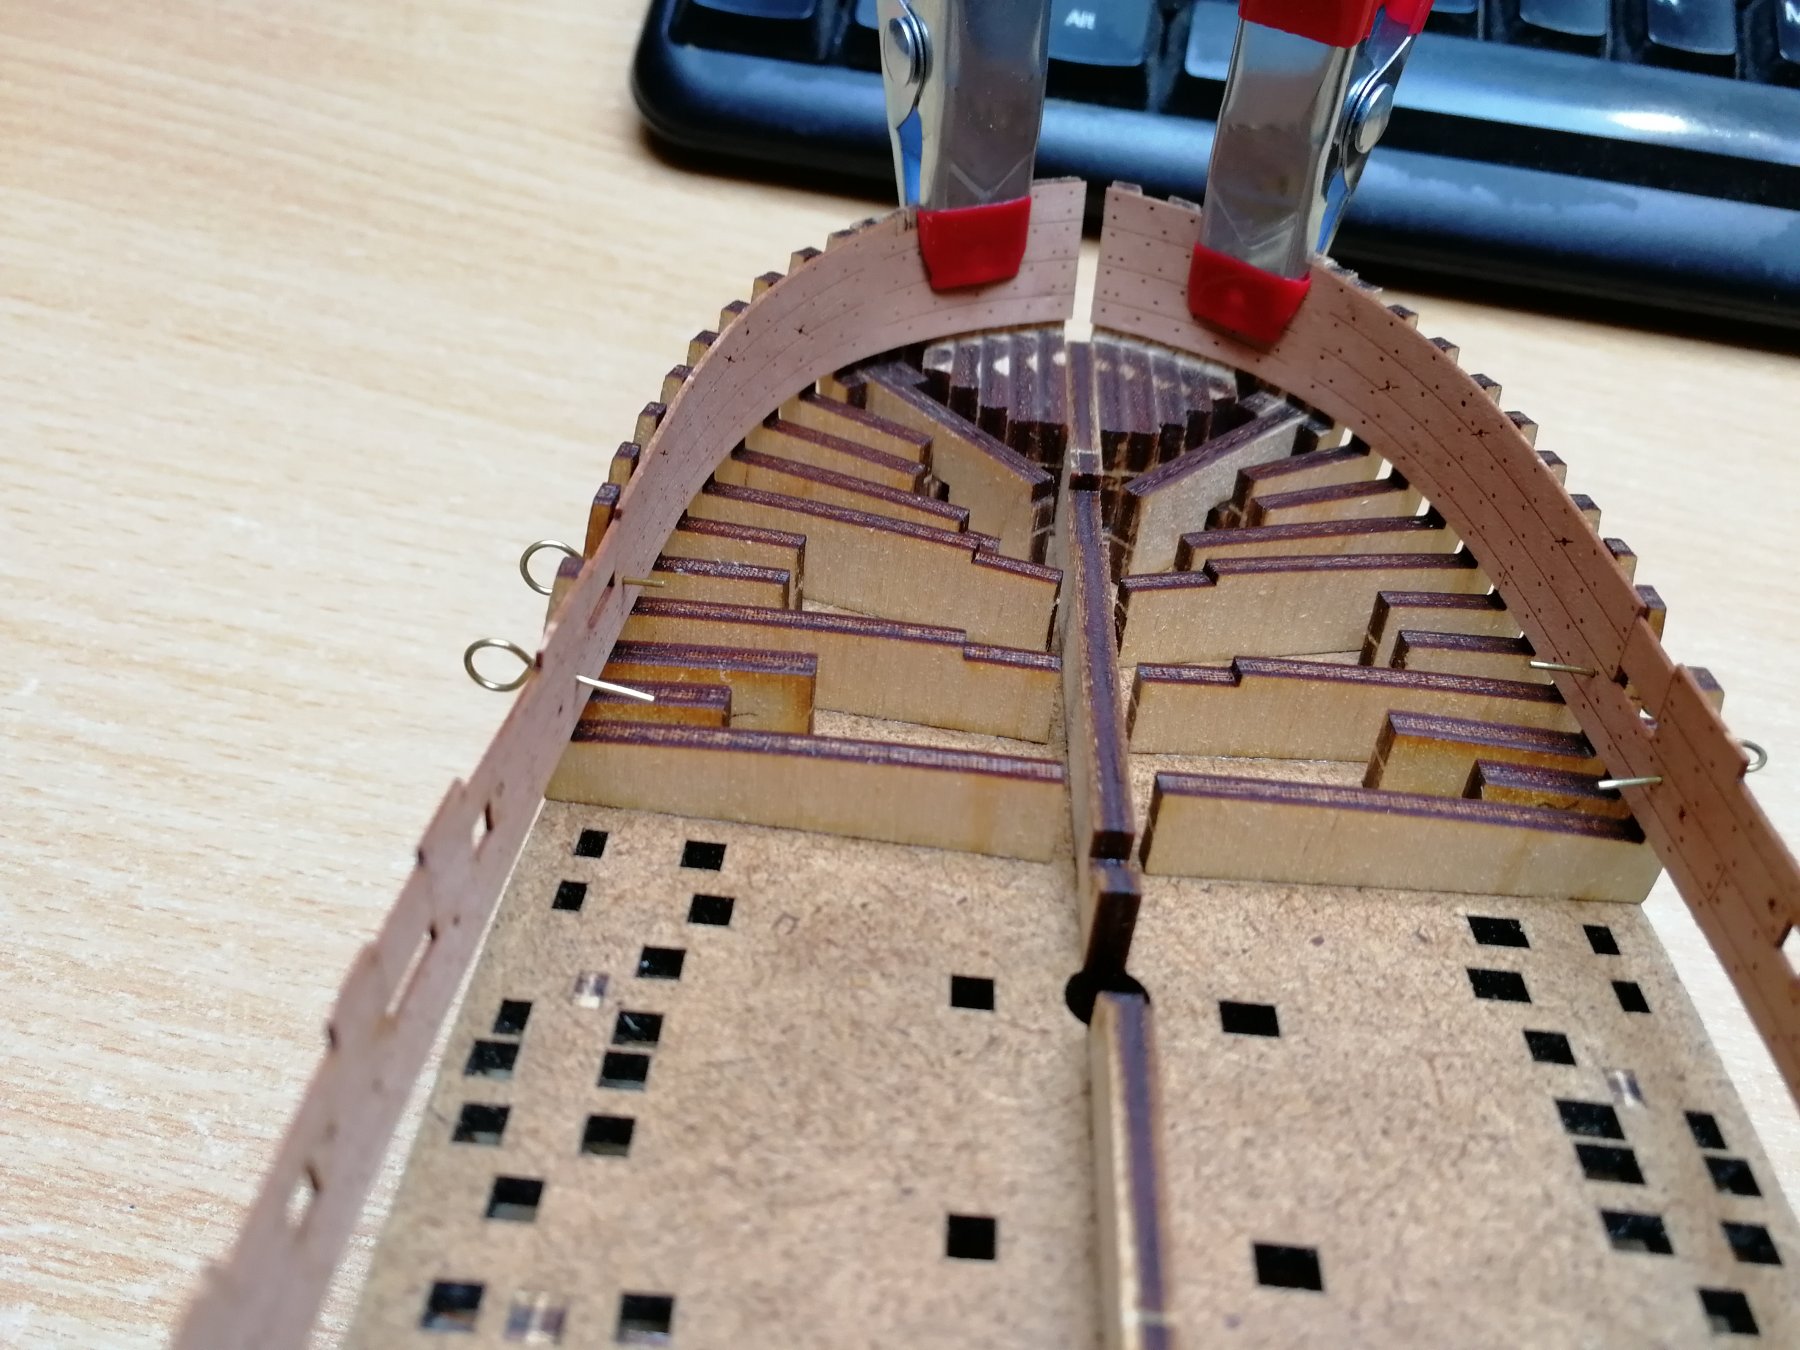
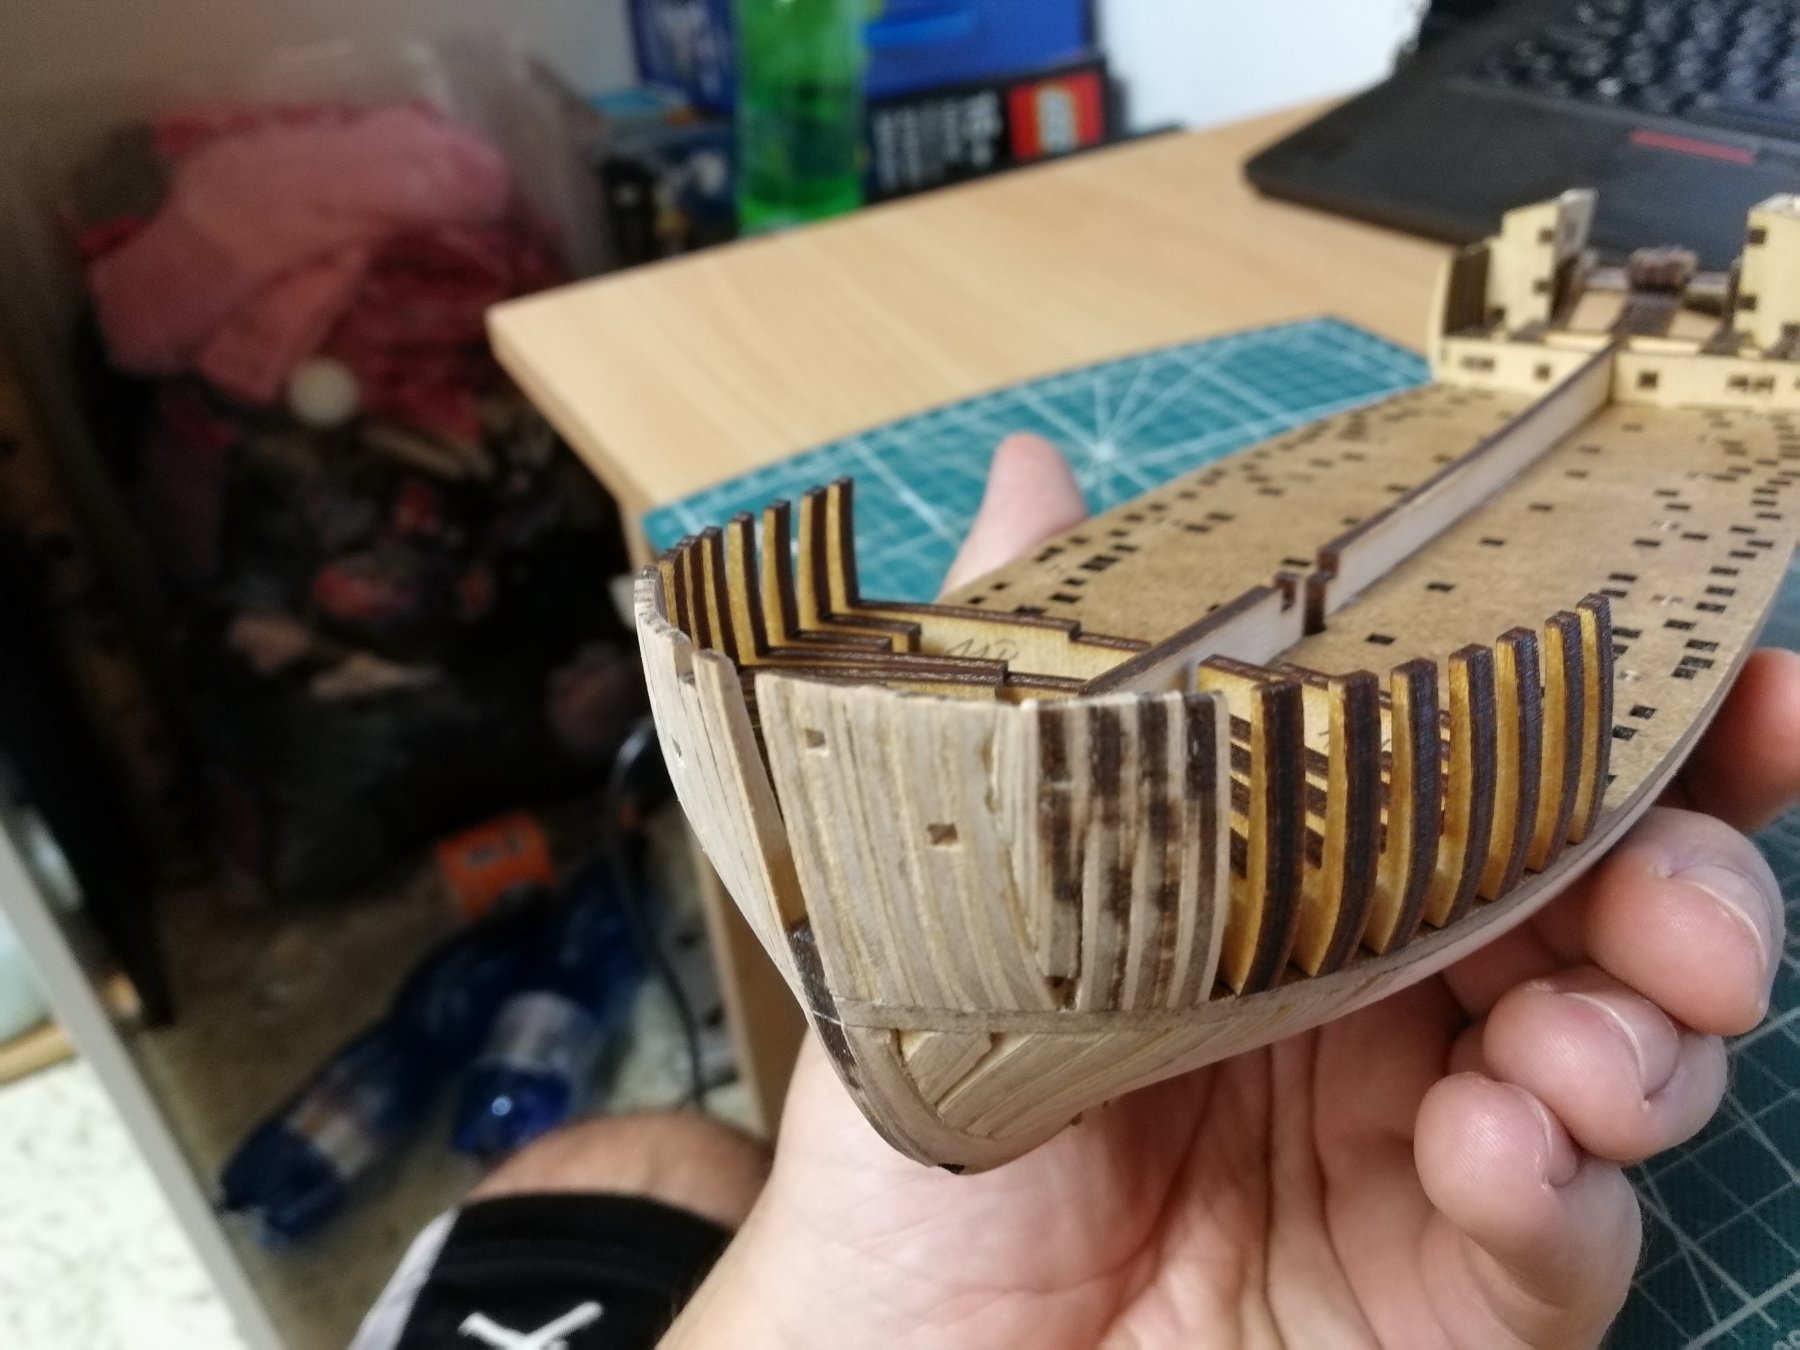
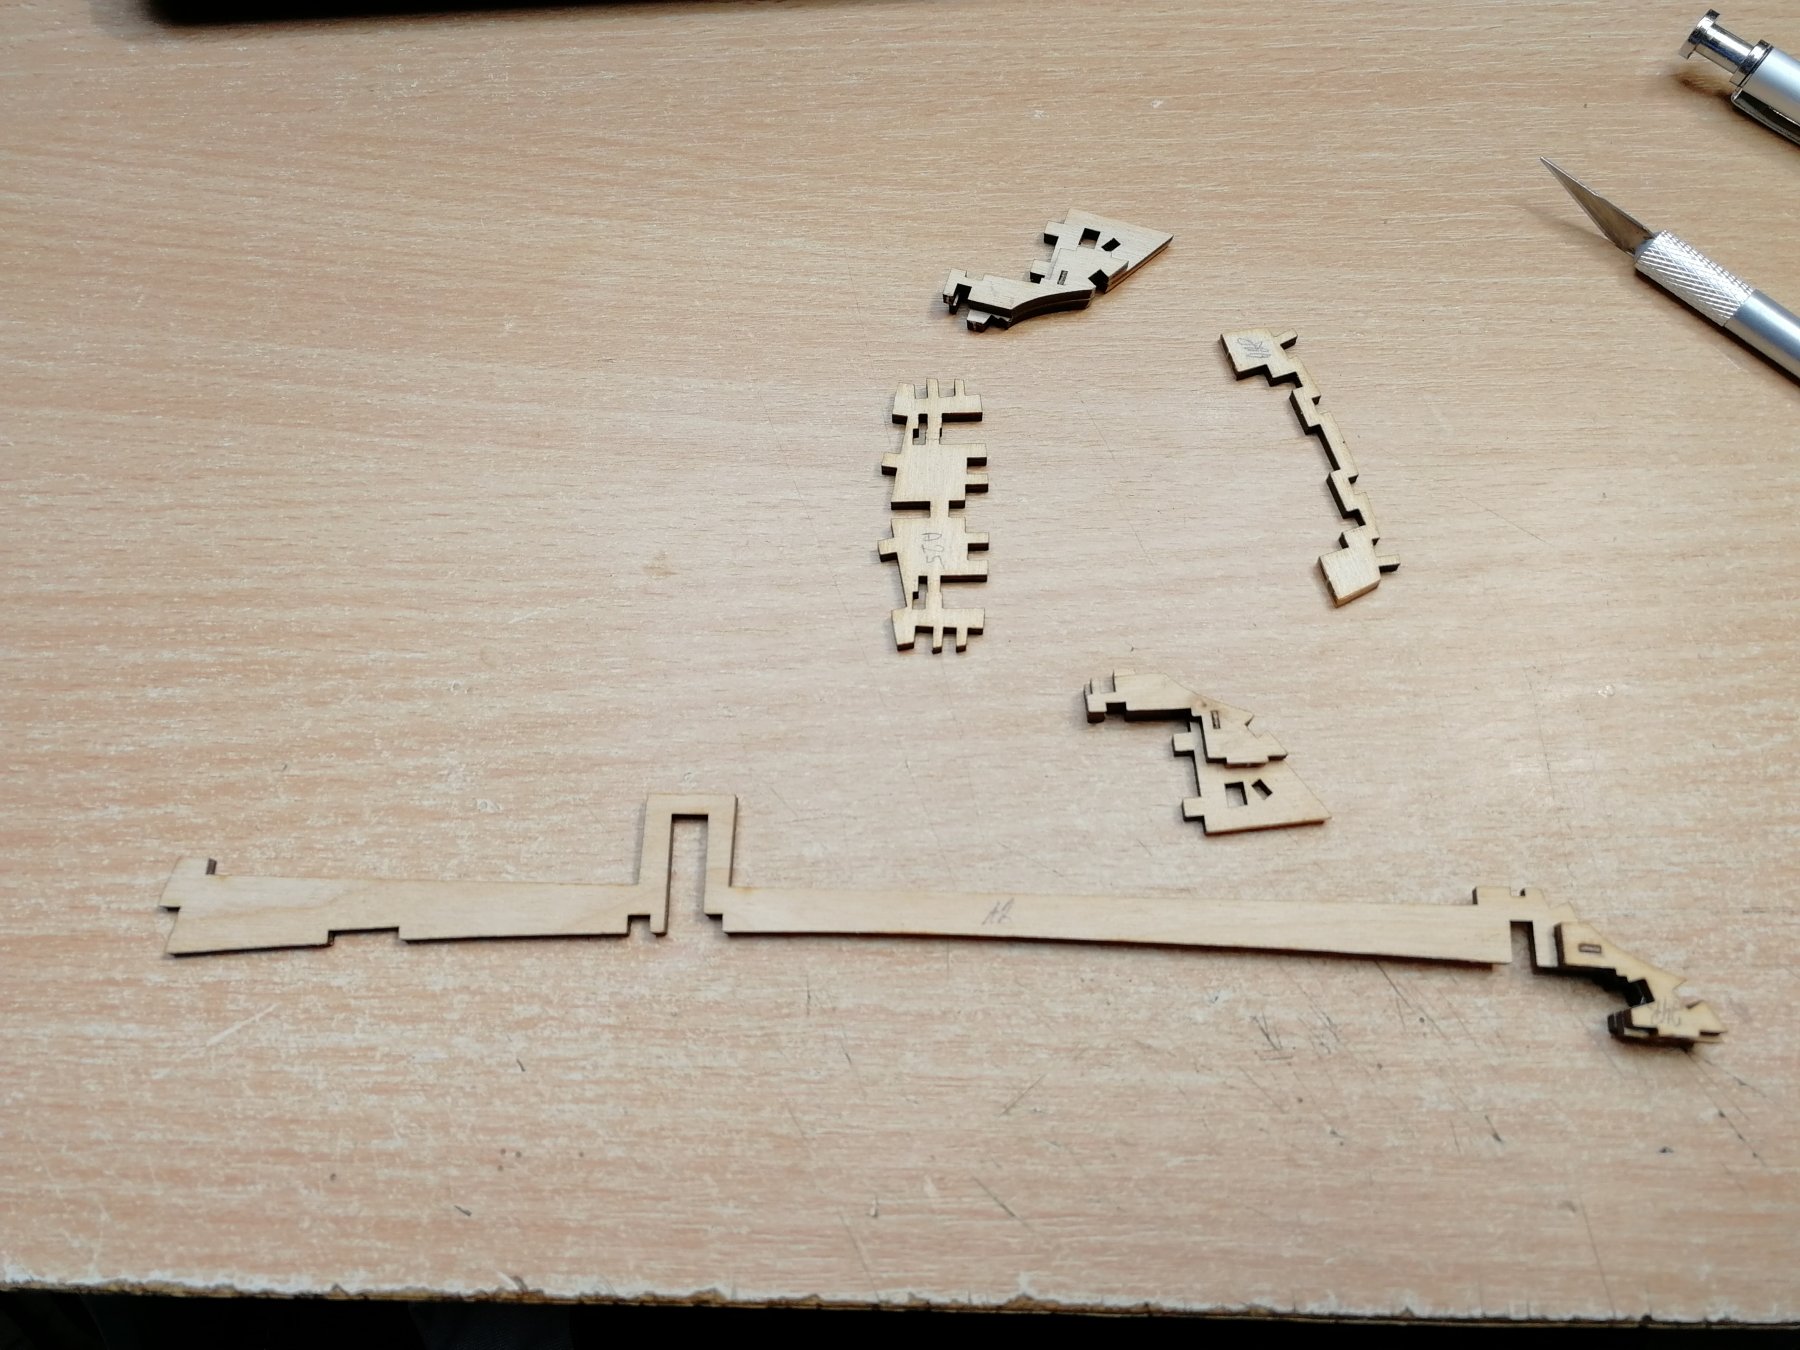
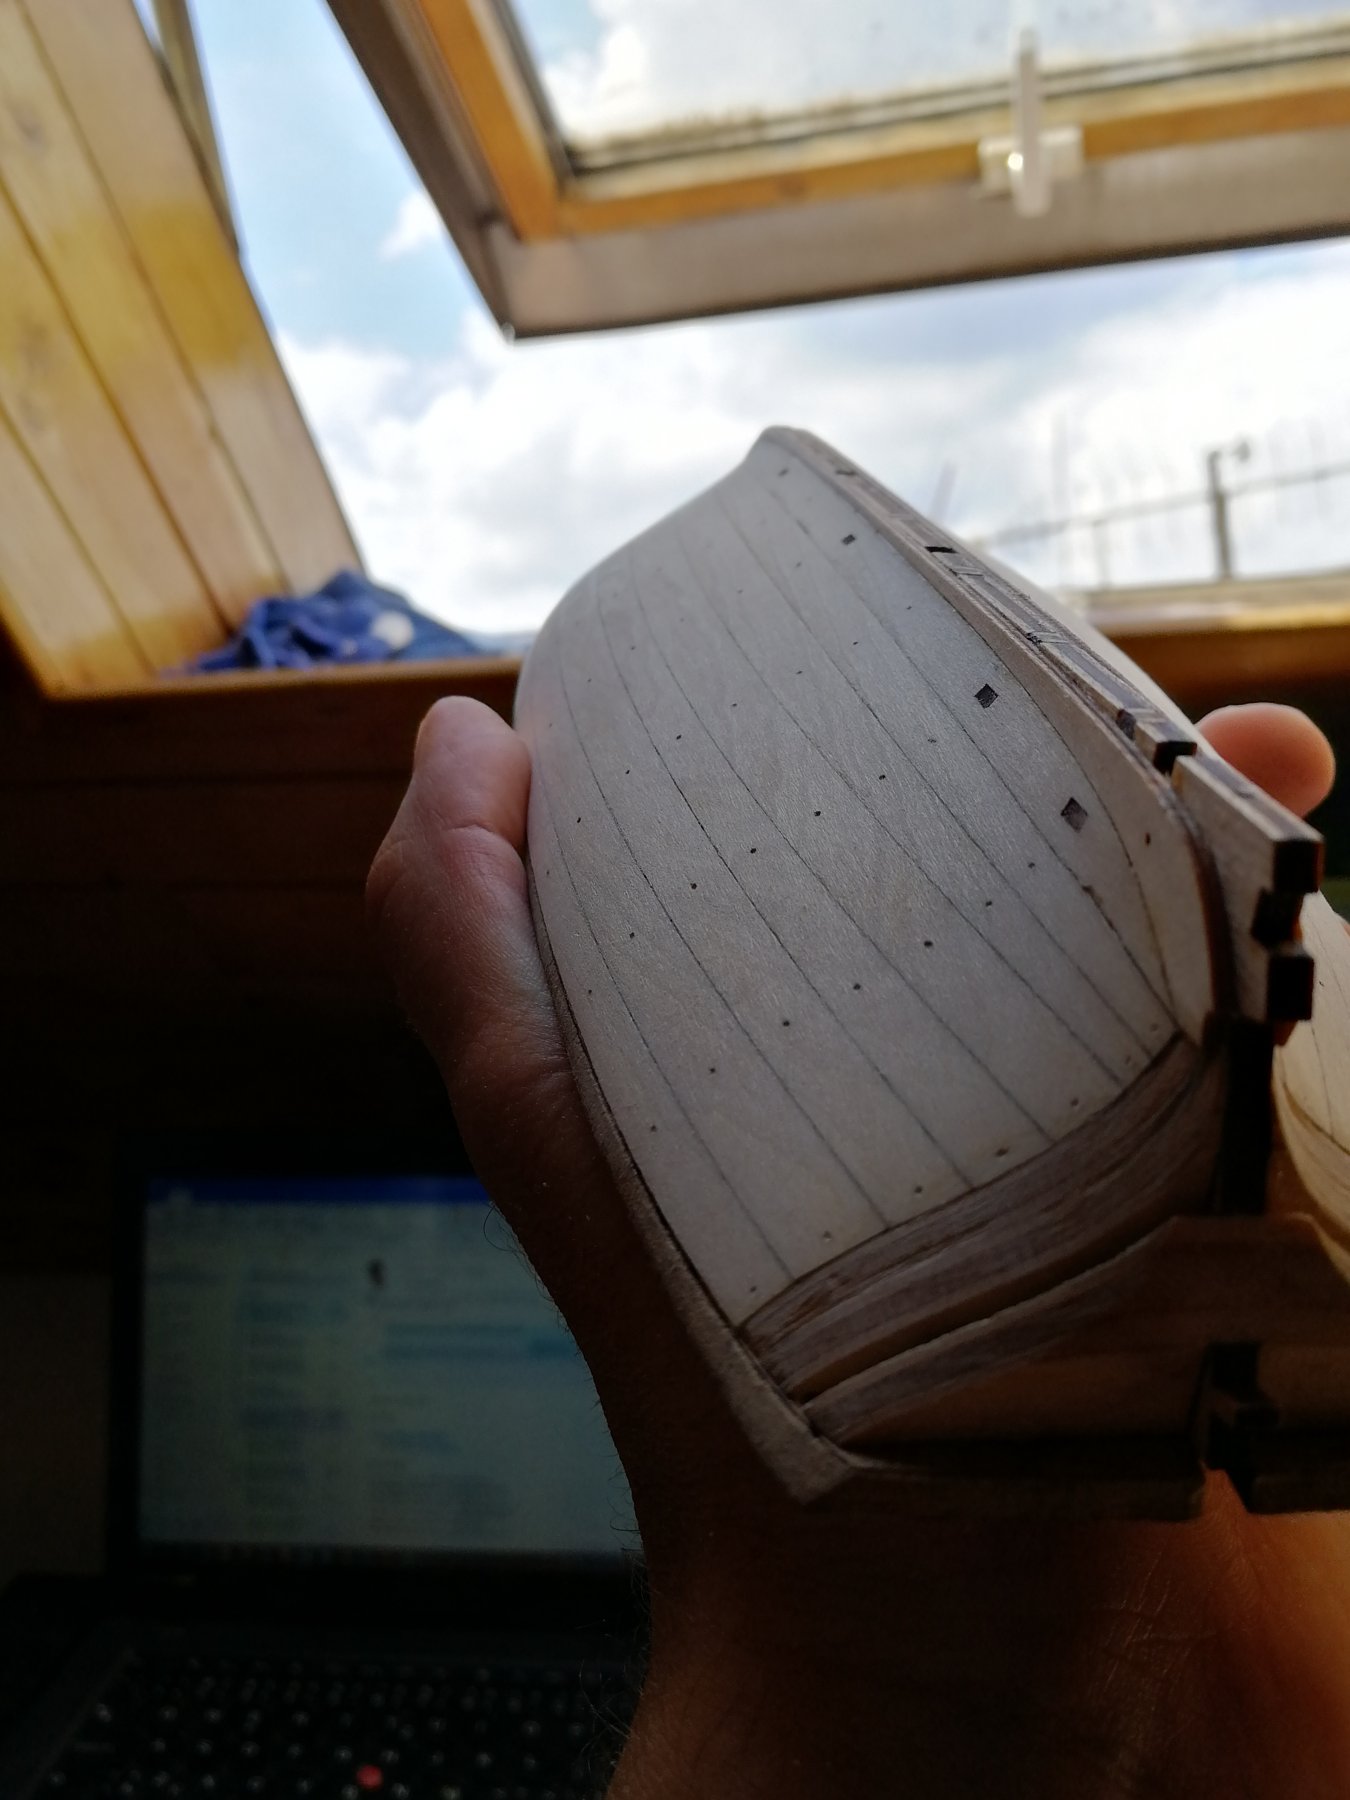
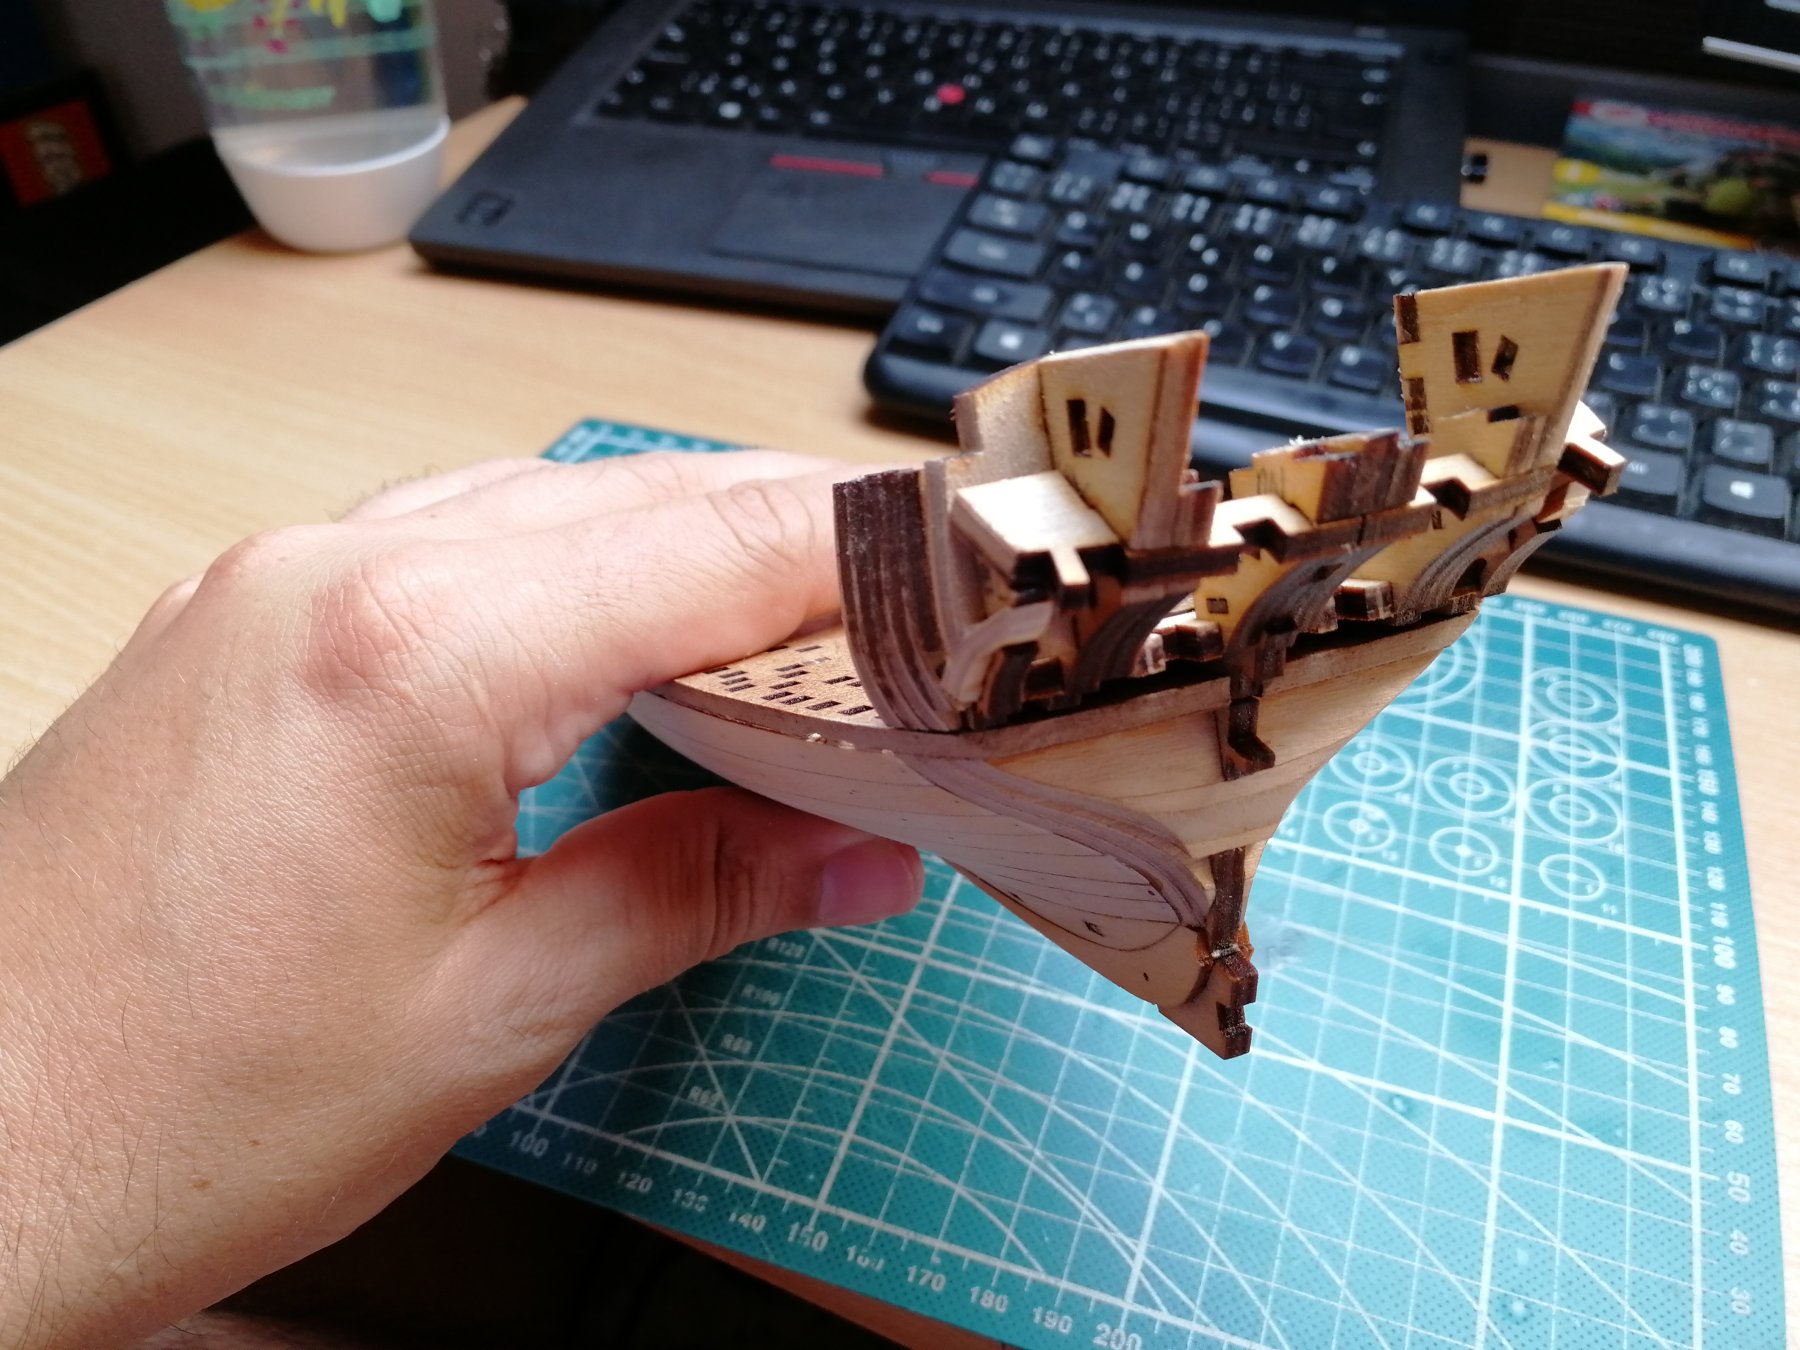
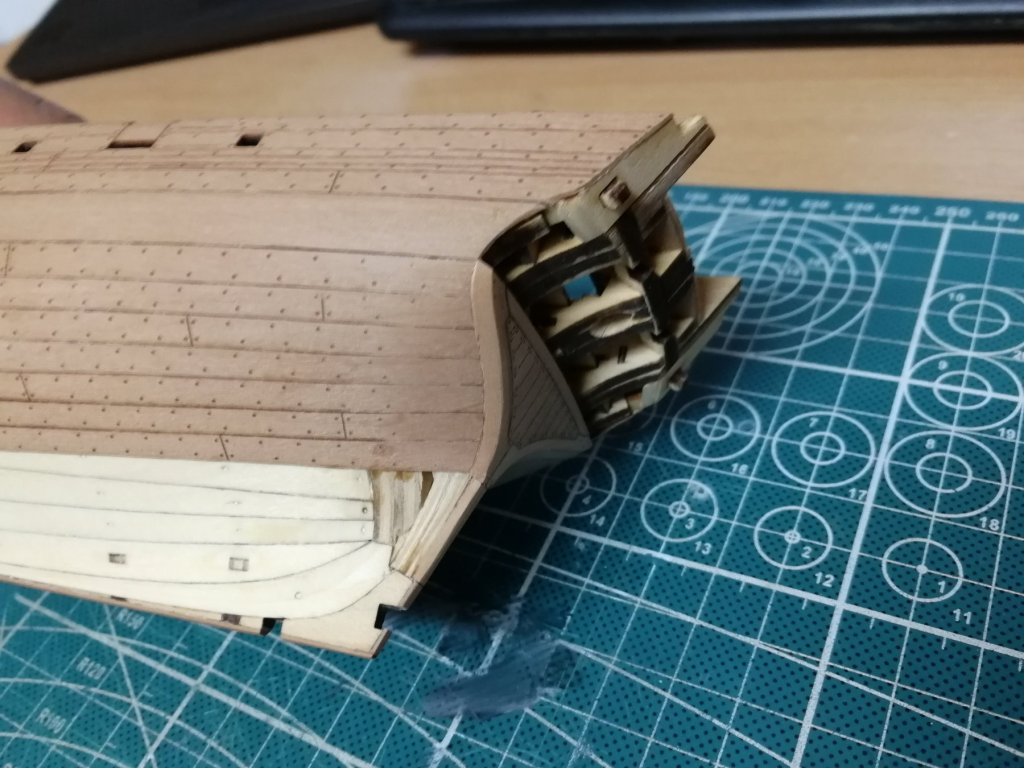
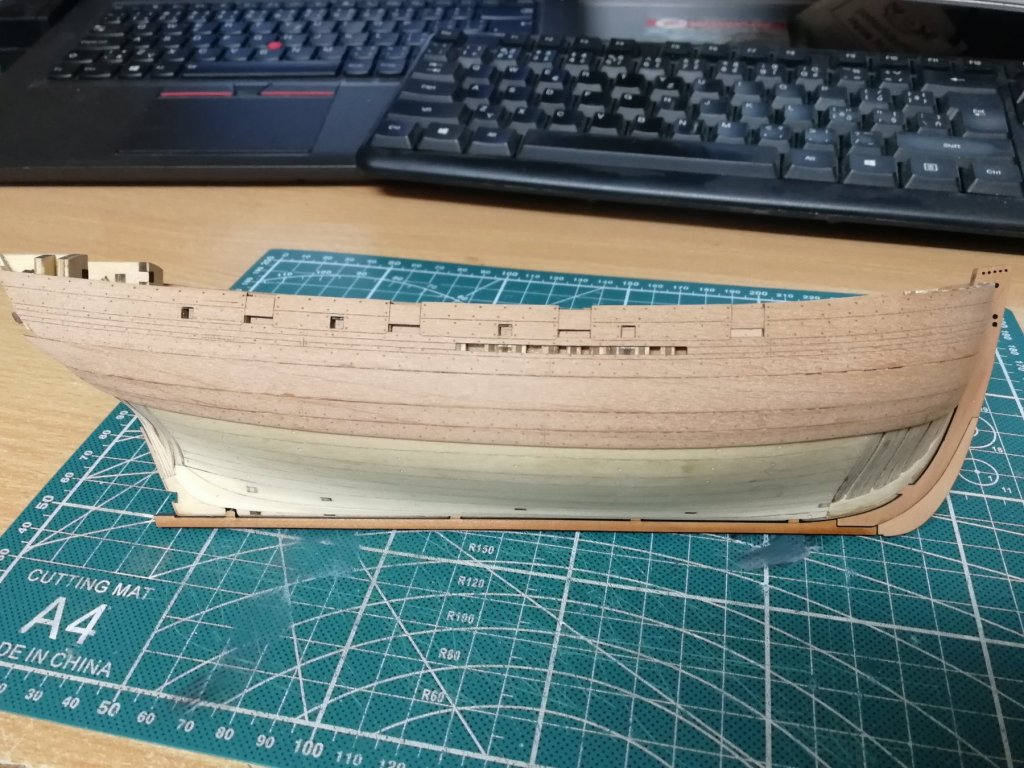
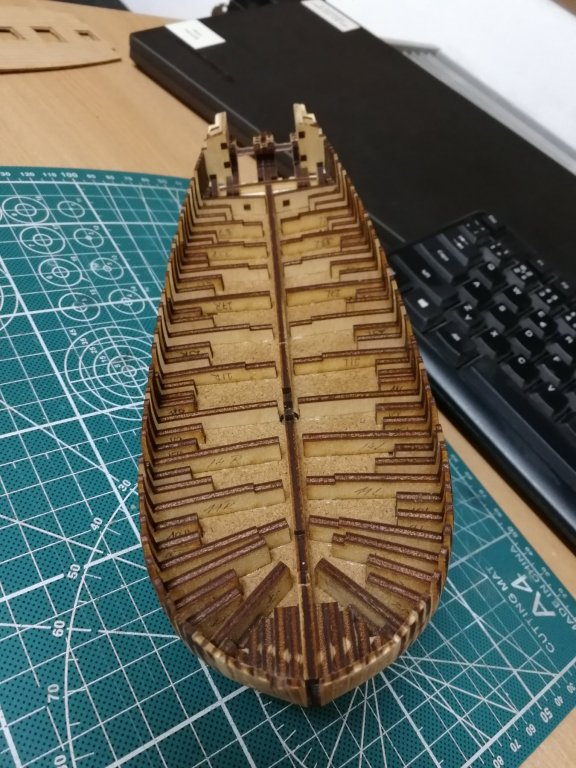
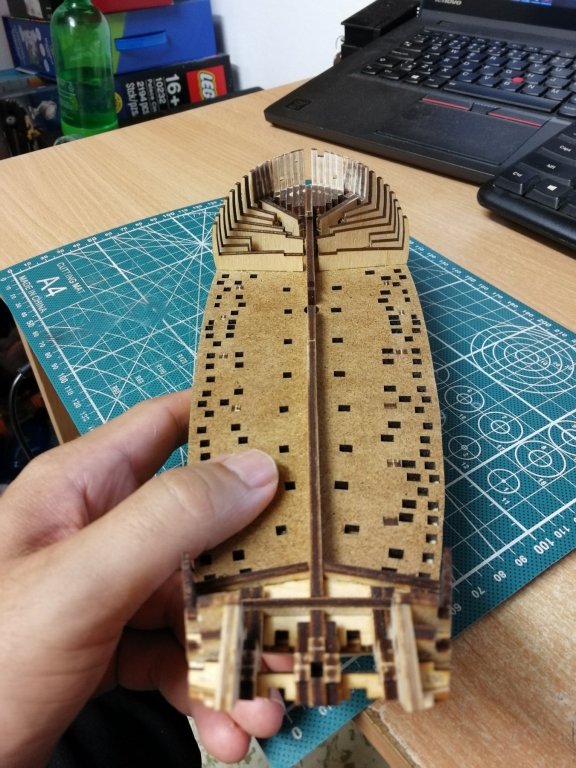
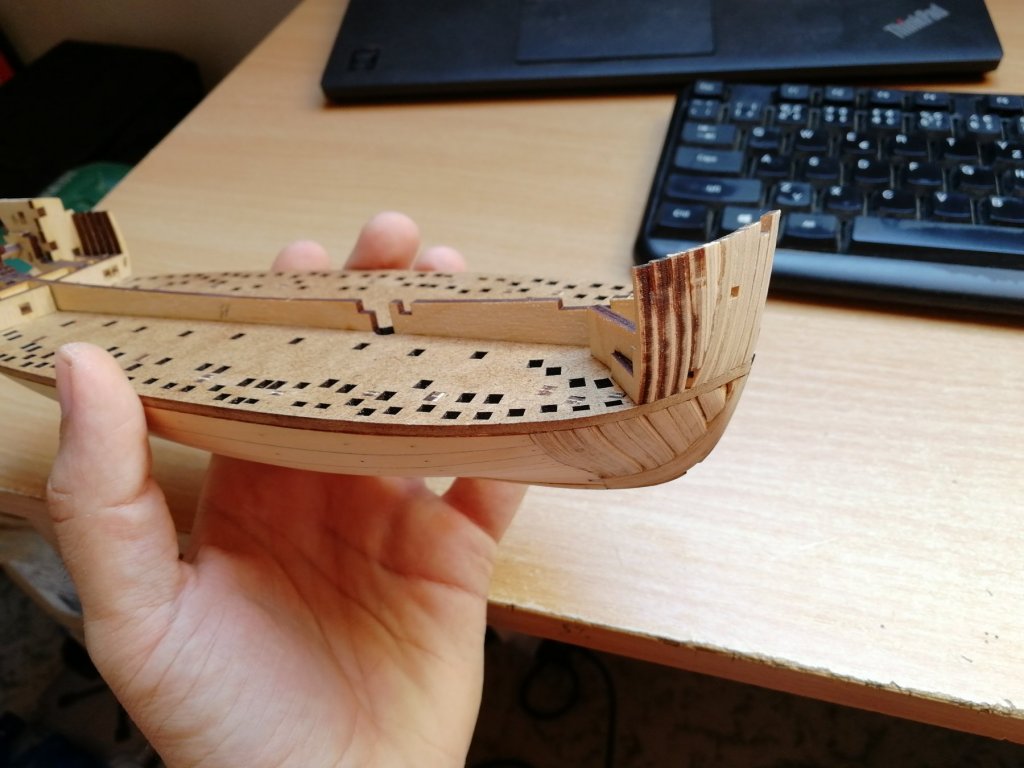
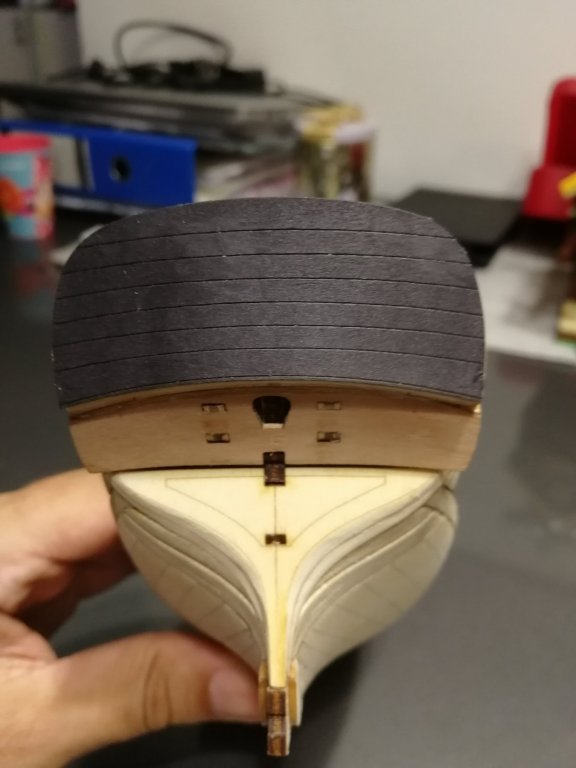
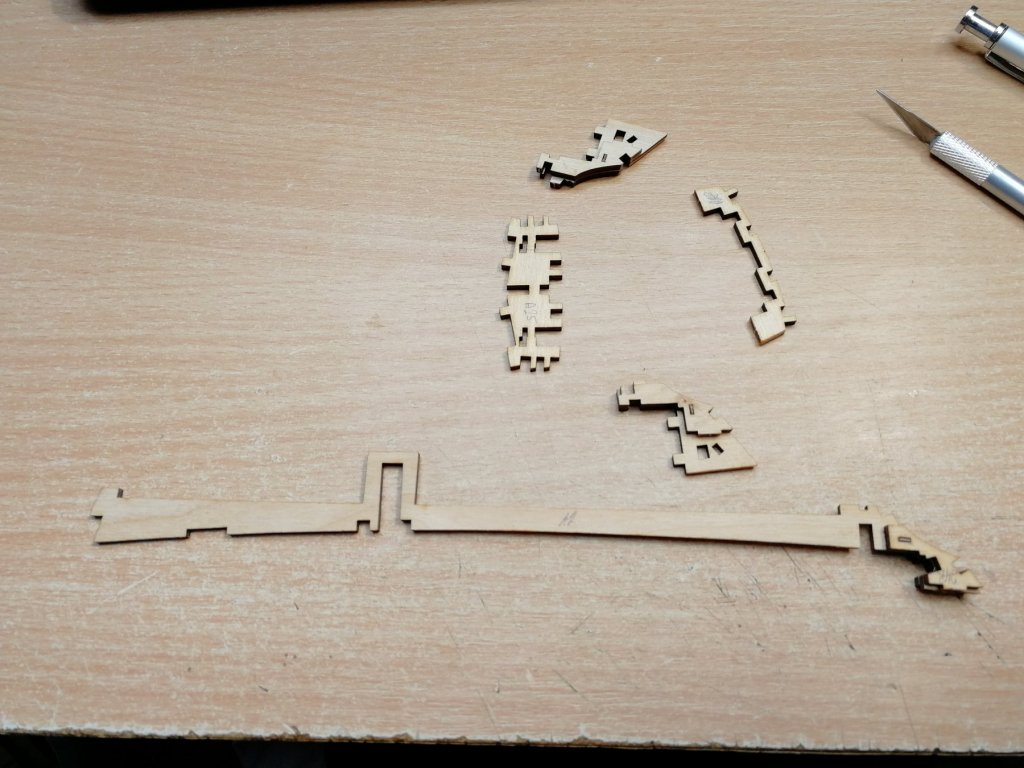
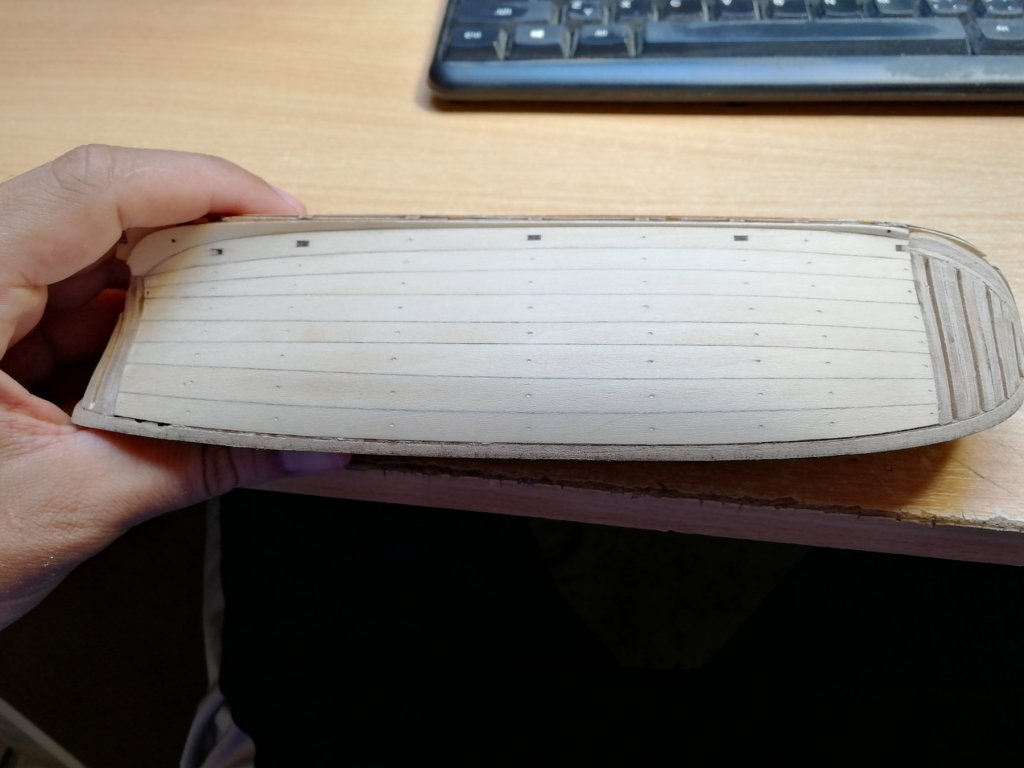
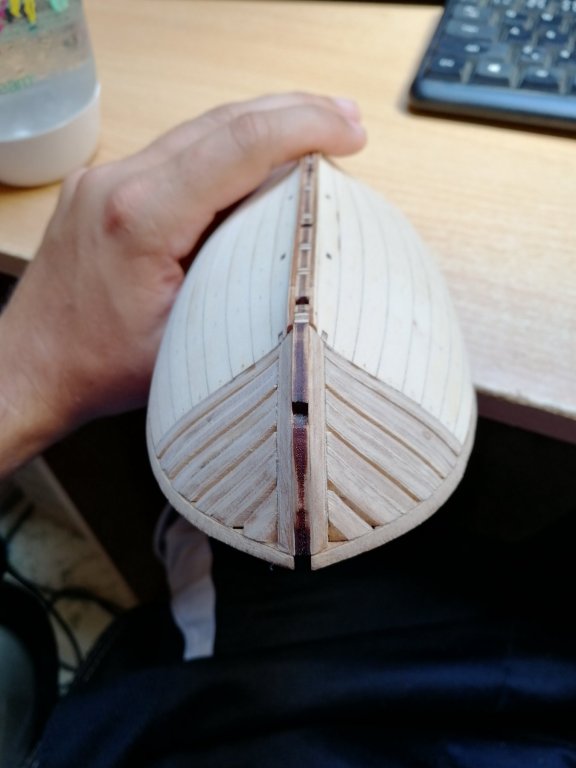
Lower part of the hull after sending. Looks smooth. Construction of the stern. There are so many small pieces. Lot of fun.


- 315 replies
-
- 10
-
-
- master korabel
- avos
- (and 1 more)