HOLIDAY DONATION DRIVE - SUPPORT MSW - DO YOUR PART TO KEEP THIS GREAT FORUM GOING! (Only 13 donations so far - C'mon guys!)
×

Peta_V
-
Posts
351 -
Joined
-
Last visited
Content Type
Profiles
Forums
Gallery
Events
Everything posted by Peta_V
-
Hi, what a nice kit! And beautyful ship. Keep the updates coming. Looks perfect 👌
-
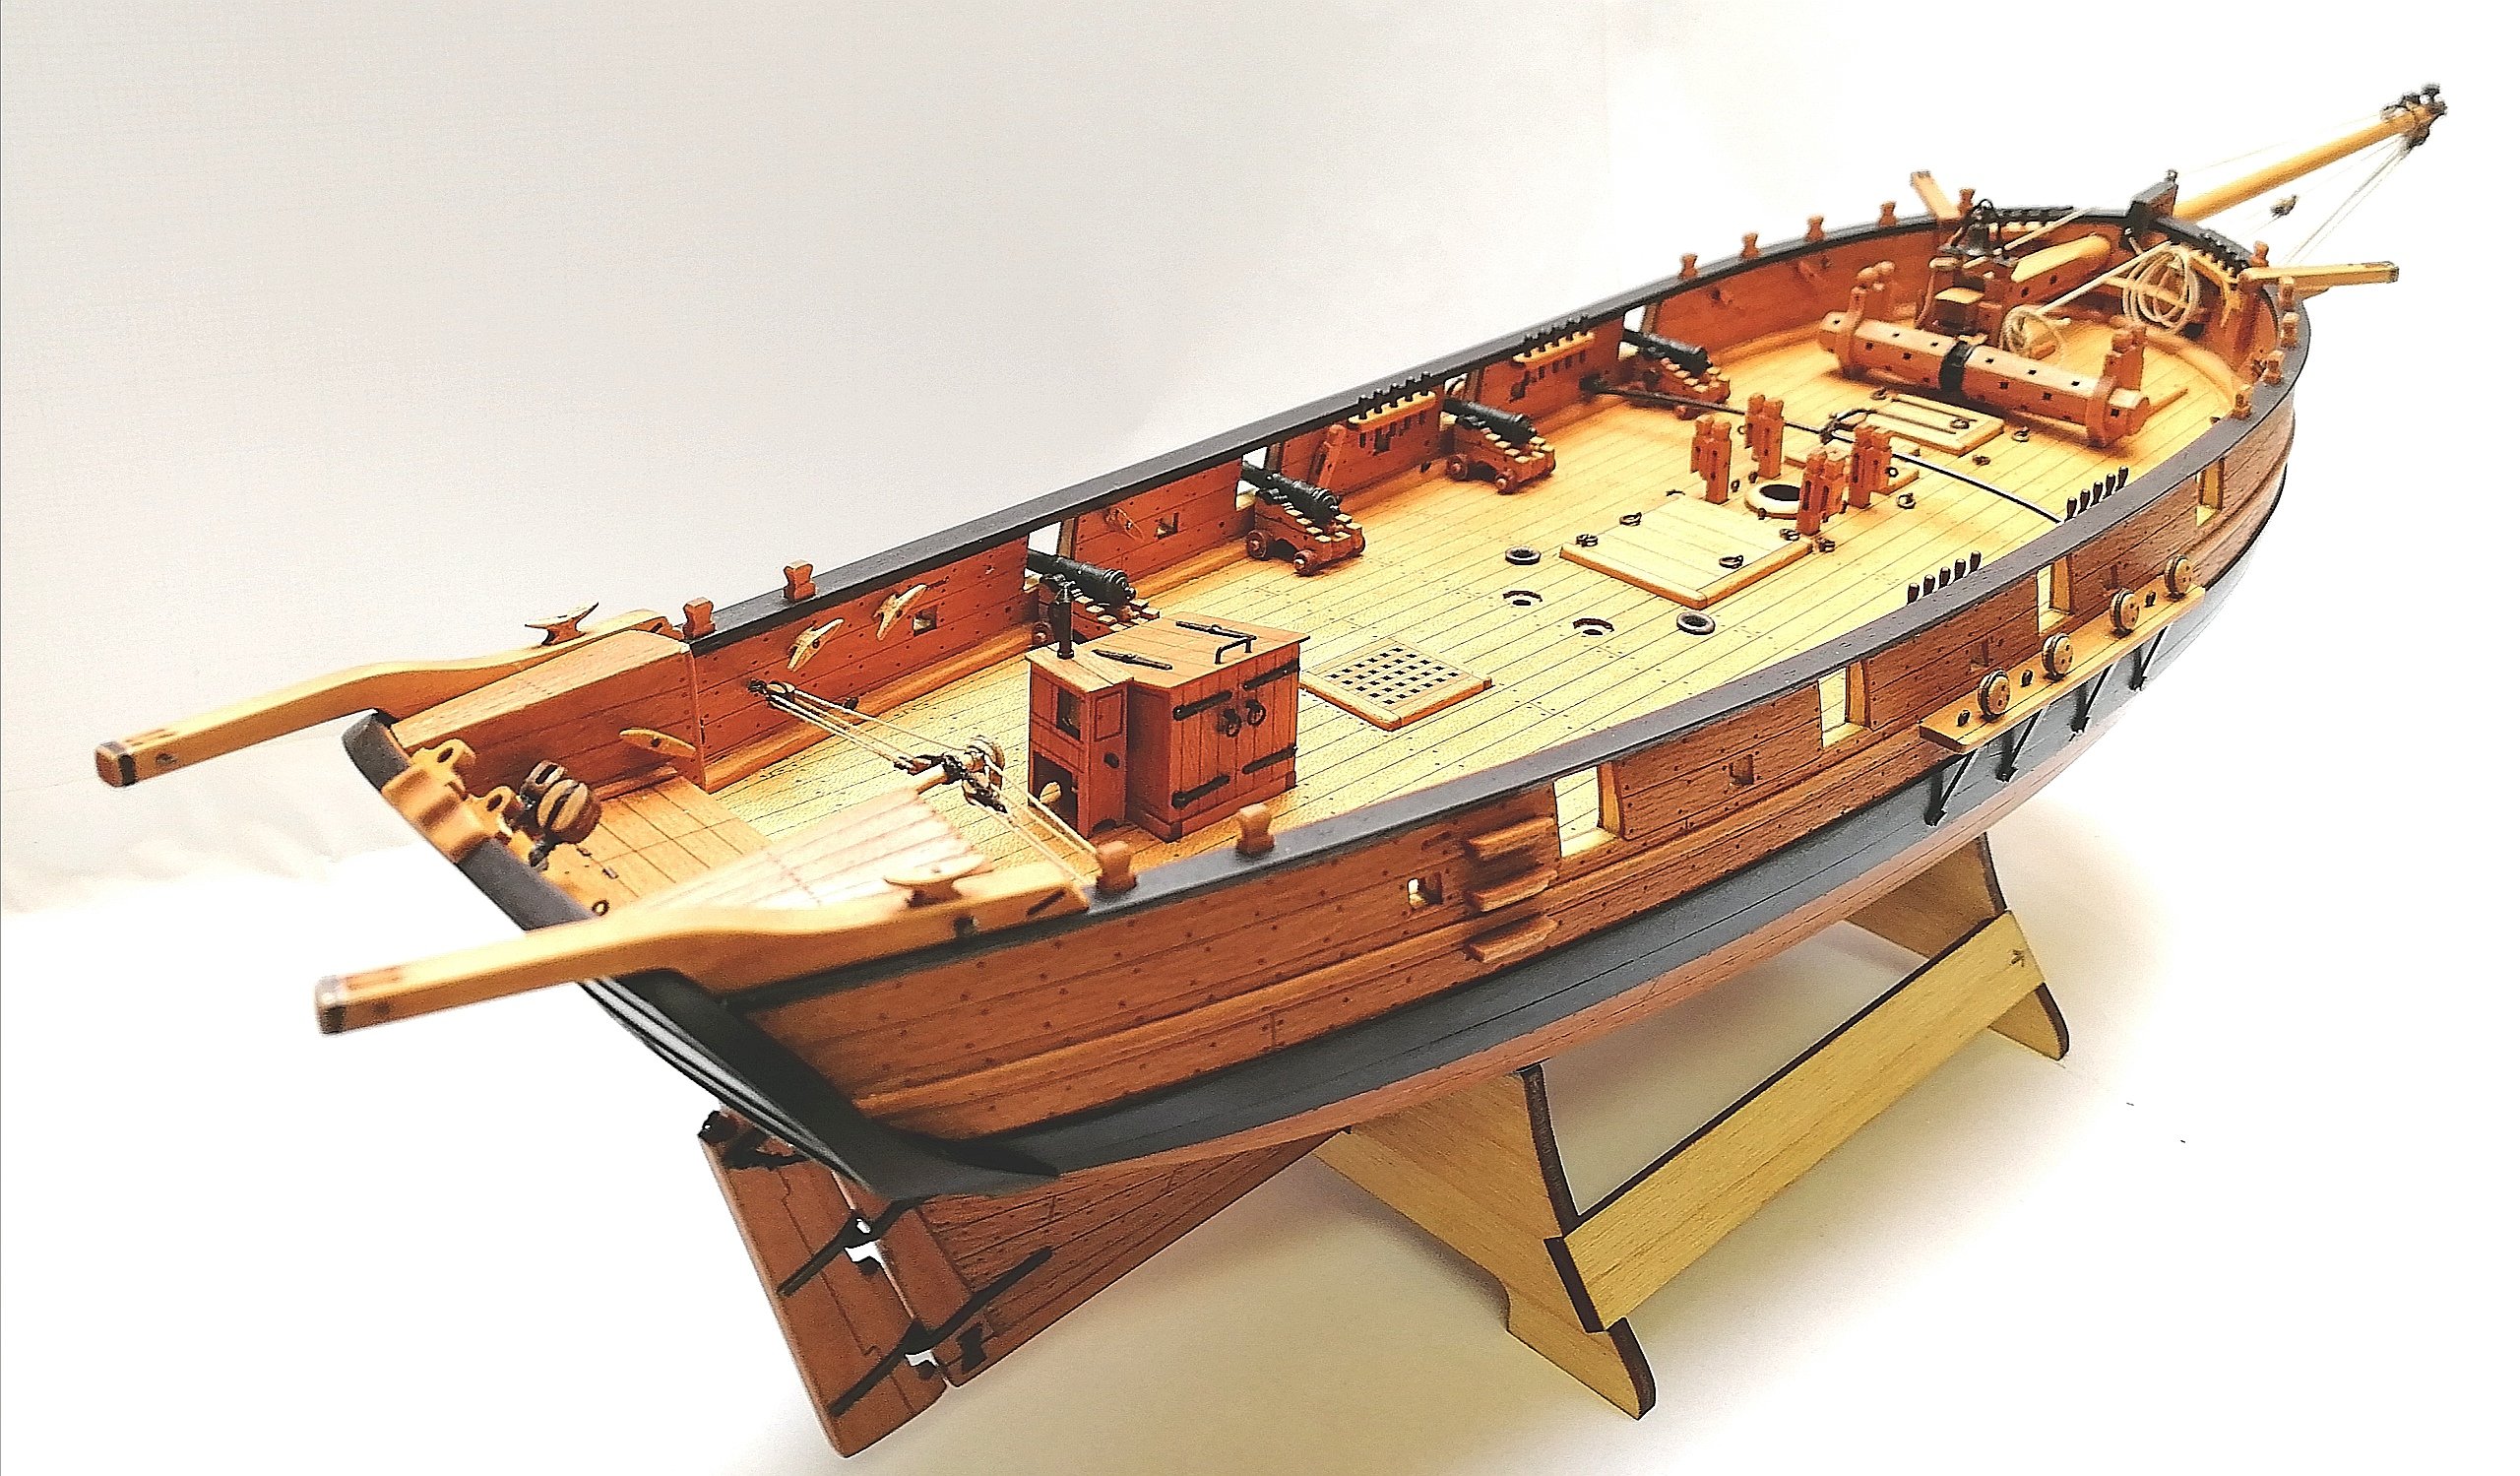
Wow, that looks awesome!!!!! I want this kit! Including sails and rigging?
- 216 replies
-
- 5
-

-
- masterkorabel
- ships
- (and 3 more)
-
Wow, that is something and the half Chuck! Looks fantastic. Bravo
- 1,784 replies
-
- 2
-
-
- winchelsea
- Syren Ship Model Company
- (and 1 more)
-
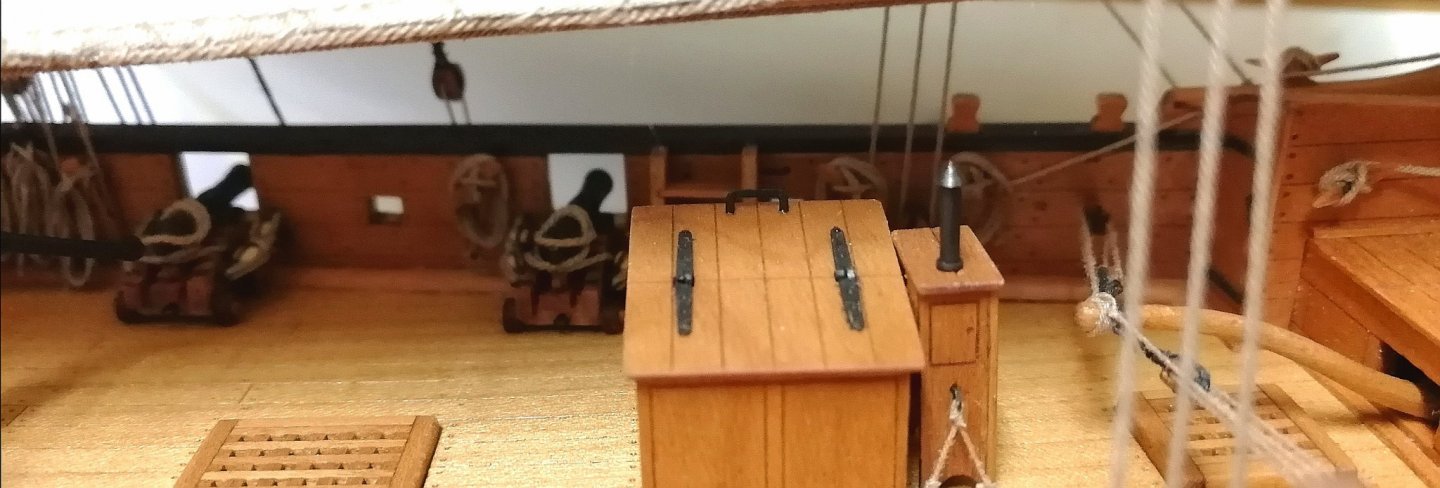
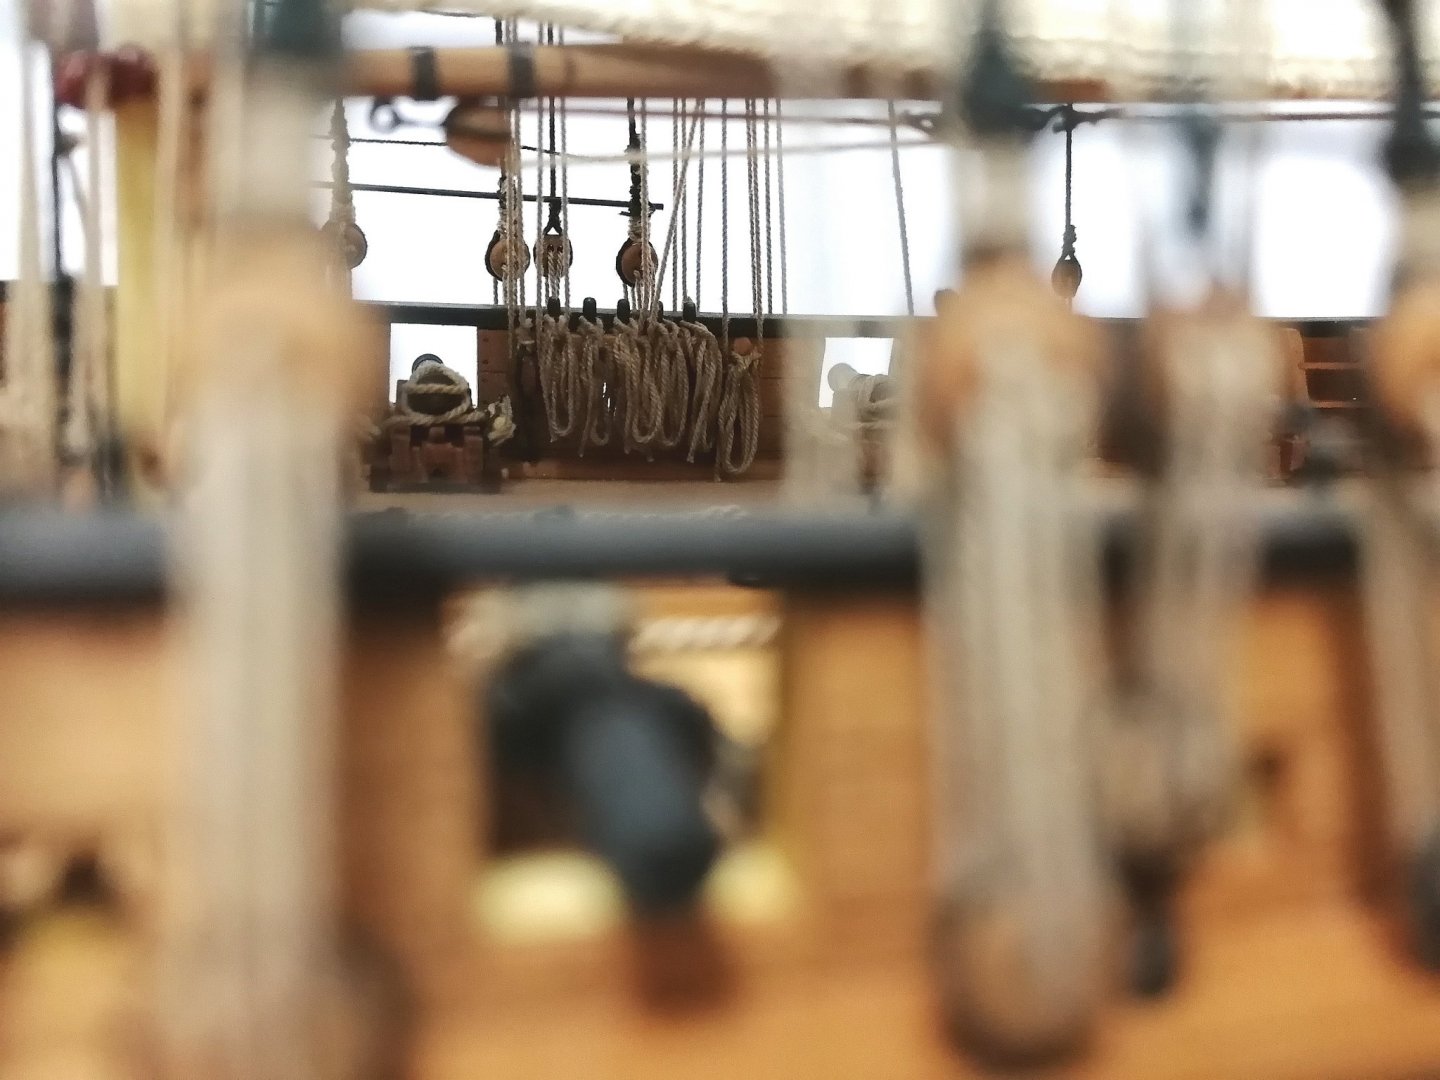
You can nicely see the difference between waxed main deck and forecastle deck before waxing on this picture. I agree with Marslav with the colors of wood. It looks amazing!
- 589 replies
-
- 9
-
-
- le gros ventre
- cargo
- (and 1 more)
-
That looks great!
-
Hi guys, Actually no update on AVOS but I wanted to share thi video (and whole series) of the restauration of TalyHo. In this episode they are finishing planking and I love it so so much! The whole series is here. I really recommend watching it as there are many valuable "how to" explanations even for us, modellers. https://youtube.com/c/SampsonBoatCo Enjoy. PetaV
- 315 replies
-
- 2
-
-
- master korabel
- avos
- (and 1 more)
-
Hi Andreas, couldn't it be that you swap sides? Right futtock on the left and left on the right? I think that could explain it? It is just idea. I'm watching your build with great interest as I'm thinking about buying one as well. Great work. PetaV
-
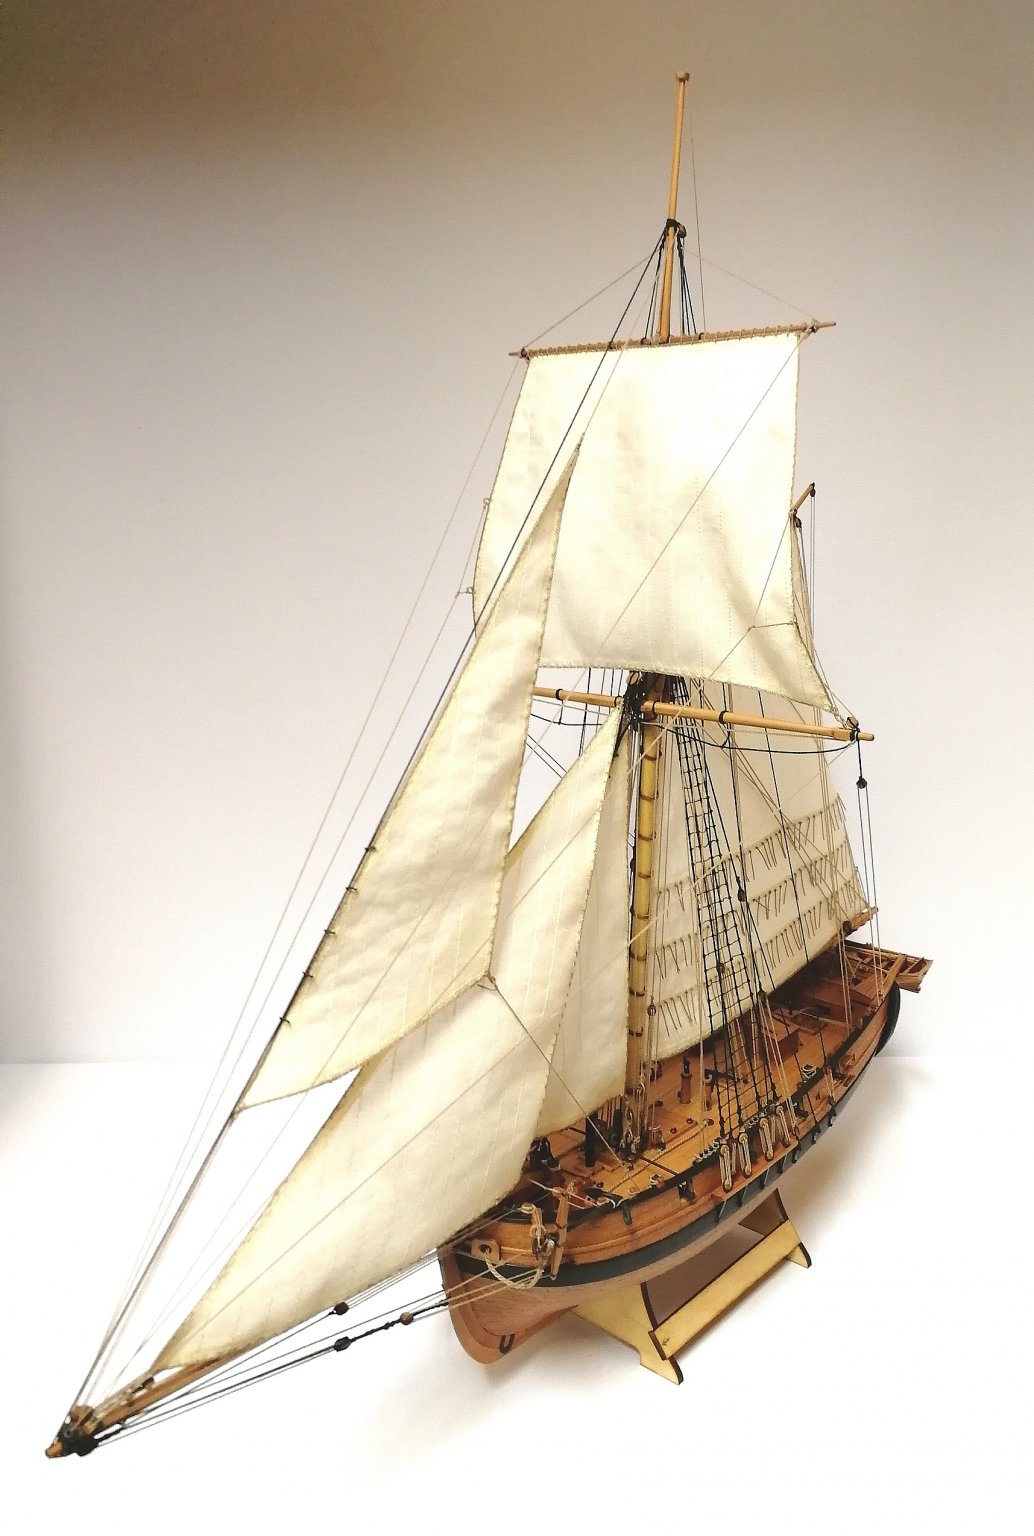
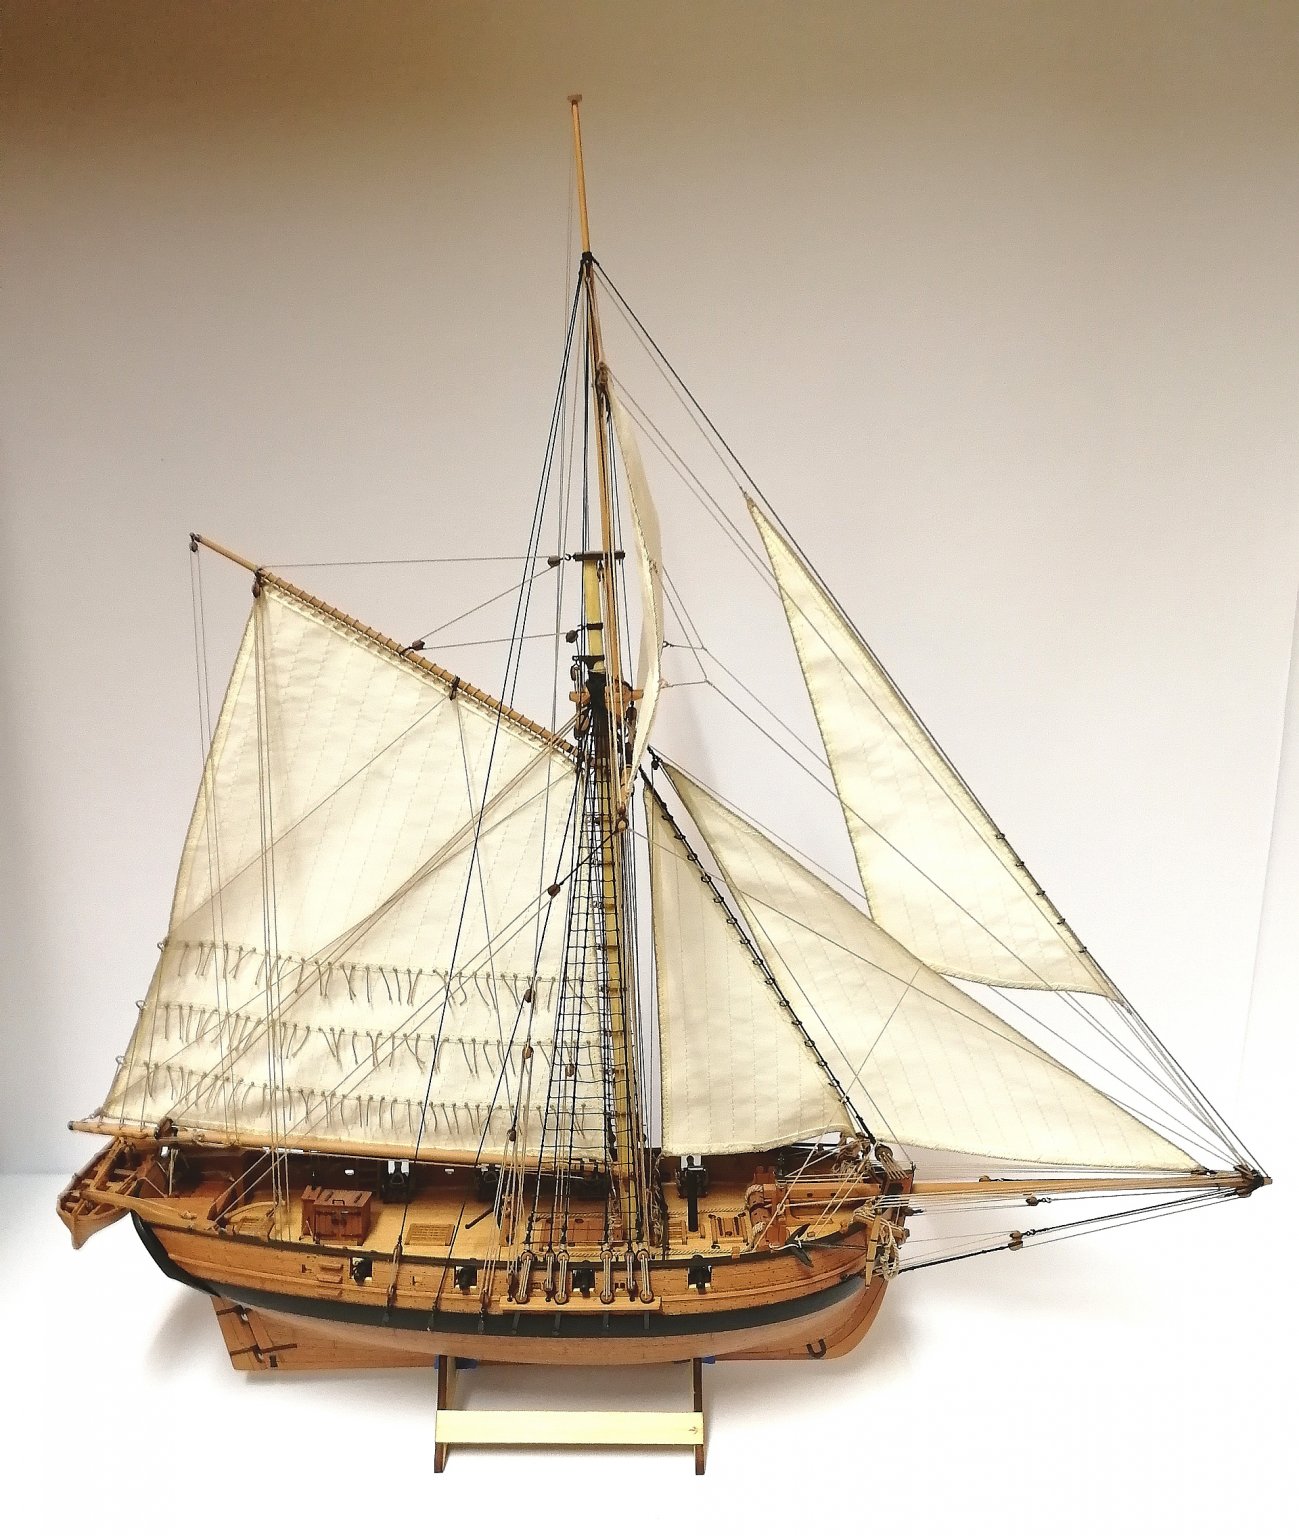
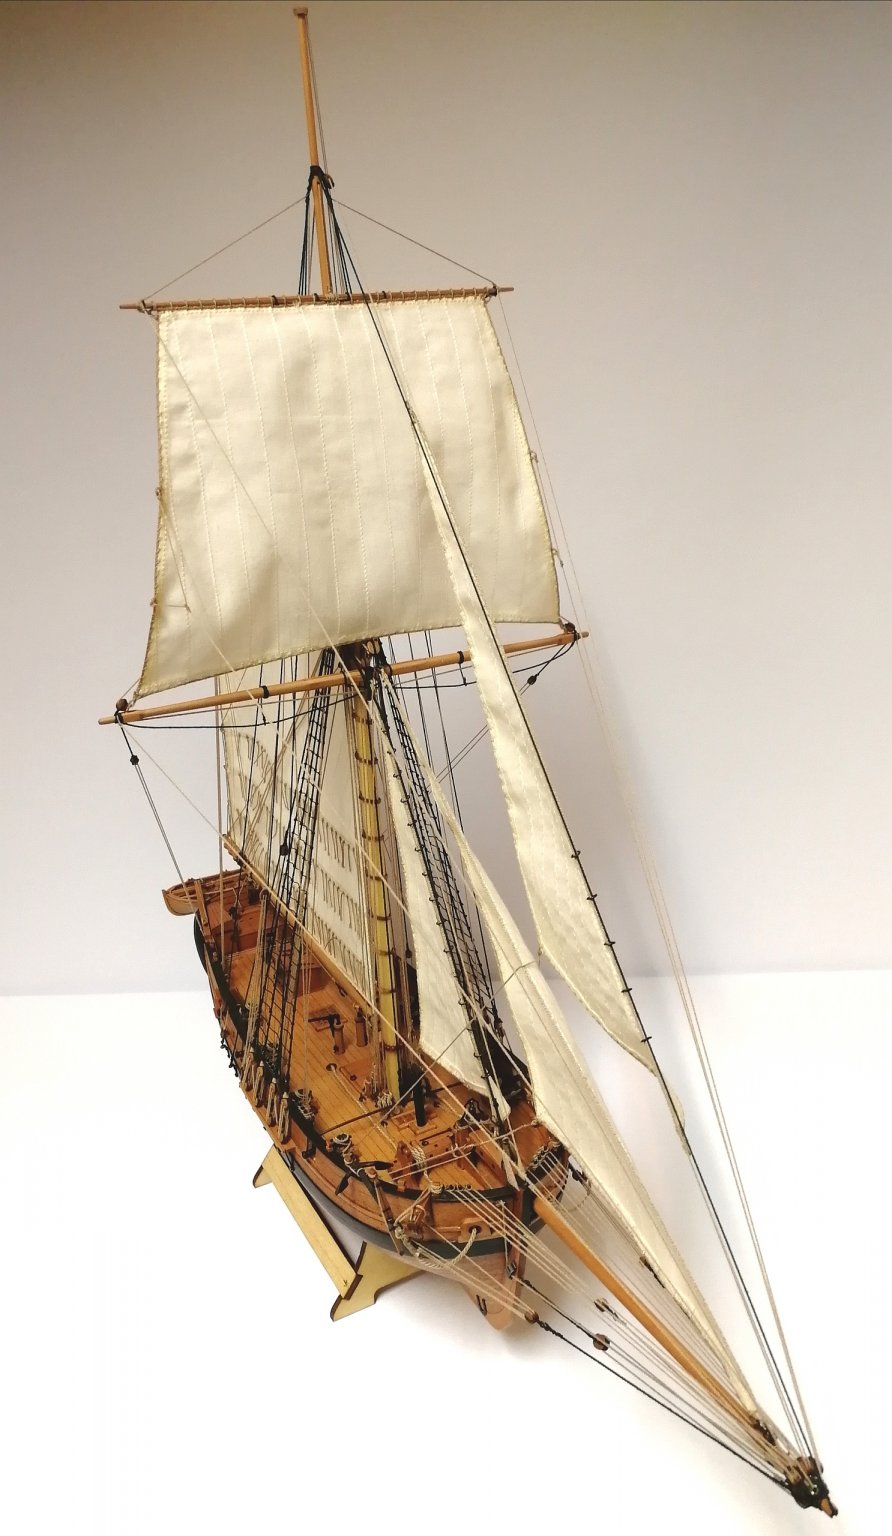
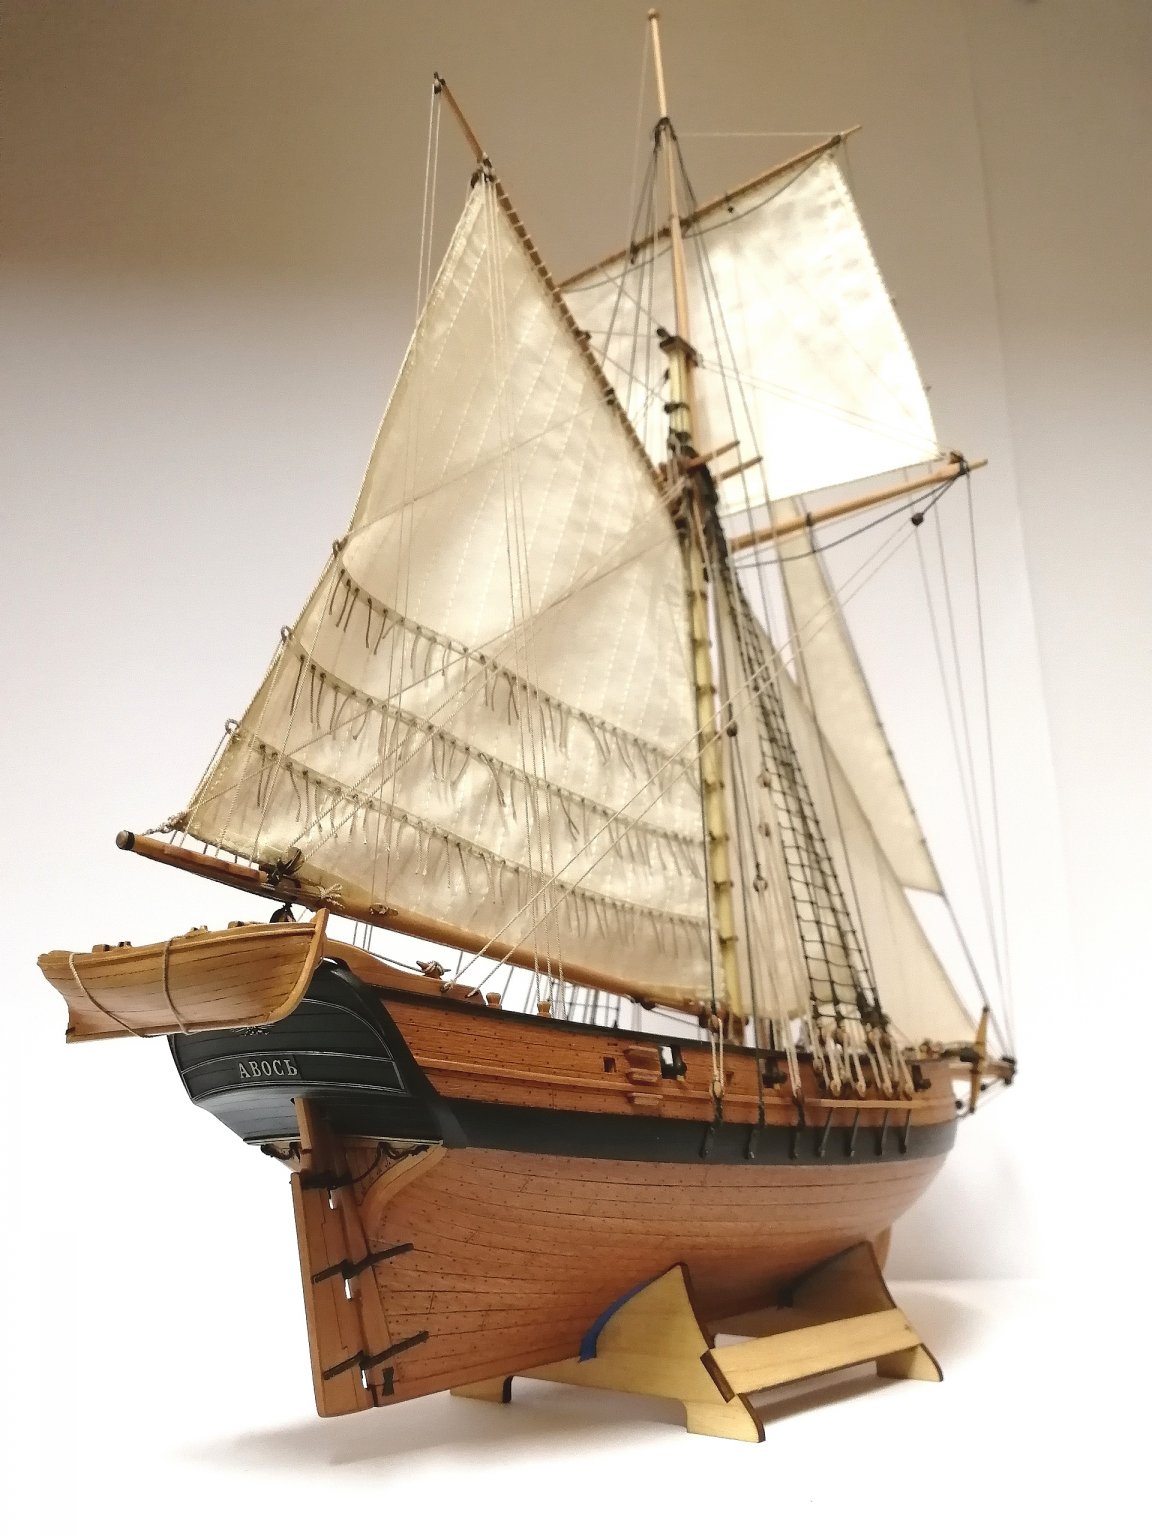
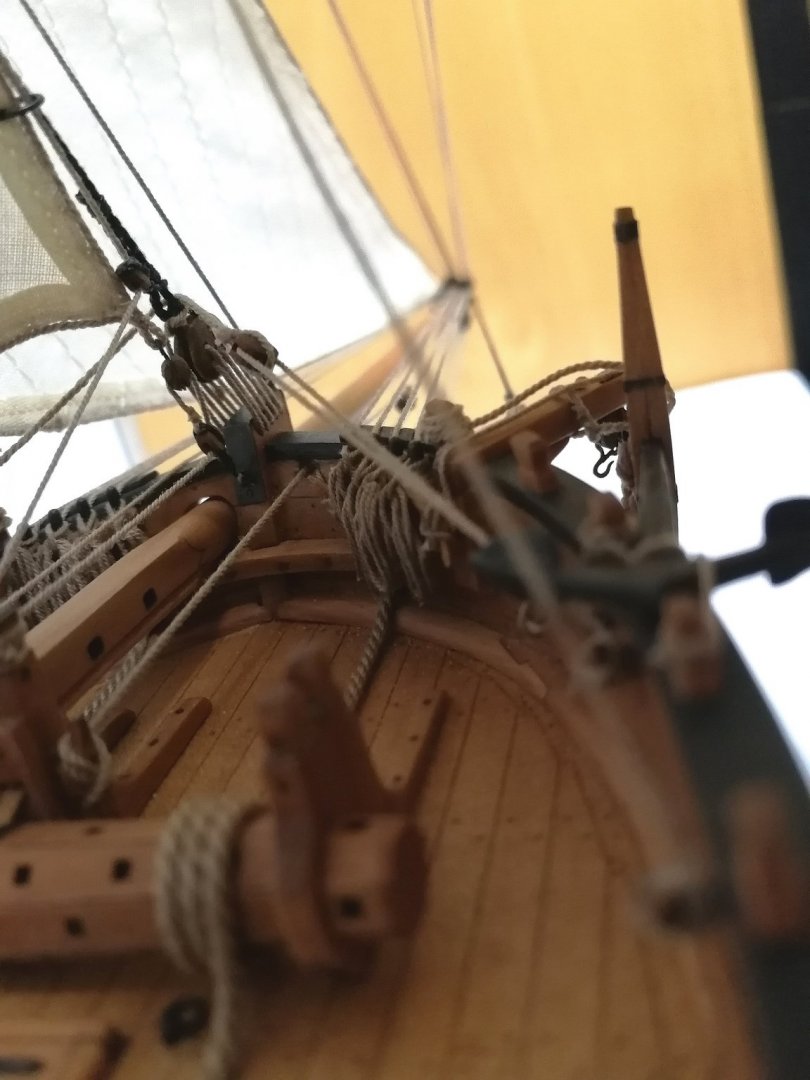
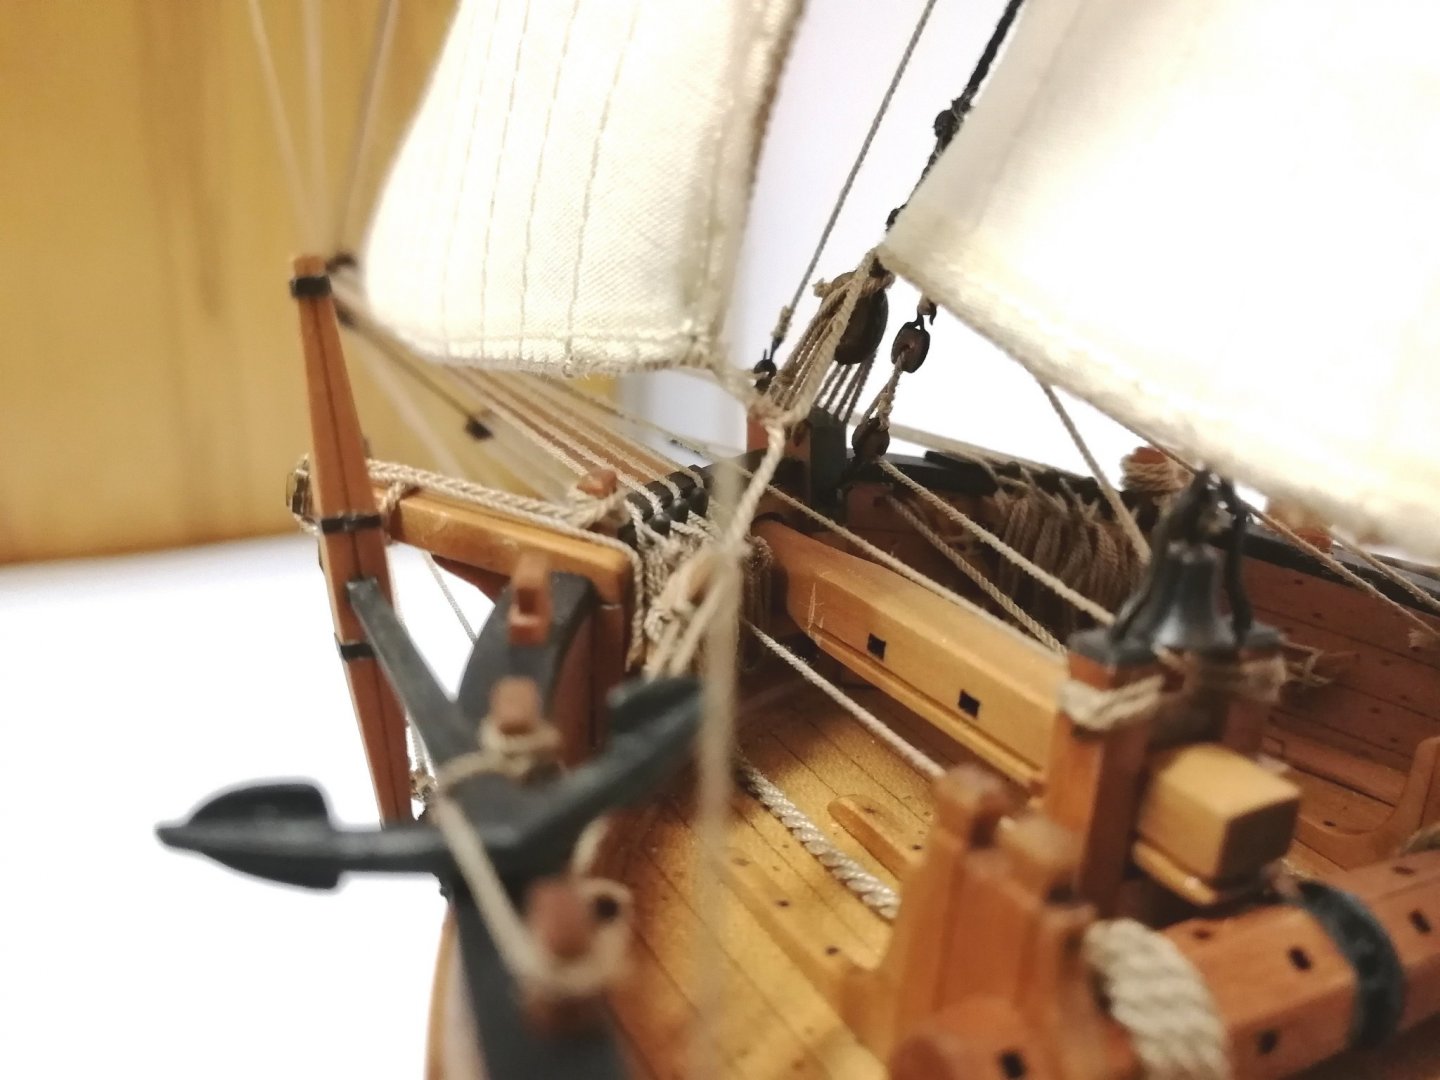
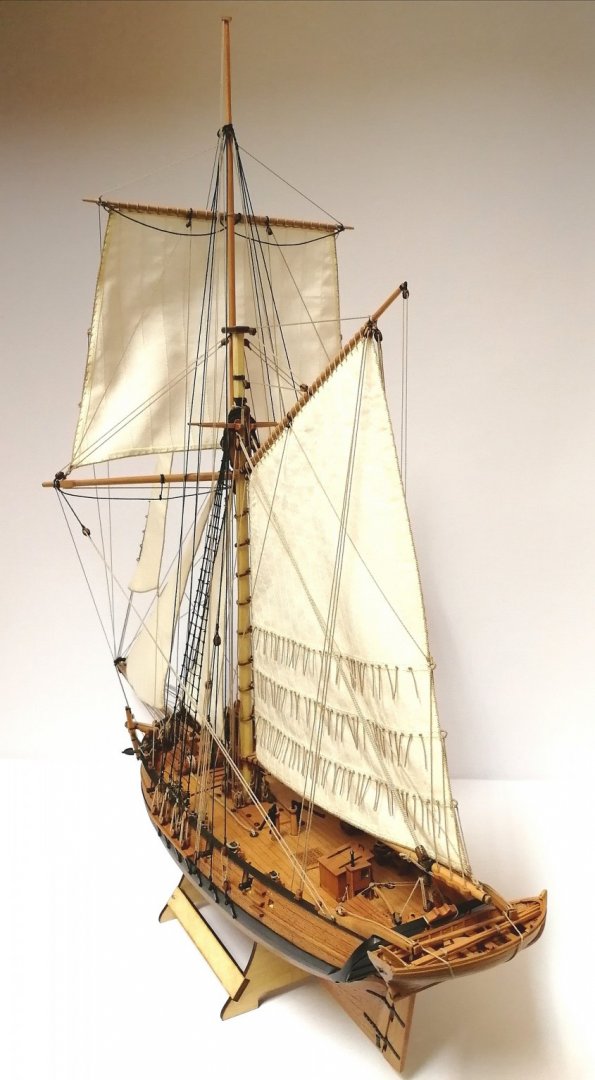
Greetings, After a long brake the cold weather came to our area which could (I hope) give me some time for ships. There is not much missing on AVOS. rope coils on the cleats and flag. Possibly I add some small details. I have started with coils. First attempts after the brake. I guess I would need some warm up to get up to speed again.

- 315 replies
-
- 4
-
-
- master korabel
- avos
- (and 1 more)
-
Hi, there is no waterway, Panart made it much more simple. @Ciciak35 those are from Czech shop https://www.hismodel.com/articles-category-1 thank you Guys for the kind comments!
-
When the line is in you can't tel if There is real shave. Save your effort for other.... Visible.... Items! Your model is.......... OH my god so welllllllll made! Congrats mate
-
Thanks guys. Unfortunately RC has to wait. I have moved to larger scale finishing our new home 😱 But she is going to be decoration in the living room for sure! @PietFriet the color is matt blue from Revell (not sure about the number) spray with air gun several thin layers and clear coat water sended until all is smooth.
- 128 replies
-
- 2
-
-
- panart
- anatomy of the ship
- (and 1 more)
-
Making Rope Coils with a Jig by Peta_V
Peta_V replied to ccoyle's topic in Masting, rigging and sails
I'm really glad it helps! -
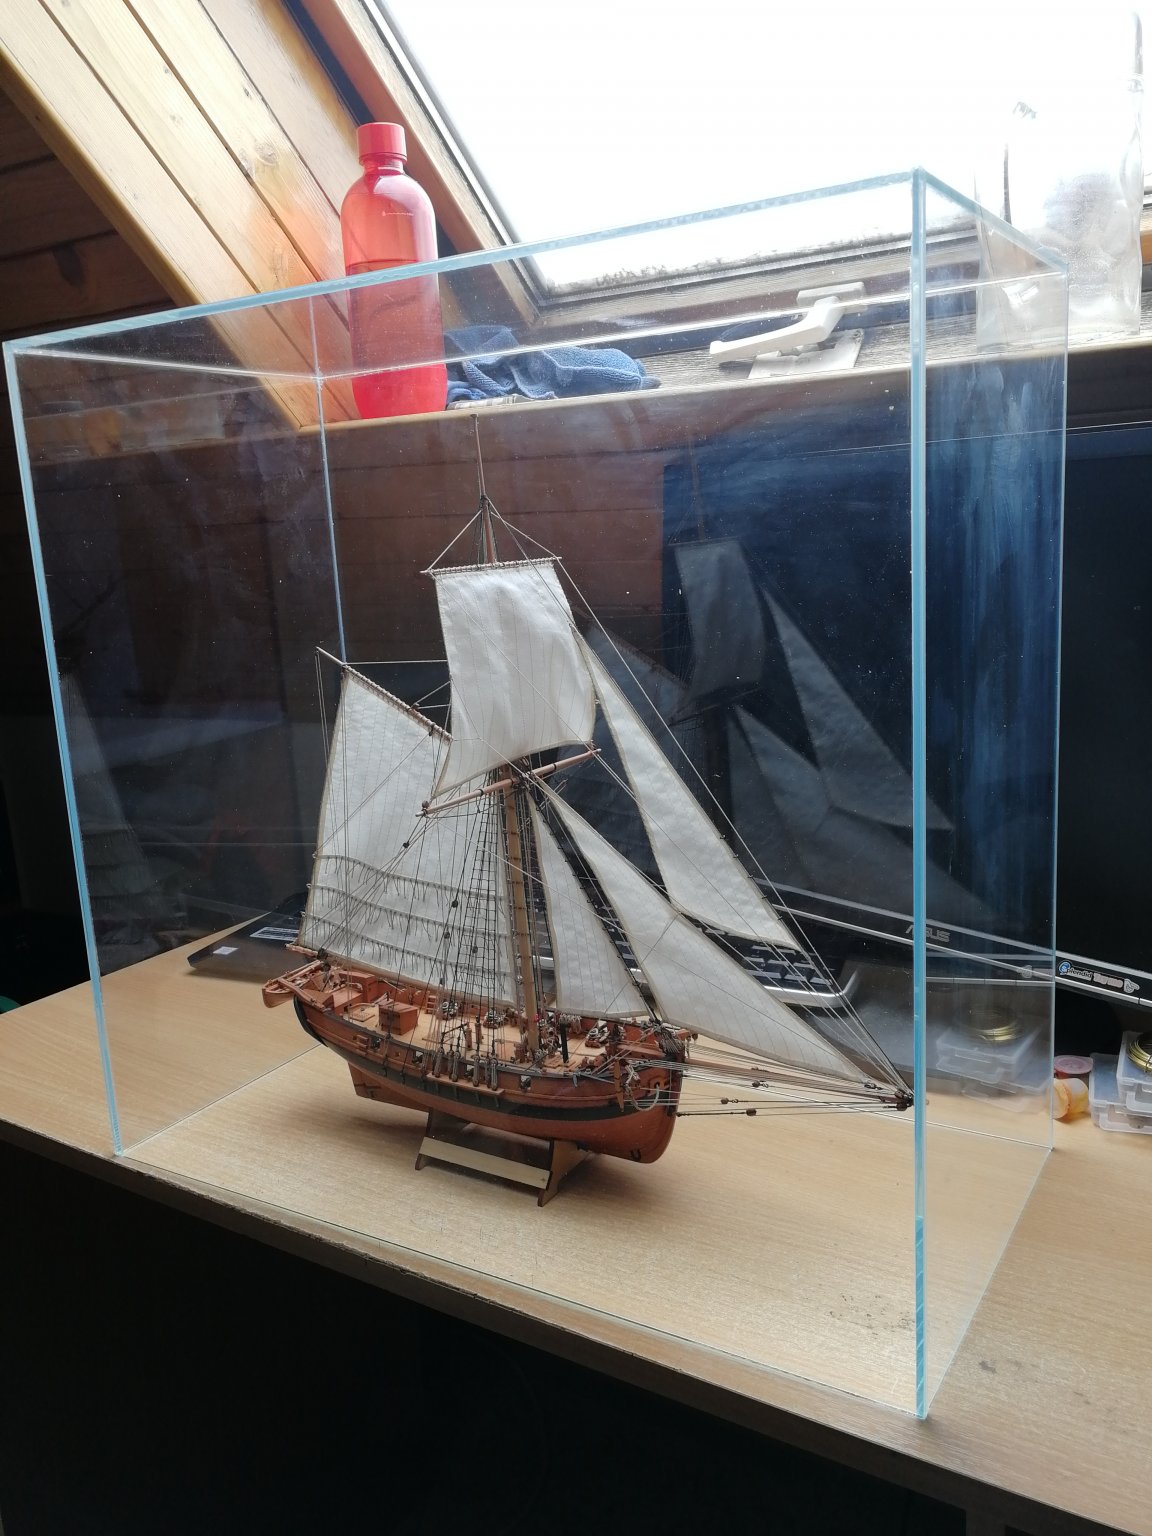
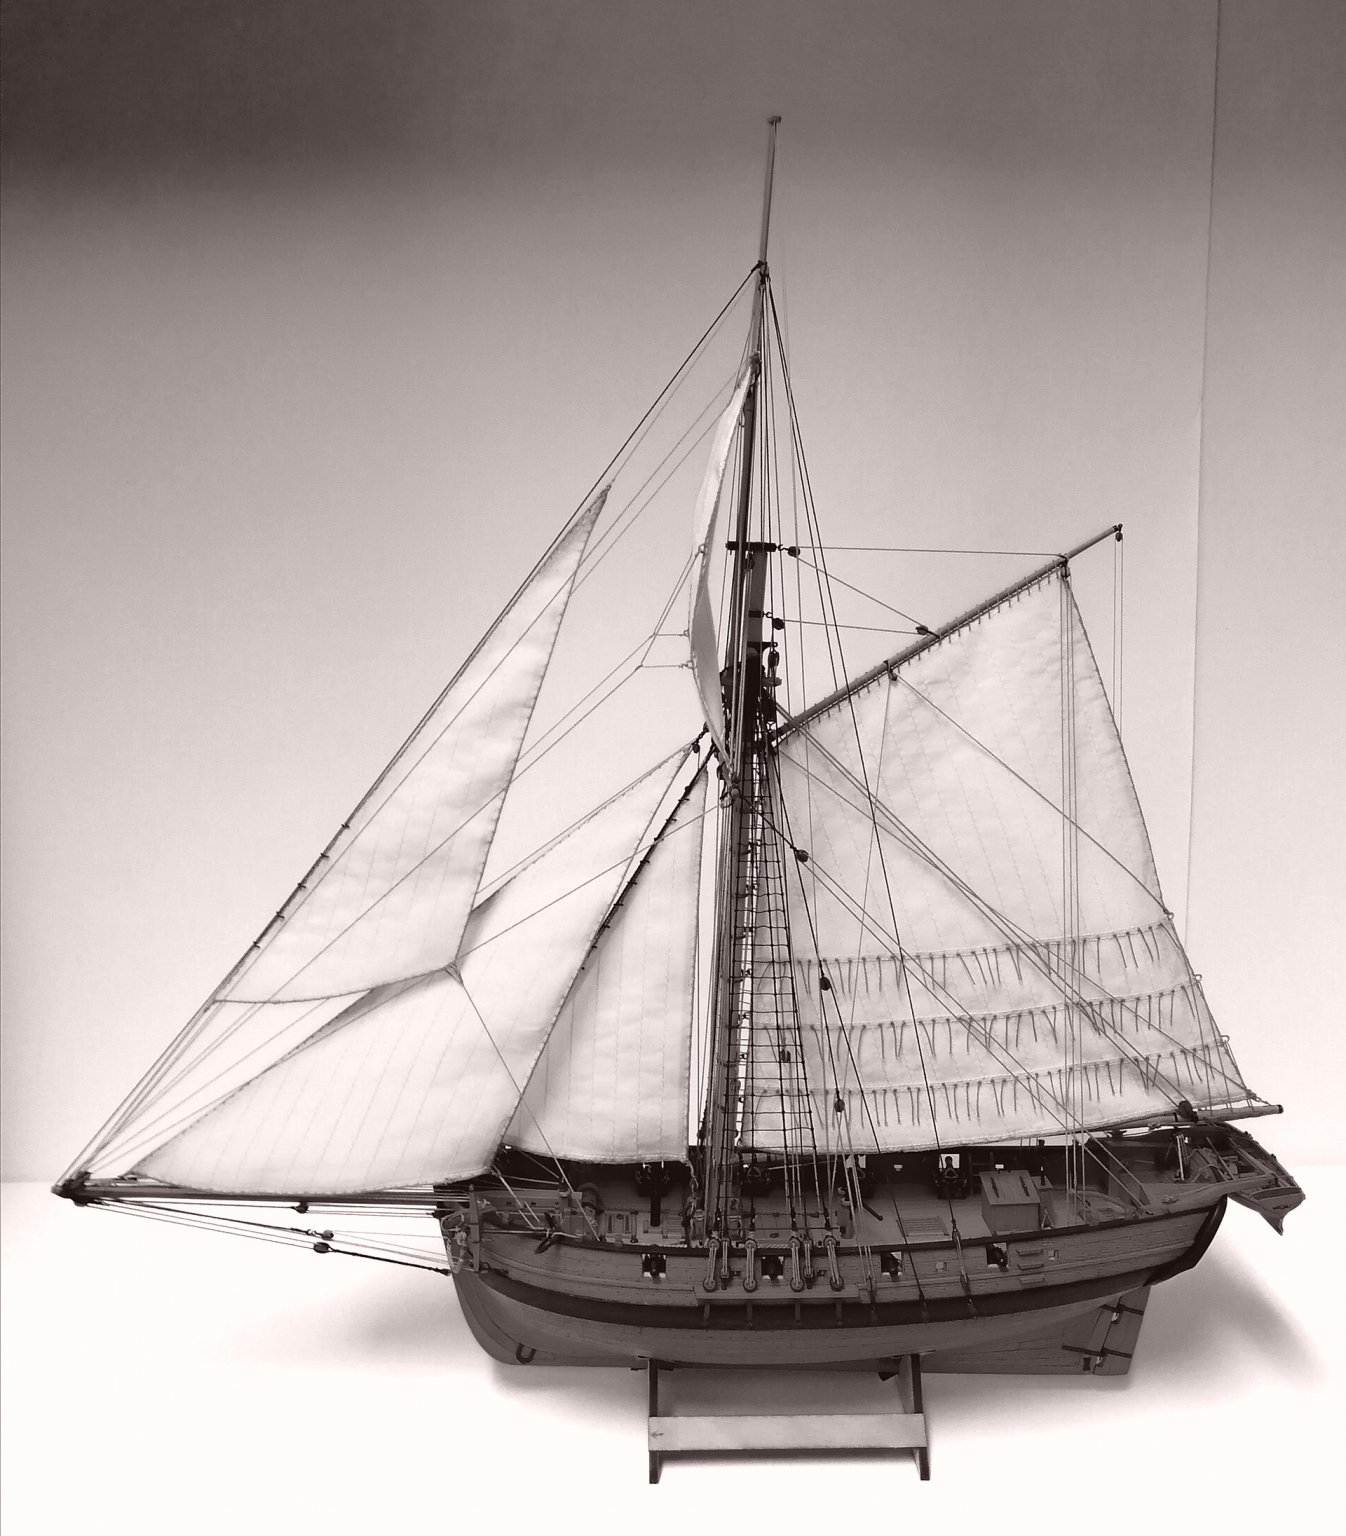
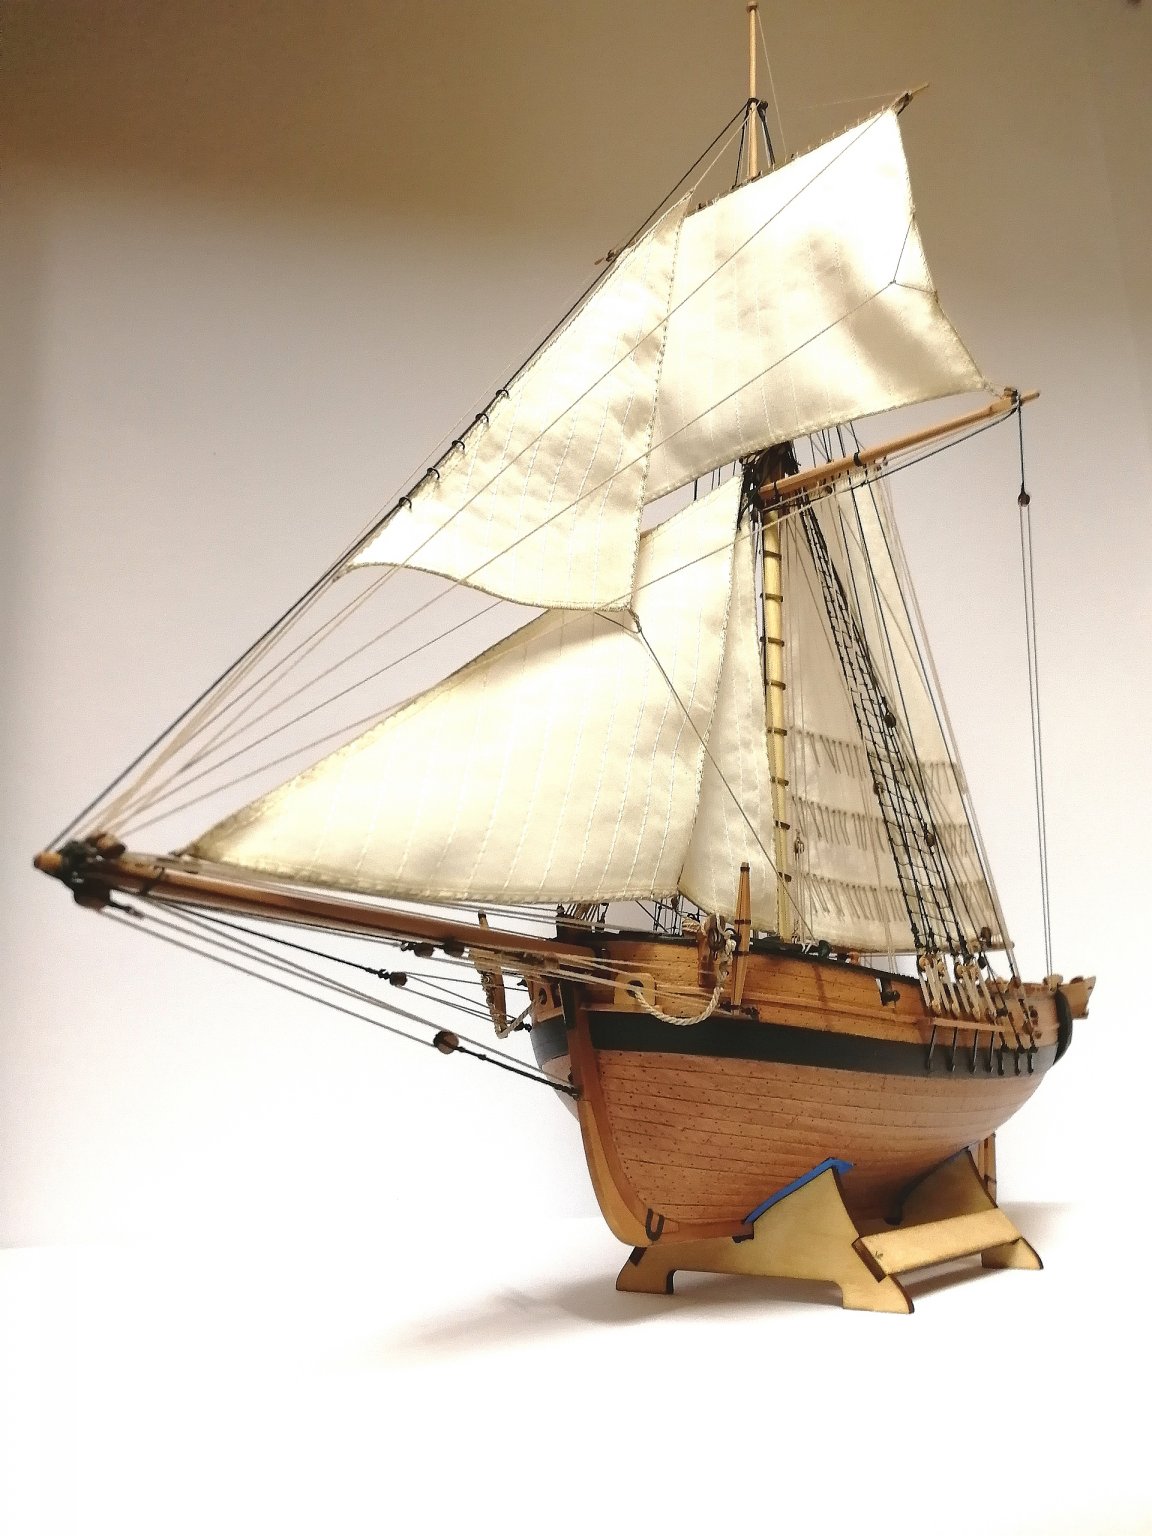
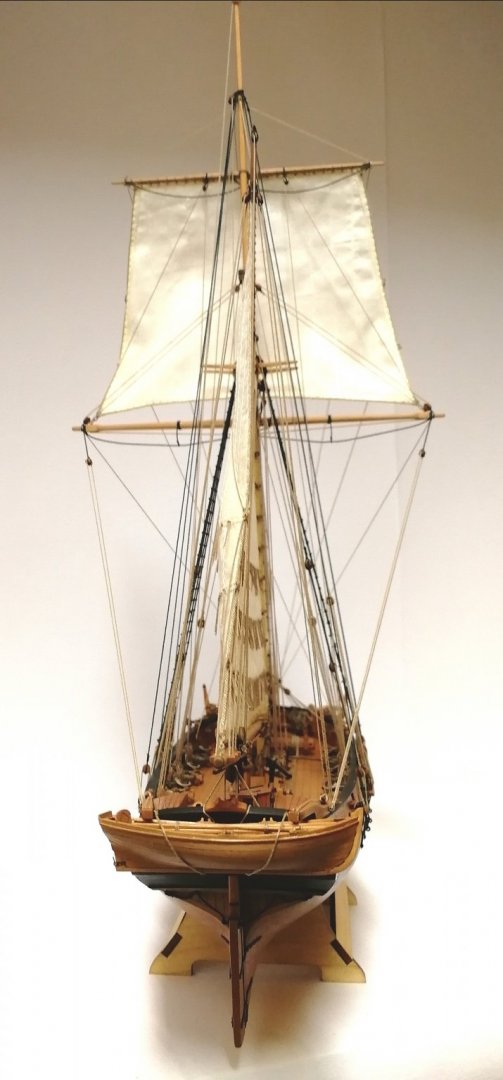
After a long time There is one small update. Unfortunately there is no free time to spent on AVOS these days but today I have received the Glass display. (so to do list is again little longer). At least one picture under the cover

- 315 replies
-
- 12
-
-
- master korabel
- avos
- (and 1 more)
-
Amazing work!
-
No problem at all. I'm glad you like it and perhaps my log helps someone else. I like it!
- 315 replies
-
- 1
-
-
- master korabel
- avos
- (and 1 more)
-
MK do more sizes. I think they have 3 different mini kits in 1/72 scale.
-
I'm almost sure it is pear. MK is using pear for their finish of "High-end" kits.
- 77 replies
-
- 5
-
-
- morel
- master korabel
- (and 1 more)
-
The planking looks perfect! Will follow your progress with interest
- 77 replies
-
- 4
-
-
- morel
- master korabel
- (and 1 more)
-
I would love to see your build. I am actually really suprised that there aren't much more building logs of this kit. It is such a great kit for reasonable price I would say! I hope you share your progress with MSW group. If you would need any of help, I'm happy to try. @yvesvidal @Edwardkenway @JpR62 thank you guys for your kind comments, really appreciated! Also thanks for all the likes!
- 315 replies
-
- 4
-
-
- master korabel
- avos
- (and 1 more)
-
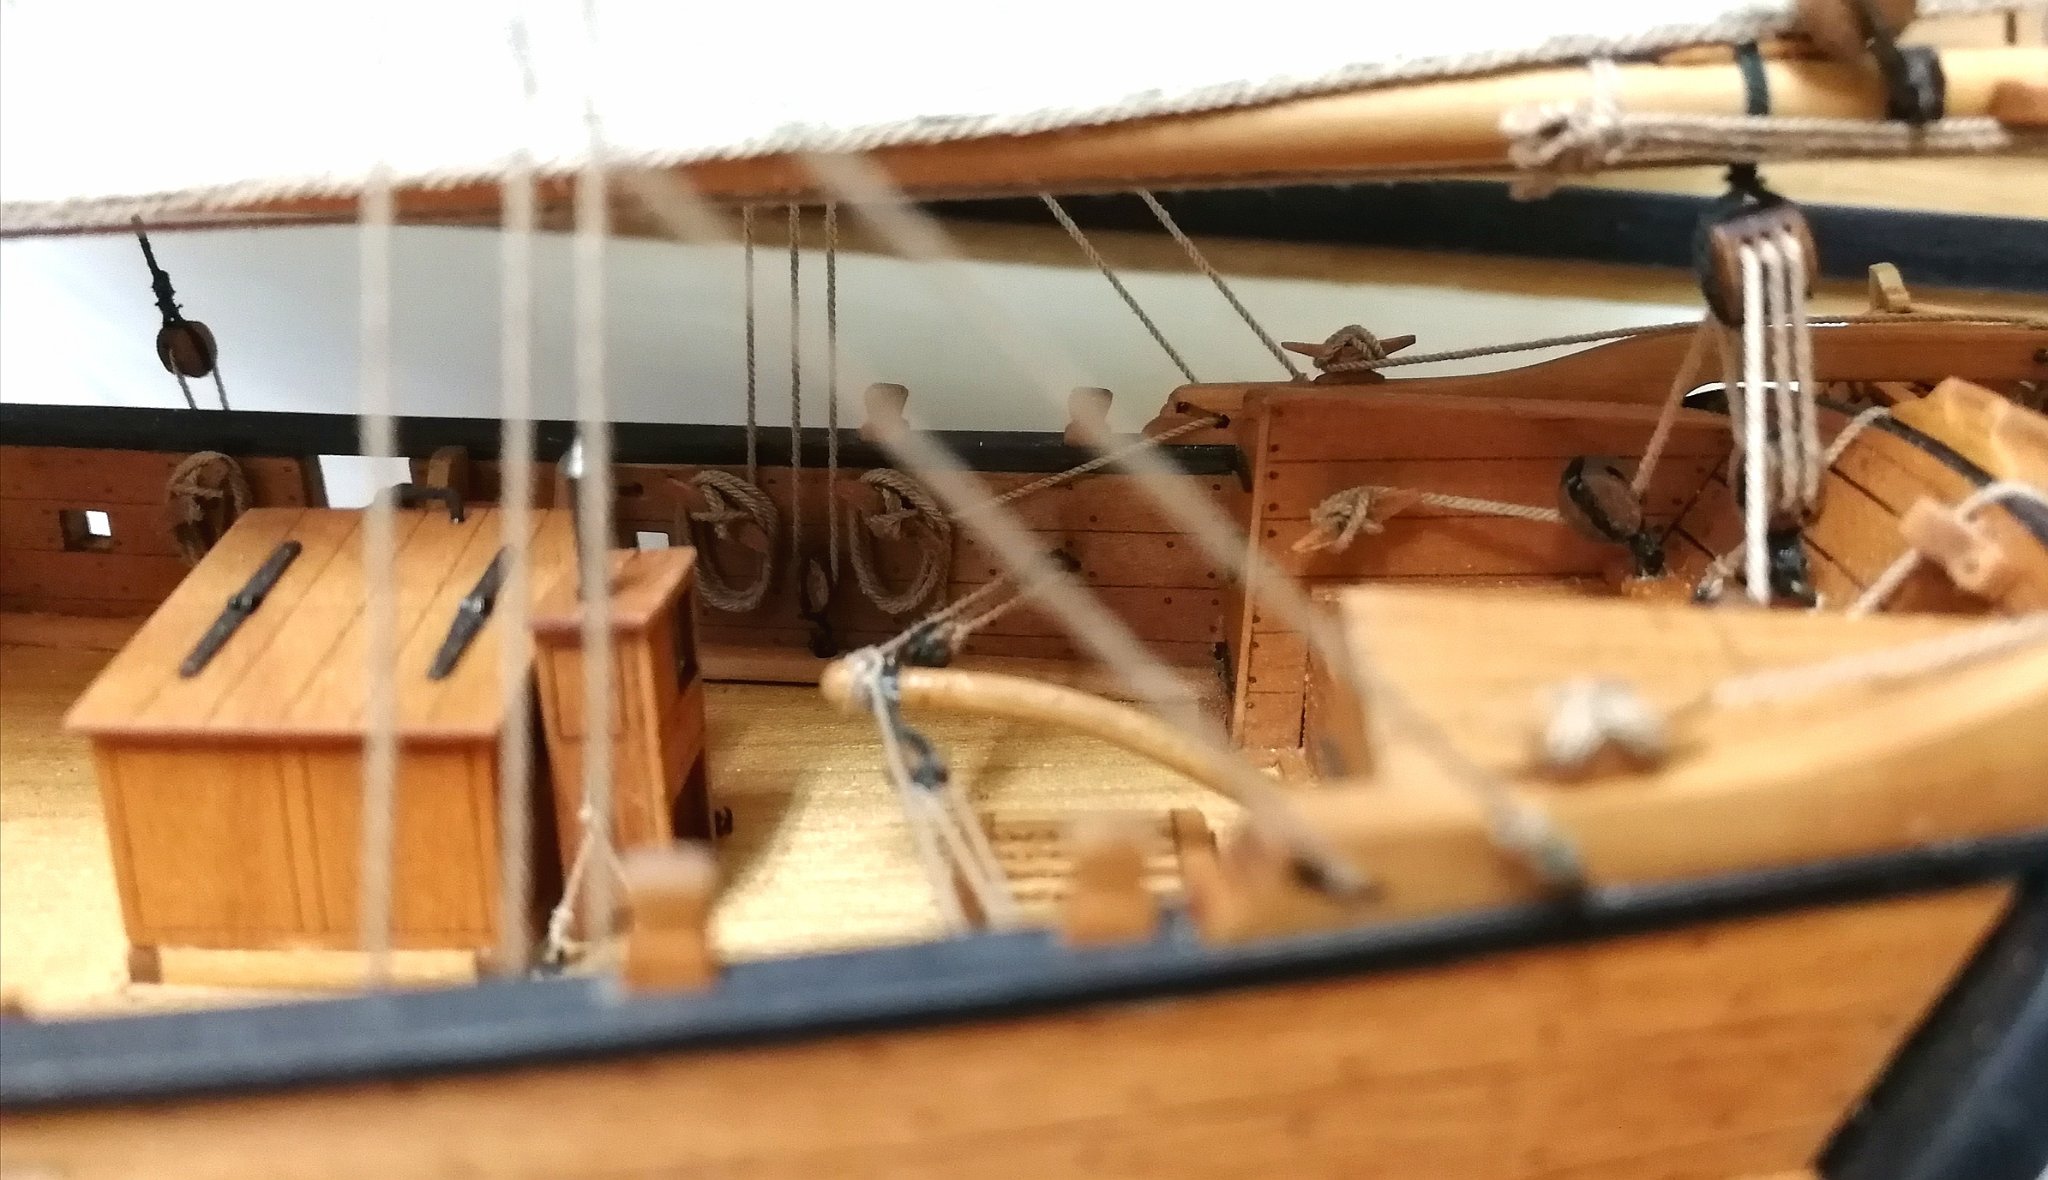
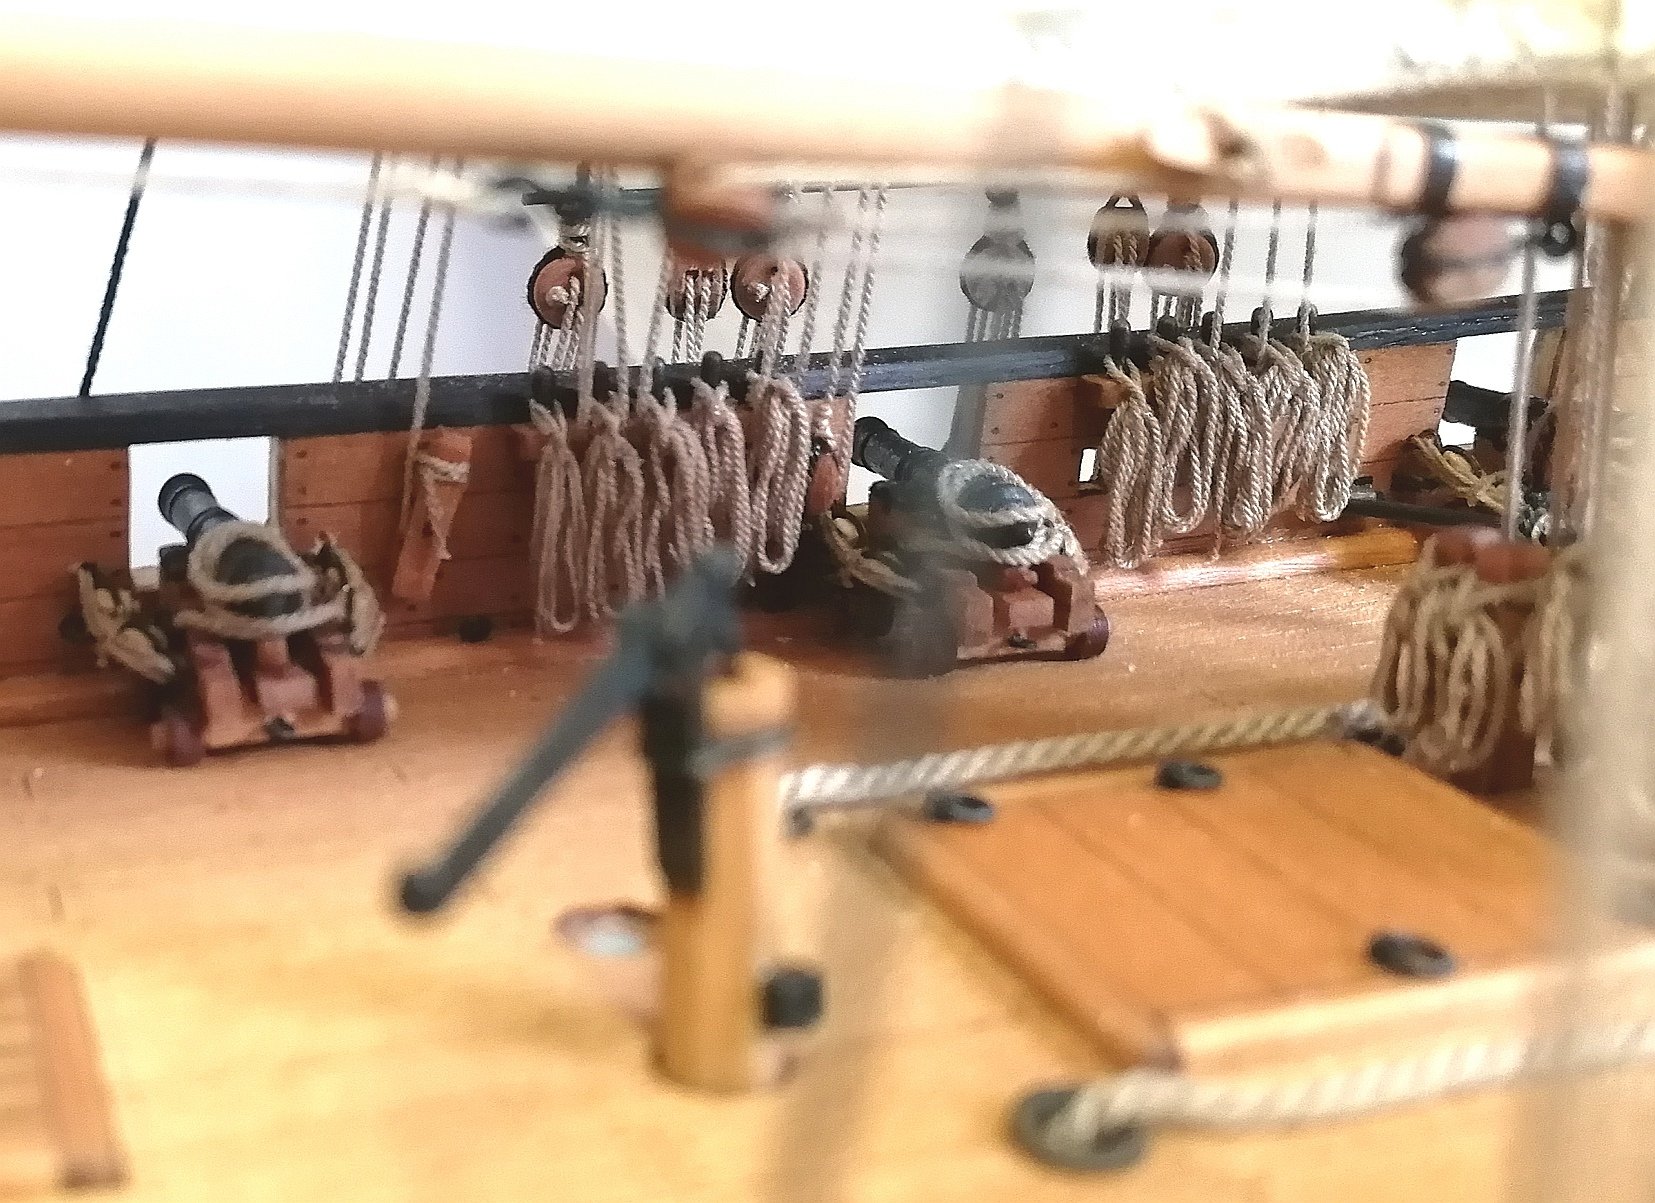
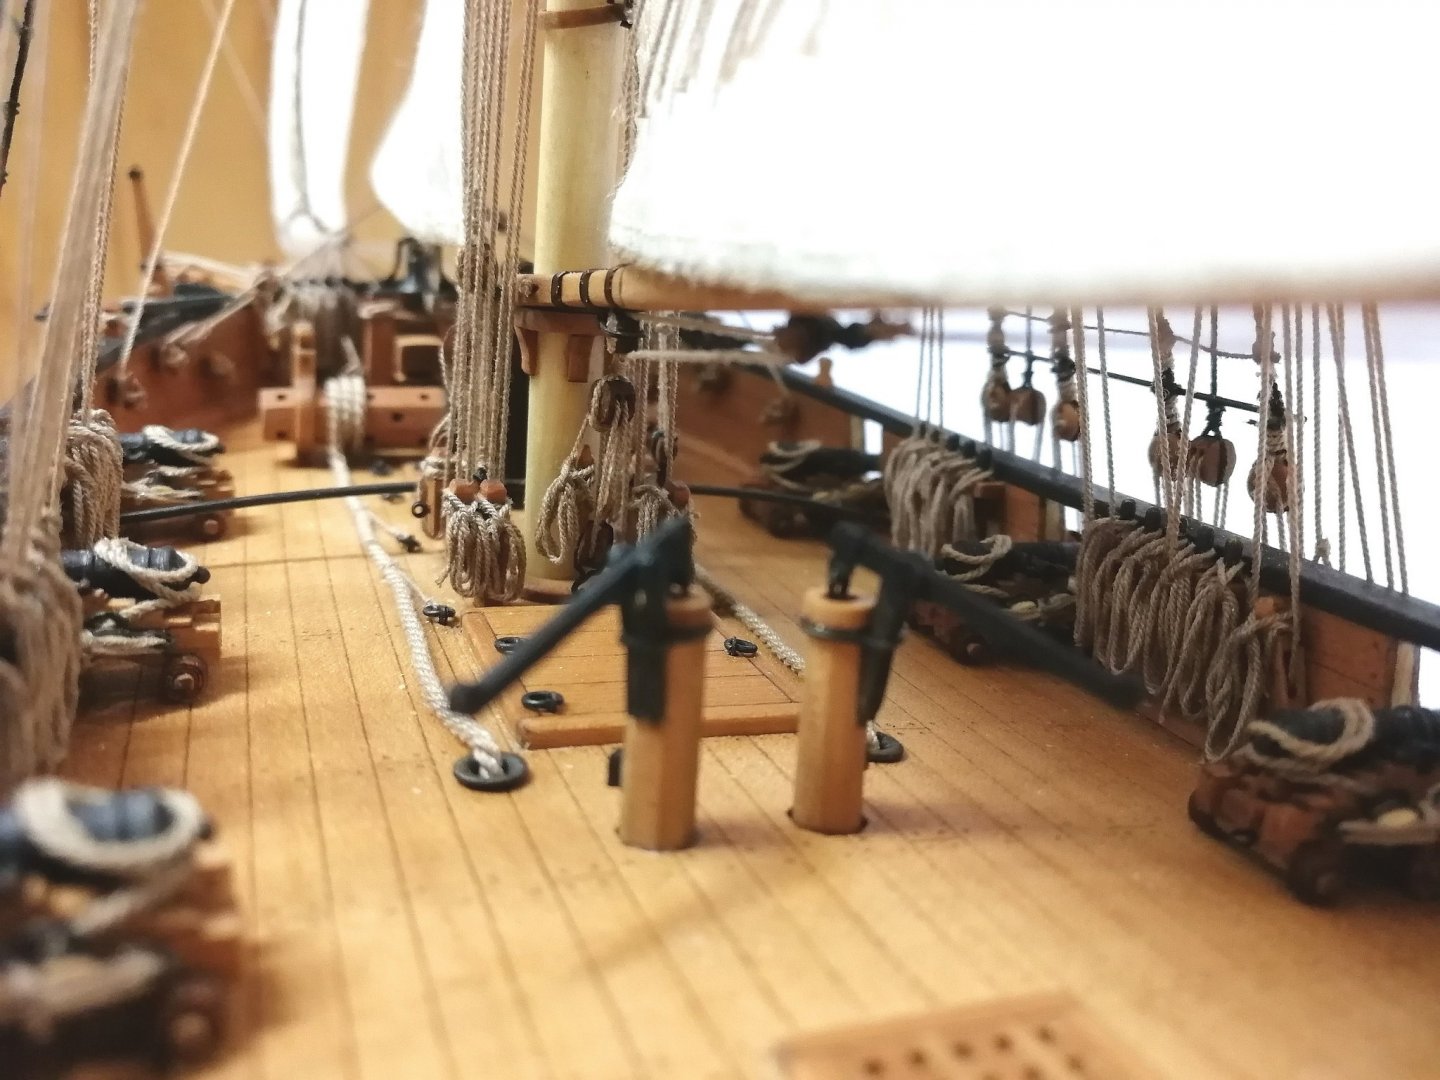
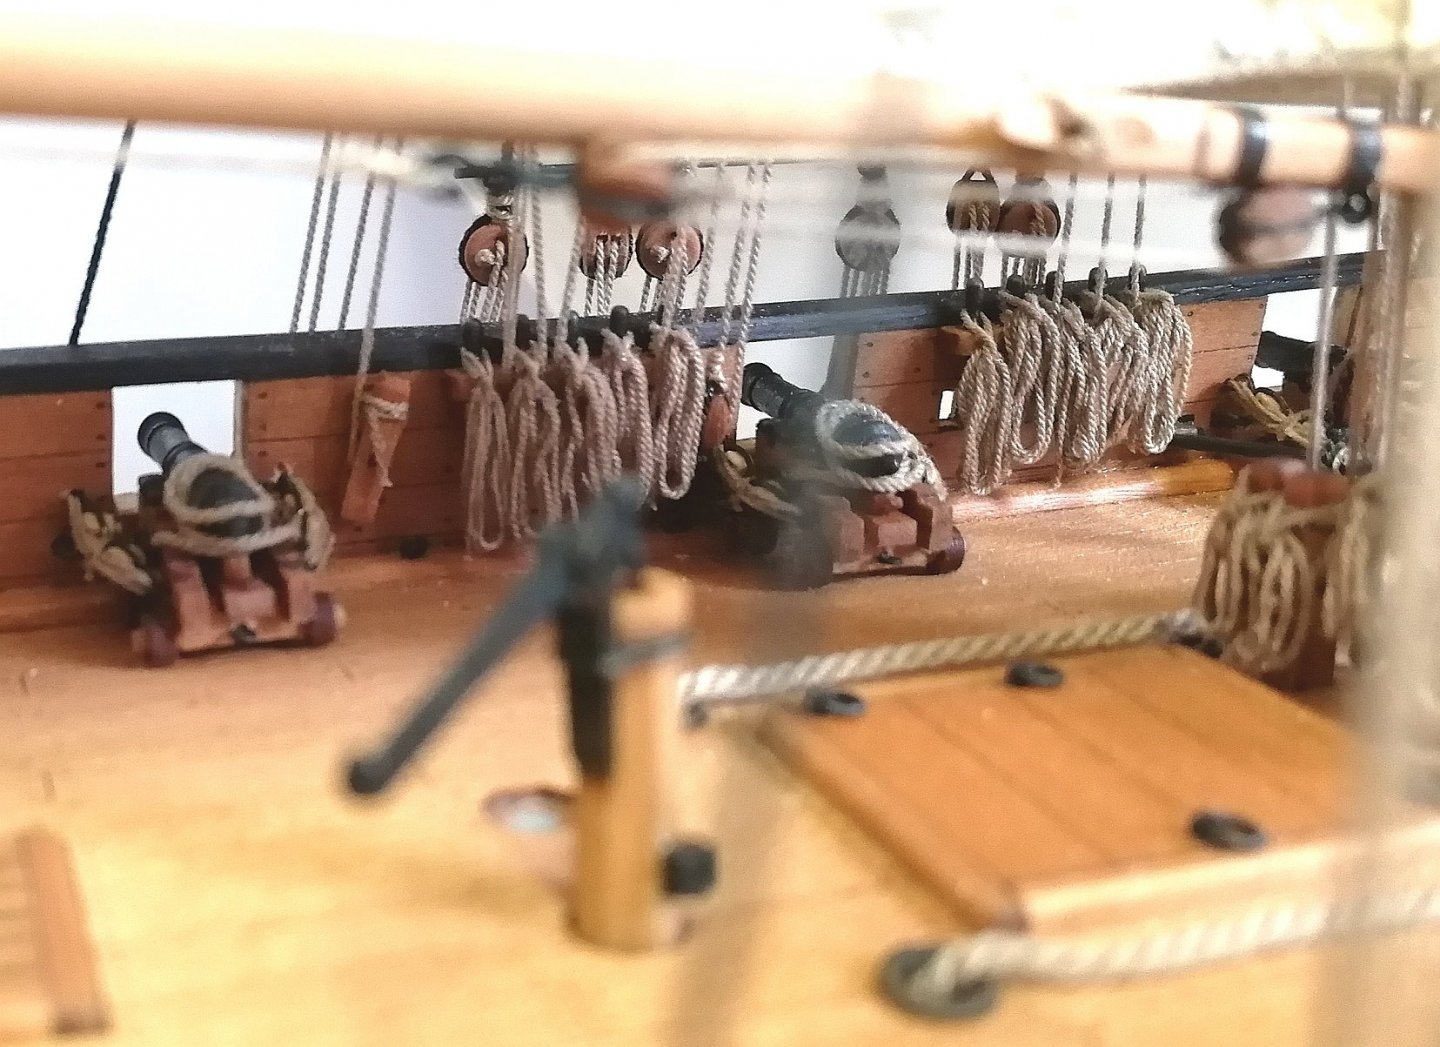
All pins are now equiped with coils..... So I can move to cleats. And few overview pictures.


- 315 replies
-
- 22
-
-
- master korabel
- avos
- (and 1 more)
-
Making Rope Coils with a Jig by Peta_V
Peta_V replied to ccoyle's topic in Masting, rigging and sails
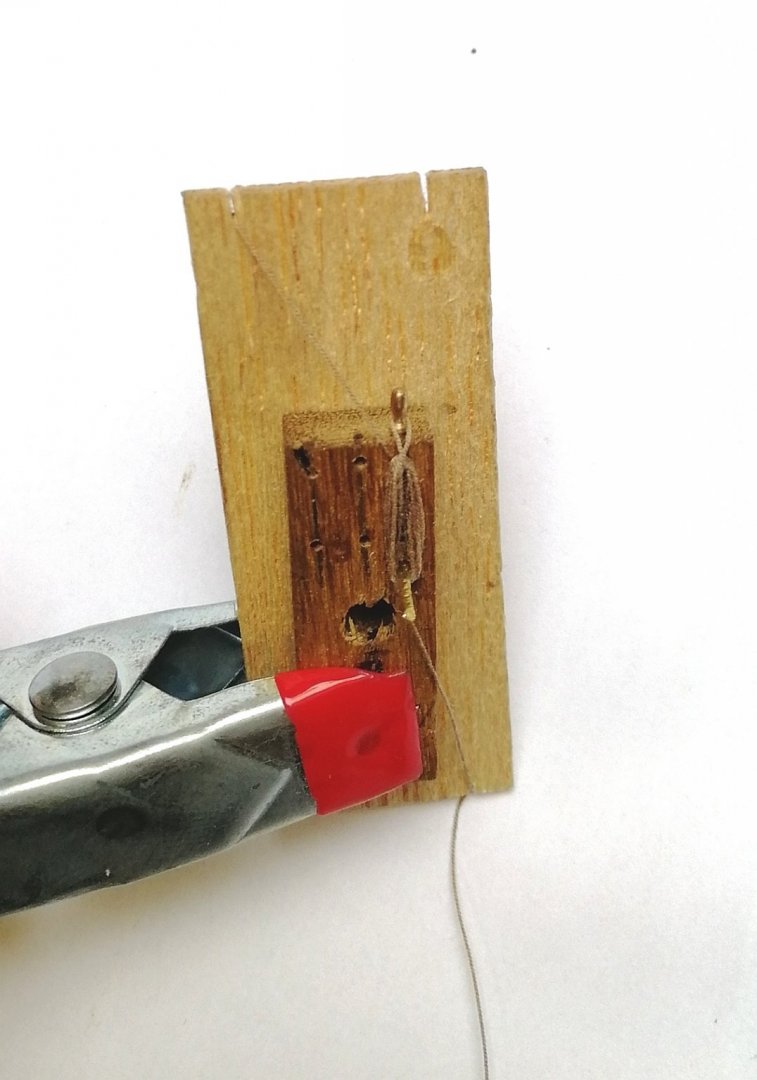
@Justin P. Yes, the line is attached to the pin with "8-style" knot (same as in reality) then cut and the eye of the coil goes over the knot. CA glue is used to simulate some weight. In 1/72 scale (which is my AVOS) everything is so tiny that it would not be podsible to do it on the same line. (I'm having problems only hang the coils on some places on fully rigged model)! Peta_V -
Sure, no problem!
-
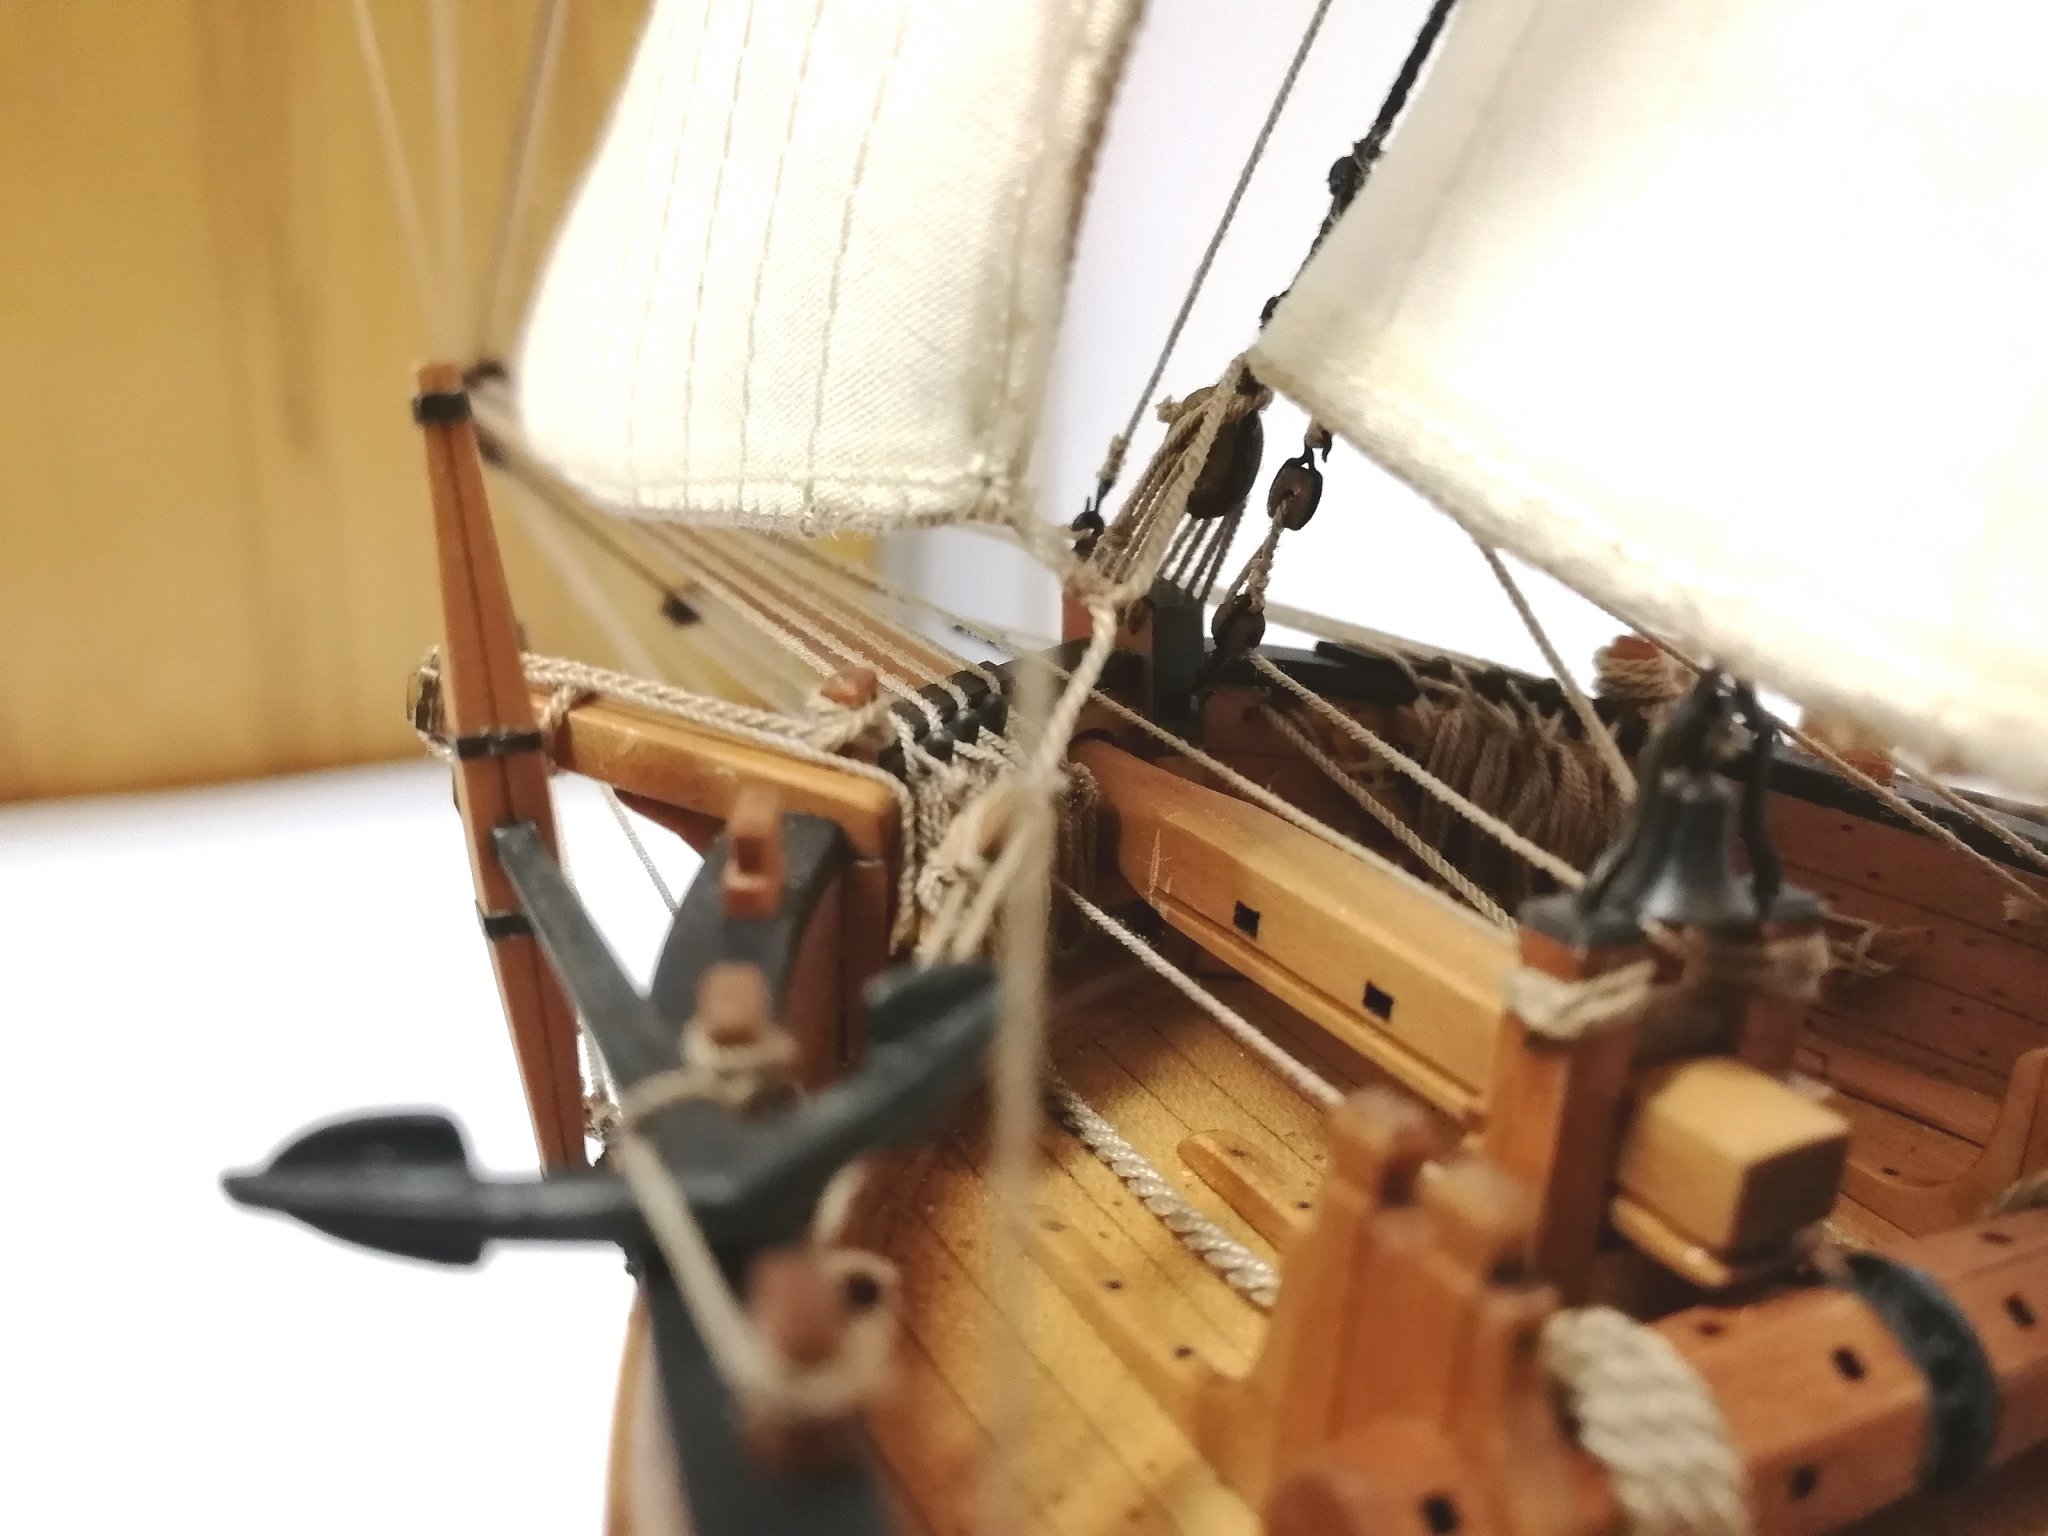
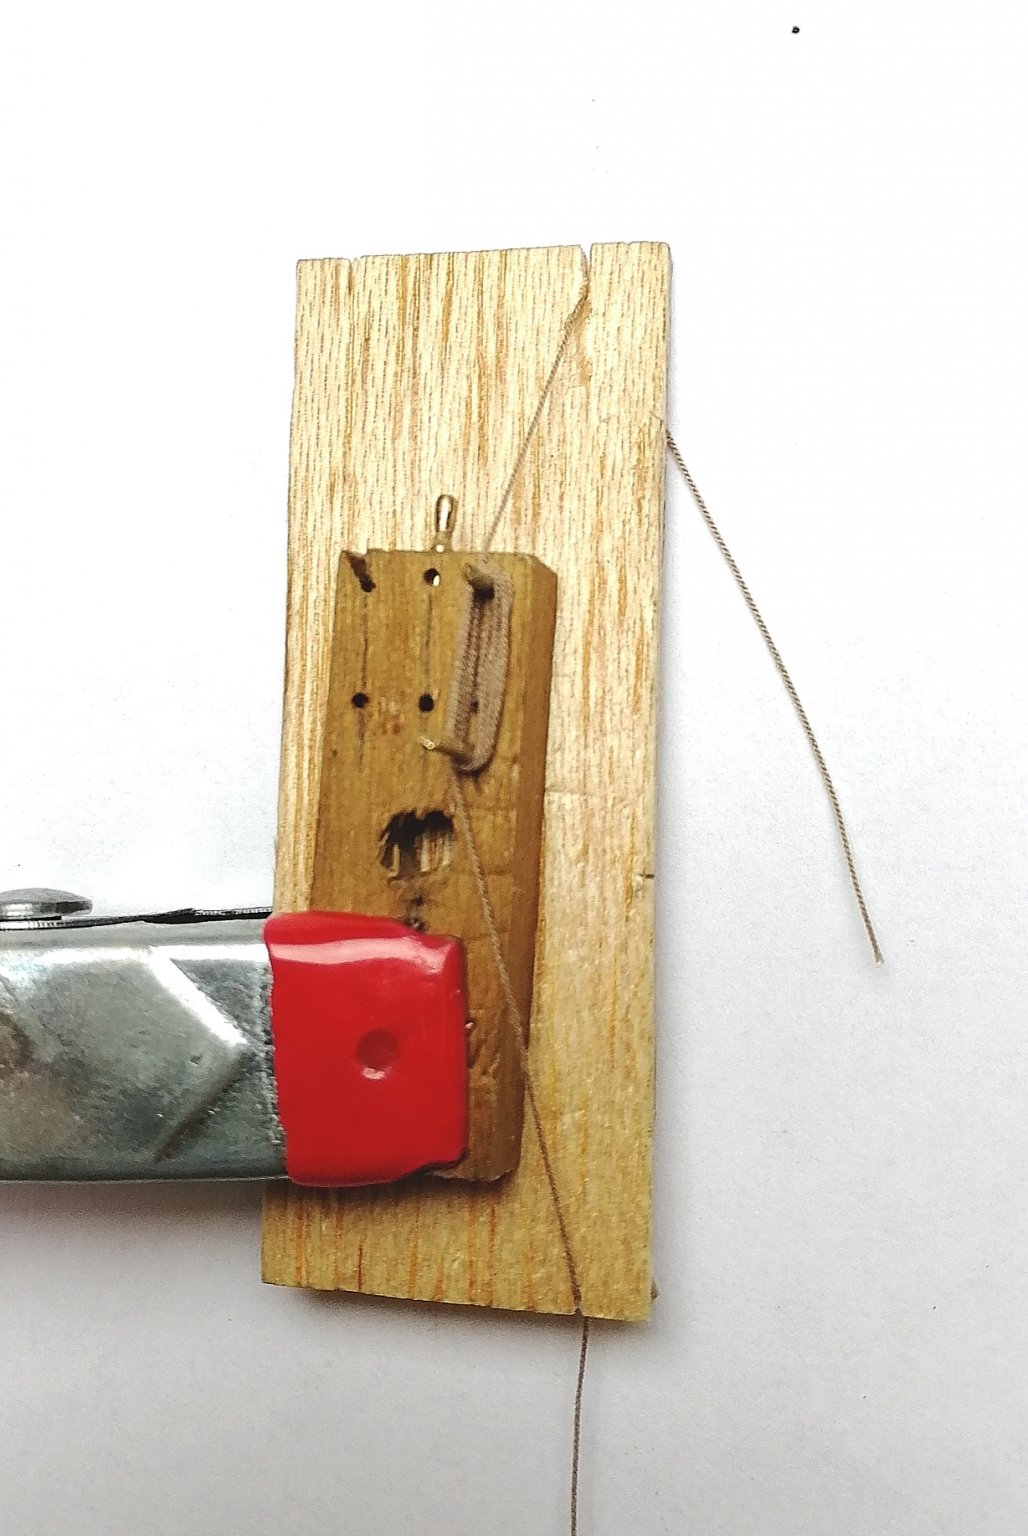
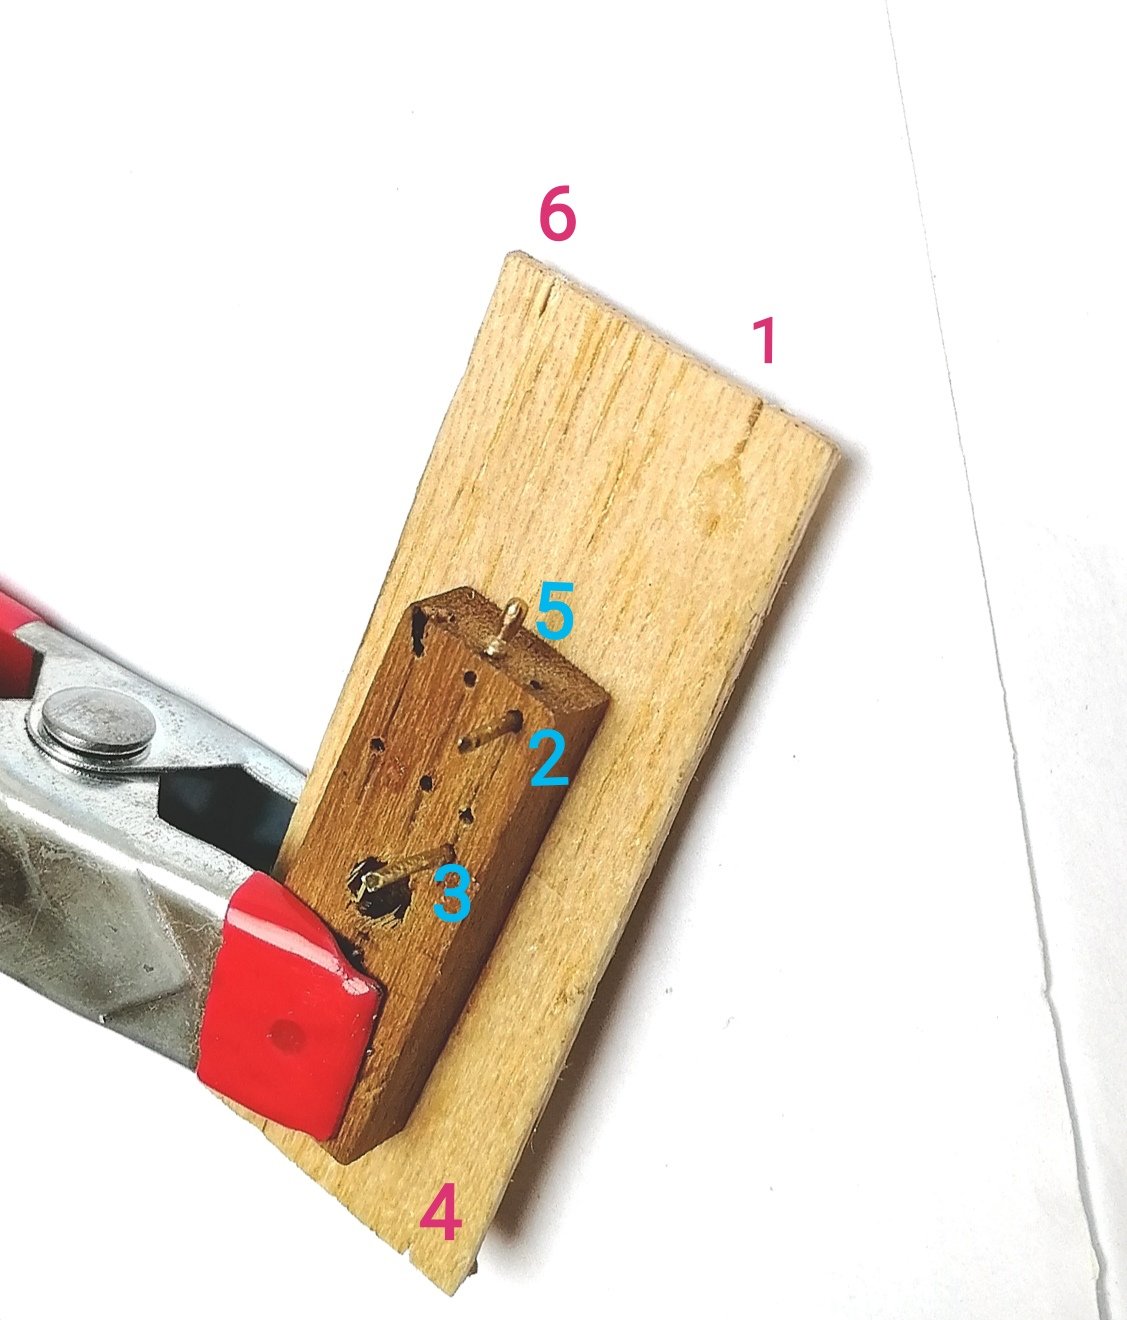
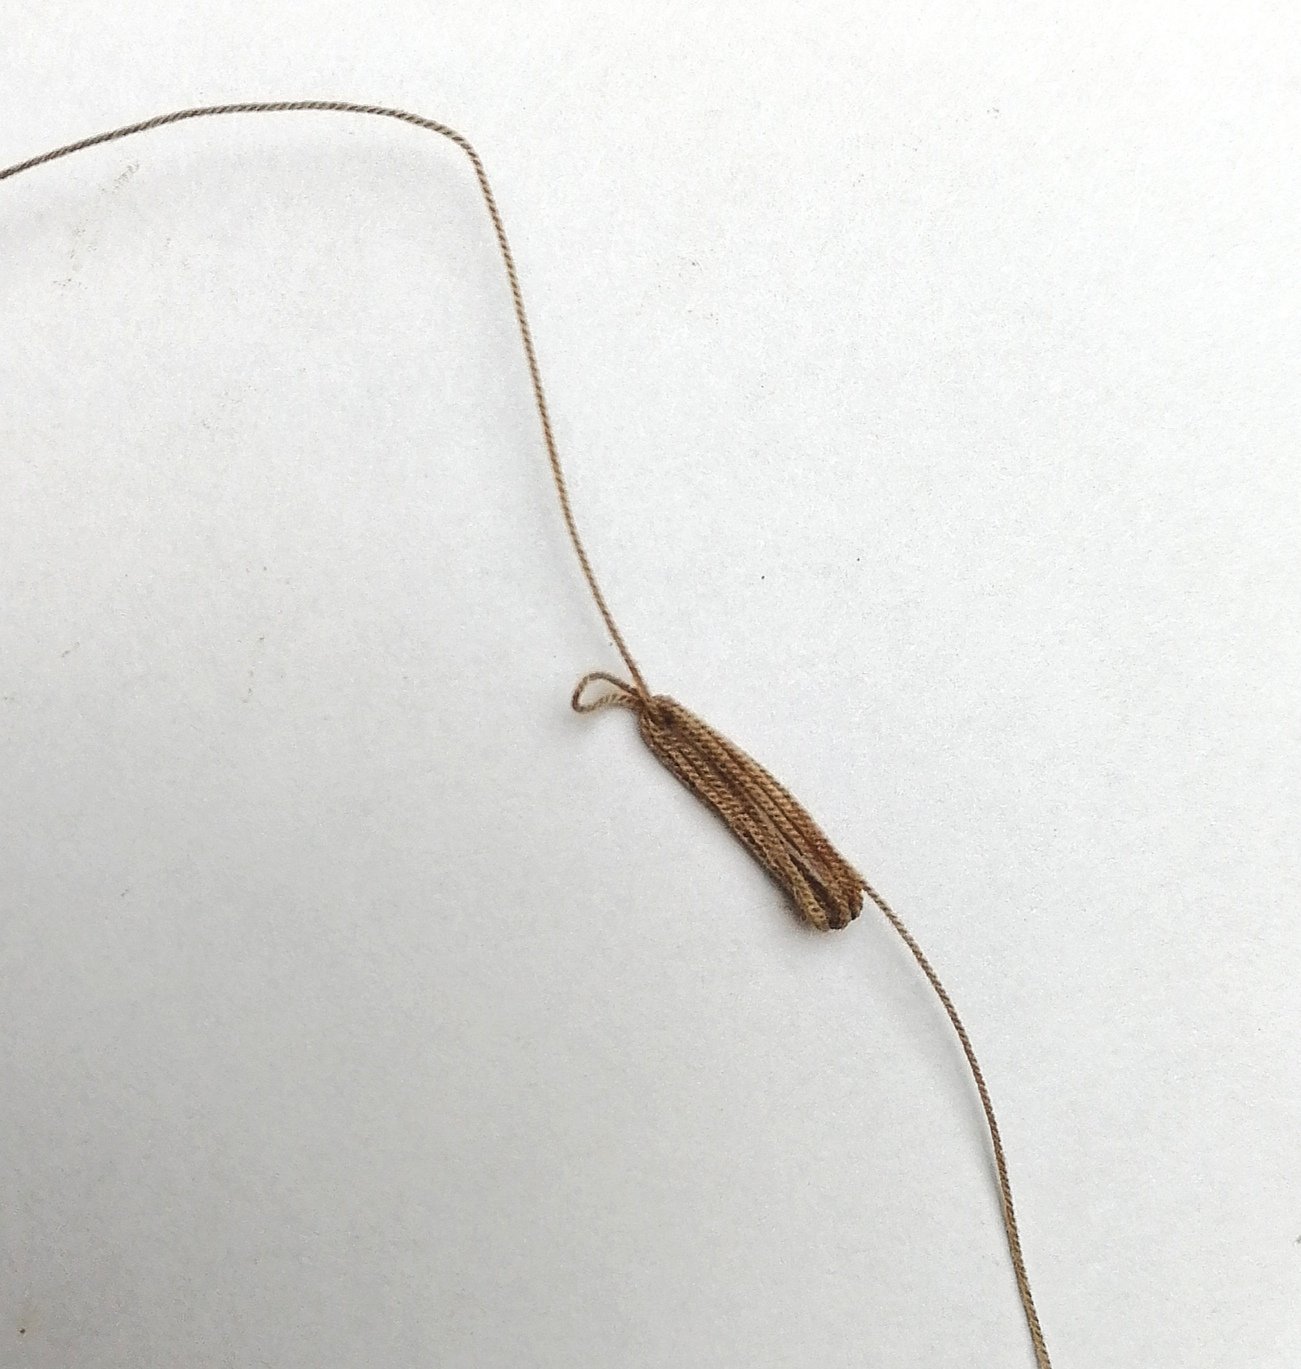
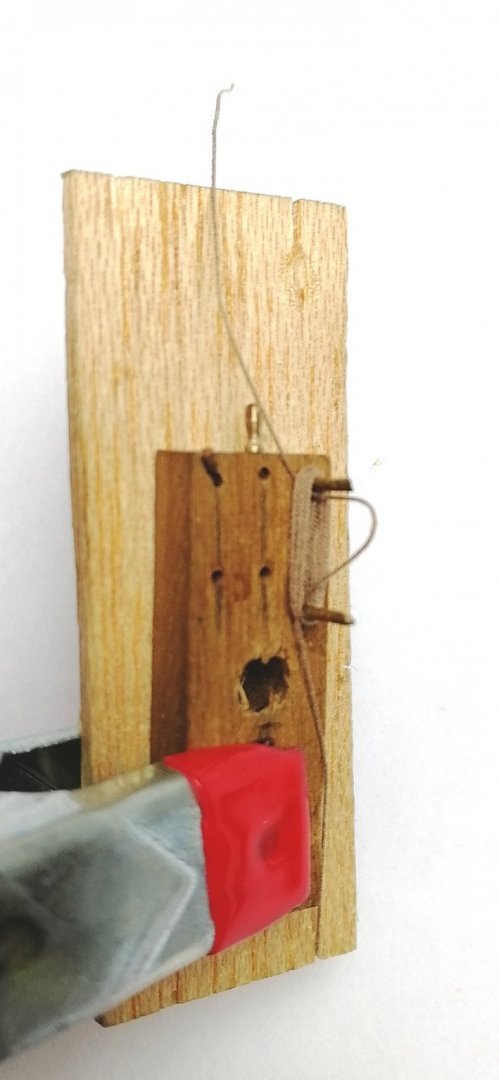
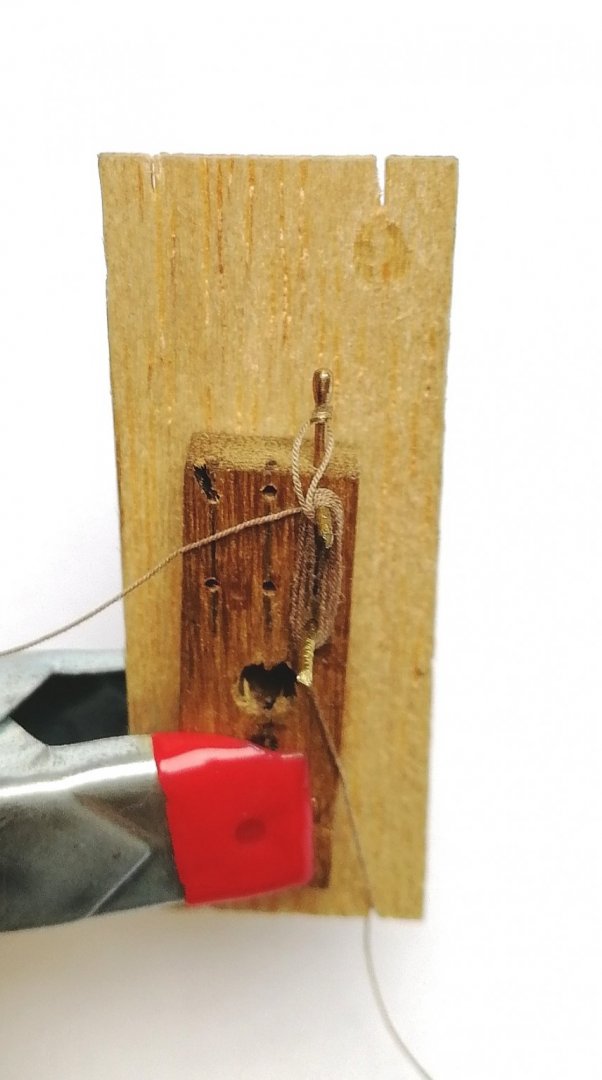
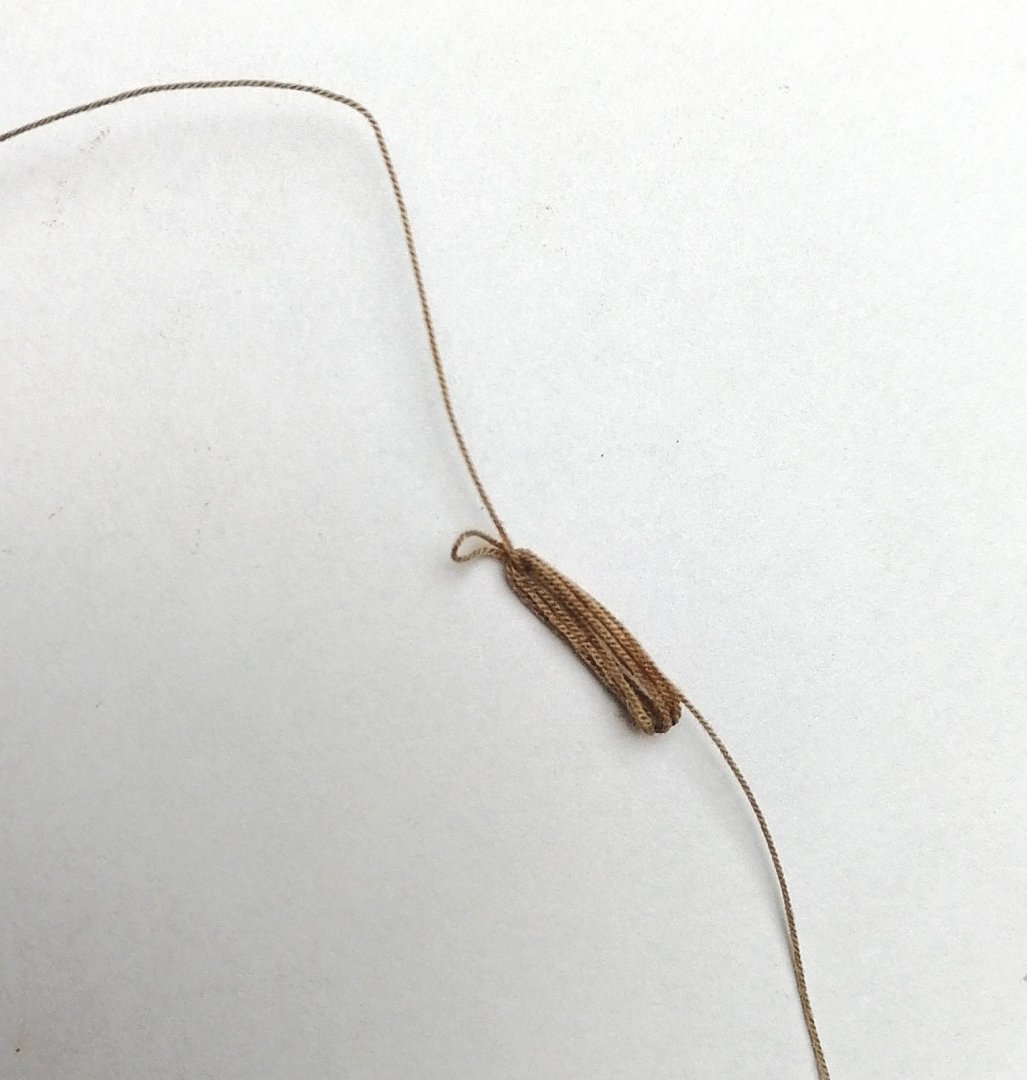
Here is a short guide, how I do coils. I have a jig from the scrap wood with 3 removable pins (2,3,5) and 3 securing points (1,4,6). 1. Secure the line to point 1 and make several loops around pins 2 and 3. I do 4-6 loops so the coils does not look similar. (I start with removed pin 5). Once finished with loops secure the other end to point 4. 2. Unsecure line from point 1 and pull out the very first loop through the middle of the coil. 3. Now you have to twist this to form the eye and secure it with pin 5. 4. Remove pin 2 and fully insert pin 5. Now you can adjust the coil as you want a once happy secure the end to point 6. 5. Now I secure the coil with 3 drops of CA glue. One where the eye meets coil, second ať the bottom of the coil and third to secure the loose end to the coil. Remove the coil from the jig by removing pin 5 and trim the excess thread. 6. Place the coil on the deck Perhaps someone finds it usefull. Stay healthy! Peta_V


- 315 replies
-
- 13
-
-
- master korabel
- avos
- (and 1 more)