HOLIDAY DONATION DRIVE - SUPPORT MSW - DO YOUR PART TO KEEP THIS GREAT FORUM GOING! (Only 13 donations so far - C'mon guys!)
×

Peta_V
-
Posts
351 -
Joined
-
Last visited
Content Type
Profiles
Forums
Gallery
Events
Everything posted by Peta_V
-
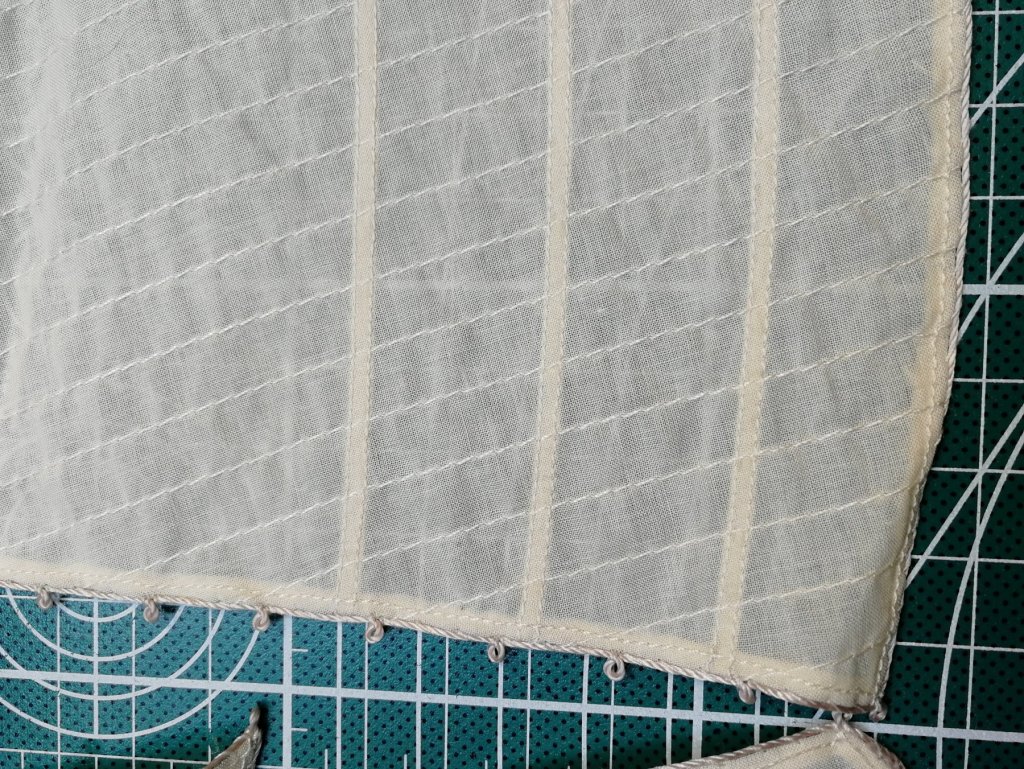
I continue building the model of the hedgehog. The first Layer came out well. Before and after raw sending
- 315 replies
-
- 11
-

-
- master korabel
- avos
- (and 1 more)
-
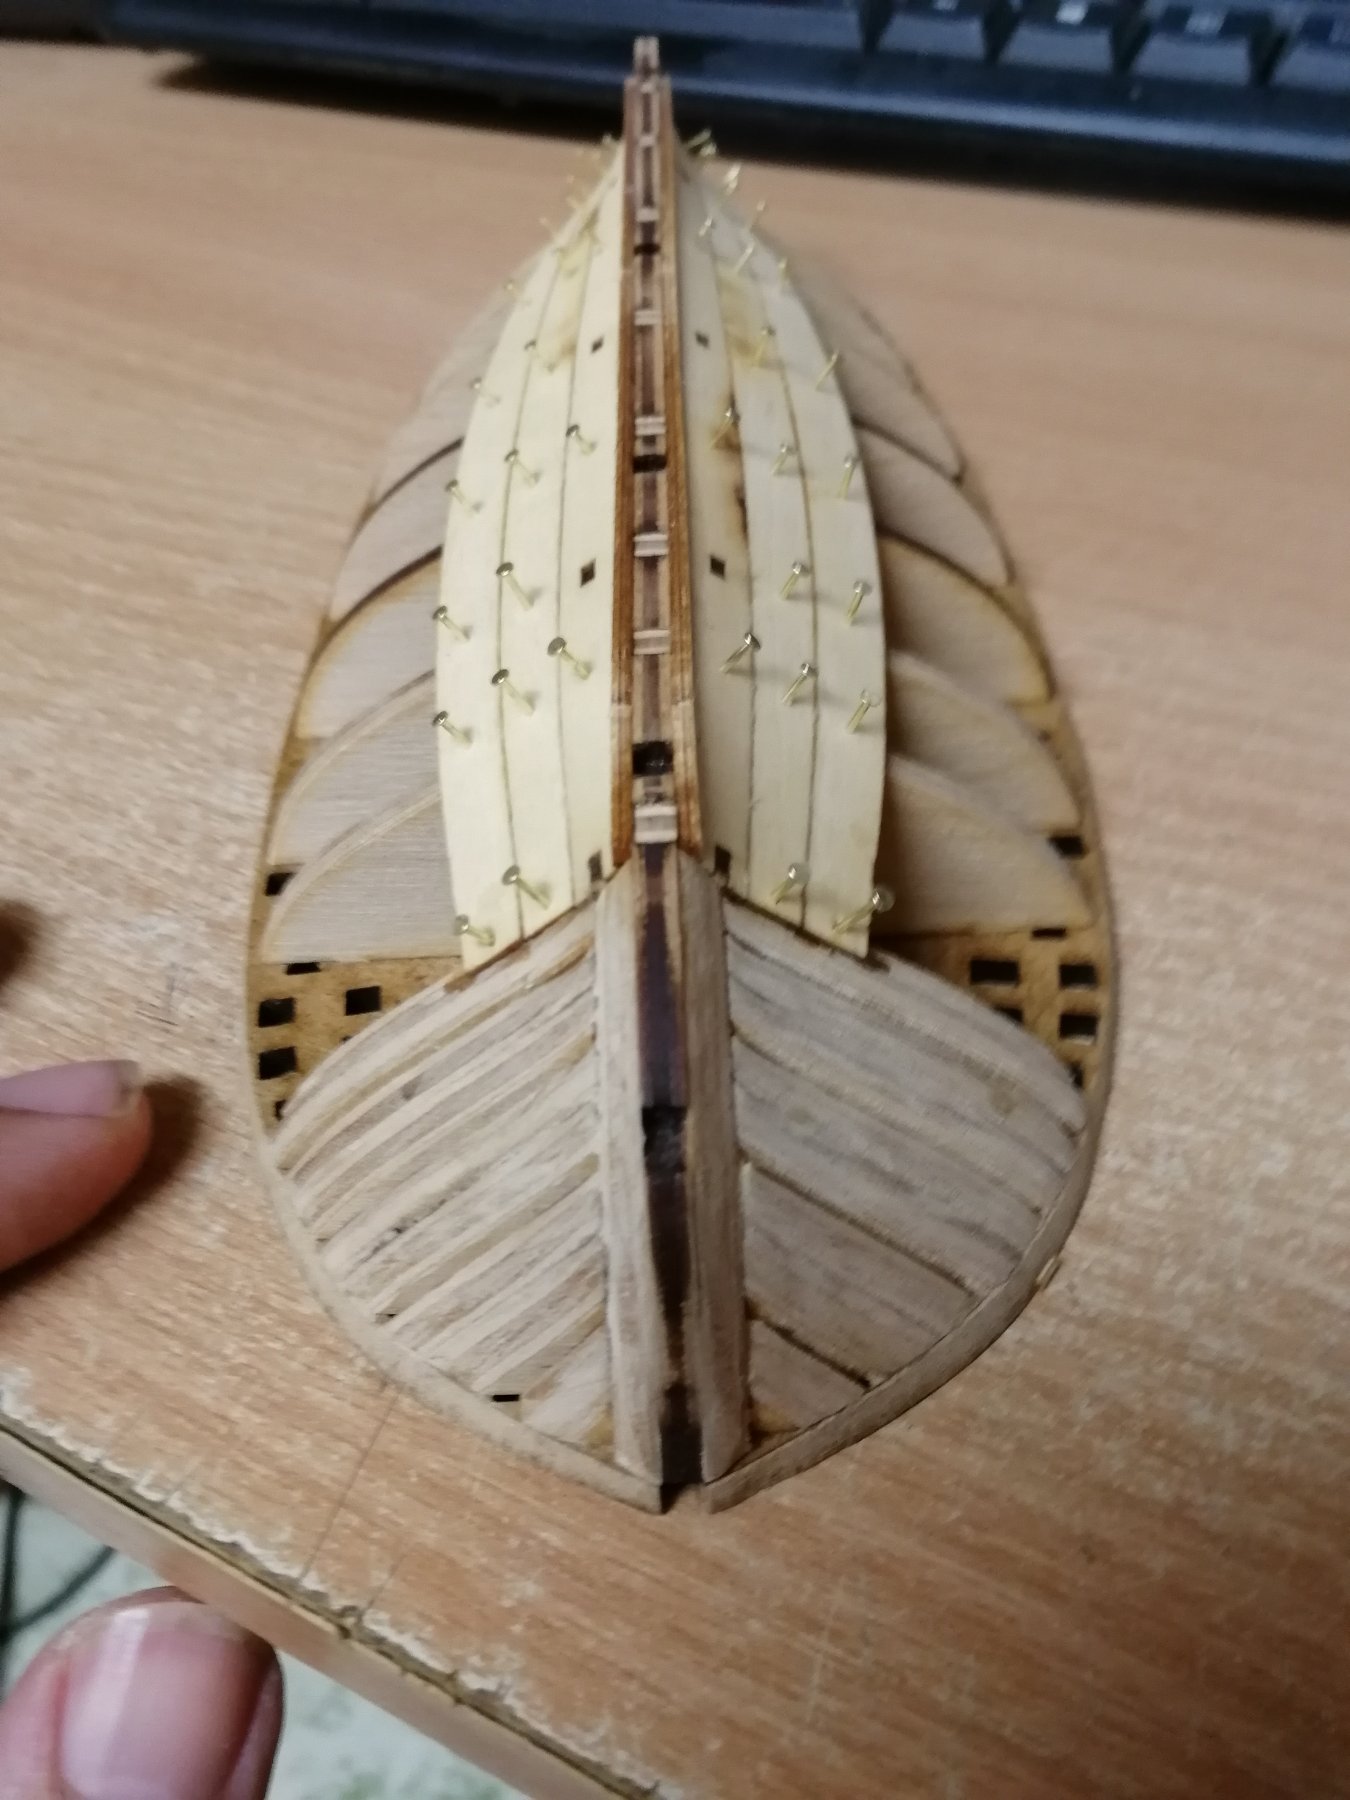
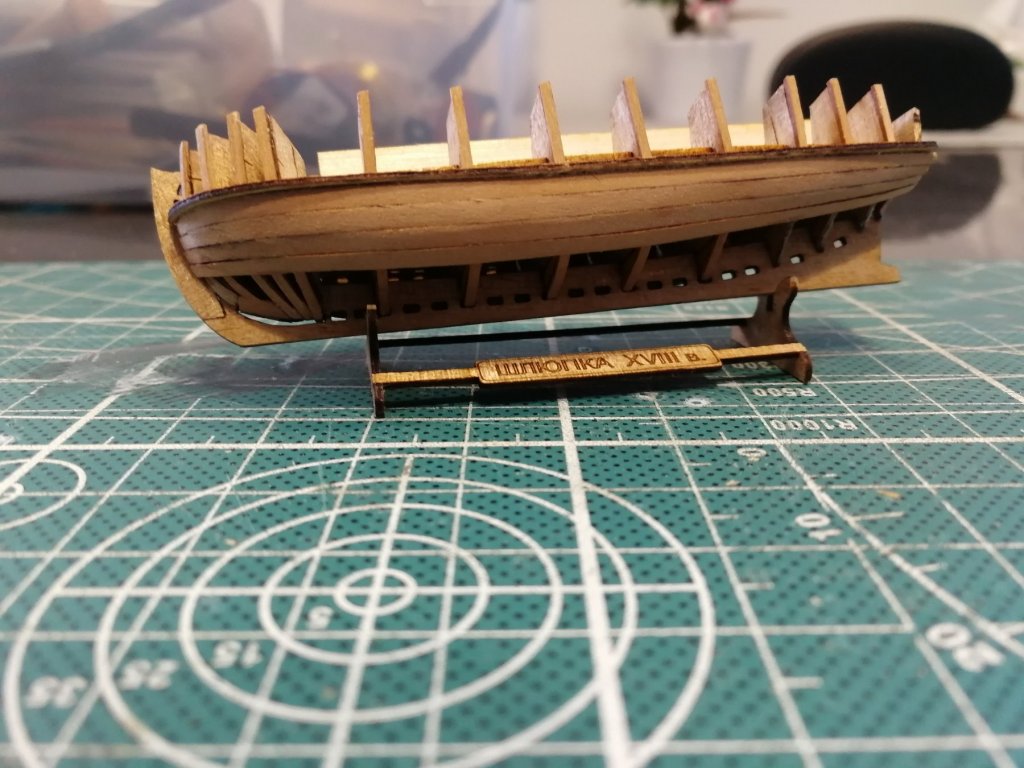
I have added all the remaining bulwarks. Lot of sending had to be performed in the bow and stern area. First 3 rows of the first planking are in place. The nails are going to be remove later.

- 315 replies
-
- 14
-
-
- master korabel
- avos
- (and 1 more)
-
Hi Greenstone, I have started building the AVOS kit..... and I have to say that I have great fun with that. You and your colleagues did an excellent job. Thanks a lot for the experience.
-
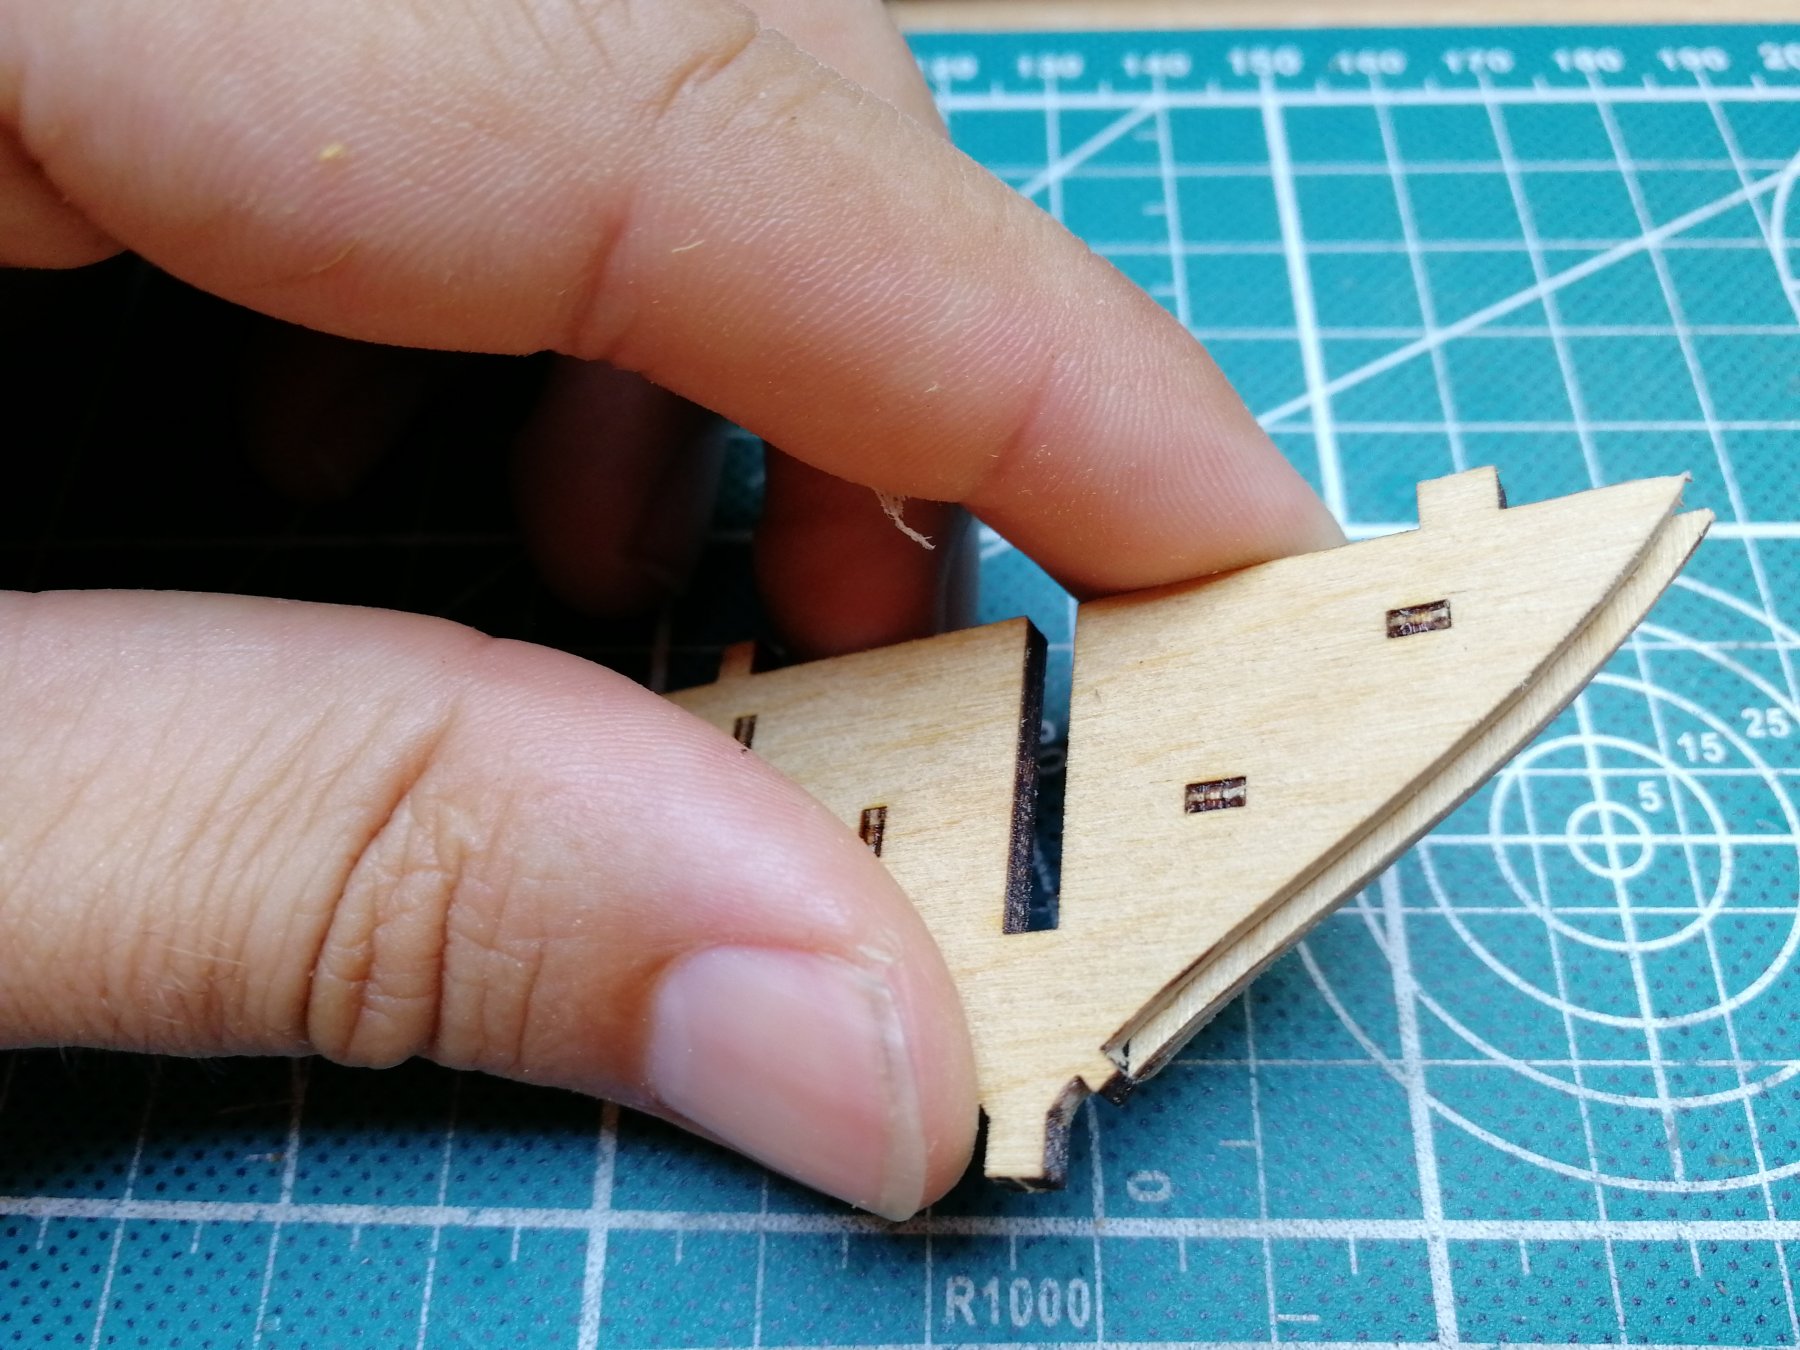
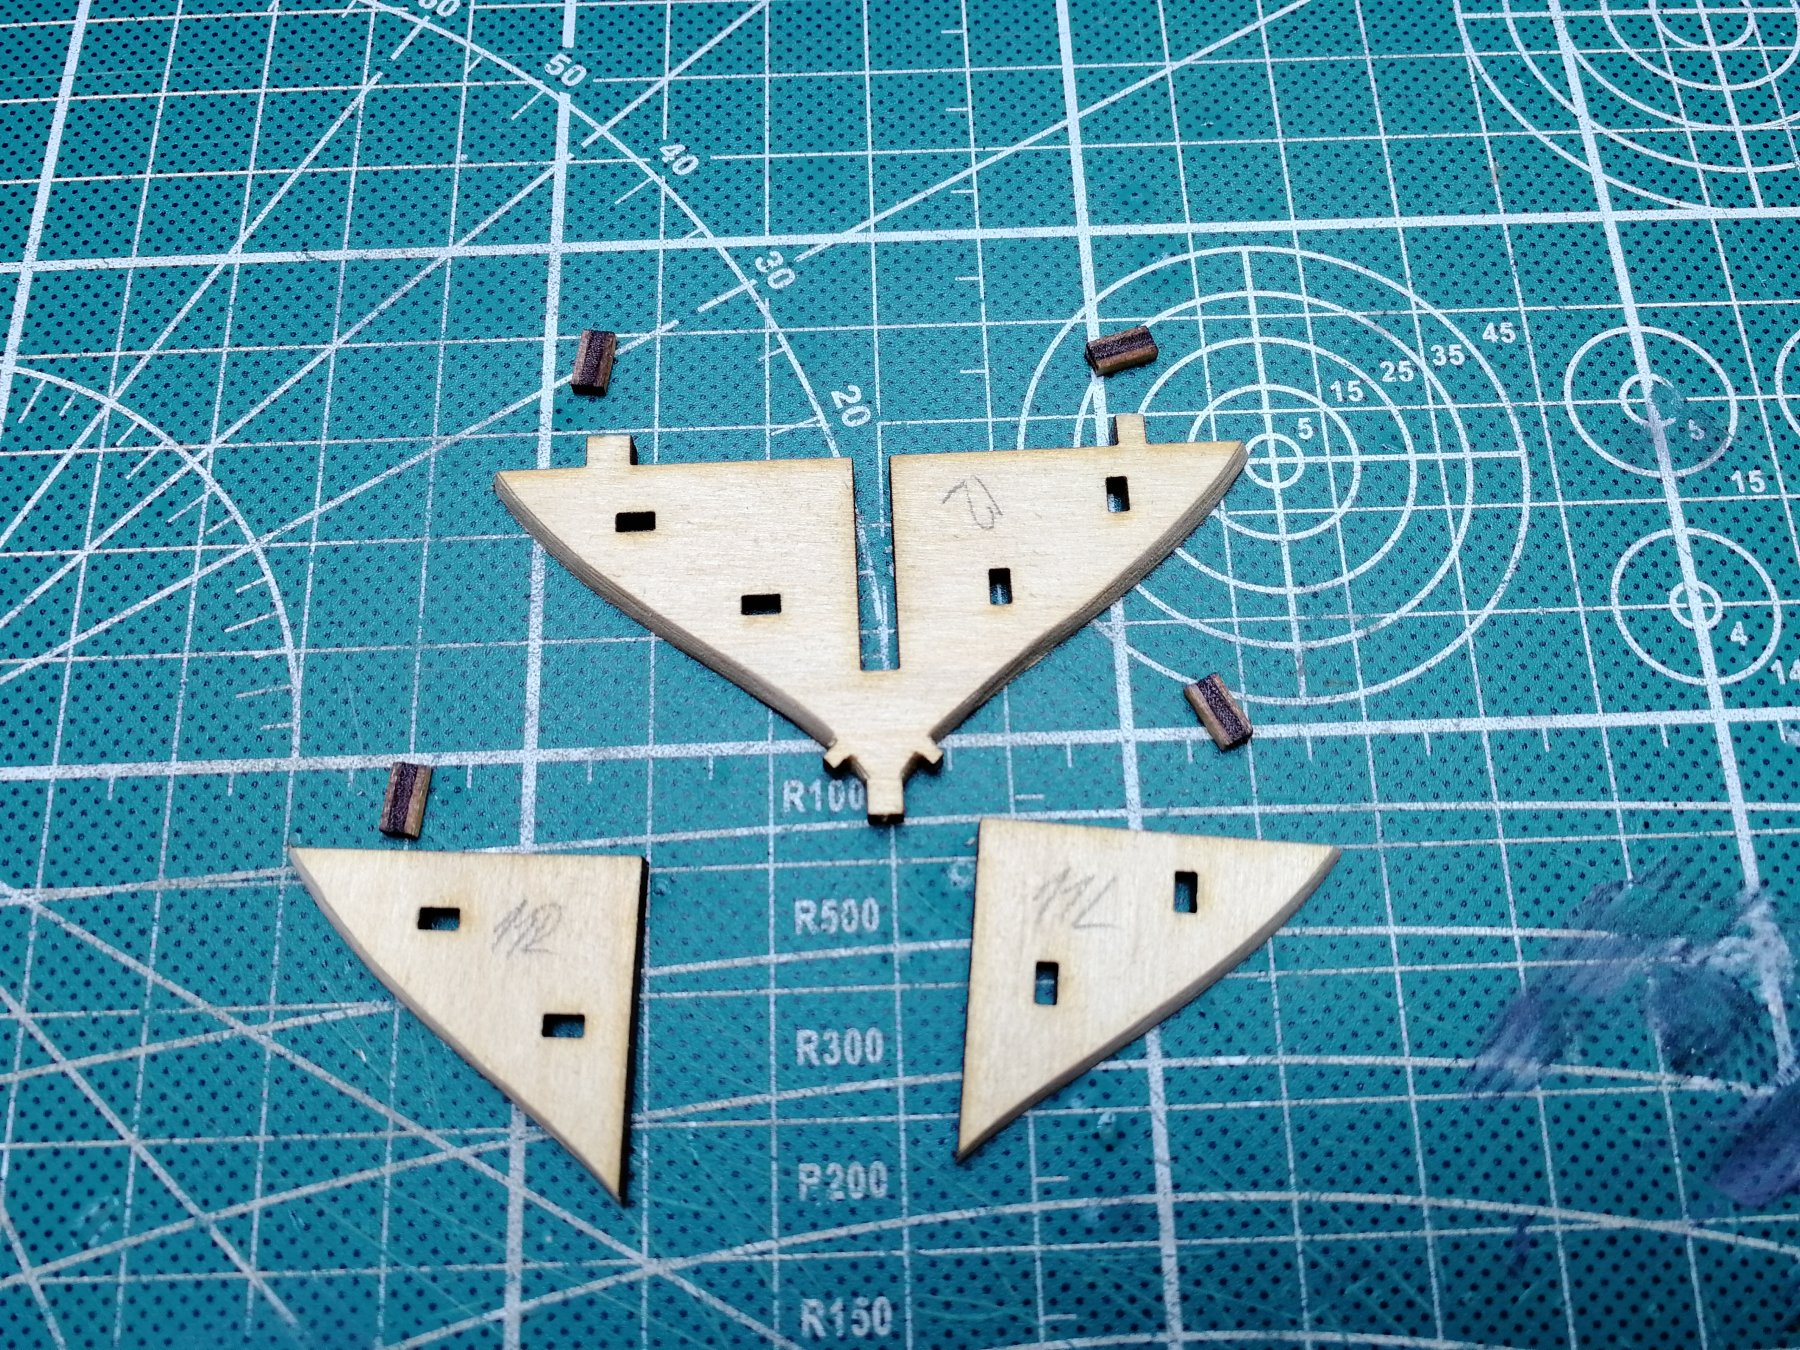
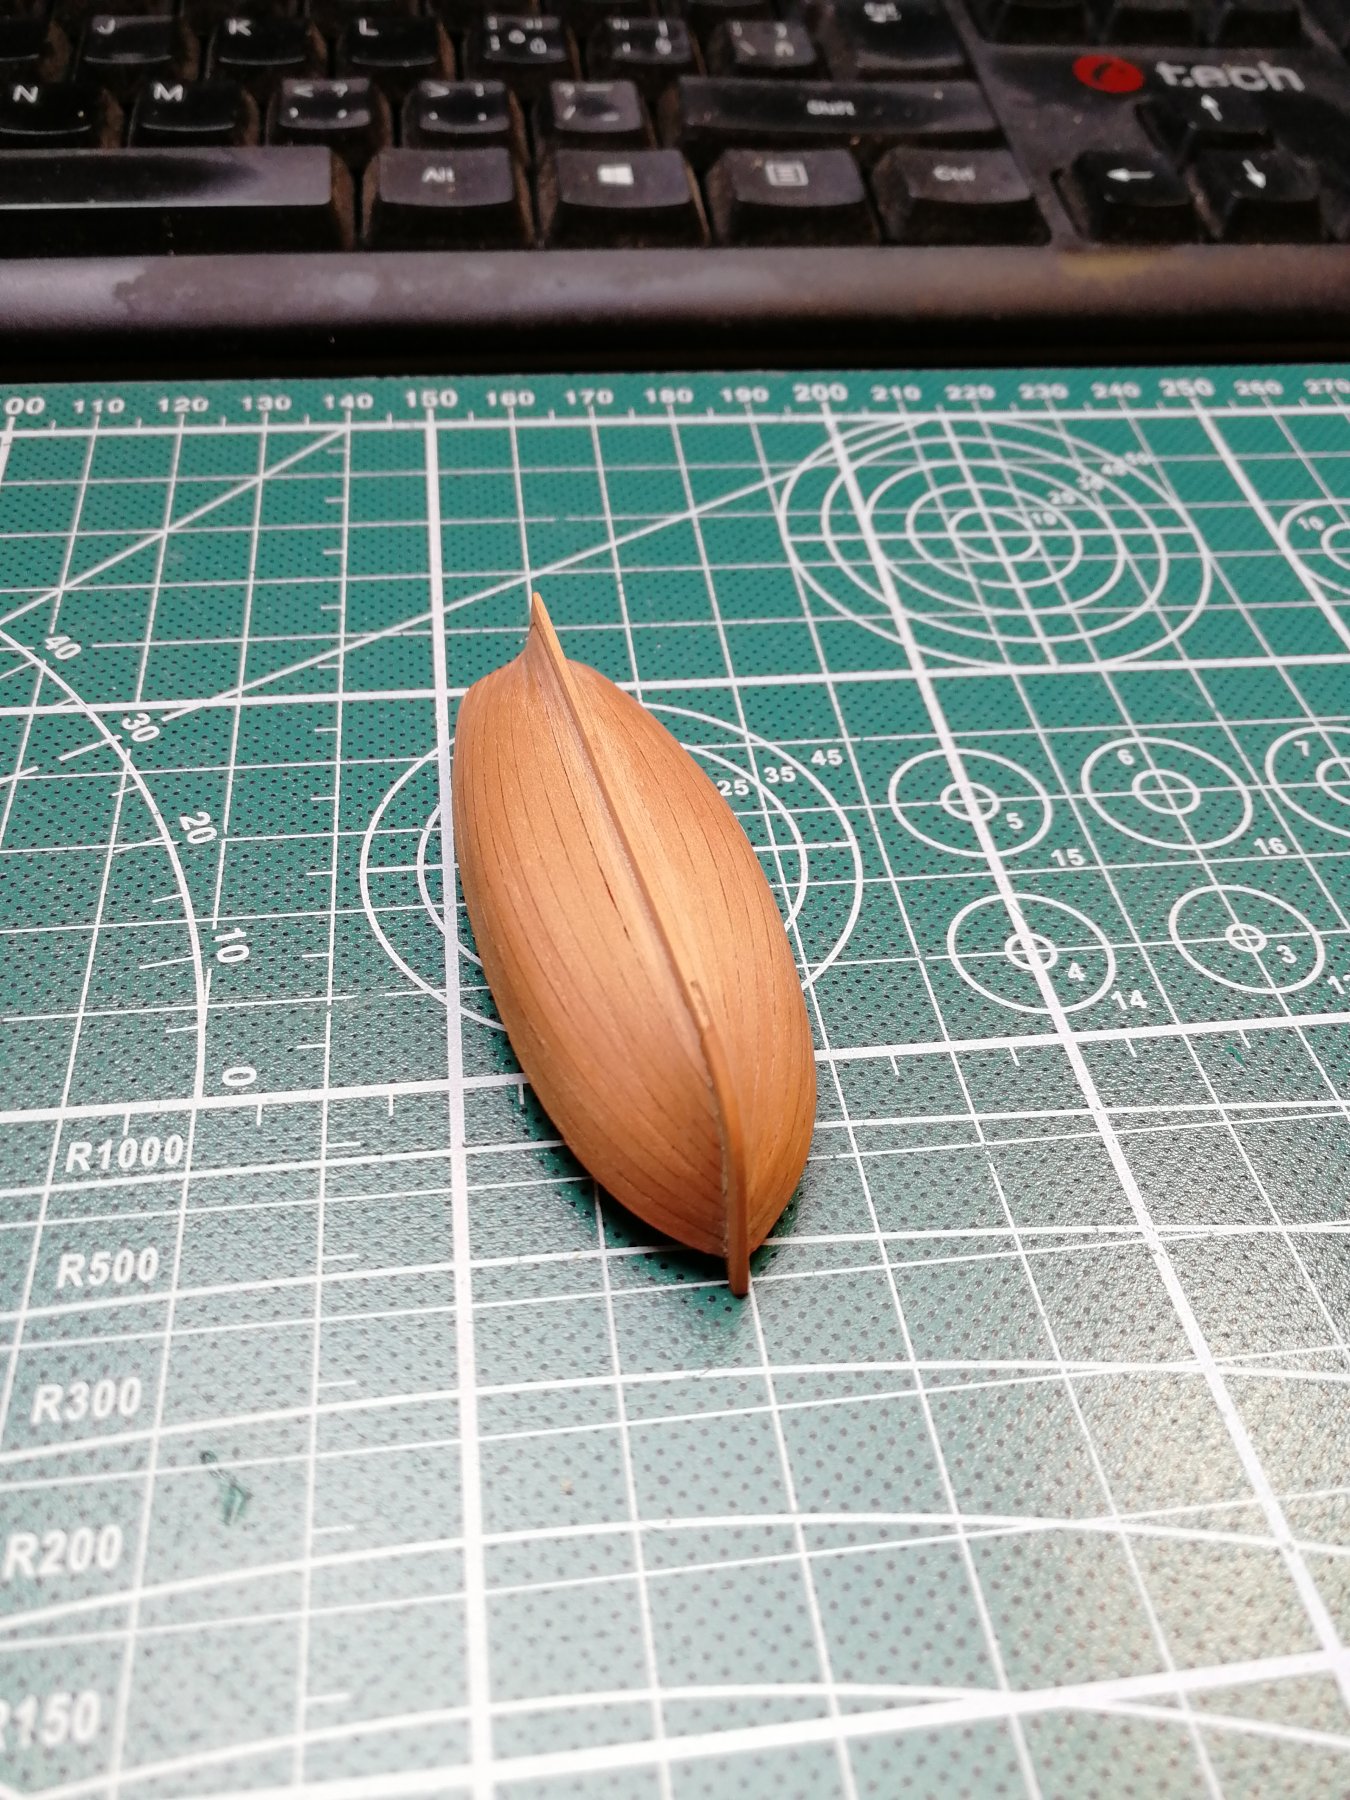
Starting with AVOS build The hearth and bone of the hull Stem pieces. One side sended. I only follow the given lines when sending and it fits perfectly. Can't imagine doing this without dremel It is not a big ship.... How well thought through is this? I do not think There is any space for mistake. Notice the edge for the First Layer of planking. All glued together


- 315 replies
-
- 12
-
-
- master korabel
- avos
- (and 1 more)
-
Hi, thanks for the comment. It still is a long way to go. Several builders from Czech did her with sails and those are lovely build..... https://www.modelforum.cz/viewtopic.php?f=177&t=67731 And https://www.modelforum.cz/viewtopic.php?f=177&t=68726 And of course this masterpiece from paper by Doris https://www.modelforum.cz/viewtopic.php?f=177&t=68385
- 128 replies
-
- 1
-
-
- panart
- anatomy of the ship
- (and 1 more)
-
Hi, I have found the link to the czech webpage where you can find the log with my RC build from the very beginning (13years back). The comment are only in czech but there are many photos. Perhaps it could be usefull as a reference...... PetaV http://www.mo-na-ko.net/php/portal/viewtopic.php?id=713
- 26 replies
-
- 2
-
-
- mantua
- royal caroline
- (and 1 more)
-
Hi guys, I need your help! I have a Hard time to blacken the brass work on the yawl. I did not want to do the blackening before glueing parts to the wood as the CA glue and the chemical do the mess on the wood (I'm using Brasblack from Birchwood) My idea was to glue all the ironwork to the place and blackend it after. I have send it with fine sendpaper and small files but it did not clean the brass enough and the result is not good. I would need some chemical that will degreas the surface, but I do not want any strong acid. What is the best to use there? Thanks a lot for advice!
- 315 replies
-
- 1
-
-
- master korabel
- avos
- (and 1 more)
-
Thank you both. Also for all the likes and followers. It gives the power to try to be precise as posible. And it is very Hard for me not to hurry as I do not have much time to spent (3 small childern, building new house......) That is why RC is on hold (unfortunately) i need for her at least 3 hours to finish one step. For this, I can do one plank in few minutes. And of course this is thanks to briliant mind in MASTER KORABEL such a great job they done there. And in the second level I have to thank to this webpage. Here I found out that something special could be purchased as a kit! All of you rock🍻
- 315 replies
-
- 3
-
-
- master korabel
- avos
- (and 1 more)
-
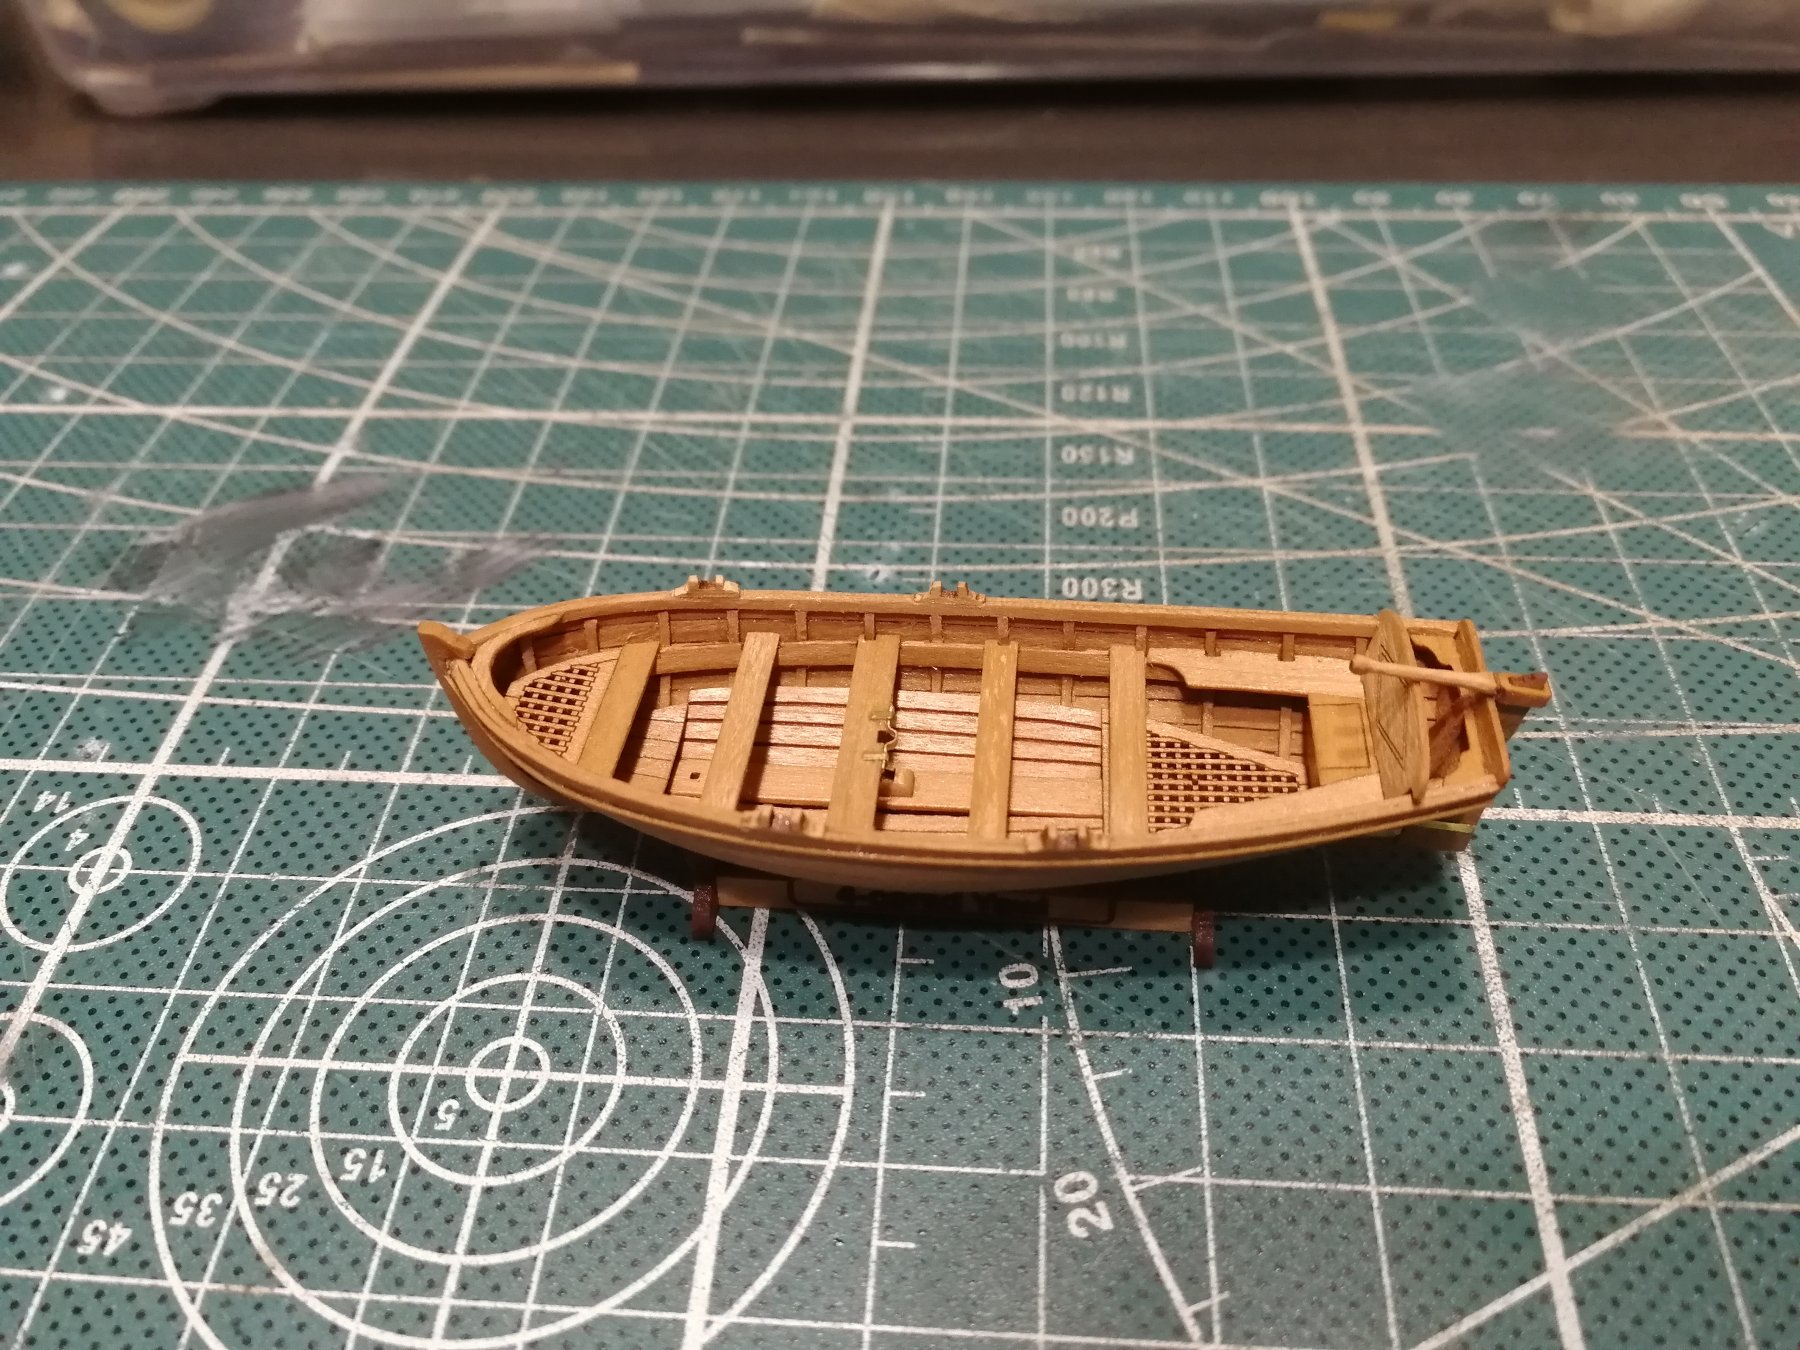
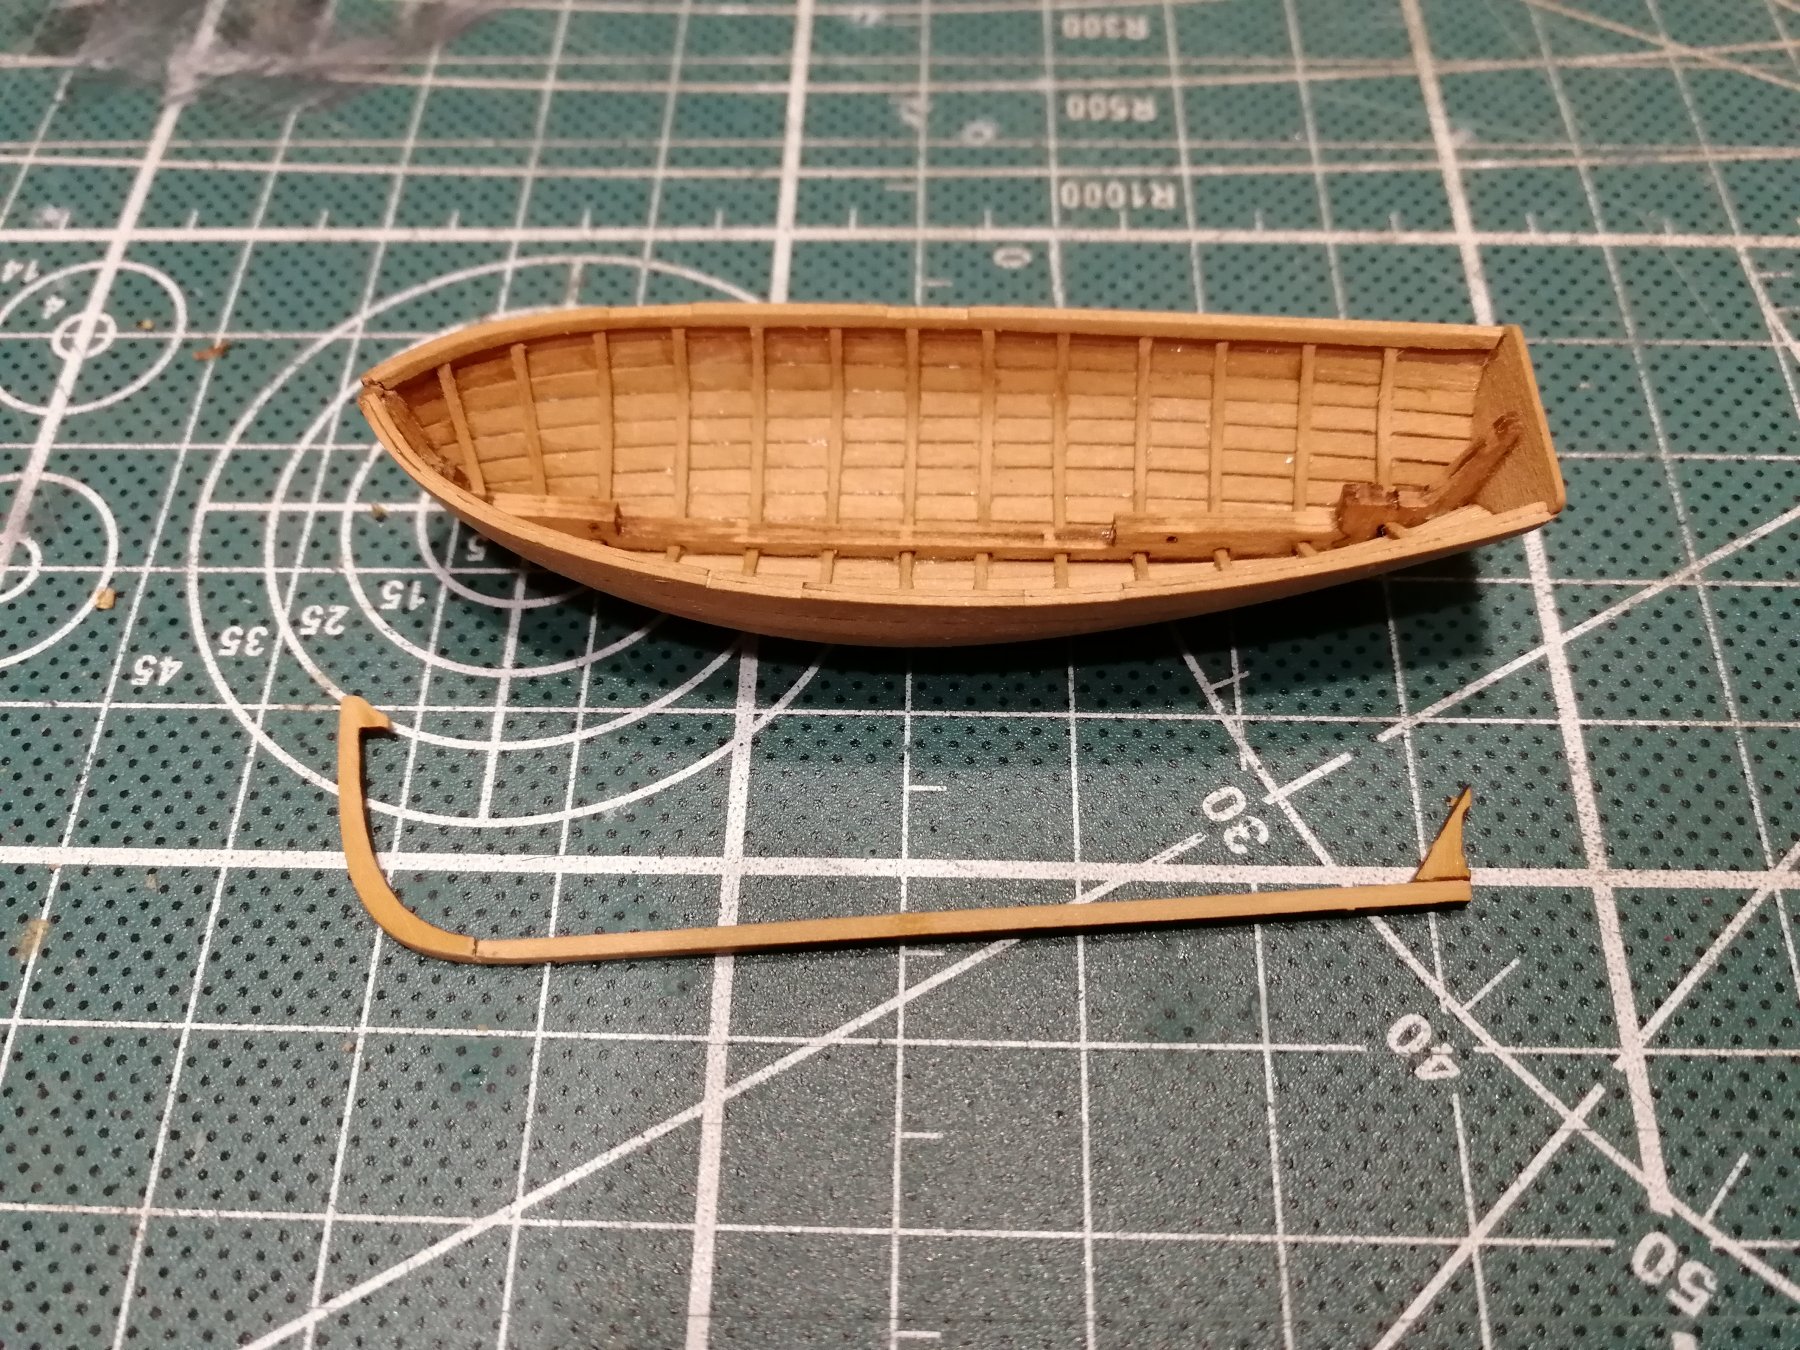
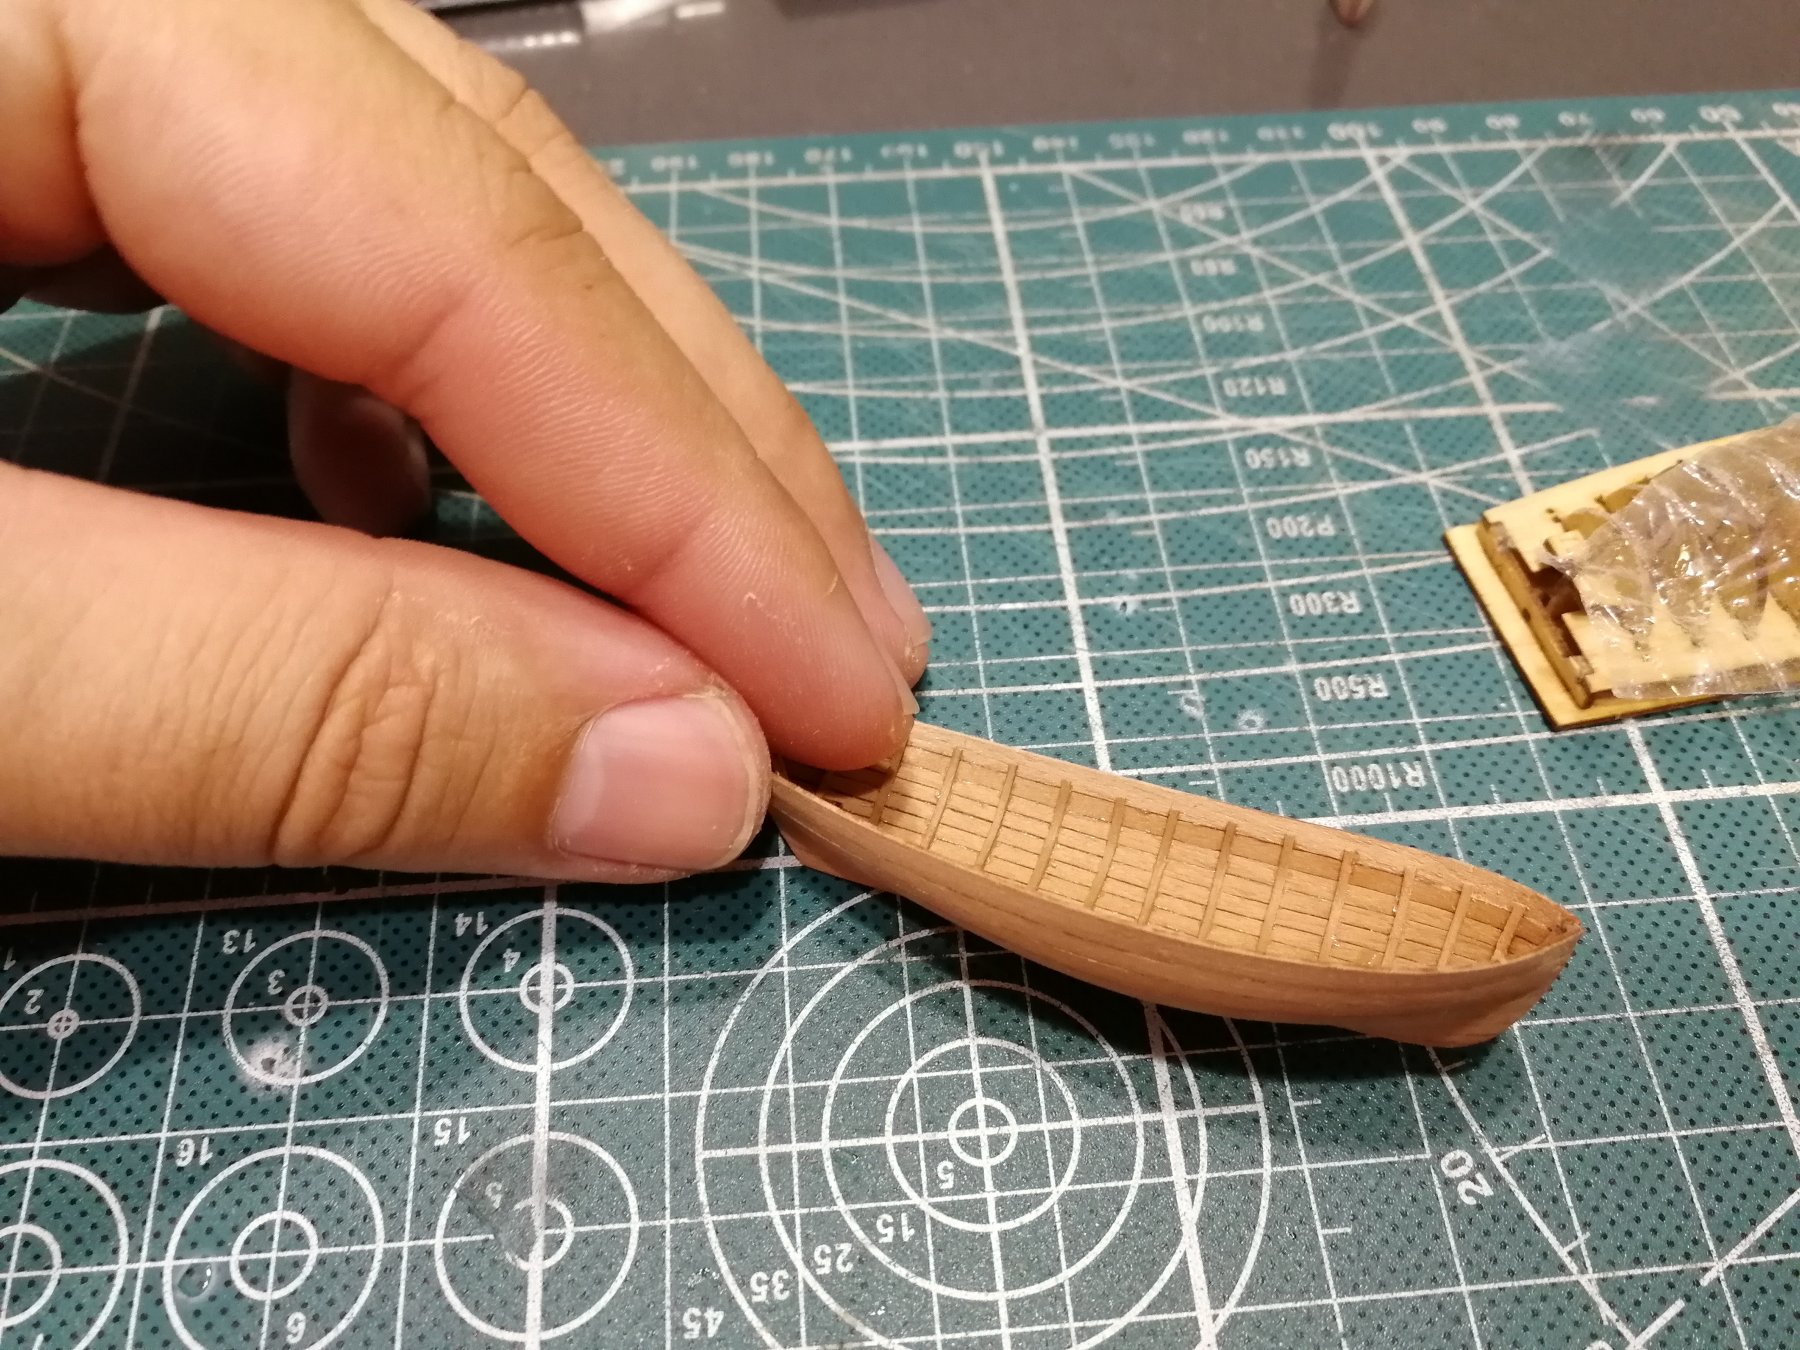
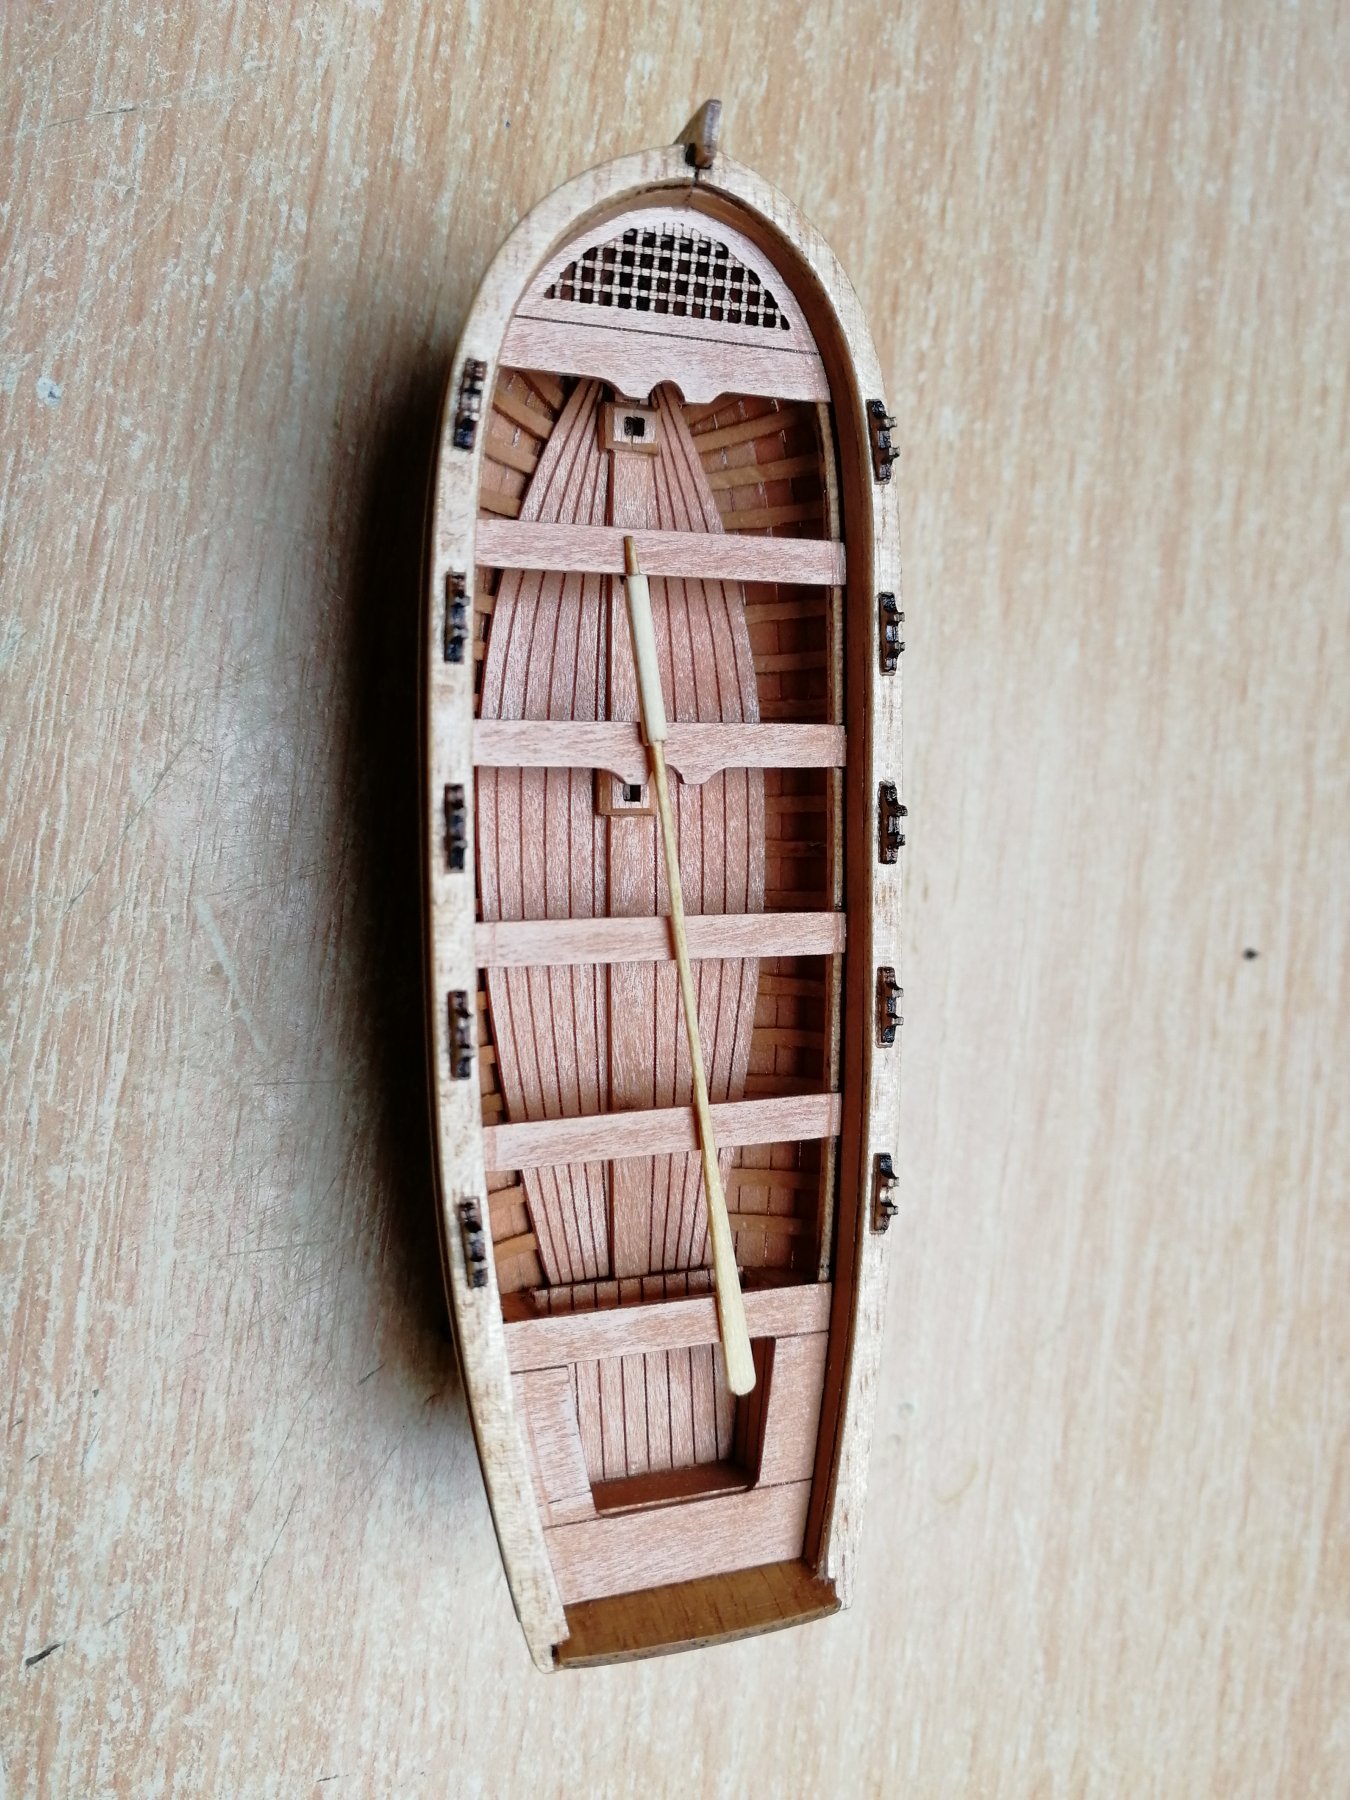
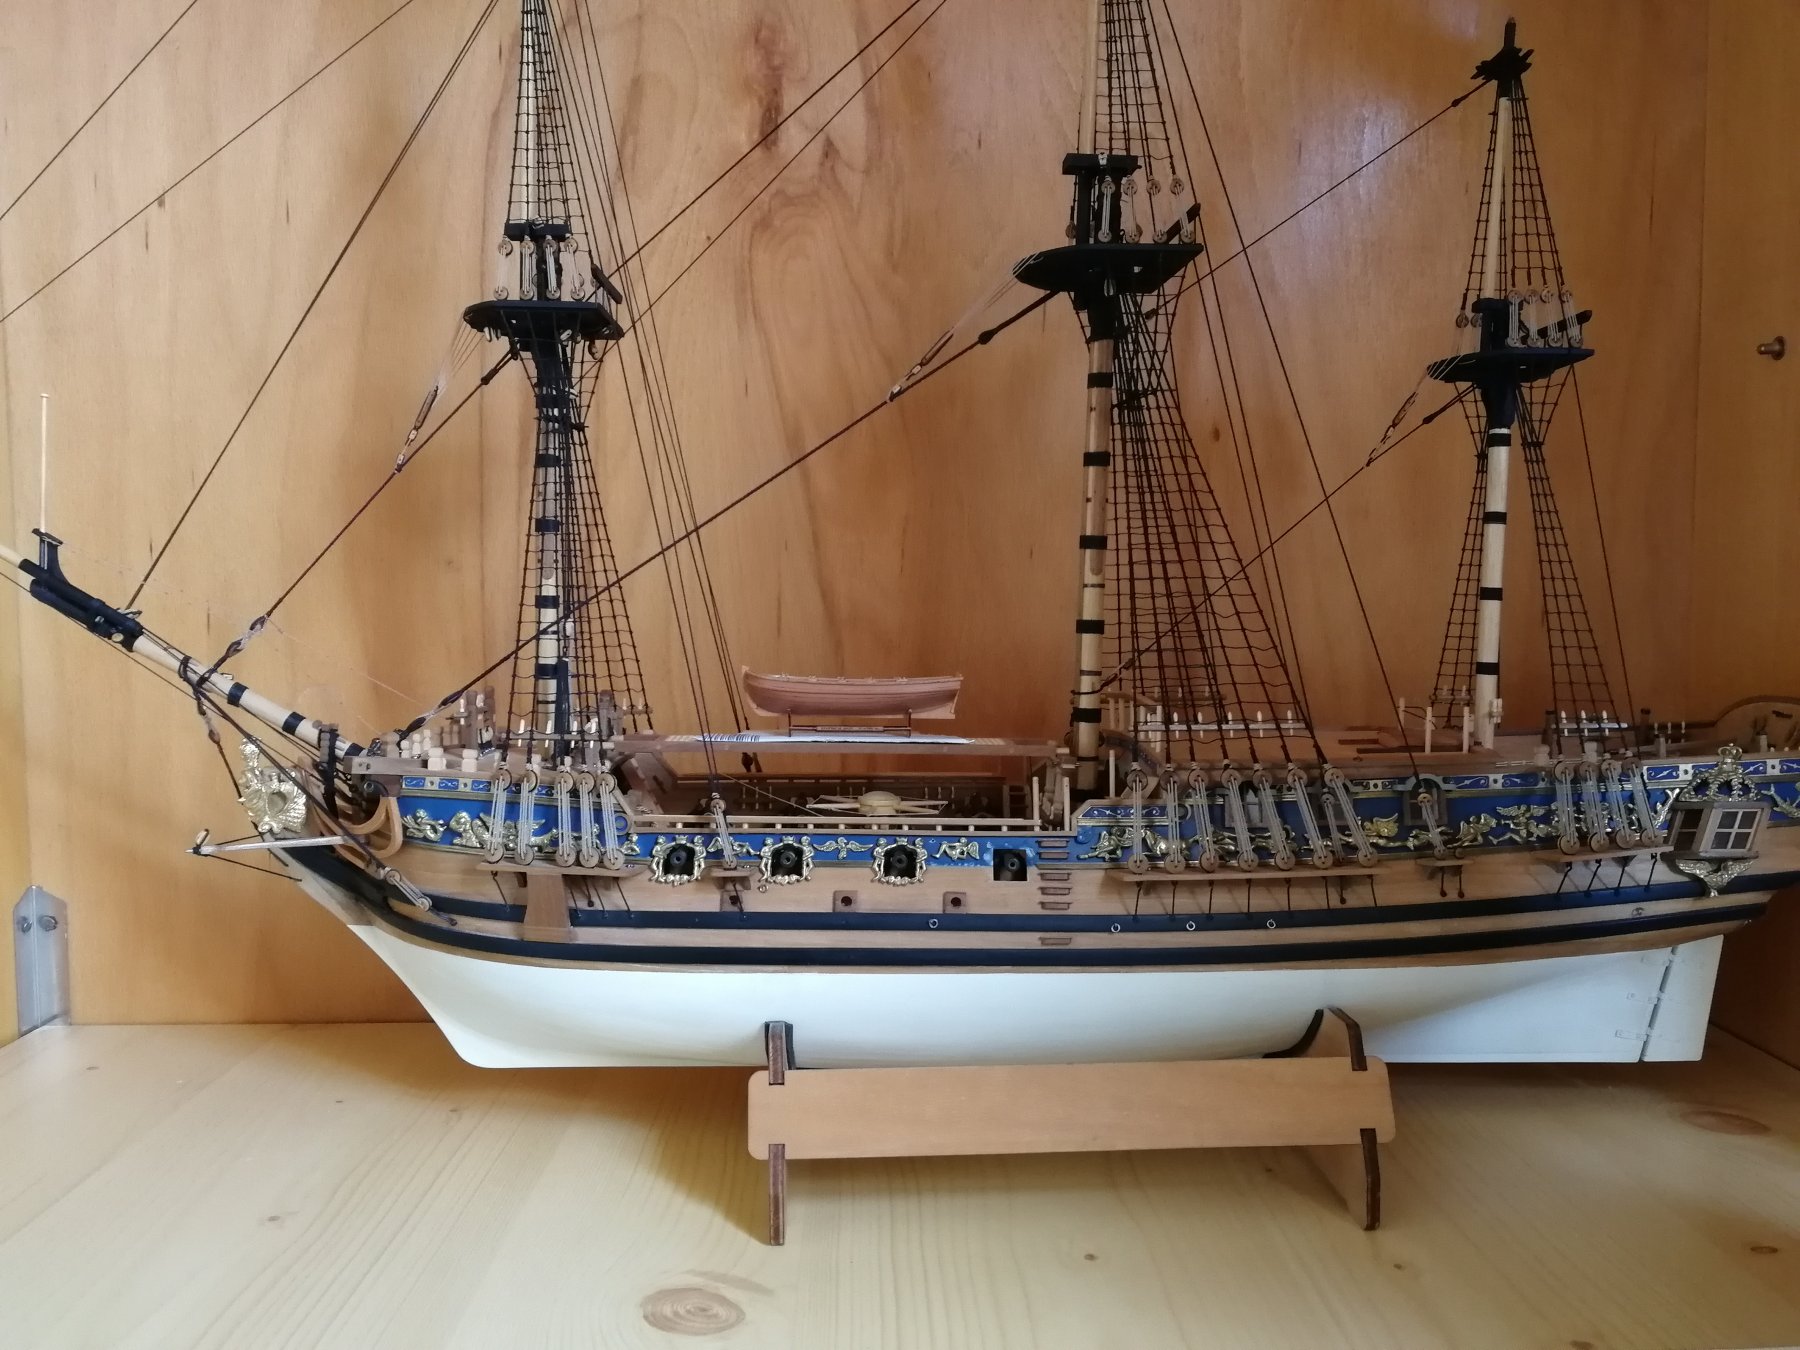
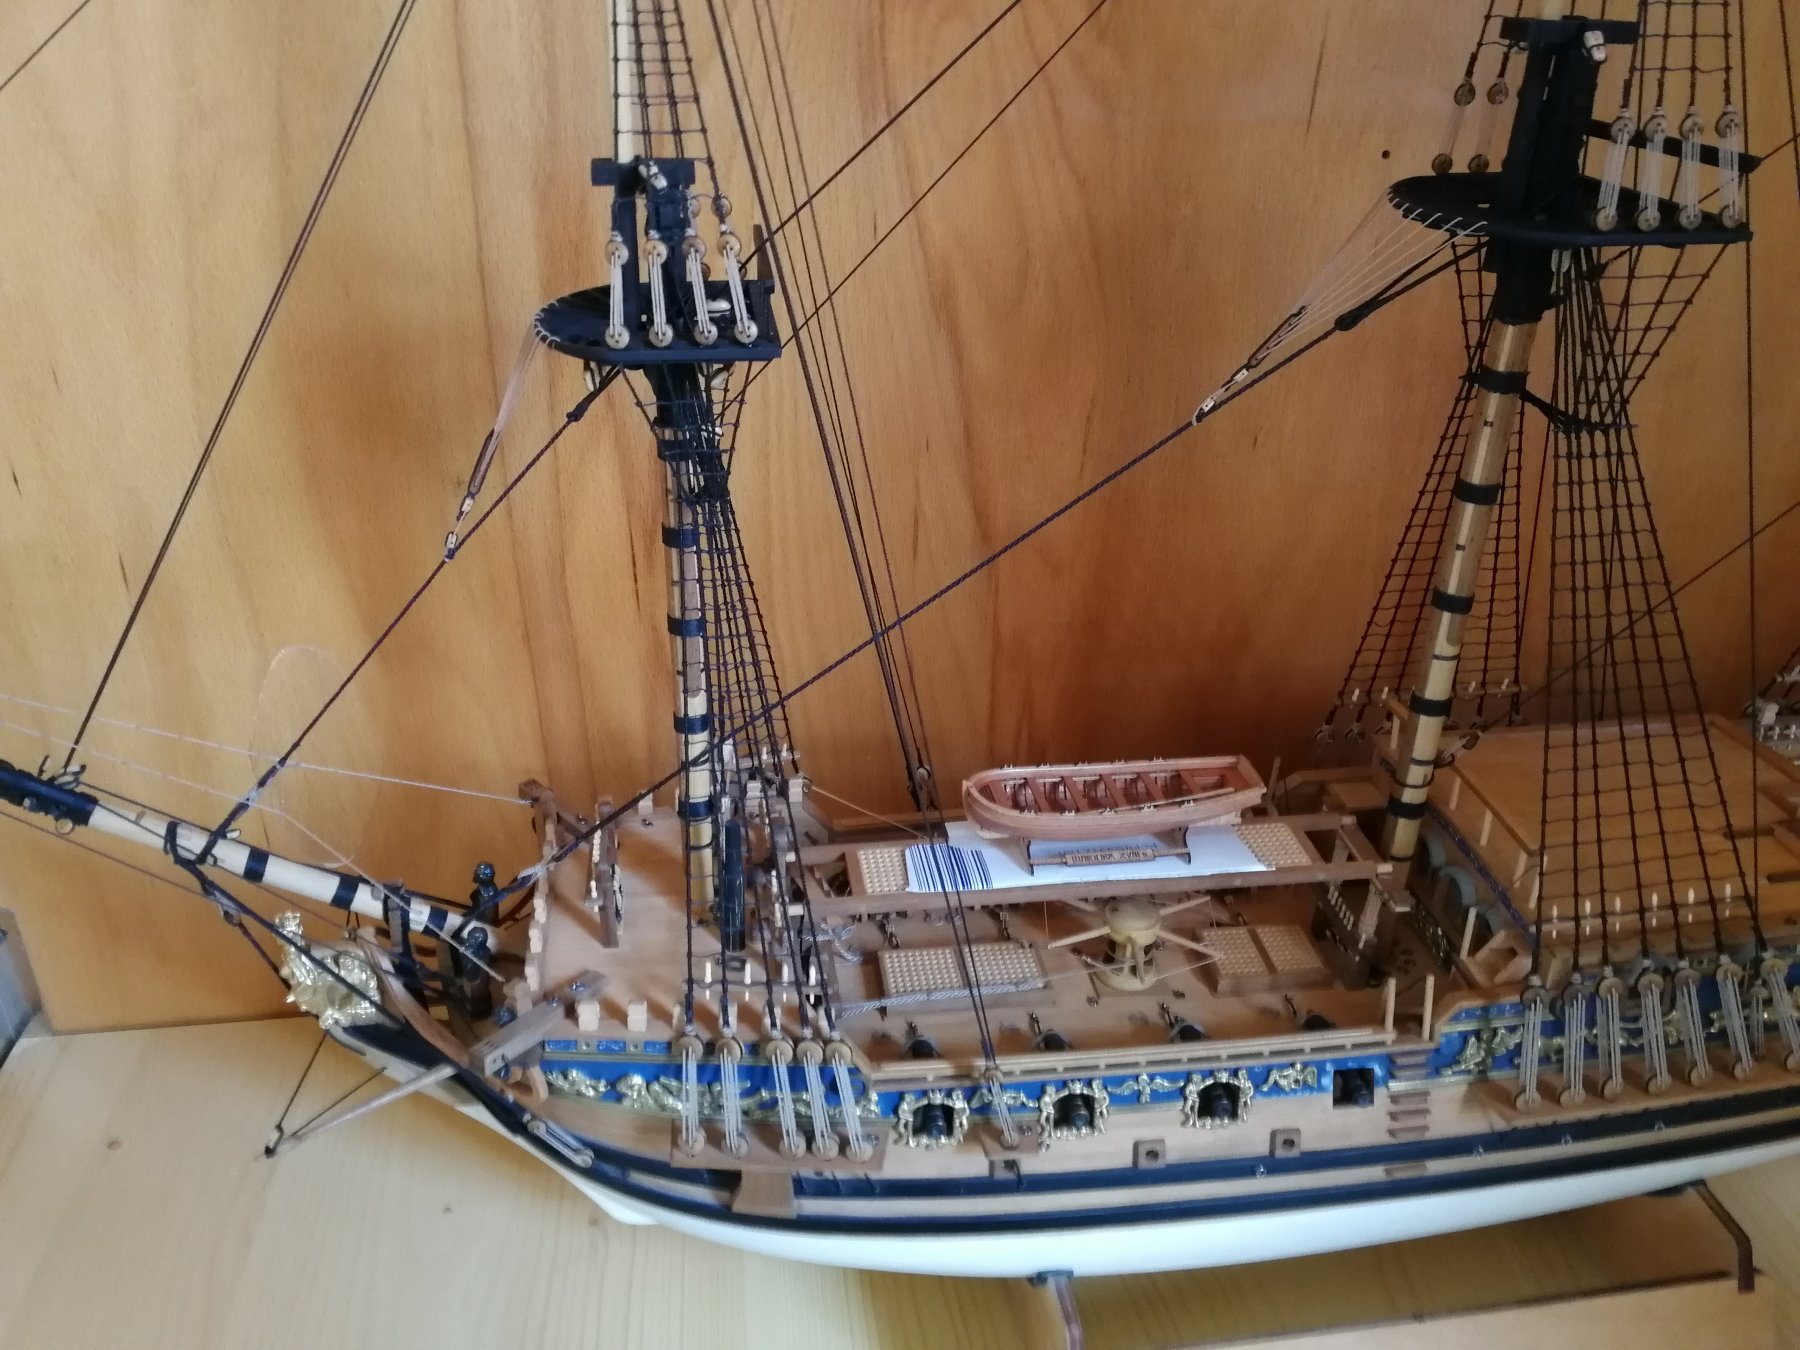
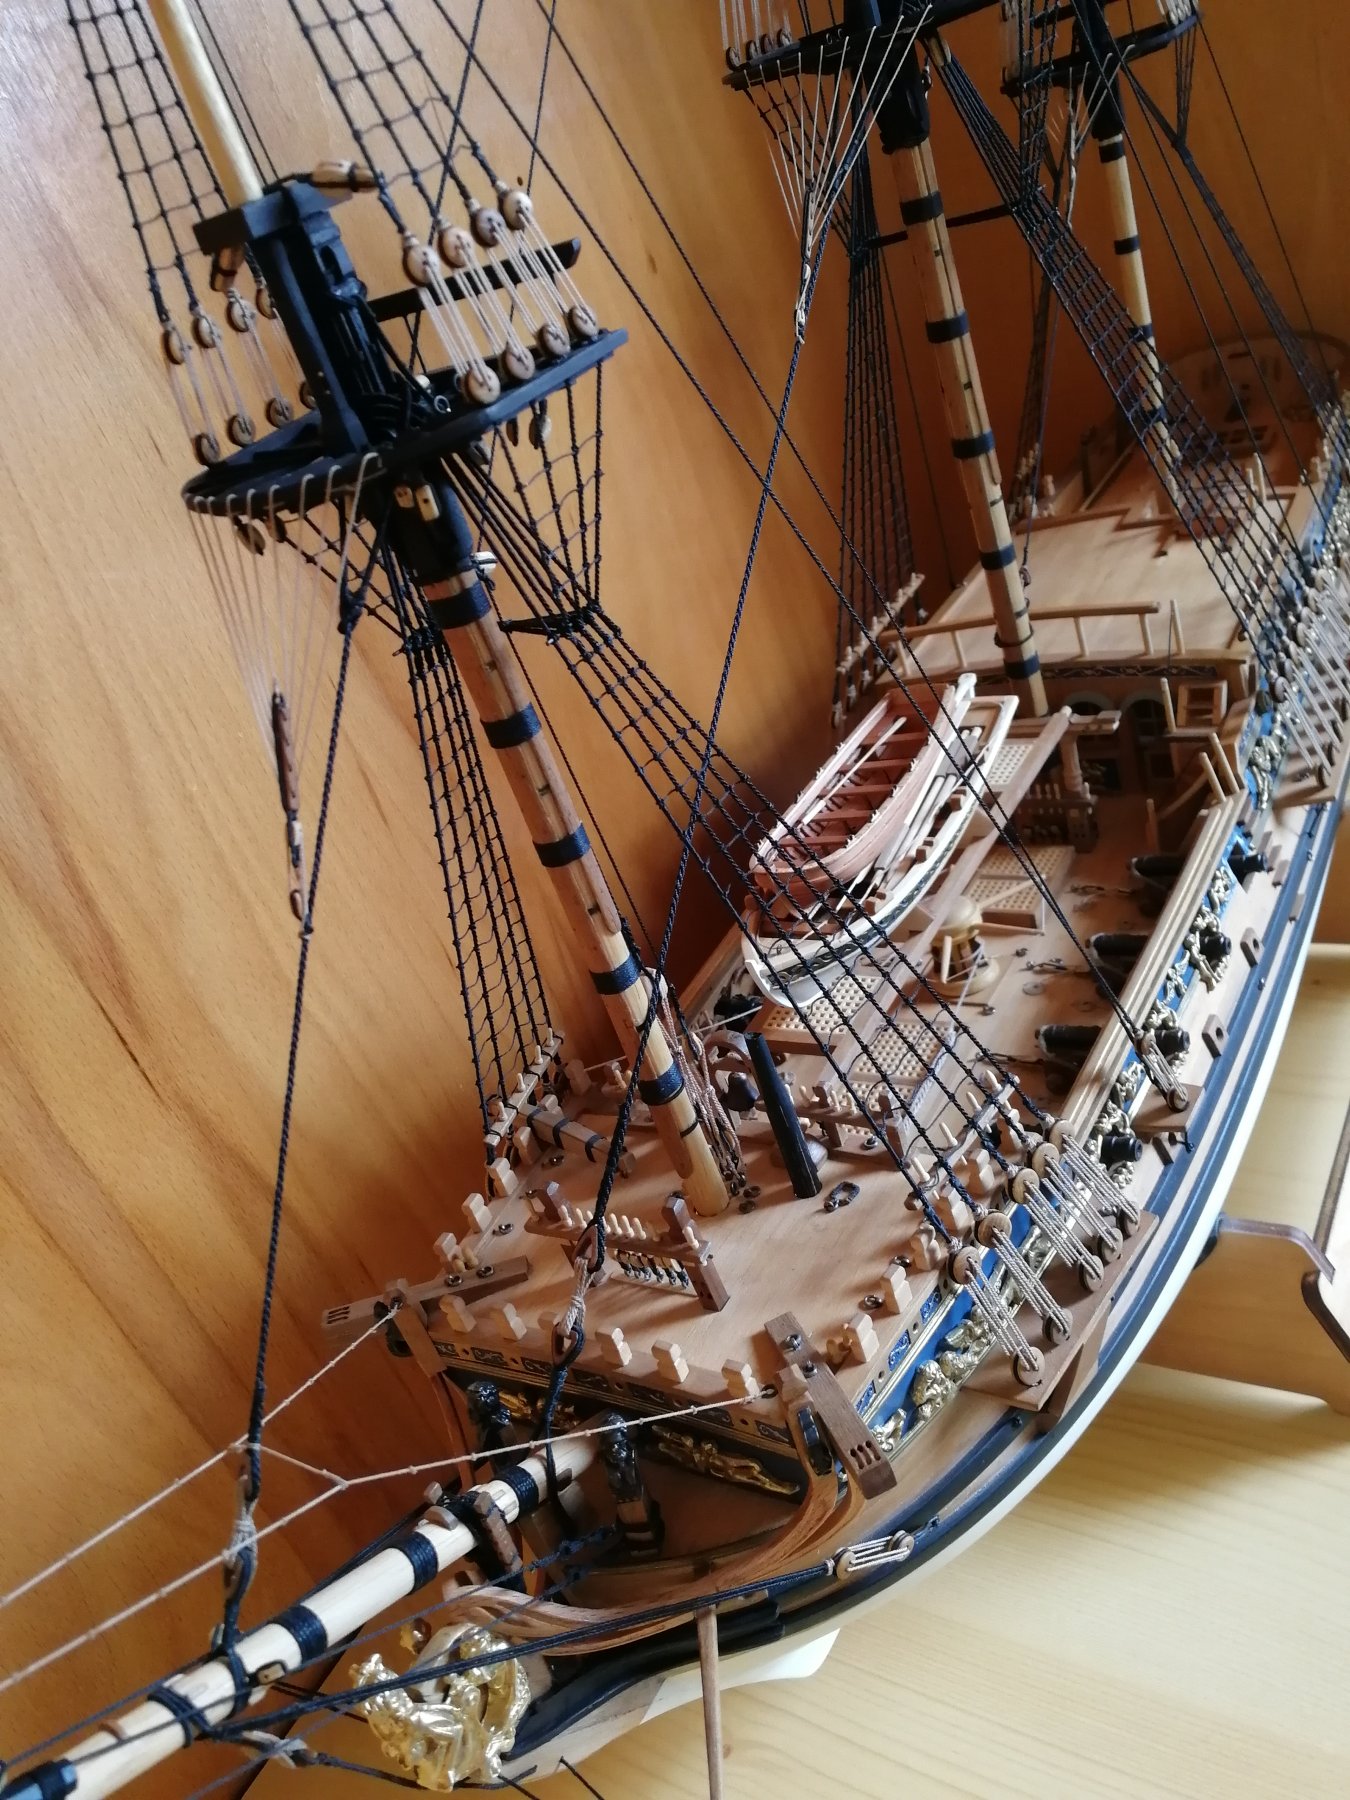
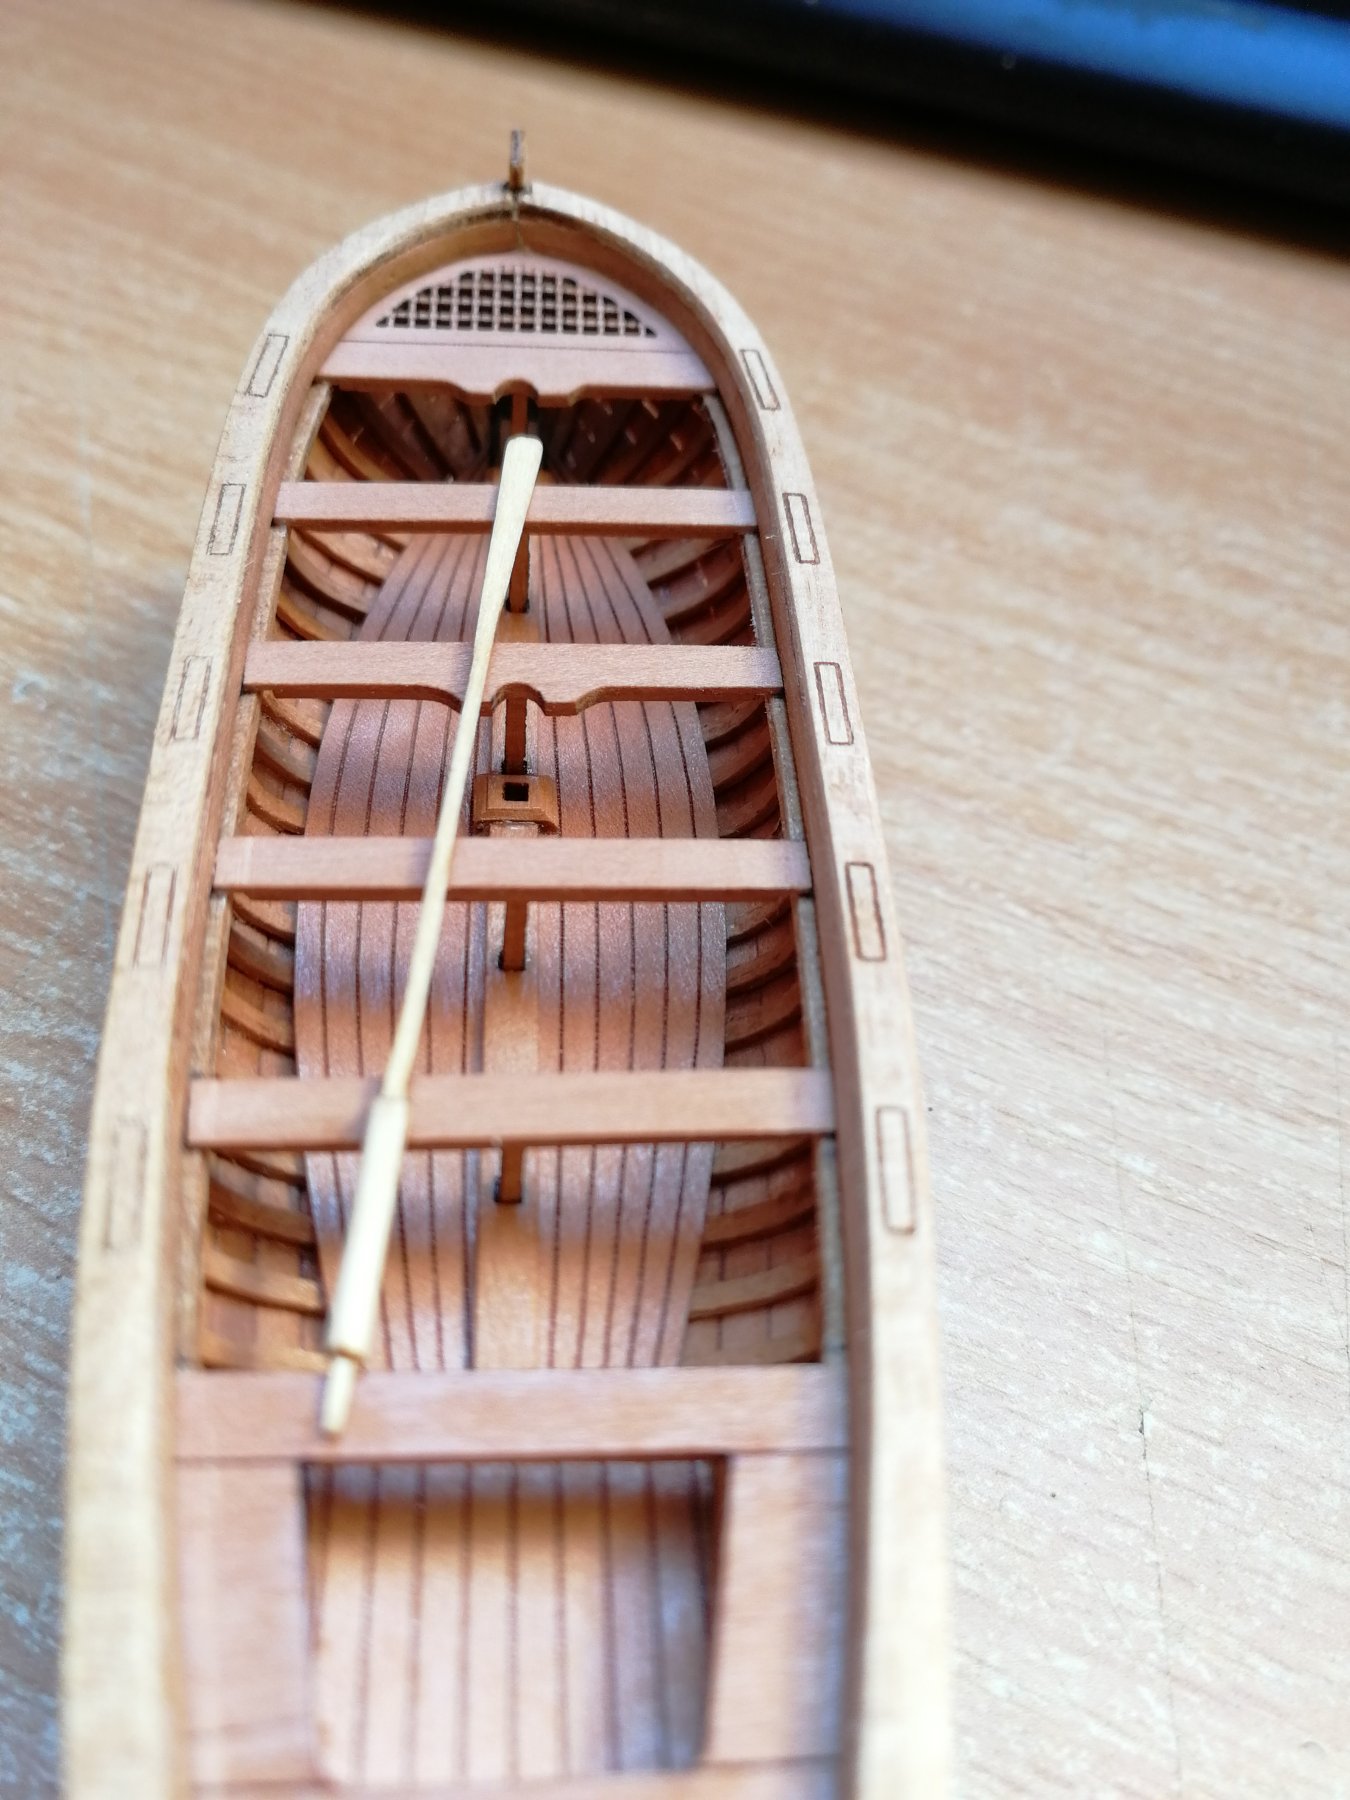
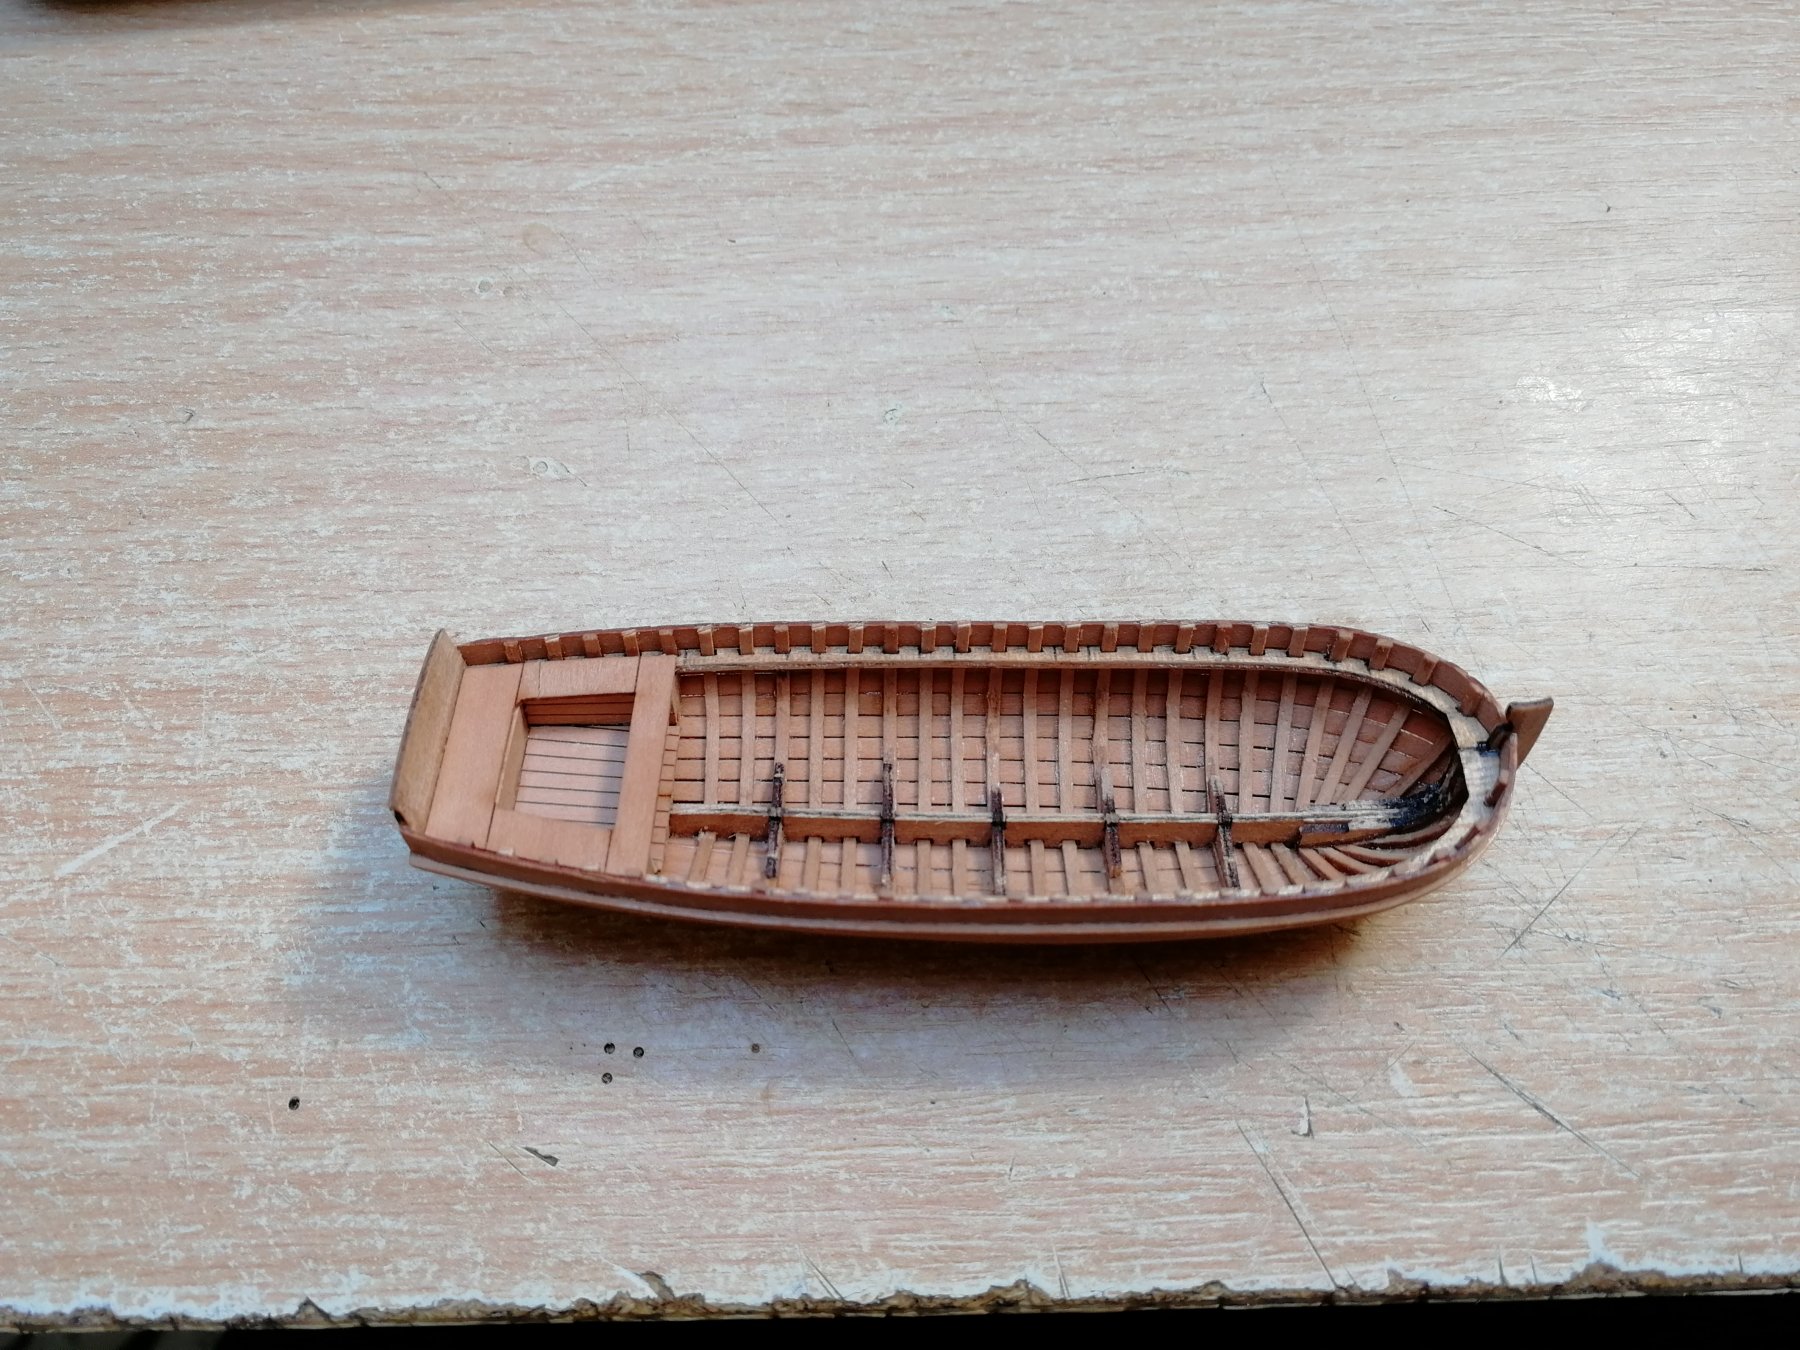
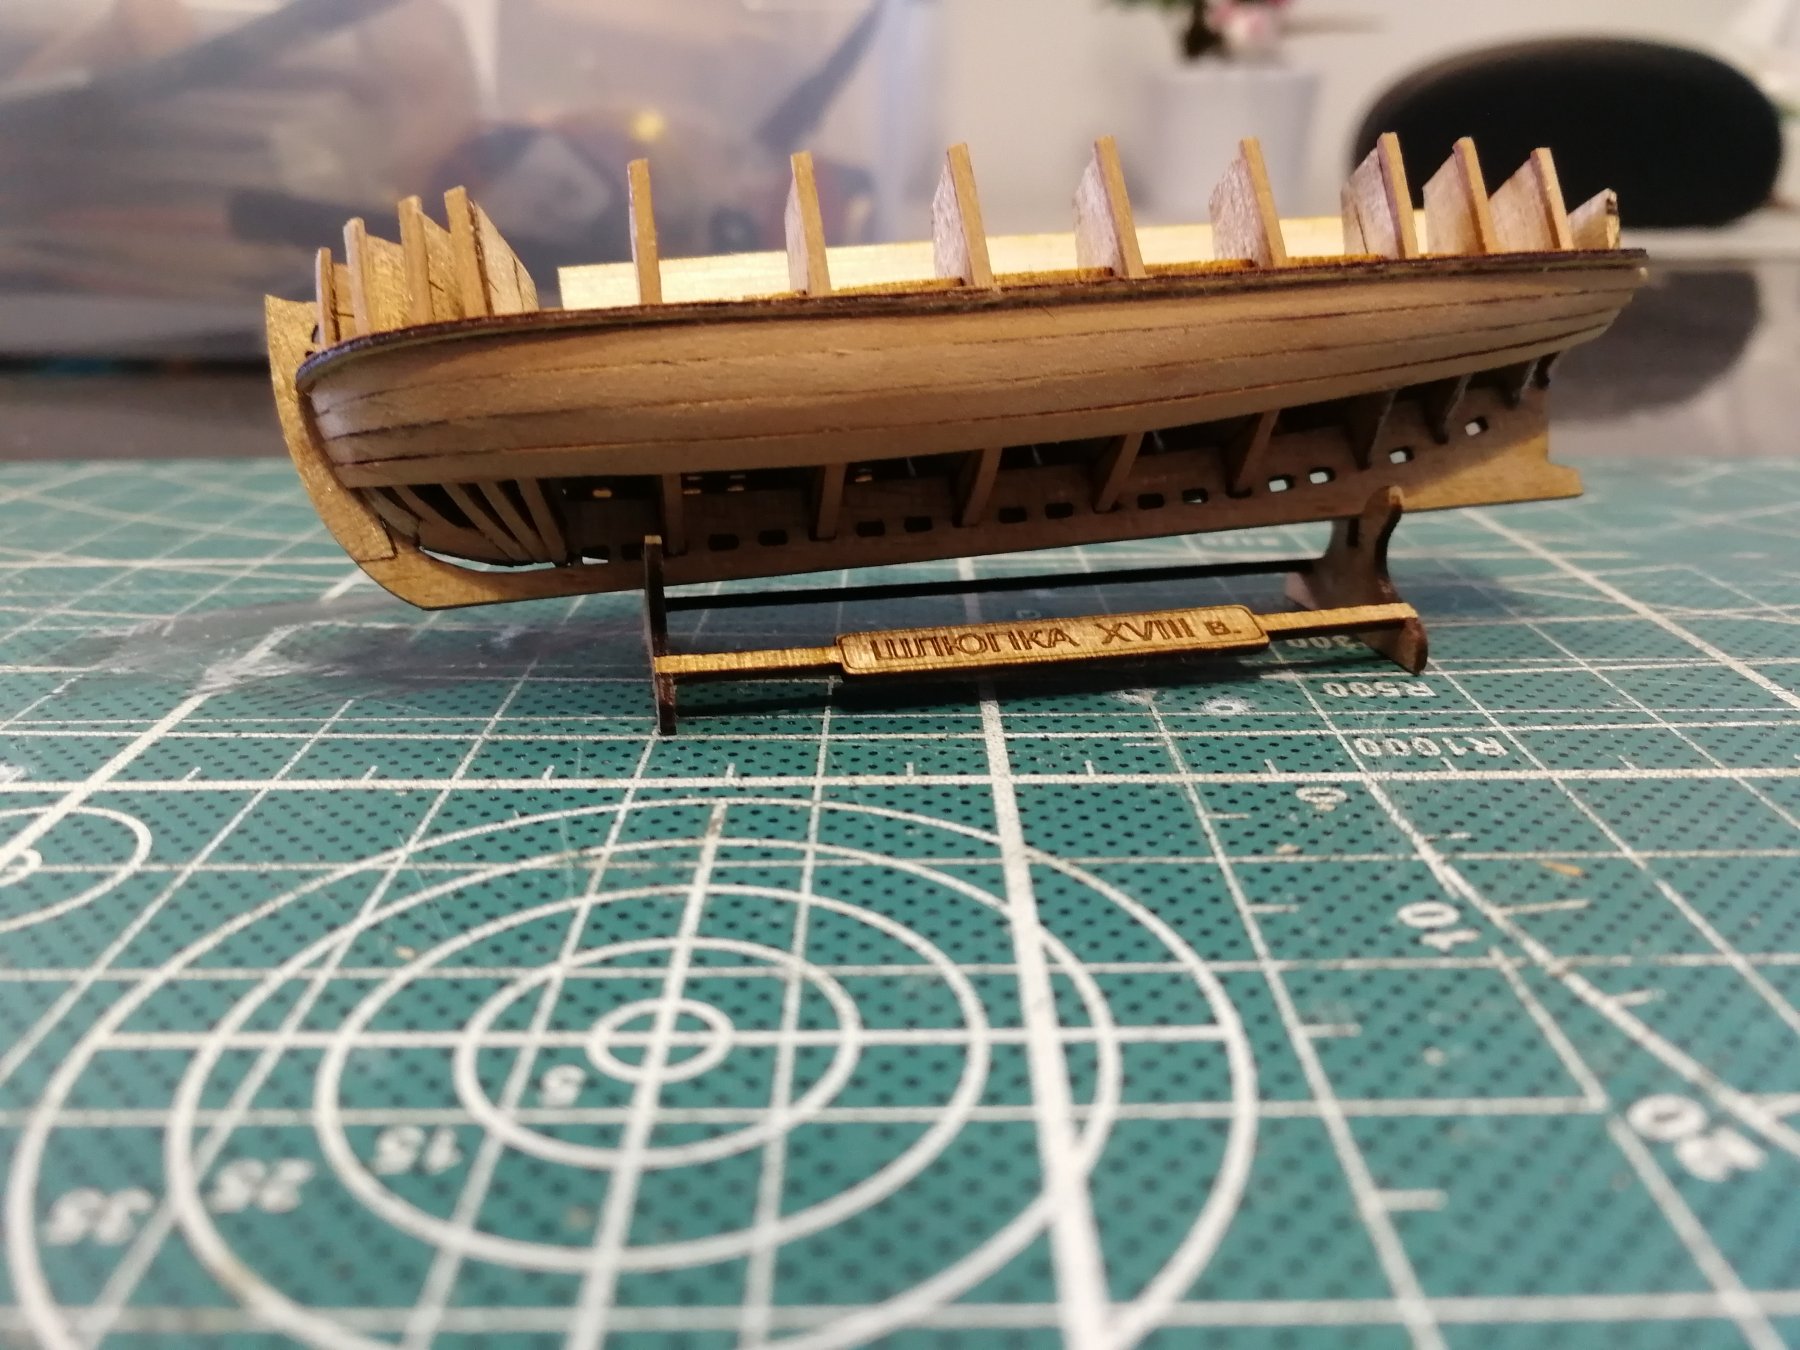
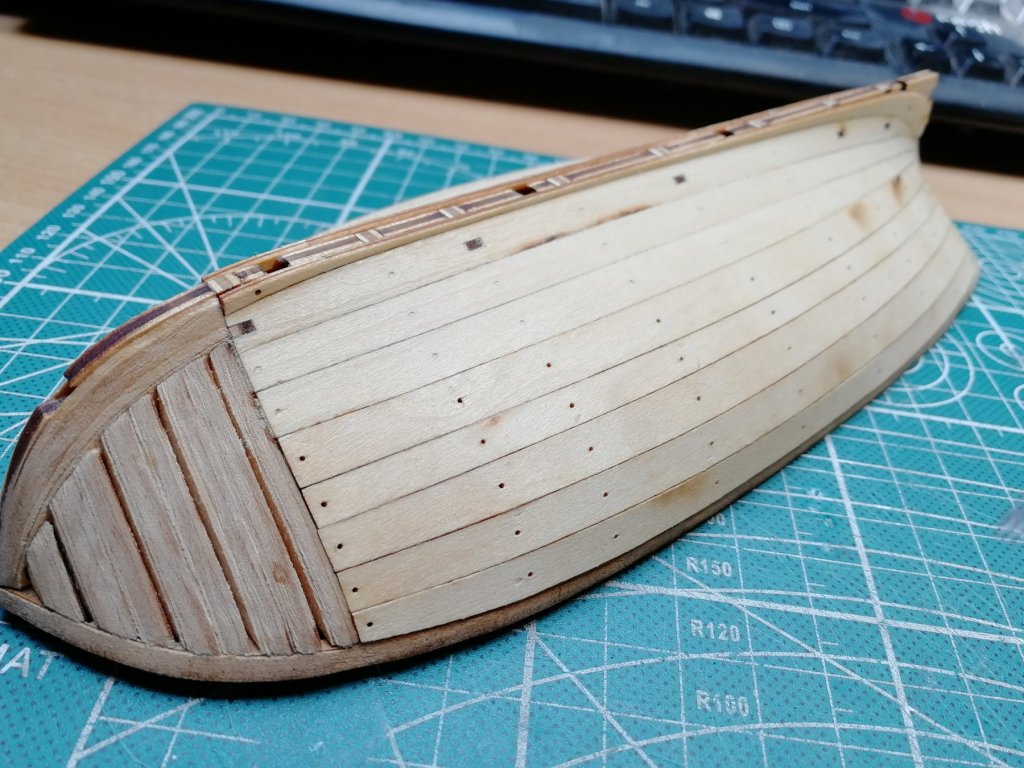
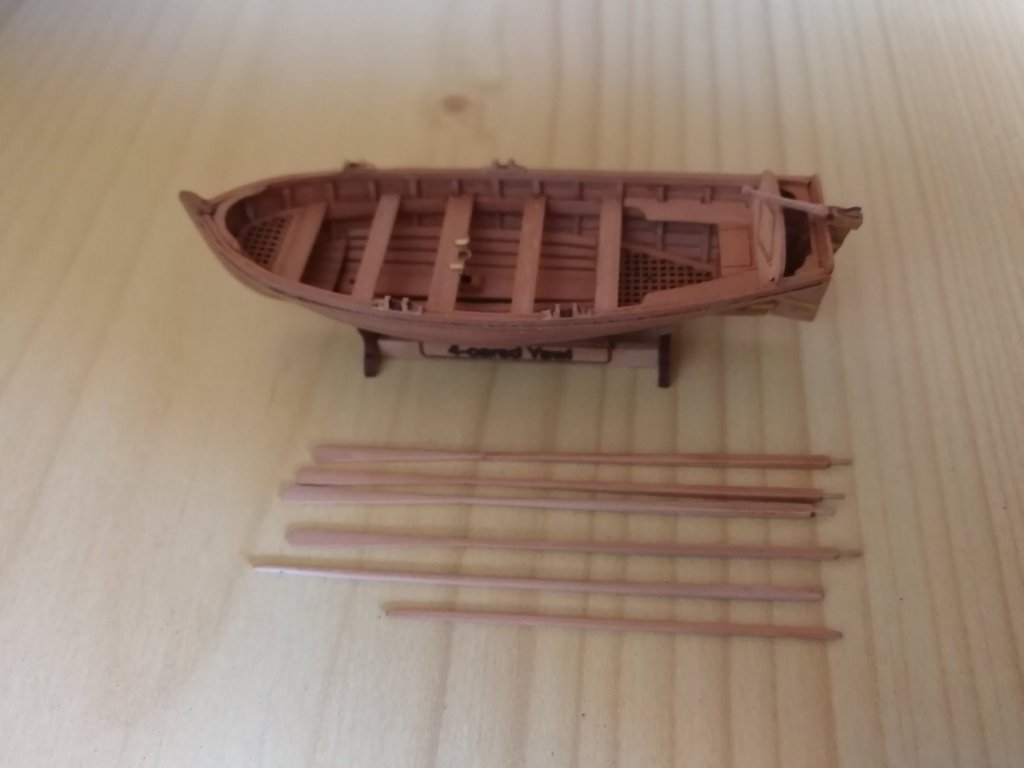
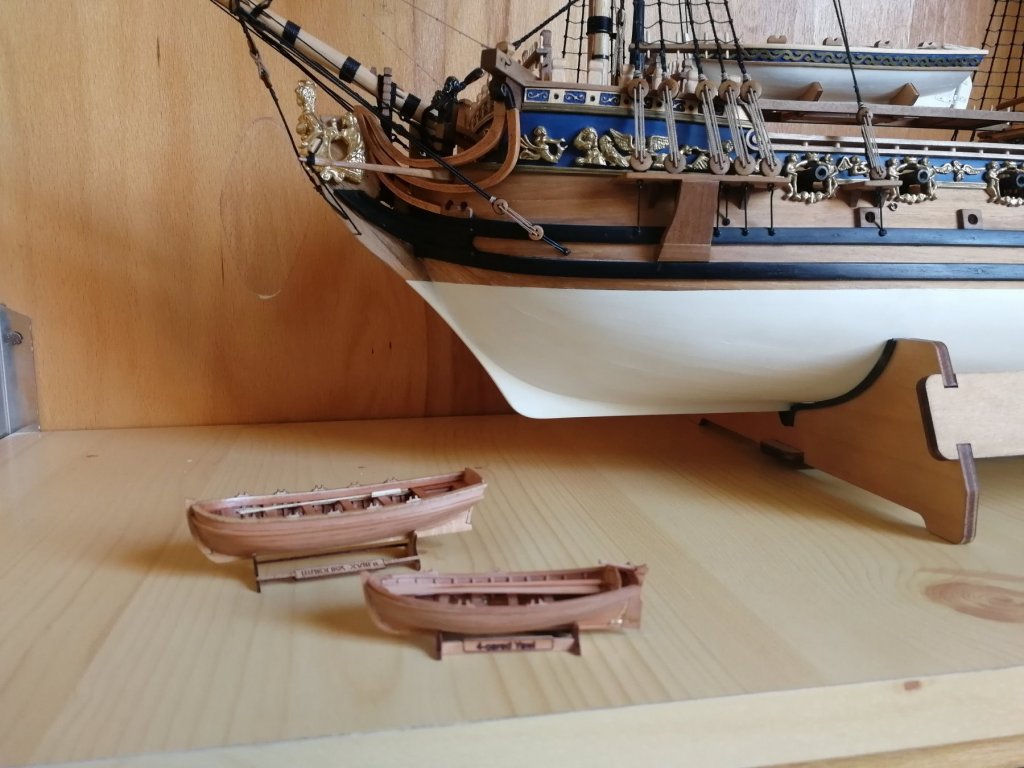
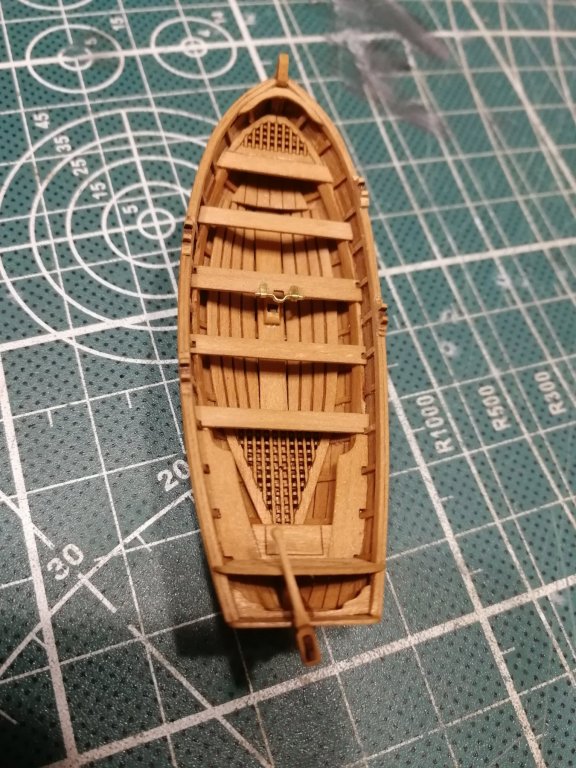
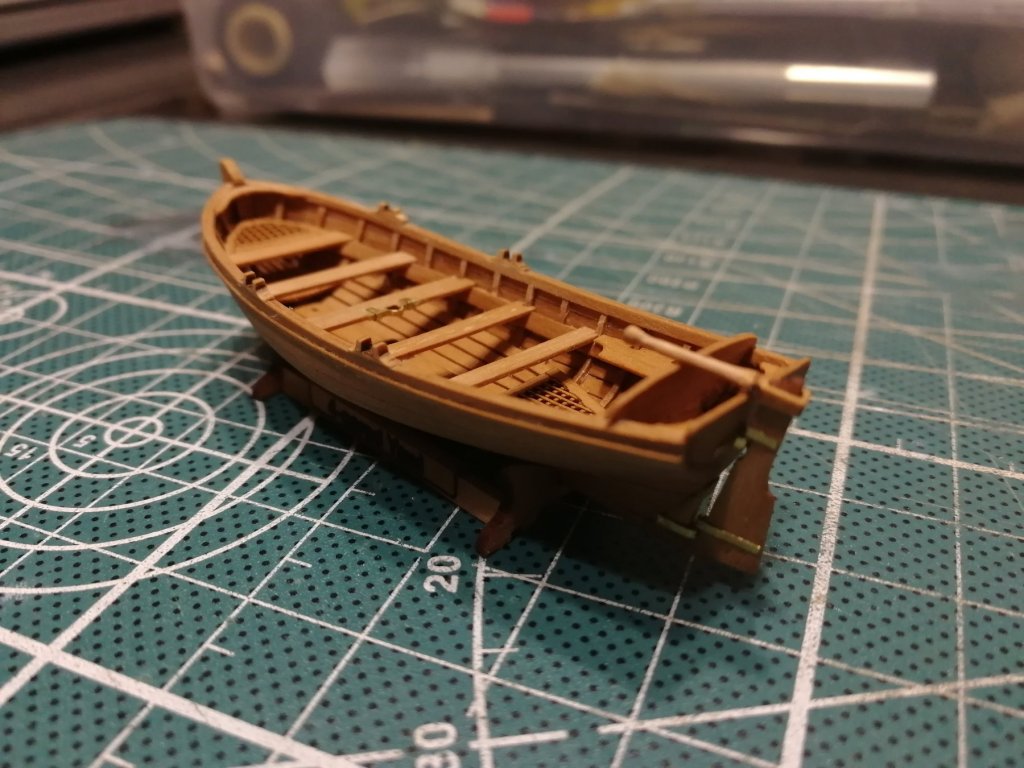
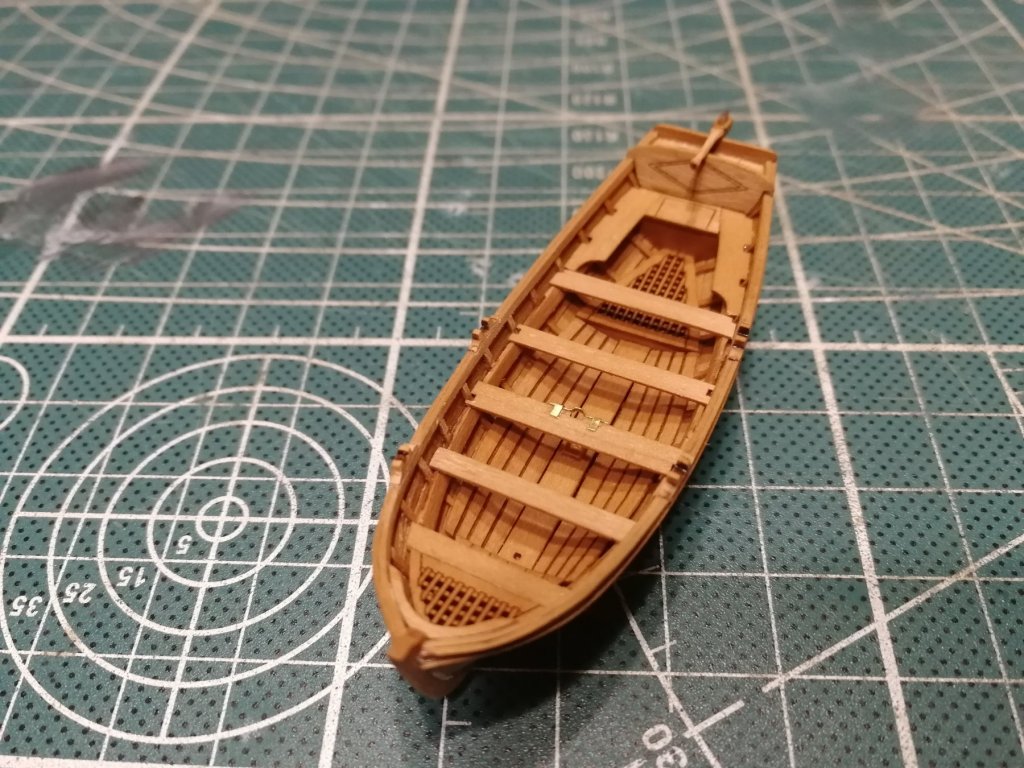
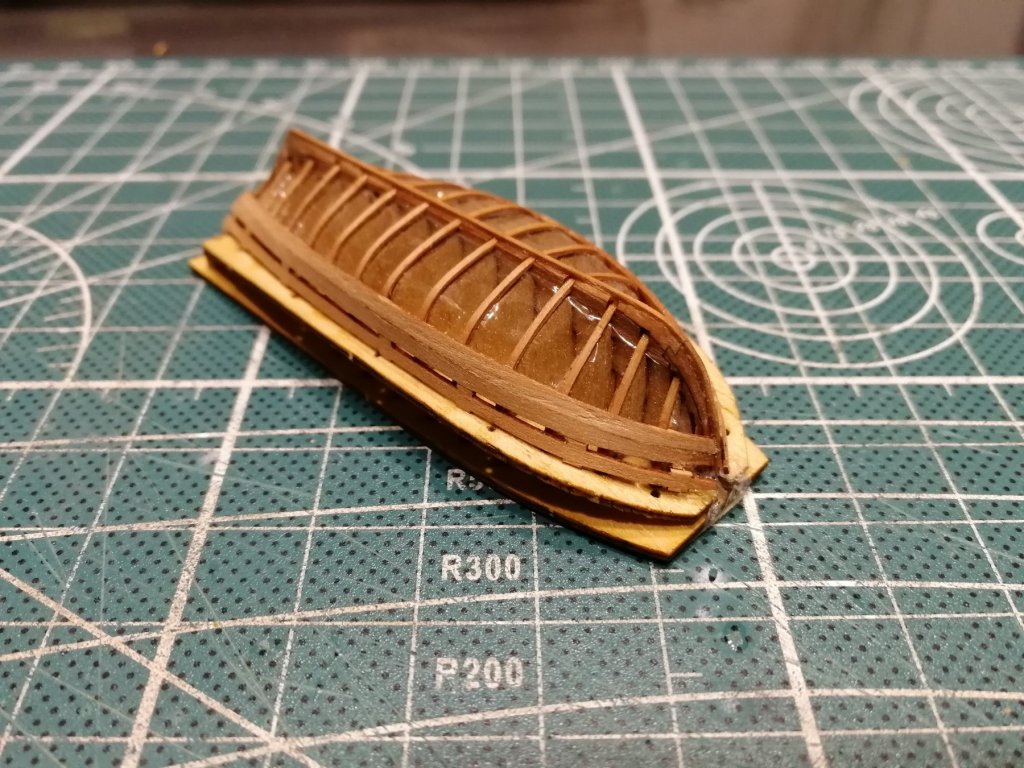
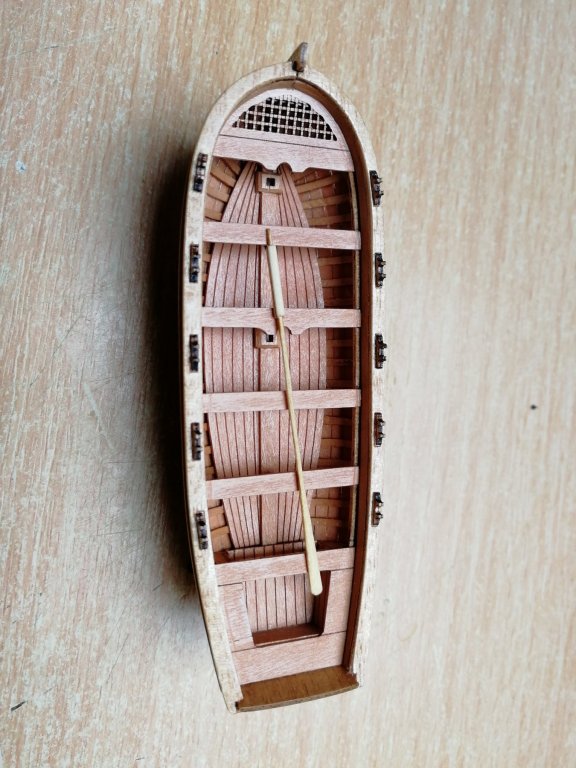
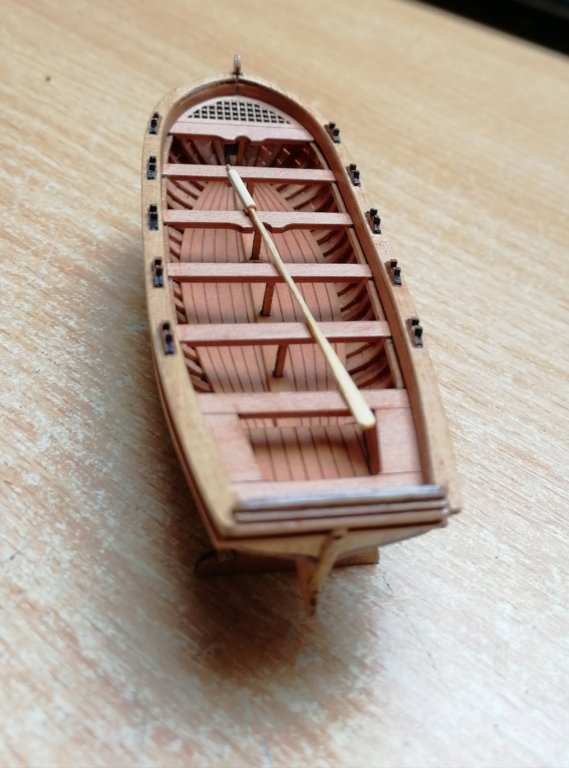
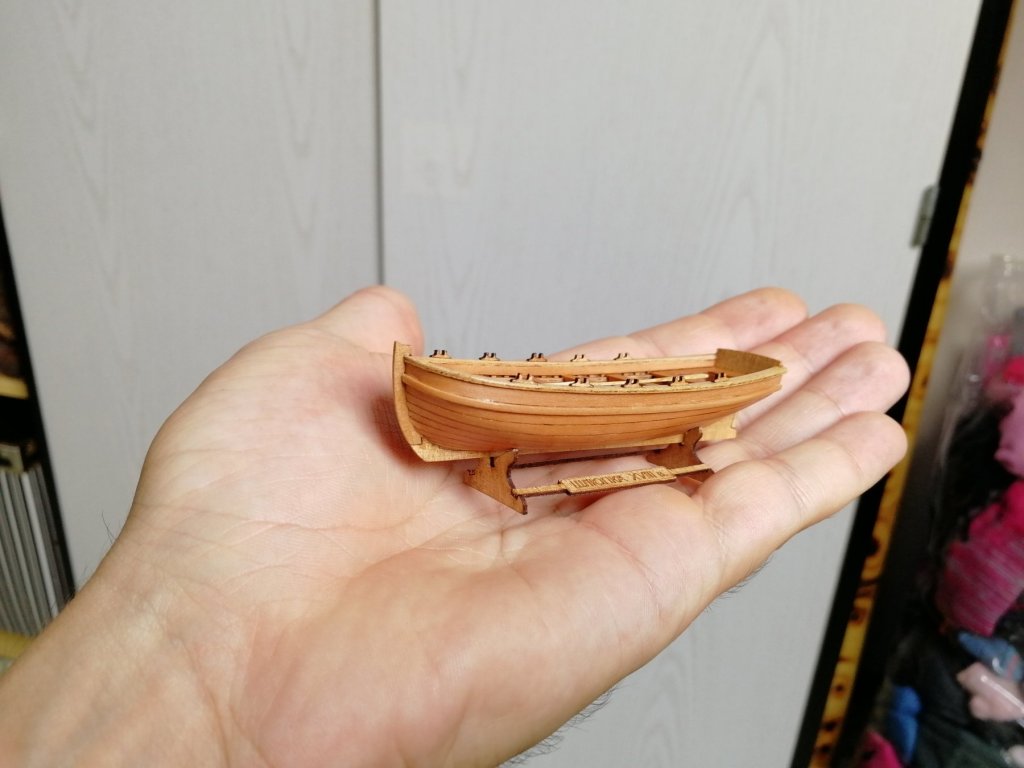
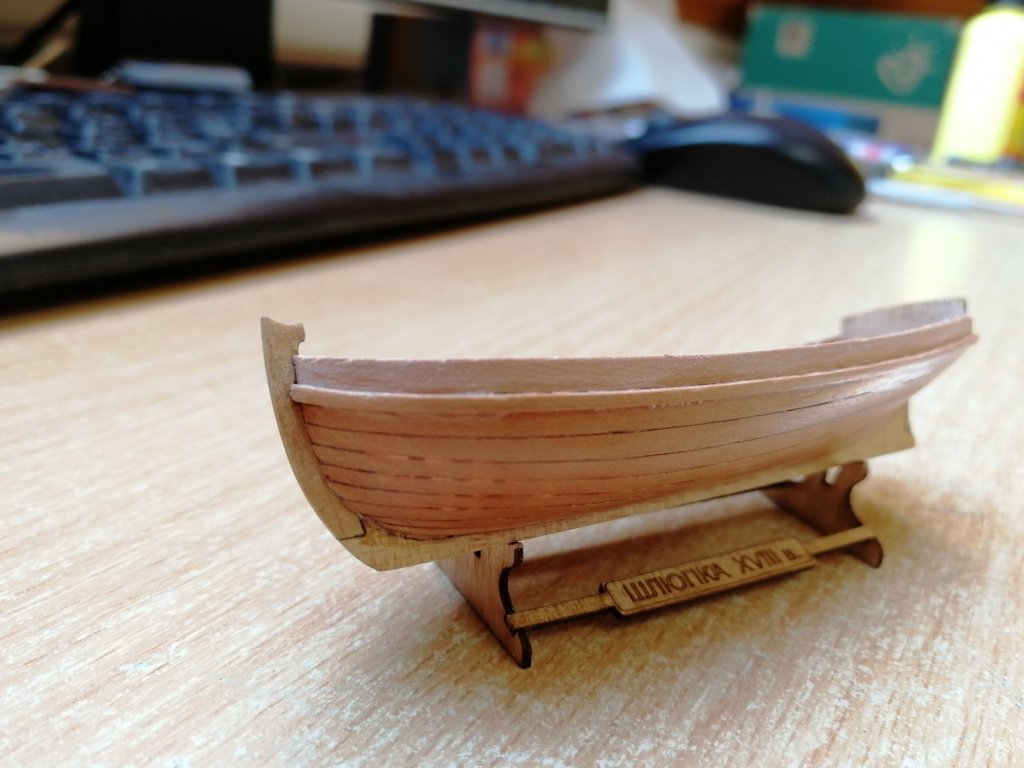
Finished. I curved 4 oars, mast and yard. Finished the surface with matt varnish. It will need few final touches like sail, ropes etc and pack it i side the boat but that will be decided later. I'm more and more curious about AVOS when only yawl looks very good 😲🤑
- 315 replies
-
- 19
-
-
- master korabel
- avos
- (and 1 more)
-
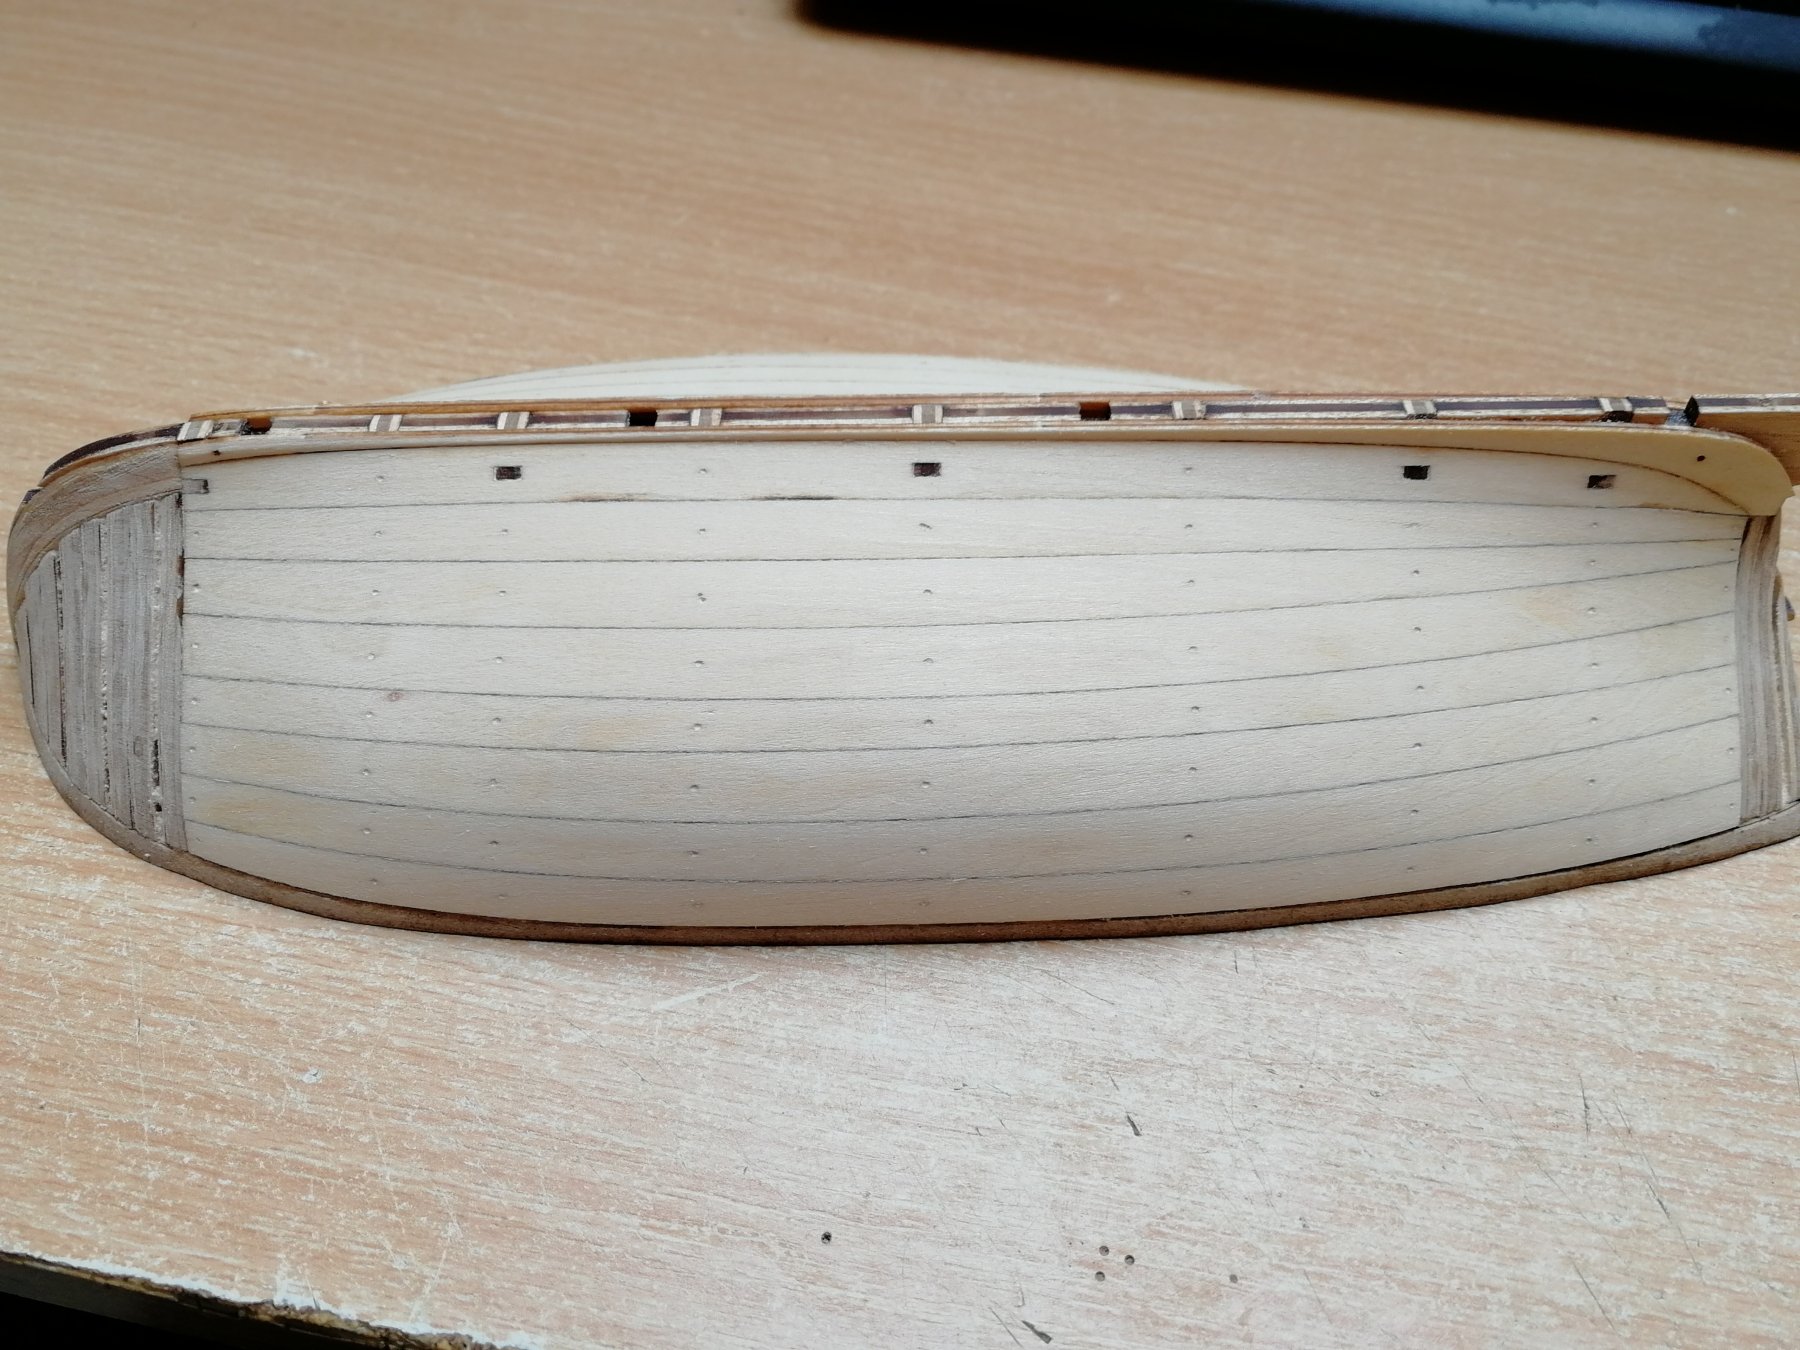
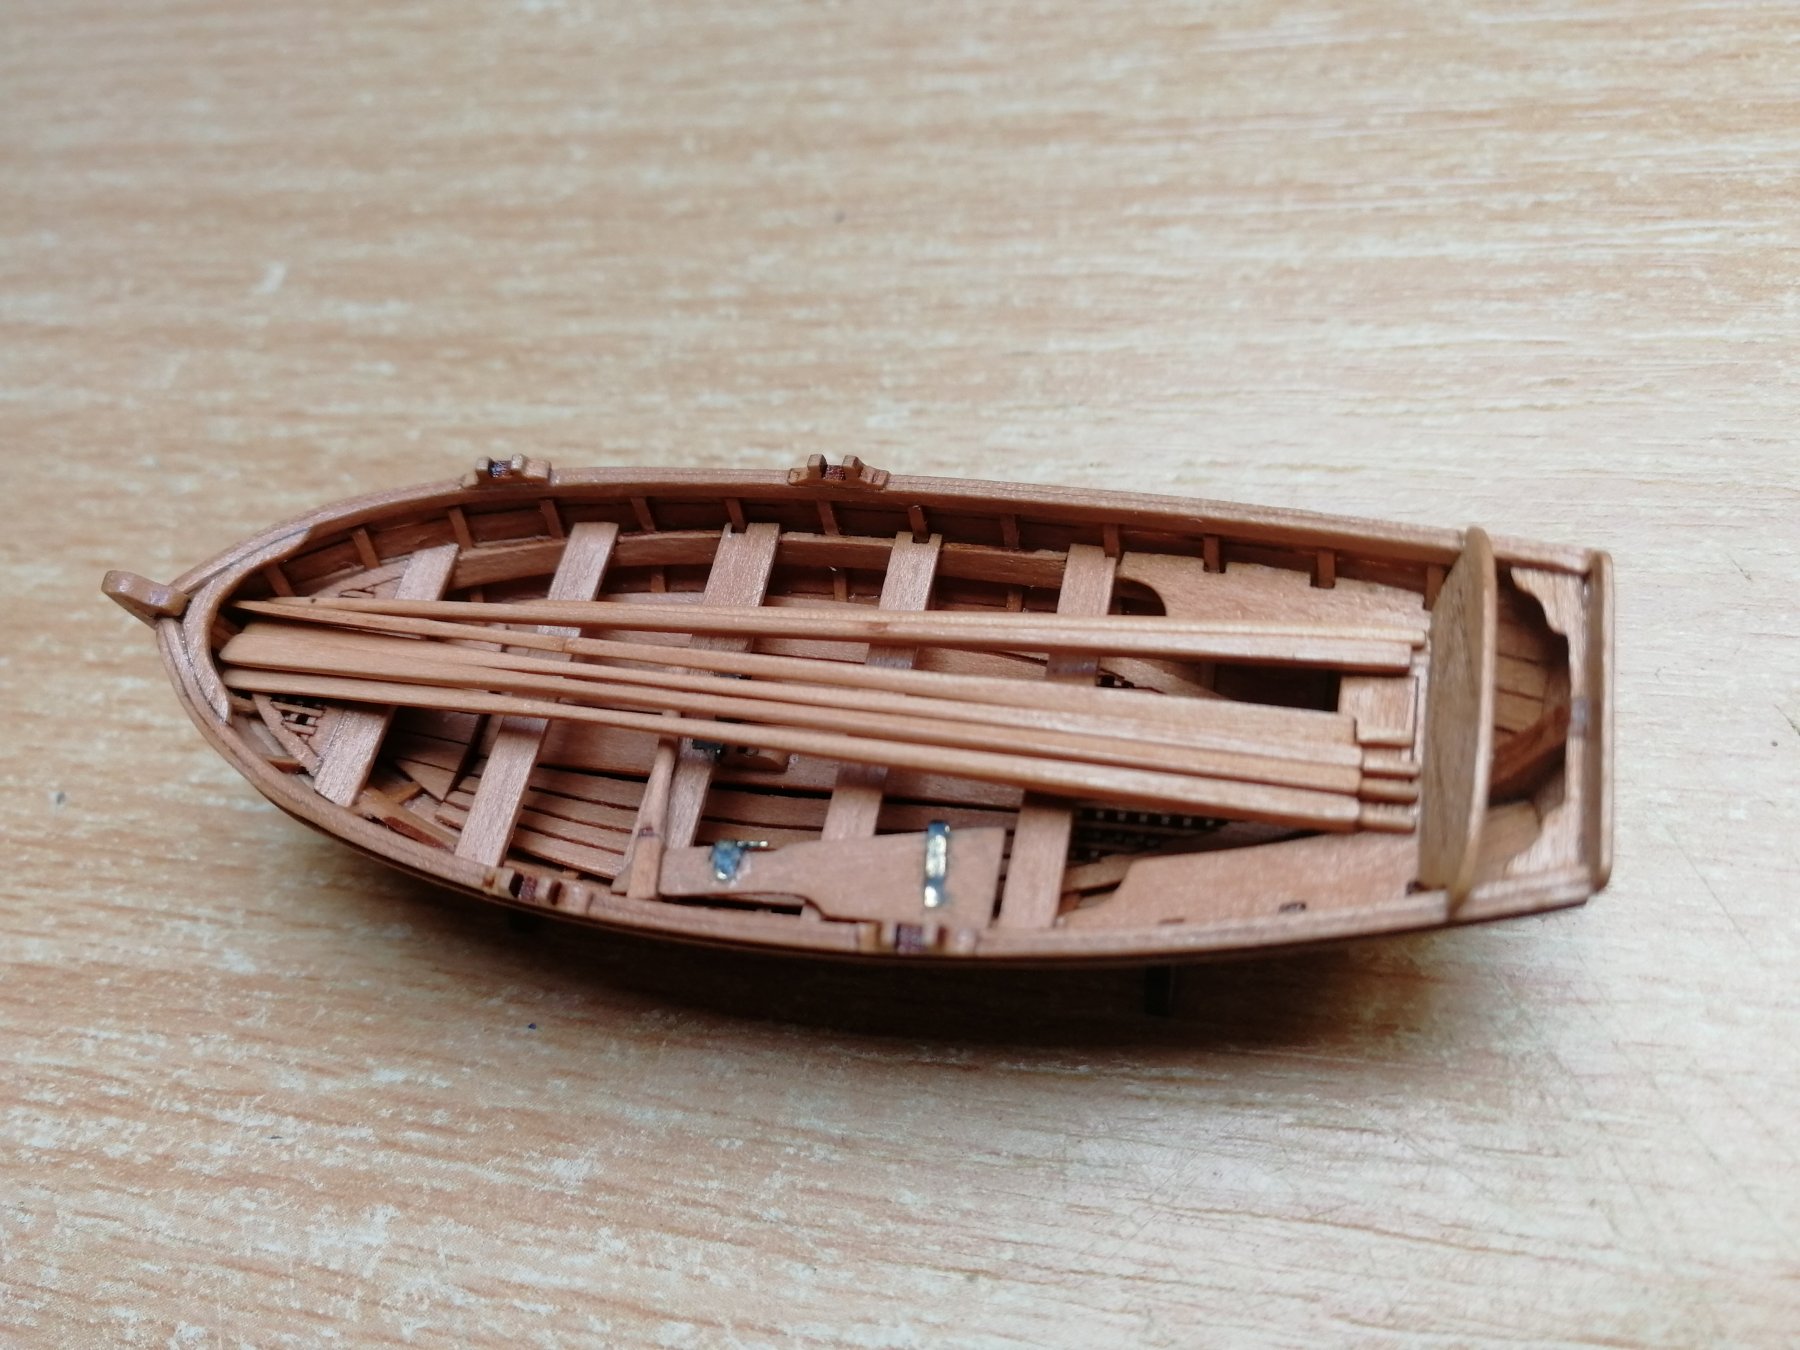
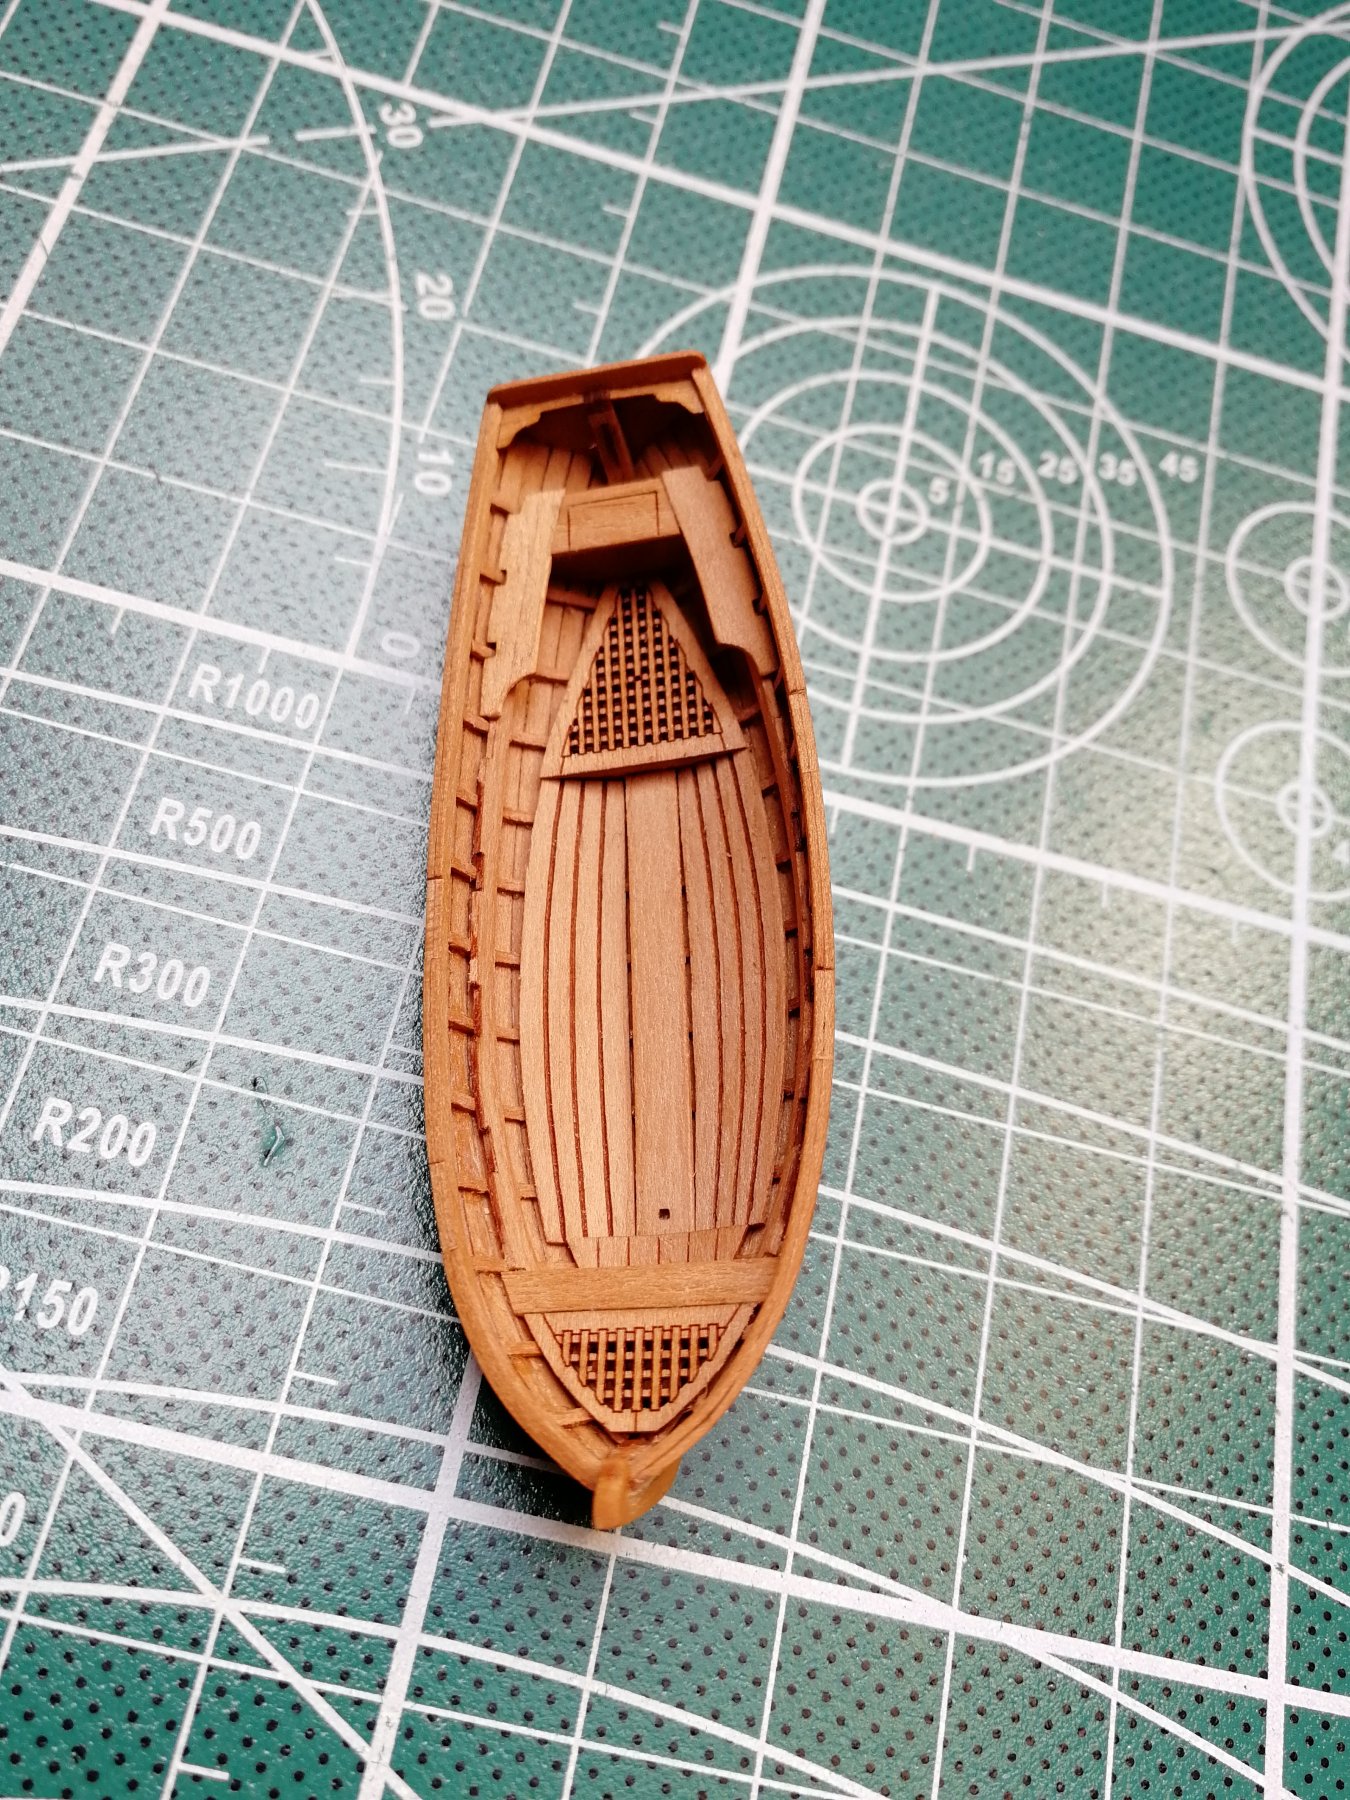
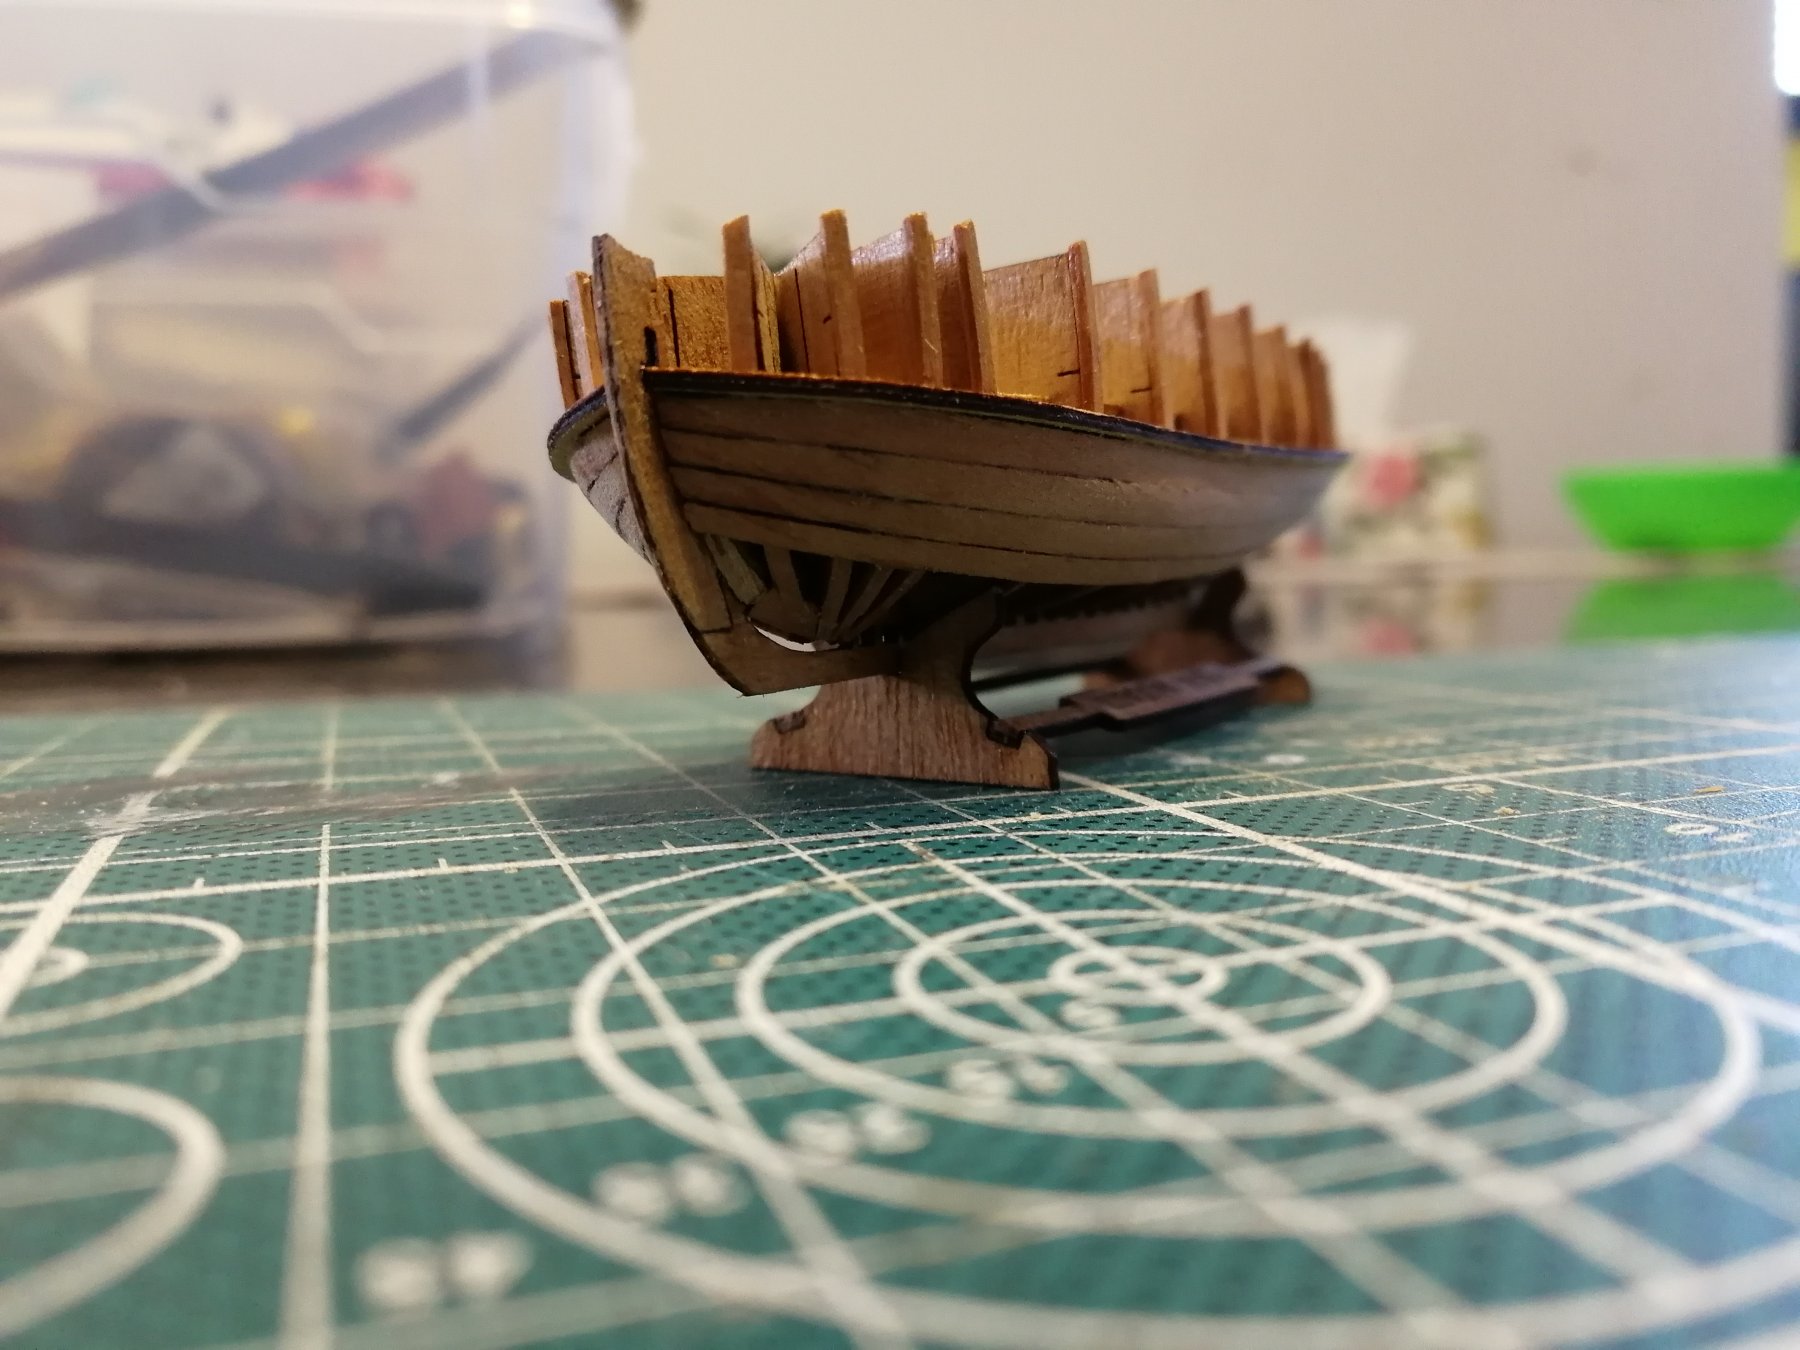
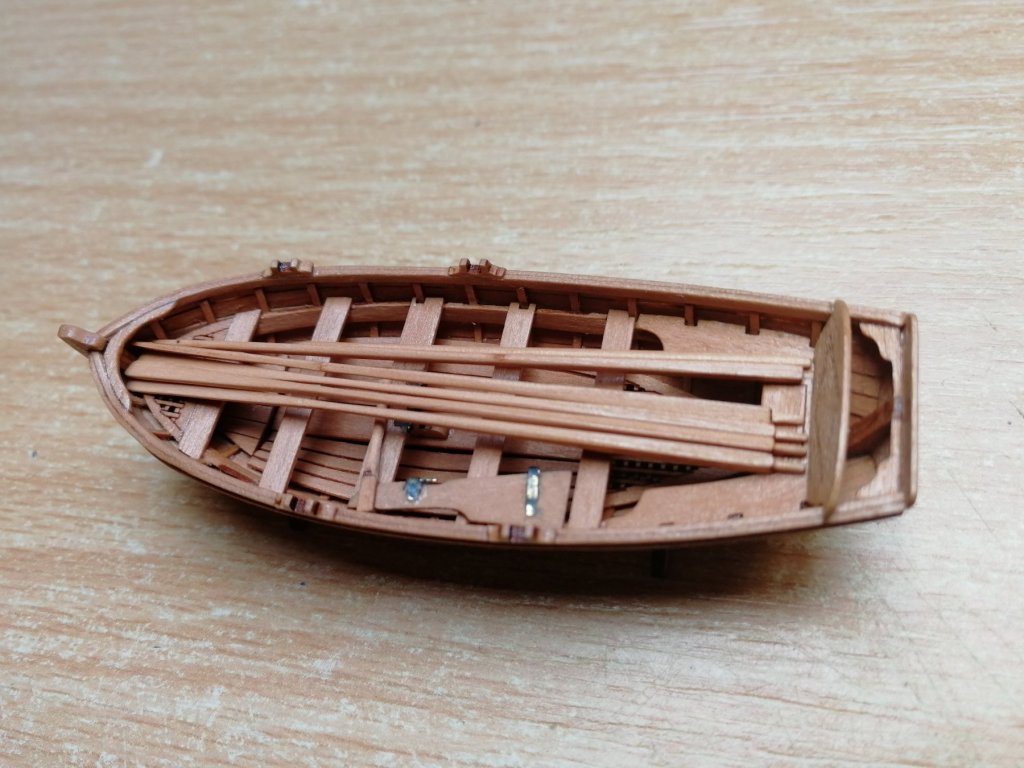
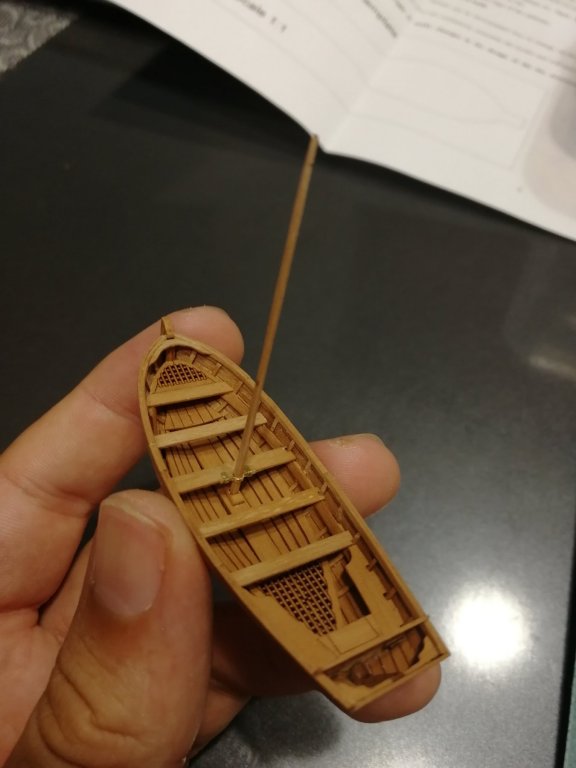
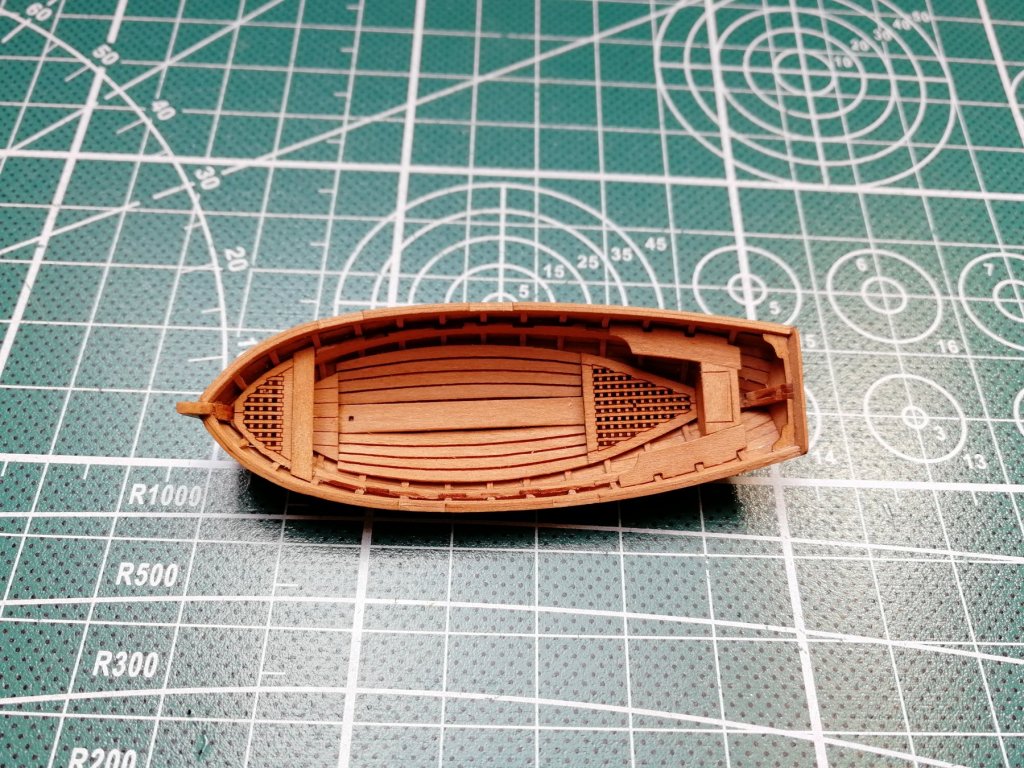
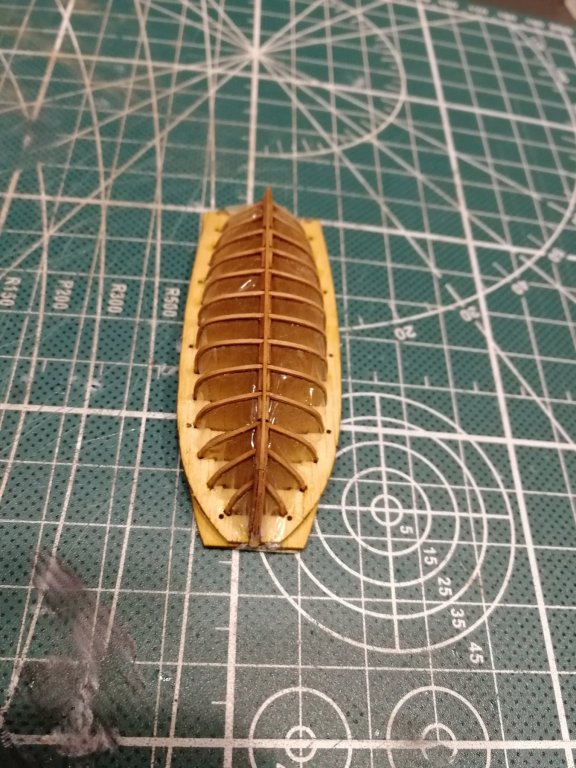
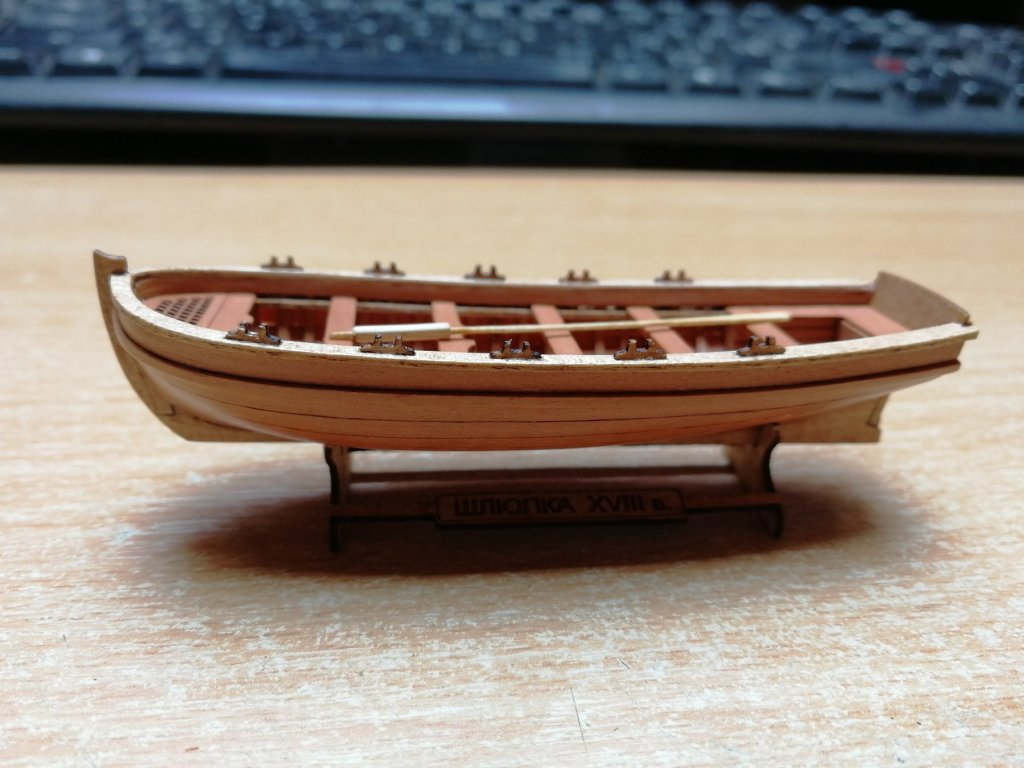
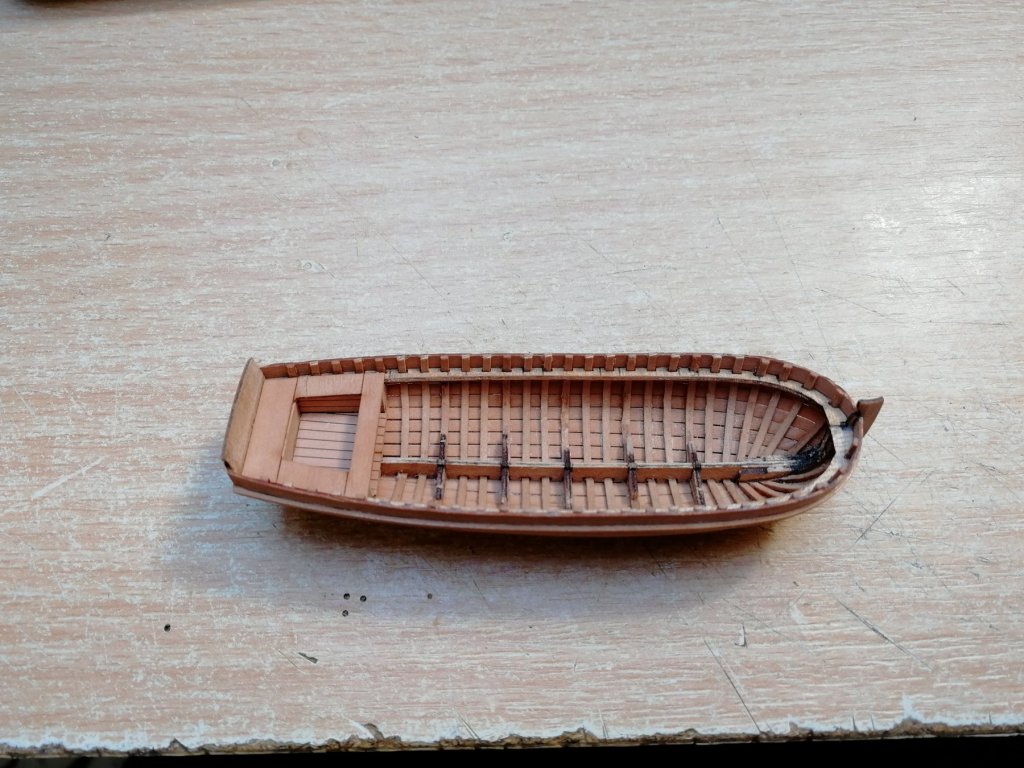
The yawl is almost finished. Interior is done, exterior and some Iron work as well. I need to finish oars, blacken the brass strips and varnish. Twart, mast clamp and mast Rudder


- 315 replies
-
- 20
-
-
- master korabel
- avos
- (and 1 more)
-
Things happen. You will be able to fix that for sure. Looks like you have some updated version of the kit. I'm pretty sure I didn't have that pre-drawn decks Just plywood. You are progressing nicely👌 Anyway I would suggest to take off the planking around the ribs now. Once you plank the hull it could be more difficult and you can possibly damage the hull planking. Good luck
- 26 replies
-
- 1
-
-
- mantua
- royal caroline
- (and 1 more)
-
Thanks Katsumoto, it is really a pleasure building kit like this. It is not that dificult to get good result when the producer gives guidence like this. Just patience and be careful.
- 315 replies
-
- 2
-
-
- master korabel
- avos
- (and 1 more)
-
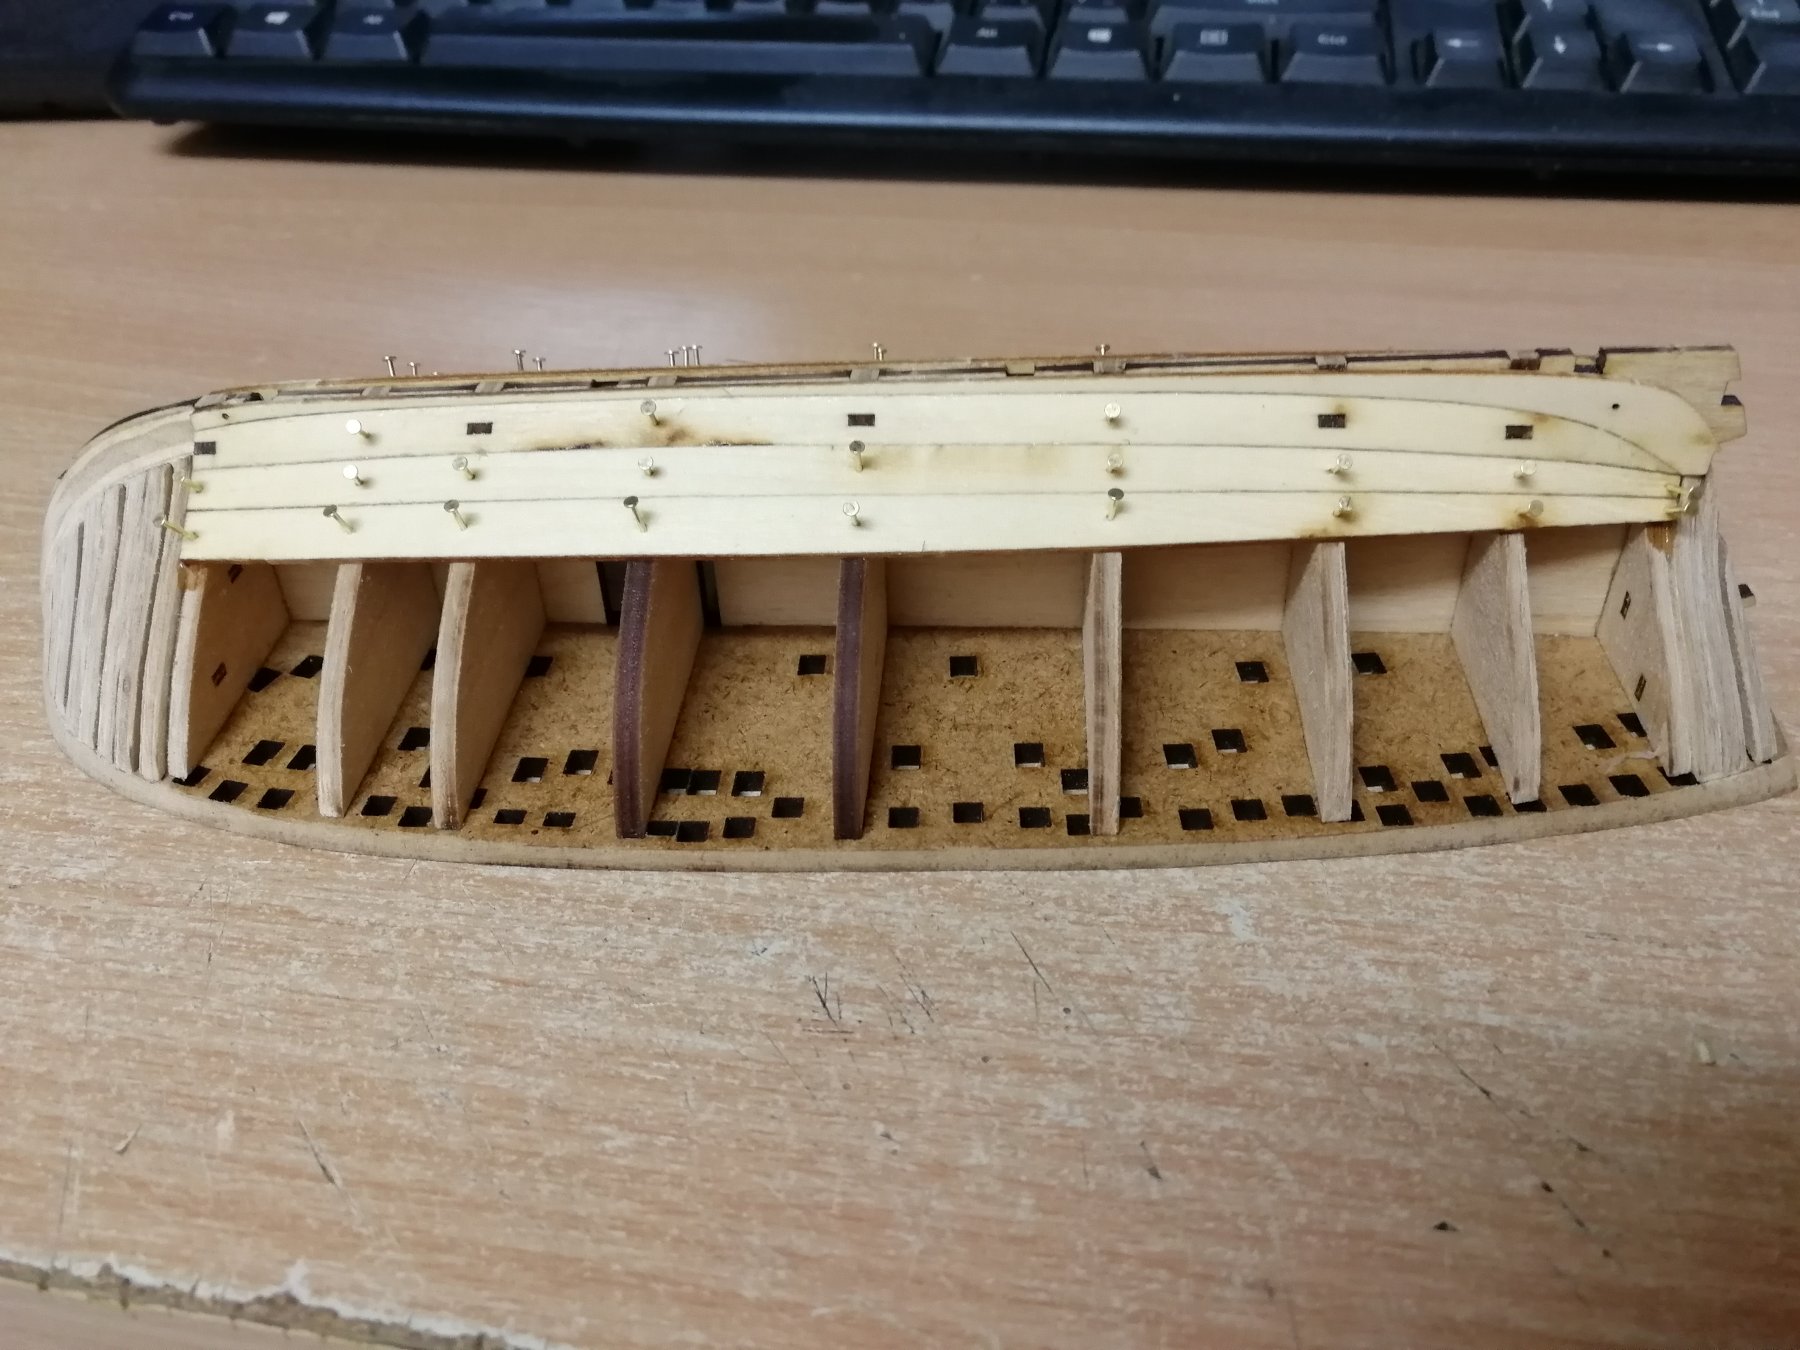
Keel, stem and sternpost glued in place and smoothend. Starting with interior. Everything fits perfectly only minor sending is needed!

- 315 replies
-
- 20
-
-
- master korabel
- avos
- (and 1 more)
-
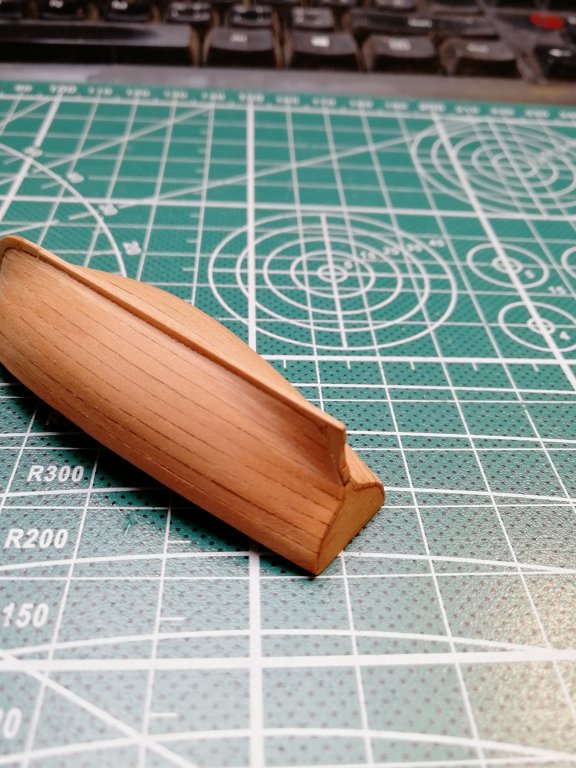
The planking is finished. Now it can be taken off the jig Sheer clamps installed Keel, stem and Stern post preparation Size comparison with 95mm boat


- 315 replies
-
- 20
-
-
- master korabel
- avos
- (and 1 more)
-
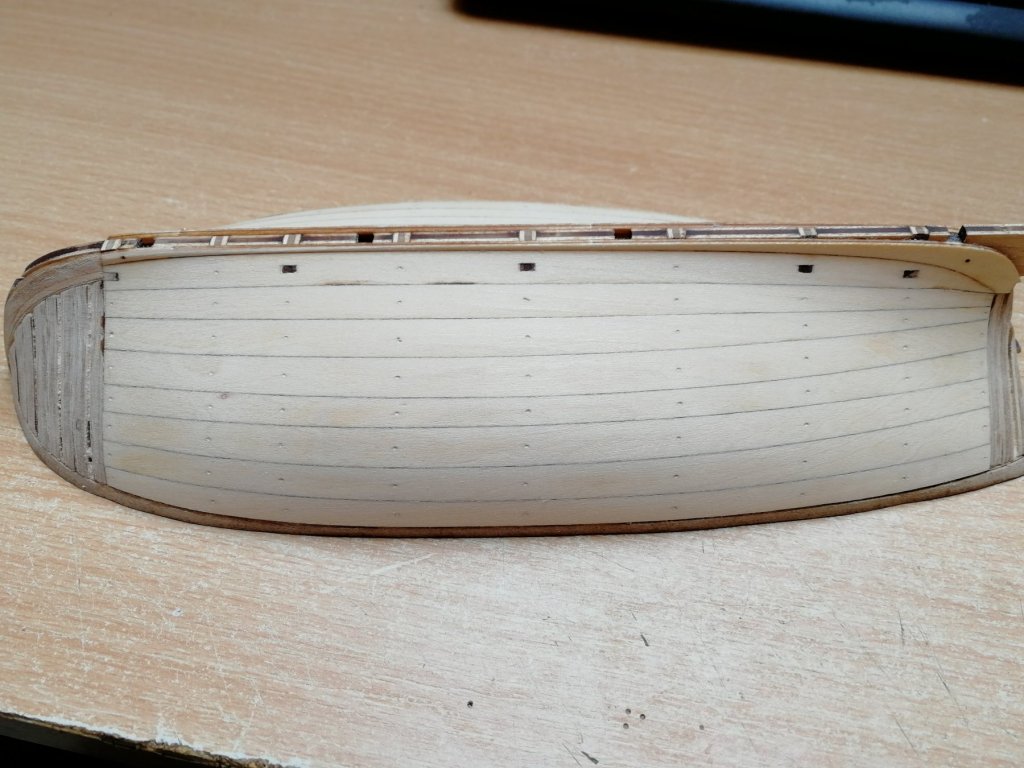
I have almost finished the planking today. I tried not to hurry and really took care of the close fit. I'm really happy with the result so far. 🤣

- 315 replies
-
- 17
-
-
- master korabel
- avos
- (and 1 more)
-
Hi Katsumoto, congrats to the new ship. I will for sure follow your progress! If you'd be interested I can share some aternative plans and sources. But I'm warning you, it will make the build much more frustrating But since you Just starting it could be easier then in my case get the plans in the middle of the build. Good luck and have fun! It is a good kit and nice ship!
- 26 replies
-
- 3
-
-
- mantua
- royal caroline
- (and 1 more)
-
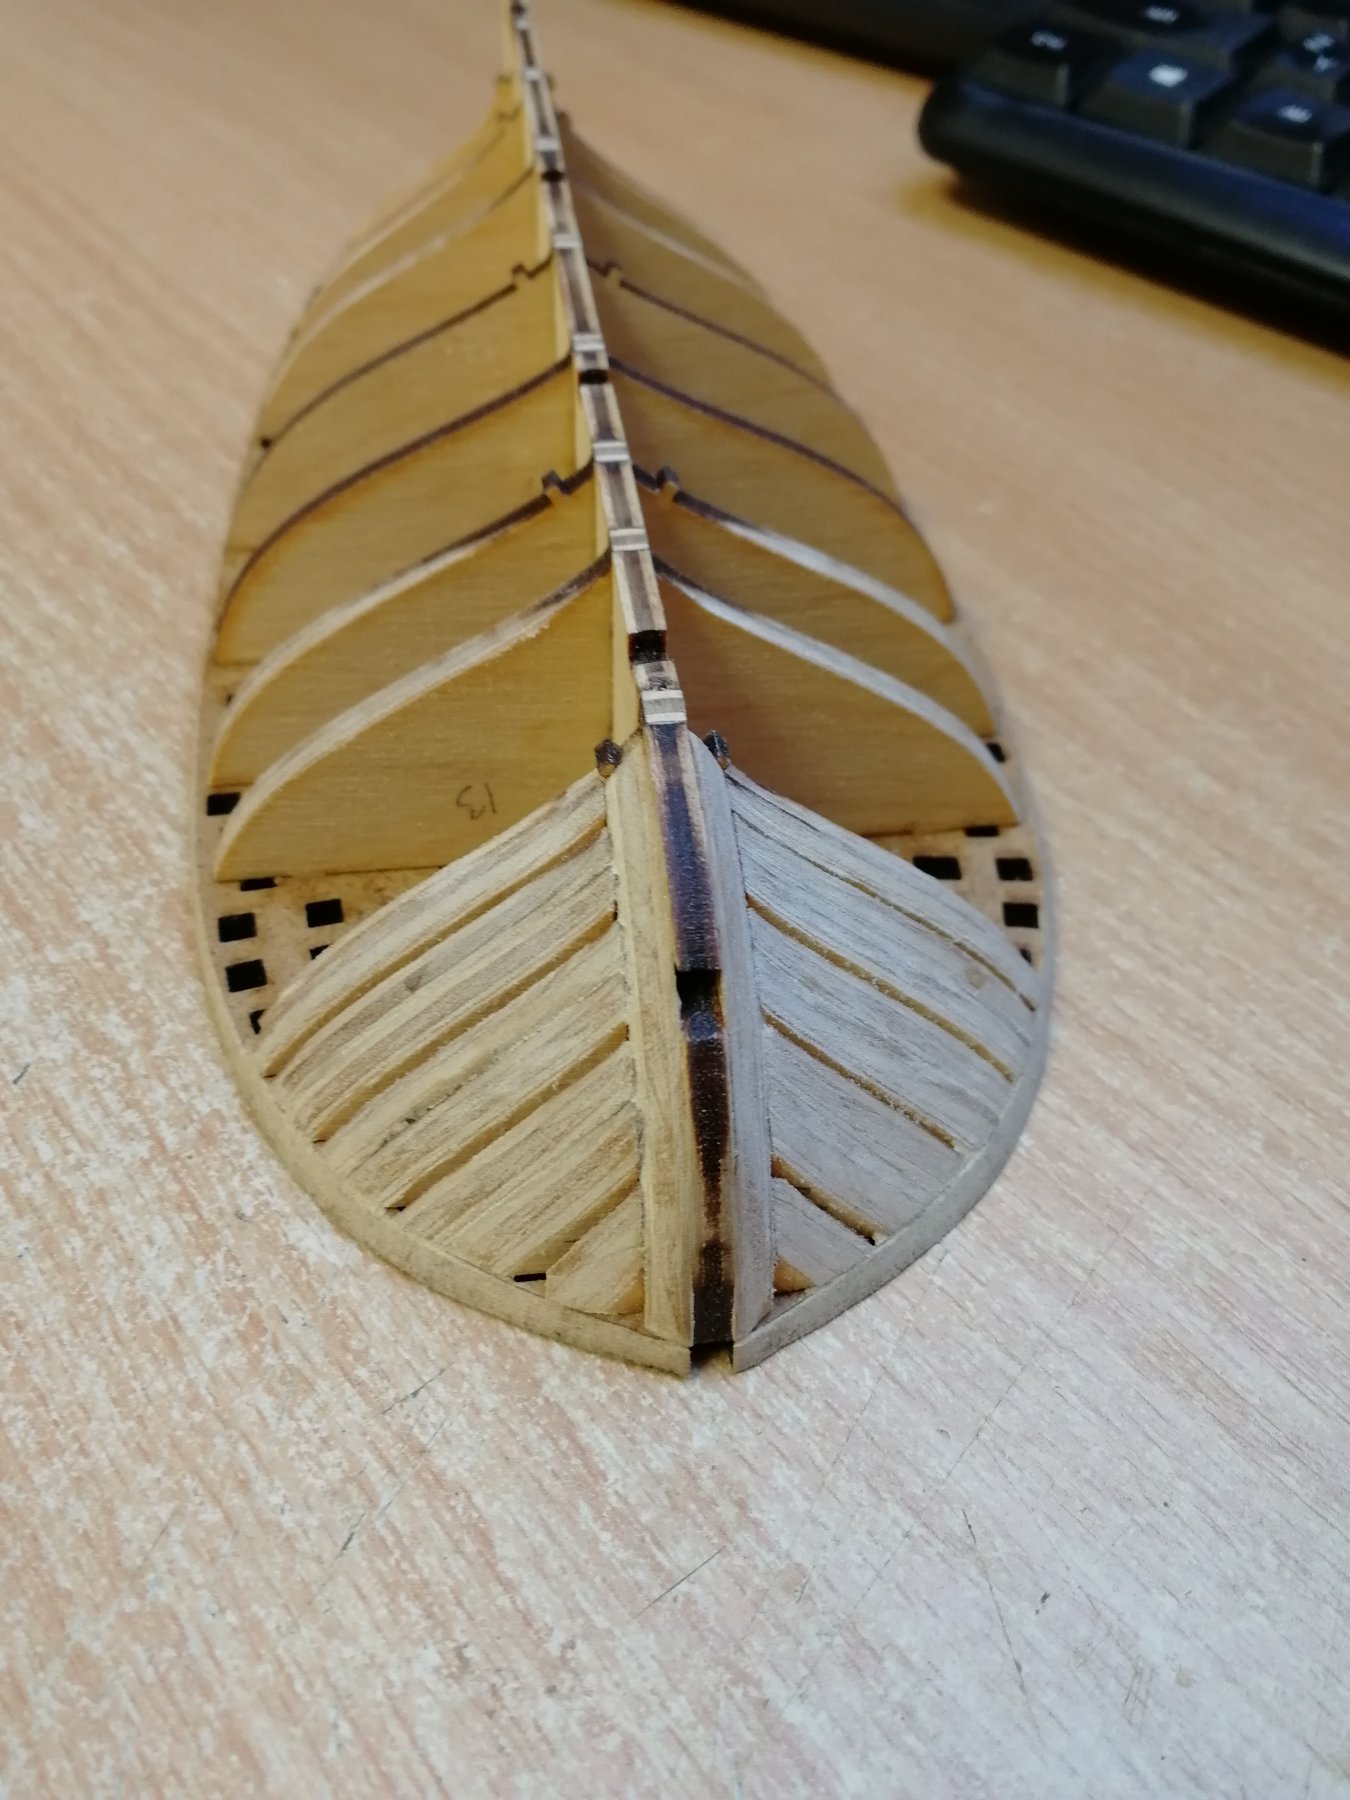
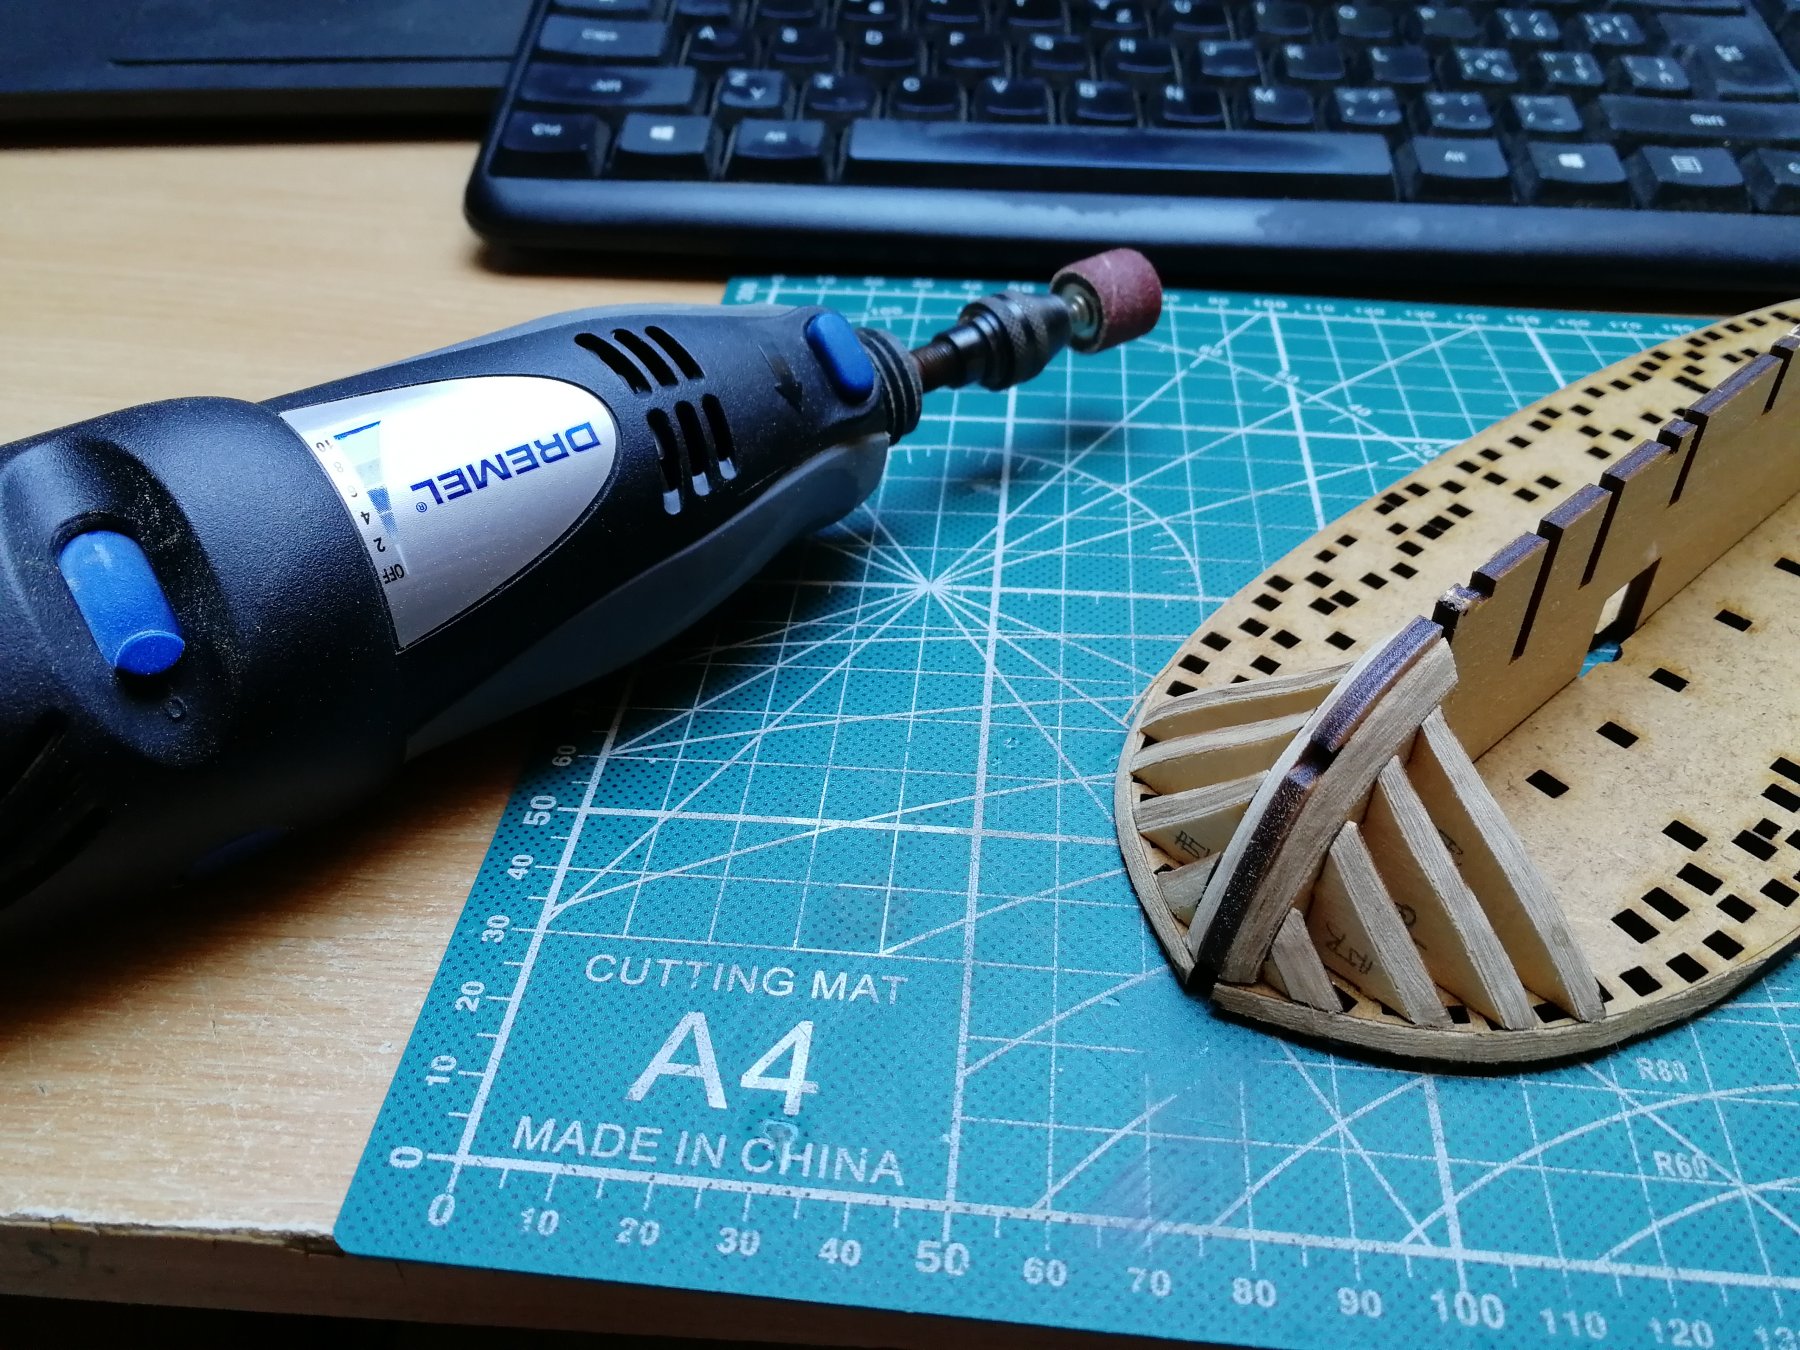
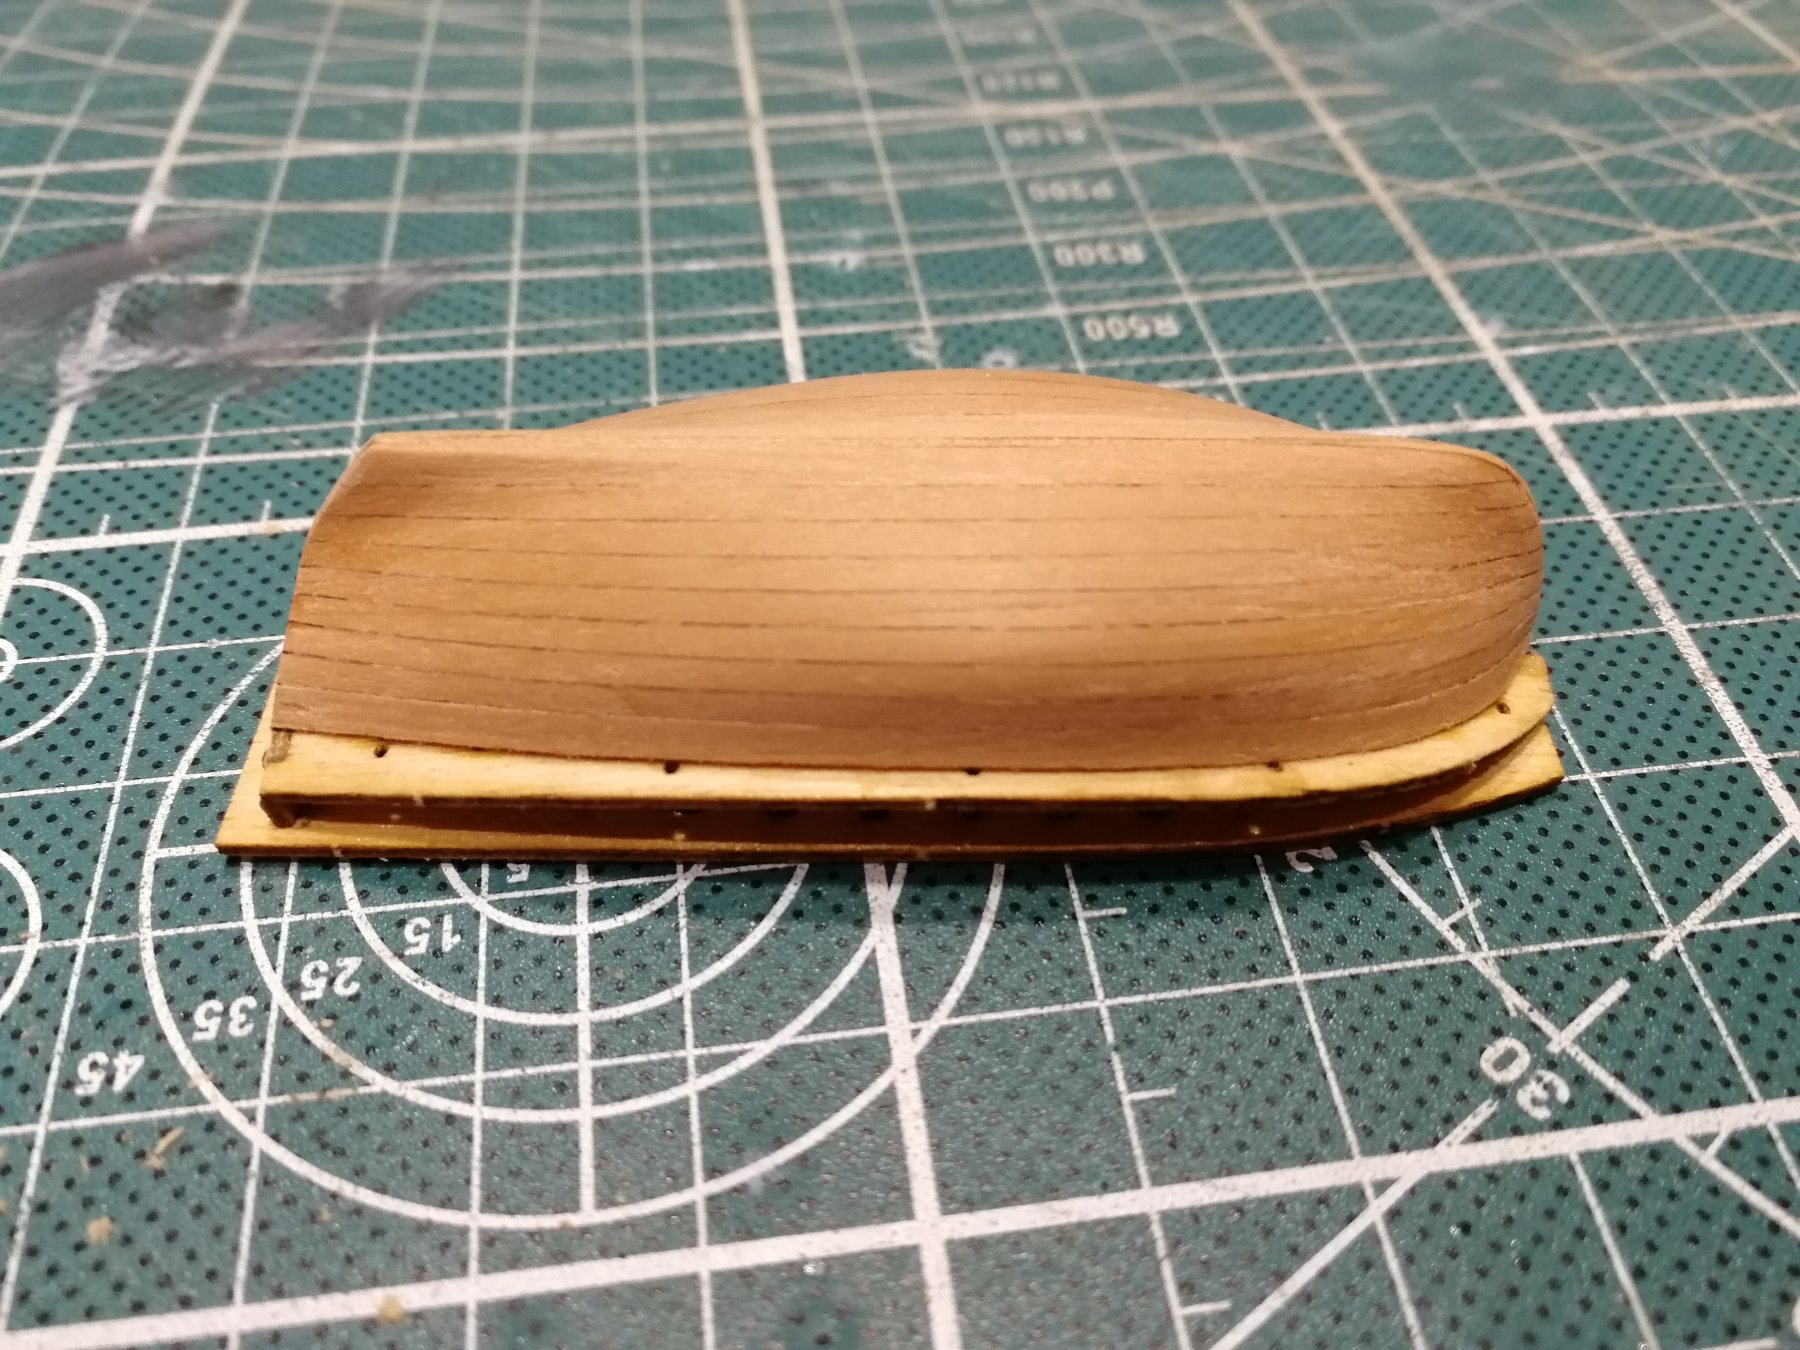
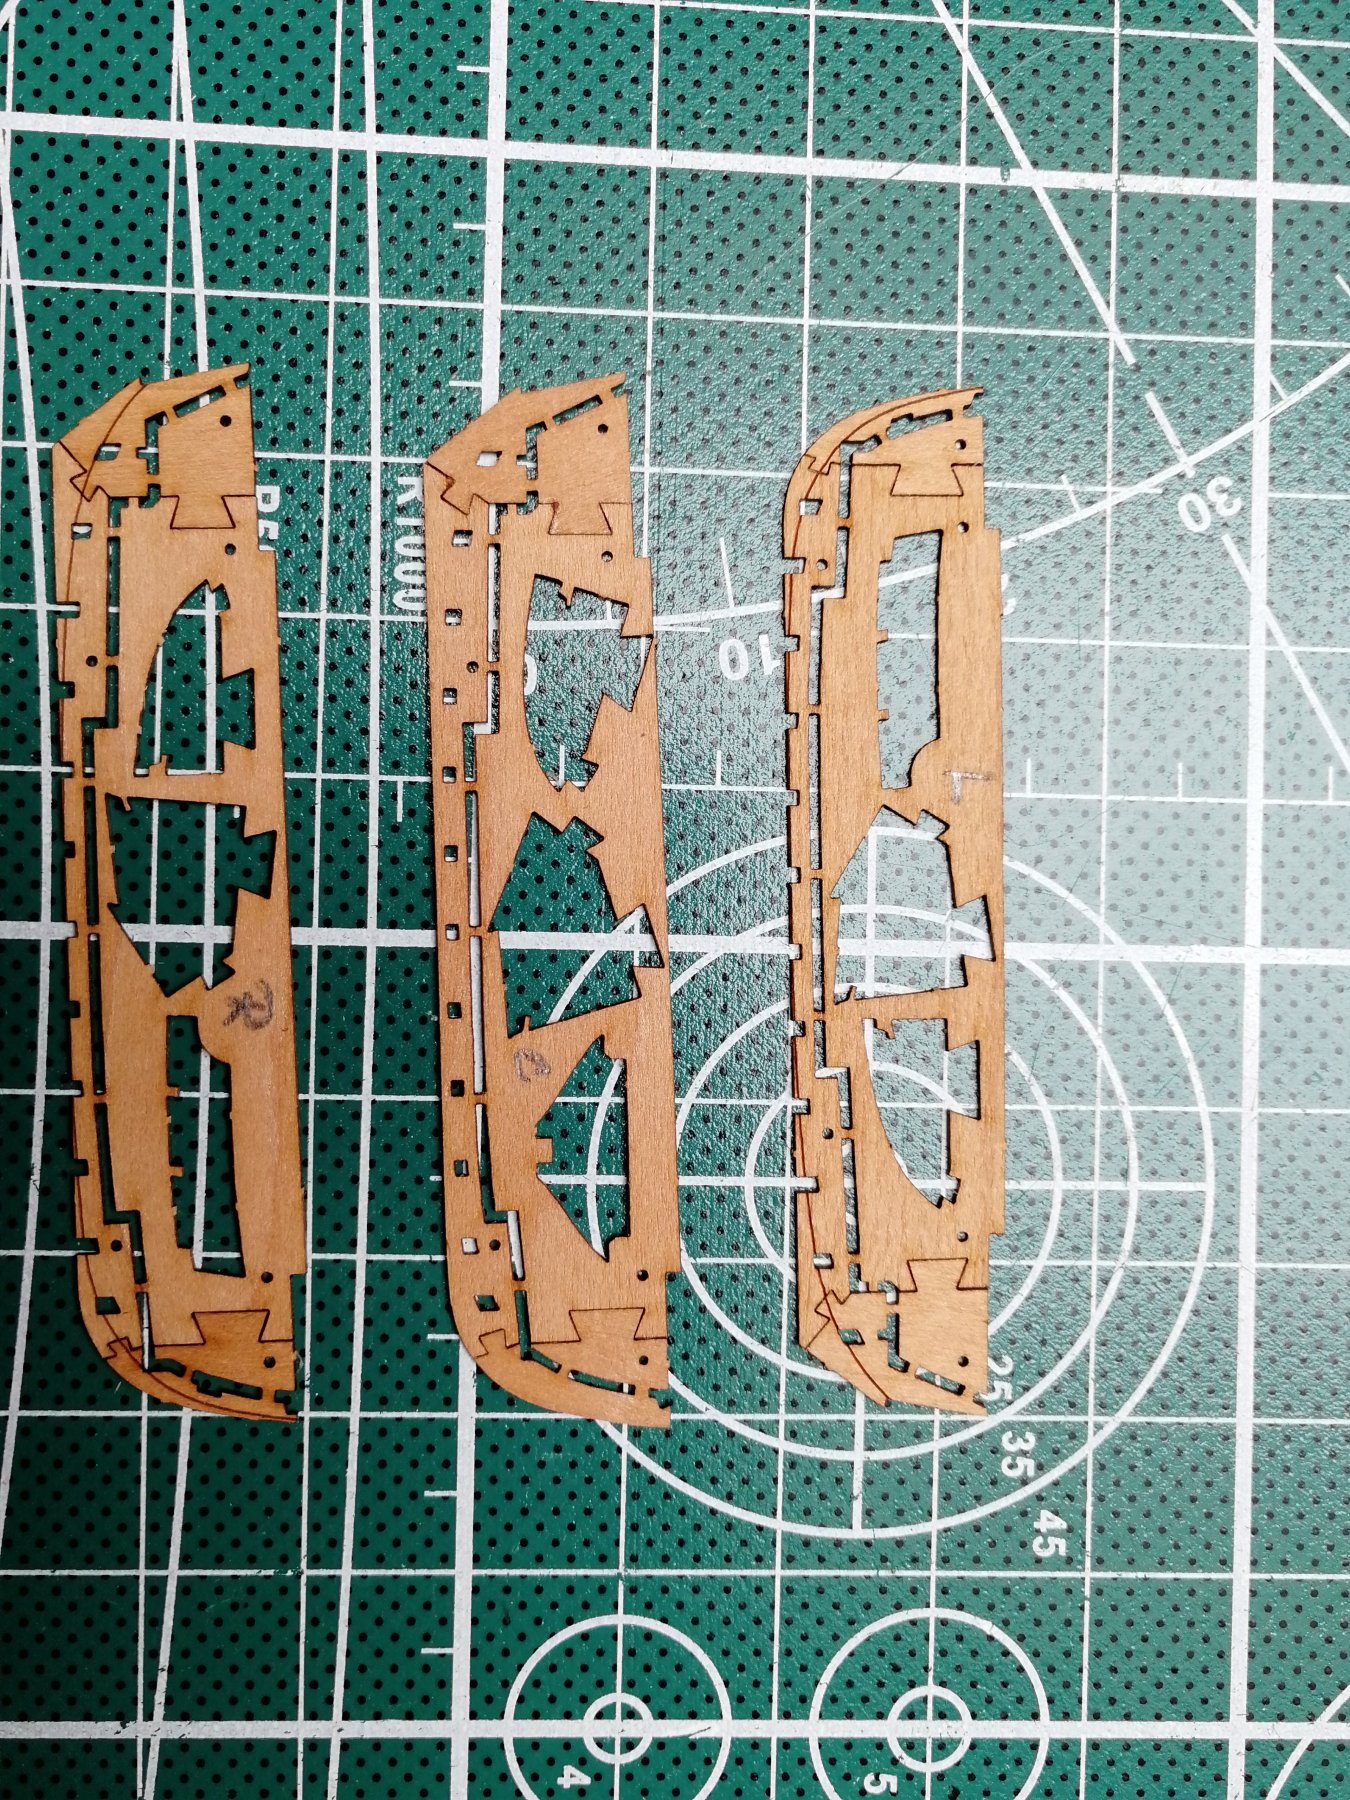
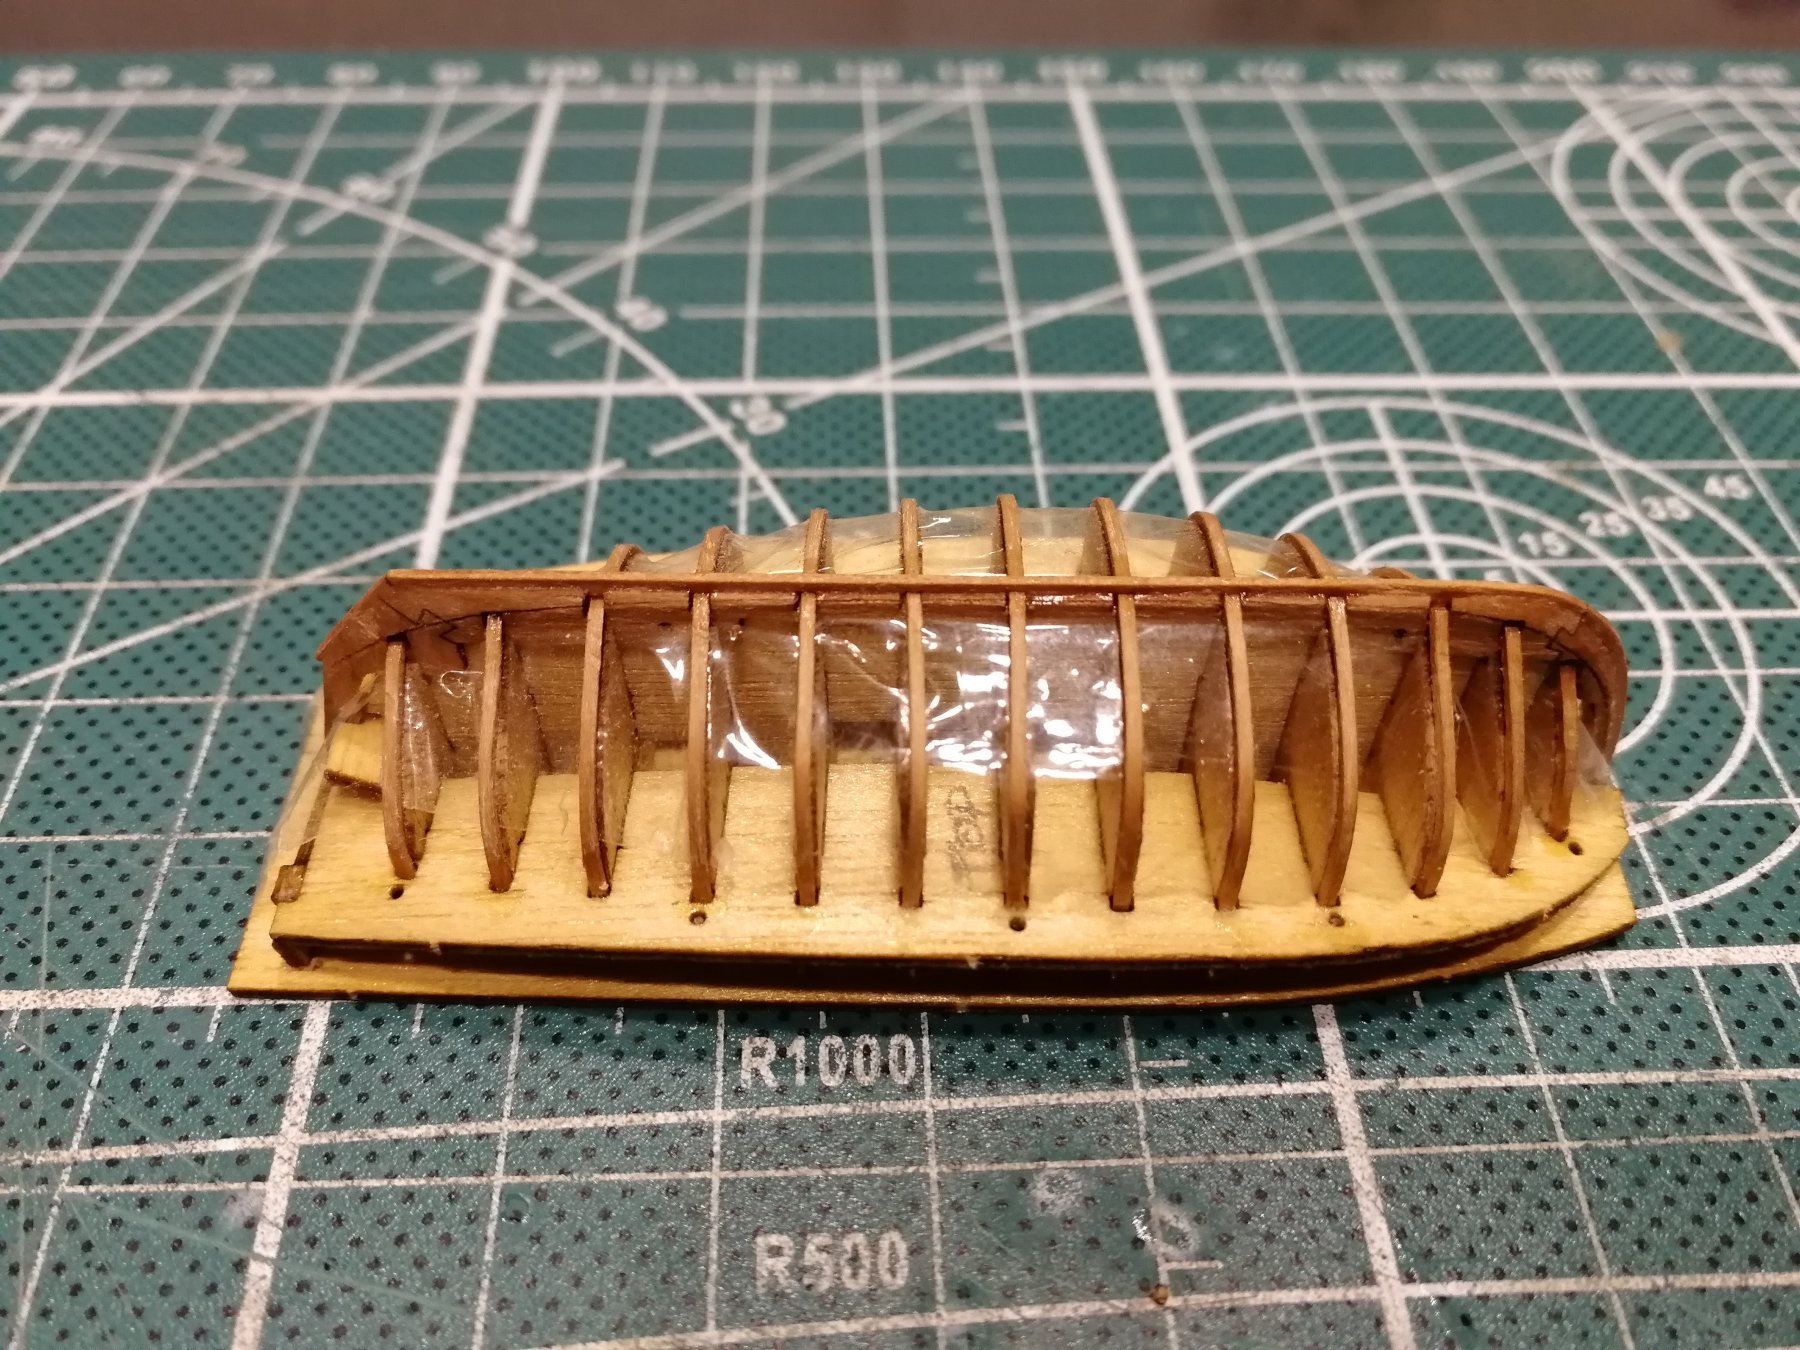
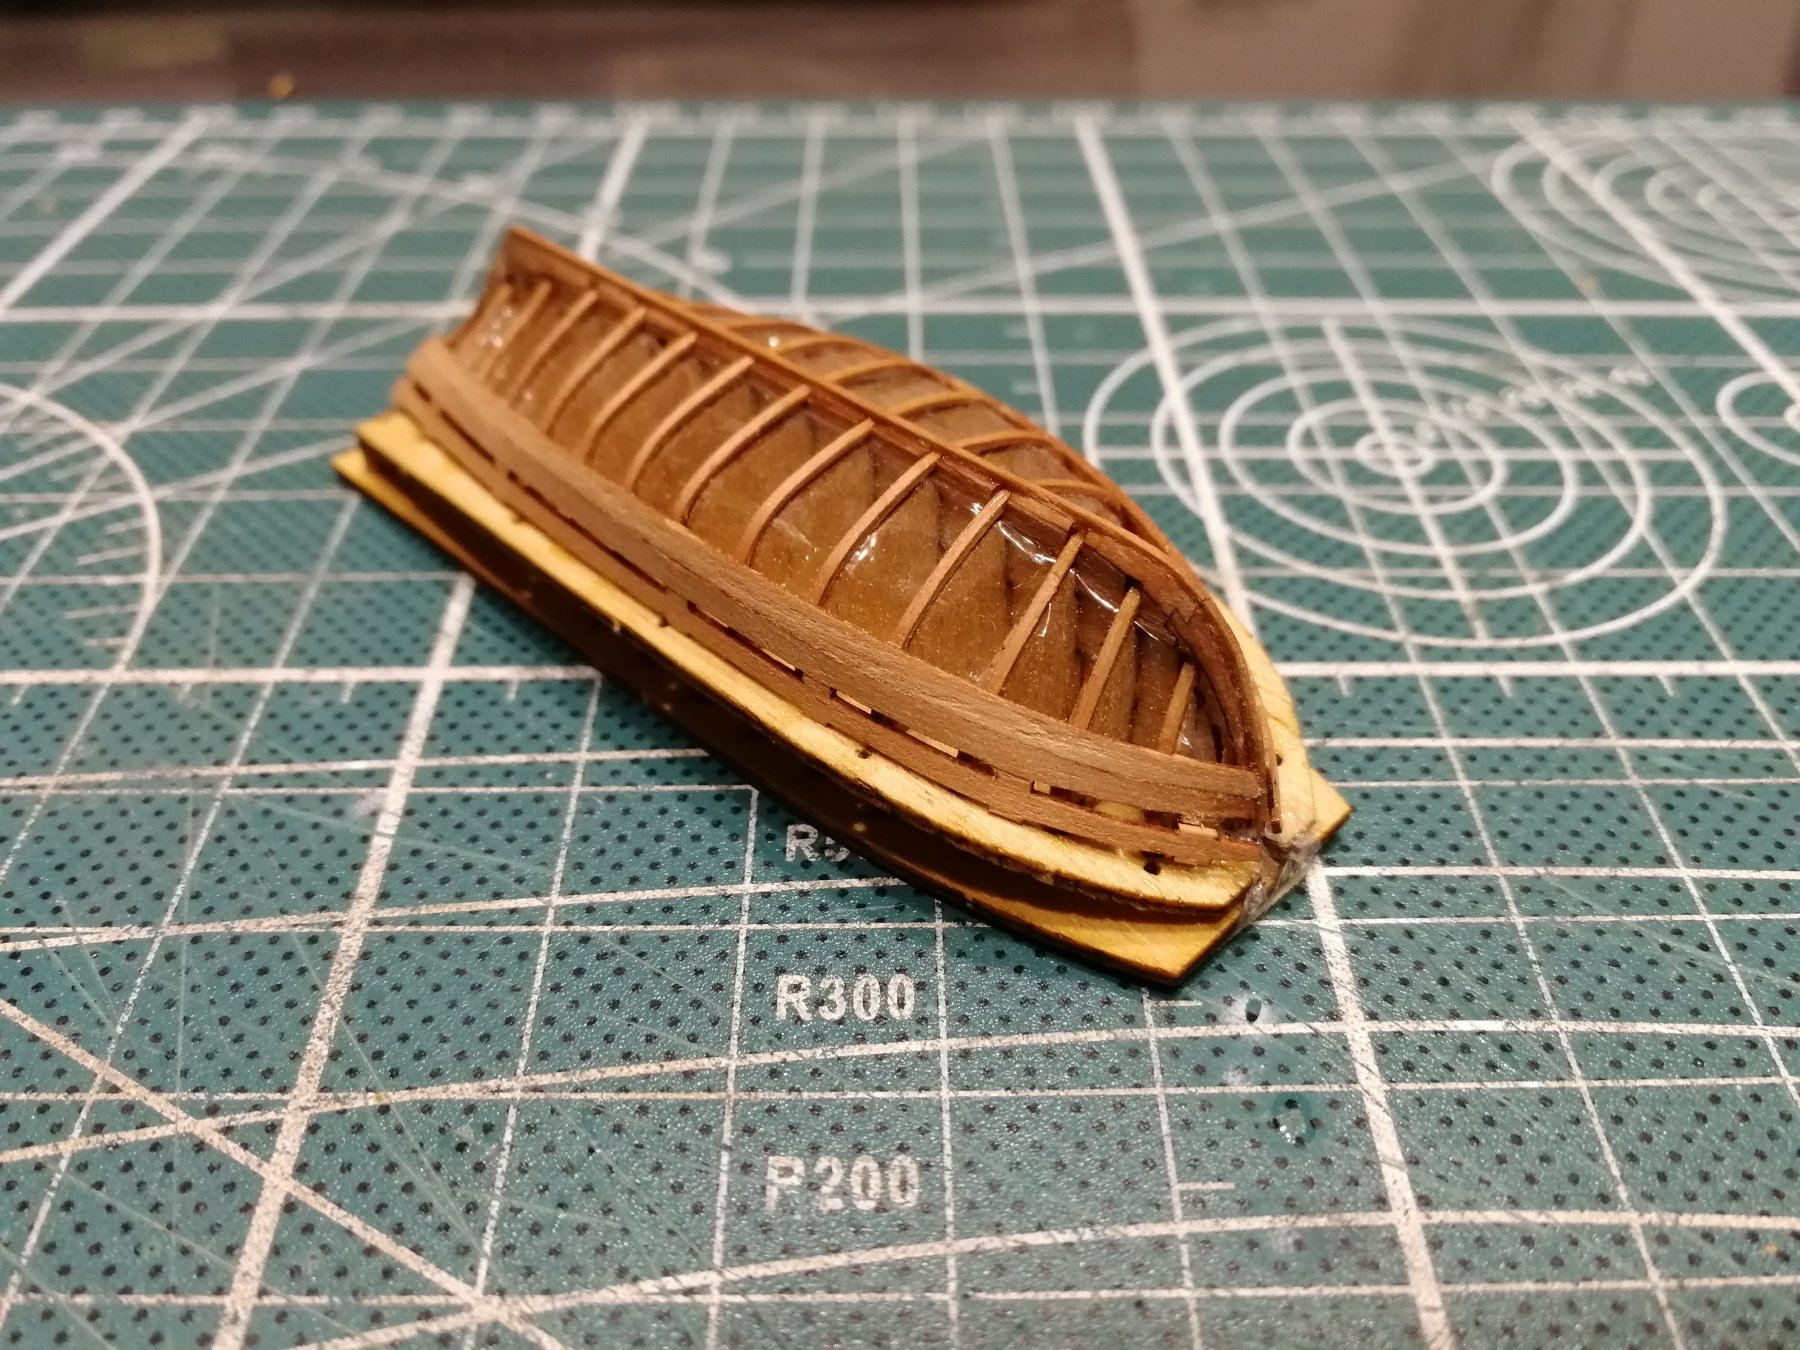
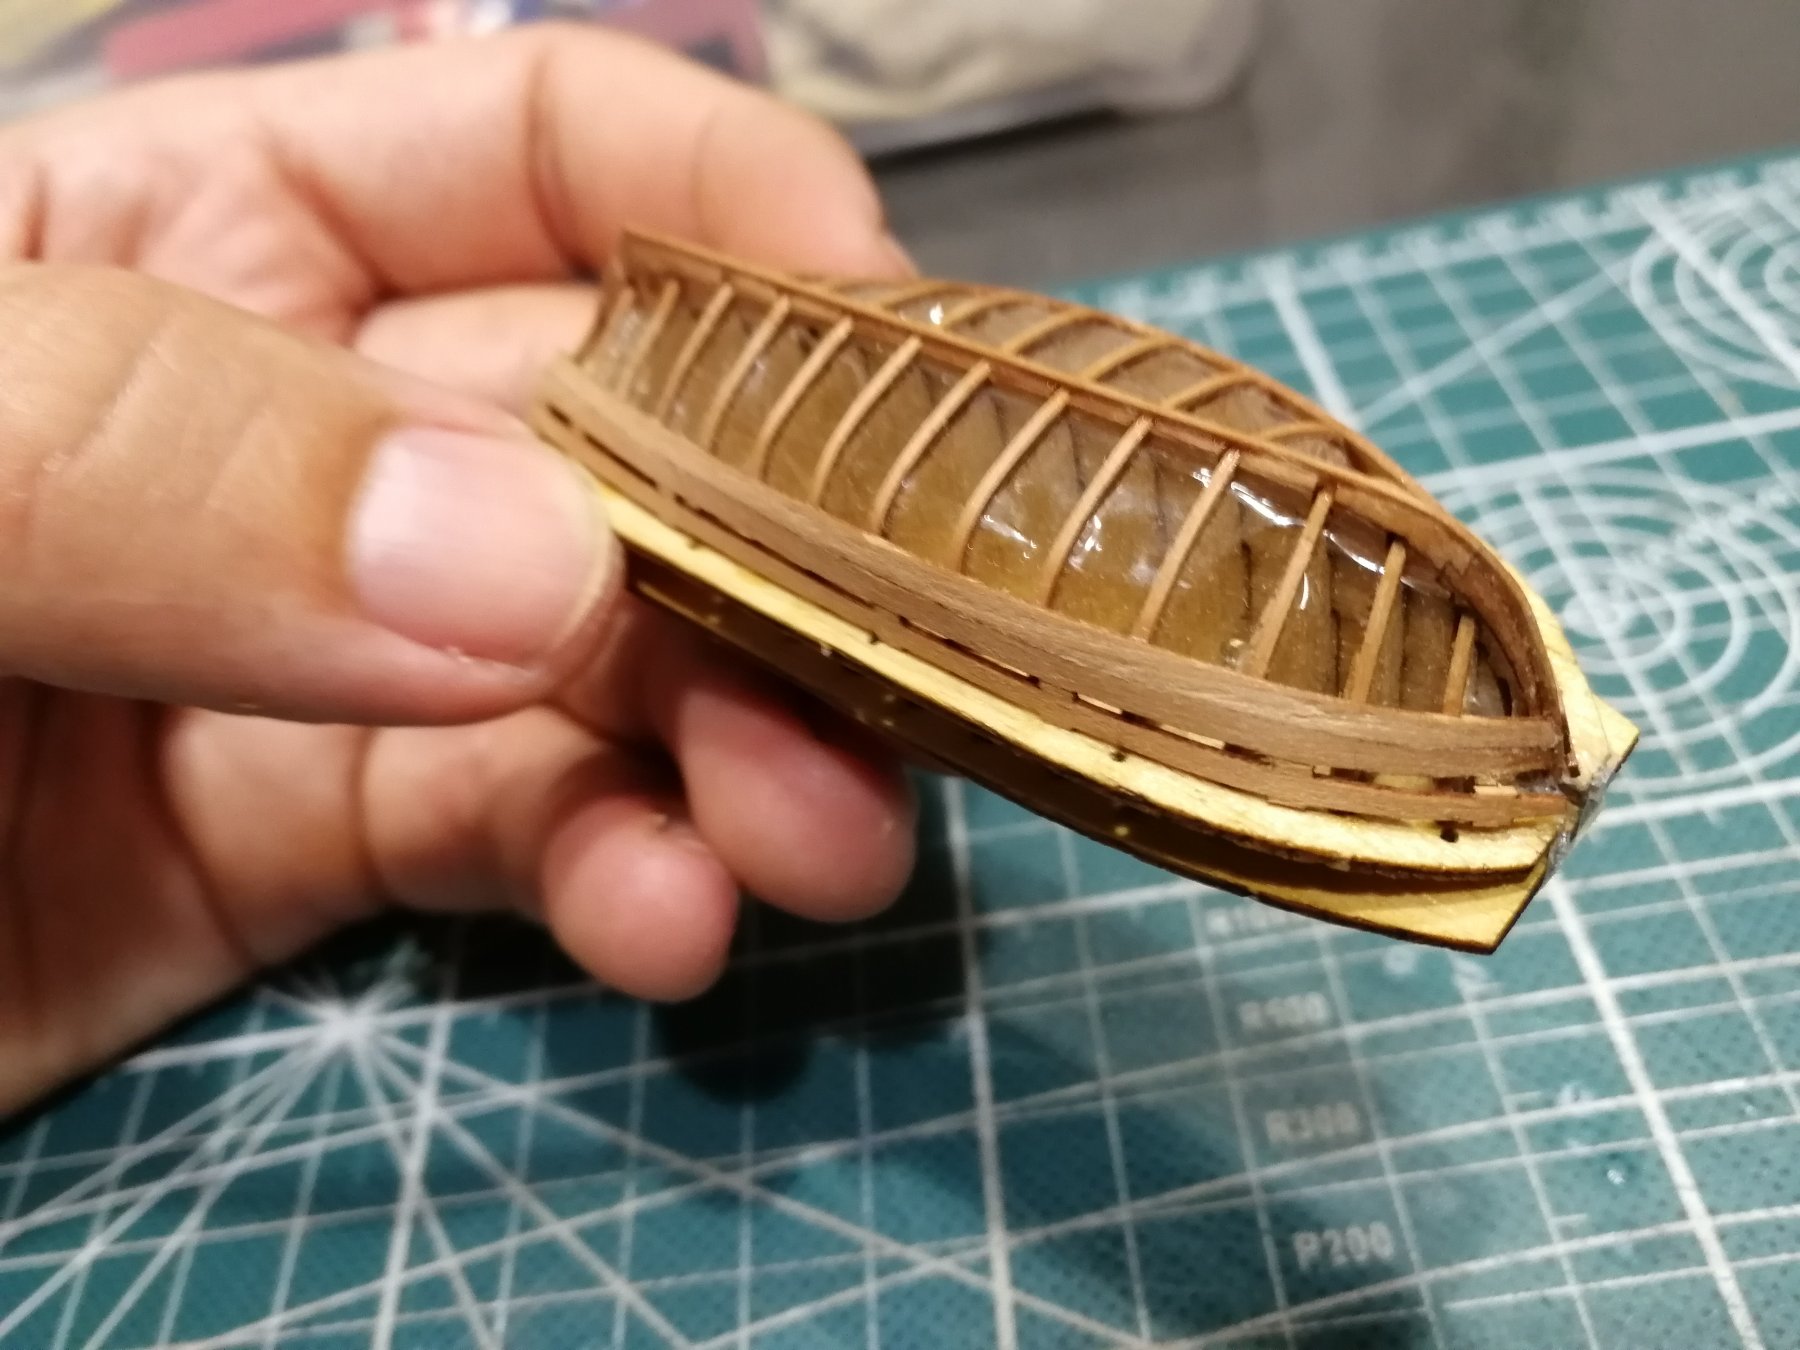
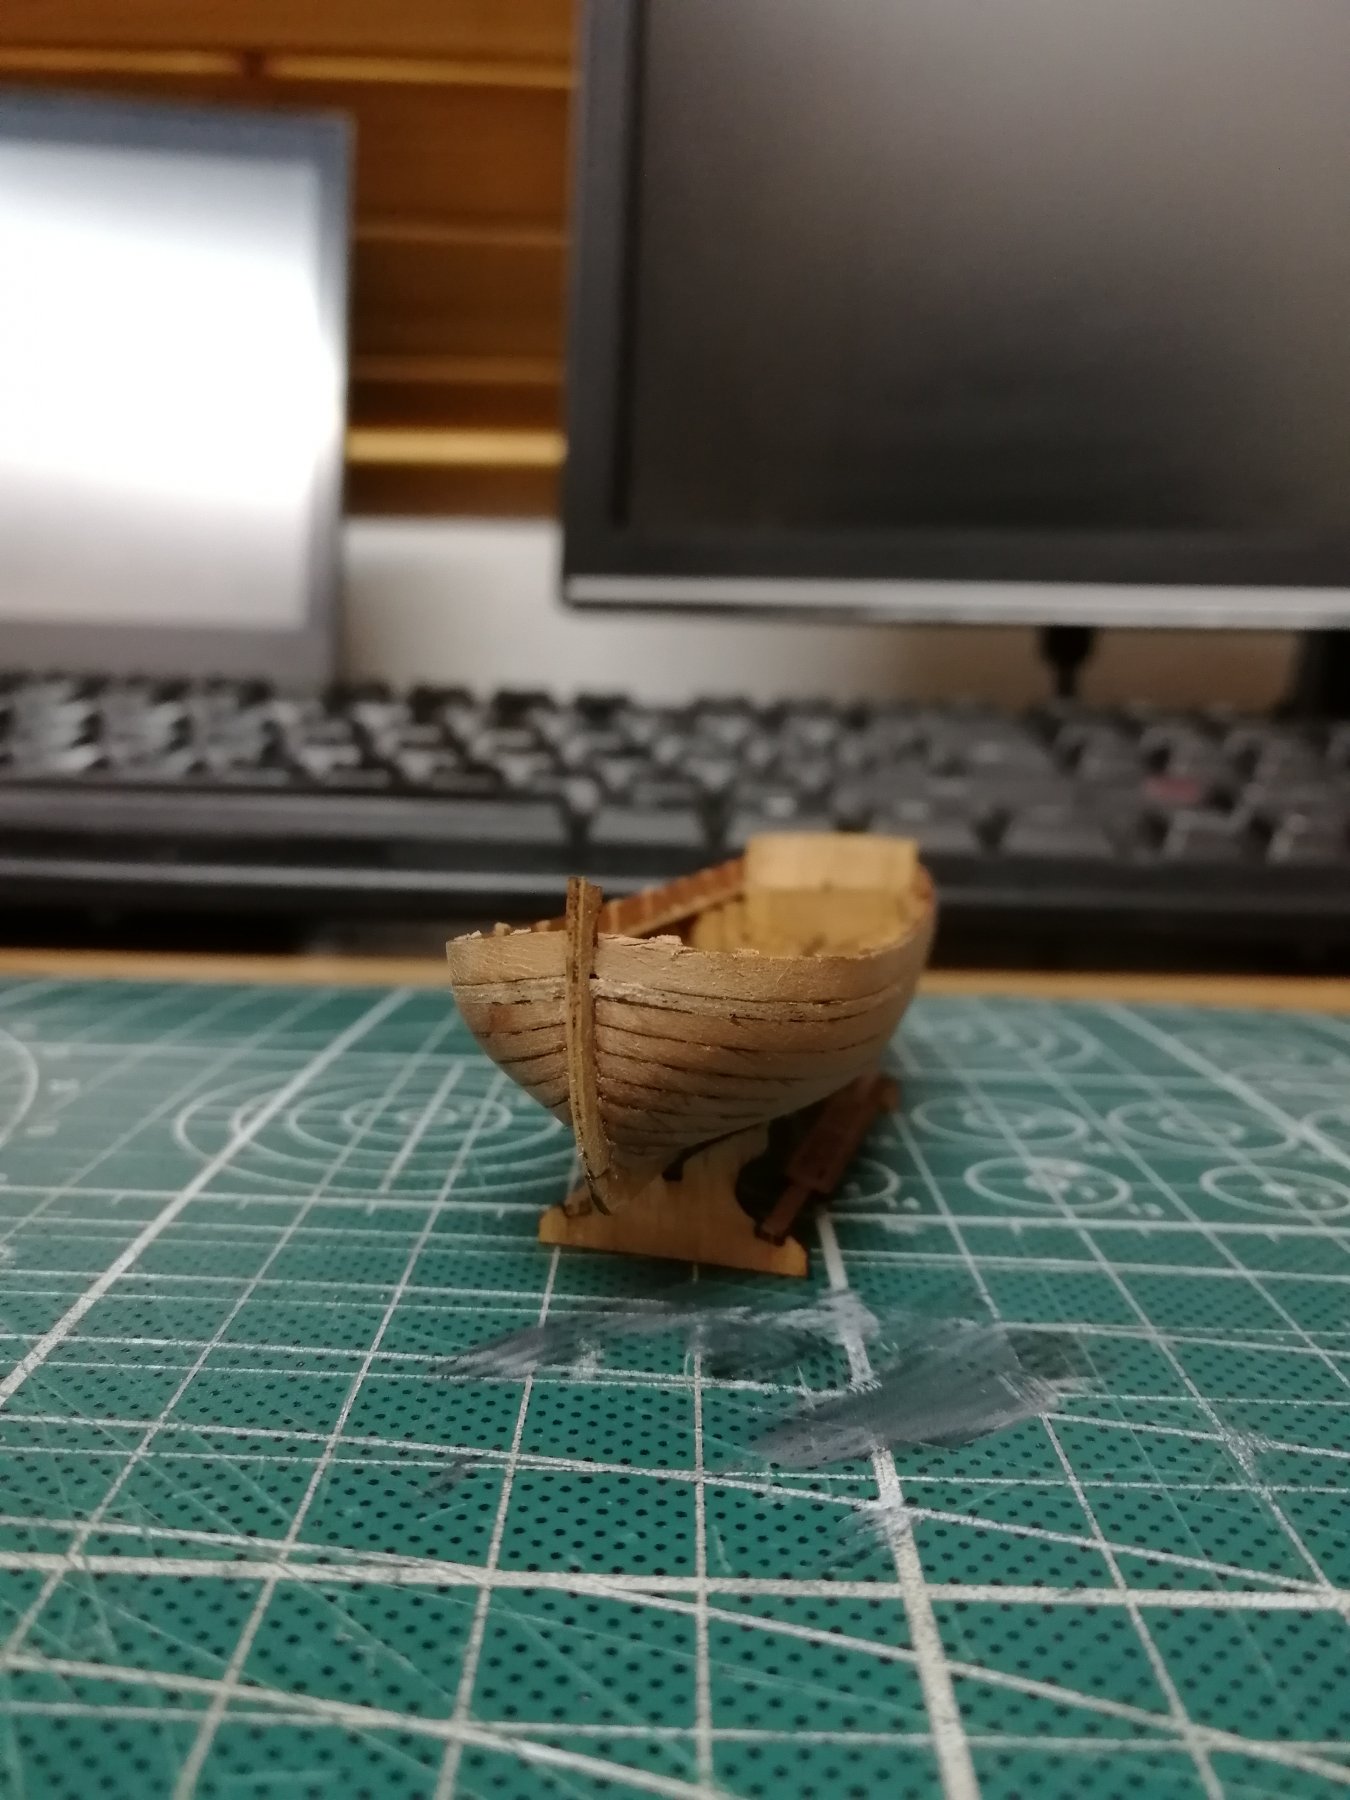
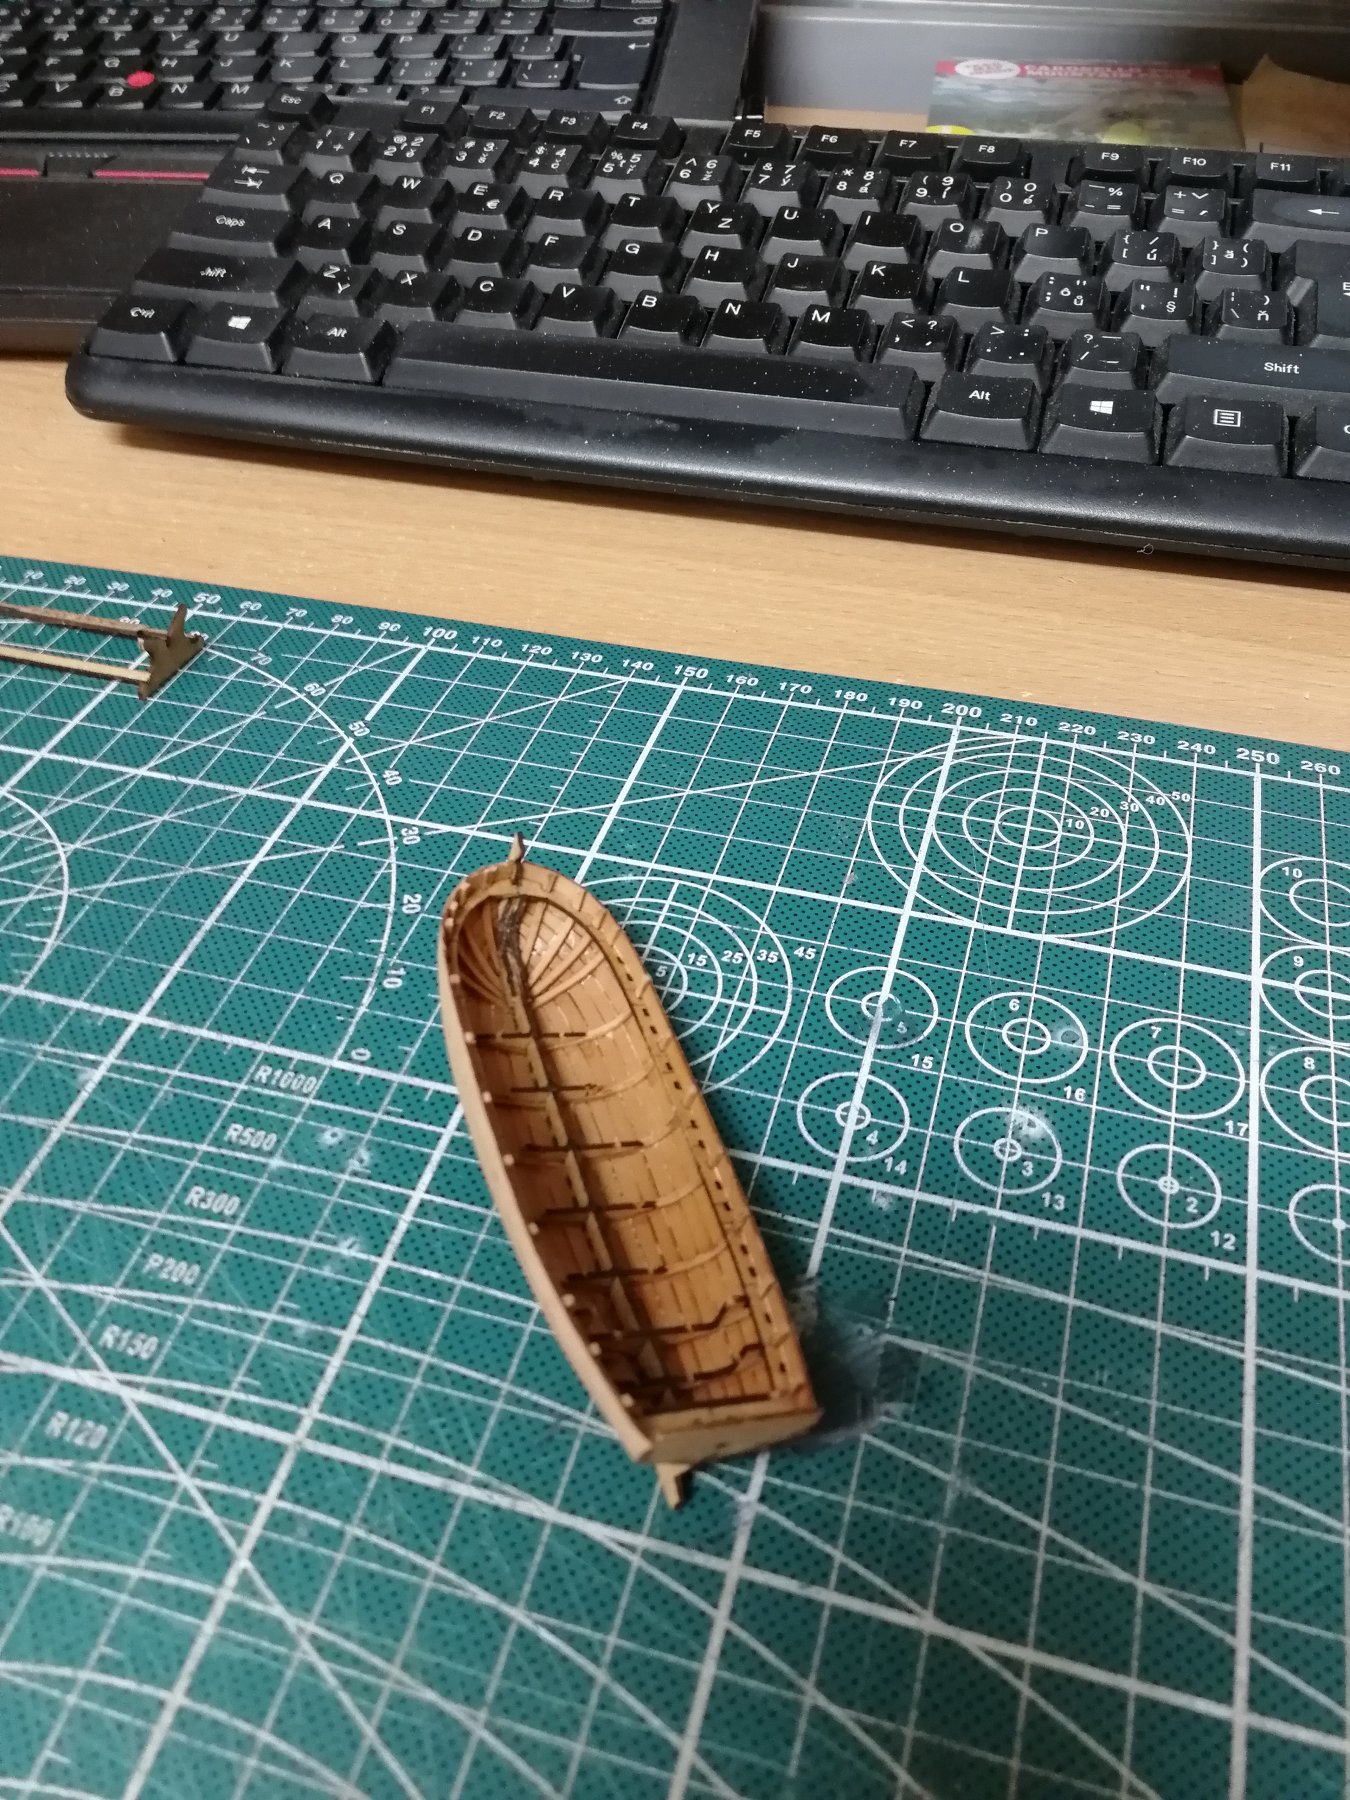
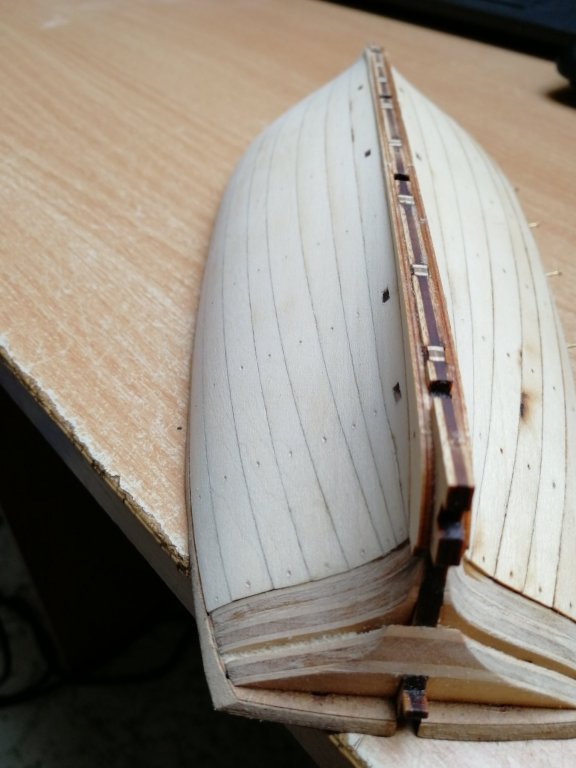
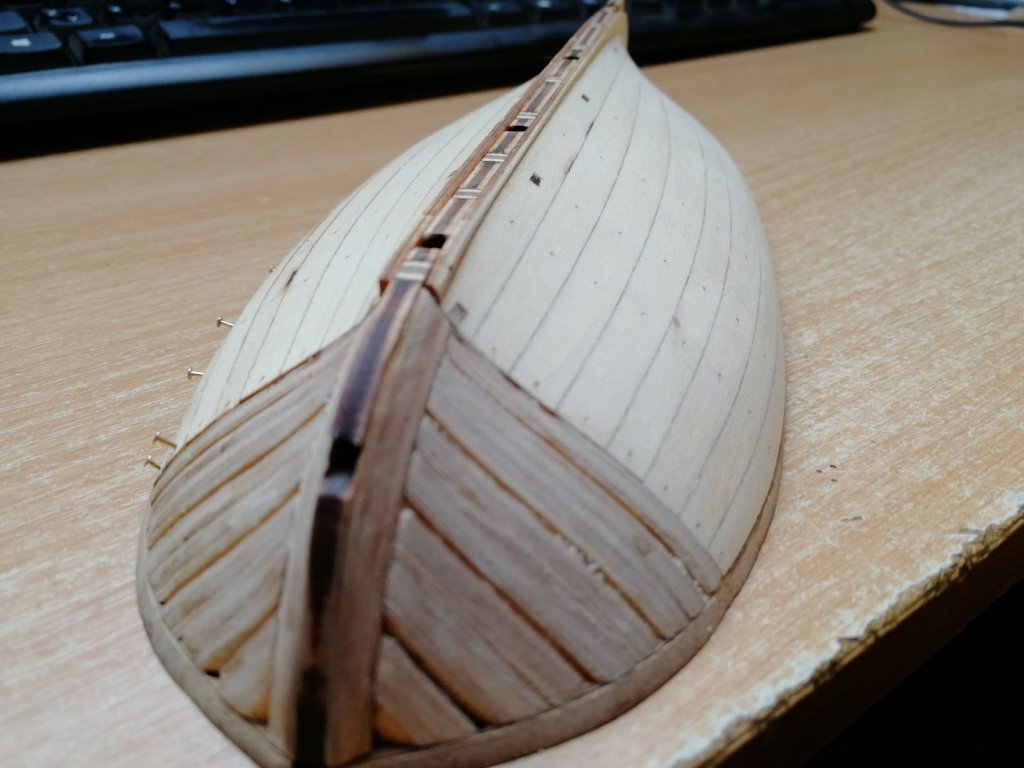
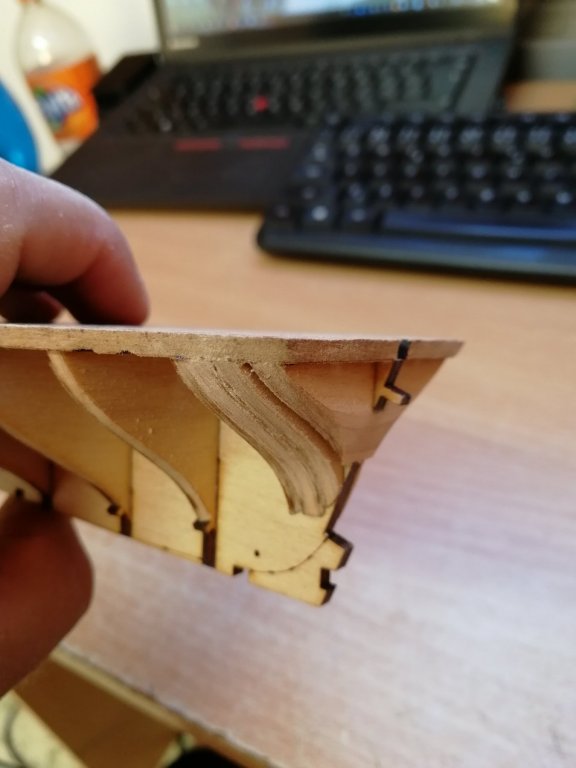
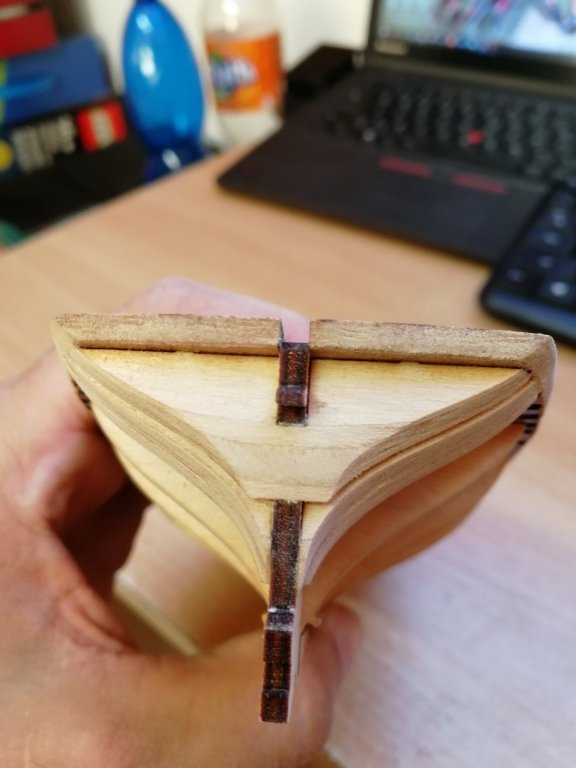
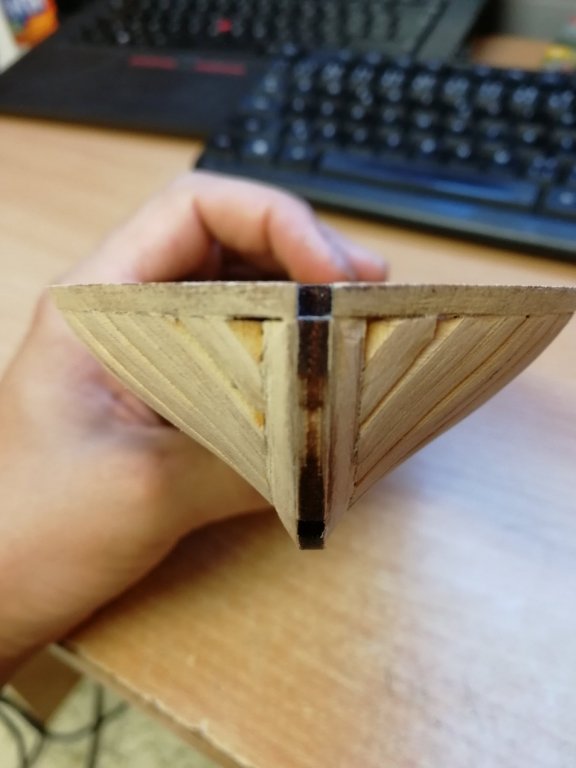
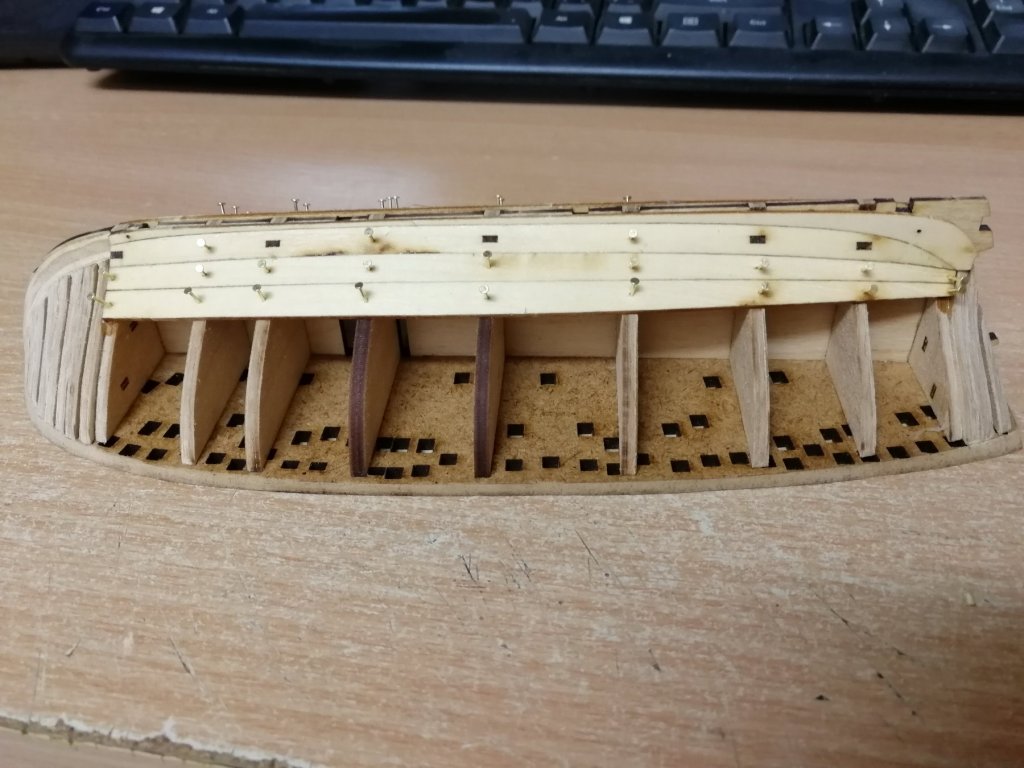
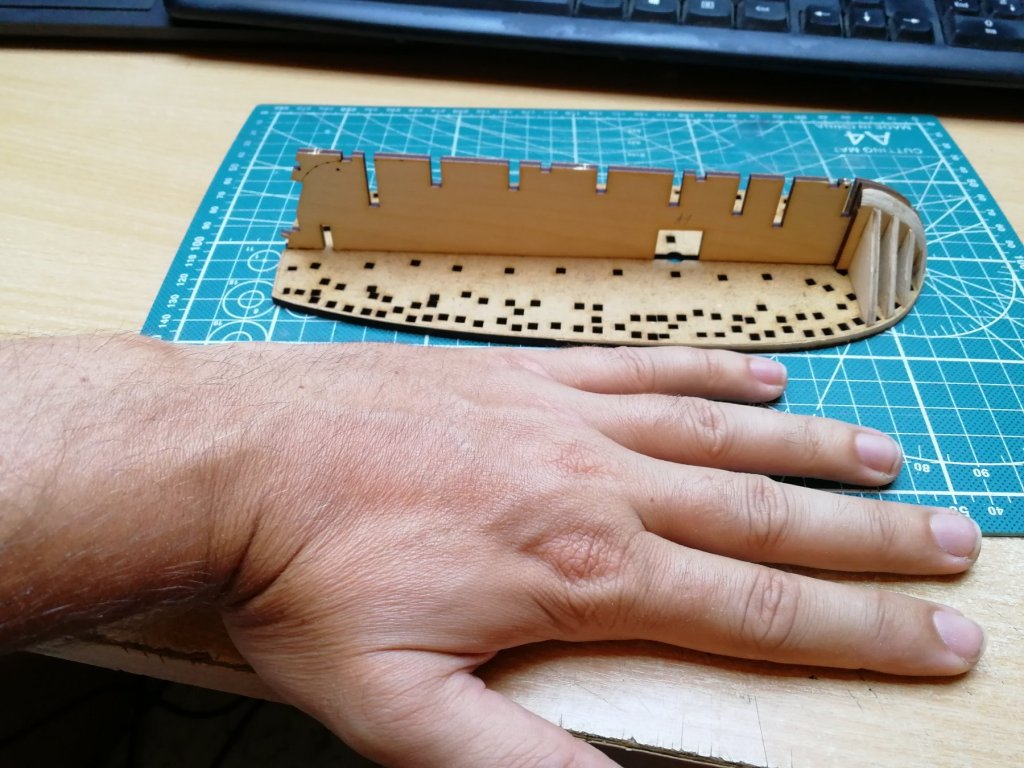
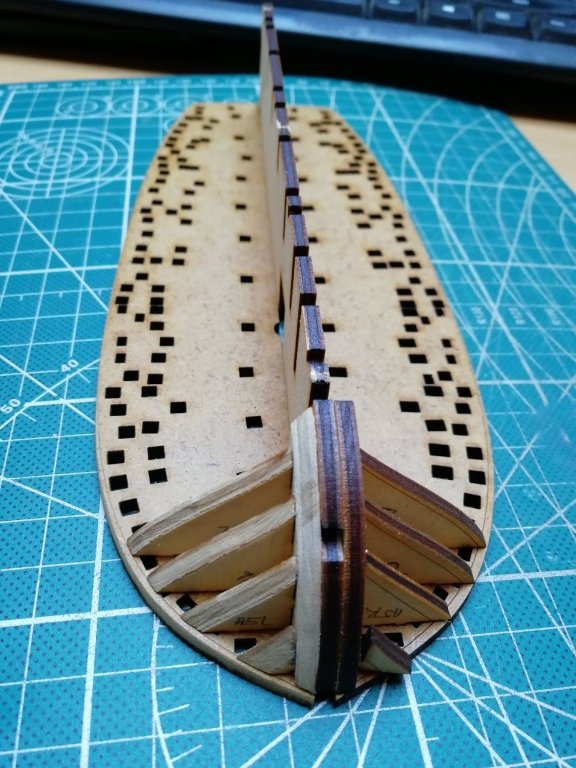
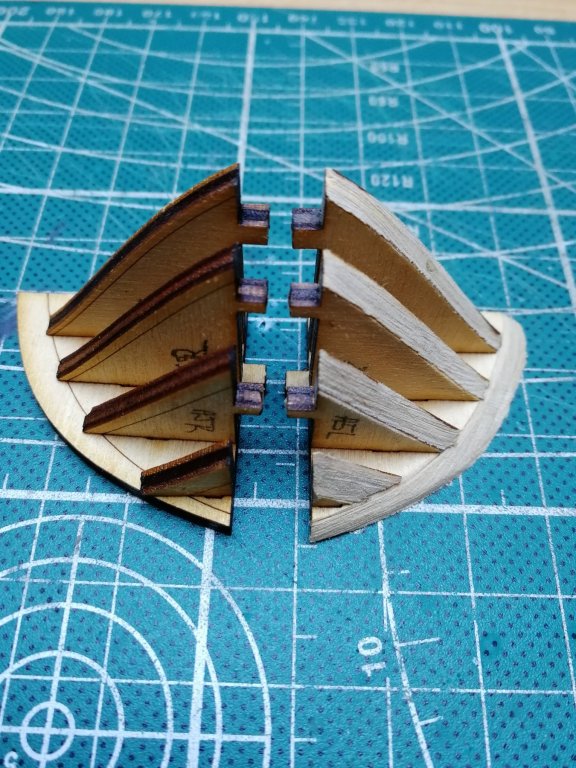
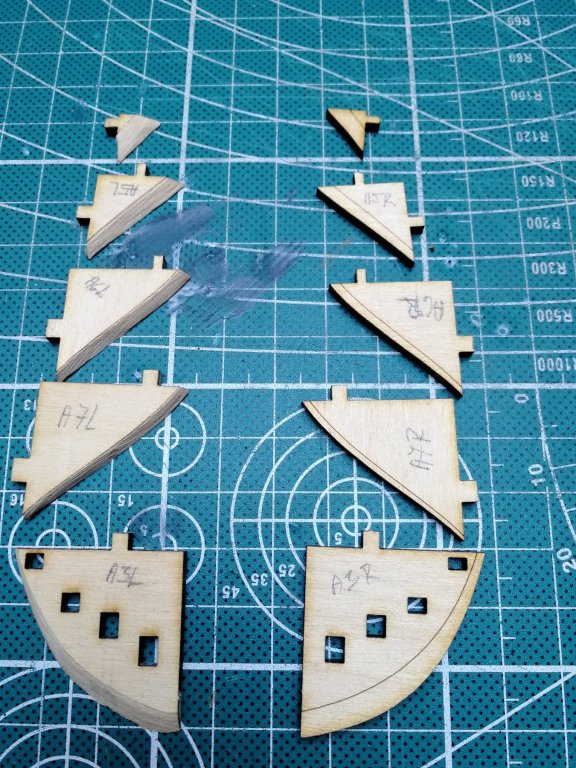
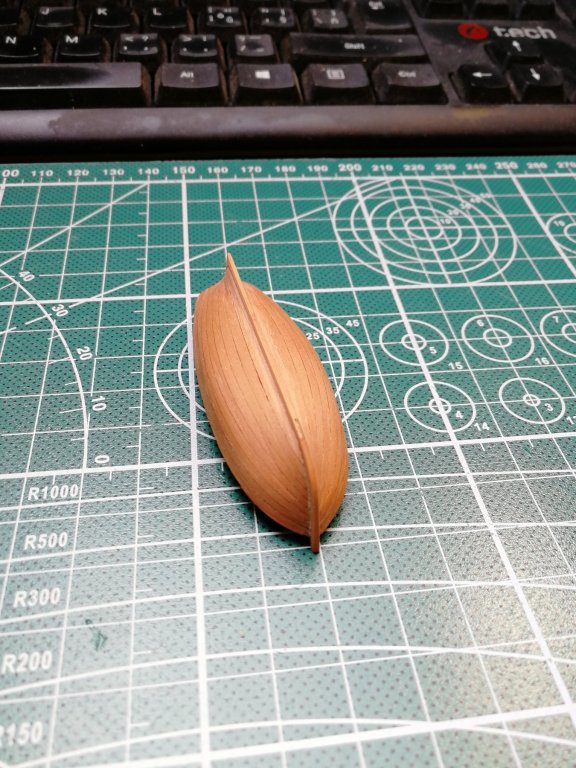
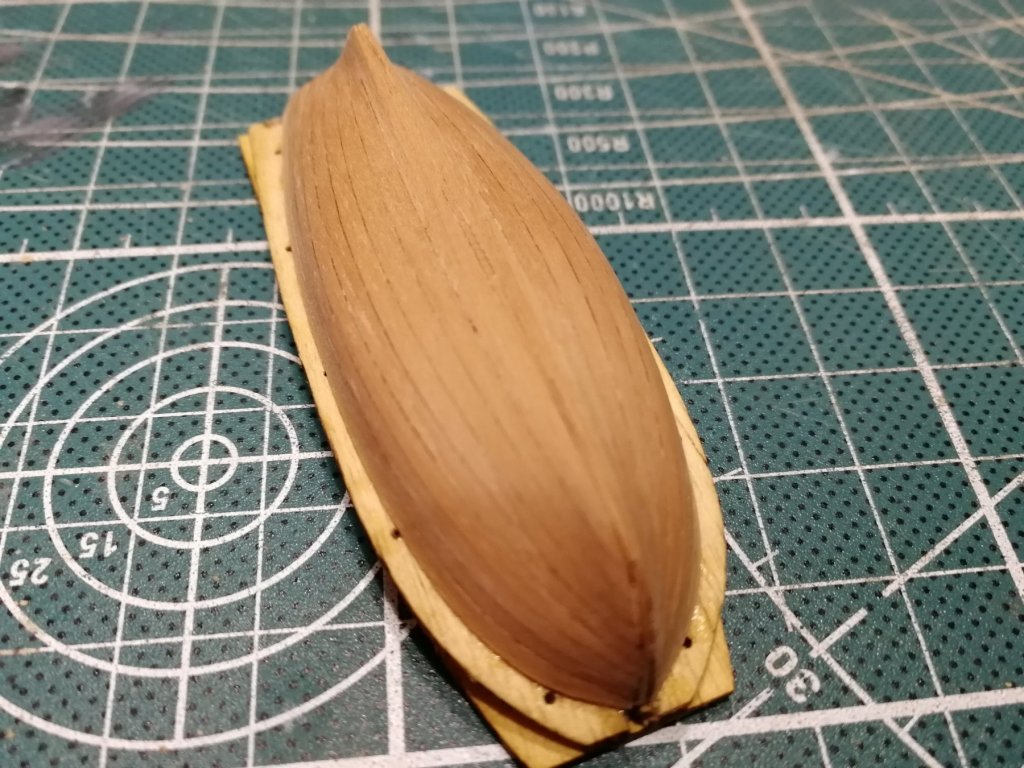
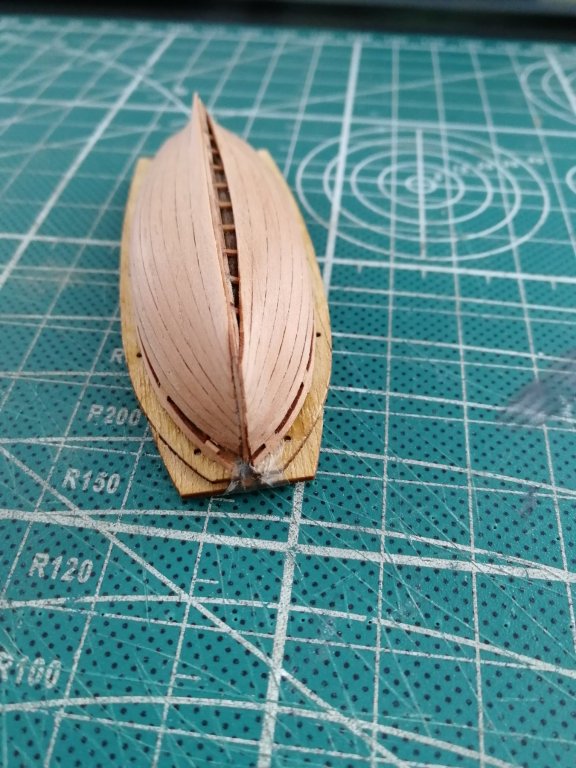
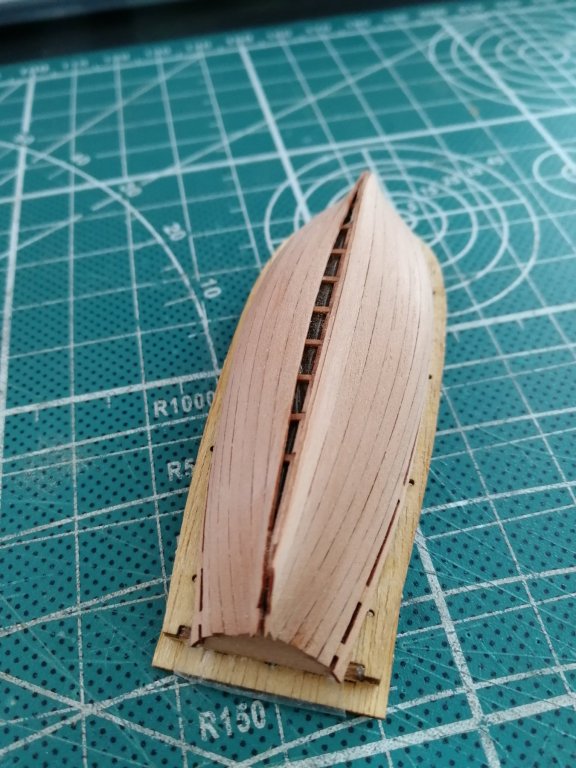
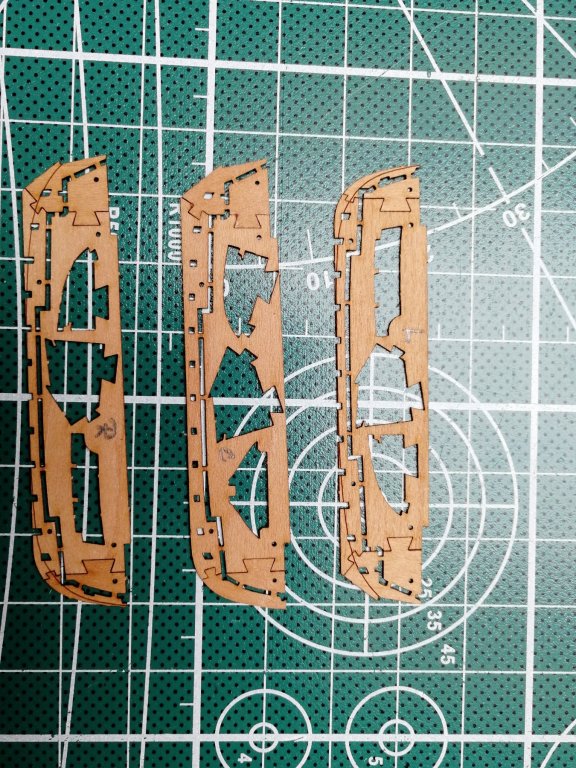
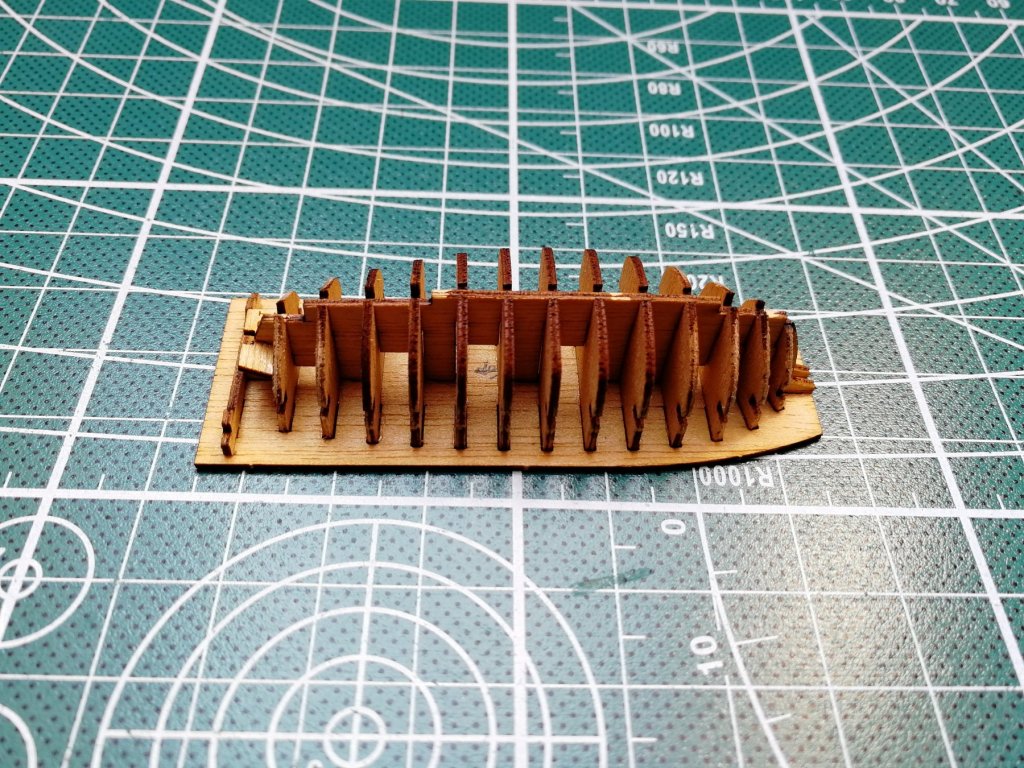
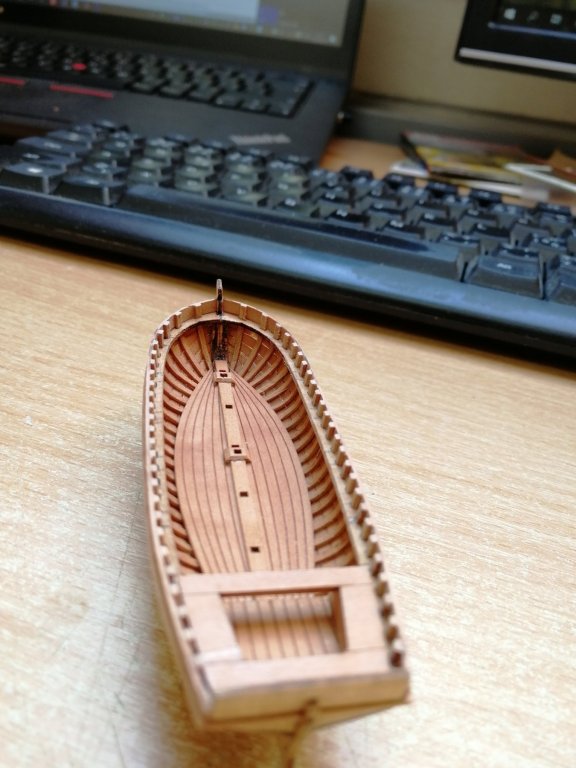
I have started with the boat. It is so tiny but So far I did not destroy any part. So all good. It has different assembly approach than 95mm boat from MK. 1. Keel First you do 3 "puzzle" sheets Then you glue them together and bevel both sides as necessary After you can remove the center 2. Building jig 3. Frames Here you have to be really careful not to brake the frame. It is made of pear strip 0.6x0.6mm. Once soaked in water it becomes softer 4. Planking First 2 rows in place.


- 315 replies
-
- 14
-
-
- master korabel
- avos
- (and 1 more)
-
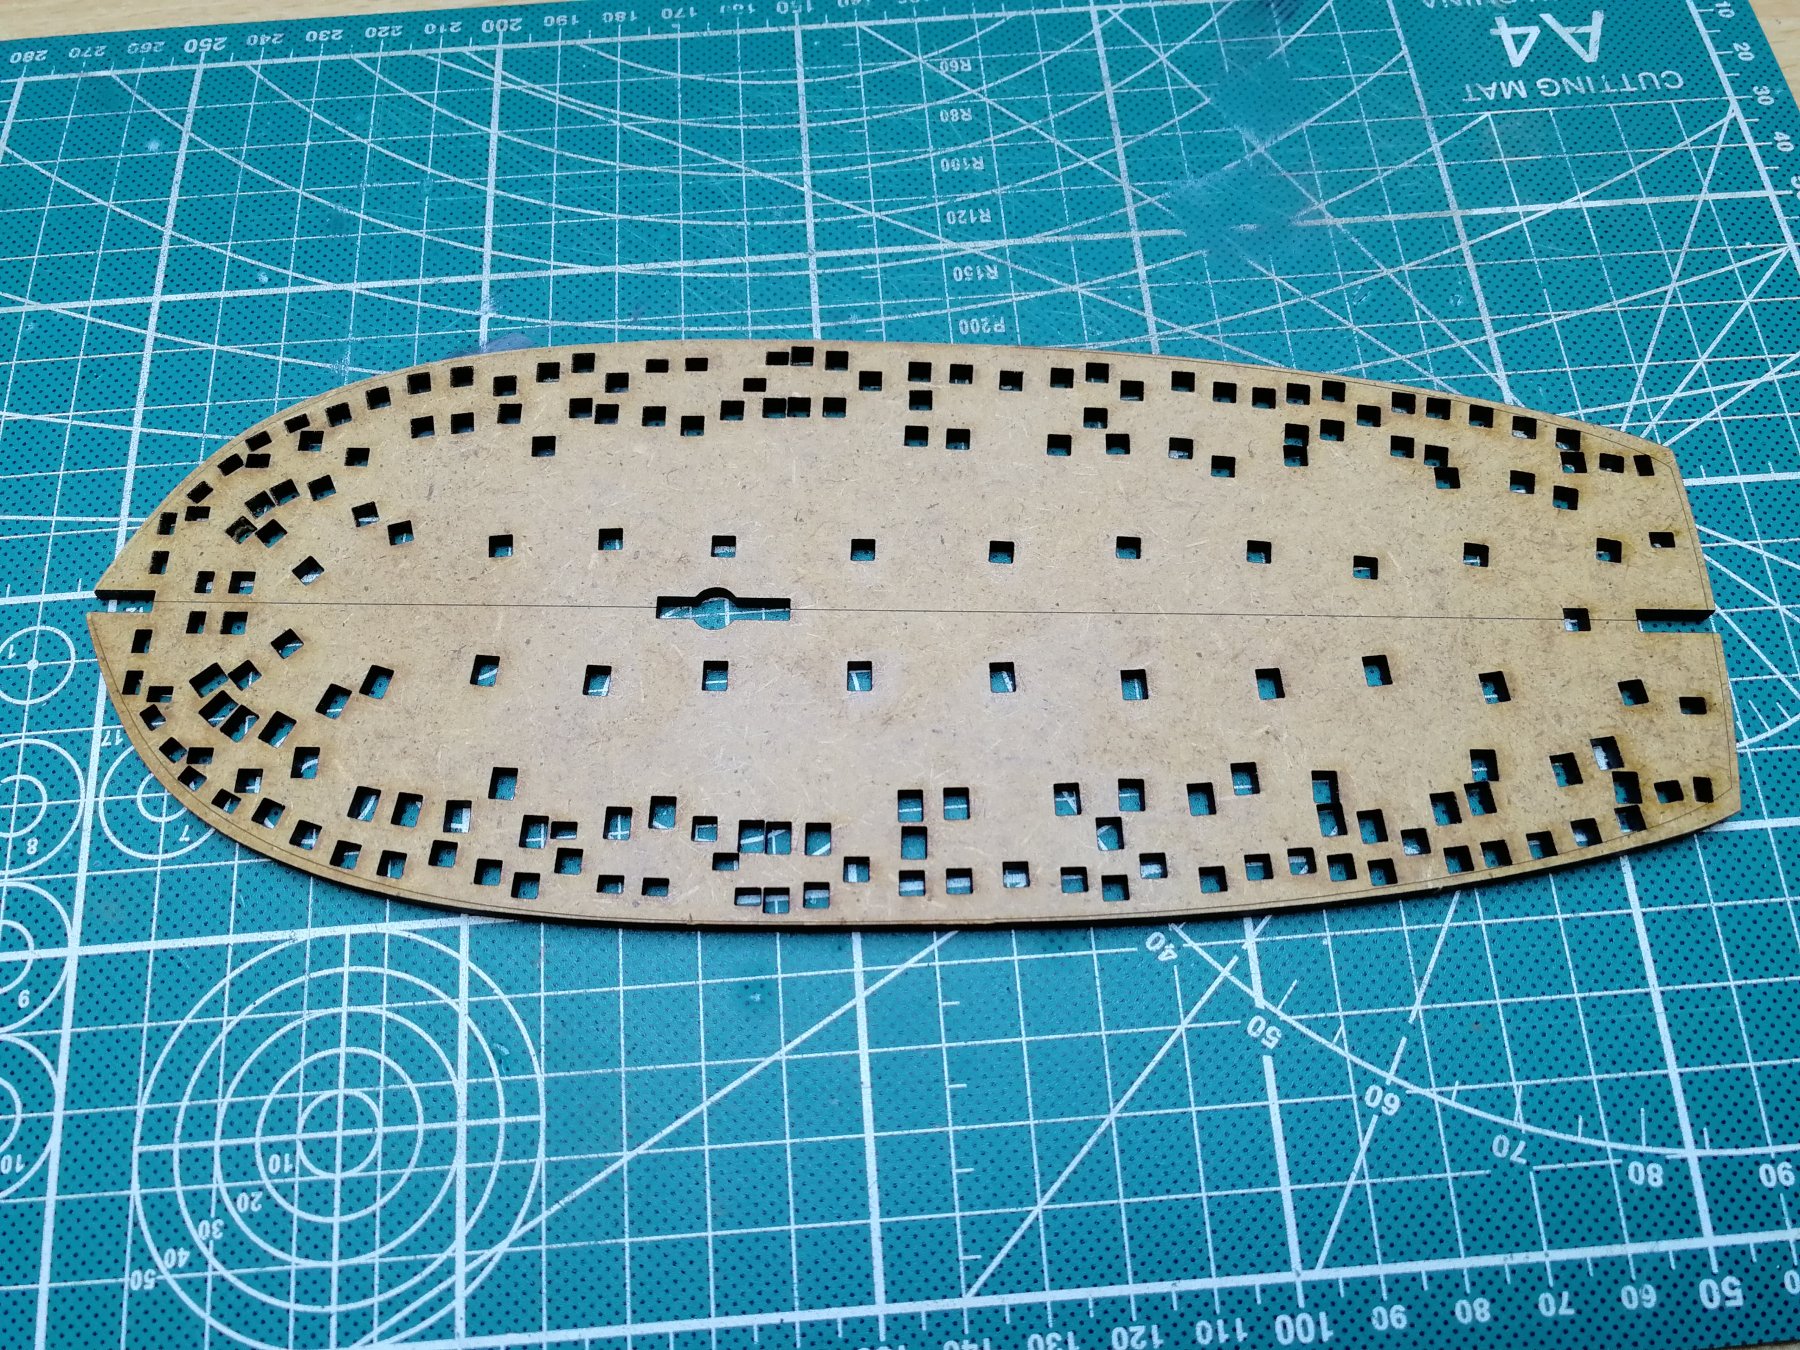
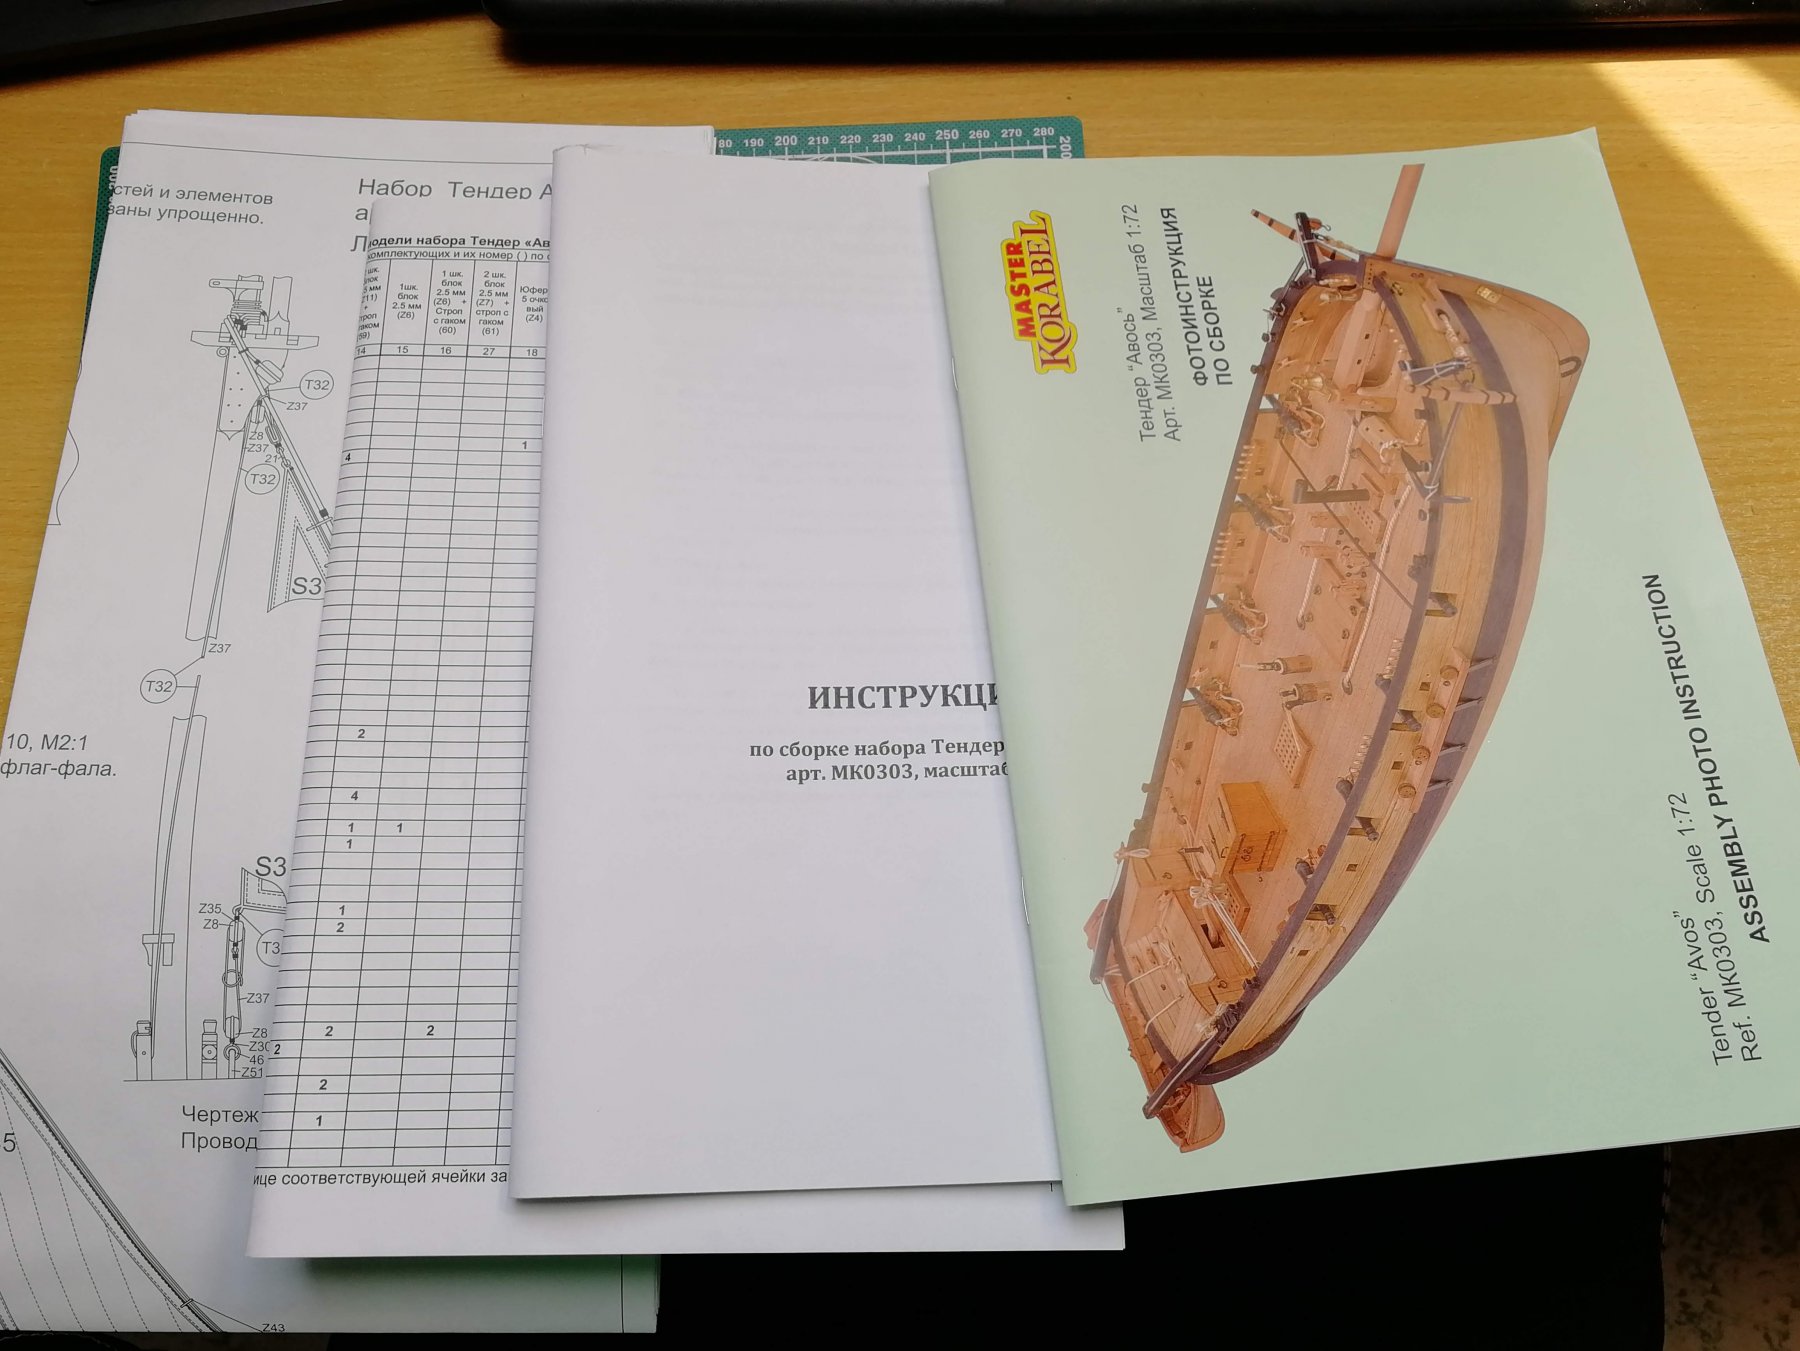
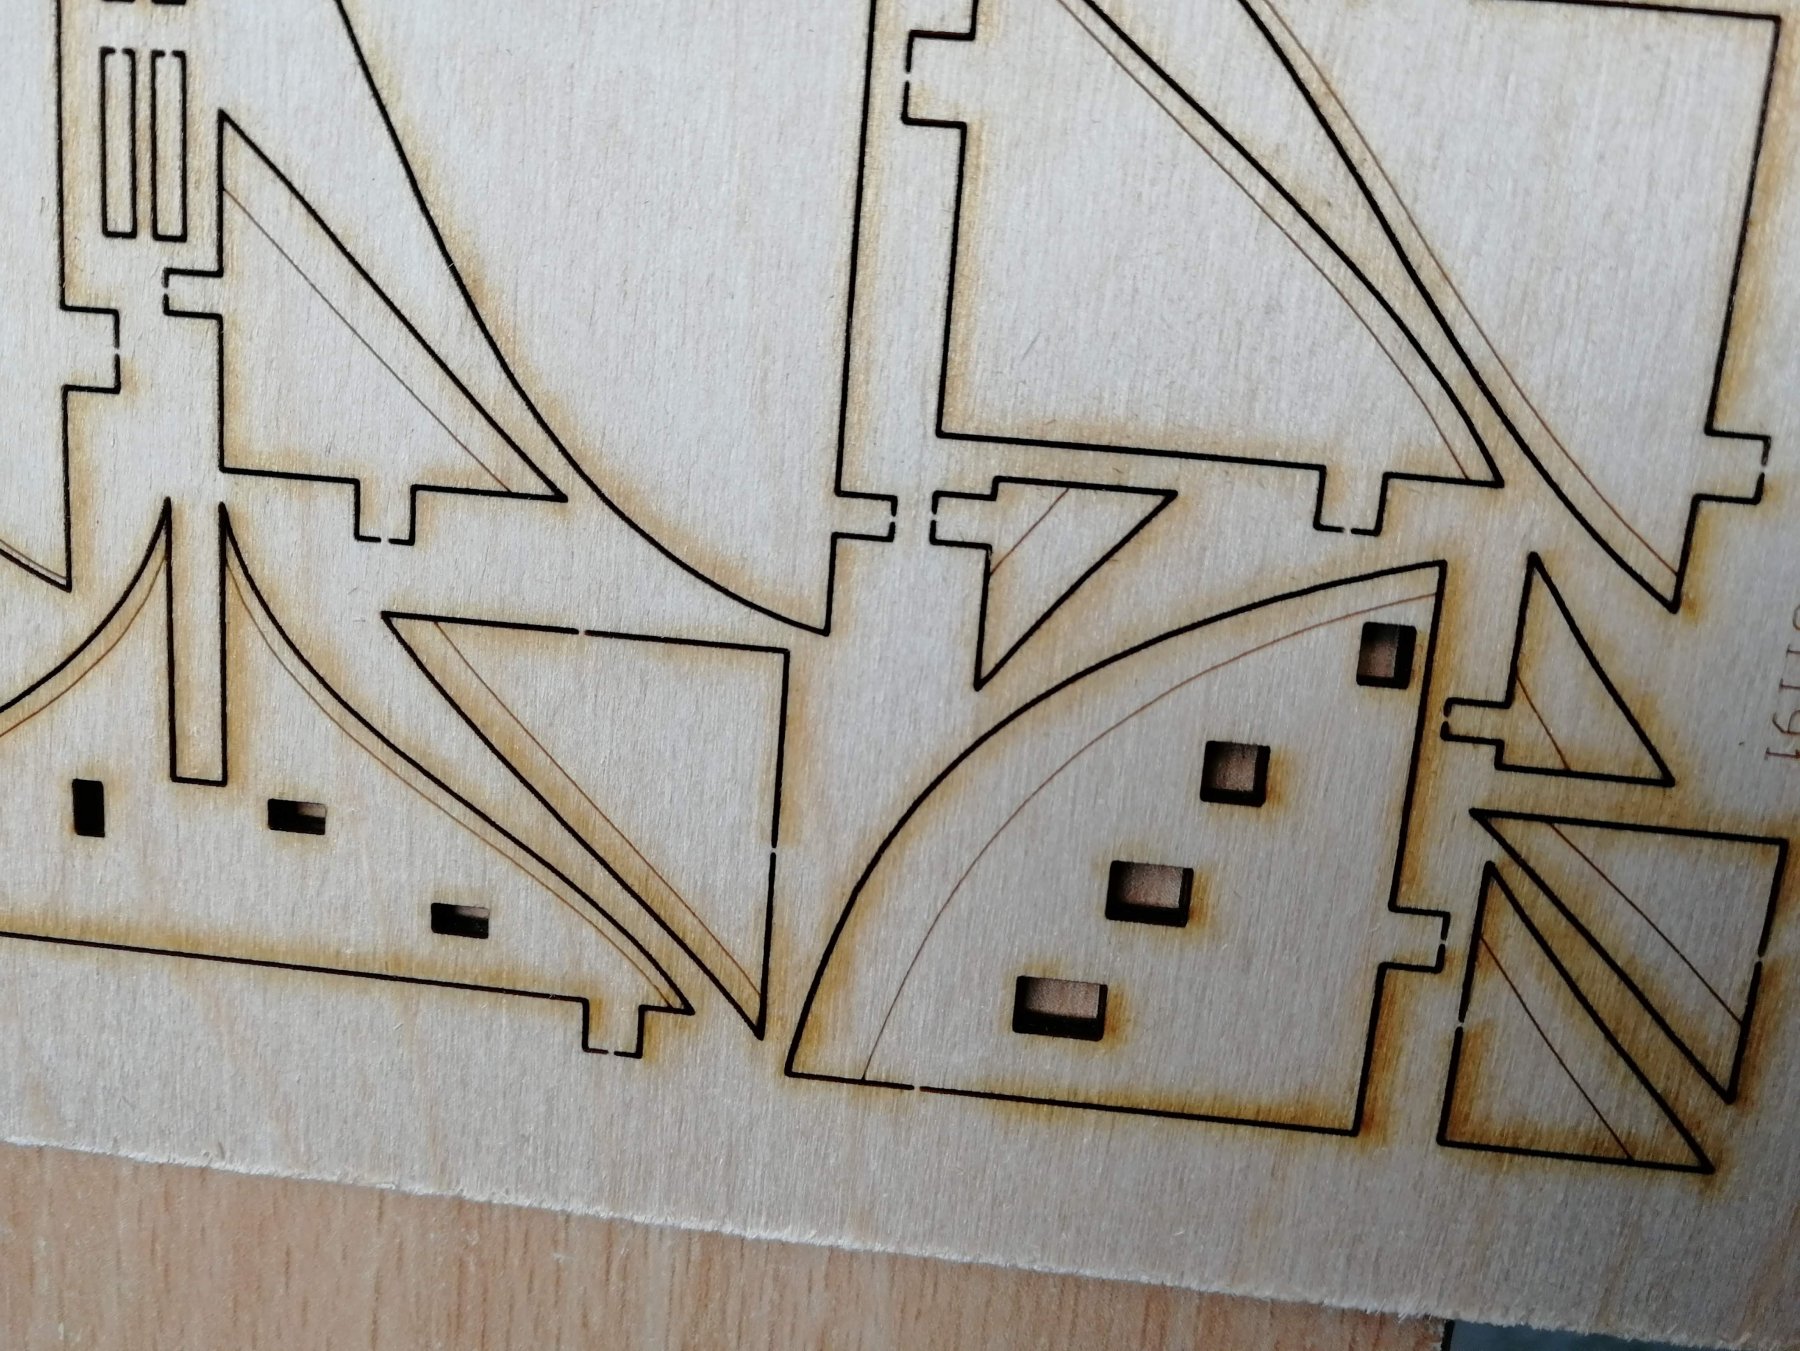
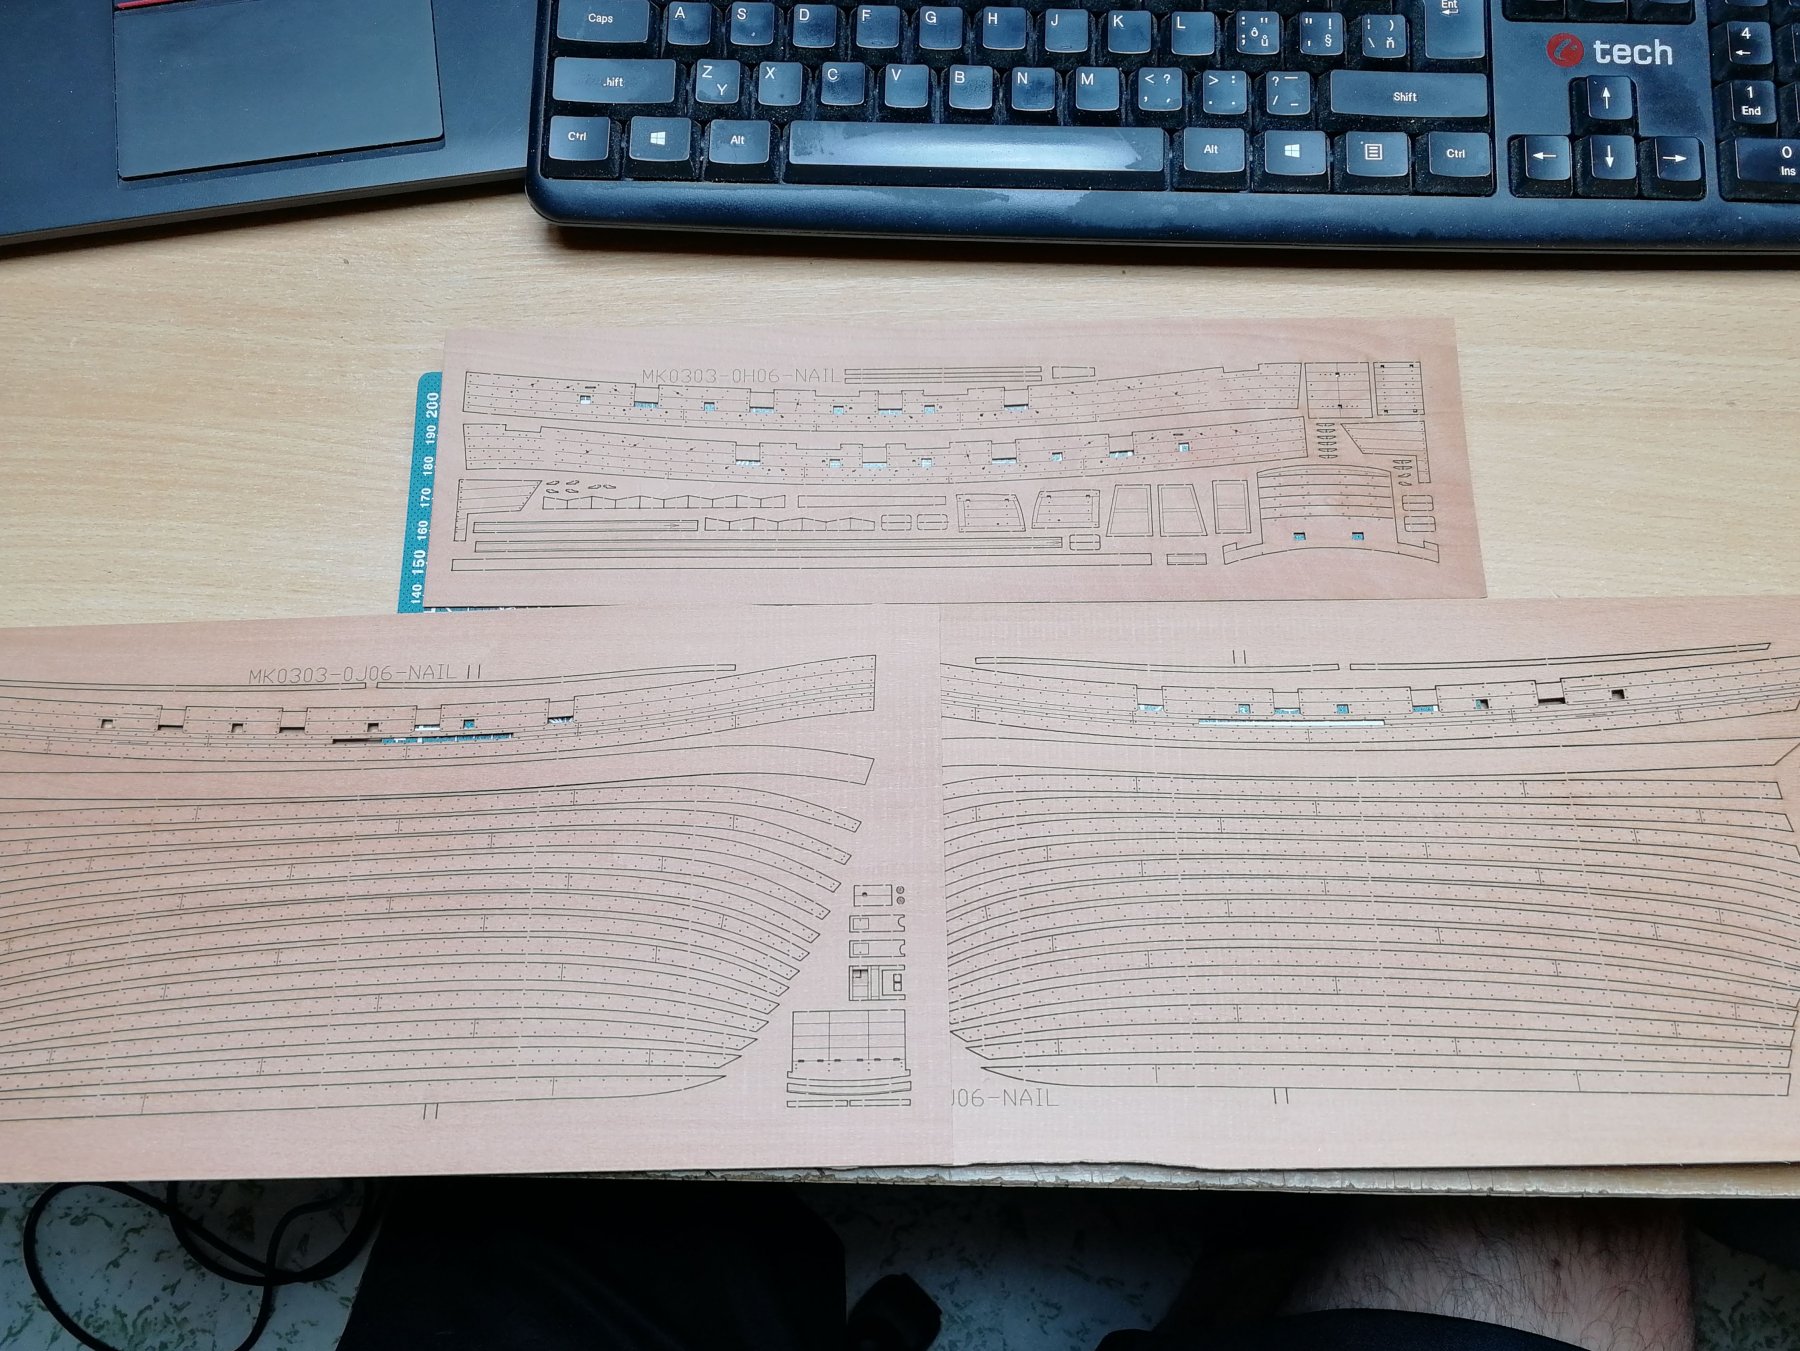
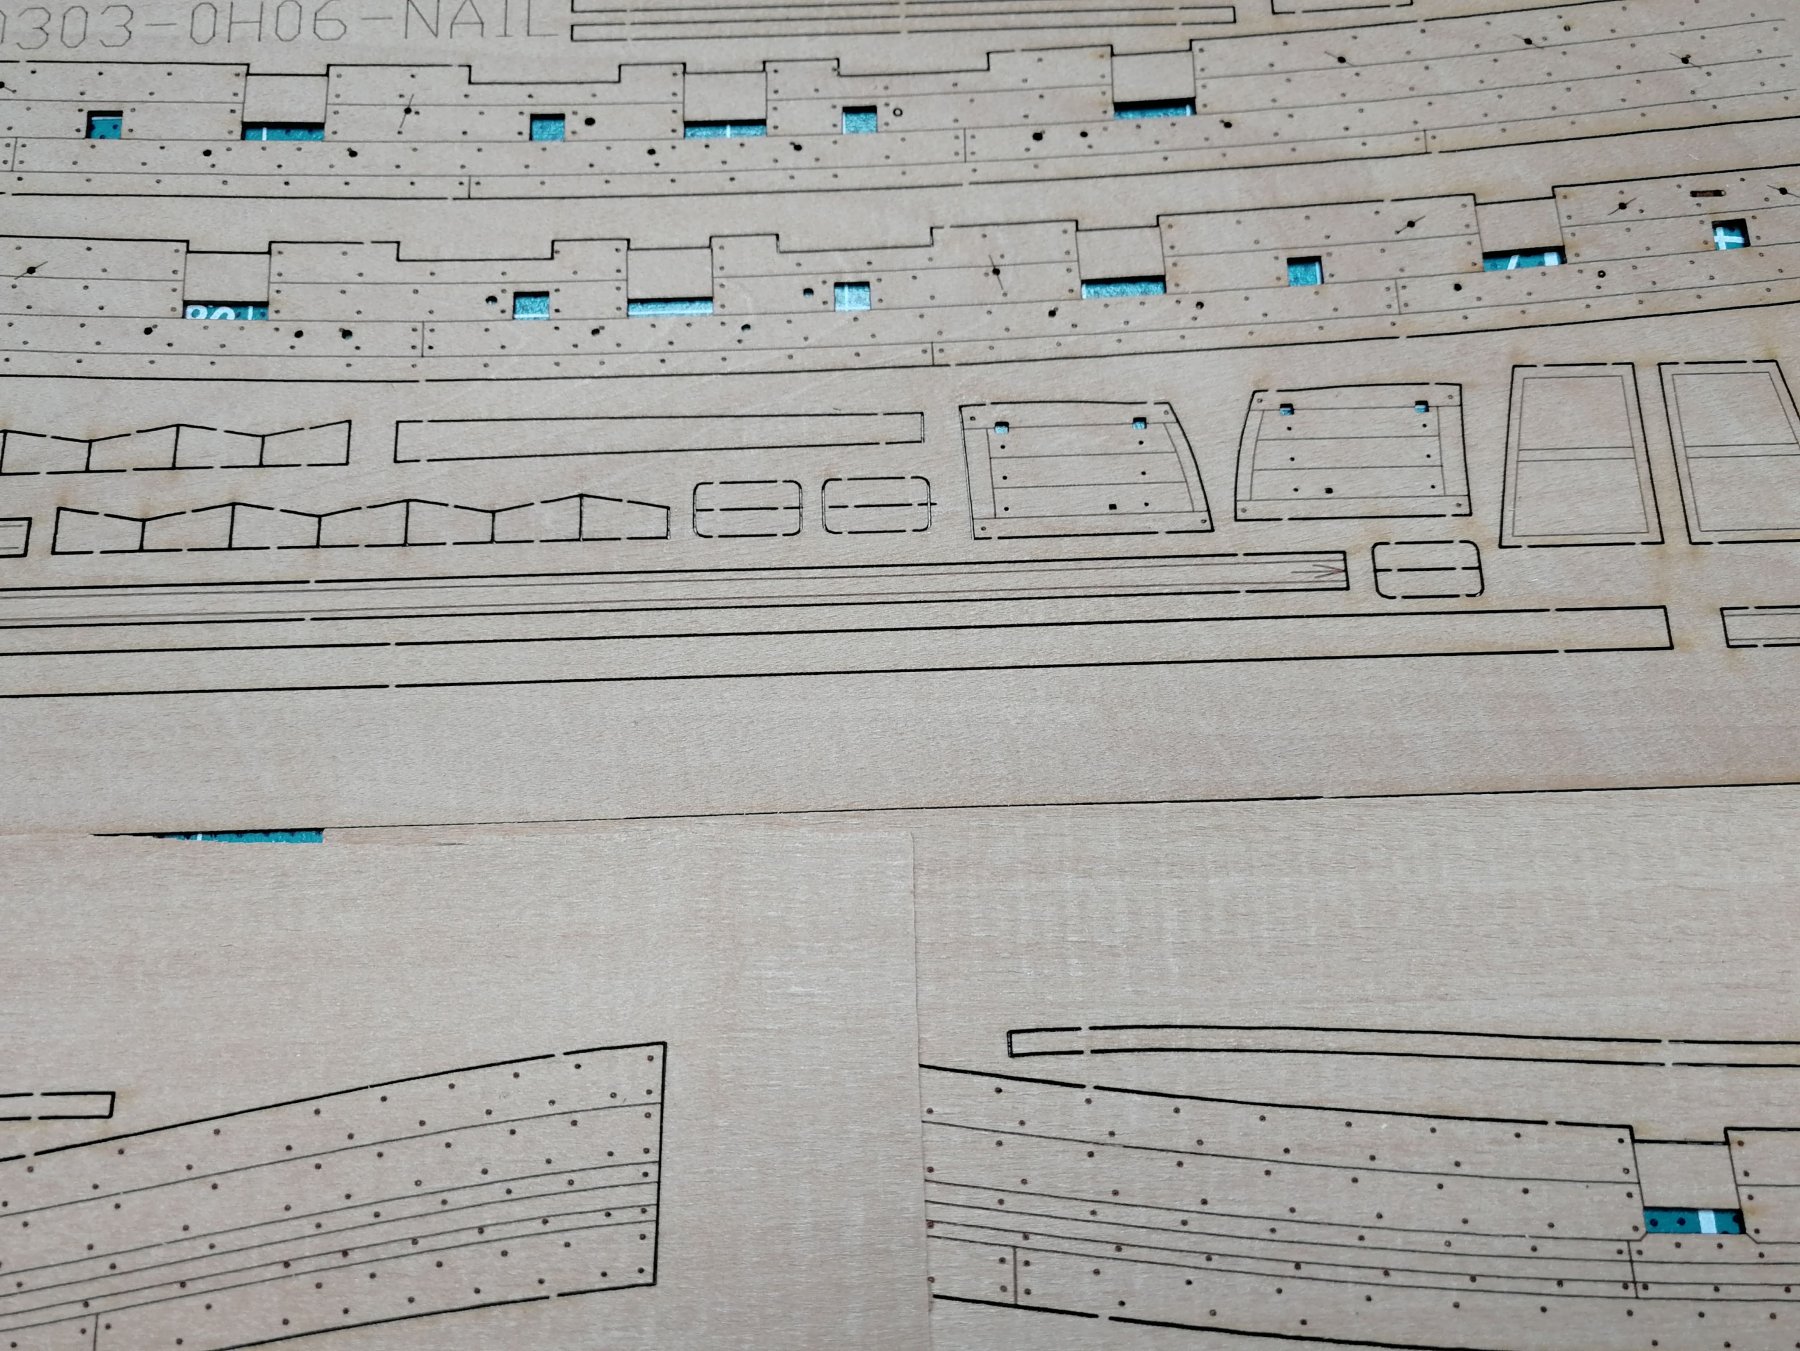
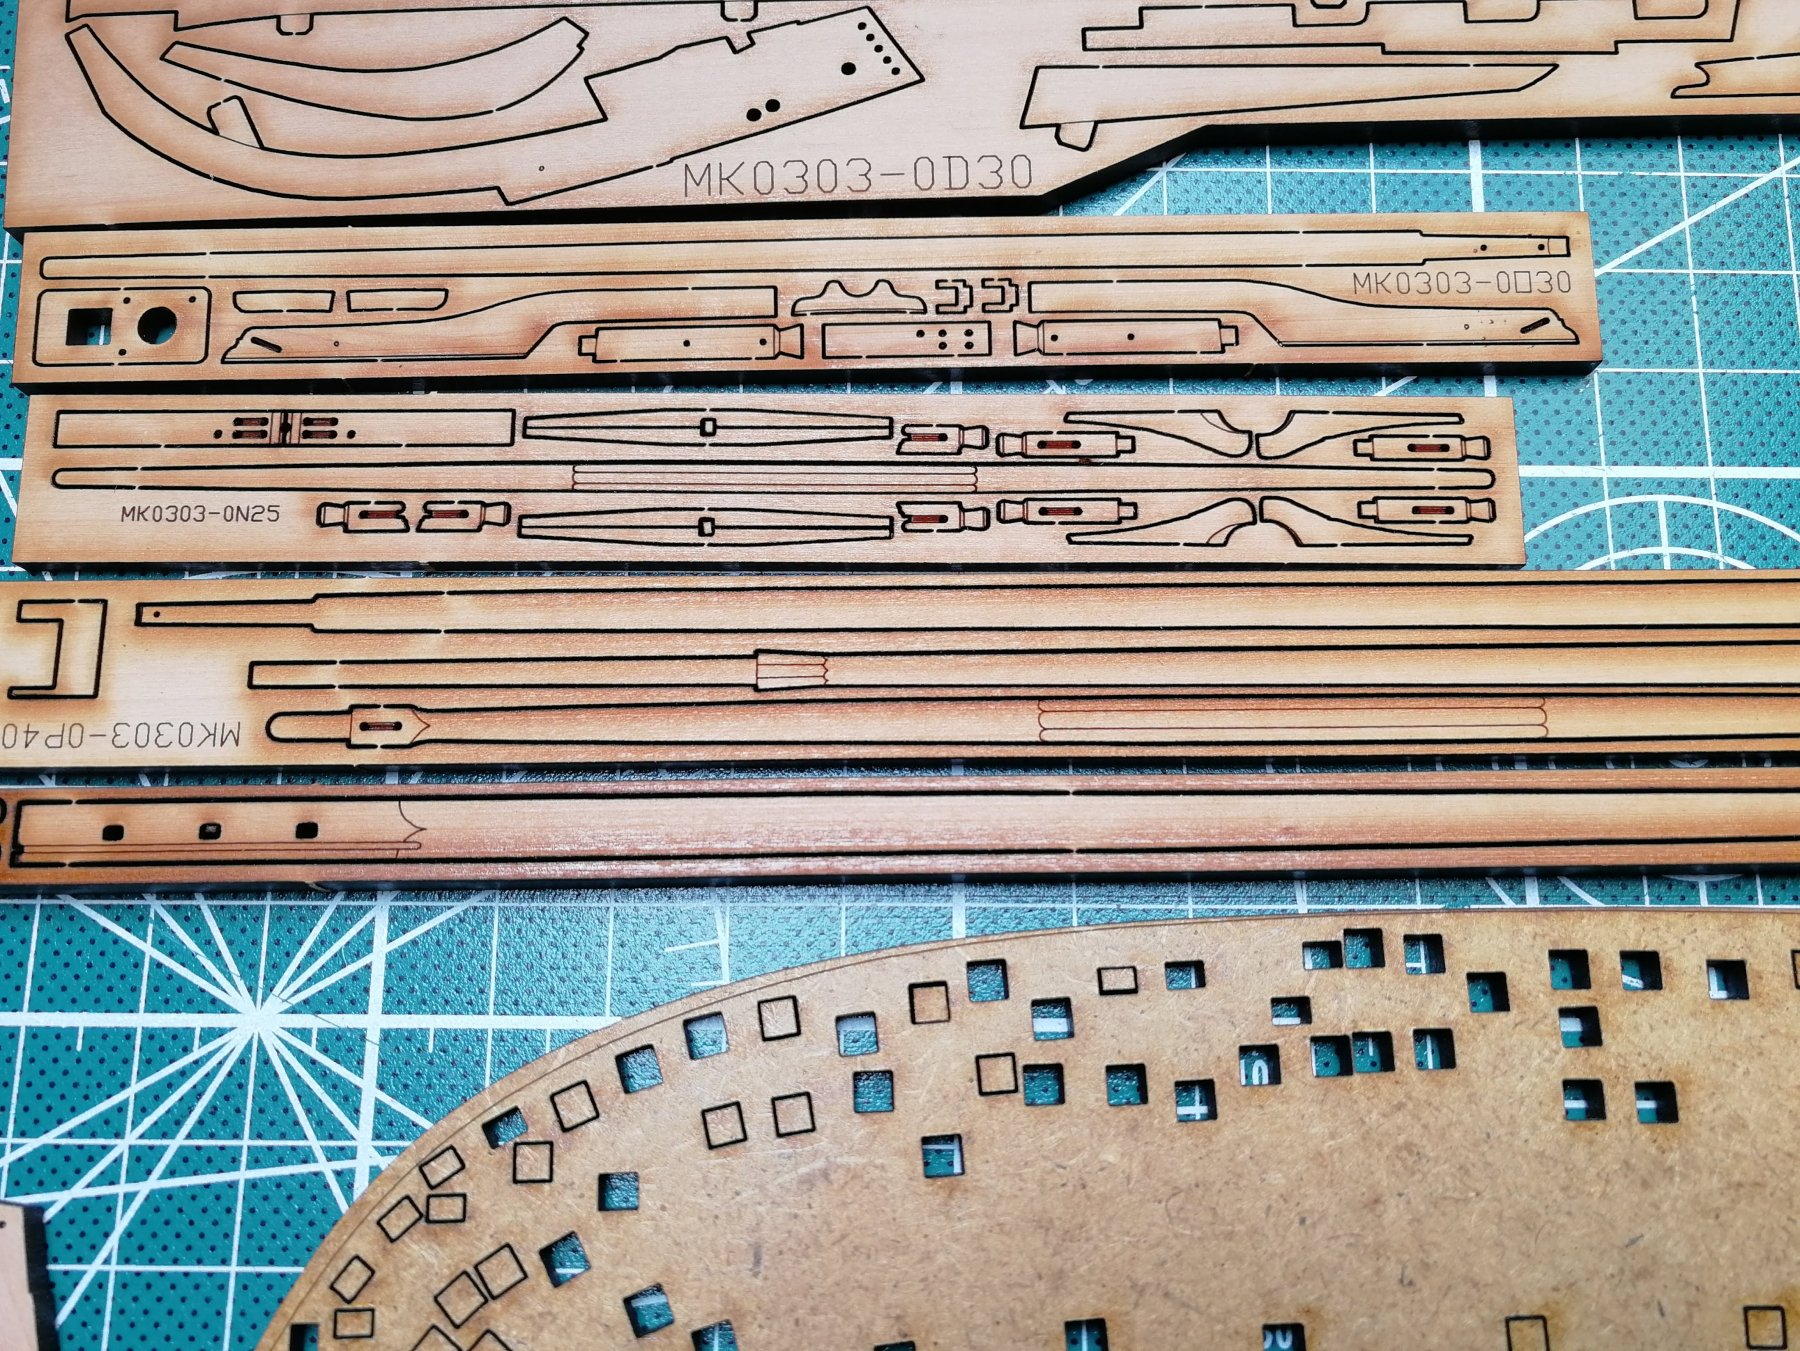
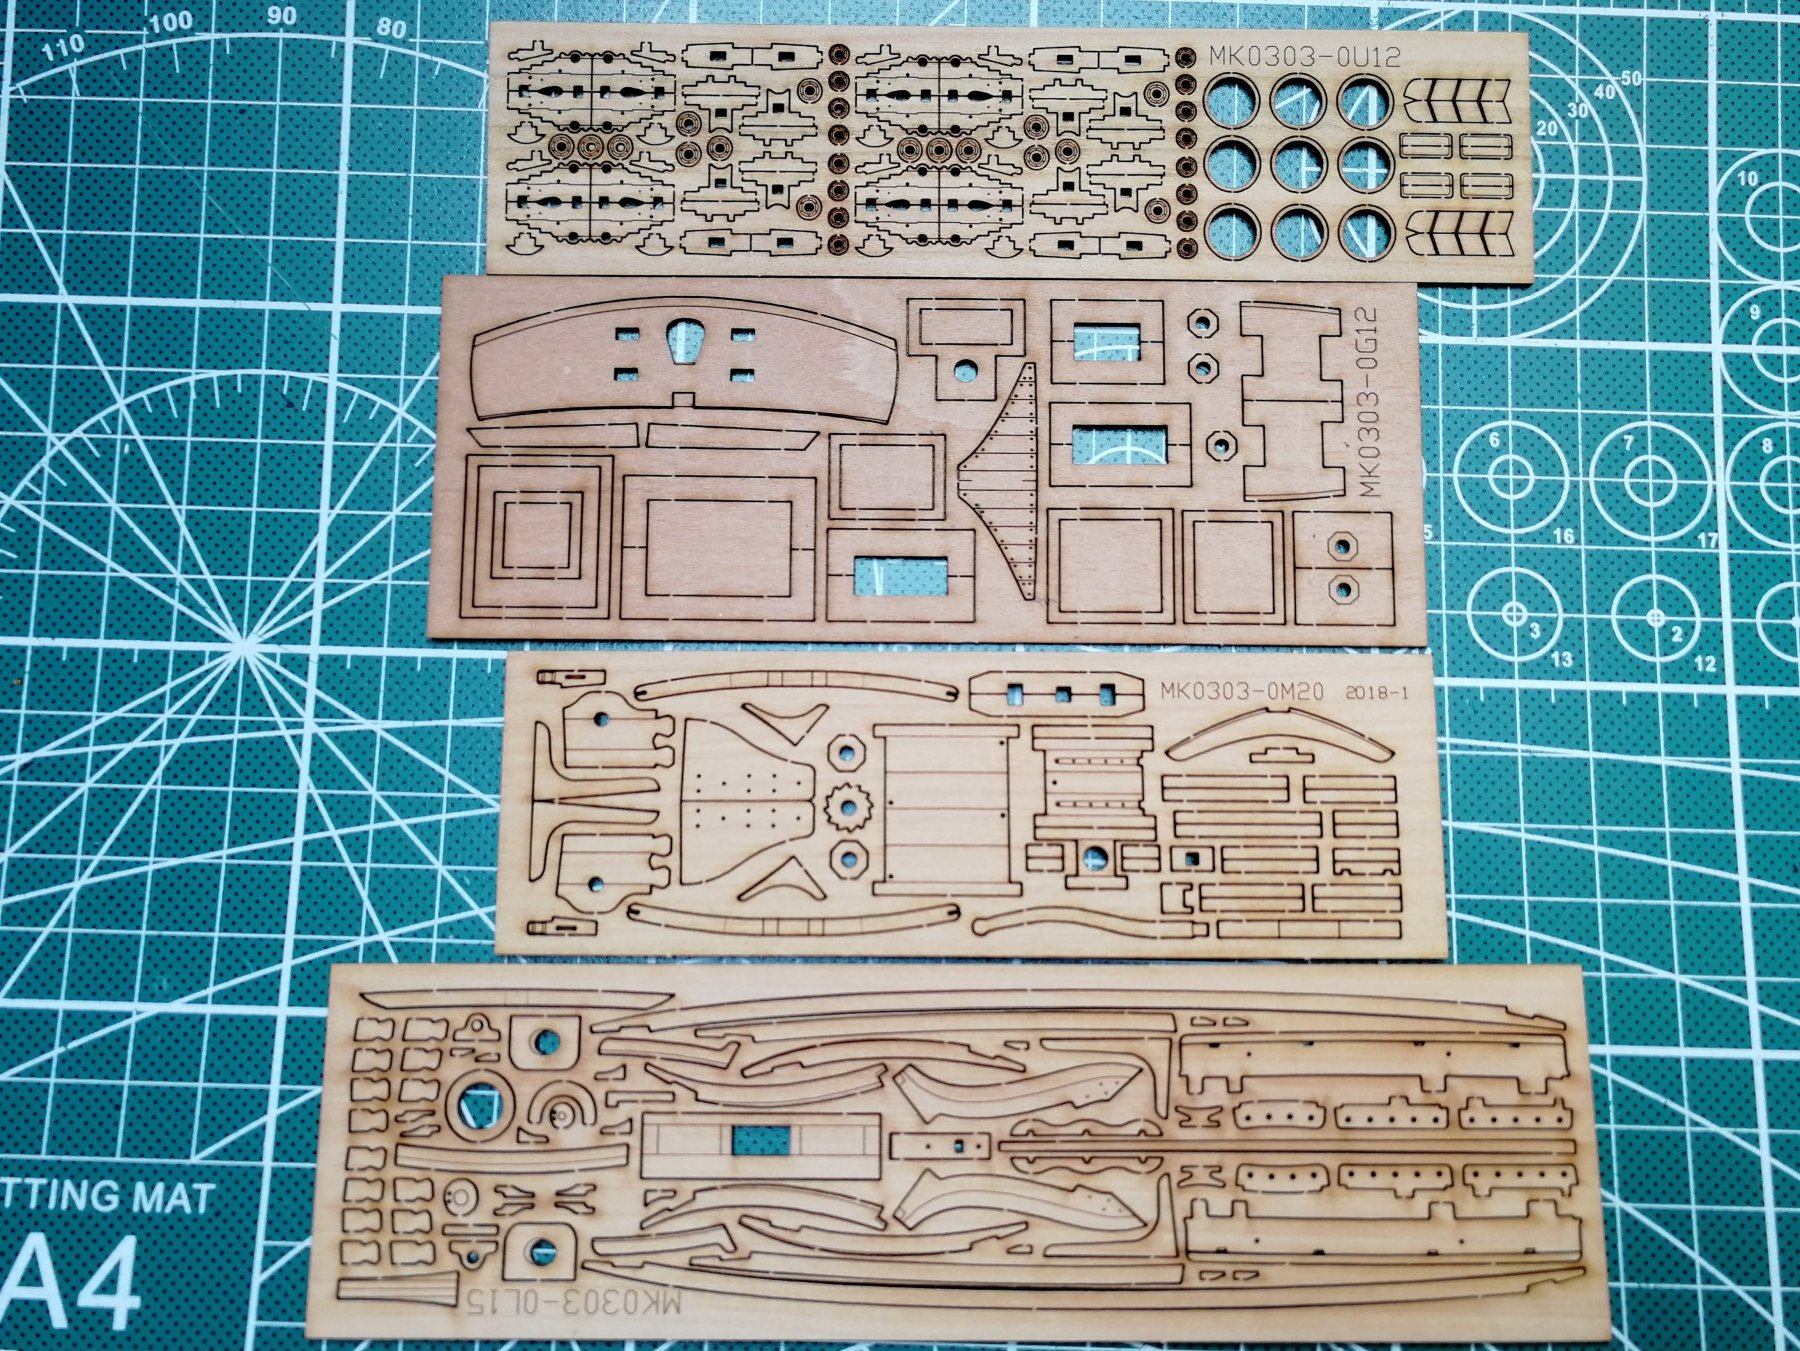
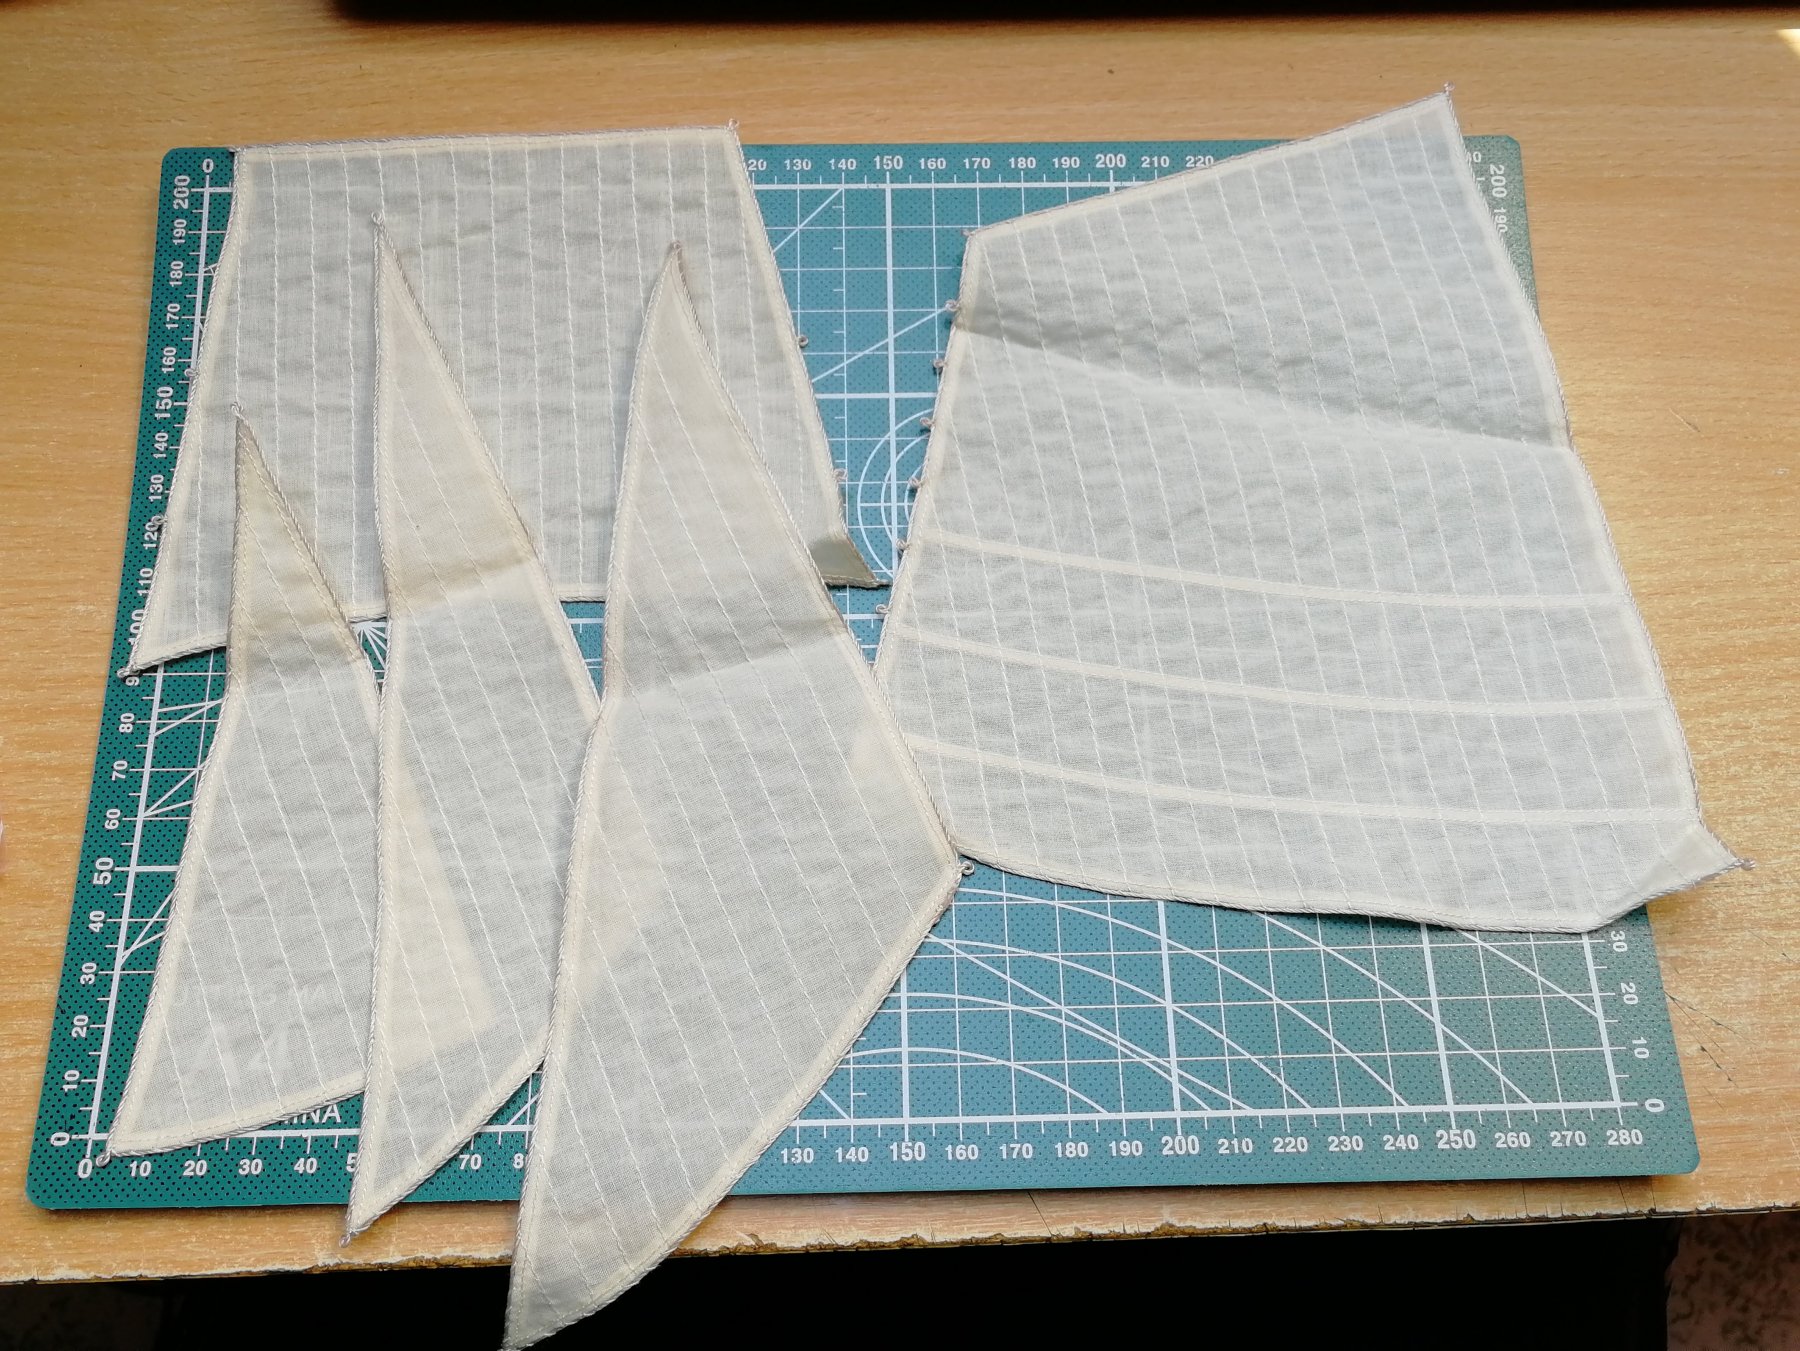
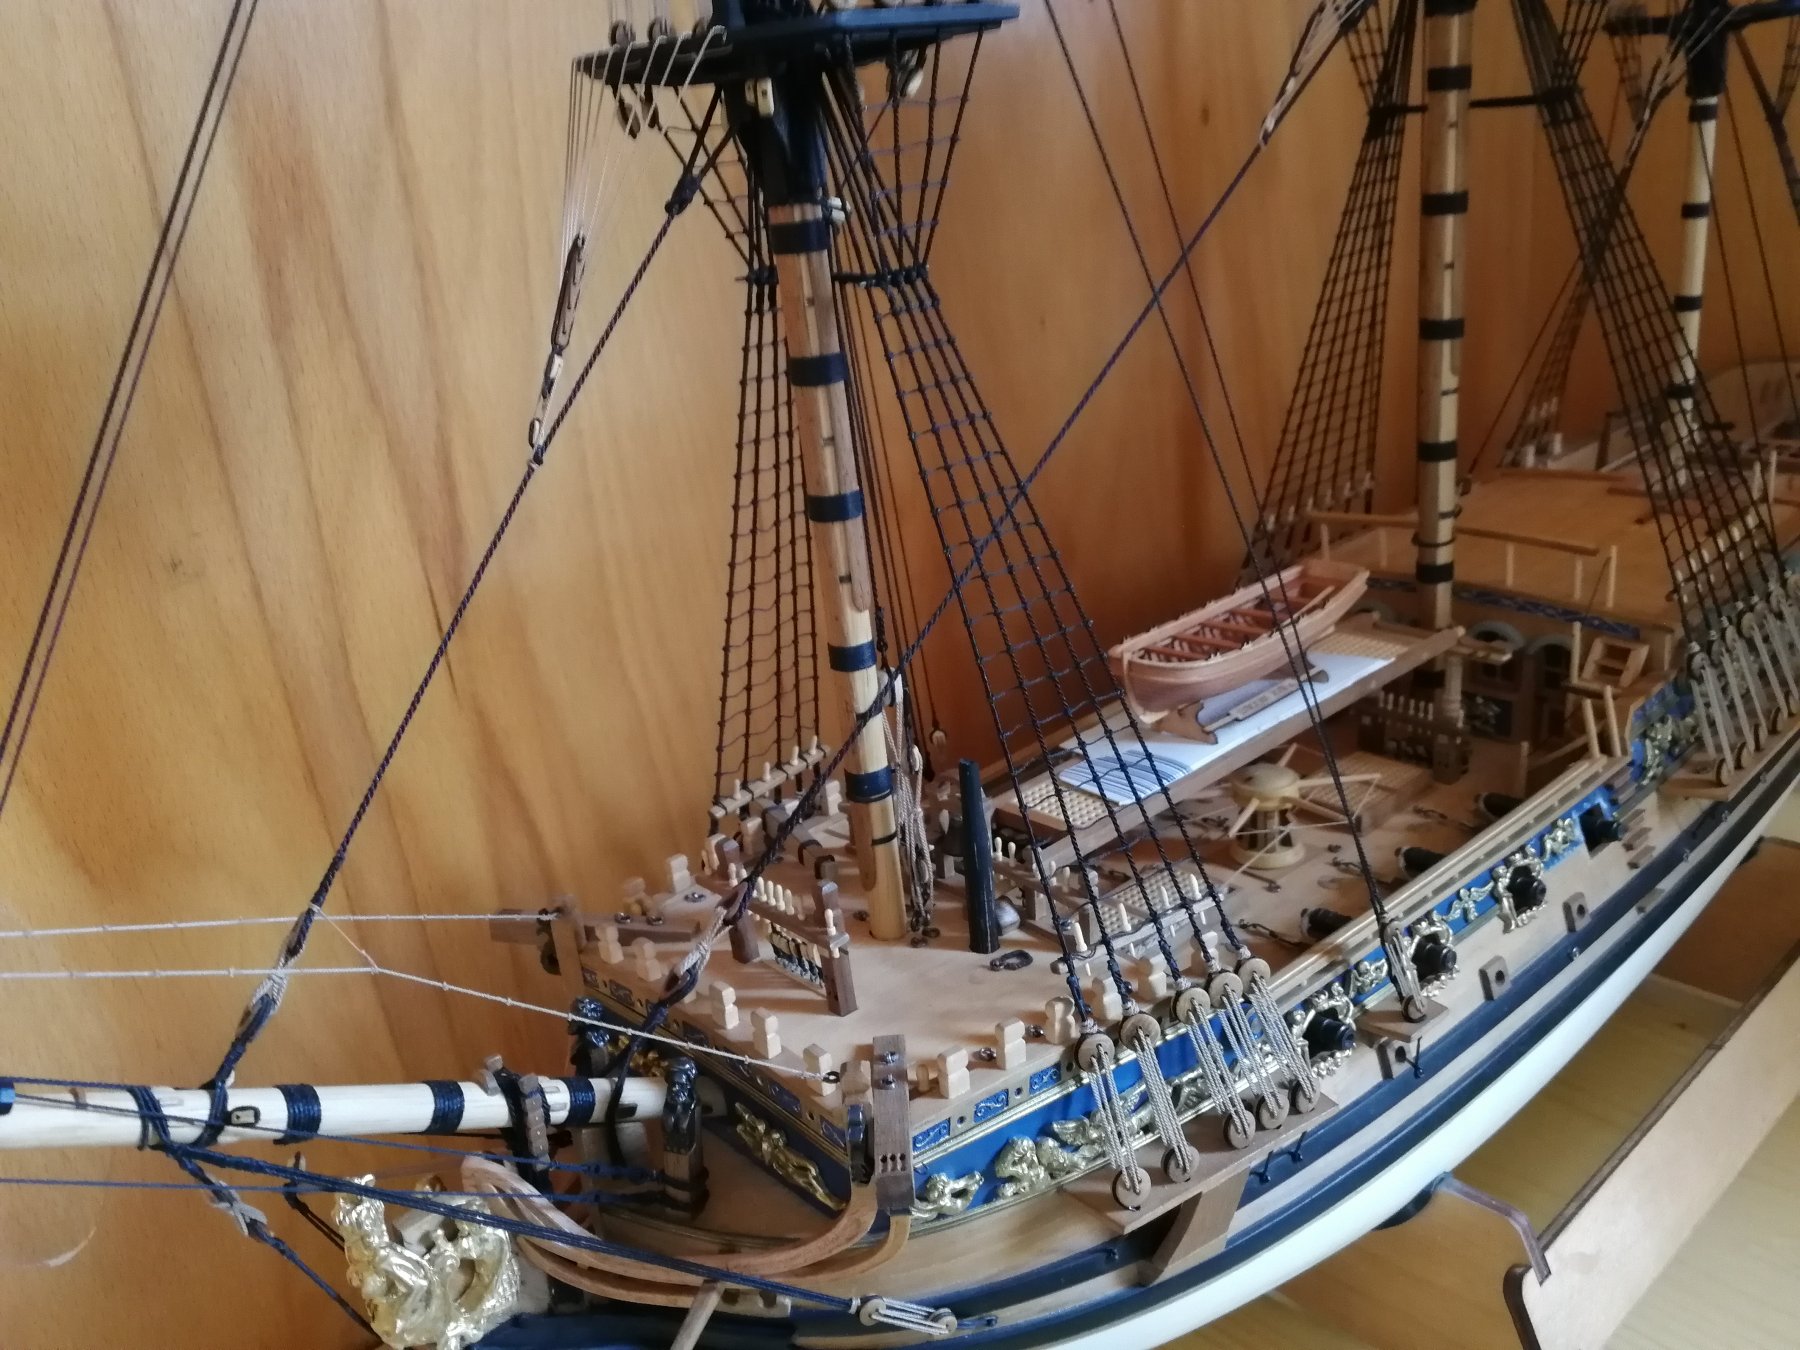
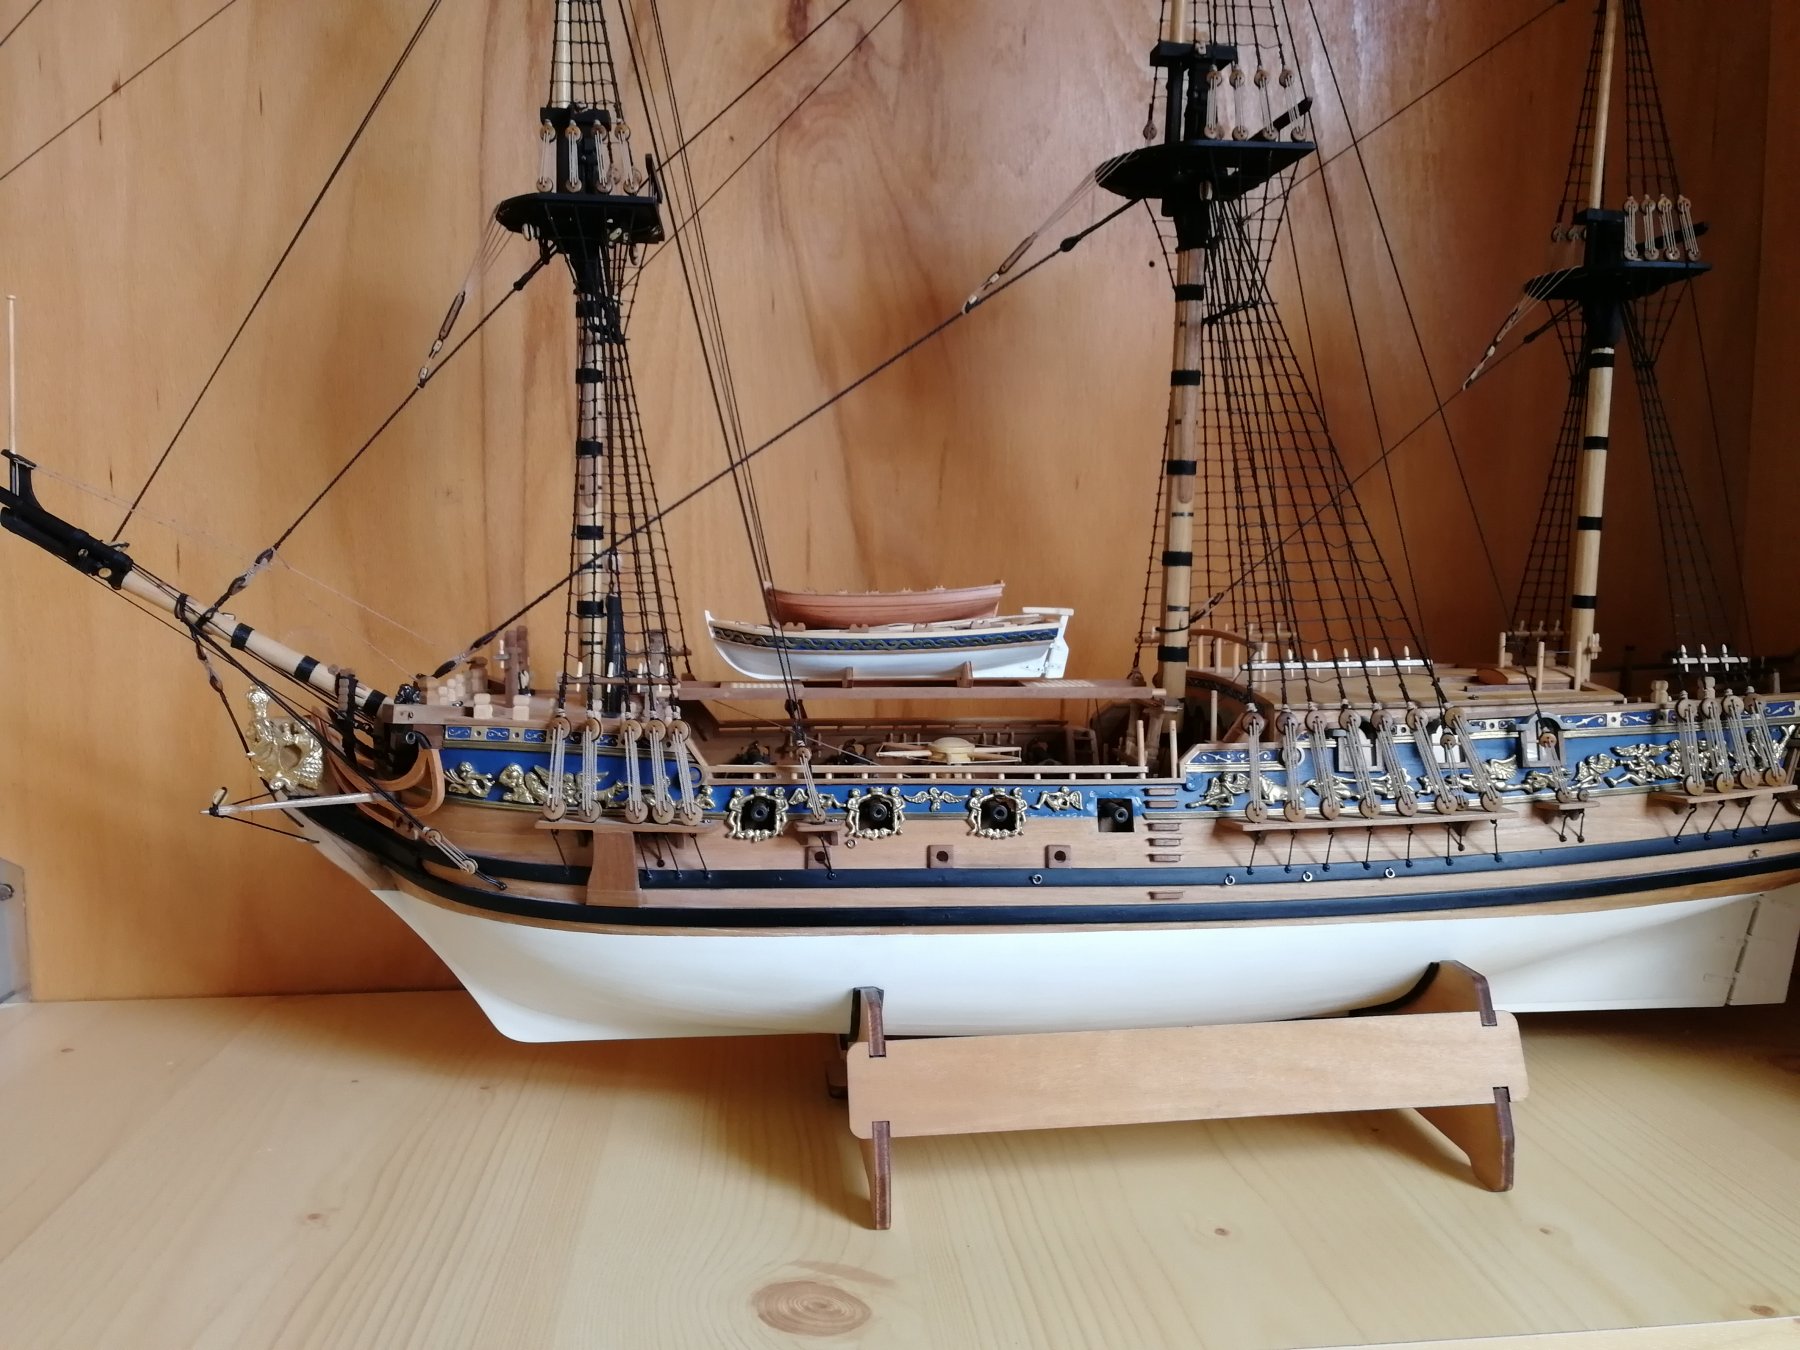
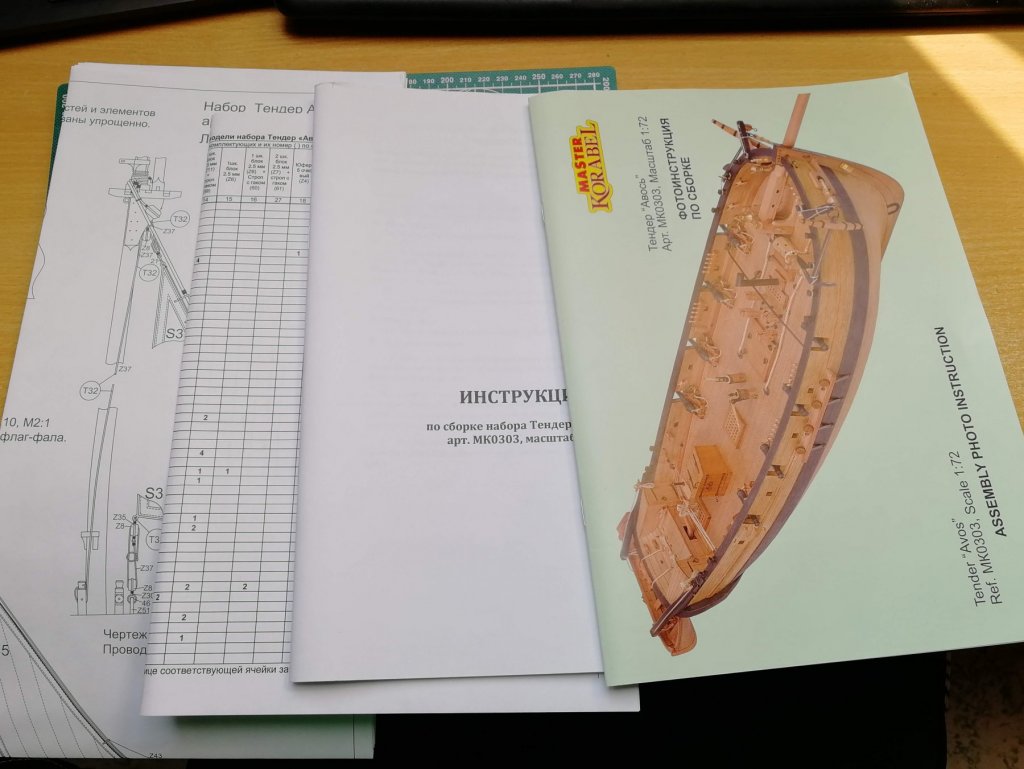
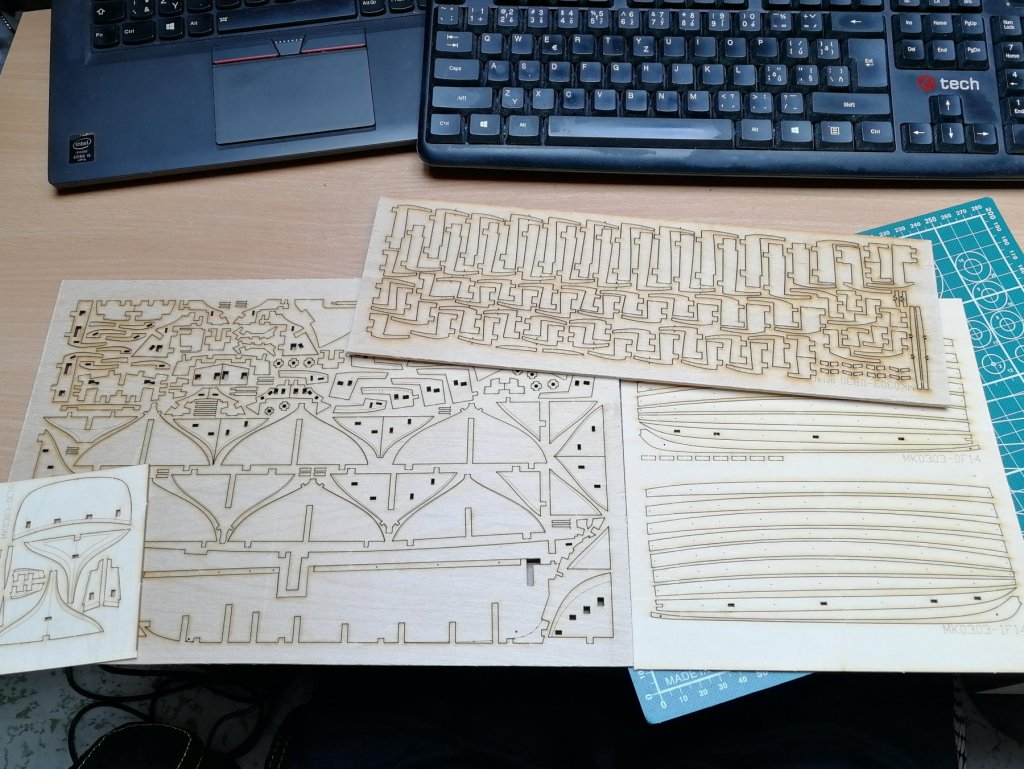
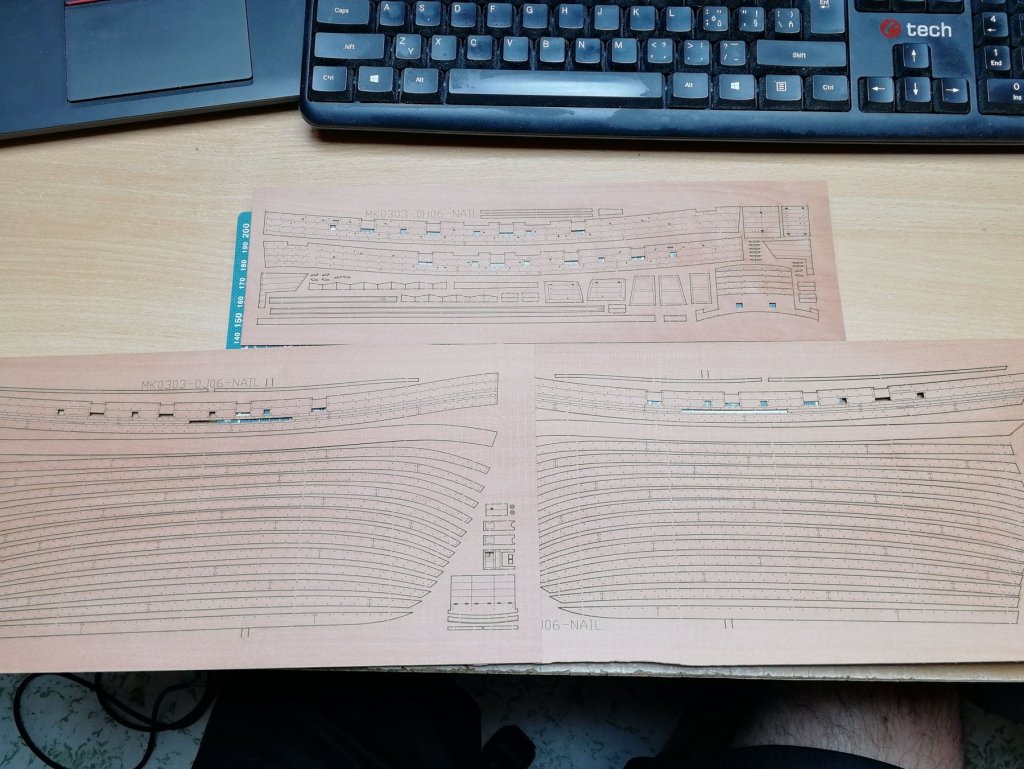
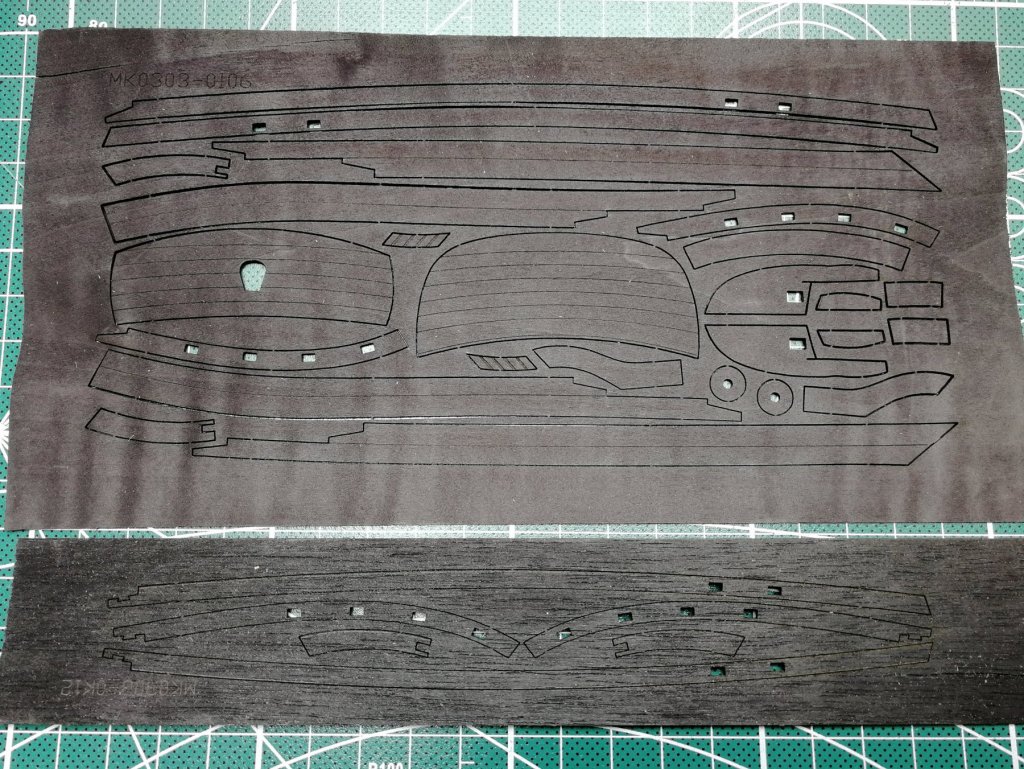
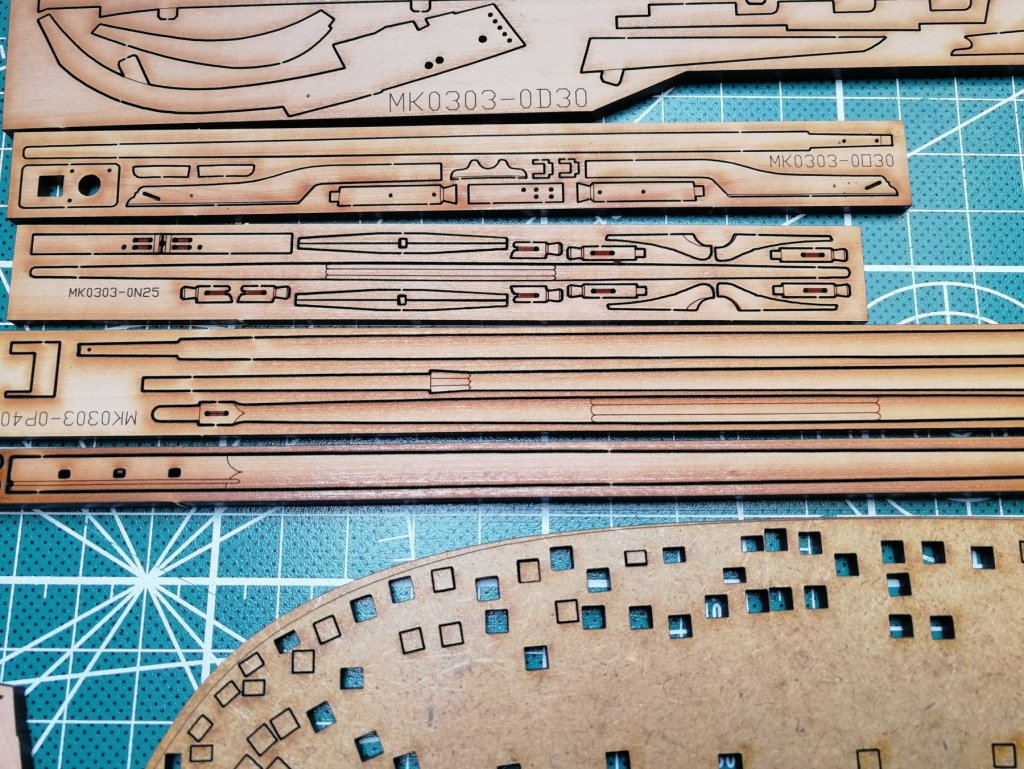
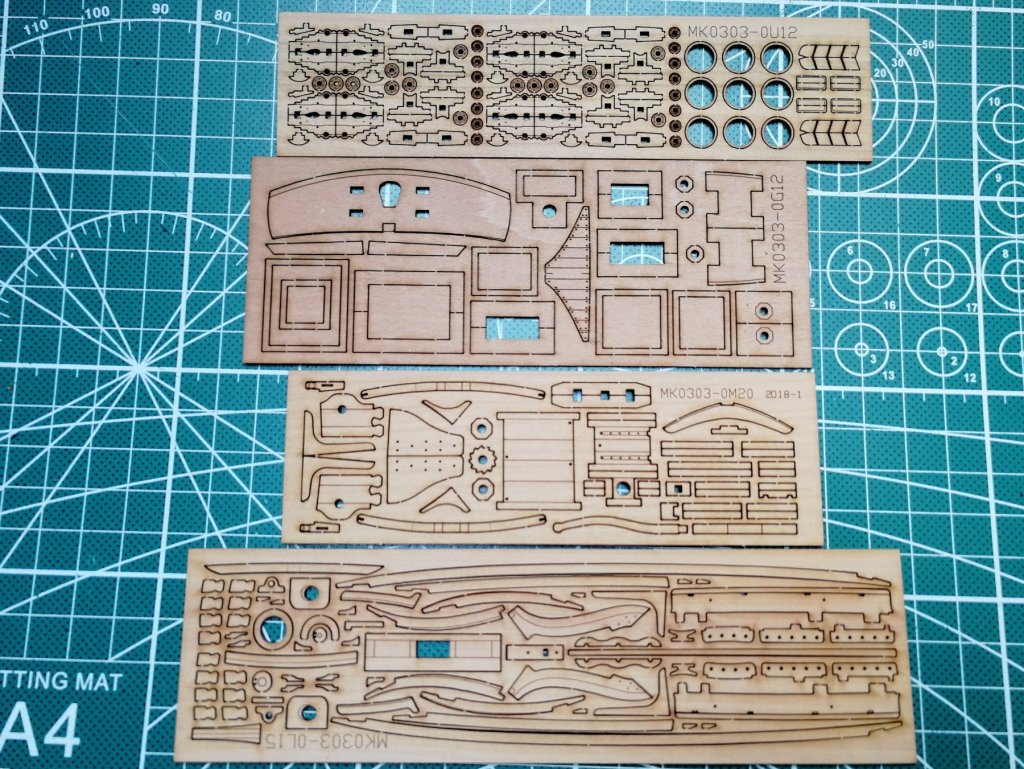
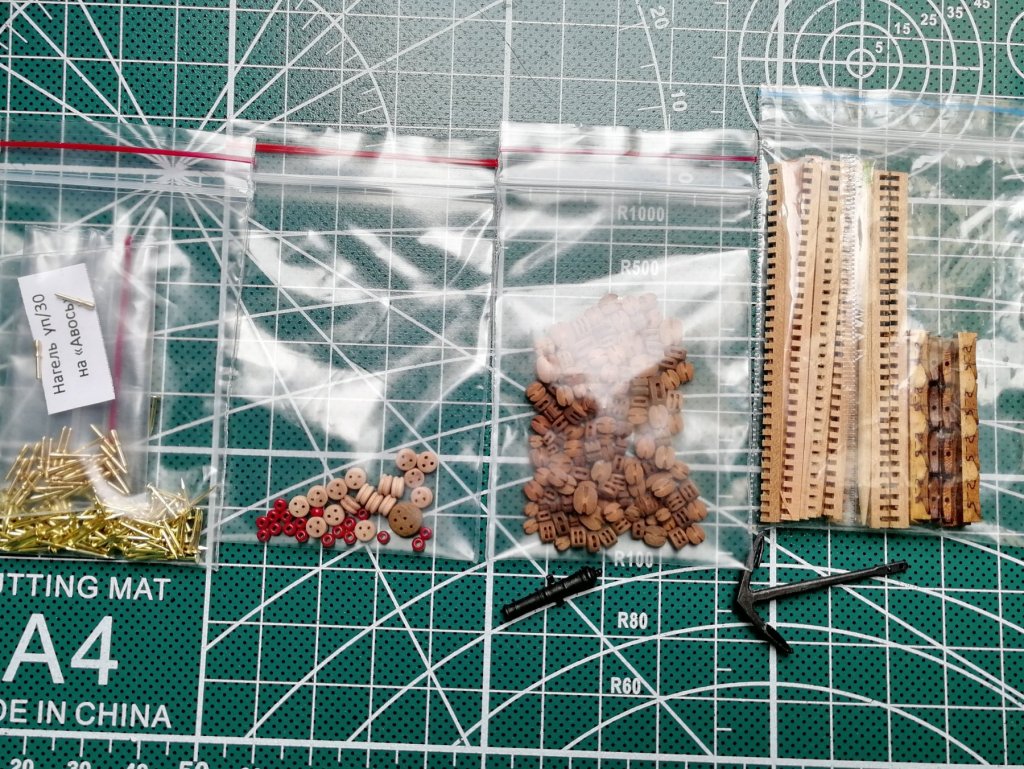
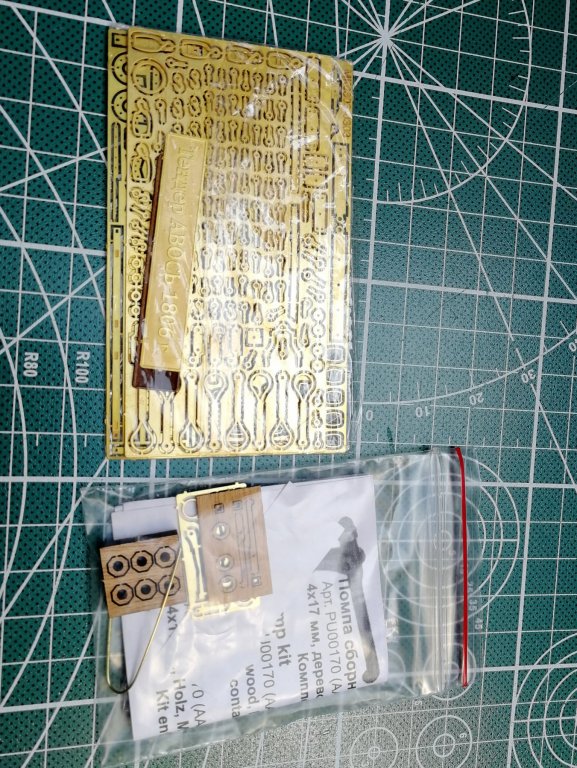
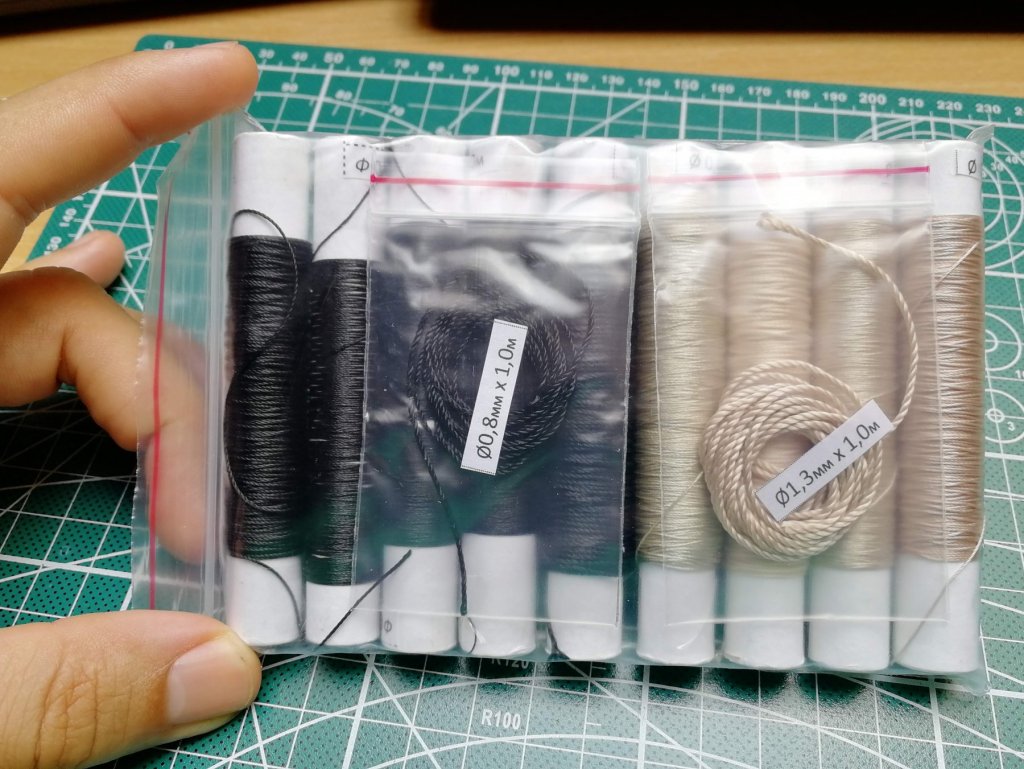
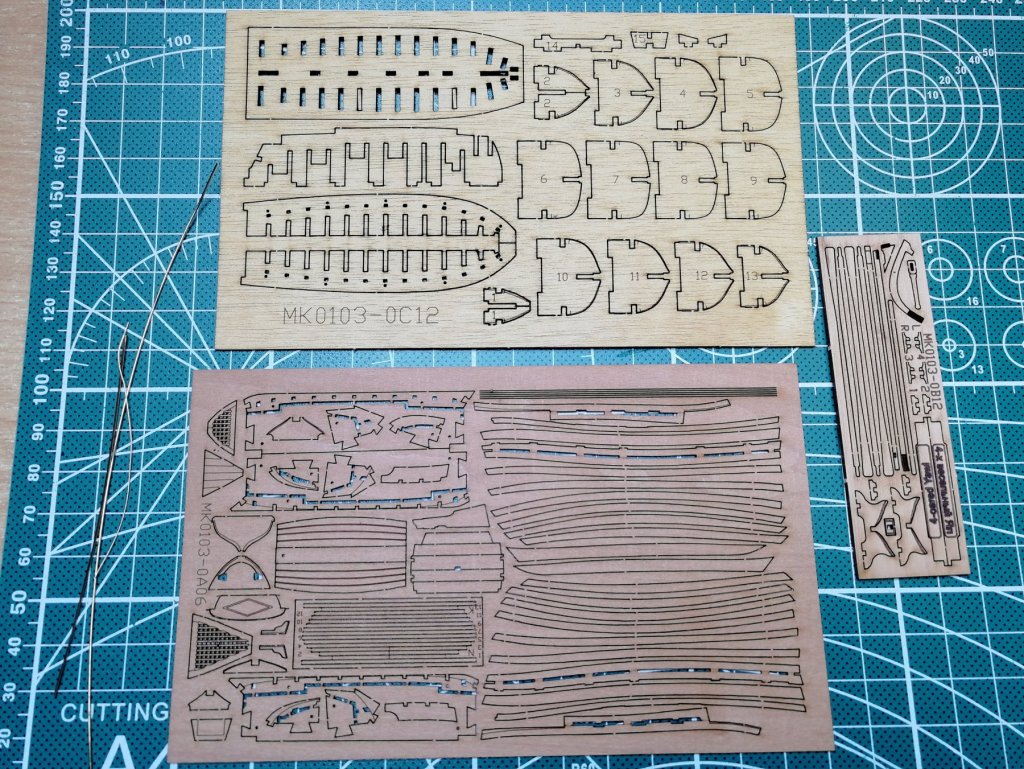
Hi, I thought I will do more detailed review of the kit and add some history which is also included in the manual. Historical background On 1st July 1806 г. in Novo-Arkhangelsk in Alaska (now Sitka, USA) a firstborn ship of the Russian-American company’s trading fleet was triumphantly launched. It was an 8-cannon tender. The Russian ambassador Nicolay Ryazanov named the ship “Avos”. On 27th of July 1806 tender “Avos”, commanded by 22-years old warrant officer Gavrila Davidov and crewed by 12 local craftsmen, departed on a secret expedition to establish the interests of the Russian Empire in the waters around of the Southern Kuril Islands and the Sakhalin. The expedition also included the ship “Juno” and it was generally guided by lieutenant Nicolay Khvostov During the sailing along the Aleutian ridge to the port of St. Peter and Paul the crew survived many storms, forced stop at the Fox islands for repairs and also saved a mysterious “native” from the Attu island. To secure the Kuril Islands and Sakhalin, to bring the local natives (aines) into the Russian allegiance and to force Japan to enclose trading relations with Russia, in 1807 ships “Avos” and “Juno” conducted many military raids along the Kuril Islands coast, raiding the illegally appeared Japan settlements, which banished previously settled Russian settlers aines. During the expedition tender “Avos” using its 4-oared yawl conducted many boarding of the Japanese ships and several landing operations, each time forcing large numbers of Japanese to run and burning and sinking the ships as scare tactics. During 1808 shipping season tender “Avos” under command of lieutenant Sukin was shipping goods to America. On 11th of October 1808, while sailing from Kadiak to Novo-Arkhangelsk, during the storm, tender “Avos” was wrecked near the coast of Chichagov island near the Alexander archipelago. Tender “Avos” had a short, but a legendary fate in history of Russia, America and even Japan, which had mixed assessments of the historians, but widely known because of world popular first Russian rock-opera by A.Rybnikov and A.Voznesensky “Juno and Avos”. It told us about the adventures of the Russian sailors and the selfless love on the coast of California of Russian ambassador Nicolay Ryazanov and young María Concepción Argüello (Conchita). Content of the box Plans - there are 3 sheets of plans, 2 tables with rigging details, one text manual and one photo manual. All looks very detailed and understandable. I have the version with only plans in Russian but together with order they send all translated to english via e-mail so I should be good there False keel and bulwarks - whole inner structure is made from plywood and the first layer of planking as well. On each bulwark there is shown how much bevel is needed so lot of sending can be done before assembly and finish just last touch on the model. Outer planking - second layer of planking is made from pear wood. It is laser cut to the shape and there are also imitations of treenails. Same is for inboard planking. For the wales, rails and transom the black veneer is used (so no colors are needed) Other deck details, mast and spars - all made from pear wood, super detailed. Love it! Other fittings - there are super nice blocks and deadeyes, belaying pins from brass, 8 2cm guns, anchors, 2 plates of photo edged details Sails and rigging - there are several width and colors of the rigging line. I'm not sure if I will use this or make my own. Will see. This version of the kit includes already sawn sails and these are looking good. Boat - the kit also includes 4-oar yawl. It has only 6.8cm and there are so many details! This will be crazy to build I guess! All made from pear as well. and that is all you get for your money Can't wait to get started!!!!!!!!!!!!


- 315 replies
-
- 15
-
-
- master korabel
- avos
- (and 1 more)
-
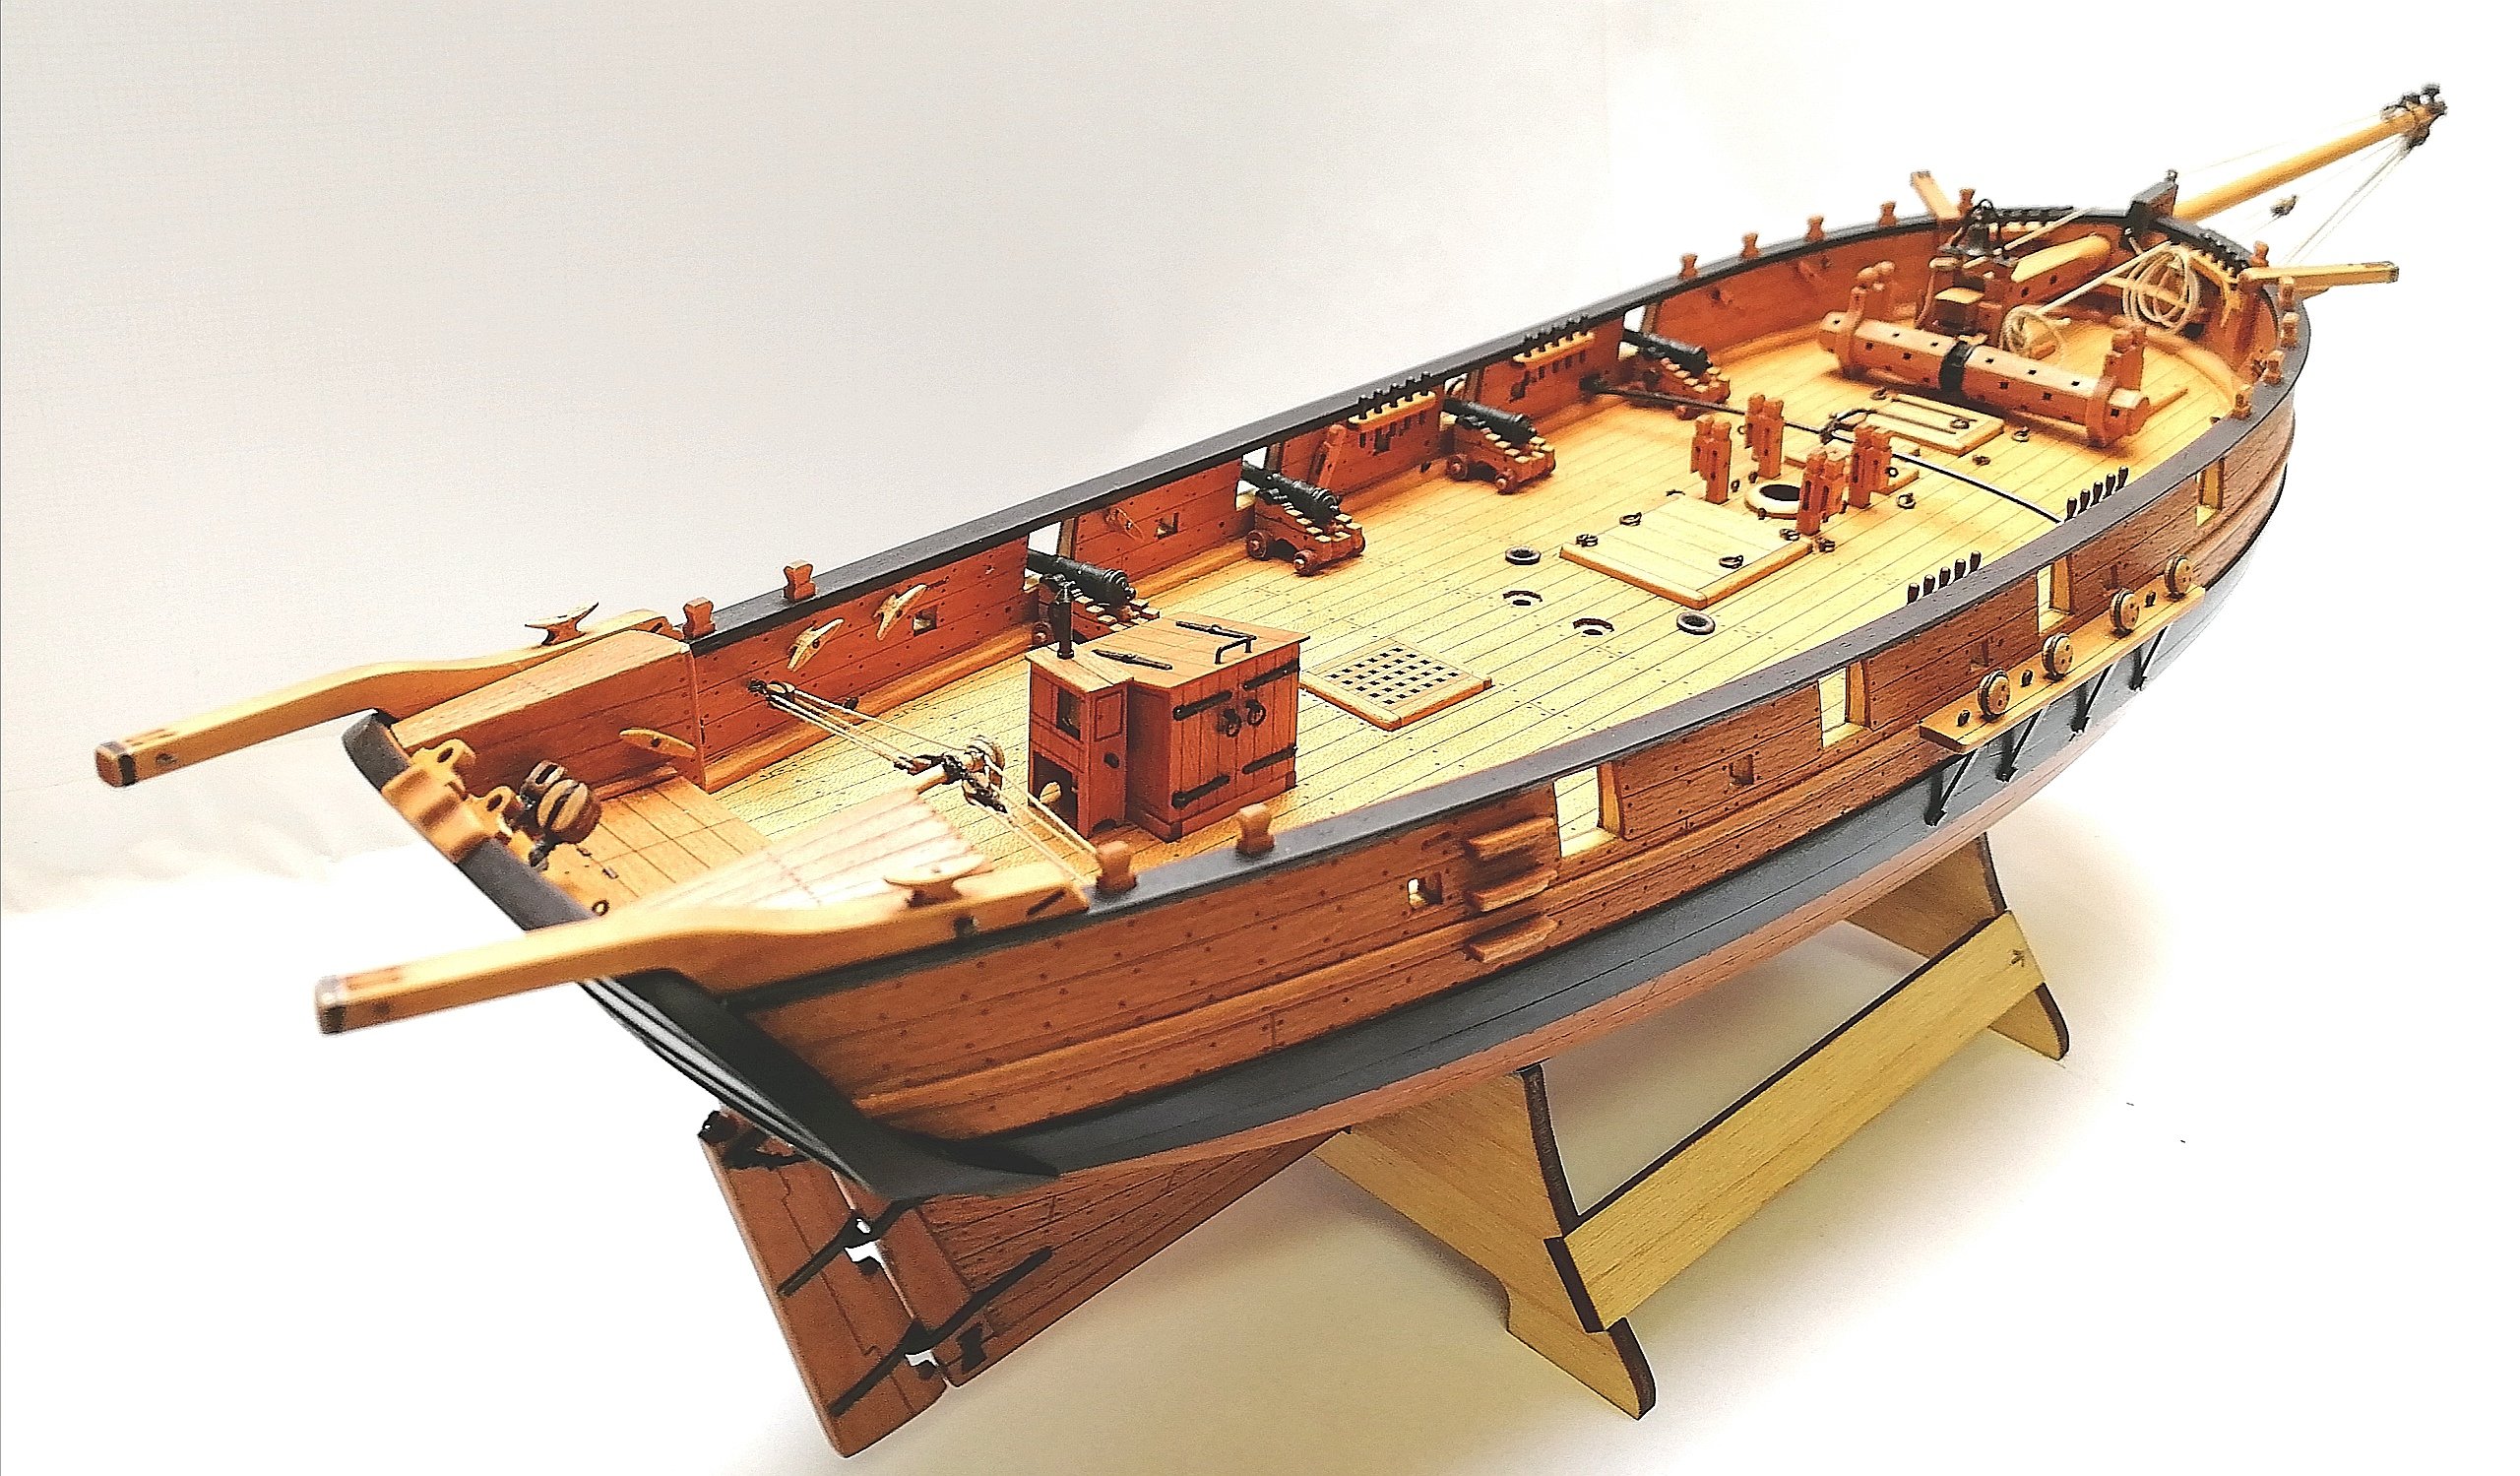
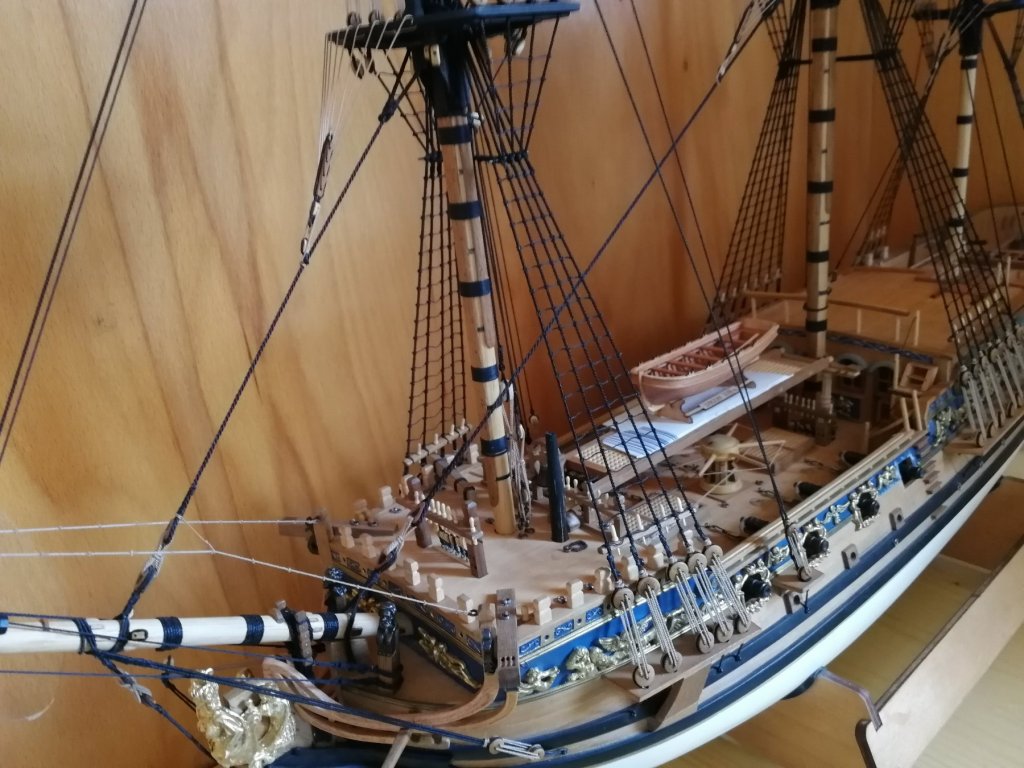
Added few last detail and put a varnish on it. The Iron work is missing but I consider it complete for now. I really love the colour of the wood! Back to RC rigging.......... I'adding also few photos with RC. What do you think?? Is it too small? And one more idea......


- 128 replies
-
- 12
-
-
- panart
- anatomy of the ship
- (and 1 more)
-
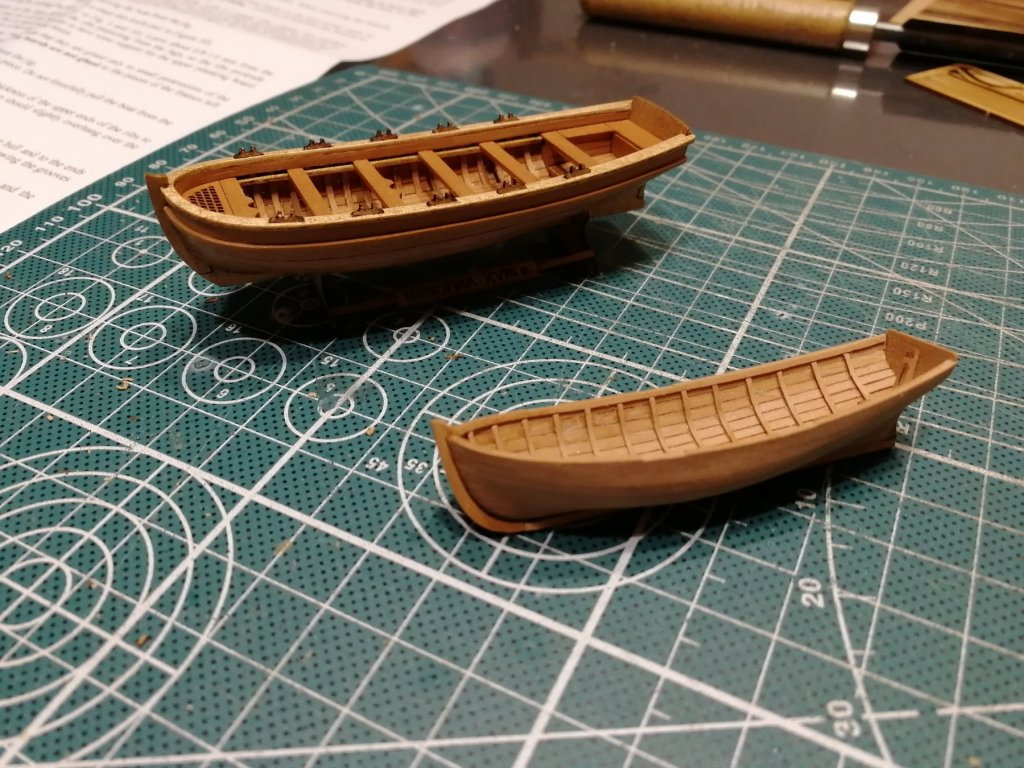
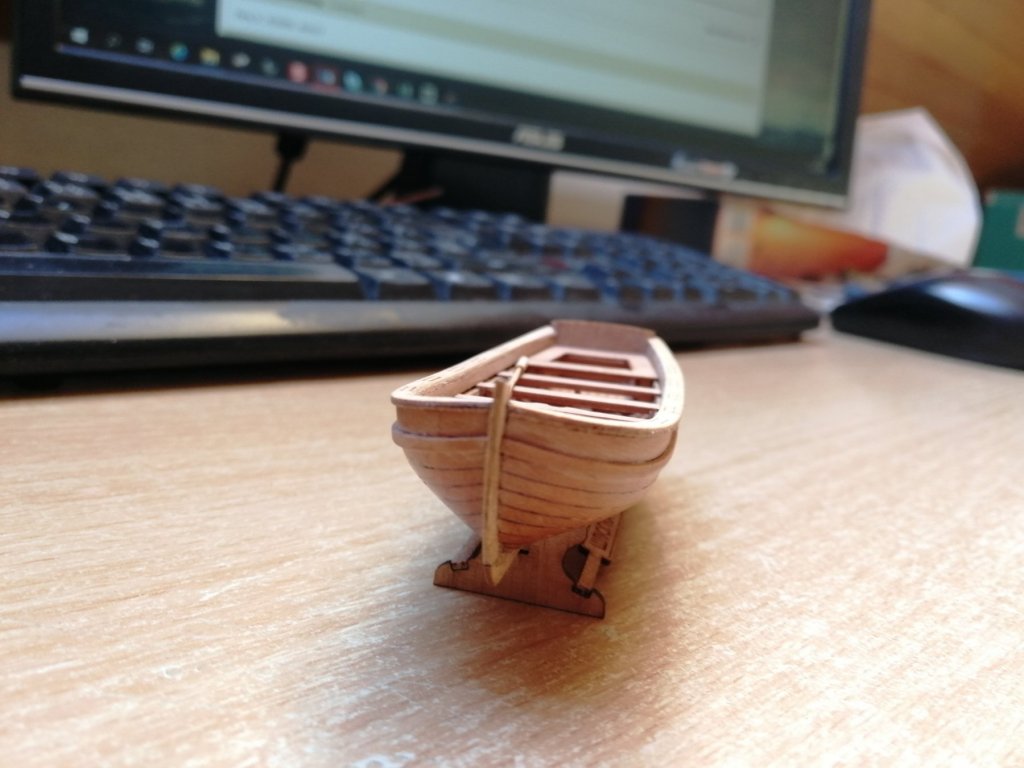
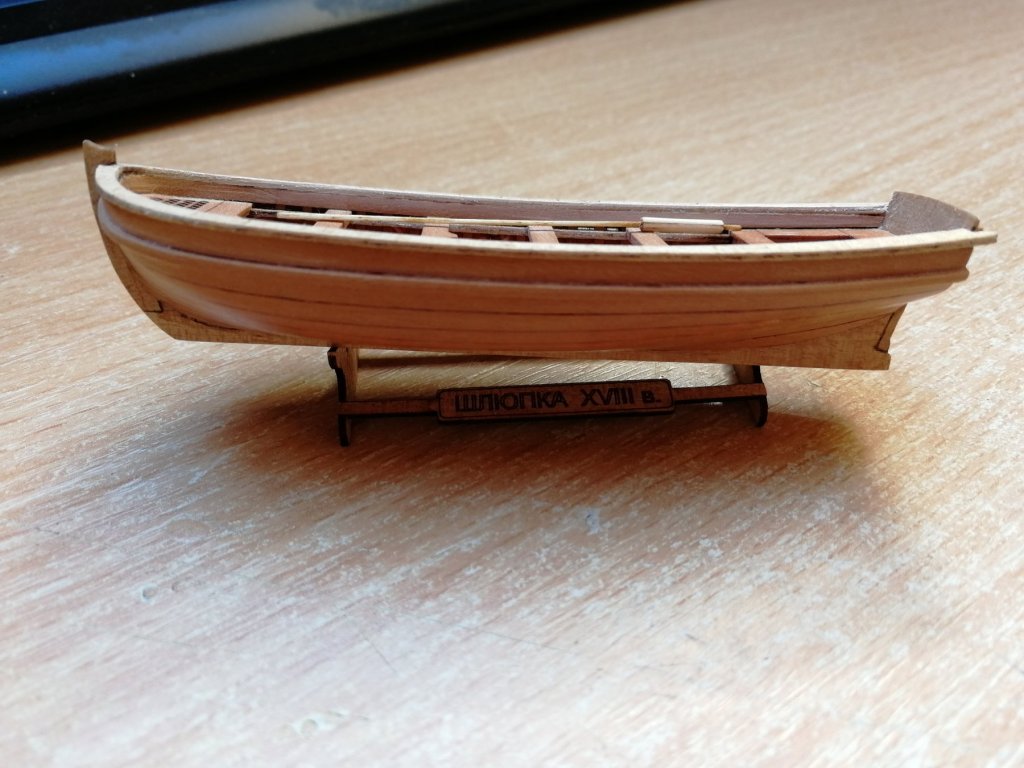
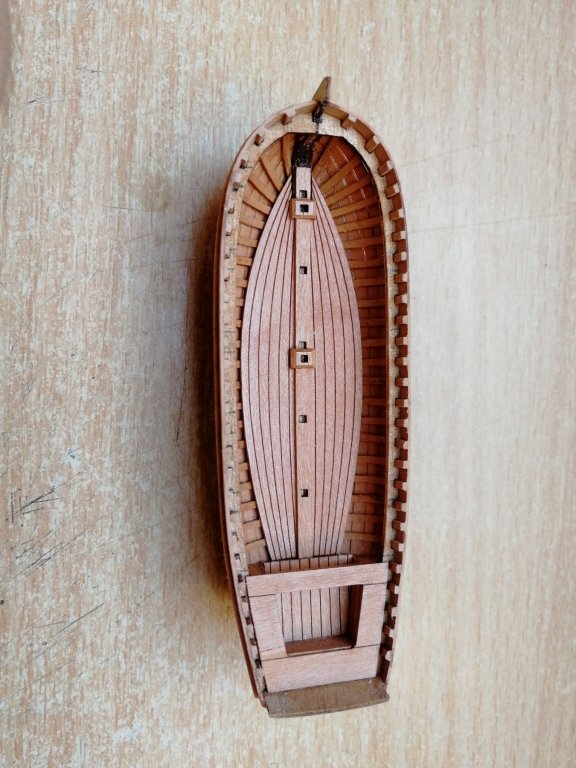
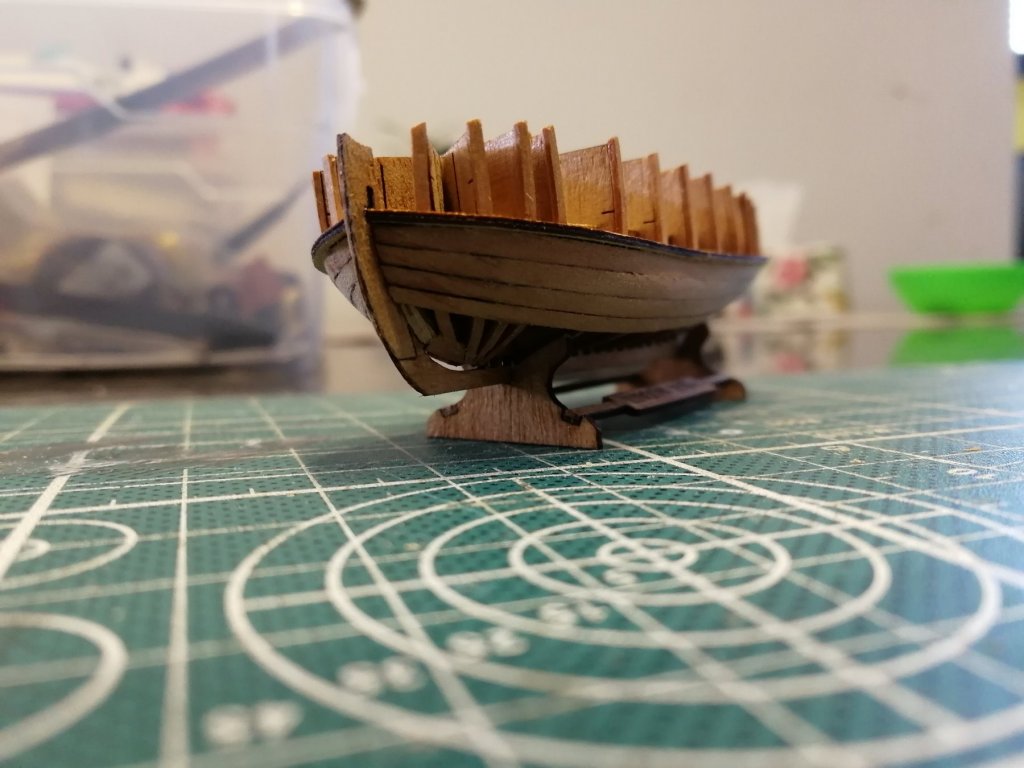
The boat is coming close to the finish. I Just need to place rudder, oars and do final sanding and varnish. Unfortunately I wil not use it on RC as it is too Tiny But it was great fun and it is looking nice! Good preparation for AVOS build.
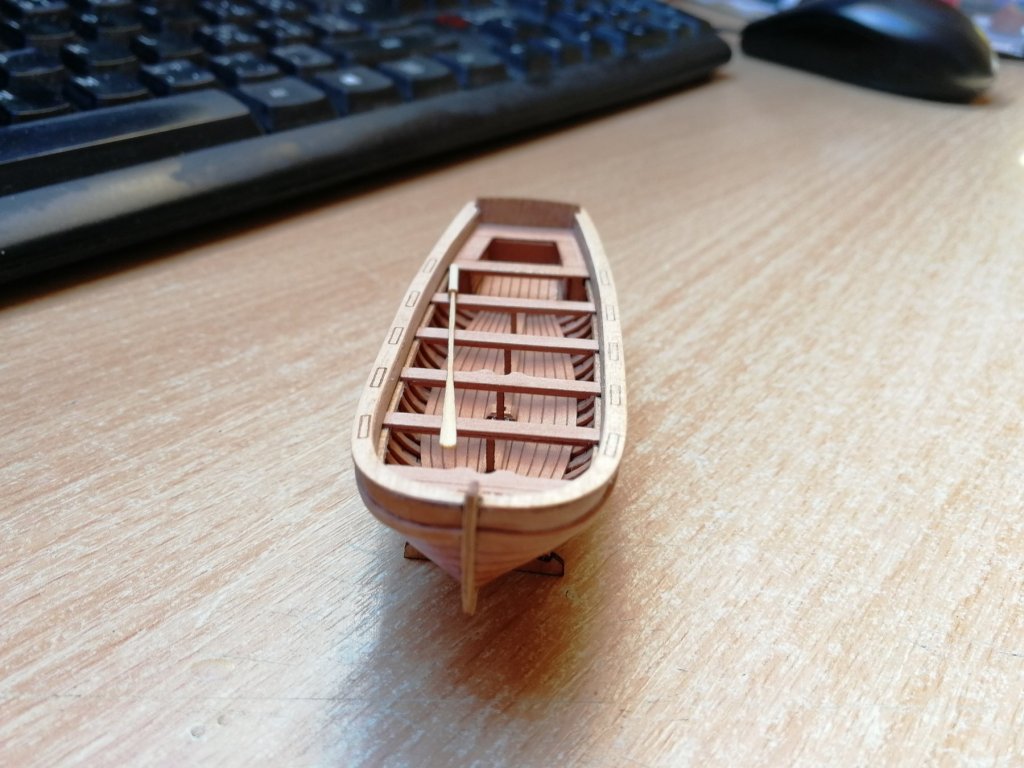
- 128 replies
-
- 7
-
-
- panart
- anatomy of the ship
- (and 1 more)
-
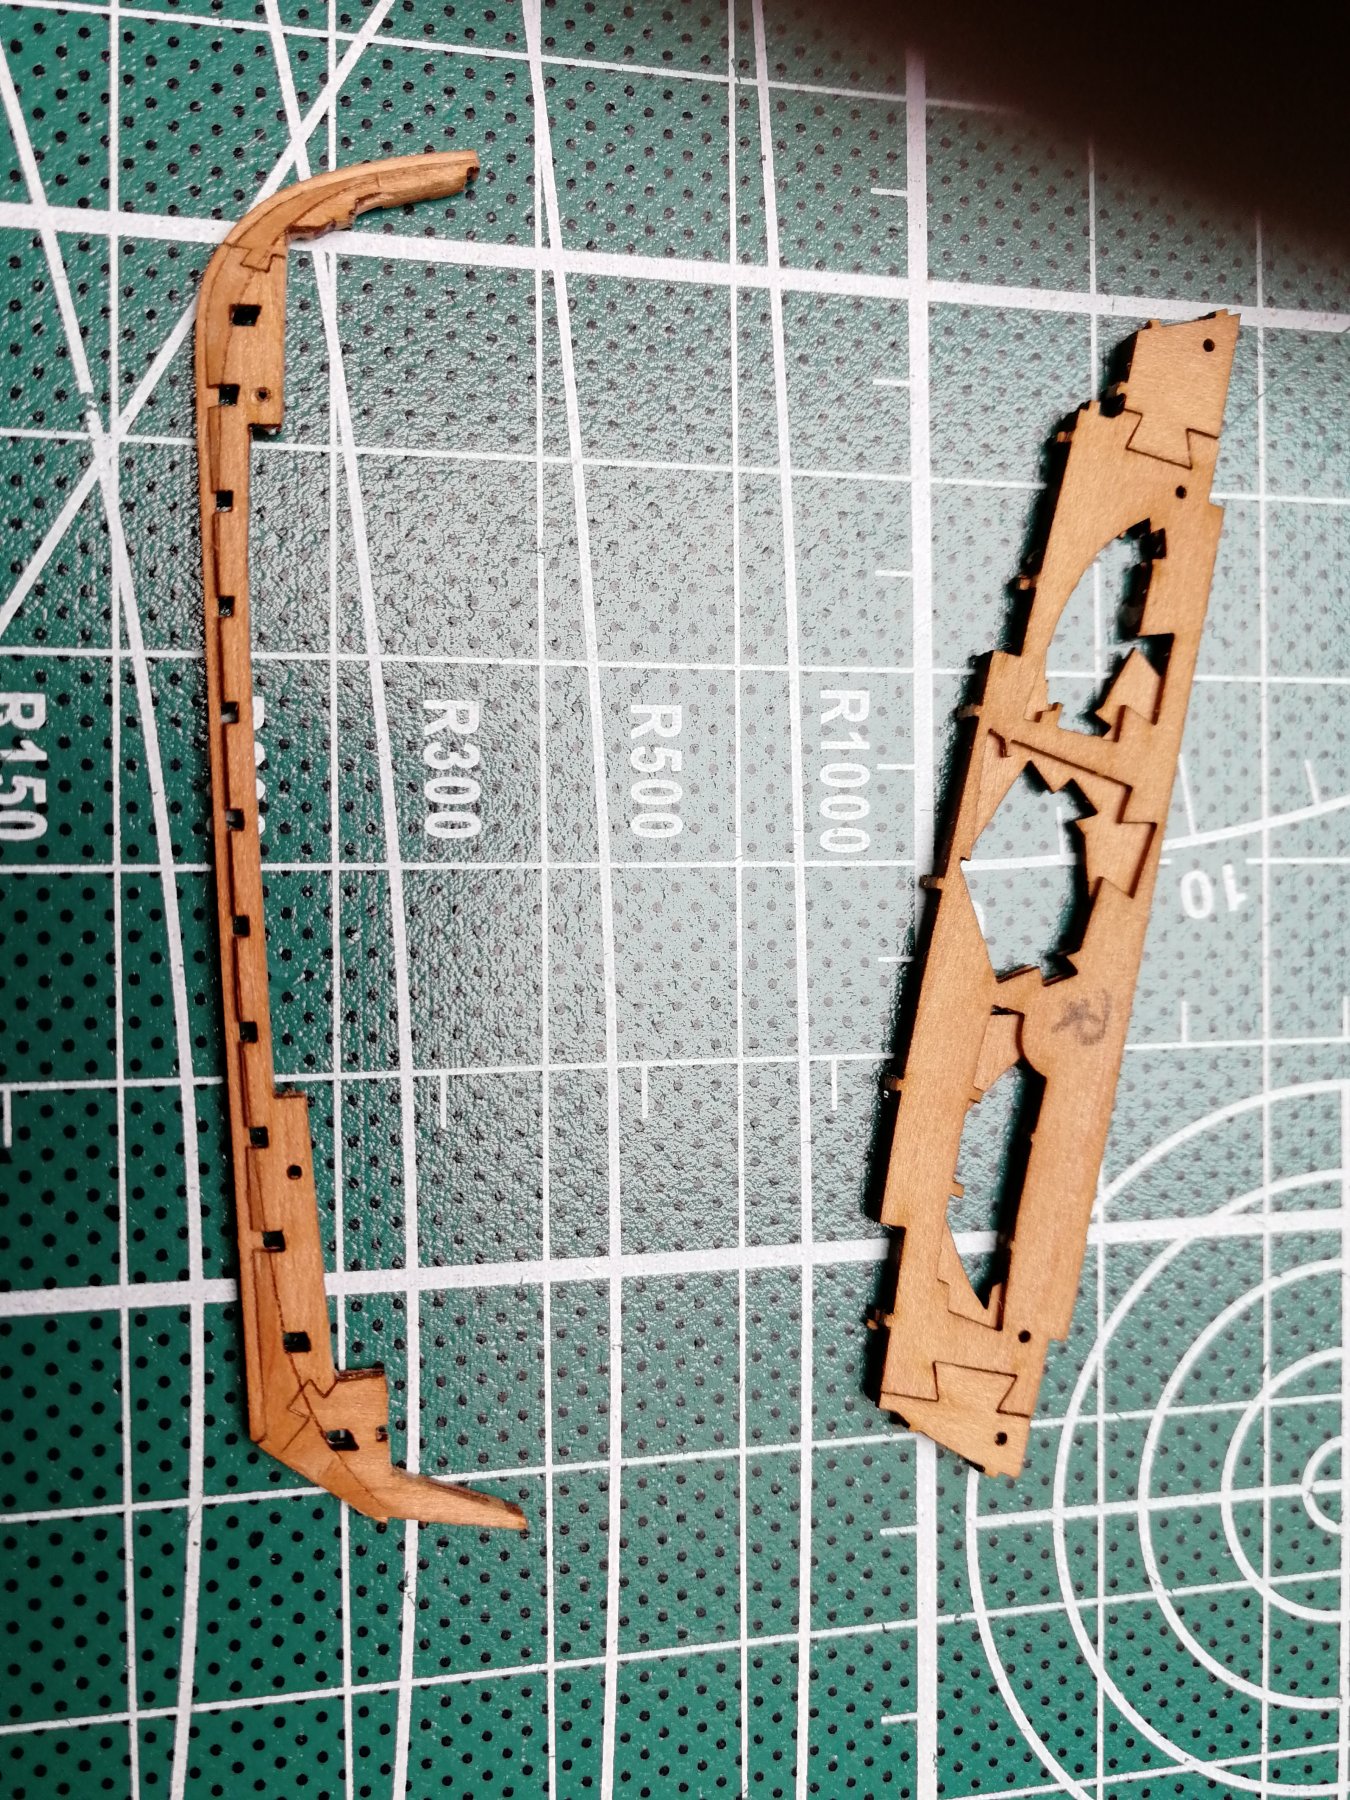
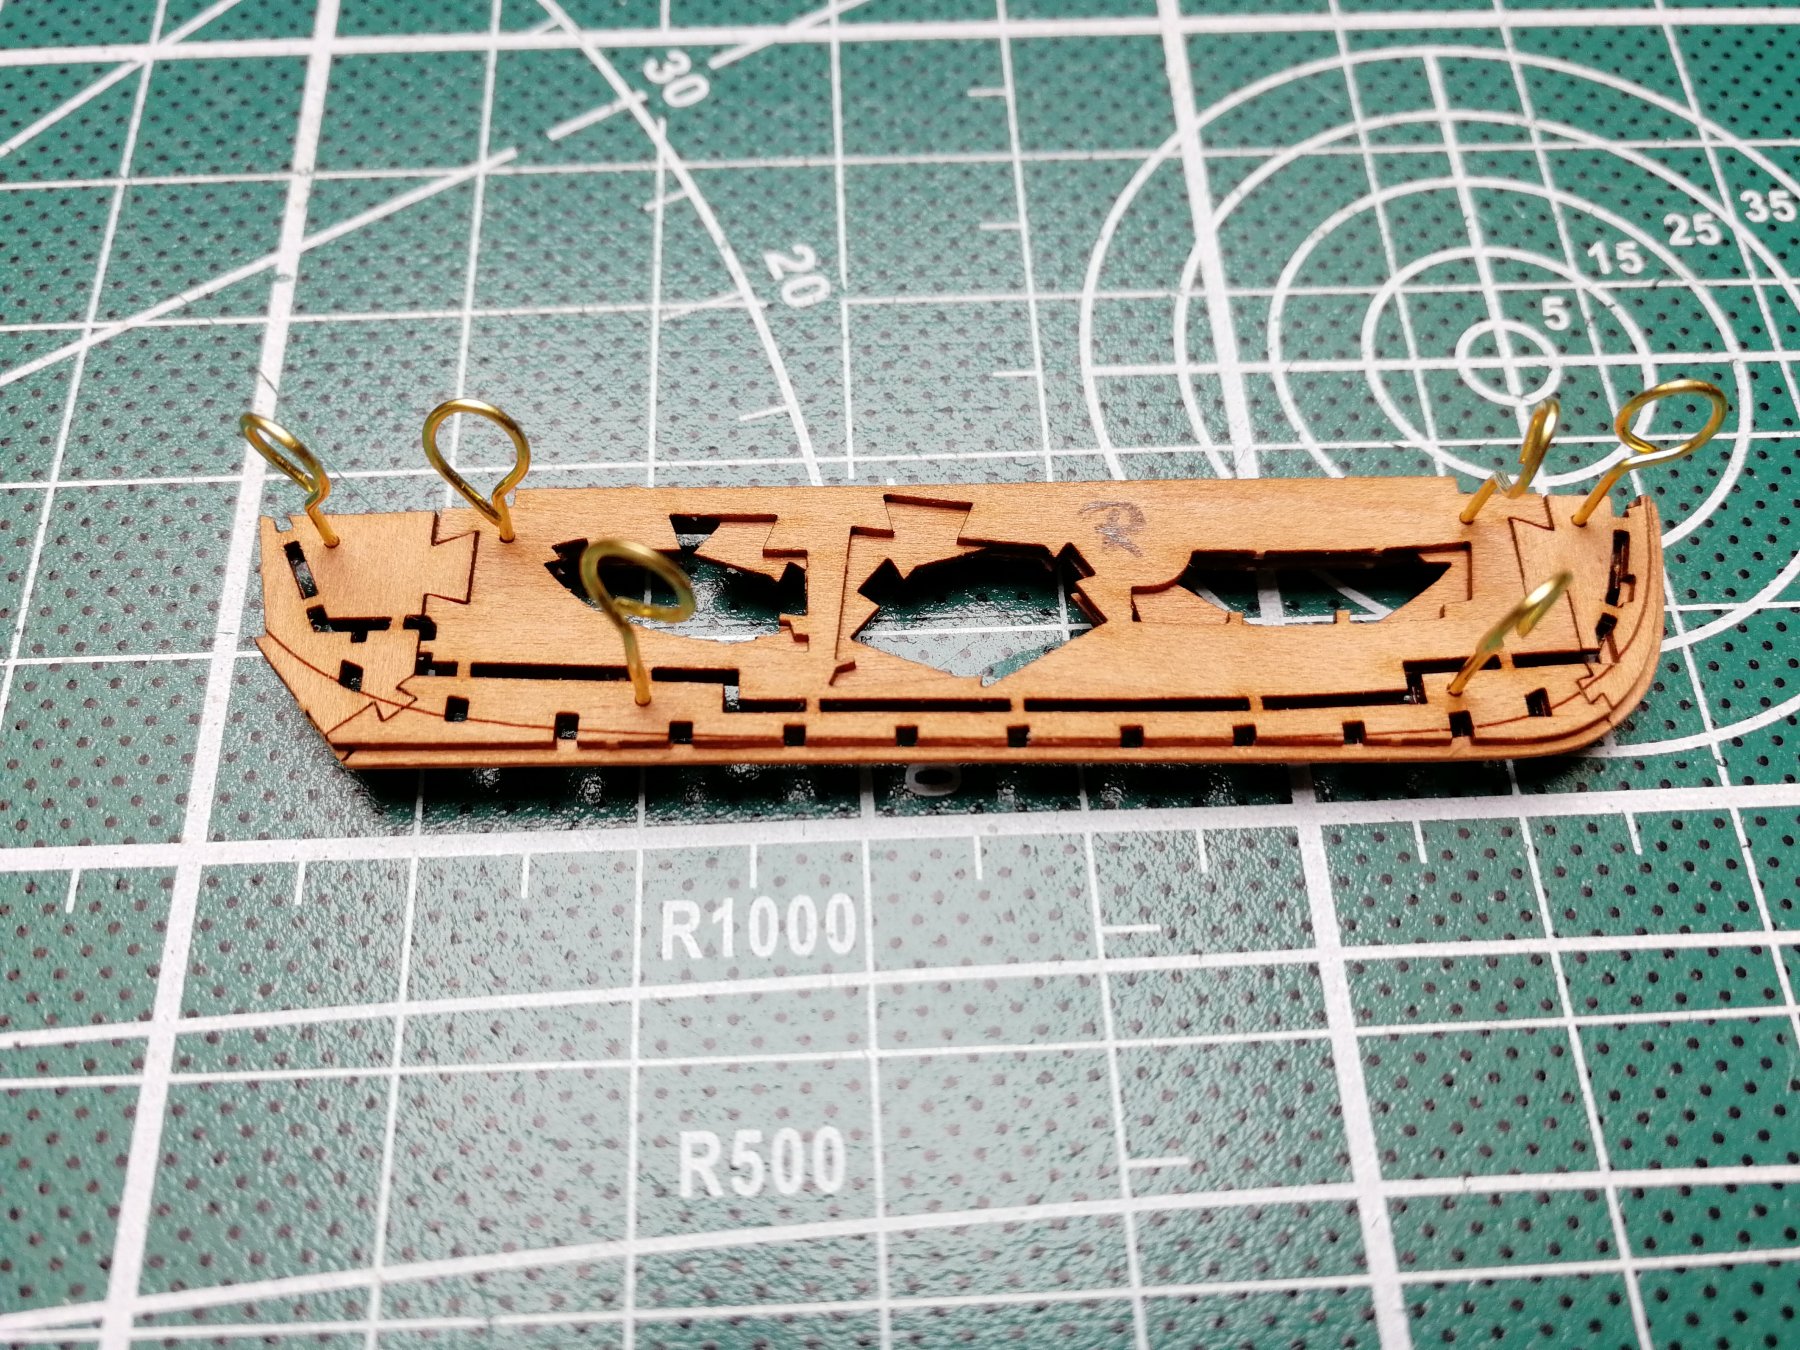
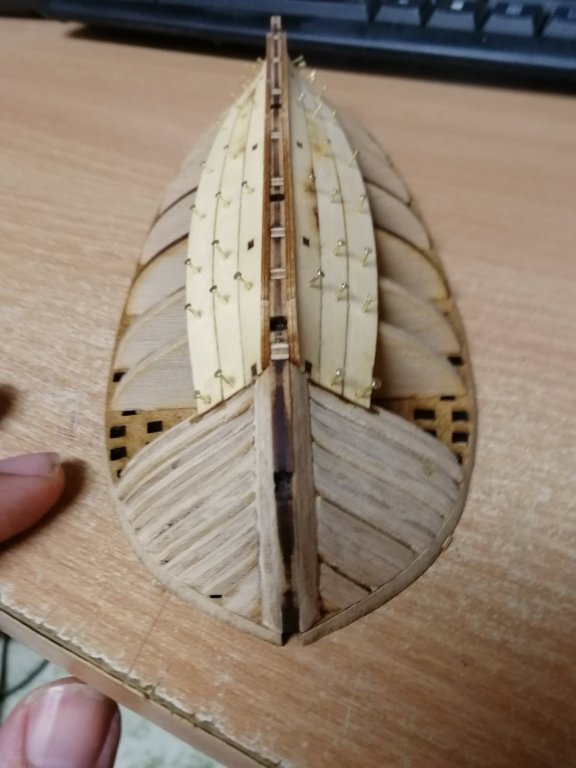
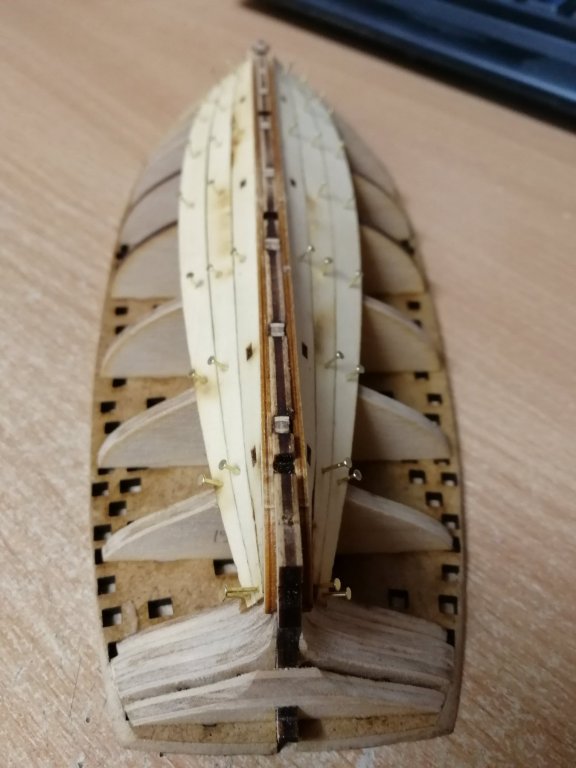
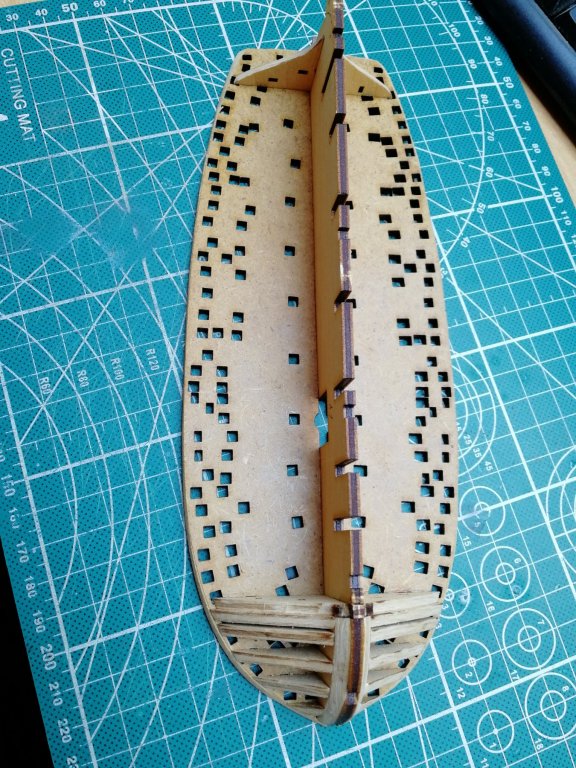
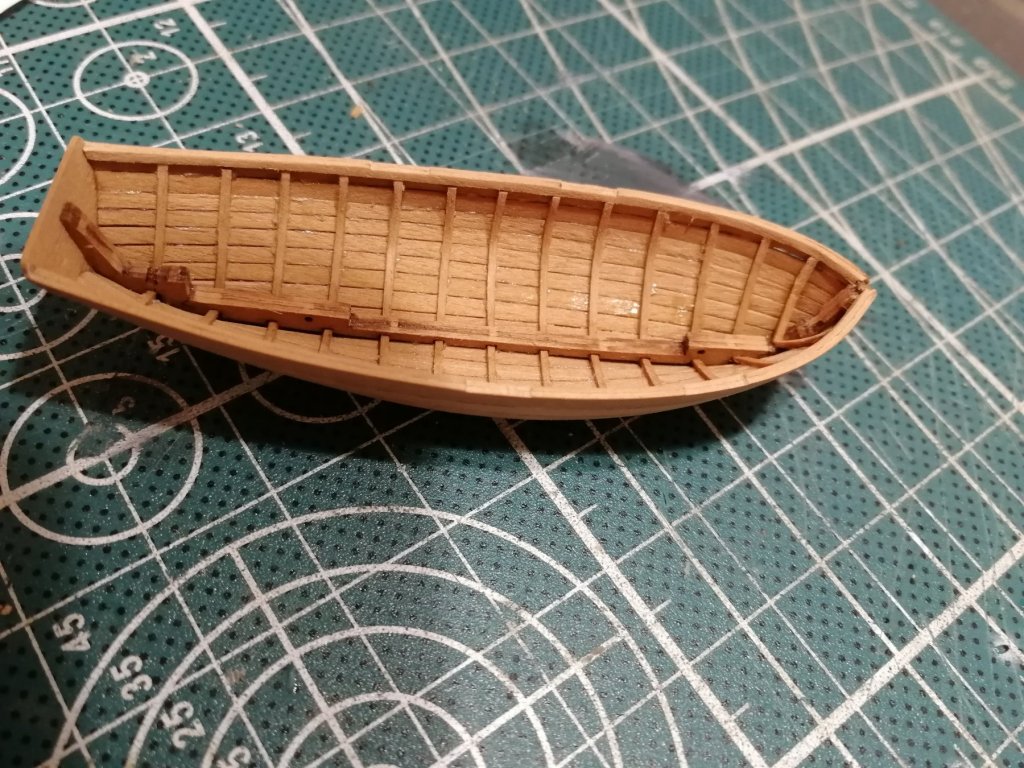
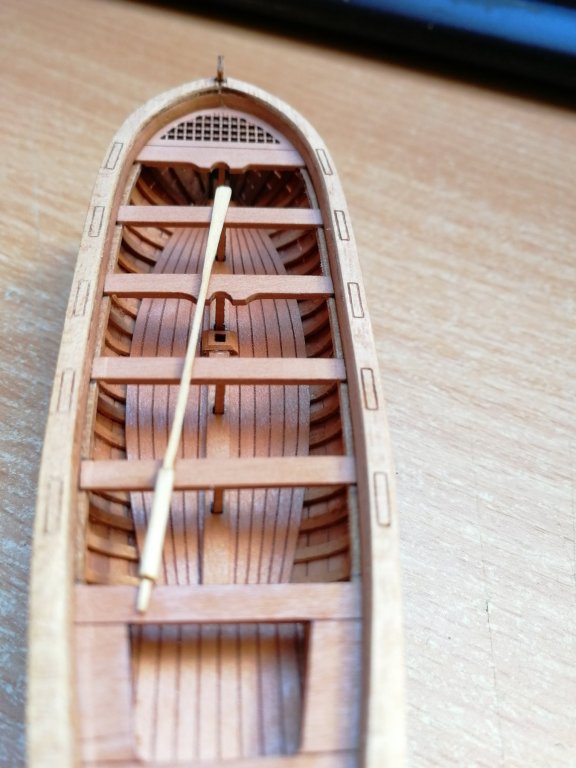
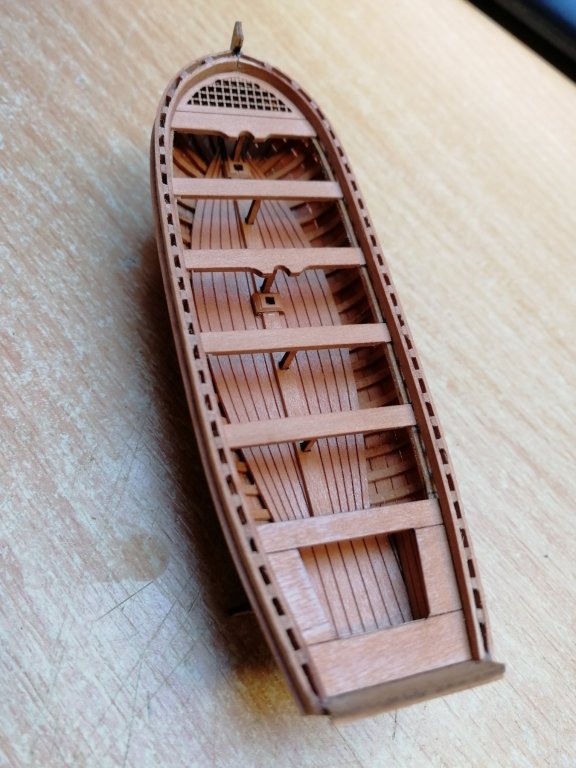
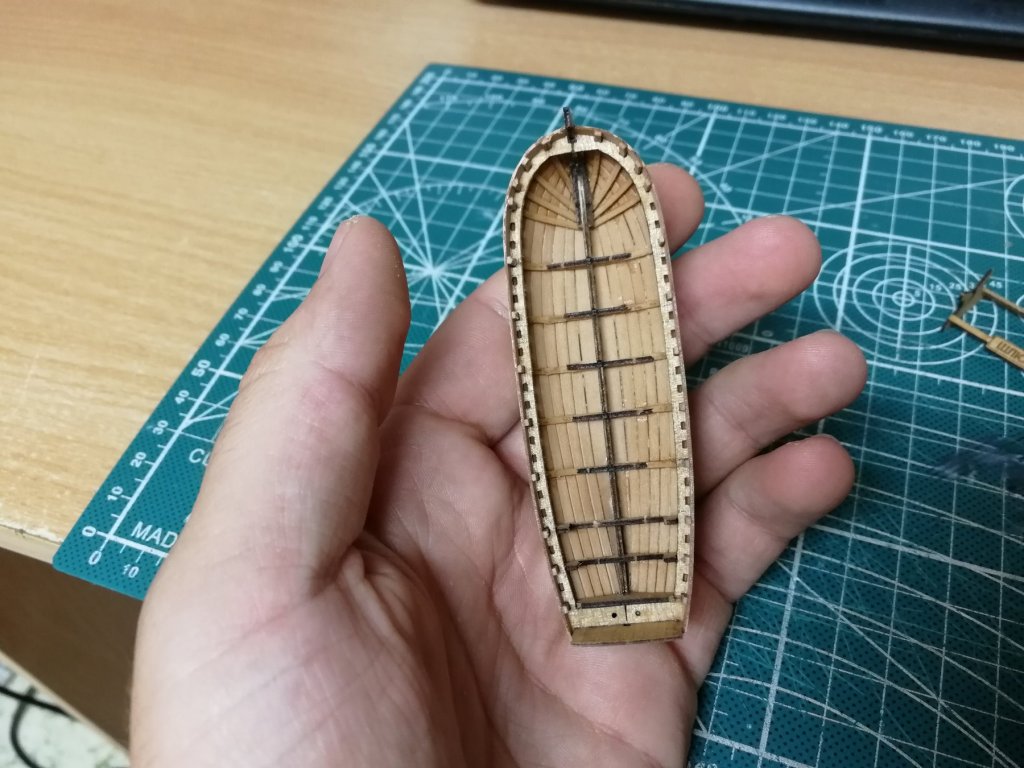
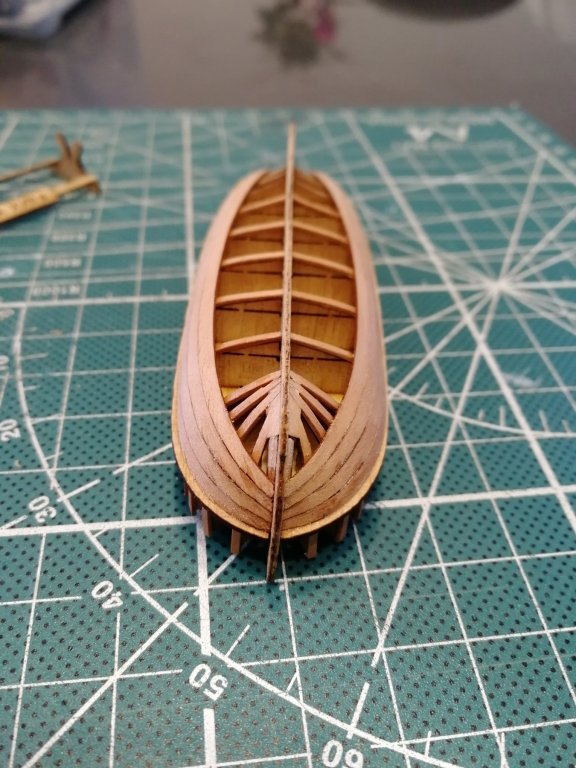
I have finished framing of the boat and added some inboard details
- 128 replies
-
- 9
-
-
- panart
- anatomy of the ship
- (and 1 more)
-
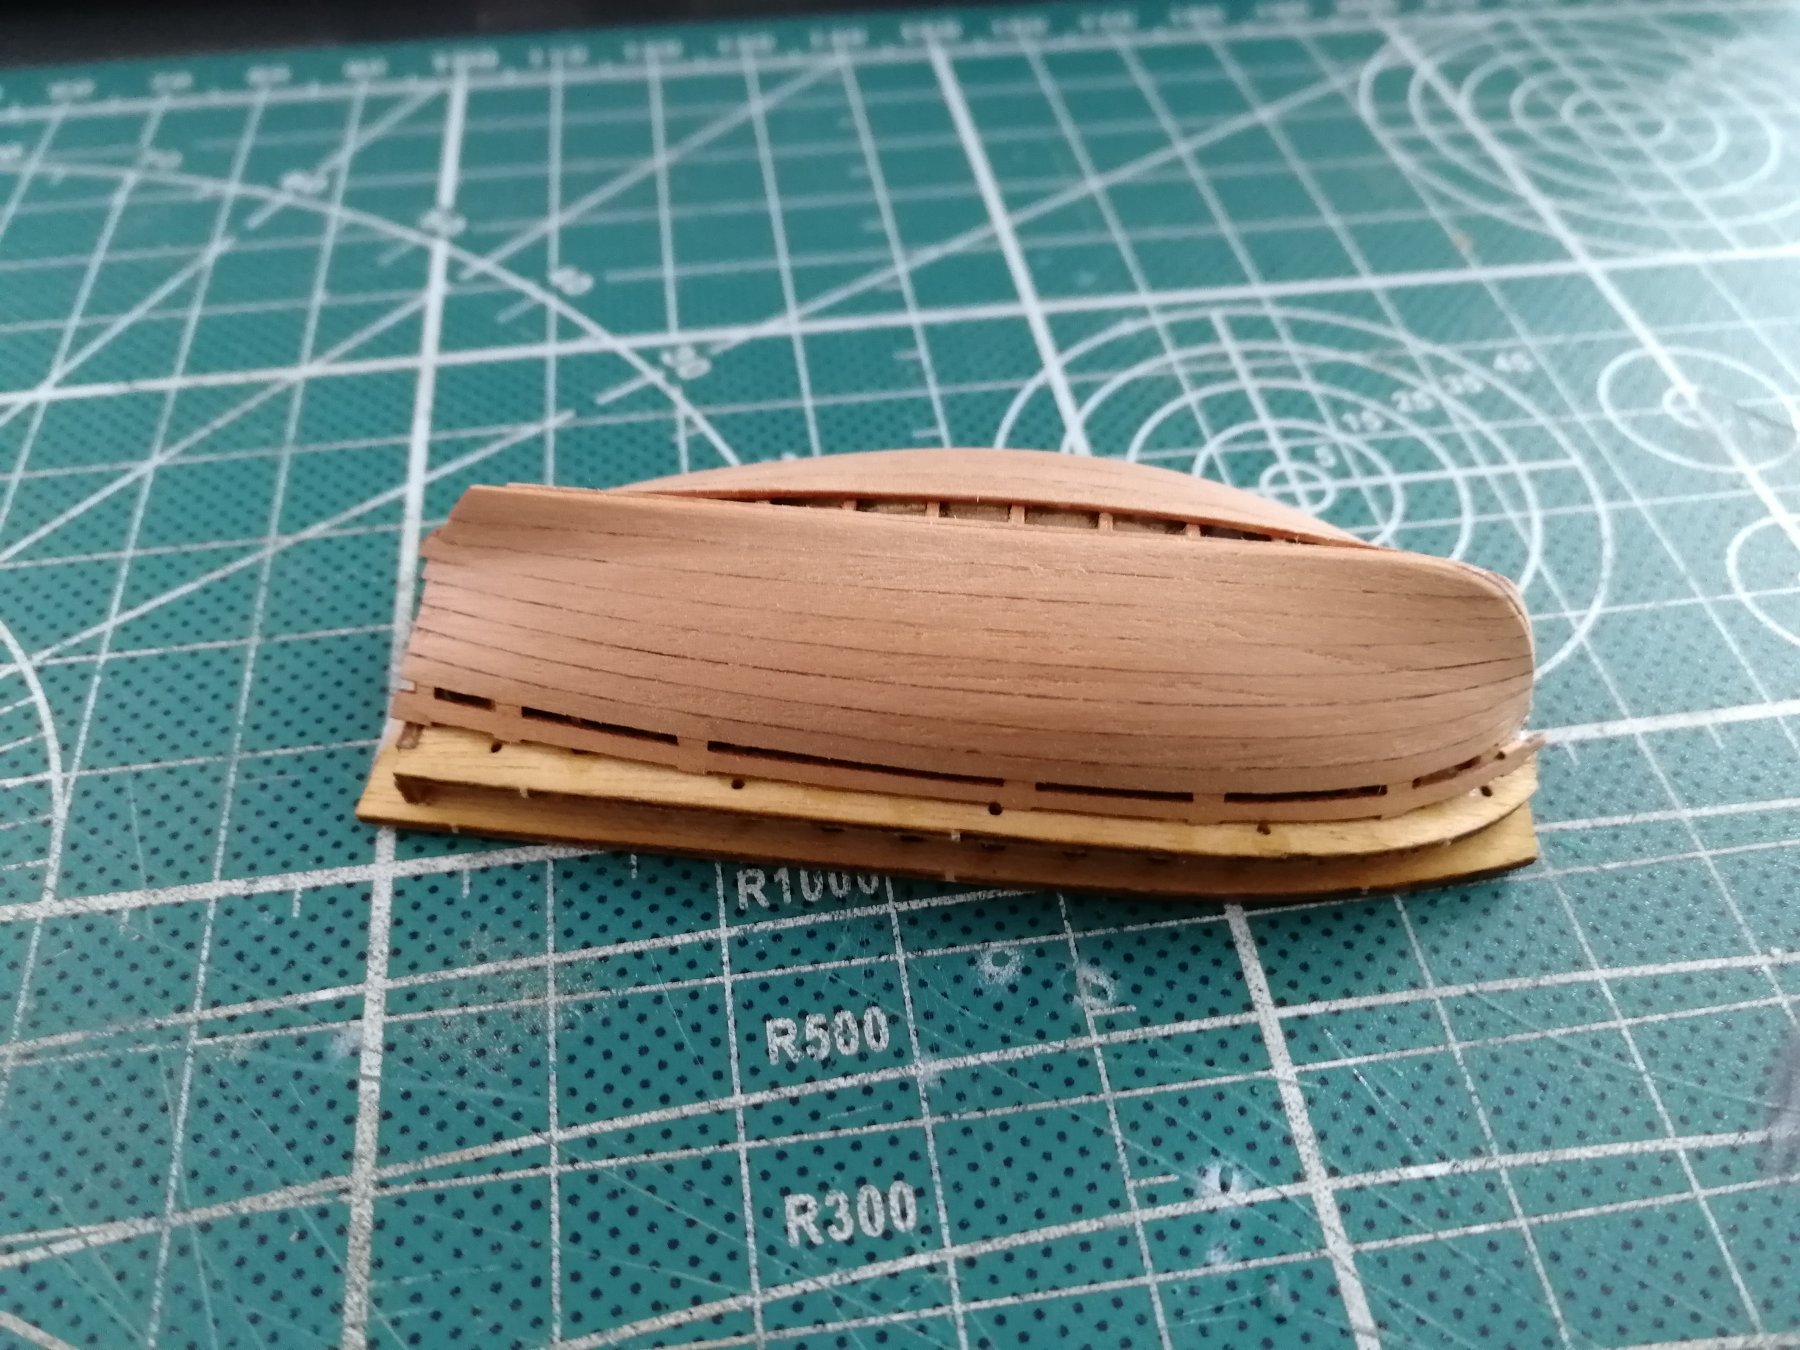
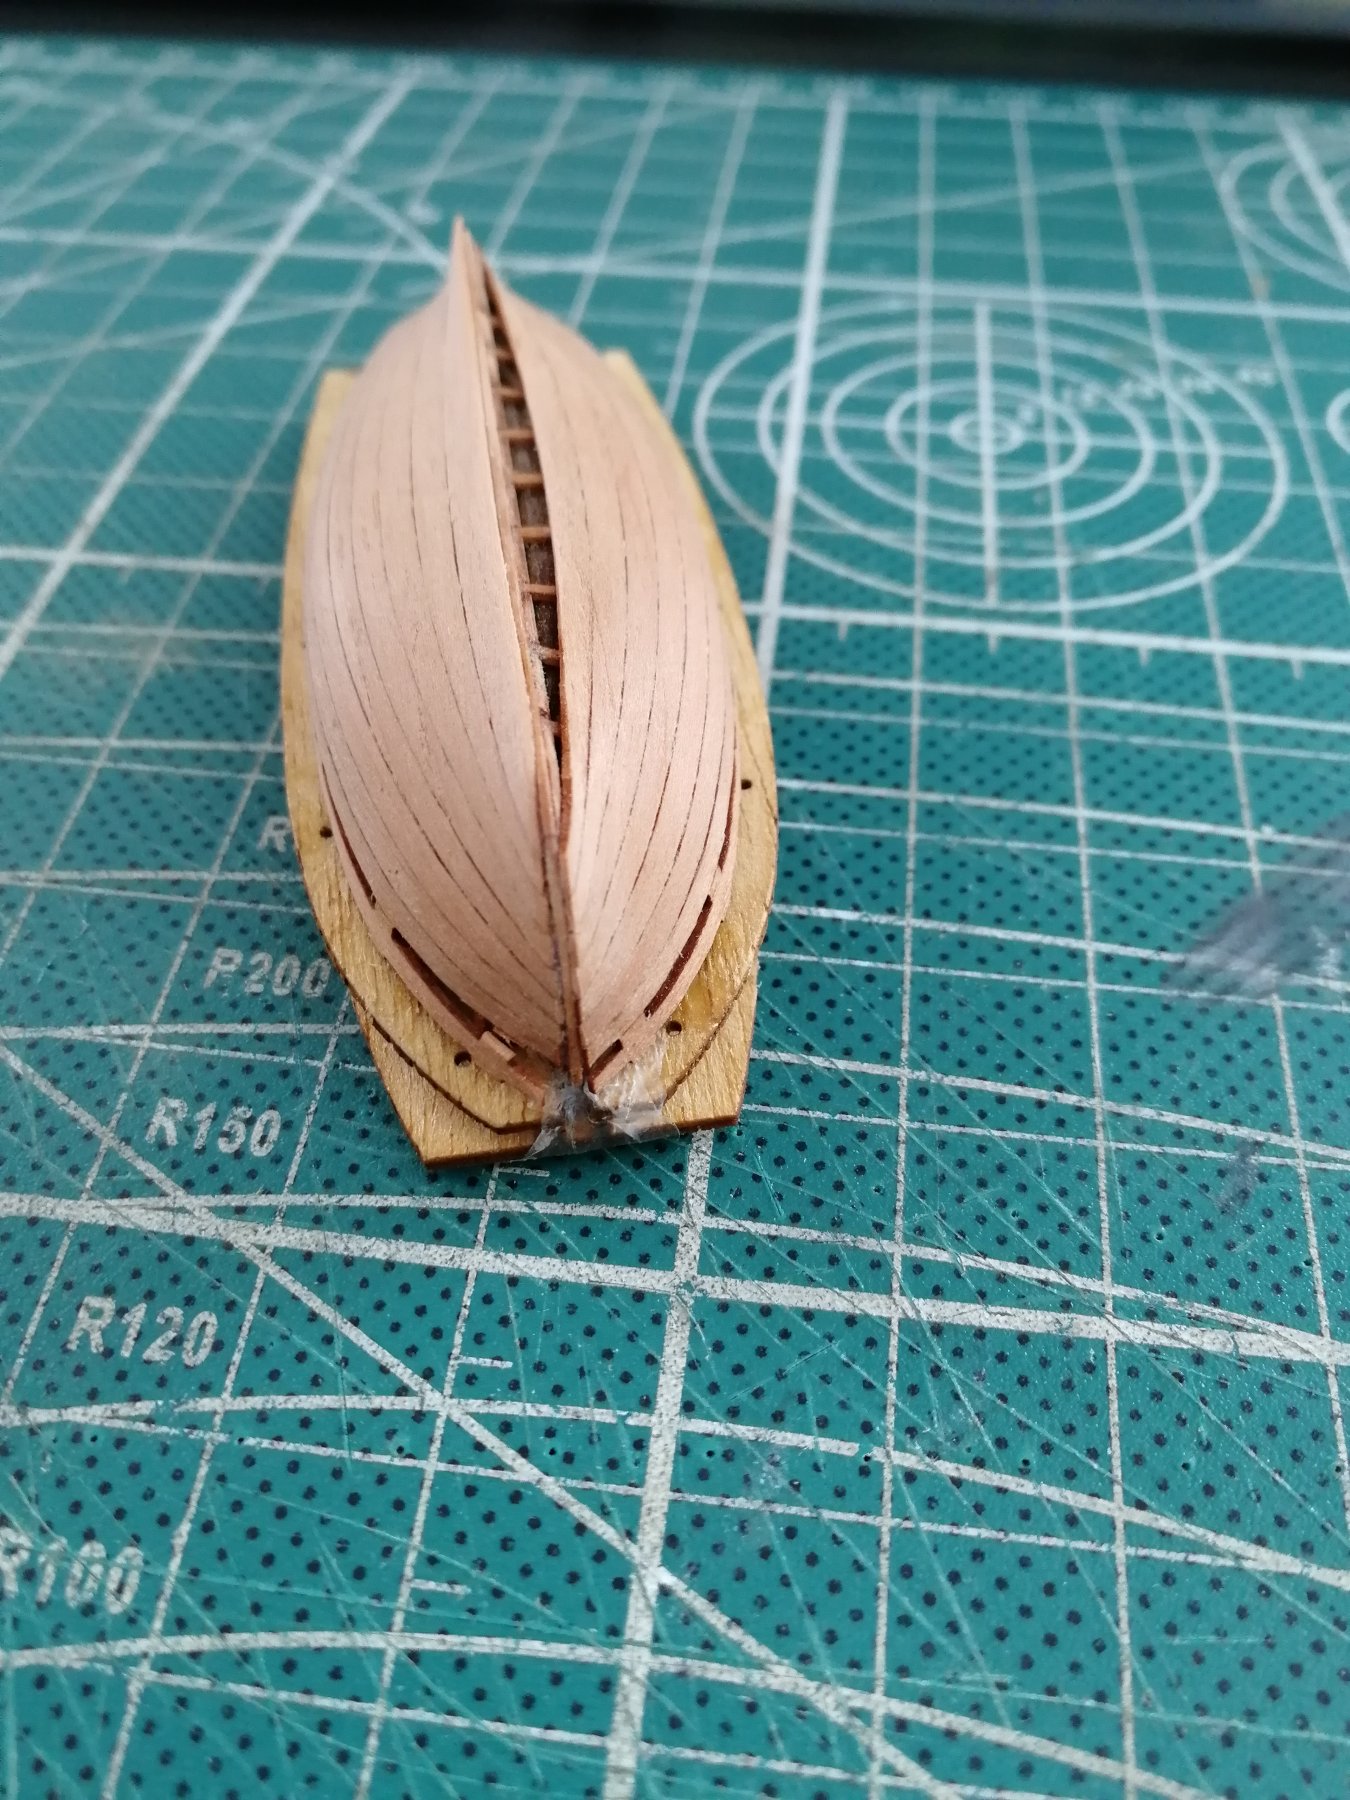
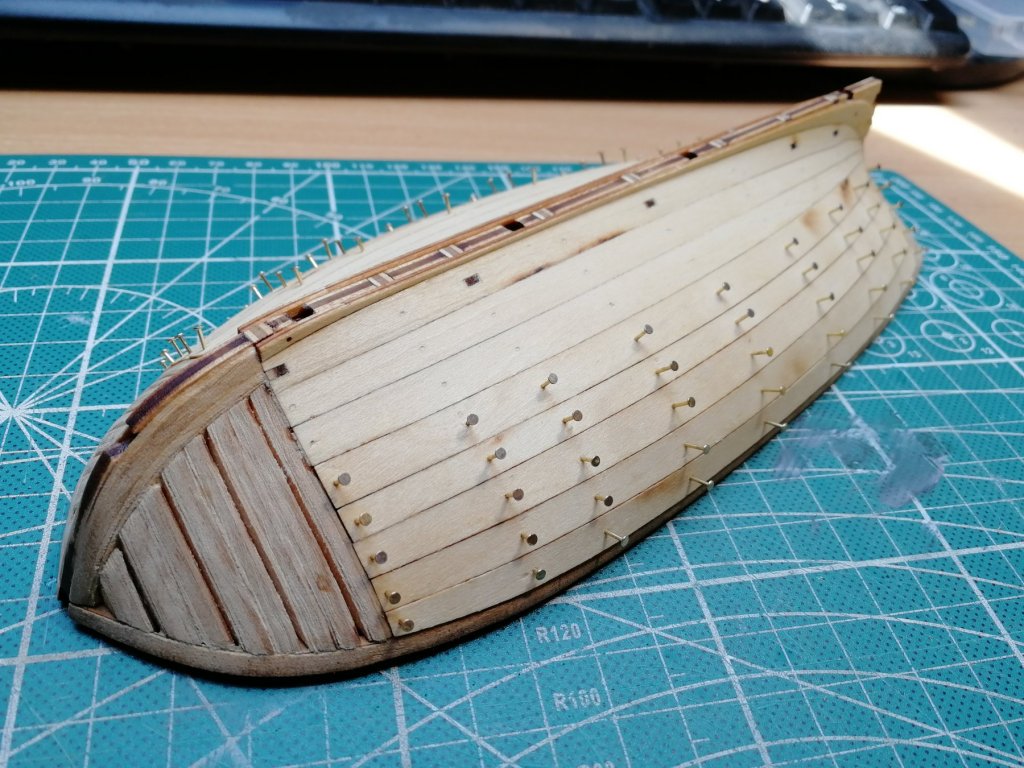
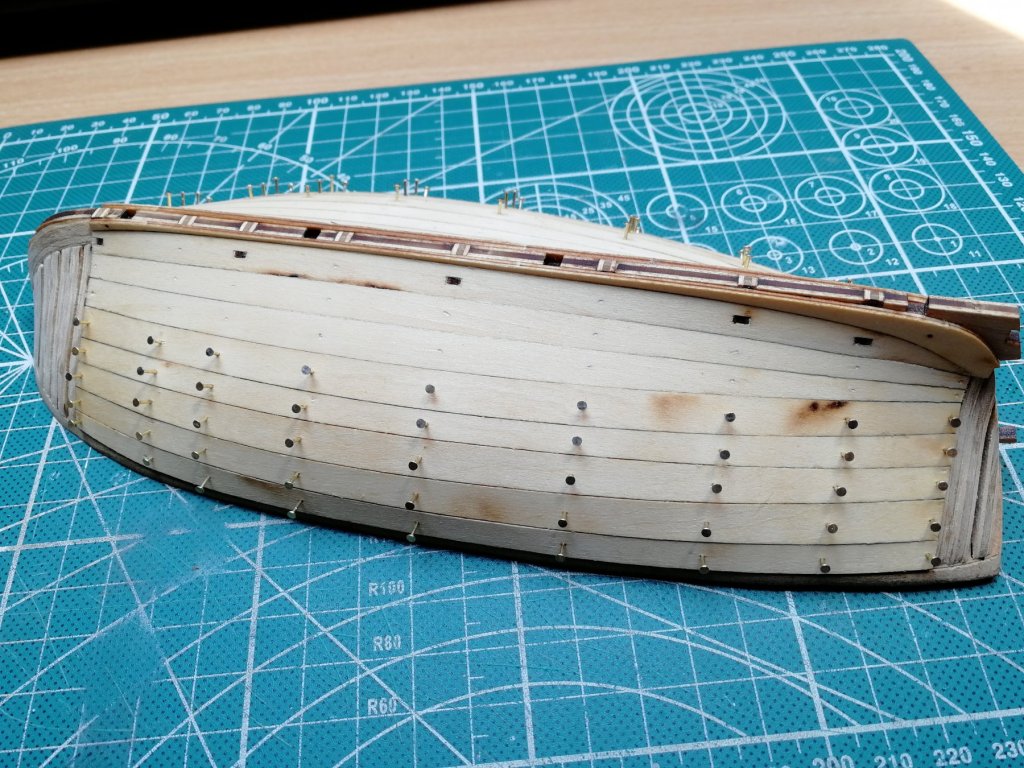
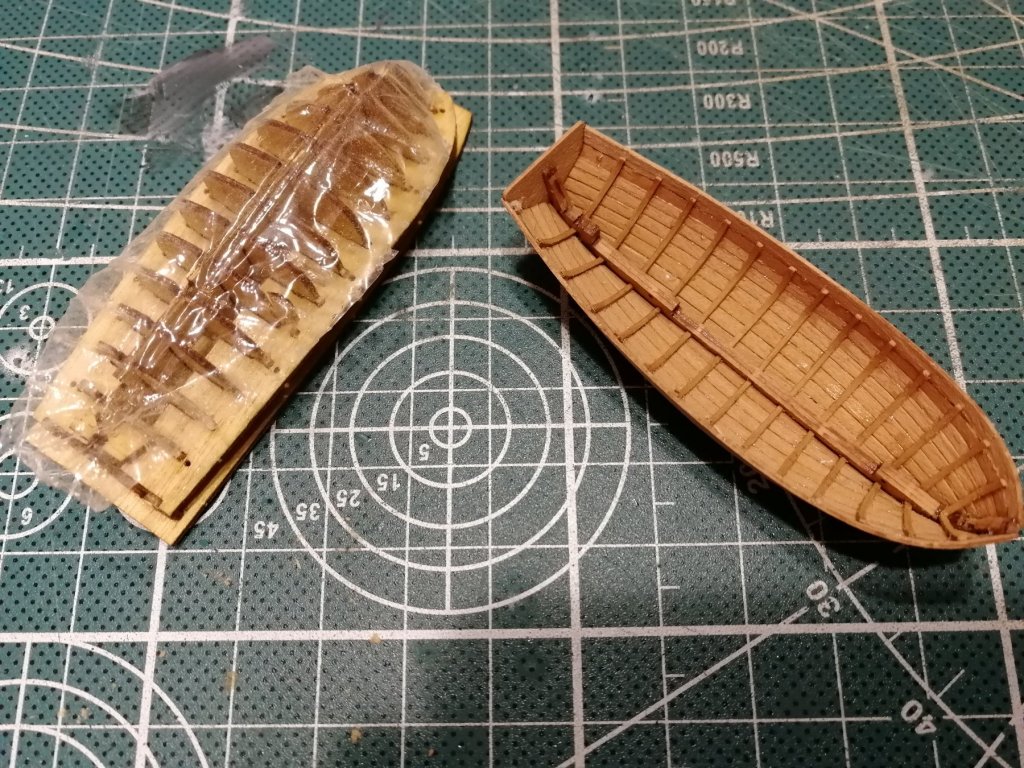
Outer planking finished. It is great fun to build such a giant boat The kit is great!


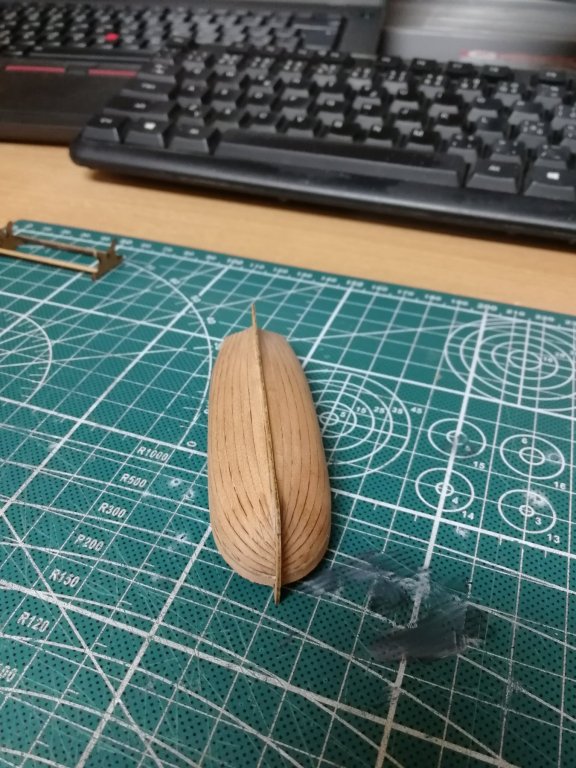
- 128 replies
-
- 5
-
-
- panart
- anatomy of the ship
- (and 1 more)
-
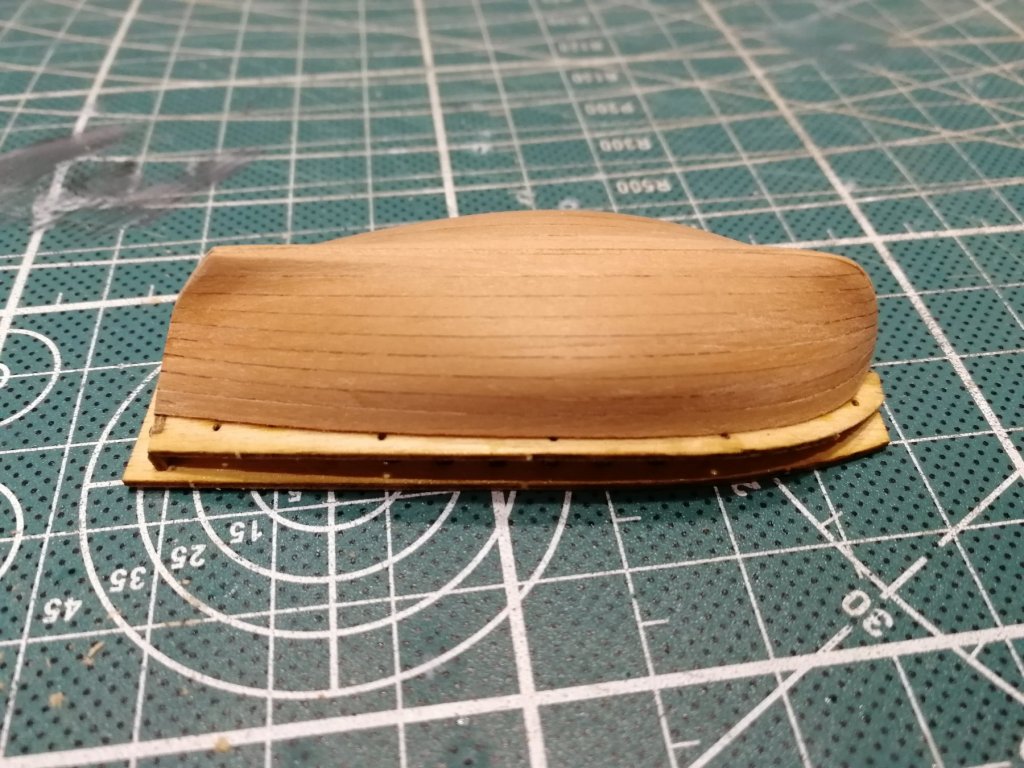
First planks. All is laser cut to the shape. All you need to do is slightly bevel the edges.

- 128 replies
-
- 7
-
-
- panart
- anatomy of the ship
- (and 1 more)