


MEDDO
-
Posts
1,869 -
Joined
-
Last visited
Content Type
Profiles
Forums
Gallery
Events
Posts posted by MEDDO
-
-
Ageed on Caldercraft.
But remember it is a lot of money compared to others, but worth it IMHO
My workrate is slow due to limited free time, but working it out I come to about 30p and hour.
Not many hobbys can be had for that sort of cost.
So my opinion is always invest whatever it takes for the best, hence my Caldercraft opinion.
Nick
I have to keep reminding my wife that I have partners who belong to country clubs and golf 3-4 times a week. We even have someone dropping 1000$ a weekend on tires to race a car.
In dollar per hour spent, modeling has a minuscule price and the value is incomparable.
One day I may build a Victory but not sure how to get it up the stairs afterwards (workshop is large but stairs to rest of house small) Interested in the Amati/Watton version.
-
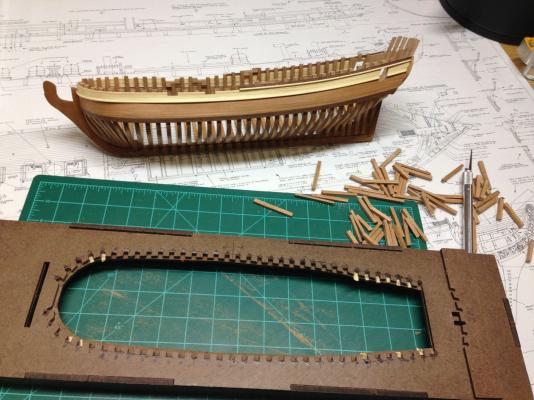
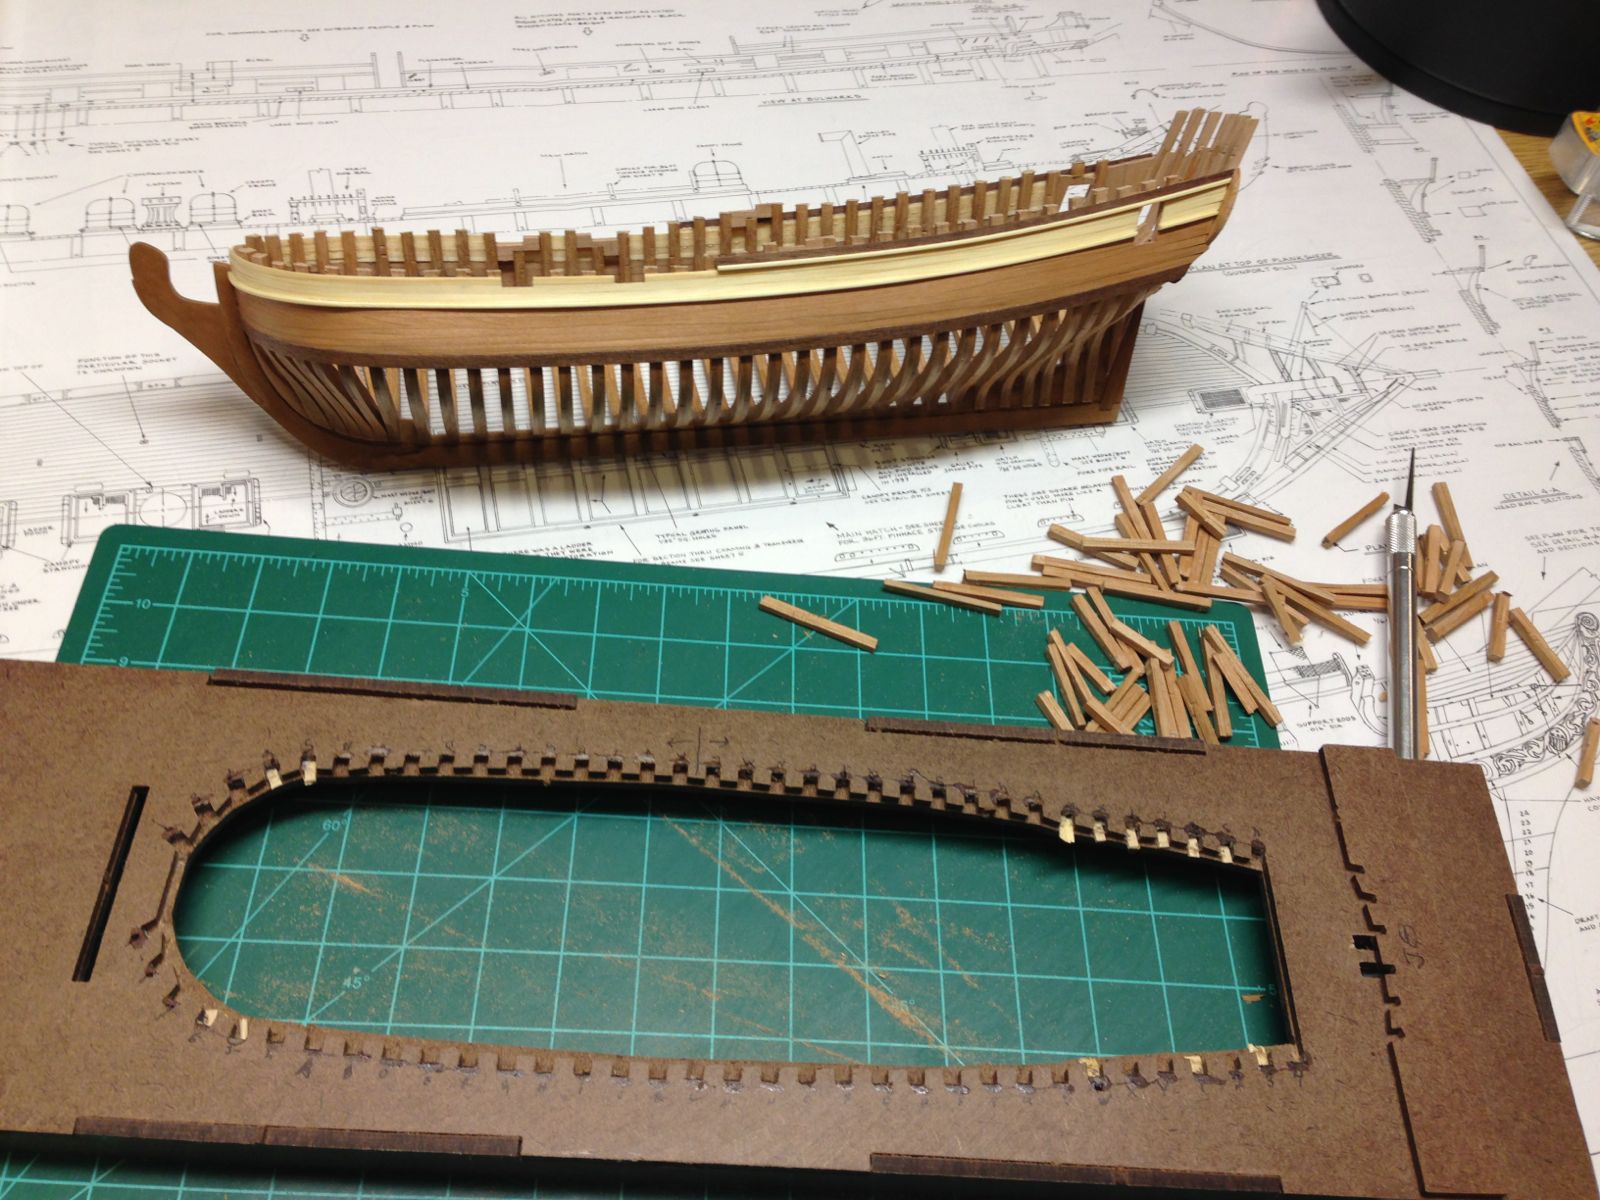
Baby steps. A few more of the deck beams in. This is the complete main deck.
Now I just need to clean up the surface a bit and move onto the Quarterdeck.
- The Sailor, rafine, Vivian Galad and 9 others
-
 12
12
-
Thanks Ben. I am such a newbie and beginner I need all the help I can get.
-
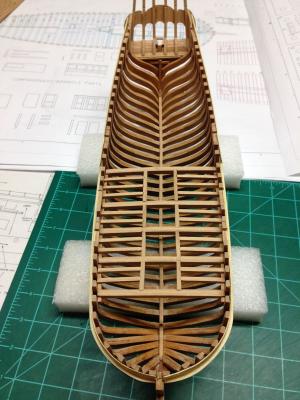
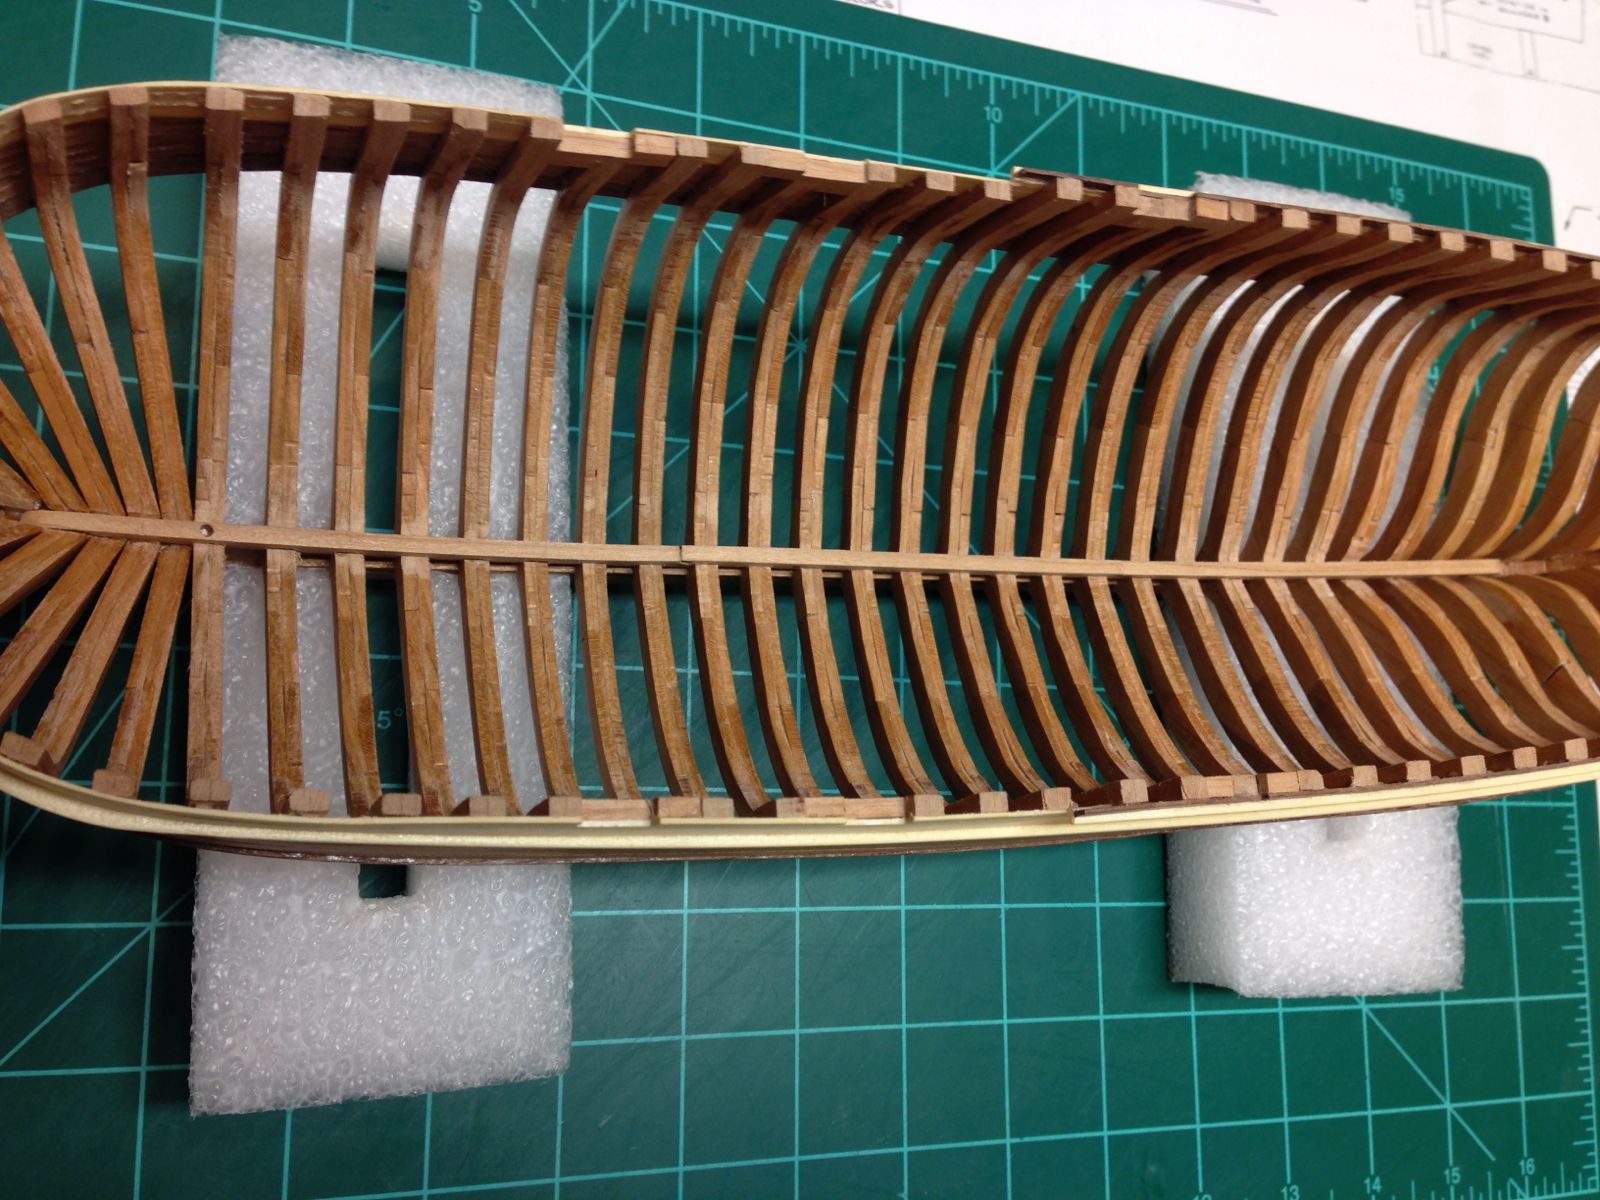
Man that's a lot of ribbing.
Yes it is Scott, thanks for stopping by.
-
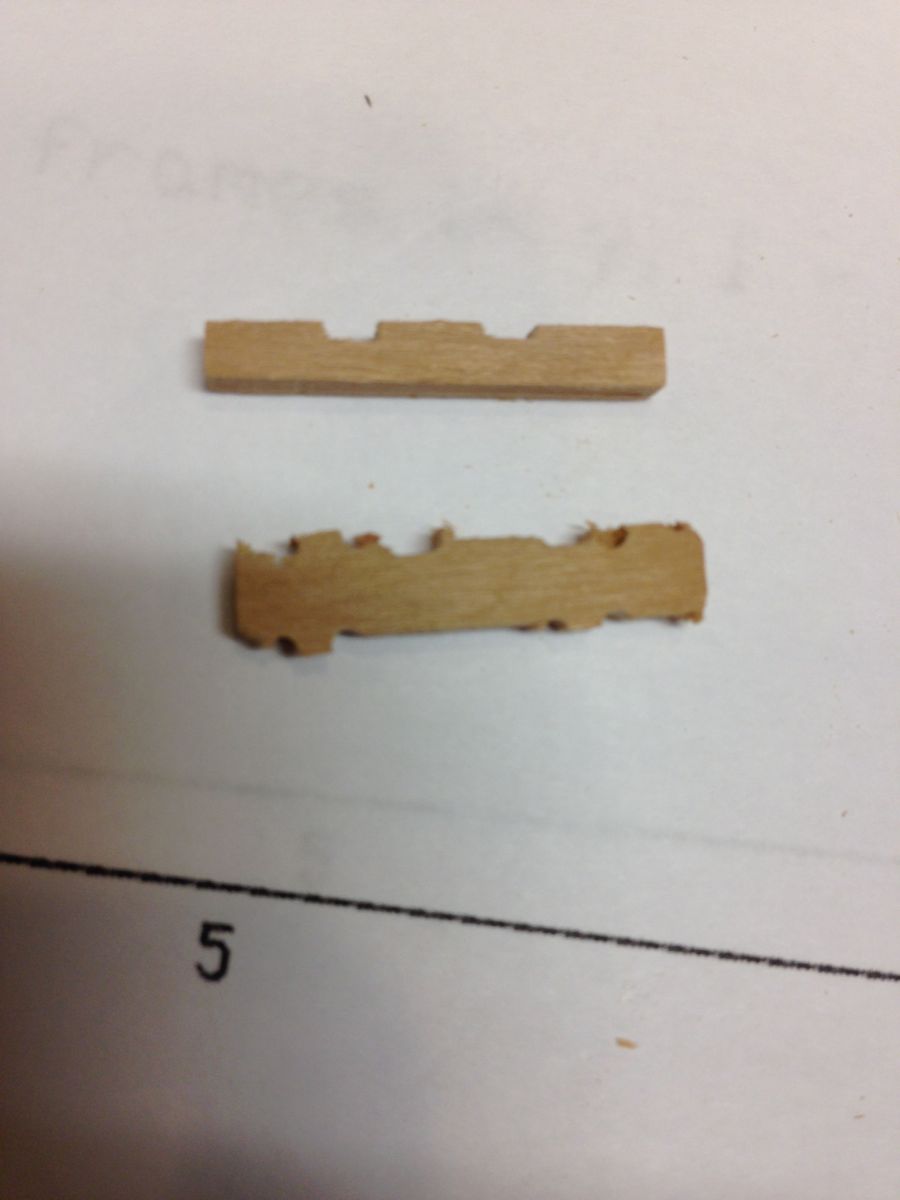
Starting to get the deck in. As always with the supplied wood it is very rough when removed. It seems to be even worse on these smaller pieces.
After a bunch of sanding and fitting starting to get the deck in.

- rafine, mij, Vivian Galad and 6 others
-
9
-
-
-
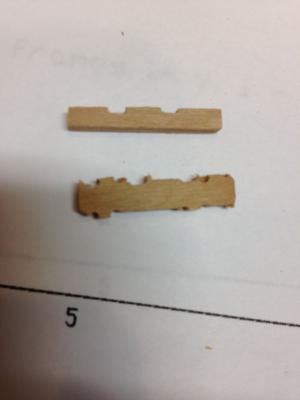
Hi Michael,
You are quite correct that the keelson should step down between the frames to the top of the keel therefore locking their positions in place.
Was the keelson in the kit made of several pieces? Or just one piece of wood? Should be 2 or 3 pieces for a ship of her size.
You can always remove it and add the notches now, I agree it just looks wrong the way it is now, maybe a few hours work but I'm sure you would be happier.
Ben
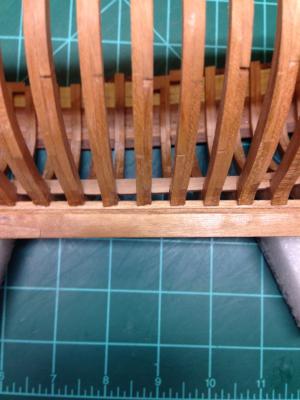
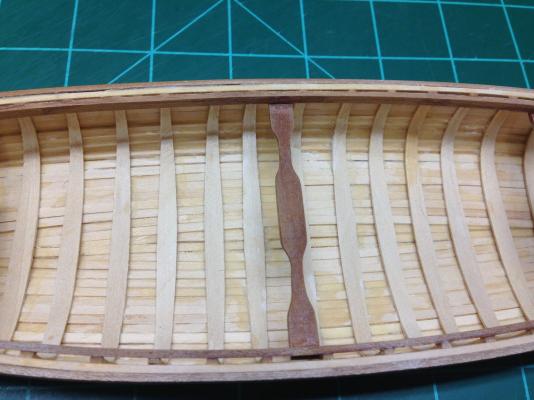
After going throughout he image files associated with the build I found the following picture. This from LSS/Bob Hunt

So I guess the kit is definitely designed to be like this.
This is a picture from The Colonial Schooner by Harold Hahn. You can also see the "gap" is built into this.
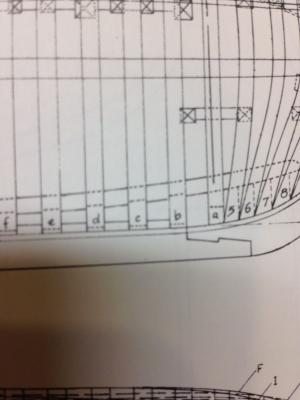
You can see the space between the frames f-b as well as the large air space between b and a.
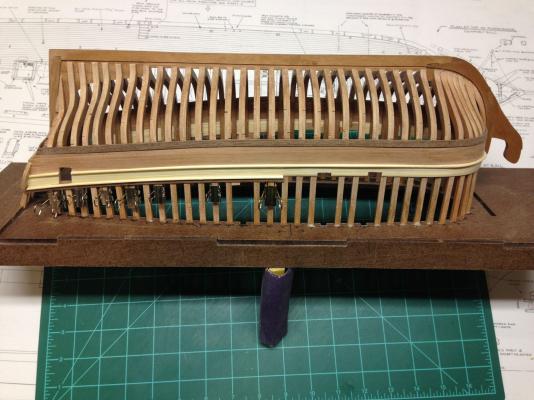
Sorry but after looking at that fame pic again it looks like all of your frame pairs are sat about 1/16" too high on the rising wood, above the rabbit by that much. That may also be causing the keelson to be further away from the top of the keel if you catch my drift.
Ben
Yup I see that now. Seems a bit too "high" as it were. I am sure it is contributing to the problem. Not much I can do about that now I guess. Will definitely be more aware of this when doing the next build.
- mtaylor, Elmer Cornish, Aussie048 and 2 others
-
5
-
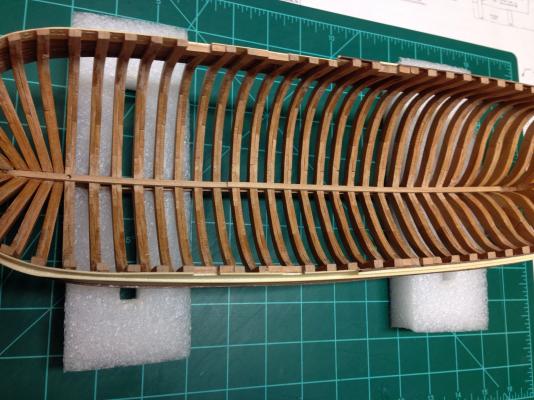
Just a quick update. I was able to sand down the gun ports and I think everything is good to go there. I put in the keelson tonight. I thought it looked a bit funny as the keelson doesn't sit onto of the keel in between the frames. I double checked the plans, image files, instructions and it seems like it is supposed to be like that. I was also able to find a picture in my copy of THE COLONIAL SCHOONER 1763-1775 by Harold Hahn that also appeared like it was intended... O well. One of the nice things being a beginner is that you don't know what you don't know. It may or may not be historically correct but it looks good to me.
- Dimitris71, Aussie048, rafine and 6 others
-
9
-
-
Thanks Ben Grant and Mark! It seems such a huge milestone. Looking forward to the next stage.
-
So here it is yesterday while applying the last coat of wipe on poly.
And here she is now.
- russ, fnkershner, alangr4 and 8 others
-
11
-
I love the look of this ship and it seems the kit is a great one. Enjoy
-
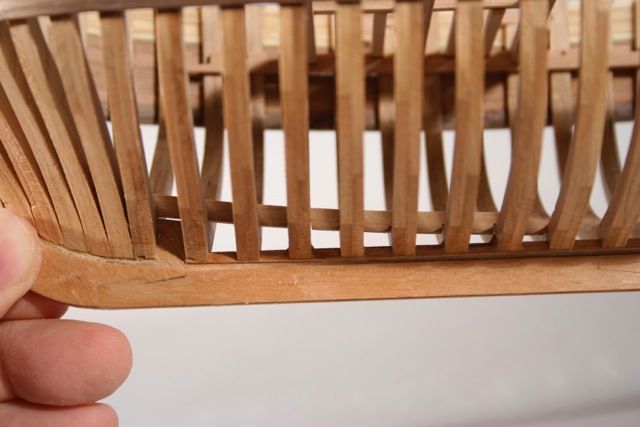
I think I know what happened to the rear gunport frames. When I was removing the frames I cut "above" the line from he template. Unfortunately I went away from the table for some reason (maybe overnight), I don't know. Anyway when I went back to place the frames I neglected to sand the remaining frame down to the proper level. Resulting in the rear gun port being to "high". I cannot see any problems upcoming because of this. I think will have to address this once I am putting in the deck support structure. Otherwise things going well. I'm off to cut it out of the jig.... Wish me luck
-
I definitely have an issue with planking and need to learn. The longboat looks like an excellent way to do that. Before I was moving all over the country for a few years my Constitution stalled at the planking stage. I have the stem back on and repaired and one day will get back to it.
-
I love seeing all the different ways the same kit can be interpreted.
-
So here is a question for you...
Now that I am done with the planking for this ship, eventually I will try to plank something else. I have found the articles on the front page of this website and read them all. It seems fairly logical and not too difficult.
My question is. Is there a way to practice this easily? Is there some kit or way that you can inexpensively practice planking. I was thinking about the MS Longboat or the Pinnace as there seems to be many here building them as either main build or side builds to complement a larger ship. Would there be anything else.
Here is my very first build, the Midwest Indian Girl canoe
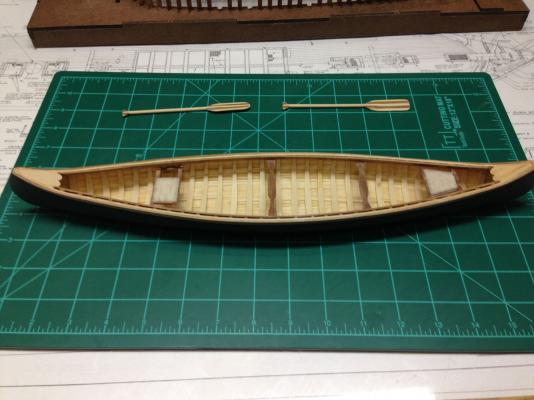
I didn't know anything about beveling/spilling/tapering etc.... The planks were almost square to start with. The outside is satin smooth, and the inside... is not.
With the Halifax I am on the finish sanding and wipe on poly stage prior to releasing from the building board.
- Mike Y, Dimitris71, Aussie048 and 3 others
-
6
-
Thanks Ben I will check it out.
-
Ben, I haven't had too much of a problem with the planking this time. I think the first plank pointed up a bit mainly because I wasn't looking for this problem at the time. It has come out ok though. Next time I will be a bit more attentive.
I almost want to make a practice hull of some sort to try out the planking techniques I have read about here and in the books. Maybe now that I have finished the planking here I will stat a side build of something like the pinnace or the longboat. Those seem to have a bit of planking to them

-
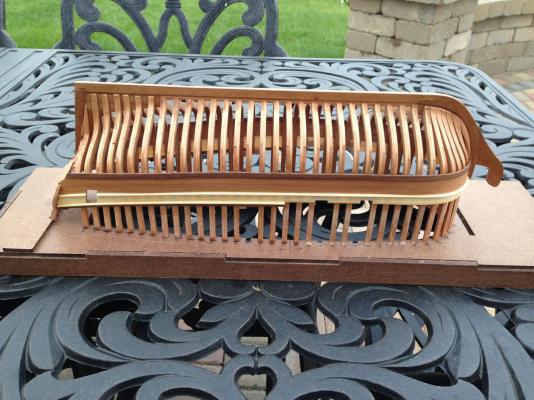
Planking is finished. I think my template was off a bit as the aft gun ports are framed a bit high. I am going to have to really look ahead and decide what top do with it. Preliminary thought is I can just sand them down to the correct hight but before I do that I really have to make sure it won't affect anything else.
Next step is to release the model from the jig. Woot! It seems like a huge milestone.
- Dimitris71, hexnut, Elmer Cornish and 5 others
-
8
-
Thanks Patrick.
Floyd, I think the wife "gets it" now. Hahaha
-
Very nice progress.
I will have to checkout this Harbor Freight. I think there might be one near here.
-
-
Nice planking. I like that you are going a slightly different way than the plans with the privateer build.


Halifax 1768 by MEDDO - FINISHED - Lauck Street Shipyard - 1/4" scale
in - Kit build logs for subjects built from 1751 - 1800
Posted
Thanks Pete. Quarterdeck coming up soon.