


schnu
-
Posts
137 -
Joined
-
Last visited
Reputation Activity
-

 schnu reacted to mtaylor in Licorne 1755 by mtaylor - 3/16" scale - French Frigate - from Hahn plans - Version 2.0 - TERMINATED
Oh how time flies when we're having fun.....
Ok.. got the shop back into shipyard mode and I'm working on the gunports. I have to thin the frames down some (to 1/16" at the ports) so that their wide enough... Done!!!!
I then have to put in the sills, paying particular attention to the location at each end of the each sill. I still check each one. So far, 6 have been done. I also check each one with check tool made from some yellowheart. Actually not made. Turns out the pen blank I bought as a sample to see what yellowheart looked like was about 1/64" inch too big. A quick bit of sanding and it's perfect for the job.
I'm scratching my head as Hahn made most of his ships in 1:96 and just a few in bigger scales. How the heck did thin the frames for the ports or get the level of detail he got, I'll never know.
Anyway.. the pic. And like the rest of us, right now I'm hating the macro setting.
-
schnu reacted to Ray in HMS Diana 1794 by Ray - FINISHED - Caldercraft - A 38 gun Heavy Frigate
Progress has been rather slow as of late due to holidays, and other pastimes, mainly selling two motorcycles, and buying one, plus ratline tying is a chore, the main lower mast shrouds,ratlines,catherpins, futtock staves and shrouds are now done.
stave location marked
ratlines done
Lower maim mast done
fore and main
-
schnu reacted to DenPink in Royal William by Denis R - Euromodel - Scale 1:72
Hi All
Just dry fitted the lower deck.
Next take it all out and start to glue in place.
Denis
-
schnu reacted to DCIronfist in Corsair by DCIronfist - FINISHED - OcCre - 1:80 scale (First wooden ship build)
Ok all moved in and repaired the moving damage to the ship.....no pics but feel free to try and find it lol.
So I've done another set of chains (seems to be quite difficult for me not sure why ) I did try the angle with these so.....
So maybe an update sooner next time but no promises lol :)
-
schnu reacted to AndyMech in USS Constitution by AndyMech - FINISHED - Mamoli - Scale 1:93 - Cross-Section
I spent the weekend working on the vertical stanchions and starting on the lower deck work.
Here are the stanchions - used a weighted bit of string to find the vertical lines, then just sanded to length and glued in.
Next up was framing the hatch - the plans called for mitered joints, so I made cuts at 45-degree angle using a lego as a guide. I glued in the outside frame, then added the slats (I guess the hatch is closed, eventually a ladder is placed on it):
Finally, I started on the deck planking. I thought it would be very straightforward, but I have some questions. First, here's how it stands right now:
I used a #2 pencil to mark the ends of one plank for caulking, which I think is ok looking.
The questions I have are: I see in the plans that each plank doesn't run the full length - like most decks, the planks are staggered and should have butt-joints at periodic locations. How, generally, do folks do this? Do you cut the planks the lengths the joints demand, or can one simulate it by scoring a line? I hesitated to cut them to the shorter lengths as I wondered how folks get them to line up properly?
Finally, you can see in the last photo, there is small gap on the left of the hatch and an even smaller one on the right side. What's the best way to fill these? My approach to date has been to try to cut a length of planking so narrow that it fits in there, but the right side one is no more than a sliver! I really would appreciate some advice for fixing this, and I'm sure similar situations will come up on the next two decks - how do I avoid this for the future and how do I fix this now?
I found measuring the distance from the edge of the deck to the hatch should have left 3mm or so, and with a 4mm plank, I should have had a bigger gap. But after the planks are laid, they must take up more room, or the planks aren't exactly 4mm, so I've got a very small gap instead.
I also must not have centered the hatch properly, or the keel isn't dead center - either way something is off and I'd like to fix the deck planking.
Andy.
-
schnu reacted to Mirabell61 in HMS Pegasus 1776 by Mirabell61 - FINISHED - scale 1:64 - 16-gun sloop
8th lot of my Pegasus buildlog......
note, the sternpost has been sanded down to half its width Prior to planking, so final width after planking and sanding is at average 4,5mm`, trust that the rudder shall later on be of this thicknness at it`s widest thickness
the 3 mm width planking of deck and walls are identical (3mm x 64=192mm in reality, seems realistic, being about 1,5 width of the sailors shoes). By the way, all Deck and wall planking edges are charcoaled by means of a soft pencil. This gives the tarline effect regarless to thickness even after sanding
allthough many wooden structural parts, the hull is of remarkable low weight and still stiff and rigid
selfexplaining view
view aftwards, now in foreground the sailroom has been added, behind are grating on hold hatch, Upper well housing and pantry. On starboard side traffic corridors, sailorcrew and marinesoldiers accomodations. Between upper well and pantry (here not visable) a staircase goes down to the cargo floor. This may be the main trafficway for fast Access from the filling room (under the waterline) via aft staircase in the intermediate deck up to the gundeck
same Features with view from top, aft
birds view intermediate deck nearly complete.......
the sailroom space seems to be limited, but could not be increased due to spaces between surrounding facilities
interior staircases fitted with railings to increase safety in battle and when ship is rolling
again intermediate naval inspection..., the officer means that in a far future a day will come, where even the stairs will have to equiped with handrails
at this Moment I have`nt made up my mind yet if I should apply coppering, White "Antifouling Appeal" that allows the plank and grain structure to be recognised, or nothing of both.
Would appreciate any fellow builders coments on this....
-
 schnu got a reaction from Shipyard sid in HMY Royal Caroline by maggsl_01 - FINISHED - Panart - 1:47
Welcome back, I envy your vacations.
Schöner Hund übrigens.
-
 schnu got a reaction from maggsl_01 in HMY Royal Caroline by maggsl_01 - FINISHED - Panart - 1:47
Hi Max
I have found this, but I am not sure if the source is accurate:
http://cdrejohnpauljones.deviantart.com/art/Uniforms-of-the-Royal-Navy-1748-1767-52414067
-
schnu reacted to gobi71 in HMS Leopard by gobi71 - 1/300 scale
Dear colleagues, although a member of this forum for some time, this is the first post.
I started building model while hms leopard 1790 1/300 scale. i use drawing from the book of rif winfield.
here are some pictures of the model .
-
schnu reacted to Ulises Victoria in Parasites?
I have turned several pens and cigar holders with padauk. To me, that's just how the wood is.
-
schnu reacted to cwboland in Parasites?
Schnu,
It could just be the way the wood was milled. I found the below doing a quick Google search for the species:
Has excellent decay resistance, and is rated as durable to very durable. Padauk is also reported to be resistant to termites and other insects.
(taken from http://www.wood-database.com/lumber-identification/hardwoods/african-padauk/ under Rot Resistance)
-
schnu reacted to jwvolz in HM Bomb Vessel Granado by jwvolz - FINISHED - Caldercraft - 1:64
Well, I've made some nice progress since the last update, and am just now getting caught up with the photos.
Quarterdeck rail installed, including the addition of the decorative molded strip that is not in the kit. This was done the same way as the forecastle rail. Forecastle knights and timberheads installed and painted. Galley flue painted and installed. A simple styrene disc and a few pieces of styrene strip were used to scratch build the deflector. Mortar surround side panels installed. Stern 10" mortar glued in place. This was completed a while ago. I've left the 13" forward mortar off for now, since I'm displaying that one in an elevated position and don't want it in the way while installing the cannons. I scratch built the windlass from walnut, rather than use the ply parts, but am not 100% happy with it. The walnut I used is a good bit darker than the rest of what Caldercraft supplies, and I may have to get some other walnut that's a bit lighter (and has less grain) and try again, which is unfortunate because it was a bit of work. That being said I'm not pleased with how the color of the supplied Caldercraft walnut varies extensively. At least I don't have that issue with the planking, but the CNC sheets are all over the map.
-
schnu reacted to GTM in Santisima Trinidad by GTM - OcCre - 1:90 - Kit Bashed
..An minor update..
And so far no problems.
I'll sanded the hull, added a rubbing strake, waxed it on the outside and it's ready for the next step.
However I still haven’t made up my mind about the kind of details / fittings i'm going to add.
...
-
schnu got a reaction from maggsl_01 in HMY Royal Caroline by maggsl_01 - FINISHED - Panart - 1:47
Welcome back, I envy your vacations.
Schöner Hund übrigens.
-
schnu reacted to jwvolz in HM Bomb Vessel Granado by jwvolz - FINISHED - Caldercraft - 1:64
Thanks again everyone.
Well, being on vacation this week as enabled me to get in lots of golf and lots of ship modeling.
The cannons have all been installed and rigged. Although it is always a tedious process, I think it went quite well. Caldercraft supplies some decently small blocks to rig the guns and they were quite usable. I still need to make up the rope coils, but I'll do that in a few days.
-
schnu reacted to ChrisLinden in Painting Tutorial Ornaments / Cast Metal parts
Introduction
My name is Chris van der Linden. I have roughly 15 years experience with painting metal and plastic miniatures. I started the wooden modelship building hobby only recently, about 2 years ago and noticed a lot of people are struggling with how to paint their cast metal ornaments to a satisfying standard. I decided to write down my experience on this topic for everyone to enjoy.
Note: this tutorial focusses on metal colored finish right now. I will add an additional explanation on how to do different colors.
Easy for anyone
One thing I have learned is that painting is not as difficult as it seems. Sometimes people are amazed at the small details, believing they need a 1-haired brush and loupe to pull it off. This is NOT the case. Even with 2 simple steps you can have great looking (repeatable) results.
Disclaimer
Please use this guide and techniques to your own discretion. Always use a tester if you are unsure about the results. Each situation and personal preference is different. I can say however that I have used all of these techniques a lot without problems. I provide these tips for your satisfaction, this is by no means "they best way" to do it...
1. What paints to use?
Painting cast metal parts has its origins in "tin miniatures" painting, the toy soldiers we all remember. A common misconception is that painting on metal requires Humbrol or Oil paints. This is not true anymore.
Brands like Citadel and Vallejo have developed acrylic (water based) paints that have exceptionally good coverage even on un-treated metal parts. This is great because they are much easier to work with. Humbrol is tricky to thin down and mix with other colors, requires turpentine to wash and takes long to dry. Oil paint takes even longer to dry...
Long story short: I always work with water based acrylic paints from Citadel and Vallejo on metal cast parts.
It dries fast, is easy to thin down, mix and work with. Add your wife/girlfriend's blowdrier and you can work even faster
Citadel paints tend to have rather funny names because they are used for fantasy/sci-fi minatures. So a certain red might be "Blood Red" or "Merchrite Red". This is their alternative for having "paint numbers". Both these brands also offer specialist paints such as instant rust, metallic colors, texture paints and weathering powders.
2. Preparation
a. Removing Flash / Mold Lines
As a result of the casting process most models have Flash and Mold lines. These are unwanted and you get a nicer looking part if you take some time to remove these. Flash is a bit of excess material that has run in between mold parts, usually giving a thin sort of "outcropping". Remove with a sharp knife or file. Mold lines are thin lines where the two mold parts are joined. Most of the times these run along the "sides" of a miniature and can be easily filed down to a smooth surface.
b. Shape your part before you paint
Some cast metal parts (depending on their material) can be deformed easily. Sometimes they are already slightly out of shape, deformed coming out of the box. Before you start painting, make sure you shape your part so it fits on your ship. Take as much time as you need because after painting you can't do this anymore. Paint chips easily.
c. Wash/rinse your parts (optional)
During the casting process so called "release agents" are used to ensure the cast pieces come free from the mold easily. This is a greasy kind of substance sometimes left on the miniature part. It can cause trouble during painting. If you want you can wash your cast parts gently in warm water with a bit of dishwater soap. Then wash clean with water and let it dry on a cloth. Use a blow drier if you are as impatient as me...
3. Primer
While paints such as Citadel and Vallejo give pretty good coverage on metal parts straight away, it usually helps to primer your castings first. This not only helps prevent paint chipping, it gives a perfect 'undercoat' for your paint work.
I always use acrylic paint spray cans to prime my metal and plastic parts. Depending on the colors used lateron, I either prime with matte black, or gray. Black being ideal for darker colors such as green, brown, gold etc. Gray being a perfect base for colors such as Blue, Red, Yellow.
a. DIY sprayboot (for free)
An easy way to prime your metal castings is to place them on a cardboard box. You can use a piece of double sided tape to "lightly fix" them in place. The box will allow you to turn your models around, without needing to touch the parts with your hands. (see what I did there lol). If you cut the front pane of a box out and place the castings inside it, you have a cheap DIY spray "boot".
b. Correct way to spray
Go outside, then spray the parts from about 30cm distance. Don't keep the nozzle pressed continually. This will un-neededly flood your fine model. Try to do short "puffs" while turning the box around, covering all angles. This will give a thinner coverage, avoiding flooding your castings.
c. Avoid warm sun
One thing that can give bad coverage is spray painting in warm direct sunlight. Due to the heat, the gas with paint bubbles will partially dry in "mid air" while traveling towards your model. This will cause tiny droplets to form, giving a coarse finish.
4. Painting
Now that you have prepared and primed your castings, it is time to paint. Whoot!
a. Make it easy for yourself
Often the parts you need to paint are quite small, making them difficult to handle. Smudging your own work. An easy fix is to stick a piece of double sided tape or gummy on old paint bottle. Then stick your model/miniature/ornament on top of that. Now you can hold and maneuvre this thing, without having to hold the actual casting. This is also somewhat less strainful on the hands during long paint jobs.
b. Color block
Likely your model will now look black or gray. The first painting step is to apply what we call a "color block". This basically is a solid appliance of the "main" color of the object. When done you have a full opaque colored object, not looking very impressive... yet ....
In this picture above: top brown parts are primed, then painted brown base color. Bottom right is the original "bling" casting.
C. Wash / Ink
Now comes the million dollar trick that will take you 90% of the way. Most miniature painters use what they call a "wash" or ink. This is a water thin paint that flows onto the model easily, ending up darkening the recesses, while staying clear of the raised areas.
This gives two results: The model becomes darker overall. Plan ahead for this, use a ligther color block if needed to begin with. It also gives a lot of your detail without manually painting. So all the small details in your cast ornament suddenly "spring to life" without any talent needed. Citadel offers specialised washes in different colors which are absolutely amazing.
Use a larger brush and royally "flood" your model with the wash. It dries up subtler than it initially looks so don't be afraid to go bold with this. Washes and inks do take longer to dry. Set the painted part aside and give it a few hours to dry. You can speed this up using a blow dryer, but be gentle.
d. Add highlights
Once the wash has dried you can add highlights to your paint work. This is optional. You can go all out and add many levels of highlights, but usually one "step" is enough. You can simply use your main color block color, with 25% white or lighter shade color mixed in. Use a fine brush and paint some of the raised areas that you think should "catch light" in a natural situation.
e. Drybrush technique
Alternatively you can use what is called the "Dry brush" technique. For this take a larger brush, then load your brush with the highlight color paint. But instead of painting, first rub it allmost dry on a tissue so virtually no paint comes off the brush. Then "wipe" across the surface of your casting, the little paint that is still in the brush will "catch on" the raised areas of your model, not the lower deeper parts. This is an easy way to apply detailed highlights without having to manually paint them, which requires a more steady hand.
Drybrushing gives a more "chalky" grittier look. Painting highlights by hand, a more smooth silky look.
Apply to your own taste or skill level.
Examples of finished results
< I am collecting photos right now - will be updated -
-
 schnu got a reaction from Vivian Galad in La Candelaria by schnu - OcCre - bomb vessel - first build
Thank you Chris, sometimes the things in the box just aren`t good enough and it is always worth a try, if I fail I can go back in the box ^^.
You are right Vivian, it gives this unique feel to the model and it feels good to know that there is not one exact model like this anywhere else, or at least I hope.
-
schnu reacted to ChrisLinden in Friesland by ChrisLinden - Mamoli - 1:75
Because of the poor shape and symmetry of the bullwarks I had to modify them to get good alignment and hull shape. This was a real pain in the ahh. The hull ended up being not really symmetrical. Oh well....
Painted the wood behind the gunports black, just in case. Started adding first planking:
Placing the metal gunport parts. I decided not to use the pen/socket system of Mamoli, where the metal ports are hung in premade sockets in the bulwarks. They did not line up at all, with as much as 1 cm difference in height. I clipped the metal ports clean and glued them to the bullwarks at the correct height.
-
 schnu got a reaction from Griffon in La Candelaria by schnu - OcCre - bomb vessel - first build
Hi, I haven`t done much on the ship lately, the school started again, so I am sitting all day long at the desk wondering what job would suit me... After some long vacations I find it always difficult to get back to the "normal life". Yes Vivian, the Vasa was amazing, she was huge. I imagined her to be smaller. I decided to use some "satin finish" (Seidenmatt in German), not sure if it is the right name. I might still change the lack, if I am not convinced with the test result.
I have finally opened a hole at the back of the ship to fit the cabin in:
I started to work on the cabin floor, which still needs some sanding and size adjustments. It is made in two parts; this made it easier to get the right sizes.
I have also started to scratch build the stern. The original one is made of metal and the window are much too high, as shown on a previous post.
(Padauk wood was used to plank the stern.)
I would be really glad if someone (or many people) could point out errors at the stern, because later it will be difficult to repair or hide them. Two things that I have already noticed: At the left of the stern I have done too much sanding.
It also seems that the left window end is higher than the right end.
I would also like to thank everyone for the likes and comments.
-
 schnu got a reaction from teloo in La Candelaria by schnu - OcCre - bomb vessel - first build
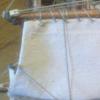
I have finally made it back home. After some thoughts if I should move my workplace to the nuclear disaster shelter or my room, I opted for my room, as the light down there is relatively dim.
(sorry for the bad quality of the image)
Today I couldn`t make any progress, tomorrow the handrails will hopefully be finished and I shall start planning for the cabin, after finding some great but few builds with the interior decorated, I want to give it a plan and am ready to fail/succeed. One question that rests upon my mind is how I shall varnish and stain the hull, any suggestions are welcomed. By the way the Vasa museum was amazing, a real beauty. It was the first time I had to make a queue to enter a museum, it was worth the waiting.
-
schnu got a reaction from Vivian Galad in La Candelaria by schnu - OcCre - bomb vessel - first build
Hi, I haven`t done much on the ship lately, the school started again, so I am sitting all day long at the desk wondering what job would suit me... After some long vacations I find it always difficult to get back to the "normal life". Yes Vivian, the Vasa was amazing, she was huge. I imagined her to be smaller. I decided to use some "satin finish" (Seidenmatt in German), not sure if it is the right name. I might still change the lack, if I am not convinced with the test result.
I have finally opened a hole at the back of the ship to fit the cabin in:
I started to work on the cabin floor, which still needs some sanding and size adjustments. It is made in two parts; this made it easier to get the right sizes.
I have also started to scratch build the stern. The original one is made of metal and the window are much too high, as shown on a previous post.
(Padauk wood was used to plank the stern.)
I would be really glad if someone (or many people) could point out errors at the stern, because later it will be difficult to repair or hide them. Two things that I have already noticed: At the left of the stern I have done too much sanding.
It also seems that the left window end is higher than the right end.
I would also like to thank everyone for the likes and comments.
-
schnu got a reaction from teloo in La Candelaria by schnu - OcCre - bomb vessel - first build
Hi, I haven`t done much on the ship lately, the school started again, so I am sitting all day long at the desk wondering what job would suit me... After some long vacations I find it always difficult to get back to the "normal life". Yes Vivian, the Vasa was amazing, she was huge. I imagined her to be smaller. I decided to use some "satin finish" (Seidenmatt in German), not sure if it is the right name. I might still change the lack, if I am not convinced with the test result.
I have finally opened a hole at the back of the ship to fit the cabin in:
I started to work on the cabin floor, which still needs some sanding and size adjustments. It is made in two parts; this made it easier to get the right sizes.
I have also started to scratch build the stern. The original one is made of metal and the window are much too high, as shown on a previous post.
(Padauk wood was used to plank the stern.)
I would be really glad if someone (or many people) could point out errors at the stern, because later it will be difficult to repair or hide them. Two things that I have already noticed: At the left of the stern I have done too much sanding.
It also seems that the left window end is higher than the right end.
I would also like to thank everyone for the likes and comments.
-
schnu reacted to CptNautilus in Vasa by Nautilus - Corel - 1628, scale 1:75
Thanks!
I'm following on your steps, learning from your great pictures how to do things and anticipate future problems. As this is my first attempt at modelling, I'm learning on the way.
-
schnu reacted to CptNautilus in Vasa by Nautilus - Corel - 1628, scale 1:75
Chapter 6: Planking the decks
Chapter 7: Stern galleries
Chapter 8: The support
Chapter 9: The beakhead and the keel
Chapter 10: The rudder
-
schnu reacted to GTM in Santisima Trinidad by GTM - OcCre - 1:90 - Kit Bashed
.. Not really "as soon" as i hoped, but ..
Today I completed planking of the ships boat.
The next challenge: Removing the template without destroying the boat.
After having removed the needles from the keel it turned out that the boat (even after having used tape) was glued/stuck to the template.
So instead of using “too much” force, I removed the template gently in small chunks with a pair of pliers.
Here’s the result right after removing the template/tape.
And here after having roughly removed all unnecessary wood.