mrcc
-
Posts
423 -
Joined
-
Last visited
Content Type
Profiles
Forums
Gallery
Events
Everything posted by mrcc
-
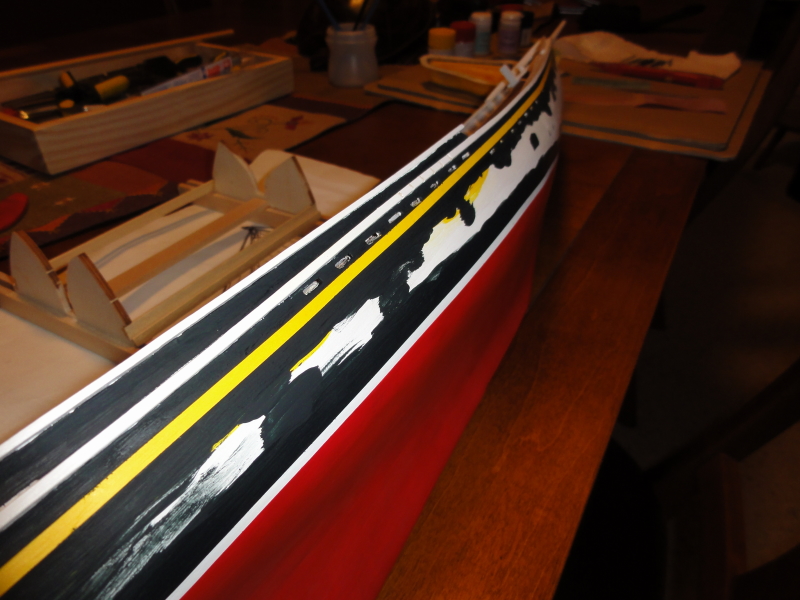
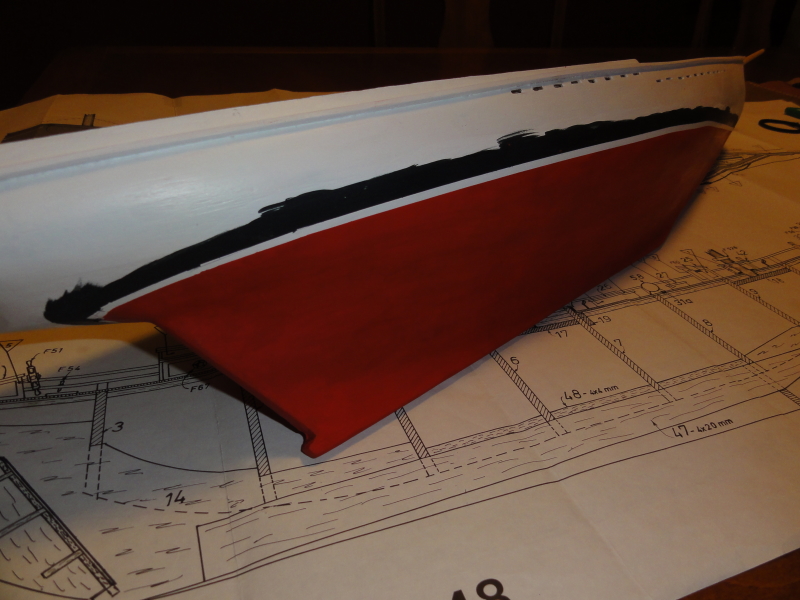
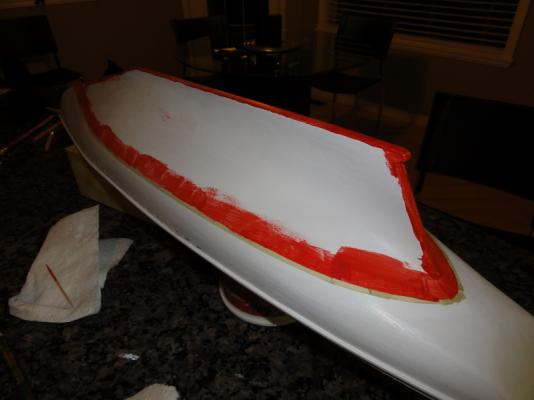
 This is the present state with the masking tape present just for some detail touch-ups. I still want to do a couple coats of red and then varnish the hull.
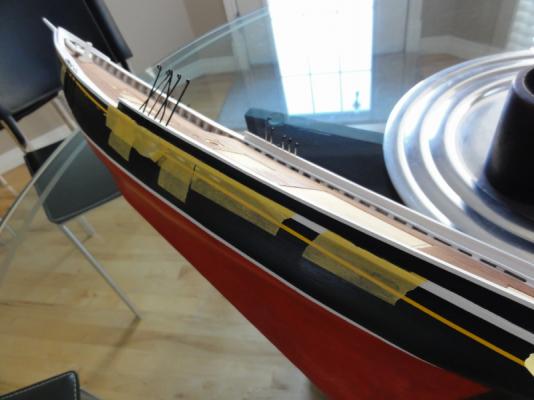
-
Since my last post, I masked with only the smallest width of tape I could find, 1/8 inch to create the cove line. I then masked back the cove line to create a more scale representation, covering with the darker paint, overlapping, thus creating closer to a 1/16 inch line.


-
The oiled deck looks great but can you apply varnish over it?
-
Hi Jan-Willem, in my opinion to varnish the deck would be more practical and in the long-term easier to maintain as reapplying an oil treatment every 4-5-6 years might be more problematic with all the fittings and furniture and masts on the deck of the finished model. PS I agree on the treenails.. tough to see. I would probably contrast more with a different stain or color on the treenails themselves. Perhaps varnish, then drill your holes and put in a wood putty, sand back, and final coat with varnish. That is what a lot of people on MSW seem to do. Just a suggestion as I have limited experience on this. Julian
- 127 replies
-
- 1
-

-
- Bluenose
- Billing Boats
- (and 1 more)
-
Thanks Jan-Willem for your reply, I used Tamiya flat acrylics, quite thin and easy to apply. With regards to the blemish, it seems to have really soaked into the wood. I will spend more time on it this week, whether sanding or scraping or both!
-
Hi Jan-Willem, I think I prefer the look with the pencil... more subtle in my opinion. PS The tree nail effect looks great!! In the bottom picture, do you have a varnish on the planks and if so, what kind as it looks very good! Julian
-
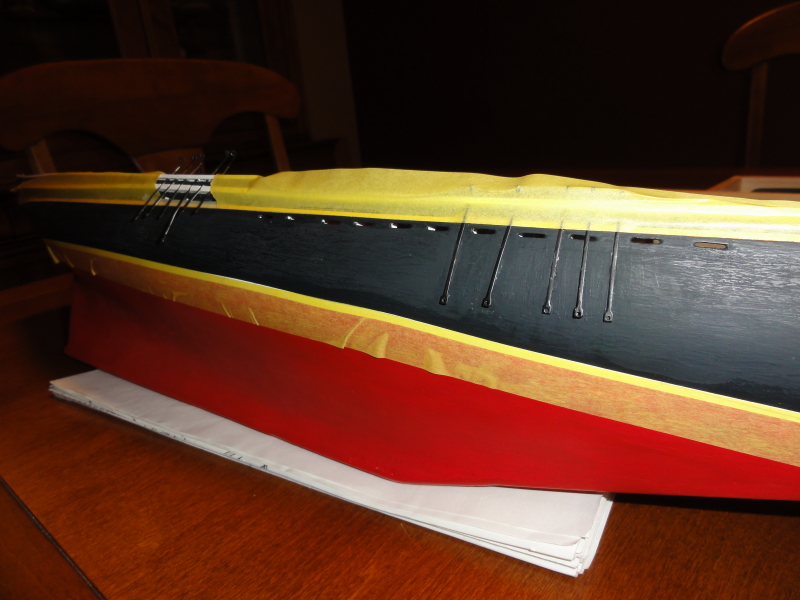
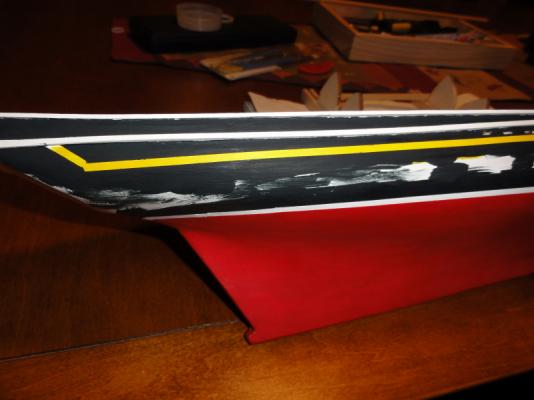
My post today is more recent work where I painted my yellow cove line and then masked off and painted below and above the masked off strip. I will do one more coat of "sea blue" from Tamiya and then pull off the masking and see how it looks. from there I will affix my chainplates and then paint the rest of the hull above the waterline.
-
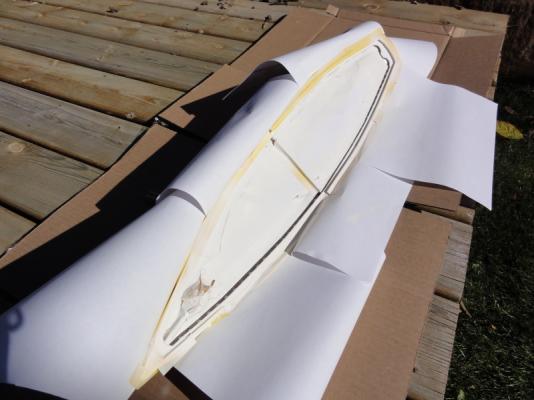
The next day, I masked off the deck and hull and spray primed and painted the stanchions and waterway. I must say much quicker and easier than painting by brush. The only problem is in a few spots where the Tamiya masking tape was not pressed down firmly enough, I had some creeping of the paint underneath. I have since scraped off some with a razor blade and sanding, but there still is a blemish on the wood. It is a tough and tight corner to completely erase the blemish. Any suggestions how to completely rid the paint blemish?


-
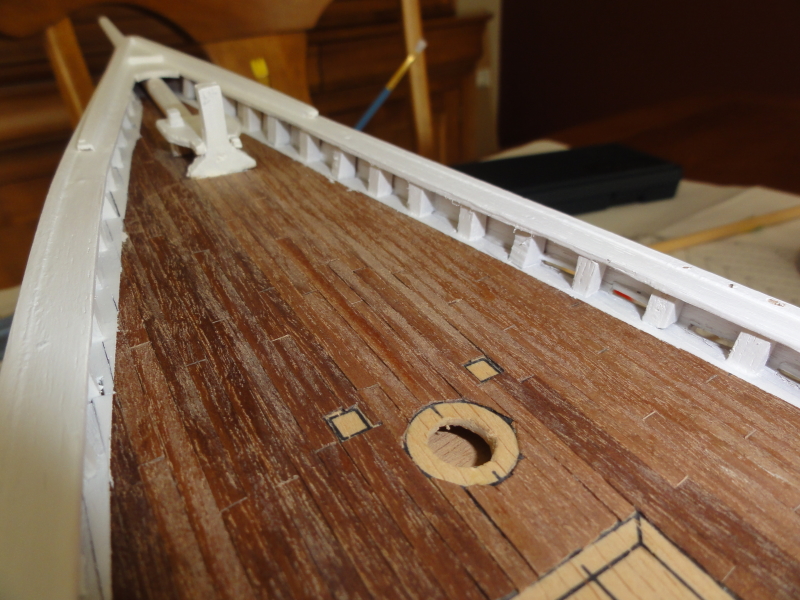
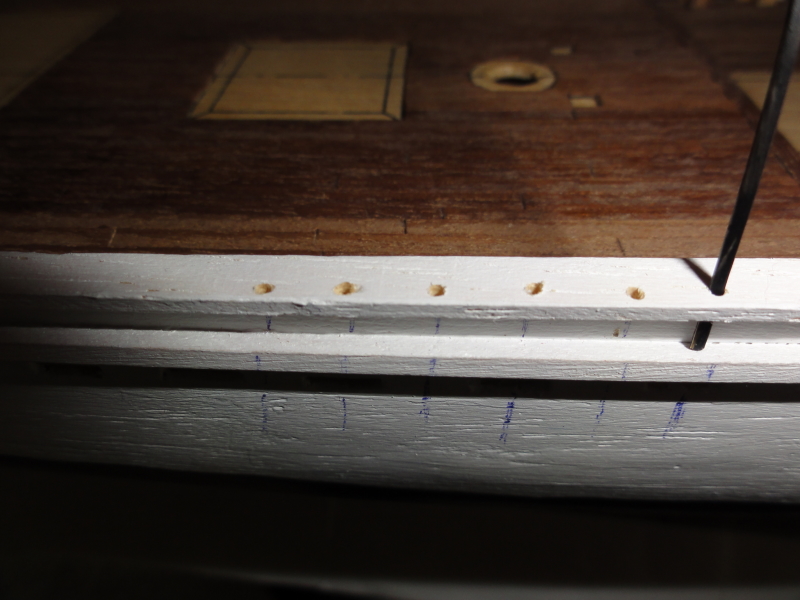
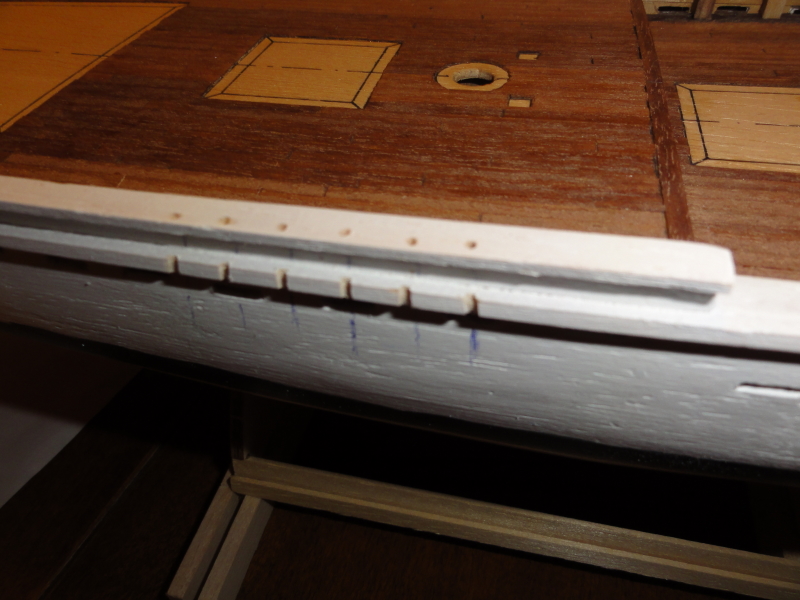
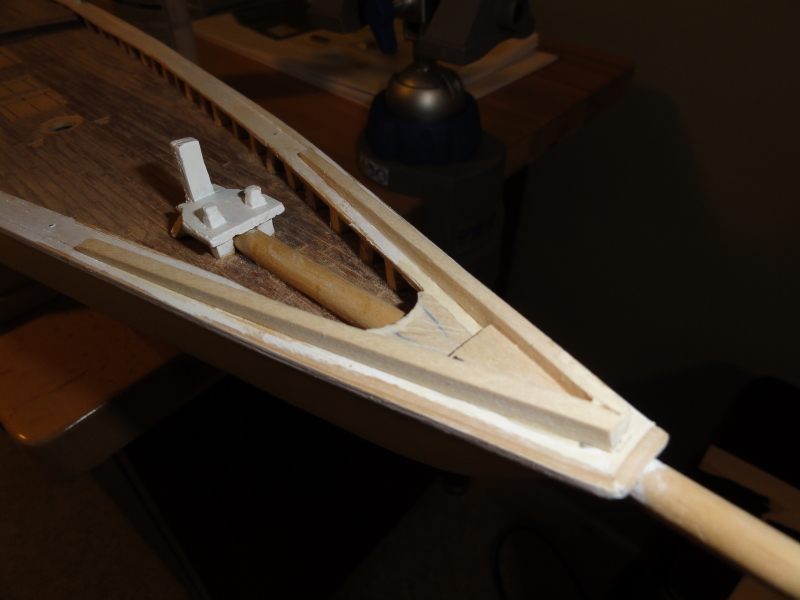
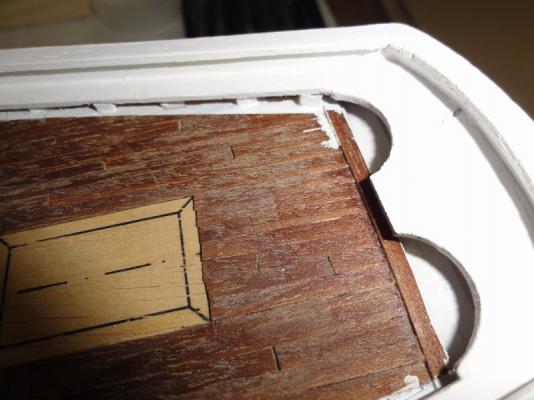
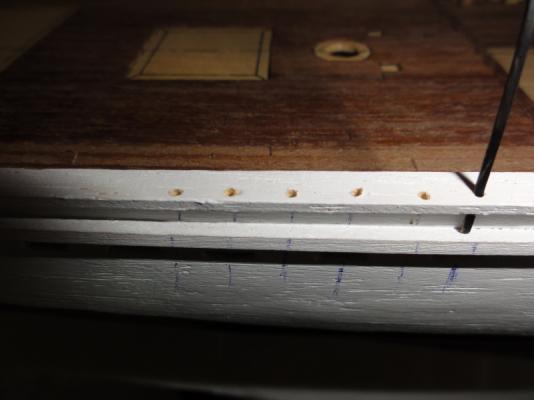
This is work from a few weeks back... I drilled the holes in the cap railing in order to accept the chainplate and then with the dowel to simulate the mast, sighted where the shrouds would end (on the dowel) and marked the slight angulations via the marks shown onto the hull. From below I sighted to the hole on the cap rail and cut out the notches to later accept the chainplate.

-
Jeez, hope you didn't send your "message" via email. You will likely not get a reply!
-
I sent an email in August. I sent an email in September... No reply and still no parts on my doorstep.
-
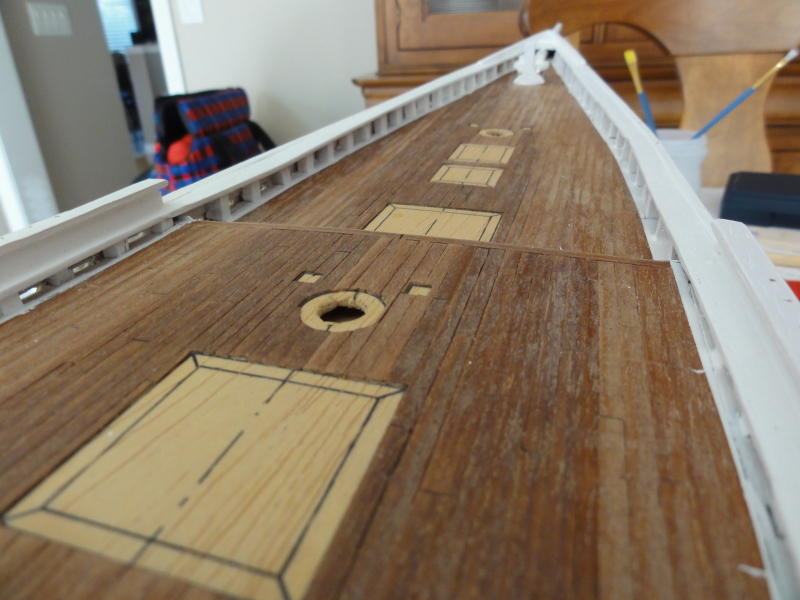
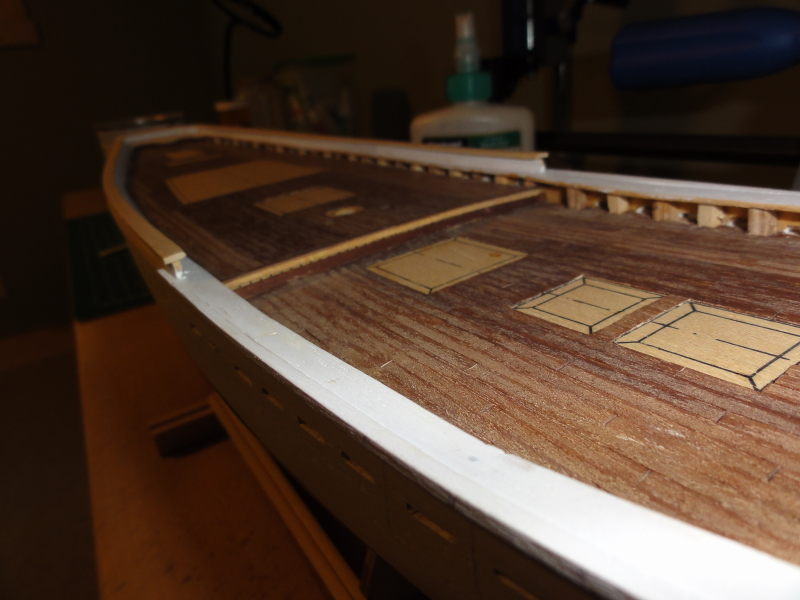
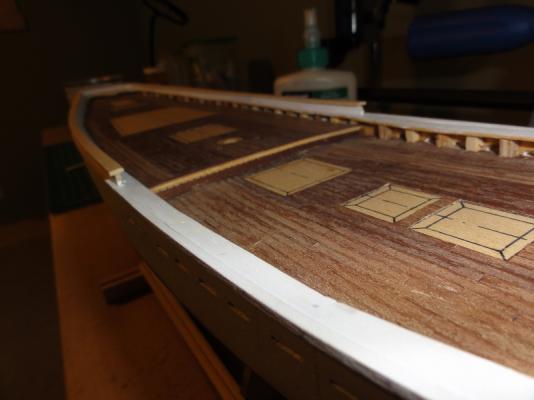
Now some pictures of the finished monkey rail and bow rail. The last image is a first sanding of the deck. I hope to get my chain plates finished this weekend... and start the final painting of the hull.

-
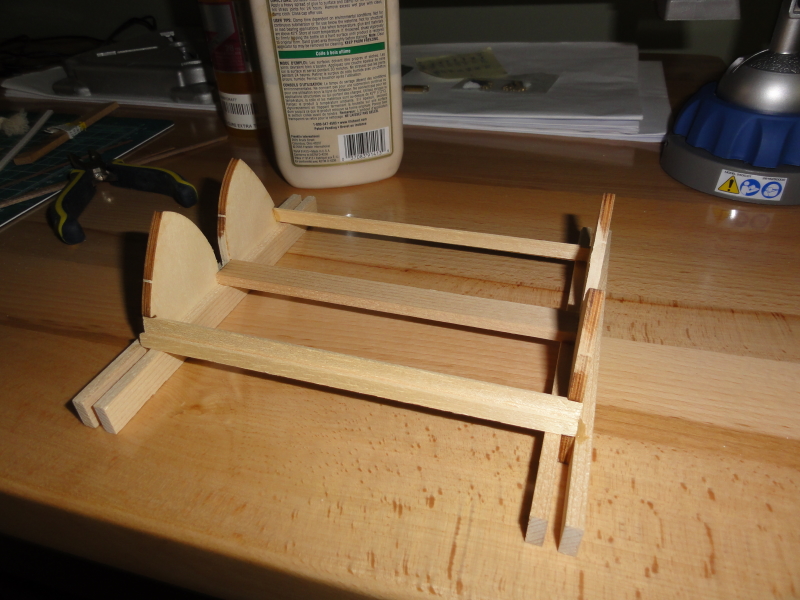
Built my cradle (from a different scale kit of Billing Boats that was sent to me as the original was long lost). I just had to open up the notch to accommodate the keel and sand open the sides a bit.

-
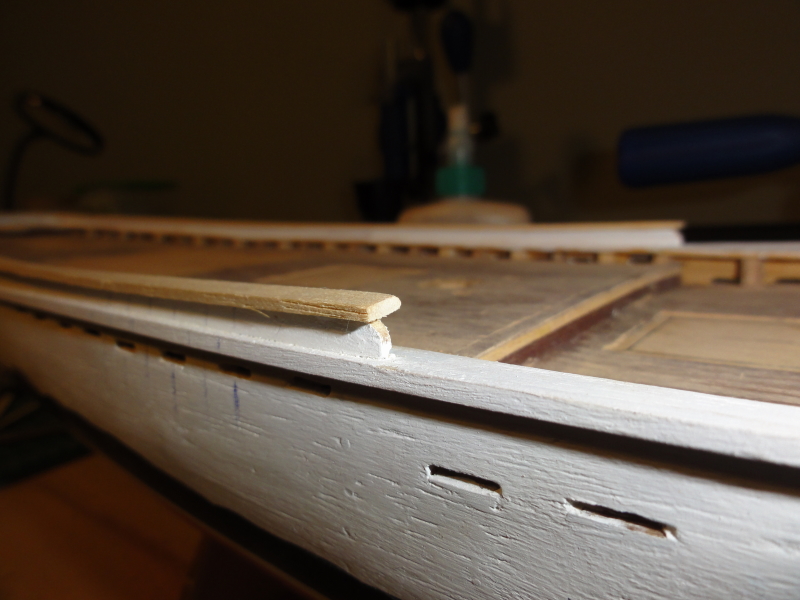
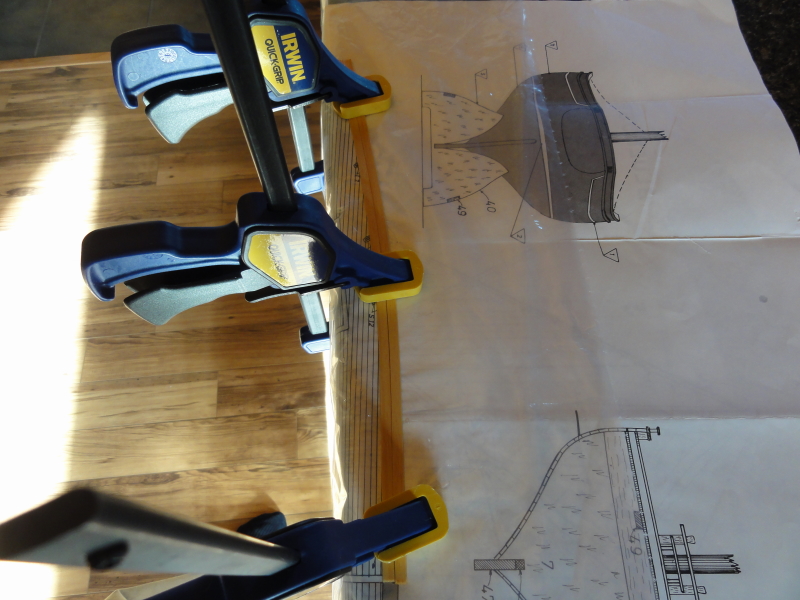
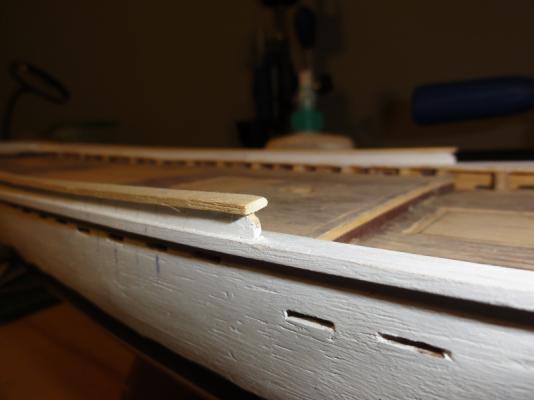
This is how I got my capping bent for the monkey rail. It did bend back to its original to a degree but there was enough memory to provide a reasonable fit and attachment with CA glue. I soaked the rails in hot water for about 20 minutes and then let them dry on top of the plans over wax paper.

-
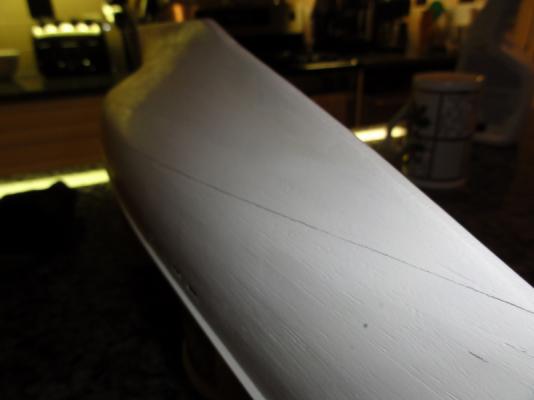
On it this week... I hope. I primed the entire hull and starting painting below the water line so where the chainplates is still only primed, should be easy enough to sand back and affix.
-
I know finishing carpenters just prior to painting or staining use it on the wood. You should be able to get it at any hardware store, in North America anyways. A slightly damp cloth may work OK as well.
-
Looks good! Once completely sanded, I would buy some tack cloth, and this will allow you to wipe down the deck and pick up all the fine sawdust, and you are ready to varnish/seal. Julian
-
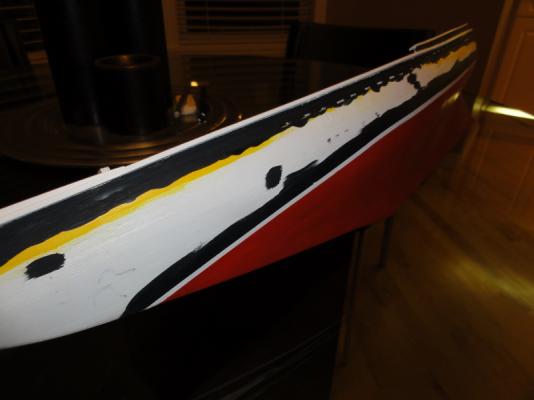
Hi Jan-Willem, When I paint the upper half (and look at the total hull painted) I will reassess the red as I hope to yet do a couple final coats of red. I know there is a great deal of mention of the red on old build logs as the red should be more of a "copper red".
-
Thanks Jan-Willem, The paint is Tamiya's Flat Red. I agree it is a bit bright but nonetheless I am still happy with the color. Perhaps it could have had a bit more of a copper tinge to it. Tamiya's paint line is a bit sparse on color variations unless my hobby store did not carry their full line. Cheers, Julian
-
This is funny... some people have luck with getting replacement parts and some don't as myself. Equally funny is that when you check build logs of members, there is always people stalled waiting for parts that were originally missing. PS I wouldn't worry about registering as I guarantee you, you will not get a response. That I am sure of.
-
Thanks Keith, With regards to the waterline, yes, that is how I did it on a previous build of mine. The issue here is that I was missing a building cradle until just recently. The new one shipped to me is out of scale (too small) but I am going to open it up and stabilize it with some build outs (with wood). Julian
-
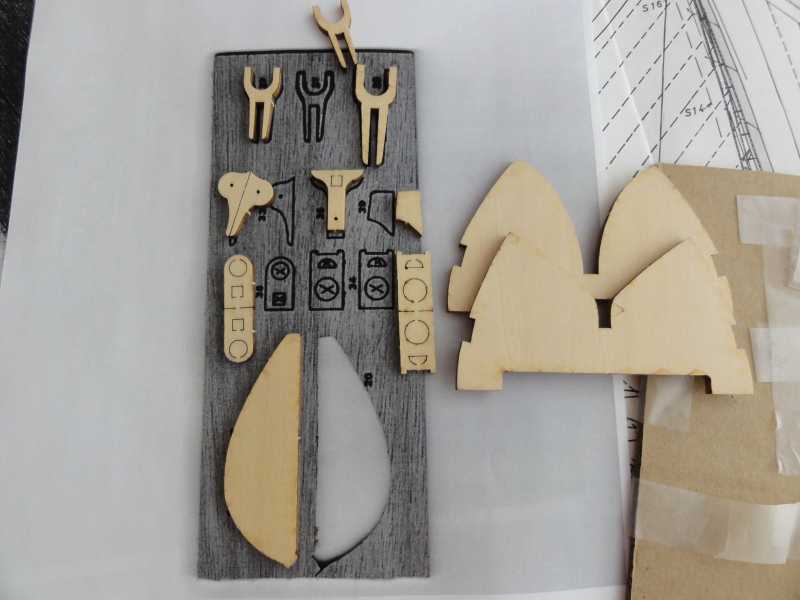
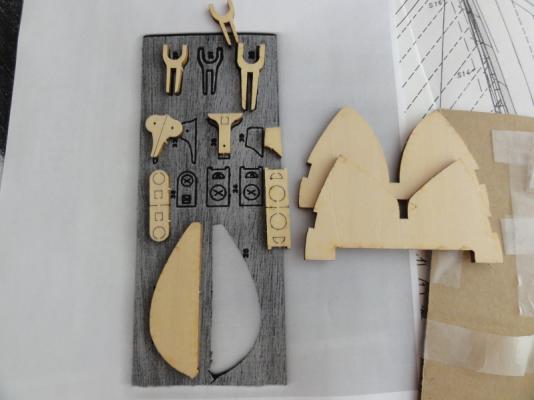
I also had some replacements parts shipping out from Billing Boats here in Canada. Very good and quick service... The parts pictured is from the present Bluenose model that Billing sells and it is at the 1:65 scale, not the 1:75 scale of my present (old) kit. I obtained a photocopy of the missing sheet at 1:1 scale from the old kit marketed by Billing... (thanks again 7Provinces) and noticed that the parts are identical in scale in comparison. I think the old kit marketed at 1:75 was "way off". The only parts that don't work on the model, and present scale, (that was shipped to me) is the building cradle. Not sure how Billing got the scale off by so much. I think the scale of my kit is likely closer to 1:60 or even larger.
-
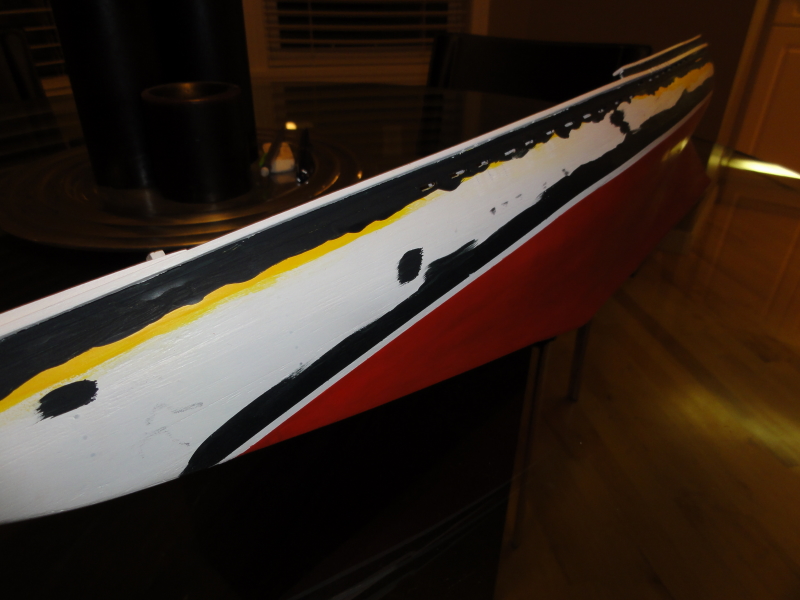
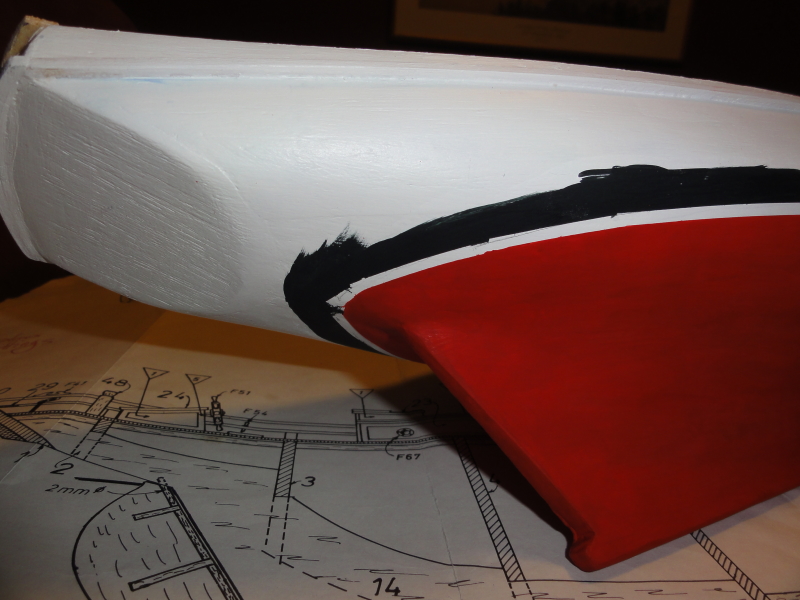
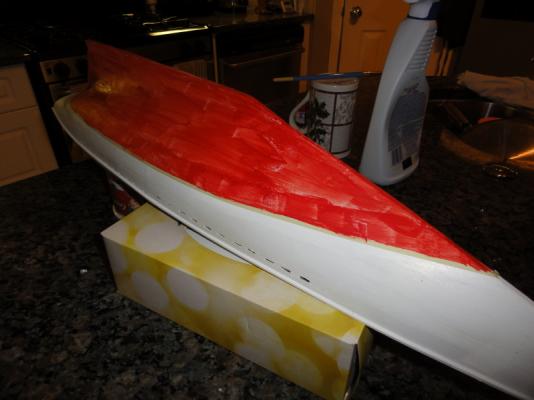
So I painted a rough swath of white on each side of the waterline and then I taped off with a 1/8 inch tape (not Tamiya as I couldn't find this size which I think may yet be a tad too thick for the present scale). I then painted a first light coat to seal the tape edge on each side and then 4 more coats (total of 5) which is the present state. I used Tamiya paint which I found a bit thin compared to Admiral paints which is a bit thick in my opinion. Looks like I need another coat or two of the red...? I also think the Tamiya tape is probably better.


-
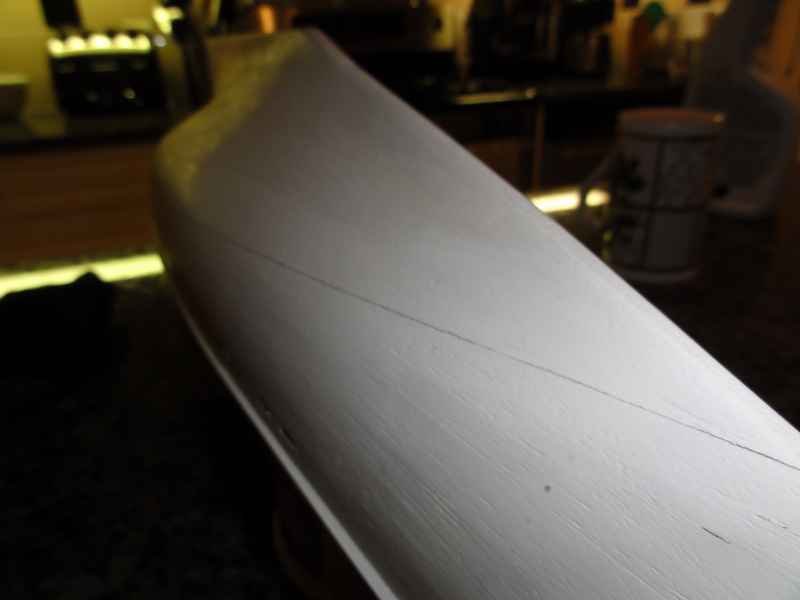
Started some painting. The waterline was a bit difficult to get. My technique was to measure off the plans down from the top rail at the bow, mid way at two points and again at the stern, on both sides, and then took a pencil on a glass to scribe a rough line connecting all the points while the ship was upside down.
-
I agree Joe... I am usually quite easy going but I think I am at a bit of a boiling point on this matter. But I sense that since venting on this thread that my temperature is already falling. Hooray for me!