HOLIDAY DONATION DRIVE - SUPPORT MSW - DO YOUR PART TO KEEP THIS GREAT FORUM GOING! (Only 13 donations so far - C'mon guys!)
×


mrcc
-
Posts
549 -
Joined
-
Last visited
Content Type
Profiles
Forums
Gallery
Events
Everything posted by mrcc
-
 I am sure it will turn out fine! Build the sides first and watch how easy that roof will fit on top! Cheers,
 -
Don't forget that there is a very slight convex bend in the roof which is normal. Looking at your pictures and having done the cabin already, I really believe that you will be OK using the supplied part given you will be gluing down the roof to the sides thus eliminating the slight warpage that is there.
-
Are the cabin sides also warped and if not I believe the roof shown in the picture will or can straighten out once you assemble the whole cabin. The smaller parts once cut out of the sheet may also be negligibly affected by the warpage. Good luck!
-
Good job Jan-Willem! I like what you are doing with regards to research and getting the most accurate look possible for your build. I think I should be doing more research... You did such an easy modification (new piece) from the kit and it looks so much better Happy New Year!
-
Oh yes, I made the vent hatch (just in front of the wheel) but I think I need to add thinner strips on the top. This looks like a redo for me...

-
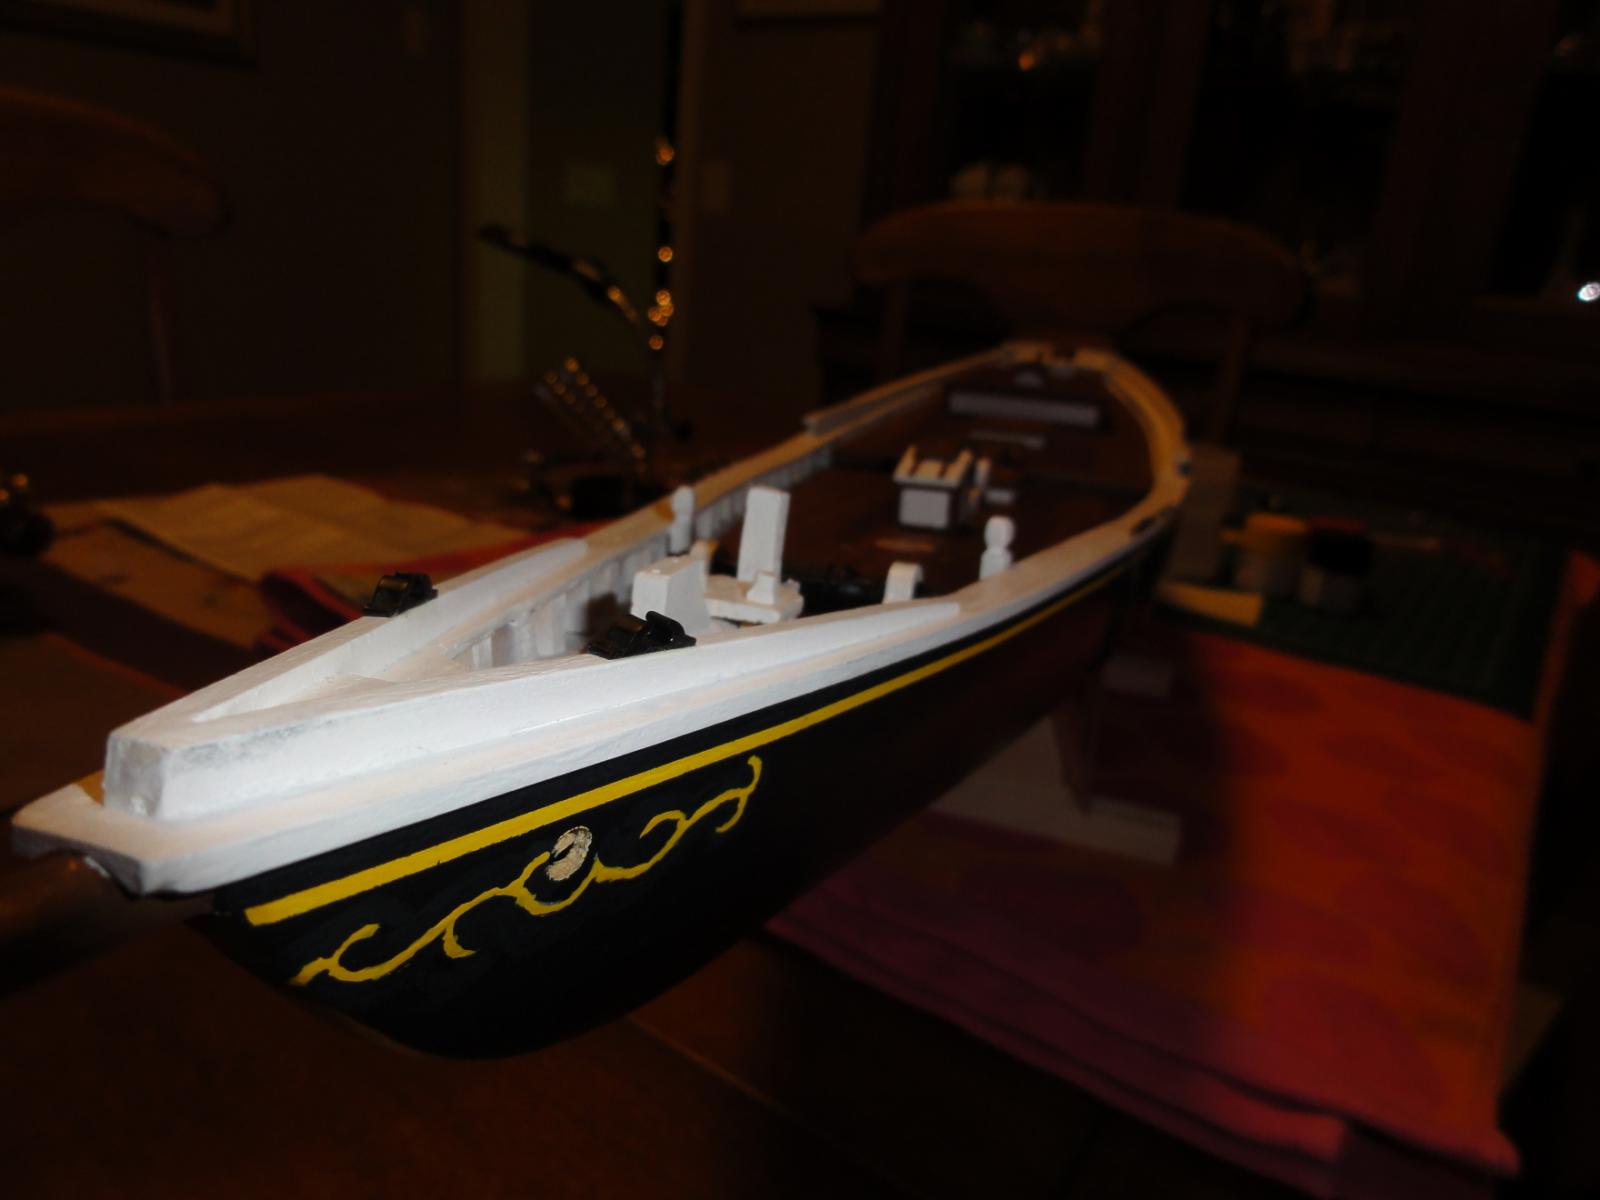
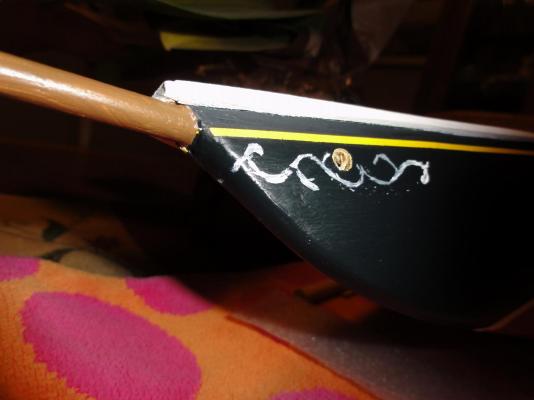
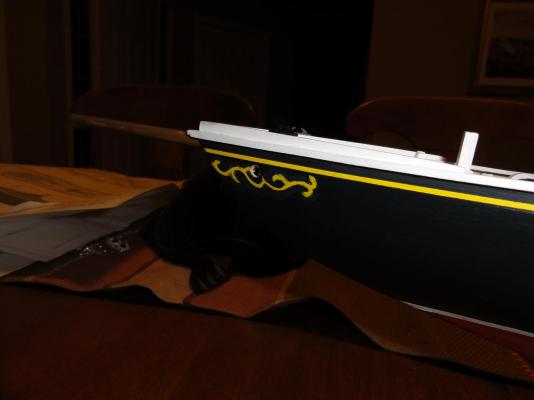
My final post this evening is a look at the scroll work that has been "refined" by painting back with the dark blue... I have seen so many variations of the scroll work on the Bluenose and realize that this is not historically accurate but nonetheless I am pleased with how it looks. A little more touch-up and then I am going to add the lettering above the cove line and the hull will be ready for a varnish.

-
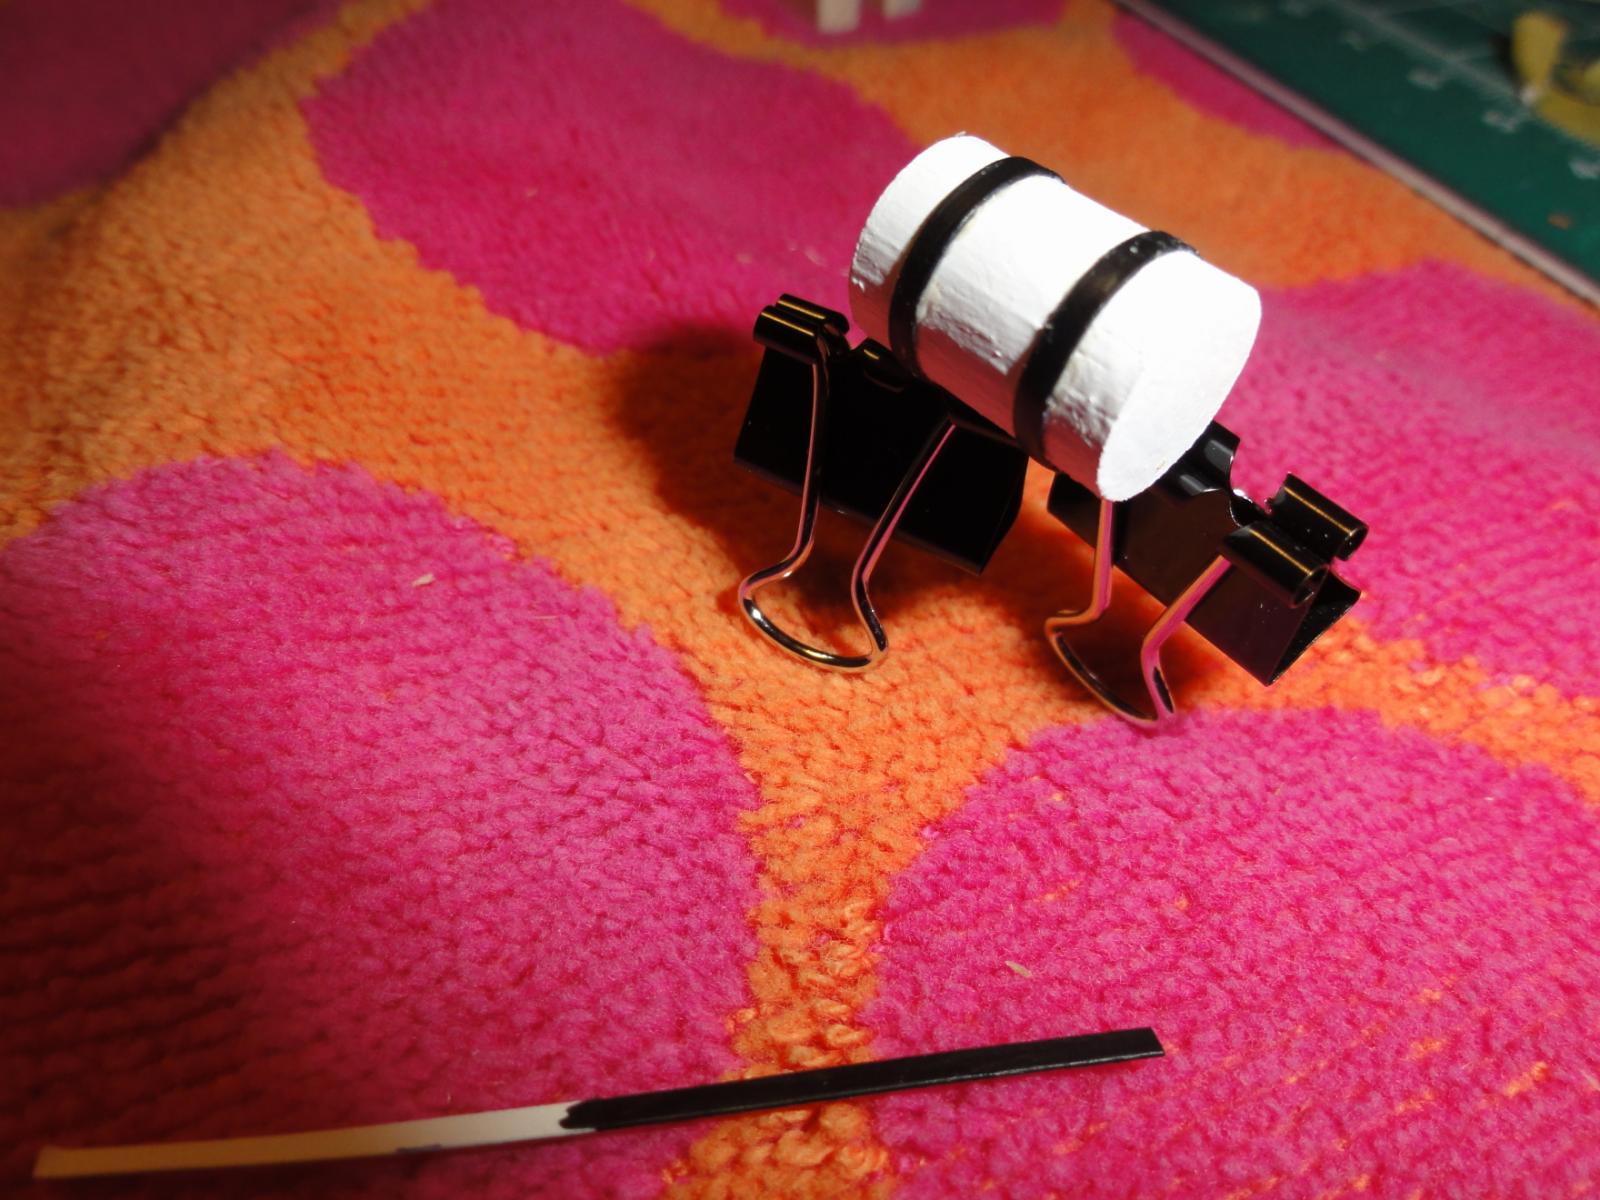
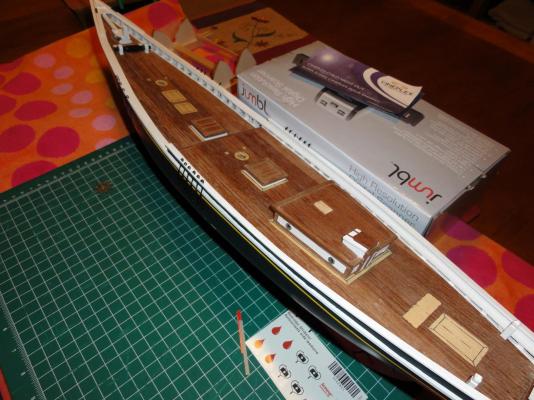
Just tidying up a few things... Billing Boats call this item a "round stick" in the parts list. Not exactly sure what it is but thought it was likely some barrel containing "something". I painted a cardboard strip (that I made) metal black and affixed with white wood glue. The deck now has two coats of Humbrol oil based matt varnish and it looks much better that what the pictures can show.

-
Beautiful work!
-
Thanks so much Jan-Willem, Matija... Very clear now between the Nova Scotia archive photo that Jan-Willem dug up and of course the beautiful work and photos from Matija's scratch build log which tonight I am going to thoroughly review. Cheers! Julian
-
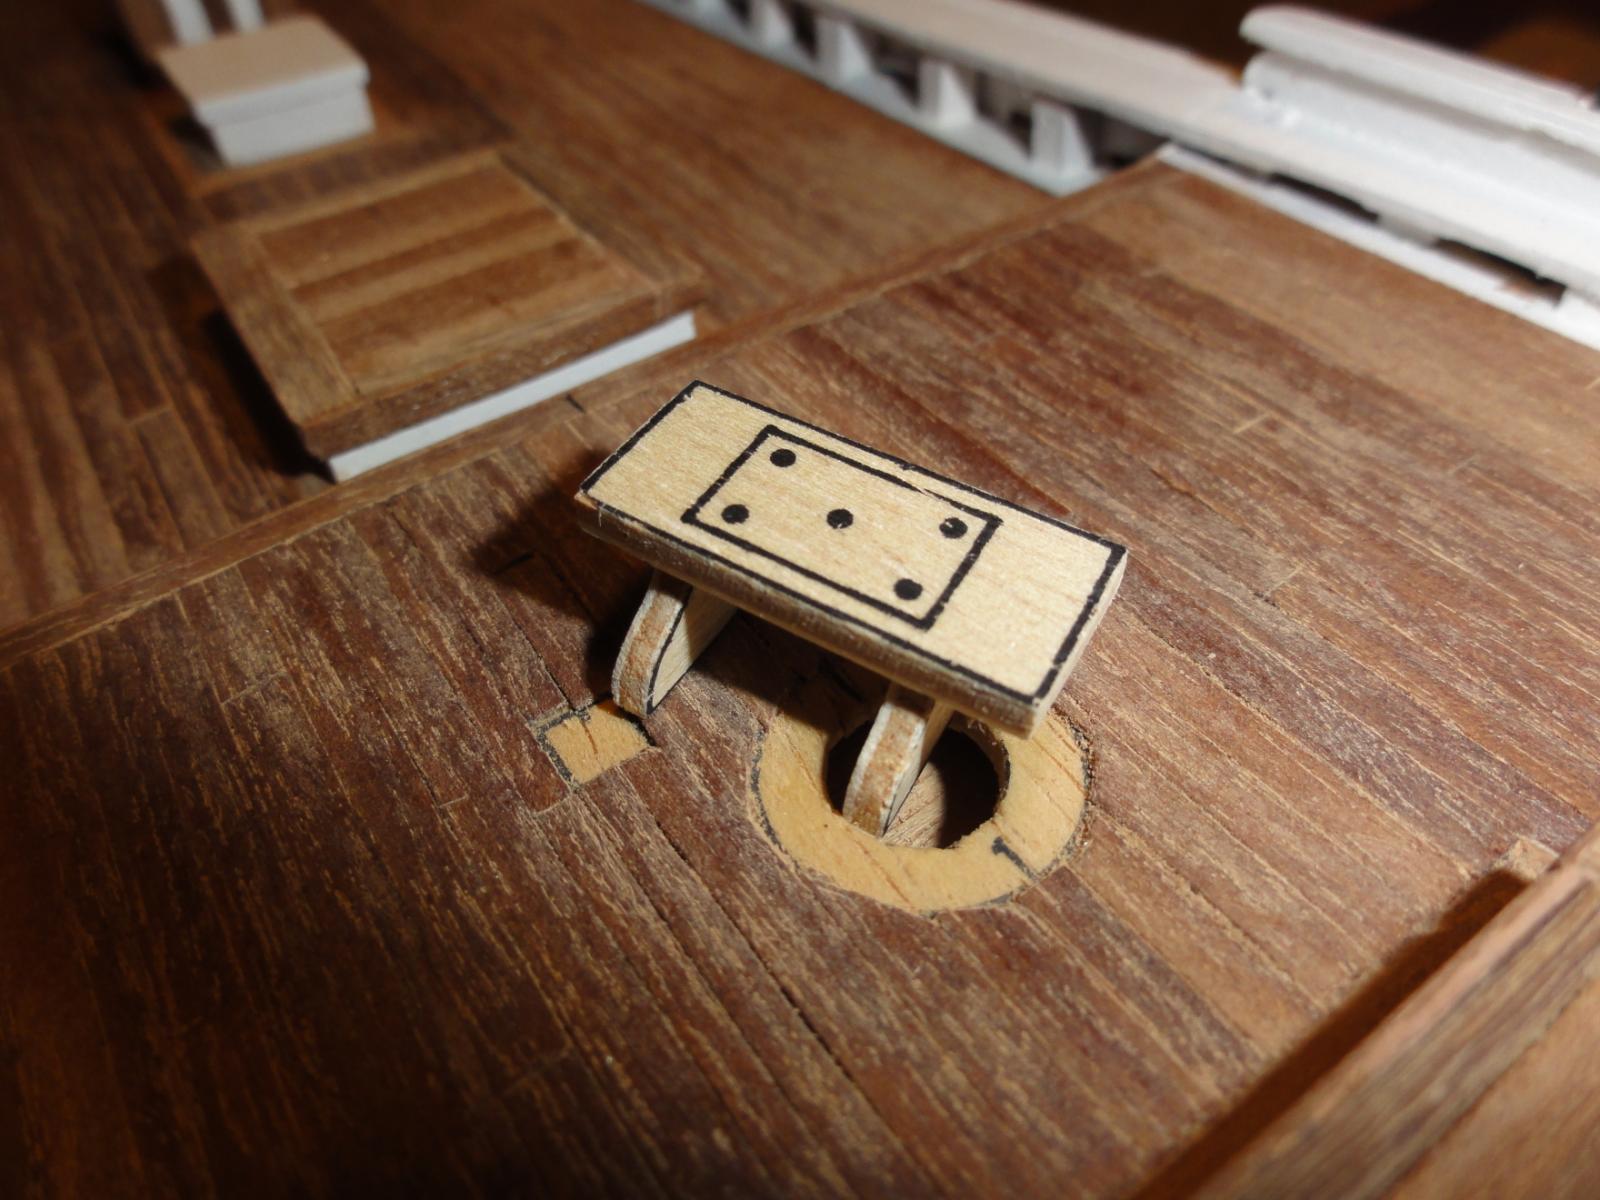
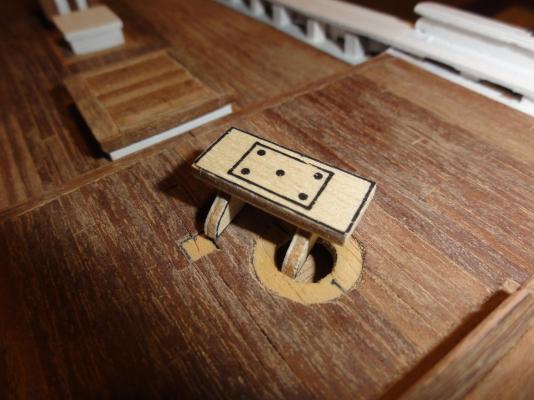
Thanks Jan-Willen and Bob... you guys are such great resources! I just can not figure out why and what Billing Boats had in mind when they added that inset (outline) with the 5 dots as there is no historical correlation anywhere / whatsoever. I wonder if at one time there was pins in those dots / holes for tying off ropes? Cheers, Julian
-
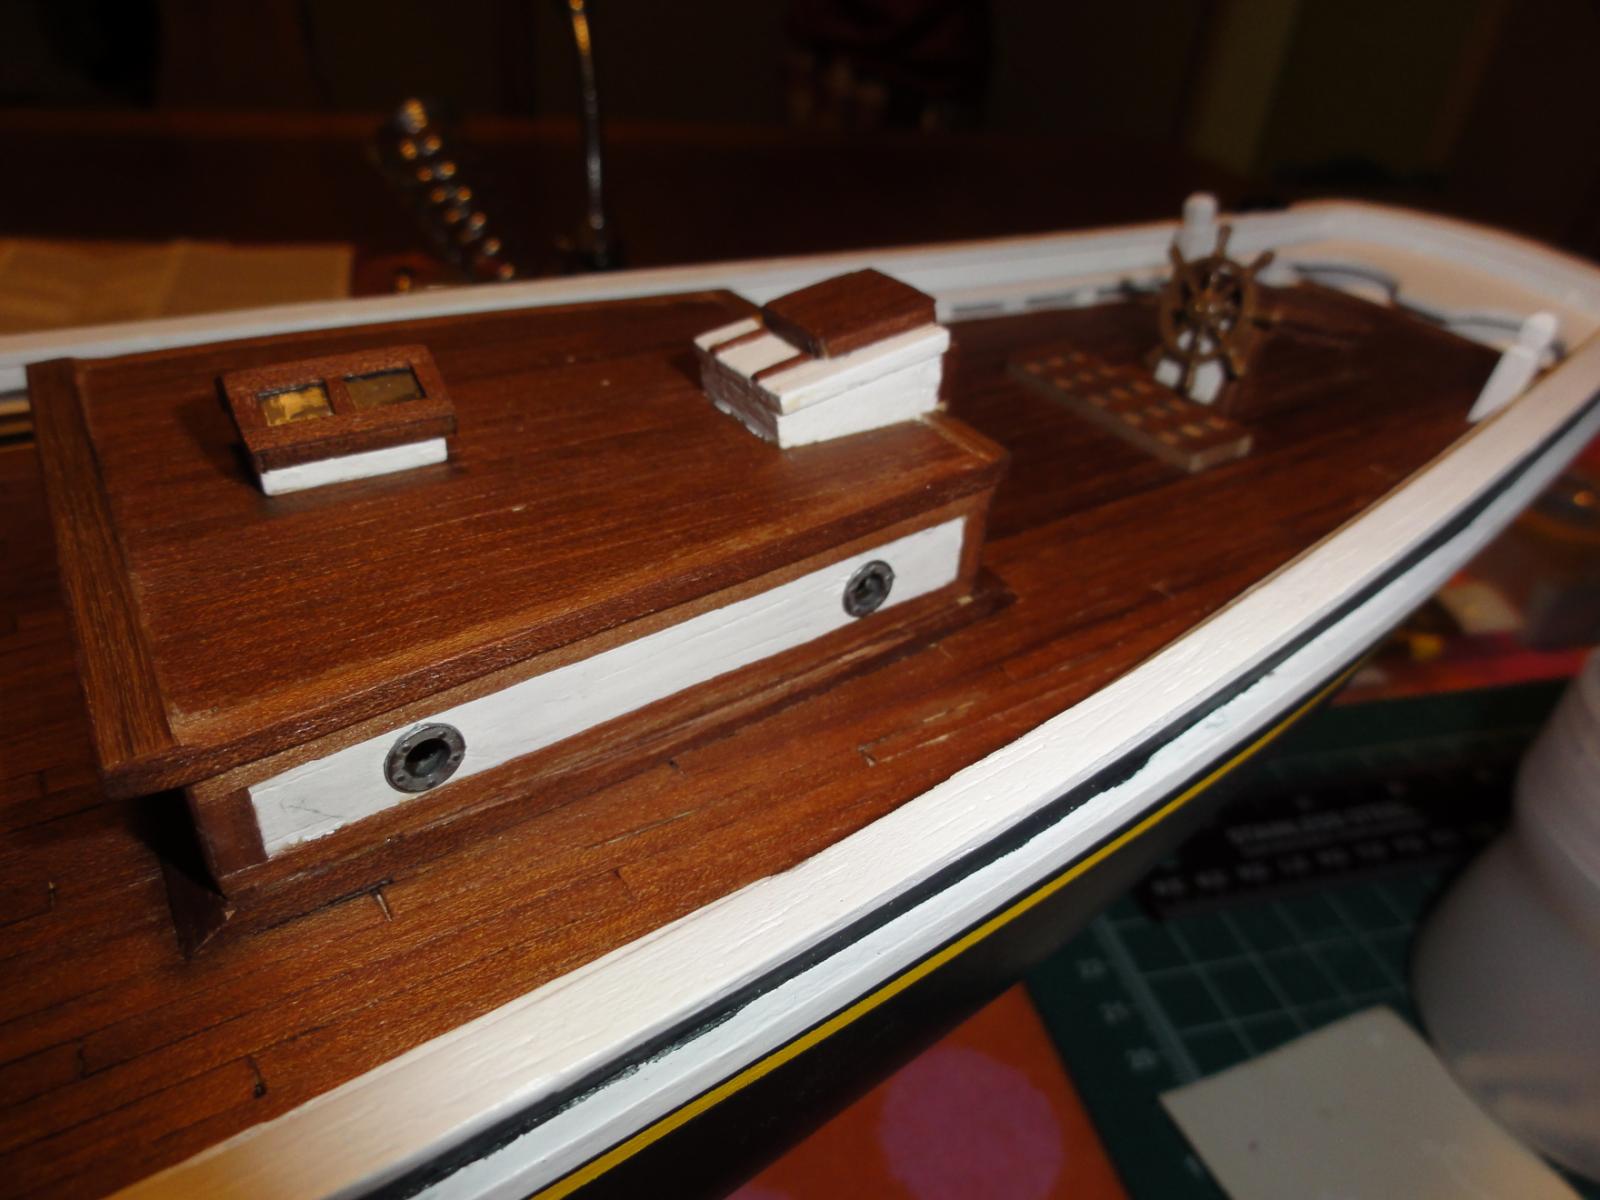
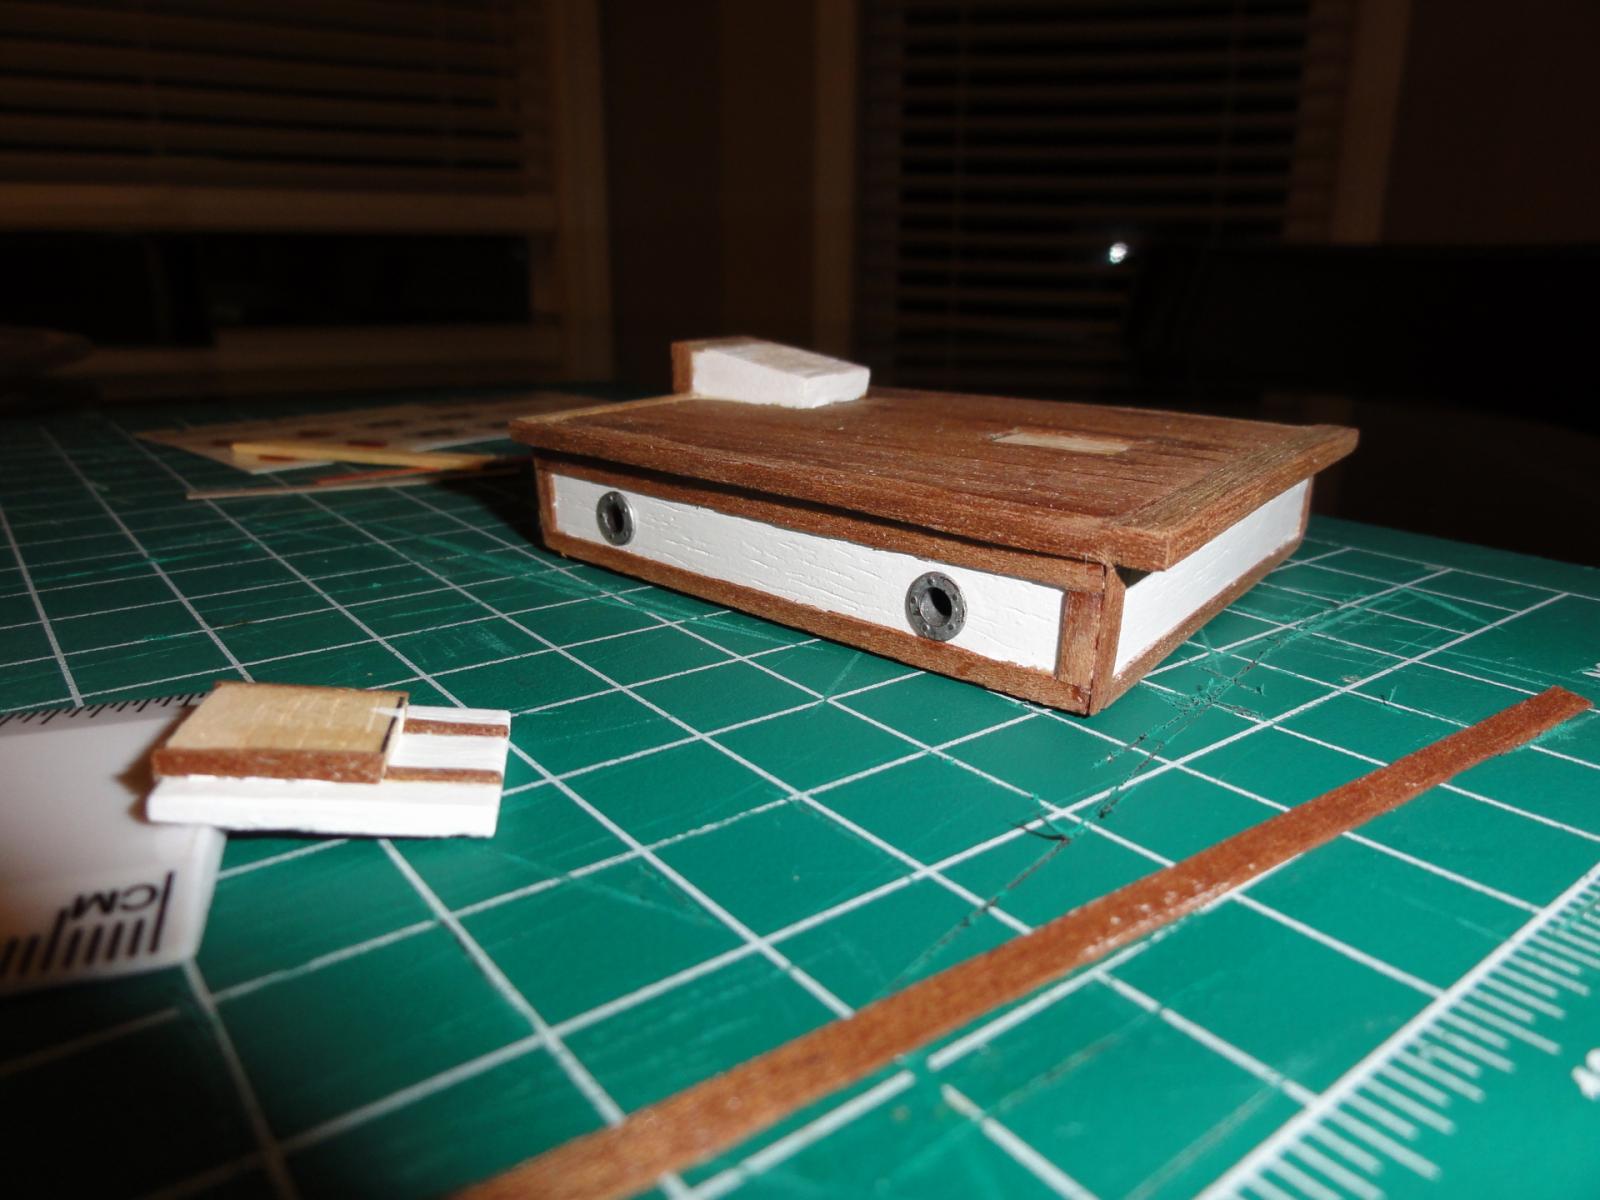
Lastly, do any of my fellow Bluenose builders know what this is...? It is a bit of the deck furniture that rests on the aft deck just above the foredeck with a slight overhang. I have looked at numerous pictures of Model Shipways and Billing Boats kits and logs and not sure if I should prime and paint the whole thing or drill holes where indicated and then prime and paint a wood color. I do not think this piece is historically accurate as I have seen so may variations of the item and I am unsure really what to do with it. My Billing Boat plans are really vague...
-
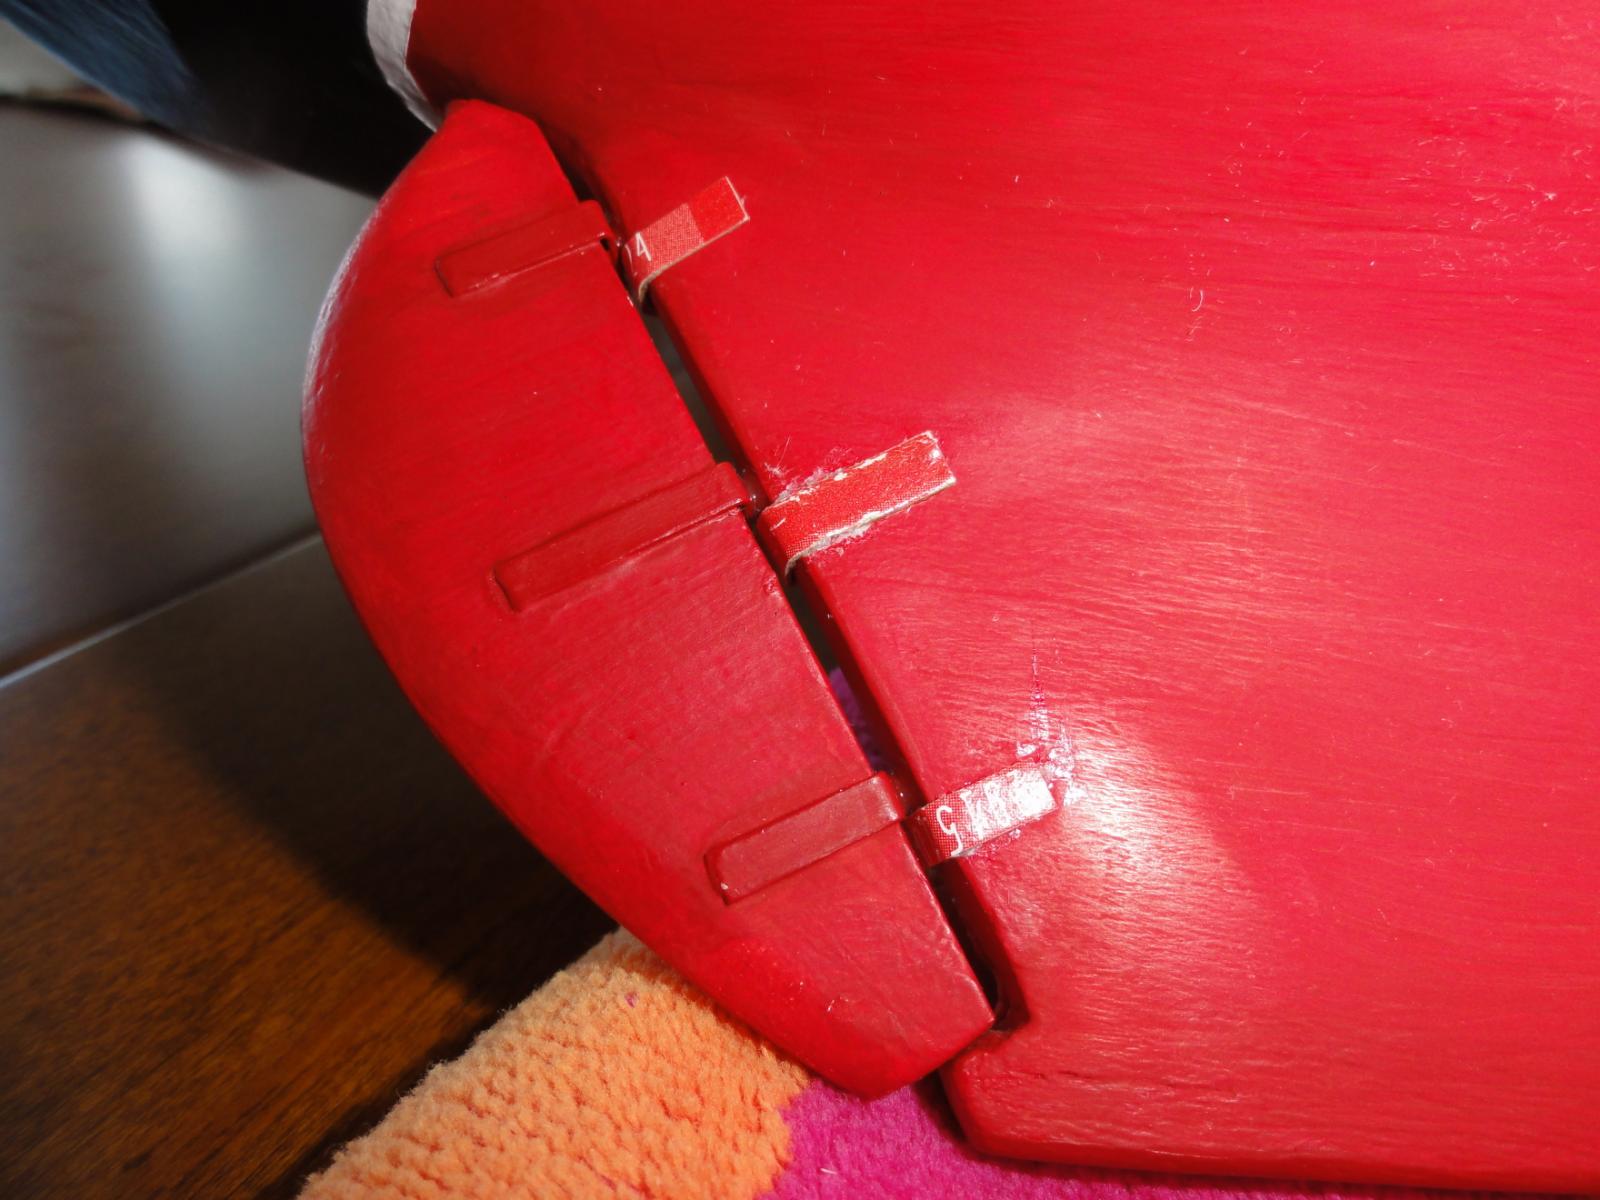
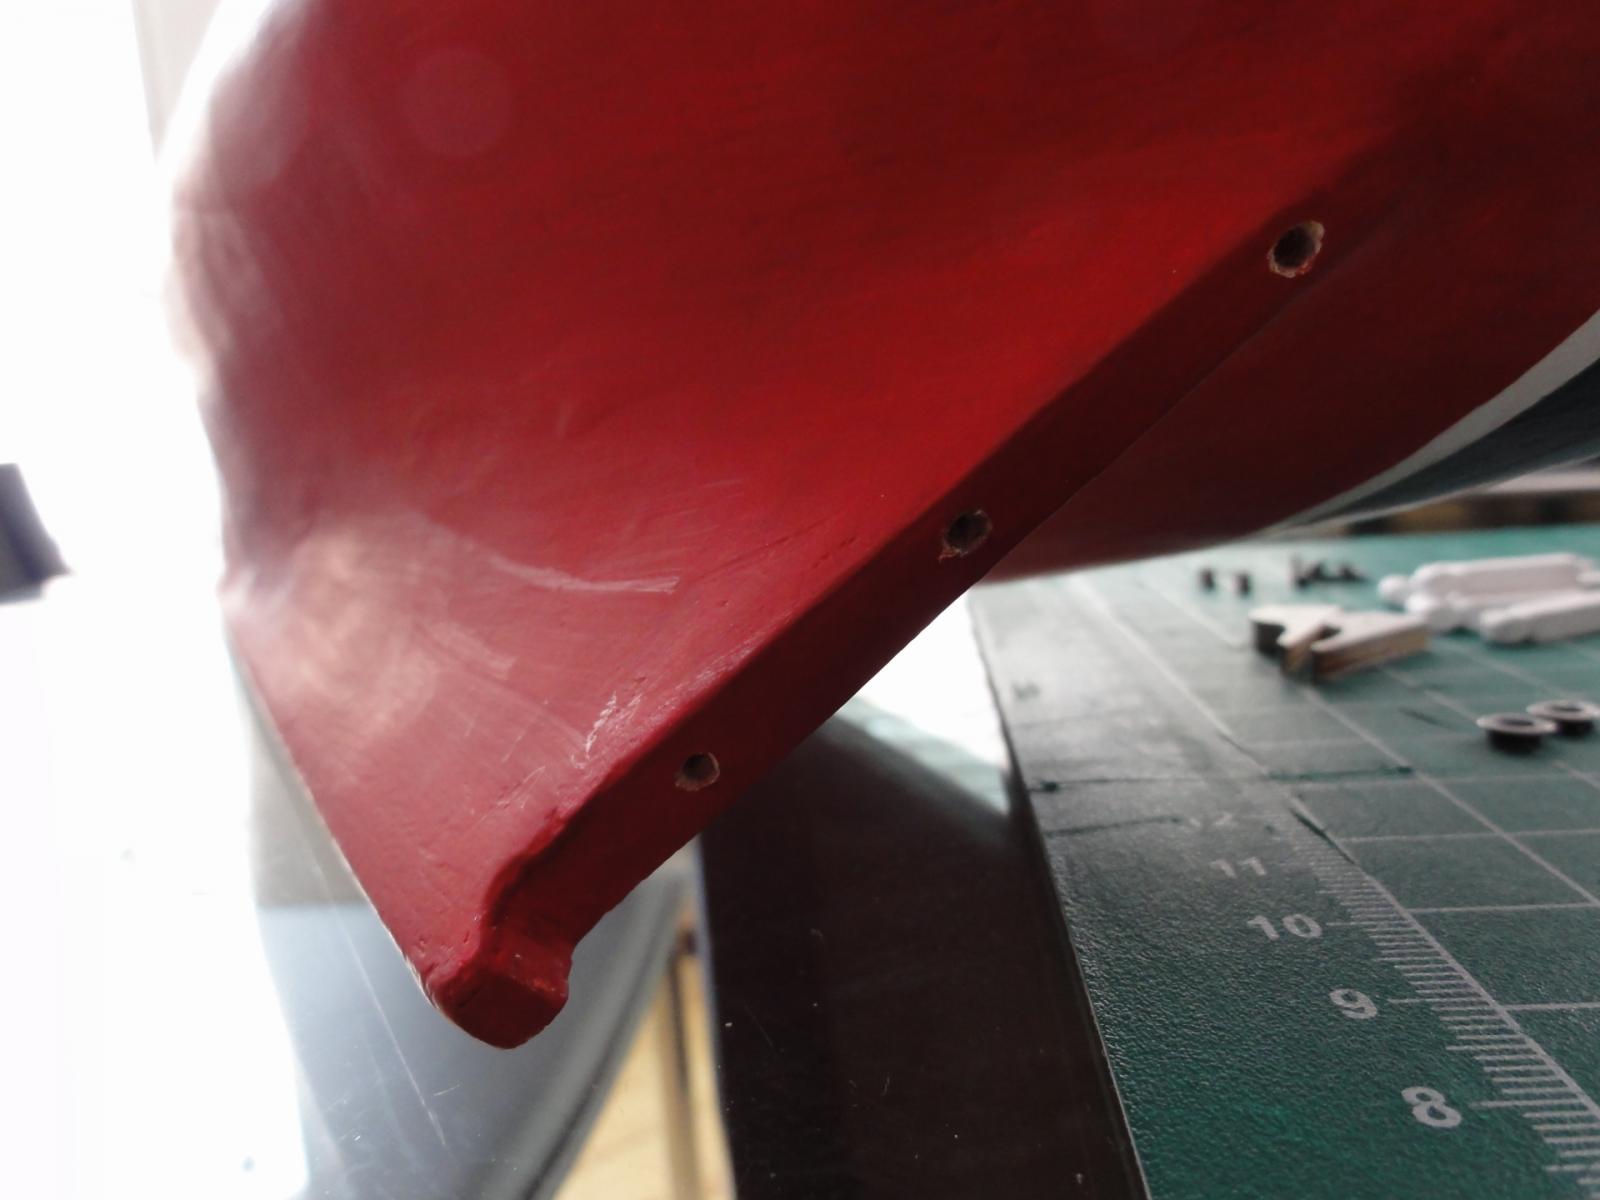
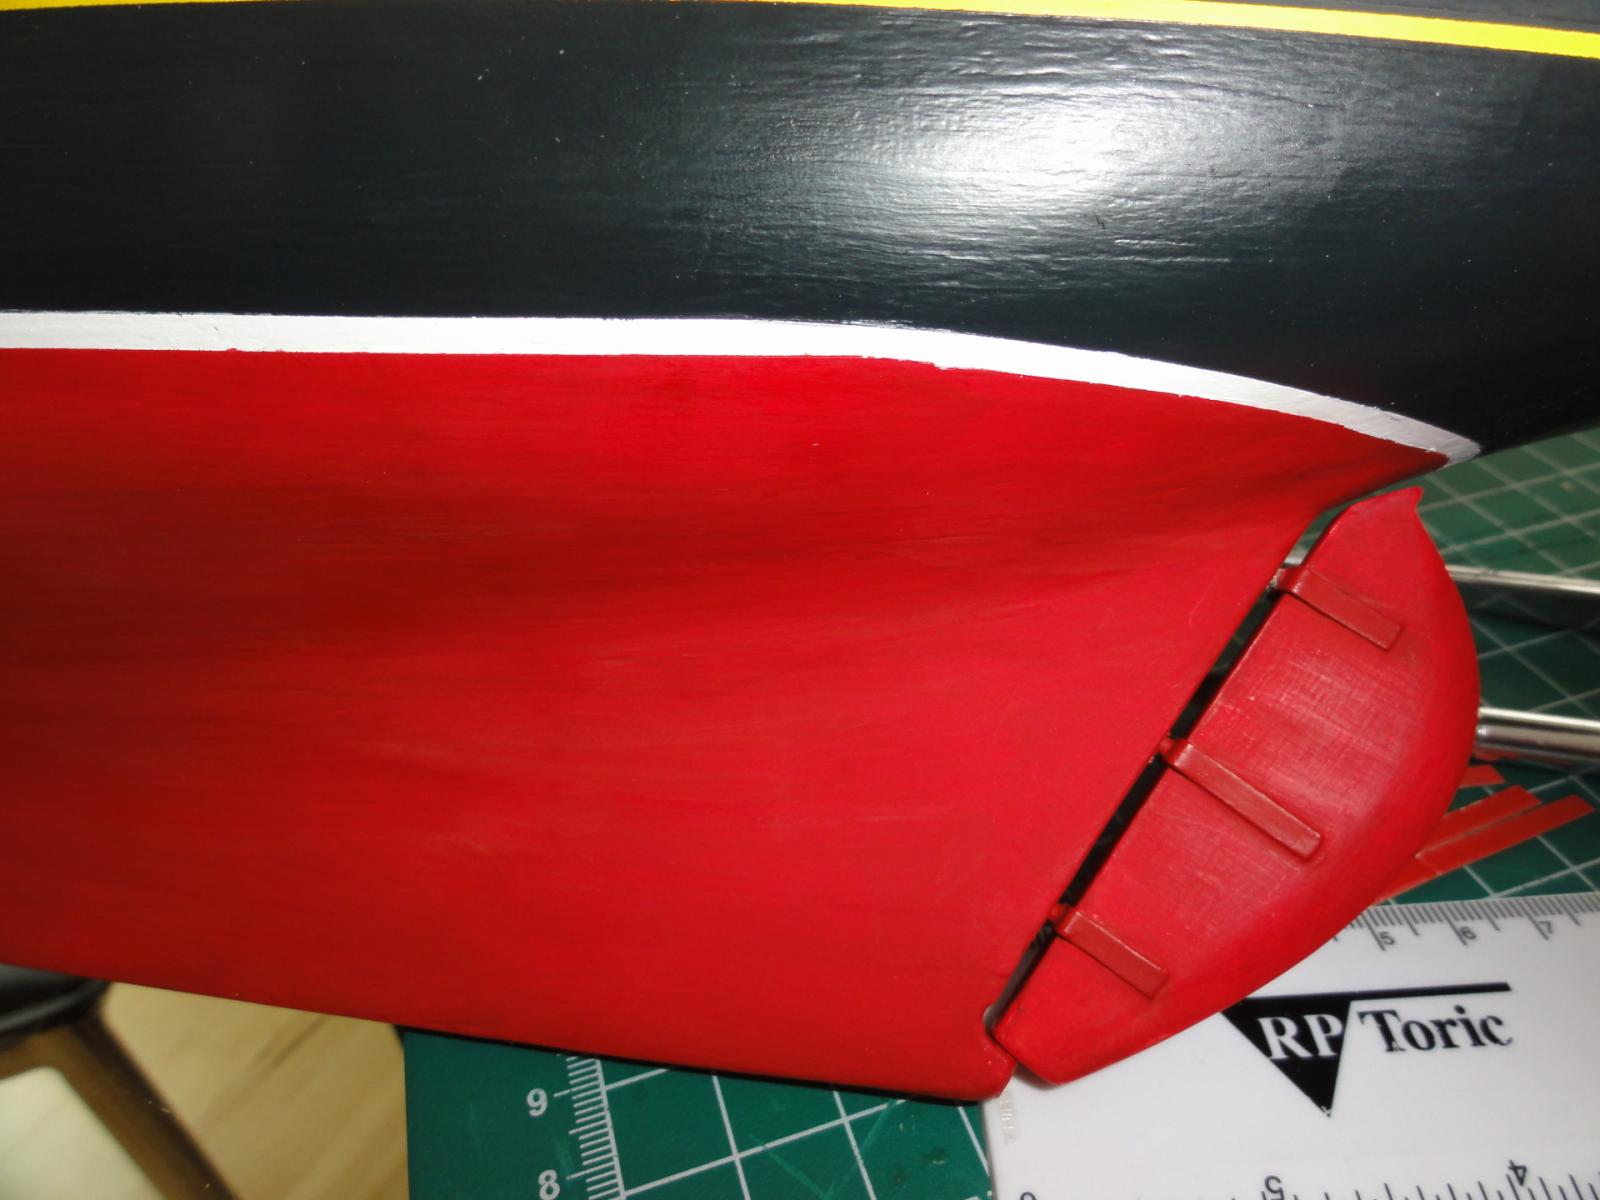
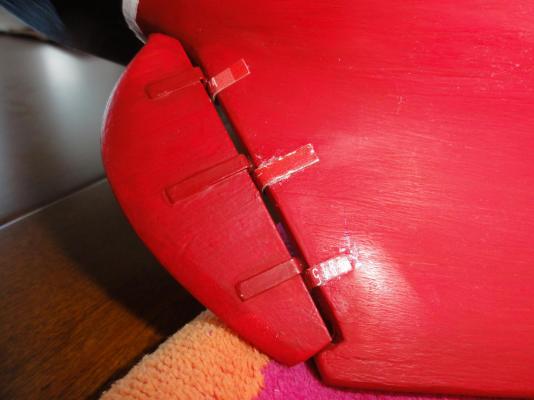
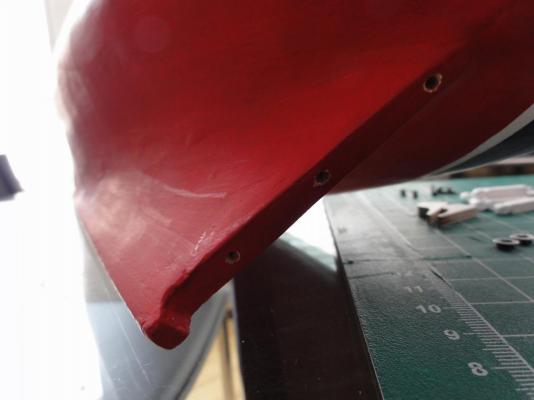
Finally I added some detail to the rudder adding the gudgeons to the hull side. These were details not included in the Billing Boat kit and I simply made them out of cardboard and glued them down with wood glue which seem to attach well to the painted hull. I have since painted them a slightly darker shade than the hull, but still red, and they look excellent. I have unfortunately forgotten to take and include a picture of the finished product.
-
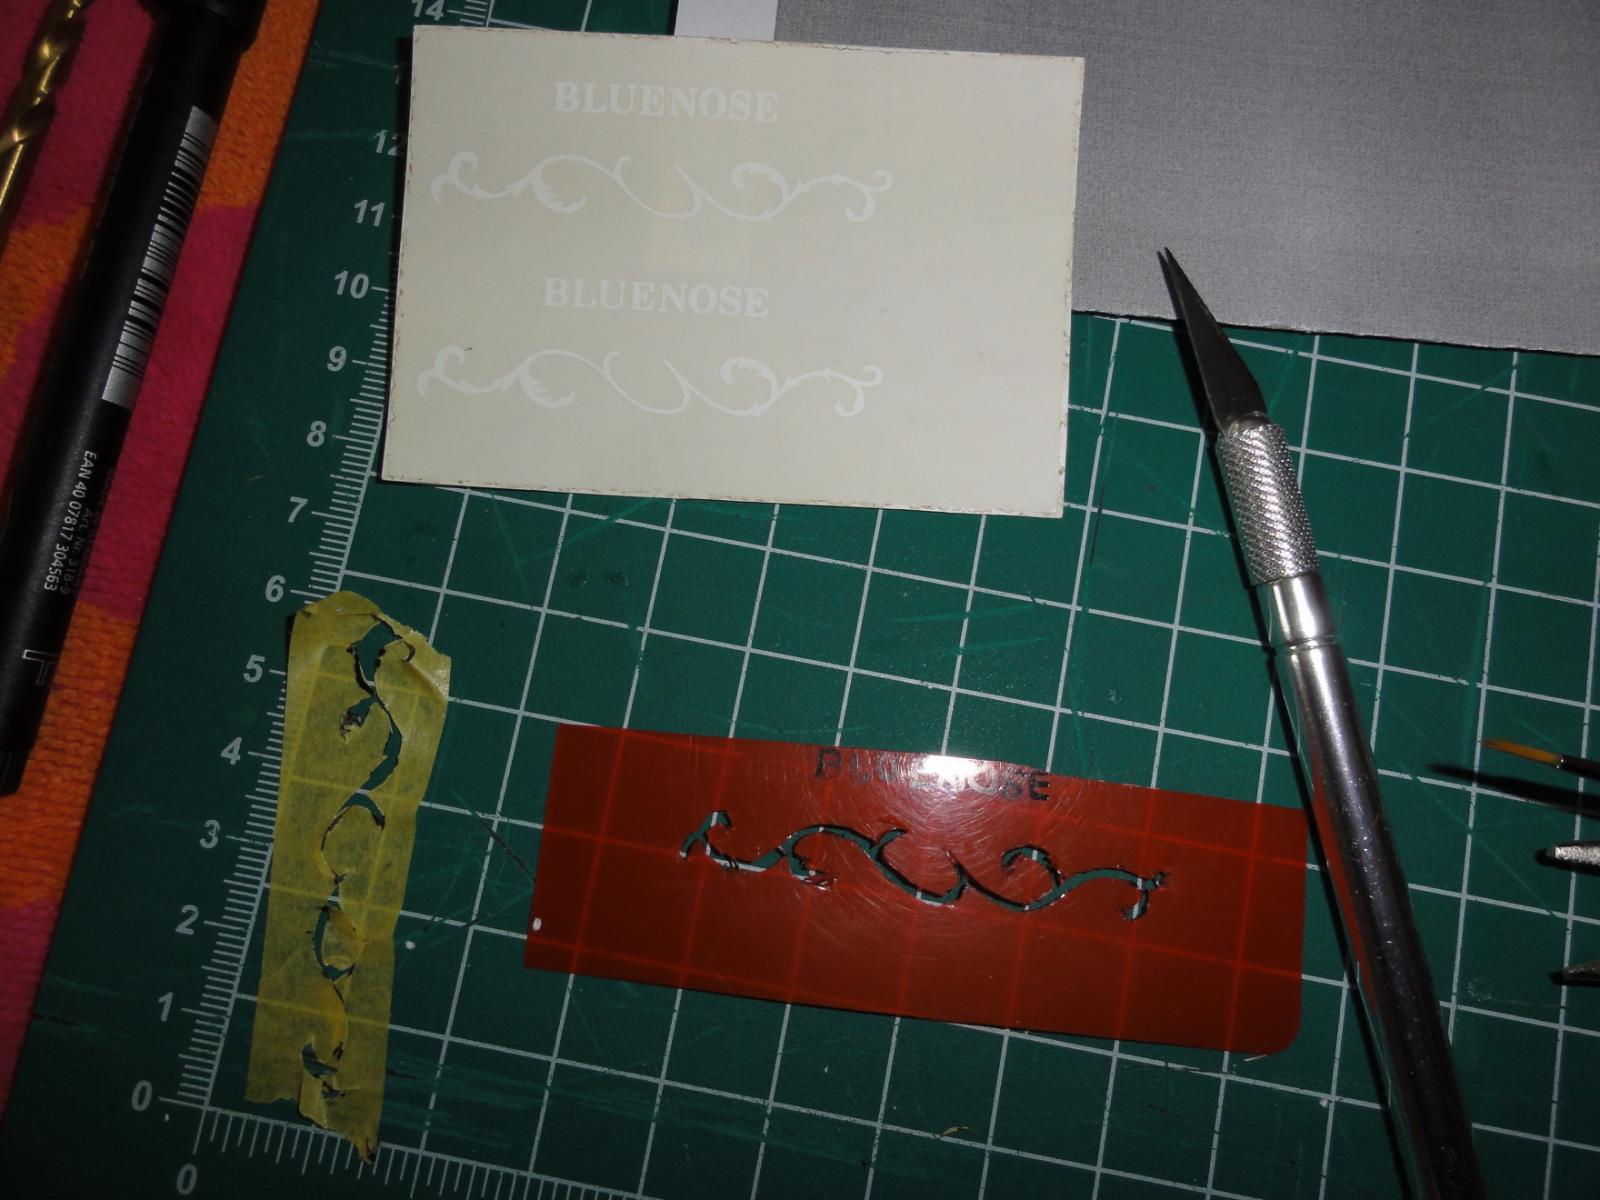
I finally have some progress to report... I created a primitive template in order to transfer my scroll design to the hull. I then put multiple coats of yellow on and in the future will cut back to a more refined scroll with the darker sea blue color covering the bulk of the outer margins of the scroll. Pictures to follow of the finished scroll...

-
Beautiful work!
-
Thanks Ken for your reply, The scan came up a bit yellow but the decal actually still looks good. If you enlarge the picture of the scan, there is more detail to see. I think I am going to paint on the scroll work but either try the old ones or make new decals or put letters down individually.
-
Thanks Bob... you are also right! I reviewed your log again (Thanks) and yes I know what I need to do now. I will attempt the scrolls by hand and then print out the decals of Bluenose, in my case, with a laser printer.
-
Thanks Jan-Willem... You are likely right... the primary concern is the lettering and what approach would be best. I know I can buy decals that I can produce with a laser printer. Of course I can buy lettering individually and apply them but not sure how they would look.
-
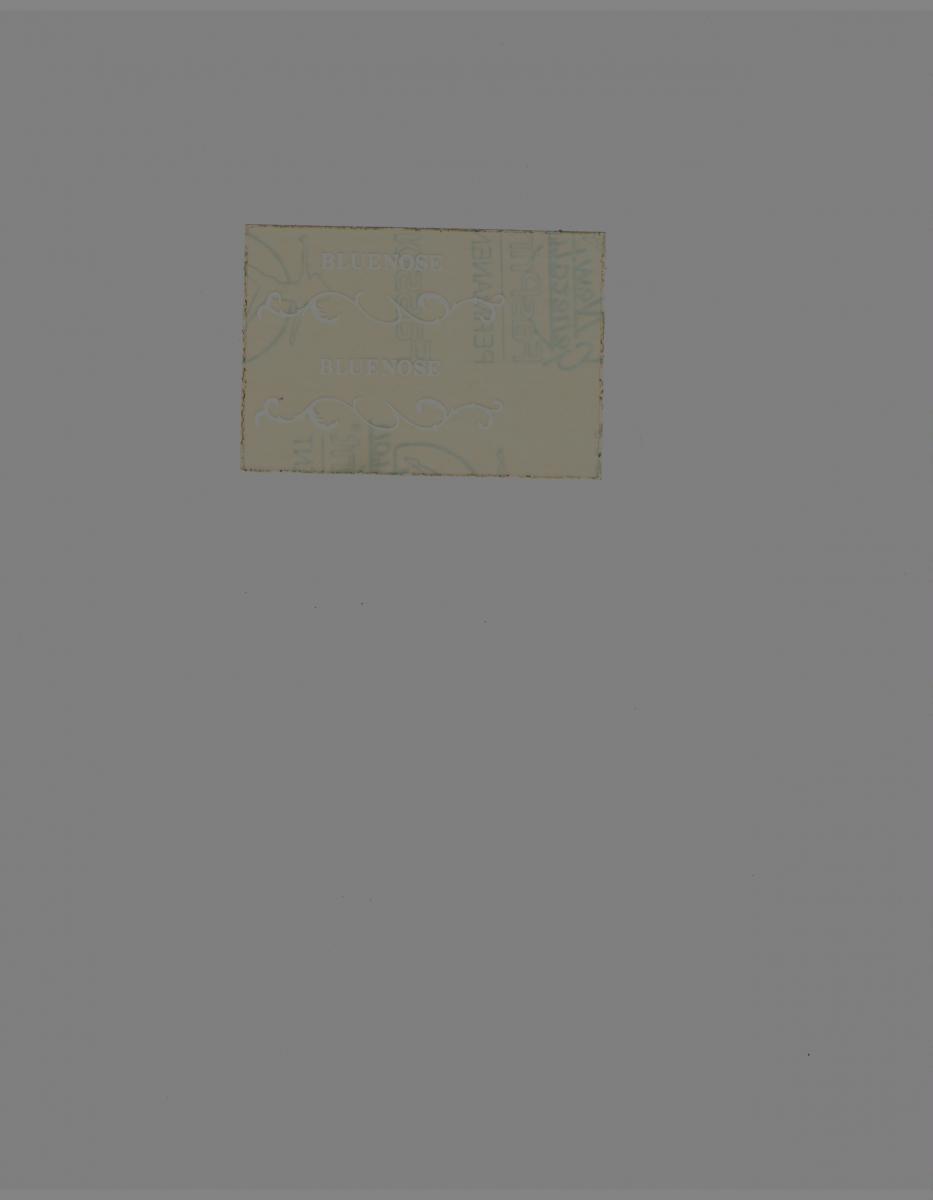
I am in the middle of a kit build of a Billing Boats Bluenose which is 26 years old and I am concerned about the usability and of course reliability of the decals included in this old kit. I have of course the "Bluenose" and scrollwork decals that are to be attached on each side of the bow. I have included a scan of the decal which has been quite a challenge itself to get given the transparency and difficulty getting the contrast and shading correct even to view. Any suggestions would be greatly appreciated... I have also posted this query in my build log. Thanks!
-
The next challenge is whether I can trust a 26 year old decal. These are the decals of "Bluenose" and the scroll work on each side of the bow and the scan of the image is shown below, which is a challenge itself given the transparency and difficulty getting the contrast and shading correct to obtain a useful image.

-
Thanks Keith, Bob, and Jan-Willem and of course the "likes". It is always nice to know that some-one is around the corner ready and available with help and advice. Bob, my plans is of course to cut the cardboard smaller and apply them just as you suggested. Jan-Willem, no UHU Hart glue here in North America... and the deck I think will be a simple coat of varnish and yes the deck is sanded, ready to go. Cheers, Julian
-
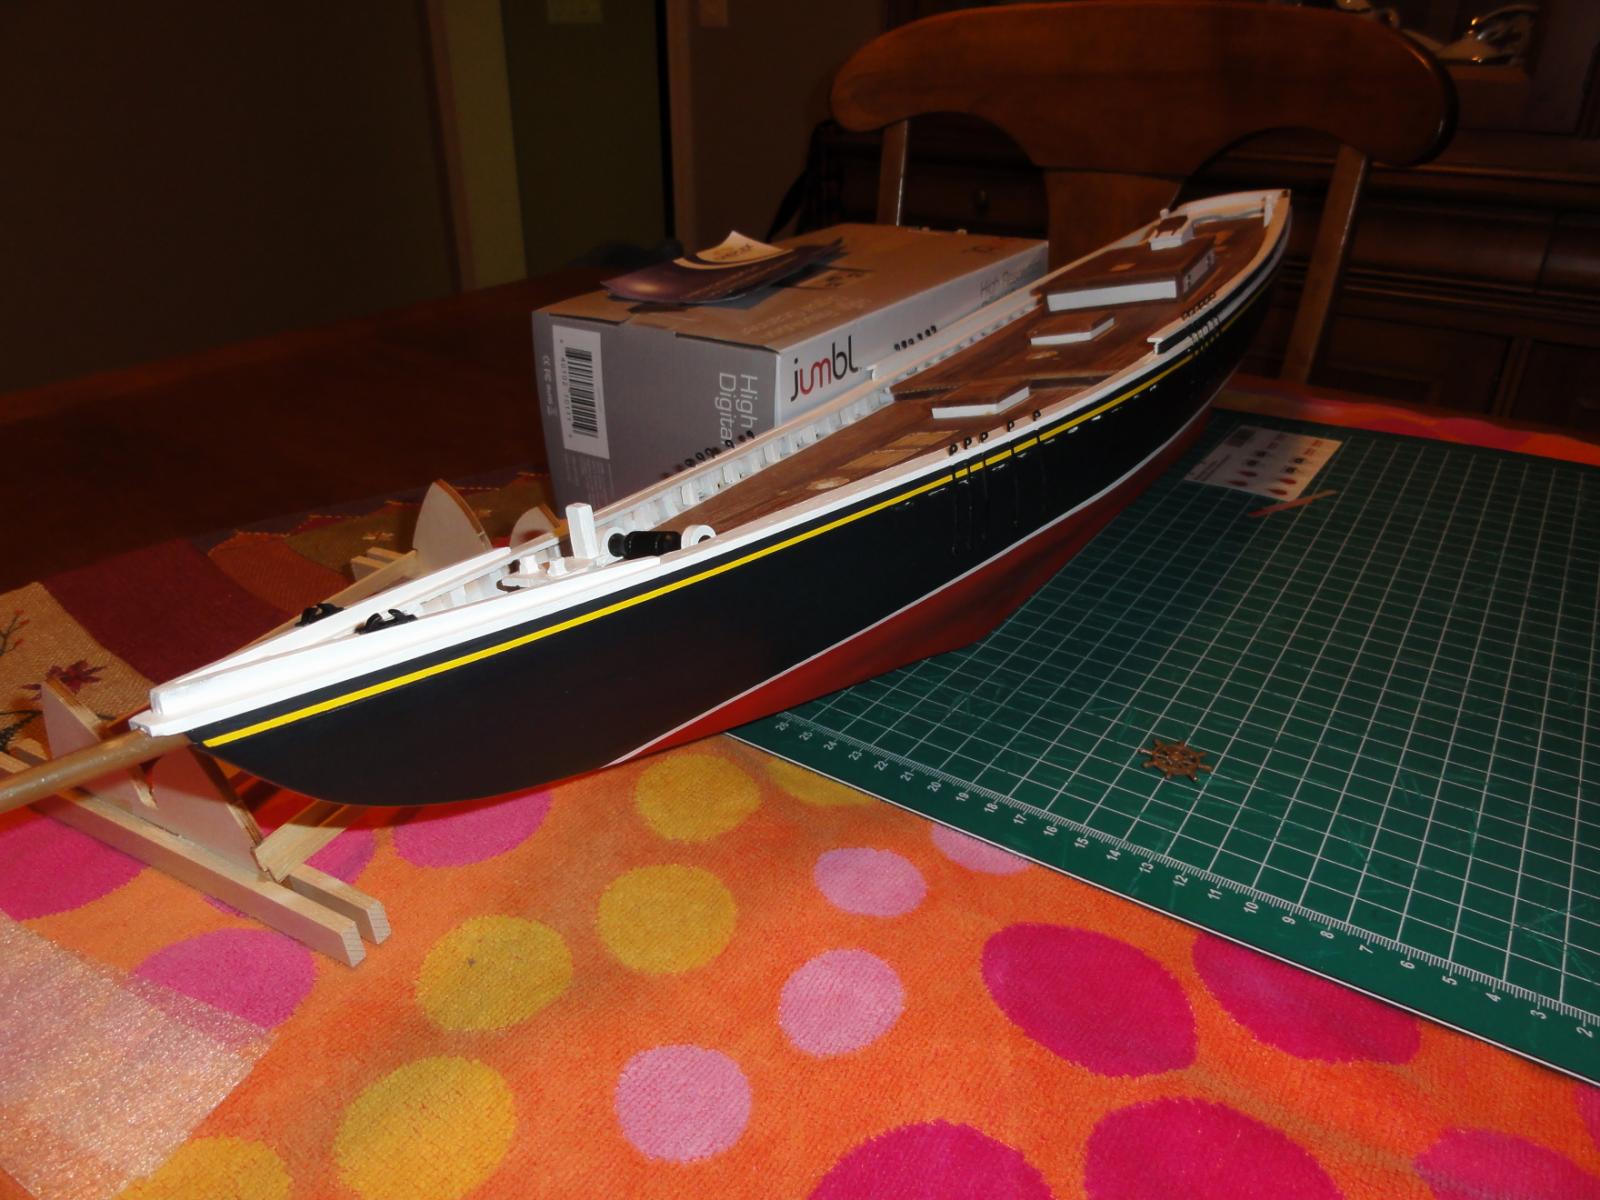
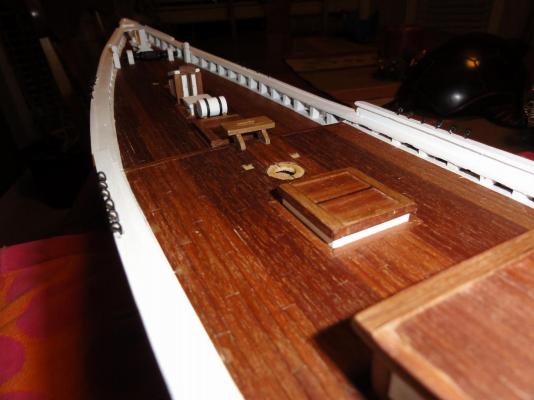
The last few pictures here show the cabin and its assembly and the ship in its current state. I must admit that I think there is no more beautiful lines of any fishing schooner ever built than the Bluenose. I am partial of course having visited Lunenburg, Nova Scotia, and have seen the (albeit newer) Bluenose II in the harbour in the water.


-
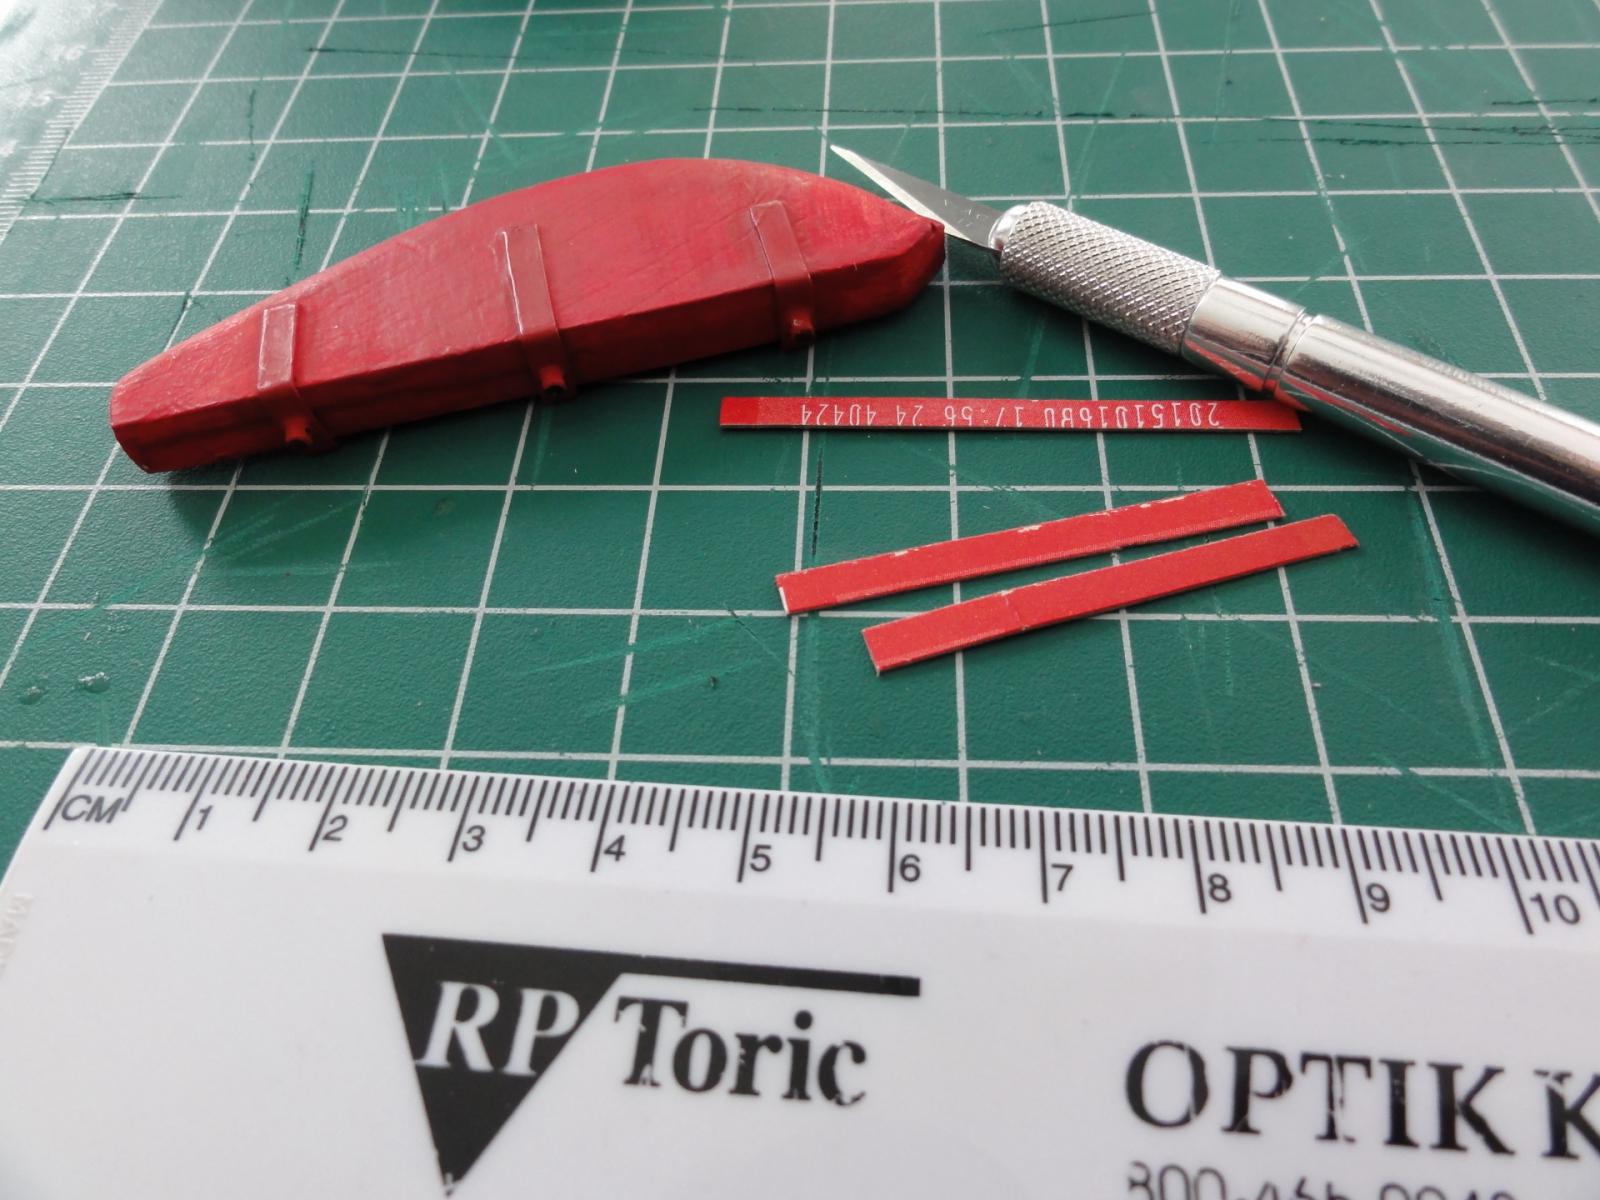
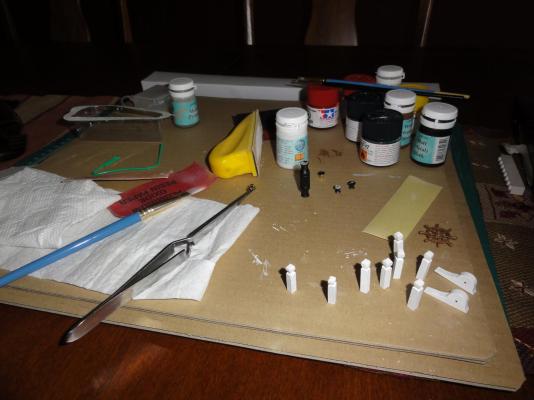
Finally some progress... I am very pleased with where my skills are as compared to my yet uncompleted first build (HM Granado). I have found this Billing Boats kit very enjoyable to date to build. I am enjoying all the various stages and aspects of this build, especially with regards to painting. Though the kit instructions are minimal, I find that I am doing more research and more study, which I particularly enjoy. The only concern is all, and I mean all the variations you see on the Schooner Bluenose models with respect to the current and past builds you see on the internet. Though there is the Nova Scotia archives, the resources and pictures are all black and white and quite limited in number of pictures available. Although it is my sense that the Model Shipways kits is perhaps more historically accurate, with more details included in the model and kit, it certainly doesn't distract from the "fun" factor in this Billing kit. I hope my opinion does not change when I start rigging the model given the absolute lack of instructions available in the Billing Boats kit. In the following pictures, I am showing some of my prep work now going into the deck fittings. I have also posted some details in affixing my rudder to the hull. The one mistake I noticed is I used from the big batch of fittings supplied by Billing Boats, some mast fittings as pintles, that I trimmed down and glued onto the rudder. This is the problem with the old instructions supplied with my kit with respect to the lack of a clear detailed parts list. I have already sourced from Cornwall Model Boats these mast fitting to replace the 3 of the 4 that I used on the rudder. I then drilled three holes on the base of the hull and with epoxy secured the rudder to the hull. The only question I have to others is should I glue down the cardboard strips (I already precut as shown in the second picture) to the hull and if so, what glue would work best on the already painted hull?


-
Hi Bob, I have been quietly following your build log. Wonderful, wonderful details, especially with respect to your instructions and perspectives on the various challenges to your MS kit. Thank-you! Certainly lots of practical information for my Billing kit and log. PS Do you mind PMing me your spreadsheet of all the small deck fittings and deadeyes as it is hard for me to keep up the details and with the Billing kit, there is very little information, and I always strive to add the little "extras" that make a model truly great. Cheers, Julian
-
Wonderful work! Two questions for you: 1) Did you file the backside of the quarter badges at the bottom a bit to allow it to sit more flush against the wale? 2) Did you use CA or epoxy to anchor the quarter badges against the hull? Thx, Julian
- 302 replies
-
- 1
-

-
- granado
- caldercraft
- (and 1 more)
-
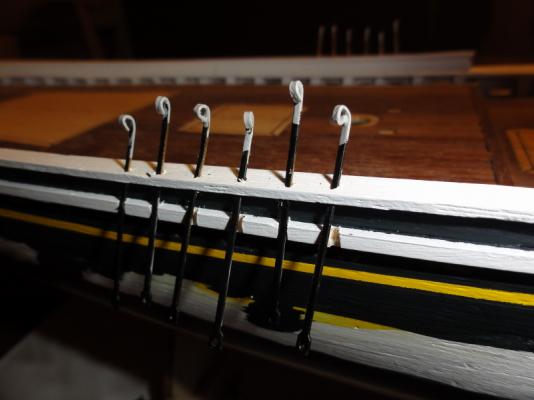
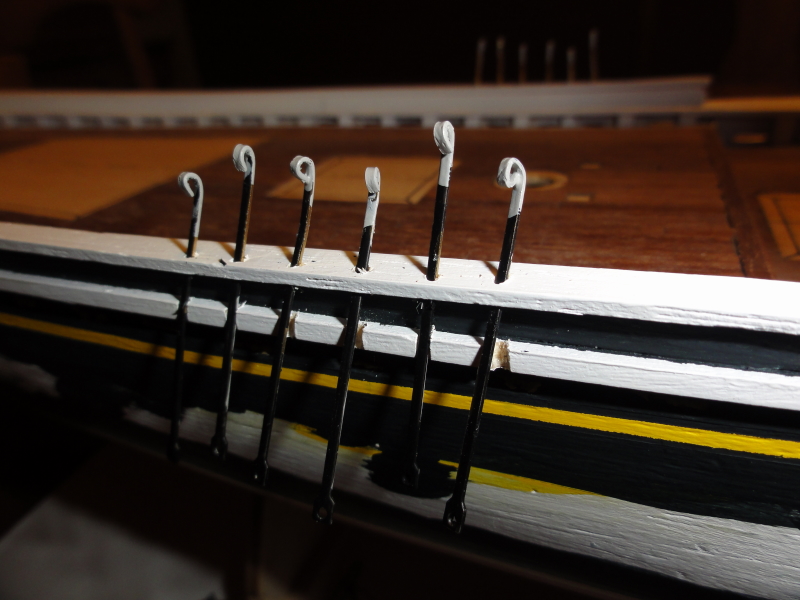
Here is a picture of the chainplates. I pierced the railing and anchored the fore 5 on each side directly flush to the hull. This picture is the aft chainplates, notched in the railing just slightly, ready to be anchored onto the hull. These are not flush to the hull along its full length, obviously sitting up off the hull where the railing runs. The other note is that when laying out the angles of the chainplates, I stuck the dowel in the mast hole and basically eyeballed the angles of the chainplates to get the best orientation with a mark on the dowel representating where the shrouds are to meet above. They seem to be OK and line up well, but time will tell when I begin the rigging.