


mtdoramike
-
Posts
2,054 -
Joined
-
Last visited
Content Type
Profiles
Forums
Gallery
Events
Posts posted by mtdoramike
-
-
-
-
mike
Ah, the twelve years was because I was running my own practice and working long hours, and I was also daunted when confronted by the rigging diagram, but I overcame that fear. I am now retired and I would guess closer to two years for a build programme? Incidentally, there will no doubt be progress in lighting in those two years but tiny lights are available now, in fact I have just come across a tiny brass lantern with an led inside. One could even have an led inside the stove.
Anyway, thanks for the encouragement guys there clearly isn't a gut negative reaction to lights in model boats.
I know what you mean Dave, I was just pickin at you a little bit. The rigging on the Vic will intimidate anyone. I know, I'm building a Vic now.
-
I also say go for it. Who knows, if it takes you as long to build the Ag as it did the Vic (12 years) they may have new technology by then when it comes to lighting:)
-
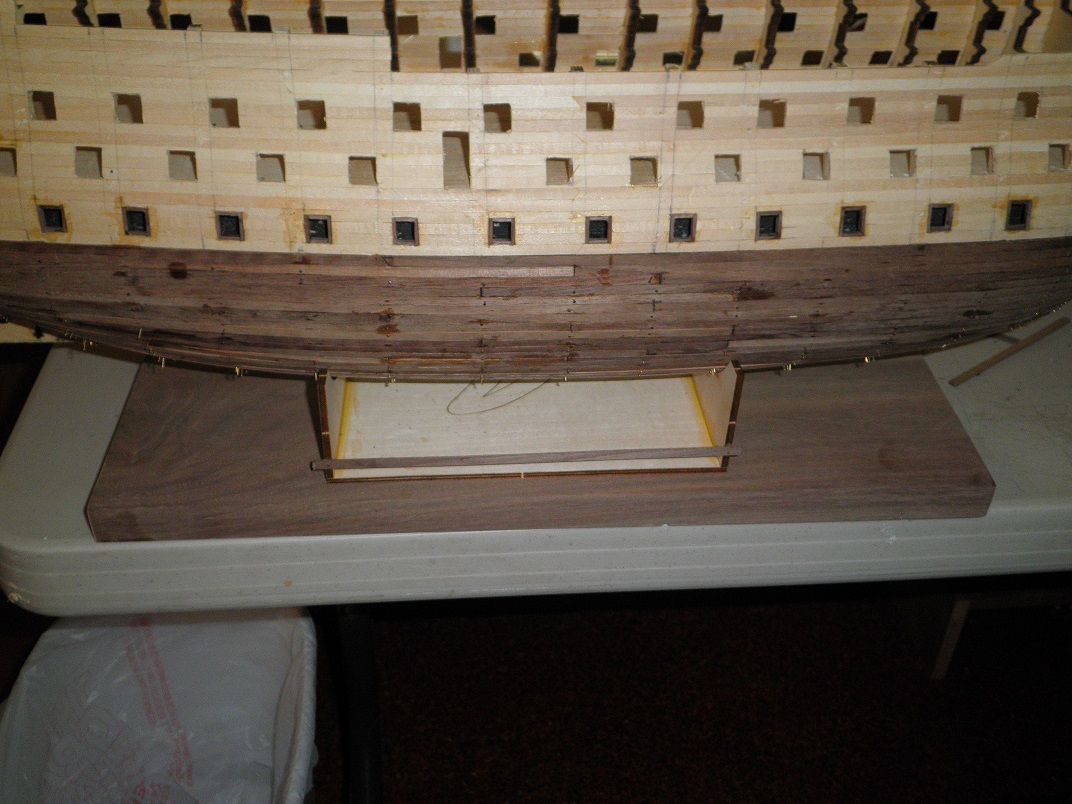
The above picture is a perfect fix, quick and simple and no one will ever see it. NOW, this is your most critical step out of the whole build. If you don't make sure to get your frames square to each other and the keel as well as making sure your false keel remains straight because if it isn't straight once the frames are glued into place you are pretty much sunk. Also, when planking, lay one plank on each side of the hull at a time in order to maintain a straight keel. So pick up the frame periodically and check straightness and for any twists as you go along.
Also, I use basic tools myself, a dremel or rotary tool, exacto knife and coping saw are you best tools.
-
I have the display board all finished off and ready for the Vic, when she gets a tad further along. I know it seems a bit premature for a display base, but I believe the sooner you get a model mounted, the better for you and the model. AL supplied a work cradle for the Vic, which I will used up until I get her coppered. But once coppered, she will be mounted to the board after that and the base wrapped in wax paper just in case of any glue droplets getting on the display board.
I may also add a support block toward the middle of the display board on either side of the model as added support, which will help during transport as well as construction. Those two brass pedestals make me a bit worried about supporting that much weight.


- clearway, Dimitris71 and Aussie048
-
 3
3
-
Stop procrastinating and get to building that Scotland. Yes, you are a beginner, yes, it seems intimidating at first, but get over it and crack that box open and start building. You have a health of knowledge here on these forums that wasn't around 20 years ago. Anyone here would help you with any questions you have. So don't sweat it, we got your back jack.
-
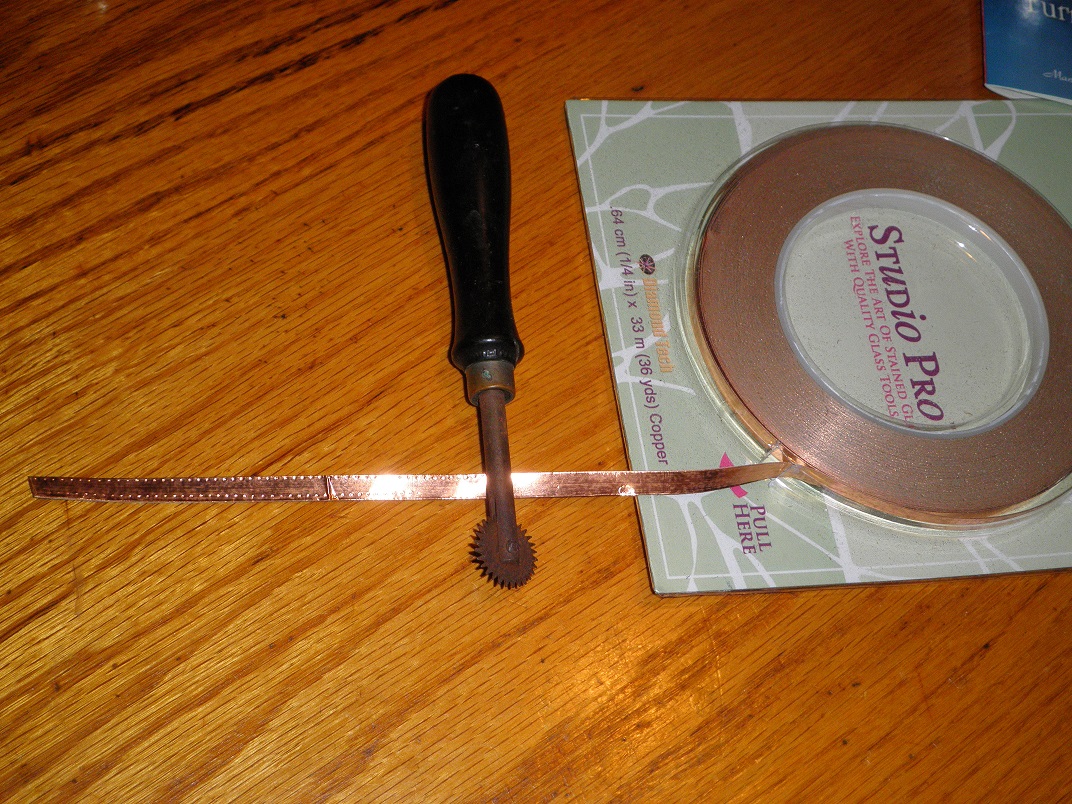
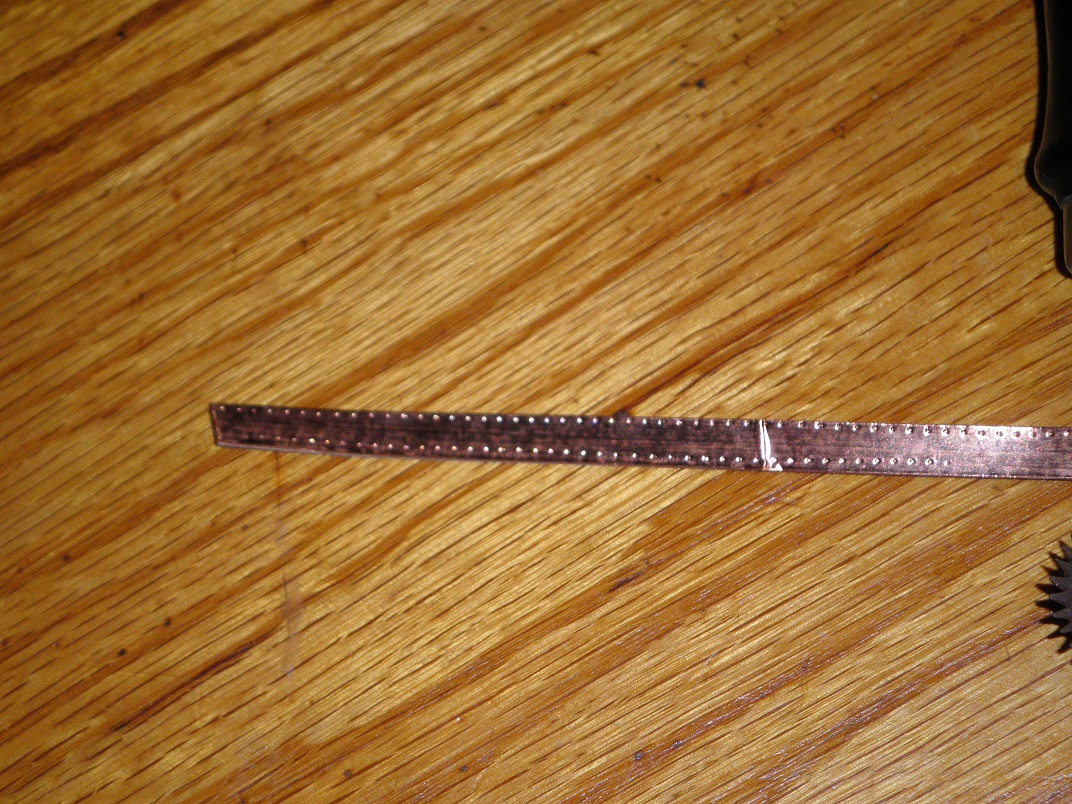
I found a dress makers tracing wheel that I will use to dimple the copper tape to simulate rivets. I had one years ago, but when I got out of modeling, I didn't think I would need one again so I gave it to someone, probably a dress maker:). I had one years ago that I made from a watch gear wheel that gave an even tighter pattern, I wish I still had that one. Once the hull is completely planked, I will sand it down with several grits of sand paper, then last grit will usually be 400. I usually then spray a clear laquer or poly over the hull, making it smooth and gives the copper tape something to stick to besides saw dust and raw wood.
Attached Thumbnails- Dimitris71, clearway, mtaylor and 1 other
-
4
-
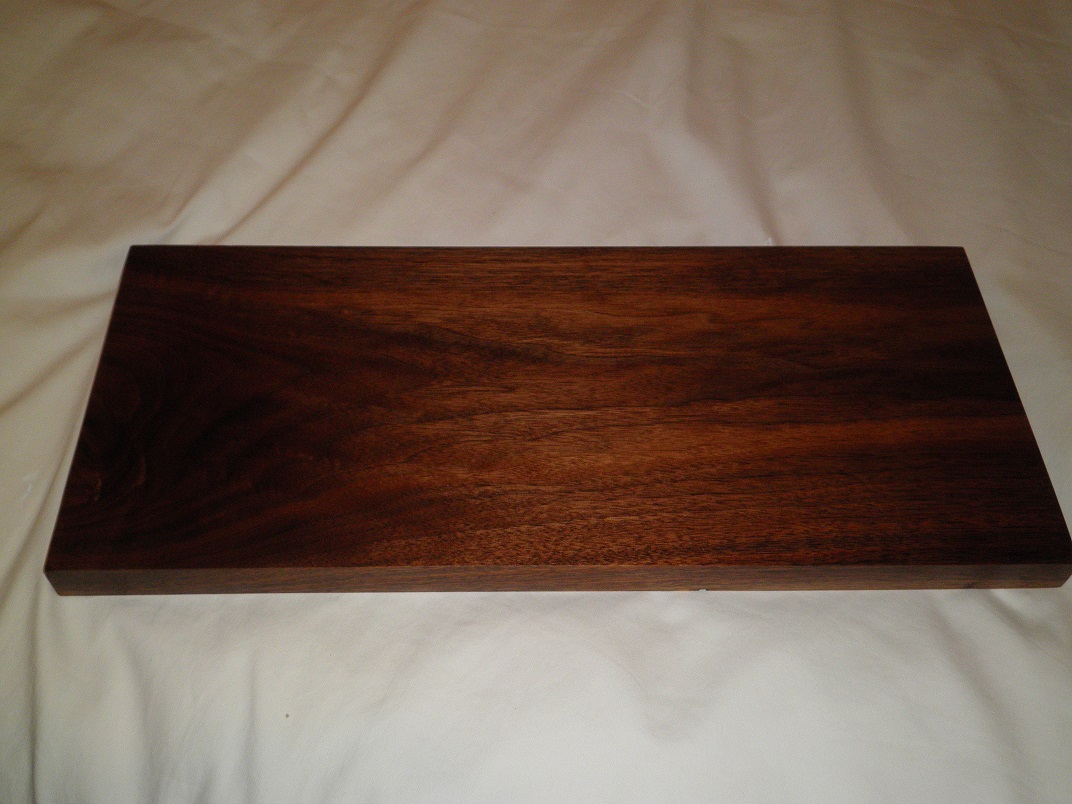
Almost done with the planking. I also found a beautiful slab of Black Walnut to utilize as a display base.
Attached Thumbnails- Dimitris71, mtaylor and clearway
-
3
-
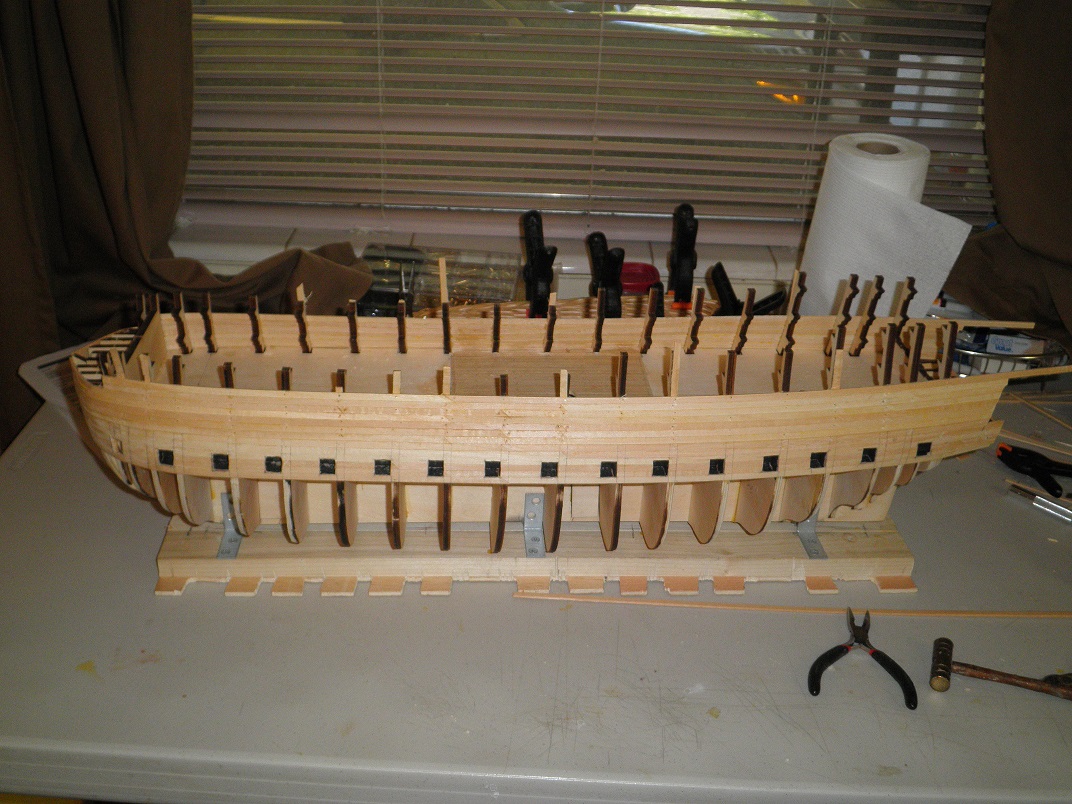
I have started the hull planking and so far, no big surprises yet.
Attached Thumbnails- Dimitris71 and clearway
-
2
-
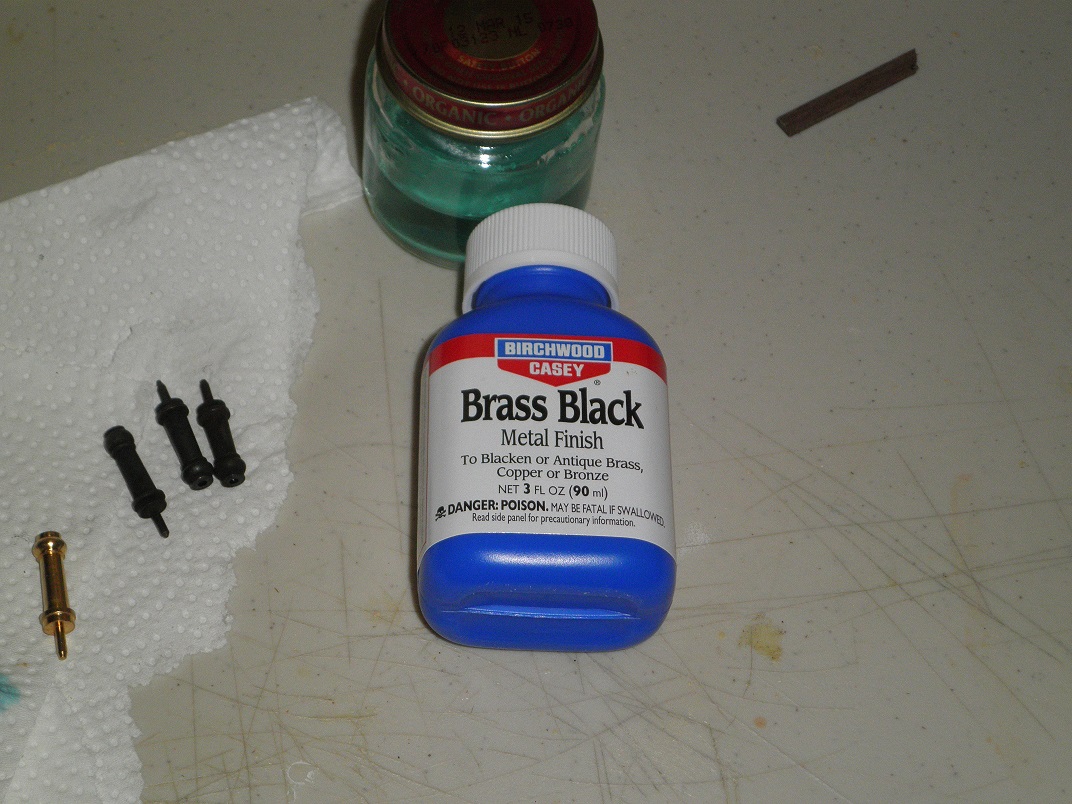
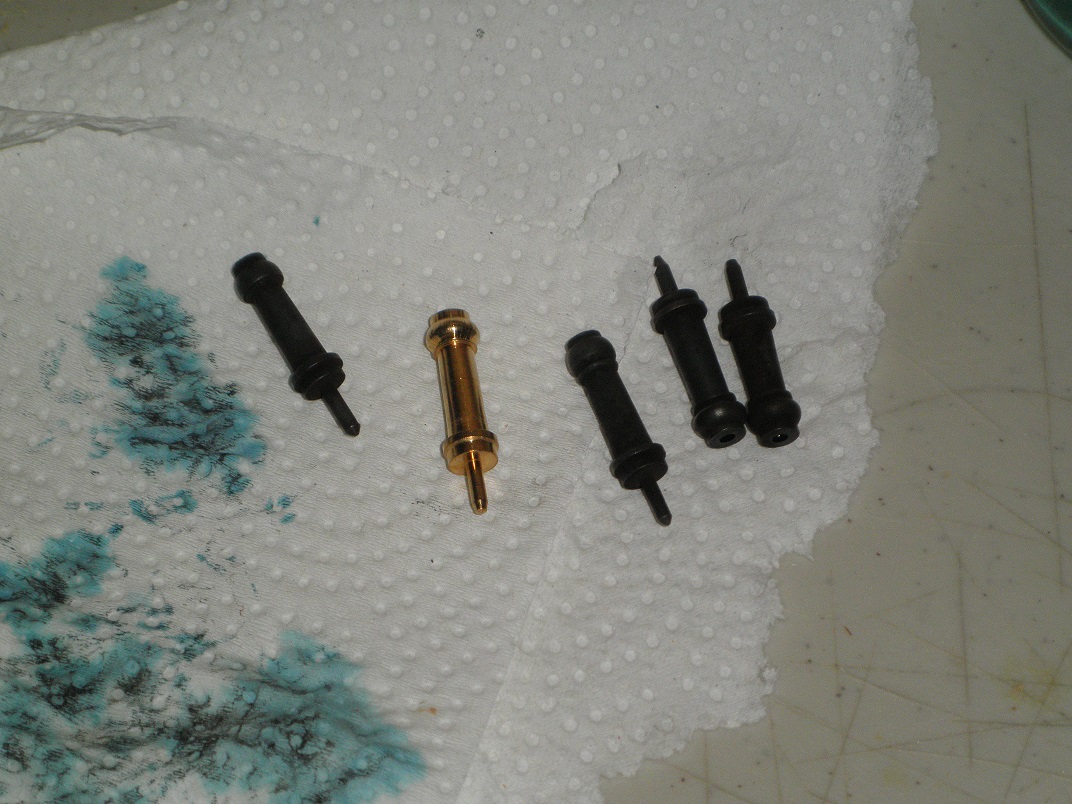
I bought some Brass Black metal finish to blacken or darken the bright brass on the new cannon. I was torn because I really like the bright brass look of the cannon, but I they were quite bright and not so realistic. They are turning out quite nicely with the Brass Black. I had thought of just painting them a flat black, but the paint I think would hide quite a bit of detail. The Brass Black does not. Hey, for $10.00 I figured why not give it a try. But, be warned, it is finicky . You have to clean and triple clean each item or else it will come out splotchy. You must remove any dirt and even oil from your fingers. So, I just dipped them in alcohol, then vinegar and then into a soapy solution, then wiped them dry and then into the Brass Black and within seconds BAM, they turn black. IT"S MAGIC, well not really, just a chimcal reaction.
 Attached Thumbnails
- Dimitris71, clearway and mtaylor
-
3
-
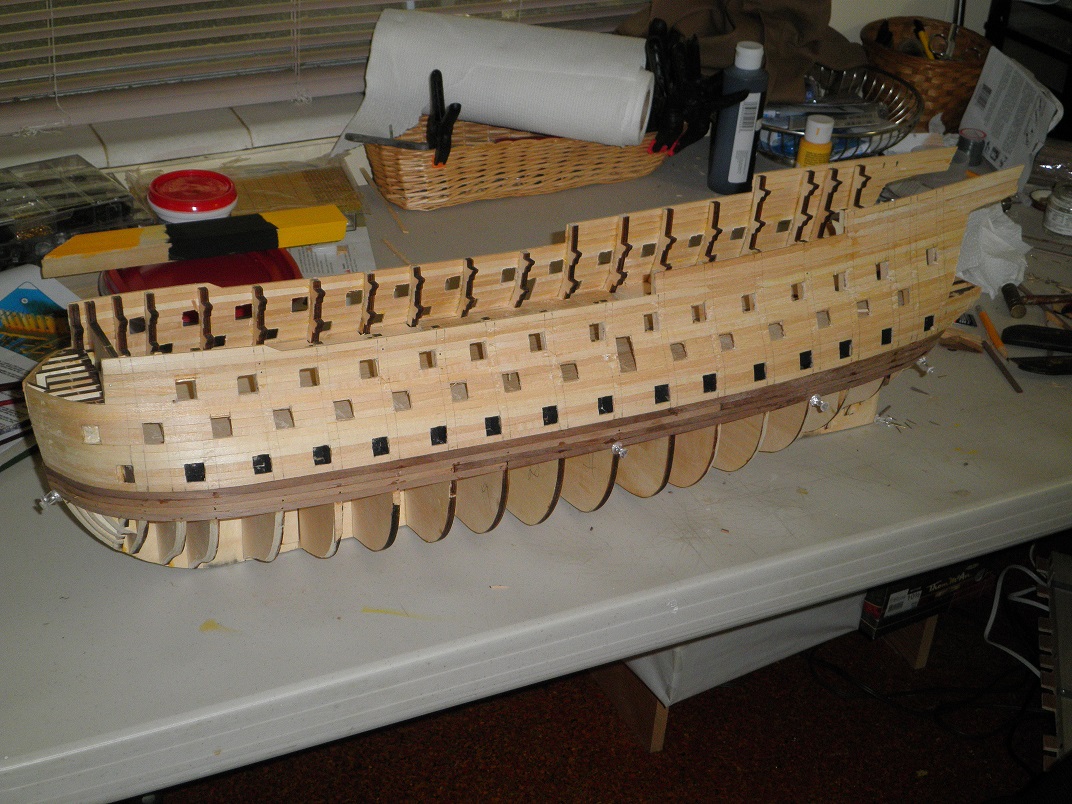
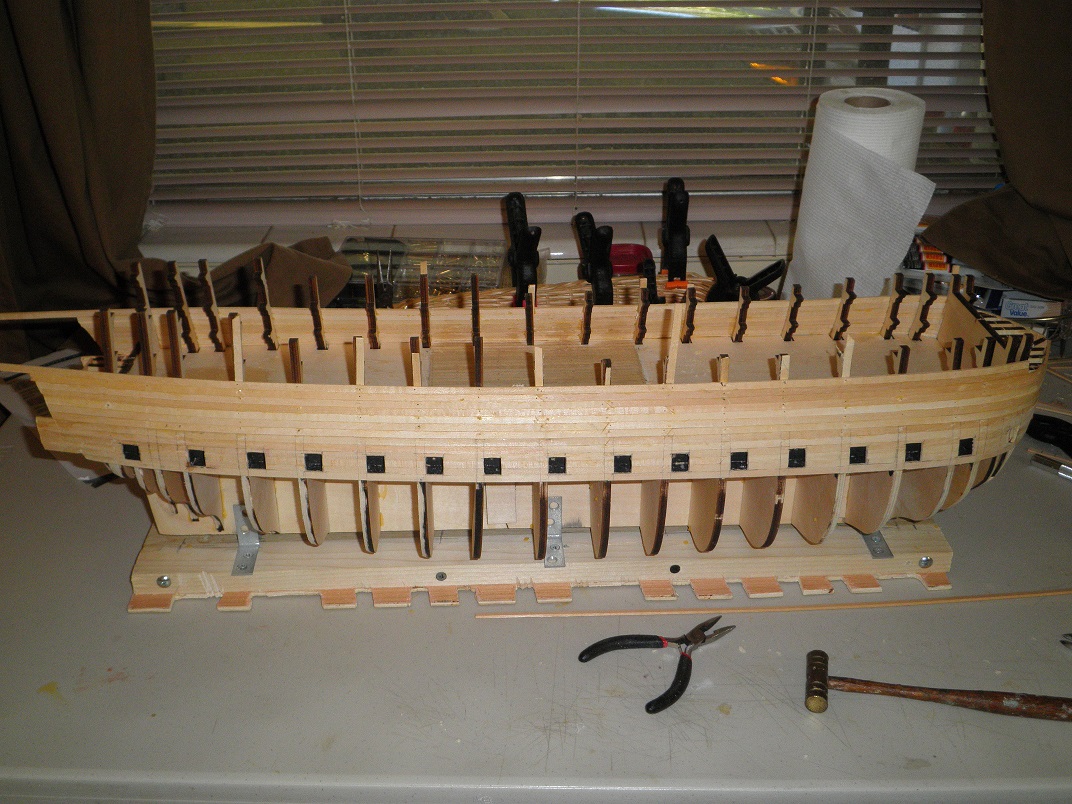
Okey, here is an update. I have determined that either I got a bad cut kit or they are all this way, but of all the model ships I have built, this is the first kit that I have had to shim better than half of the bulkheads while planking just to get them to run true without any dips in them. Planking is getting rather exhausting after laying a couple of planks, checking them and then having to go back and shim 3, 4, or 5 bulkheads in a run. I feel like this kit is fighting me every step of the way so far. I'm just short of calling this kit a dog. But I'm not far from it. I'm missing the Mainsail and the foresail, although I have the full accompaniment of sails (19). Artesania Latina used to be one of my favorite manufactures for those lower budget kits, but after spening over $500.00 for this kit, which a bit more than I have ever spent on a previous kits, I'm beginning to wonder.
The white or natural wood color is the shims.
Attached Thumbnails- Dimitris71, Aussie048, clearway and 1 other
-
4
-
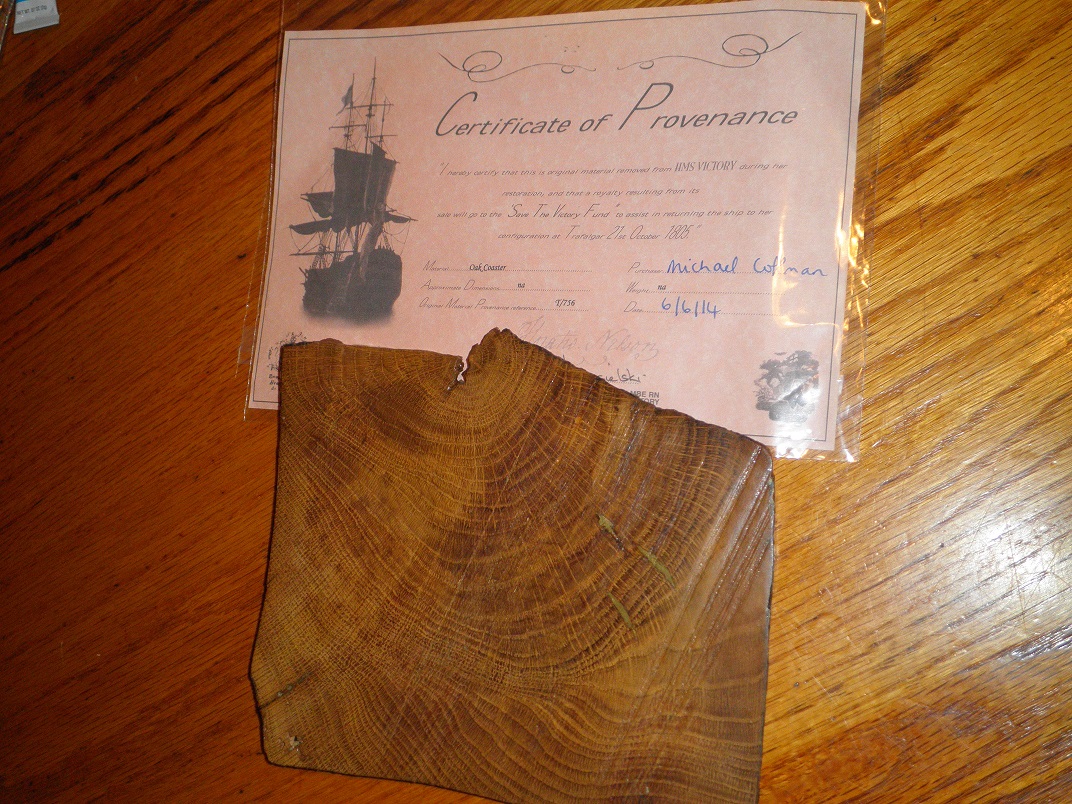
I just received the piece of HMS Victory wood from England that came off the Victory during one of her recent refits. I will use some of the wood to make various pieces of the model and then will include what ever is left of the wood in the display case which will be included in the donation to the library along with the model.
Attached Thumbnails -
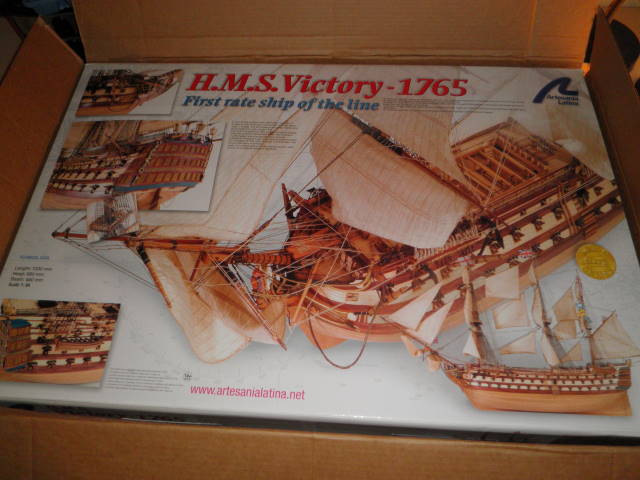
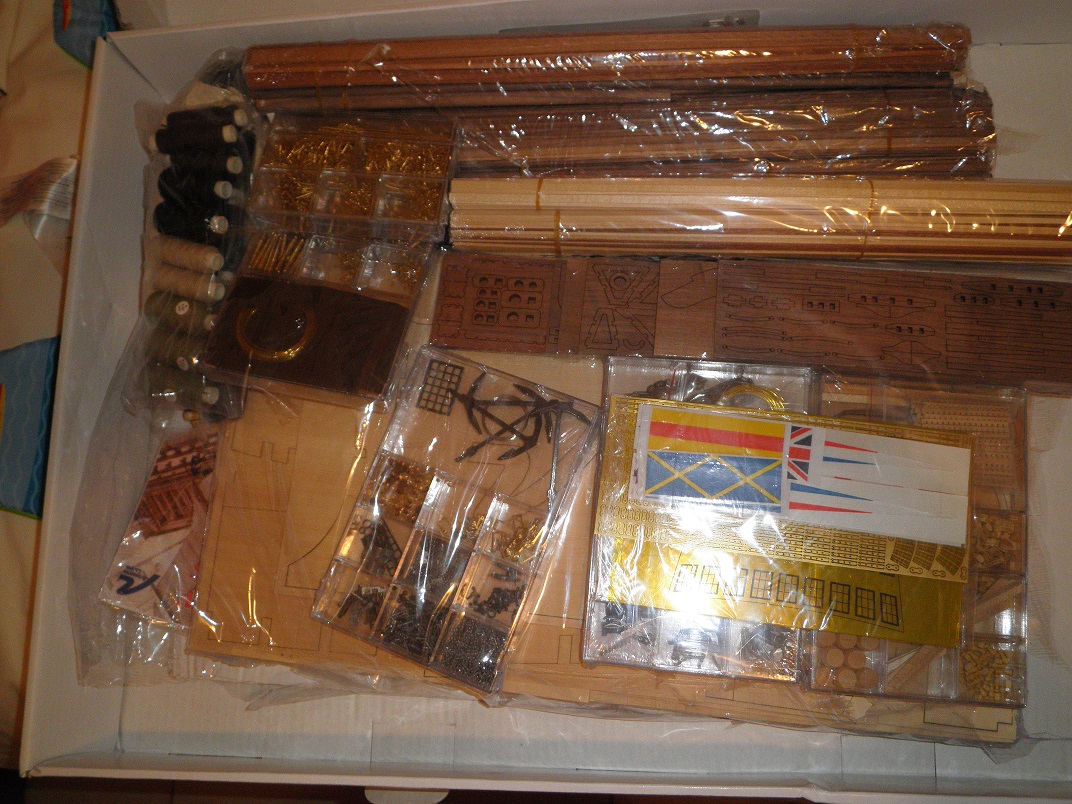
I recently ordered the Artesania Latina HMS Victory 1:84 scale from Plastic-Model-kits.com for the price of $567.00 with free shipping. They basically only sold Latina kits. They are a sub of Oakridge Hobbies, who actually shipped my kit. It took 10 days from the date of order to receive this massive kit. The invoice claimed 21 pounds shipping weight and I believe every bit of it. Upon receiving the kit, I opened the box and did an inspection of the contents. I was quite pleased with the woods chosen for the model and the fit and finish materials supplied. But they included an adendum to the instructions due to a sheet of the laser cut bulkheads were mislabeled and giving the correct sequence in the adendum.
Observations so far:
LIKES: The building materials are outstanding, the instruction book is quite thick and very detailed with color pictures to follow as well as written instructions.
Definitely the price point for a kit of this magnitude.
The false keel and bulkheads are cut from some thick plywood, so no worries about breaking anything.
As usual with Latina, they include some very nice containers with actual lids to keep all the parts in one bin. They are a lot nicer than those egg carton still containers that are shrink wrapped but the small pieces still find their way into other bins.
Dislikes: A major dislike for me is NO PRINTED PLANS, What???, no, you heard right, I can't believe AL cheaped out on a kit this expensive and sent a CD with plans on it rather than printed plans. This is a problem for me, because I build by plans, not by instructions or a CD. So now, I have to locate someplace to get the plans printed off of the CD and bare that added expense and living in my neck of the woods, it's not that easy. We don't have a Kinko's/Fedex or anything like that. The best I can do is Office Depot, so I'll have to check them out. Now, can the model be built with the CD plans? YES, it can and has been and there's a build log on it. But, I'm old school I guess.
I could be wrong, but I didn't see a second layer of hull planking, which was Always supplied with AL kits in the past just in case you messed up on the first layer.
One of the bulkheads was quite warped, so I had to wet it down and then took a hot air paint remover gun and with enough heat and a bit of cursing, it flattened out fairly well enough for government work anyway.
The fit of the bulkheads to the false keel is quite sloppy and some with gaps up to 1/16". This makes plumbing up and squaring the bulkheads quite difficult. Also, you MUST lay the first false layer of decking BEFORE gluing the bulkheads to the keel or you will have a devil of a time getting the deck to fit properly. They floppy bulkheads do help in this instance though. So it may have been planned.
They also included a cheap cradle style display board for this grade of s ship model, something besides plywood will be in order to compliment her beauty.
With all this being said, so far I like the kit and I have always like Artesania Latina kits for fit and finish and it's nice to see they are still kicking. Will this kit make into a fine model? the answer is yes, with a little hard work and determination. I know there are doubters about Latina kits, but as long as you remember, kits are not Museum quality models, they make into fine ship models but they aren't unique. If someone is looking for museum quality then they should scratch build, which would be unique. I'm not a scratch builder, I'm a kit basher. I have a lot of respect for scratch builders willing to devote the time, patience and money into a single project. I know a few near me and applaud their efforts, but I was more into building and selling my models at the time. So build time was a premium.
But this particular project will be my last model. This model (the HMS Victory) will be donated upon it's completion. So no hurries mates as long as my health holds out and my eye site holds on.
I will continue to add to this review as I go along. I was also able to obtain a small piece of wood from the actual Victory ship, which I will incorporate into the Victory model such as anchor collars or something like that.
Attached Thumbnails -
Now that turned out beautiful.
-
They look quite beautiful, but quite an undertaking for sure. As far as gluing versus nailing, the glues on the market today from wood glues to super glues, they bond quite well and will last for many, many years, especially if the wood is properly bent before applying. I have built models some I have left the nails in while others I pull them out and some are close to 20 years old and have no structural issues from removing the nails. Most model kits expect you to cut off the head of the nails and then drive the nail flush, so there isn't much attachment there from the nails anyway.
-
- That hull turned out beautiful. The high gloss poly might be a bit shiny, but look how beautiful that wood is.
-
I found a dress makers tracing wheel that I will use to dimple the copper tape to simulate rivets. I had one years ago, but when I got out of modeling, I didn't think I would need one again so I gave it to someone, probably a dress maker:). I had one years ago that I made from a watch gear wheel that gave an even tighter pattern, I wish I still had that one. Once the hull is completely planked, I will sand it down with several grits of sand paper, then last grit will usually be 400. I usually then spray a clear laquer or poly over the hull, making it smooth and gives the copper tape something to stick to besides saw dust and raw wood.
-
-
Latina uses clear yellow plastic for the cabin windows. I personally like the blue better now that I see it on yours. I do like the added frame work and your windows are looking great.
-
That might be worth a try Paul, I have heard of several different attempts with starch, but this is a new one. It might work if you position two dowel rodson a platform, attach the sails to the dowel rods and put the fan in back of the sail.
-
I have bought many a kit from Ebay and not expecting too much, I have always been pleasantly surprised by what I have received. The main thing people fail to do when dealing on ebay is: Ask lots of questions, don't wait until the last minute to do this, thoroughly review the sellers feedback. This is the rule of thumb I always follow and have never been burned.
-
That reminds me that just before I bought the Latina Victory, I had bid on a Corel Victory on Ebay, it went for $178.00 US, my bid was $175.00US. I'm still kind of kicking myself over that one, especially since I paid $567.00US for the Latina version.
-
I agree, I like Corel kits and the Victory by Corel was one of the top choices of mine. But I decided I would go with the AL version. But my top Vic picks were Corel, Artesania Latina and Constructo. Cauldercraft was never a consideration because I would never pay $1100.00 for a ship model kit, no matter how great it is. I have built many ship model kits by numerous manufactures over the years and I have learned that no matter how much you pay for a kit or who the manufacture is, it still comes down to the builder and how well they build the model.


HMS Victory by mtdoramike - FINISHED - Artesania Latina
in - Kit build logs for subjects built from 1751 - 1800
Posted
Keith, I thought the Latina version was huge, but the Billings version has it beat by more than a few inches or millimeters:)