


mtdoramike
-
Posts
2,058 -
Joined
-
Last visited
Content Type
Profiles
Forums
Gallery
Events
Posts posted by mtdoramike
-
-
very nice work. It also doesn't look like you had to shim too many frames.
Mike
-
I happily await pictures. If your Ana was anything like my AL Victory, you will have to shim numerous frames in order to get the planking to lay properly.
-
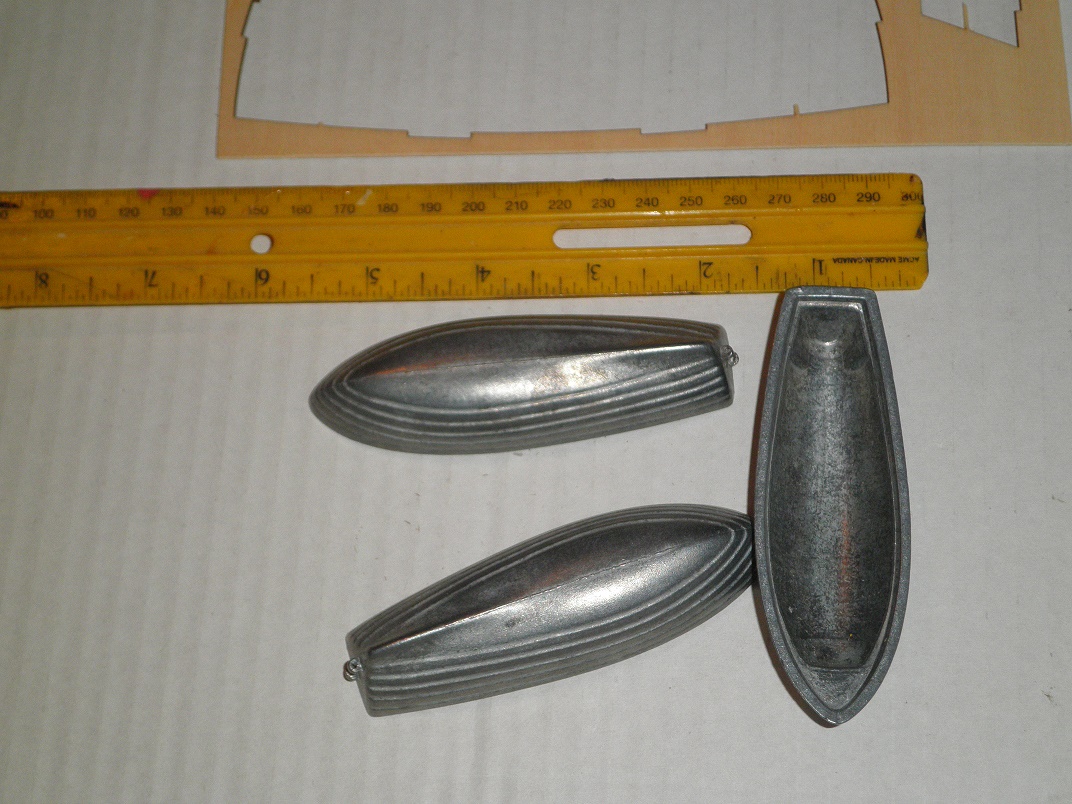
They about 95mm or 3 3/4 inches long. But 4 inch boats would work as well. I also have contemplated replacing these with wooden life boats as well and have thought about scratch building my own. But with a bum ticker and limited time left I figured my time would be better spent doing something else and since this model is being built as a donation, I want to make sure I finish it while I still can. I also have another model waiting in the wings that I hope to have time to build as another donation.
Mike
-
-
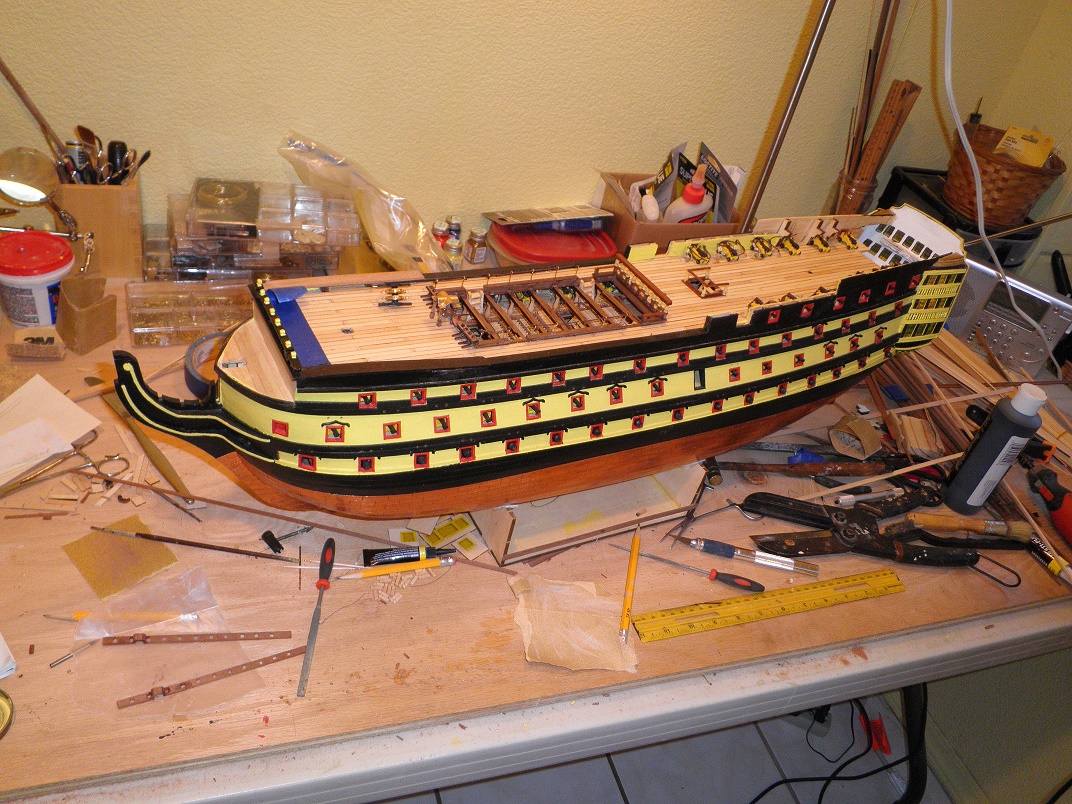
Yes, it comes with three metal boats that require planking. The kit also includes sails, which is a major advantage if you intend to build it with sails. Most kits back in the day didn't include pre made sails. I got pretty good at using my wife's sewing machine and also hand stitching :rolleyes:Here is a picture of the bare boats unfinished.

-
Very nice planking job, I can't wait to see how the build goes.
Mike
- Eddie and Mike Dowling
-
 2
2
-
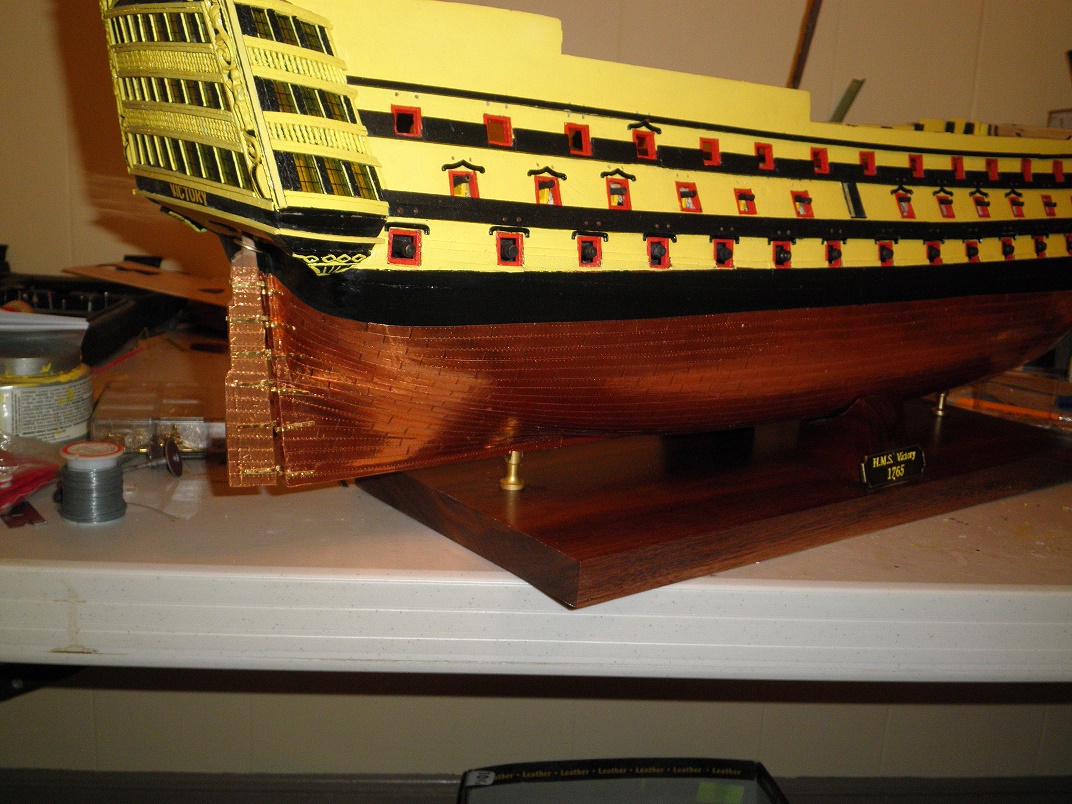
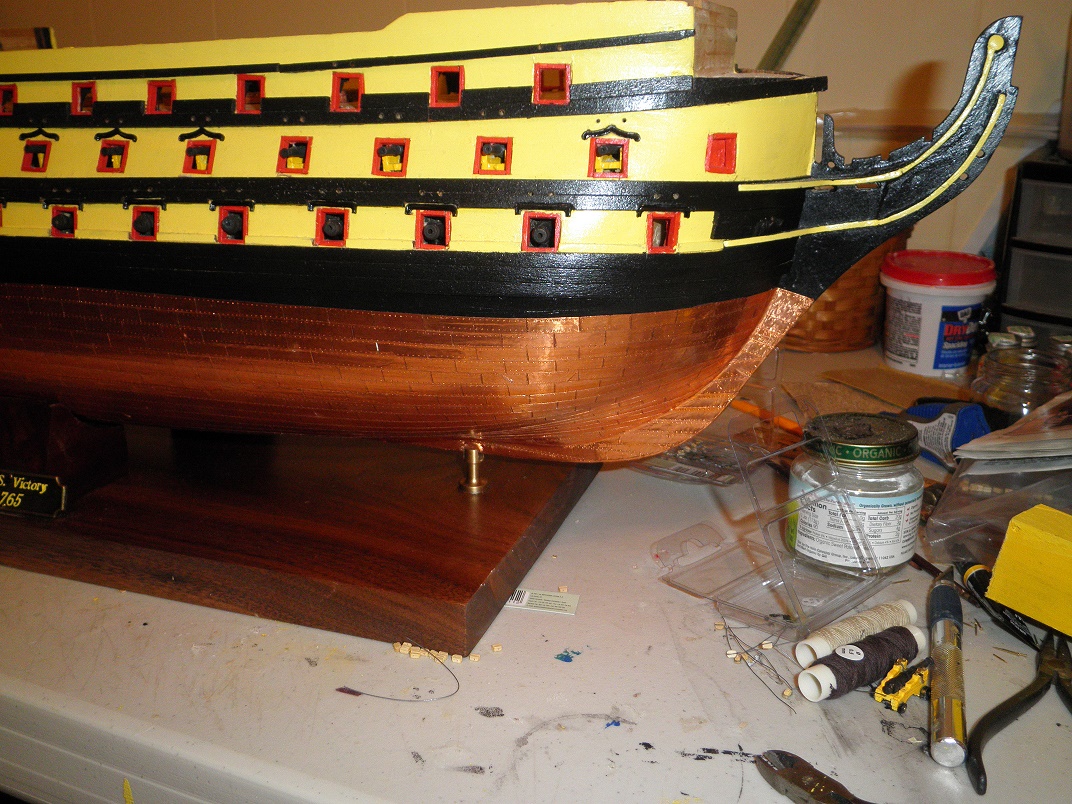
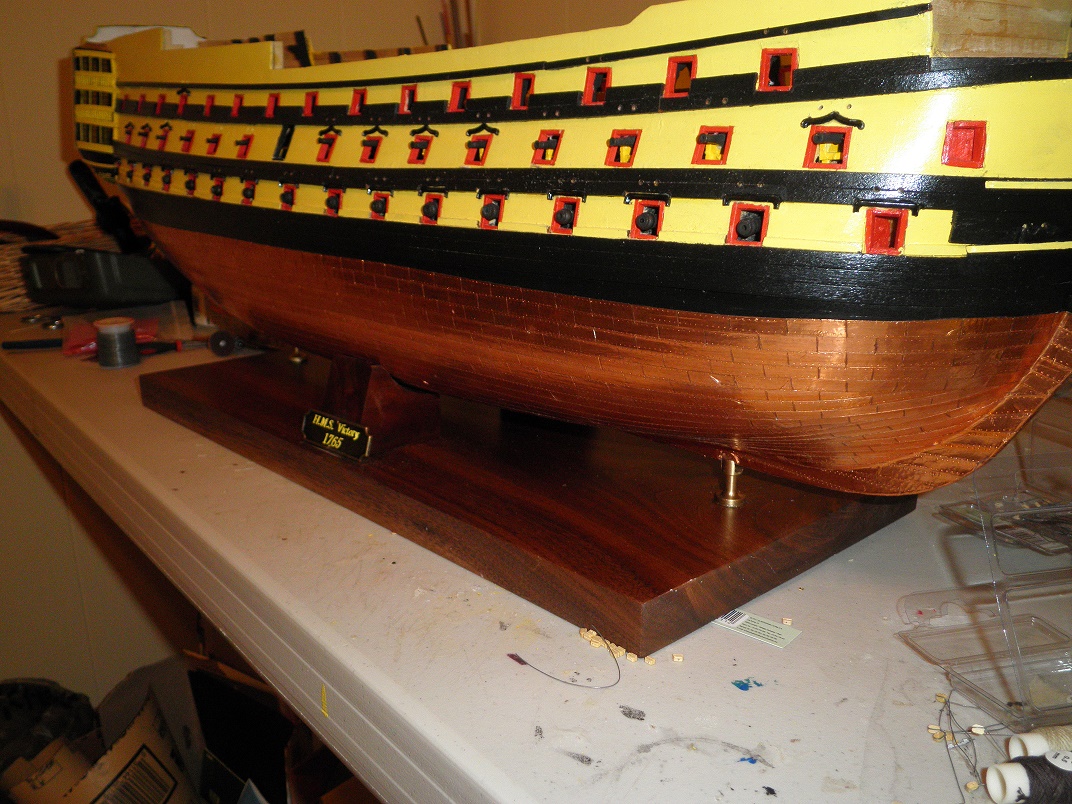
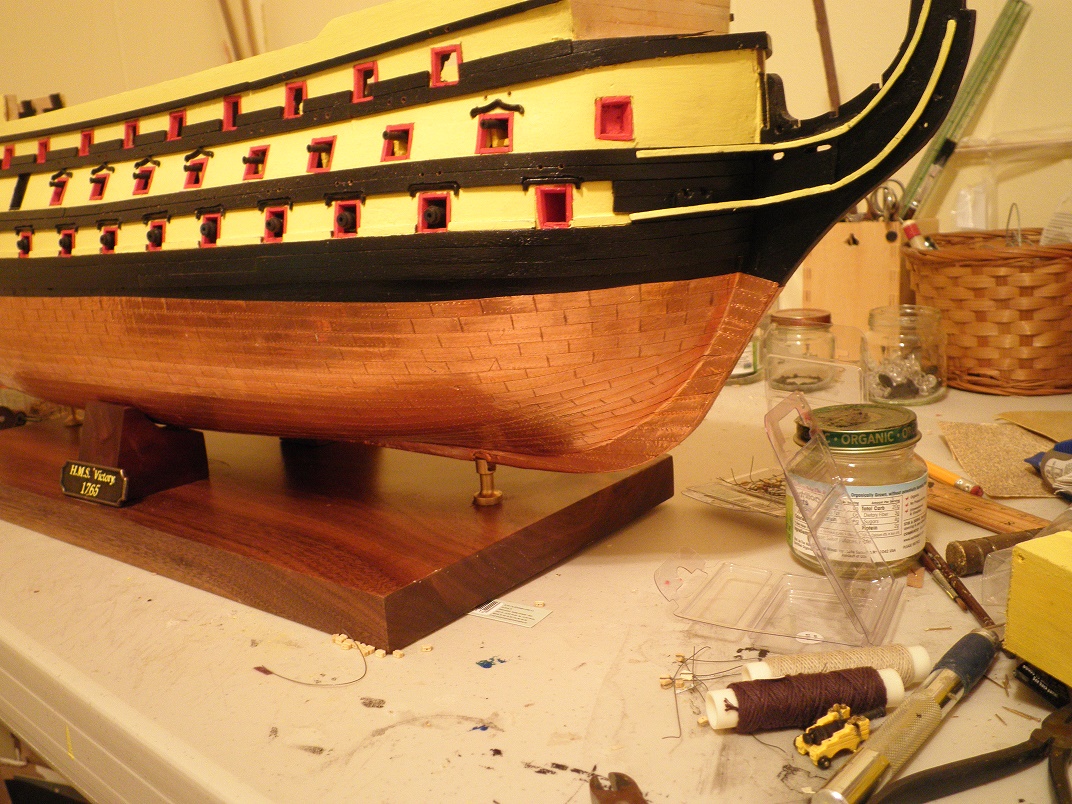
commercial@artesanialatina.com addressed to Ana . No, Latina kits don't supply the copper sheeting. This is something you have to buy separately. I used 1/4 inch copper foil tape cut into 3/4 inch lengths.
Mike
-
-
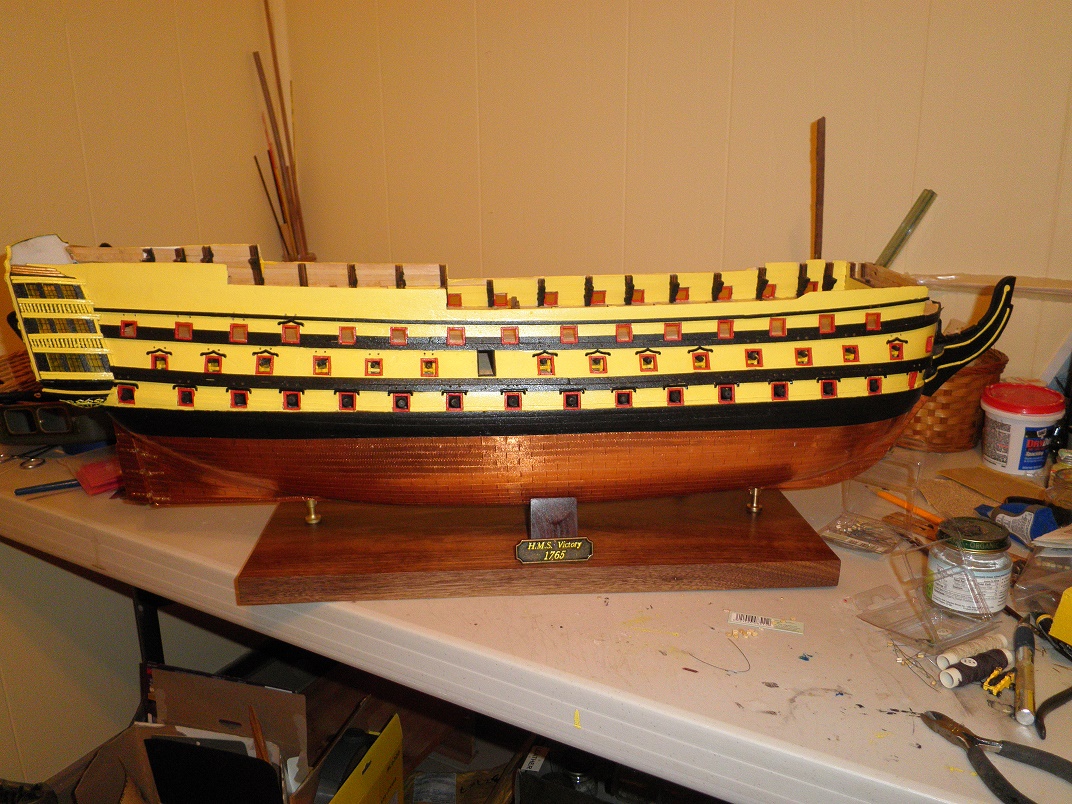
Hi Ron, the scale is 1:84, which equates to about 49 inches in length when finished. The Copper tape is 1/4 inch in width. It cost about $7.00 a roll from Hobby Lobby and takes a tad over one roll to finish the model. This is the same tape that stain glass folks use, which is also called copper foil tape. I have used this tape a numerous models that I have built and find it the best alternative to purchasing actual copper plates from places like Cornwall Models and spending $75.00 and up.
Mike
-
Thanks for posting Pictures of the box and contents. I love Constructo kits because of the quality of the parts and woods used. The instructions leave a bit to be desired and sometimes the plans lack a bit of clarity, but their kits make into nice models. You just have to remember while building a Constructo kit that they only supply the basics and if all you are looking for is a nice wall hanger then you will not be disappointed. If you are looking for closer to a museum quality model, then you will have to put in extra time, materials, research and expense. Good luck with your build, I look forward to following it.
Mike
-
It looks very good. If you aren't happy with the final result, you can always paint the hull. If I were building it I would most likely paint it anyway. I was unaware that Constructo made a Robert E Lee paddle wheeler kit. I'm glad to see it. Thanks.
Mike
- Eddie and Mike Dowling
-
2
-
Has there been any progress on your build?
Mike
-
I've built over 20 ship models in the past 15 years and still own the original first model that I ever built (HMS Bounty) and used strictly CA and white wood glue and have never had an issue with failure that you speak of. Now once a model gets 30 years old and older, most any glue will fail. I have repaired models built back in the 40's and 50's for people and yes there were some issues with glue failure, but that was well before CA glues were invented or used. But I used CA glues on the repaired parts and well over 10 years and they are still in great condition without failure.
All models that I have repaired or built and sold have a lifetime repair policy offered by me and as yet, I have never had an issue where I needed to honor that policy. But glue is like the use of tools, wood and anything else, it's a matter of preference.
Mike
-
I use the cheapest old crap I can find, both liquid and gel control. I usually use off name brands sold by Walmart. Now, my favorite is the Loctite Gel control that you have pictured. I really like the new packaging on this rather than the old tube style. You can run through better than $100.00 just in glue on a model. I have found that the name brands don't really out perform the no name brands.
Mike
-
Absolutely beautiful work. I built the original San Francisco from Latina, back when they supplied wood veneer strips for the hull, which was applied to a cheaper white wood planking as a second layer. If you don't mind a suggestion, In the future, sand the wood smooth first after you glue it down and once sanded, come back and nail in the nails. It will give a much nicer finish, especially since the Frisco uses the nail heads as adornment.
Mike
-
-
The ratlines look good, I use the heavy thread for the horizontal lines and a thinner thread for the steps going up the ratlines. It makes a cleaner knot. Floquil used to make and sell liquid tar that I would use to paint on the ratlines once completed, which took away the fuzziness of the thread and gave it a nice appearance. But you can't buy that stuff anymore.
-
WOW, absolutely stunning work. I know you aren't really keen on The Constructo version of this ship, but you are surely making a silk purse out of a souse ear for sure. I always look at a ship model kit as a starting point and then go from there, realizing that there will need to be changes, modifications and corrections if historical accuracy is what you are after and not just a display piece. You are doing excellent work and the more I see you build taking shape, the more impressed I am.
Mike
-
What a real beauty she is too. I love this model, the natural wood look really shows her off nicely. WELL DONE!
- Eddie and Mike Dowling
-
2
-
Mine are 1/4" X 3/4" width and length.
-
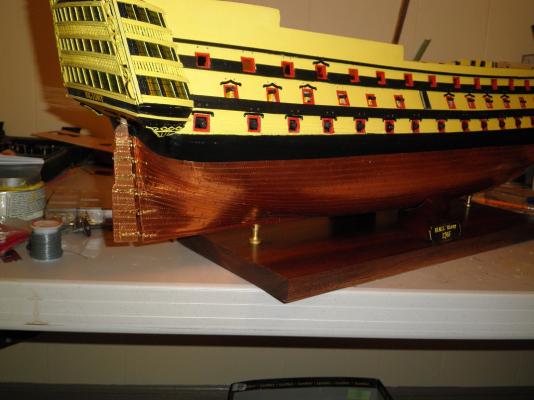
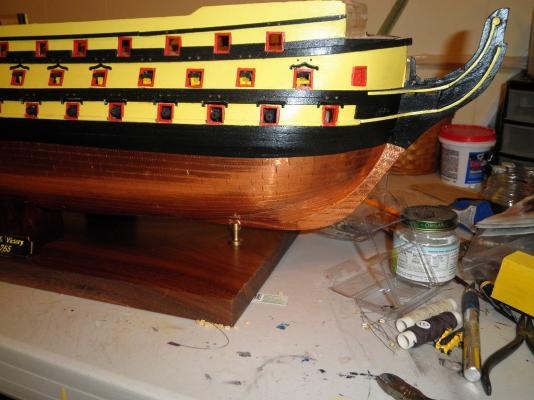
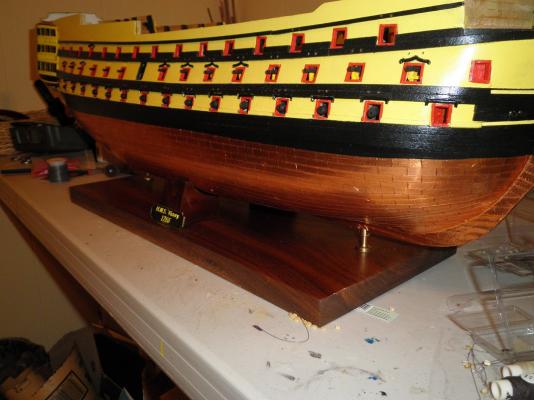
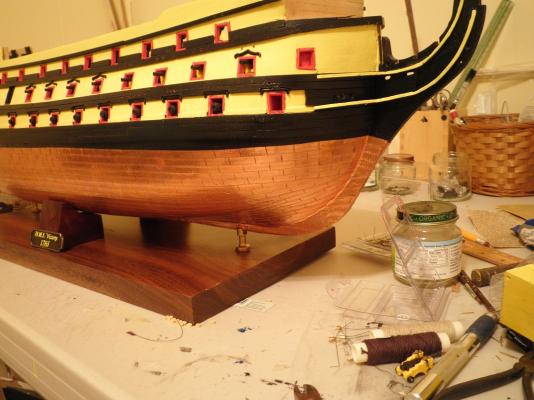
I use the riveting tool on the copper side of the tape and run it along each edge of the tape before installing. I will pull 10 feet or so of the copper tape from the spool as I mark it with the tool. Then I lay the tape strips in full length layers on the hull in one solid piece if possible. Then I come back with a pencil and mark the tape and then score it with a hobby knife to indicate individual plates. It saves a ton of time compared to cutting the tape into individual plates and then installing. Start at the waterline and work your way down towards the keel. The rudder itself is plated the same, but with much smaller copper tape strips and is done before mounting to the model. I try to line up the copper plates on the rudder to the copper strips on the hull as best I can to give it more of a pleasing appearance. I have it mounted to the board so this was about the best that I could do.

- Dimitris71, GLakie and clearway
-
3
-
Hi Lawrence, a Happy New Year to you as well and I hope that you have great success with the Anna Parker. With your skill and dedication to detail, I don't see where you could go wrong. Yes, I would like your imput on my AL Vic review even if it's to point out flaws in the kit or things you chose to change with your build. I'll be looking for that cloud of saw dust after the New Year

-
Hey Paul, Ebay. It is actually seamstresses pattern marking tool. I think you can buy them new on line. I had one that wasn't nearly as old as this one, but gave it away 6 or 7 years ago when I got out of ship modeling for awhile. I love using the cooper foil tape. It lays great and is quite a bit cheaper than ordering the copper plating. It took a tad bit over one roll to copper the Vic which was about $7.00 for a roll. The drawback is, that you have to do your own rivet markings. But if I ordered the Copper plating from Cornwall for the Vic, it would have cost a great deal more.
I hope you and family had a wonderful Christmas as well.
Mike
-
Robert E Lee by Mike Dowling - FINISHED - Constructo
in - Kit build logs for subjects built from 1851 - 1900
Posted
Yep, I can tell it's a thrill a minute, especially with Constructo. But they do finish off to be a beautiful model. It's looking great so far.
Mike