HOLIDAY DONATION DRIVE - SUPPORT MSW - DO YOUR PART TO KEEP THIS GREAT FORUM GOING! (89 donations so far out of 49,000 members - C'mon guys!)
×


hof00
-
Posts
1,647 -
Joined
-
Last visited
Content Type
Profiles
Forums
Gallery
Events
Everything posted by hof00
-
 Hi Rod, I'm pleased that this worked out in the end.... I did not want to use the Disk Sander, a bit too "Heavy Handed" perhaps. Just a small Corse file followed by a fine one to finish. How's that painting? Cheers....HOF.
 -
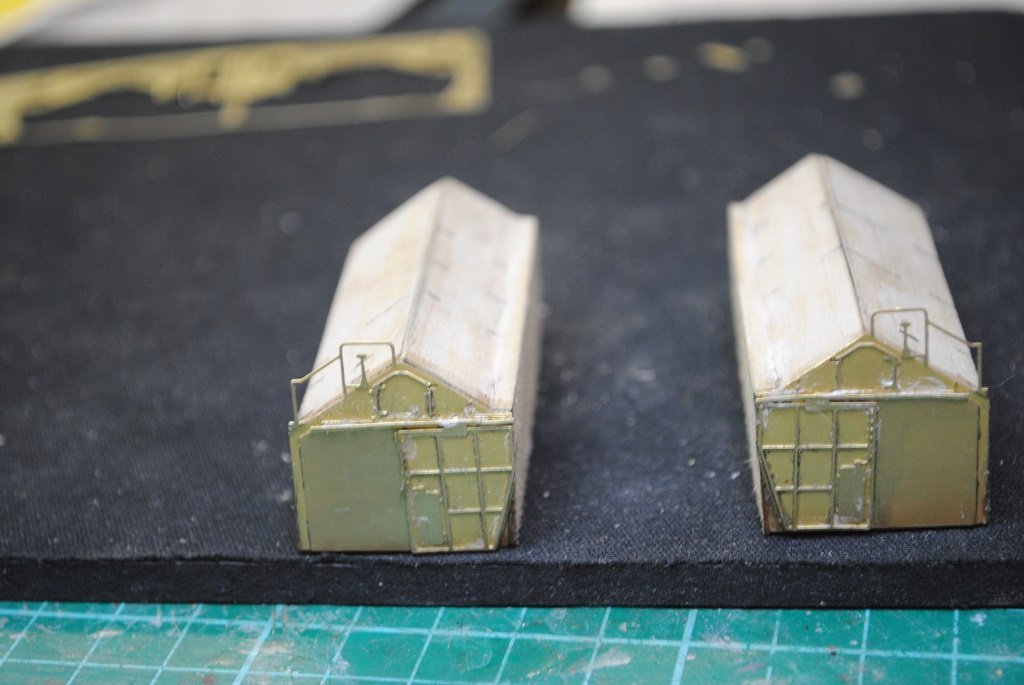
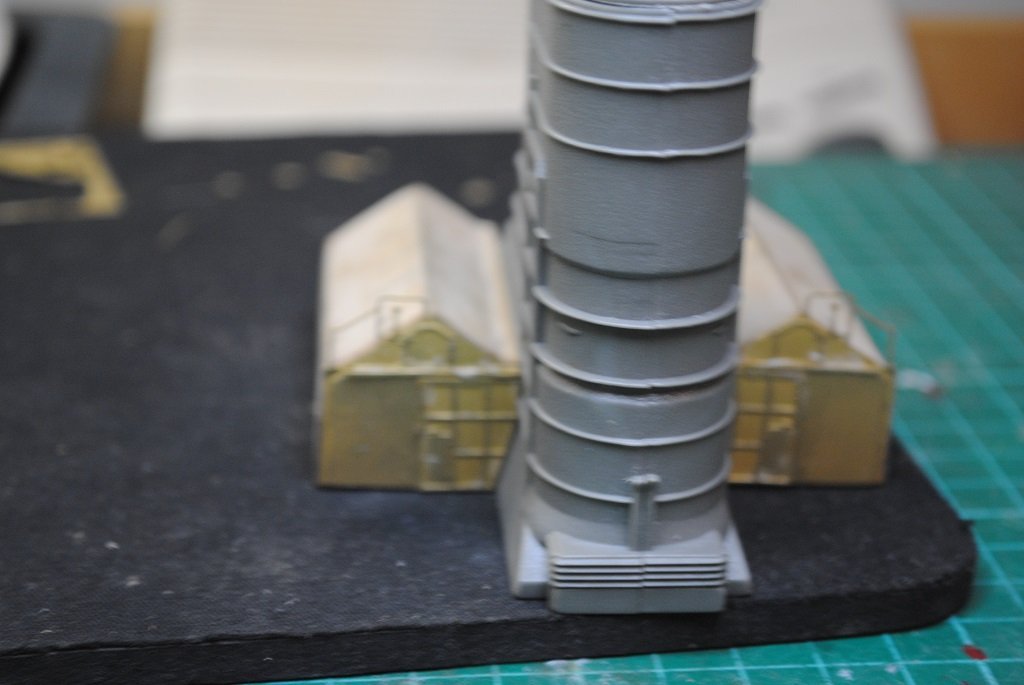
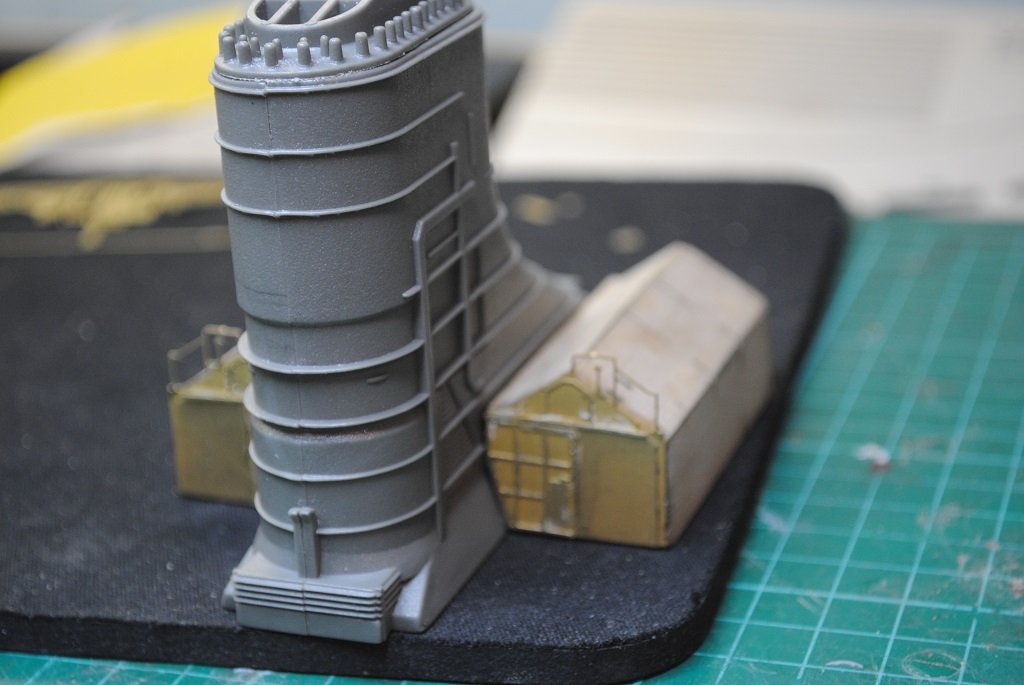
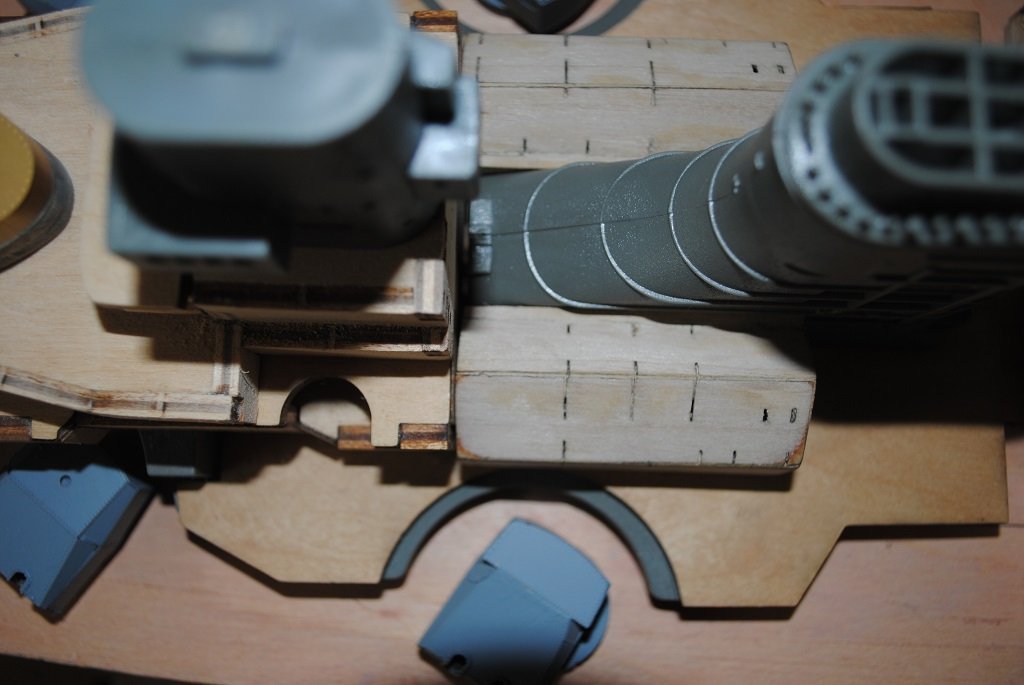
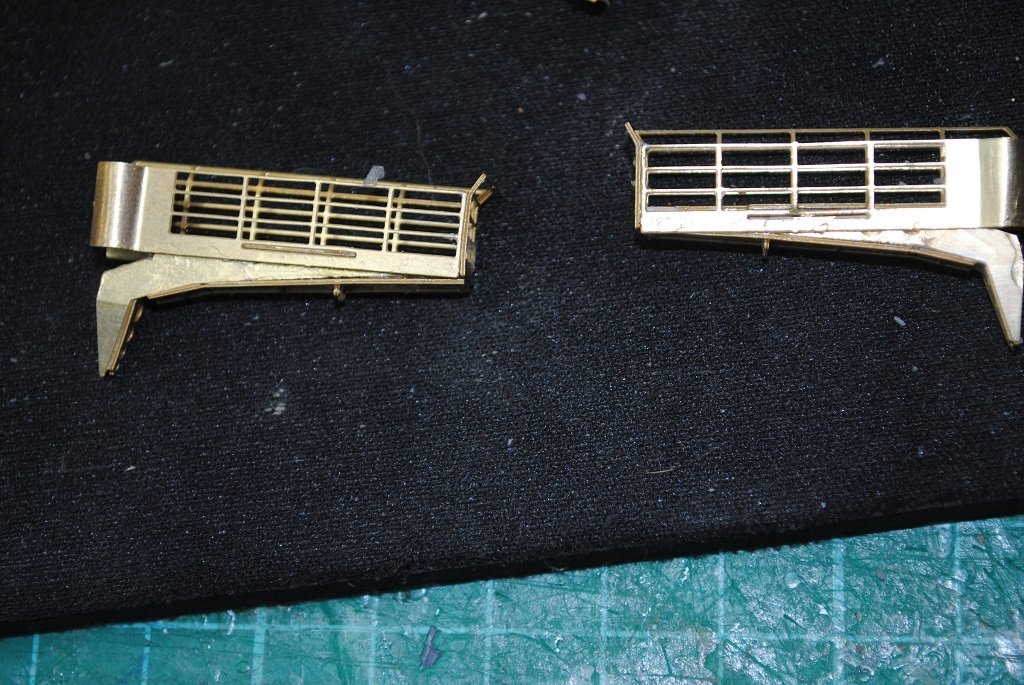
Hi All, Piet's suggestion, (Above), worked out nicely!! The Hangers are now the correct size and so is the front PE. The best thing is that it all fits!! 🙂 The Hanger doors remain pretty much centered also. A big thanks to Piet for his suggestion!! I can now move on with the rest of the Hanger components. Cheers....HOF. Photos:
- 544 replies
-
- 11
-

-
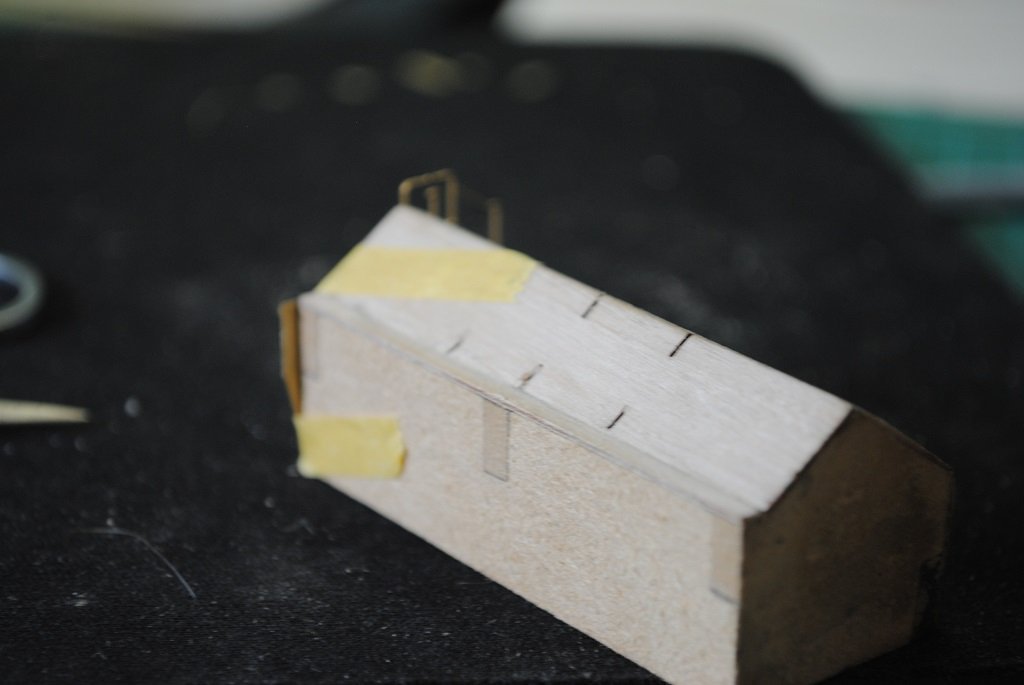
Hi Chap, That's a damn good idea!! 🙂 I don't think that a Non-centered door would be a problem. I was thinking about the door detail and how I would replicate after trimming.... It also makes things far simpler.... Just thinking about it, I could utilize the inboard edge of the door as a template for trimming the front PE. I also made a Template for the front, I realized the bottom angle would also need trimming by the same amount. I'll de-bond the doors tomorrow and have a play with it. Keep the ideas coming!! 🙂 Cheers and Regards, Harry.
-
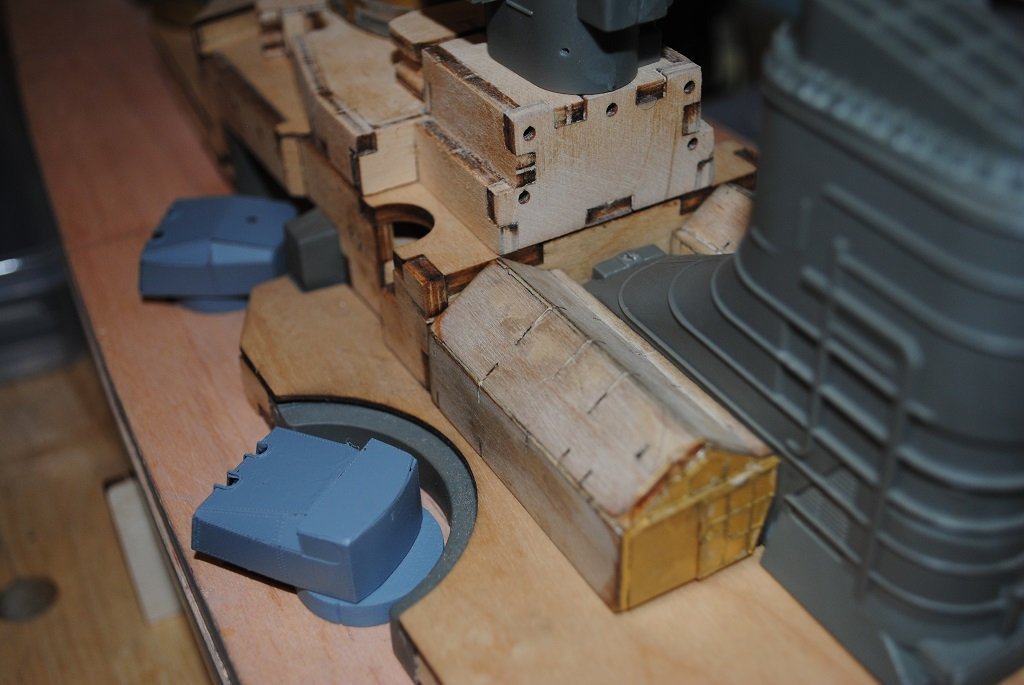
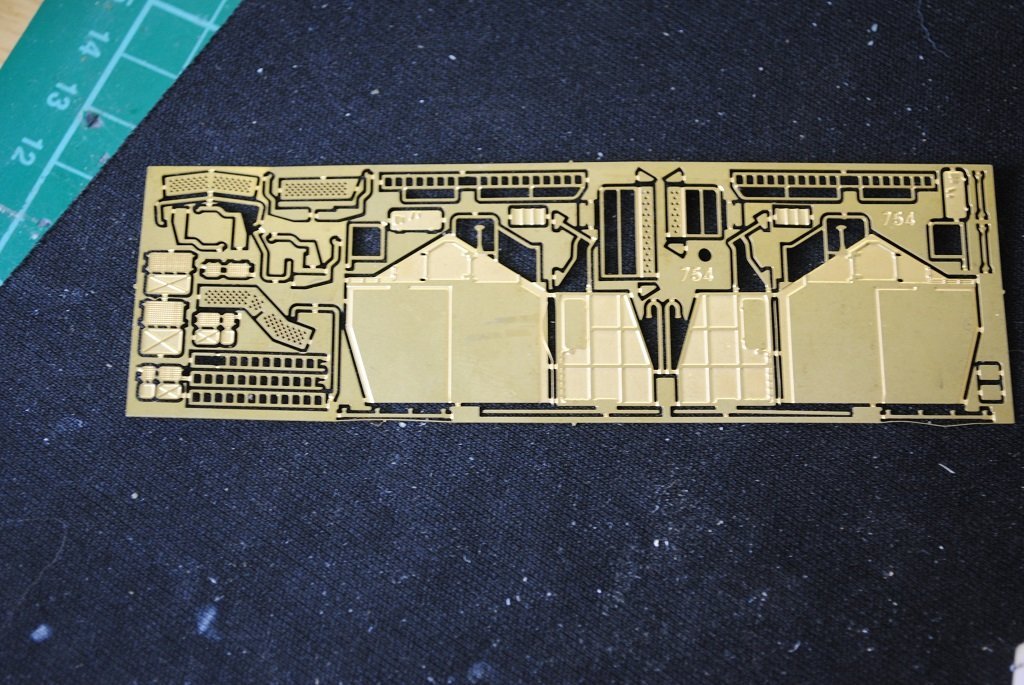
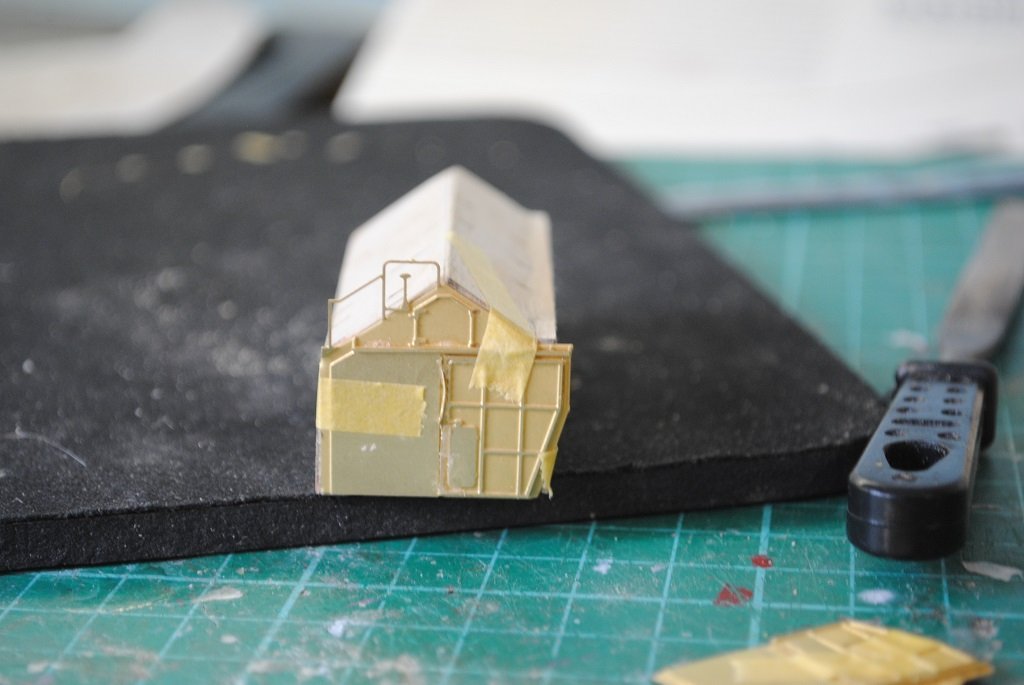
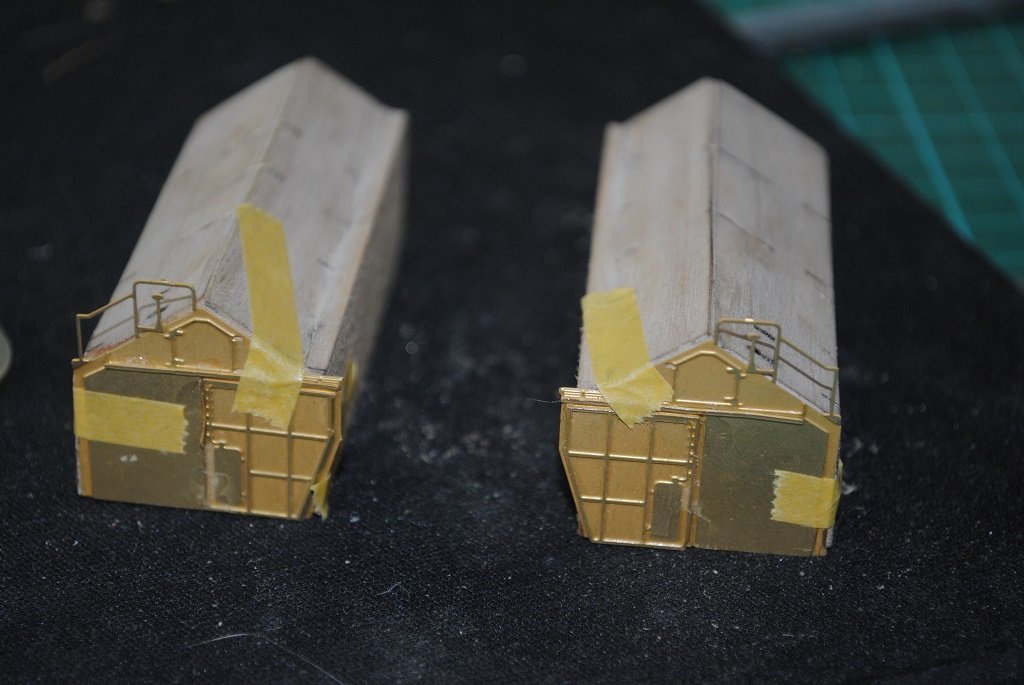
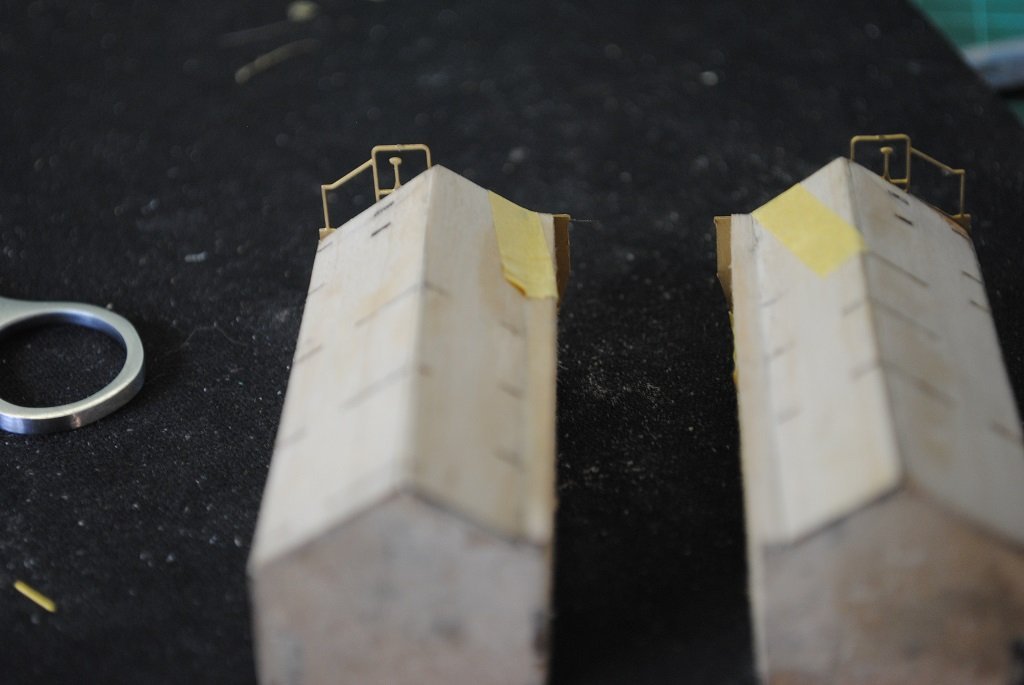
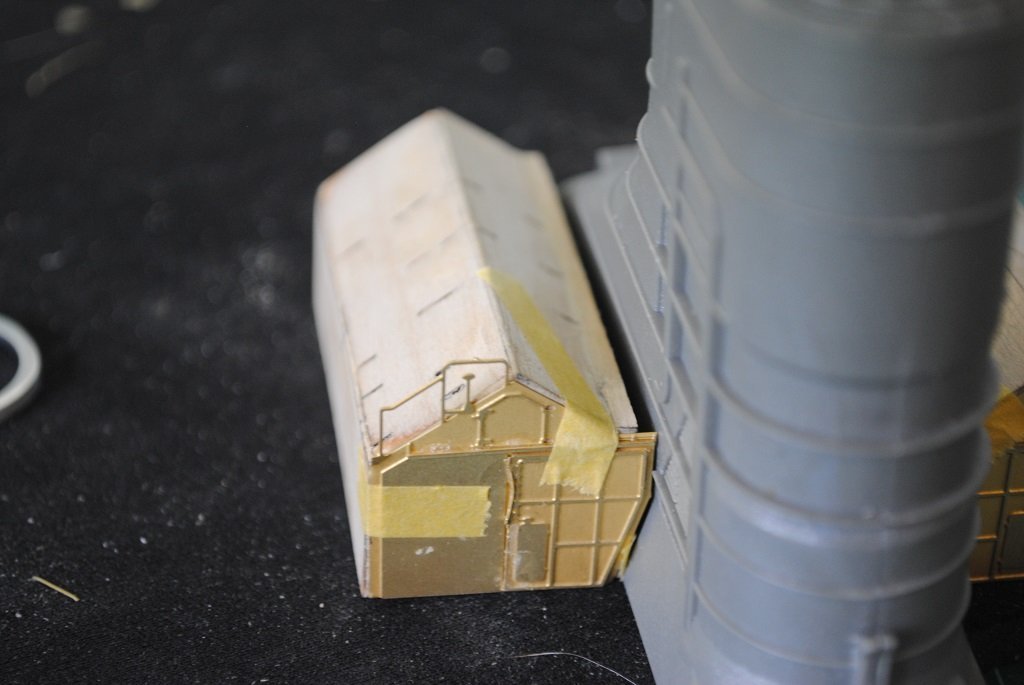
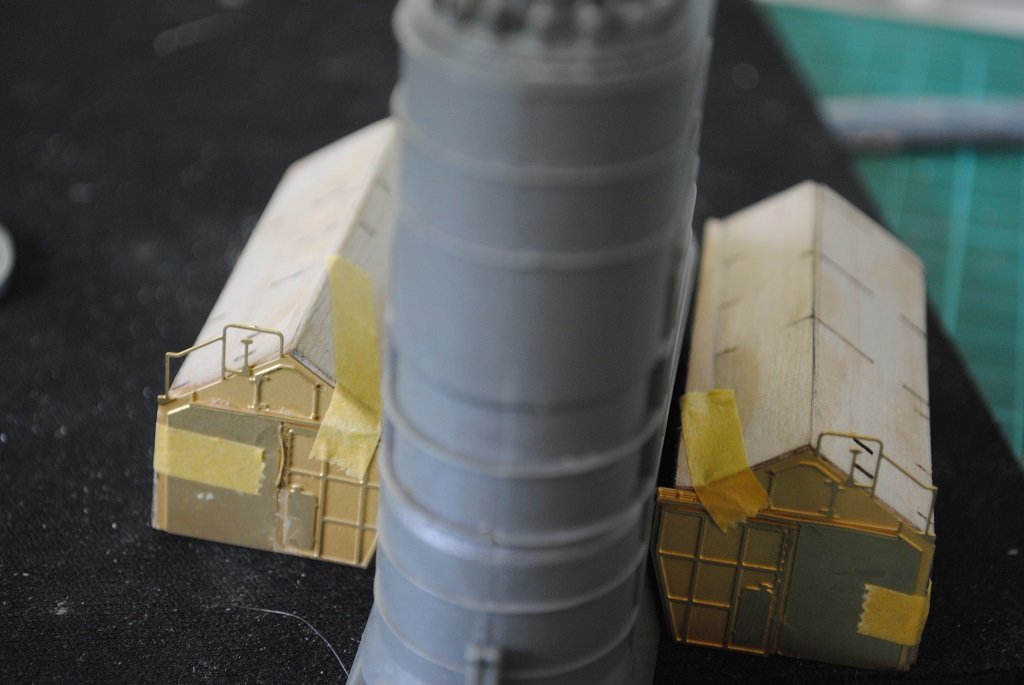
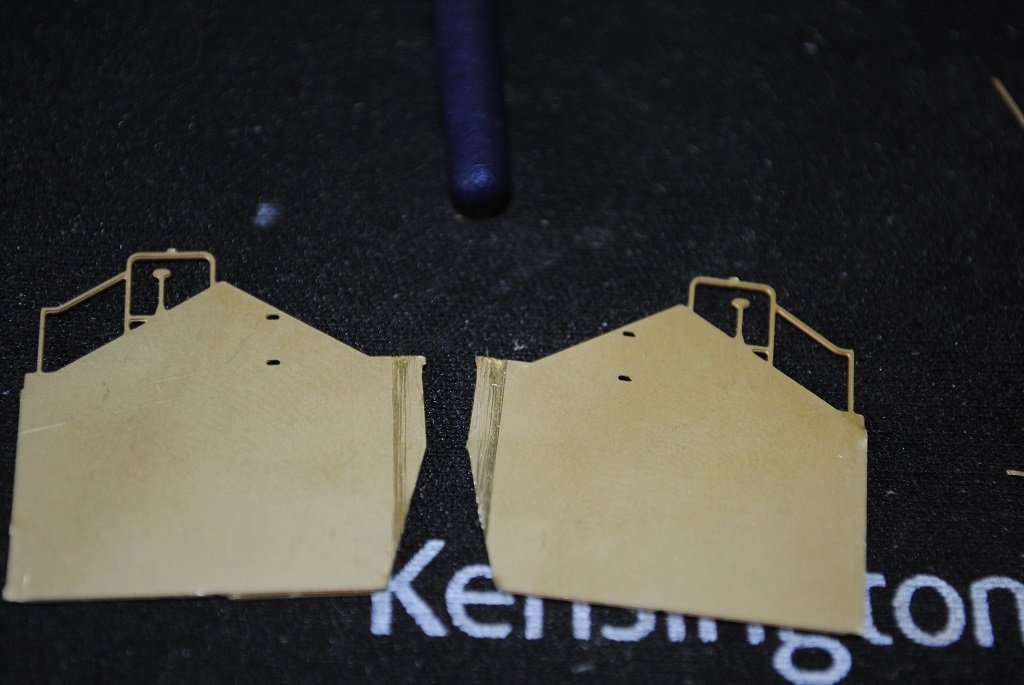
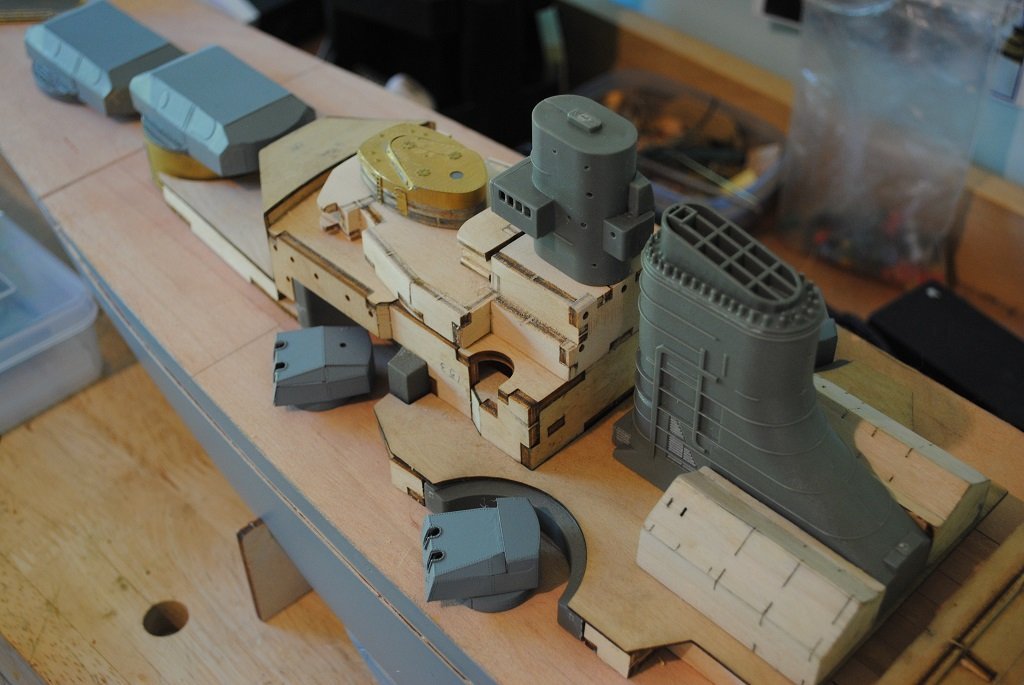
Hi All, I thought I'd ask the Forum regarding the Hanger conundrum.... I put he fronts together and taped in place for two reasons: See how much material has to be removed Mark on the reverse where the removal need to occur Should I: Remove the material Cut a slot in the Funnel to accommodate I took heaps of photos, so, if any of you have time, please have a look and give me some feedback. (Remove overhanging PE or hide it.... 🙂) I'm quite tempted to utilize the Stationary Disk Sander and support the PE on a piece of scrap wood. (Could be too harsh perhaps?) Cheers....HOF.
-
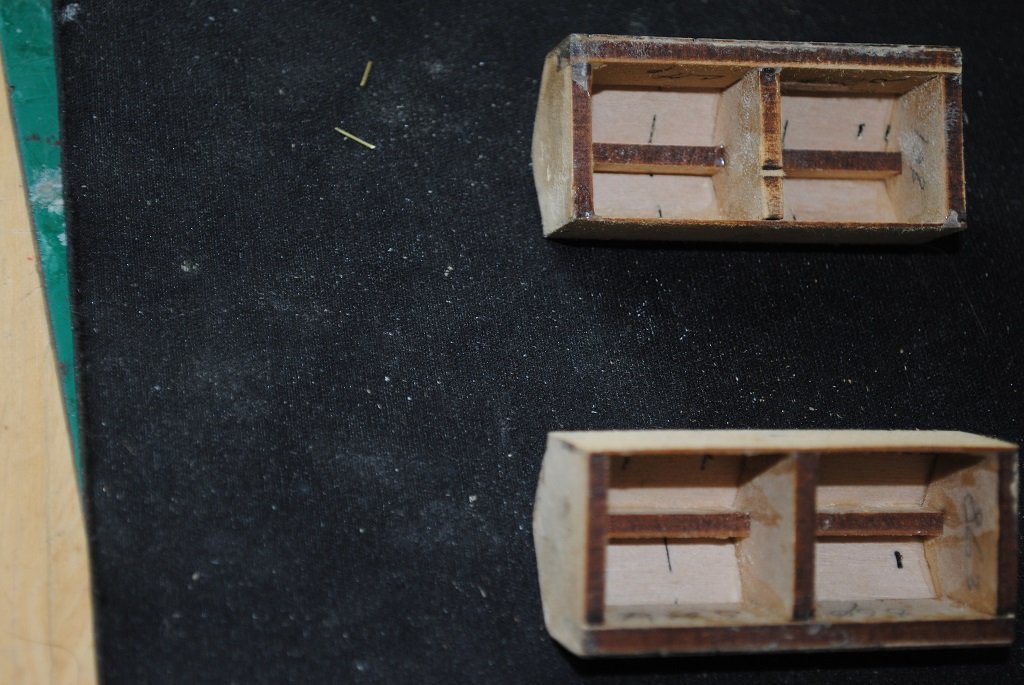
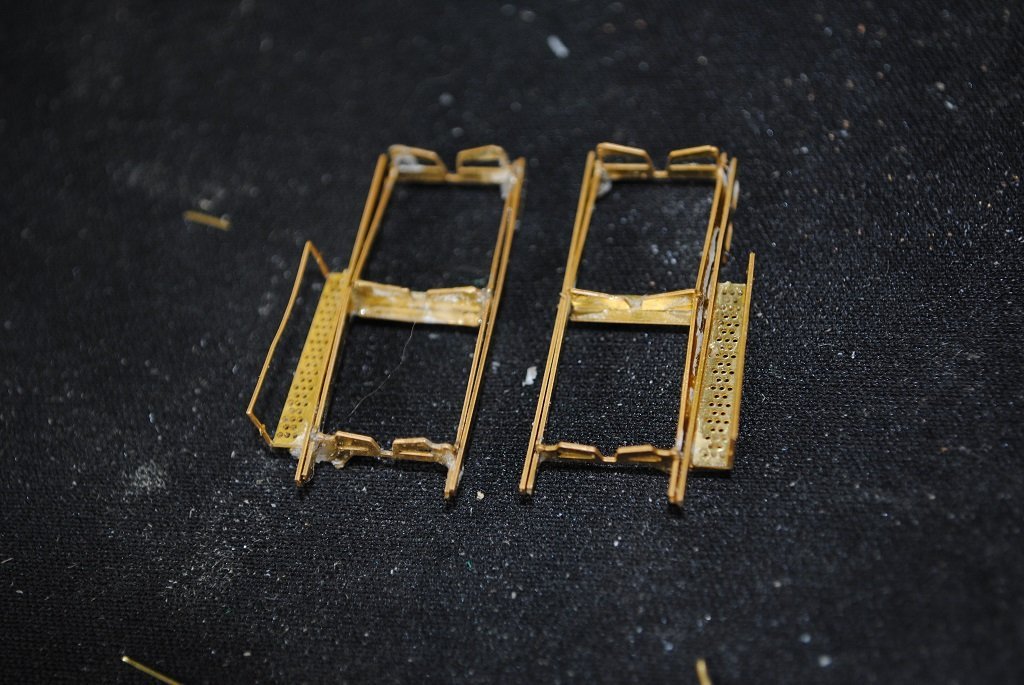
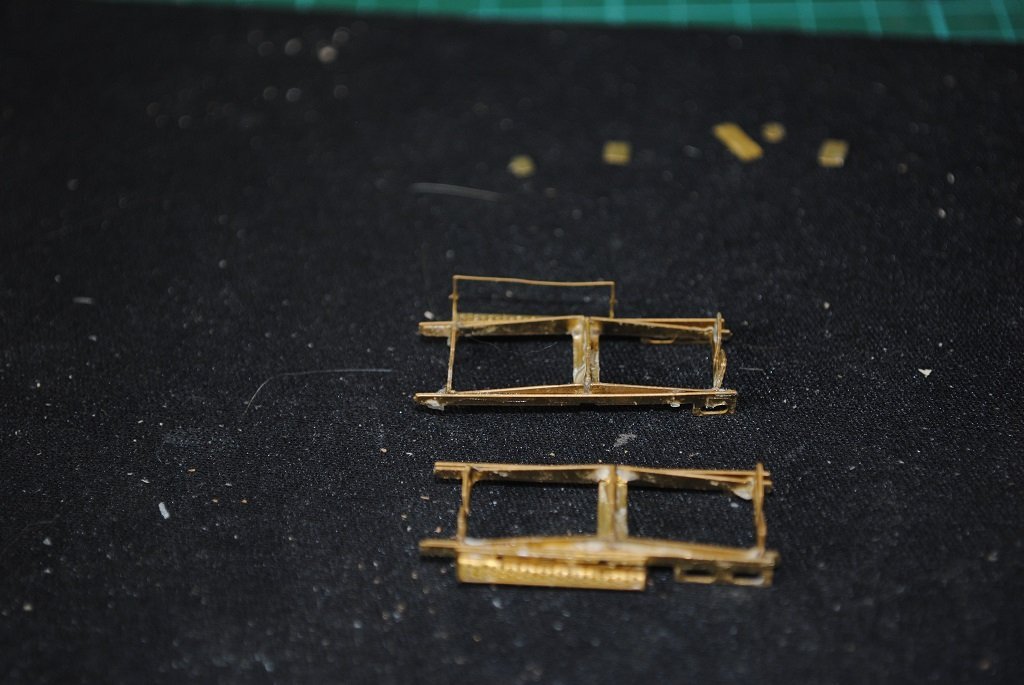
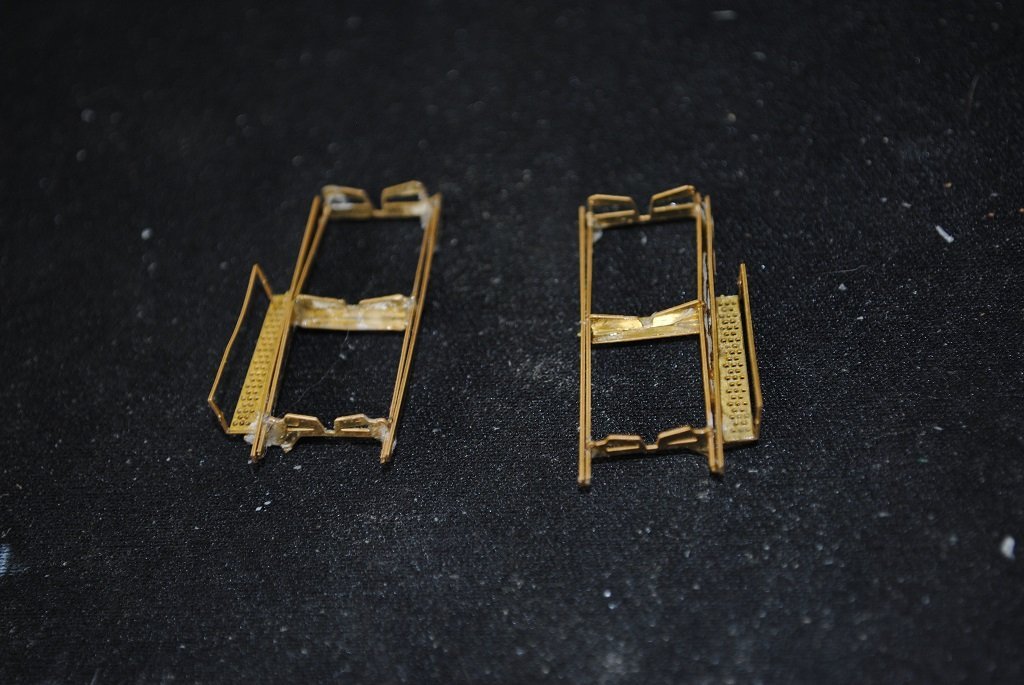
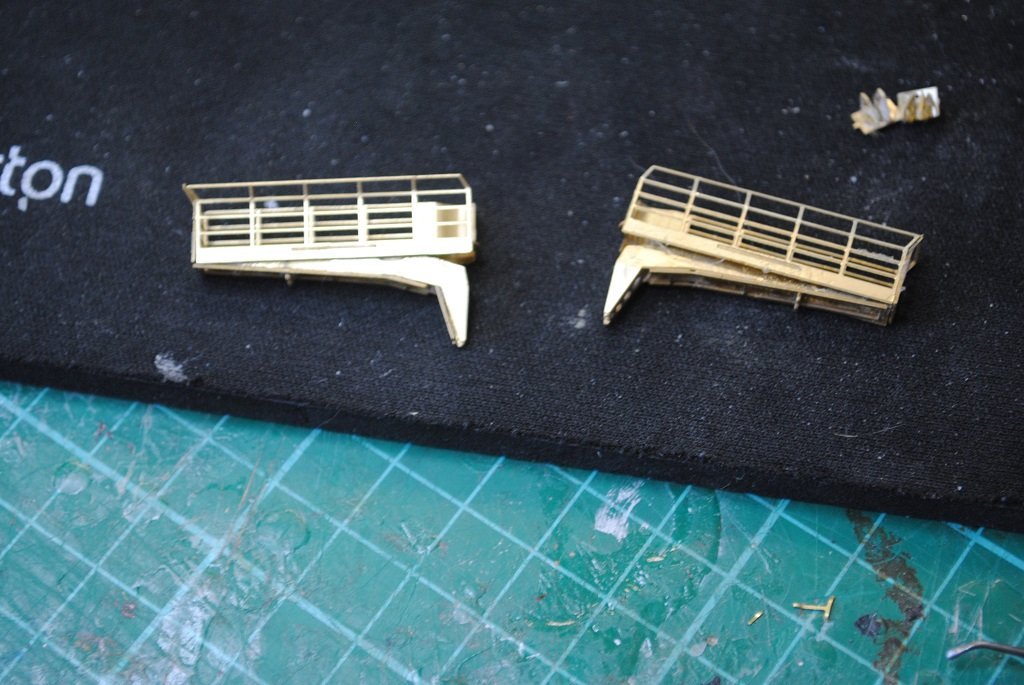
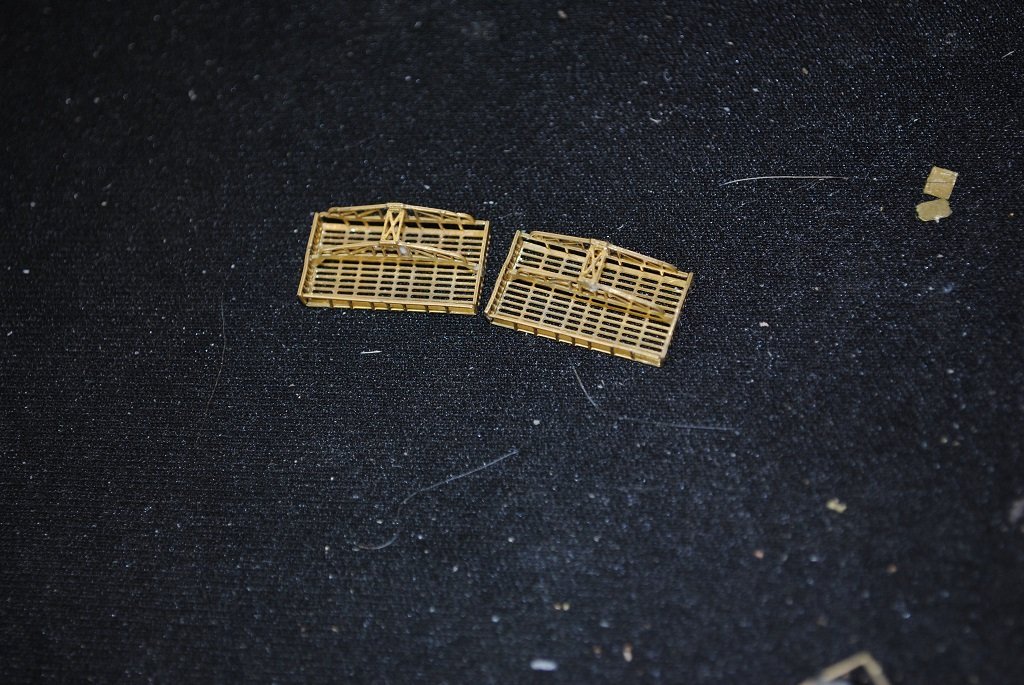
Hi All, Small update: Boat/Launch Skids completed. These sit on the Main Hangar next to the Mast. (Not my best PE effort but will be o.k.) (Added to the completed components organizer....) Cheers....HOF. Photos:
- 544 replies
-
- 10
-
-
Hi Piet, Thanks for the update. I think, (Maybe🙂), that things will work out o.k I intend to get a start tomorrow and will get some photos along the way. With other components, (Plastic, etc), I have no idea which "Issues" they are in at present. The "Issues" that I have out and immediately at hand, are the two which deal with the majority of the major PE for these structures. I agree that it will be interesting to see what works.... 🙂 Cheers....HOF.
-
Thank you for that Rod, appreciated!! It's a bit late to restore the 2.2mm inside edges of the Hangers, There is still the "Flat" on the roofs, albeit slightly less width.... 🙂 I am pretty confident the PE will fit with the exception of the Hanger front and door which will need a bit of "Treatment." I'll get some photos when I do this.) Regarding the front PE, this fits the roof peaks etc, no problem so as Piet alluded to, the original Amati/Part Works were only in error with the overall Hanger width by 2.2mm (The Hangers protrude about 0.4mm past the sides of the fore superstructure, just about right for the width of the superstructure PE.) (I had in inkling that the PE might be an issue prior to the thickening work but decided to carry on regardless and see....) I'll get stuck in to the Hangars later, working on Boat Skids at the mo. 🙂 Just out of interest, how many Pedestals are you intending to use when you get around to mounting your ship? I'm thinking maybe four for me, two in line with the center and two close to the Bilge Keels. Cheers....HOF.
-
Thanks for the words of encouragement Chap!! I've had a good look at the instructions/components and the only things that I can see that is affected are the PE Hanger front, (Shame), and a bit less of the Hanger sliding door. About 2.2mm, (funny that.... 🙂 for the former that either needs: File off the overhanging PE Cutting a slot in the Funnel to conceal the overhang (I'm currently leaning to this method, I think it has the least risk associated with it, maybe, and I can easily fill the plastic if there is any error.) The offending bit is about 8.0mm in length and 2.2mm wide The majority of the rest of the PE seems to be "Outboard" so should be o.k. If you have a look at Rod's, (rvchima), Bismarck Hanger photo, the front PE and Door have an angle about 10mm in length, where the taper finishes and goes vertical is the problem child. Whatever method is done I'm pretty sure that it won't be too noticeable, better than the Hangers hard up against the Redoubt Railings. If any one has any other ideas or can understand my ramblings, please feel free to pass comment.... 🙂 Cheers....HOF.
-
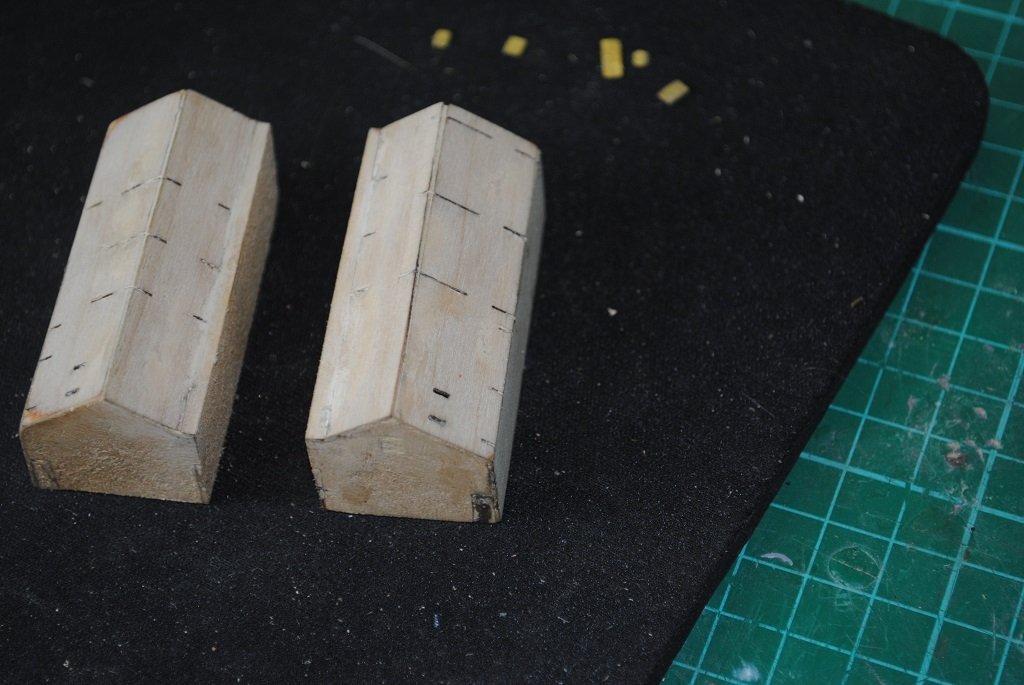
I think that the best thing that I can do at this stage for my Hanger issue is to sleep on it.... Any advice comments welcome. (Reduced the width of Hangers, (So that they would fit the Deck correctly), Inboard sides.) by 2.2mm each, Photo etch Hanger fronts now will not fit correctly, unsure if any other PE pieces compromised.) I'll console myself with some other PE tomorrow perhaps. 🙂 Cheers....HOF.
-
Hi All, For those looking at Hanger issues on the HOF00 Bismarck... (As discussed on Rod's Amati Bismarck build log.) @ HOF00 Looks like you did nothing wrong. In comparing the Hachette and the Amati versions I noticed the hangars are different in width, The Hachette is wider yes, because they used 3mm ply for both of the long walls, Amati on only 1 side. Better leave as is, or else some of your hangar PE parts will not fit anymore. Seems to be a design fault by Hachette that was 'corrected' later in the Amati version. Piet My reply to Piet: Hi Piet, Thanks for your reply. I've copied you in directly.... Thanks Chap, I could not leave as is because the Hangers were pretty much "Hard-UP" to the Deck Railing. I've had a look at the PE, first off, the fronts have an inboard overhang of about 2.0mm where the "Flats" are on the Hangar Roof. I thought that I may be able to deal with this by either: Filing off the overhanging PE Cutting a slot in the Funnel to conceal the overhang The only other piece that I can see at this stage that may be issue is the Hanger Door Haven't looked at the other components yet to ascertain if there are any other issues.... If I am really unhappy, I can shim the inboard hanger sides but I'll be back to square one. Hey, Piet, If you have any more advice/comments, could you please respond to the HOF00 Bismarck thread? Cheers....HOF.
-
Hi Piet, Have PM'd my reply to you. Could you please respond to the HOF00 thread with advice comments? I do not wish to "Hijack" Rods' Bismarck thread. Much appreciated and so is your advice!! 🙂 Cheers and Regards, Harry.
-
Thanks once again Rod, The verdict is that I'll have to reduce the inboard Hangar walls by 2.2mm (I'm thinking Stationary Disk Sander and Digital Calipers.... 🙂) Cheers....HOF.
-
Hi Rod, Thanks for your comment regarding my PE journey!! 🙂 (I'm learning and the positive comments are really good.) Yup, I saw your photos and realized that the Funnel was incorrect, carefully prized the top off and re-attached.... 🙂 Cheers....HOF.
-
Hi Rod, Thank you for your response, much appreciated. I an now wondering if the Inboard side of the Hangars are sloped to accommodate as per the PE detail in your photo. That would indicate why they don't fit for me. My Hanger "Substrate" is all square and vertical. I'll check today. Cheers and Regards, Harry.
-
Hi Rod, Could I please ask a favor? Could you measure the width of your Hangars? (Just the wooden shell, outside edge to outside edge.) I have just fixed my Funnel orientation.... Oops.... 🙂) Anyway, when my Hangers are placed on either side of the Funnel, they appear to protrude 2.0mm or so past the edge of the Forward Superstructure. I am thinking that I may need to reduce the thickness of the "Inboard" Hangar sides. Many thanks in advance. Cheers and Regards, Harry.
-
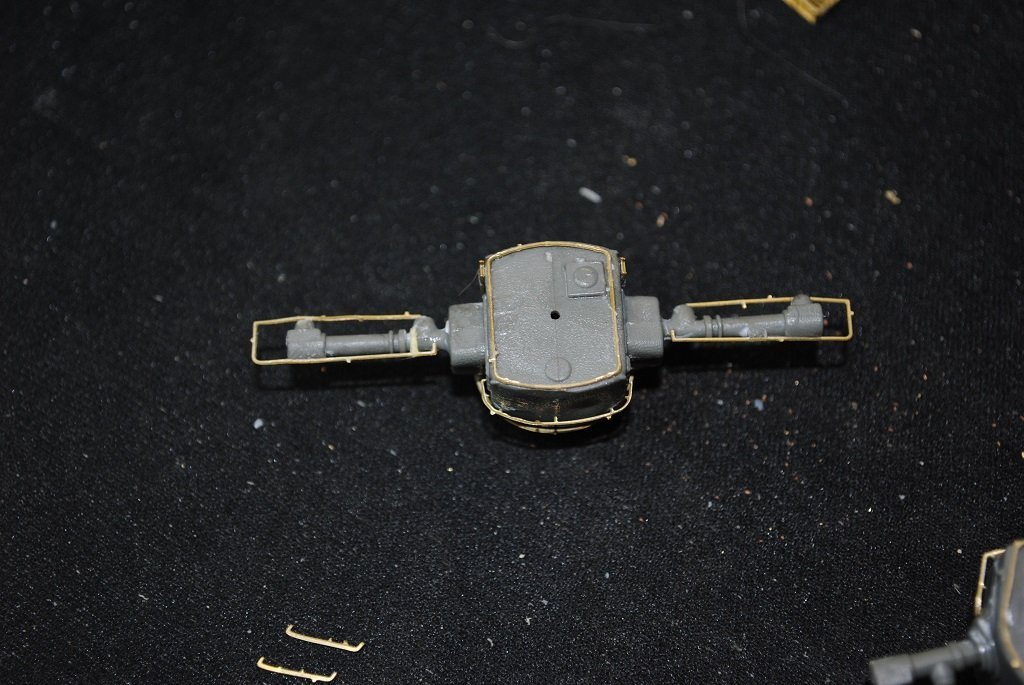
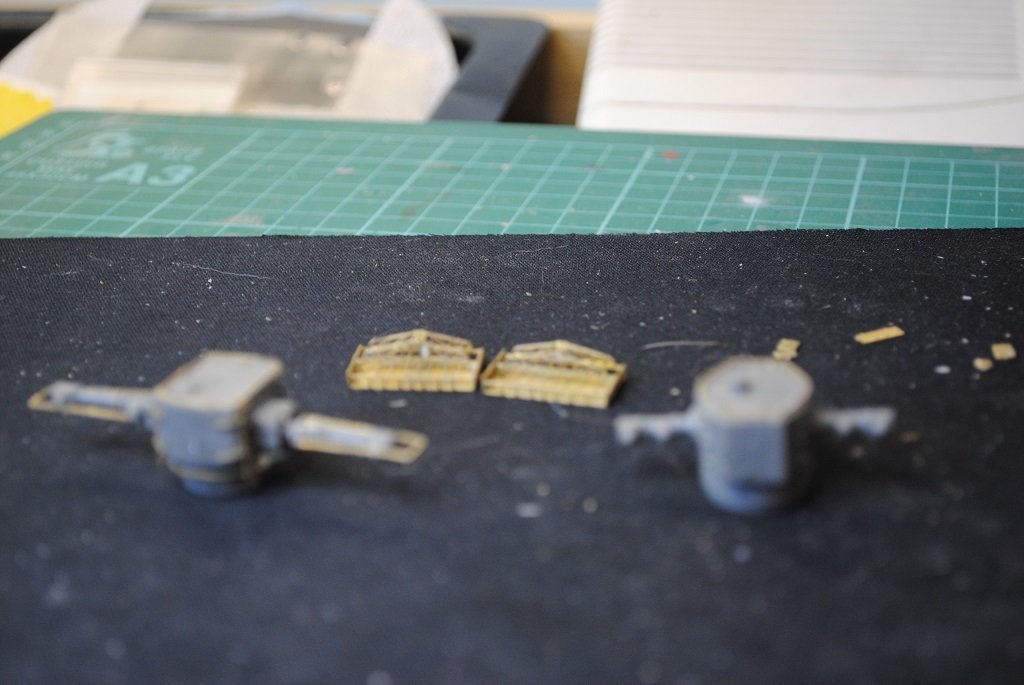
Hi All, Small update: Completed and cleaned up Rangefinders. Issue # 77: Bridge Wings constructed (2nd orphan.🙂) (Issue #77 had some Decking pieces that I wanted some time ago) I think that these components are my best PE effort thus far. I'll probably have a go at this tomorrow, PE boat/launch skids on roof of central Hangar. (Found a plastic organizer for the growing quantity of sub-assemblies. 🙂) Cheers....HOF. Photos:
- 544 replies
-
- 10
-
-
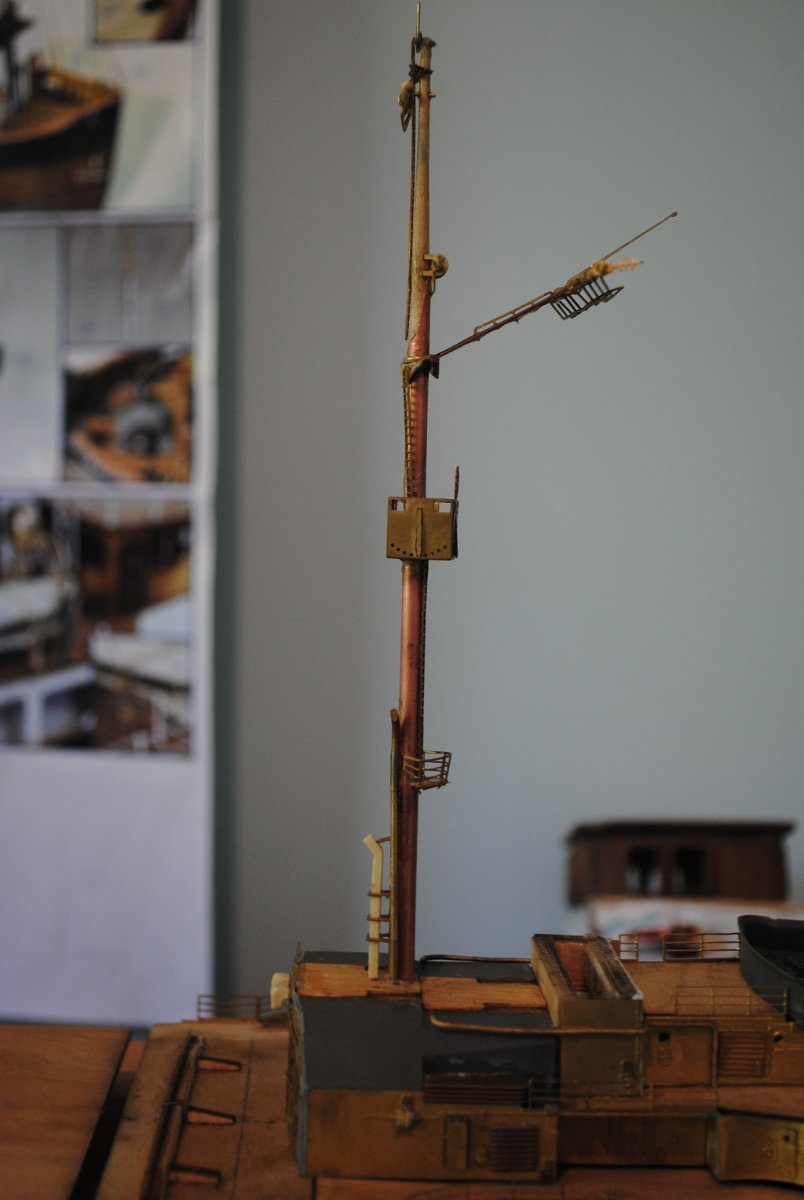
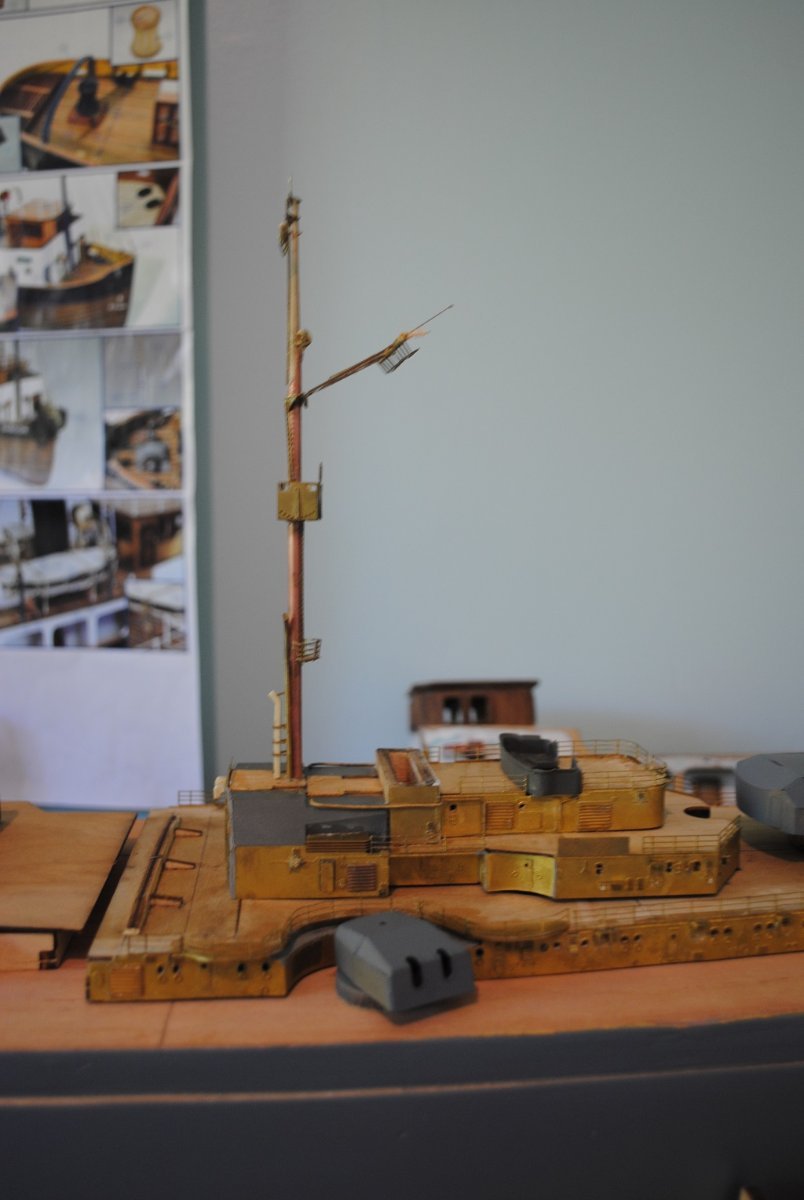
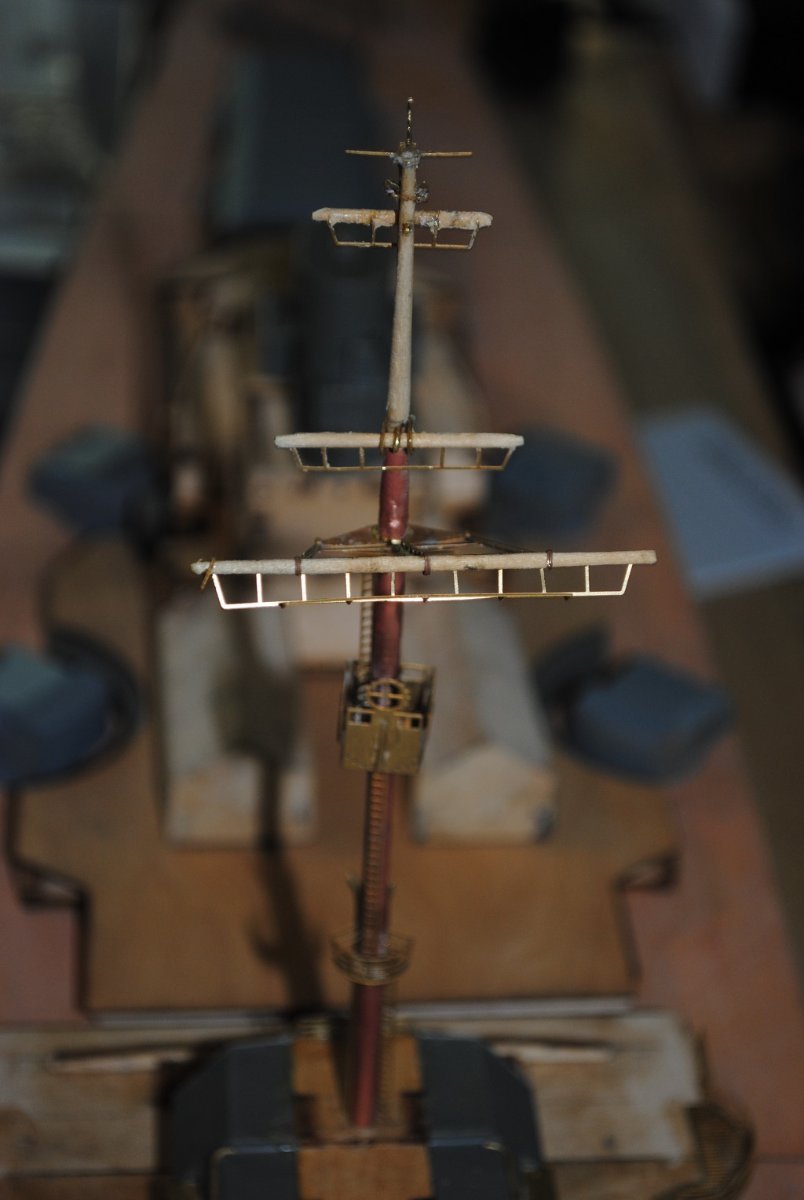
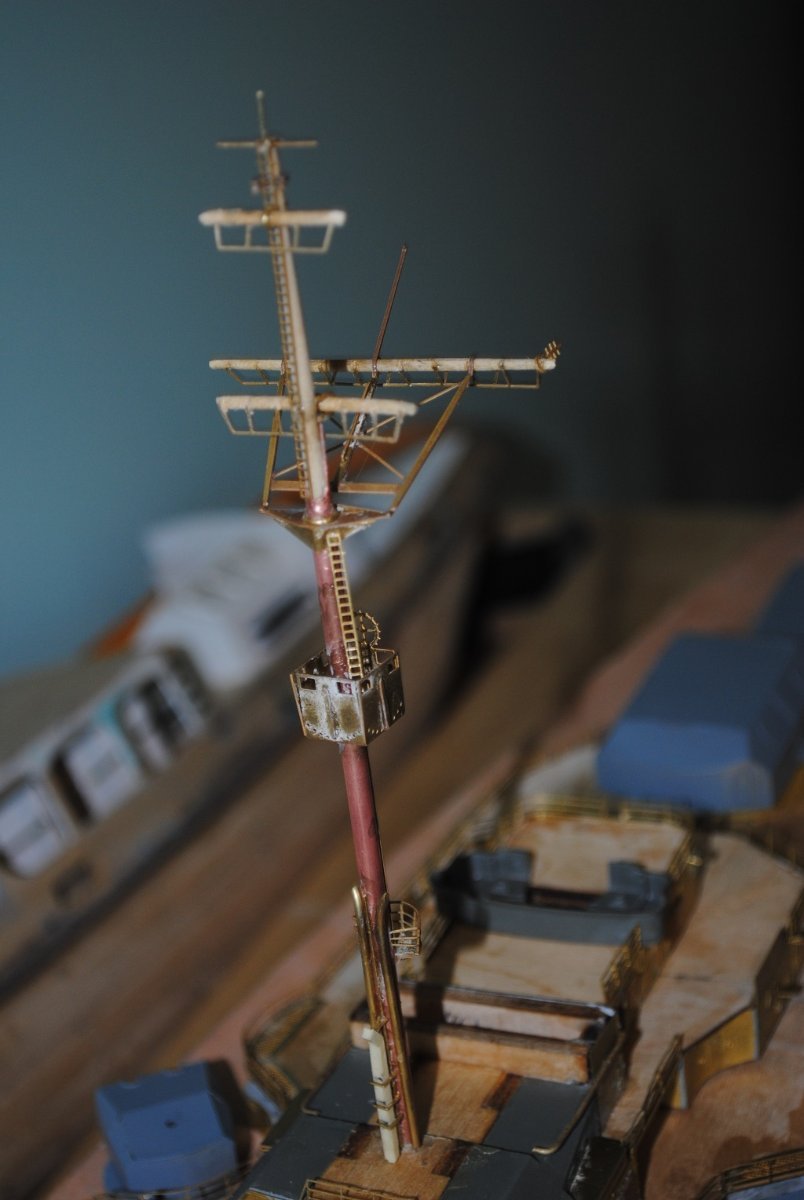
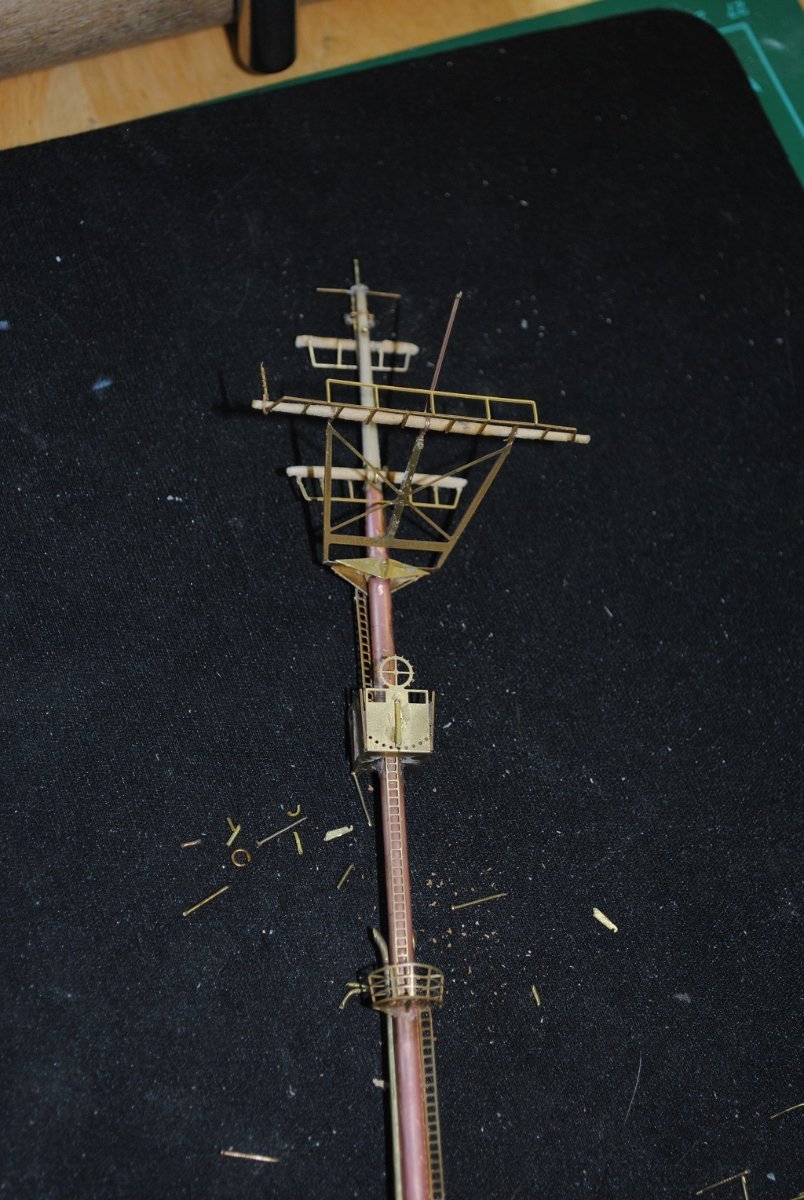
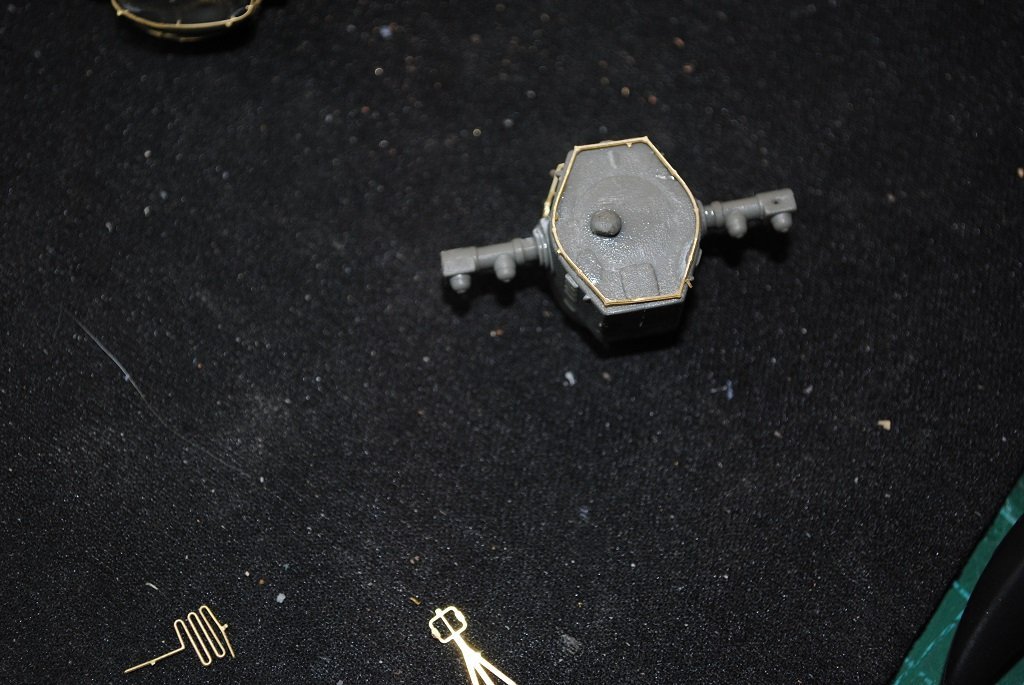
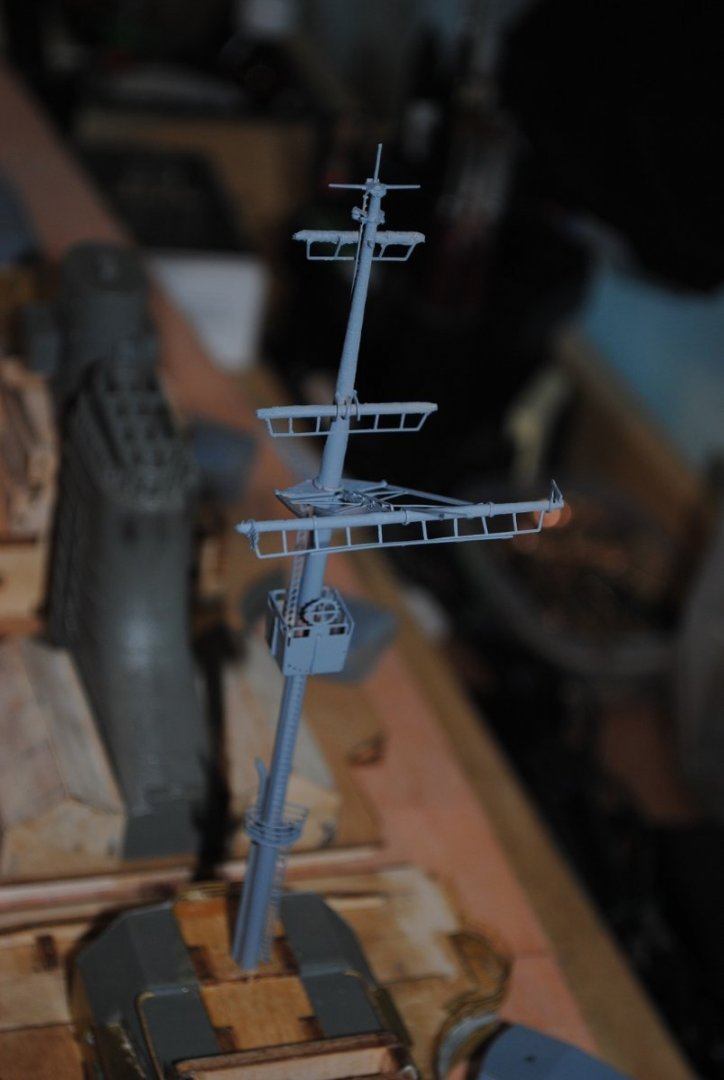
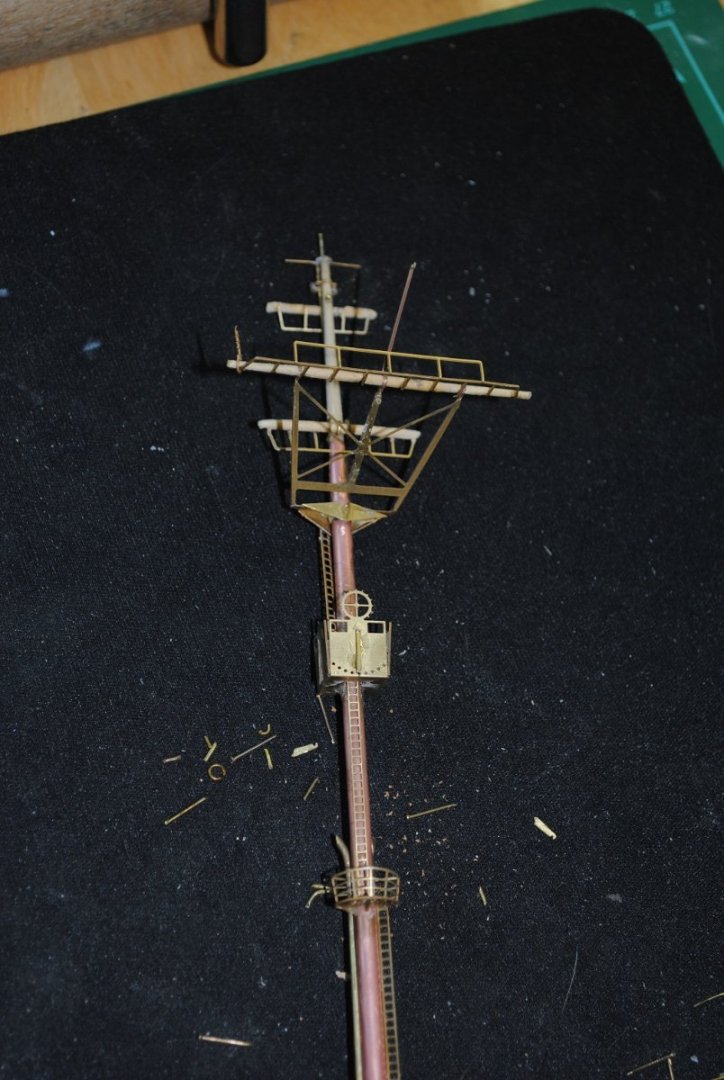
Hi All, Small update: Primed the Mast, it looks heaps better than the confusing color of different materials used in its' construction. (Not really 100% chuffed with the diameter of the uppermost Yards but I'll live with it for now.... 🙂 Worked on Rangefinder PE. This was originally domiciled with issue # 113 which I opened to get to the Hull Portholes. So, it was good to get an "Orphaned" issue more or less complete. (I have several more of these "Orphans" that I will work on to get them complete.) So, the Rangefinders are complete with the exception of four PE pieces that I'll add and clean up the structures tomorrow, Cheers....HOF. Photos:

- 544 replies
-
- 11
-
-
Thanks Rod, Yup, I agree that the tiny bits are good even though they can be frustrating. I primed the Mast, it looks heaps better. The Tug is an AL Sanson, something that I made a bit of a hash of a few years ago. It's a complete tear down/Rebuild with LED lighting. There is a build log somewhere here. (I must finish it one day. How did the Plastic components go? (Adhesive.) Cheers....HOF.
-
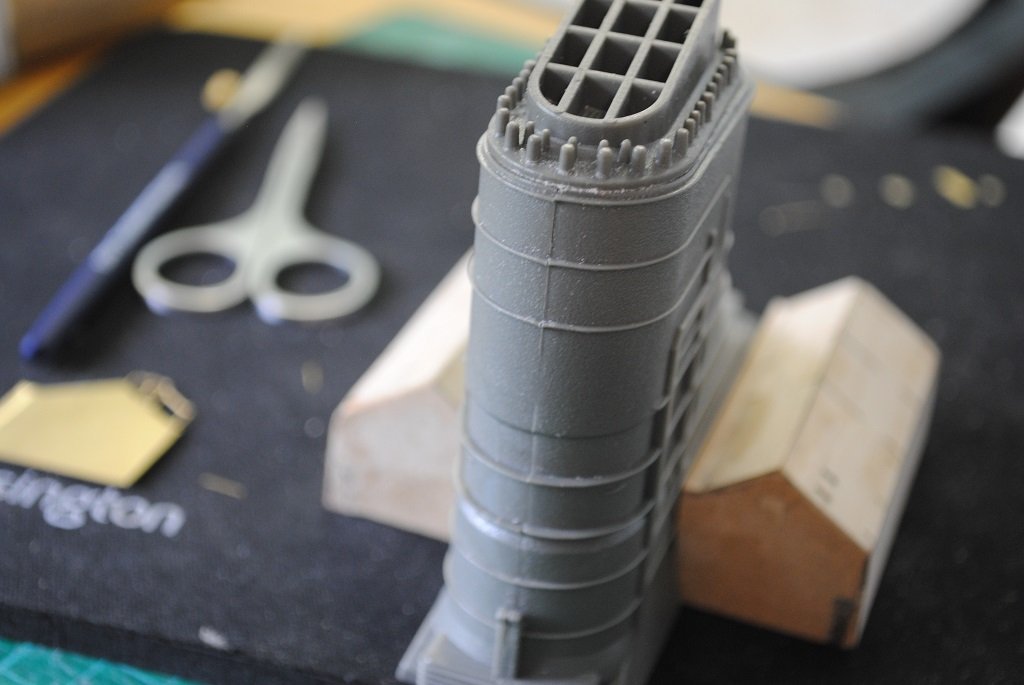
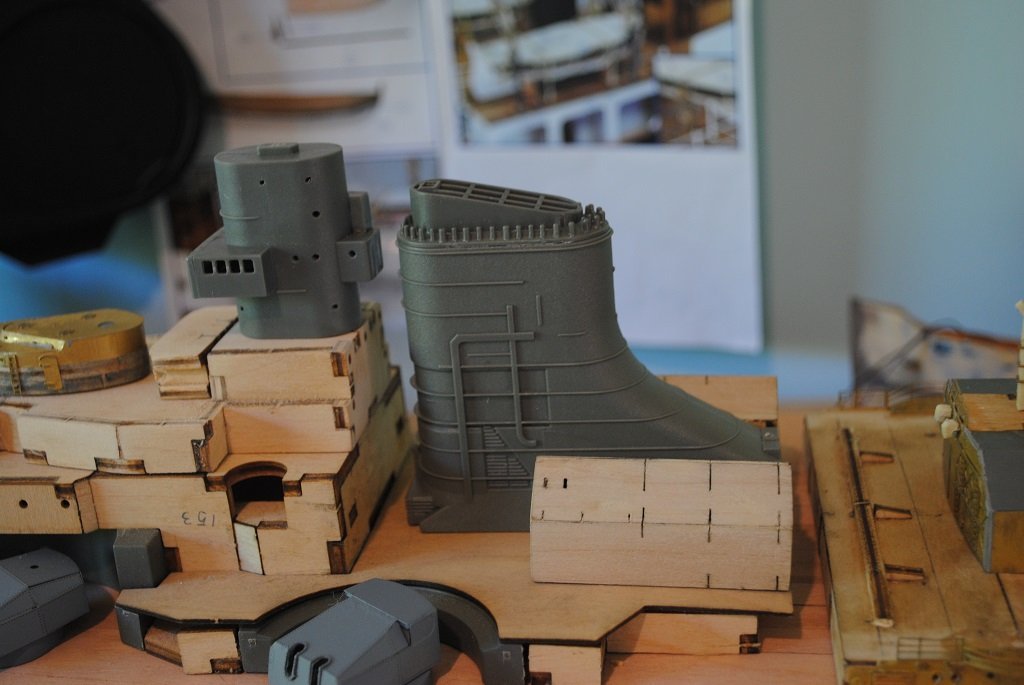
Hi Rod, Just assembled the Funnel and used Tamiya Thin cement. (Brush applicator.) One the Pieces were together for a few minutes I "Wicked" in the cement along the seams. (Yup, the plastic components are a little "Strange." CA to Plastic/Brass seems to work o9.k.) Cheers.... HOF.
-
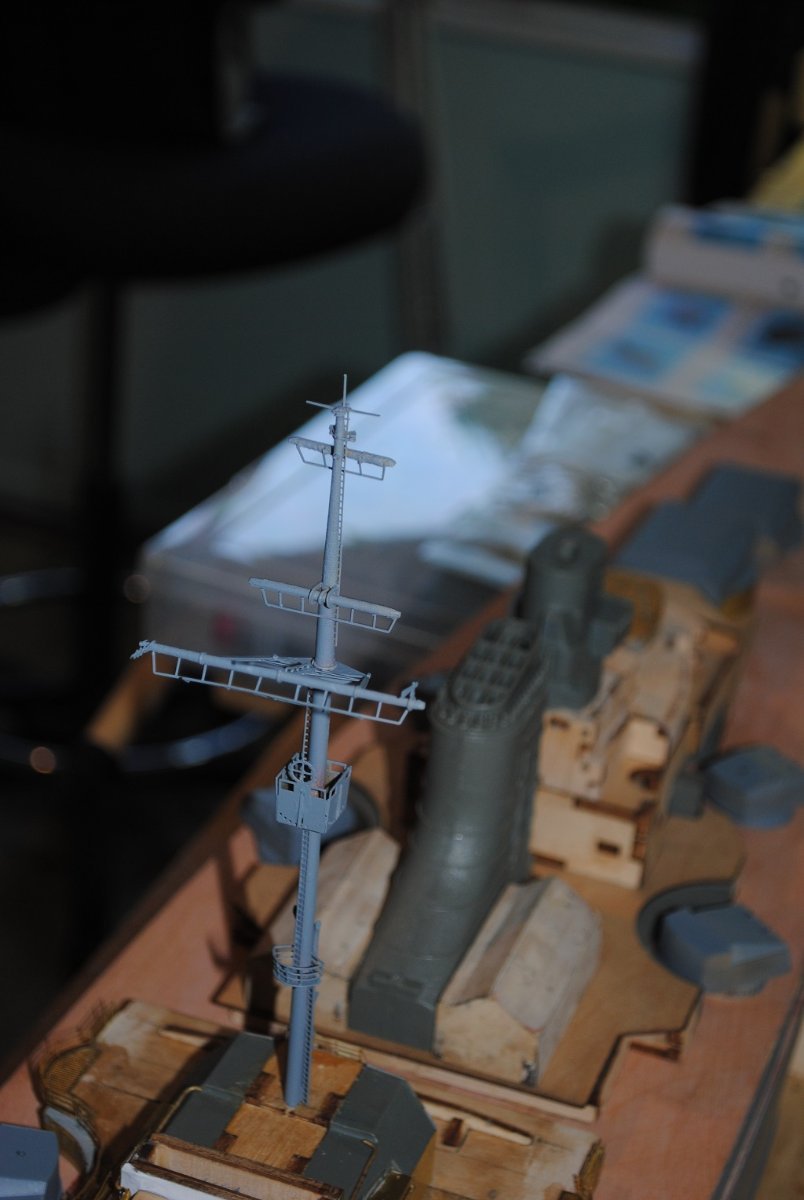
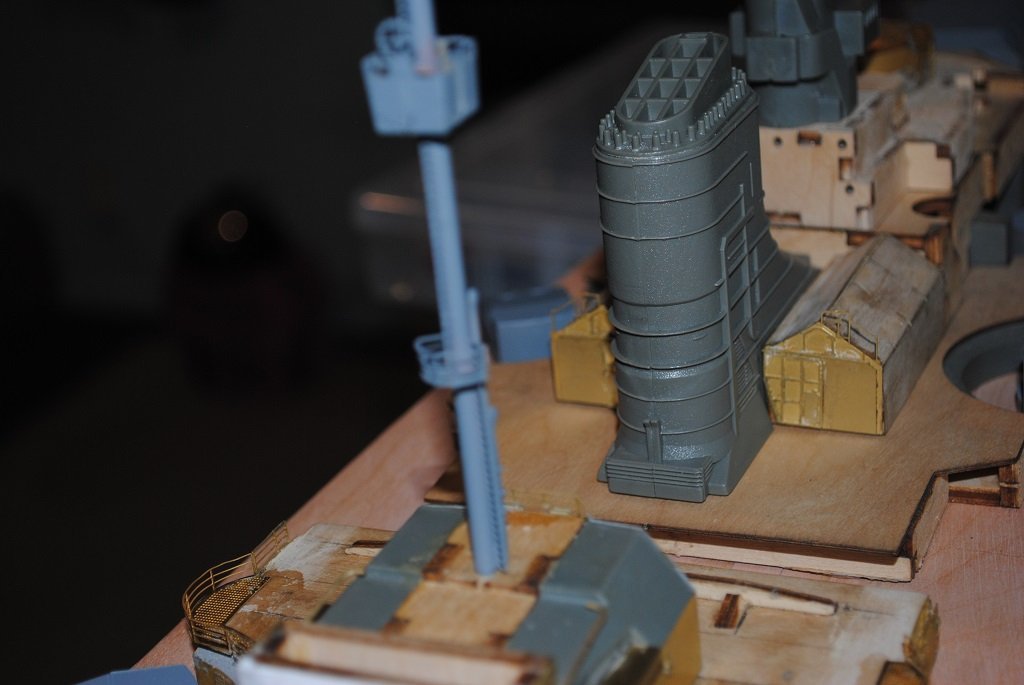
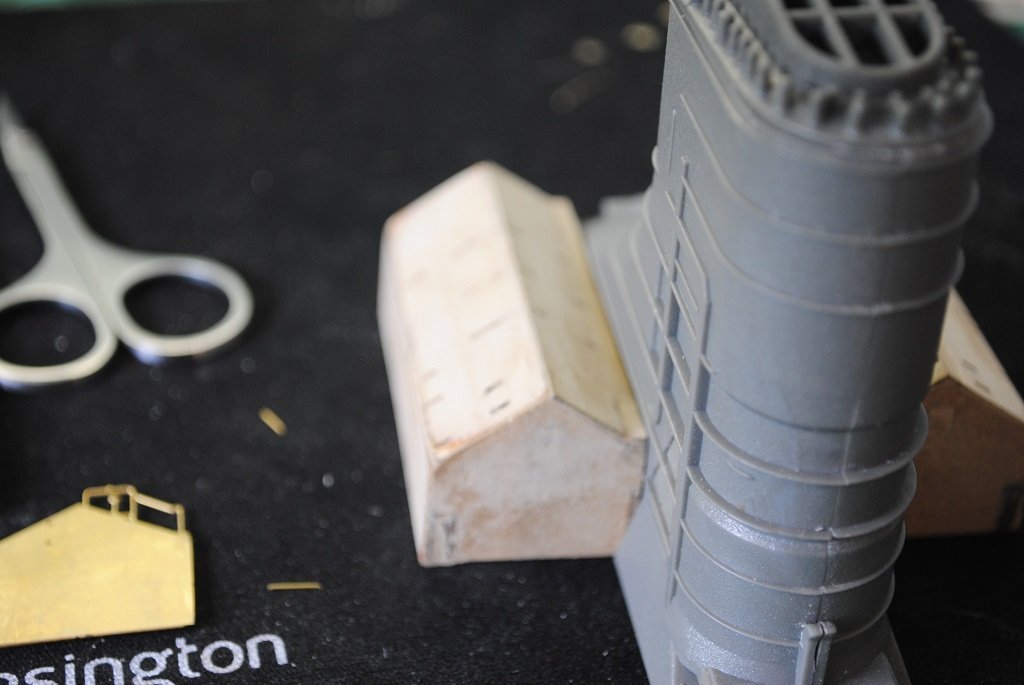
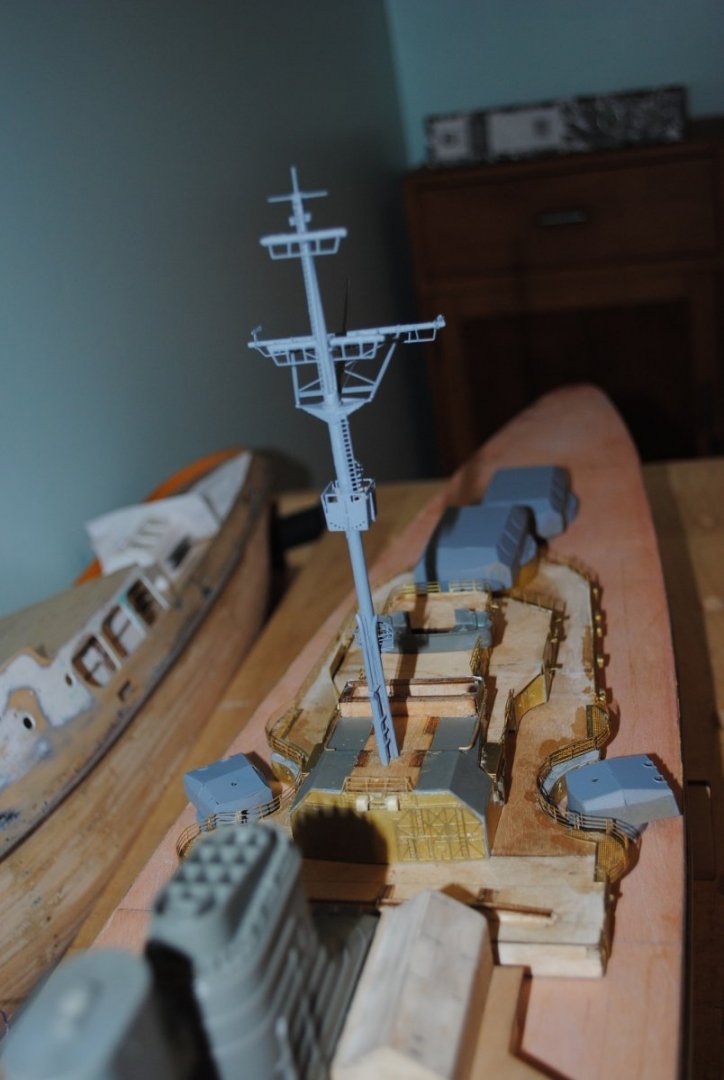
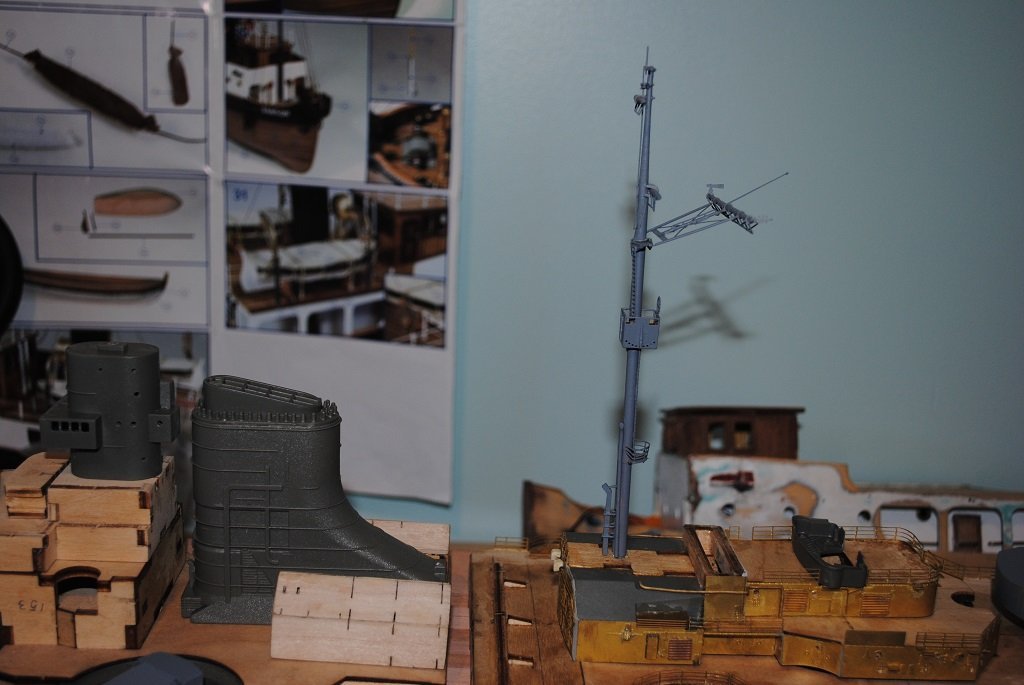
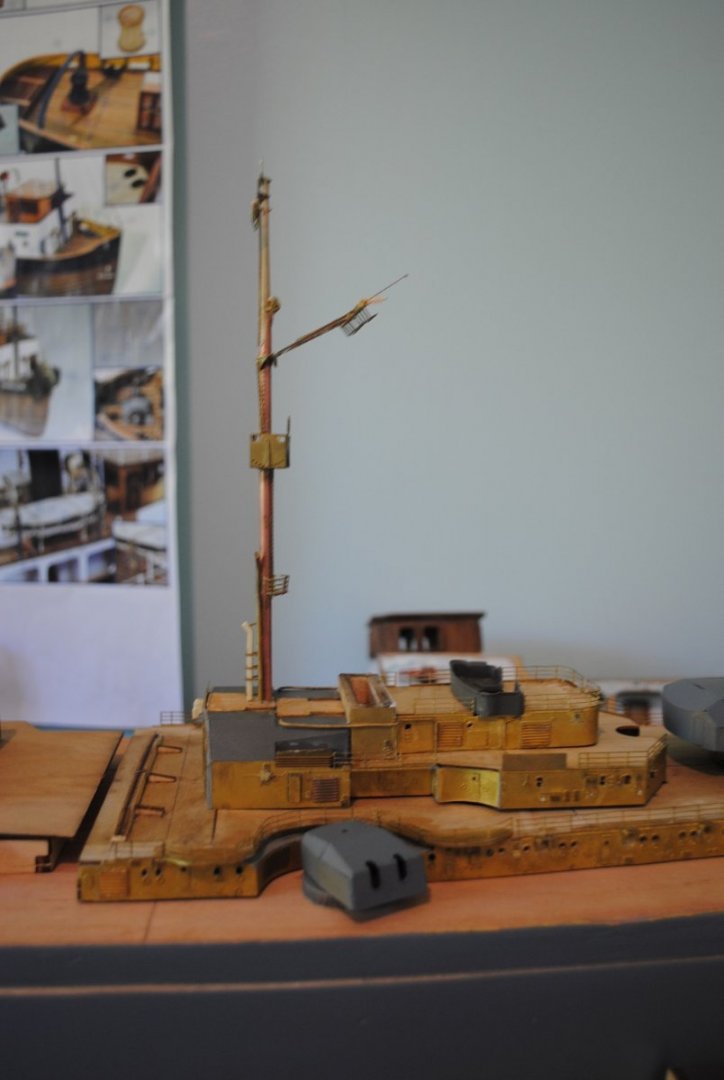
Hi All, Update: I think that I am progressing. Interesting, you want to assemble something, i.e Funnel and you get hit with a sheet of PE to detail Hangers, I guess that's part and Parcel of the Part works doctrine. I call it down a rabbit hole.... 🙂 Aft Superstructure: Added Vents Exhausts, Radiators, etc. (I think that's all for the short term anyway.) Mast: Is this the Main or Mizzen? (Seems to be the Main at the rear of the ship.) It took me some time to assemble, again.... Patience is definitely a virtue and so is knowing when to "Walk Away.... 🙂" The "Cross" Yards are 2.0mm dowel and they were supposed to have a series of 0.5mm holes drilled along thier length to accommodate the PE "Footropes." I grew tired of trying to drill these and lucky that I have plenty of spare dowel!! I tapered these Yards and notched one side to accommodate the PE. It look o.k and after filling the excess "Slot", you do not notice at all. (I think anyway....) Funnel: As per the intro to this post, I wanted to get tis on to see what it looked like. The ship now a little more "Purposeful" with this placed on. (I guess I'm going to start the Port and Starboard Hanger PE next.... 🙂) (Please forgive the quality of the photos....) Cheers....HOF. Photos:


- 544 replies
-
- 11
-
-
Hi Rod, Thank you tor your considered reply. I'll have a think and how to approach the task. (I still have the luxury of time at the mo.... 🙂) Cheers and Regards, Harry.