
HOLIDAY DONATION DRIVE - SUPPORT MSW - DO YOUR PART TO KEEP THIS GREAT FORUM GOING! (89 donations so far out of 49,000 members - C'mon guys!)
×


hof00
-
Posts
1,647 -
Joined
-
Last visited
Content Type
Profiles
Forums
Gallery
Events
Everything posted by hof00
-
 Thanks Chap!! I'm still getting used to the way the "Mains" look, I just have to live with it. 🙂 Maybe the best solution hirer would have been to purchase "Aftermarket" Barrels, Brass or similar. Cheers and Regards, Harry.
 -
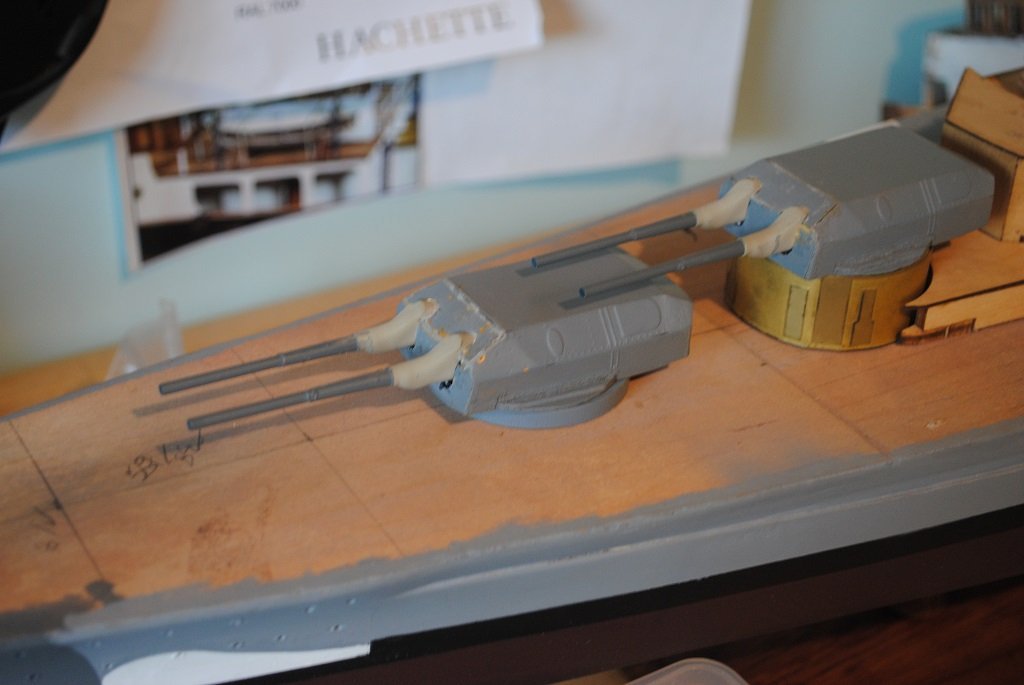
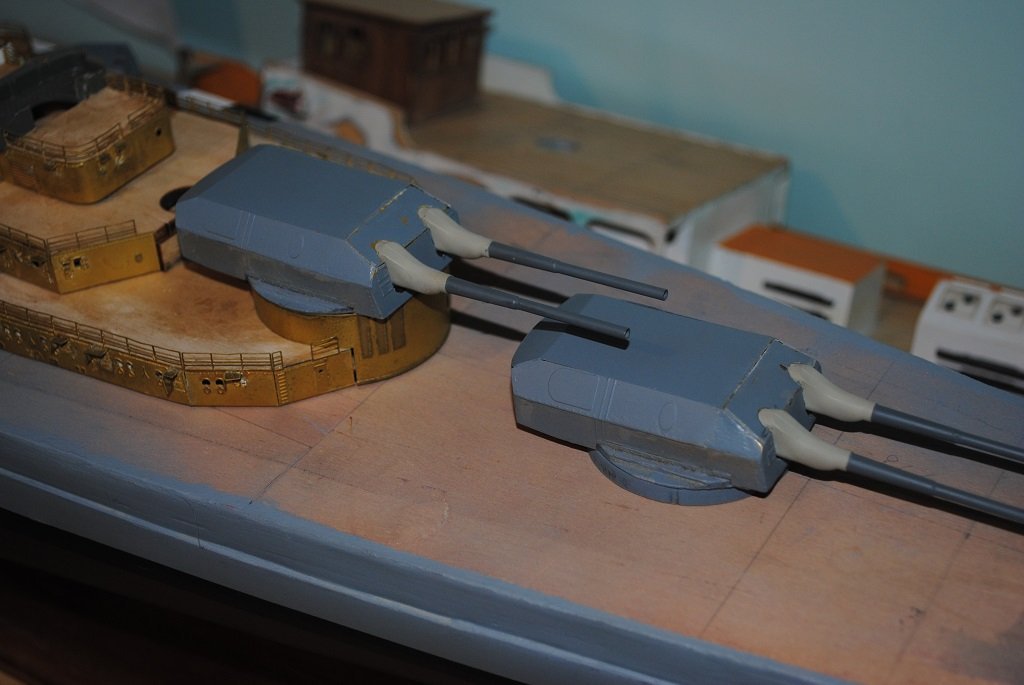
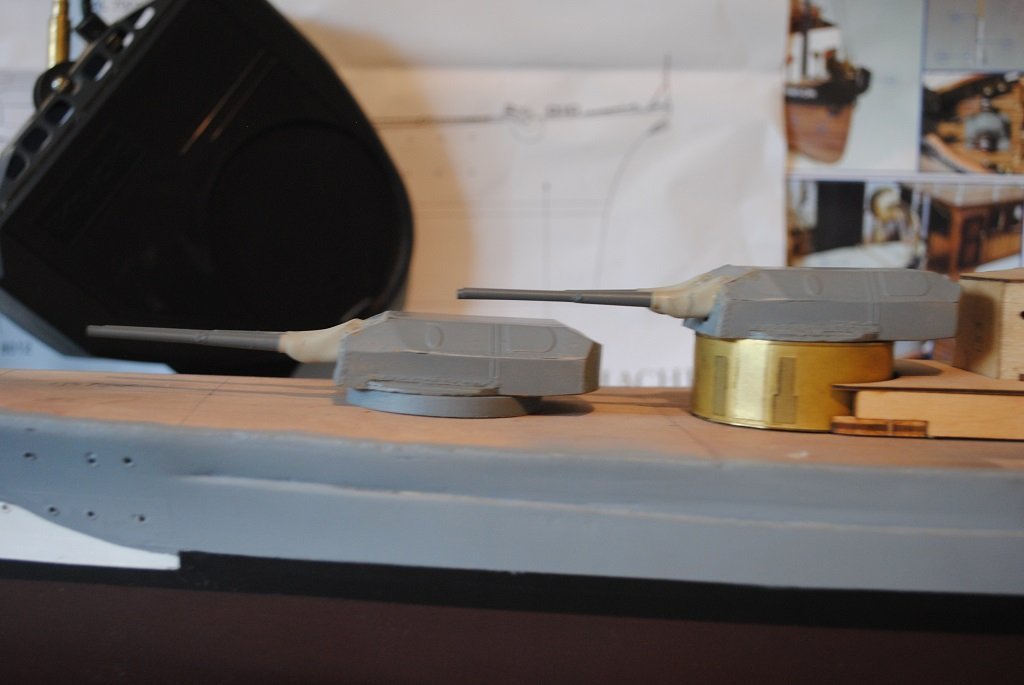
Secondary Turrets: and Barrels: The Secondary Barrels and Breeches, as discussed, did not fit into the Secondary Turrets. I wrapped a bit of 6.0mm masking around the front of the Blast Bags that I wished to protect. Out with a fine File and reduced the Breech thickness on each side by about 0.75mm The plastic supplied is very soft and reduces rapidly. Pushed the Barrel and Breech into the Turret, no worries!! 🙂 Now that I have the "Madness to the method," I can safely leave mounting of these until the Turrets are complete and painted. I am more than a little relieved.... Cheers....HOF.
-
Hi Rod, These "Boat" supports look "Interesting." My Part-works stuff has additional strips of wood to assemble a rudimentary jig.... I wonder how that will go?? I also had a good look at your Turret photos. I'm thinking from these that you did not have any "Fitting" issues with the Barrels. (The front sloped turret Roofs, Main Turrets. are quite different from the ones I was supplied with, even the Breech parts seem to differ markedly.) No wonder then that I have had problems here.... The Secondary Turrets and Breech components have fitment issues also, issues that I am still thinking about how and the best method to fix.... (I am now fairly convinced that the Amati/"Part-work" thing was definitely a pre-production run for Amati. (If I wasn't so far down the track and had not invested the "Coin" I wouldn't have even attempted the Part-works version....) Anyway, onwards.... Cheers and Regards, Harry.
-
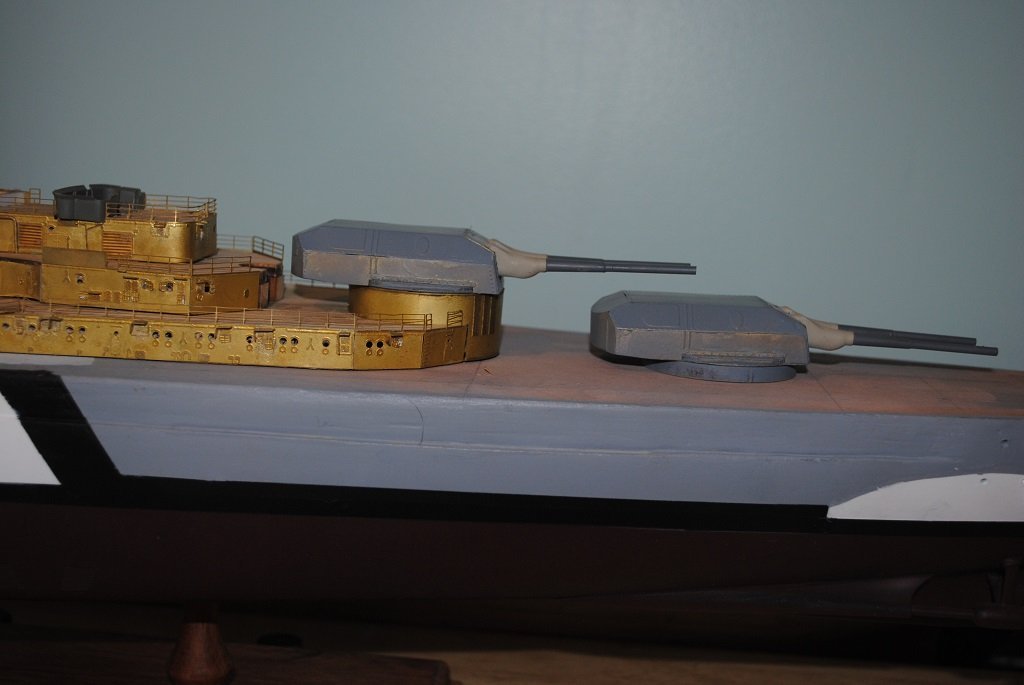
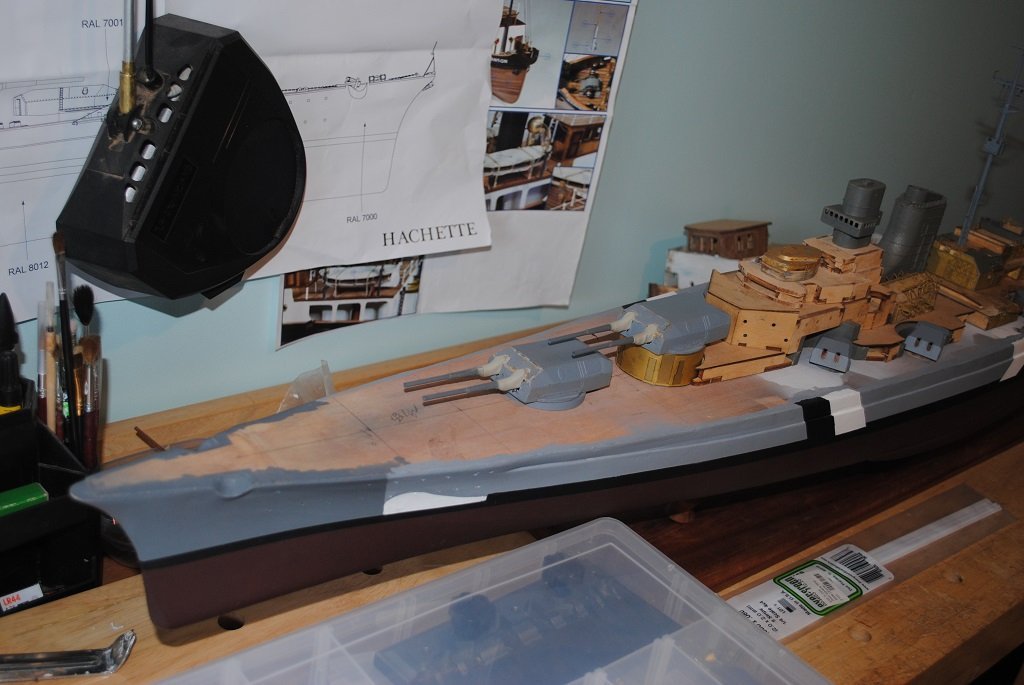
Hi All, Main Turret Photos: Just an explainer here, I really wanted to have the Barrels orientated correctly, that is parallel to the Decks. In order to achieve, 2.0 X 2.0mm plastic strip to shim the front of the Barrels The Down side to this was that I had to modify the Front Turret Roofs. So, it was all a bit of what is going to look best.... A compromise since the Barrels didn't fit anyway and the Barrel "droop" was totally unacceptable With the Barrels in thier correct orientation, the Blast Bags protrude about 1.5mm past where they should be, that is flush with the sloped Turret Roof PE. I couldn't see any other solution other than the above. I need to stop "Agonizing" about it and carry on.... 🙂 I guess it looks o.k. and it "Is what it is." I'll let the Forum pass judgement.... Bearing in mind, I now cannot change it.... 🙂 Cheers....HOF. Photos: .
-
Hi All, Small update: Completed Main Turrets insofar as getting the Guns to fit properly. I used 2.0 X 2.0mm Styrene strip at the very front of the Turrets behind the PE of course..... This elevated the Barrels just enough so that they are pretty much level with the Decks. (Better to put in the work rather than have "Drooping" Barrels.) I had to modify the Sloped Turret front roof to accommodate the Blast bag structures. I decided to keep the Brass Roofs and carefully file the semi-circular slots. (I would have had to do this anyway as the Breeches were far too large in terms of vertical width.) I am in the process of filling the gaps around the roof's, there are not too many gaps anyway. I'm reasonably happy with the results, one bonus is that the Turret front PE is allot more robust. I'll look at the Secondary Guns and Turrets as well, as per my last post, the Guns do not fit.... 🙂 I do not have the luxury of being able to remove the Roof on these as the Turret PE is a two-part shell, so, maybe a file to reduce the "Breech" width?? Have been constructing the Searchlights while bits dry on the Turrets also. I think that I'll have a go at the Cable Reels tomorrow. I was going to carry on with the Ships Boats but I am awaiting some "Gold Wood" paint for the Boats internals and Cabins, but, Taranaki Anniversary Day tomorrow, (Monday), so I don't think couriers will be working. I'll get some photos up one day soonish. Cheers....HOF.
-
Hi All, Interesting Bismarck issues.... Must have been Pre-Release problems for Amati/"Part-works." Test fitted Main Turret Barrels, they don't fit, well they do if the sloped front Turret roof is removed. Another problem is the Barrels slope downwards by a couple of degrees when fitted, No good at all, not even parallel with the Deck!! Looks like "Anton" wants to put a hole in the Bow and "Bruno" is going to destroy "Anton" if it's not careful.... 🙂 (I am assuming that "Caesar" and "Dora" are going to be the same as all Turrets are the same.) I think what I'll have to do, is shim the front of the Turret floor, (Internally), by 1.0mm or so and either modify the front sloping Turret Roof or make a new one from Plastic Card. (I think Plastic would be easier to work,) I also think that I might just have to build the remainder of the main Turrets with Barrels in place. This just implies more masking but not a huge issue. Secondary Turrets, the Barrel "Breeches" are too wide by at least 1.0mm, maybe more.... (File some width off perhaps??) I'll look at that once I get the Mains sorted. So, problems but I don't think insurmountable. (Something for the weekend Sir.... ?? 🙂) Cheers....HOF.
-
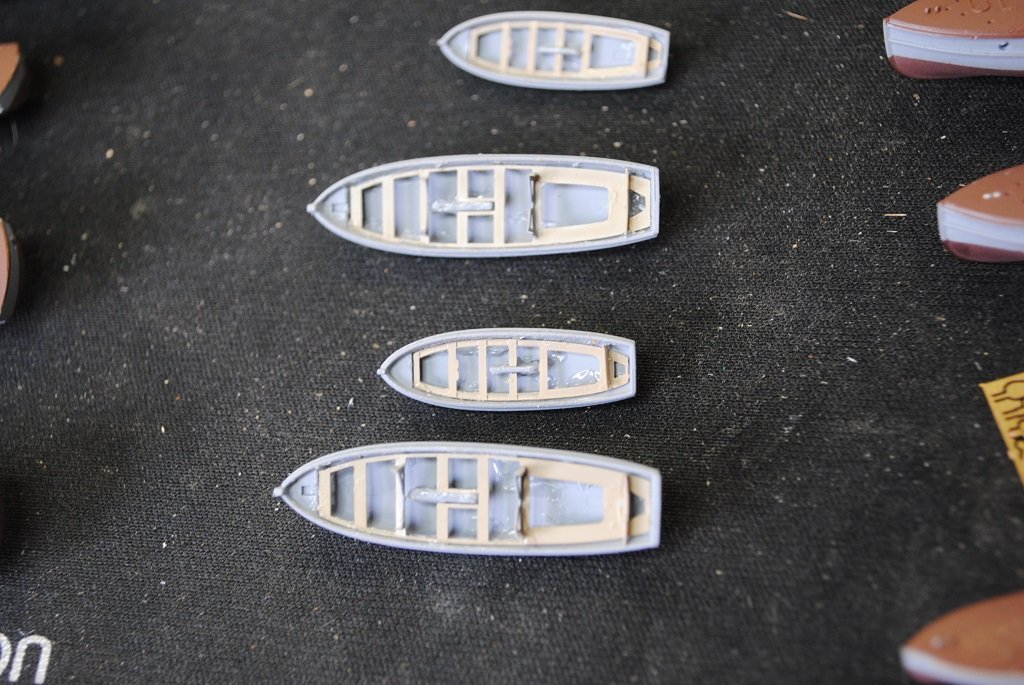
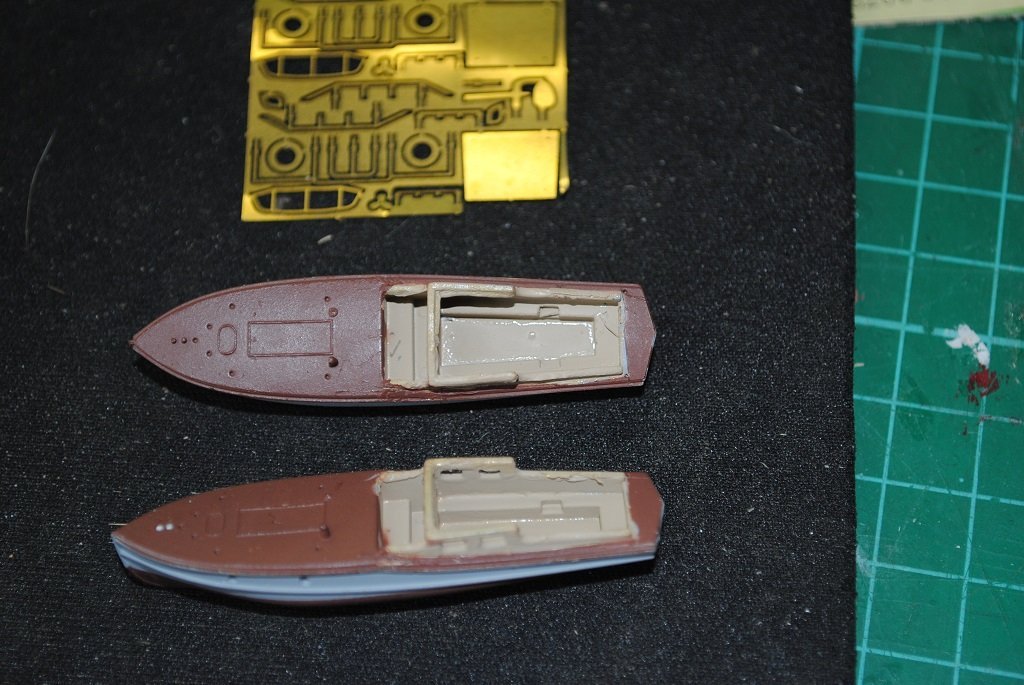
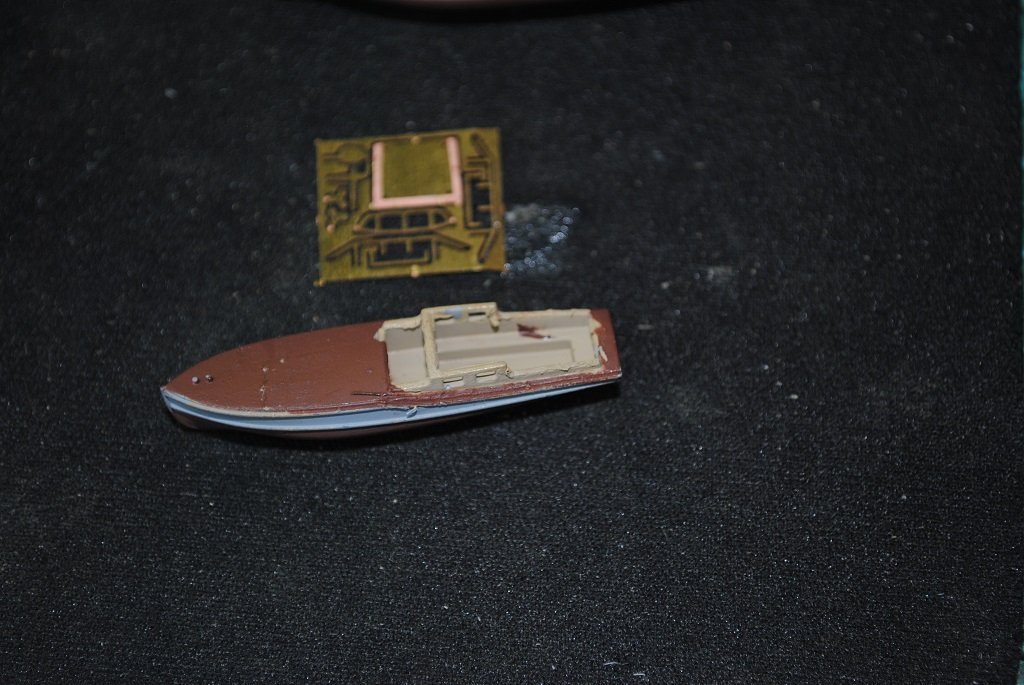
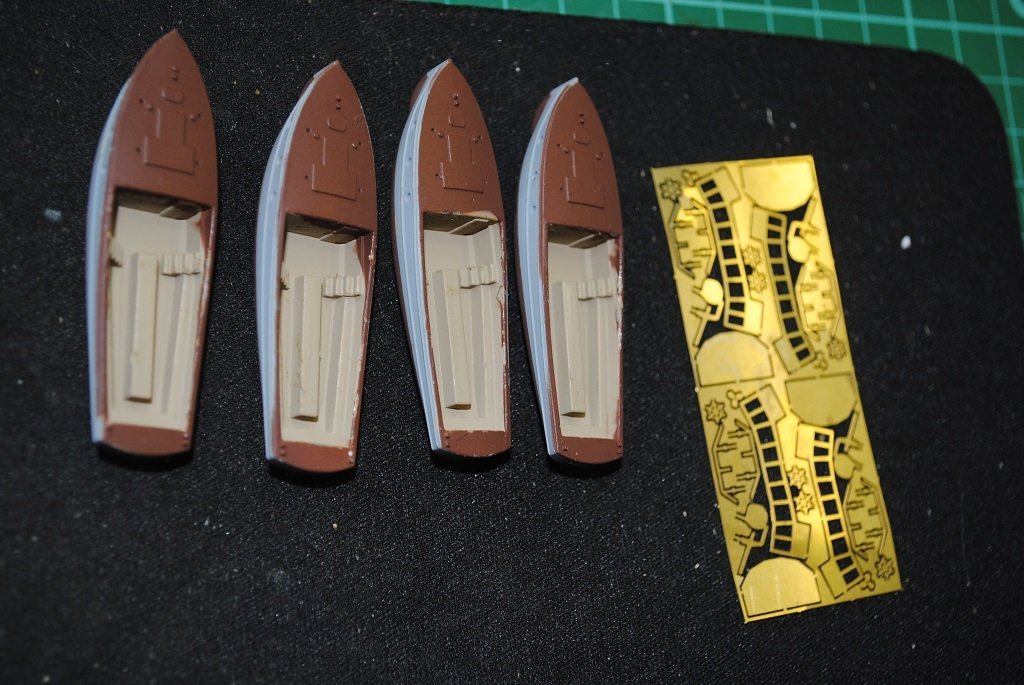
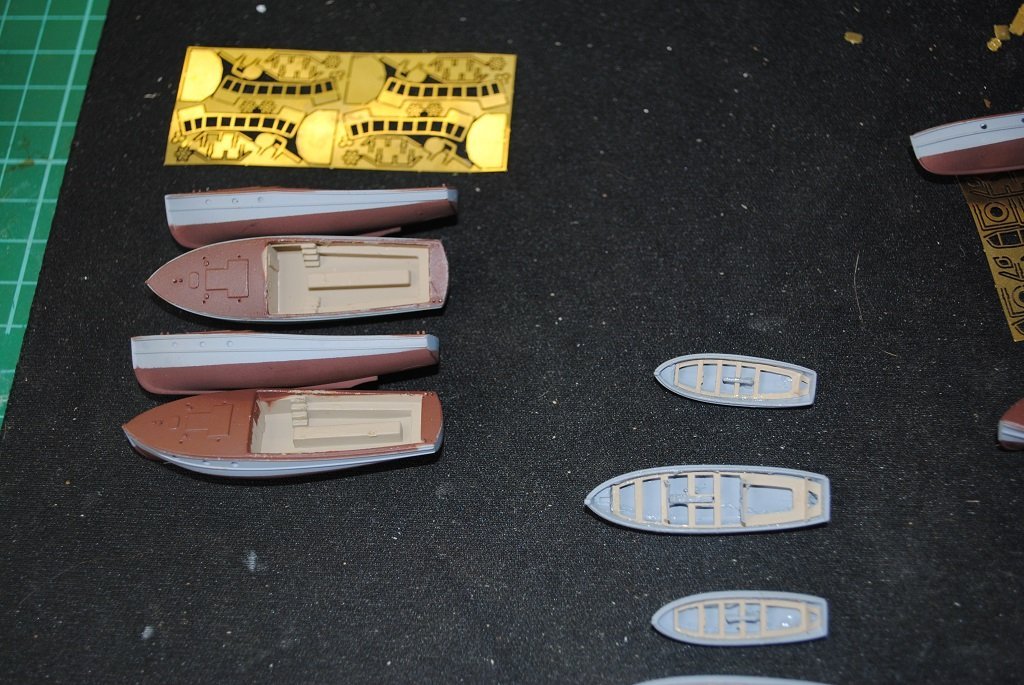
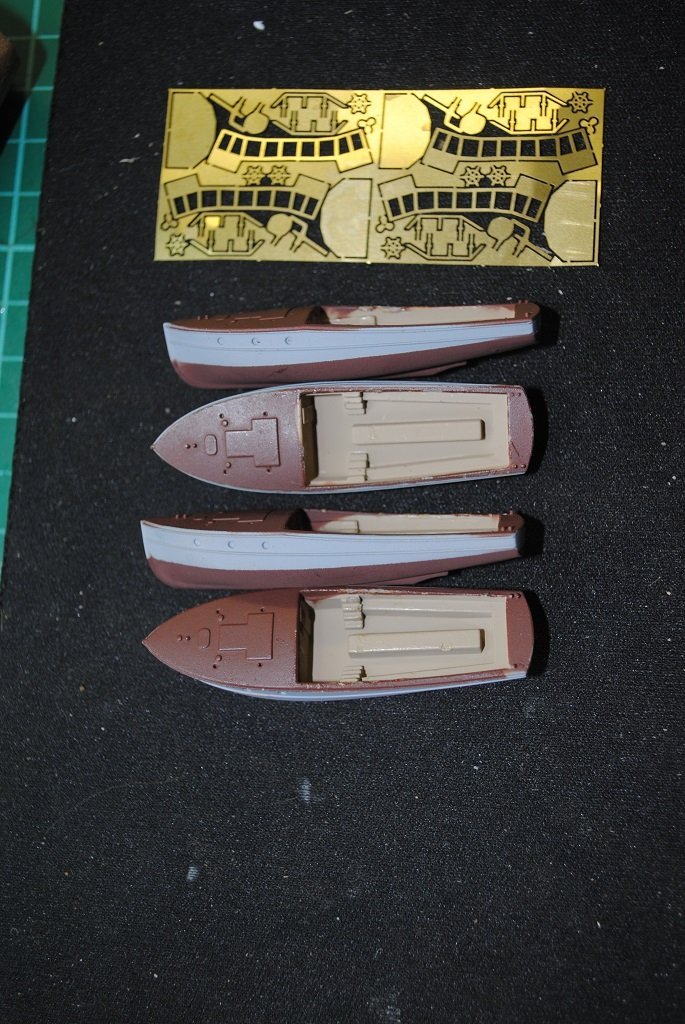
Hi All, Small update and even smaller Boats!! Decided to work on the Bismarck's Boats.... After painting the Hull, I thought that I'd carry on masking and spraying all 11 of the various Motor Boats, Cutters, Gig, Longboats and Dinghy's. (It also gets rid of five, (Relatively), contiguous "Issues." 🙂) I think I mentioned that the Boats reminded me of free gifts in cerial packets that my sister and I fought over many years ago.... Completed the Longboats/Dinghy's and completed painting the rest. With the exception of the PE stuff which I will start tomorrow. Colors used: Hull Red, Light Grey, NATO Brown and Buff. (I am unsure about the "Buff" but I'll look at that again tomorrow. Don't want to use anything too dark.... Scale effect?) (There may be some "Touch-ups" required, I'll look at that tomorrow also.) Cheers....HOF. Photos:

-
Thanks Chap, I thought I'd give wood turning a go.... 🙂 I have a fairly "Generic" wood lathe that I have only ever used in the past for tapering Masts and Spars. It will be interesting to see your Trumpeter Bismarck, I have this in storage currently, whether or not I'll attempt this next, I'm unsure but the current build is teaching myself much about PE. Cheers....HOF.
-
Hi Chap, Good to see you back at it and welcome back after your hiatus!! Looks absolutely awesome!! (Love the "Along the Deck" shots.) I reckon your almost done. (Don't forget the Hatch covers/Deckhouses though.... 🙂) My opinion, "Museum Quality." Looking forward to more progress/completion. (I hope you have a display cabinet lined up....🙂) Cheers and Regards, Harry.
- 525 replies
-
- 2
-

-

-
- cutty sark
- mantua
- (and 2 more)
-
Hi All, Just for the record, I used the "Sergal" plates on my Cutty. I wasn't too fussed about getting it 100% accurate, but accurate enough.... 🙂 Now a few years on, it still looks good and is very slowly getting a "Patina." I certainly do not wish to detract from other opinions here, it's what I had to hand, provided with the kit. At the time of the build, I was not, at that stage, a member of this awesome forum, so "Flying by the seat of my pants.... 🙂)" (My Cutty build log for reference is under HOF00 on this site and has a gallery here also.) Cheers....HOF.
- 39 replies
-
- 3
-
-
- cutty sark
- sergal
- (and 1 more)
-
Nice one Chap!! Looking really good. I painted my Cutty Hull also a Copper color prior to plating. I think that you only have about 2,500 plates to install. I'll watch with interest. Cheers....HOF.
- 39 replies
-
- 2
-
-
- cutty sark
- sergal
- (and 1 more)
-
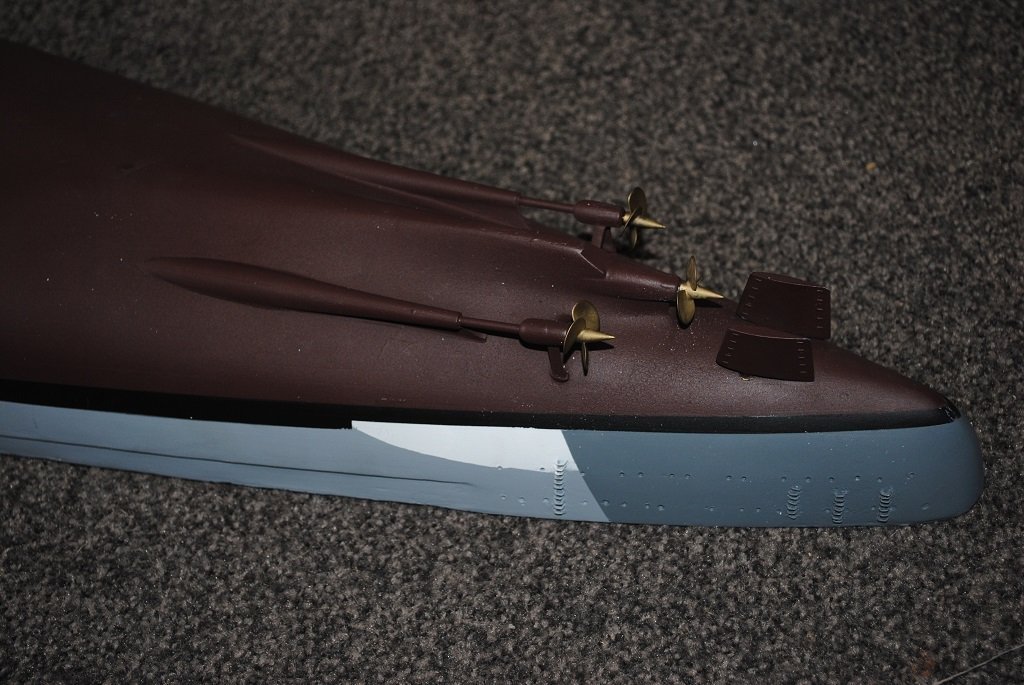
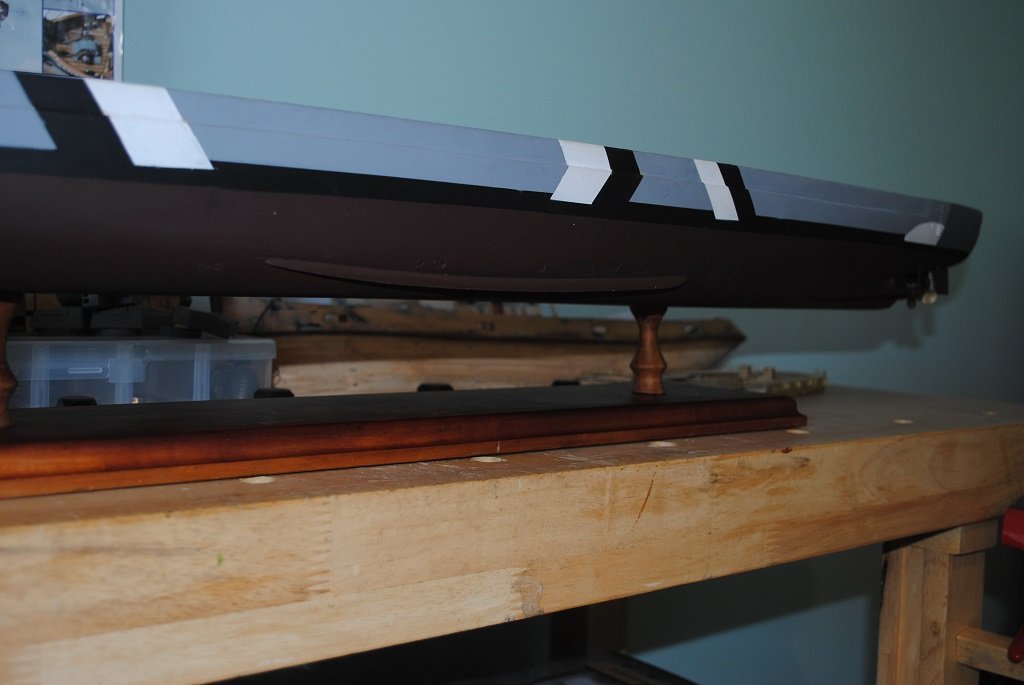
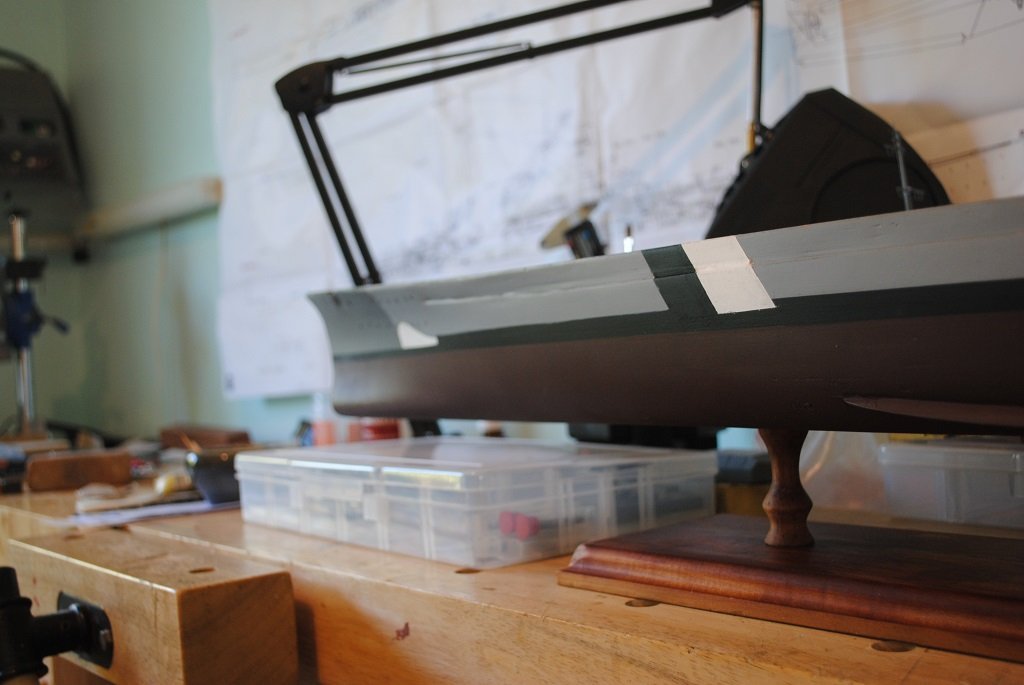
Very small update: Decided to re-spray the White "Dazzle" bits, pleased that I took the time and the small effort, I just couldn't live with it the way it was....🙂 I also re-sprayed the Port Bow wave. (3.0mm Tamia tape for curves is the business!!) When the paint has hardened, I'll give it a dose of Acrylic Polyurethane. (Tomorrow morning I guess.) To finish the Hull, I'll ensure that there is at least 1.0 - 3.0mm of Grey around the perimeter of the Deck. and I'll affix the Props and Rudders in place. (It feels like I'm getting somewhere now.... Maybe....🙂) Cheers....HOF.
-
Thanks Chap, I'll look at the White bits today.... I may re-spray or maybe just leave well alone.... 🙂 Cheers....HOF.
-
Thanks Chap, As stated in the post, there's a bit of re-work with the White required. (I guess I'm a fussy person.) Cheers....HOF.
-
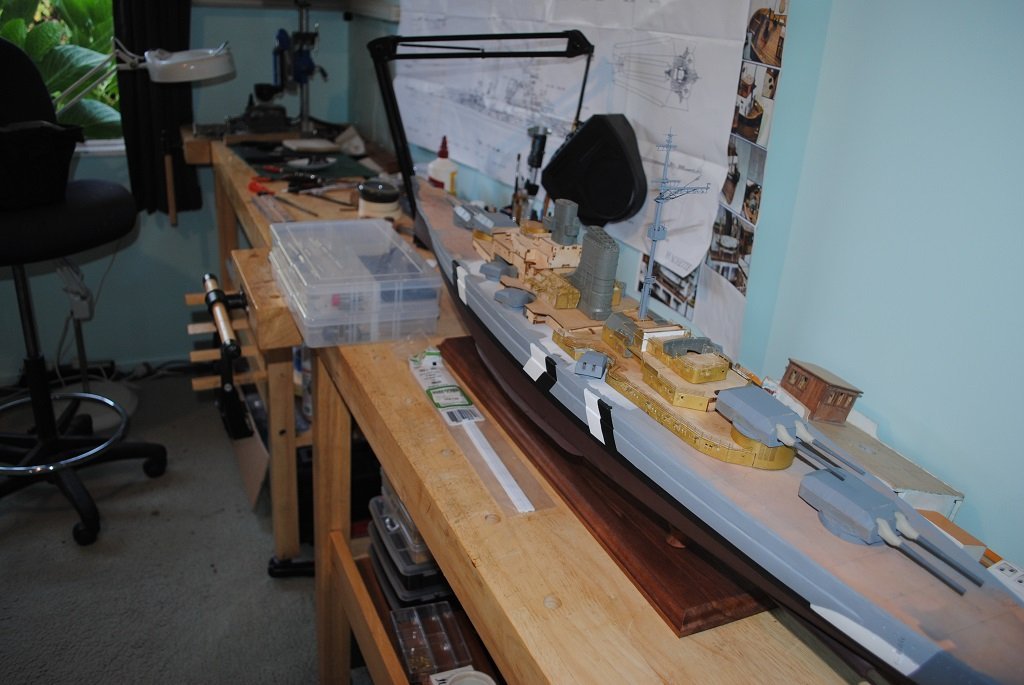
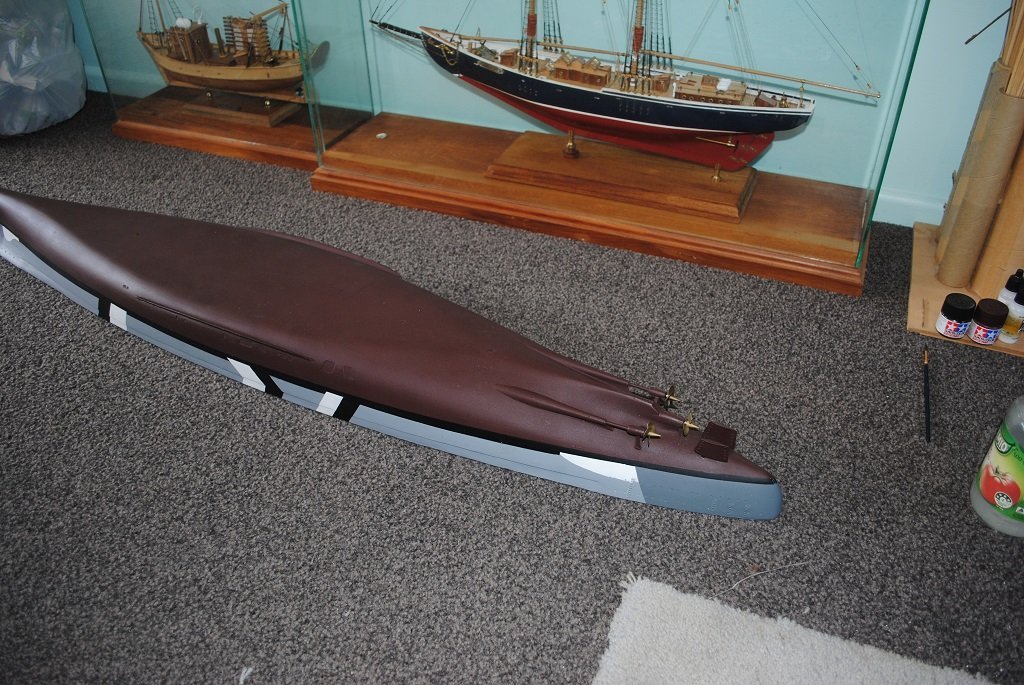
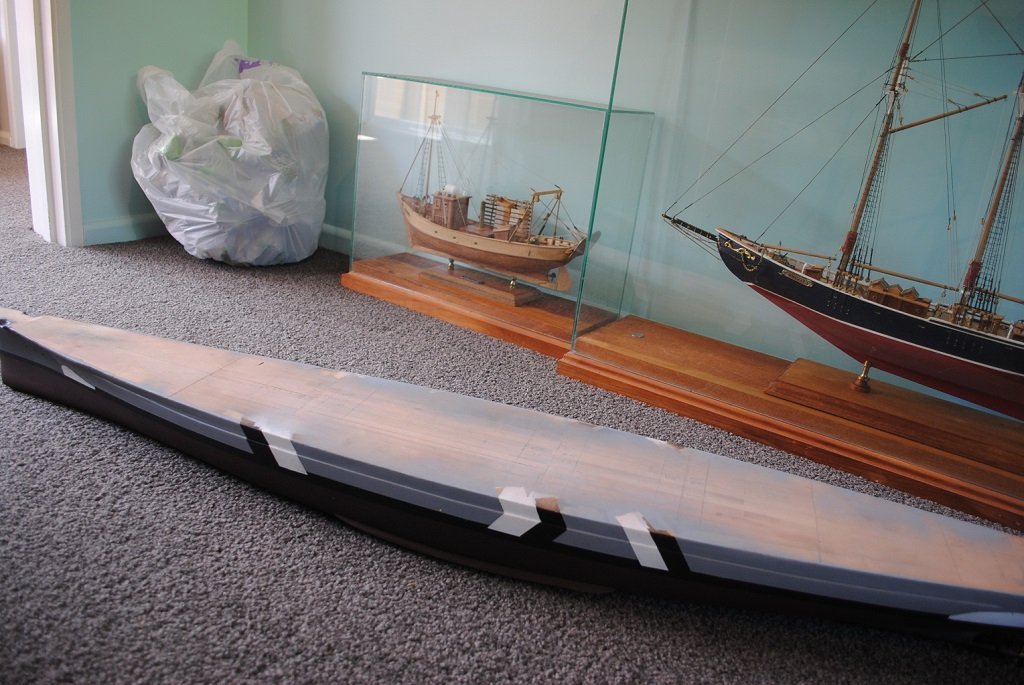
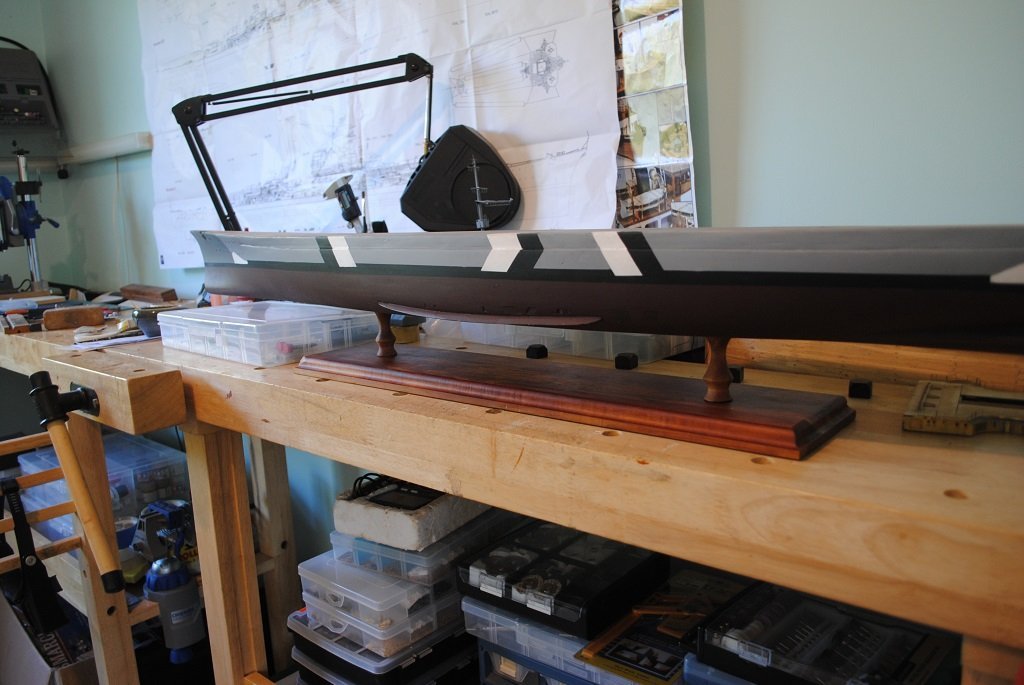
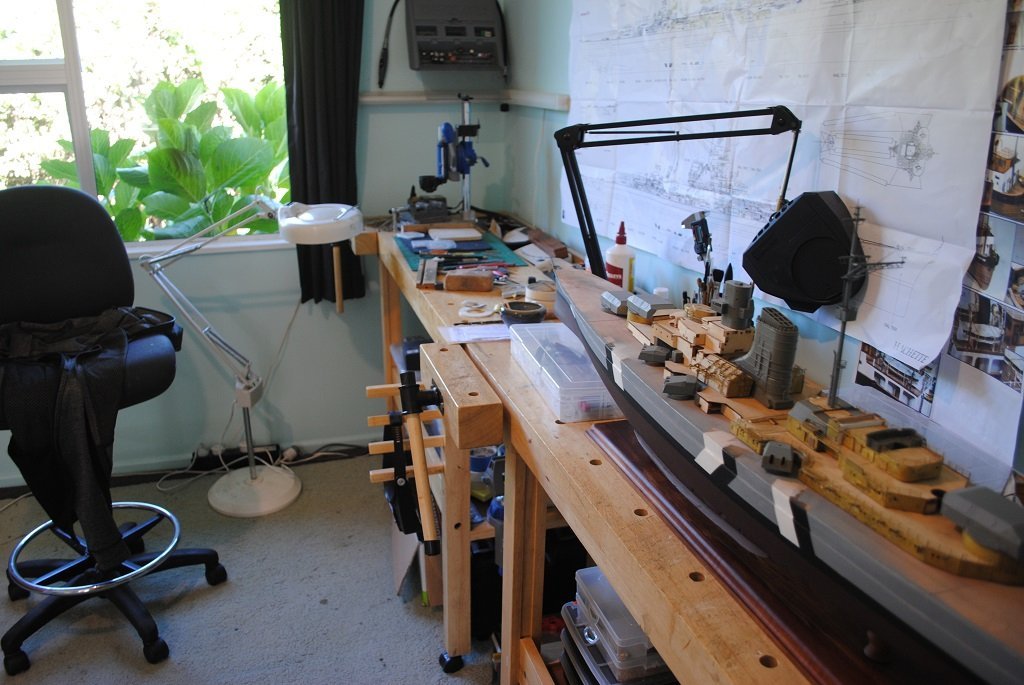
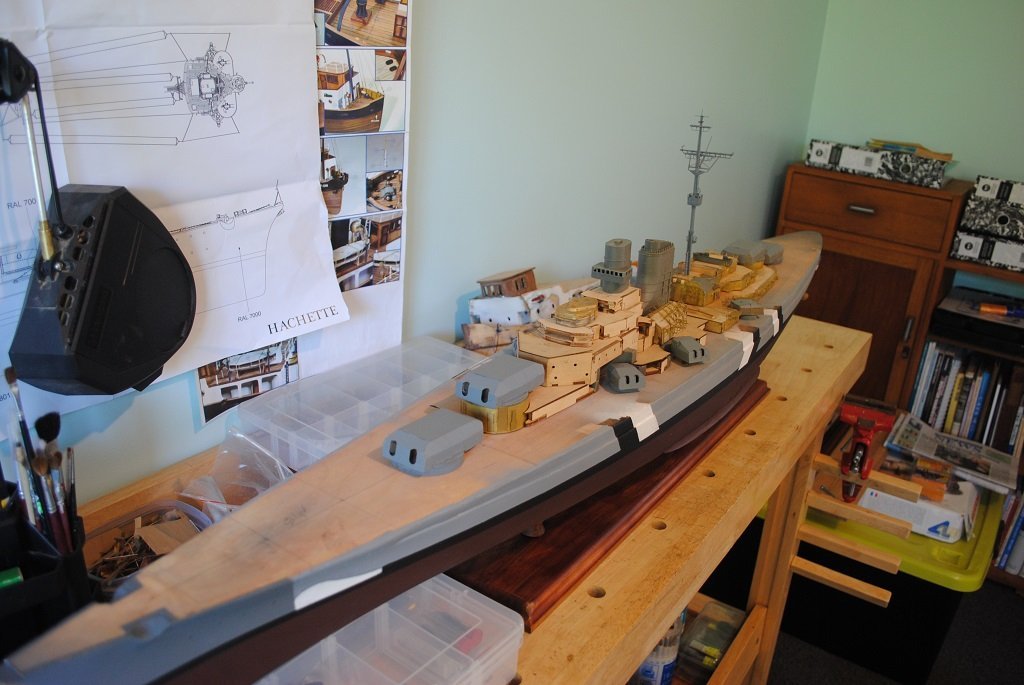
Hi All, Update of sorts.... Well, the Hull is painted, finally. I'm still thinking of spraying a light coat of Write on the "Dazzle" caomo bits as they are not 100% and this being the case, it "Bugs" me.... 🙂 I found that painting a Hull of this size was expensive in terms of time, paint and masking tape, (Esp. time) I guess I'm just used to simple schemes of Waterline, below and above this. Never mind, it's pretty much done now so I guess I shouldn't moan about it. 🙂 I found that I could touch up the darker color's with a brush and overspray with Acrylic Semi-Gloss varnish, this ensured that the light striking these was consistent and the touch-up indistinguishable from the sprayed color.... Not the White though!! (I should have known better....) Cheers....HOF. So, I think that when I re-spray these White bits, I'll leave the model on its Pedestals also, this will save the Hull getting scratches on it, another problem I encountered with general handling during the painting process. I couldn't resist placing the Superstructure bits on to have a look overall.... Photos:

- 544 replies
-
- 12
-
-
-
Waterslide Decal Paper
hof00 replied to hof00's topic in Painting, finishing and weathering products and techniques
Thank you Gents, All good information.... (I'll PM Denis also.) I need to continue the research. 🙂 Cheers....HOF. -
Hi All, Does anyone have any experience using Waterslide Decal Paper? Looking to create markings for my Bismarck perhaps.... is that a good idea? I'm a little confused with information regarding this medium: Coloued paper seems to be available - Is it possible to just cut shapes from the sheet and use directly? Does the paper need to be printed first? Any advice very welcome. Cheers....HOF.
-
Hi Rod, Looking really good!! (I'm still painting the Hull, looking forward to getting back to some Superstructure stuff....🙂) Cheers....HOF.
-
Nice one Chap!! Your PD is far too nice to relegate to the "One Day" file. Don't be too concerned about the Rigging, there isn't too much of this and I'm sure that once you get the "Standing" stuff up, the "Running" will become apparent. (I'm sure there are errors with my PD rigging but who's complaining? 🙂) Give me a shout if you think you are running into "Issues" and I'll try to assist. (If I can remember....) I'm very keen to watch your progress and see the finished article. Cheers....HOF.
-
Nice progress Chap!! Matt or gloss, your choice.... I lean to Semi-Gloss or Satin myself. (Try on some scrap first perhaps?) Cheers....HOF.
-
Hi All, Still working on the "Beastie" if anyone was wondering.... Pretty involved with painting the Hull, tying to get things "Just So.... 🙂" I'm not as quick at this as others seem to be, I like to give time for Paint to harden before masking up for another round. (One thing at a time....) I have decided on the May 21, 1941 scheme with "Dazzle" on the Hull only. Once I'm done with this, I'll get some photos up. Cheers....HOF.
-
Hi Ted, Thank you regarding the Deck advice, yup, I'm leaning to Aliphatic, (PVA), Resin for the Deck when I get to it....🙂 Concentrating on Hull painting at the mo. I sprayed the Deck sections some time ago with Vallejo acrylic polyurethane. The "Part-Work" thingy is the same as yours, a pre-release if you like of the full Amati kit with the exception of being in 140 separate, (Annoyingly), issues. (So, Hull, Decks and everything else, pretty much identical. The only luxury that I do not have is to be able to fully complete many structures/components until I get through the "Parts" (Issues) and locate the parts for them.... (I cannot begin to tell you how frustrating this is!!) Never mind, in some ways this forces me to stop and think about the next "Issue." Cheers and Regards, Harry.
