DONATION DRIVE - SUPPORT MSW - DO YOUR PART TO KEEP THIS GREAT FORUM GOING!
×


hof00
-
Posts
1,651 -
Joined
-
Last visited
Content Type
Profiles
Forums
Gallery
Events
Everything posted by hof00
-
 Hi Chap, That is some awesome miniature joinery!! 🙂 Cheers....HOF.
- 454 replies
-
- 1
-

-
- Union Steamship Company
- Stepcraft 840
- (and 3 more)
-
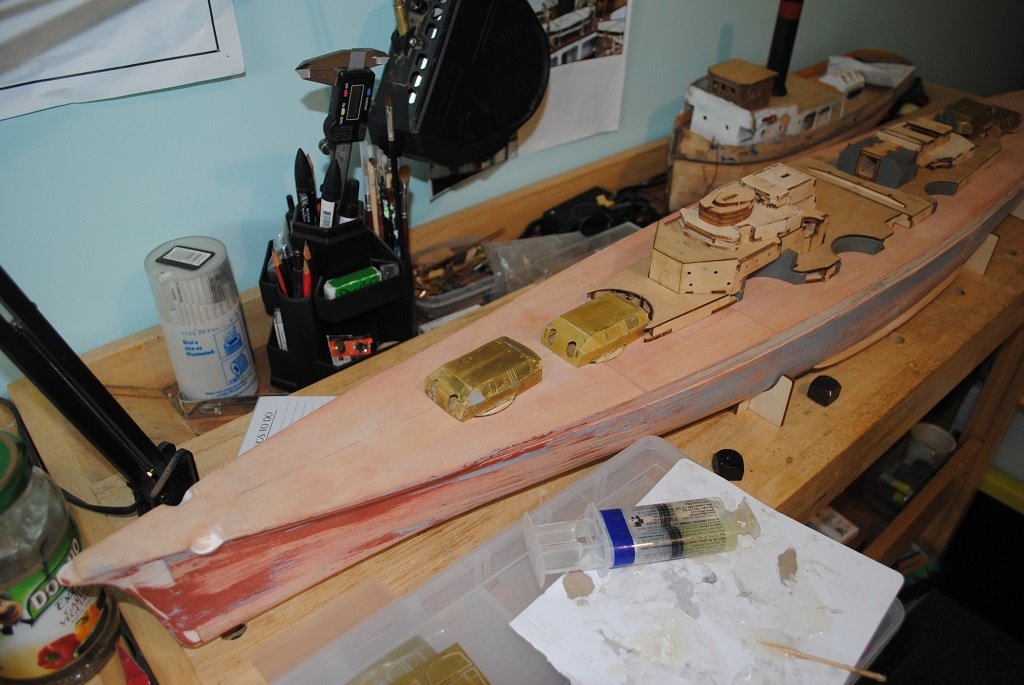
Small update: The final two 150 mm Turrets completed today, for some reason these were the most difficult to sheathe.... The PE Fret seemed really hard and it was super difficult to shape the Turret rears. (I was sorely tempted to anneal them. After an inordinate time of pushing, Etc, I got there.... 🙂) The Main and Secondary Turret construction got rid of another thirteen magazine issues. (A total of 61 issues done out of 140 but who's counting? 🙂) On the to-do list tomorrow will be to "Finish,") all Turret structures thus far and start looking at the Superstructure side PE Frets, (Lots of them.), and associated components.... (I think the latter will prove challenging to say the least. (For this Chap anyway....) The plan with these is to use acrylic PE adhesive, (Mig), to attach the tiny parts initially and a drop of CA to secure. (Any advice for a PE newbie appreciated.) Sound good? Cheers....HOF.
-
New Member from waaaaay South of the Border
hof00 replied to Smokeyr67's topic in New member Introductions
Hi Chap, Welcome to you from someone even further South!! 🙂 Cheers....HOF. -
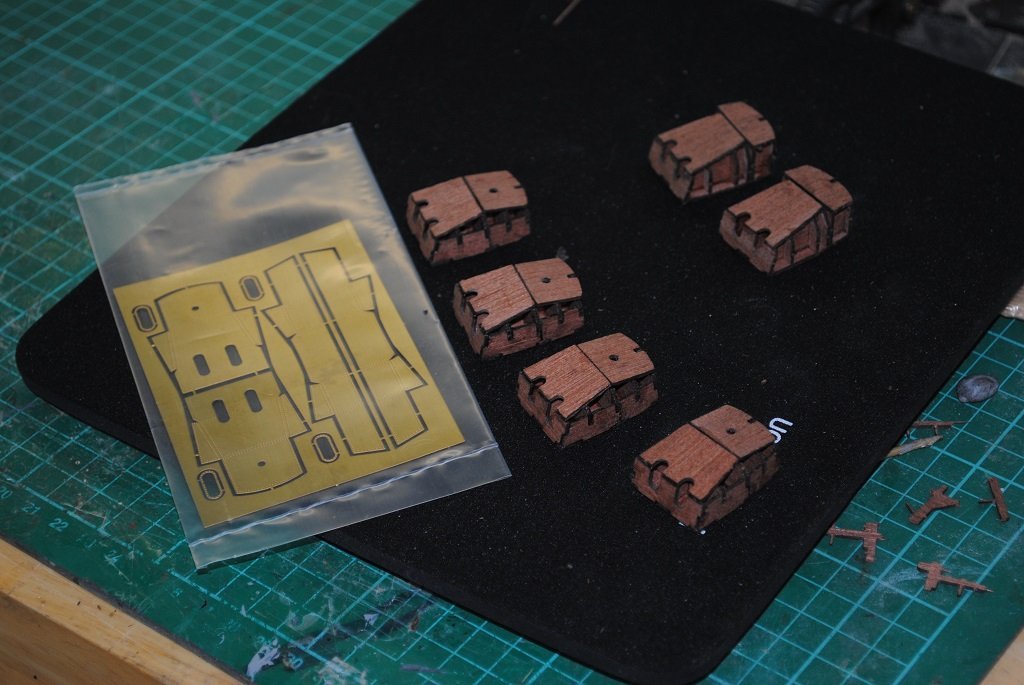
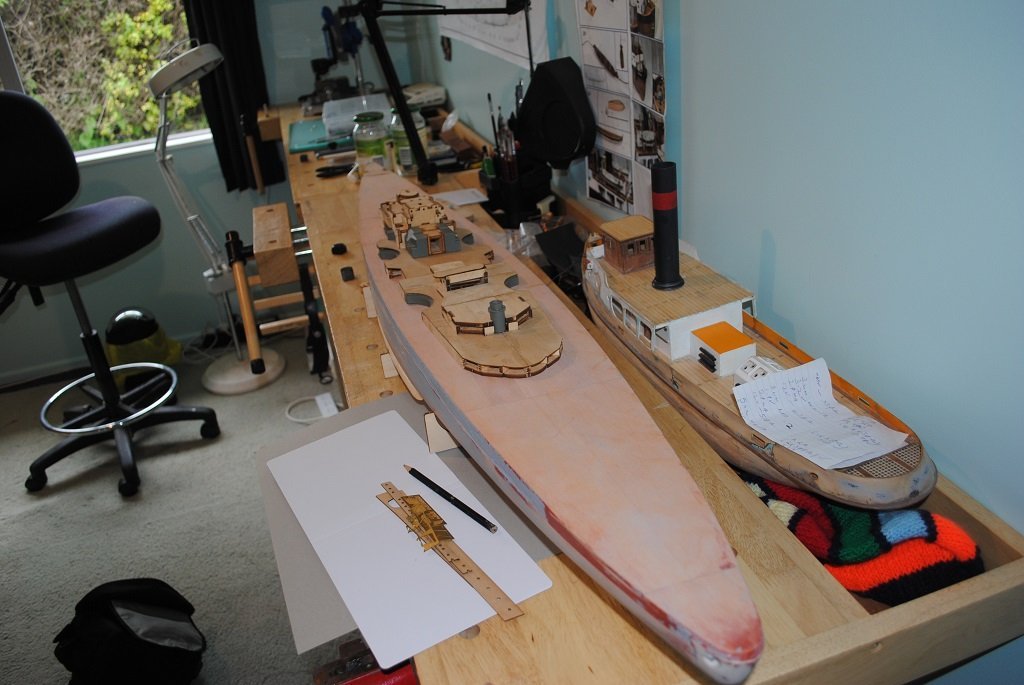
Hi All, Spent the majority of the weekend working on the secondary Turrets, there are six of these, two differ slightly. Sheathed the fist four, they came out better than I was hoping for. (I must be learning or something....) I have two left for tomorrow morning. (Apologies also for no pictures of the Hull build but there are two other builds going at this time also.) Mine followed the same build sequence.) Placed Main Turrets on the Deck to see what it will look like one day.... 🙂 Anyway, that's me for the mo. Cheers....HOF. Photos:
- 544 replies
-
- 12
-
-
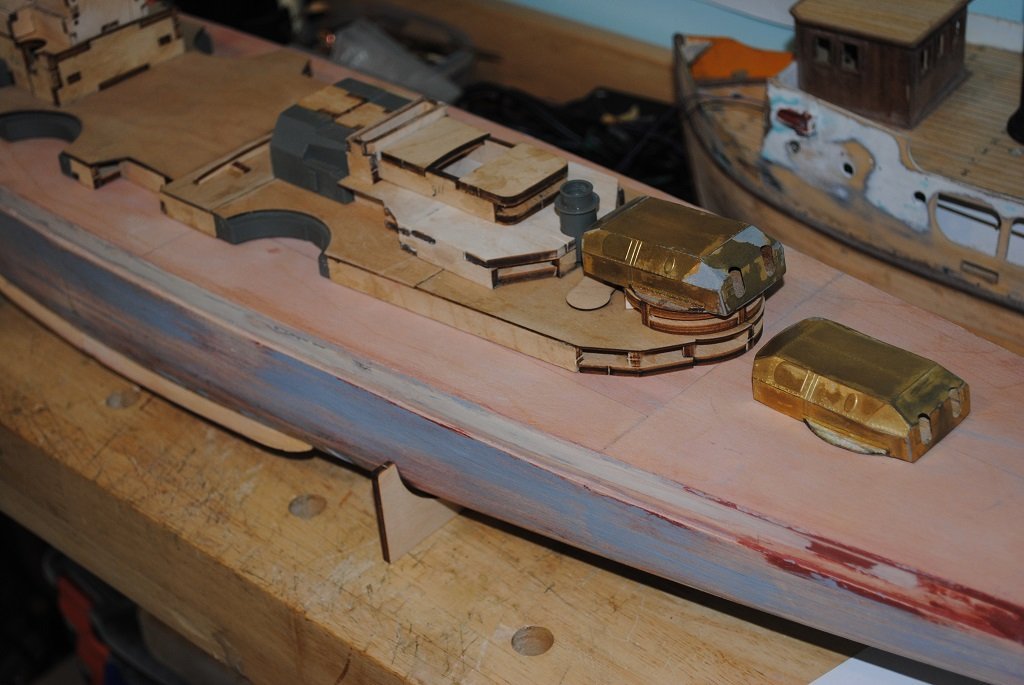
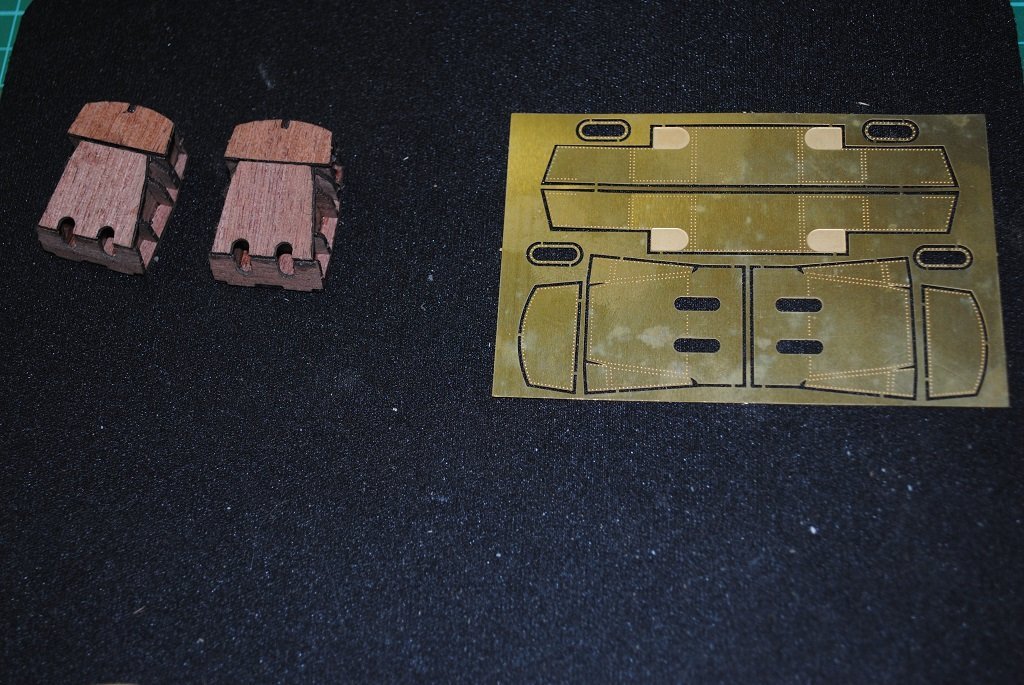
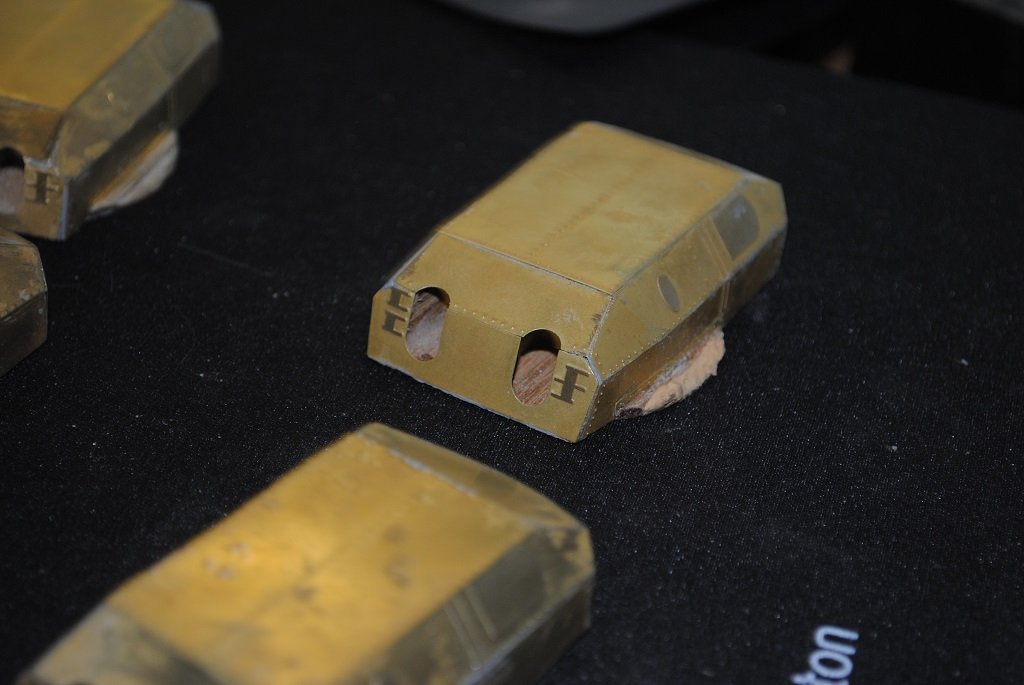
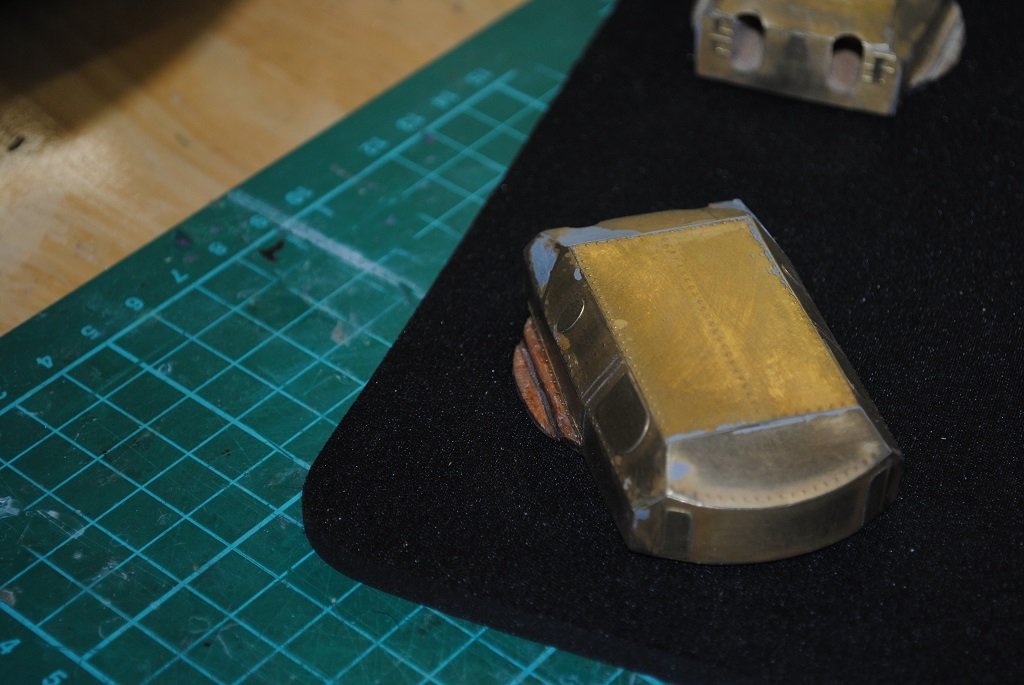
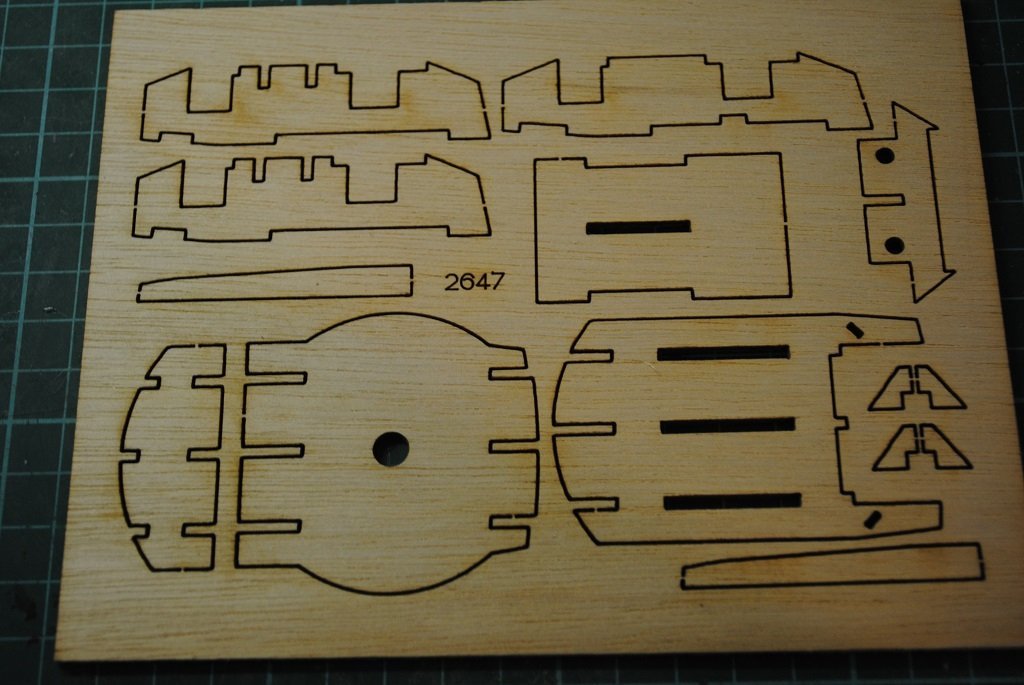
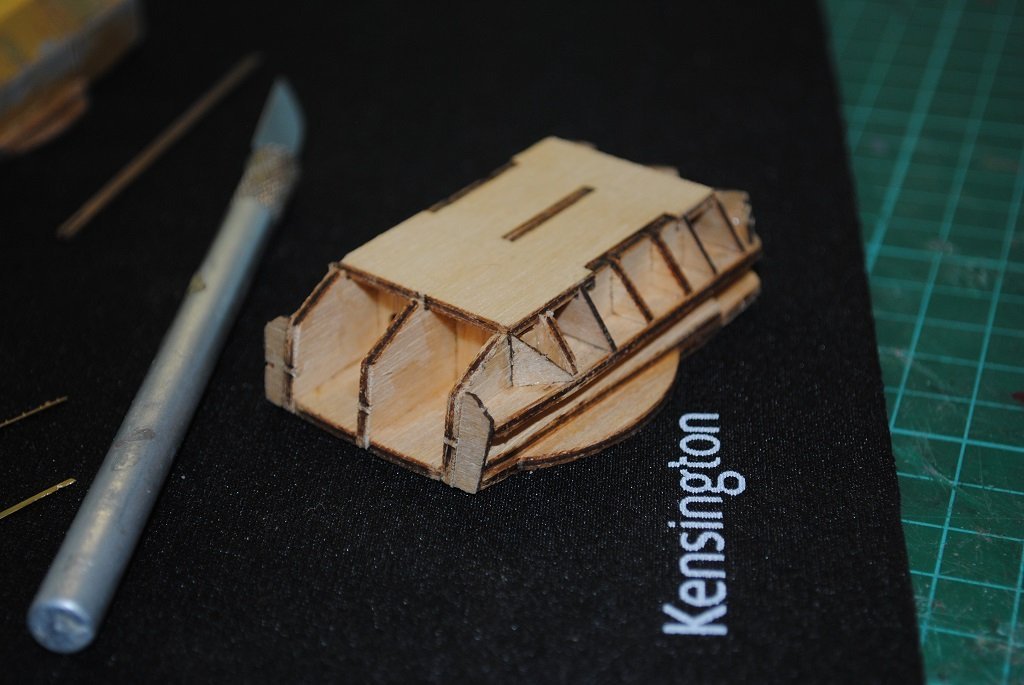
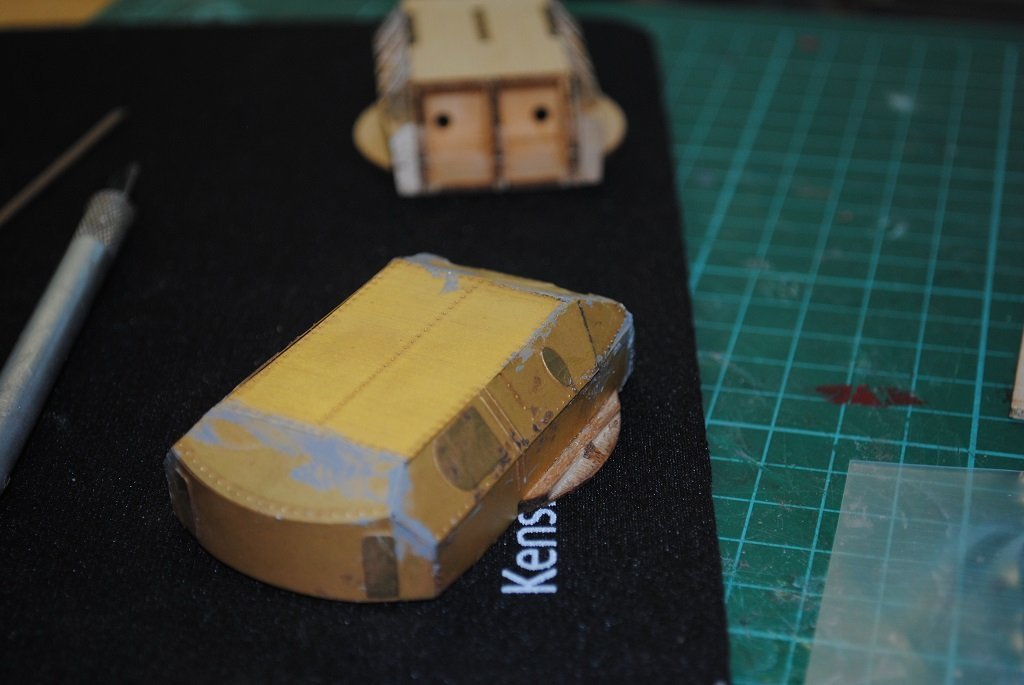
Small update: Main Turret "Basic" structure complete. The photos show much room for improvement which I will perform in the coming days. allot of fine sanding to get rid of CA residue, Etc. (I would have liked to have done this today but life gets in the way sometimes.) The Filler on certain pieces of the Turrets are where "Dents' have occurred, the cause is, of course, myself.... I lost some Rivet detail in these areas but I don't think it will be noticeable in the grand scheme of things (I'd much rather have a "Flat" section that is supposed to be flat rather than a gentle "concave" depression. 🙂 Another issue with the PE cladding is that when the sides are assembled, they stood about 0.75 mm proud of the Turret Roof. The only way that I could see to fix this, file the Top-Sides down to Roof level. I thought that I did o.k. (Being a PE Luddite.), and think they will be o.k. in the end. (I can be pretty "Fussy" when it comes to this stuff. 🙂) The last photo are the six secondary Turret ply components. There are only 4 pieces of PE for each, two for cladding and two for the Barrel openings. Cheers....HOF.
-
Hi All, Small update: Working on the main Turrets for the past couple of days and believe that after I complete sanding polishing that the might just pass muster. As I mentioned PE is very foreign to me but I think that I'm getting used to it. Some errors but nothing that a bit of filler won't fix.... I am surprised that the Turrets were not a one piece plastic item, no challenge I guess. 🙂 Photos tomorrow. Cheers....HOF.
-
Hi Ted and Rod, Your builds are both coming along very nicely!! Questions regarding forming/rolling PE for rails superstructure sides, rails can be found in this URL and may be useful? Build the Bismarck - The Model This is a log by a chap in the UK, I think. Not complete but still useful. The second URL: Bismarck | 1:200 Model Ship Full Kit | ModelSpace (model-space.com) A full set of build instuctions in PDF form. (Go to "The Build" tab to get to these." These are both for the "Partworks" Bismarck but I'm pretty sure identical, maybe.... 🙂 (I just have more "Spread Out" bits with my version.) Have a look and see if these are any use to you both. (You can never have enough information sources....) Cheers....HOF.
-
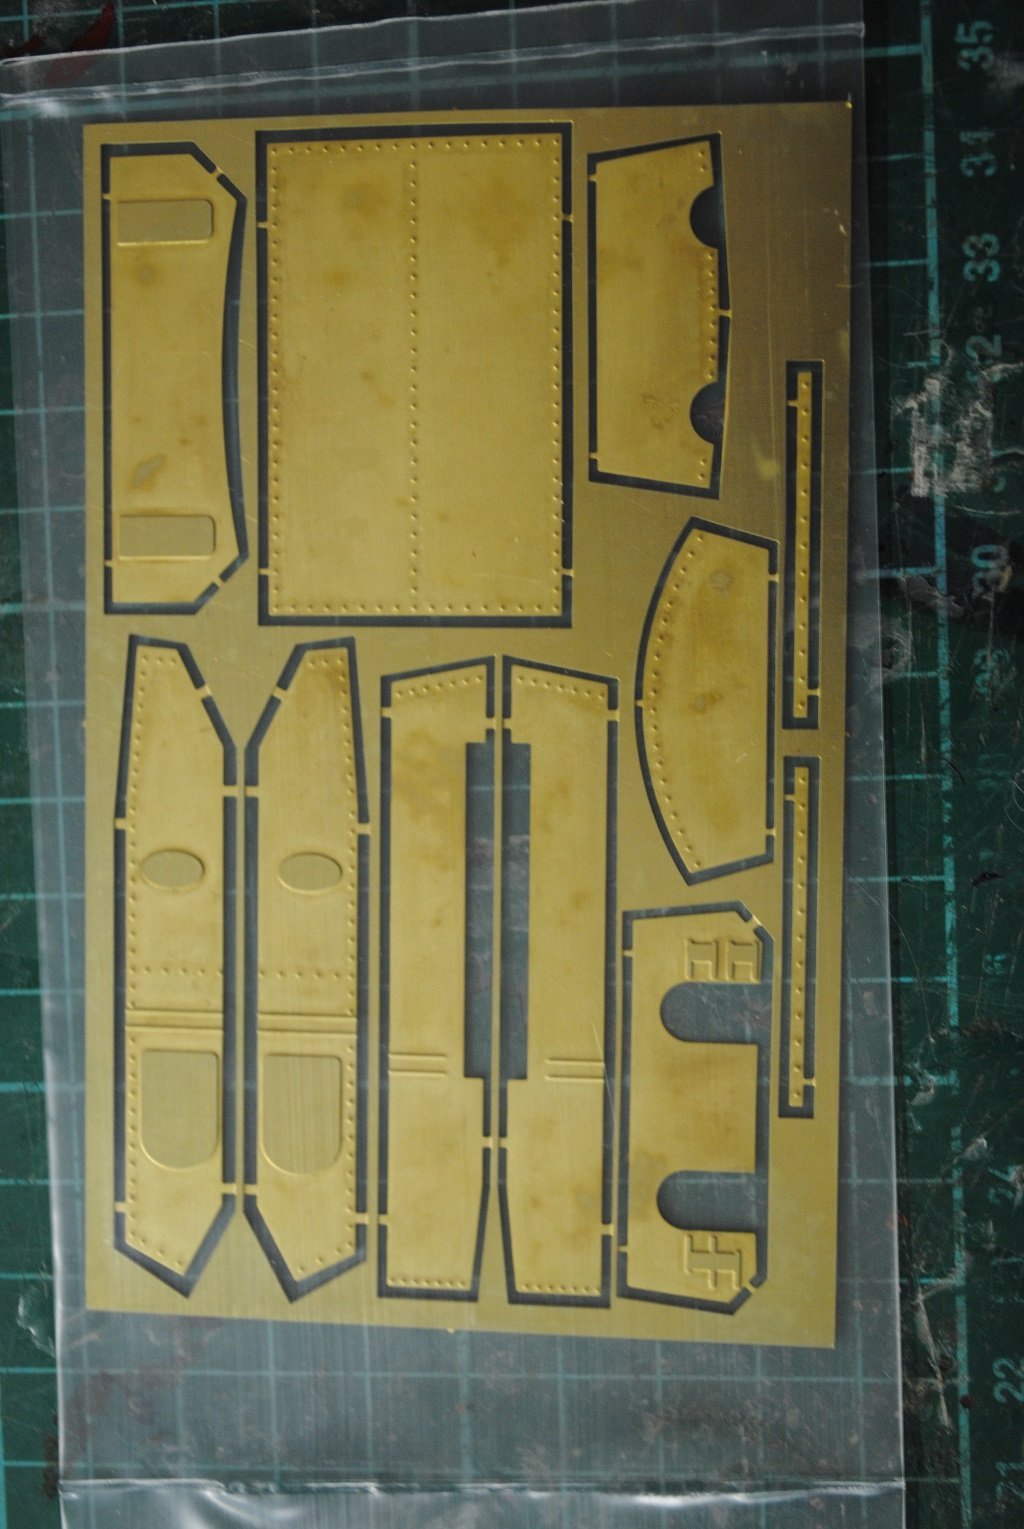
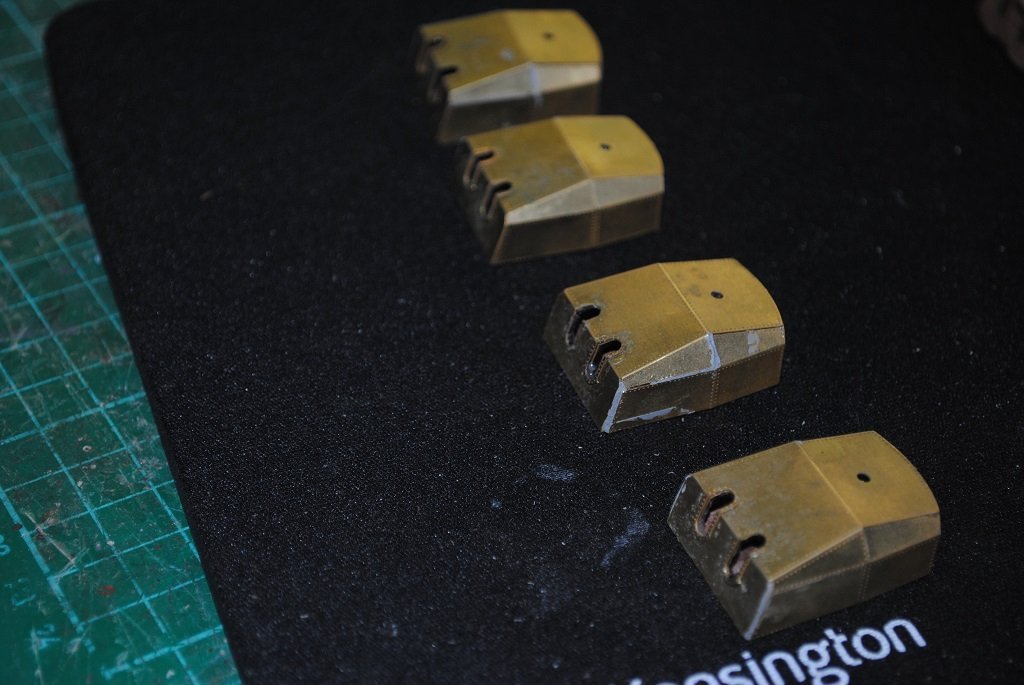
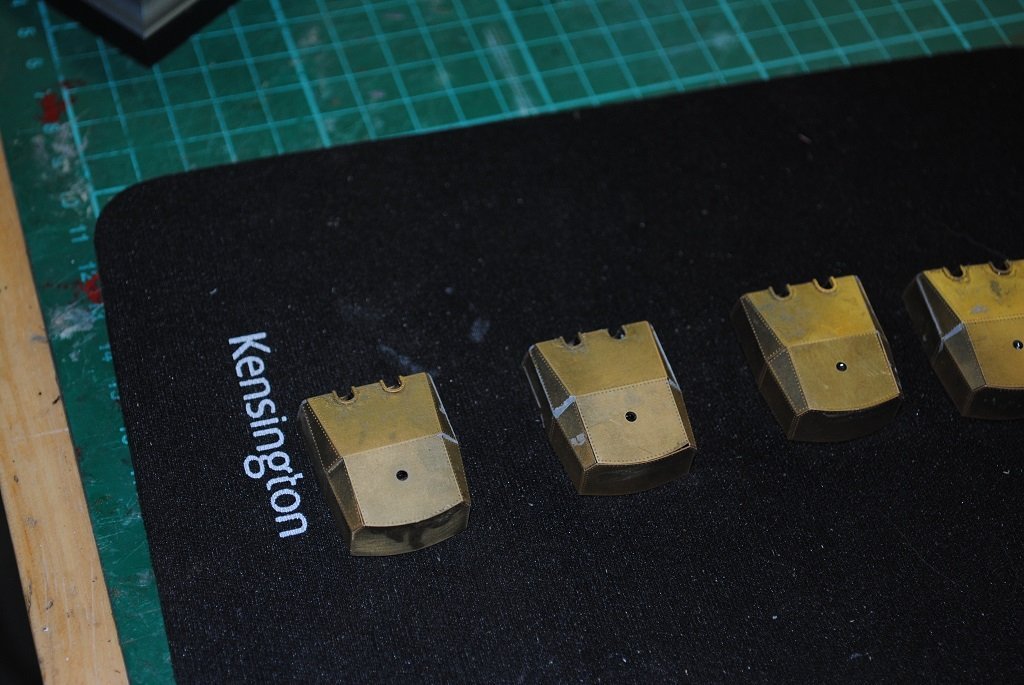
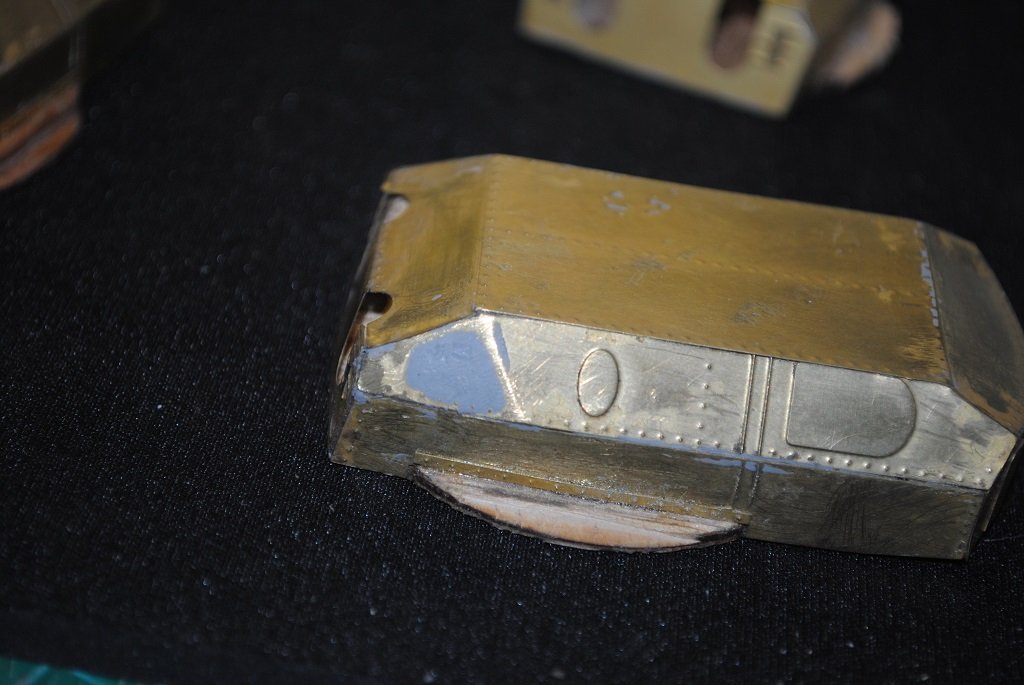
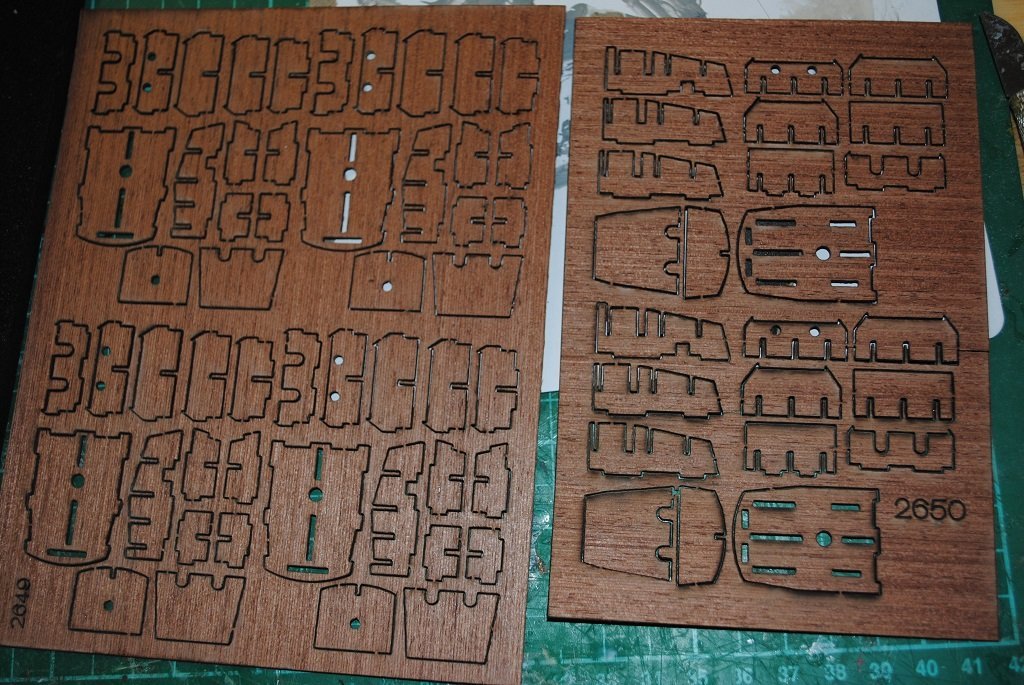
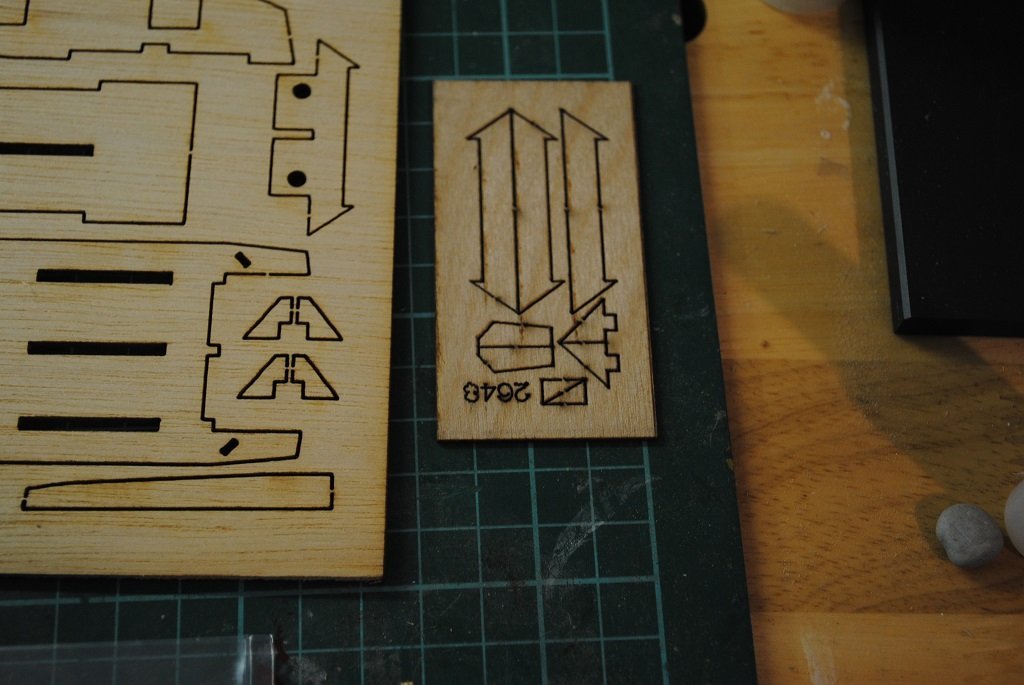
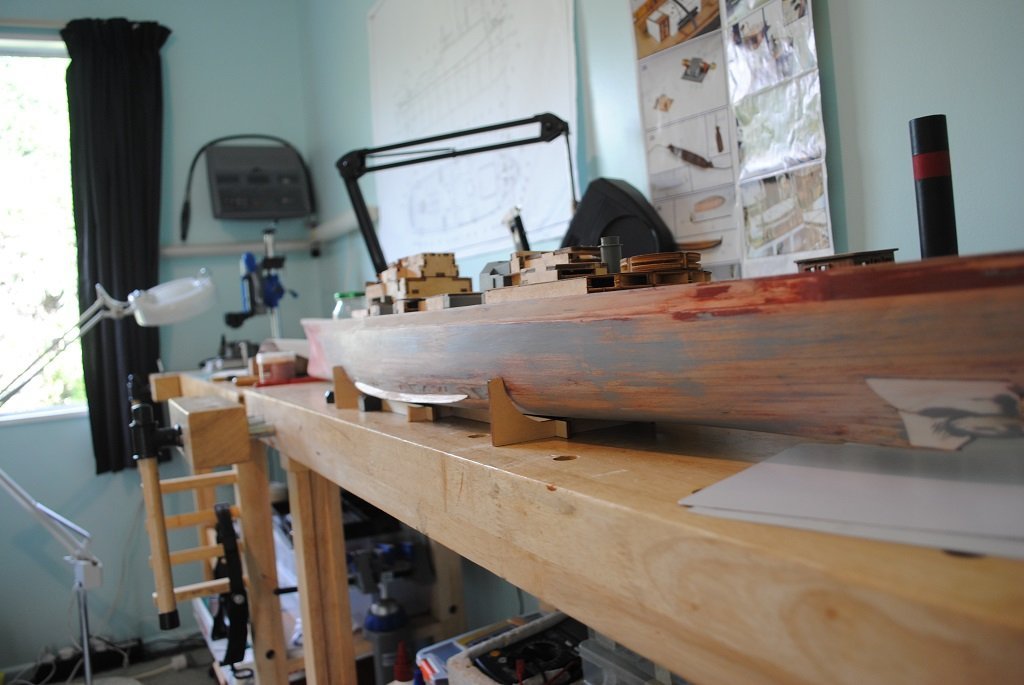
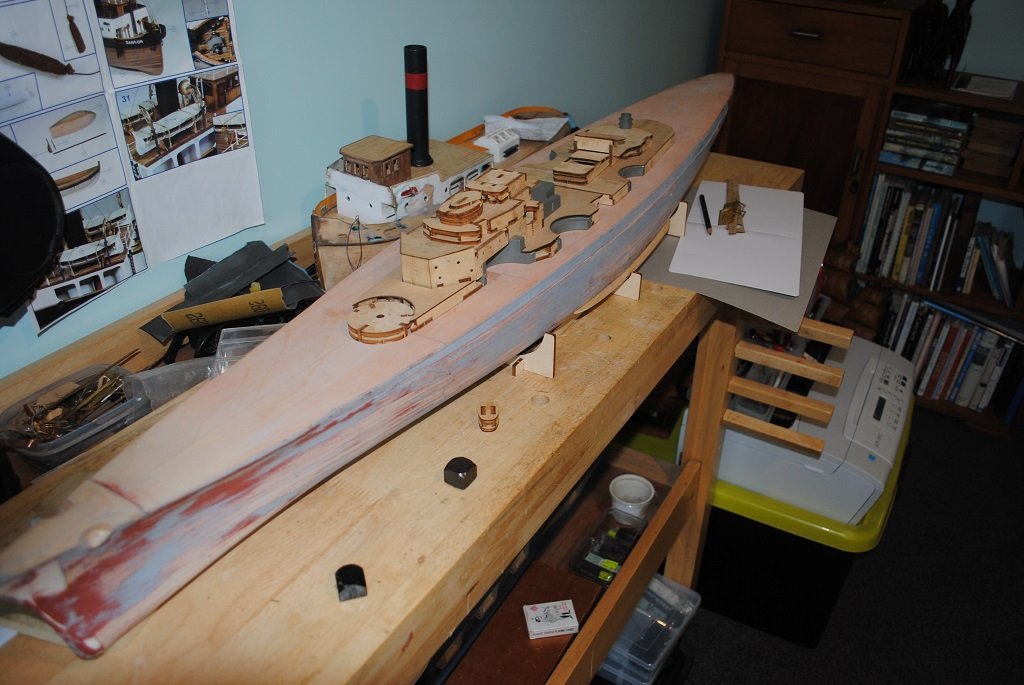
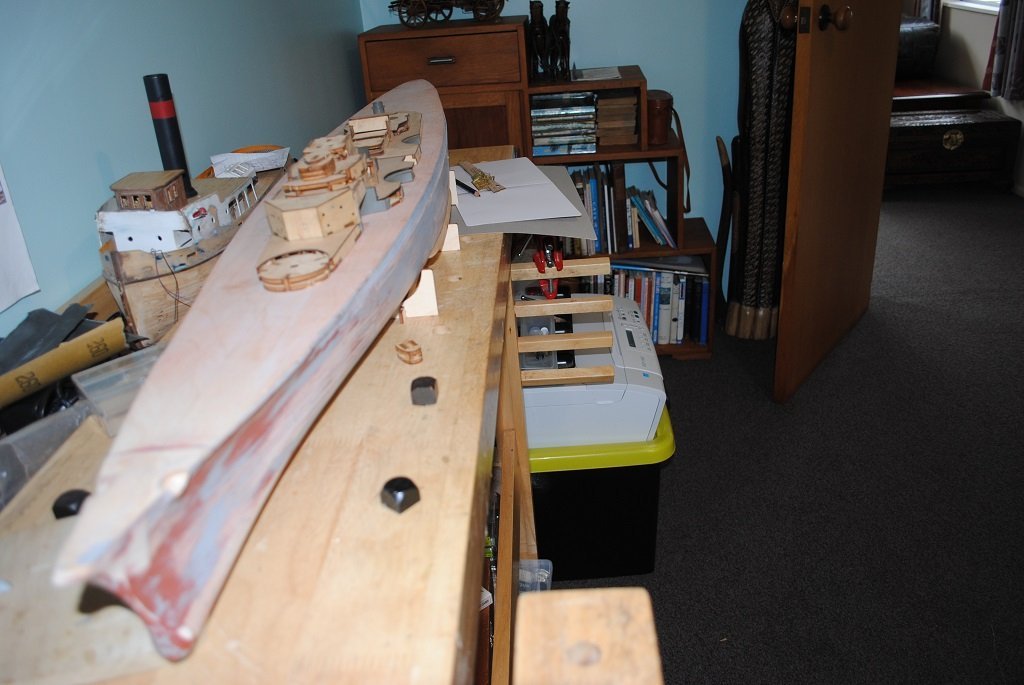
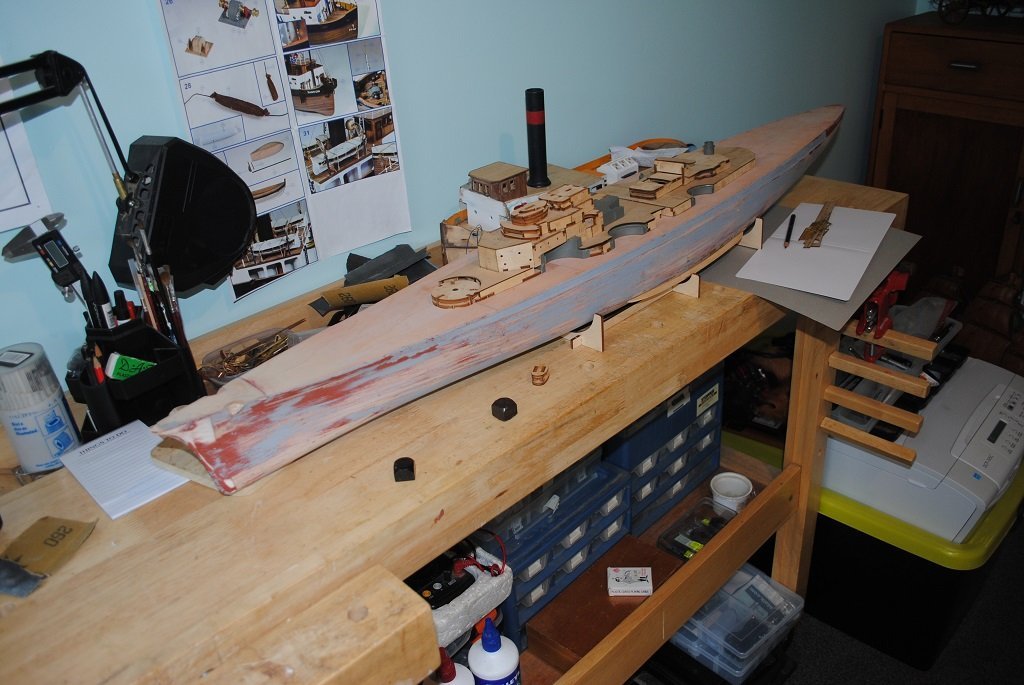
Small update: Sanded the Hull a bit more and decided before the Putty/Primer I'll need to have a think about it and ask myself is it ready for this or does more work need to be done? I gave the Anchor Hawse holes a bit of shape internally from the Deck down to the Resin piece. (The Deck Hawse hole pieces are beveled around the edges.) Decided to have a go at the Main Gun Turrets. There are eight magazine issues for the four turrets, four for the ply structure and four for the PE. (The issue instructions are identical.) (I have taken photos of the Frets, one Turret structure in ply and one with PE fret added.) So, the ply structures go together very nicely but when it comes to PE, I have a very steep learning curve....🙂 I got the PE on the first Turret after a few hours of planning/dry fitting. I hope that the other Turrets won't be so difficult as I now know how the pieces line up.... The completed Turret photo shows a bit of filler in a few of the joins. (I'll use some very fine Wet and Dry and a fine Wire Brush to clean this up.) There are Ventilators, Hatches, Ladders, etc. still to be added, these are on different frets in other issues.... (At least it's a bit of progress and something out of my comfort zone. (PE) Cheers....HOF. Photos:


- 544 replies
-
- 13
-
-
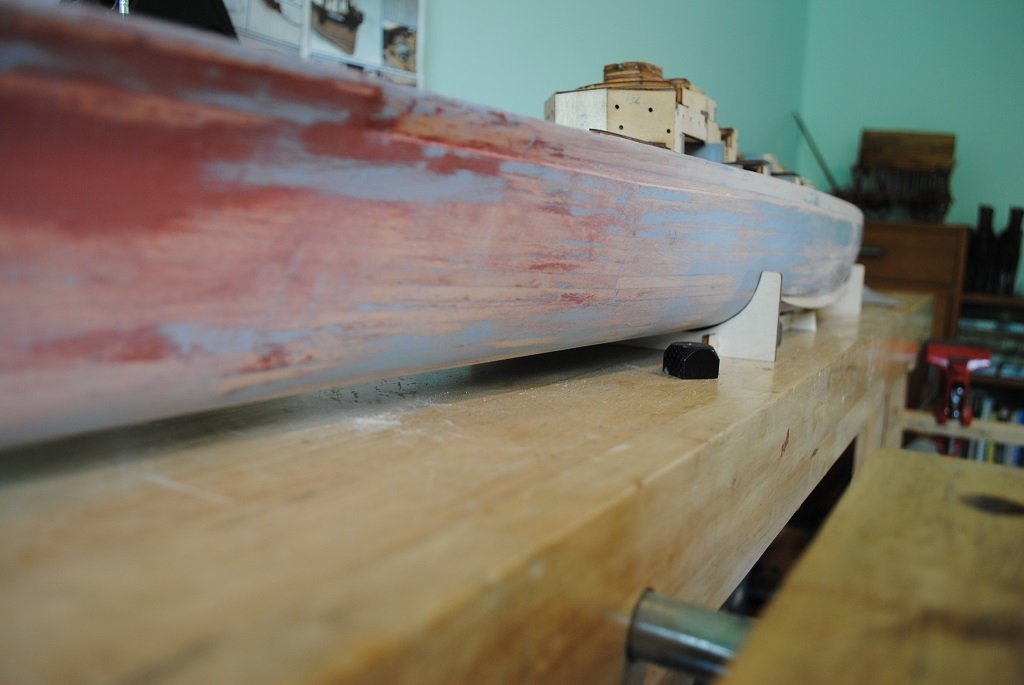
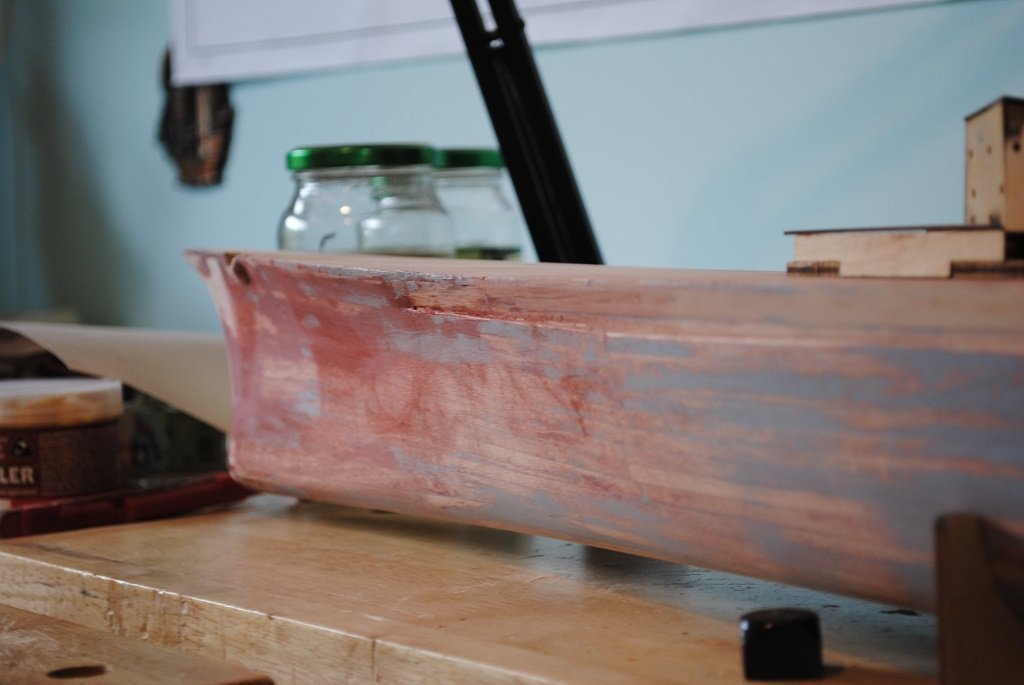
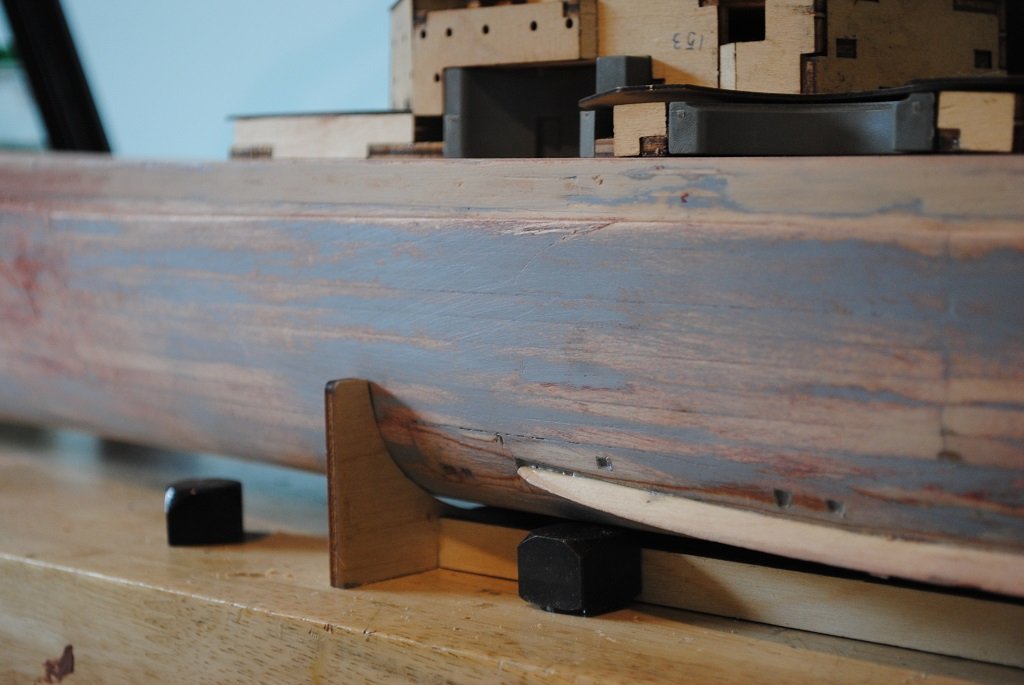
Small update: Continued review of Partwork PDF instruction material I found on-line. (Saves going through countless magazine issues. 🙂) I have identified several "Installments" that I can complete, (almost), where I don't have to Jump around.... The Main and secondary Turrets can be assembled. Nice! Have also identified a small section of Superstructure that needs "correcting," for want of a better word. I'll post as few photos of the Hull to hopefully illustrate the definition of the Armored belt. (Citadel Armor?) The plan this evening is to fix the Superstructure error and continue prepping the Hull in anticipation of spray filler/primer. (The Left arm is doing the majority of the work with the right is pretty useless.... 🙂Perhaps it's just a case of the left hand not knowing what the right is doing. 🙂) Cheers....HOF. Photos:
- 544 replies
-
- 10
-
-

-
Thank you Sir!! Been sanding the Hull and defining the "Citadel?" Armored Belt in preparation for Spray Putty/Primer. Had some PE "Sea Chest" grilles, Starboard, that had to be removed prior to this. (I have a new set of these for both sides of the ship.) I guess it was a good thing that I had almost finished the Hull and a lot of the Superstructure. (Also great to have all subsequent issues/components. 🙂) I'll get some photos up later today. Cheers....HOF
-
No Worries to look and borrow. It's a good thing. 🙂 Yup. there's a couple that I have been looking at. (Ted99's inc.) There's one also in this Forum from manufacturer "Agora," (Hachette re-branded?), if you had missed that one. Cheers.... HOF.
-
Thanks Chap. The other two Amati Bismarck got me motivated to do something "Constructive." So, begs the question really.... Are you intending to post a build log of your Biizzie? 🙂 Cheers....HOF.
-
Hi Chap, I think they most certainly are!! 🙂 The ship and its' rather short operational history has been a fascination of mine for some time. Not sure what I'll do with it once complete as I really want to build the Trumpeter version which looks at me every time when I open my ship room Wardrobe. Cheers....HOF.
-
Small update: Getting back to grips with the Beastie.... Hull: Defining the top Armored Belt just below the Deck, this was a little "Overfilled" at bow and stern with Knifing Putty. (The Fillets are Bow and Stern on this Belt where the Portholes are located.) Still defining this feature before Spray Putty/Primer. Filling remaining defects in the Hull. (Small dents, etc.) Found the Port and Starboard Prop Shaft locations and opened these slightly. Superstructure: Most of this was o.k. apart from one "Module" that I had to dismantle and re-assemble, accurately. In the process of sanding these structures and studying instructions for the plethora of PE. Things I dislike about this partwork.... (I only purchased this as the Trumpeter version was not quite released at the time I started this version.) Jumping around with differing assembly stages. (Put this assembly aside until a later stage, etc.) Printed Decks. Crappy Main Gun Barrels. I am sure that there will be other dislikes as the build progresses. This kit is a step down from the Trumpeter version but should be presentable nevertheless. Well, I invested far too much "Coin" in purchasing this so need to complete it. I'll post some photos when in the next day or two. Cheers....HOF. 0
-
Hi All, Something newish for me thanks to the inspiration of others on this site. I started this build several years ago, 2008? I got the basic hull and some Superstructure almost compete and thought it was time to drag it out again.... Reasons for this is that I am tired of sitting on my Chuff for the last couple of months waiting for surgery on a torn right Rotator Cuff and looking like I'll be languishing for a couple more month's to come. The scale and size makes things a little easier to accomplish with my left hand. 🙂 The Partworks version is essentially an Amati offering in 140 magazine issues and it seemed too good an opportunity to re-start proceedings. (I have the Trumpeter 1/200 version with MK1 Detail set and the Tamiya 1/350 version also.) I began this afternoon by ensuring all subsequent issues and contents were present and put aside the 1/400 Titanic for a future when I have both arms fully operational 🙂 So, don't know how far I can get but my best shot and it's better than casting around feeling "Disabled." The Hull looks good for the time it's been in storage, some attention with filling, sanding and primer will help The Superstructure components will be wrapped in PE I'm looking forward to getting stuck in!! (A very big "Thank you" to the Gentlemen currently building the Amati version, it's given me much needed inspiration!!) Cheers....HOF. Photos:

- 544 replies
-
- 15
-
-
Hi Chap, That's a bit of extra height there.... 3.00/5.0mm? (Difficult to tell where I'm sitting. 🙂) Don't know chap if this is correct or not. A couple of ideas to maybe assist with the decision making process: Make a mock-up of the Deck House - The Roof sits slightly higher than the top of the Bulwarks? Place a couple of Bulwark stanchions - Ask yourself questions - does it look correct? Would a 1.5mm strip added to the height be a good place to start? (Plans can be in error....) Photos of other builds fort comparison? (Had a look at mine, since it is in a glass cabinet, I can't get measurements for you....) Send a PM to the other BNII build log on this site and ask for their Bulwark height measurements above Deck. Don't want to put you crook here as your work looks really good thus far. Cheers....HOF.
-
Hi Richard, An interesting build!! The only other models of the Wahine that I can remember, are in the Maritime Museum in Wellington. Your post has bought back memories of that day, I was eight and lived in the coastal suburb of Eastbourne, Wellington. So, there was no warning of the impending cyclone, (Giselle), I guess forecasting has progressed.... My father had driven to work, (In the city), on the morning and by the time for school, the wind had really ramped up. By the time we had got to school, we were informed it was closed due to blown-out windows. Got a lift home from one of my friends mother. On the drive home, (About a mile.), I remember seeing huge waves breaking over the sea wall. News reports came in regarding Wahine and other damage around. Remembering hunkering down at home and 4WD vehicles heading out towards the Pencarrow Coast to assist in rescues. (From memory, most loss of life was around the eastern coast, fairly rugged with unforgiving rocks.) To cut a long story short, the ship had founded on Barrets Reef at the entrance to the harbor, it was there for many months, on its side, while the salvage crews cut her up. A day after the storm, I was lucky enough to find a five dollar note stuck in the hedge outside my parents house, five dollars bought a kings ransom in stuff back then!! (I did think some years later that this might have come from some poor soul on the ship.) Wahine was replaced on the Lyttelton to Wellington run by the Rangatira for a few years after the tragedy. (Wahinie - Beautiful Woman) I shall follow you build with interest!! Cheers....HOF. (Harry)
- 454 replies
-
- 4
-
-
- Union Steamship Company
- Stepcraft 840
- (and 3 more)
-
Hi Chap, Just a thought about the Bulwark height, you need to factor in the Rail on top of the Bulwarks as well, the plans should reflect total height of these if you get my drift. Cheers....HOF.
-
Hi Chap, You have been busy!! 🙂 Looking good. Filler: You could touch up a little where planking stands "Proud" and gently sand, or not, up to you. The first cover should be nice and as smooth as possible, it's the Base for the thin stuff.... Just be careful not to sand the first cover too thin!! Bulwarks: Look really good, pretty much how fussy you want to be getting correct height. (I probably would, (I'm a fussy bugger.), but up to you.) You may like to consider if this height, or lack thereof, may be a problem further down the track. 2- 3 mm strip of wood fixed with CA would probably do the trick. Have a think about how you will achieve first. 2nd cover: Yup, plank the Bulwarks.... This will fair planking overall. (I think the newer version of this kit varies in this respect, at least what I have seen thus far.) Again, my two cents worth.... 😀 Cheers....HOF.
-
On Ya Chap!! 🙂 I agree wholeheartedly with your comment, basically picking up someone else's work and fixing. (An example, my A?L Sanson, I'm still working on this now and again.... To cut a long story short, I was very unhappy with my work so decided to pull apart and try to fix all the errors. (In this case, my work at fault.) Anyway, I wish the best for your work going forward. (I'll be watching with interest. 🙂) Remember, take your time, dry fit, etc. Cheers.... HOF. (Harry.)
-
Hi Chap, Things seem to be progressing....🙂 Have a look at your plans to confirm Bulwark orientation, ie lining things up. The Step in Bulwarks in relation to the Step in the Deck, etc. Plans will also show how far forward the front of the Bulwarks are from the apex of the Hull. (From the first photo, the Bulwarks look very far forward of the Bow apex. The step in the Bulwarks should also assist in orientation. Can't really tell.... your measurements should confirm things.) You may still need to adjust the apex Bow Bulwarks. (Sanding?) Anyway, just my humble opinion from what I can see from your photos. Cheers....HOF. Cheers....HOF.
-
Nice!! Good on you chap!! Skylights/Hatch's look great. (Nice detail.) Cheers....HOF.