
HOLIDAY DONATION DRIVE - SUPPORT MSW - DO YOUR PART TO KEEP THIS GREAT FORUM GOING! (83 donations so far out of 49,000 members - C'mon guys!)
×


hof00
-
Posts
1,647 -
Joined
-
Last visited
Content Type
Profiles
Forums
Gallery
Events
Everything posted by hof00
-
 Hi All, Small update: Aft Starboard Superstructure Side Railing, (Already completed), got damaged.... Not all of it but about 60mm of the curved pieces.... 😗 (How did this happen? I thought I'd be smart and hold the structure in a Dremel vice while I attached the Port side Rails. All went well until the Jaws "Slipped" and the Starboard side impacted the base of the Vice. Not happy about this and took me a couple of hours to carefully "Tease and Coax" the Railings back into shape. I think a good save!!) Continued with Port Side Railings and completed. They are not perfect but they are o.k. Added some components to the Aft Superstructure and I think that that's all the PE for this, perhaps? (I lost one Resin Exhaust above the Hangar door, it "Pinged" away somewhere into another dimension. I should be able to duplicate a plastic replacement. 🙂) The way my instructions are, the next task over three issues is the Mast and its' many components. So, I intend to do this over the next two or three of days. I then would like to return to the Hull, get some traction, install Aft Grab Rails and get some paint on the Hull. That's the plan anyway. Cheers....HOF. Photos tomorrow hopefully.
 -
Thanks Rod, Since my Printed Decks are flush with the Hull sides, I am in two minds whether I shave off a tad or just leave.... (What do you reckon? I guess I'm asking due to the fact that you have already affixed your Deck and might have some useful insights.) Cheers....HOF.
-
Hi Chap, Nice work and good and compact workstation. Cheers....HOF.
-
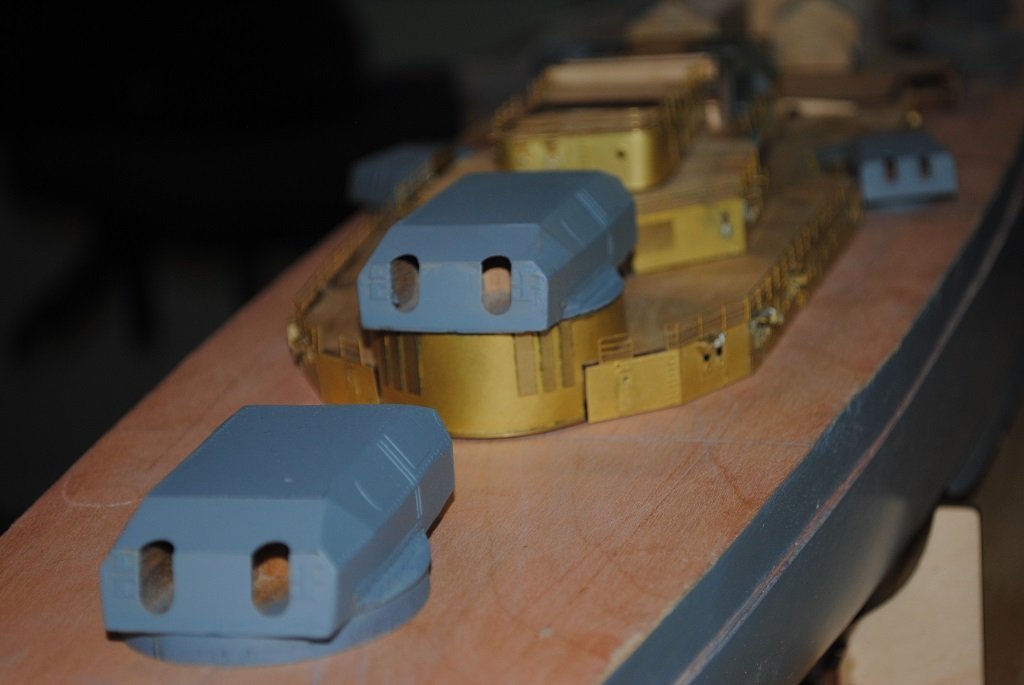
Hi All, Small update: Decided to do some "Plastic" components today, Aft Signal Station thingy, Uppermost Tier Aft Superstructure insert and what the instructions call a "Fighting Mast." (I actually think this is part of the Conning Tower.) Decided to push myself into more PE work and attached the 1st Tier, Aft Starboard Superstructure Side Railing, this went together quite well. (I surprised myself.... 🙂) (I'll do the Port side tomorrow.) Nice to see the ship grow.... That's me for the day. Cheers....HOF. Photos:


- 544 replies
-
- 12
-

-
Hi Rod, Looking really good. I like your "Drive-By" definition 🙂 Regarding your Decks, are they flush with the sides of the Hull or is there a slight space? Your Hull came out very nice indeed, crisp and clean. (I must get mine finished one day in the not too distant future.) Unsure if I'll do the Air Recognition markings. Cheers....HOF..
-
Hi Rod, Pleased that this will be o.k. It was something that I thought I should let you know about. 🙂 Cheers....HOF.
-
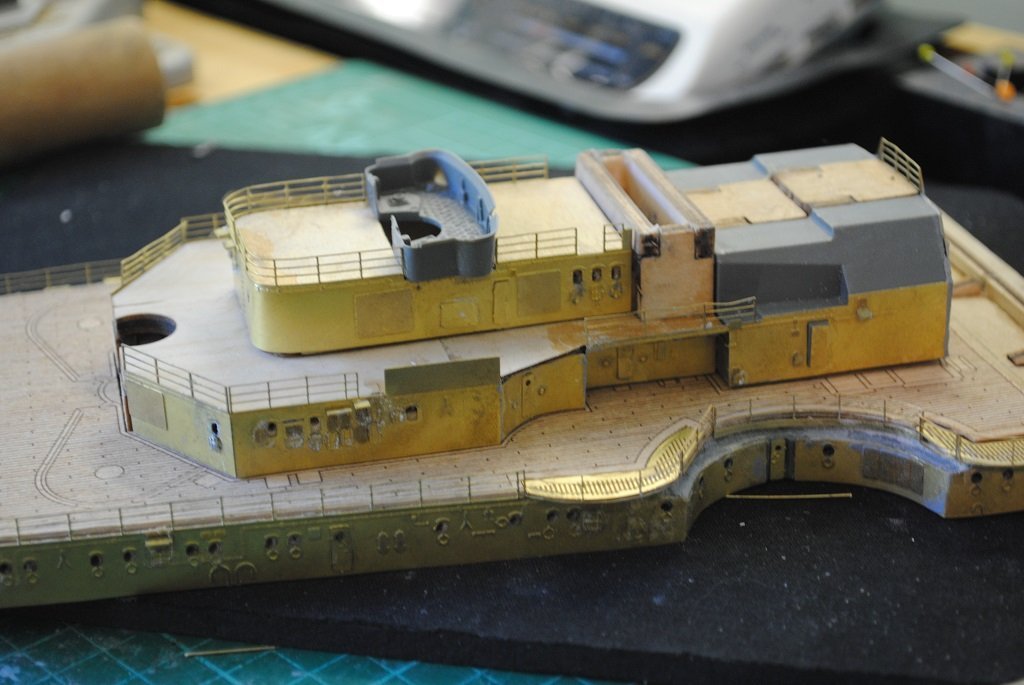
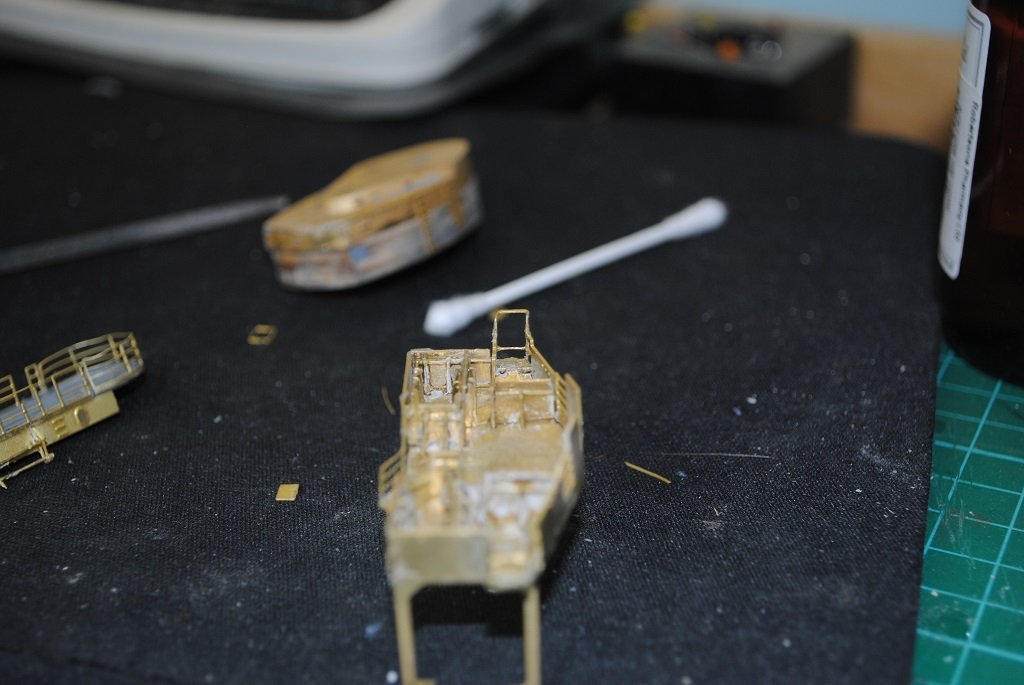
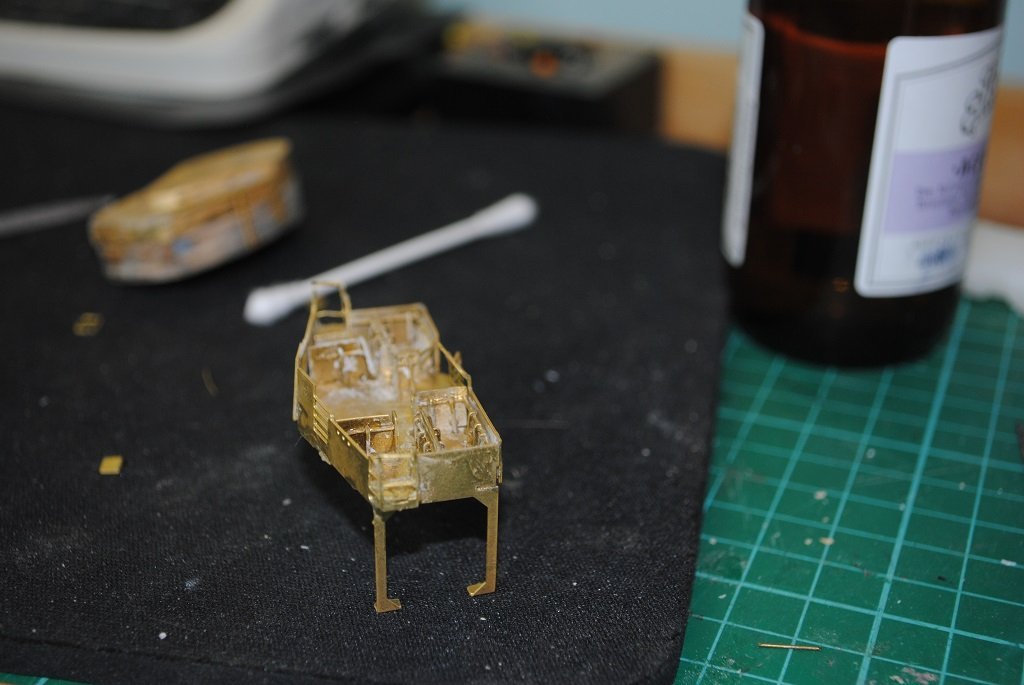
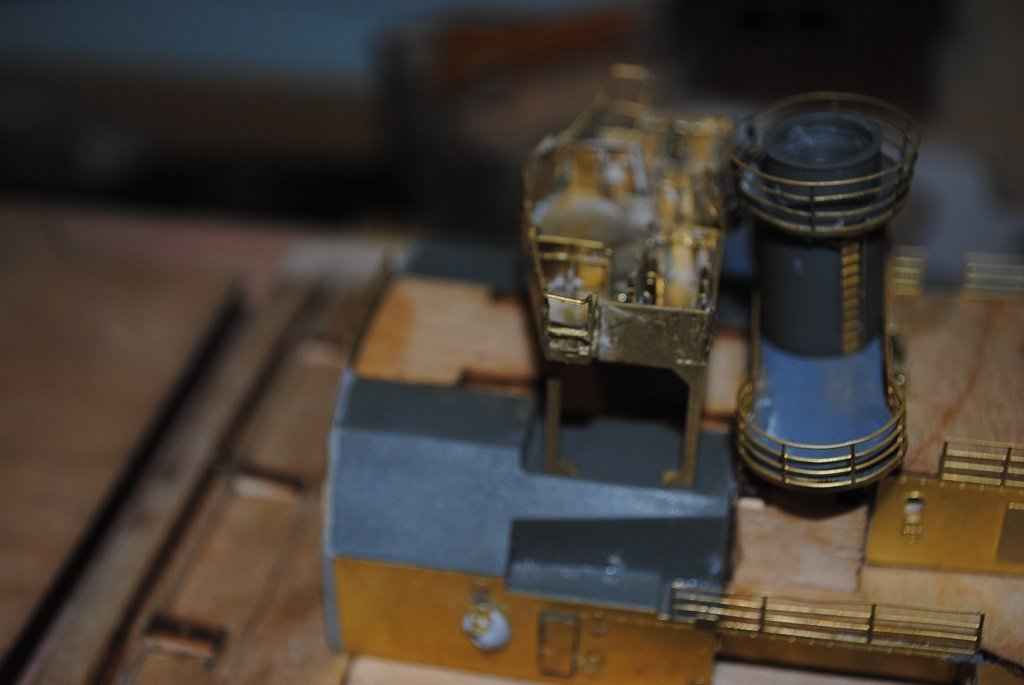
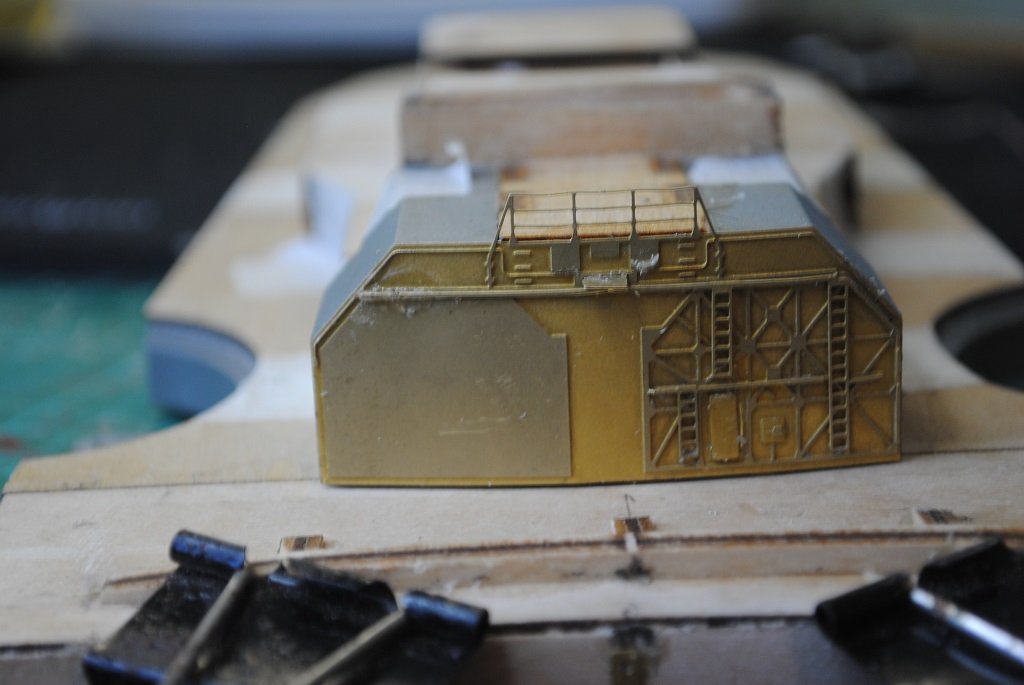
Hi All, Update: HOF has been busy, no too much to show for my efforts over the past few days but progress none the less.... Forward Gunnery Control Centre sheathed Aft Signal Station constructed, 58 PE parts to this, very fiddly and looks like something from "Tron." ( It took quite some time to construct, don't ask me how long, but too long. There were two tiny bits of Railing for the "Wings" of this structure that I just could not fit. No one will know and I decided not to after some other bits of Riling started to give way.... 😗 Allot of this will be concealed under other pieces of Superstructure. There's a bit of PE cleanup still to do.) Aft Searchlight platform completed (I get the feeling that the Searchlight Platform will require a millimeter or so packing in its location on the Superstructure.) So, more PE challenges yet to come I am sure.... 🙂 Onward and upward.... Cheers.... HOF. Photos:
- 544 replies
-
- 10
-
-
Hi Rod, Have a look at the URL below: Build the Bismarck - The Model Go to The model week by week Go to #72 for the reasoning Go to 79 on the left and select #79 Cheers....HOF.
-
Hi Rod, Looking really good!! You are certainly making some excellent progress there!! Just something that comes to mind regarding the Forward Superstructure are the PE parts for the AA Platforms. Unsure if this is addressed with your version is that once these are on, you will end up with a 0.38mm "Step" between the Deck and platforms. In the Build Log by a Chap in the UK, (Incomplete), he solved this issue with a 0.38mm plastic card Deck on top of the ply Deck with cut outs to accommodate the AA Platforms. As mentioned, unsure if this has been addressed with your kit but information only that may or may not be useful. 🙂 (I have ordered some 0.38 Plastic Card to address this for my build. (Also some 2.0mm square strip for another issue for a Mast exhaust thingy.) Cheers....HOF.
-
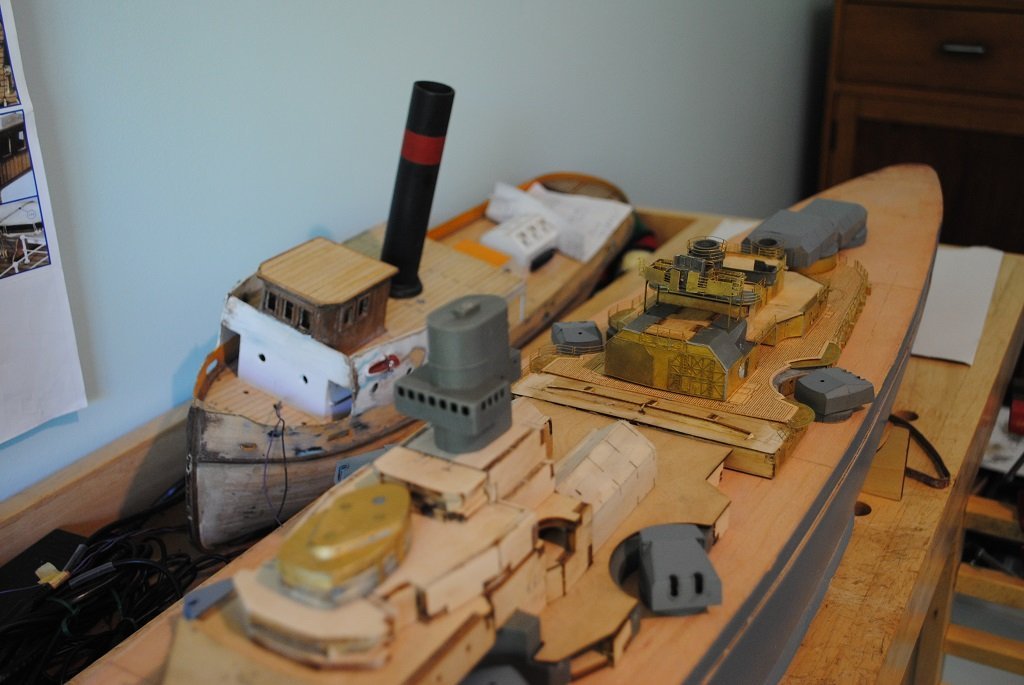
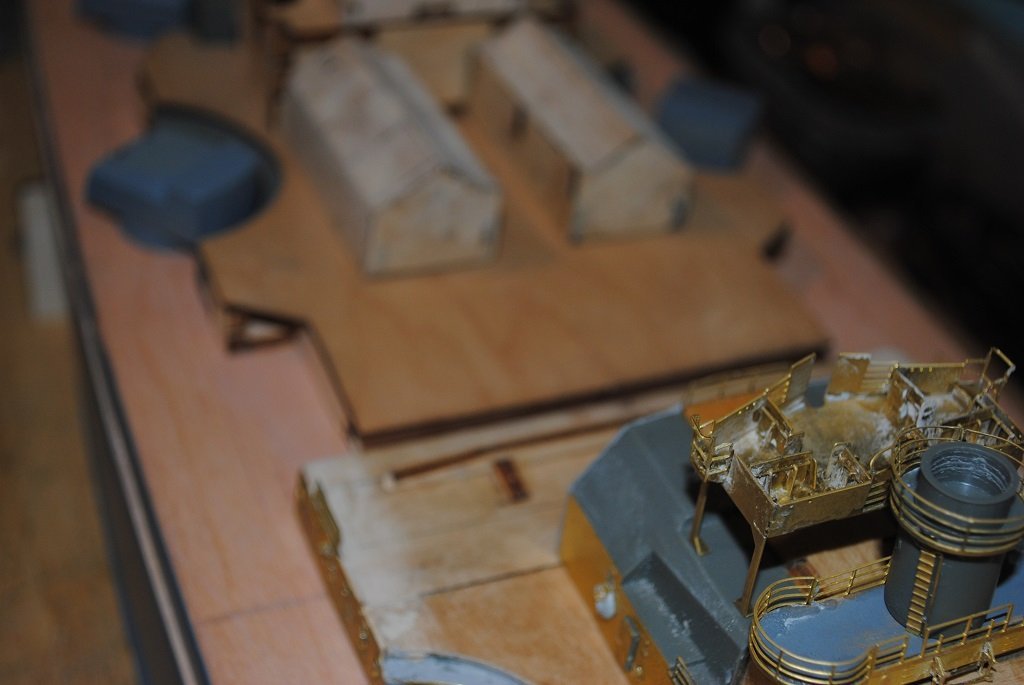
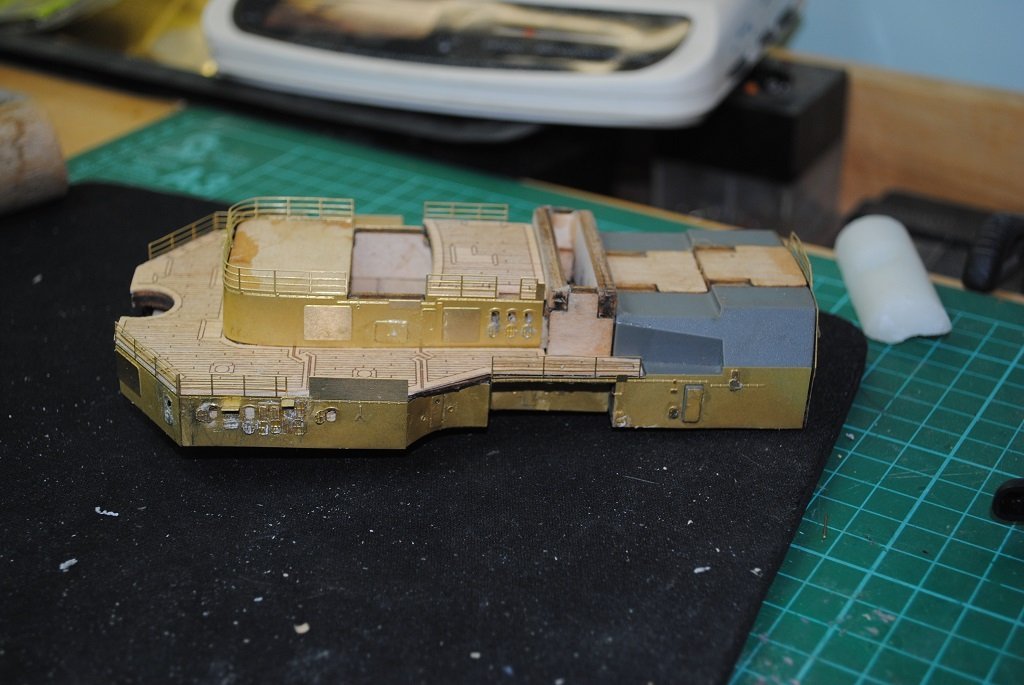
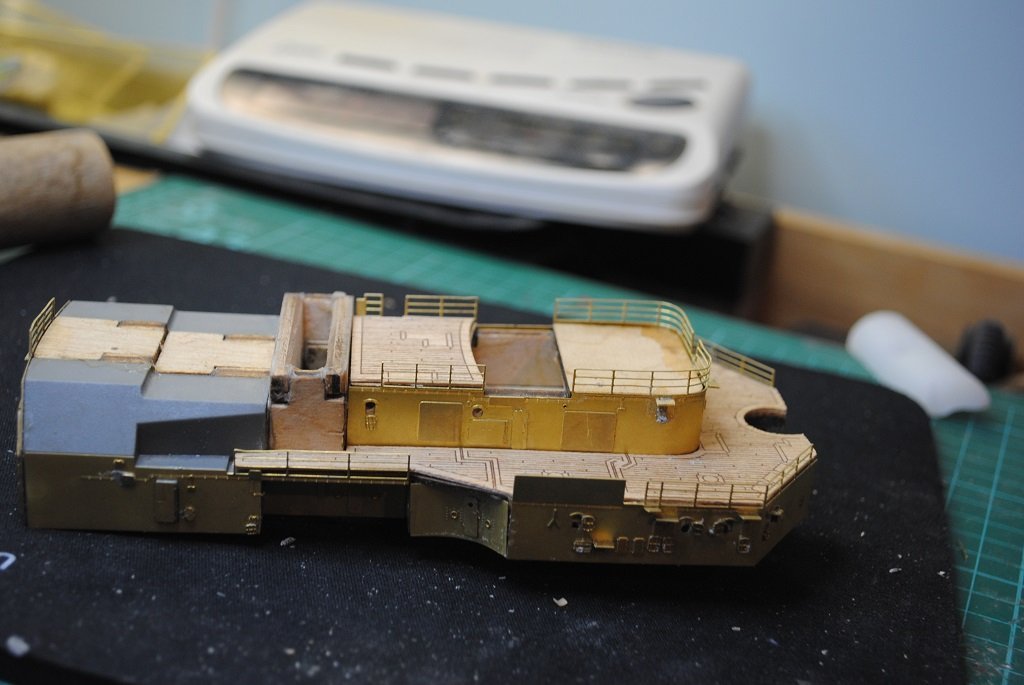
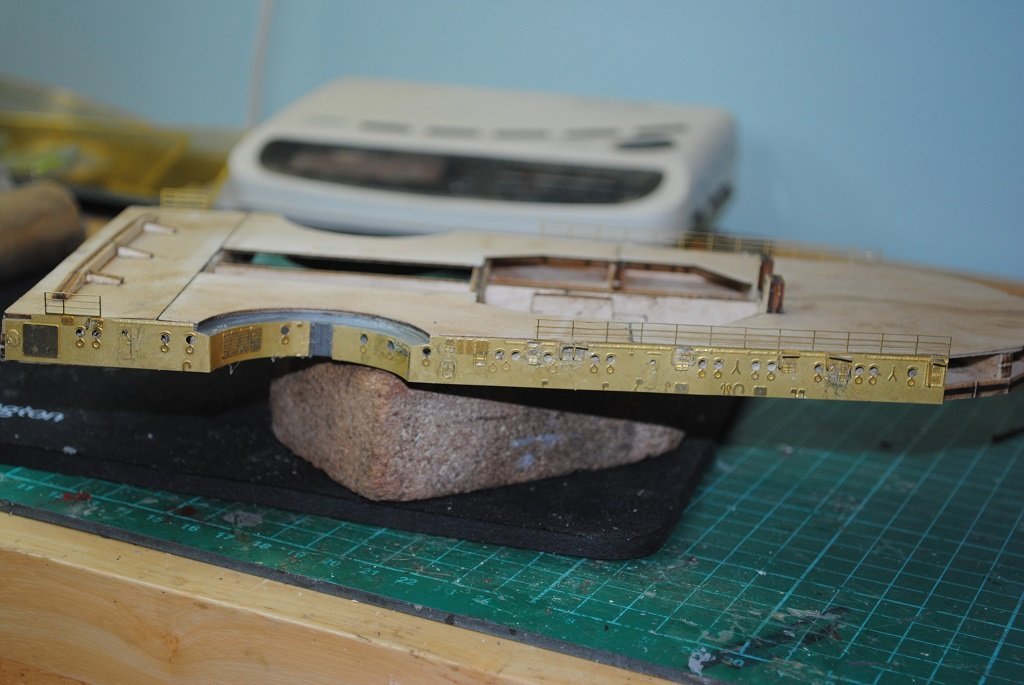
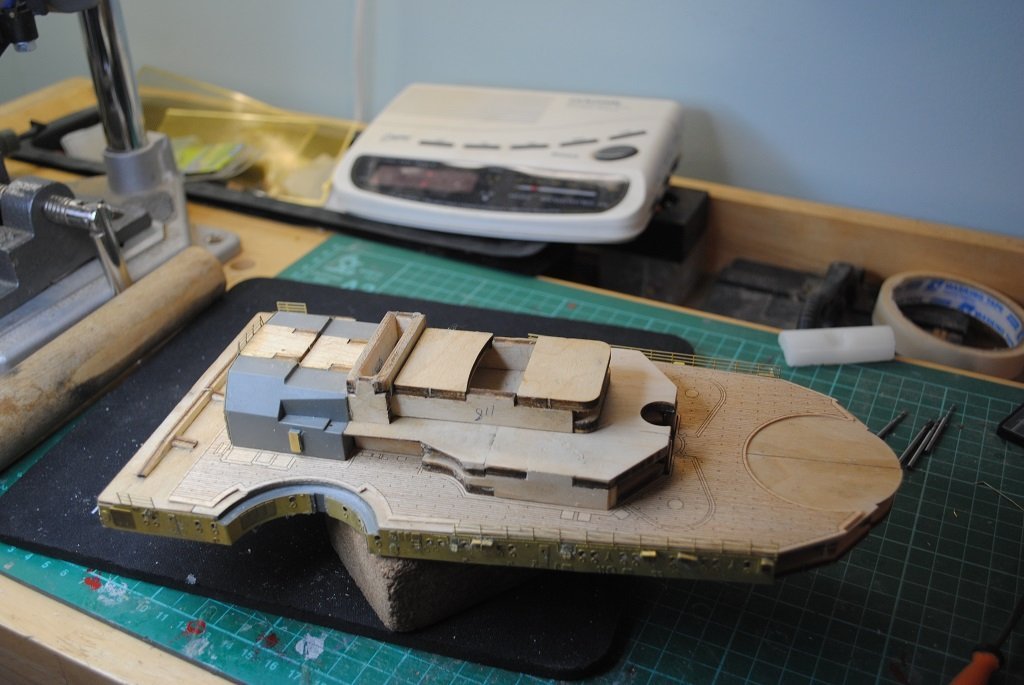
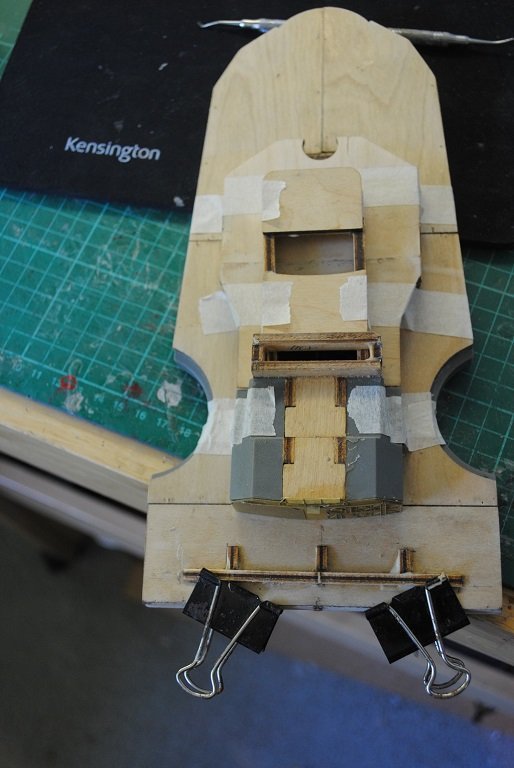
Hi All, Update: So, been pretty much "Under the pump" today fixing Aft PE Superstructure sides that I had been preparing for a the past few days. (Attaching doors, vents, windshields, etc, etc.) Adjusted some of the PE cladding for the 1st tier, wasn't happy at all but much improved now. Easy to prize off due to the epoxy that I used. I don't think I'll be using this again.... 😗 and CA to re-attach. What I should have been doing is cleaning up filler and cleaning up PE on this level, never mind, tomorrows another day and it's not going anywhere.... Started cladding with the 3rd tier, one piece that wrapped around the entire wooden substructure, nice!! No real issues here. Sized the 3rd tier Decking and commenced sheathing for the 2nd tier. Got this pretty much complete apart from other bits "That will be added later....😗" It's not perfect, some of the PE cladding joins have small gaps, 0.5mm or so that will require a judicious amount of "Squadron" Putty. Two or three details cane loose from the cladding, I found them all and re-attached, lucky.... 🙂 One issue was the Hangar fell off, another victim of the 90 second epoxy, no damage thankfully. CA seems to be the way forward now, i thought I'd give the 90 second epoxy a go, don't experiment "On Ship" something that I forgot about....😗 The only downside is that with all the Rails around, I have to be very careful handling stuff,,,, Cheers....HOF. Photos: The photos, attached, show some Deck detail, this is not affixed as yet.
- 544 replies
-
- 12
-
-
Hi Rod, Yes I did omit the pre-drilled ply pieces and opted for filling the locations, bow and stern, with Knifing Compound since only one row of Portholes were provided and a Porthole template was provided for drilling these anyway. (Resulted in a bit of sanding that I would have had to do anyway....) The Amati/Part works thingy gave me "Rivets" to insert in the holes once drilled. I don't think you are missing anything as you mentioned that your Brass insets had "Ringoles" (Eyebrows), on the Brass pieces so your Brass pieces are a "Fae de comple." (I think that's spelt right....) (Mine does not have Ringoles.... 😗) You also have to remember that my Bismarck is around 2008 many years away from a commercial Amati release. (Some things will have changed in the intervening period to make things better?) Cheers and Regards, Harry.
-
Hi Rod, Yes I did omit the pre-drilled ply pieces and opted for filling the locations, bow and stern, with Knifing Compound since only one row of Portholes were provided and a Porthole template was provided for drilling these anyway. (Resulted in a bit of sanding that I would have had to do anyway....) The Amati/Part works thingy gave me "Rivets" to insert in the holes once drilled. I don't think you are missing anything as you mentioned that your Brass insets had "Ringoles" (Eyebrows), on the Brass pieces so your Brass pieces are a "Fae de comple." (I think that's spelt right....) (Mine does not have Ringoles.... 😗) (I could be incorrect but molded detail would suggest that no "Rivets" are provided for with your Bismarck version.) You also have to remember that my Bismarck is around 2008 many years away from a commercial Amati release. (Some things will have changed in the intervening period to make things better?) Cheers and Regards, Harry.
-
Hi Chap, That looks really good!! Cheers....HOF.
-
Hi Rod, Interesting comparison.... Yup, I agree, the Amati offering does seem overcomplicated in ways. I'm unsure if I'd be comfortable with large blocks for the Superstructure though.... Cheers....HOF.
-
Hi Chap, Well, I guess its good to see what in store for you!! 🙂 Still struggling a little with the 1st tier of cladding. There are some "Interesting" points of note: The instructions reference one of the aft wooden Bulkhead structural, (Close to Barbette Caesar), pieces to line up the cladding, not such a good idea.... I refenced all cladding on this level to line up with the concave plastic pieces, Secondary Turret rear wall. (I am unsure of what your instructions show, probably similar? (Give me a shout if you need and I'll try to assist.) Anyway, a couple of bits of filling required her and there, the rest of the cladding for this is now in place, there's a couple of bits of PE detail that I'm not 100% happy with, excess CA that needs to be removed, if possible.... (Just learnings....) I now have to be so careful handling this structure, the Rails are easily bent.... 😗 I am about to embark on preparation of the uppermost piece of cladding for the Aft Superstructure, It should be much easier to form without the second tier rails getting in the way. (I'd like to get around to installing the Grab Rails on the rear hull, maybe after the Aft Superstructure?) I'm pleased that you enjoyed New Zealand!! I lived in Wellington most of my life up until a couple of years ago when my lady and I decided to move to South Taranaki, Manaia. (Not a big town at all, semi rural and nice and peaceful.) I did not see the Endeavour replica, I'm unsure if it ever came to Wellington. (I remember that there were a few protests about the visit, injustices that may or may not have taken place.) Anyway, onwards and upwards!! Cheers and Regards, Harry.
-
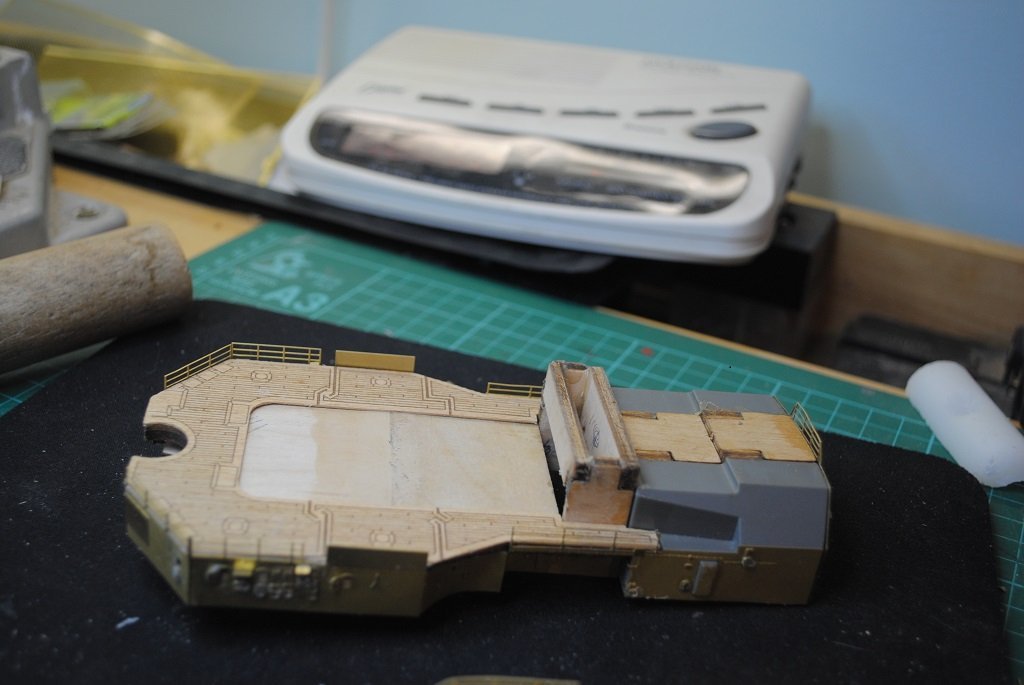
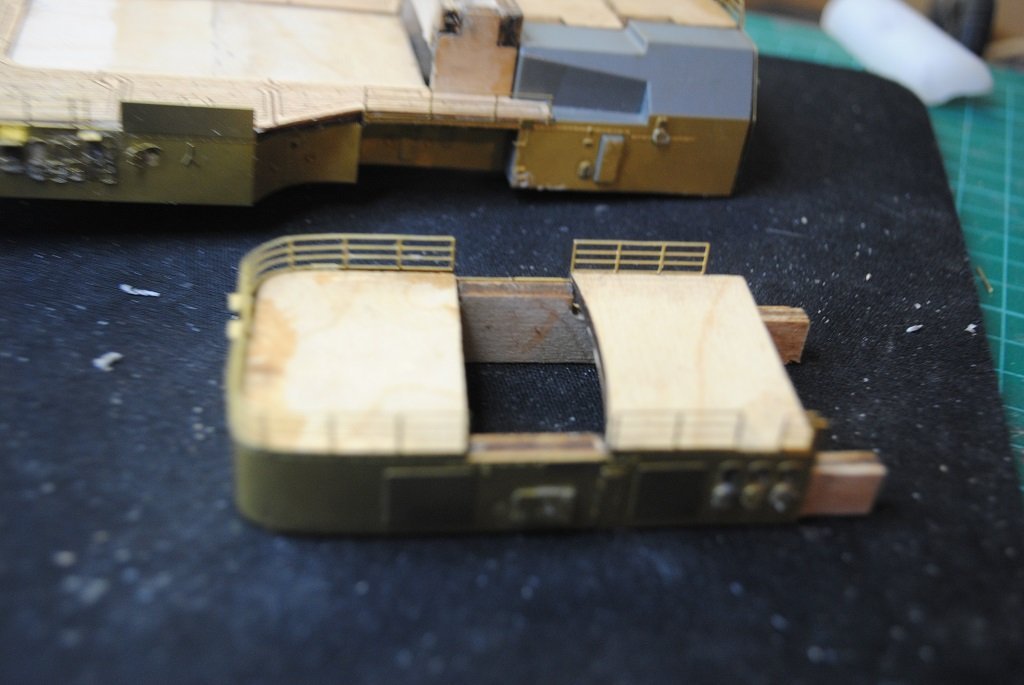
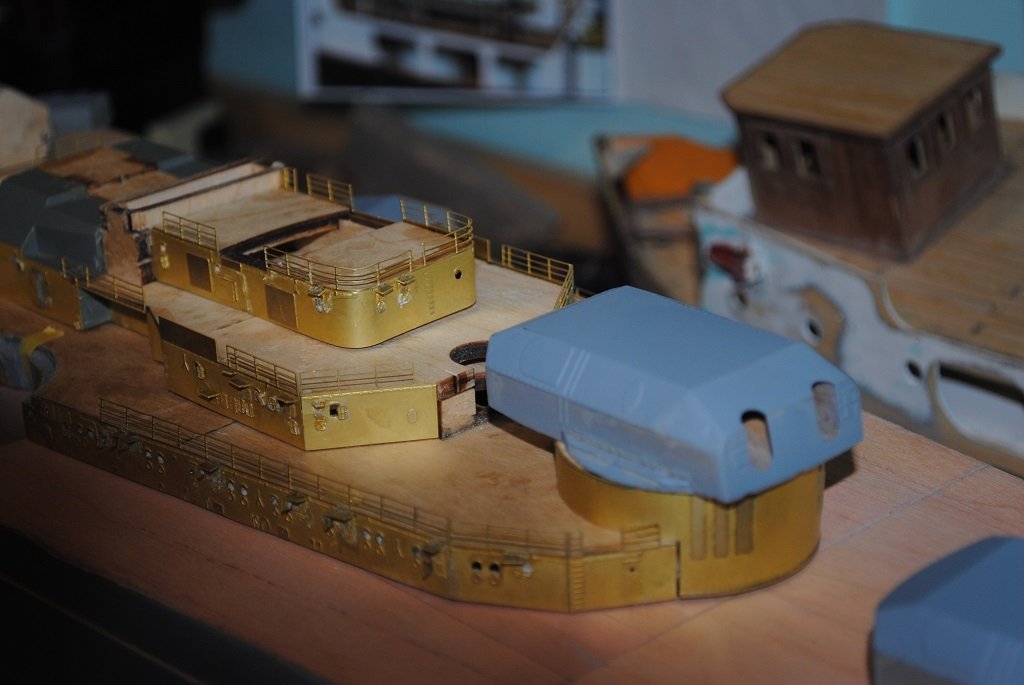
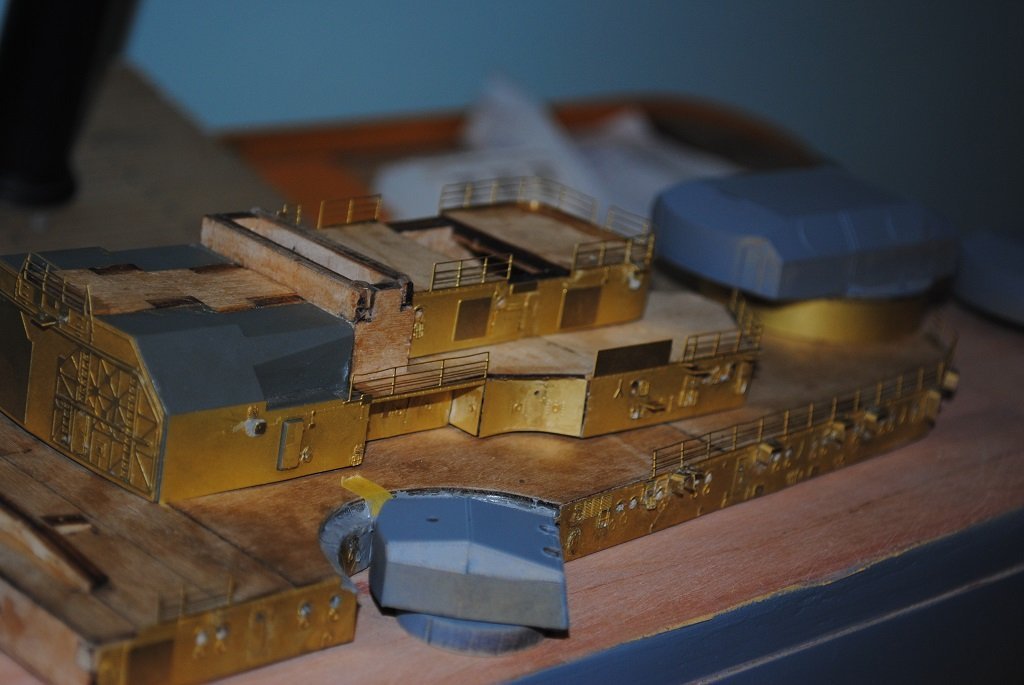
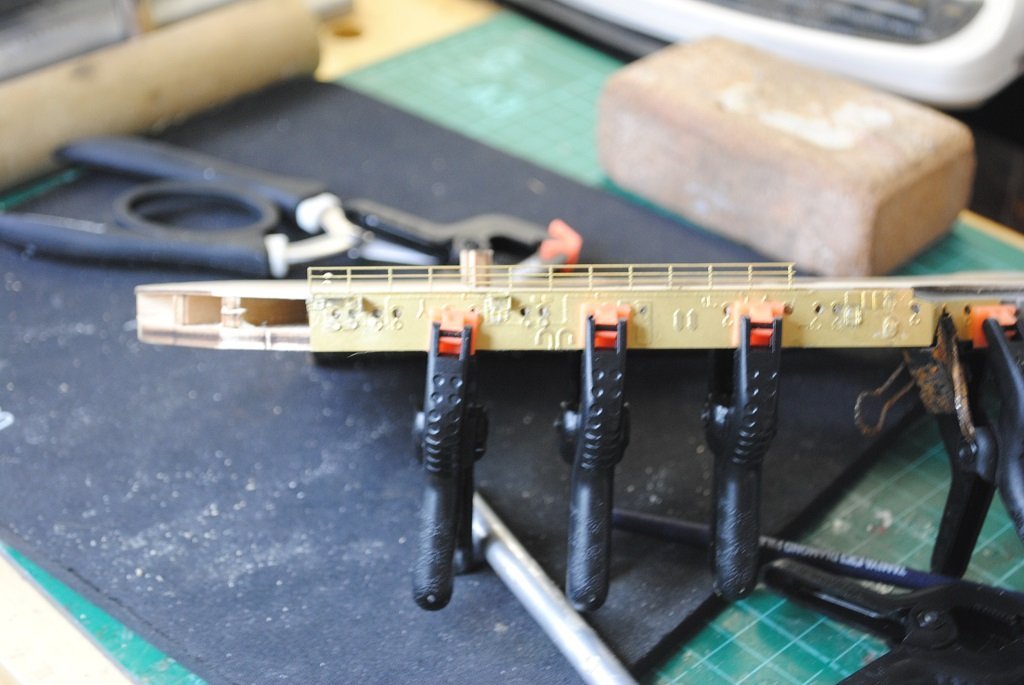
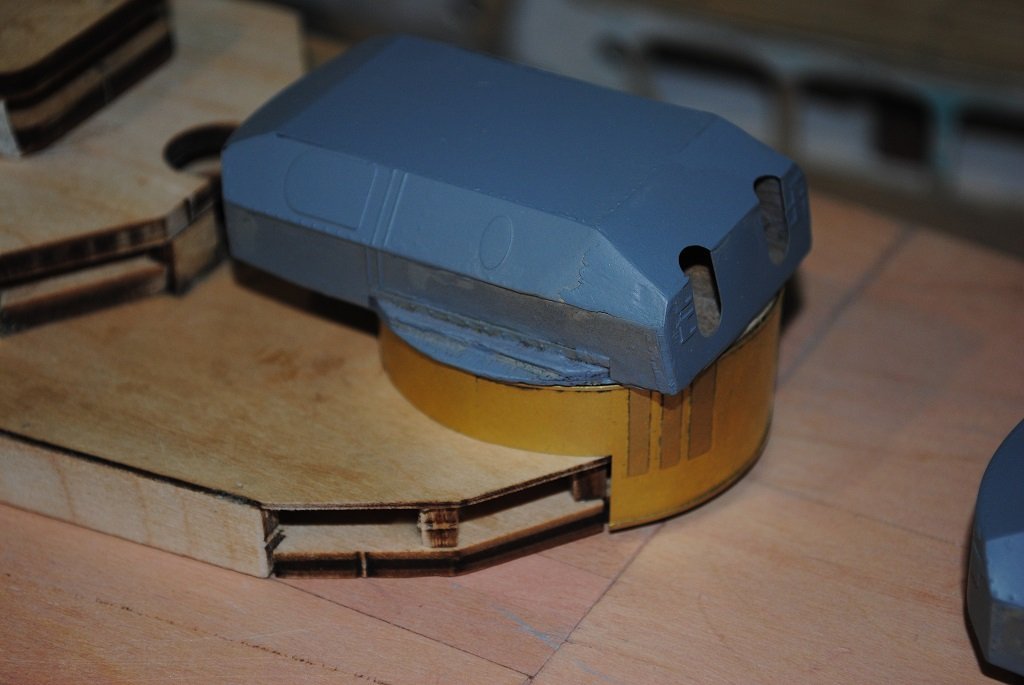
Hi All, Small Update: Started cladding the first tier of the Aft Superstructure. I think it went o.k. and the epoxy is still going off. (Used 90 second epoxy as gives more time than the recommended CA) A bit of work to do before I'm happy with it but getting there.... (Tomorrow's work.) A bonus is that the Deck still fits!! 🙂 Cheers....HOF. Photos:


- 544 replies
-
- 11
-
-
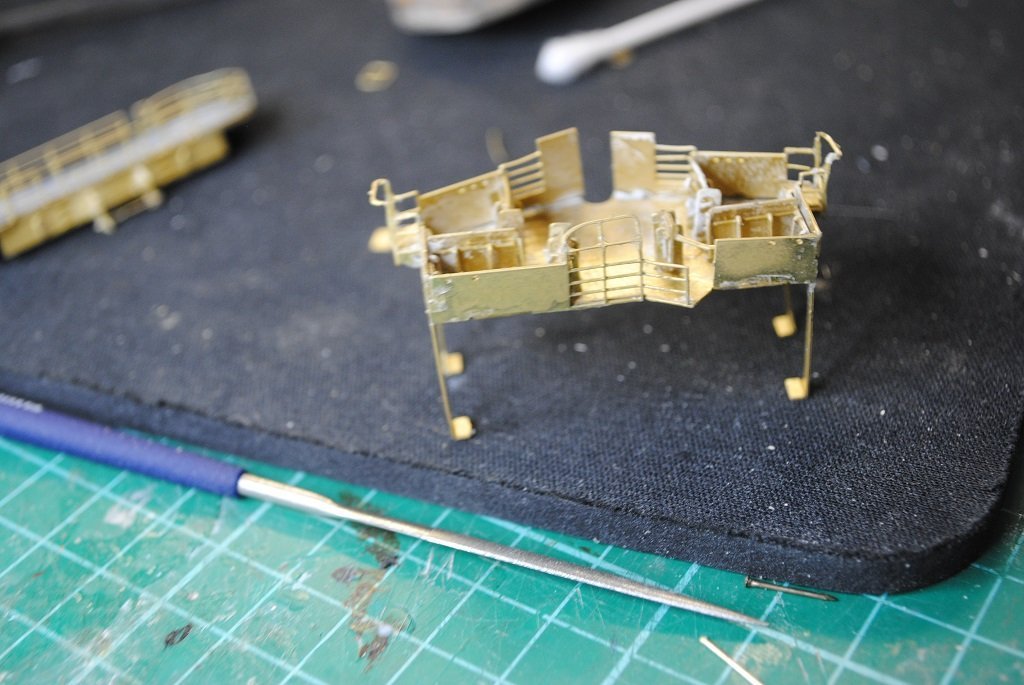
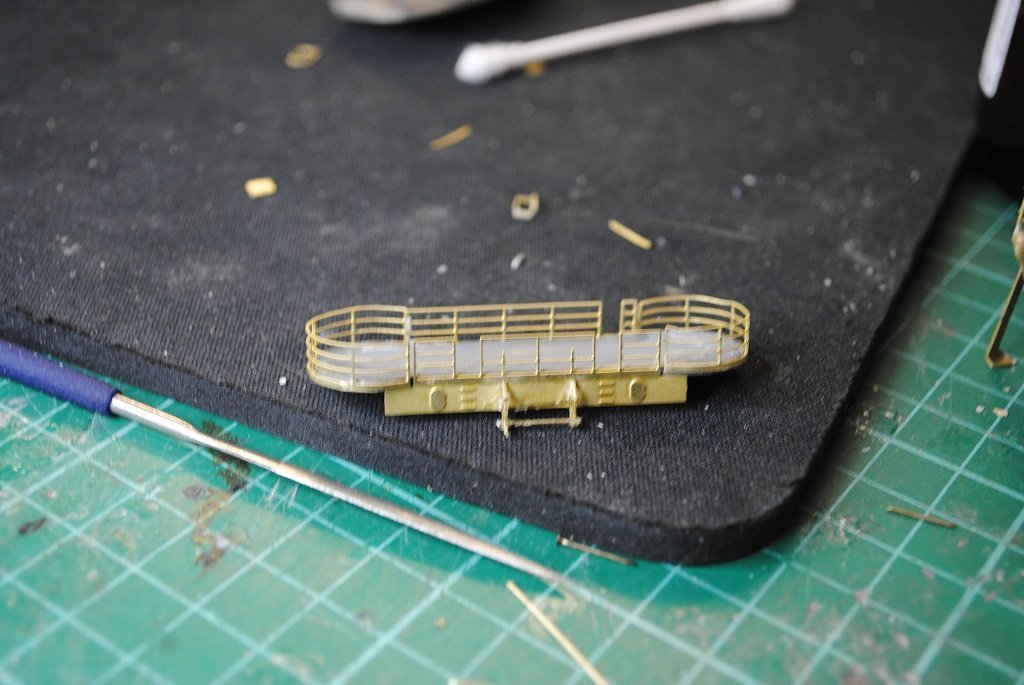
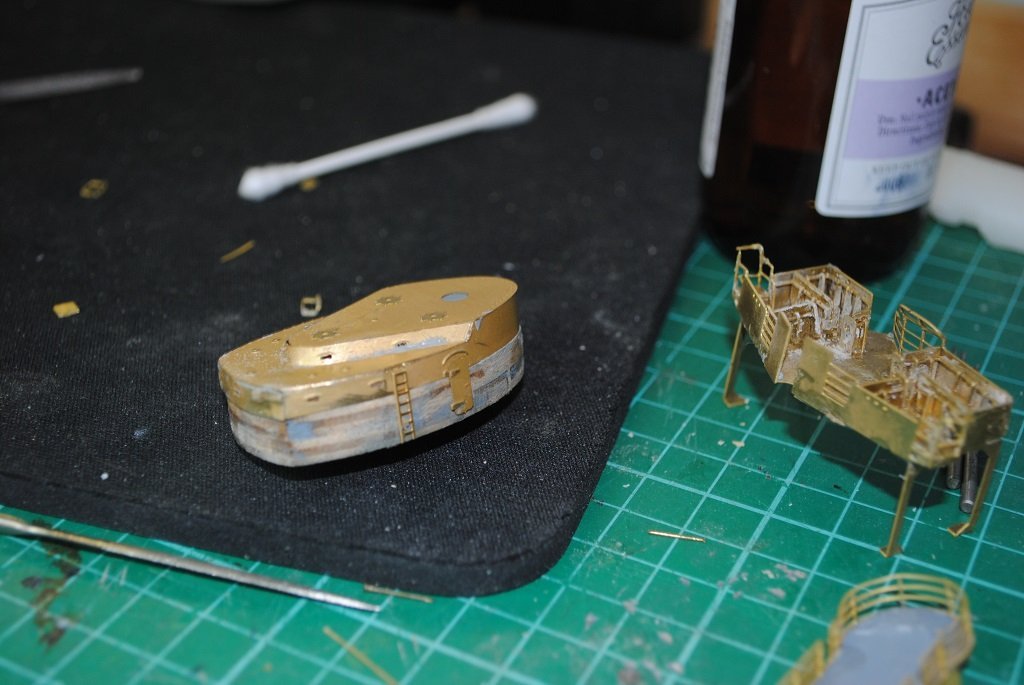
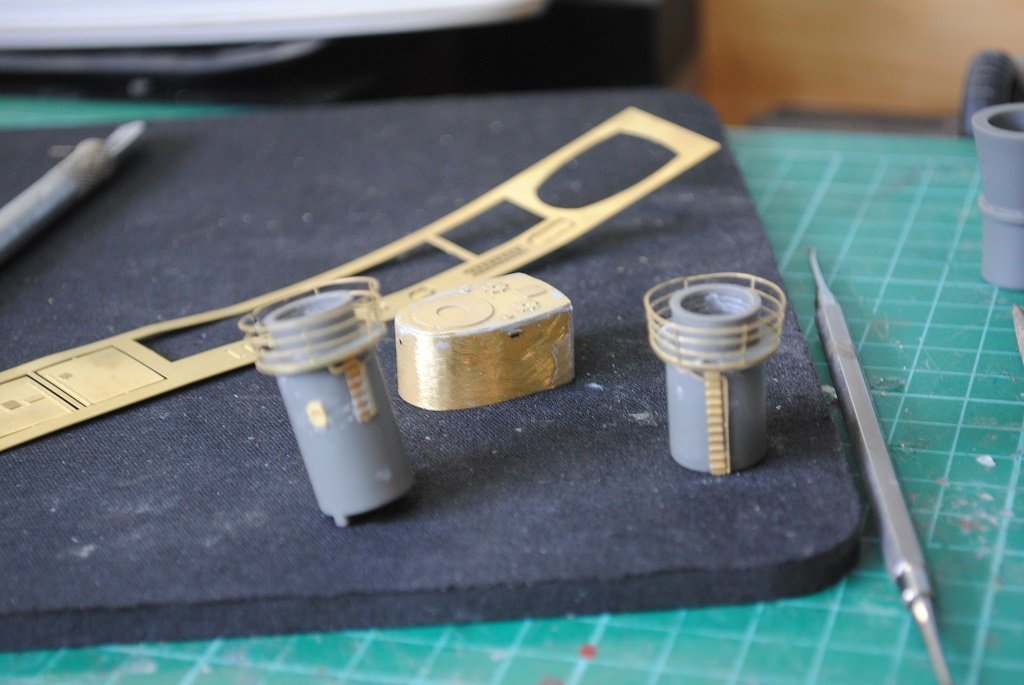
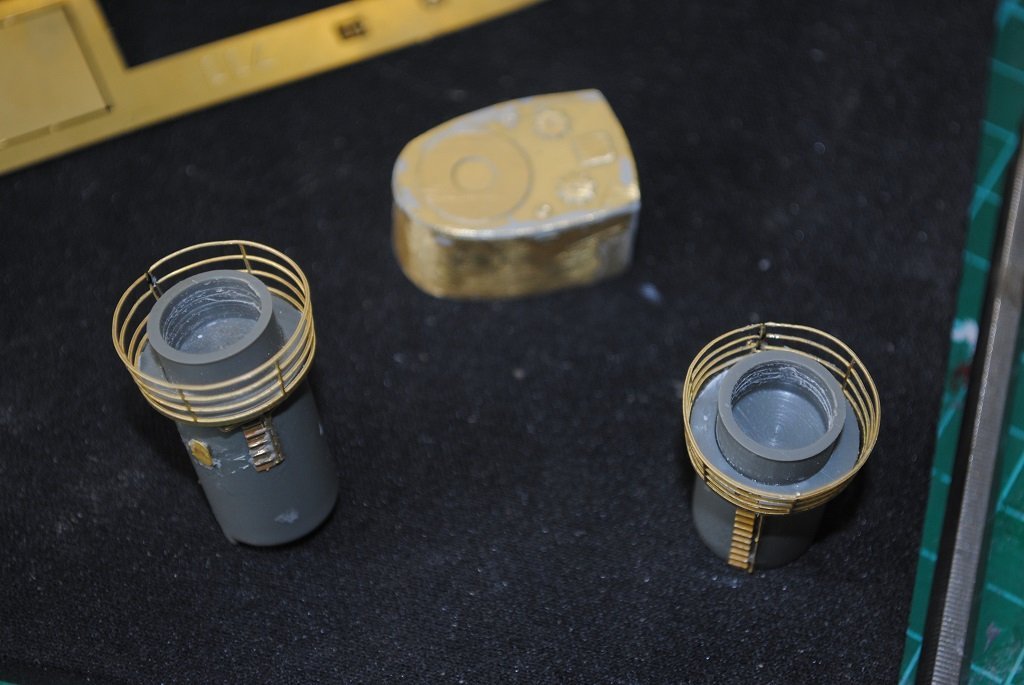
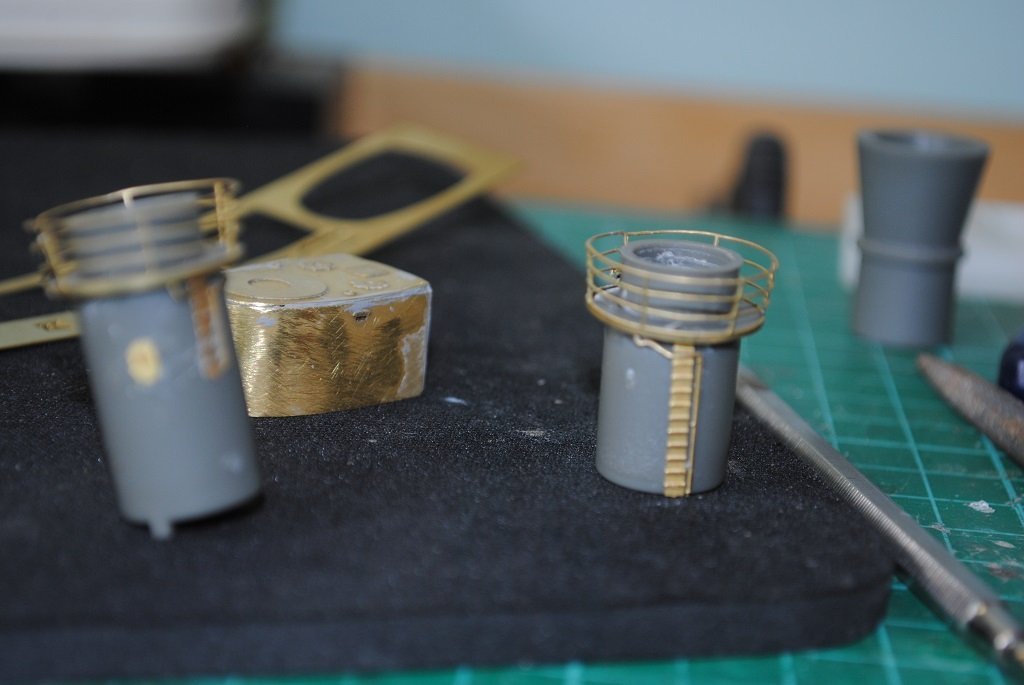
Hi All, Small update.... Completed Aft Gunnery Control Thingy and Anti Aircraft Gunnery stations. I am finding out more about PE and had to form Railings for the first time. (Not too bad with 1.5 arms.... 😗) Not particularly happy about the joint where the Railings meet to form a circle, They are o.k. but will have a think about improvements, perhaps.... It may be better to leave well alone. Looking at sizing, (Ensuring Deck edges are flush with Superstructure sides), the 1st tier Superstructure Decking. I think this will be tomorrow. I might even get some PE sides attached!! 🙂 Thank you for all the "Likes!!" Cheers....HOF. Photos:
-
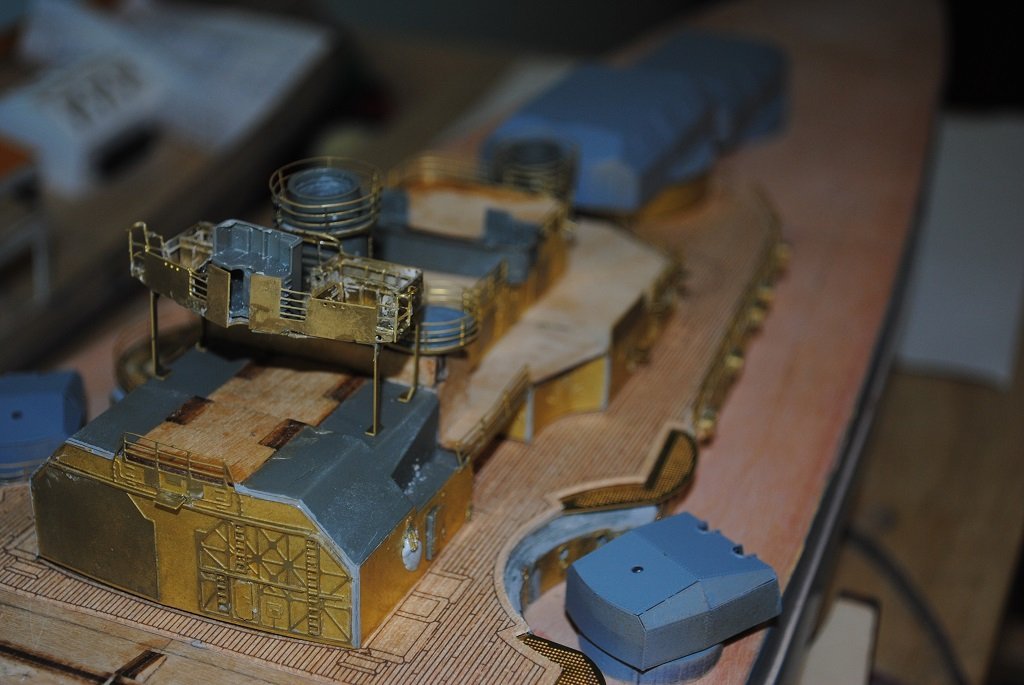
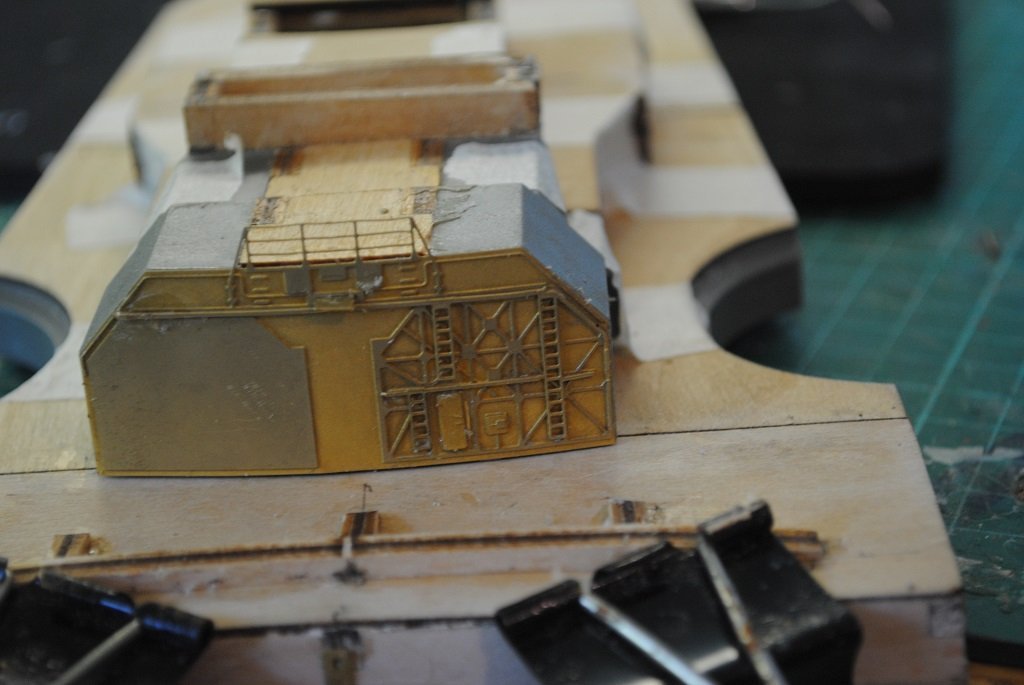
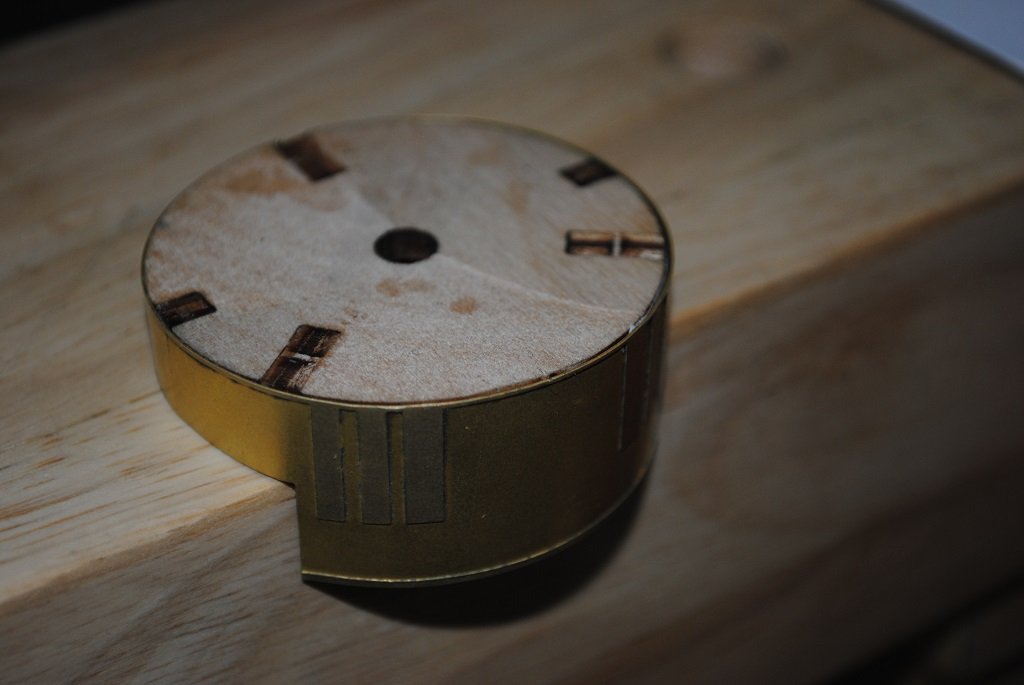
Hi All, Bit of an update.... Working on more Aft Superstructure cladding, lots of doors, scuttles and wind shield thingies. I feel that I can shortly start to assemble this PE and fix it to the Aft Superstructure, finally!! 🙂 There is one more "largish" piece of PE for the uppermost Superstructure tier. (t's one piece formed around the uppermost tier itself.) This will have to go on fairly early in the piece to prevent fouling the second tier rails, etc. Also been working on Barbette "Caesar" cladding. This was not too much of an issue but, the cladding needed to be shortened by approx. 1.5mm.... Central Aft Hanger PE assembled and installed, Hagar affixed to uppermost Superstructure tier. (Note: Superstructure tiers are not glued to each other as yet, this comes some way down the track.) Before I complete the Superstructure PE, I need to form the AA sighting towers, ladders, doors and railings. I also have to clad a rear gunnery control thingy. Hope you are all having a great Christmas!! 🙂 Cheers....HOF. Photos:

-
Hi Rod, That Hull is looking awesome!! A very nice save indeed.... Ps With my build, there are RC options discussed in the instructions. The Prop Shaft Housings are very different toi the plastic offerings with the static model and I think that you had to purchase these with the RC upgrade package. Cheers....HOF.
-
Hi Chap, I started this in 2008 I think and never got past a partially complete Hull. Thought it was time to complete.... I too have the Trumpeter version with the MK1 detail set and may have a look at this after this one is done.... (I also have a Tamiya 1/350 version.... 😗) More than happy to share the journey!! Great if my build log is assisting your project. 🙂 Cheers....HOF.


