HOLIDAY DONATION DRIVE - SUPPORT MSW - DO YOUR PART TO KEEP THIS GREAT FORUM GOING! (89 donations so far out of 49,000 members - C'mon guys!)
×


hof00
-
Posts
1,647 -
Joined
-
Last visited
Content Type
Profiles
Forums
Gallery
Events
Everything posted by hof00
-
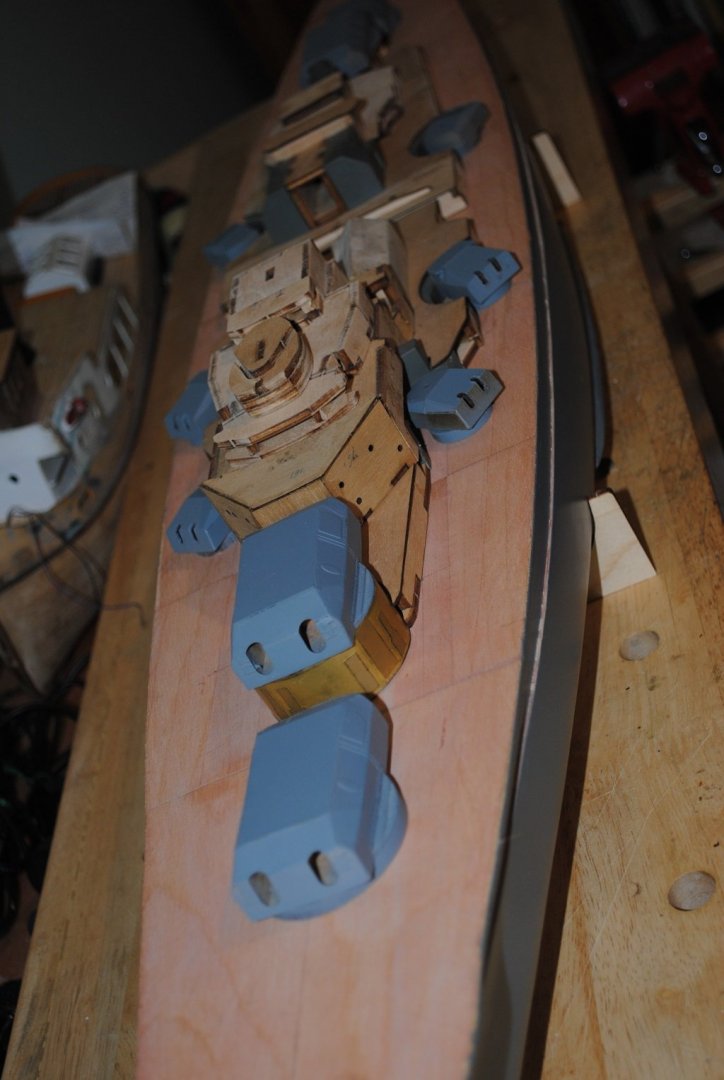
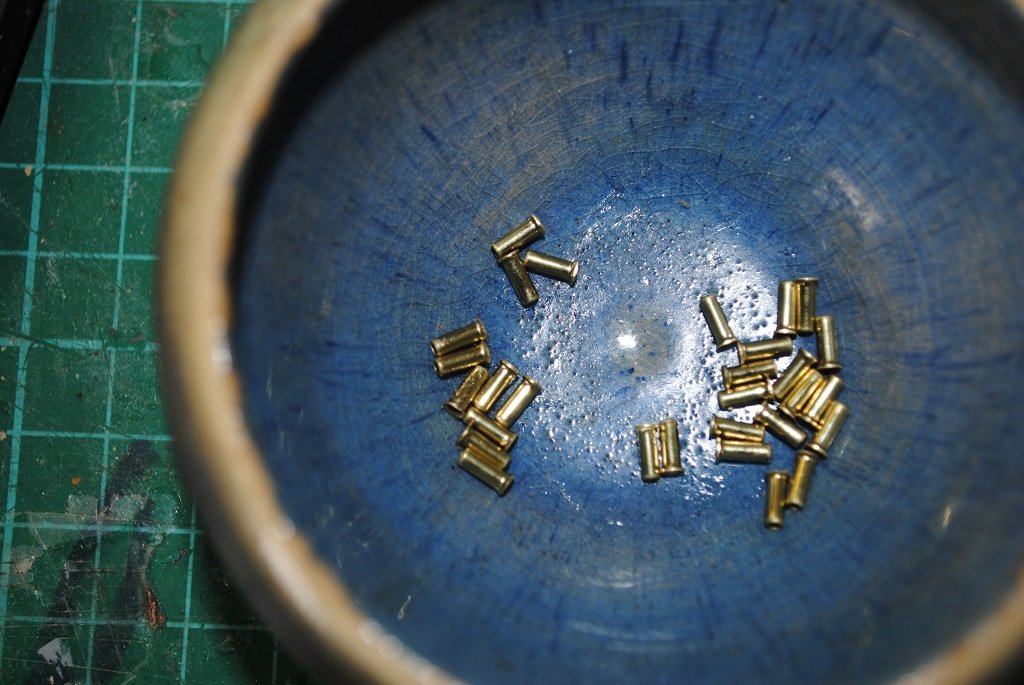
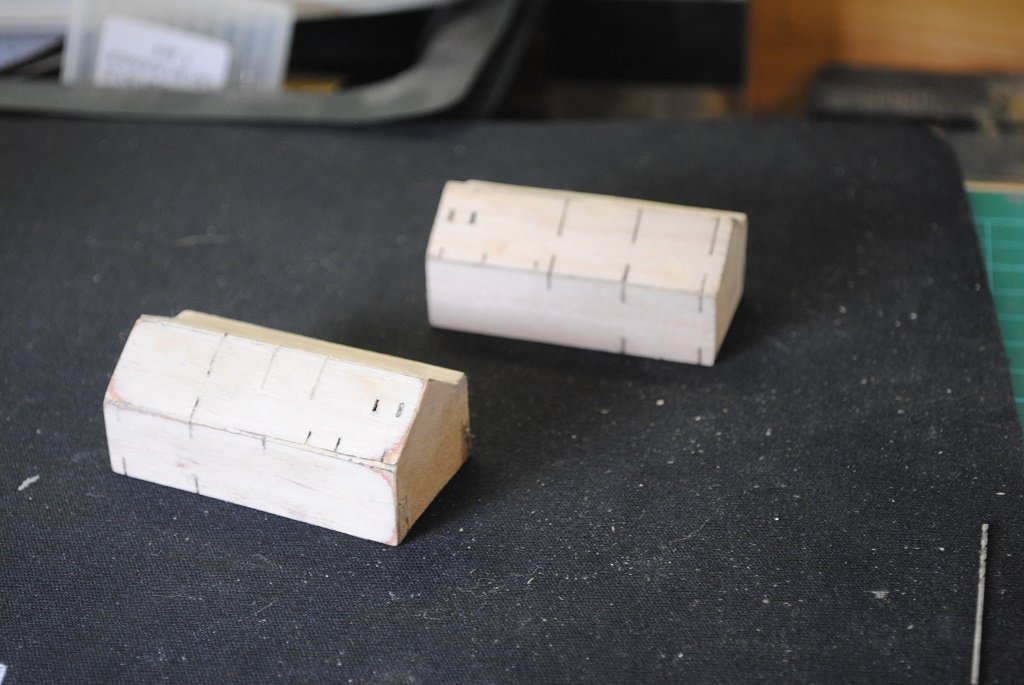
 Hi All, Completed both Catapults.... Finally.... 🙂 I wasn't sure that I'd be able to complete these but perseverance paid off. (I'm sure there will be many more "Challenges" coming up.😗) The Catapults comprise of 13 separate pieces each, 14 including the wheel axle. (Unsure if the Trumpeter version has a folded Catapult structure, I must have a look.) Unsure of the time taken but it doesn't really matter, and, if I keep making the same excuse that I'm a PE novice, I'm sure you'll understand. The first Catapult to me 2.5 attempts at getting it reasonably o.k. The second only took maybe three hours and one attempt to complete. (Always the way....) I can now move on getting more aft Superstructure sides prepared, Hatches, Doors, Scuttles attached, and a nice big piece of PE for cladding Barbette "Cesar." 🙂 (Once I give myself a bit of a break.) Cheers....HOF. Photos: (Sorry, no "Macro" lens.)
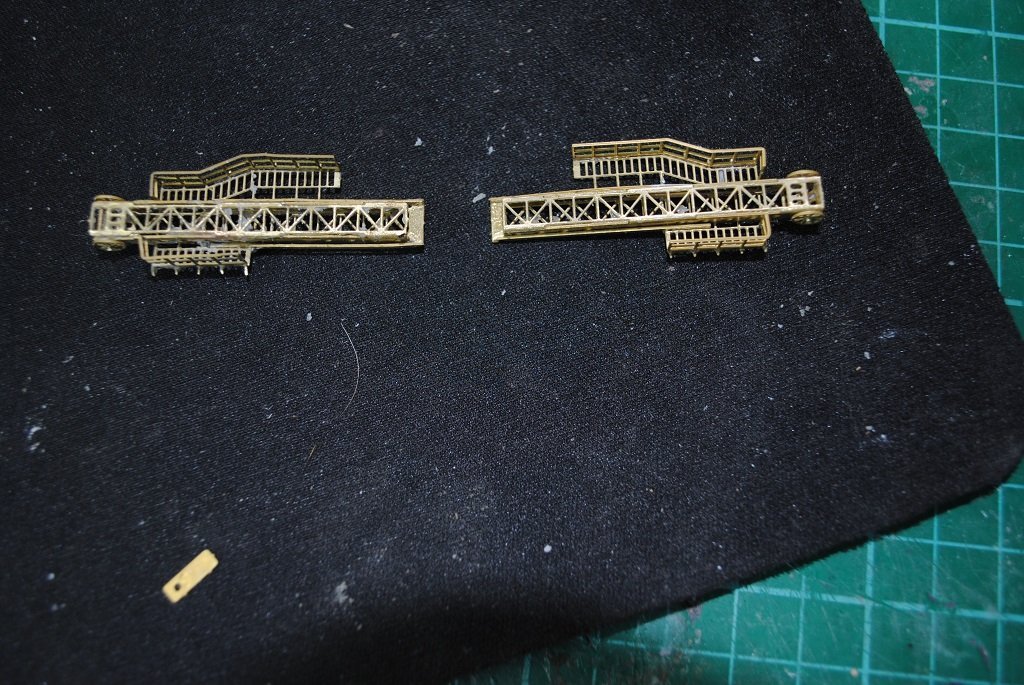
-
Hi All, Another very small update: Still working on the Catapults.... Noticed with the second that looking from the top, there is a definite pattern of the lattice structure that I didn't have with the first.... The second structure looks' like XiXiXiXi, correct. The first looked like VIViVi, incorrect. 😗 Decided to pull the first Catapult apart and try to fix by flipping the top PE over. So, I eventually got this done after a bit of fiddling.... (I was very concerned about the possibility of breakage .) (I hate re-work but I am not expert with PE.) I will hopefully complete both Catapults today, I'll then get some photos uploaded. The second Catapult is a "Mirror" image. 🙂 Cheers....HOF.
-
Hi All, Very small update: Been working on the first Catapult.... I started this last night but the structure collapsed.... !! 😗 (Not enough CA in the joints.) Had another go at it today and made a very rudimentary jig for aligning top and sides, a simple piece of Walnut the correct width. 4.5mm X 3.0mm and rubbed with Candle wax to that it would come out cleanly. Cleaned up the PE pieces and started again.... This time it worked out o.k. A couple of very "Fiddly" pieces on the base almost had me giving up for the day.... A very important note seems to have been omitted, from my instructions anyway.... The second Catapult needs to be a "Mirror" image of the first!! I'll hopefully get some photos tomorrow and I'm hoping the second Catapult won't take as long as the first.... 🙂 Cheers....HOF.
-
Hi Rod, Thank you for coming back to me. One more question: How did the the Hull surgery go? Cheers....HOF.
-
Thank you Sir!! I can see and handle most of it with fingers.... 🙂 Nothing as tiny as your 1/700 models. Cheers....HOF.
-
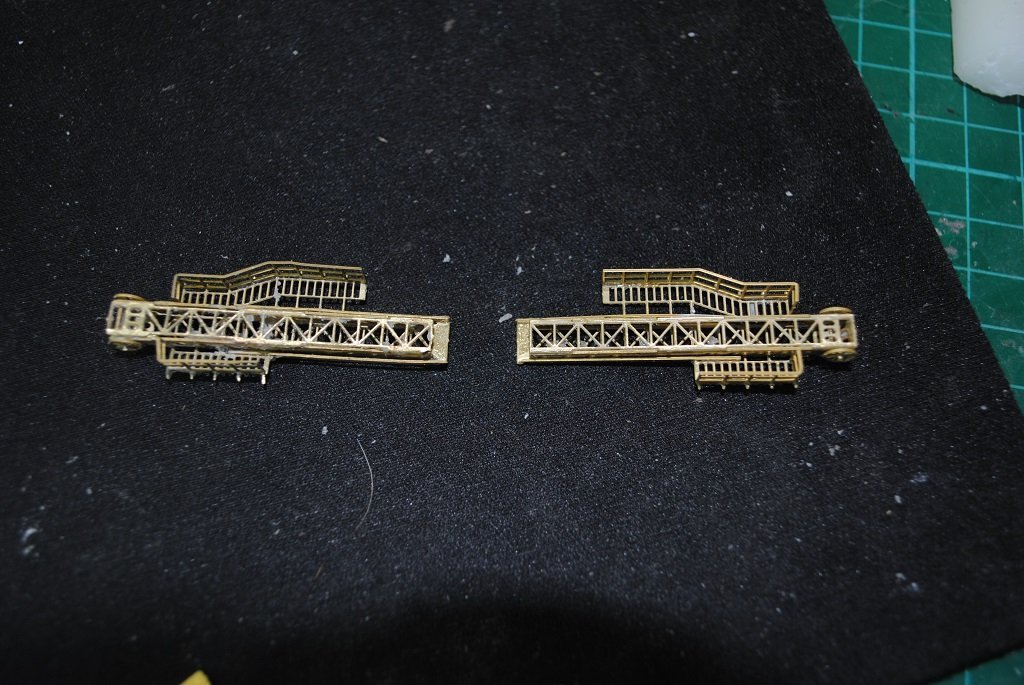
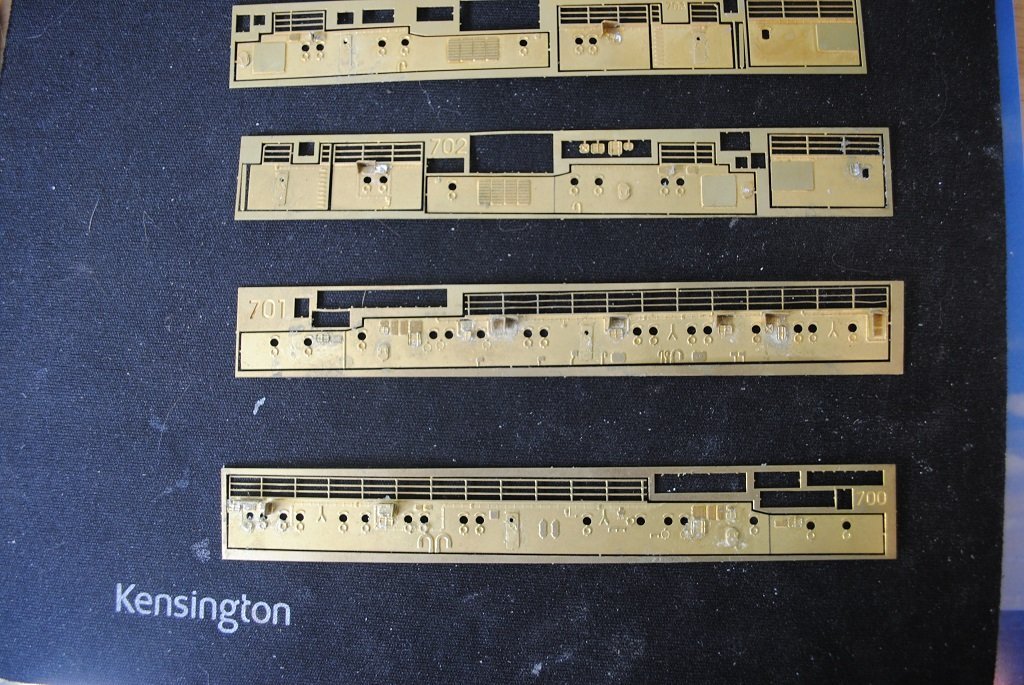
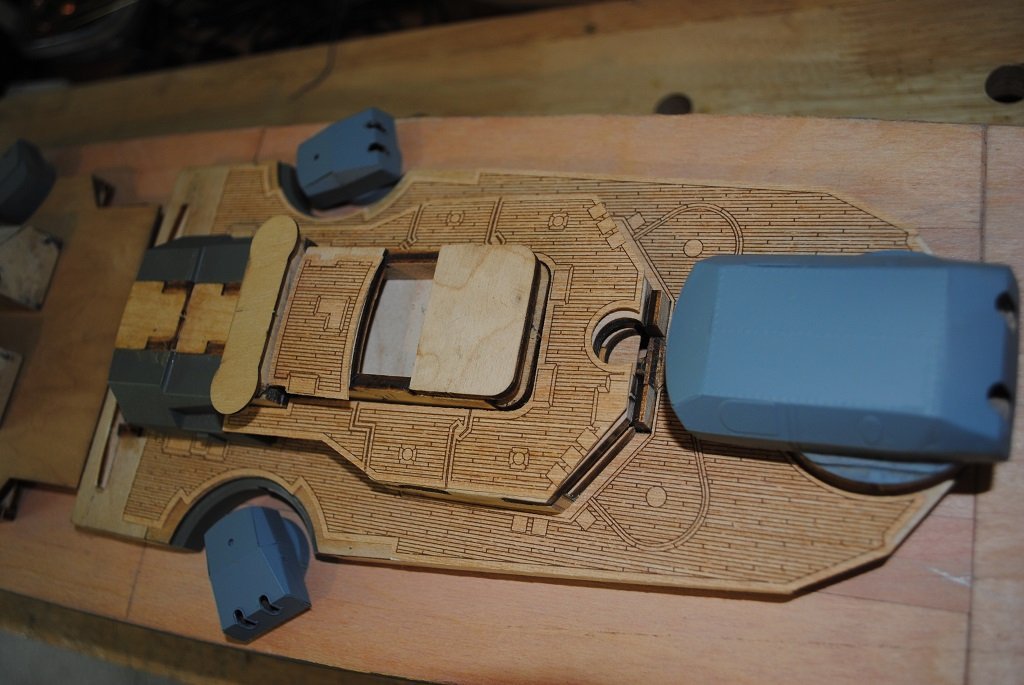
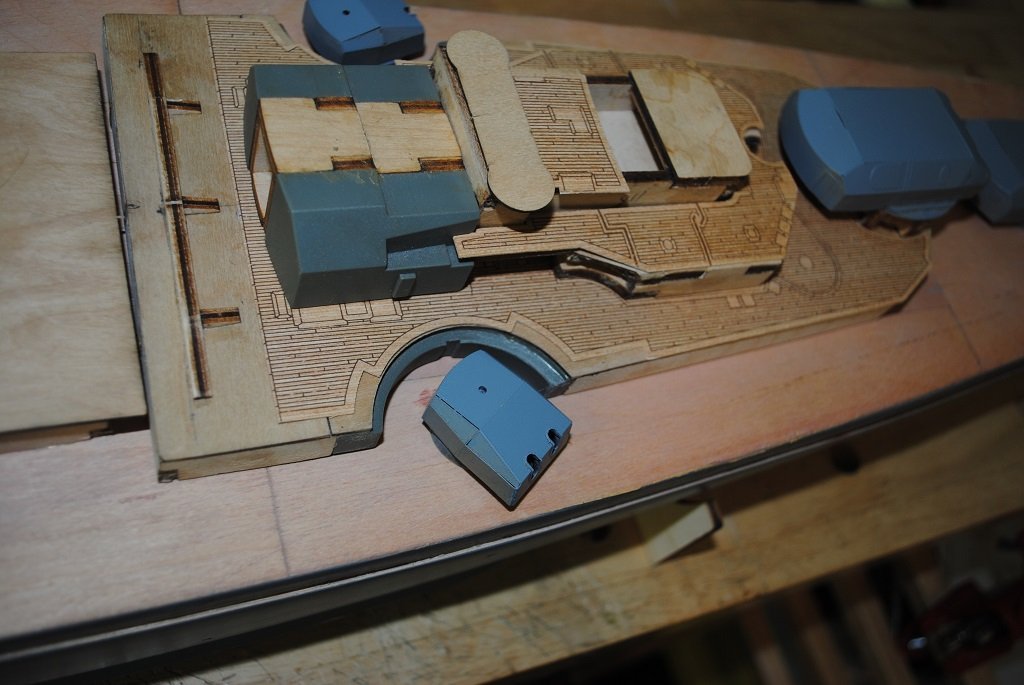
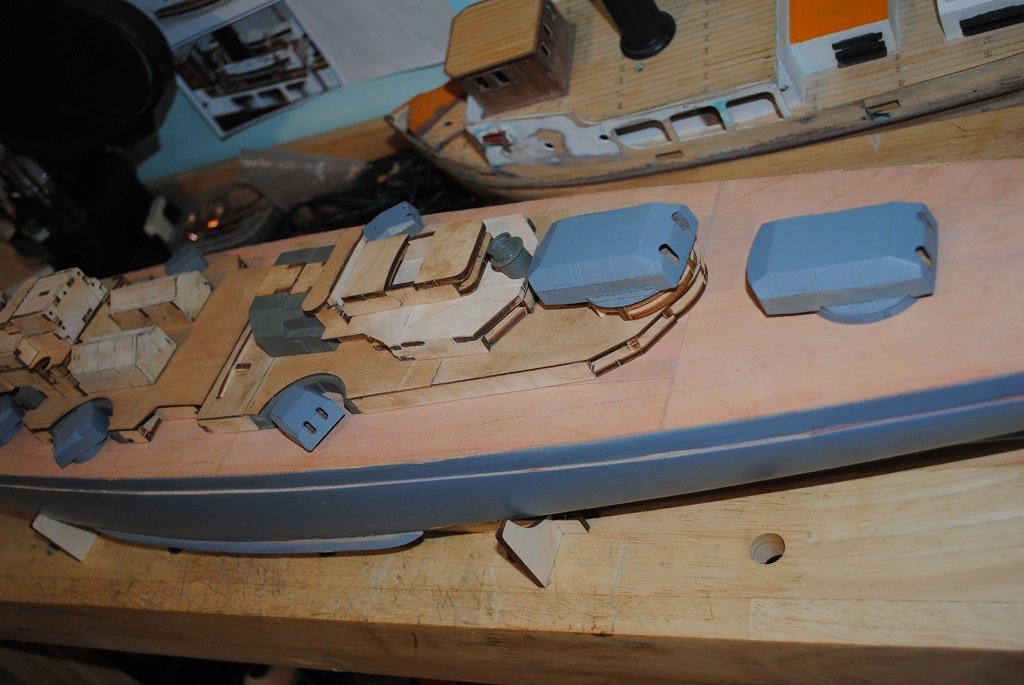
Hi All, Small update: Still working on the Aft Superstructure PE and have more to go before I can complete.... I have enough completed to clad the Bottom Superstructure tier but have more tasks to complete before I can contemplate installing this. (It would be nice but then I'd be rushing.) Completed some other PE for cladding the second tier also, quite complex and took a few hours of work. I do however think that, I'm getting a little better at PE. (For positioning open Scuttles, etc, I have started to use a tiny dot of Blue-Tack to hold the part in position, dot with CA and let the capillary thing happen.... 🙂 PE waiting for my attentions, probably tomorrow: More Superstructure cladding Catapults (There's some "Tempting" PE Frets including cladding for Barbette "Caesar." 🙂) Tasks that are required before attaching PE: Position cladding Draw Port Hole locations Remove cladding and drill Port Holes Clamp Printed Decking to Superstructure Sand edges of Decking flush with Superstructure sides Remove Printed Decking Install PE cladding Clear as mud? So, I think my tasks tomorrow I'll start with more PE, (I feel that I am punishing myself a bit but I need to get a better handle on the vagaries of this medium.), then get the Decking flush. So, that's me for today anyway.... Cheers....HOF. A couple of photos:
-
Thanks Chap!! I'll get some nail polish remover tomorrow and give it a go....🙂 Cheers....HOF.
-
Hi All, No update as such, just a continuation working on the aft superstructure PE sides and associated hatches, grilles, etc. (I am also leaving the completed PE structures on thier respective "Frets" until it's time to attach them.) ]\12 I do however, have a question, How do I remove an unwanted build-up of CA off PE? My PE skills seem to be improving but on one of the first PE sides that I attempted, I had trouble attaching "Scuttles" to the main PE piece. It probably wouldn't be visible but I need to get the excess off. Do I use something like Thinners? (I don't have any "De-bonder") I have tries carefully scraping to no avail.😗 Any advice would be most welcome.... Cheers....HOF.
-
Hi Rod, Sorry to see you had some re-work there.... 😗 (Never a good thing....) Looks like nice surgery and a nice save!! (In hindsight, I have been lucky with paper templates for the Port Holes and even more paper templates for drilling/positioning the Ladder, (Grab Handles), Rungs.... All the Best and I'll be looking forward to seeing your completed Hull recovery/save. Cheers and Regards, Harry.
-
Hi Chap, Your post to Rod piqued my interest,,,, "Did you bevel the top edge of the belt armor? Can't tell from the pictures of your model. All of the pictures I have seen of the ship has the top of the belt armor at about a 45 deg angle down.Did you bevel the top edge of the belt armor? Can't tell from the pictures of your model. All of the pictures I have seen of the ship has the top of the belt armor at about a 45 deg angle down." I have also considered this and am still doing so.... Personally, I need to weigh up the pros and cons of attempting this at the stage of the Hull that I am at. (It's possibly more a case of "What could possibly go wrong.... 🙂) Are you going to attempt this? Cheers....HOF.
-
Thanks Bob. Hi All, Small update: Not too much activity in the Ship Room" today, I'm a bit knackered/stuffed. 🙂 Managed to get a nice fillet around the Prop Shaft shrouds. (If that's what they're called.) Been studying PDF's in terms of what is coming up. I have pretty much decided to add the two Starboard side Stern Portholes that I had omitted. (I guess I'm a little fussy at times. 🙂) So, I won't add the Stern Grab Rails as yet but will continue with the Aft Superstructure PE sides. (It will be good to have them installed one day soonish. (PE still fills with a certain amount of dread at this time but I guess like anything else it will become the norm.) I took some photos that I will share of progress thus far with components just placed, helps to give me a bit more enthusiasm also. As Clark Gabel said in Gone With The Wind, "Tomorrows another day!!" Cheers....HOF. Photos:
- 544 replies
-
- 11
-

-
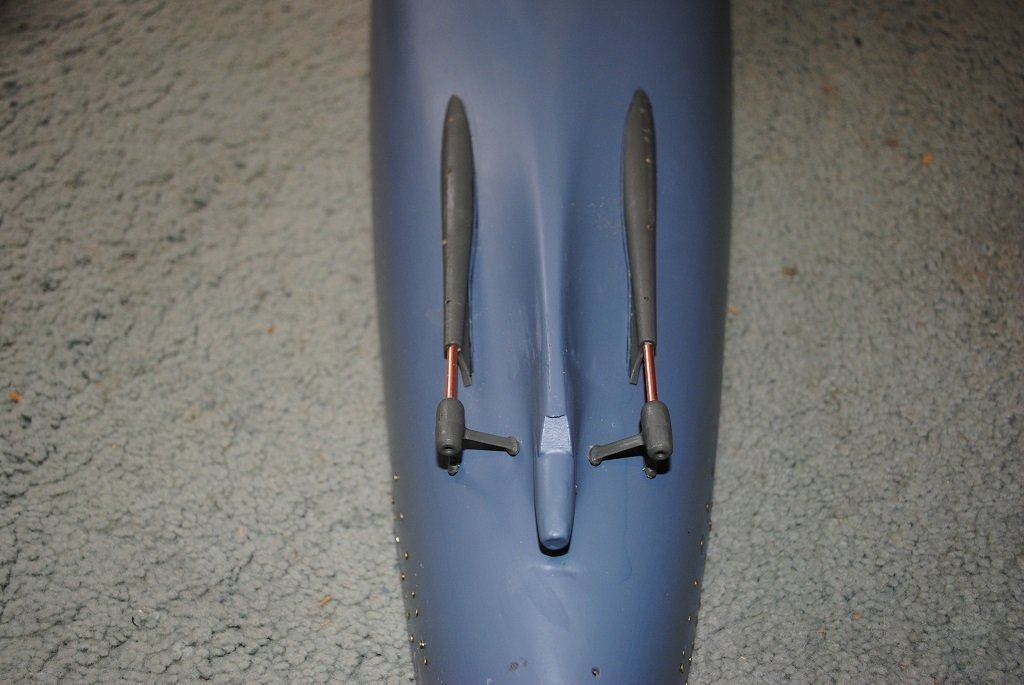
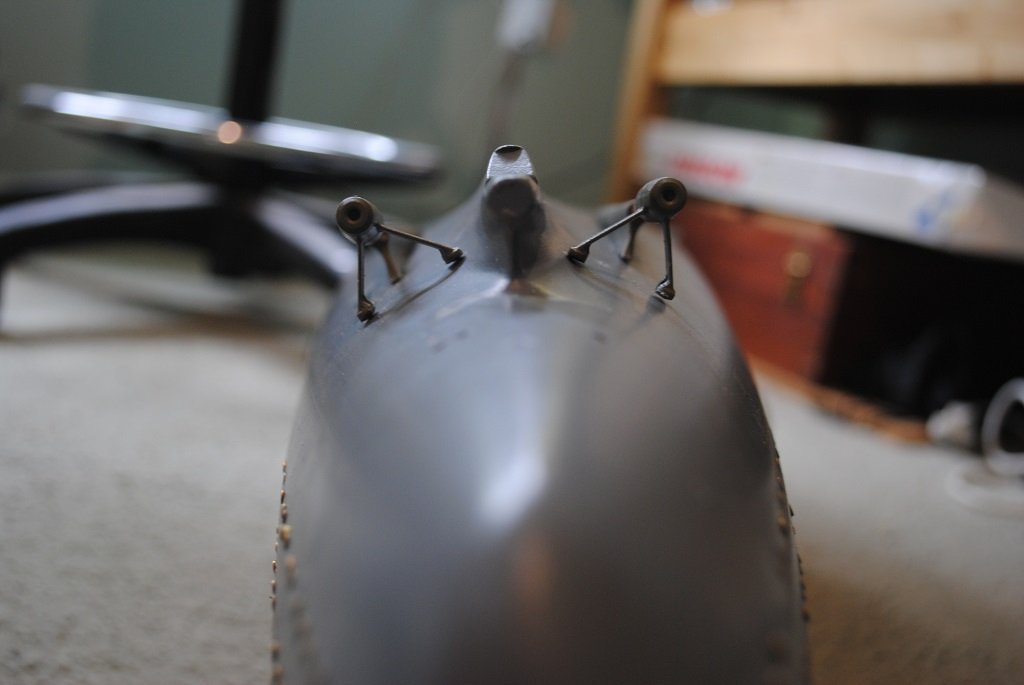
Hi All, Small update: Installed Starboard side Sea-Chest stuff. this went allot more smoothly than the Port side.... Installed Prop Shaft shrouds/fairings and prepared the rest of this structure. Paper Templates locate the shrouds/fairings. Jumping ahead a few issues but not to worry too much. Instructions advise using epoxy for this, I had other ideas. Keyed up the Hull where the shrouds/fairings are mounted, CA and "Pinned" with four 1.2mm Brass rods each side. They need a small bit of filler around the edges but they're not going anywhere!! (Very firmly affixed 🙂) The shaft triangular supports are not yet affixed, a bit of fiddling to get this correct first. So, that was today's little effort anyway. Tasks for the next few days: Finish Prop Shaft structures Aft Hull Grab Rails (Maybe) Continue with aft Superstructure PE sides Cheers....HOF. Photos:
-
Hi All, Final update for today.... Port side Sea Chest and other inlet PE attached. I had to very carefully clean out the locations small chisels and the odd second hand dentist tool.... 🙂 I think I'll stop for the day and carry on with the Starboard side tomorrow. Cheers....HOF. Photos:
- 544 replies
-
- 10
-
-
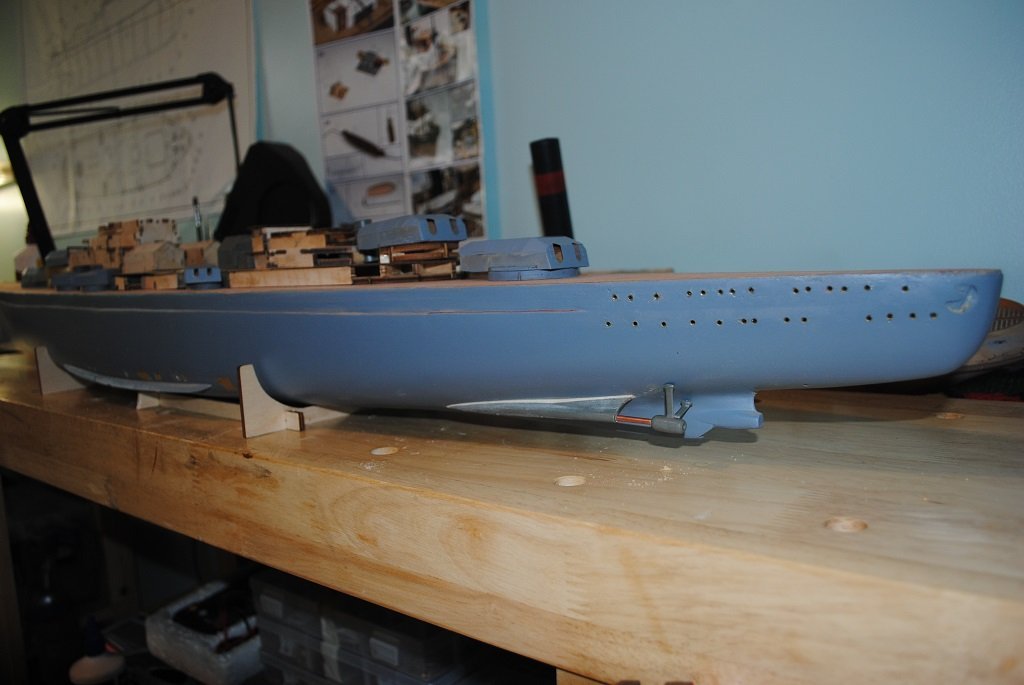
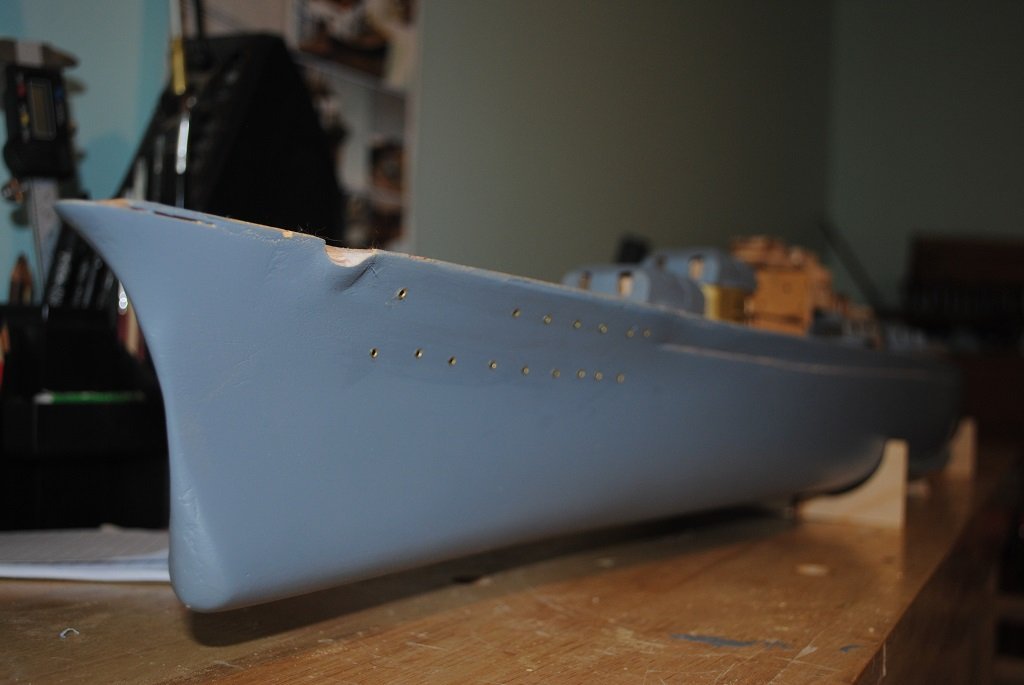
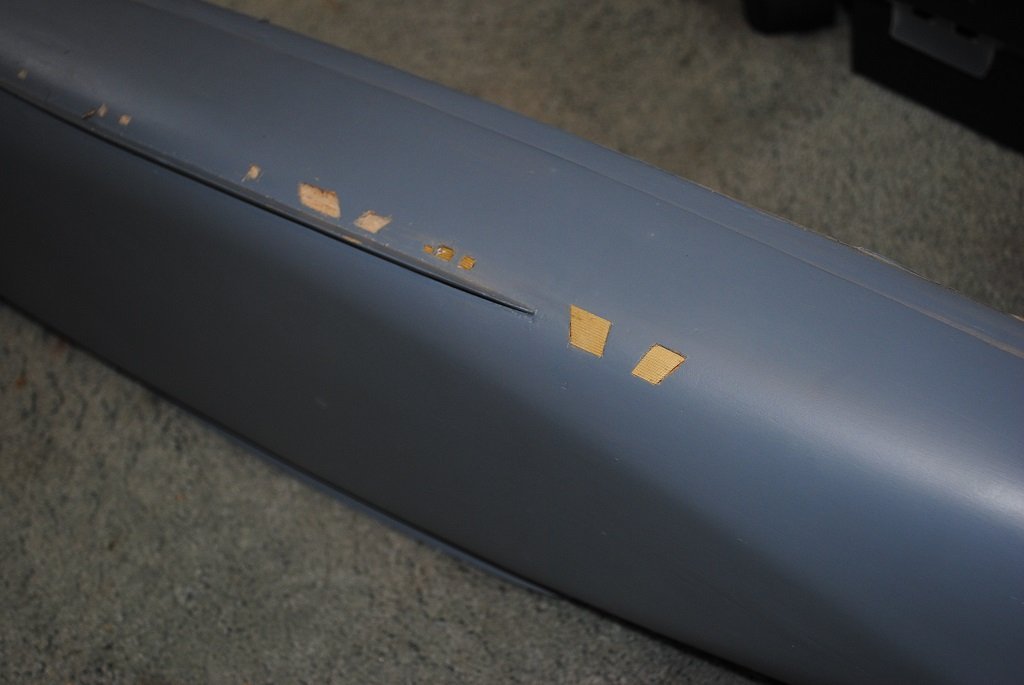
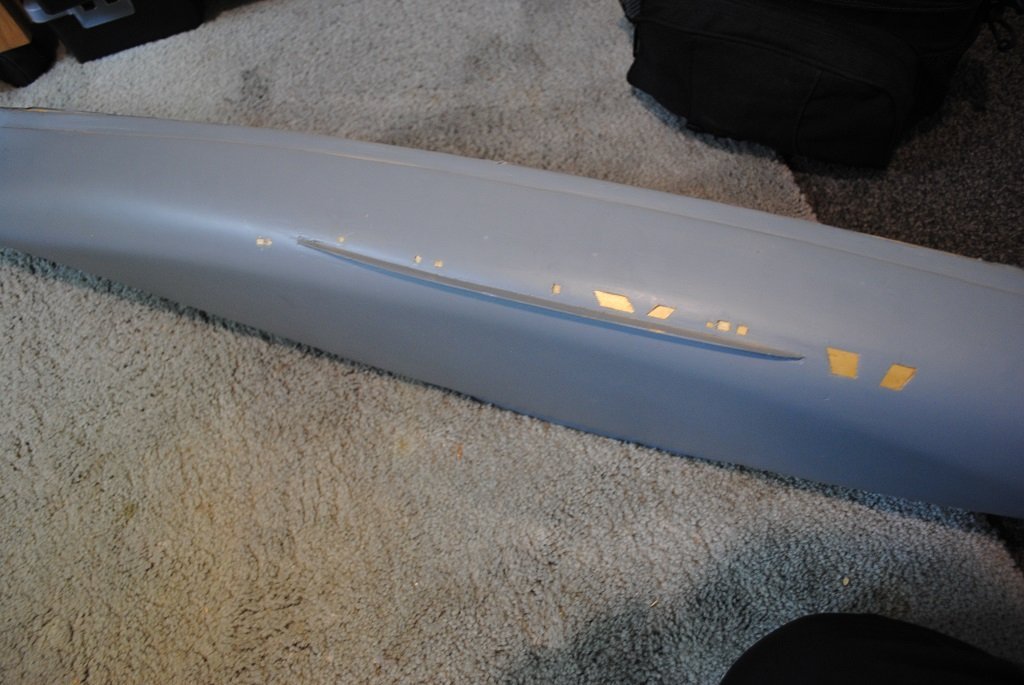
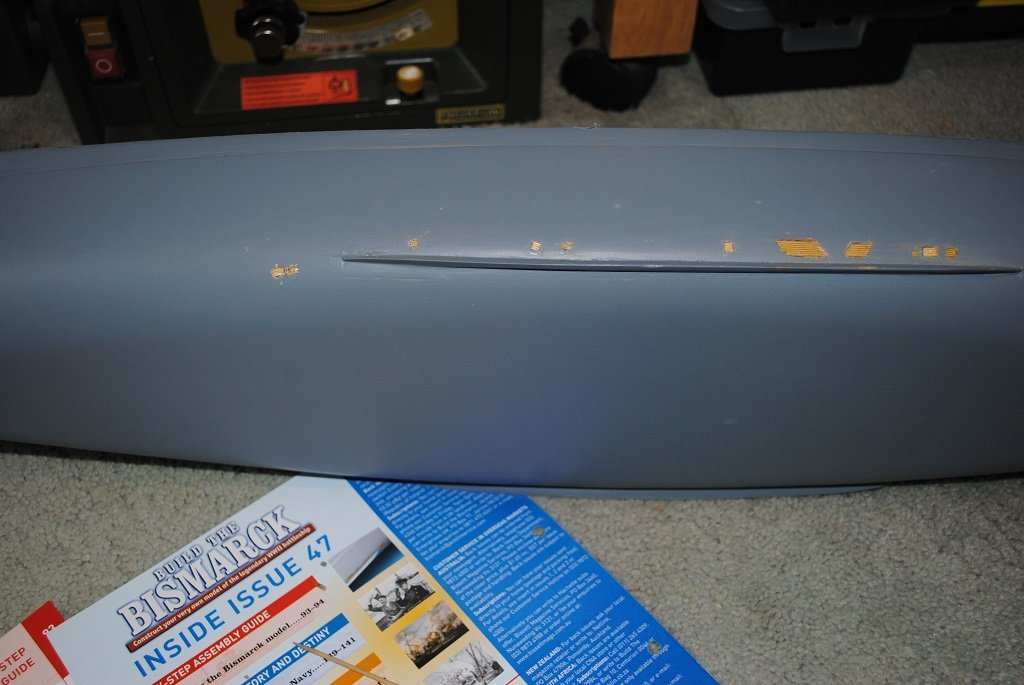
Hi All, Thanks for the likes and comments, appreciated. Small update: Filled filling/snding and re-primed the Hull. Decided to skip to issue to #126, Hull Porthole Rivet thingies. Commenced to instal using Mig Ammo Ultra Glue so that I could easily remove and re-seat if necessary. the portholes need a really good "Push" to grt them seated properly. (Flush) The installation went very well until my 2.0mm drill bit snapped inside the Stern resin piece. One hole on the Port Stern holes was way out of line. I could not retrieve the drill bit nor did I re-drill the one Port Hole but filled then.... (A bit lazy but no one will know apart from me and anyone that reads this.... 🙂 (I really don't want to re-prime the Hull again!!) Completed the wooden structures for Port and Starboard Hangers. I won't prime these unyil some of the etch goes on but may do a bit of sanding sealer as the slots for the PE I feel would be too easily "Lost." Almost forgot the Sea Chest PE!! 🙂 There are, I think 13 or 14 components per side. I guess I'll work on these next and I'll have to ensure the locations for these fit the PE after the spray putty/primer went on. Cheers....HOF. Photos:
-
Thanks Kevin, Yup, finishing the Hull with a bit of paint certainly gives one a bit of satisfaction, relief? 🙂 With pervious Wooden ships, they all seem to have a "Look like S...t stage." I have learnt to just push on and not get too disheartened. 🙂 Cheers....HOF.
-
Thanks Chap, Much appreciated!! Yup, when you get a mo, (Or, when you are a little further along with your Bismarck), I'd be very interested to know if your Decks are "Flush", (Or otherwise), with the False Deck. Cheers and Regards, Harry.
-
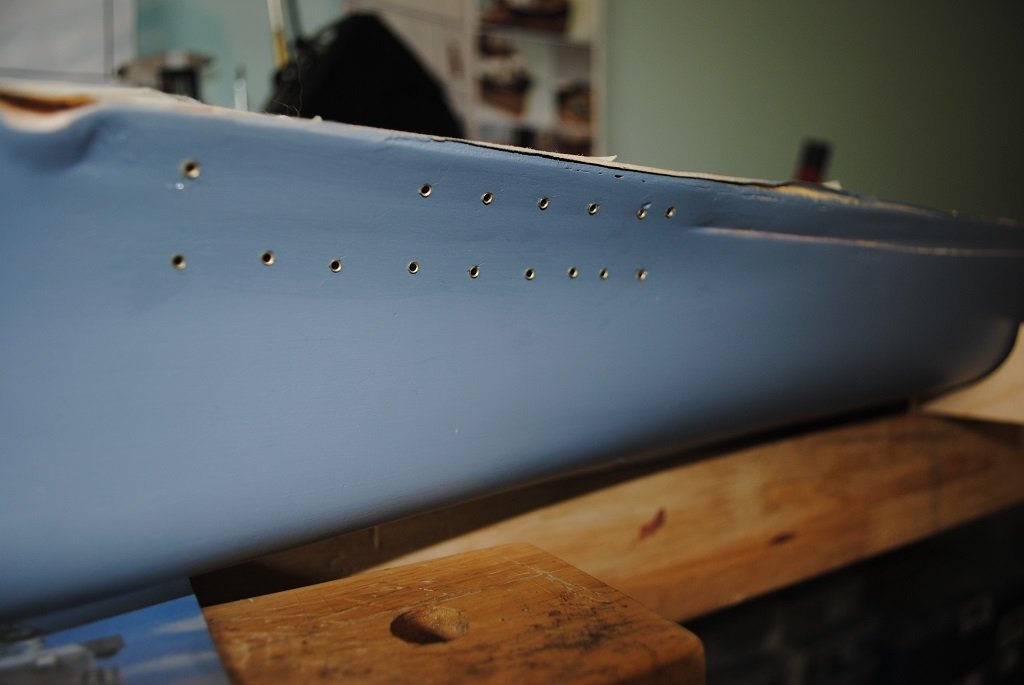
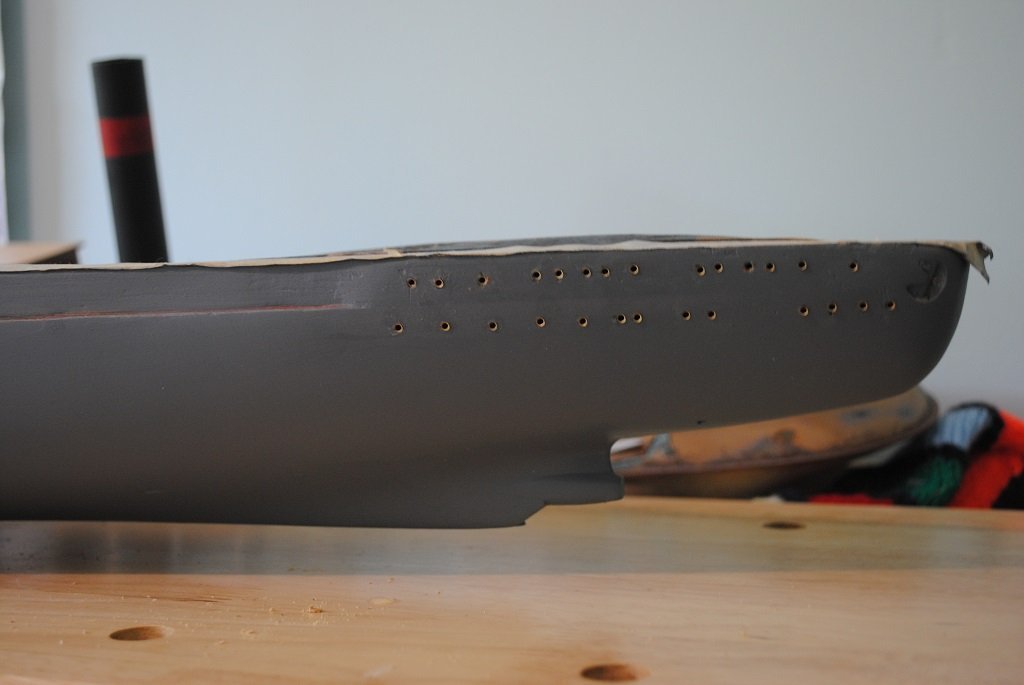
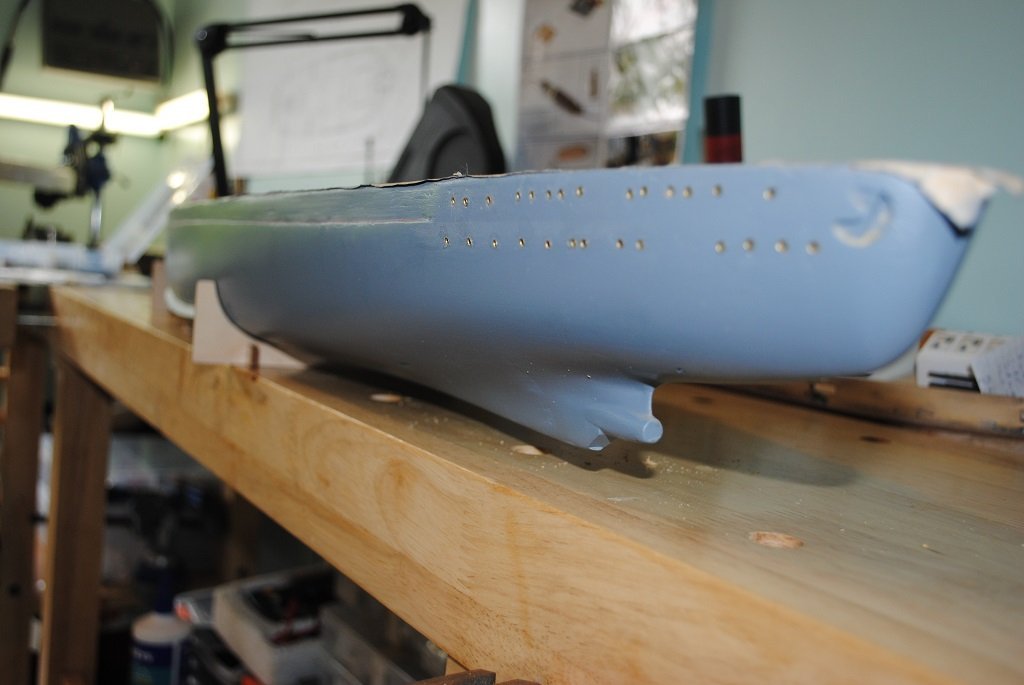
Hi All, Not much happening in the "Ship Room" today. Once again, many thanks to all that have offered advice for securing Deck veneers. (As mentioned to Mark, (Above), I'll try thinning white glue and see how it performs, "Off-Ship." (Please let me know if other ideas come to mind.....) So, have filled a couple of spots on the Hull and a couple of Port Holes that look slightly out of alignment. I managed to "Loose" the Rudder Shaft holes in the Hull. (Spray Putty/Primer). It took me at least an hour to find their exact locations. 🙂 Things I hope to achieve over the next few days: Finish filling/sanding/priming Hull (Lucky I didn't remove Deck masking.) Insert Hull Port Holes Install Hull "Grab Rails" Install Propeller Shaft Housings Experiment with adhesive for Deck veneers That's the plan anyway.... Cheers....HOF.
-
Hi Mark, Thanks for the suggestion. I have not tried but I have a paradigm running that I may ruin the viscosity of the glue and maybe introduce too much water content that could warp the Decking. I think the best thing that I can do is experiment "Off-Ship." I'll give it a go tomorrow. (Do you have any idea of quantities of water to glue?) I haven't seen Elmers Glue but in saying so, I have never looked. (It may be available on-line, something else for me to have a look at. 🙂 (I'll see if I can create a new paradigm) Cheers and Regards, HOF. (Harry)
-
Thanks Gentlemen, Interesting debate!! Bob, thanks Chap and yes, I'm after allot more than 10 seconds wriggle time.... 🙂 I guess the worst case scenario would be if I had laid all but one veneer and the first one required adjustment of say 1.0mm and all subsequent veneers required adjustment.... The other requirement is that the adhesive needs to be "Viscous" enough to hold the veneers flat while curing. I really appreciate the time and thought you guys have put into my query thus far. Cheers and Regards.... HOF.(Harry) .
-
Hi Rod, Just thought that I'd mention the pre-drilled holes for Grab Rails on the Stern Port hole etch pieces, I thought that this was a great addition to the kit. (Mine is pretty old.... 🙂) I got paper templates and a bunch of measurements of where \to place them. A question for you, do your Deck veneers come in sections and is there a 1.0 - 2.0mm space between the edge of the false Deck and the Veneers or are the veneers flush with the edge of the False Deck? Cheers....HOF. (Harry)
-
Hi Grant, Thanks for the info regarding different set times for white glue. I will have a look next time I'm at the Hardware Store. The only two varieties that I have seen are either interior or exterior.... 🙂 I may not have noticed any other variety and I don't believe that I have ever looked. (Live and learn!! 🙂) Yup, I am leaning to white glue also. I may need to "Fiddle" with all the Veneer pieces at the time of installation, just a bit of a "safety net" that I wan to give myself. The veneers when taped down, line up pretty much perfectly and I need, of course, the same result with adhesive. Thanks once again for your advice. Cheers....HOF.
-
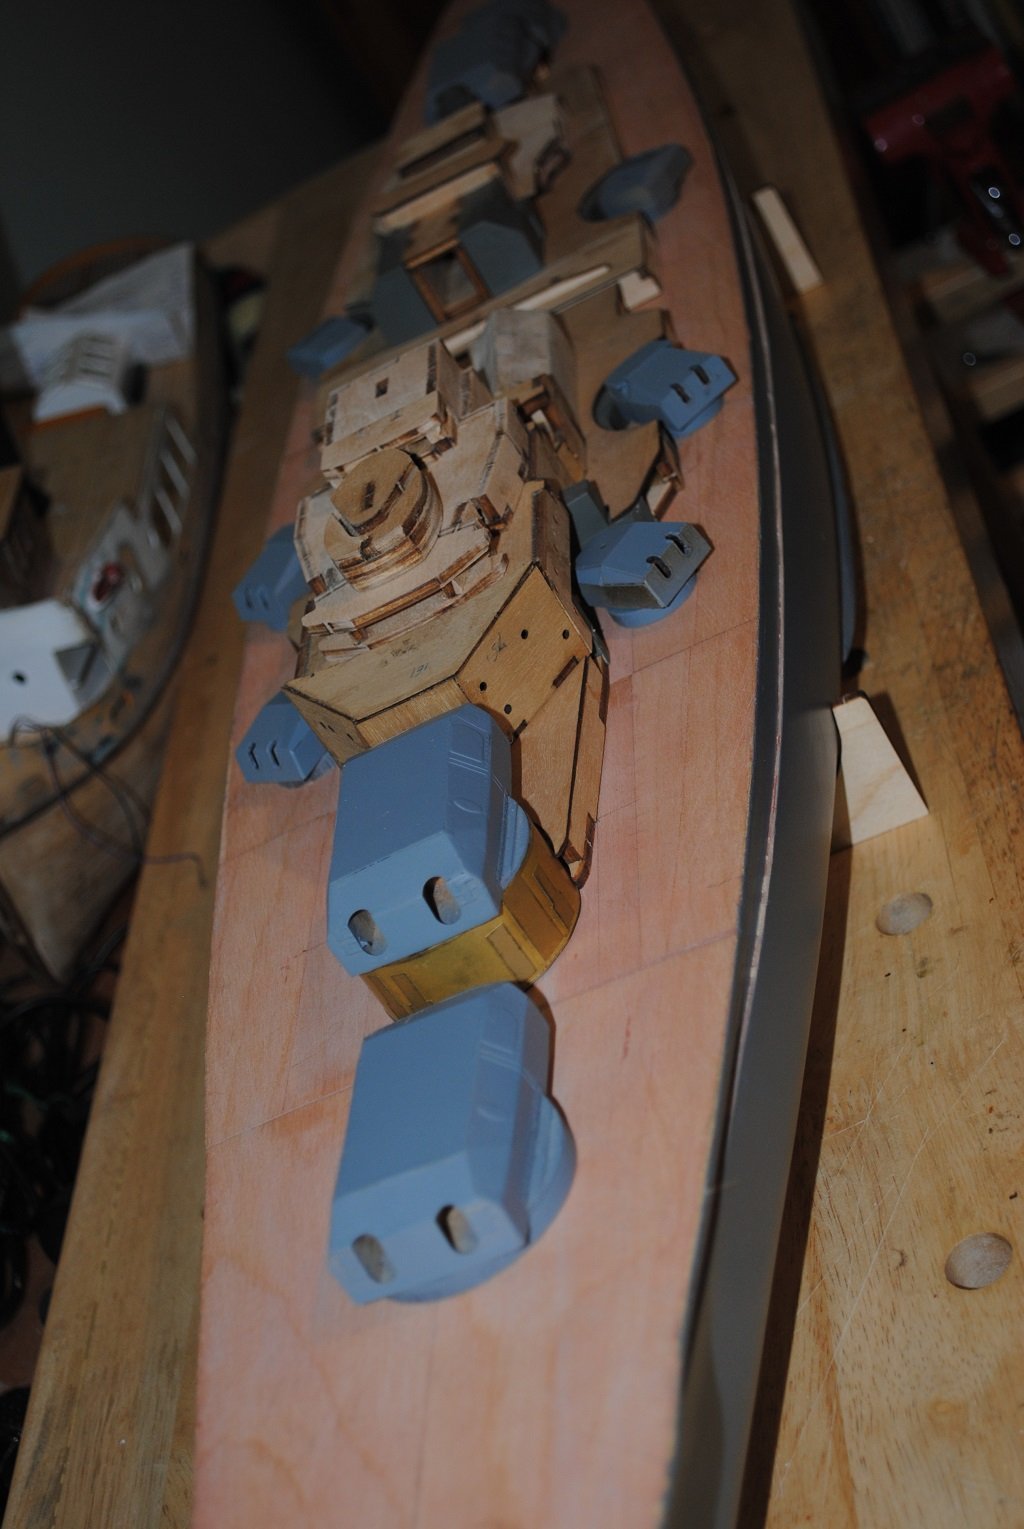
Thanks Chap!! I agree the the Hull is greatly improved.... 🙂 (I primed the Turrets and Barbettes today also, apart from "Bruno" and Cesar.") It's quite an enjoyable build thus far. 🙂 Cheers,,,,HOF.