HOLIDAY DONATION DRIVE - SUPPORT MSW - DO YOUR PART TO KEEP THIS GREAT FORUM GOING! (89 donations so far out of 49,000 members - C'mon guys!)
×


hof00
-
Posts
1,647 -
Joined
-
Last visited
Content Type
Profiles
Forums
Gallery
Events
Everything posted by hof00
-
 O.k, I have a question if someone could find the time to offer some advice.... I have been thinking of installing the Main Deck, I feel that sooner is not going to make an iota of difference. The instructions "Recommend" that the Deci NOT be installed until after the Hull is fully painted. I am masking rhe False Deck anyway during painting operations.... Now, my question: What adhesive should I use for the Main Deck Veneers? I need to have some "Fiddle" time whilst I align all five or six sections and they are not that small either.... 🙂 am leaning to white glue but this goes off fairly rapidly if thinly spread ( don't want to thin either as it tends to loose its' viscosity) 24 hour epoxy? Messy 15 minute epoxy? Messy CA, definitely not Contact: same as above, CA, definitely not The only other option that came to mind is a product called "Aerodux", useful for "Skinning" Veneer to foam core wing blanks. The stuff I have Is pretty old and I have never used it before. (t consists of a resin and a brown powder hardener. (i's supposed to have an unlimited shelf life....) Never having used this before, I don't really want to experiment on the Bismarck. I think that I have now exhausted my available options.... 😗 (It's been keeping me awake at night.) Any ideas/advice would be most welcome. Cheers....HOF.
 -
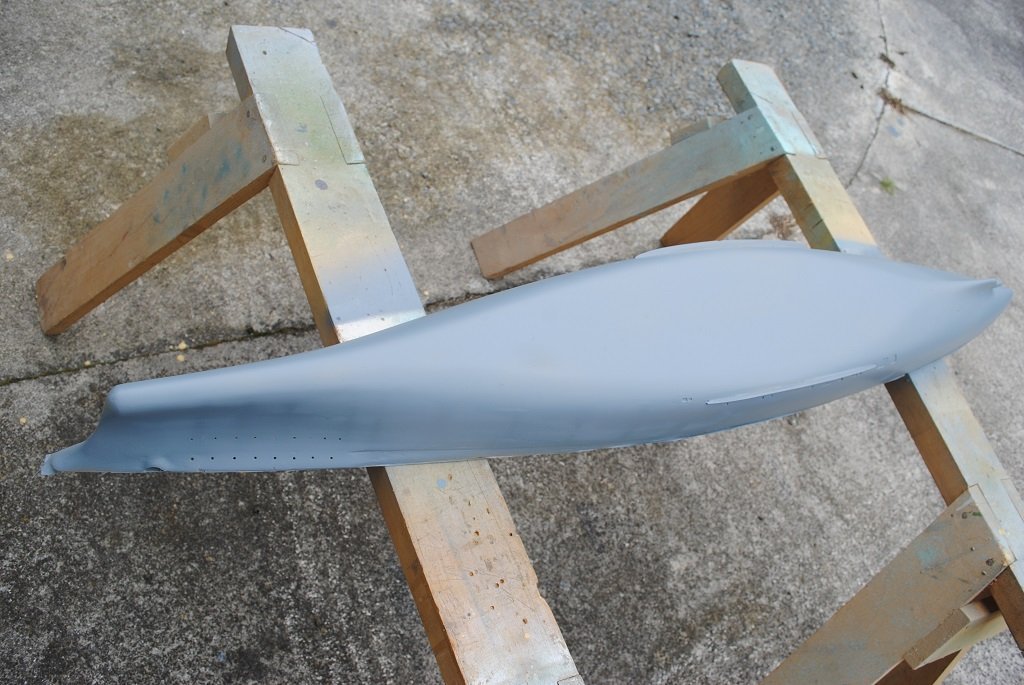
Hi All, Decided that I'd better gat busy prepping the Hull today. Spray Putty, rub down and initial Prime. I'm reasonably happy with the result and realized that I should have done this years ago.... 🙂 (Cest la vie!!) There a two or three spots that will require a bit more attention but I'll wait until tomorrow for that to let everything cure. I may decide to give the Turrets a bit of a prime as it's a beautiful hot day. The only downside to performing this now is that I'll have to clean off location points for ladders, etc. (No biggie.) Cheers....HOF. Photos:
- 544 replies
-
- 11
-

-
Hi Chap, For Deck sealant/finish I use an acrylic satin clear, it's a "Cabbots" product, (Here anyway), called Crystal Clear. Easy to apply, a couple of thin coats, and dries really fast to a very nice transparent clear. Being acrylic, no thinners to ruin Caulking markings on your Planking. (Try products on scrap wood first maybe?) Once hard, a bit of 000 Steel Wool to finish. That's my method/madness anyway.... 🙂 Cheers....HOF.
-
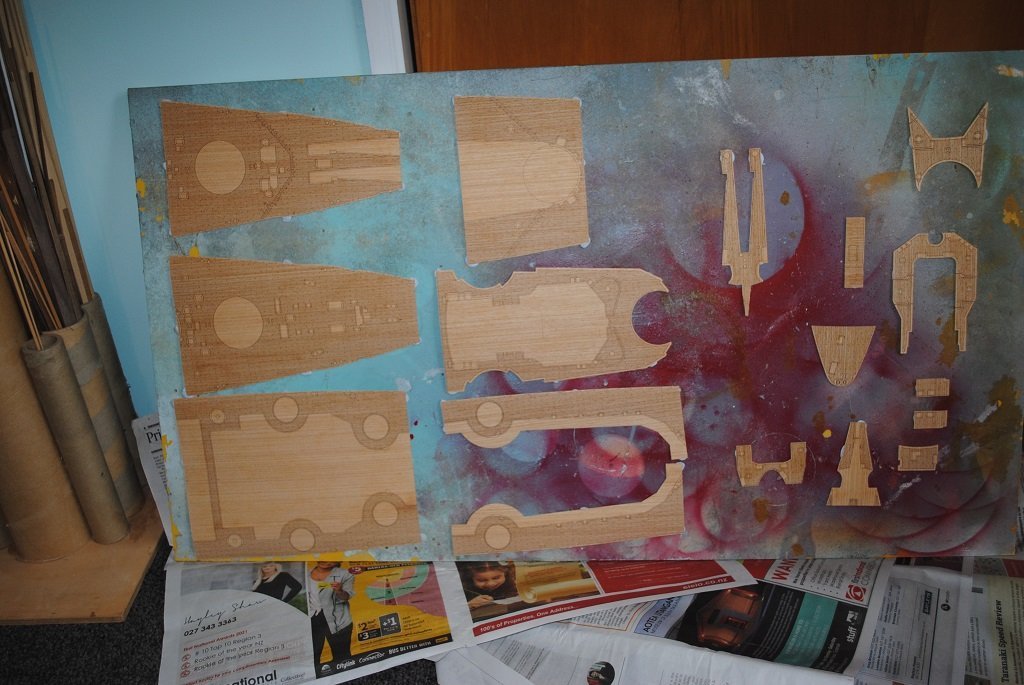
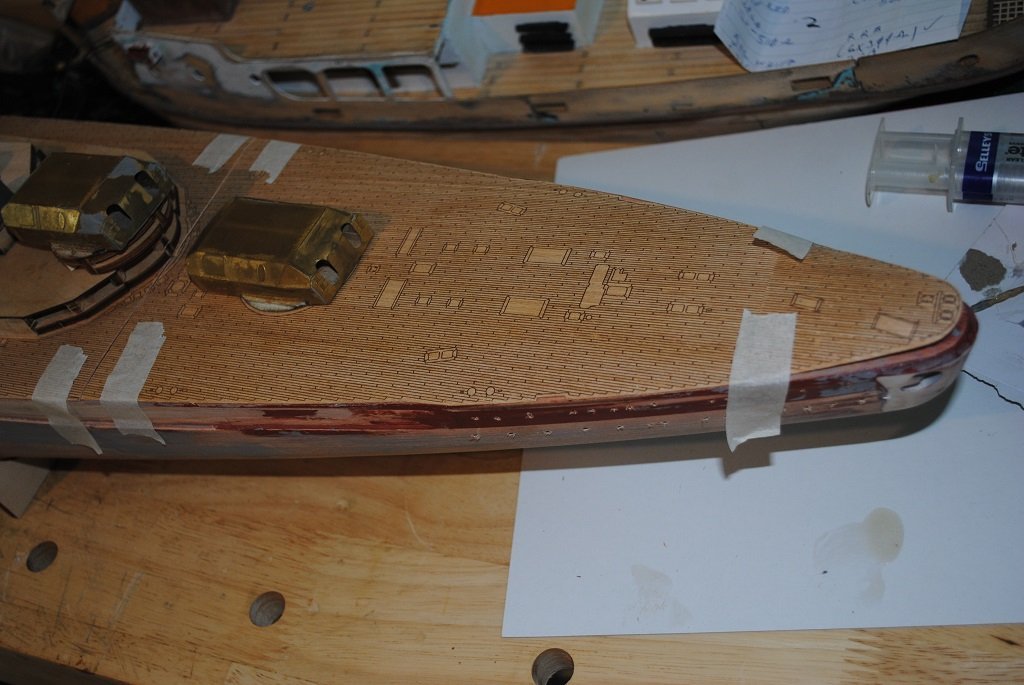
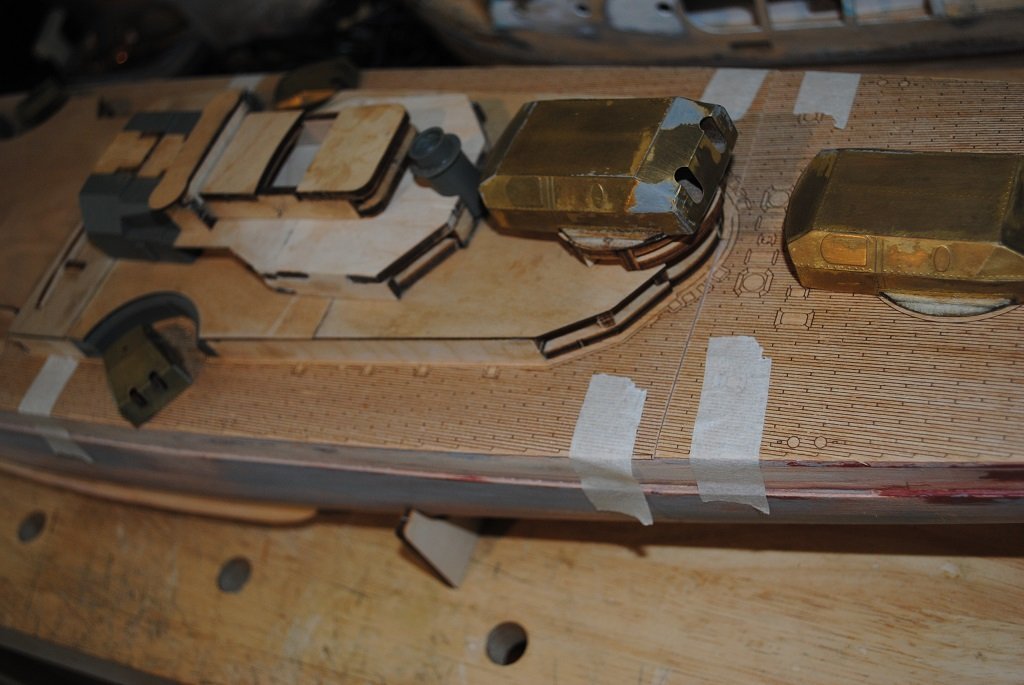
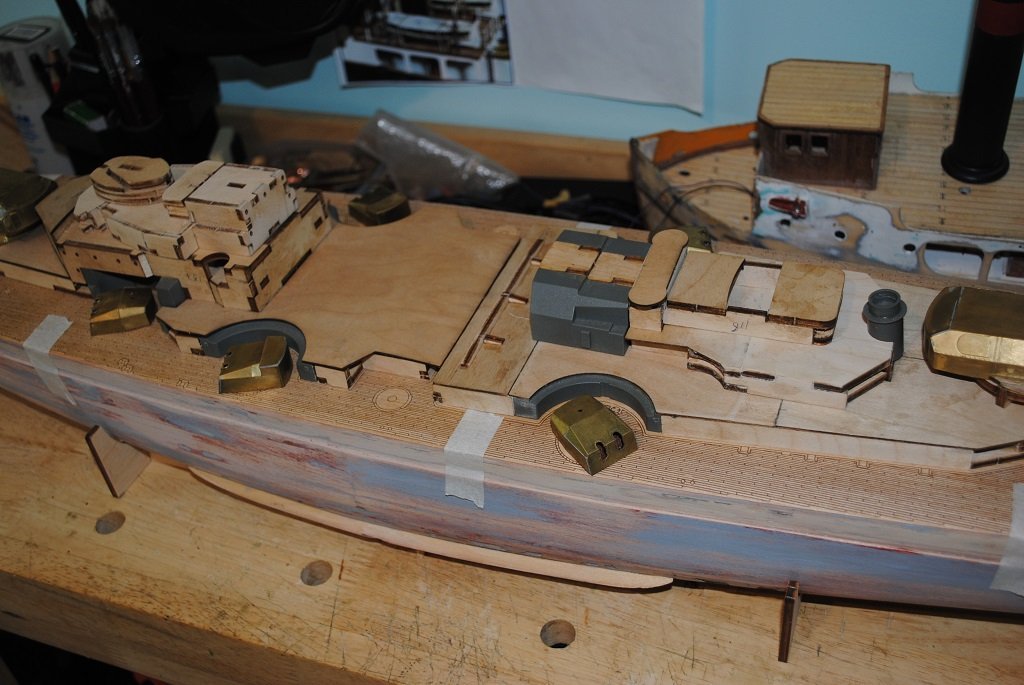
A bit more today, Constructed Port and Starboard Hangers, no PE as yet. I decided to place the main Deck pieces on ostensibly to check the fit and alignment as it has been a few years since I constructed the Hull and False Decks. (I must have done something right.... 🙂) (I'll retract my initial comment regarding "Printed" Decks, this one anyway. Really nice detail!!) The Deck lines up very nicely with the edges of the False Deck, interesting as the instructions show a 1 or 2mm border around the printed Deck, not the case in mine anyway.... 🙂 The Main Deck stanchions are all individual and there is a template for the spacings around the Deck perimeter. (300 + Stanchions) The printed Decks, Inc. Superstructure Decks will be permanently attached quite some way down the track.... So, for the mo. the printed stuff is set safely aside. I am unsure what tasks will be next, either: Finish prepping the Hull Continue with Superstructure PE I'll do one of these regardless, of course!! 🙂 The only issue with the Part Work thingy is that you don't want to "Bounce" too far forwards or backwards, otherwise you end up with lots of bits out of sequence. (I used to think that Part Work was a dirty word but it's Amati through and through!!) Criticism, constructive or otherwise most welcome. Cheers....HOF. Photos:


- 544 replies
-
- 13
-
-
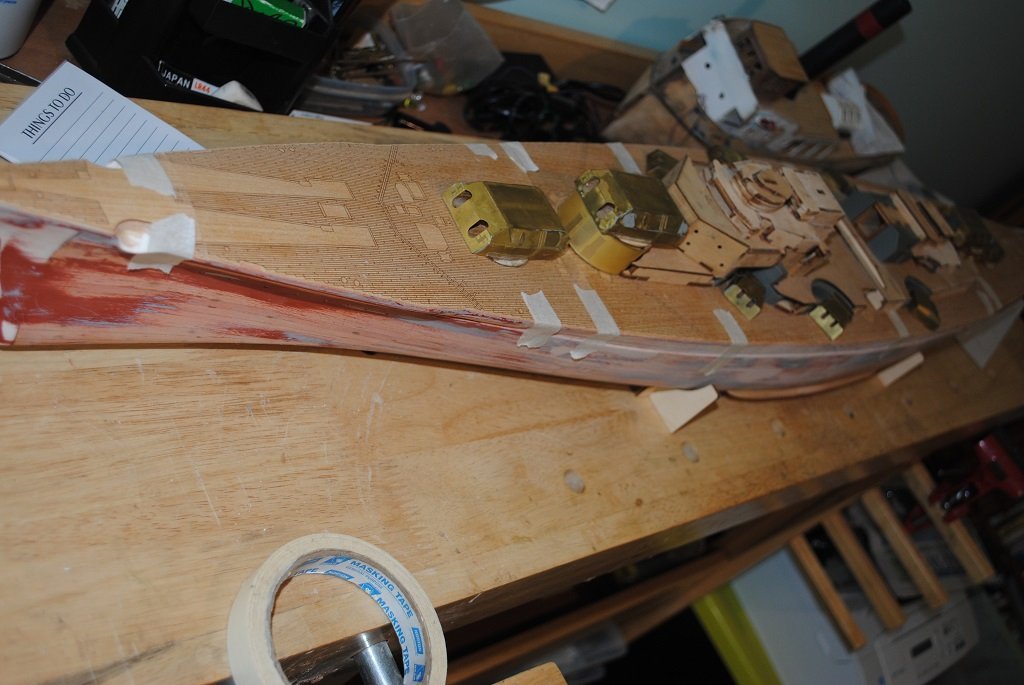
Hi All, Small update: Airbrushed all printed Decks with Vallejo semi gloss. I was concerned with the Decks "Curling" when the Vallejo went on. Thought about this and applied small dots of BlueTrack to hold the pieces "Flatish." Worked o.k. and removed Blur Tack prior to the stuff going hard or something.... 🙂 Barbette for Turret "Bruno" constructed and plated with PE. (In my mind, I thought this was a little "Over engineered." I'll work on the Hangar structures later this evening and when I can get away from Superstructure , I'll putty and prime the Hull. Photos either tonight or tomorrow. Cheers....HOF.
-
Hi Chap, That looks pretty damn good!! (Onward and upward....🙂) Cheers....HOF.
-
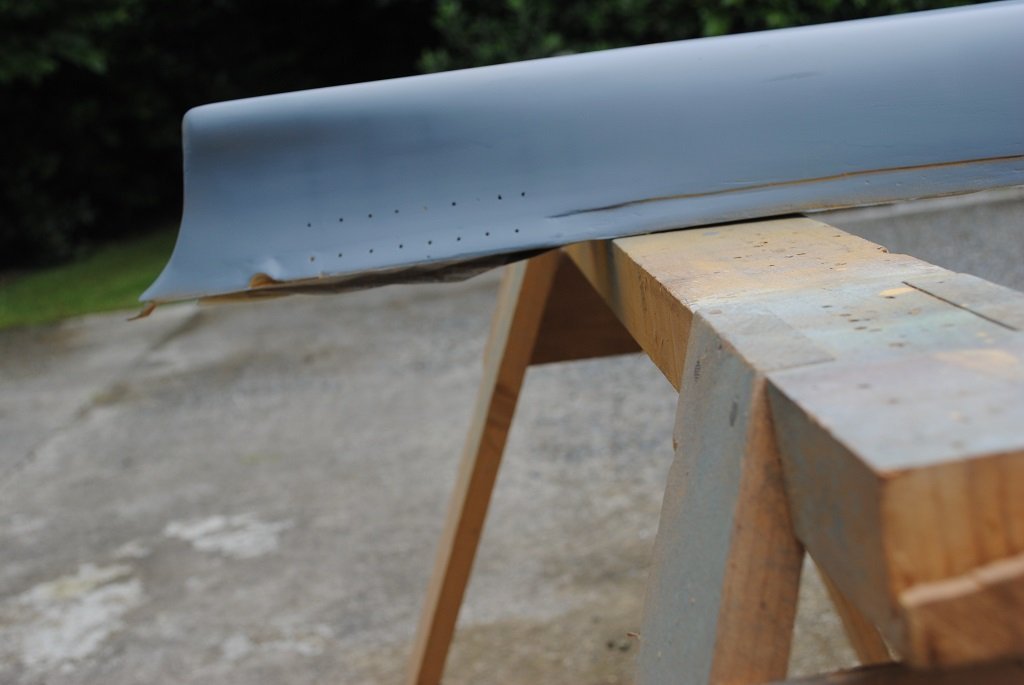
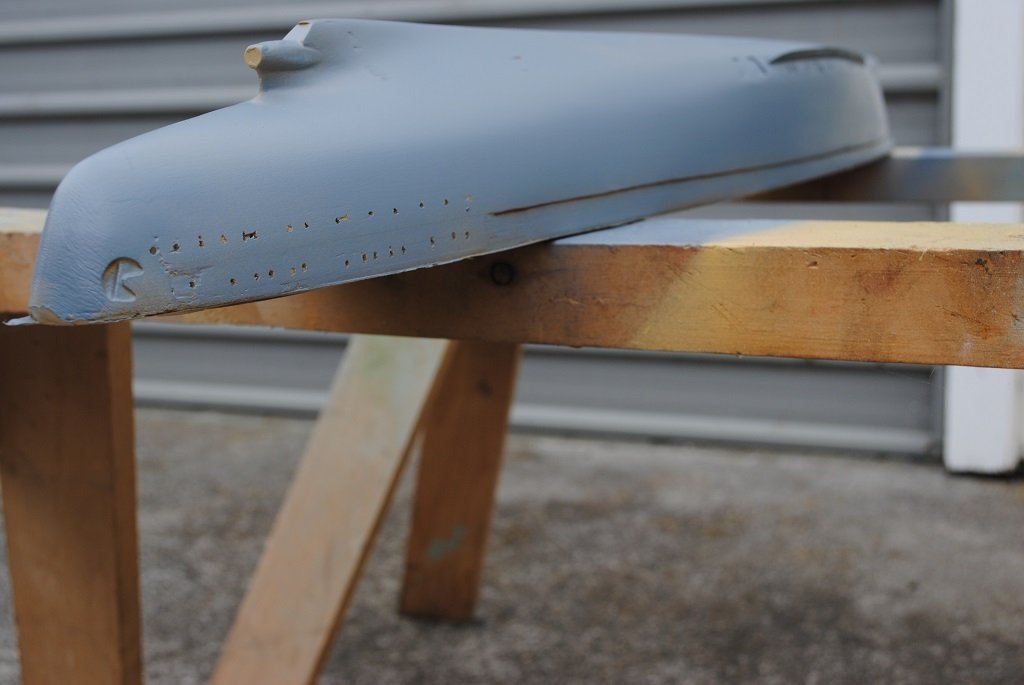
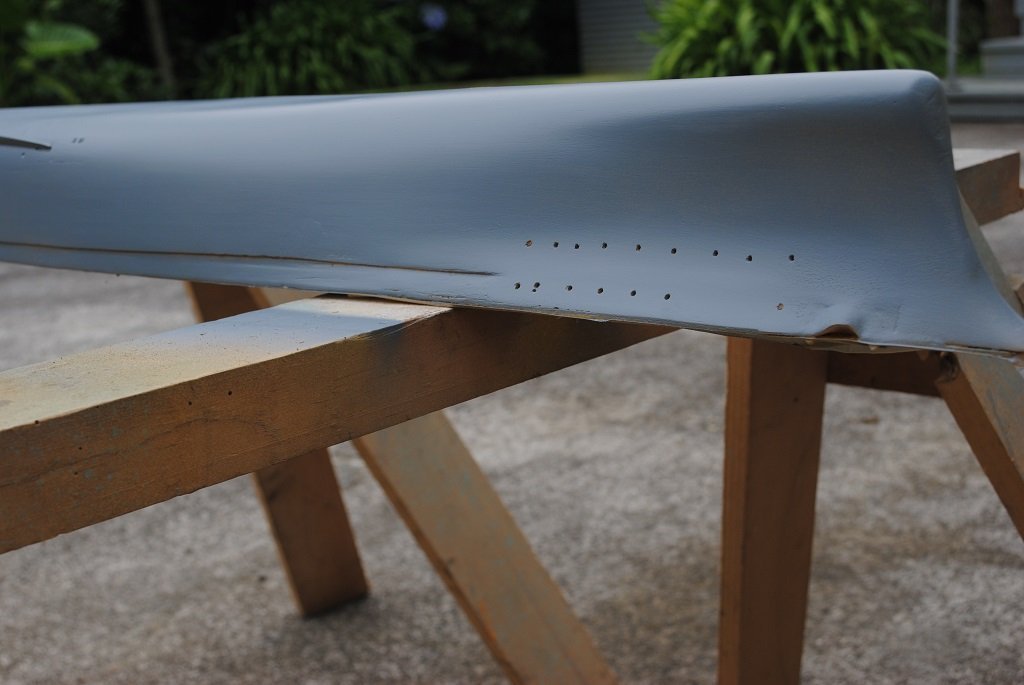
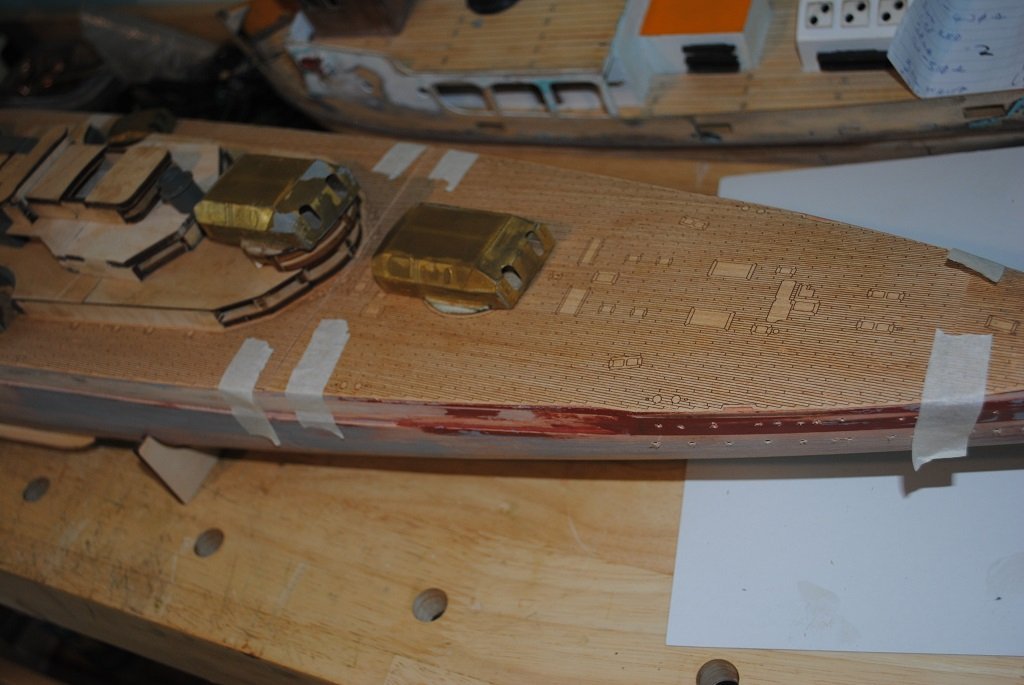
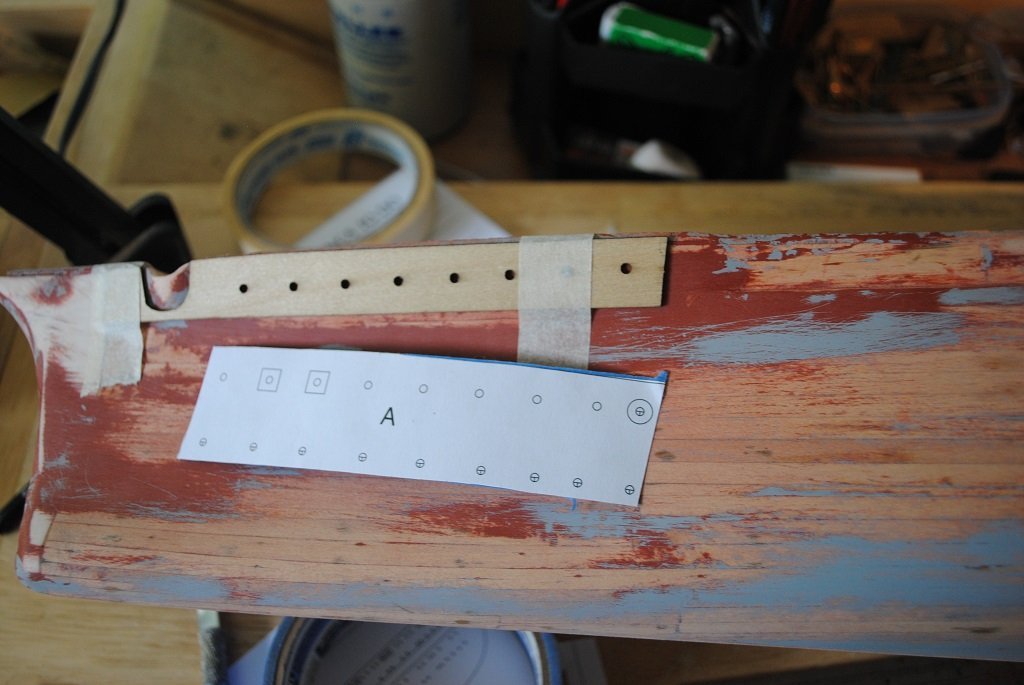
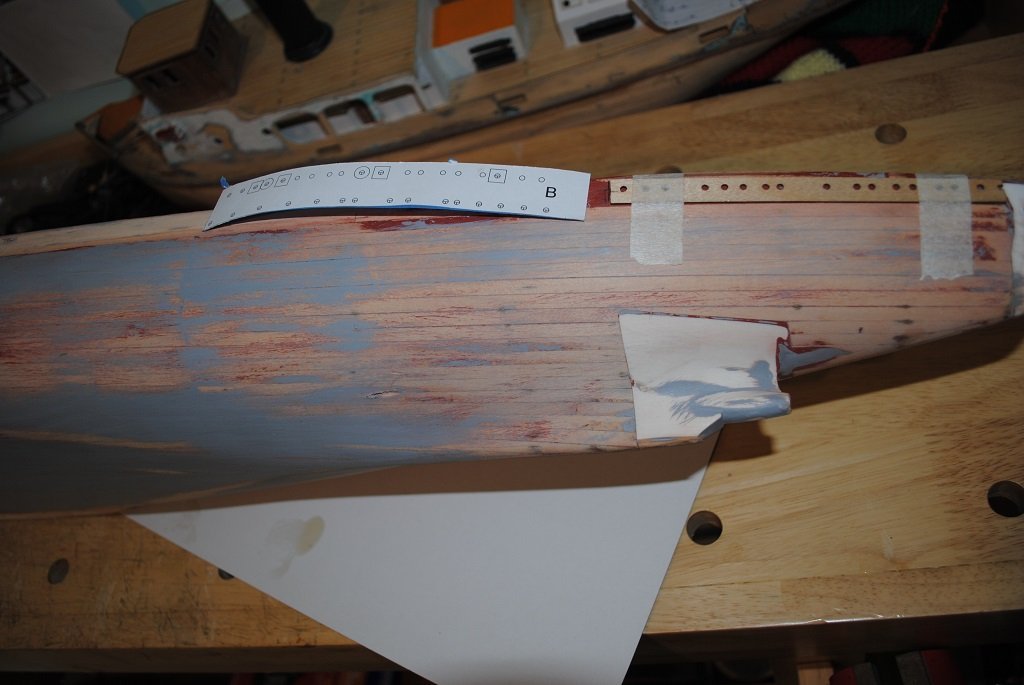
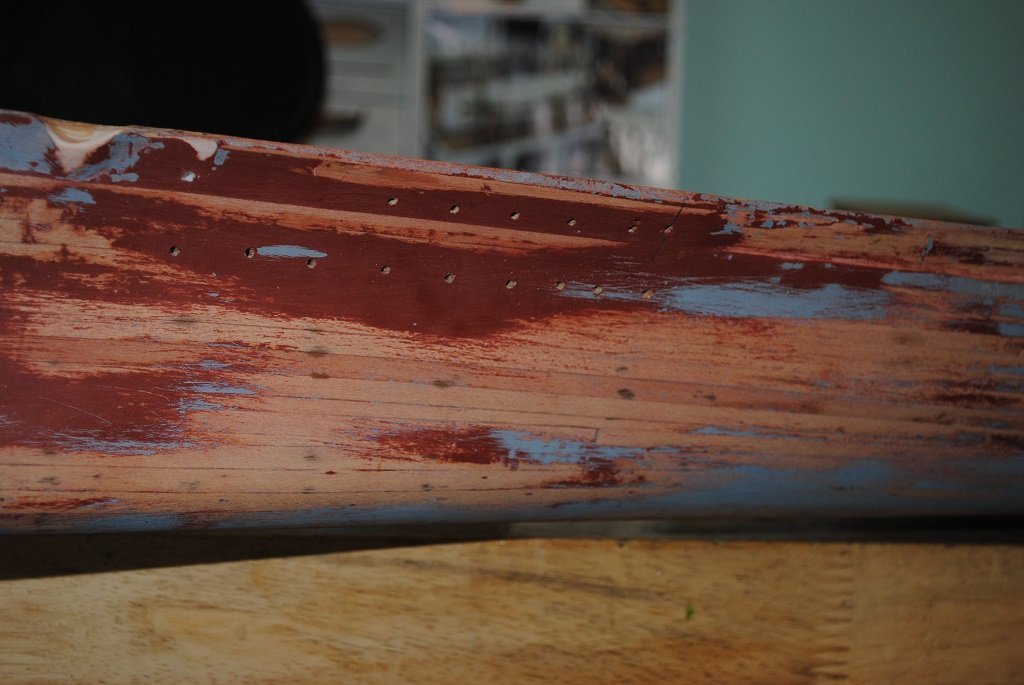
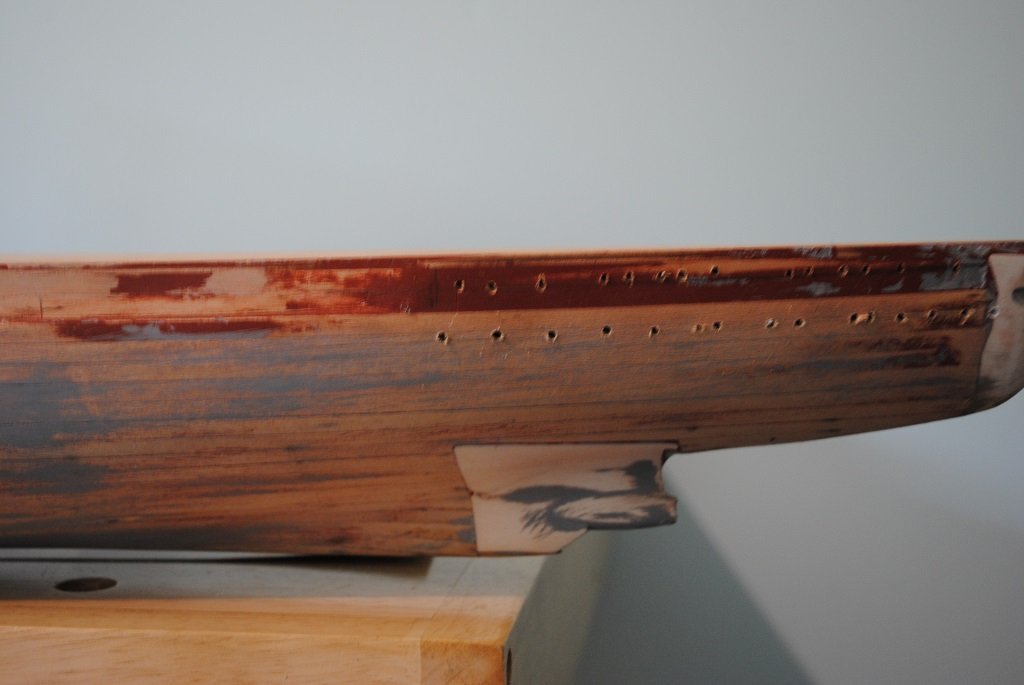
Update: I feel that I've been a busy Possum today.... 🙂 Got the Portholes drilled out, something that I wasn't looking forward to particularly. Anyway, the method: (Or the madness.... 🙂) Firstly tape the ply templates that should have been part of the Hull in place. (Why didn't I use these? Personal preference. The Bow/Stern sides where these should have been, was faired in with knifing compound..) You may ask why didn't I wait until the Hull was completely prepped/premiered. The reason is that I could reference the ply parts with the resin Bow/Stern Resin blocks and the edge of the base of the Deck. Cut out the Paper Templates and strengthen the back of these with Blue painters masking tape. Pin the templates to the ply pieces, (Holes), two pins, Remove the Ply and reposition the templates on the Hull utilizing the same holes in both template and Hull. Drill out the holes using the paper template as a guide with 1.0, 1.5 and 2.0mm drills (94 holes X 3) So, it worked out o.k. The completed port holes look a little scrappy but this will change after priming. (There are also "Rivet" thingies that occupy the holes.) I can now go over the Hull filling anything obvious, Spray with spray putty, (I love this stuff, it gives an "Eggshell" smooth finish.), and Prime.... 🙂. So, onward but no more today. I'll look at spraying the Deck pieces tomorrow with Vallejo clear. Cheers....HOF. Photos:
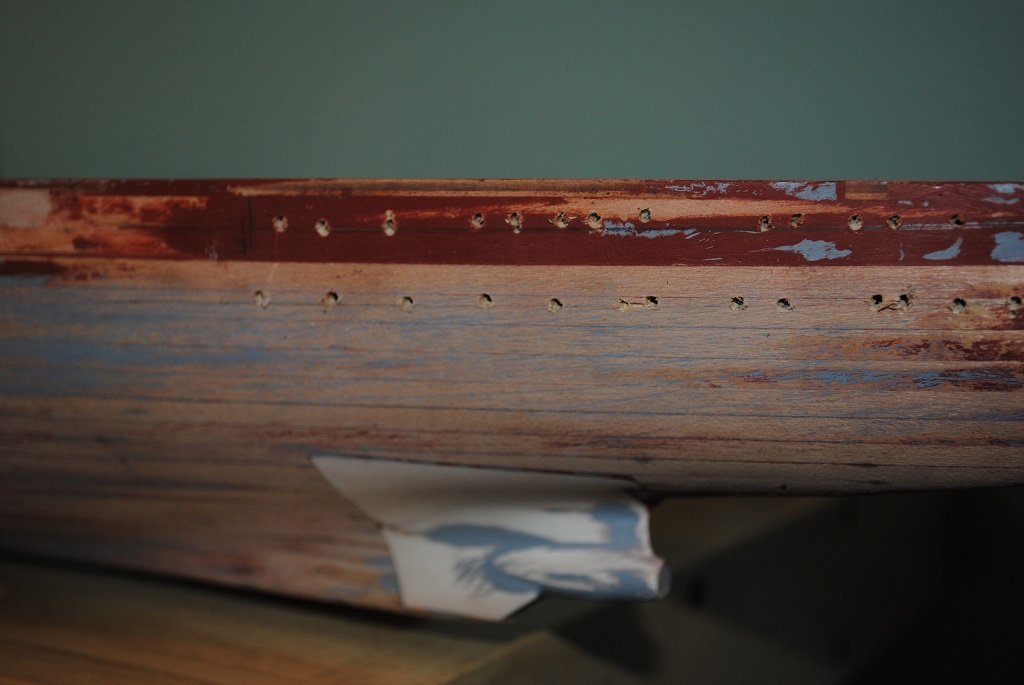
- 544 replies
-
- 11
-
-

-
O.k, so, things are progressing. ( am allowed some limited movement in the right arm.... Nice!! 🙂 Today I made around 50 "Grab Handles that will be affixed to Port and Starboard rear, mine ended up about 3.0mm each in length. Almost completed aft superstructure PE sides, only two thus far, quite a few more to complete before attaching these. I plan to Semi Gloss all decks tomorrow and drill all Hull Port Holes prior to spray putty/primer. Well, that's the plan anyway.... I'll get some photos up once I have something to show for my efforts, Cheers....HOF.
-
An awesome piece of modelling Sir!! Since this looks almost complete, I have to ask the question, "What's next?" 🙂 Cheers....HOF.
-
Hi All, I decided to do something positive on the Bismarck, well what I can do at the very least.... 🙂 I downloaded all 140 (+1) PDF's for the build and started to go through them, nothing of any huge significance, just quite a complex set of tasks, esp. in the last couple of PDF's, 140 - 1 and 140 - 2 (Here is the URL, if you are interested, click on "The Build" tab to access te PDF info.) Bismarck | 1:200 Model Ship Full Kit | ModelSpace (model-space.com) The thing that really stood out for me in the very last PDF was a small comment, easy to miss, that states, "Under no circumstances should the Printed Decks be brushed with varnish." This information may be well known to many but it was news to me!! I guess the "Definition" of the Decks could be severely damaged esp, if the varnish/polyurethane used contains thinners. (I was planning to use an Acrylic poly, "Crystal Clear.") I'll now plan to Airbrush Vallejo Semi gloss clear followed by "000" Steel Wool. Anyway, I thought I'd post this for the Amati Bismarck builders on this site, or, indeed anyone dealing with printed wooden decks. The reading/research continues.... 🙂 Cheers....HOF.
-
Ditto!! A very nice build. Cheers....HOF.
-
Hi Chap, The reference material that I have and that I have seen is a Black Swastika on a White circle surrounded by Red rectangle extending to the sides of the Deck. Don't know about removal of wooden Decking prior to Battle. Anyway, just my humble observation/opinion. 🙂 BTW: That Hull of yours looks great!! Cheers....HOF.
-
Thanks Chap, As mentioned somewhere at the beginning of this log, I had been casting around for something to get myself motivated... The other Bismarck builds on this site, gave me the impetus that I needed with restarting my own. It's essentially, an Amati offering sliced up to fit into 140 magazine issues. I started this around 2008 I think ,and, getting as far as the Hull mostly completed, I put it into storage. At NZD $17.00 for each issue, it made sense to get inspired once again...🙂 So, there you go, off with a "Hiss and a Roar" only to get the brakes slammed on.... Anyway, plenty of time to study/contemplate and plan the build going forward. Cheers and Regards, Harry.
-
Hi All, I guess that things "Under the knife" went as well as could be expected, unfortunately, I am forced to have some Bismarck "Down time," At least six weeks.... 😗 Nothing to be done I guess apart from a bit of study/research. I still get to "Lurk" around here and watch the other Bismarck and other builds, a bonus!! Thanks for likes and kind comments and I hope to be back soon with some "Constructive" stuff. 🙂 Cheers and Regards, HOF..(Harry)
-
One word that comes to mind, Awesome!!
- 454 replies
-
- 2
-
-
- Union Steamship Company
- Stepcraft 840
- (and 3 more)
-
Thanks Gentlemen, much appreciated!! I am, at the very least, hoping that I'll be able do something post operation. ( "Low-Impact" PE work comes to mind, there's plenty of it and I think I'm slowly getting used to it.... 🙂) Cheers....HOF.
-
Hi All, Small update: Stated placing the tiny PE components on the first two PE Superstructure sides. They turned out o.k. (I think....) (I really don't know how 1/700 scale builders do their PE, my hat is off to you gentlemen!! At least I can pick mine up with my fingers, for the most part anyway.) Rotator Cuff surgery tomorrow so am unsure if I'll have 1 or 1.5 operational arms at the end of proceedings. I guess we'll see.... 🙂 Anyway, it'll give me time to contemplate and plan my next tasks with the Bismarck. Cheers....HOF.
-
Hi Chap, That is some awesome miniature joinery!! 🙂 Cheers....HOF.
- 454 replies
-
- 1
-
-
- Union Steamship Company
- Stepcraft 840
- (and 3 more)
-
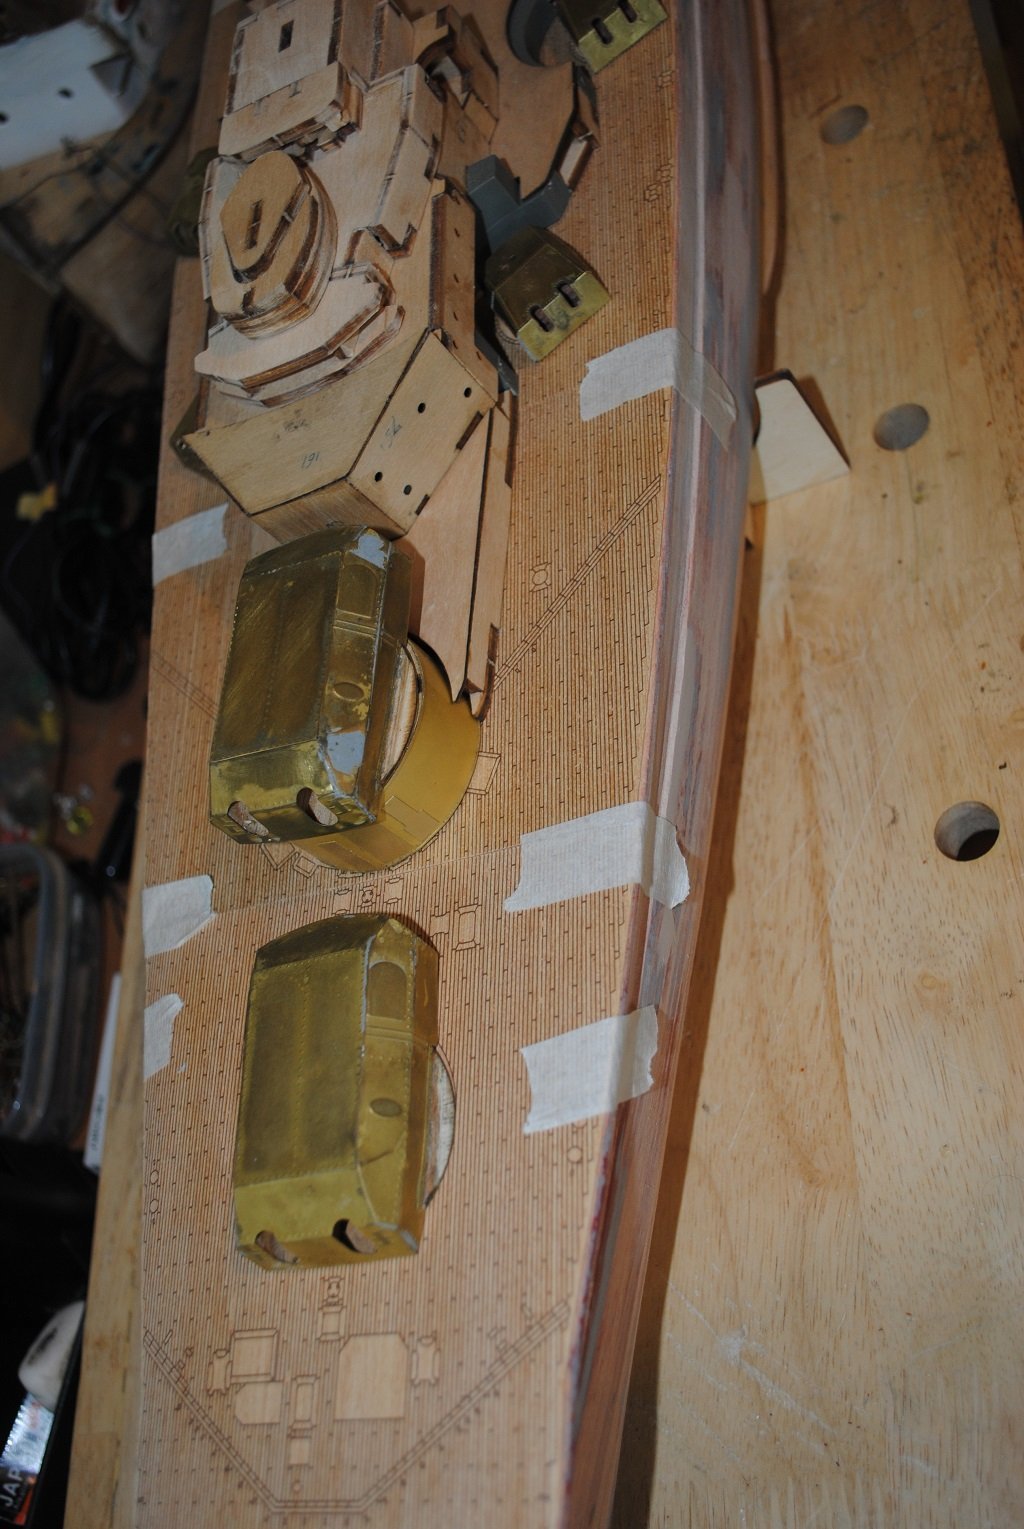
Small update: The final two 150 mm Turrets completed today, for some reason these were the most difficult to sheathe.... The PE Fret seemed really hard and it was super difficult to shape the Turret rears. (I was sorely tempted to anneal them. After an inordinate time of pushing, Etc, I got there.... 🙂) The Main and Secondary Turret construction got rid of another thirteen magazine issues. (A total of 61 issues done out of 140 but who's counting? 🙂) On the to-do list tomorrow will be to "Finish,") all Turret structures thus far and start looking at the Superstructure side PE Frets, (Lots of them.), and associated components.... (I think the latter will prove challenging to say the least. (For this Chap anyway....) The plan with these is to use acrylic PE adhesive, (Mig), to attach the tiny parts initially and a drop of CA to secure. (Any advice for a PE newbie appreciated.) Sound good? Cheers....HOF.
-
New Member from waaaaay South of the Border
hof00 replied to Smokeyr67's topic in New member Introductions
Hi Chap, Welcome to you from someone even further South!! 🙂 Cheers....HOF.