hof00
-
Posts
1,654 -
Joined
-
Last visited
Content Type
Profiles
Forums
Gallery
Events
Everything posted by hof00
-
 Thank Dave, Very much appreciated. Cheers....HOF.
 -
O.k. a problem, False Quarterdeck hangs over, (Proud), of all Quarterdeck Bulkheads by about 1.00 - 1.25 mm. Is this something that others have discovered? Everything is as straight and level as I can get it. All other Bulkheads, Fore and Poop stand proud of the Decks, a good thing. Also notice that the "Sheer" of the Pop Deck is much more pronounced than the others. Pack out the Quarterdeck Bulkheads? Cheers....HOF.
-
Hi Bob, Your Gallery and its windows look awesome chap!! Very nicely executed detail. Cheers....HOF.
-
Hi Marc, Those are just awesome!! Looking forward to see the results. Cheers....HOF.
- 525 replies
-
- 1
-

-
- cutty sark
- mantua
- (and 2 more)
-
Thank you Sir. Much appreciated!! Cheers....HOF.
-
Hi All, Thank you all so much with your guidance/advice thus far.... I have more questions, what length are the individual Deck Planks, (Not very clear from AOTS as the Drawings are quite smallish.... Supposedly 1/48 but thinking 1/100) If someone could advise what the "Real" Scale of AOTS Endeavor, in the publication, I would be most grateful. Any input appreciated. O.K. have started to cut some stuff, Mast Holes Drilled and a couple of Lower Decks planked. Hopefully tomorrow, I'll be attaching Decks to Bulkhesd, Etc. Cheers....HOF.
-
For a "Scratch" Build, something that I would be very maybe afraid of, your work is awesome chap!!
- 4,152 replies
-
- 5
-
-
- cutty sark
- tehnodidakta
- (and 1 more)
-
Thanks Steve, Much appreciated. Thanks for the advice on sourcing correct colours. Cheers....HOF. (Harry.)
-
Thanks Chap. I'll have to find a match, hopeless in NZ,,,, Bugger!! all "Choice." (Pardon the French....) I'll concentrate on the initial build for the mo. See how the "Bendy" thing goes first...,. Much appreciated, thank you.... Cheers,,,, HOF.
-
Nice one!! Thanks Chap. I guess once I have got the foundation, (False Keel, Bulkheads and Deck fitted, this weekend hopefully), I can really get stuck in. I have some spare Lime, so I intend to experiment a little with the Bending thing. Think I'm actually looking forward to it. Question for you, what colors have you used and what flavor? (Manufacturer) Any advice appreciated. Cheers....HOF.
-
Hi Paul, I am going to give the Amati thingy a go.... Are you talking about the Aluminium "Bulb" at the business end of a Soldering Iron or the "Squeeze" thing with a blade in it's Jaws? I'll be trying the former of the above. Have had success with this before and does nice tight curves but have to soak first of course. Am also thinking that tapering the Planking Strakes at Bow and stern prior to the bend "Heat" treatment at Bow and Stern I'll do on the Stationary Disc Sander. If the Plank bender doesn't work well with the "Heat" treatment, I'll be making the Jig.... Anyway, just planning and visualizing my potential next few steps. I have a whole weekend coming up so looking forward to being "Constructive!!" Your example is looking rather good!! Cheers....HOF.
-
Thanks Rowan, Not much happening last weekend, bit of a "Write Off" with Data Centre Maintenance to the fore, however, I did get the False Decks "Bisected" for locations of False Keel and Bulkheads ready for me to Drill and Nail. I get the feeling that it may be a lengthy build and it's my first "Bluff" bow that I will be attempting. Cheers and Regards....HOF. (Harry.)
-
Unsure if the memories are fantastic.... Good to see something started that was so close to me for so long. I'll get you that E-Mail address when I get in the office tomorrow. No Worries Sir!! Cheers....HOF.
-
Hi Mark, Brings back fond, (Or otherwise), memories. Things fit really well in this kit, yes? I am looking forward to your progress. BTW, I have an E-Mail address for a Chap at Mantua if you want the full PE Bulwarks, Etc. I think its probably still valid and I will send tomorrow if you wish. Did you get the Greenwich Society plans also? Cheers....HOF.
-
Thanks Boyd. I'll have another think. :-)
-
O.k so I'm being lazy, Can someone please let me know what the Anatomy Of The Ship Drawings are for the Endeavor in 1/60? (The AOTS drawings are 1/4" to the Foot, well the ones that I am interested in at this juncture.) Maybe point me in the direction of a Calculator? (Feel like a real dummy....) Cheers....HOF.
-
One thing that I discovered is that the Deck Planking seems to be "In Scale." Counted the Planking Midships from Anatomy of the ship, Measured the kit deck in the same location and divided by 6mm (Supplied Deck Material) I'm pretty happy with this!! (Maybe I'm getting fussy....) Having a think still regarding the Keel.
-
Thanks Chap, I already paid about NZD $30.00 A wonderful resource yes? Second Hand but all that's required!! Cheers and Regards....Harry.
-
Thanks Boyd, (And everyone else.) I think that this will be "Interesting" to say the least. I am thinking that my Plank bender is going to get some Overtime!! (Very "Bluff" Bow and some otherwise compound curves....) Your going to have this challenge soon Boyd. :- (At least one half of your Bounty. :-)) Let me experiment for you.Chap :-) Mr Lester, I have had a damn good look at your stuff, really good am hoping that I can replicate something to the quality of what you have accomplished. I think that the Endeavor "Club" is in good health. The Ship is as just as important, (In historical terms for you in the "West" Island :-) of New Zealand, as it is to me. Sorry, a bit of "Swish." I am looking forward to this, something totally different in terms of years, (Century), and the build itself. I am looking also forward to maybe "Picking your Brains." A question that I am trying to get some closure on, How about affixing the Keel proper to the False Keel, Cutting a Bearding Line before 1st layer of planking? Wot is your estimation? The choice was difficult, Mamoli Flying Cloud or something totally different. (Maybe a prep for the Victory?) I guess I chose different. :-) Cheers....HOF.
-
Thank you. Much appreciated, I hope it helps those contemplating or building. Thanks all for the wonderful and constructive comments/likes. I'll add to this as more comes to mind as I have really just "Skimmed" the build. As previously alluded to, happy for people to "Pick my brains" as I have had a couple of sleeps between September 2014 and now. I should also add a disclaimer that my methods worked for me through trial and error, they will not suit everyone as we all approach things in different ways. Cheers and Regards, Harry.
- 47 replies
-
- 1
-
-
- cutty sark
- sergal
- (and 2 more)
-
Thanks Boyd, The Avatar was my favorite Abyssinian, Sudamo, now sadly passed as few years ago but was also responsible in trashing my A/L Cutty Sark together with his Sister, Asmara. (I think a very appropriate Avatar.) Abby's are just so "Full on" and I don't think I would settle for any other type of cat. Phoenix and Shiwa are the two at present. Cheers....HOF.
- 47 replies
-
- 1
-
-
- cutty sark
- sergal
- (and 2 more)
-
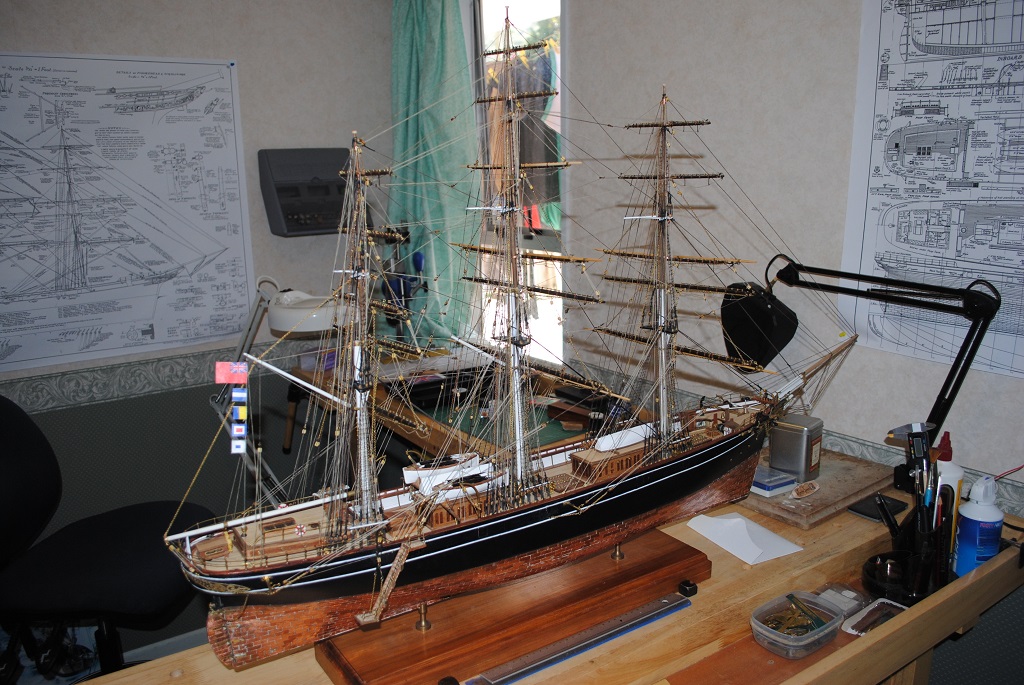
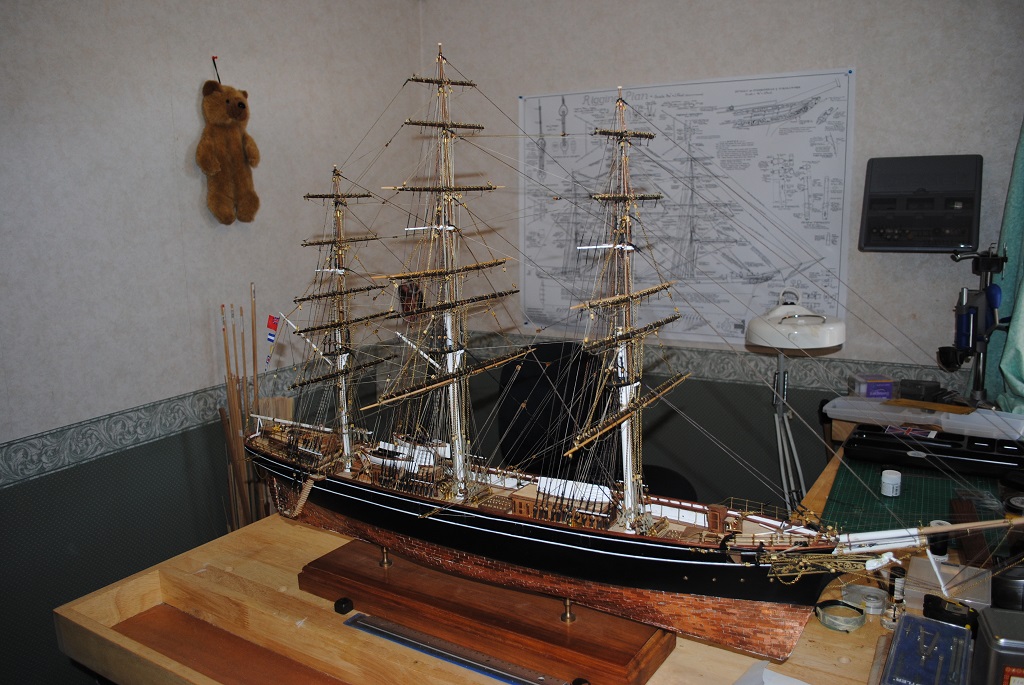
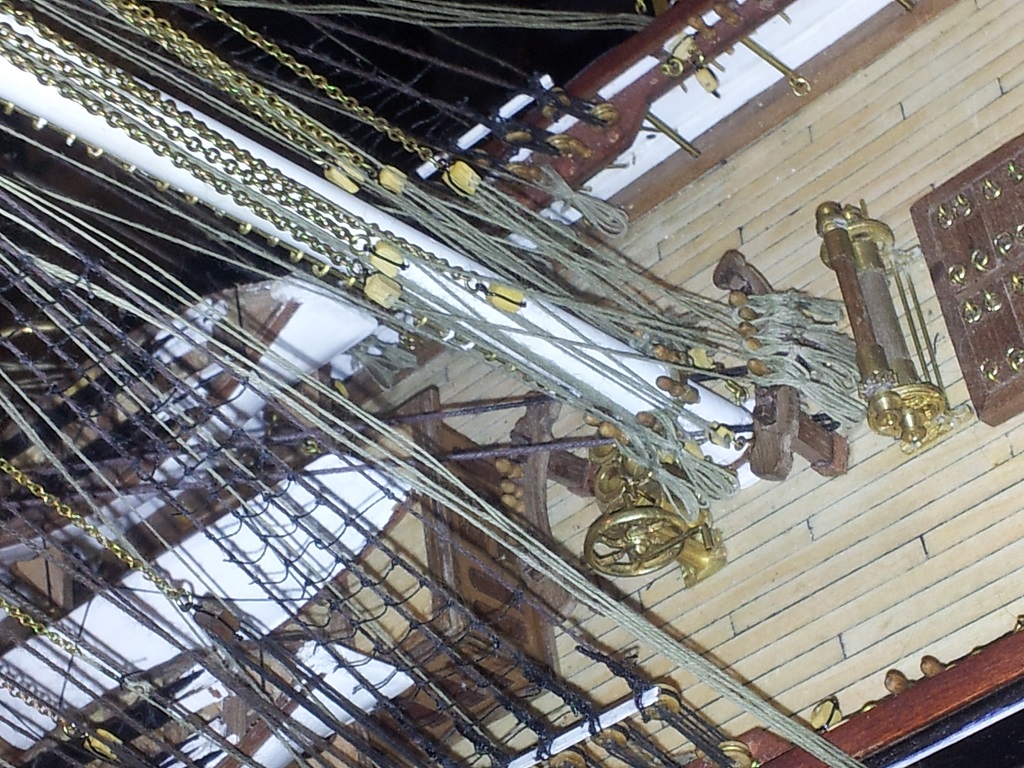
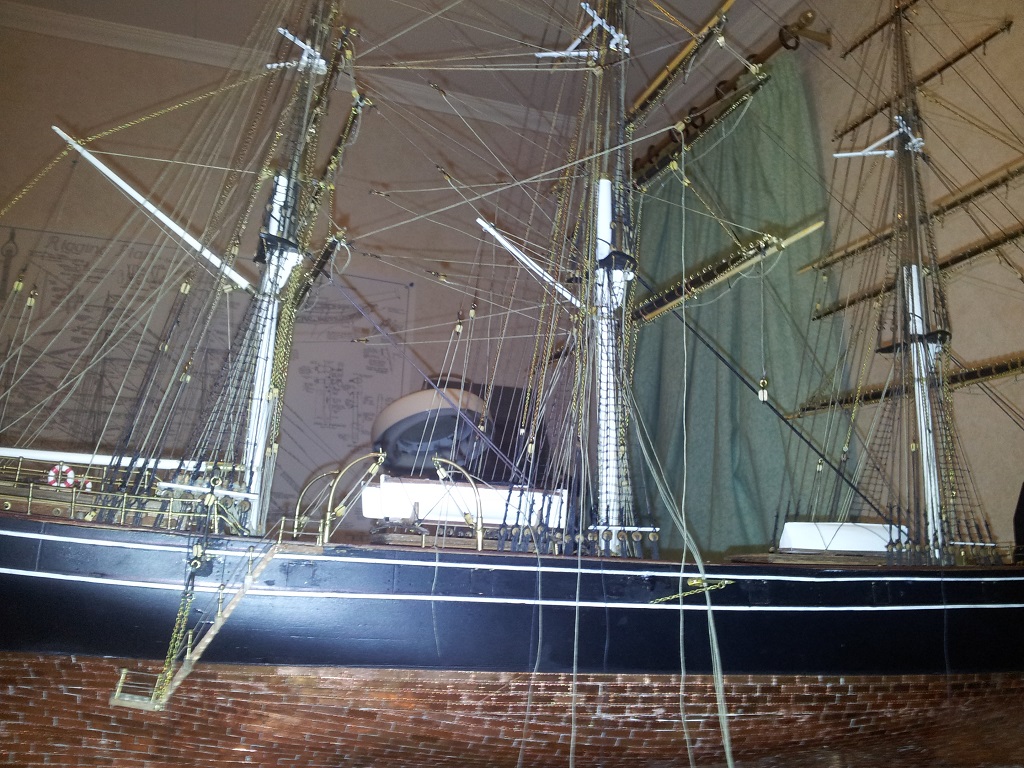
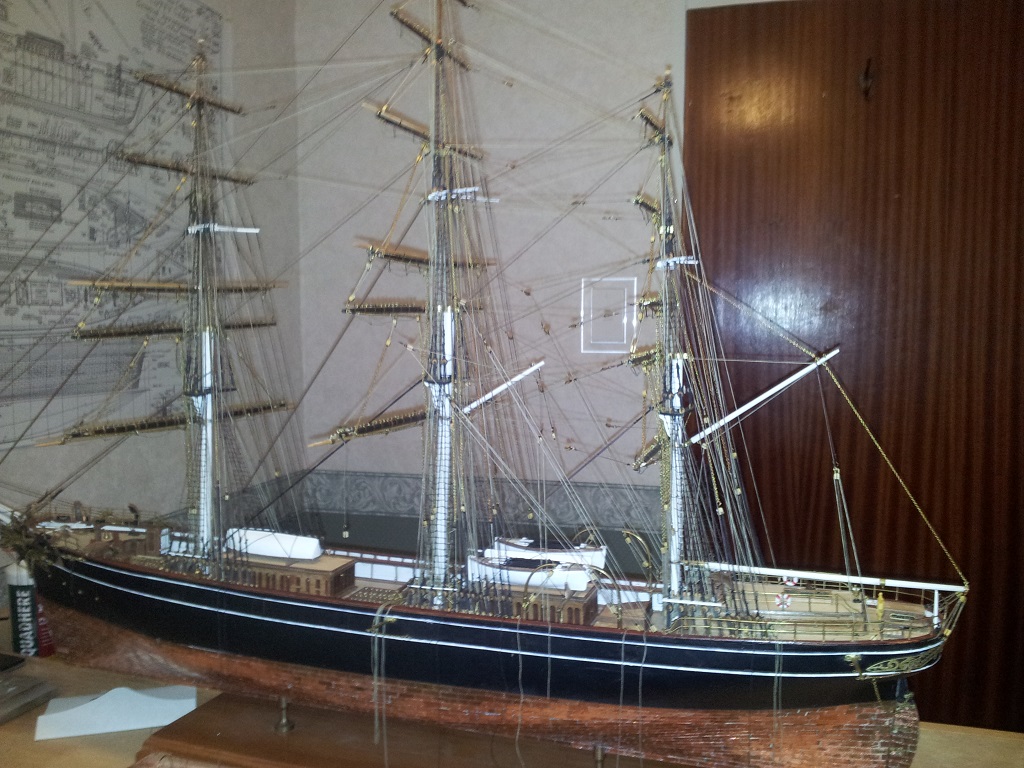
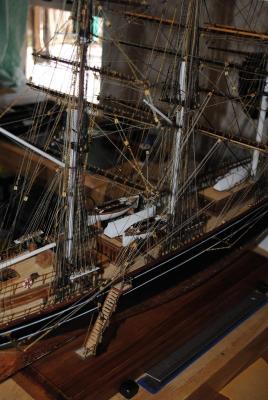
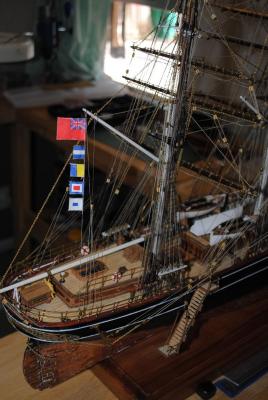
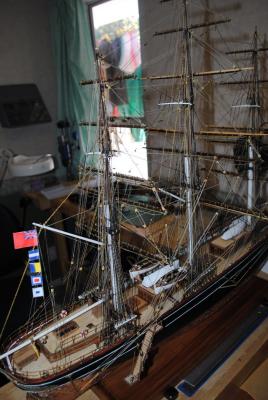
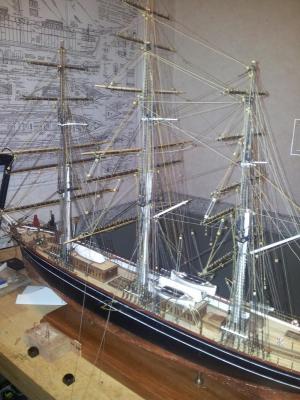
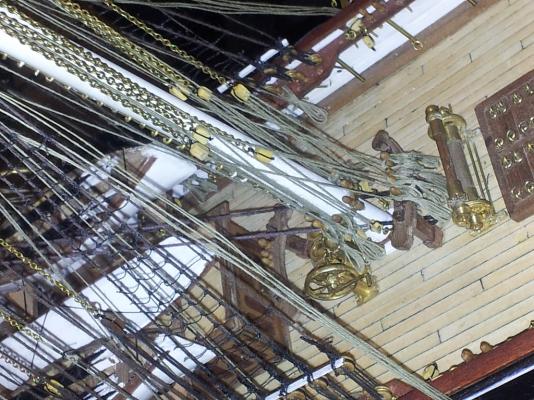
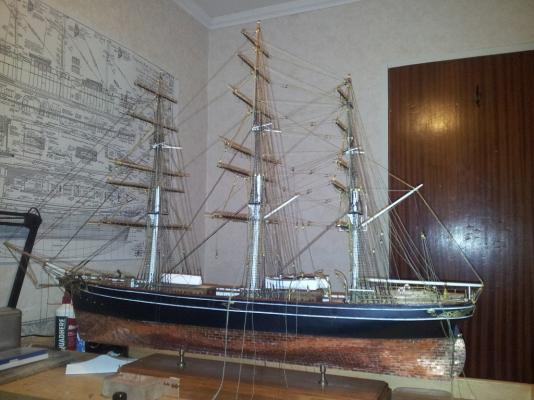
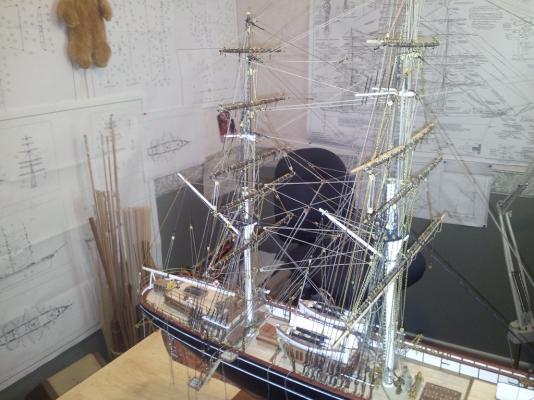
To Continue, after Pendants installed, time to think about Braces. This was initially very confusing to figure out the "Run." (I even used some Revell plans that I found on the Net to help me visualize!!) I figure work from Top to bottom, in a manner that would not "Paint me into a corner" so to speak. Another challenge were the Braces that were tied, (Siezed), to various Forestays, I made a thread loop and tied to the end of these Braces, fixed with CA. I could then fix the Brace somewhere accessible on the Stay in question by running the "Live" end of the Stay running through the thread loop, pull up the tension so that the Brace would slide up the Stay, one positioned, pull up the Stay nice and tight and secure with a little CA. I did try to directly knot the Braces to the stays but the knot formed looked like Dogs B...s!! This was the only real option available to me due to the lack of space and the height of the Model on the Bench. Braces were not "Belayed" at this stage, there was too much going on, (Very busy!!), and I wanted to ensure that the runs were correct, not interfering with each other or any other Rigging. Quite complex to describe and quite difficult to visualize. Once I was happy with things, I belayed all braces on the Ship. Last thing to do, Flags and Flag Hallyard. I used the Flags from the A/L kit and secured to the Flag Hallyard. Once done, Installed to tip of Gaff and tied to the Starboard Rail. I have had comment that it would be better not to have the Pendants below the Merchant Navy flag but I pointed out that the spell out "JKWS" (Jock Willis, the Ships owner.) All Done!! A couple of notes: All Blocks were Stropped with 24 Ga Black Plastic coated "Artistic" Wire, Local Bead Shop sourced. Ratlines, Black Sewing Thread. Stanchions: Billings 2 hole. Rigging Material A/L. Cross Tree Spreaders: A/L "Muntz" metal. (These were very much "In Scale." Just had to make the holes a little bigger.) All Standing Rigging Served. Fore and Aft Bumpkins made by my friendly Manufacturing Jewelers. (Logridge Spec.) SpiderBands, Fore/Main/Mizzen: Made again by my friendly Manufacturing Jewelers. (HOF Spec.) Chain Sheets/Gammoning/Halyards: A mixture of Billings and A/L (Sheets may have been a little oversize but who cares? :-)) Sheet Chain Run and Blocks: A/L but cast in Brass. (again by my friendly Manufacturing Jewelers.) Railings: Hard Brass wire. (Bent and adjusted with love. :-)) Deck house sides/Scroll work: Double O Laser (US) (As alluded to by Keelhauled,(Marc), seems to have disappeared off the radar,) I can't think of allot more at this stage but am more than happy to advise interested Parties of my methods/solutions. Just drop me a line. It's been interesting to think about what went into it and good to share. I'll end with a couple of photos....


- 47 replies
-
- 4
-
-
- cutty sark
- sergal
- (and 2 more)
-
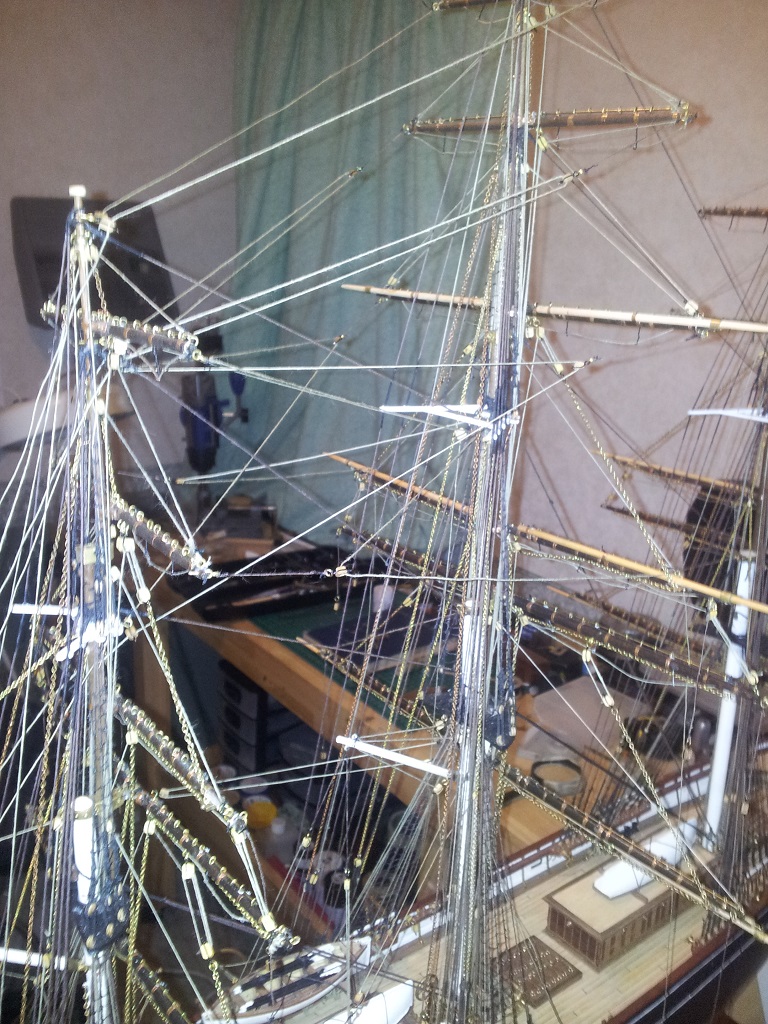
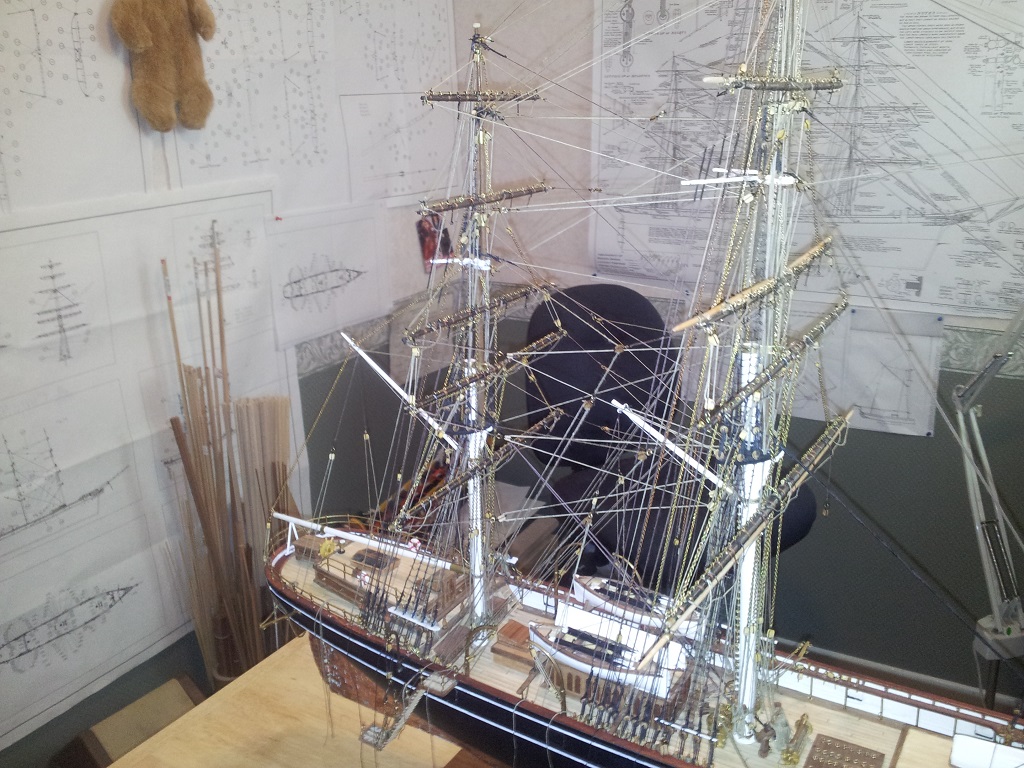
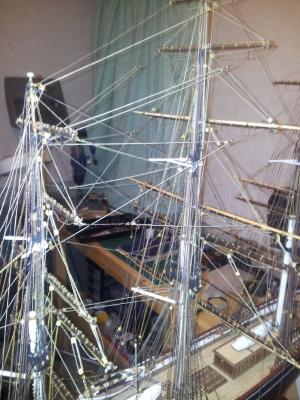
Thanks Marc!! I like to get on the Bigger Woodworking Tools occasionally. O.k, to continue, Time to tie Mainmast, (Fore/Main/Mizzen) Ratlines. this was a little difficult as all Back stays had been rigged, so it was a case of being extremely careful, trying not to break things!! Got really difficult at the Futtock level and above. Probably would have been better to tie these earlier but it was what I chose to do. Next came pendants.... I used the A/L plans to determine the lengths of these. Looked about right at the end of the day. I used the smallest Single Blocks from the Sergal Kit and tied to extremity of the Yards to a 2mm Brass ring held into the yard by the smallest ring Bolt that I could find. (2mm Rings feature all over this model as it gives a rotational quality to the Rigging attached,) Tied Single and Double blocks on to various Shrouds/Stays as shown in the Grenwich Plan. (Just to point out an error in these Plans, the only one I found, is the Block tied to the Main Mast Shroud, close to the Sheer Pole, this is described as Single but is actually Double!! Try removing what is already attached and swapping for a Double at this stage, almost impossible.... So really important to have all these blocks fitted before the Braces are Rigged. (I did have some real "Fun" in a couple of other Blocks that I missed....)


- 47 replies
-
- 4
-
-
- cutty sark
- sergal
- (and 2 more)
-
Thank you all for your replies!! Hi have a couple of A/L ships already complete, Bluenose II and Mare Nostrum and the Keel ha always been fitted after the 1st planking. I guess I'm looking for an alternative method? I have read somewhere that the Keel is fitted prior to the 1st planking, maybe with a Bearding Line cut at the join of the two Keels. The False Keel is nice and straight!! :-) I bought the "Anatomy of the Ship - Endeavor" a few months ago off Abe Books. The Bulkheads needed a little "judicious" work with a Flat File to get a nice fit on the False Keel. A little disappointing that the holes for the Mast locations were not pre-cut, never mind.... I took the measurements off the plan with some calipers and transferred to the Ply Decks. Just need to also mark positions of the Bulkheads on to the decks. So, at Present, I have not gone "Wild" with the glue, just dry-fitted at this stage. (Measure twice, cut/glue once. :-)) If I am to fit the Keel first before planking and cut a rebate. it will need to be done before the Bulkheads/Decks are fitted. (Hence the question.) Cheers and Regards, Harry.
-
HMB Endeavour by mikec - Eaglemoss
hof00 replied to mikec's topic in - Kit build logs for subjects built from 1751 - 1800
Another question, (Don't want to be a pain), how did you accomplish the "Weathering" on the Decks? Looks awesome.... Cheers....HOF.