hof00
-
Posts
1,654 -
Joined
-
Last visited
Content Type
Profiles
Forums
Gallery
Events
Everything posted by hof00
-
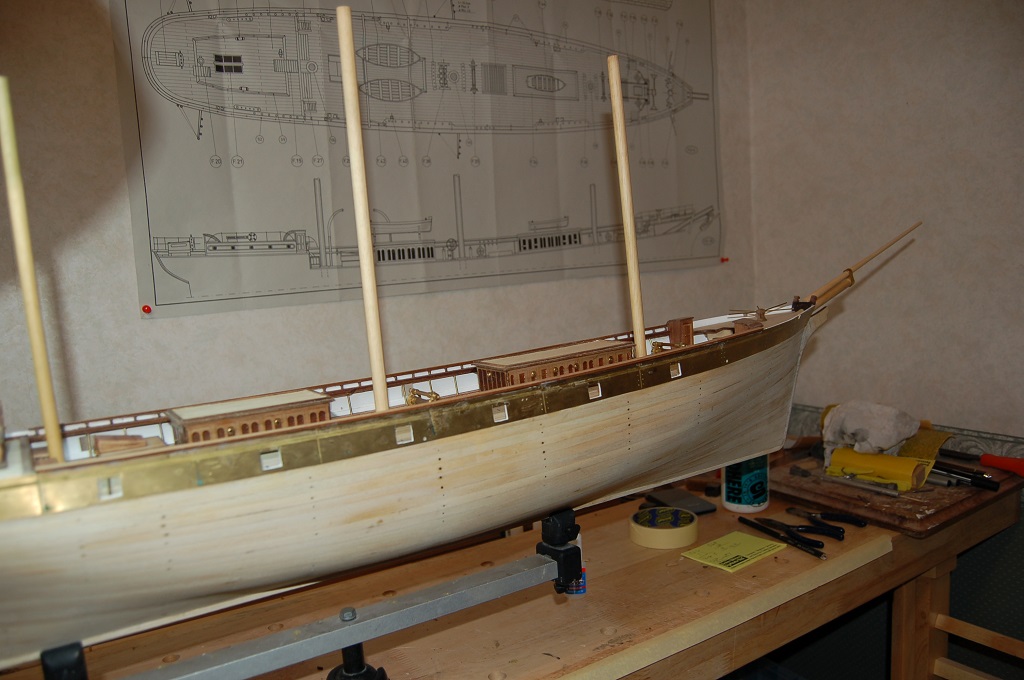
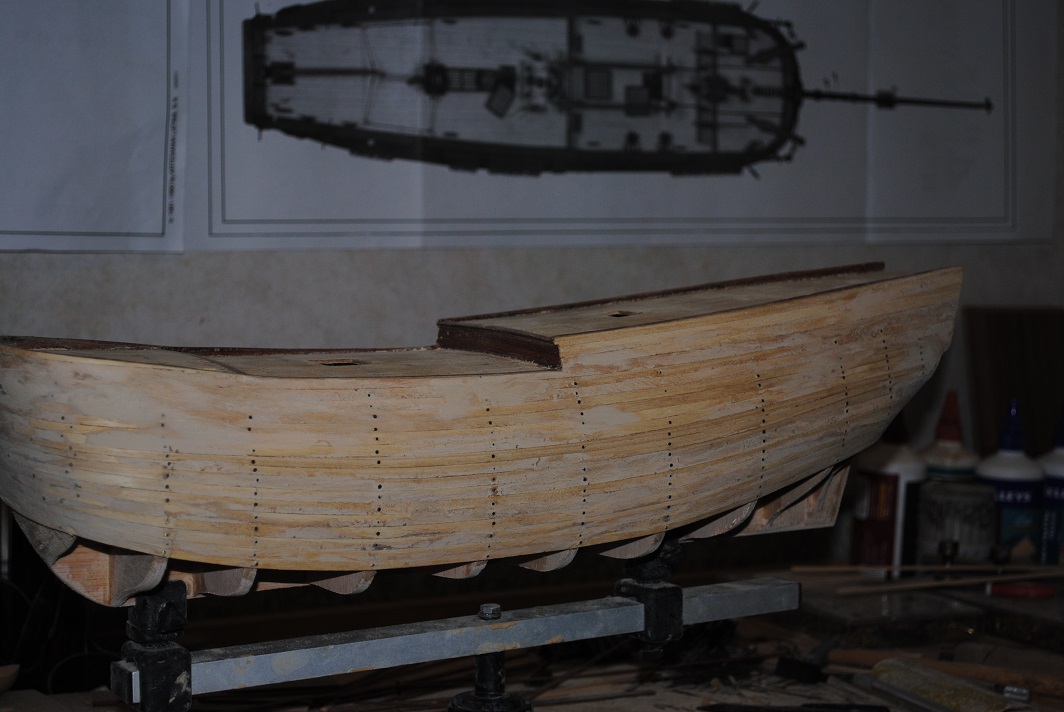
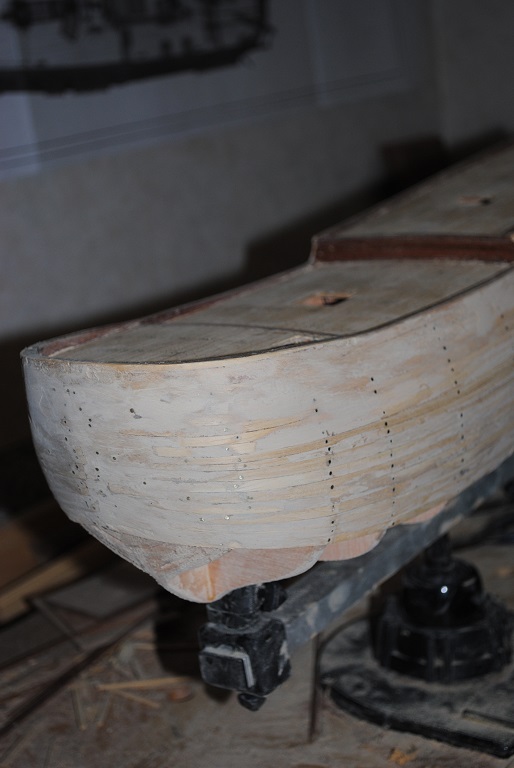
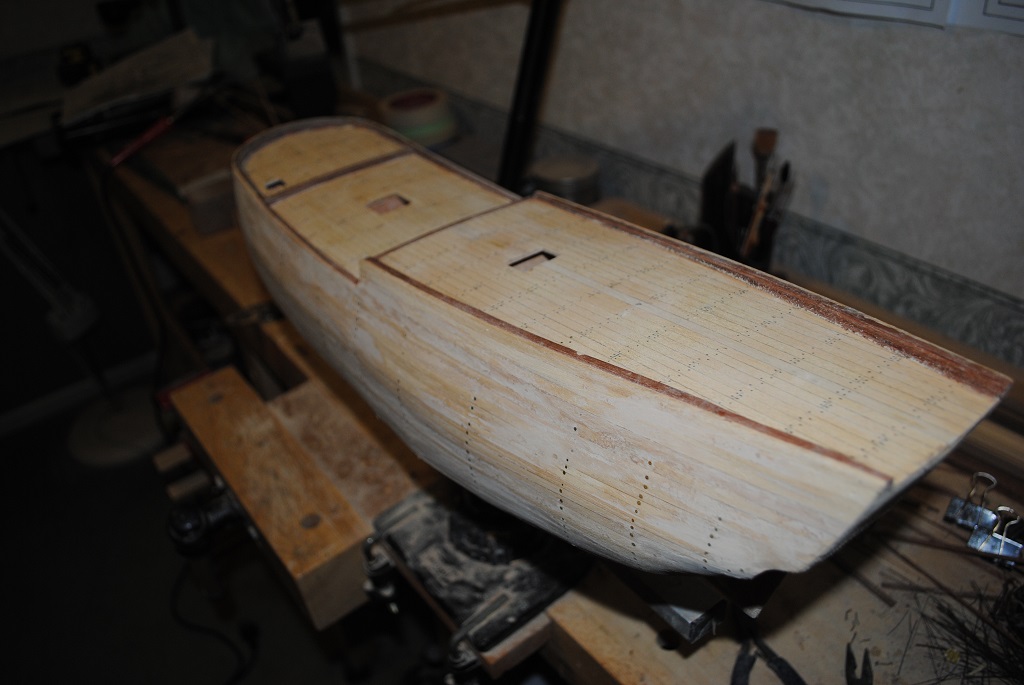
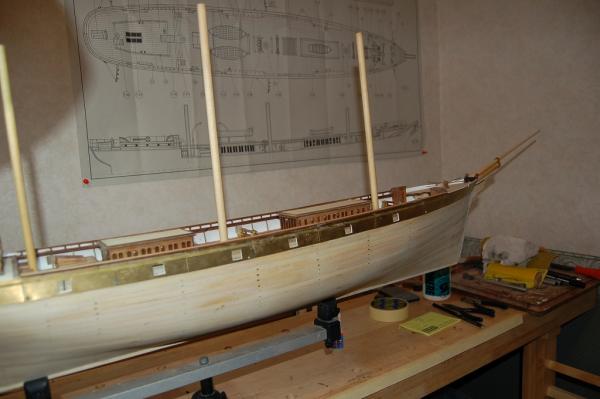
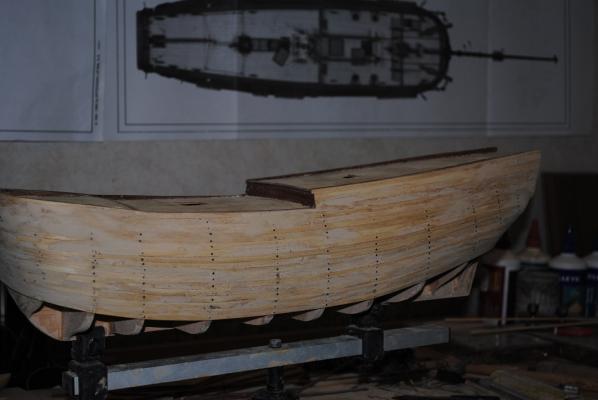
 O.K. First planking almost complete. Not at all happy with the Bow below the "Bilges planking effort, wished I'd included a couple of Balsa Filler Blocks, never mind, it is what it is and I have applied a fist coat of filler over the offending piece. More to follow after the first lot is sanded and dried. To give an idea, about 2.5mm - 3.0mm of thickness of filler is required between the Bow and 1st Bulkhead aft. I'm sure it will come out in the wash. Cheers....HOF.
 -
Thanks Michael, Getting into the "Groove" with the Endeavour. There will be light at the end of the Tunnel soon enough. Cheers....HOF.
-
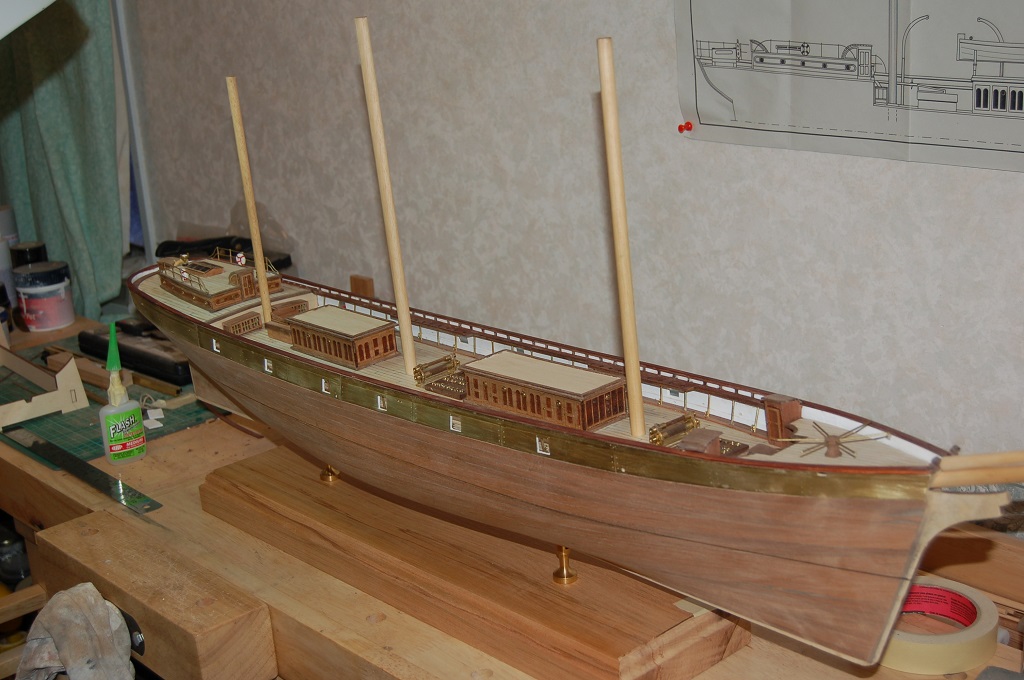
Cheers Ears!! Aliphatic Resin is sandable Waterproof PVA. (Exterior PVA?) (Not a "Ship" person either, hate the sea but a compulsion to learn about the components.) My dad was supposedly a French Sailor who jumped Ship in Invercargill, knocked up my Birth Mother who adopted me out. (Too much info?) I guess that I have something in the blood. No meltdown chap, not worth it!! I wish you well also with your second Planking!! I reckon that I have about another 8 - 10 planks for the first cover inc. Garboard Strake, (One at the Centre of he Keel. ) Looks a bit "Bumpy" but once filler applied and sanded it will look much better and a good grounding for the second round. BTW, I like how you have already cut a rebate in your planking to accept Channels. Good Planning!! I'll be doing this at some stage, miniature router bit on the Dremel. Enjoy....HOF.
-
Hi Chris, Posted reply in my Endeavour stuff in case you didn't see it.... (Unsure how to copy....) Cheers....HOF.
-
No worries Chap!! How's the Cutty coming along? Did you find the Bulkhead stuff? Cheers....HOF.
-
Hi Chap, Look for "Red Devil" it is an Australian product. "Bog" I think would make things a little difficult to affix the second layer of planking and I am unsure if Aliphatic resin would adhere. How about fixing the Keel, Etc? Have you considered using Bamboo Toothpicks after drilling the appropriate holes? (Just a thought.) I have got a few more planks on today, For the planking below the Bilges, I am using full width Planks where I can, speeds up the job a bit and so far, the Wood is complying with my wishes!! I am applying the planking "Wet," (Damp), works for me although some say that the planking will shrink, no issues thus far and it works for me. Should be complete fist Planking tomorrow or Friday. Yup, saw your planking in shorter lengths, if it does the job, all good and your build is certainly coming along very nicely!! This is my first "Bluff" bow, am more used to "Pointy" Bow Ships. I'll see how this goes and think about another Clipper. (I have Mamoli Flying Cloud waiting for my attentions.) How's the Ship "Terminology" coming along? Cheers....HOF.
-
Hi Chris, Yup, the first layer is a bit of a pain.... I have, at present, more planks soaking in the Bath. (Lime) I'll be using a bit of "Red Devil" pine coloured filler to smooth out the contours of the Hull before attempting the second planking which is described as African Walnut, 0.5mm to answer your question. I really like the Red Devil as it dries fast and sands beautifully and Aliphatic resin bonds well over the top of this stuff. Cheers....HOF.
-
Nice!! Same problem with the "Post" at this end also. Did you get the "Native" timber on the Hull or did you use the kit stuff? (Not clear rom your posts and my interest only.) Be gentle on your Keel Chap!! Cheers....HOF.
-
Sorry Chap, One further question, are you going to paint? (Was thinking of leaving mine "Au Natural." Cheers....HOF.
-
Hi Chap, Looking good. I personally don't have a problem with "Back to front" as long as the result is what is pleasing to the eye. At the end of the day,, (My thoughts), it's an art form, a release from the daily "Hum-Drum" of life. Personally, Still stuffing around on the first planking.... Enjoy.... Cheers and Regards, Harry.
-
Hi Chap, How are you getting on? Your build is looking really good!! Cheers....HOF.
-
Hi Peter, Looking forward to your build. I did have this kit but gave away to a good friend who wanted to attempt this with his son as I had already completed the Sergal version. Still have the "New" A/L version tucked away but who knows when I'll get to that.... Cheers....HOF.
-
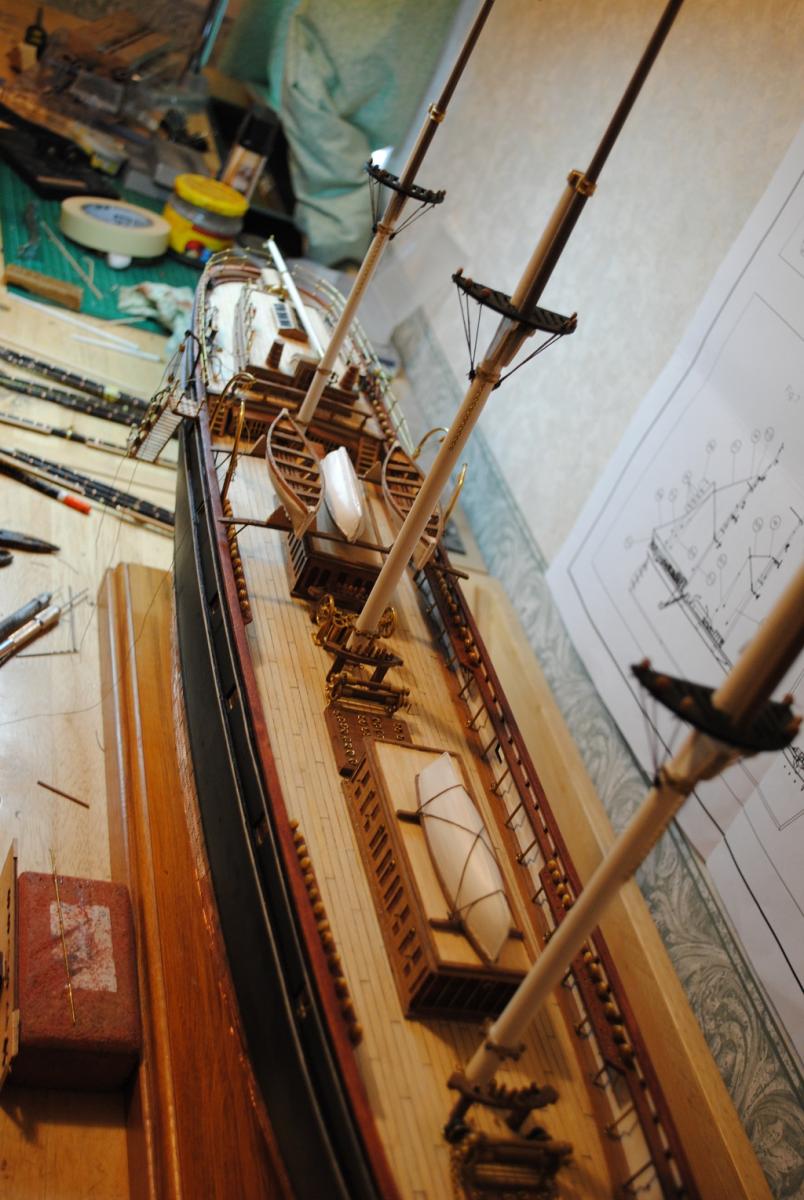
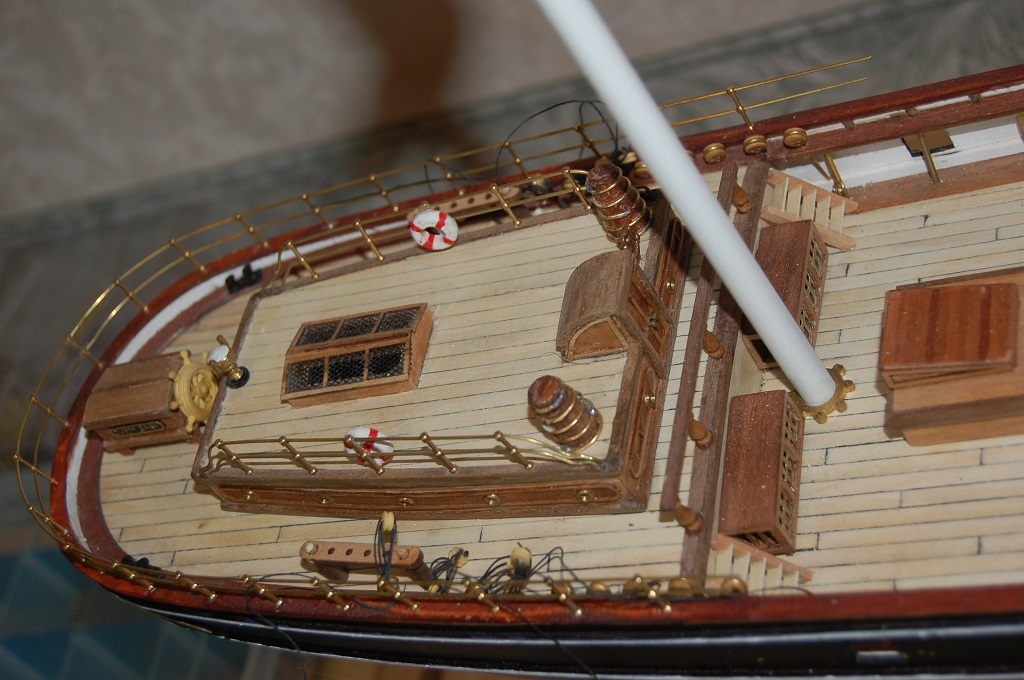
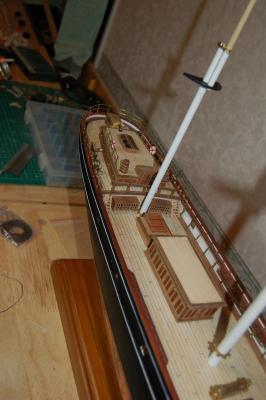
Hi Mark, O.K. a few pictures, seems like a lifetime ago.... Photos are in no particular order, sorry. Included, Brass bulwarks, Spider Band, Stanchion detail, and I do not have any photos of the Mast Caps, before anmd after, only in place on the Fore, Main and Mizzen. The aft hole of these needs modification only, the Fore and Main Mast diameter is 10mm and the Mizzen is 8mm from memory. All the rest, Top Masts and Top Gallant are fine as these are tapered. Bowsprit/Jib Boom Cap is good to go also. The Deckhouses are only placed on in the early photos until all bulwark fittings were complete, otherwise I'd be painting myself into a corner, so to speak. Hope this helps. Cheers....HOF.


- 71 replies
-
- 9
-

-
- cutty sark
- mantua
- (and 2 more)
-
Hi Peter, Nice to see yet another "Cutty Nut." Looking forward to your progress. Cheers....HOF.
-
Hi Boyd, A truly Awesome job there Chap!! Like the use of Teak Oil. Reckon I'll be using the 2B pencil in the future. Cheers....HOF.
-
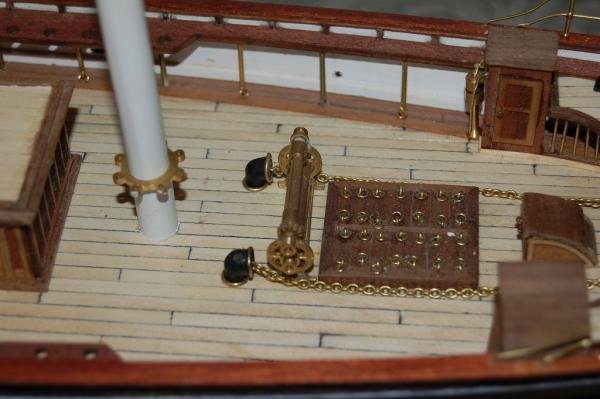
Hi Mark, I found that Billings do a good two hole stanchion. The "Flat" offerings that the kit provides are a waste of space. I also did not think that the Bulwark Stanchions were much chop either.... I replaced these with Brass Rod with a 2mm ring soldered on to each, don't recall how many, but a fair few were required. These also gave quite a bit of extra strength to the Channels. I also found that the all 3 Main Mast caps required modification, the plans indicate that these are tapered. If you refer to Longridge, they are not. I deferred to a friendly Manufacturing Jeweller to modify these and also to create some Spider Bands, not included in my kit. If you go down this road, the Main Tops will require a little modification also to accommodate the Main Mast diameter. Enjoy!! (I certainly did) Cheers....HOF.
-
Hi Chap, Not as far progressed as yourself.... (A bit slack....) Once you are happy with filling/sanding the 1st planking, A/L adv. to fit the Stem/Stern Post Keel. This seems to be standard practice with A/L. (Have done a couple of these, Bluenose/Mare Nostrum) For the fittings/Hatches and all other stuff, wait until your second planking is completed. My advice only....
-
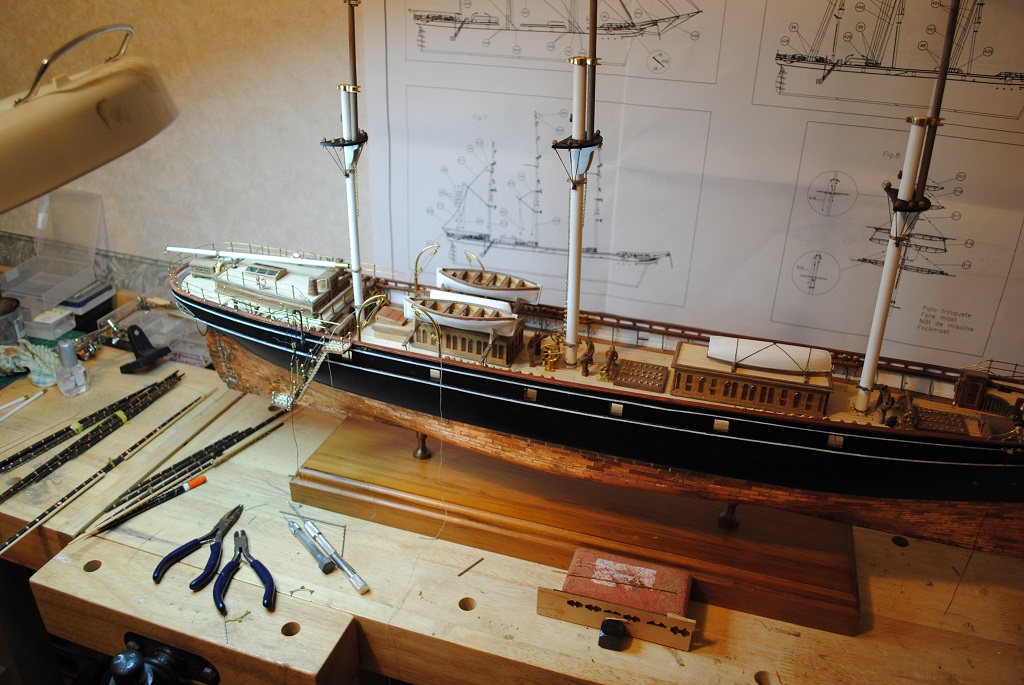
Hi Chap, Really good progress thus far. How did you find the fit? Bulkheads, Etc Good? I really liked the first planking also, really easy to work with. (Hard Balsa perhaps?) Anyway, regarding the second planking, ensure that your Brass Bulwarks are fitted first as your second planking butts up nicely against this. (The Brass etchings also give a nice line/grounding for Rubbing Strakes.) I also ensured that all cut-outs were done prior to this, (As you probably are well aware), as once fitted, the Freeing Ports are a breeze to cut in you initial Bulwark planking. Regarding the second planking, I steamed this stuff on after applying a reasonable amount of Aliphatic Resin. Worked for me anyway. Also, watch out for the only error that I found out the Hard Way.... There is a Block seized to the Main Mast After most Shroud, just below the Gaff. Plans describe this as Single but it is most definitely Double!! (Used for Mizzen Braces.) (I am assuming that the "Campbell" plans you describe are the same as I procured from Greenwich, Cutty Sark Society.) I got mine enlarged as I sometimes feel like I'm an old Fella. Pin Rails/Channels: I filled all but the first five holes (Shroud Holes), as there are quite a few Backstays not catered for, I made a jig to drill for these extras. They are also "Inboard" and present an interesting challenge? Have fun and always pleased to offer advice if requested/required. Cheers....HOF.
-
Hi Mark, Looking good!! Certainly brings back memories. I'll be following you build with interest if that's o.k. Cheers....HOF.
-
Looking good!! I find the A/L version has a little more "Guesstimation" in the height of the top of the Keel above the Deck. I guess if the parts of the Keel fit nicely, all will be o.k. (It is what it is and I can always adjust if necessary.) Cheers....HOF.
-
Thanks Dashcat, Thinking of doing this also before the Keel is fitted. No work on mine for a couple of weeks, Christmas and all that stuff. Got a few days before I head back to work so am looking towards some progress tomorrow. If I am lucky, (And have the patience), I am hoping to complete the first layer of planking in 2 - 3 days. Cheers....HOF.
-
Thanks Paul, My first "Bluff" bow.... My other ship models have all had "Pointy" bows. Not too difficult. Cheers....HOF.
-
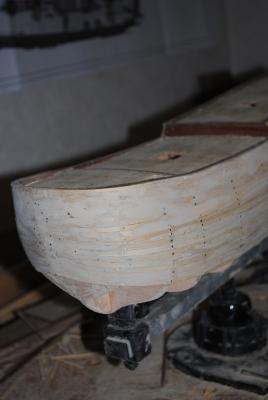
I don't know how they ever made "Headway" with a Bow Like that!! Anyway, 1st Planking, Taper, Soak and Steam.... Seems to work o.k. No problems thus far. Bit of "Red Devil" Bog and sanding but a good foundation for the 0.5mm Walnut.
-
Progress Stuff....


-
Hi again Chap, From what I recall, you are doing a Single POB? Kauri? Don't worry too much about the accessories until you Hull is fully planked, (Filled, if necessary, mine is.), then worry about "Embellishment Stuff." I have the same sort of Hatches, Etc, in my kit. Would I use them? Most probably. Chain Whales, (Channels), Hatch positioning, Etc, Don't worry, these will come later. Finish your Hull first, all that comes after will "Flow." if you get my drift. Most important, take your time!! (These things, (Model Ships), take ages!! (Or can do.) Cheers....HOF.