hof00
-
Posts
1,654 -
Joined
-
Last visited
Content Type
Profiles
Forums
Gallery
Events
Everything posted by hof00
-
 Is your False Deck attached to the Bulkheads? Can't tell from your Photo but would be a good idea to do this before Deck Planking due to camber, etc.
- 134 replies
-
- 1
-

-
- artesania latina
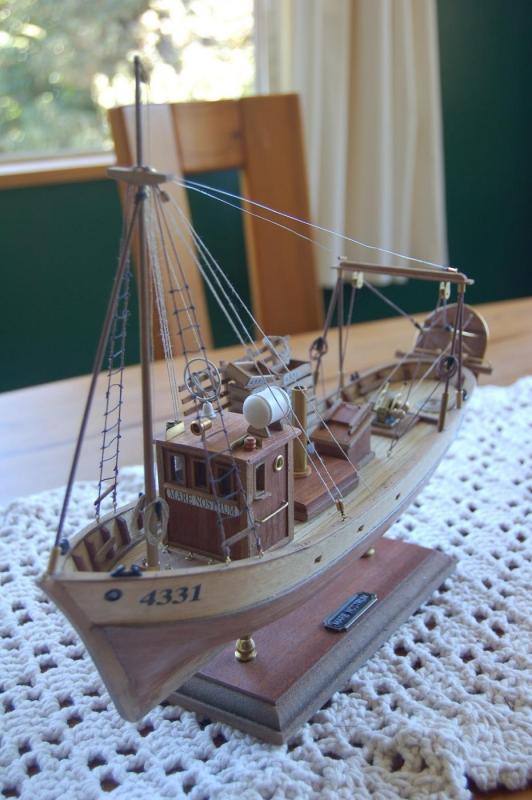
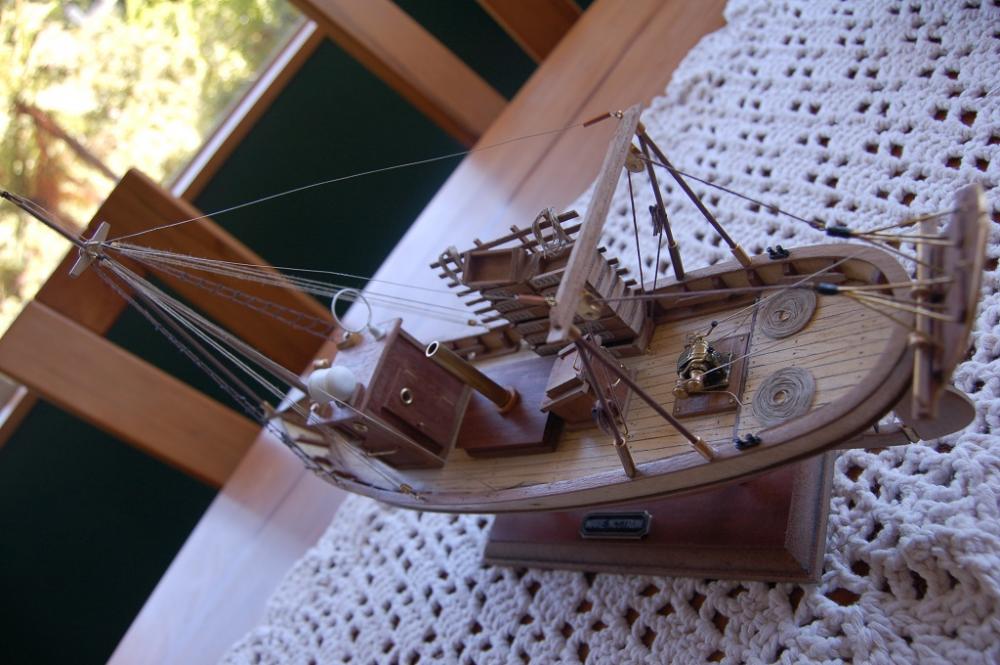
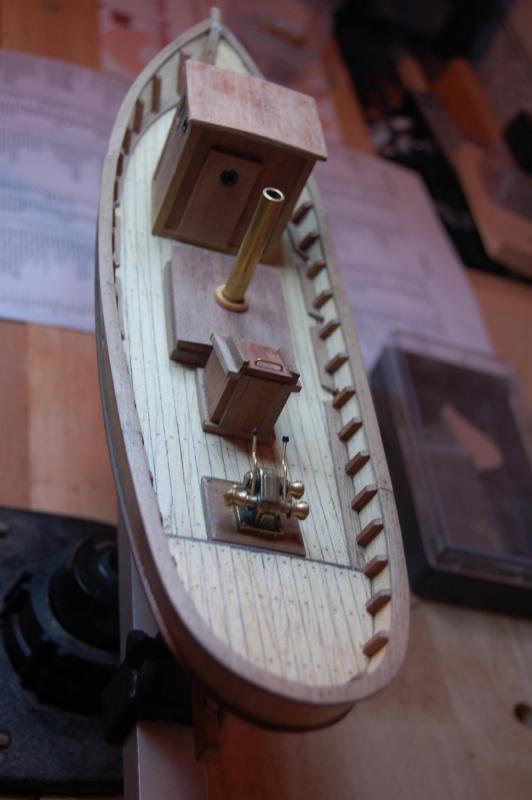
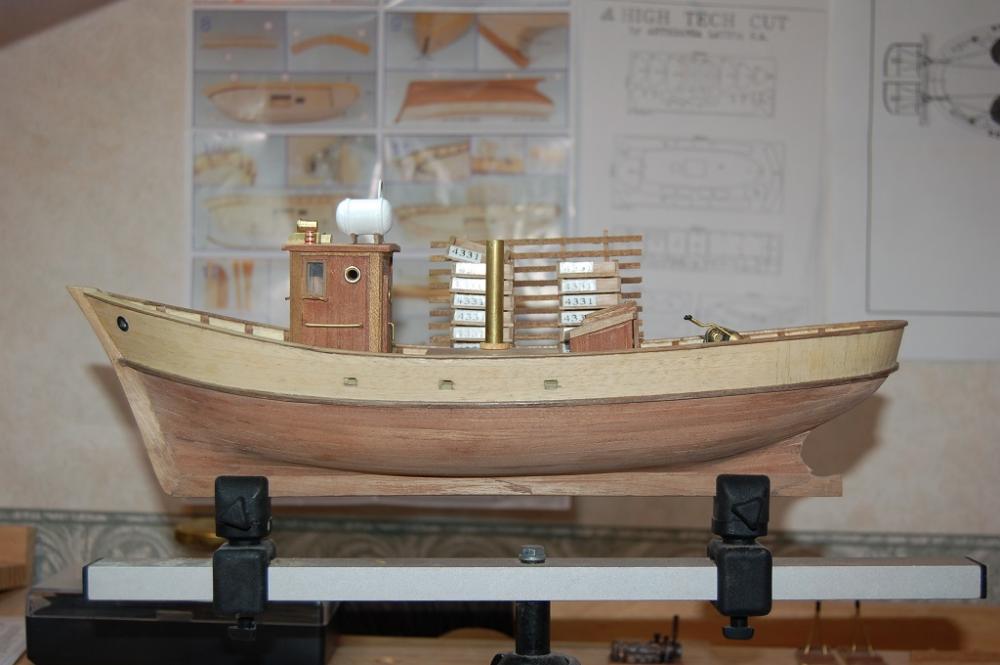
- mare nostrum
- (and 1 more)
-
Hi Chap, The idea is to run a Plank the full length of the Deck, (King Plank), this should be dead centre. The rest of the planks are laid against this with a dark pencil marking Both edges of every subsequent plank, including the "Butt" ends. (I used to use a "Sharpie" but have tried a pencil with my latest build, I'm converted!!) Deck Planks are laid very close to each other, the King Plank, Once dry), will keep everything in line. Yup, go ahead and cover the openings in the false deck but mark with a pencil where the openings are. It also doesn't matter if the Planks overhang the False Deck as this gets trimmed/sanded flush after Decking is completed as do the openings in the Deck. I also use an Aliphatic Resin, sandable White Glue and apply sparingly as the Decking is only 0.5mm thick, very easy to "Cut-Through!!" Cheers....HOF.
- 134 replies
-
- 1
-
-
- artesania latina
- mare nostrum
- (and 1 more)
-
Hi "Worldway'" I built this some time ago, looks like you are off to a good start. I wrote a Practicum/Review for another site and can send to you if you wish and have some photos of my build if you are interested. I think that mine took around 3 months of mainly Weekend work. Take your time, it'll be worth it!! Cheers....HOF.
- 134 replies
-
- 1
-
-
- artesania latina
- mare nostrum
- (and 1 more)
-
Hi Chap, That would be awesome, thank you. Cheers....HOF.
-
Hi All, Does anyone have any experience/s with the A/L Pen Duick? I've got this sitting in my Cupboard and it's rather tempting.... Cheers....HOF.
-
Hi Chap, The Mizzen on you plans looks a little to extremely "Raked." Don't know.... I included a couple of photos from my build, early on in the piece and complete. I'll have to let you be the judge as it's your work. Cheers....HOF.


-
Hi Chap, Just had a look at Longridges book: Fore - 86" Main - 85" Mizzen - 84" Angle of Steve of Bowsprit - 18.5" (All with respect to the Horizontal or 0' of course) Mainmasts are not tapered, Tapers only appear on Top Masts and Topgallant. (With the Sergal Kit, the Mast Housings were already done.) I'm guessing that your Fore and Main are 10mm in diameter and your Mizzen is something like 8mm in Diameter. The other thing that you may like to consider, when Masting don't Glue the masts in position, let the Rigging hold everything in place, there's more than enough pressure exerted to hold everything in place. This holds true for the Top and Topgallant. (By not Gluing these, you have a little leeway to "Twist" if necessary to line things up, also, if you are unfortunate enough to break something, it is far easier to remove and remake. :-)) Hope this helps. Cheers....HOF.
-
Hi Chap, The masts are "Raked." I cannot recall the exact angle and would need to refer to my Plans/Research Material. I'll have a look-see but someone may come up with the figures before me. Cheers....HOF.
-
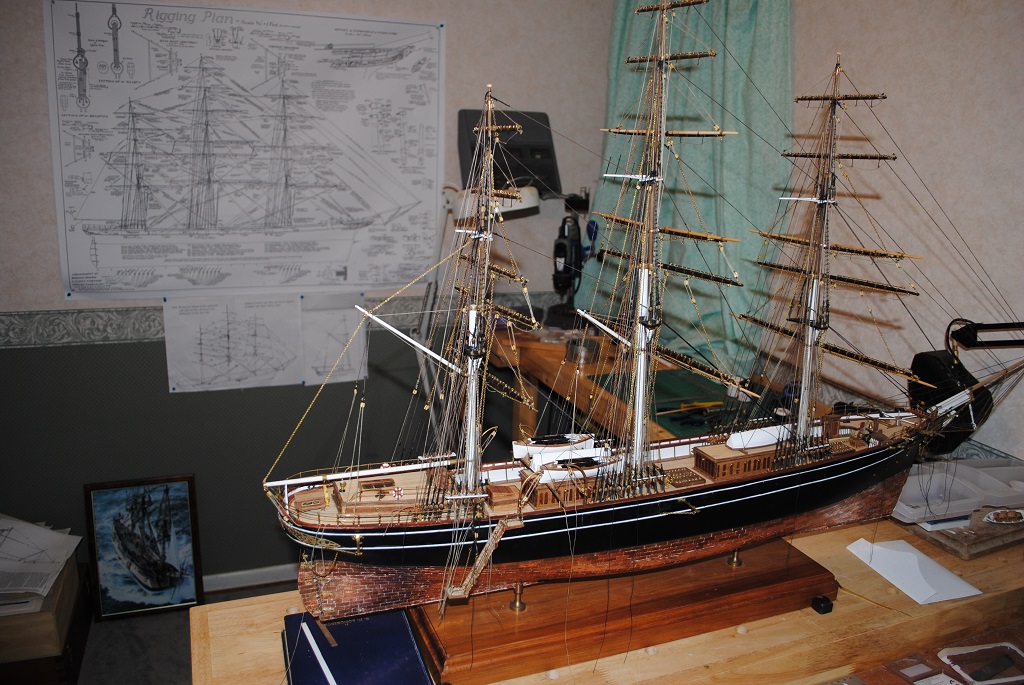
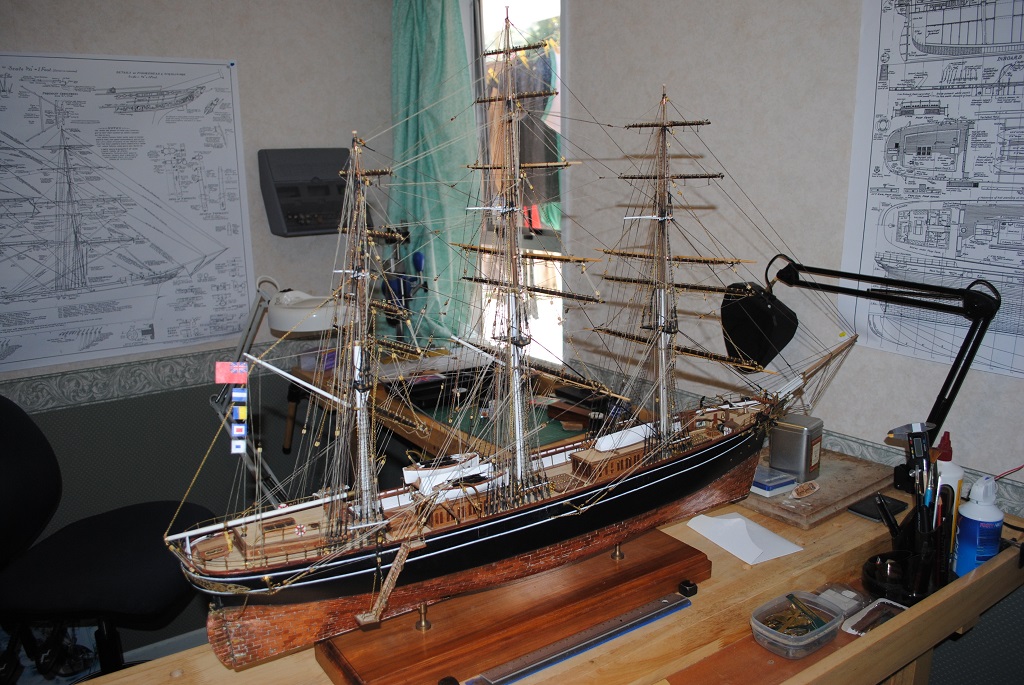
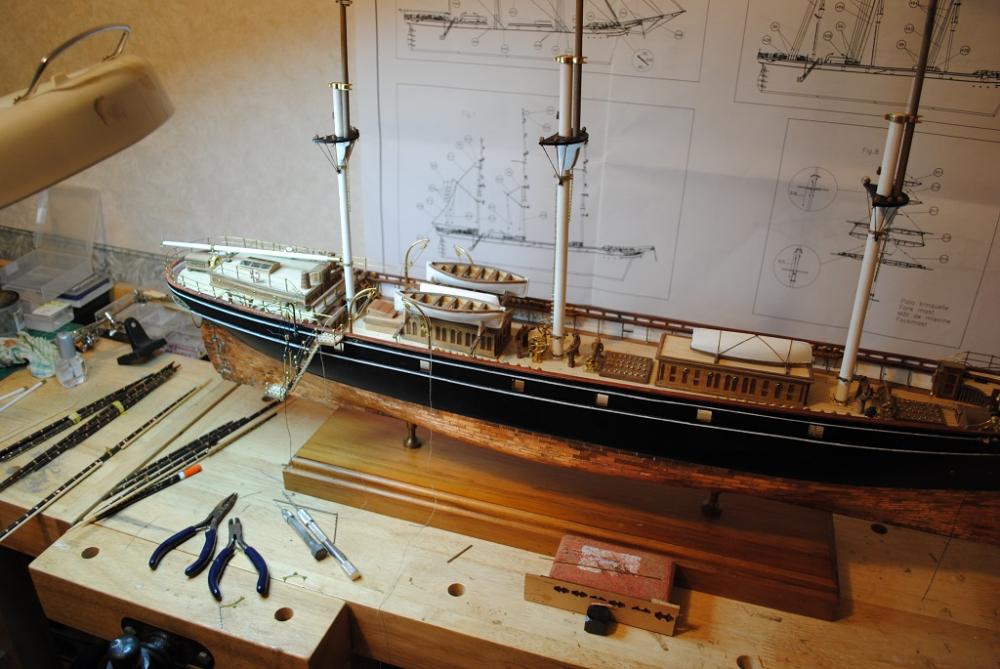
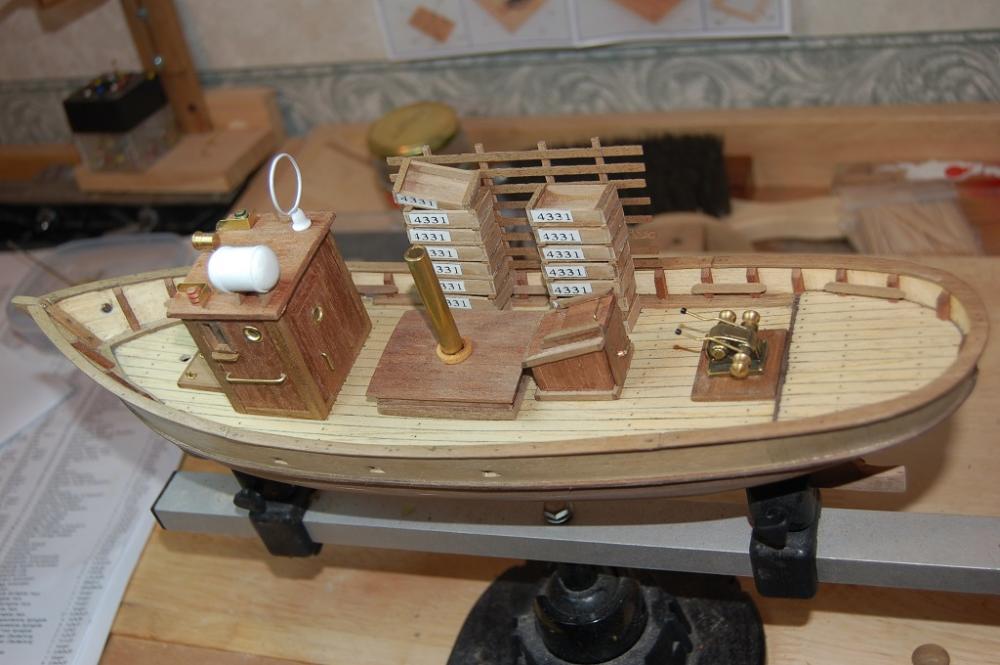
Some "Early" Build Photos.... Give me a shout if I can help. Cheers....HOF.


-
A few More....

-
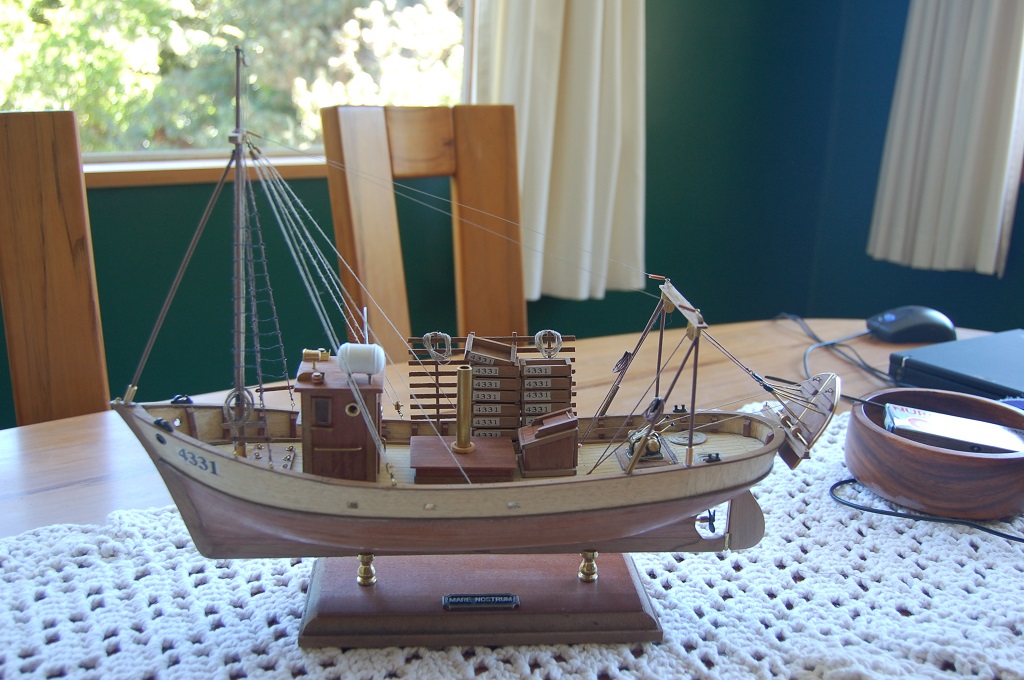
Hi cdogg, I built this a few years ago and have located some photos. Yup, during various stages of this look less than ideal. I also have a Kit review that I wrote for the Ship Modelling Forum but is 10Mb, so if you want this, send me an address. (No shame in Wood Filler!!) Hope these help. Cheers....HOF.


-
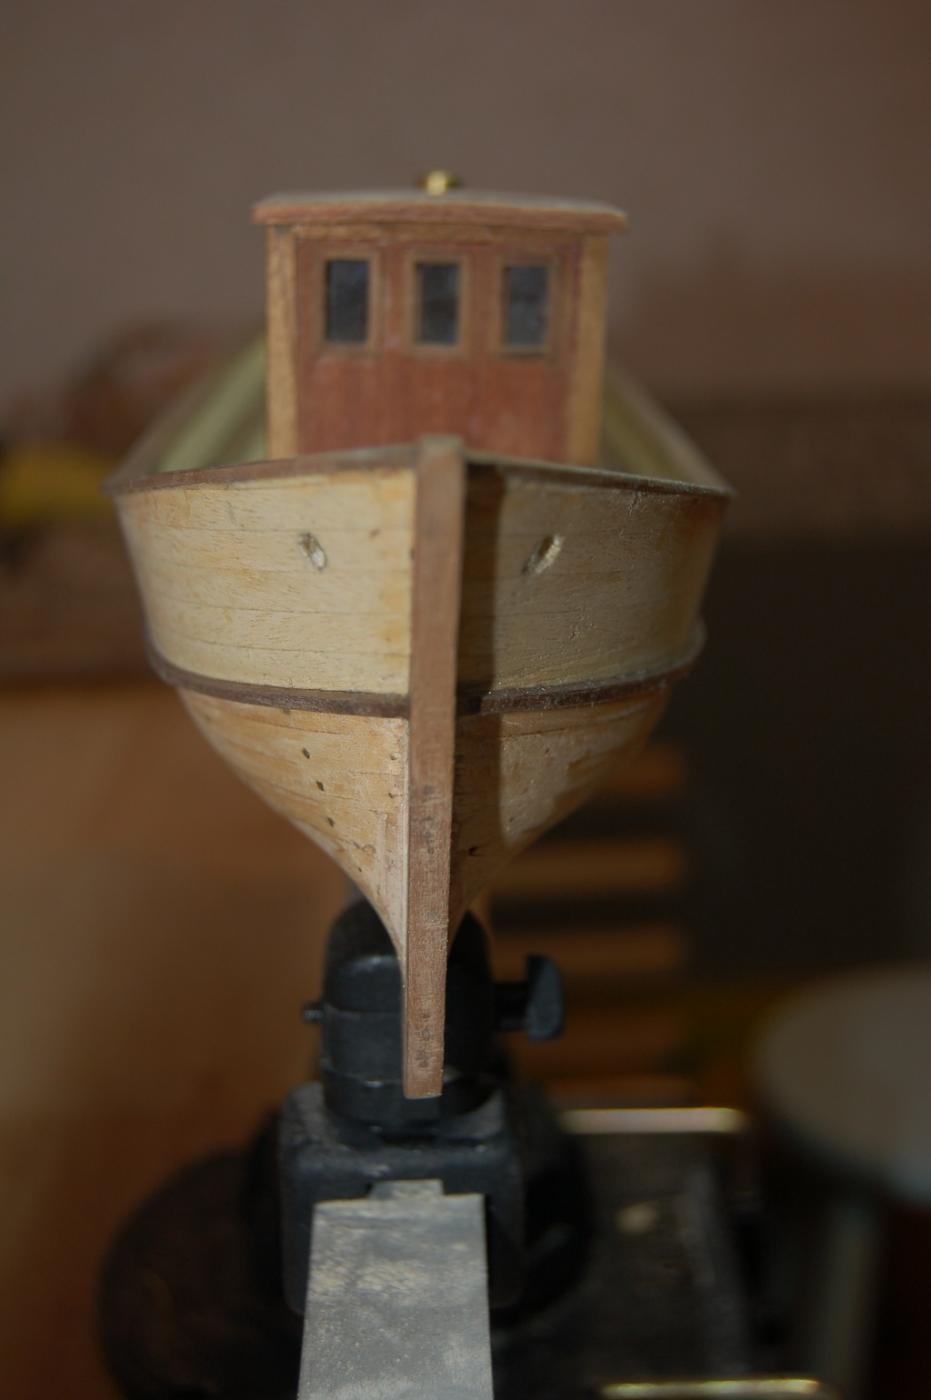
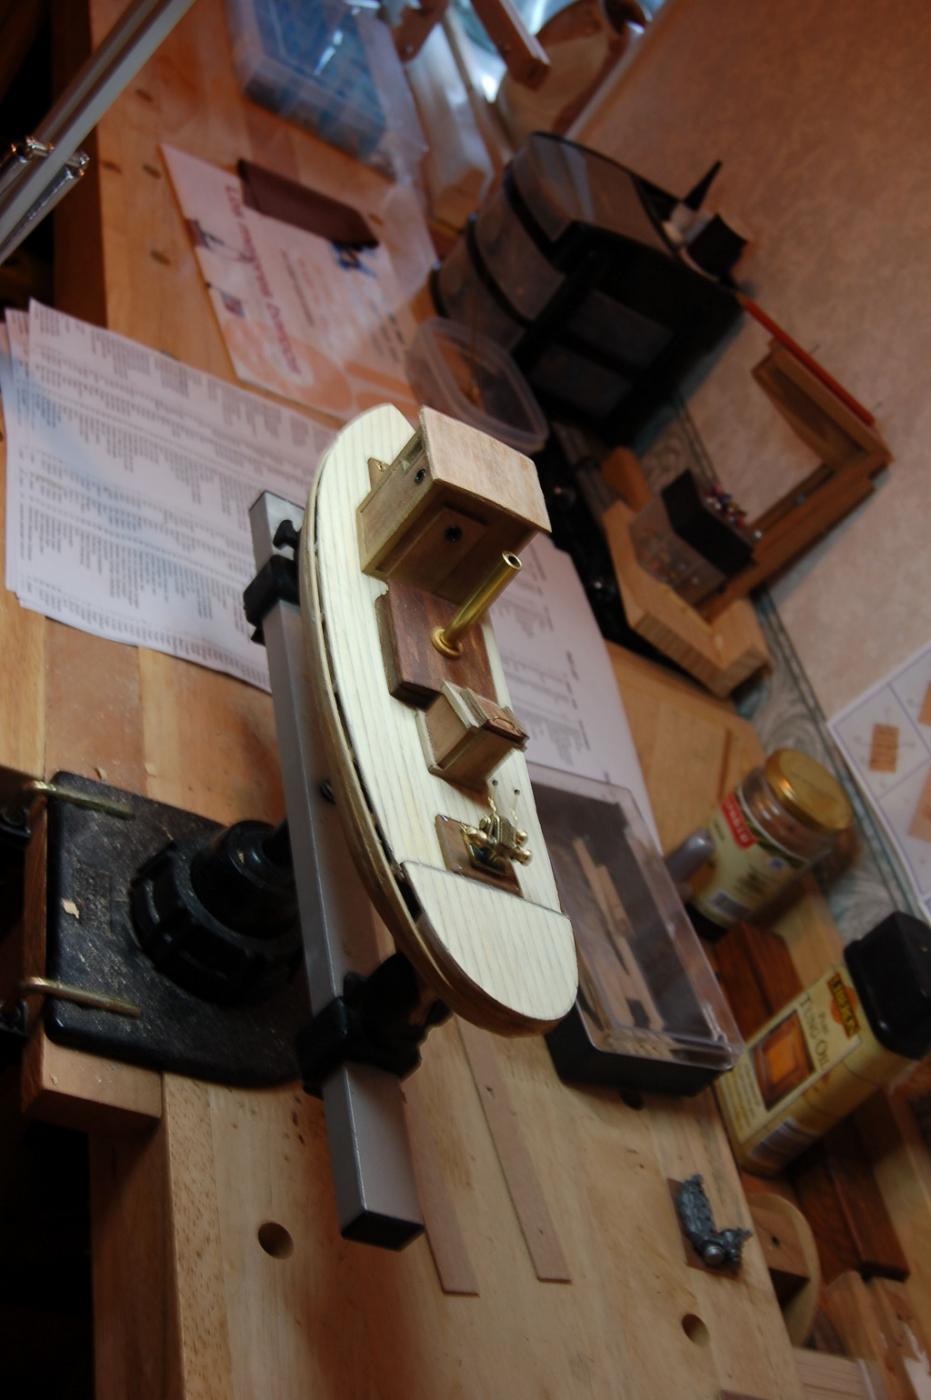
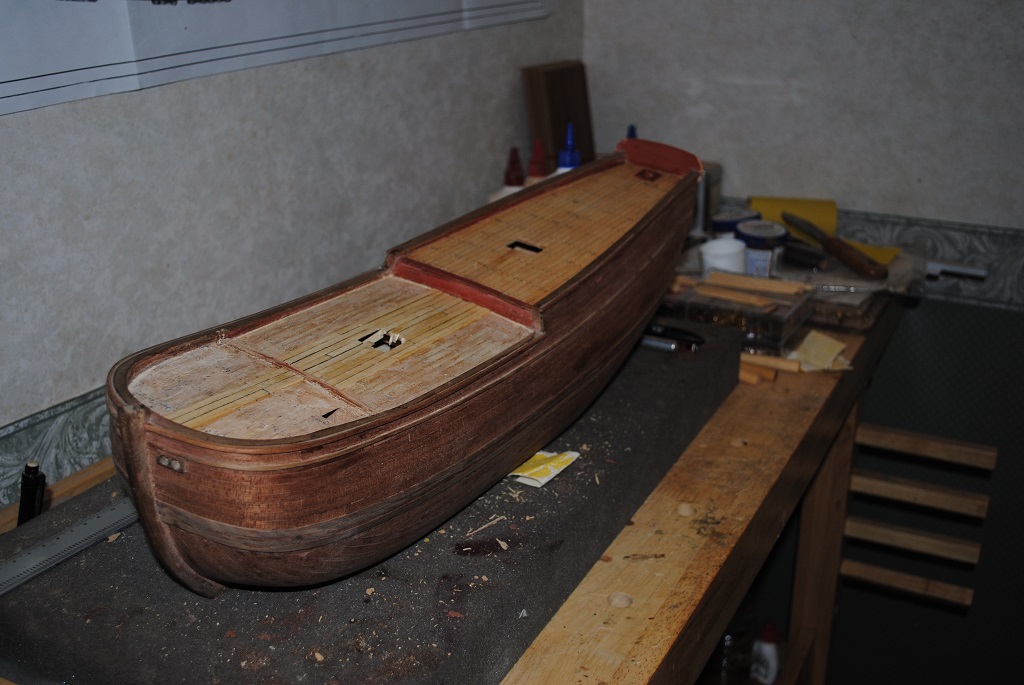
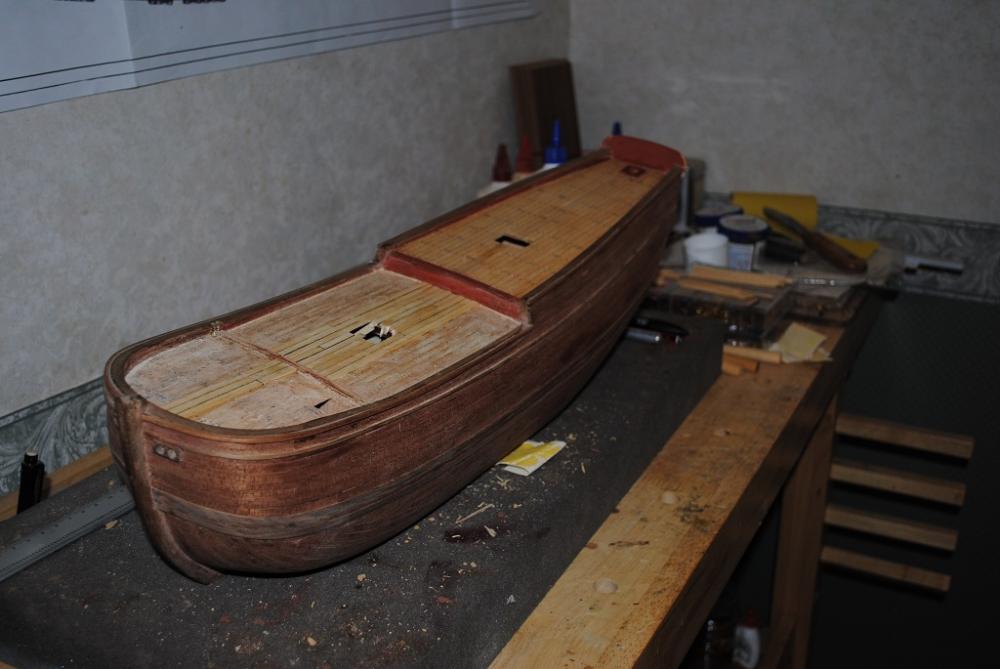
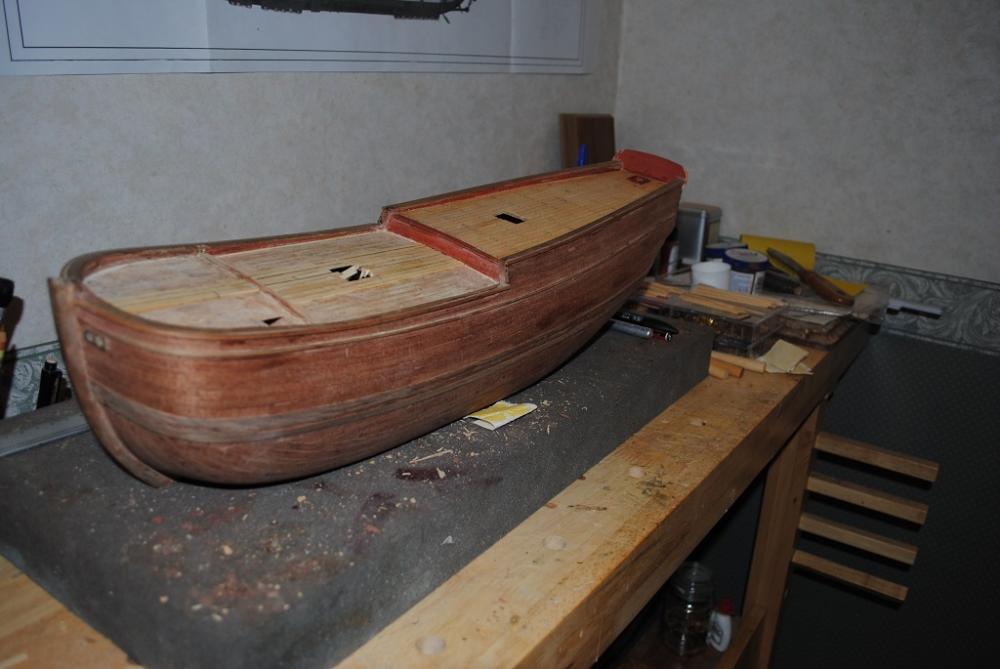
Hi Chap, Aliphatic Resin, (Selleys), Sandable PVA. The Hull is not too bad, I can live with that as the majority will be painted. Not happy with the Deck but time will tell, so far, the replacement is not too bad but plenty more to go. (Had to make a start!!) Fore and Quarter Deck first, Poop maybe. I'll see if there are major differences. I guess I'll be happier with the build once the Decks are complete, able to move on. Cheers....HOF.
-
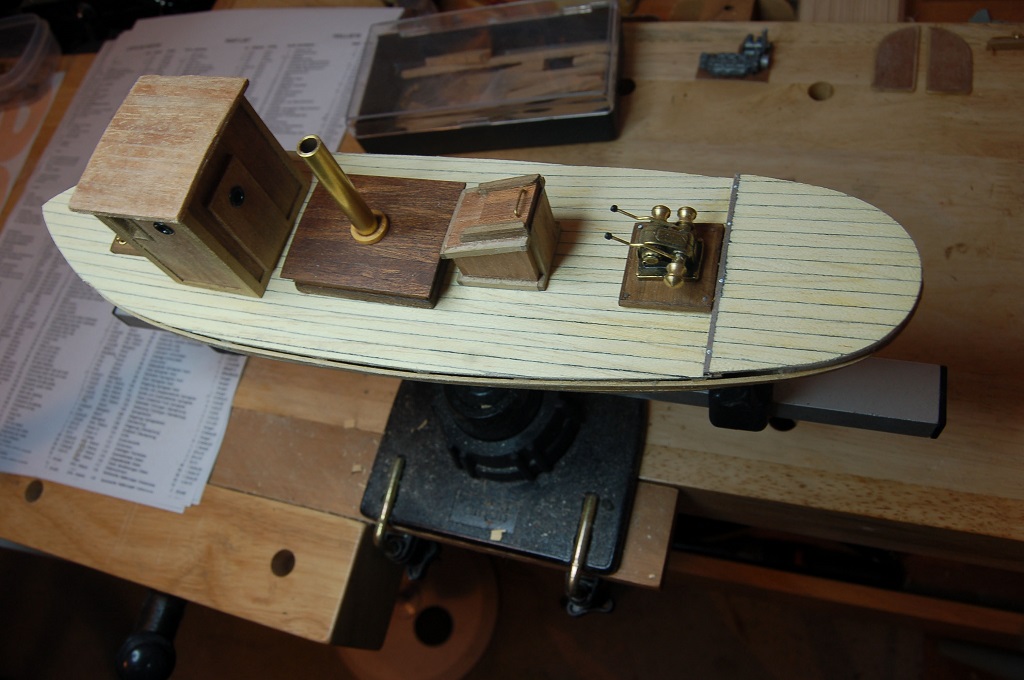
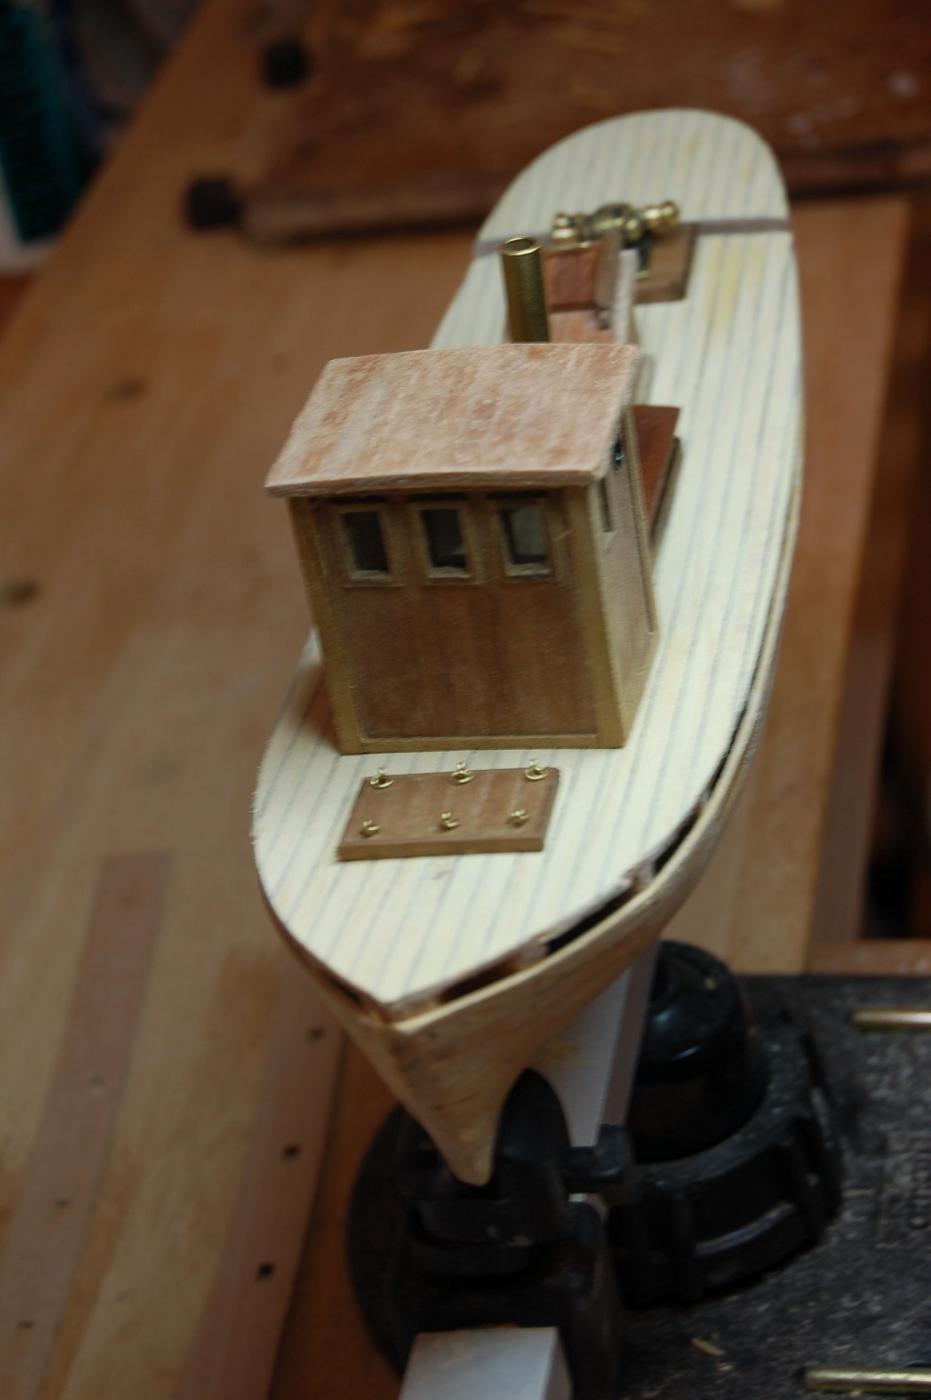
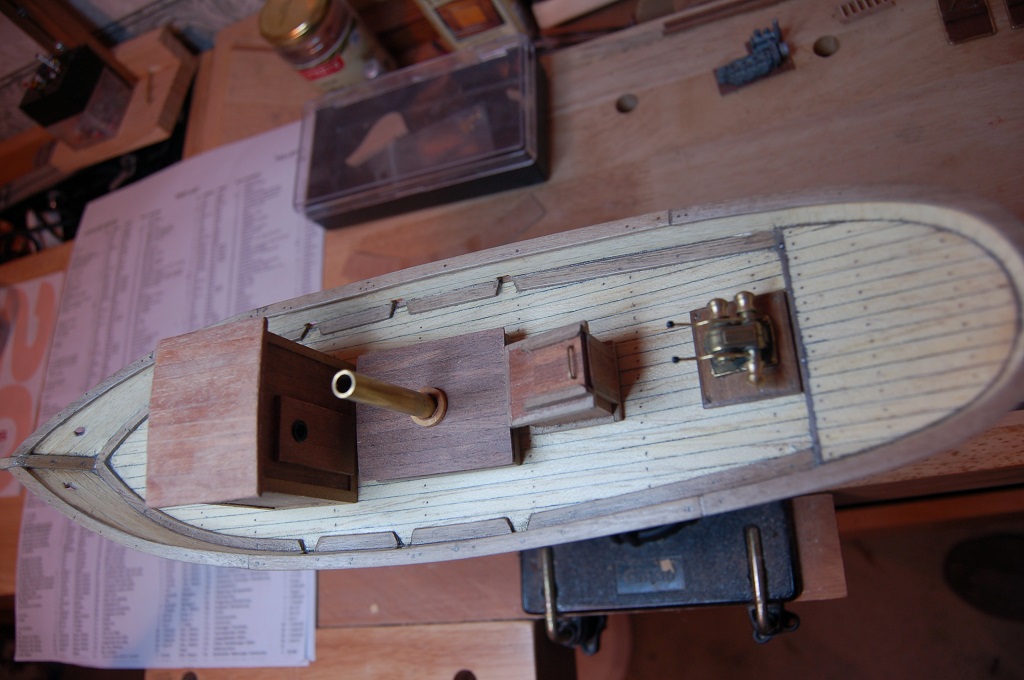
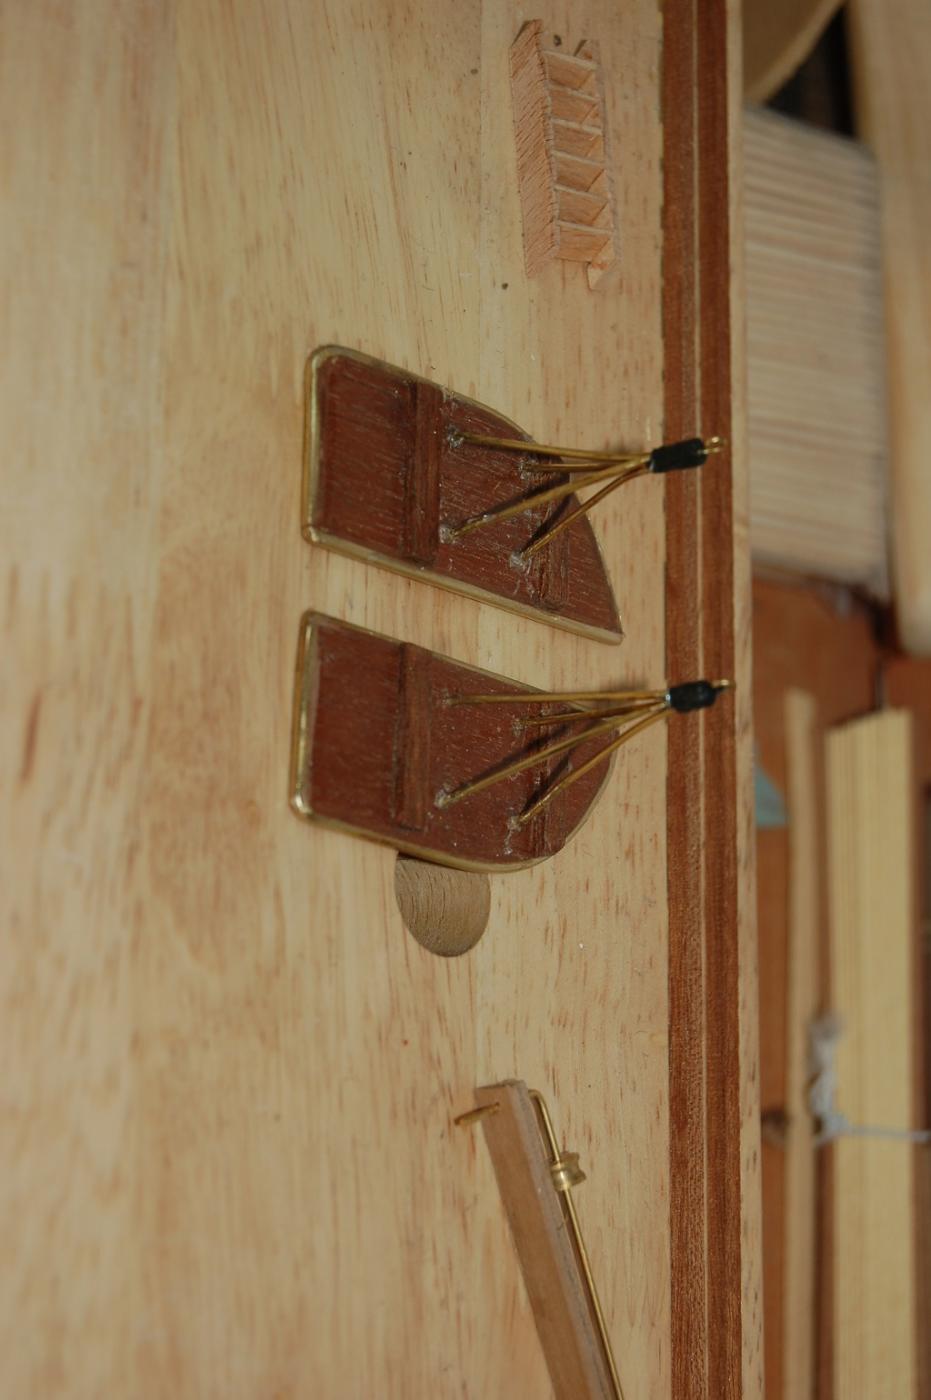
O.k. a few pictures, Deck Replacement.... Doesn't look too Crash Hot at the mo and rather difficult to get Decking to behave. (I'll get there.)

-
Hi Chris, How's your Build going? Looking forward to my Saturday work on Endeavour, ready for replacing the Decking.(Have been recovering from personal injury.) You?? Sunday, unfortunately, Work.... Cheers....HOF.
-
Hi Chap, I would like to "Qualify" my statement about 4 years to Rig the C/S, it was actually 4 years of Weekends. I could not work for more than 4 Hours at a time, so 8 Hours per weekend. (X 6.5 years total, about 3,500 hrs?) Patience and perseverance is the key. More than happy see what comes of your awesome build thus far. ("I'll pull up a Chair", as they say. ) Also looking forward to see how you treat the Rig, with or without Sails. (Endeavour is my current subject, Plastic/Wood does not matter as far as I am concerned, it's the same doctrine.) (I do tend to shy away from sails as there are many more Blocks/Lines that go with these. I am led to believe that these items were unshipped when in port.)(19th Century anyway.) Awesome to see what happened with your "Plastic Treatment," Looks fantastic!! Keep up the great work!! Cheers....HOF.
-
One more thing, Rig "Aft and up." Picked this up from "God knows where" but worked for me thus far. (Braces are different, Aft, Top Down" but you'll get the idea.) All the best and looking forward to your continuing posts. (I'll get the Endeavour revved up soon.) Cheers and Regards, Harry. (HOF.)
-
If it's any consolation, it took me the best part of four years to rig the Cutty Sark. (Much research, Trial and error.) Used to walk into the "Ship" Room and walk back out if I did not feel or up to the task. Cheers....HOF.
-
Awesome Build!! Love the way you have executed the "Timber" finish, fantastic!! Gold Leaf, what can I say? Just shows what can be done with the right amount of "Wherewithal." Looking forward to more updates. Cheers....HOF.
-
Hi Chap, You can choose and I think that your Build thus far is awesome. (Brings back memories.) I Coppered using the Plates that came with the Mantua kit. (Used CA Glue.) You can purchase but ensure that you get at least 2,500!! Alternative, Copper Tape, suitably "Enhanced." From my perspective, the Plates certainly "Enhance" the build, but, personal choice. Cheers....HOF.
-
Hi Rowan, Your build is looking pretty good!! Currently working on this particular Model also, albeit a little slow at the mo. I have found myself removing the Planking from the Fore and Quater Deck as I got a bit carried away with the sanding/finishing. (Not sure if I'll remove the Poop Deck Planking yet. I have a question for you though, do you have the spacing's of the Stanchions for the Cap Rail? The A/L drawings are no at all clear and I am also struggling with Mast Hole Centres. One other issue is that AOTS shoe six 4 Pounder Cannons but A/L only provide four, these are 25mm in length but it seems that we, (In NZ), can only get our hands on 30mm at the smallest. Thoughts? Cheers....HOF.
-
Yup, Hit the "Like" button too!! Like everyone else, would like to see the Planking progress and the precision that you have so masterfully executed thus far. (No stress though ) Cheers....HOF.
-
Ditto "Popeye." Looking forward to seeing your progress Chap!! Cheers....HOF.
-
Hi Chris, Yup, Things look good with the Stern and the rest of the Hull. (Nice work!!) Hope mine will work out as as good!! The Deck replacement is a mission, after this I can move forward. Good to Chat after a few months. Keep up the awesome work!! (When life doesn't get in the way, of course.) Cheers....HOF.