HOLIDAY DONATION DRIVE - SUPPORT MSW - DO YOUR PART TO KEEP THIS GREAT FORUM GOING! (Only 64 donations so far out of 49,000 members - C'mon guys!)
×


hof00
-
Posts
1,644 -
Joined
-
Last visited
Content Type
Profiles
Forums
Gallery
Events
Everything posted by hof00
-

Cutty Sark by samson - Billing Boats
hof00 replied to samson's topic in - Kit build logs for subjects built from 1851 - 1900
Hi Chap, I applaud your work/skill!! Just awesome!!- 188 replies
-
- 2
-

-
- cutty sark
- billing boats
- (and 1 more)
-
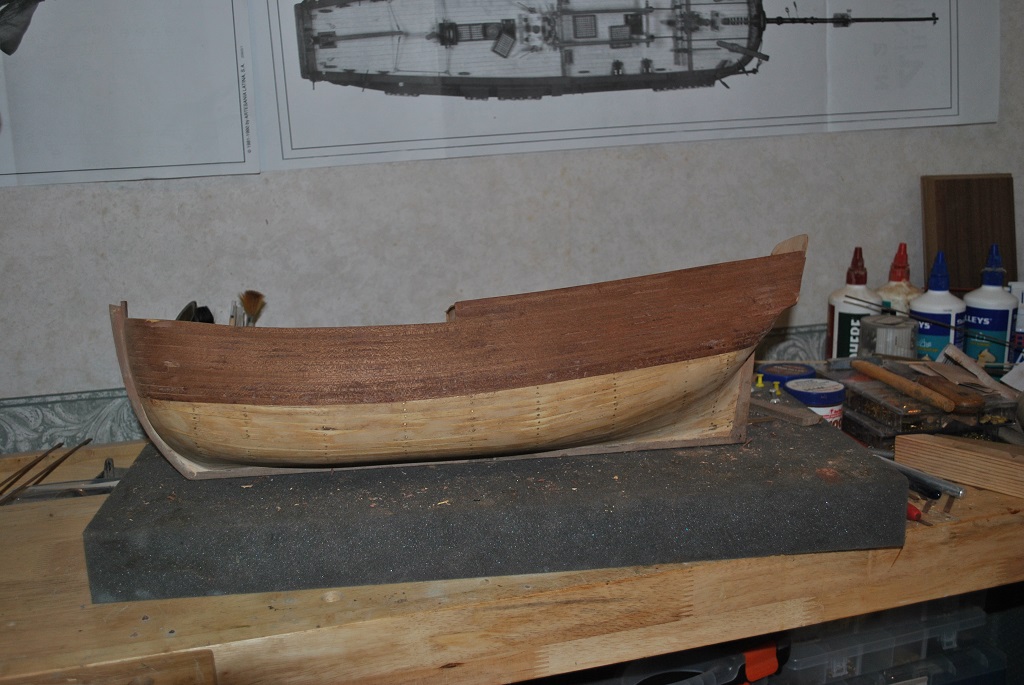
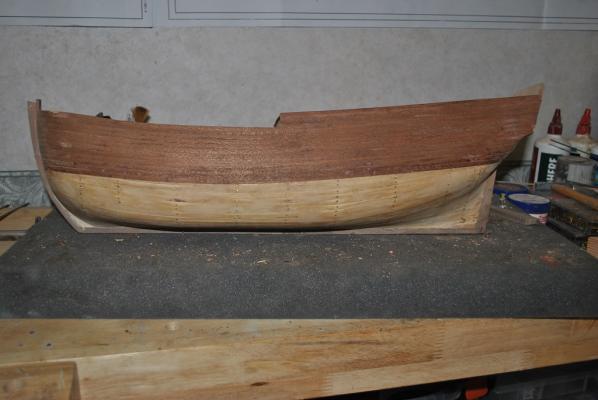
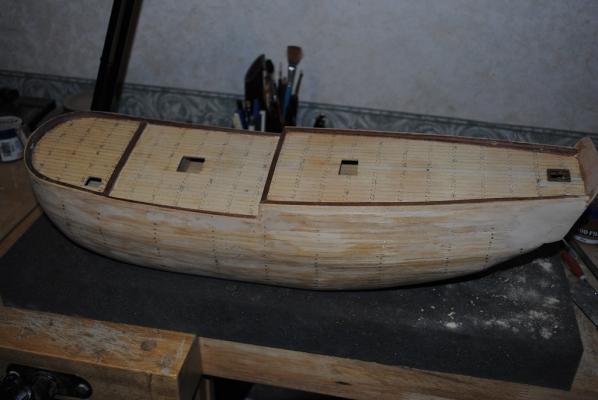
Some progress.... 0.5mm Walnut for the second planking.... Had a chat to Boyd last night, he did warn me that 0.5mm was getting pretty thin, especially after a bit of a san!! Anyway, about 1/2 is done and I must think about Drop Planks at the Bow as things are going to start bunching up. Used CA for each Plank at the Bow, Aliphatic Resin, (Sandable PVA), heated with my Plank Bender thingy. The glue boils and sets in seconds. The only issue is that it "Erupts" and makes a bit of a mess on the Planks previously laid. A bit of masking tape resolves this and 180 Grit paper sends the Dross packing!! NZ Holiday Monday, Waitangi Day, so should be able to get more done.... Anyway, Photos....

-
Thanks Nick/Mark, To answer your question Mark, I have not viewed the other clips as of now, but I intend to!! Thanks for your words of wisdom Nick!! Cheers....HOF.
-
Ditto.
-
Awesome!! Thanks Mark. Cheers....HOF.
-
A question that I have prior to rigging the Endeavour. I have been using annealed, Plastic coated wire in my previous Models, 19th century or later as this represents Iron Strops for this period. (And is pretty easy to form.) For a 18th century Ship, I believe that the Blocks were Stropped with rope. Does anyone have a "Sure Fire" (Simple) method of using a rope Strop that is going to look "In Scale?" Cheers....HOF.
-
Hi All, Thanks for the kind comments!! O.k. not too concerned about 0.5mm second cover. Ill use the adhesive on the plank and "Steam" on with a little judicious heat from my trusty Plank Bender. Sanding this stuff has proved no problem in the past as it's nice and hard, so, takes a lot of sanding to cut through!! Yup, am indeed lucky that it's double Planked....
-
Hi Chap, They, (Ship Models), are all different. Different in shape and approach. I really don't think that there is a "Correct" method. What looks/feels good and looks good is the "Bomb." If I can give you some "Qdos/Encouragemet" I think that your work is that of an experienced Model Ship Wright!! (Don't doubt yourself!!) Your build is looking great!! I am also hoping for Rain!!
-
Hi Chap, Yup, am pleased that the fist cover is done. Happy with the Keel also, I'll be able to do a wee Rebate and slot the second cover in. I'll be using the Kit supplied 0.5mm Walnut. Already had a trial fitting and flows nicely around the curves. (As I think I mentioned in the past, this is my first "Bluff" Bow Ship model, more used to pointy Bow Ships.) Have a good rest of the weekend!! Cheers....HOF.
-
Looking really good sir!! I followed your "Protected Cruiser" build with interest. I have a couple of Bismarck's, 1/350 and 1/200 waiting for my attentions. Couple of questions, do you use an "Etch Mate" to Bend/Fold and what do you use to affix the Railings? I have read White Glue. Cheers....HOF.
-
That's looking pretty damn good Chap!!
-
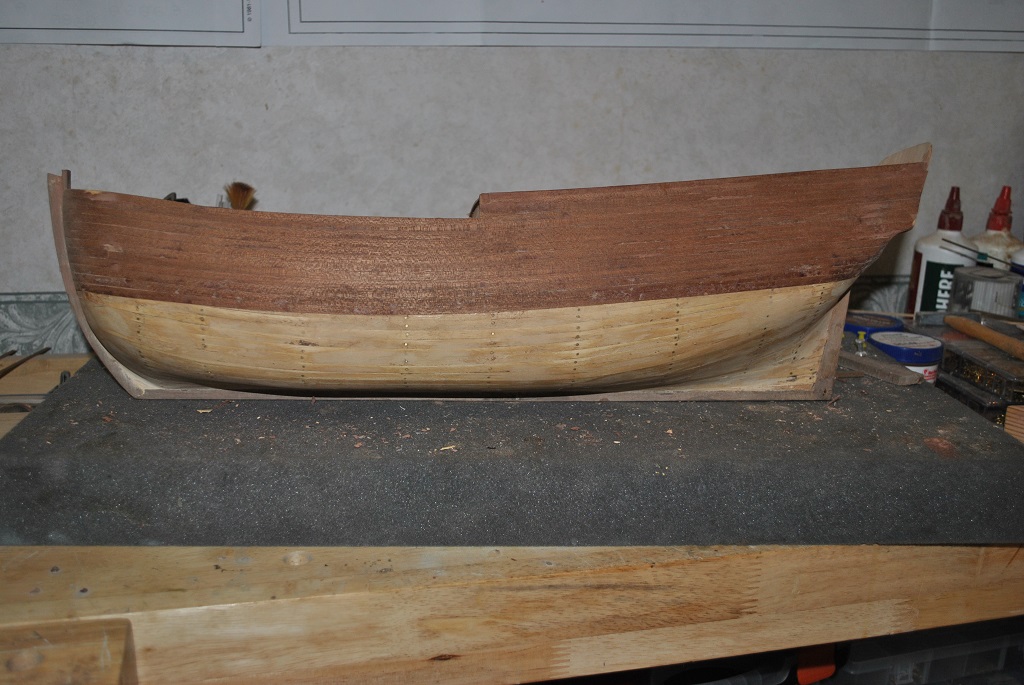
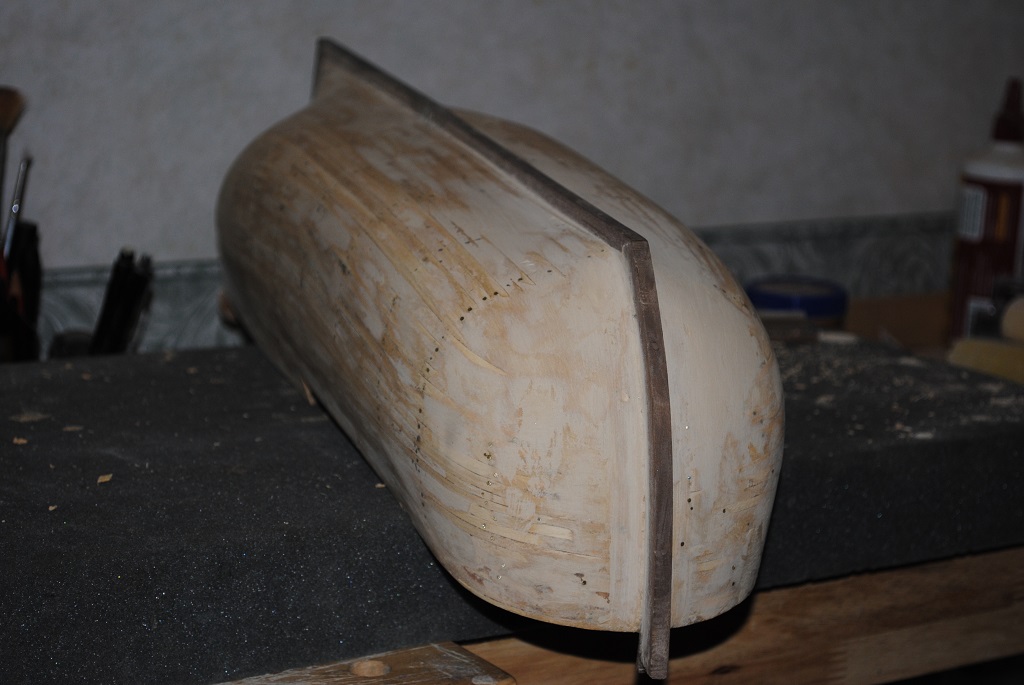
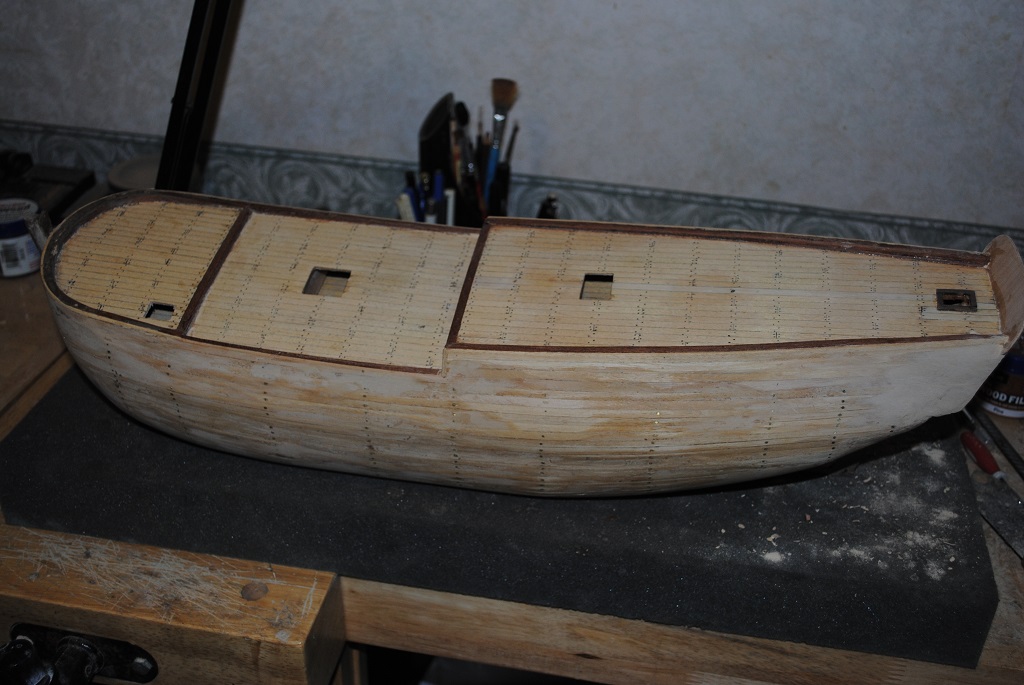
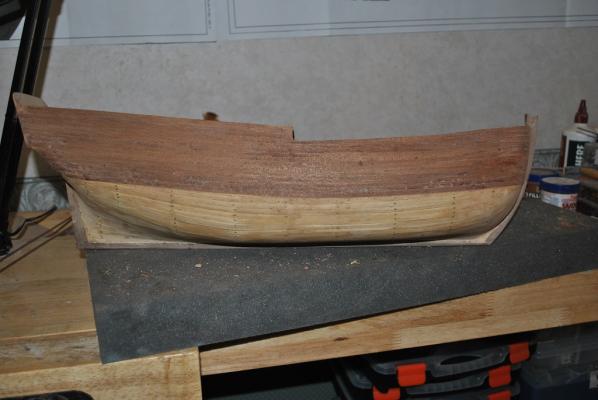
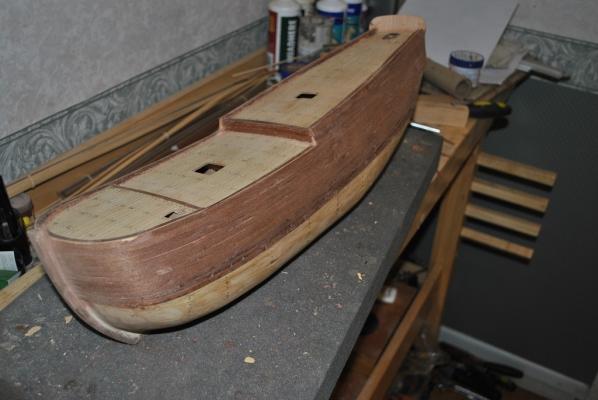
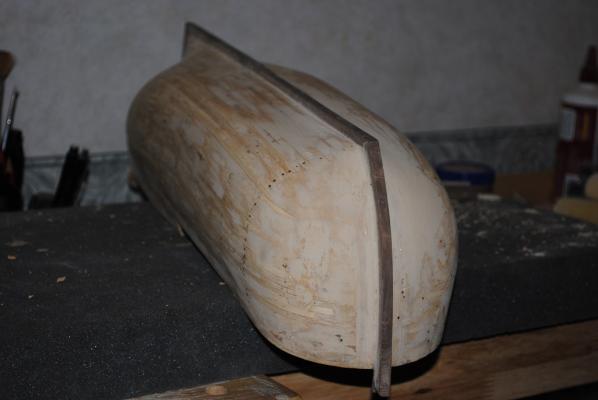
Hi All, Some progress stuff.... Completed 1st Planking, not without it's issues. I felt that I should have used Balsa Filler Blocks in the Bow, found that the Rudder Trunk was a bit of a challenge and the most interesting issue was that of the Transom/Gallery. I did read in another version, (Don't remember where), that these overhung each side by a couple of mm, so, being a little "Compulsive" (Sometimes) I sanded them flush with the Planking. Wrong!! Had to use filler to bring this back to the proper profile. Have used a bit of filler also at the Bow, but, I don't believe that there is any crime committed here as the 2nd Planking will cover this quite nicely. Keel attached with Aliphatic Resin and round Toothpicks. The Hull is nice and smooth although it might not look it. I'll look at the second Planking tomorrow. Not perfect but I am happy with it thus far.
-
Hi Chap, How did you get on with the Brass Bulwarks? Did you source from Mantua? (Had to ask. ) Cheers....HOF.
-
Looking good Chap!!
-
Cutty Sark by samson - Billing Boats
hof00 replied to samson's topic in - Kit build logs for subjects built from 1851 - 1900
Very nice indeed Sir!!- 188 replies
-
- 1
-
-
- cutty sark
- billing boats
- (and 1 more)
-
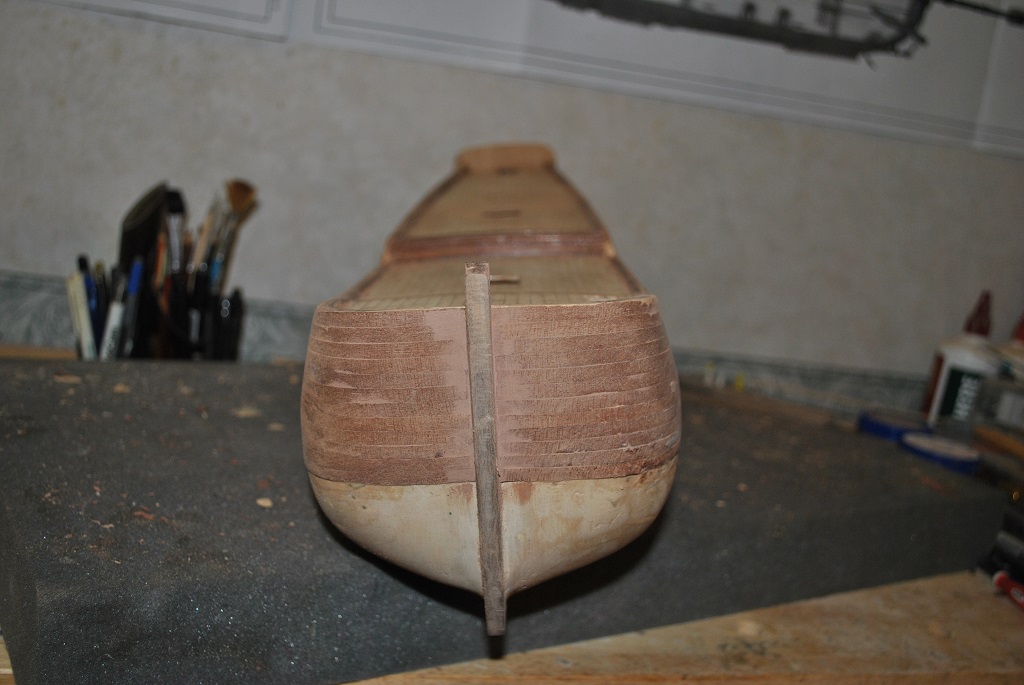
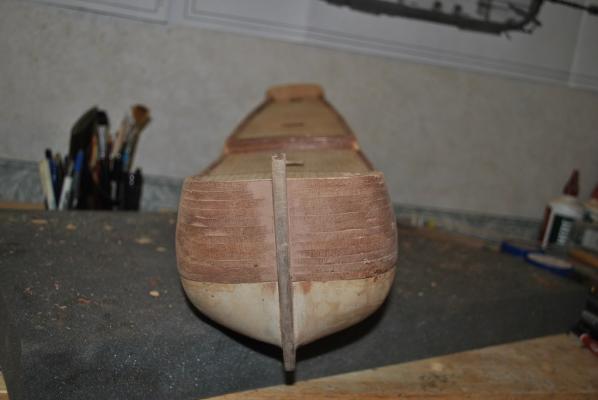
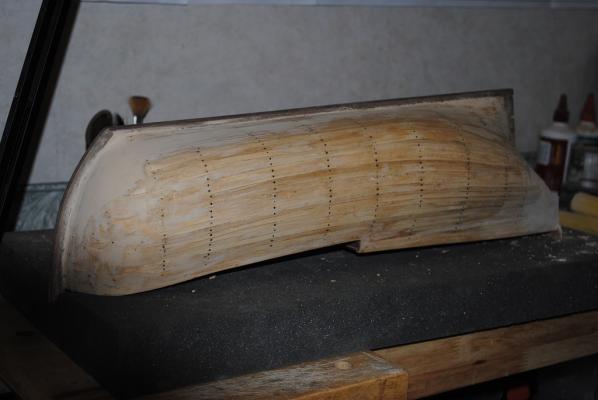
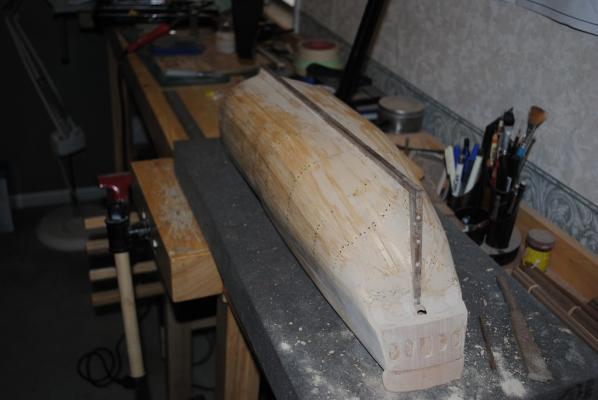
O.K. First planking almost complete. Not at all happy with the Bow below the "Bilges planking effort, wished I'd included a couple of Balsa Filler Blocks, never mind, it is what it is and I have applied a fist coat of filler over the offending piece. More to follow after the first lot is sanded and dried. To give an idea, about 2.5mm - 3.0mm of thickness of filler is required between the Bow and 1st Bulkhead aft. I'm sure it will come out in the wash. Cheers....HOF.
-
Thanks Michael, Getting into the "Groove" with the Endeavour. There will be light at the end of the Tunnel soon enough. Cheers....HOF.
-
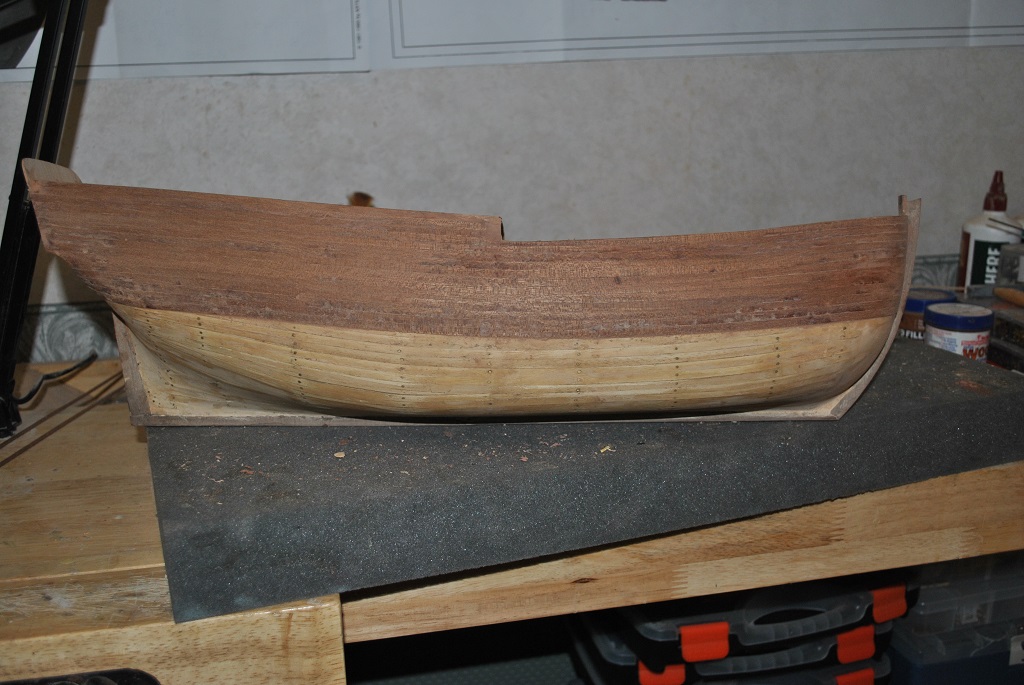
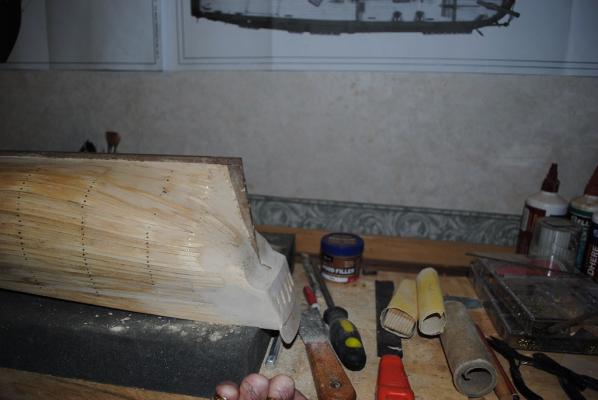
Cheers Ears!! Aliphatic Resin is sandable Waterproof PVA. (Exterior PVA?) (Not a "Ship" person either, hate the sea but a compulsion to learn about the components.) My dad was supposedly a French Sailor who jumped Ship in Invercargill, knocked up my Birth Mother who adopted me out. (Too much info?) I guess that I have something in the blood. No meltdown chap, not worth it!! I wish you well also with your second Planking!! I reckon that I have about another 8 - 10 planks for the first cover inc. Garboard Strake, (One at the Centre of he Keel. ) Looks a bit "Bumpy" but once filler applied and sanded it will look much better and a good grounding for the second round. BTW, I like how you have already cut a rebate in your planking to accept Channels. Good Planning!! I'll be doing this at some stage, miniature router bit on the Dremel. Enjoy....HOF.
-
Hi Chris, Posted reply in my Endeavour stuff in case you didn't see it.... (Unsure how to copy....) Cheers....HOF.
-
No worries Chap!! How's the Cutty coming along? Did you find the Bulkhead stuff? Cheers....HOF.
-
Hi Chap, Look for "Red Devil" it is an Australian product. "Bog" I think would make things a little difficult to affix the second layer of planking and I am unsure if Aliphatic resin would adhere. How about fixing the Keel, Etc? Have you considered using Bamboo Toothpicks after drilling the appropriate holes? (Just a thought.) I have got a few more planks on today, For the planking below the Bilges, I am using full width Planks where I can, speeds up the job a bit and so far, the Wood is complying with my wishes!! I am applying the planking "Wet," (Damp), works for me although some say that the planking will shrink, no issues thus far and it works for me. Should be complete fist Planking tomorrow or Friday. Yup, saw your planking in shorter lengths, if it does the job, all good and your build is certainly coming along very nicely!! This is my first "Bluff" bow, am more used to "Pointy" Bow Ships. I'll see how this goes and think about another Clipper. (I have Mamoli Flying Cloud waiting for my attentions.) How's the Ship "Terminology" coming along? Cheers....HOF.
-
Hi Chris, Yup, the first layer is a bit of a pain.... I have, at present, more planks soaking in the Bath. (Lime) I'll be using a bit of "Red Devil" pine coloured filler to smooth out the contours of the Hull before attempting the second planking which is described as African Walnut, 0.5mm to answer your question. I really like the Red Devil as it dries fast and sands beautifully and Aliphatic resin bonds well over the top of this stuff. Cheers....HOF.
-
Nice!! Same problem with the "Post" at this end also. Did you get the "Native" timber on the Hull or did you use the kit stuff? (Not clear rom your posts and my interest only.) Be gentle on your Keel Chap!! Cheers....HOF.
-
Sorry Chap, One further question, are you going to paint? (Was thinking of leaving mine "Au Natural." Cheers....HOF.
-
Hi Chap, Looking good. I personally don't have a problem with "Back to front" as long as the result is what is pleasing to the eye. At the end of the day,, (My thoughts), it's an art form, a release from the daily "Hum-Drum" of life. Personally, Still stuffing around on the first planking.... Enjoy.... Cheers and Regards, Harry.