hof00
-
Posts
1,654 -
Joined
-
Last visited
Content Type
Profiles
Forums
Gallery
Events
Everything posted by hof00
-
 Hi Chap, I hope to post some photos tomorrow. Wish I could offer some advice. Am doing the Double Plank stuff, 2/3 the way through 1st planking. Sorry, doesn't help you at this stage.... Cheers....HOF.
 -
Hi All, I think of the Gunwales as a little "Sacrificial" at best as there is a 1.5mm X 8.0mm Walnut "Finishing" that goes over the first layer of planking and the Gunwales/Bulwarks, so, the Gunwale material might get a little thin but will be covered up. In saying so, the "Bevel/Tape"r is important and the Bulwarks get level when they are tapered. (File across the Deck.) If you chamfer to the Bulkheads, I reckon you can't go too wrong, it seems to "Flow" a bit. Anyway, I'll post some photos of my efforts soonish. (Have had to re-do the Fore Deck Planking as cut through the 0.5mm material, might be a blessing in disguise.)
-
Hi Chap, If I am correct these are bits of 5.0mm X 5.0mm along the edge of the Decks? From what I get from the instructions is that these are sanded to fair in with the upper Bulkheads. After the first layer of planking, they get tapered lengthways. I Laminated mine from 2.0mm X 2.0mm Walnut as this I thought would be easier to form around the edges of the Decks. Any help? Cheers....HOF.
-
Hi Marc, I have everything to worry about!! New Zealand is and are Shaky Isles!! You can hear things in the Cutty Cabinet, Glass panels vibrating before you feel it.... Yee-Ha!! My other models/construction/cabinets/Etc, I always keep in mind the potential "Threat." (Earthquake Putty, Etc.) Construction Benches secure Models and Plinths with "Dogs." Good Fun. Cheers....HOF.
- 525 replies
-
- 1
-

-
- cutty sark
- mantua
- (and 2 more)
-
Hi Boyd, Ditto other comments, the "Bar" is definitely raised reasonably high!! Awesome craftsmanship!! Cheers....HOF.
-
Hi Marc, Nice work on the mounting!! I used a couple of Brass Pedestals with the Keel End shaped to contour to the Hull. Screws through the plinth, pedestals and about 25mm through the Keel. Haven't read about models rolling off their bases!! God forbid that this happens to mine!! It's been through a few earthquakes a couple of 6+ ones and a 5.8 last night so I must have done something right. Cheers....HOF.
- 525 replies
-
- 2
-
-
- cutty sark
- mantua
- (and 2 more)
-
Hi Chap, I guess welcome to he Endeavour build fraternity. As Paul has alluded to, there are a few Endeavour Builds!! You are doing the A/L version, as am I. The Instructions are not good, (To say the least), and am more than happy to do this build in Concert with you if hat's what you would like. Unsure of the issues until I get there.... Aware of the "Potential" issues that others have had. I guess I will have my own and I'll happily share with you. Enjoy, I guess.... It's a hobby at the end of the day!! (It's an art form and more than happy, as others to help you Chap.) Not worrying about the Transom stuff at this juncture, I really don't care, I do, but after the fact, if you know what I mean. I am thinking that the "Transom" is going to be about the right dimensions after the planking is complete. I guess I will see soon enough. Cheers....HOF.(Harry)
-
Hi Andrew, Just replying in addition to Paul's post also, probably good to strip the offending Decking as the 0.5mm Deck Planks have a different look/feel to them. Maybe sand, (Block Sand), off with 40-60 Grit? If you go this way, protect your Fore and Aft Step positions with some Masking Tape so that the orientation of these is not affected if you go this way.... Sanding could be a viable alternative as you can easily see when the Ply gets to the surface. Cheers....HOF.
-
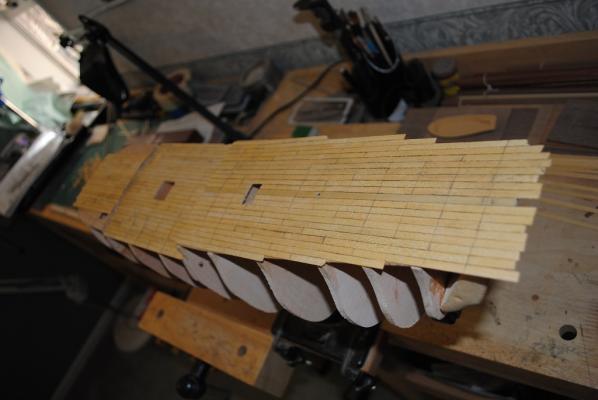
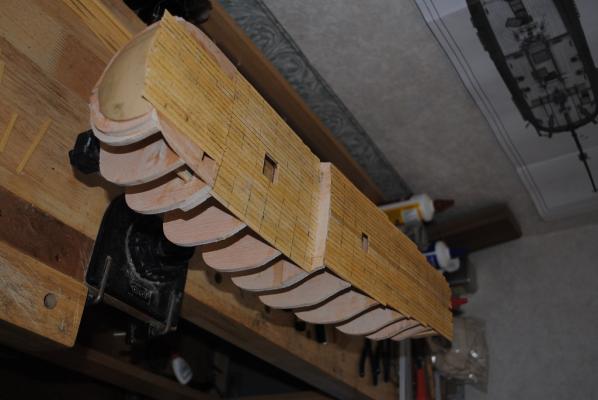
O.k. a bit of progress. Deck Steps, Laminated same with Bulwarks and tapered. Easier than trying to bend 5.00mm X 5.00mm Walnut. Still early days.... Unsure if I'll Paint, I do like the color of the different Wood, Plenty of time to decide....
-
Hi Chap, I persevered with the two Lifeboats but discarded the small Gig, not to scale anyway. From memory, I didn't have too many problems with planking these, used Aliphatic Resin and small Bulldog Clips and used Ramin/Mukal 0.5mm strips for planking. A careful sand, added Thawts and Gunwales after painting. I installed the Lifeboats on the Aft Deck house. The other two, Captains Gig and Longboat I made from a Balsa plug, Planked and Painted. These are upside down on the Fore and Aft Deck houses so didn't matter that they are solid Balsa, more or less.... Have a look at my Build Log/Gallery. Cheers....HOF.
-
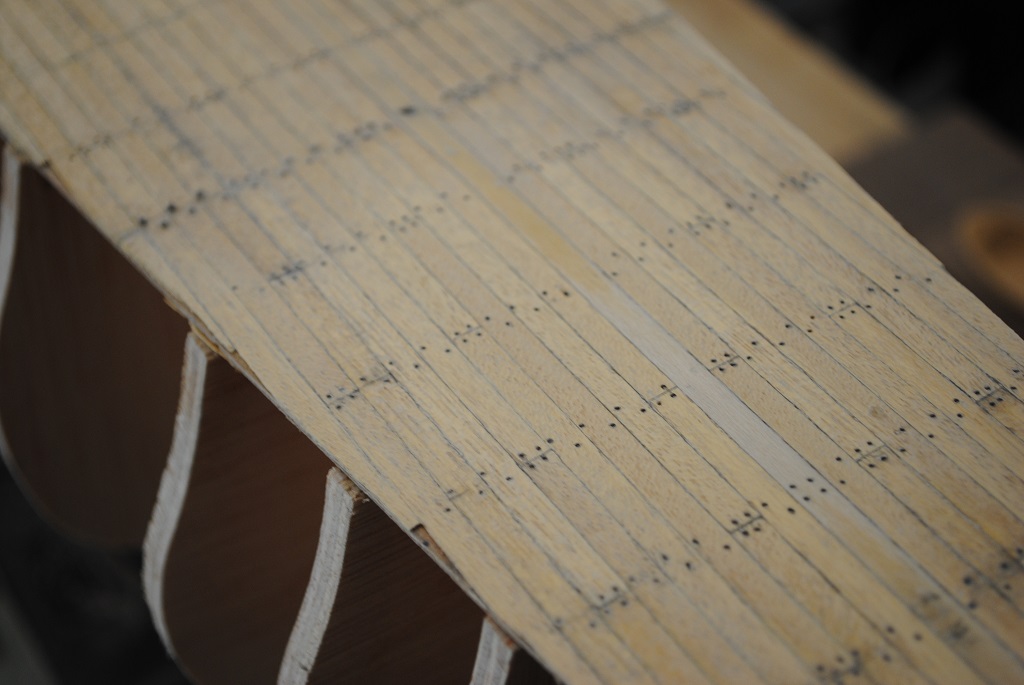
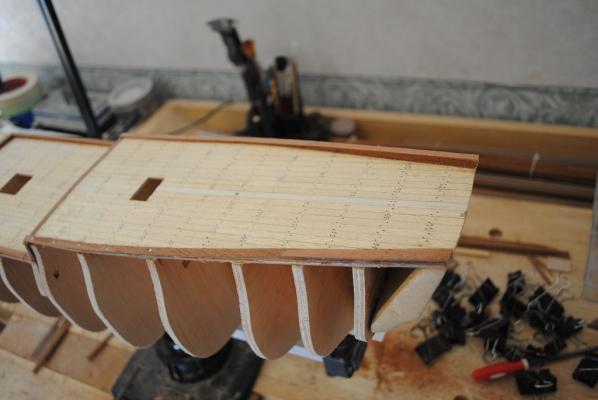
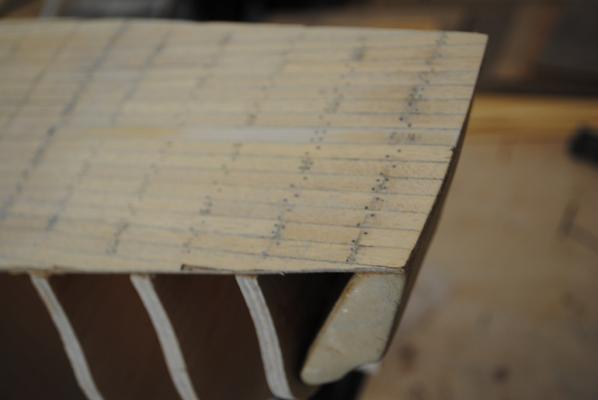
O.k. some pictures of today's efforts, and the "Sacrificial" Hearth Brush "Bristle" Tree Nail method. Not perfect but good enough.... Just have to be really careful not to cut through the Deck!! Have a great weekend!!


-
Thanks Dave, My "Sacrificial" Hearth Brush Bristle method has worked well in the past. Quarter Deck this weekend. (Or should I say "Well Deck? I always thought that the Well Deck was on 20th Century Steamers, i.e. Titanic.) Looking through the instructions last night, it is not clear what thickness of Wood to use for the Waterways/ Bulwarks, parts list suggest 0.5mm X 5.0mm for both. I can understand for Waterways but seems the Bulwarks are vertical, (Edge on), and I am thinking that this would be rather flimsy to say the least. Anyway, I have some time to think about this while I finish the Tree Nail stuff. Have milled some Walnut Strips for the For and Aft "Well Deck" Steps, but again, these won't go on until the Decks are Tree Nailed and sanded. (I'll do extra detail also in the Aft Step, Manholes, etc. (Looks like this won't be an OOB Build.) Cheers....HOF.
-
Hi Chap, I can't comment on the warped stuff other than your "Blocks" will most probably straighten things out. (Clamp and glue your Bulkheads/Keel. Your "Jig looks really robust.) Pedestals will come much later in your build, after Planking. So, my thoughts, get everything straight, Blocks inc. to real;ly lock things in and install and Glue your Bulkheads. Think of this stage as a miniature Joinery project. Wot comes later is also a miniature joinery project, no straight lines!! Pedestals are available, pre-drilled`but expensive, (For me anyway. Have to import), in NZ Any Help?
-
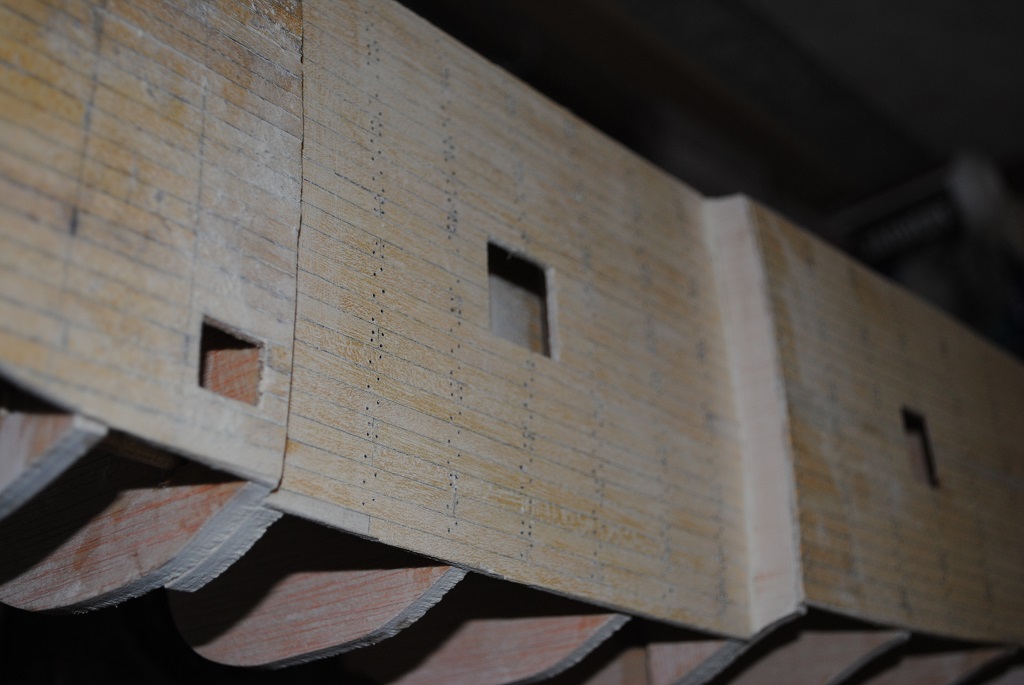
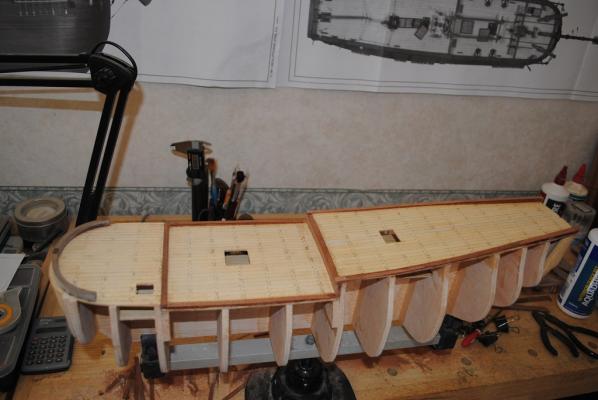
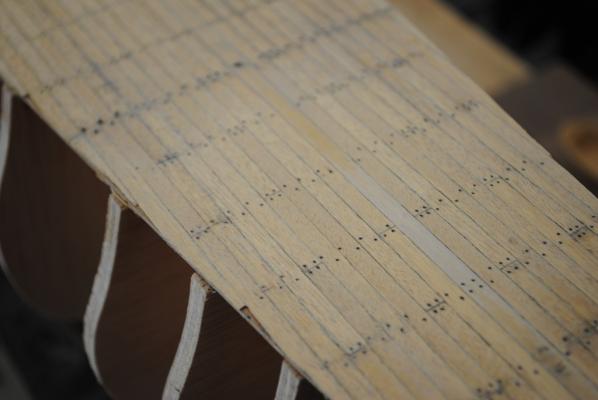
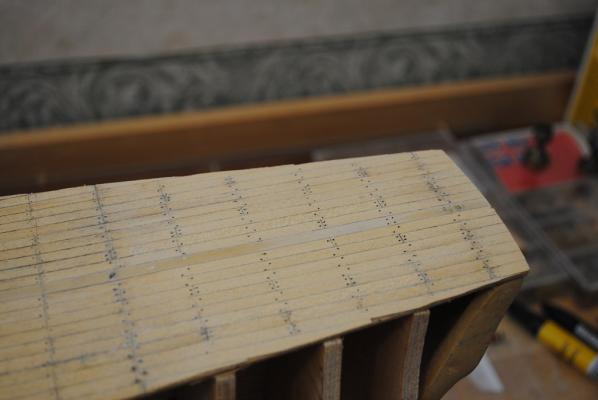
Dear All, A few pictures of my "Mark/Drill/Bristle/Glue" Tree Nails on a partially sanded Poop Deck. (There's always a madness to the method.) Had to give it a "Wee" bit of a sand to see how it would look. More work tomorrow. Have a great Weekend!! Cheers....HOF.
-
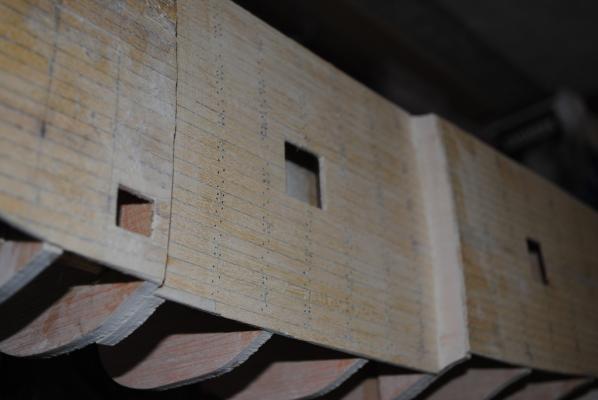
Thanks Dave, I am currently drilling the Decking, Butts and no Butts. There are Tree Nails, I am using Bristles off a Hearth Brush. glued into the afore mentioned holes. (The Bristles have to be "Graded and are Black in color.) Have used this method before and it's come out o.k. Once all Tree Nails are in place, I'll carefully sand the Decking to get rid of the Sanding Sealer/excess Aliphatic Resin. Lots of holes, lots of Bristles. Cheers....HOF.
-
Thanks Chris, Have just started my A/L Endeavour as well and follow yours with interest. Cheers....HOF.
-
Hi Chap, Where did you get your Kauri from? I think that your build will be EXTREMELY interesting using Native New Zealand timber!! (I guess you will "Re-Saw" your material? Hull or Deck?) I am picking Deck? (Close Grained, light color and very Hard!!) Have been thinking about Native timber selection in the past, but, how to mill it without waste? I have some planks of Kauri but are in my ceiling space to facilitate "Crawl Way" for light maintenance, Etc in between Roof Trusses. Am now thinking that I should recover and mill. Most of my timber is Rimu/Matai, good for cabinet work and I also have a few planks of Teak, given to me a few years ago. I am thinking that the Kauri that you are in possession of is not the 6,000 - 10,000 year old variety, (Swamp Kauri), but more of the 200 year old timber. (Kauri takes a very long time to grow.) Logging of Kauri is now prohibited, as is most NZ timber, you are very lucky to have this in your possession, as am I!! ) (I think that Cook had a bit of a "Chop" regarding NZ Trees with Endeavor repairs, so, appropriate that you choose NZ Native timber.) I am very interested in how you will mill you Timber without undue waste. Cheers....HOF.
-
Hi Peter, Looking good chap!! Great Shrouds and Ratlines look superb also. (Watch your fingers!! ) Nice "Cats Cradle" of Braces coming along. Cheers....HOF.
- 92 replies
-
- 1
-
-
- Cutty Sark
- Billing Boats
- (and 2 more)
-
Hi Peter, In my opinion, Rig "Aft and Up" Standing/Running rigging but leave the Braces to very last. I found that the Braces were easiest "Aft to Stem" and top down. I started with all shrouds in place, Fore/Backstays installed, (Inc. Forestays on the Jib Boom), Halyards, Gaff topping Lifts, Vangs. Braces and Pendants very last. You will also probably discover that Billings have omitted Cap Stays for the Fore and Main and a few others as well. I can try and assist you further if you wish, happy to send you a little more "Hi Def" Photos, PM with your E-Mail. Are you still having an issue with the Halyards? Tell you what, your Fife Rails are pretty good!! (Mine only had eight holes, so had to double up on some Brace Belaying stuff.) I'll be having a look at your continued progress with interest. Cheers....HOF.
-
Hi Peter, The Mizzen Royal and Top Gallant Braces reeve through a Double Block, (Port and Starboard), just below the Mainmast Cross Tree Spreader. The Royal Brace is on the inboard side of the Double Block and The Top Gallant Brace is on the Outboard side of the Double Block. They both drop down from here and Belay to the Aft Mainmast Fife Rail. (There may have been a Fair Lead involved rut I personally didn't find it.) There is no Pendant on the Mizzen Royal Yard but the Top Gallant has a Pendant for the Brace, the Standing part for this terminates on two Eye bolts in the center of the Mainmast Cross Tree Spreader. Well, that was the information that I gleaned from the Cutty Sark Society's Plans. With my build, I omitted Blocks that would have been used for Sails as mine does not have them and I believe that these Blocks were "UInshipped" when in port for any length of time. Braces/Pendants are a real "Cats Cradle" if you know wot I mean.... I guess you already know, Top down and Aft to Bow. Goes against the "Aft and Up" rule of thumb. More than happy to assist if I can, I've had a couple of sleeps since my Cutty build but something that's still very close to the Heart. :Looking good Chap!! Any help?
- 92 replies
-
- 2
-
-
- Cutty Sark
- Billing Boats
- (and 2 more)
-
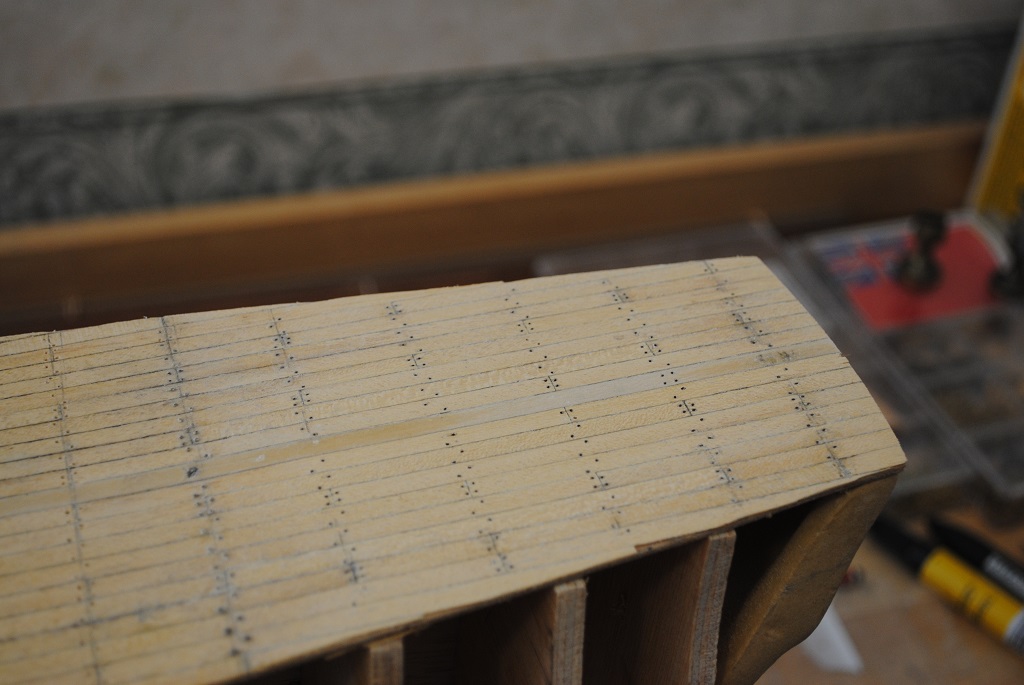
Thanks Boyd, Early days.... I am thinking that I'll drill the ends/Butts of the planks and use my Hearth Brush Bristles to represent the Nails then sand the deck down. The alternative that I am "Toying" with is to prick the ends/Butts with a pair of dividers and use my Tech Drawing Pens, (Yup, these are old but good.), to place a dot of Black Ink into the depressions left by the dividers, then sand the Deck.... Thoughts? Anyway, while I'm thinking of my options, it gives me more time to research and study wot has been left out of the Kit, or, I should perhaps be more positive and say what I can add in terms of fittings, etc. Cheers....HOF.
-
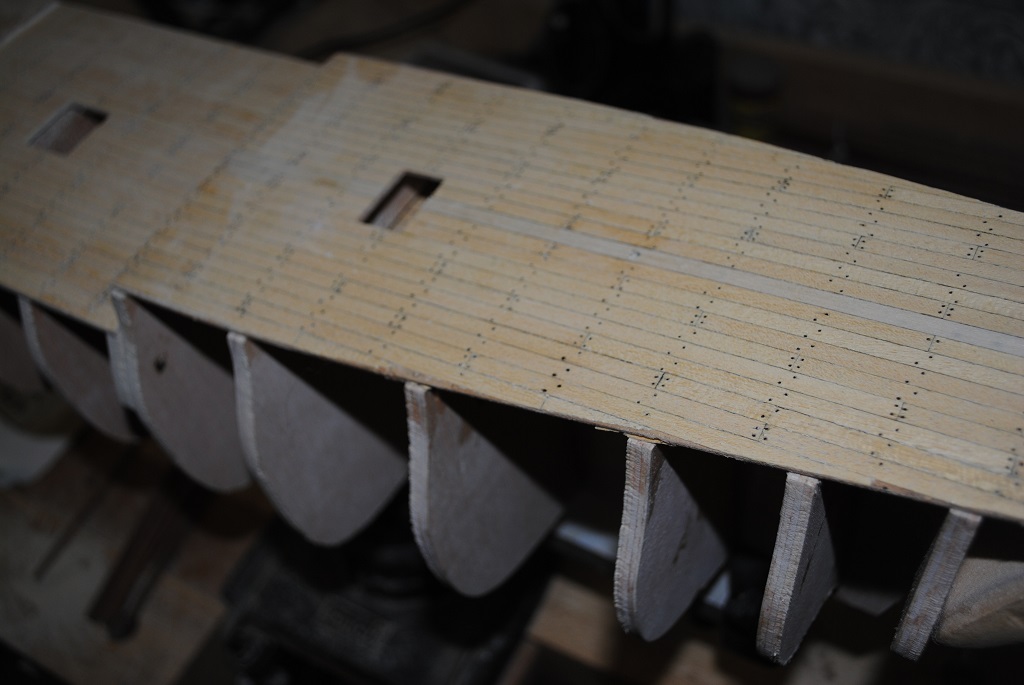
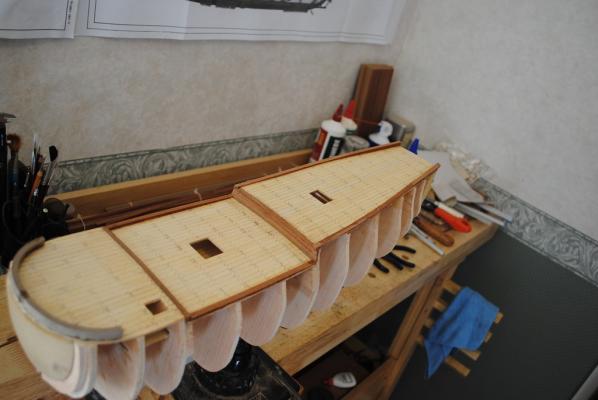
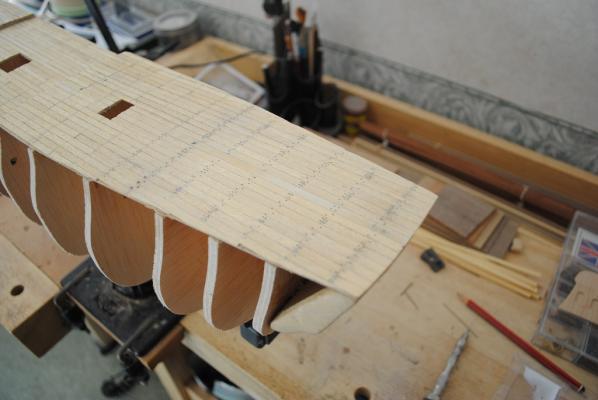
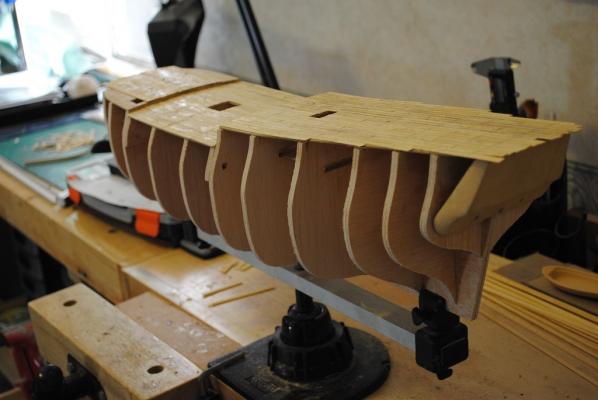
Oky Dokie, A little progress to date... There are some simply awesome examples of this subject on this site!! To Date, have sorted out the Deck Camber, Thanks Paul. Glued all Bulkheads in position using the False Deck to line them up, but of a mission, and have almost completed planking the Decks. AOTS shows a reasonably complex Deck with Scarf Joints, Etc. I guess I may have been more "Pragmatic" in my approach, 4 Butt Shift, no Scarf.... I also did the "Shift" on the Fore Deck, Oops, never mind, I'm not going to take the Planks off now!! (It is what it is.) Unsure if i'll give heaps of extra detail in the build, but, I think I may have started already. Anyway, some Pic's from today. Have an awesome weekend!!

-
Hi Chap, Yup, Rig "Aft and Up!!" (Unsure where I got that quote from....) Inboard to Outboard worked for me also. I approached things a little differently, I placed the Main Masts in place first and approached the Top and Top Gallant Masts as separate assemblies complete with Yards and associated Rigging. (I adopted this approach as the height of the Model on my Work Bench meant that I was at the limit that my little arms could comfortably reach. ) Masts and Yards were not glued, everything is held together by Standing/Running Rigging. This made things a little more interesting as the Yards were "Live." The upside of this was that I could fiddle and get the Yards in more or less the correct positions for a "Harbour" Rig. Yours will be more interesting still with your Sails Bent to the Yards before your Yards are installed. By all means, PM me on the subject when you get closer or just use this Forum as others may have a different approach to me and I am certainly no expert.... BTW, Nice touch with your "Hermaphrodite" Masts/Spars on the Deck!! Cheers....HOF. (Harry)
- 525 replies
-
- 3
-
-
- cutty sark
- mantua
- (and 2 more)
-
Hi Chap, Some very nice progress indeed!! Regarding your Deck Structures/Rigging, my experience here, get these attached first.... I would have had an awful time trying to mount/attach these after the fact. My experience, put your various Blocks/Eye bolts in place on the Deck/Pin Rails, Mount Deck fittings, then Rig. Dead Eyes "In Board" are a Bi--h!! But Lanyards are for these are relatively easy if you make a "Bodkin" with your rigging thread with a bit of CA and some tweezers to pull the thread through. (My Stern Bulwark Railings were also in place when I rigged mine, I sure wasn't going to remove them so had to Visualize the sequence/method.) Last stuff that I put on the Decks/Skids, Boats. (Post the majority of Standing/Running Rigging.) Don't rush!! Cheers....HOF.
- 525 replies
-
- 3
-
-
- cutty sark
- mantua
- (and 2 more)