hof00
-
Posts
1,654 -
Joined
-
Last visited
Content Type
Profiles
Forums
Gallery
Events
Everything posted by hof00
-
 Looks really good chap!! I'm still stripping of the Decks, Fore/Main Decks, unsure if I'll do the Poop but will probably have to ensure "Consistency." (Have been held up at the mo. with life stuff.) Really like the detail on the Transom/Gallery, fantastic!! (IMO) So, all good "Aficionados" no problem with this, I think my Endeavour will be not 100% accurate, (Definitely not), more of an "Object de art) Keep up the great work. Cheers....HOF. Cheers/....HOF.
 -
Looking rather nice Chap!! I built the older version of the A/L Kit. (Still on the Ship Modelling Forum under HOF00 I believe.) Was my first POB model and enjoyed the experience. Good modifications to the new Kit, pre-drilled Mast Steps, Etc. Are the Chain Clates going through the Monkey Rail on your kit? I modified mine a little, got the Name Plate CNC'd from Bronze and the Scroll work shaped in Brass by a friendly Manufacturing Jeweller. Cheers....HOF.
-
Thanks Dave, I have some ideas in mind of how I am going to approach this. Hopefully, the coming Weekend will see some progress. (Rework?) Anyway, if I'm not happy with the way it is at present, it's best to have a go at rectifying, I wouldn't be happy if I didn't!! Cheers....HOF.
-
Looks like the A/L version on Steroids!! Doing well Chap. Cheers....HOF.
-
Hi Chap, Unfortunately, work is in the way of any time I have last and this weekend. (Gives me more time to "Ruminate." ) Looking to get stuck in next weekend. Cheers....HOF.
-
Looking good Chris. I seem to be having the same issues as you in my Ship Yard, work etc. Cheers....HOF.
-
Hi Chap, Welcome to the Forum!! (Esp. Cutty Sark Nuts, Like me!!) That model looks like a cross between Artesania Latina and the Mantua version. (Atesania is smaller scale but same construction method, Mantua is the same scale as yours.) If you use the A/L doctrine for Planking, they advise Stem/Stern Post/Keel after first Planking, then second cover. You may need to score a rebate the same thickness of your second cover, (I'm guessing 0.5mm?), for the Planking to "Slot" into in these components. If Stem/Stern/Keel are added after the second cover you may require a little more filler in places. Personal choice, have a good look/think before deciding what is best for your particular model. Your build looks good!! My second cover was Stem to Stern, as it was painted/Coppered there was no need to make things more complex, me anyway. Happy to offer any assistance. There are a few build logs for the Cutty. (HOF00/Neenad/Markjay) Cheers....HOF.
-
Hi Chap, Yup, Interested to have a look-see, wot you are up to. Paint? I'll do this so long as the Deck turns out o.k. I like the look of the Freemantle Replica. The weather? El Nino is holding sway at the mo. The longest and hottest Summer that I can remember since I was very young. (I was 7 years old in Eastbourne, Wellington when the Wahinie went down, most of the 53 passengers lost their lives being "Blown" across the Harbour from West to East, Cargo moved, (Being a Roll On - Off Ferry,) Foundered on Barrets Reef at the entrace to Wellington Harbour and ended up on her side, half submerged. For years, there was a Boy we Called "Moaning Minnie" to warn of the wreck while salvours did their stuff. (Very firmly in my mind, cannot forget that day), Cyclone Giselle. 48 Years ago on April 10th this year.) The prevailing wind used to be from the South for many years but now m ore Northerly. Is the weather changing? I am firmly of the opinion that it is. (Not at all out of line Chap, administrators can be the judge.) I live in the Bush so pretty much always Green. Grandstanding perhaps: Carbon Credits/Trading are a little bit of "Lip Service." Anyway, as soon as I get my Decking replacement from Boyd, (Thanks Boyd), I'll be into it once again!! ANZAC Day Monday, Have an extra day off and remember the Fallen. (I don't think there is an "Emoticon" for this.) Cheers and Regards, Harry.
-
Nice work Chap!! Am waiting on My Deck stuff before I move on, and, when I do, it will be getting the Deck as good as I can. (I do intend to completely remove the old deck material, and yes, at this stage it's going to be "Interesting.") Apologies, not talking about the Liquid Gloss, but filling you in on the build across the Ditch!! (Hopefully not out of line.) Cheers....HOF.
-
A Lorch Micro-Mill that never was ...
hof00 replied to wefalck's topic in Modeling tools and Workshop Equipment
Hi, Considered Proxxon Stuff? Am thinking of making the investment. (Might be talking through "A hole in my head" regarding machining/milling.) Cheers....HOF. -
Hi All, Stumbled across a communique earlier today that Mamoli had a bit of a disaster? Does this mean that I don't have any recourse for any Spares, Bits & Pieces Etc, for the Mamoli kits in my possession? I have a Mamoli HMS Victory and Flying Cloud, un-started and complete. (Not "Mini Mamoli") Are these now "Collectors" items? Cheers....HOF.
-
Hi Mark, Your build is coming on very, very nicely Yup, Copping is a bit Nuts but I think you have truly mastered it!! (There's always another Build that requires this) All ship models are different as I have found out.Loving it!! (Have to have something to live for.) If I can say, my work colleagues have described previously, that Ship Modelling is the "Pinnacle" of Modelling. Your Coppering efforts esp. are looking awesome!! Nice Build. Happy to share if an issues/problems but understand that there are more "learned" than I. Enjoy!! Cheers and Regards. Harry.
-
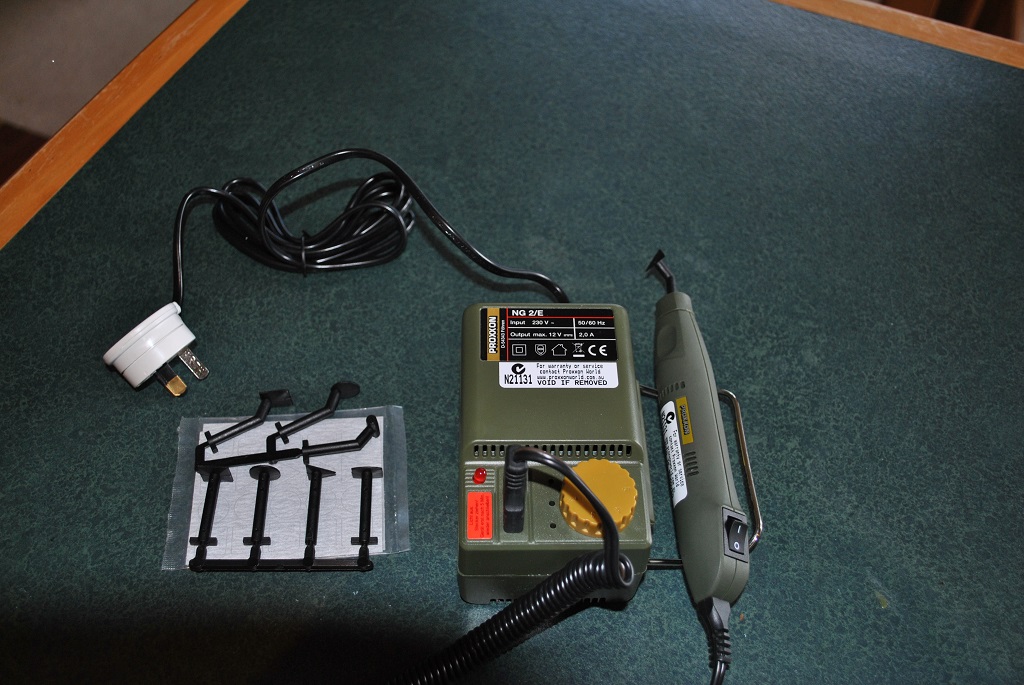
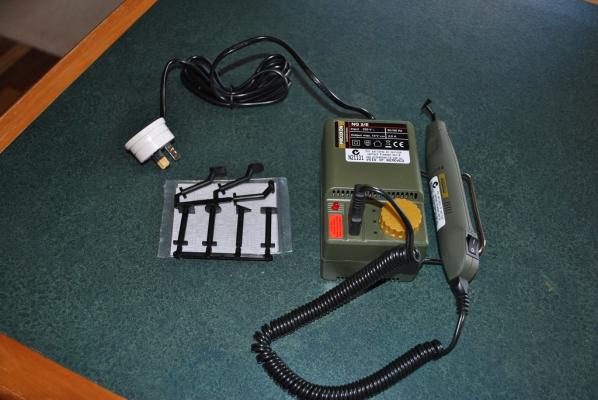
And, a couple of pictures of the Tool I will be using to "Attack" the Deck. Thanks for the Links Chris, appreciated.

-
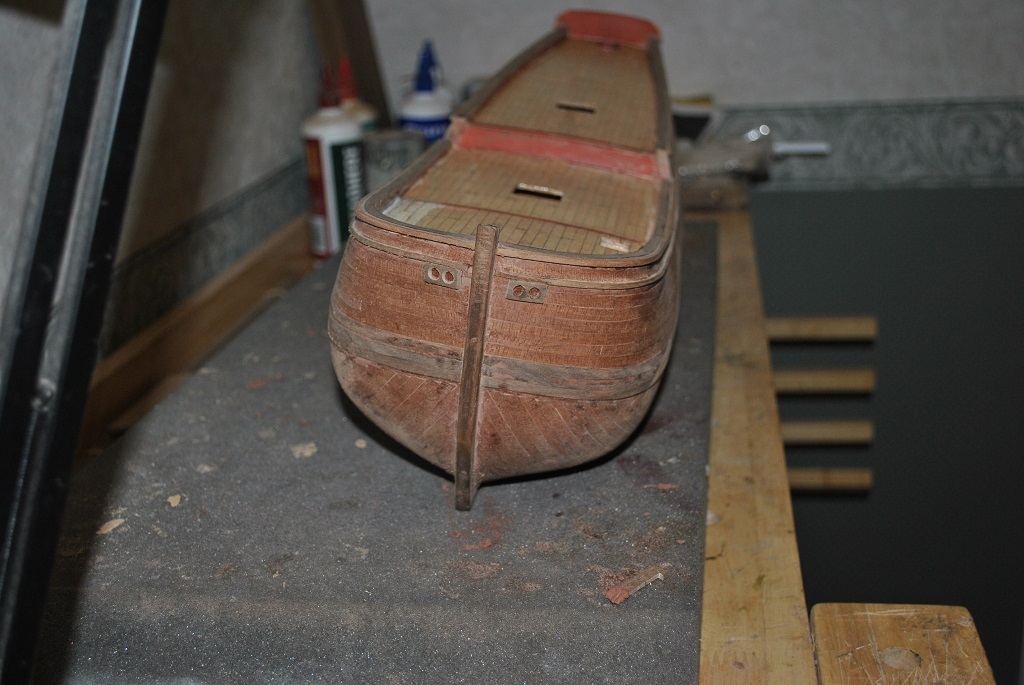
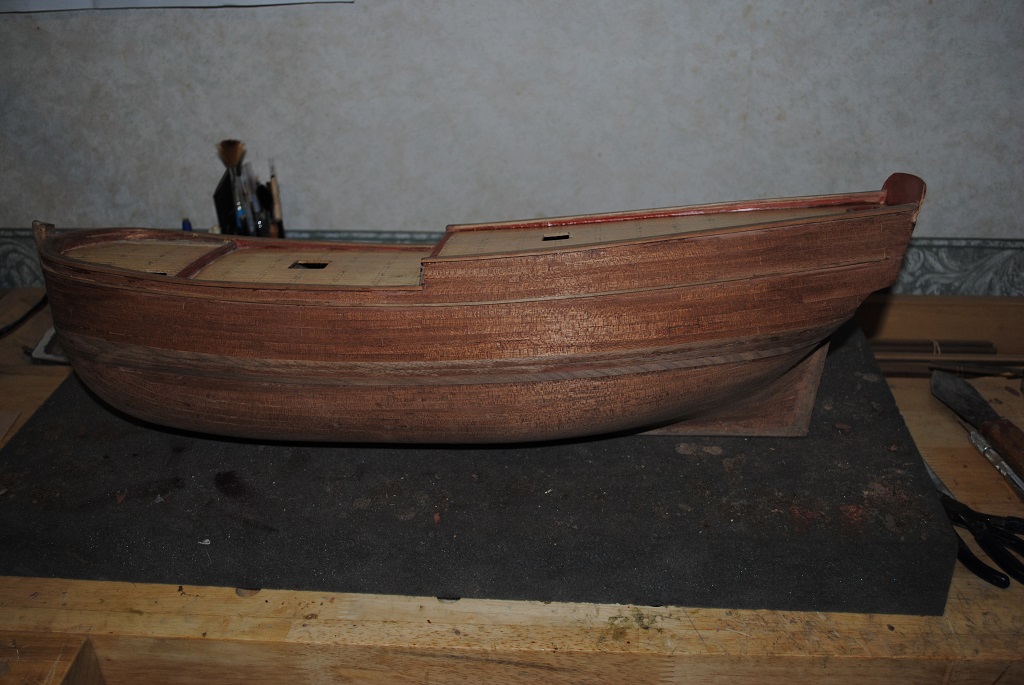
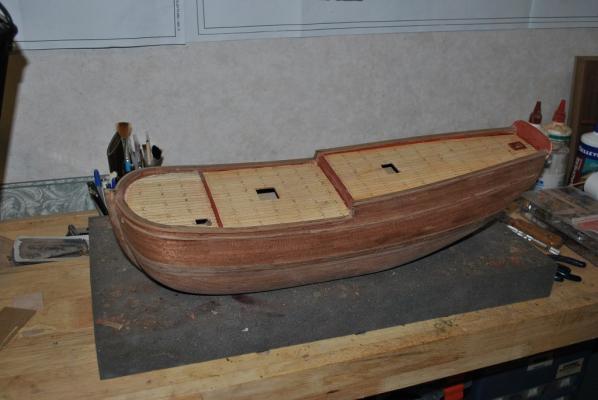
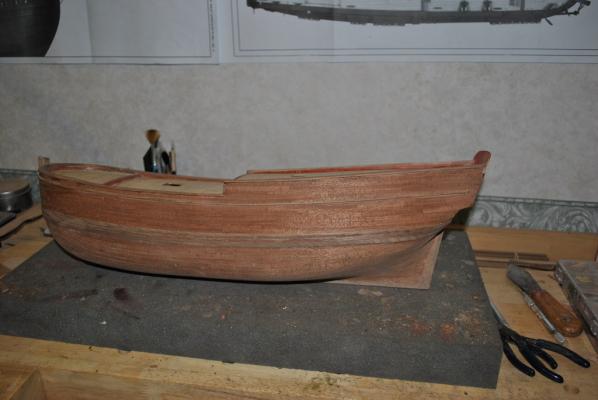
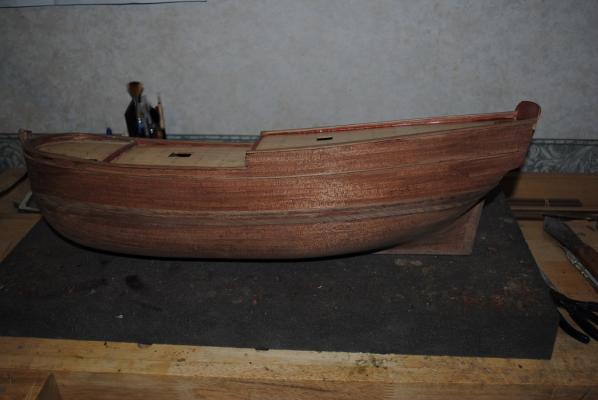
O.k, some pictures of the current state of affairs, have not yet attacked the Deck.

-
Hi All, Just a small update in case you'd all thought I've rolled over and died. (Only the good die young, or so they say.) O.k. the Hull is looking really good but I'm not happy with the Deck, at all. Sanded away, trying to make things perfect but created far more problems, cut through the deck in a few places, and, where I didn't, the Decking is so thin that it's translucent, the Ply underneath shows, not good at all.+ Thanks for your input Chris, yup, got some assistance with "Paper" Decking, (Thanks RichardG, it was worth a crack!!), played around with this but, no go really. Am aware that there is going to be a bit of work re-doing the Deck at this stage but am up for it!! Spoke to Boyd, (Thomaslambo), who is sending me some Decking that he didn't use on his Bounty, Thanks Boyd!! (Just calling out your assistance!!) Also bought a Proxxon Pen Sander/Power supply which should make removal of the old Decking a little easier. I'll post some photos later. Cheers....HOF.
-
Hi Chap, Looks like a very Nice Bluenose 1 I don't think that you'll have too many issues with you restoration Pretty simple Rigging to restore. I built an A/L version a few years ago. (You can find this on :the "Ship Modelling Forum" under HOF00 (I guess my photos are still there, I started a thread: Calling all Bluenosers which was, at the time met with a little derision.) I look forward to seeing your progress. Brings back some memories. Cheers....HOF.
- 30 replies
-
- 3
-

-
- bluenose
- billing boats
- (and 1 more)
-
Hi Richard, Thanks for that!! I'll take home tonight and do a little "Experimentation with some thinned colour. Cheers....HOF.
-
Thanks Richard, Very much appreciated. Should mention that the existing pattern is a four Butt shift, 25mm per shift. Cheers....HOF.
-
Looking really good Chap!!
-
Hi Richard, Longest plank is 100mm and shifted at 25mm. The Nail pattern that you have illustrated is what I have used to date. A4 would be really good. Any help, much appreciated. Cheers....HOF.
-
Hi Chap, Thanks for the advice.... I guess I am being critical but I don't think overly so. I replaced four Planks on the Fore Deck that I cut through, they look alright but there are other areas also that are getting a little on the thin side. I'll post some pictures soonish. Cheers....HOF.
-
Could someone please direct me, or assist me in obtaining something approaching a 1/60 Decking PDF? I am getting a little more than frustrated in trying and failing to get the wooden planks perfect. My plan, (Hope it's a valid one), was to print and overlay on to existing Deck. (1/60 Endeavour) Doesn't have to be the exact dimension, just something that I can cut and fit. (Planking width, 5.0mm with 3 or 4 Butt shift.) Cheers....HOF
-
Hi Chap, How are things? I'm taking a wee time to think about the Endeavour. Have completed second planking, Hull, but have managed to "Cut Throughh" a portion of the Fore Deck Planking. Unsure if I'll try to Re-Do this as I am worried that I might make a bad si9tuation worse. Maybe covering the error with "Cargo?'" Couple of Barrels/Casks and Cases wrapped up in a Net? We'll see I guess. I must admit, this is the most frustrating build ever!! Cheers Ears!! Harry. ...
-
Hi Chap, Finish sanding the Hull, add the last plank to the Whales, Paint the Bulwarks/Deck Steps/Bulwark finishing Strips, Loading/light/Air Ports/Hatches, Paint like the replica, French Blue, White and Black for the Whales, Channels, Etc. Pretty much in that order I think. Cheers....HOF.