
Supplies of the Ship Modeler's Handbook are running out. Get your copy NOW before they are gone! Click here to order
×
MORE HANDBOOKS ARE ON THEIR WAY! We will let you know when they get here.
×


hof00
-
Posts
1,631 -
Joined
-
Last visited
Reputation Activity
-

 hof00 reacted to John Gummersall in Stage Coach 1848 - John Gummersall - Artesania Latina - Scale 1:10
On to putting the strips around the windows and doors. Keep in mind since it is a curved structure, the strips around the doors and windows will be slightly slanted. In the picture below I only outline a few places, but in reality strips around almost every window and door are slightly slanted.
A few pieces of scrap wood some in handy to keep the curved pieces in place while the glue dries. Having said that, once you heat and bend the strip, with wood glue you can just hold the piece for a few minutes and it will adhere very well. Strips are not really required.
Not sure if is a flaw with the builder (me) or just all the movement of the pieces in creating the carriage so far, but the tabs that make up the main door and windows for some reason do not line up. They need to be lined up in order to glue the side door piece. A few clamps and some thick wood will line up the tabs, so the door side piece can be easily attached.
Once the side piece is glued on, the clamps can be removed and the door side will be perfectly lined up
-
 hof00 got a reaction from amateur in Double Channels
Thanks Jan,
I think that sometimes I can't see the wood for the trees....
I do recall seeing this in Flying Fish instructions I downloaded years ago.
I'll have a go once I have completed the remainder of the Flying Cloud Yards.
The time spent on this task will give me more time to ponder my approach.
Cheers and Regards,
Harry.
-
hof00 reacted to amateur in Double Channels
Did some googling.
you can use that same string to determine the position of the slots in the lower chanel.
You may discover that the slots in the upper chanel need some tinkering to get enough space to set them on the correct angle
Jan
-
hof00 reacted to Rick310 in Flying Cloud 1851 by hof00 - Mamoli - 1/96 - American clipper
According to the plans for the flying fish, only the fore and main topsail yards, had Flemish horses.
Rick
-
hof00 reacted to Ian_Grant in Flying Cloud 1851 by hof00 - Mamoli - 1/96 - American clipper
As I recall, flemish horses were present on any yard carrying a sail which had reef bands. A crew member had to be at the very very end of the yardarm to haul the end of the reef band taut and attach to a fixture at yardarm end. I believe this was called "passing the ear-ring". The regular footrope is too near the yard (in the sense of height to the yard from the rope) for this seaman to safely stand. The Flemish horse droops lower to provide this.
I haven't looked to add to this response, but there are pictures of seamen even sitting astride the yardarm end to haul the band taught.
That's what I recall anyway; I should consult Harland.
-
hof00 reacted to rwiederrich in Flying Cloud 1851 by hof00 - Mamoli - 1/96 - American clipper
Flemishhorses, generally were used on yards that supported the stunsail booms. Crew deeded to get out far to rig and tend to the sail affixed to the boom.
Rob
-
hof00 reacted to petervisser in Cutty Sark by petervisser - Billing Boats - Scale 1:75
After tying about 900 clove hitches to complete the ratlines, the model is ready for the last phase of rigging. Phew! I can now begin rigging the braces at last. What with the hot weather here in Victoria, my workshop which is semi-sub ground level is one of the coolest rooms in the house. This has allowed me to work on the model, despite the sunny weather. Here's a photo showing the current status...
-
hof00 reacted to John Ruy in Red Jacket by John Ruy - Marine Model Company - 1/16”=1’ (1/192 scale) - Vintage Solid Hull Clipper Ship Kit
Main Mast Futtock shrouds…
One step at a time…
Cheers 🍻
-
 hof00 reacted to Javlin in Scharnhost by Javlin - Trumpter - 1/200 - PLASTIC - Operation Paderborn - Kriegsmarine
The forward SS is rigged and I think I may of gotten about 90% now on to the rear SS many rope lines for flags in that area so some more brown into the mix.Sorry had taken two pics earlier to close got fuzzy did those without the cover you get the cover this time.
-
hof00 reacted to Javlin in Scharnhost by Javlin - Trumpter - 1/200 - PLASTIC - Operation Paderborn - Kriegsmarine
Work continues waiting on some brown EZ-line for the ropes for the flags quite a few of those so the turrets came off and blast bags till the line shows up.
-
hof00 reacted to Jared in Flying Fish by Jared - FINISHED - Model Shipways - 1:96
Here is a higher resolution photo of my completed Flying Fish (not focus stacked).
-
hof00 reacted to Jared in Flying Fish by Jared - FINISHED - Model Shipways - 1:96
Wow! I never thought I would get to this moment. My Flying Fish has reached completion.
Mounting the 2 ships boats was an interesting bit of enjoyable work. There were lots of pieces that had to made and connected. These are shown in the photos below.
Next I then spent time tightening some of the chains under the bowsprit. This included cutting out and replacing the rigging between 2 of the hearts.
Lastly I cleaned up the model and applied a few spots of touchup paint here and there, and polished up the mahogany base with a fresh coat of tung oil. I have not finalized my decision yet whether or not to add any flags. I think they would be distracting/tacky looking on the model. I can revisut this later before the model is placed in its case.
The last photo shows a stbd side view of my completed model. In October I am planning to post much better highly detailed images as a conclusion to this log.
Final Thoughts: This model was a real challenge from start to finish, but was a work of considerable satisfaction and enjoyment for me. I learned a lot of new skills and am most grateful to George, Rich, Rob and Rick and others who have offered encouragement and answered my questions throughout the build. I also would like to give a shout out to NRG for hosting this terrific web site and for all they do for our members and hobby.
For anyone thinking about building this beautiful model, be advised that it would be an extremely poor choice kit for a beginner. I would rate it as an advanced kit. My impression from looking at other build logs over the years is that many of the modeller's who have bought this kit with good intent sadly were unable to complete it.
Thank you all.
-
hof00 reacted to rvchima in Bluenose by rvchima - FINISHED - Amati - 1:100
Much Better!
I built a new mainsail from silkspan using Tom Lauria's technique linked above. Tom does not seem to post on MSW but a quick search on Lauria turned up 6 pages of mentions, mostly about making sails or rope hanks.
I had plenty of silkspan from previous model airplane projects. It is strong and does not disintegrate in water - that's why it's also used to make teabags. It is available in three thicknesses from Sig Manufacturing.
Tom said his was .0015" thick. Mine is .003" thick - I suspect it's Sig's medium-weight material. My only concern is that silkspan can become brittle and yellow over the years. However, the first step of Tom's process is to coat the silkspan liberally with artists' acrylic paint, and that should help protect the material.
I chose an off-white paint called Titan Buff. I think it resembles muslin. I painted two sheets about 18" x 24" and used almost half a tube of paint! The silkspan really soaks it up. The paint goes right through the material, so when the front is done the back is too.
I marked the sails with a hard, dark pencil and attached hem reinforcements with diluted Elmer's glue. Tom recommends using a travel iron to seal the strips down, with a sheet of dry wax paper between the sail and the iron. Dry wax paper is NOT the wax paper you have in your kitchen. It is also called deli paper and has the wax embedded in the fibers so it doesn't come off on your sandwich or your sail. Even better, we had some parchment paper which is silicon-based and used for baking in a hot oven. I only needed a 6" strip.
I don't have a travel iron - I don't think I've ever ironed clothes while traveling. I do have a covering iron used to attach iron-on covering to larger model airplanes. I set it to 250 degrees and it worked perfectly.
The mainsail took a few hours to make and I am pretty happy with it. I still have to stitch it to the boom and gaff, and attach the sail to the rings on the mast. That looks tricky.
-
hof00 reacted to rwiederrich in Footropes, Flemish Horses and Stirrups
I’ve always reminded builders to keep their stirrups/foot ropes very short. I made sure they were on my Glory of the Seas. The men working the sails are able to do so.
Rob
-
hof00 reacted to dafi in Footropes, Flemish Horses and Stirrups
I had once an analysis to the "3 feet below the yard". It is measured from the top of the yard in my opinion, other points of taking the measure do make no sense imho.
Short Executive Version:
The simplyfied definition "3 feet underneath the yard" would possibly read on the working basis like this:
Stirrup 3 Feet long, with enough overlength to do 3 turns around the yard and nailed to the top of the yard. Hangs behind and underneath the yard.
XXXDAn
-
hof00 reacted to Kenchington in Footropes, Flemish Horses and Stirrups
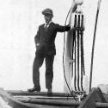
Just for fun, here's the gear in use:
Note the reef tackle (beneath the feet of the men on the yard) hauled from the deck and easing the strain on those aloft. The stuns'l boom has been topped up to give some clearance but the skilled man, at the yardarm, has it under his arm. His feet are braced on the Flemish horse as he hauls (though the earring is not shown accurately). The other men are supposed to take hold of reef points and pull to windward to ease the load on the man passing the weather earring. Later, they will let the wind do the work of stretching the sail toward the lee earring, before gathering up the canvas and tying the reef points.
I have only participated in this task the once and that only in a training exercise, not when a reef needed to be tucked in. (In the old insult of greenhorns, I was strictly a "bunt reefer and yardarm furler", the skilled work being needed in furling the bunt but passing the earring when reefing!) If anyone cares, that was on the topsail yard of Rose, during a sail from Halifax to Lunenburg before she went off to Hollywood to play at being Surprise.
Trevor
-
hof00 reacted to Snug Harbor Johnny in Footropes, Flemish Horses and Stirrups
Good point, so I googled sailor height in 1850 and got:
Historical records of British military and merchant seamen provide the most detailed information on average height. British Royal Navy: In 1841, a naval surgeon suggested that recruits be of "middle stature" (between 5'4" and 5'8"), noting that excessively tall or short men were at a disadvantage. British merchant seamen: An analysis of merchant sailor records from the period shows the average height to be 5 feet 5.5 inches. Height requirements for entry into naval training programs were also enforced and adjusted, reinforcing that a "middle stature" was sought. With the above in mind, the foot ropes should not be more than 30" below the yard - at 1:100 scale that is about 9/32" (.281) - a little over 1/4".
-
hof00 reacted to Kenchington in Footropes, Flemish Horses and Stirrups
That makes sense: Flemish horses would likely be useful when reefing, as the man hauling out the weather earring would have something to push his feet against. Most times on squareriggers, topsails were the only ones routinely reefed -- and that ended when split-topsails came into use instead (though I suspect that was after Flying Cloud).
Trevor
-
hof00 reacted to Kenchington in Footropes, Flemish Horses and Stirrups
3 feet below the yard would suit a tall man but be too low for me. You need to put your belly on top of the yard, while your feet are securely braced against the footrope and your arms reaching down to work with the sail. And if the shipmate working beside you is a big, heavy guy, his weight will pull any slack towards you, lowering the rope.
Then again, I have worked aloft on a vessel that seemed to have been rigged for teenagers. If I stood up straight, the yard was at mid-thigh, which did not encourage a sensation of stability!
Trevor
-
hof00 reacted to Snug Harbor Johnny in Footropes, Flemish Horses and Stirrups
Just be sure that your foot ropes don't hang too low, as seen on some models. Sailors standing on them still had to be able to bend over the yard to pull up sail. 'Guess about 3 feet below the yard would be about right, so at 1:100 scale the foot rope will be about .36" or 3/8th" to be generous.
-
hof00 reacted to popeye2sea in Footropes, Flemish Horses and Stirrups
Steels Art of Rigging specifies stirrups at 'proper' distances, two three or four on each side of the yard. Flemish Horses are only mentioned in connection with topsail yards.
Falconers Dictionary of the Marine states the same thing with almost identical wording
Regards,
Henry
-
hof00 reacted to rwiederrich in Flying Cloud 1851 by hof00 - Mamoli - 1/96 - American clipper
Wonderful job...she is coming along nicely. The attention to detailing the yards out with *ALL* their blocks, stirrups foot ropes , flemishhorses, and sheet blocks can be daunting. Not to mention the jackstays.
Many modelers tend to forego many of these and keep the yard furniture to a minimum. If you plan on adding leach and buntlines...you'll need these blocks as well. Not failing to mention those pesky jewel blocks for the reef tackle. It can get pretty busy for sure.
Good luck.
Will you be adding sails...furled or otherwise?
Rob
-
 hof00 got a reaction from uscharin in Flying Cloud 1851 by hof00 - Mamoli - 1/96 - American clipper
Hi All,
Bit of an update seeing that it's been a few weeks....
Working on Spars, Blocks and Hooks tiring to get my "Recipe" correct for these items. 🙂
I have completed Block installation for the Mainsail yards. For the Blocks that attach directly to the yards I first made up "Pigtails" with the Block siezed to one end using a "Slidey" Siezing secured with a dab of CA.
I then wrapped the "Pigtail" around the Yarad and used the same Siezing to secure the Block and "Pigtail."
After much Gnashing of teeth and brow beating the method works for me, a little more work but the results are more acceptable than other methods attempted. I also utilized the Jack Stay installation to line up Blocks along the center of the Yard. (Blocks for Boom and Gaff a similar approach for Block installation.
The Stunsail Booms are not yet glued in position as I need to develop a method for Footropes and Stirrups. While I experiment, it will be nice to remove any "Clutter." (I have some ideas for Stirrups and Footropes.)
I took some time to have a think about Hooks for Blocks and Rigging and developed a simple Jig to create 5.0mm Hooks. (I need quite a few of these as I am thinking that allot of the Running Rigging will eventually be secured to "Hooked" Blocks with Eyebolts on the Deck.)
Next was to think about attaching the Hooks to the Blocks.... These Blocks require a Becket, no problem to create these but I was disappointed with the result after tying the Siezing on the "Hook" side of the Block. (Even with 0.15mm Rigging Thread, the result was disappointing.)
I decided to resort to 0.4mm Black "Art Wire" More acceptable results and much easier.
Next tasks:
Stirrups and Footropes Topsail Yard Furniture That's me for the mo.
Comments/suggestions always welcome.
Cheers....HOF.
Photos:
-
hof00 reacted to ERS Rich in Flying Cloud 1851 by maurino - Mamoli - 1/96
Look into the concept of tapering (reducing plank width) and planking using the belt concept. Learning opportunities to increase the skill set. Somewhere on this site is a planking guide for different situations.
-
hof00 reacted to rwiederrich in Flying Cloud 1851 by maurino - Mamoli - 1/96
Hoping you won't make a mistake....but those strakes at the stern go all the way back to the edge of the stern post...they do not curve as you have them against the last bulkhead. they should go straight back to the stern post.
Rob