72Nova
-
Posts
677 -
Joined
-
Last visited
Content Type
Profiles
Forums
Gallery
Events
Everything posted by 72Nova
-
 Good grief Kirill is it possible to add any more detail?, I'm beginning to believe you don't want this build to end..hehe. Looks great!!, by the way I'm using your technique with the iron photo transfer, experimenting with canopy and the results look good, how did you accomplish the fringe on the banner along the bulwarks if you don't mind me asking? Michael D.
- 228 replies
-
- 2
-

-
- spanish galleon
- lee
- (and 1 more)
-
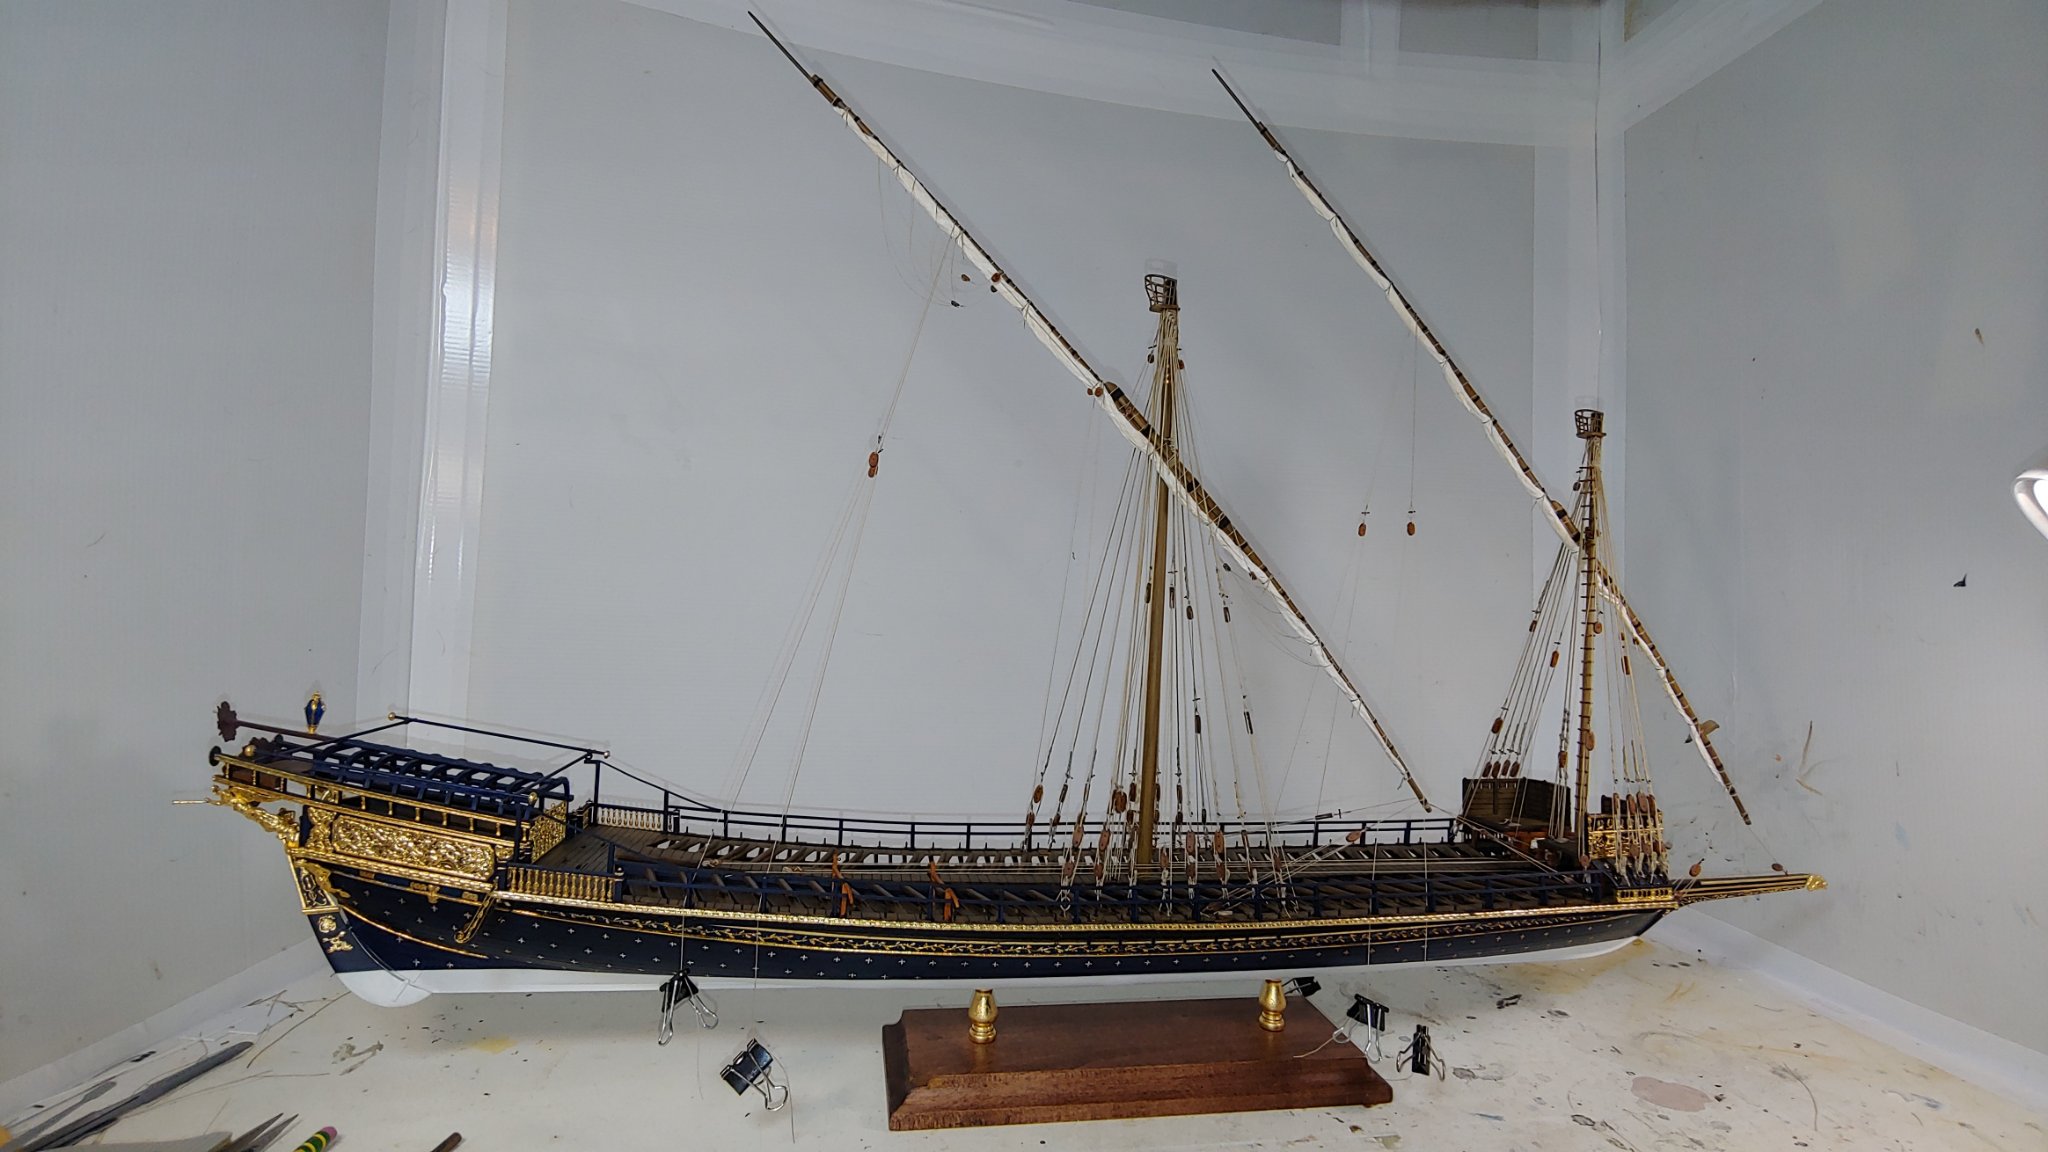
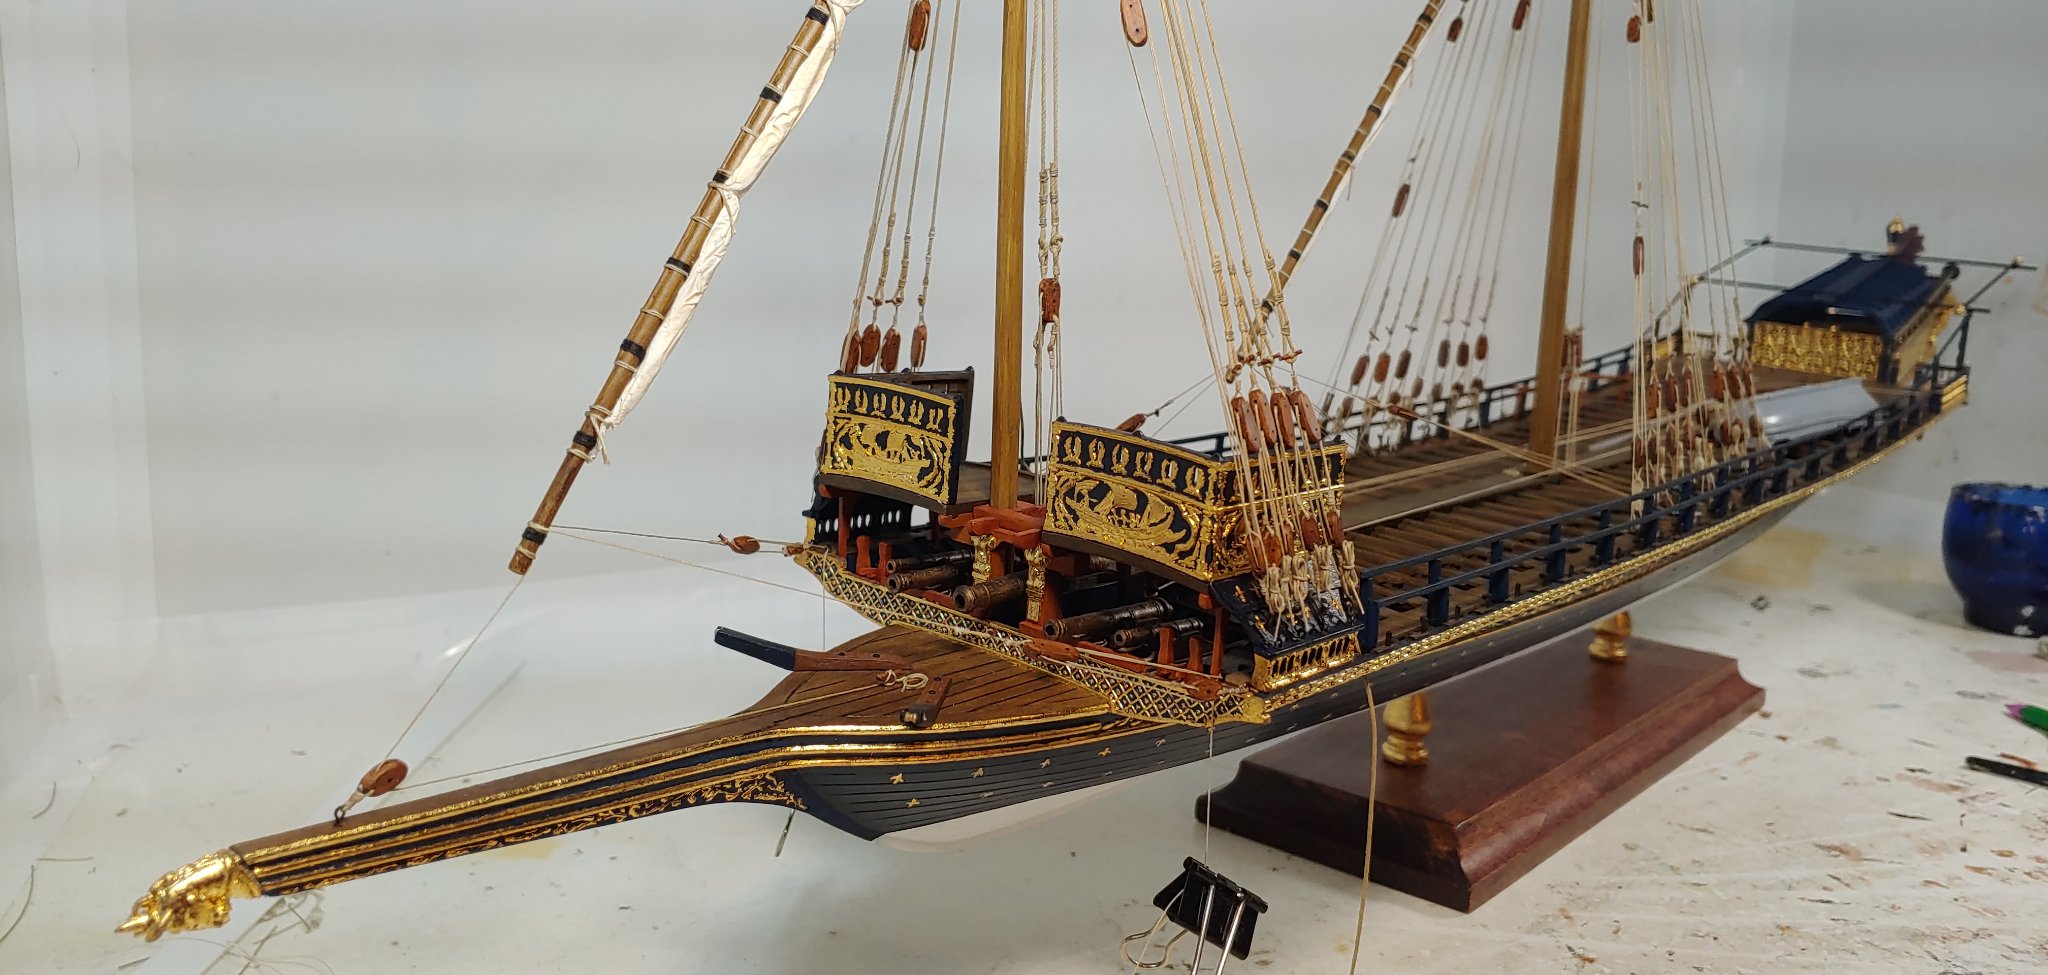
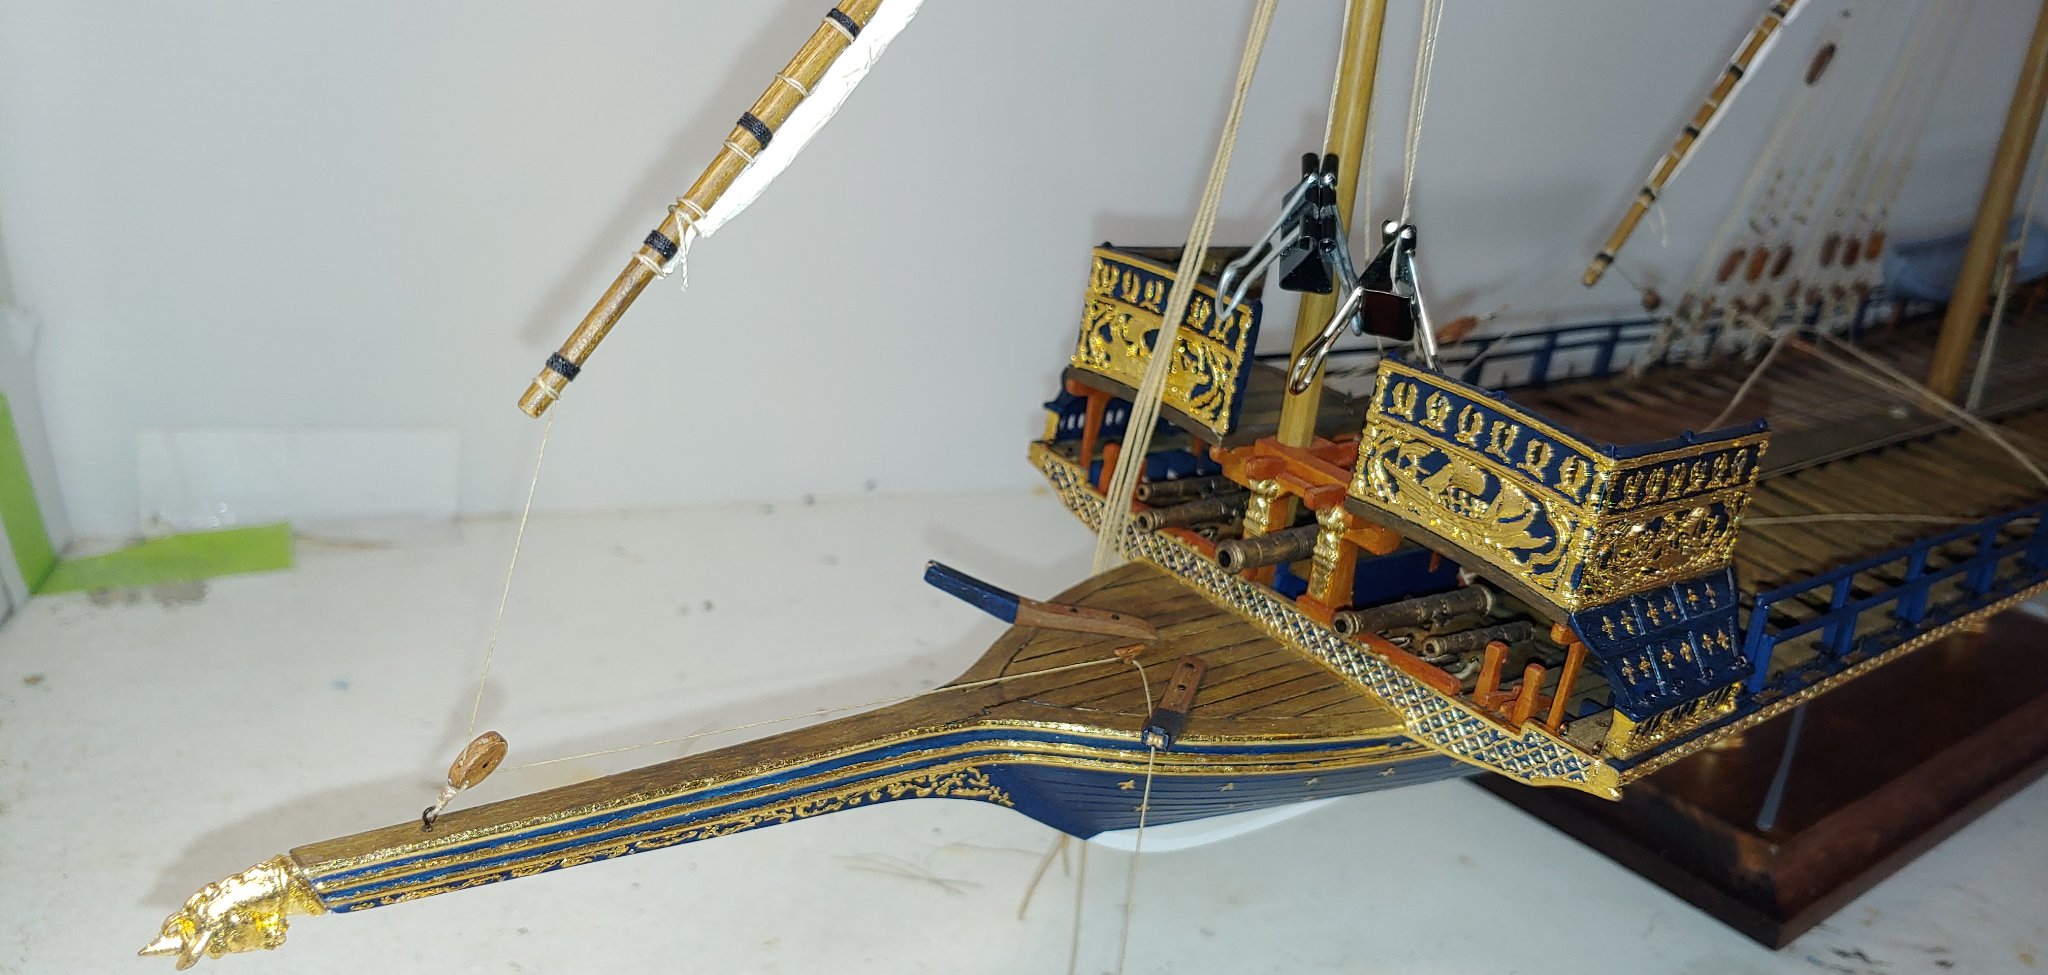
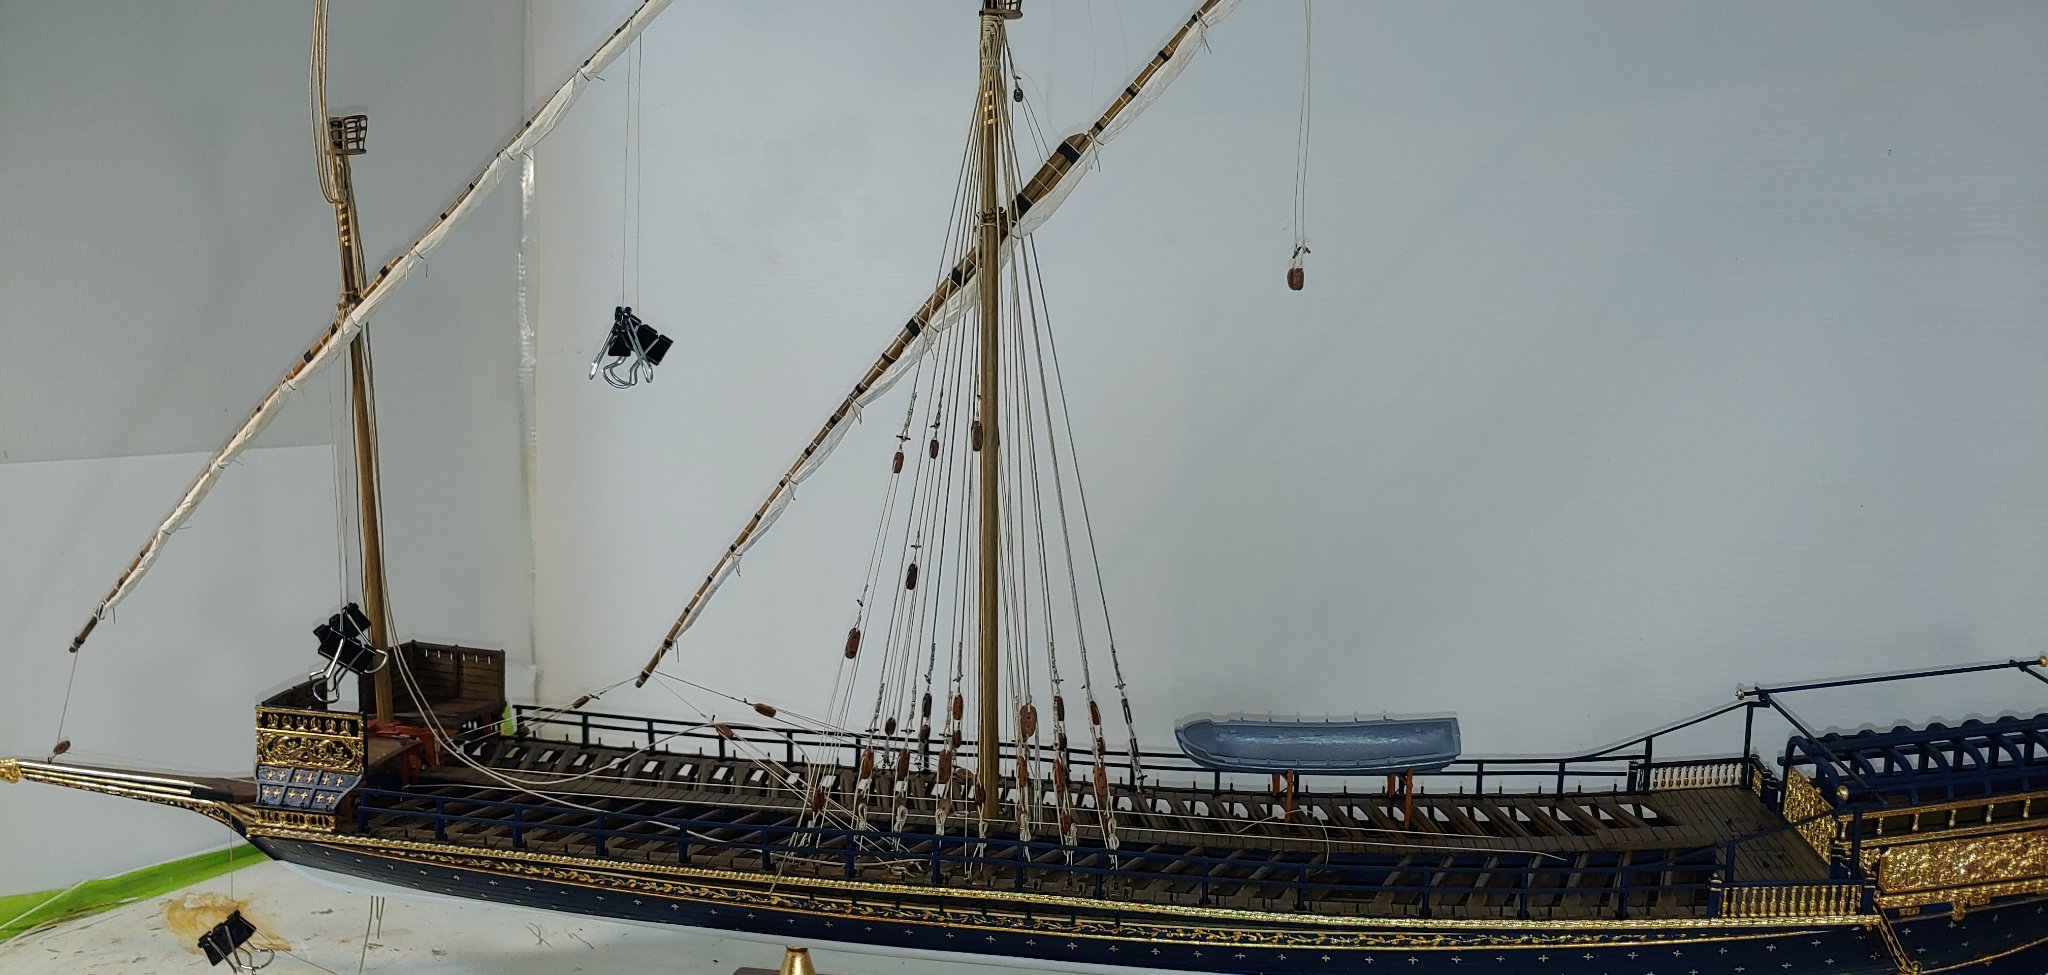
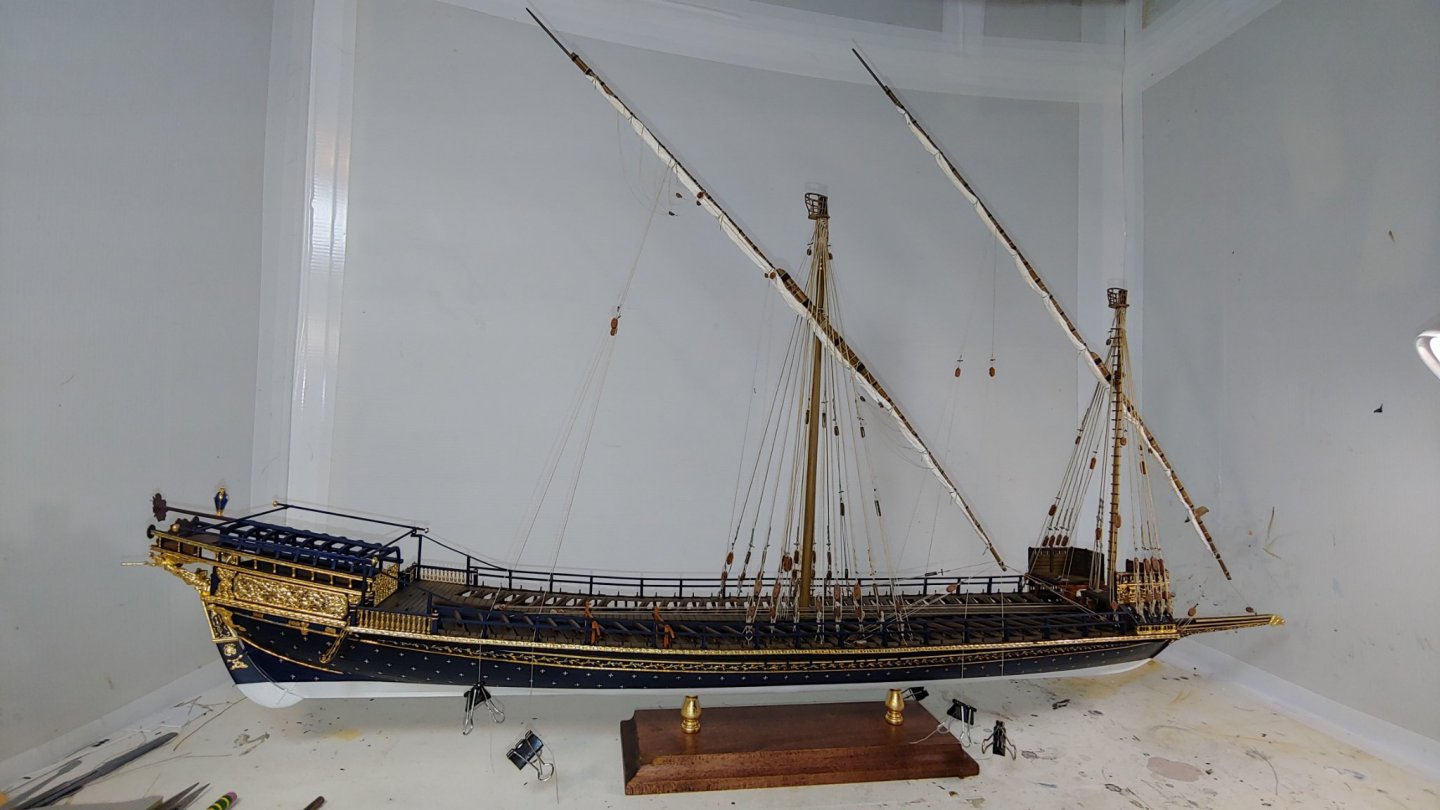
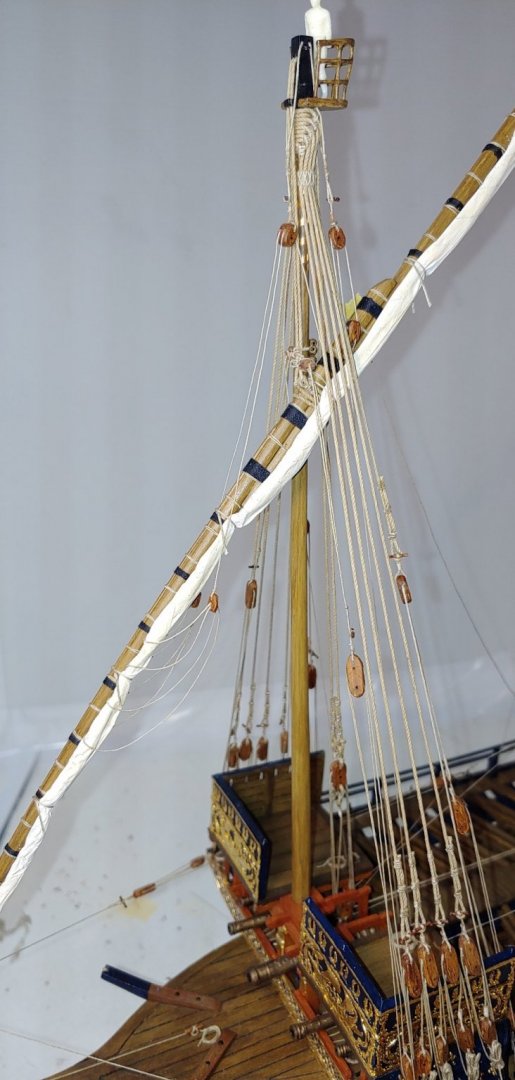
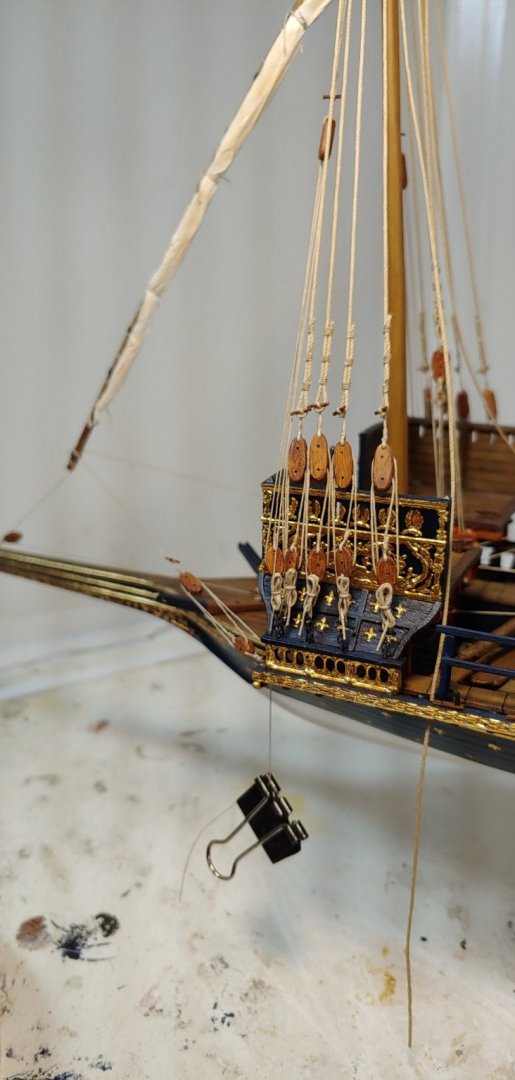
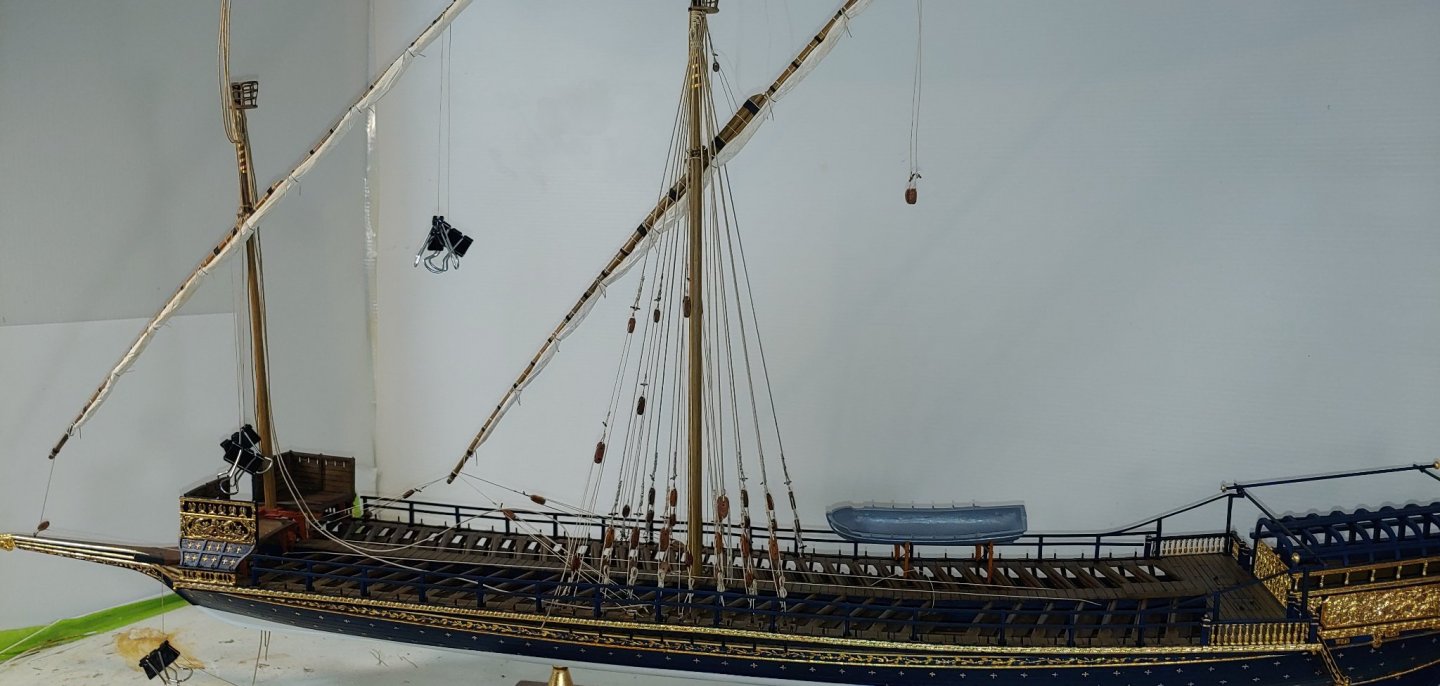
Thank you Marc, sometimes we have to to let the build win a few. Here's an overall shot of it's current state, total block/dead eye count thus far is an even 100 and rigging is about 95% complete. Michael D.
- 222 replies
-
- 8
-
-
- reale de france
- heller
- (and 1 more)
-
Nice work👍, love that model. I toured the San Salvador when it was about 2 thirds completed, I was in awe then when it was just in the construction stage and now since it's completion the rigging can provide a wealth of information. Looking forward on your progress Jeff. Michael D.
-
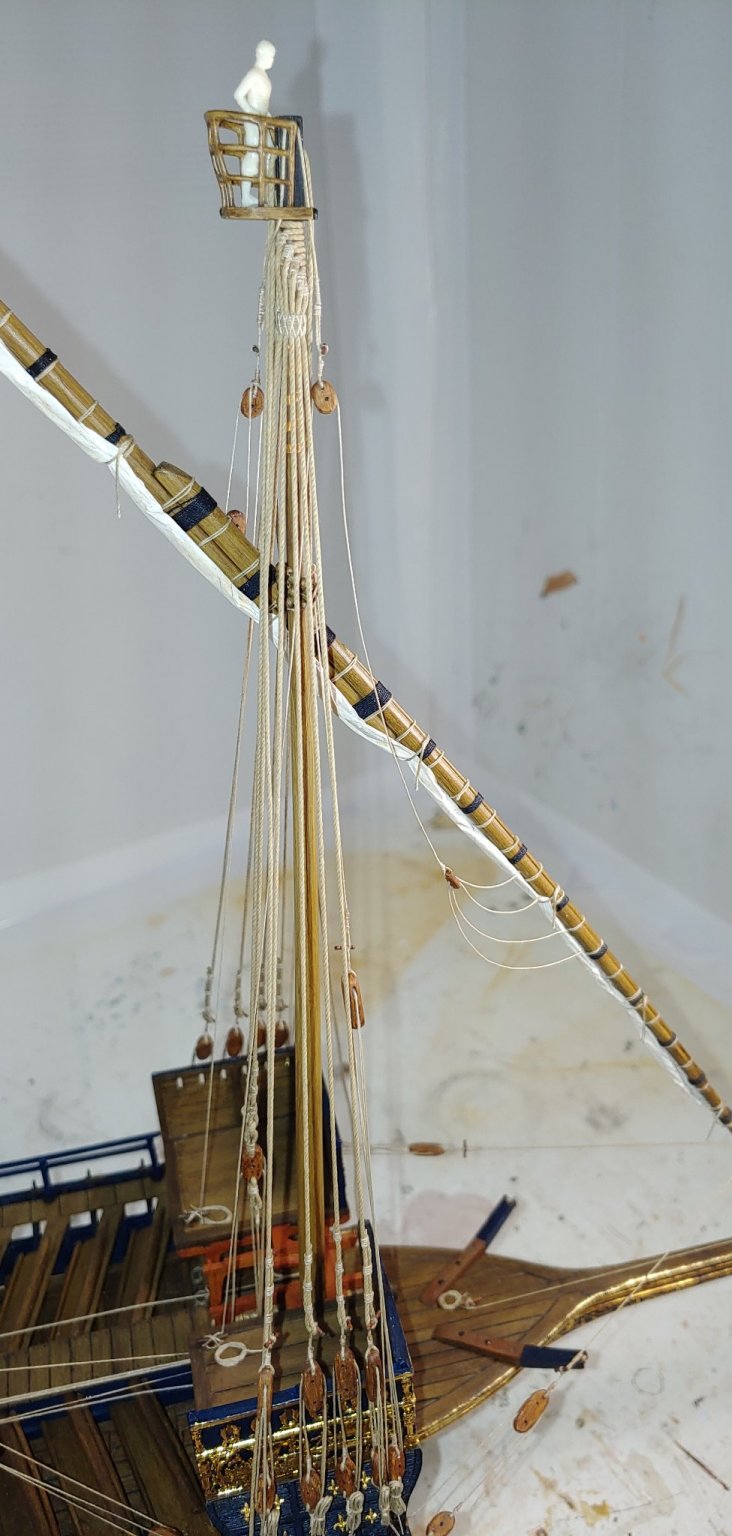
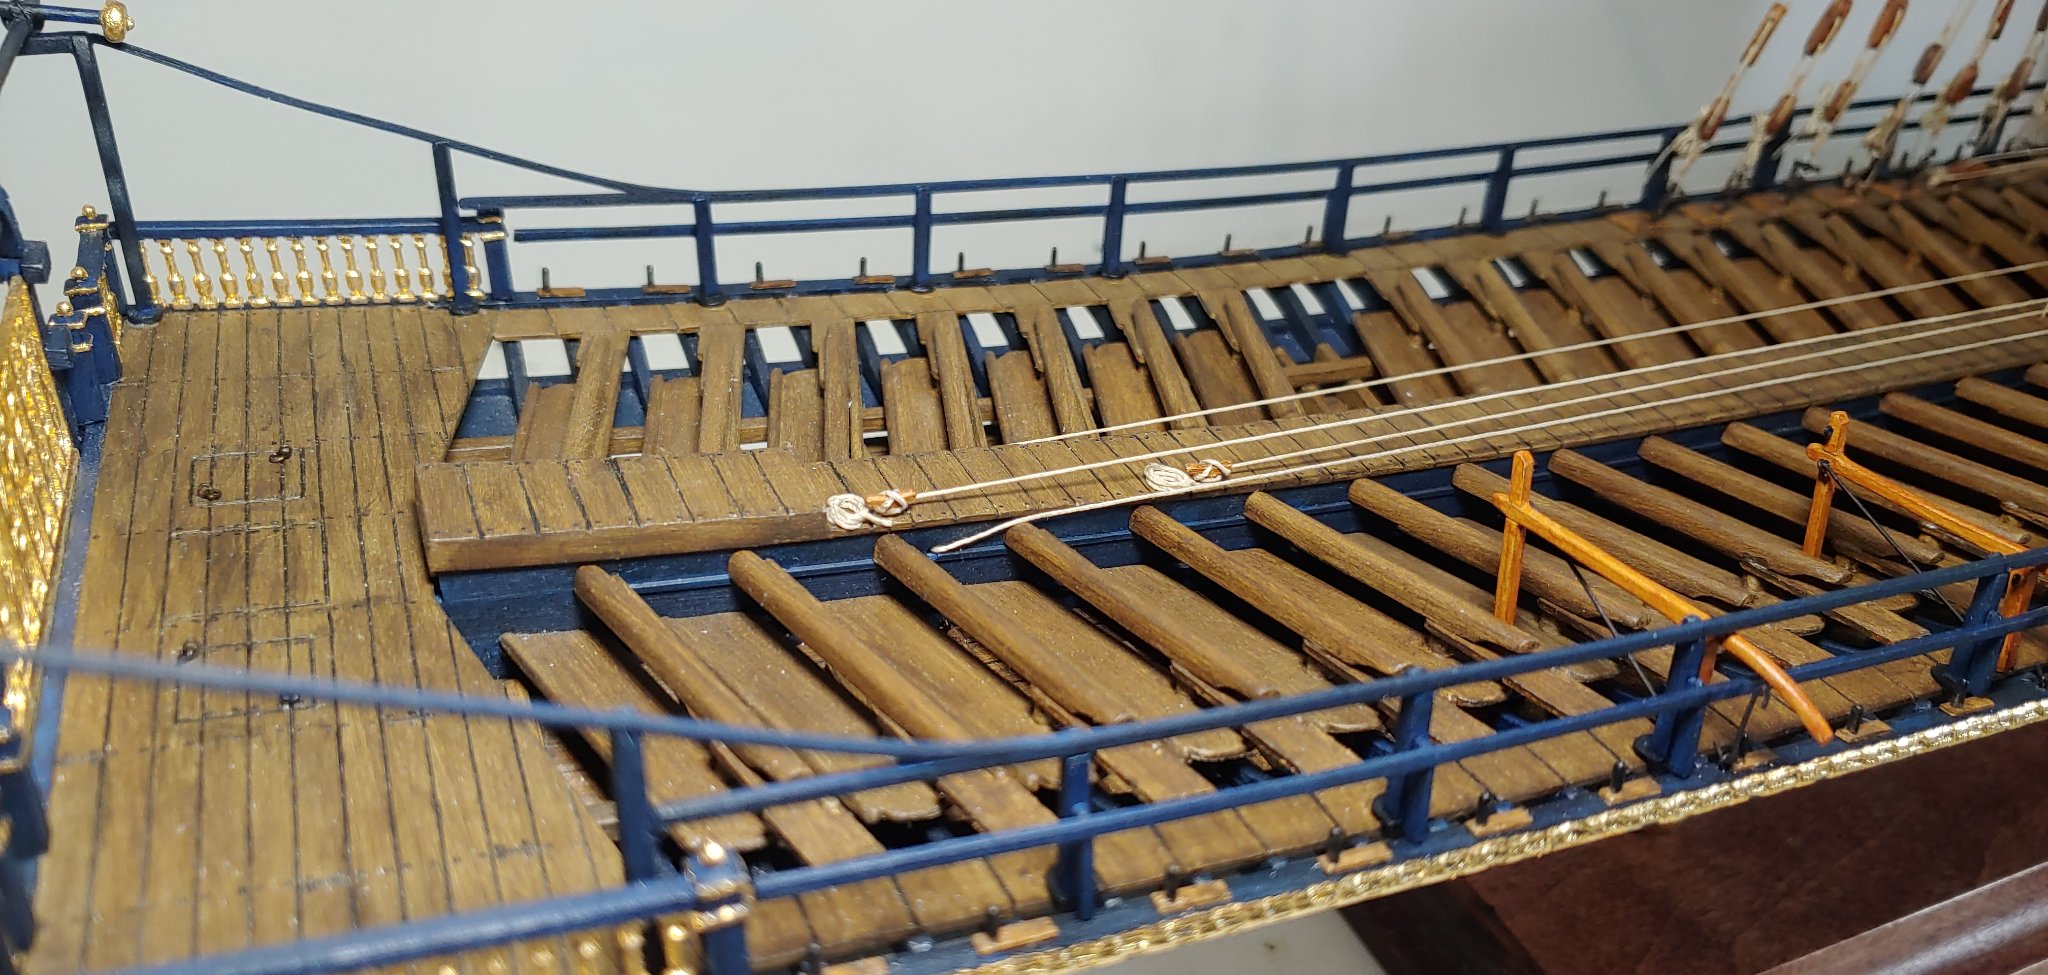
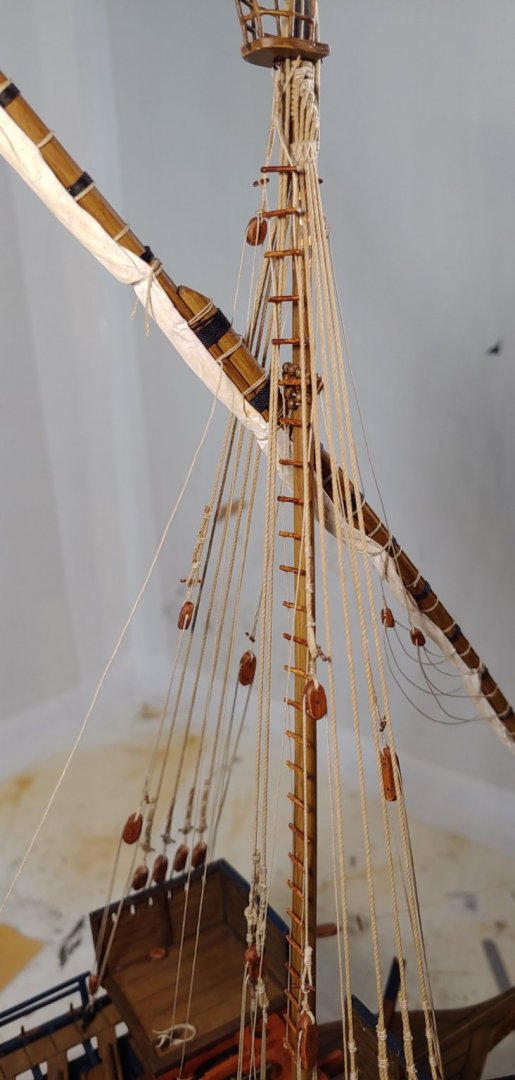
I spent some today and made up the rope ladder for the fore mast, using 0.30mm line for the rope and .30" rod for the rungs, without spending an eternity knotting the rope around each rung I simply CA glued them and I think the overall effect is not too bad. Michael D.

- 222 replies
-
- 5
-
-
- reale de france
- heller
- (and 1 more)
-
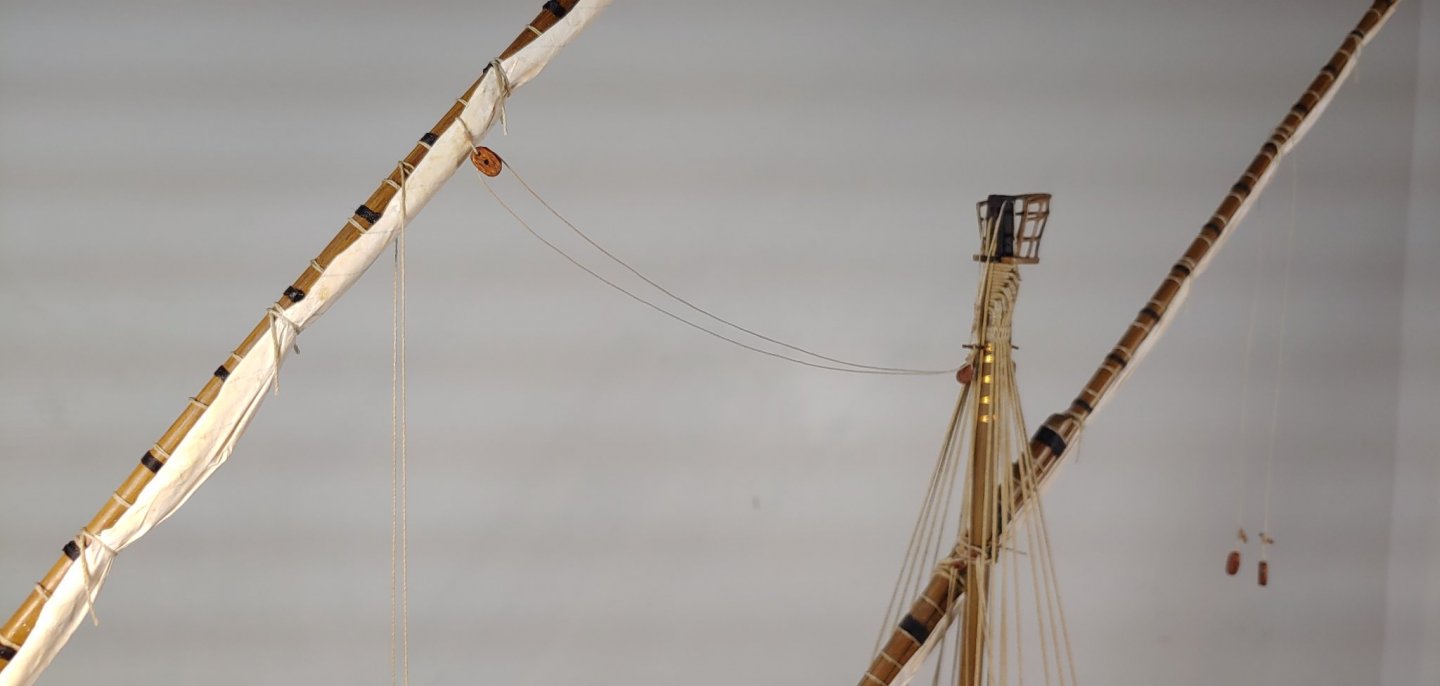
I added an additional martnet to the fore sail and swapped the single for a double block at the mast head, looks much better and started rigging the vangs. I also mocked up a martnet on the leech of the main sail and while it looks like it belongs I'm not so sure It's correct though since martnets on square sail ships were superseded by leech lines around 1650, but unsure about Galley's?, I'll ponder this for awhile as I focus on other areas of the build. Michael D.

- 222 replies
-
- 4
-
-
- reale de france
- heller
- (and 1 more)
-
Glad you were able to remove those channels without too much damage and nice solution on the lids👍 Michael D.
-
Yes Kirill I did position the yards on different sides, as for the line you're asking what it's for, obviously when the sail is set it would be vertical, the block tied to the clew and I can only assume to help assist the only foot brail when furling which doesn't make sense for a sail that big, one would think there be more and what about the main sail?, I need to think this one out and maybe use my own artistic license on this. I might rig it like the last picture and add either a peak brail or martnet to the back of the sail, thank you for the picture Kirill they help out a lot my friend!. Michael D.
- 222 replies
-
- 1
-
-
- reale de france
- heller
- (and 1 more)
-
So you're using an iron transfer sheet?, onto what fabric?, and then coating it with varnish?, is that correct Kirill?, they do look amazing!! Michael D.
- 228 replies
-
- 2
-
-
- spanish galleon
- lee
- (and 1 more)
-
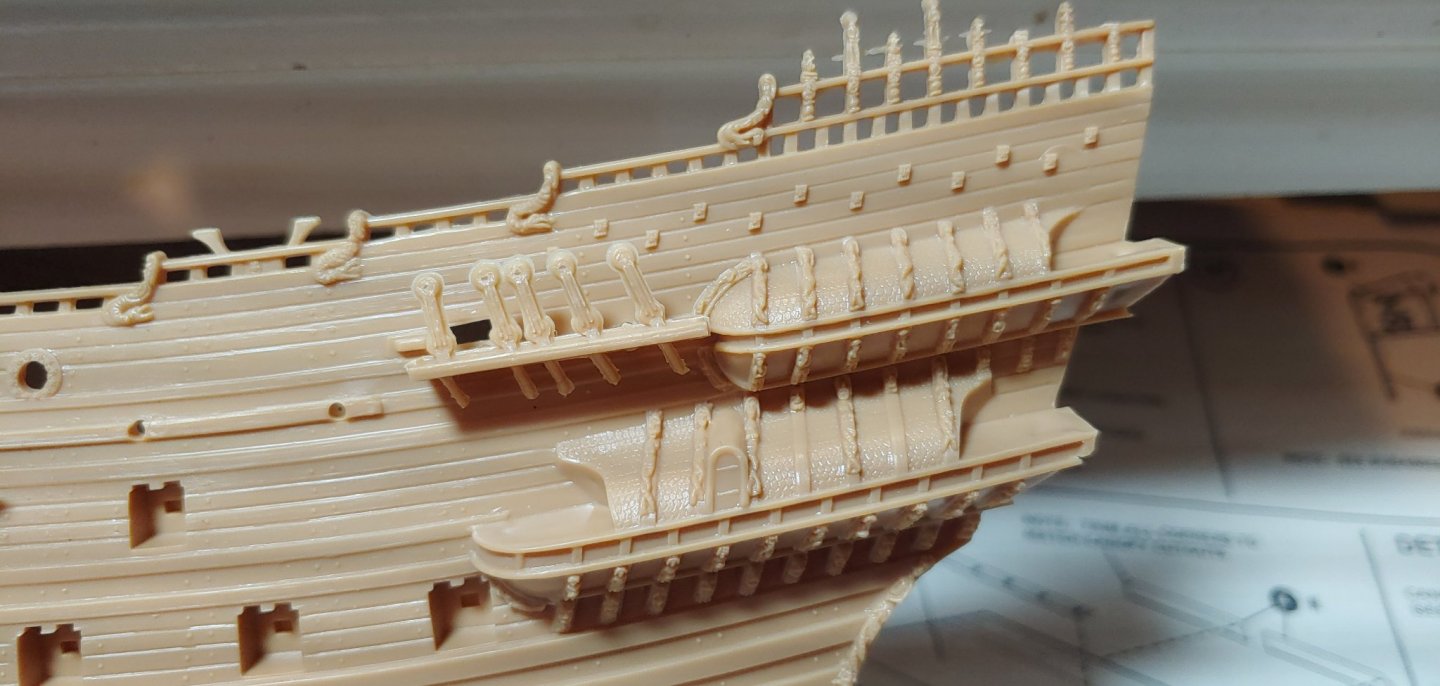
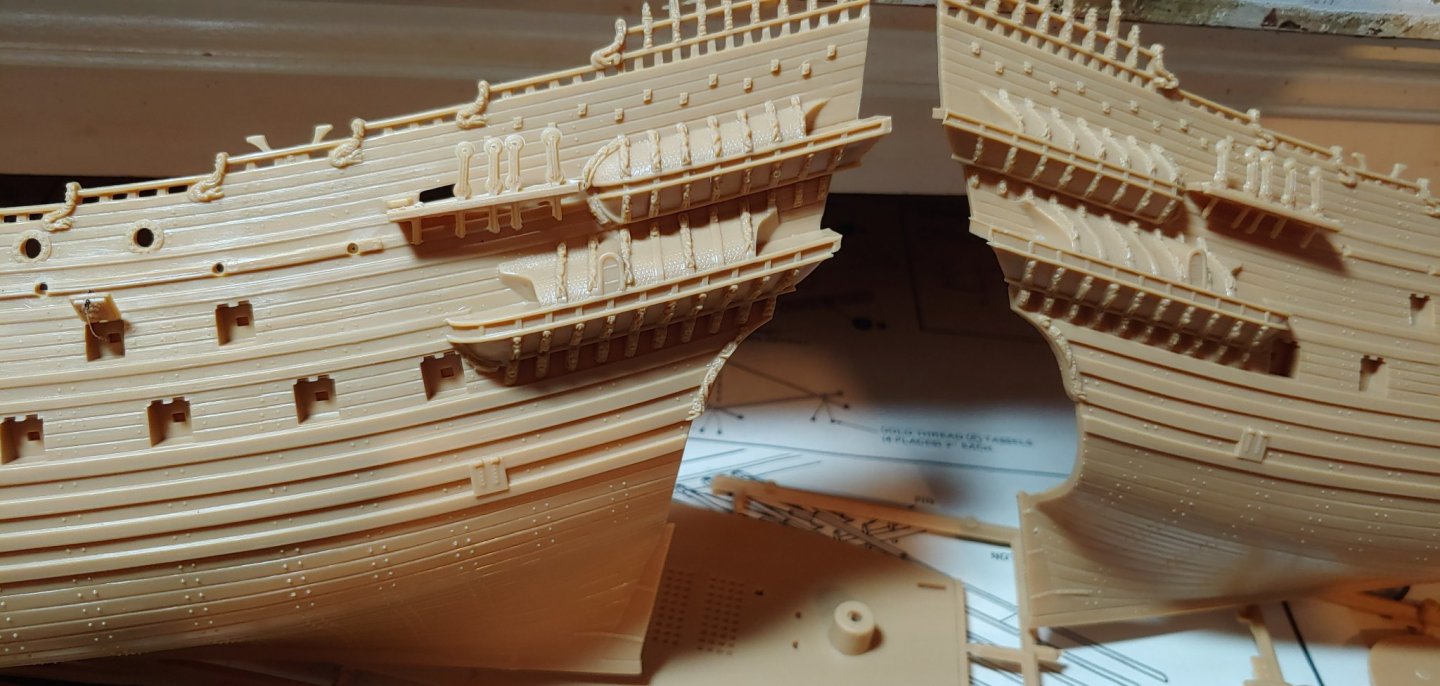
A tricky situation for sure Bill, I would scribe the mating surface between the channel and hull multiple times with a sharp blade/blades to separate the channel. Michael D.
-
Bill, Here's what it looks like when I swap the starboard mizen channel to port. Michael D.
-
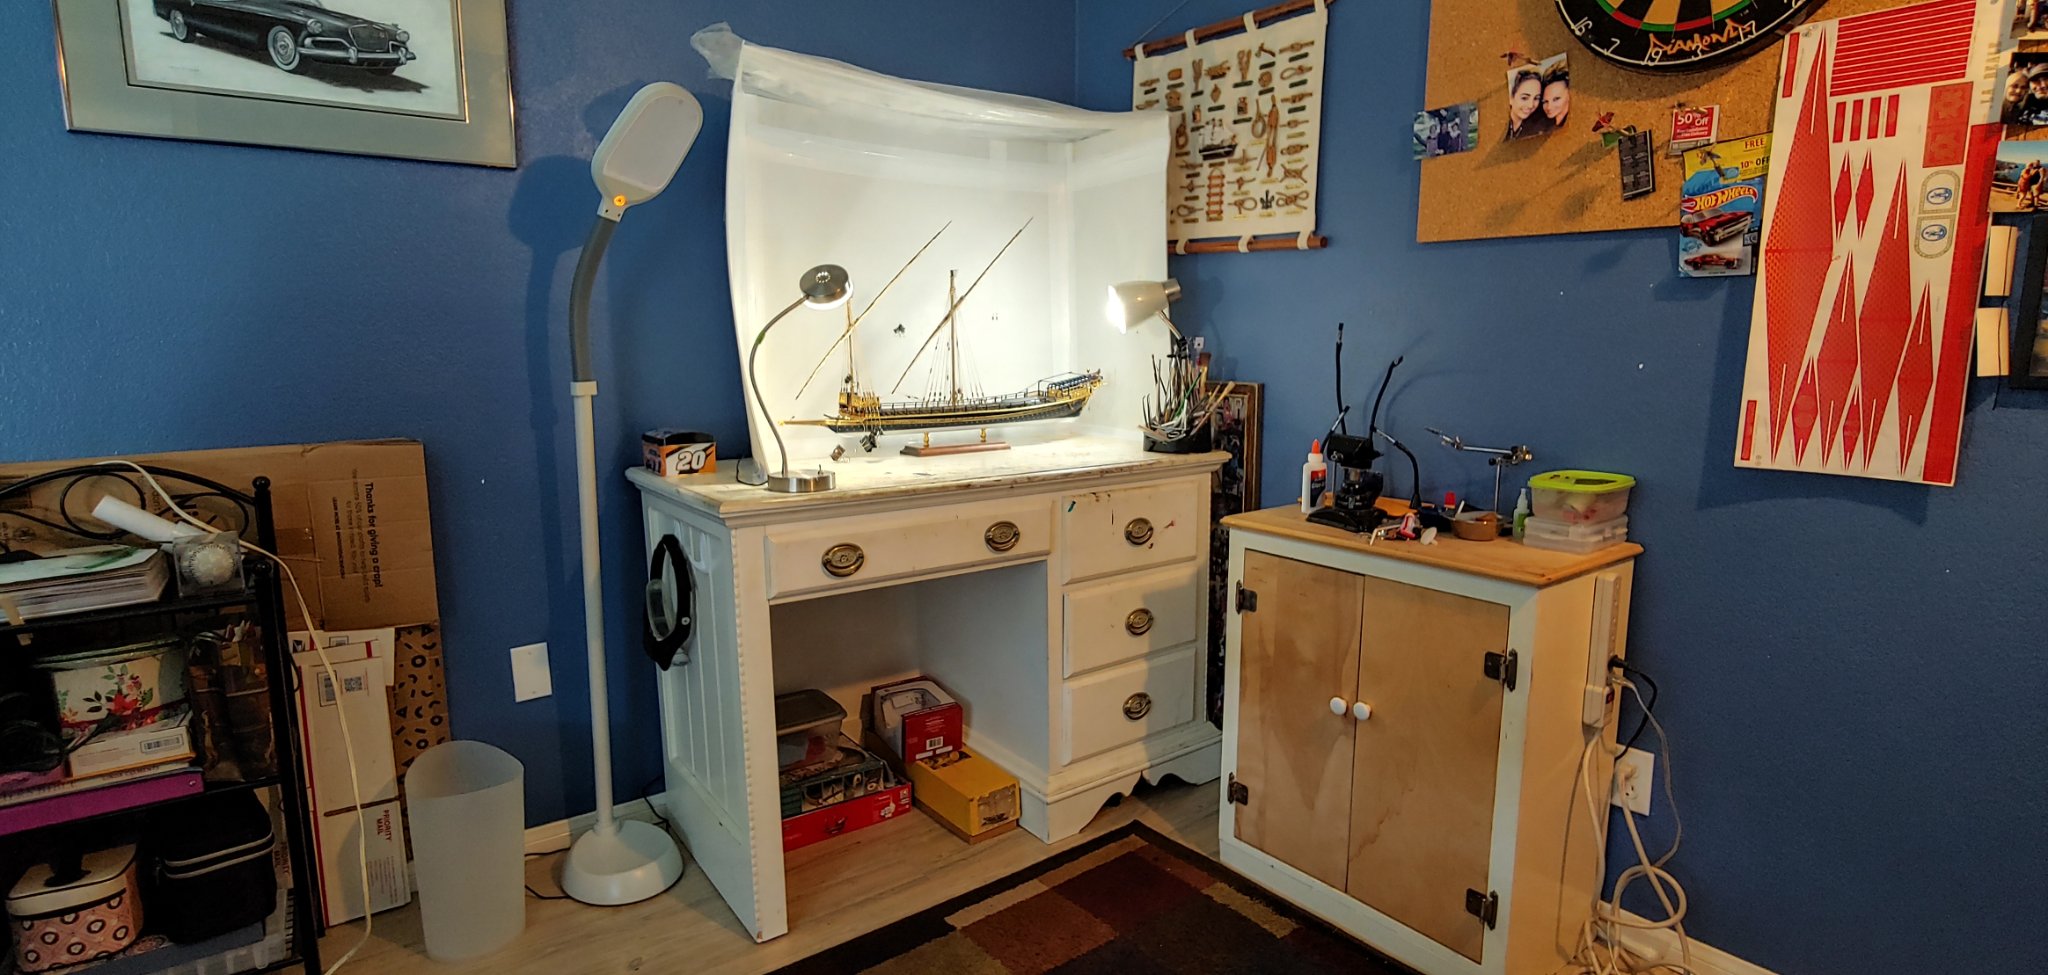
Right now just my makeshift building booth out of corplas sides and painters plastic for the top that drapes down in front to keep the dust out, nothing high tech here and very soon I will need to build a display case for her. Michael D.

- 228 replies
-
- 4
-
-
- spanish galleon
- lee
- (and 1 more)
-
Thank you for the compliments gentlemen, Kirill I represented the martnets as seen on this model which is only rigged on one side, as for the block at the main mast top that is also visible in the picture, that would be one of the brails for the fore lateen sail, not the sheets as I indicated...my mistake and may have to redo. In post #135 I did show a mock up of the sheet line. Michael D.

- 222 replies
-
- 4
-
-
- reale de france
- heller
- (and 1 more)
-
Thanks for the heads up on the davit Bill, you got me thinking on the lanyards so I did a mock up, part 173 is port and 170 is starboard as illustrated and they look to be ok at almost a vertical position. When I reverse them they look like yours, unless you have by chance the mast seated incorrectly, I'd remove the channels and switch them. Michael D.
-
Looks marvelous Kirill you should be very proud and will you be building a case for her also?. All the best! Michael D.
- 228 replies
-
- 1
-
-
- spanish galleon
- lee
- (and 1 more)
-
She's looking good Bill, maybe they are on backwards?, hope to start mine in the coming months. Michael D.
-
I'm just about finished with the fore sail rigging, I added more detail by rigging the marnets, not looking too bad. Michael D.

- 222 replies
-
- 6
-
-
- reale de france
- heller
- (and 1 more)
-
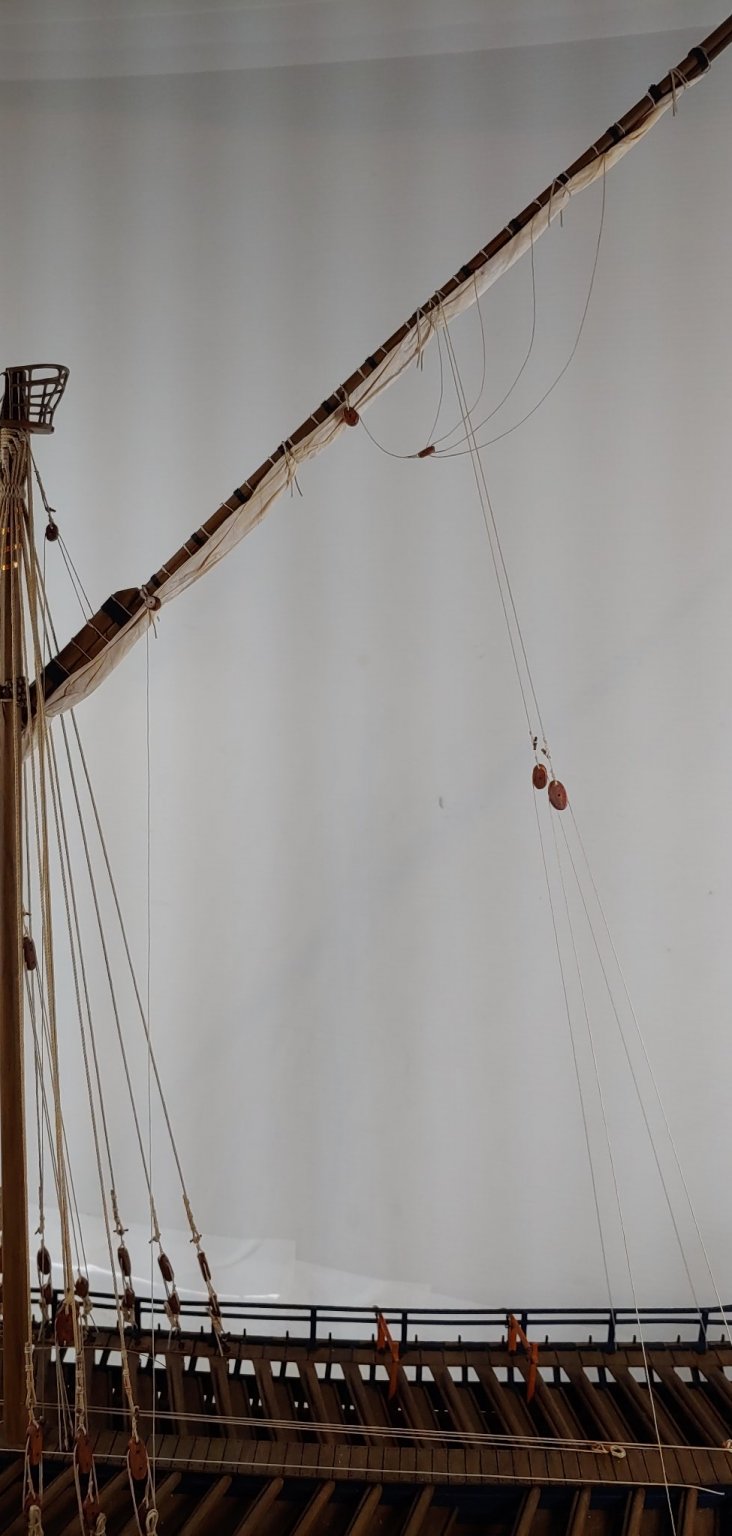
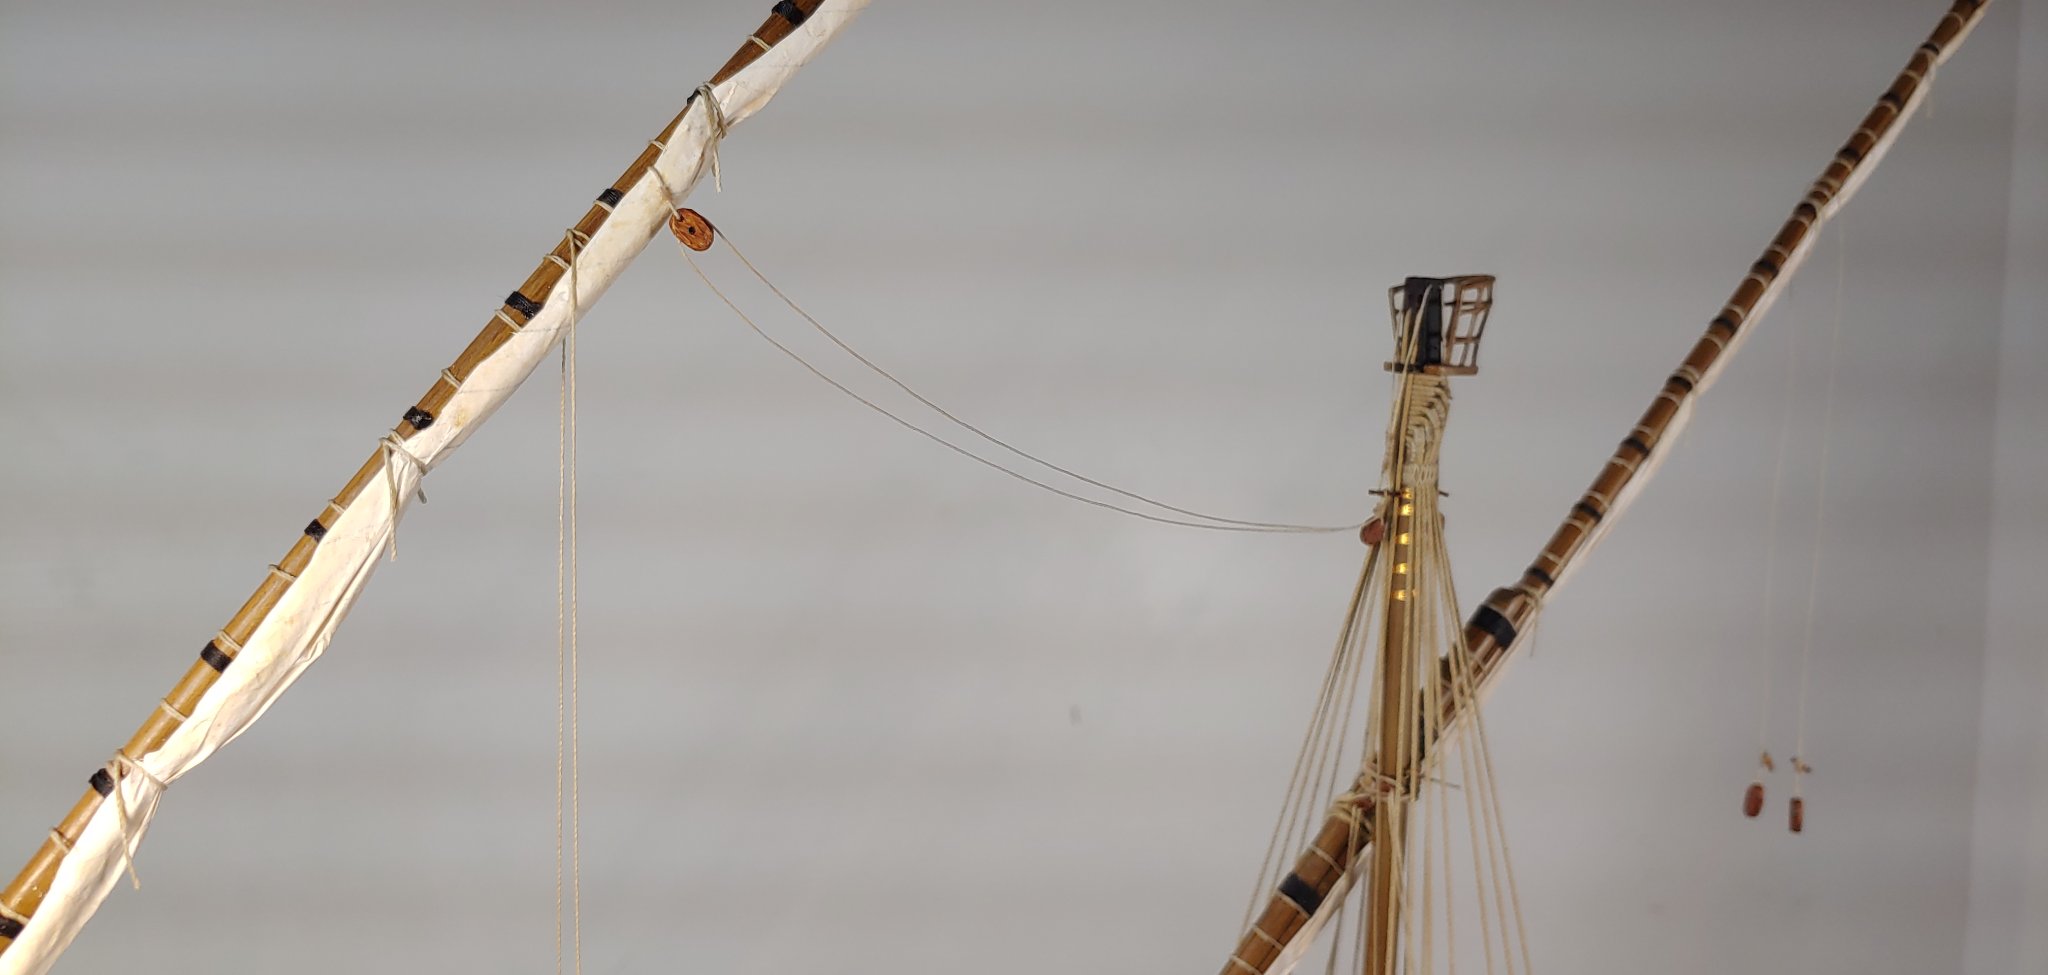
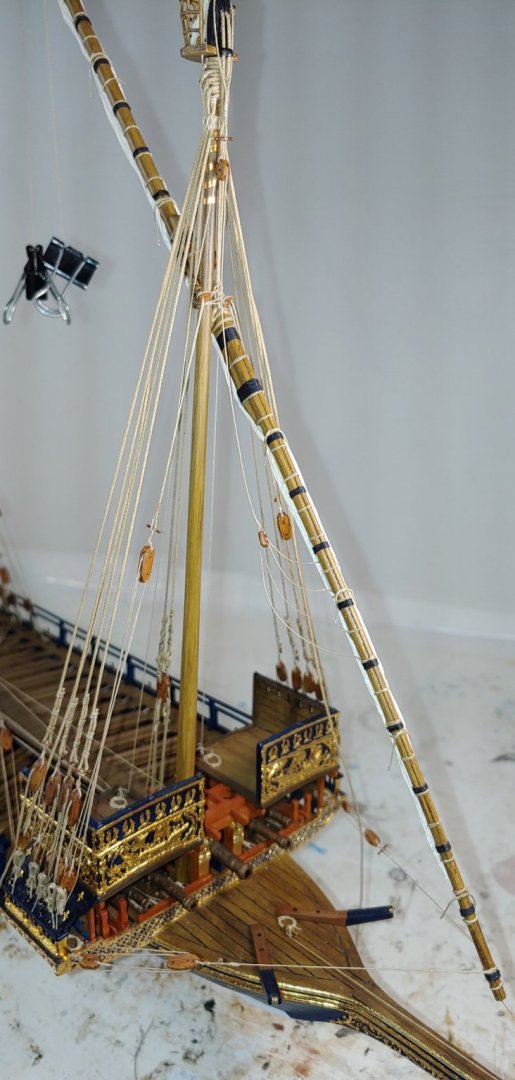
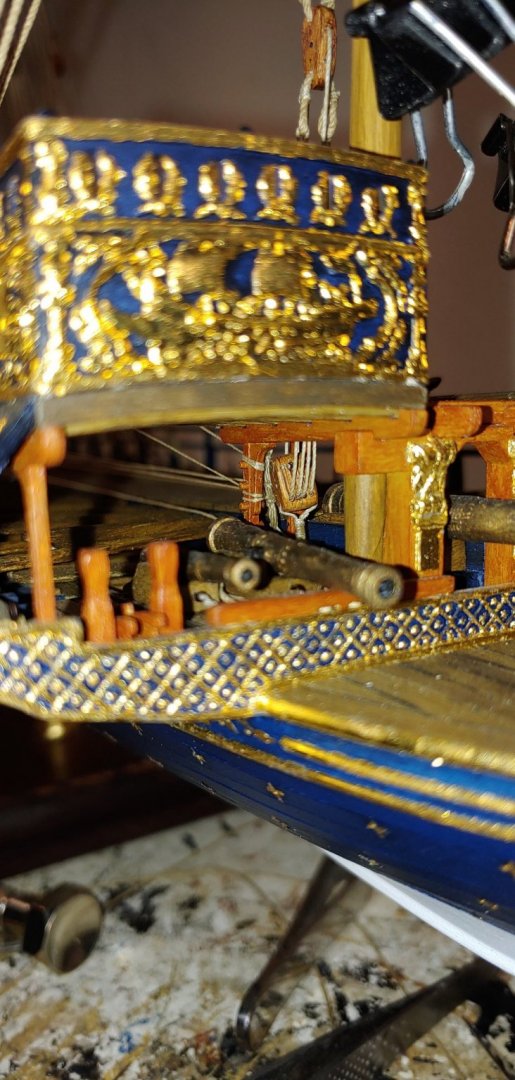
One more small update, I decided to display the fore sheet line and while it may not be practical once the sail is furled, I do like the added detail. Michael D.
- 222 replies
-
- 6
-
-
- reale de france
- heller
- (and 1 more)
-
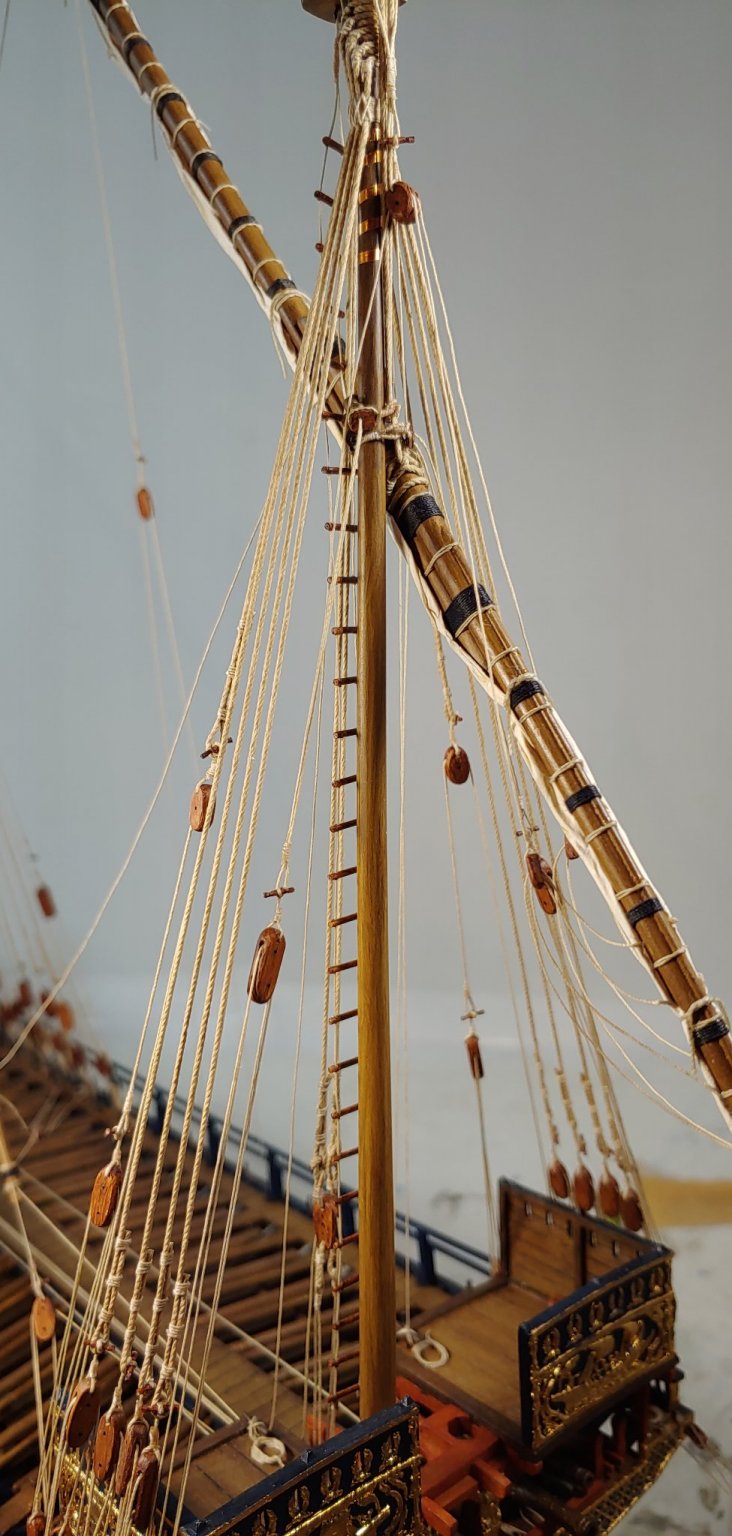
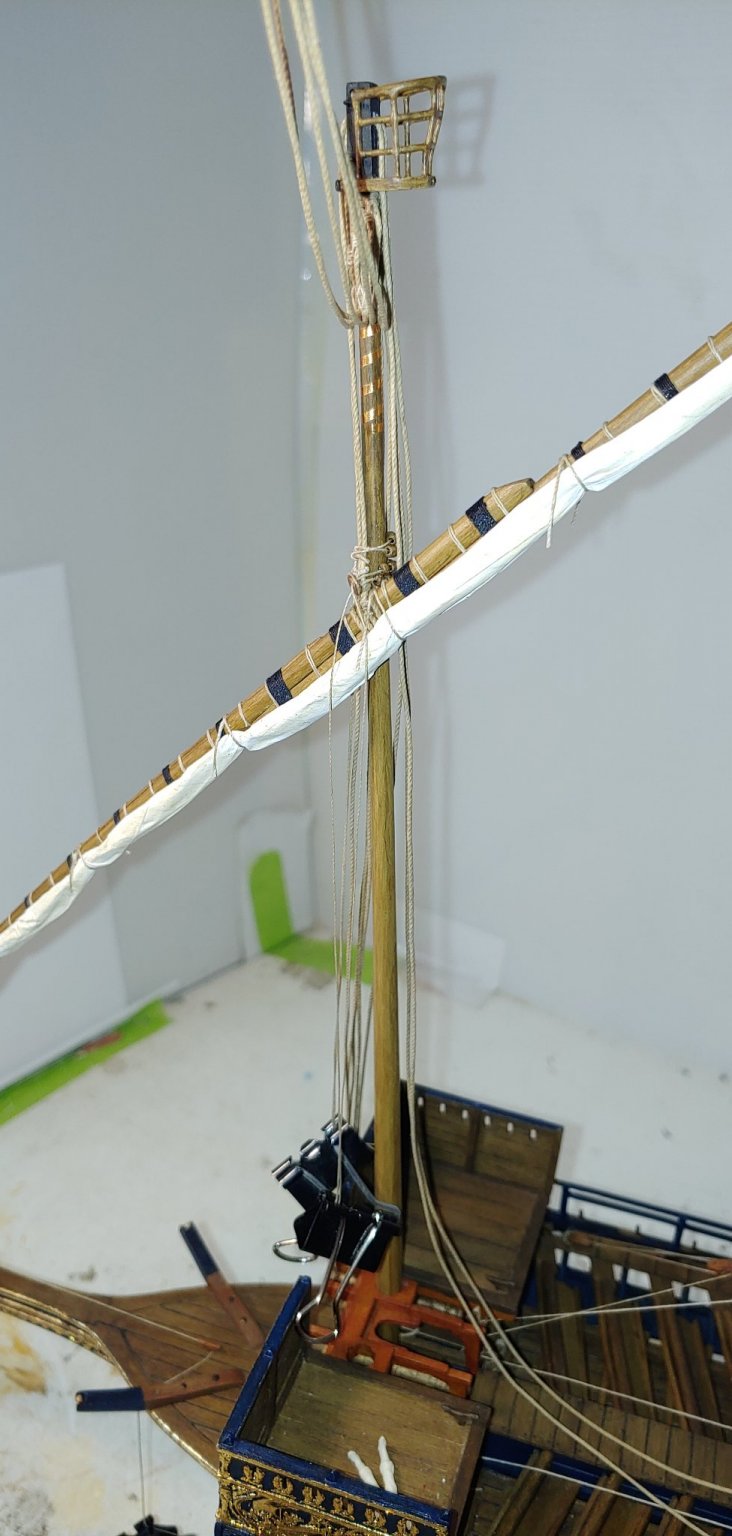
Well work continues on the fore mast and yard, shrouds are completed along with the parrels, the tackle for the parrels are hooked to the 1st shroud chain and led through a tackle block and single and tied at the chain. The bow line is finished as well as the braces. Up next are the fore stays and vangs. Michael D.

- 222 replies
-
- 4
-
-
- reale de france
- heller
- (and 1 more)
-
Coming along nicely Maurice, regarding post 1532 is that the filament/fake nails so to speak you talked about earlier sticking out between the frames? Michael D.
-
Kirill, She's getting closer for launch, you do plan on adding gun port lid ropes? Michael D
- 228 replies
-
- 2
-
-
- spanish galleon
- lee
- (and 1 more)
-
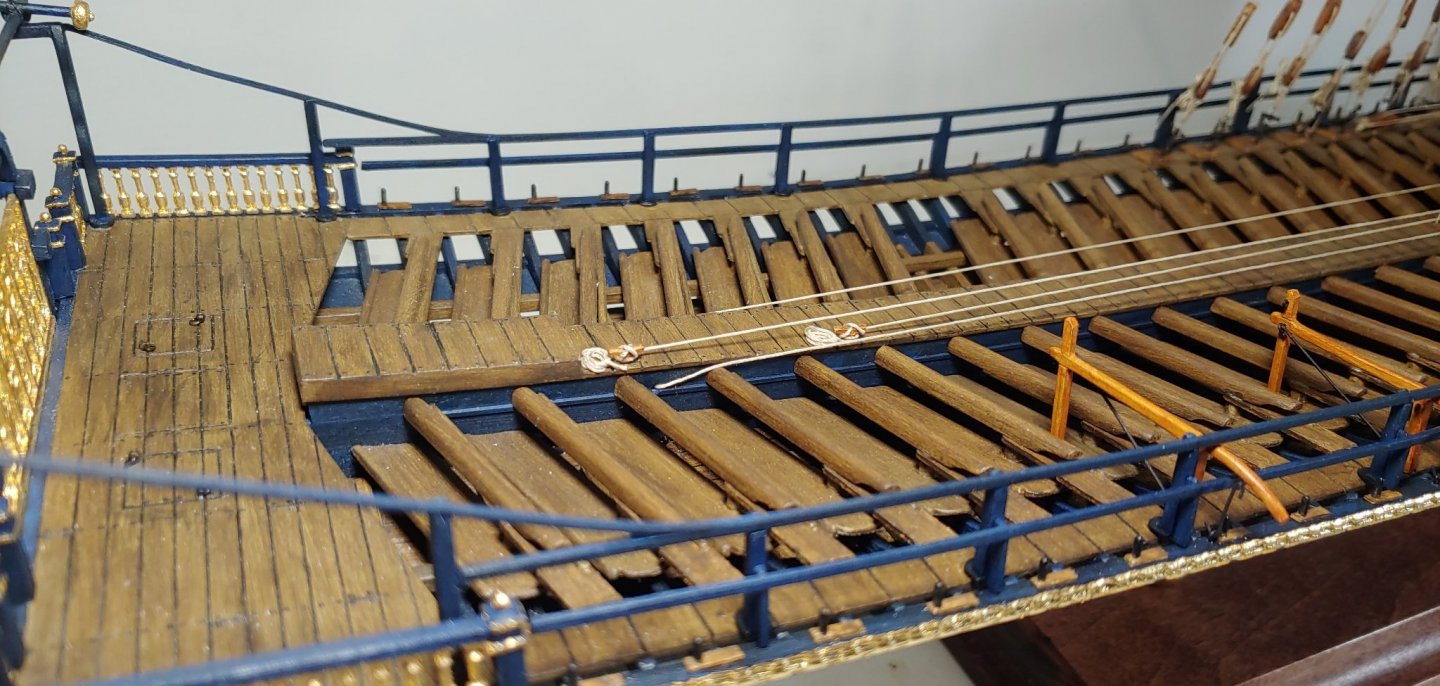
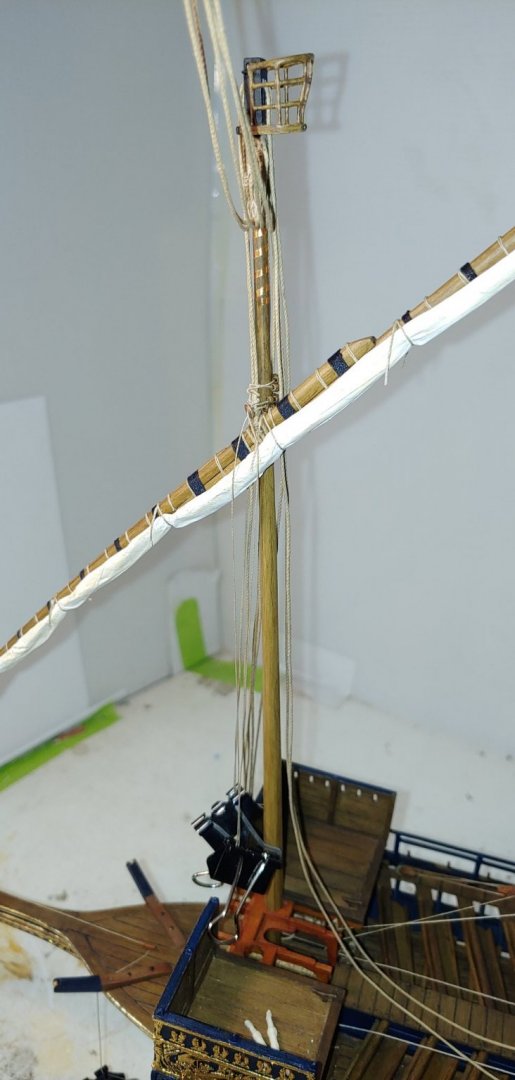
Thank you Kirill, I'll need it. I have the lifts for the fore yard completed, however made one mistake that I did not notice until after the lift ropes were tied and seized, I made a single block instead of a double....arrrrgggg!!, I contemplated redoing it, but the extra effort would be negotiable in appearance so I proceeded and made it look like a long tackle block and actually looks fine. The tackle lines are tied to rope on the fake tackle block and are led through a 4 sheave block and belayed to cleats in the middle deck aft of the main mast. Michael D.

- 222 replies
-
- 6
-
-
- reale de france
- heller
- (and 1 more)
-
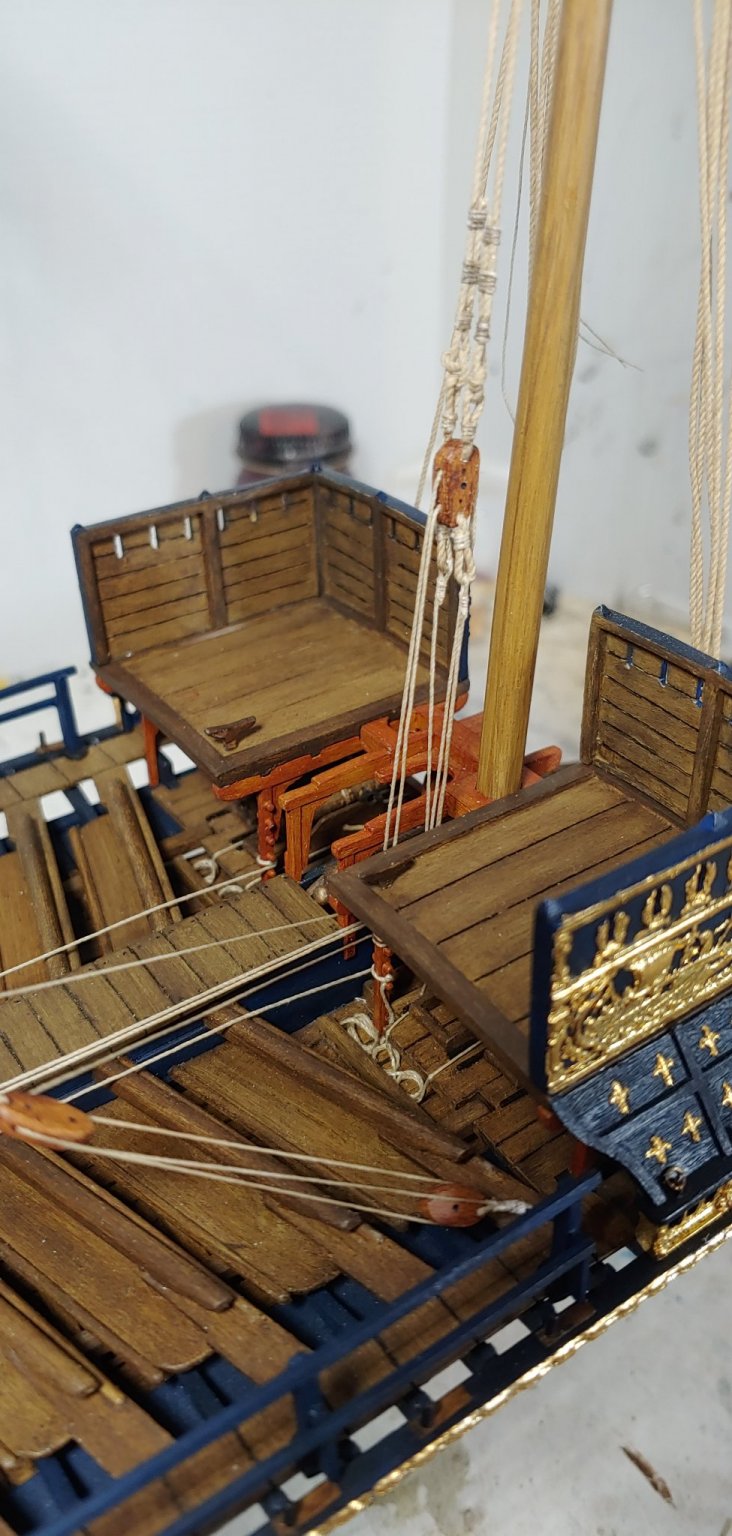
I completed the furling of the Fore sail, have the parrels in place, up next will be rigging the lifts/tackle, the tackle for the parrels and then the shrouds, she's starting take shape. Michael D.

- 222 replies
-
- 7
-
-
- reale de france
- heller
- (and 1 more)
-
Kirill I like that added detail of the frames a lot!👍 Michael D.
- 228 replies
-
- 1
-
-
- spanish galleon
- lee
- (and 1 more)
-
It's nice to finally see an end to a long term project and sad too, at least that's how it was for me and Victory. I pretty much treat my thread the same way Kirill, I run it through my fingers with diluted PVA glue and let hang/stretch for a bit then twist and it seems to hold and honestly at this scale your technique makes the lines so much better, one would be hard pressed to really notice much of a difference then if made on a rope walk. Well done Sir!👍 Michael D.
- 228 replies
-
- 3
-
-
- spanish galleon
- lee
- (and 1 more)
-
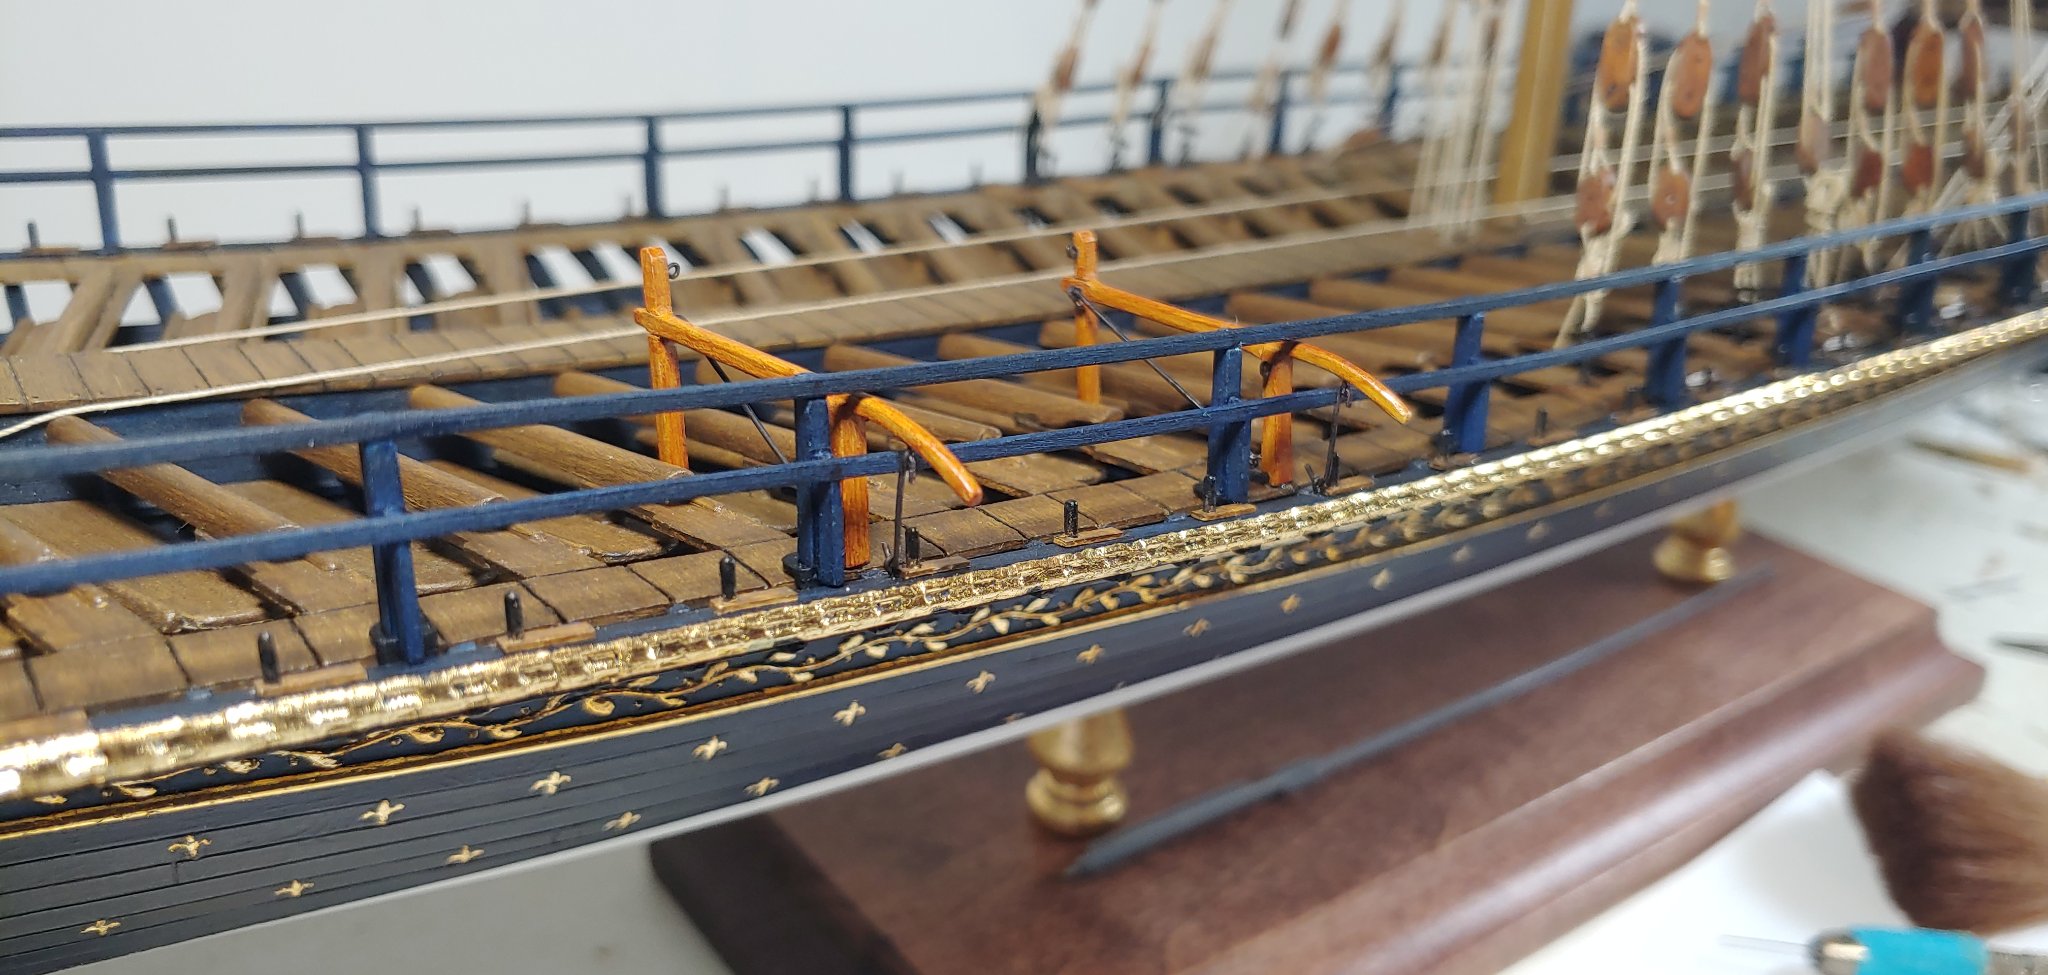
The Davits on the starboard side are completed and will need to scratch build the port side ones. Michael D.

- 222 replies
-
- 3
-
-
- reale de france
- heller
- (and 1 more)