


rcmdrvr
-
Posts
420 -
Joined
-
Last visited
Content Type
Profiles
Forums
Gallery
Events
Posts posted by rcmdrvr
-
-
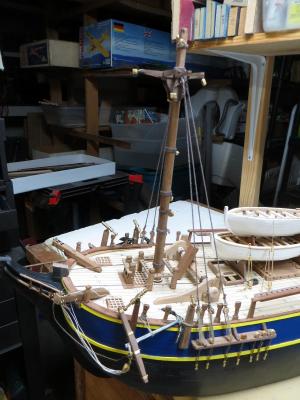
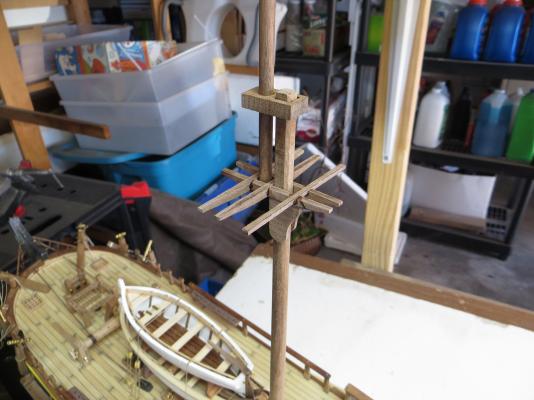
Continue to work on rigging. I find I am spending a lot of time looking over plans and having to "guess" which block to attach where. I have several sets of blocks that look the same. I think I am making progress but certainly not performing at the level many other builders at this site do. On the other side of the coin, wow, is this a learning experience. First, I am trying out new skills. I have not often taken on a project where I have a clip holding "ropes" between my lips, tweezers and other clamps in my hands and wishing I had two more appendages to hold more. Second, I am quite taken by the engineering feats these ships were. I am beginning to see how these ship's masts were held together. While here are some shots of my work:
- WBlakeny, wim500, GrandpaPhil and 1 other
-
 4
4
-
Very nice interior work. You have made a good start to the model.
-
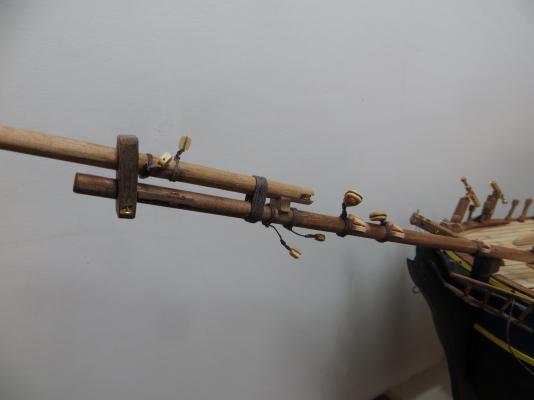
Captain. I looked closely at your bowspirit photos. Great photos and great work. I have found the quite useful. The problem I am running into is at the forward end of the bowspirit. The plans mention sheaves, jib hooks and blocks. I just don't get how the sheaves are installed. Are they placed in blocks and attached like a block. Is the bowspirit slotted and they are placed there. I am at a lost as to how they are installed.
-
Wow, another Bounty build log. This AL kit is getting to be quite popular with members of this site. I know other Bounty builders have been of great assistance to me. Don't hesitate to ask questions (or give advice).
Welcome to the list of Bounty builders.
-
-
-
Captain Al or Dan....any closeup photos of the bowspirit. Not being very nautical, I am having trouble identifying the parts that need to be attached. Any help appreciated.
-
Looking at your bowspirit. Beautiful work. Question....the bowspirit cap provided has the holes at 90 degrees to the surface of the cap. However, the plans would indicate that the holes are actually at an angle. I was thinking I would make a jig that holds the cap at the correct angle and redrill on my drill press. How did you do it?
-
I have not mounted my masts. What I have completed is just the barebones. I became quite confused about how to proceed. I am used to diretions that are more step-by-step. I figured if I was able to just get the main mast assemblies I could go back to add the details. I am using the rigging "figures" included with the plans. I am not beginning to add the detail that is show in Figure 1. Hopefully, following the order of the Figures, I will be heading in the right direction. I am sure I will miss detail, but I will learn as I proceed.
I am using some of your photos to assist in this process.
-
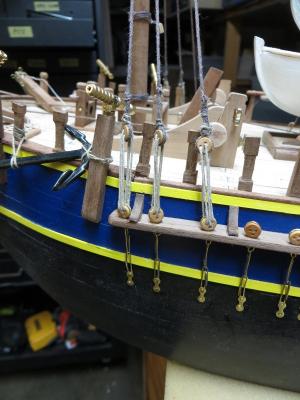
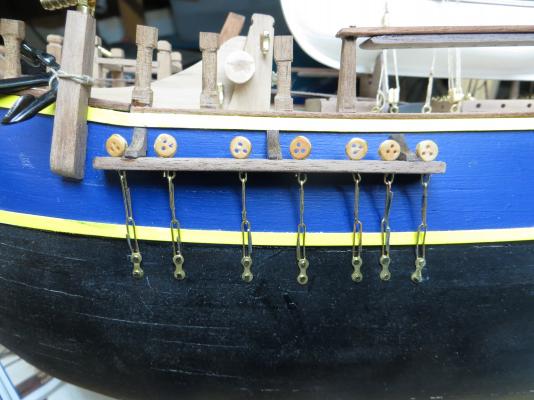
After the basic mast assembly I began work on the Dead Eyes. Manufacturing the chains connecting the dead eyes to the hull were time consuming. A used nails hammered into a block of wood as a bending jig. Worked pretty well. I have got to research a way to blacken brass and silver solder. The chemistry described on this sight is not available locally (and I live in LA!). I guess I will have to import something from the internet.
- GuntherMT, AntonyUK and GrandpaPhil
-
3
-
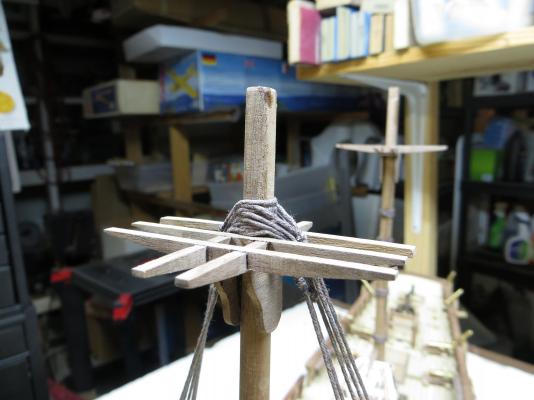
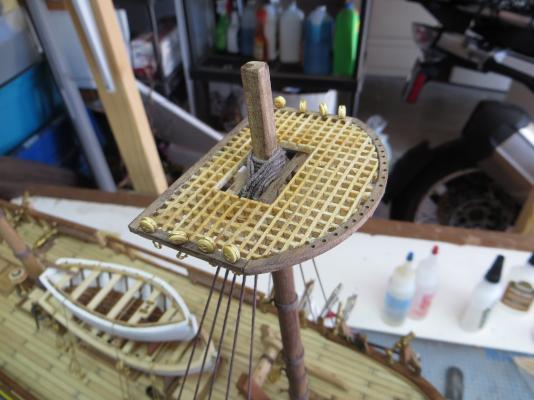
I spent the last week or so assembling the masts. The books recommended by Captain Poison helped. My tapering is a bit crude. I have to place the dowels in a drill motor clamped in a vice, hold the free end of the dowel between two sanding blocks. I am using 60 grit to shape the masts.
I ran out of dowel before I ran out of masts. I will have to purchase some walnut doweling to produce the bowspirit. I think one of the local woodworking stores will carry this.
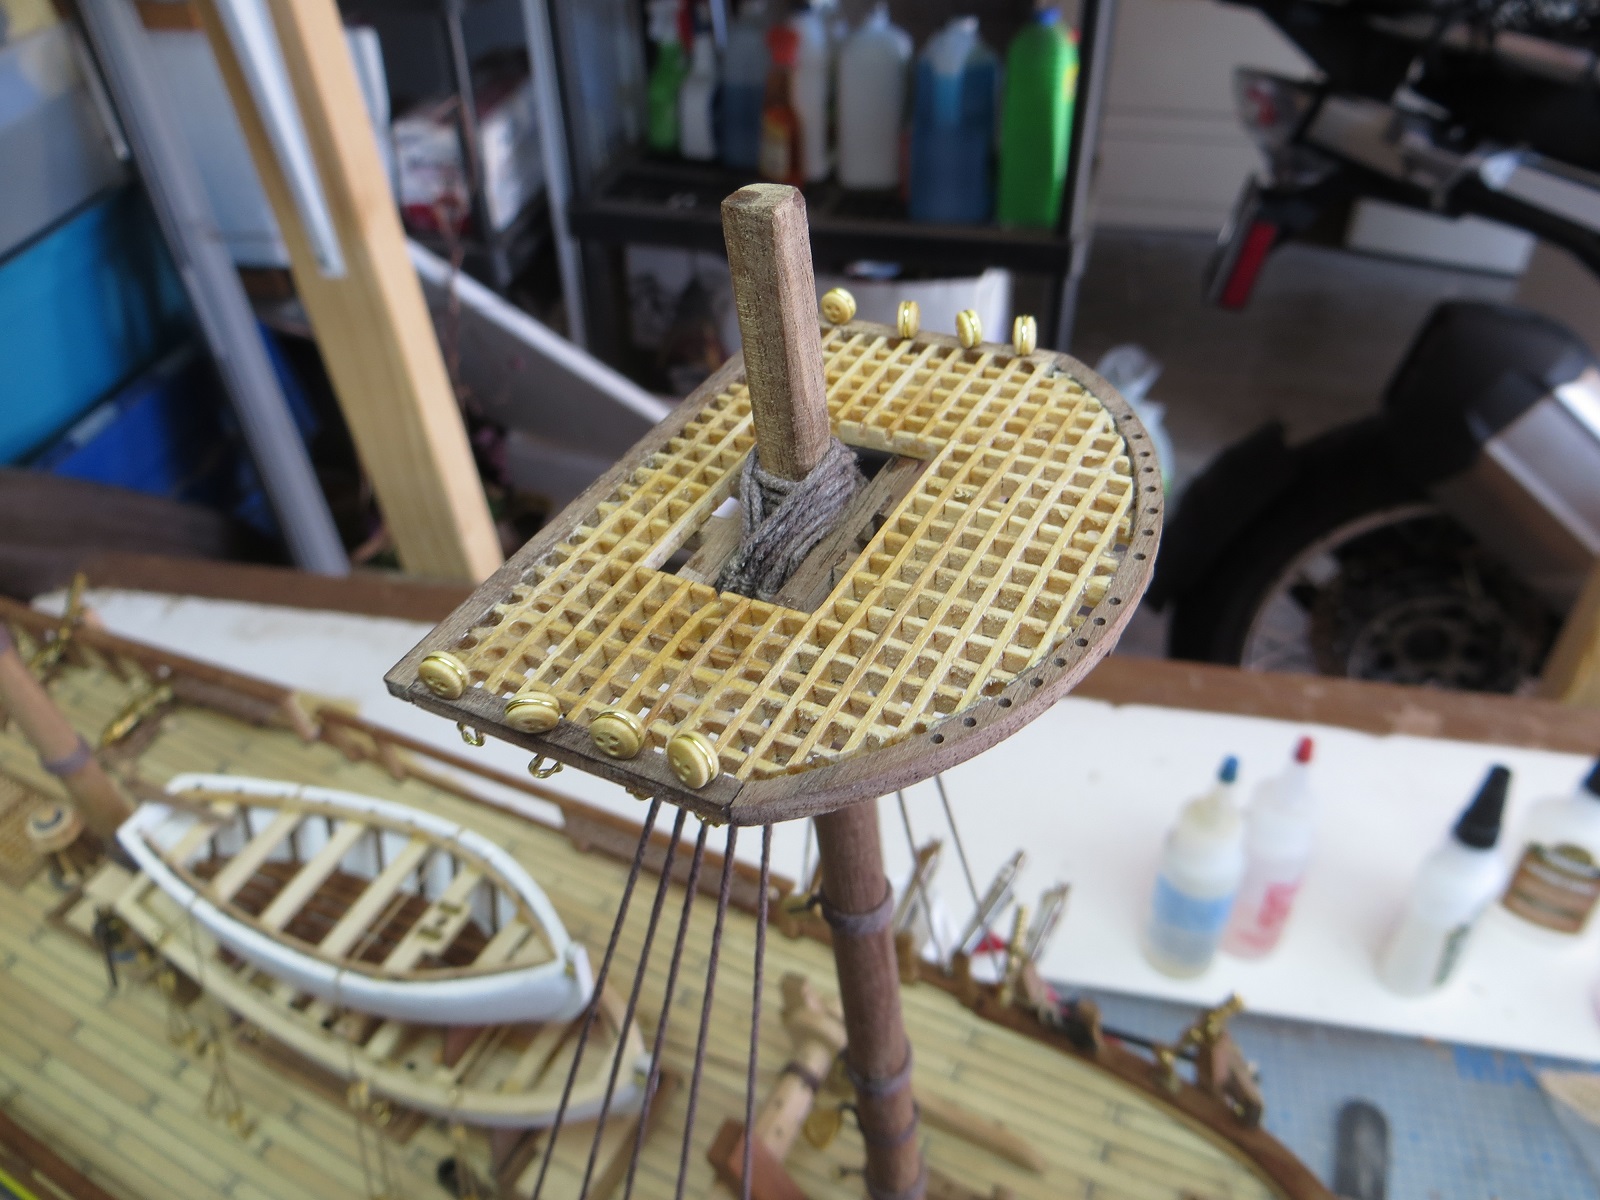
I had to guess which parts created the crow's nest platforms. I think I will be OK.
The instructions do not lend any hints as to the order of rigging. I would assume that assembly and mounting of the masts is early in the process.
- bryanc, GrandpaPhil, AntonyUK and 1 other
-
4
-
-
I was recently referred to a book on Amazon titled "Rigging Period Ship Models". I purchased it. While it is a description of a "typical" ship of the period it has been an enormous eye opener for me. You might want to take a look at it.
-
I too have just begun the rigging process on my Bounty. It appears that there are two "rigging systems" on these ships. The "standing rigging" which I believe is to give structural integrity to the masts and yards and the "running rigging" which was used to control the sails. Some of the books and articles I have read state that if a ship was going to be in port for any length of time, the sails were taken down and the running rigging stowed. This was to prevent rotting, etc.
I am thinking you could display with just standing rigging, standing and running with or without furled sails, all rigging with full sails or partial sales
As to difficulty, it looks like the least amount of work is standing, then standing and running, then adding sails, whether furled or not.
I have made no decision yet. Figured I start with standing rigging and work my way up, stopping when the work exceed my skill level or I go crazy.
-
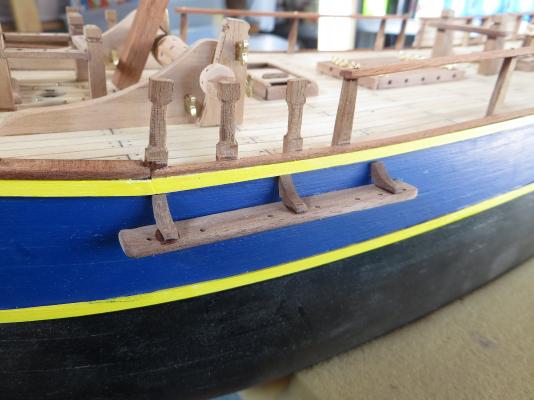
I like the paint job. What did you use for the "gold" painting on the stern. I couldn't find a gold that worked so I turned to yellow....which I also do not like. Might consider stripping.
-
Great resources, thanks
-
Captain Poison. Great attachment. What is the source of this? Can I get my hands on the source?
-
My cannon brackets were hand made. I could not find any furnished parts.
I did notice that A.L.'s photo directions pretty much end when you complete the hull and deck furniture. I guess they felt that photos of the mast assembly was too expensive. I also searched the drawings and came up with no help in assembling the masts. I found a book on Amazon on rigging model ships and I downloaded the Kindle version. It is of some help.
I came to the same conclusion as to caps etc. Yes the dowels fit the round holes in the caps loosely but I plan to make small wedges to tighten everything up. According to the book, this sort of approximates what was done on 1 to 1 scale ships. I have decided not to apply any adhesive until I have all three masts "assembled" and aligned. Hopefully this will allow me to back out of any mistakes.
I will try to post photos as I go along.
-
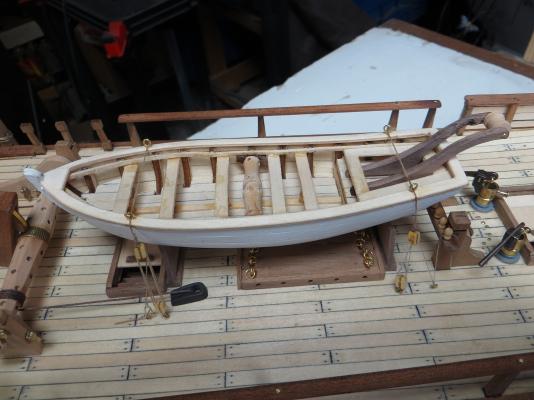
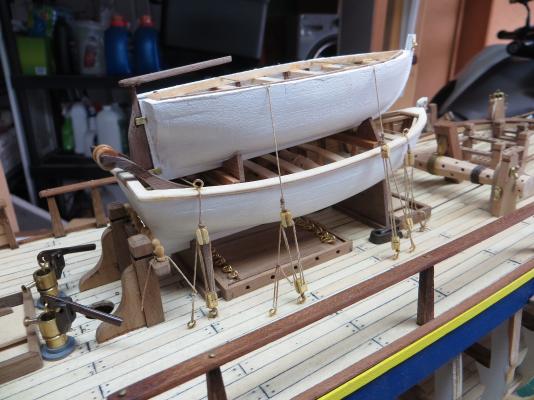
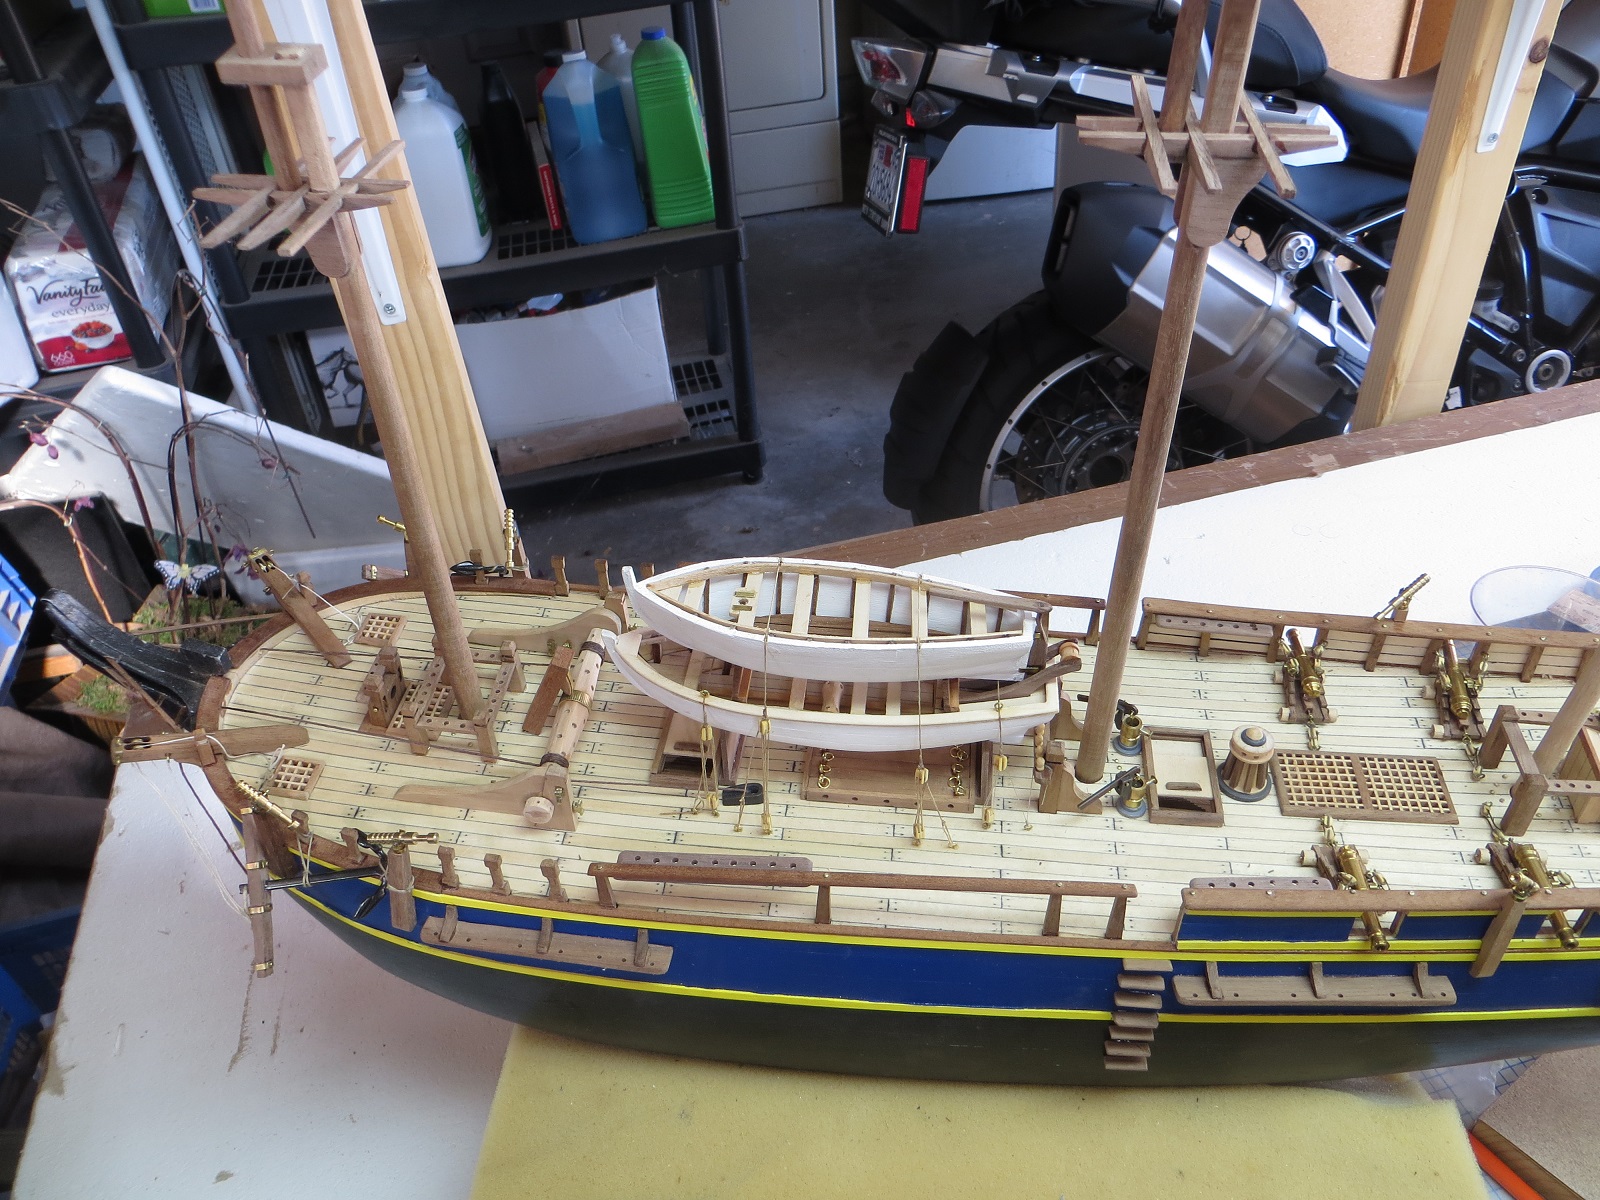
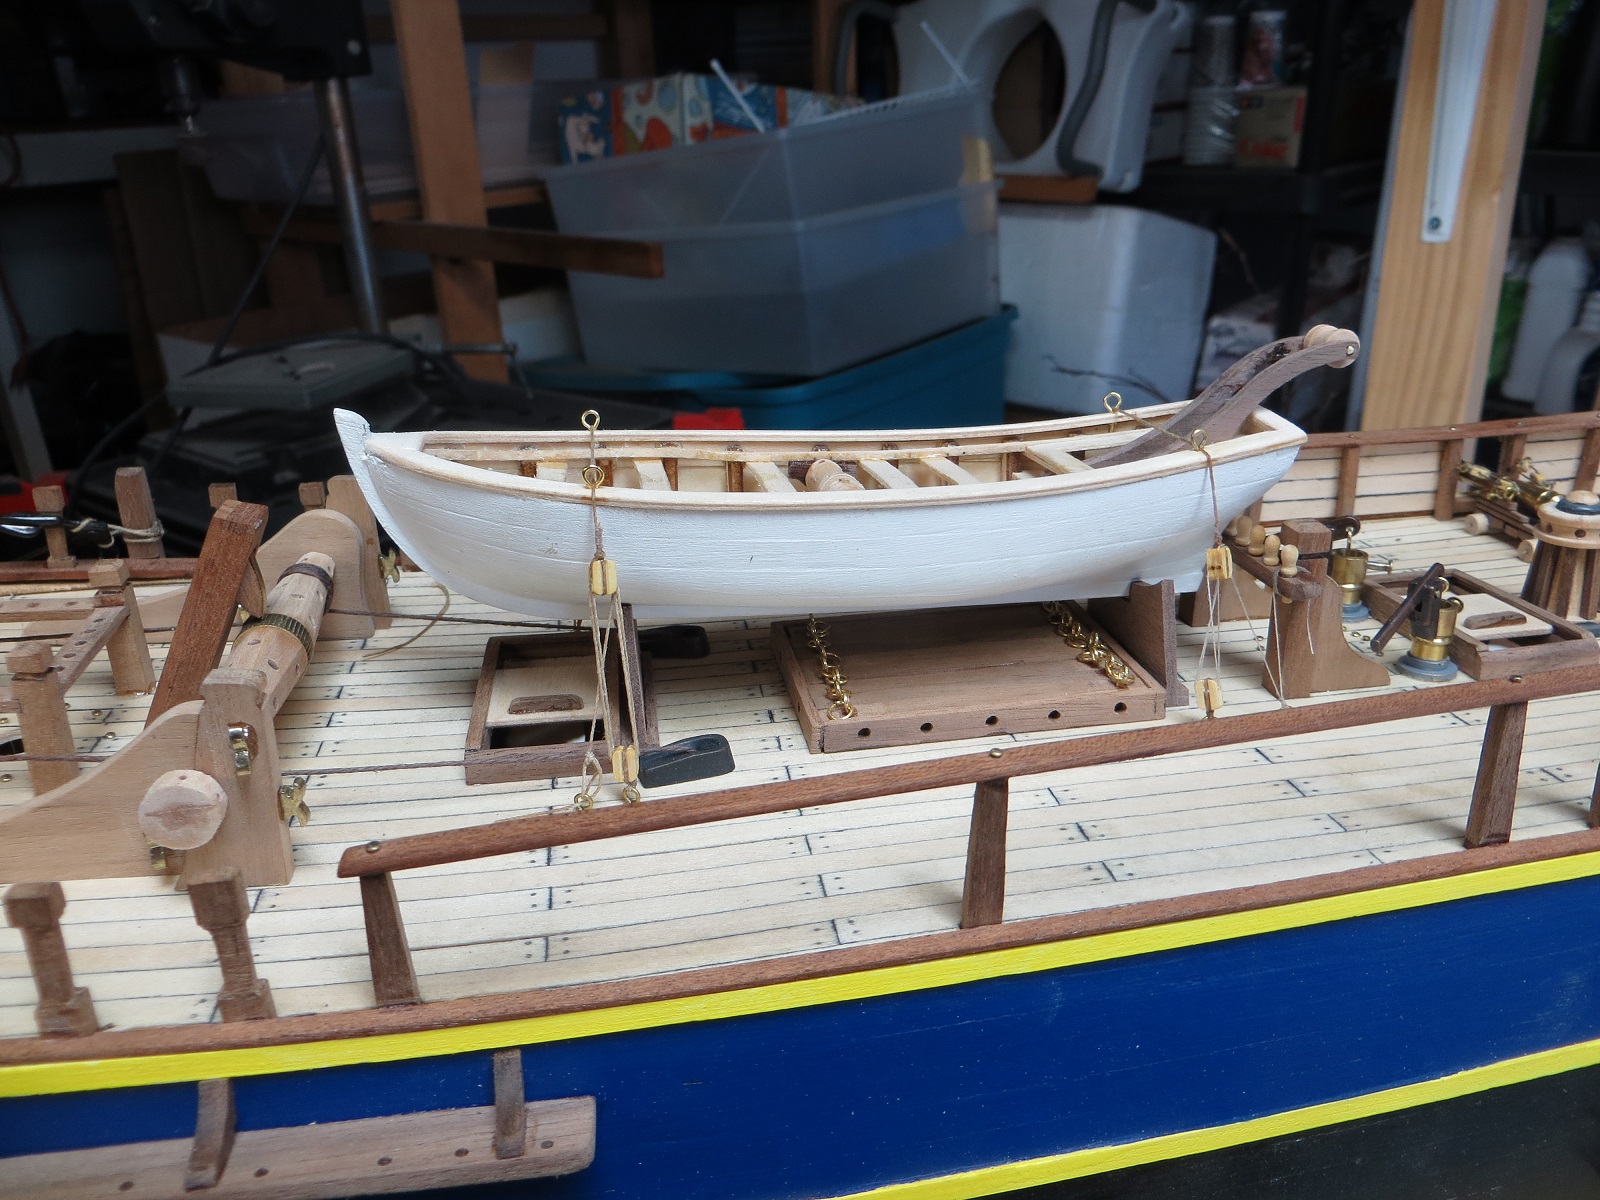
Well, work continues. I have now completed work on the life boats (did they call them life boats?). The bottom boat and the larger of the two was plank on frame and not to difficult. Some of the interior work was a bit tedious but I feel it came out OK. Be careful of some of the walnut parts. The grain runs across some of the smaller parts and can split if mis-handled. The top boat was built by stacking elongated "donets". The stack was then sanded and carved to shape. I used a dremmel motor a lot on this boat. Hint: Don't glue the bottom of the boat to the donet stack until you have completed most of the shaping.
Rigging the two boats to the deck stands was a job. As I progress, I see that rigging is a major task. I have found that if I CA the end of the thread, it hardens into a needle that makes it easier to thread thru the blocks.
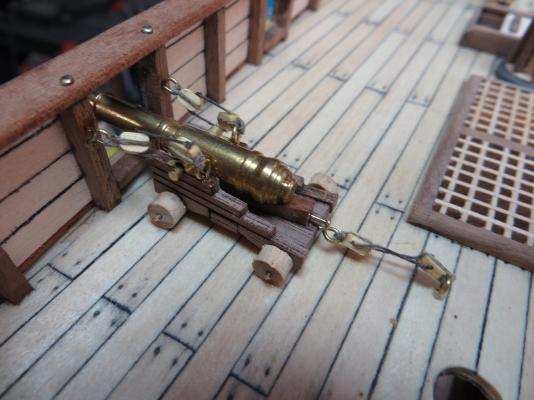
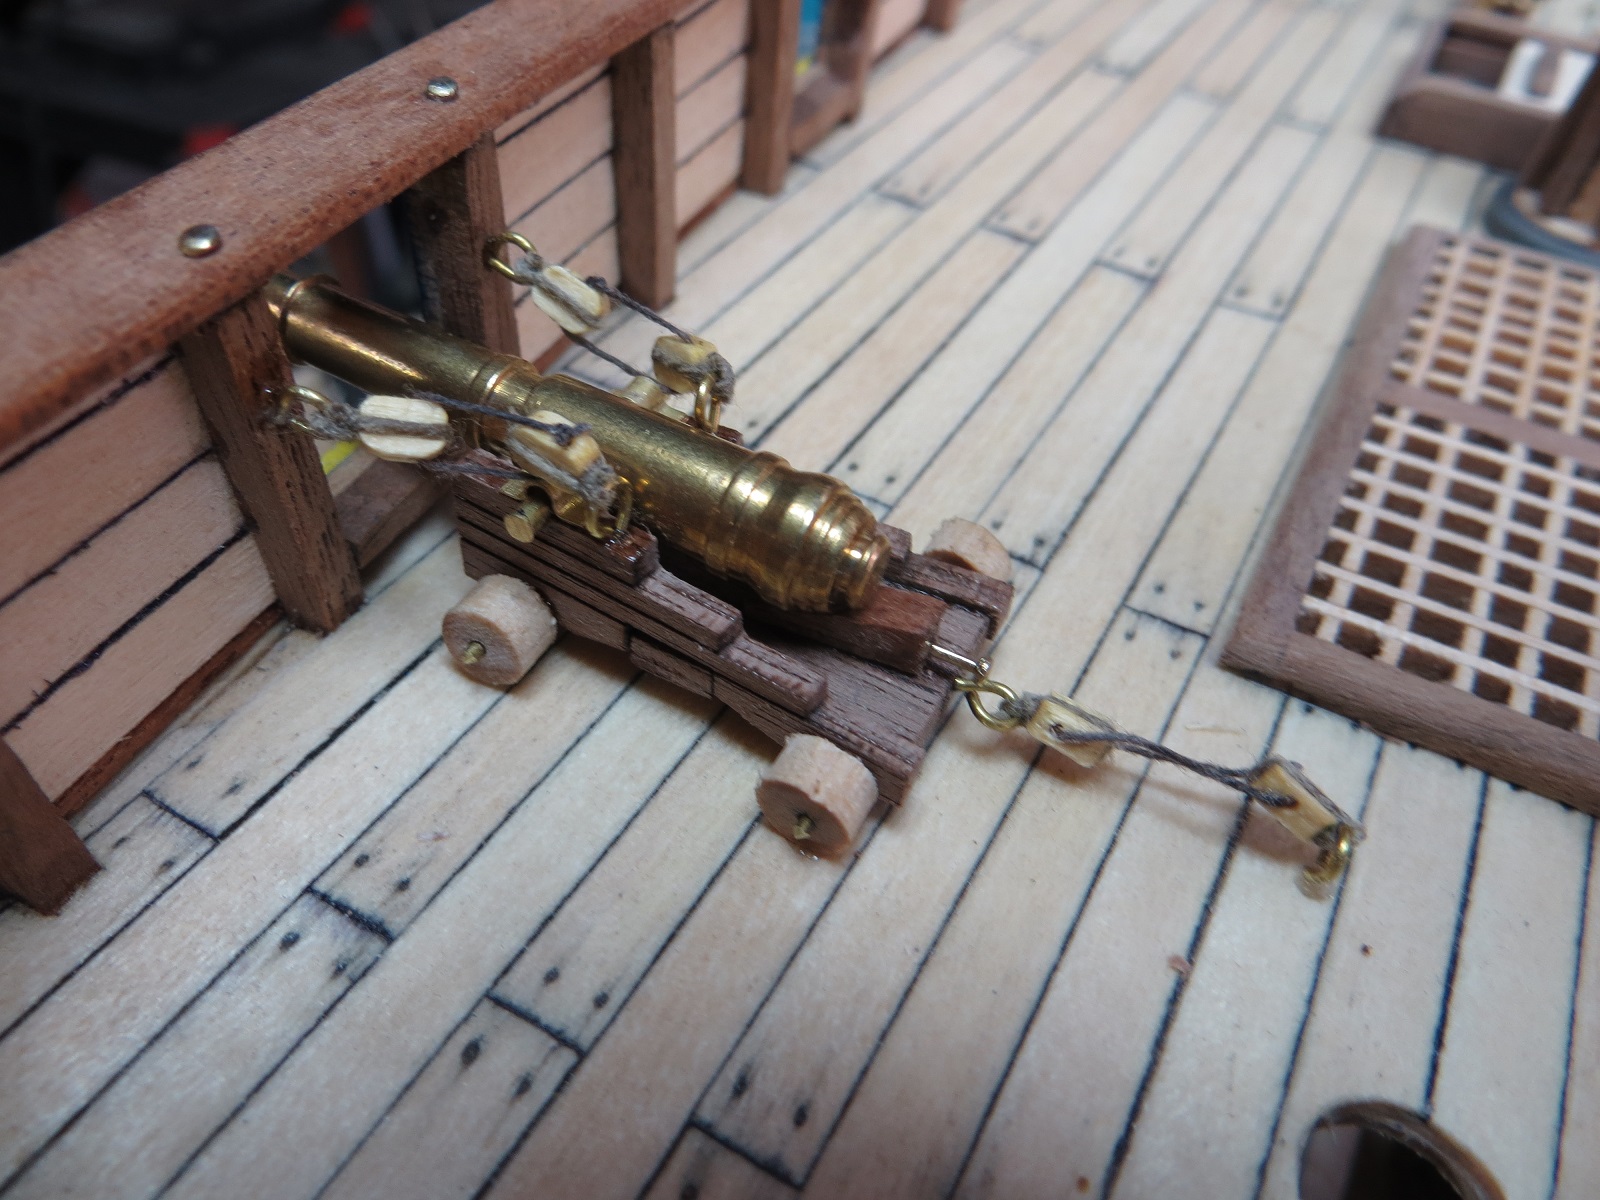
The last completed steps was mounting the boarding cannons. There are ten all together. Easy, relaxing work.
Well, it looks like masts is the next step. I will try to be more frequent in my updates.


- GuntherMT, cristikc, Mirabell61 and 3 others
-
6
-
-
If you have been following my build, I single planked and then painted the hull. As other have expressed, this is a tough hull to plan. If I had decided to have a natural finish, I would have applied second planking of very thin wood such as pear. This would be a challenge, however, as you would have to deal with the matching all the open ended planking on the side that is only partially planked.
Good luck.
-
-
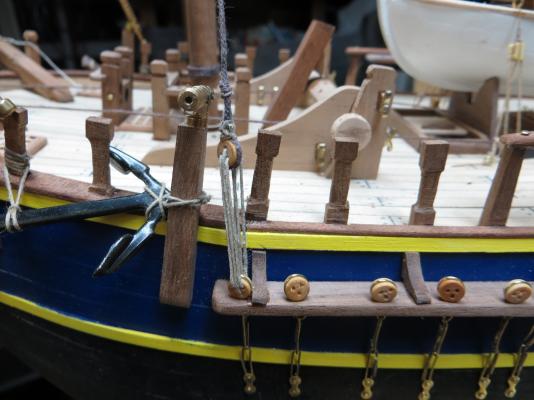
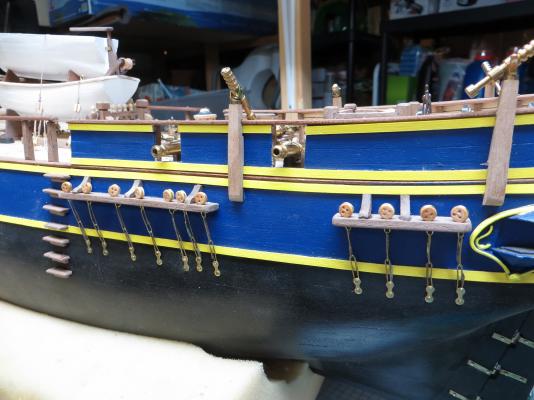
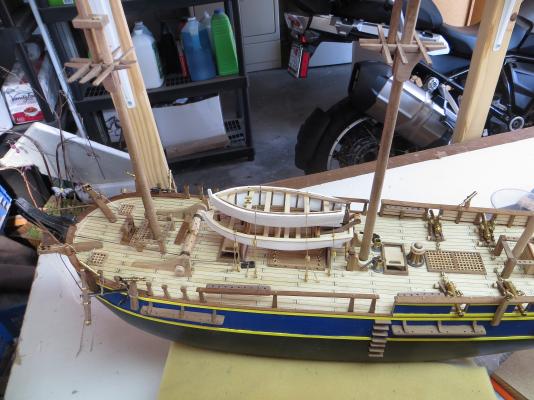
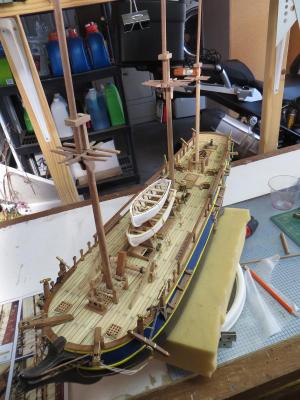
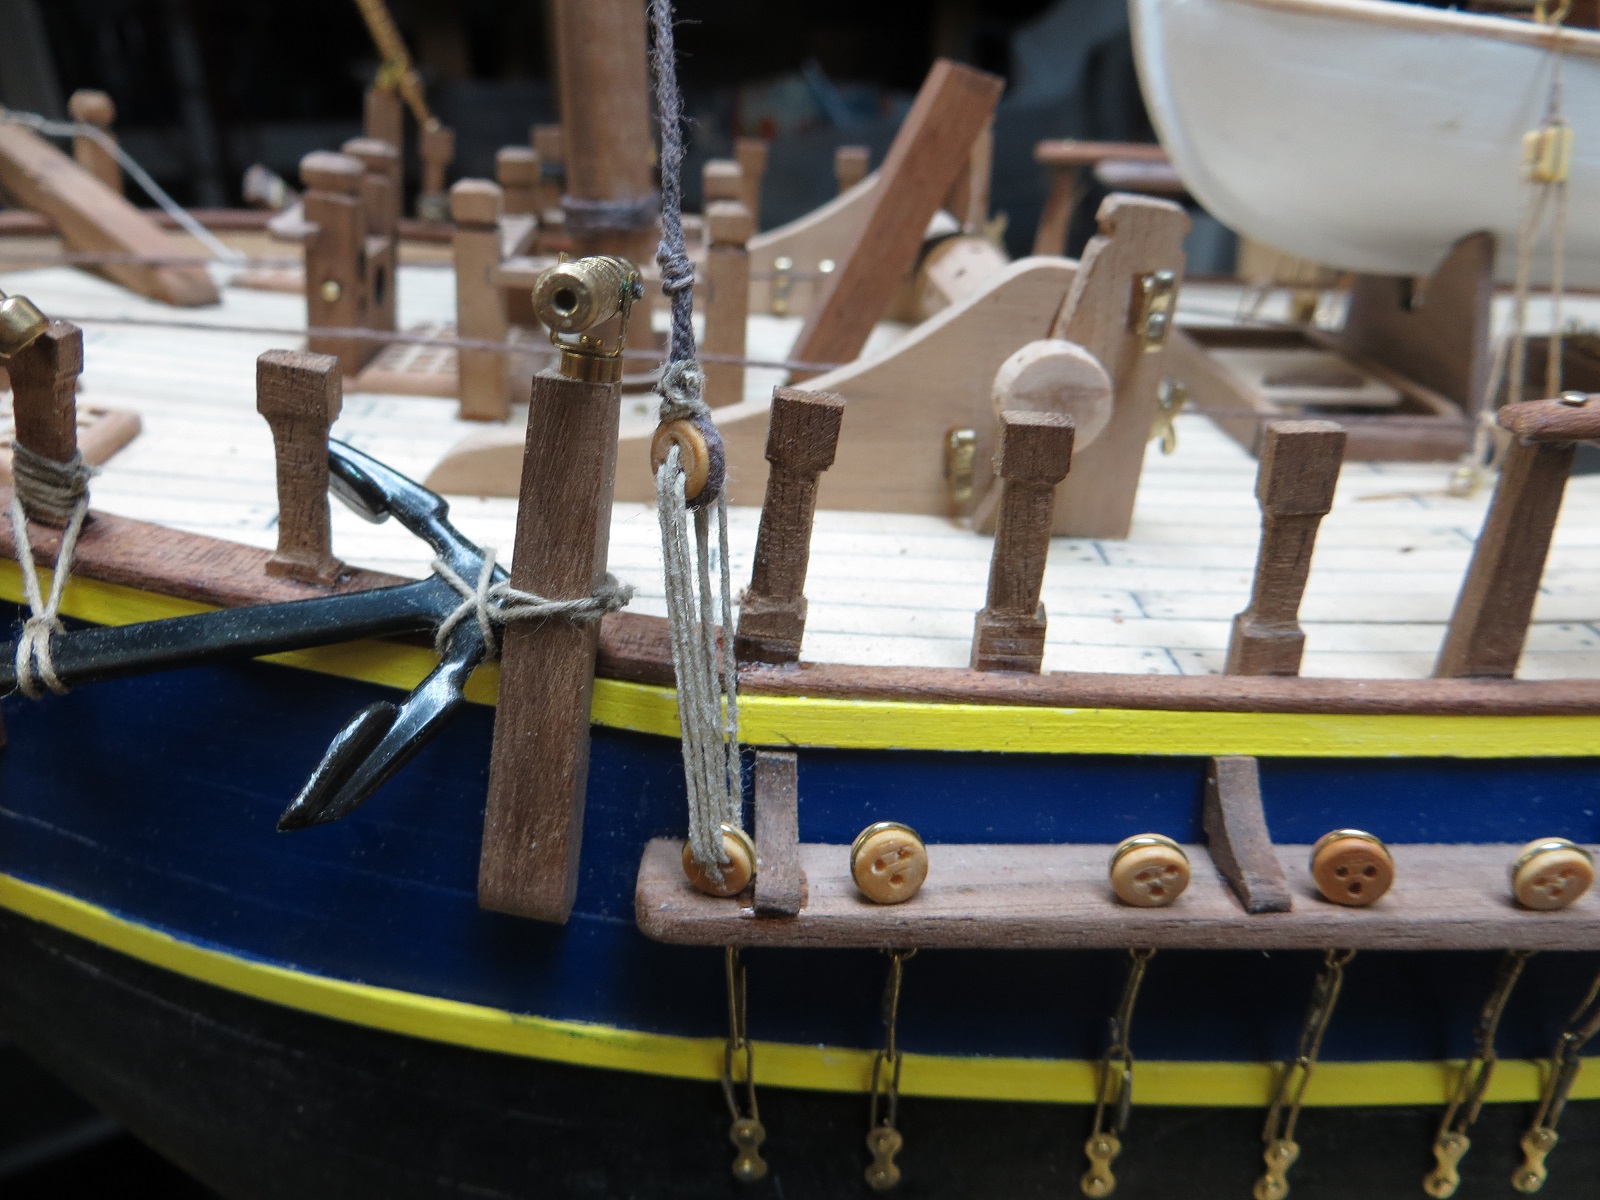
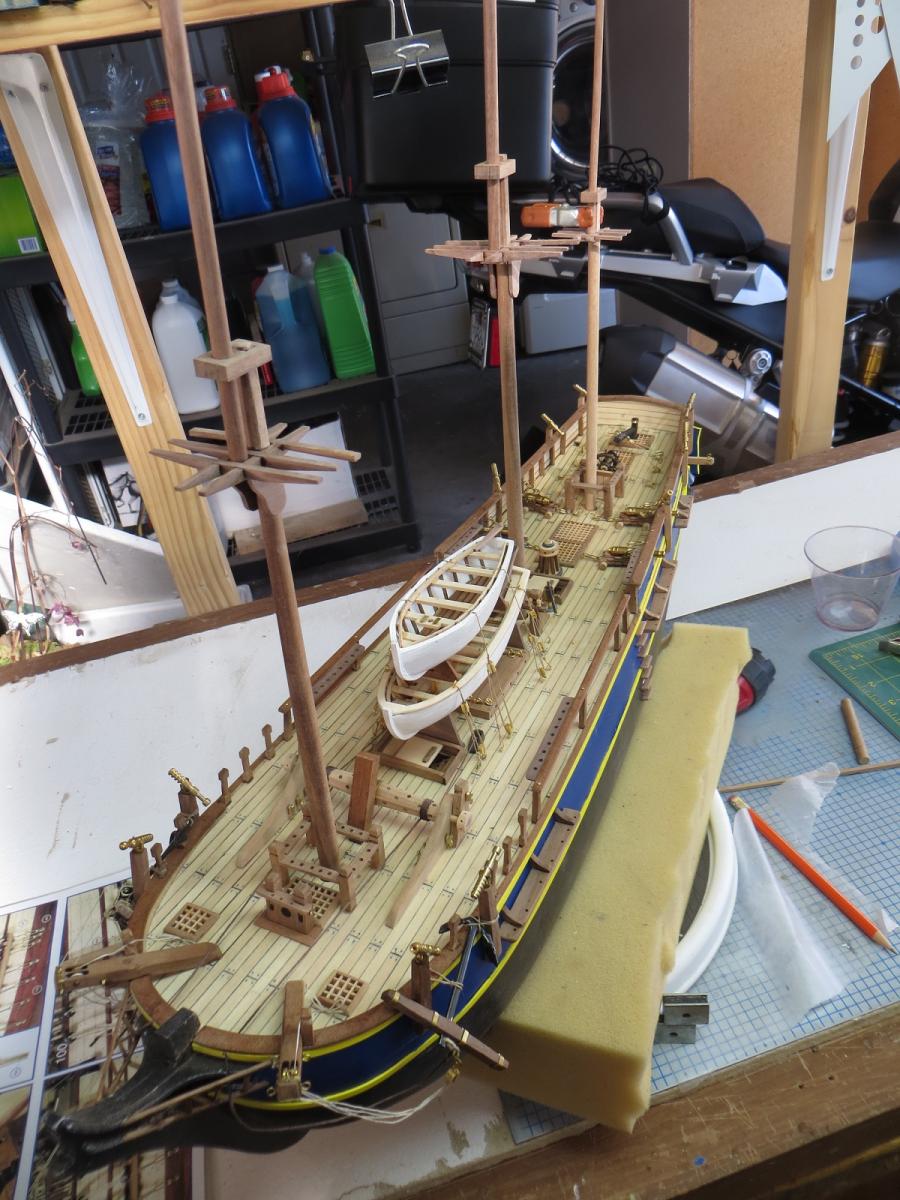
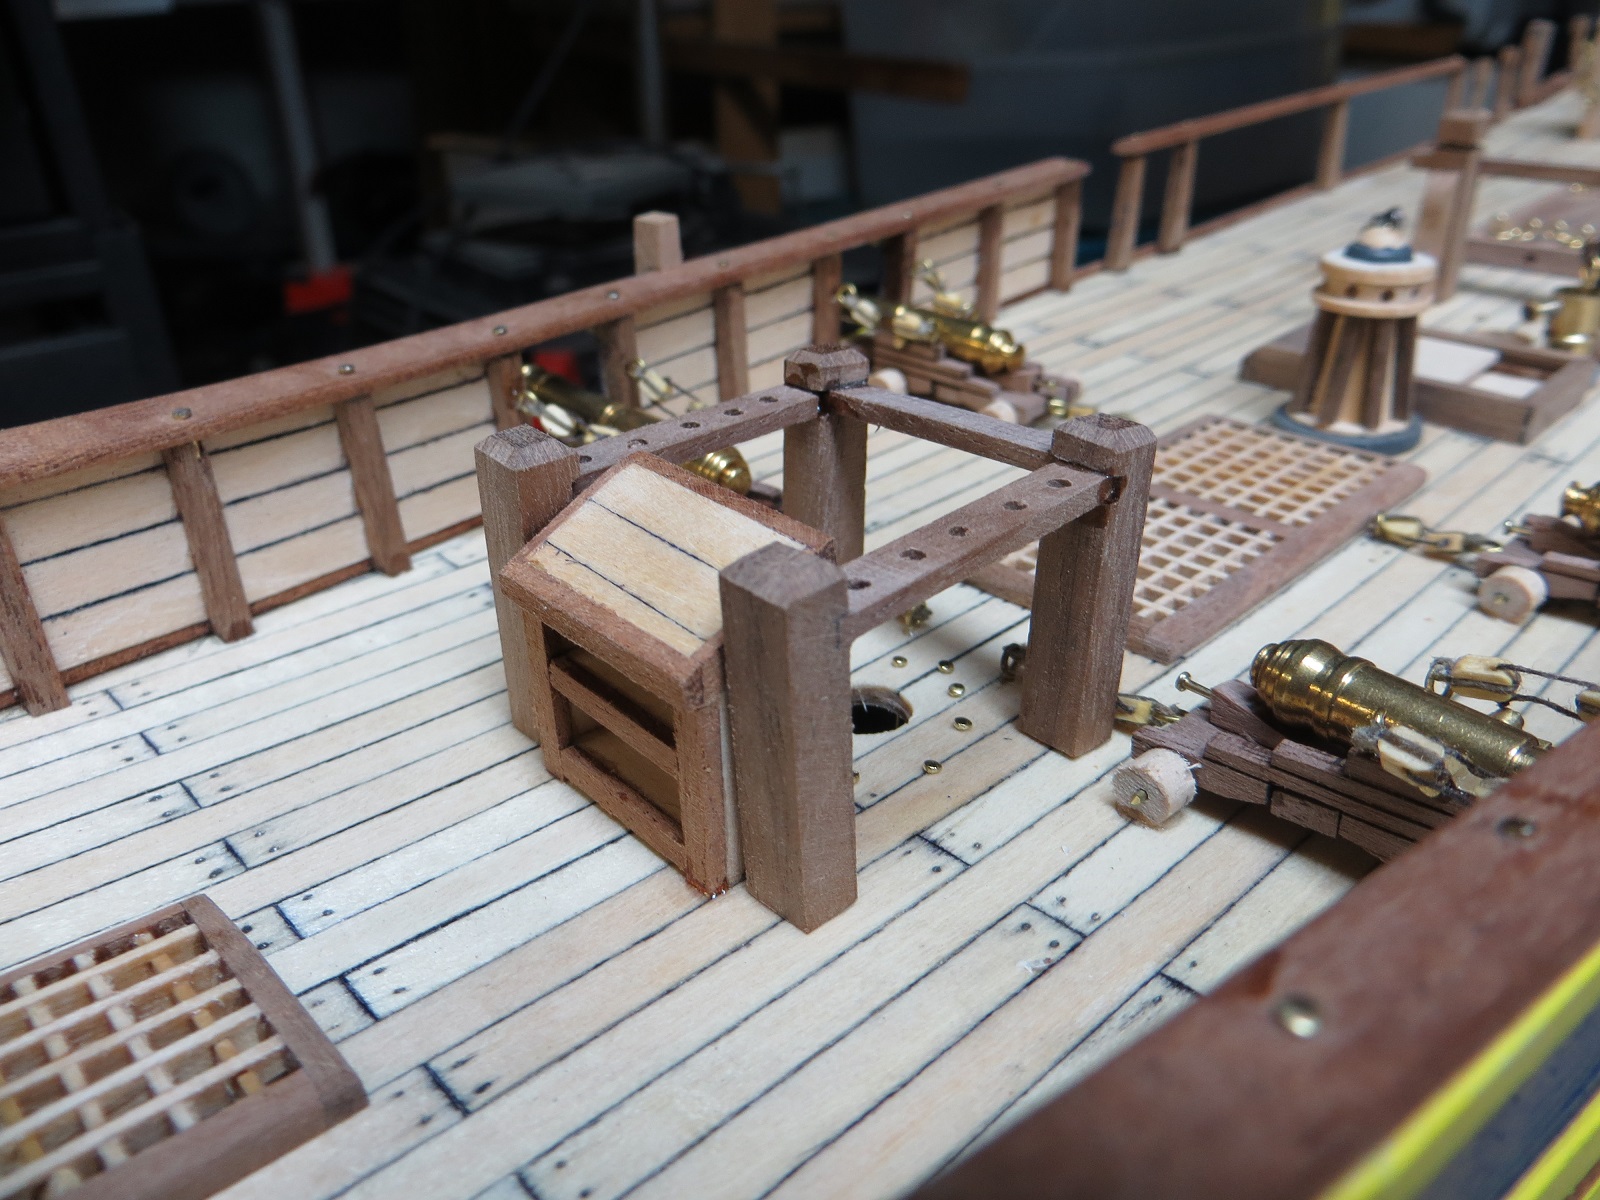
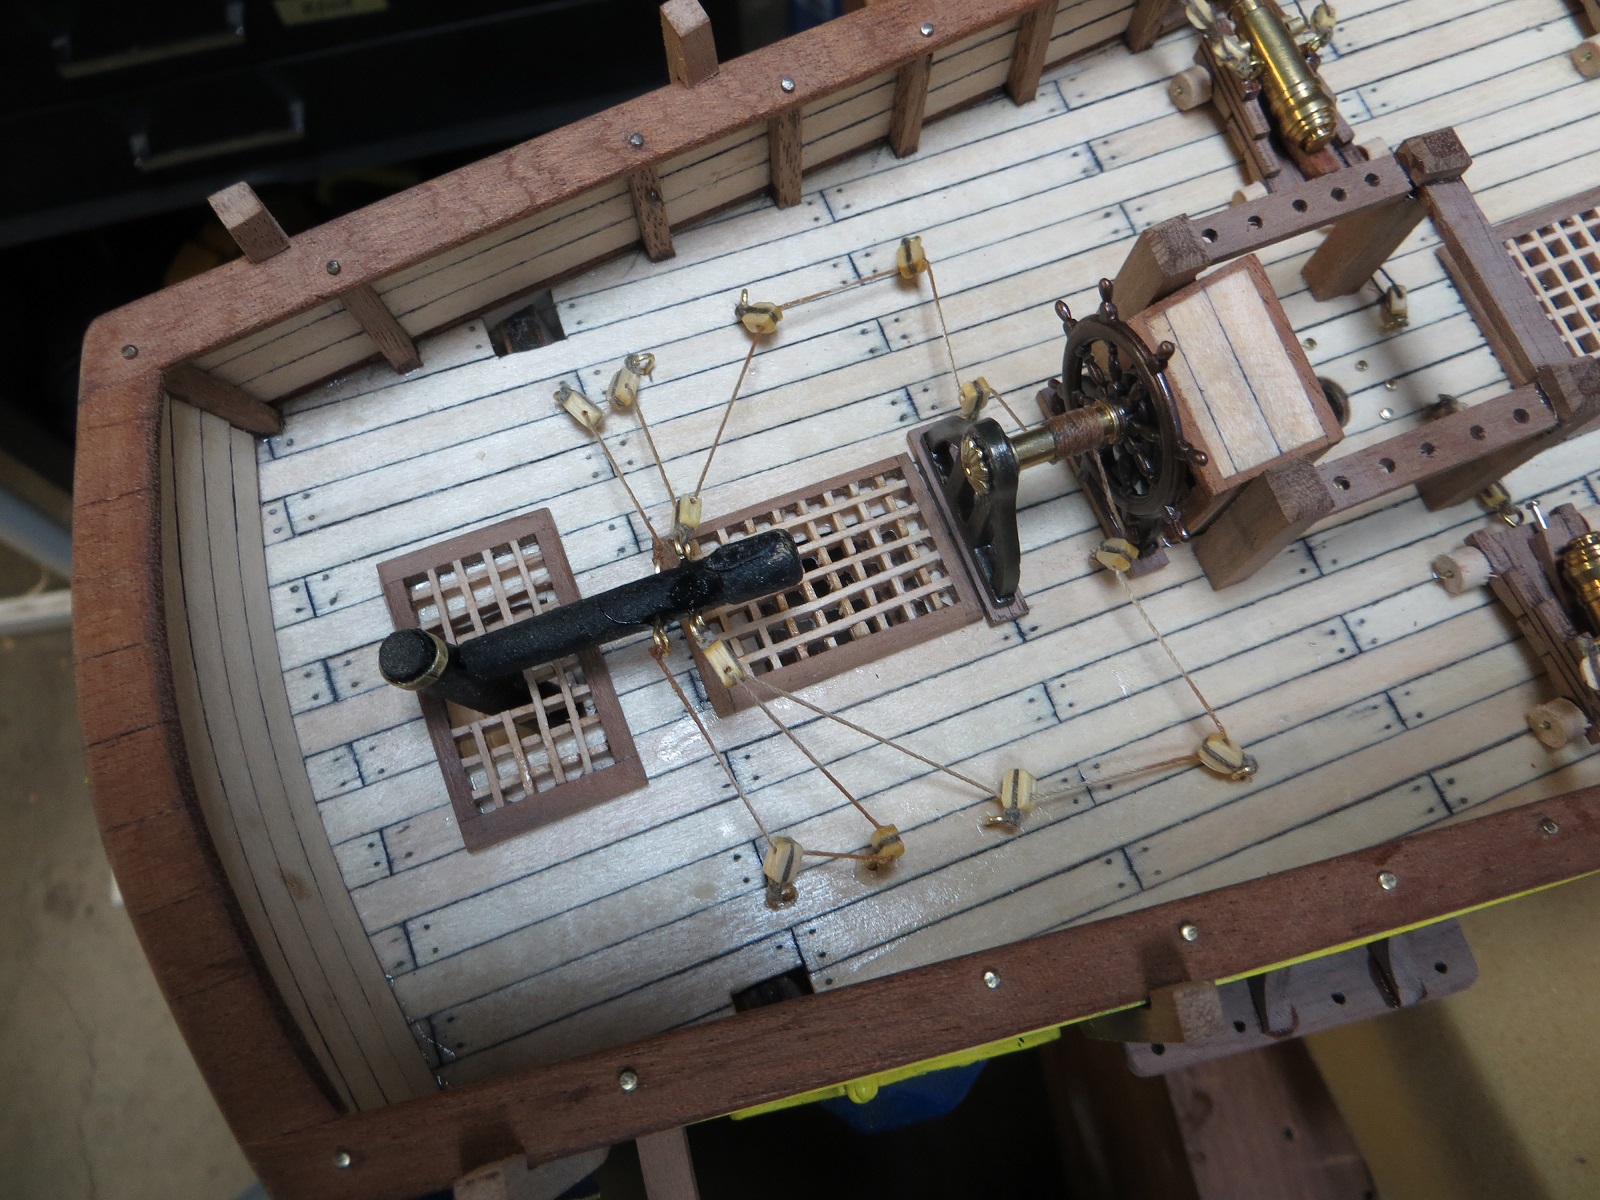
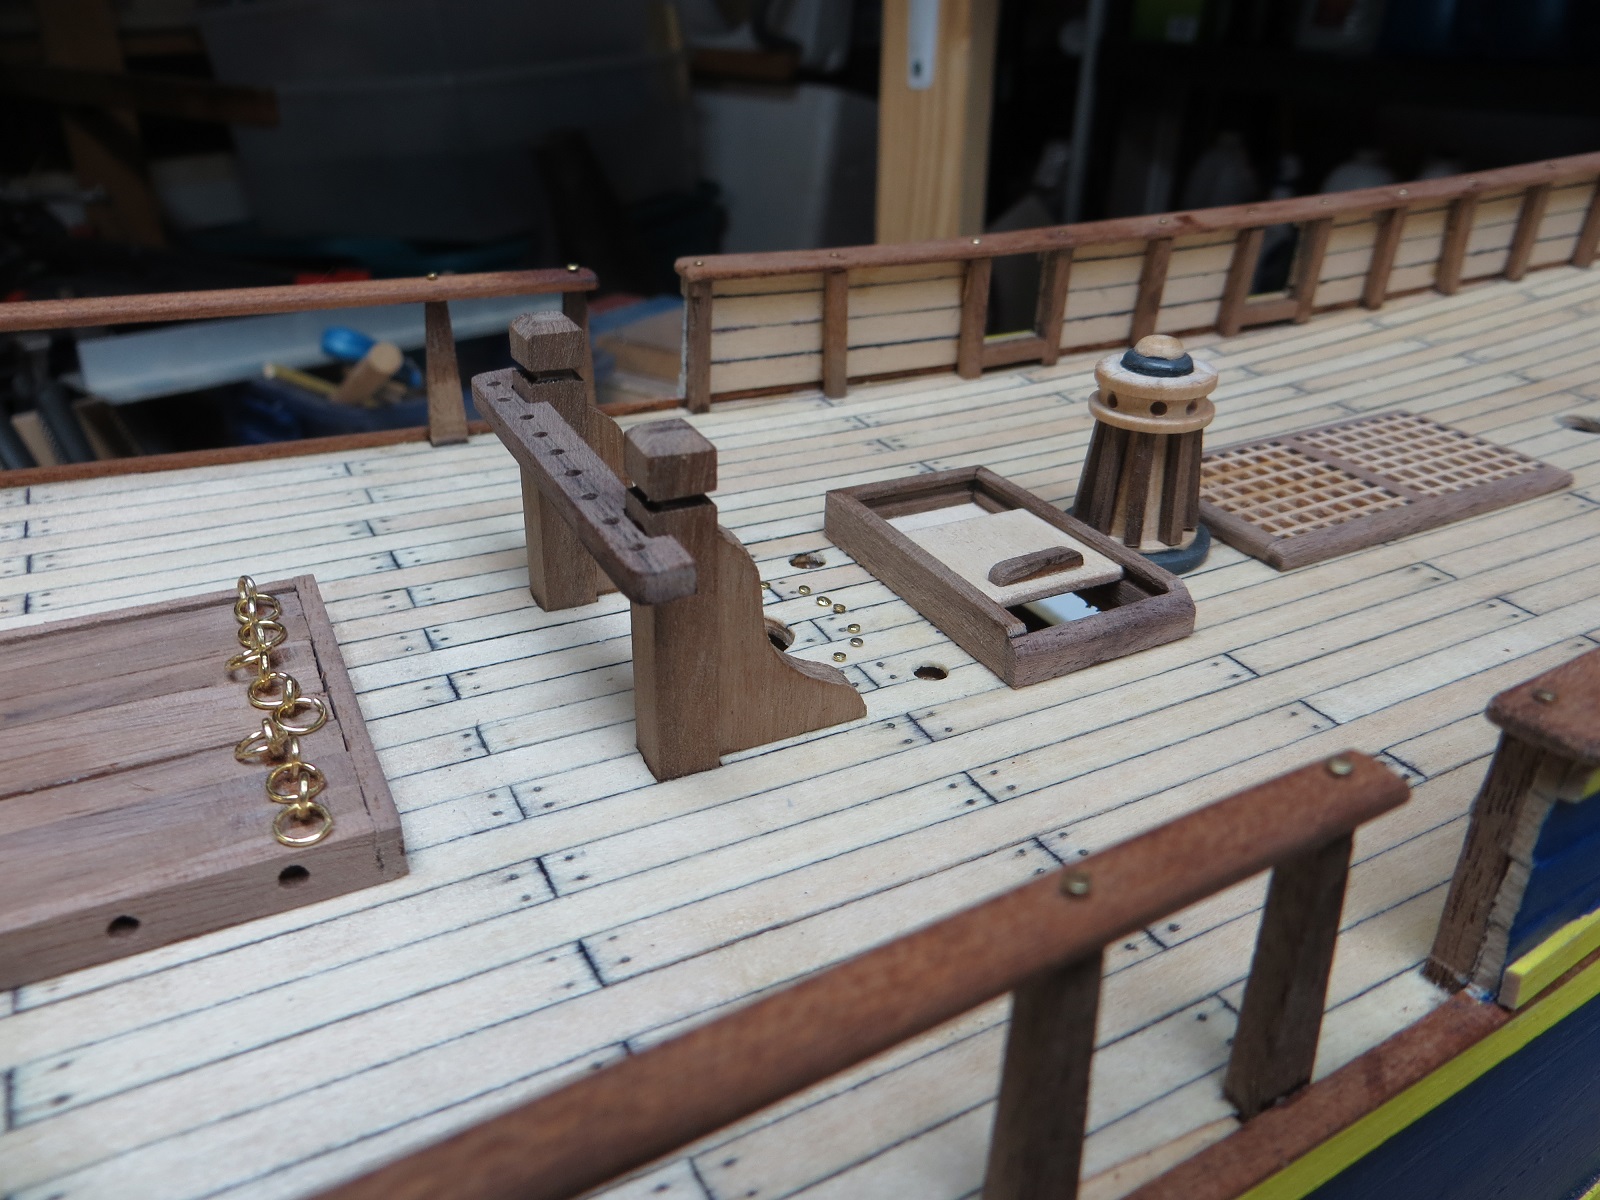
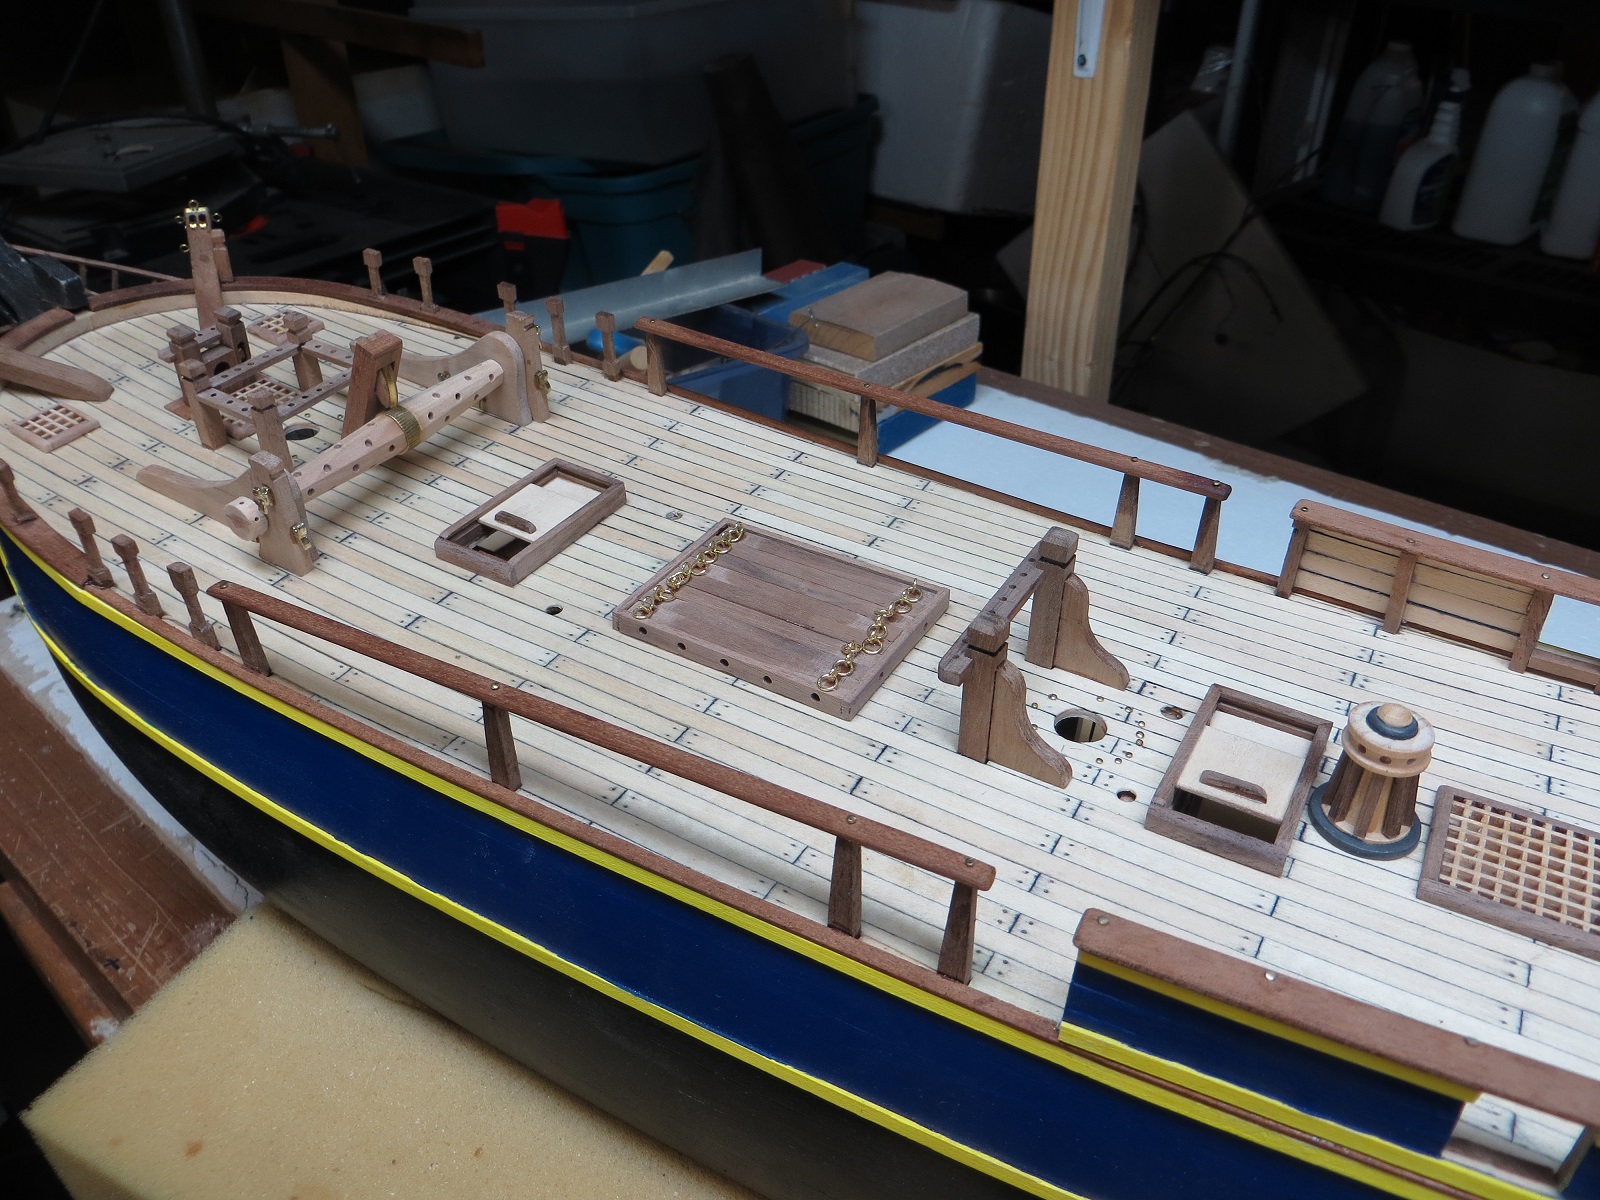
Well it has been a few weeks since I posted. I do remember to take pictures as I complete a step but I am not good at resizing and posting the photos. I have continued working on the deck furniture. Making and rigging the cannons proved to be quite a challenge. First time I have worked with making blocks. Lots of work with tweezers. Quite a tedious effort but I am generally pleased with the results.
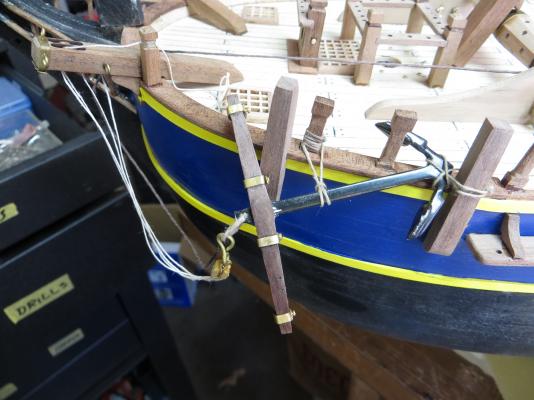
The anchors were also a project. Again, the thread work is all new to me.
As you can see, I tend to break the model down into a series of little projects. I work on that project until it is done. Lots of projects to go.
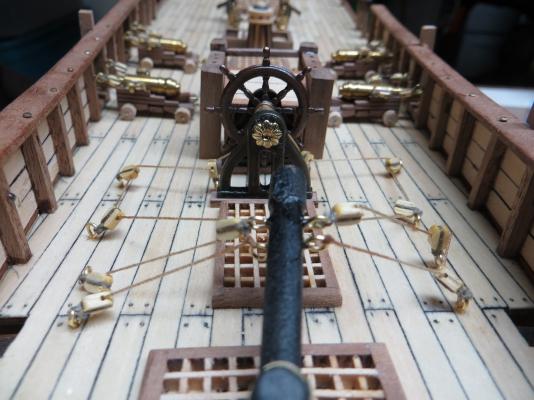
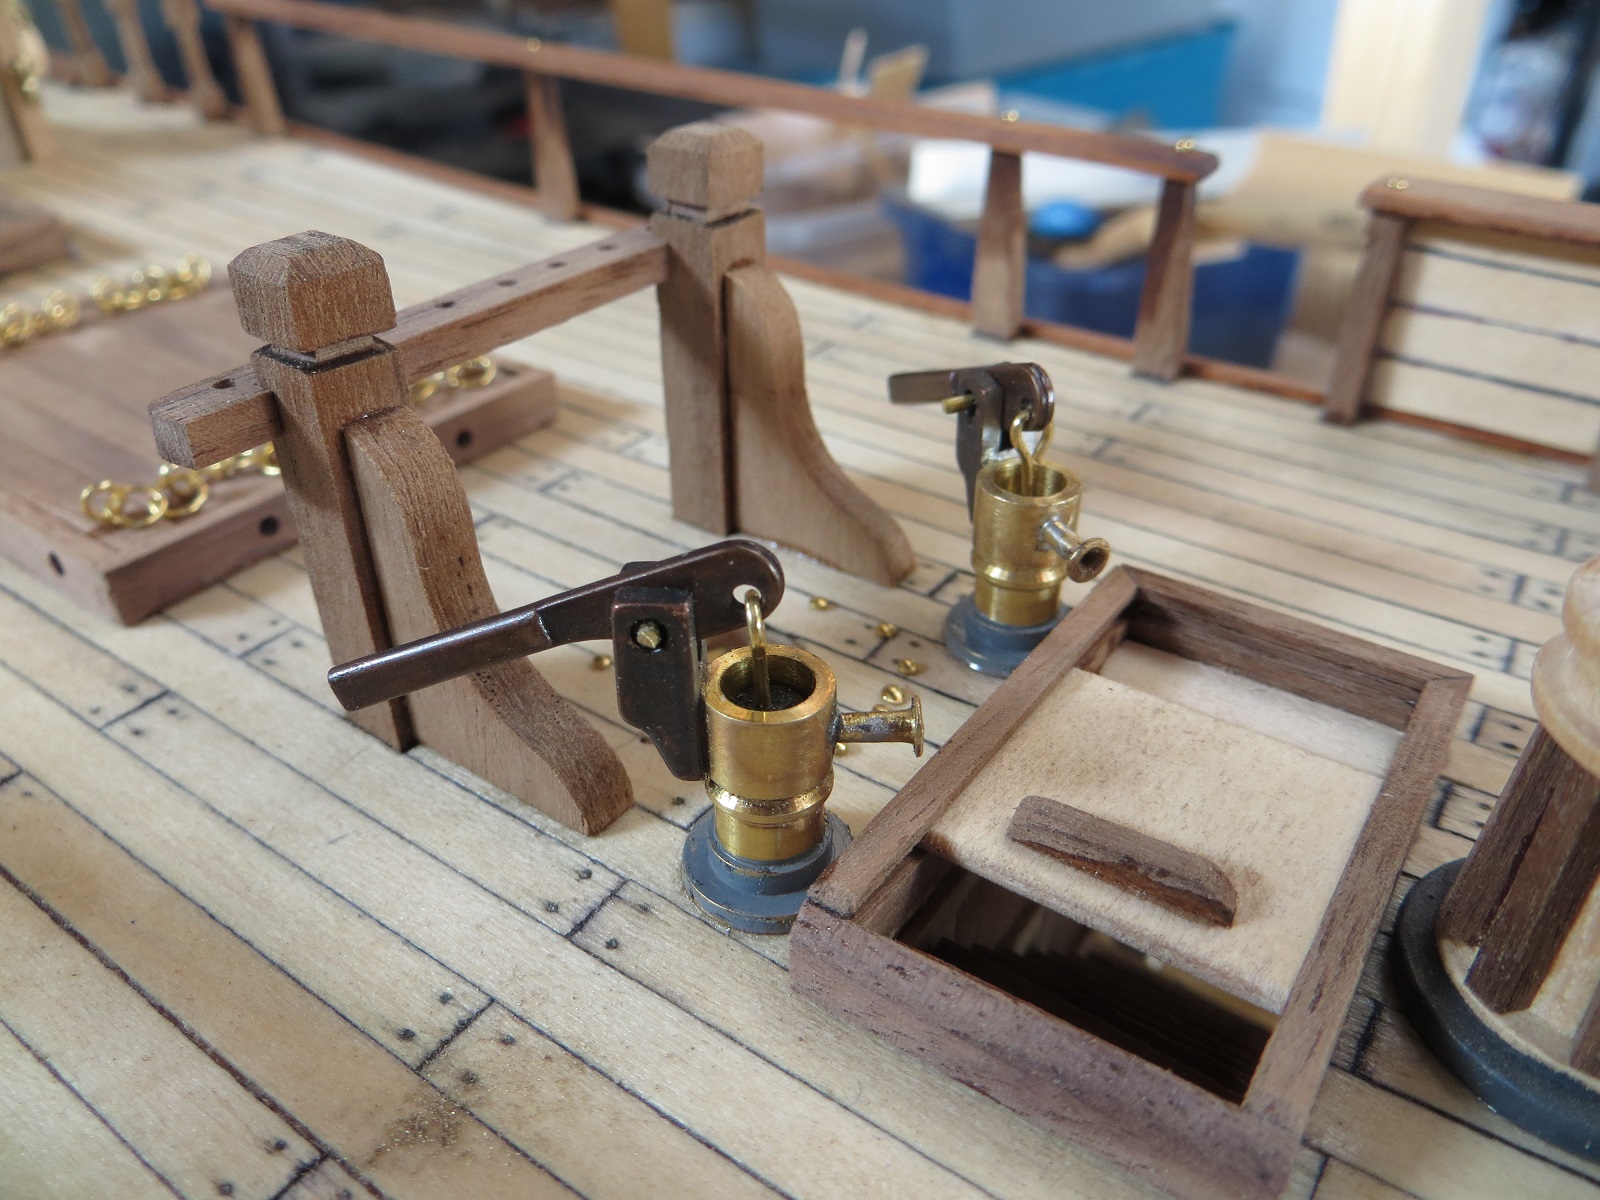
The steering mechanism was kind of fun. First, I did not realize the complexity of steering aboard these older ships. Must have been fun dodging all the steering ropes and blocks when you were rushing around the decks.
I am really enjoying this model. I tend to put in three or four hours per week (an hour at a time in the evenings). Learning a lot of new skills as I go along. One is figuring out what the plans and instructions are telling me.
I hope you enjoy the photos.


-


HMS Bounty 1783 by rcmdvr - Artesania Latina - Scale 1:48
in - Kit build logs for subjects built from 1751 - 1800
Posted
Oh yea......this is a kick.