Justin P.
-
Posts
1,008 -
Joined
Content Type
Profiles
Forums
Gallery
Events
Everything posted by Justin P.
-

Rotary tool recommendations, preferences
Justin P. replied to Steve116's topic in Modeling tools and Workshop Equipment
No at all! I actually thought you made an excellent point that I had wished I made myself. You are absolutely right, I learned the hard way (multiple times) that a rotary tool is just the wrong tool for most things Ive tried with it. -
Planking Question
Justin P. replied to Malazan's topic in Building, Framing, Planking and plating a ships hull and deck
To specifically answer your question though, cutting the rabbet can be made easier when you consider using a scraper method as opposed to actually "cutting" the rabbet. I had mixed/poor results trying to use a knife. However once I learned how to perfect a custom scraper tool from a box knife blade, my result got much better. I wish I could pull the best resource to share on this method out of thin air, but I cant recall how I put it together. Its covered in good detail in many places on the forum, and in a articles here and there. Maybe someone else can link to something that covers this well. The problem with having access to so much good info on MSW is that its hard to remember where in the site it came from when the time comes! -
Planking Question
Justin P. replied to Malazan's topic in Building, Framing, Planking and plating a ships hull and deck
Agreed. However, I think the spirit of Glenn's wisdom still has value. Read everything you can, when you cannot be building. At least this version has served me well. If I have bench time, Im building. I try to not spend too much of that valuable time with my nose in a book. The more I build, the better modeler I become. When I cant be at the bench, I READ. I read MSW, I read modeling books, I read articles, I read Age of Sail fiction and non-fiction, etc... I also try to read as much as I can regardless of context on my modeling subject. This enriches my experience. Maybe its just me... maybe Im obsessive. I know both daughter and wife cant possibly roll their eyes enough or groan any louder when they see another book arrive or I start in about how their current life issue is analogous to that time Captain so-and-so did that thing back in 1740... ha! My advice would be to focus on the Dory, read a few things about the Dory - get to know the design, its purpose and history and just start building it. -
Hi All, Apologies if this topic is covered elsewhere, I think I did a pretty good search ahead of starting this thread - but you never know. Ive done quite a lot experimenting with different brands/types of sandpaper over the years and Im curious, what's your favorite and why? Whats your go-to grit sequence for finishing parts? Ive lately been making sticks with a 400, 600, 800, 1200 sequence using wet/dry paper. This stuff seems to clog quickly, but is far easier to use on custom sticks than the higher quality brands. Whats your experience?
-
Try the new Modellers Sawmill. New but has good experience, and close support from seasoned modelers. http://www.modelerssawmill.com
-
Planking Question
Justin P. replied to Malazan's topic in Building, Framing, Planking and plating a ships hull and deck
So true. Indeed one of my favorite parts of the hobby is the collecting/curating my library. -
I cant even imagine this... Im sure it will be well worth the effort if only it meant that you could only automate half the process.
-
I still cant even work out how you do this with just a mill... whatever secret genius sauce you re using, its working! So cool.
-
Ha! I dont know about that, but do appreciate the compliment! Im pretty happy with it, so long as I ignore all the annoying little errors, known and unknown.
-
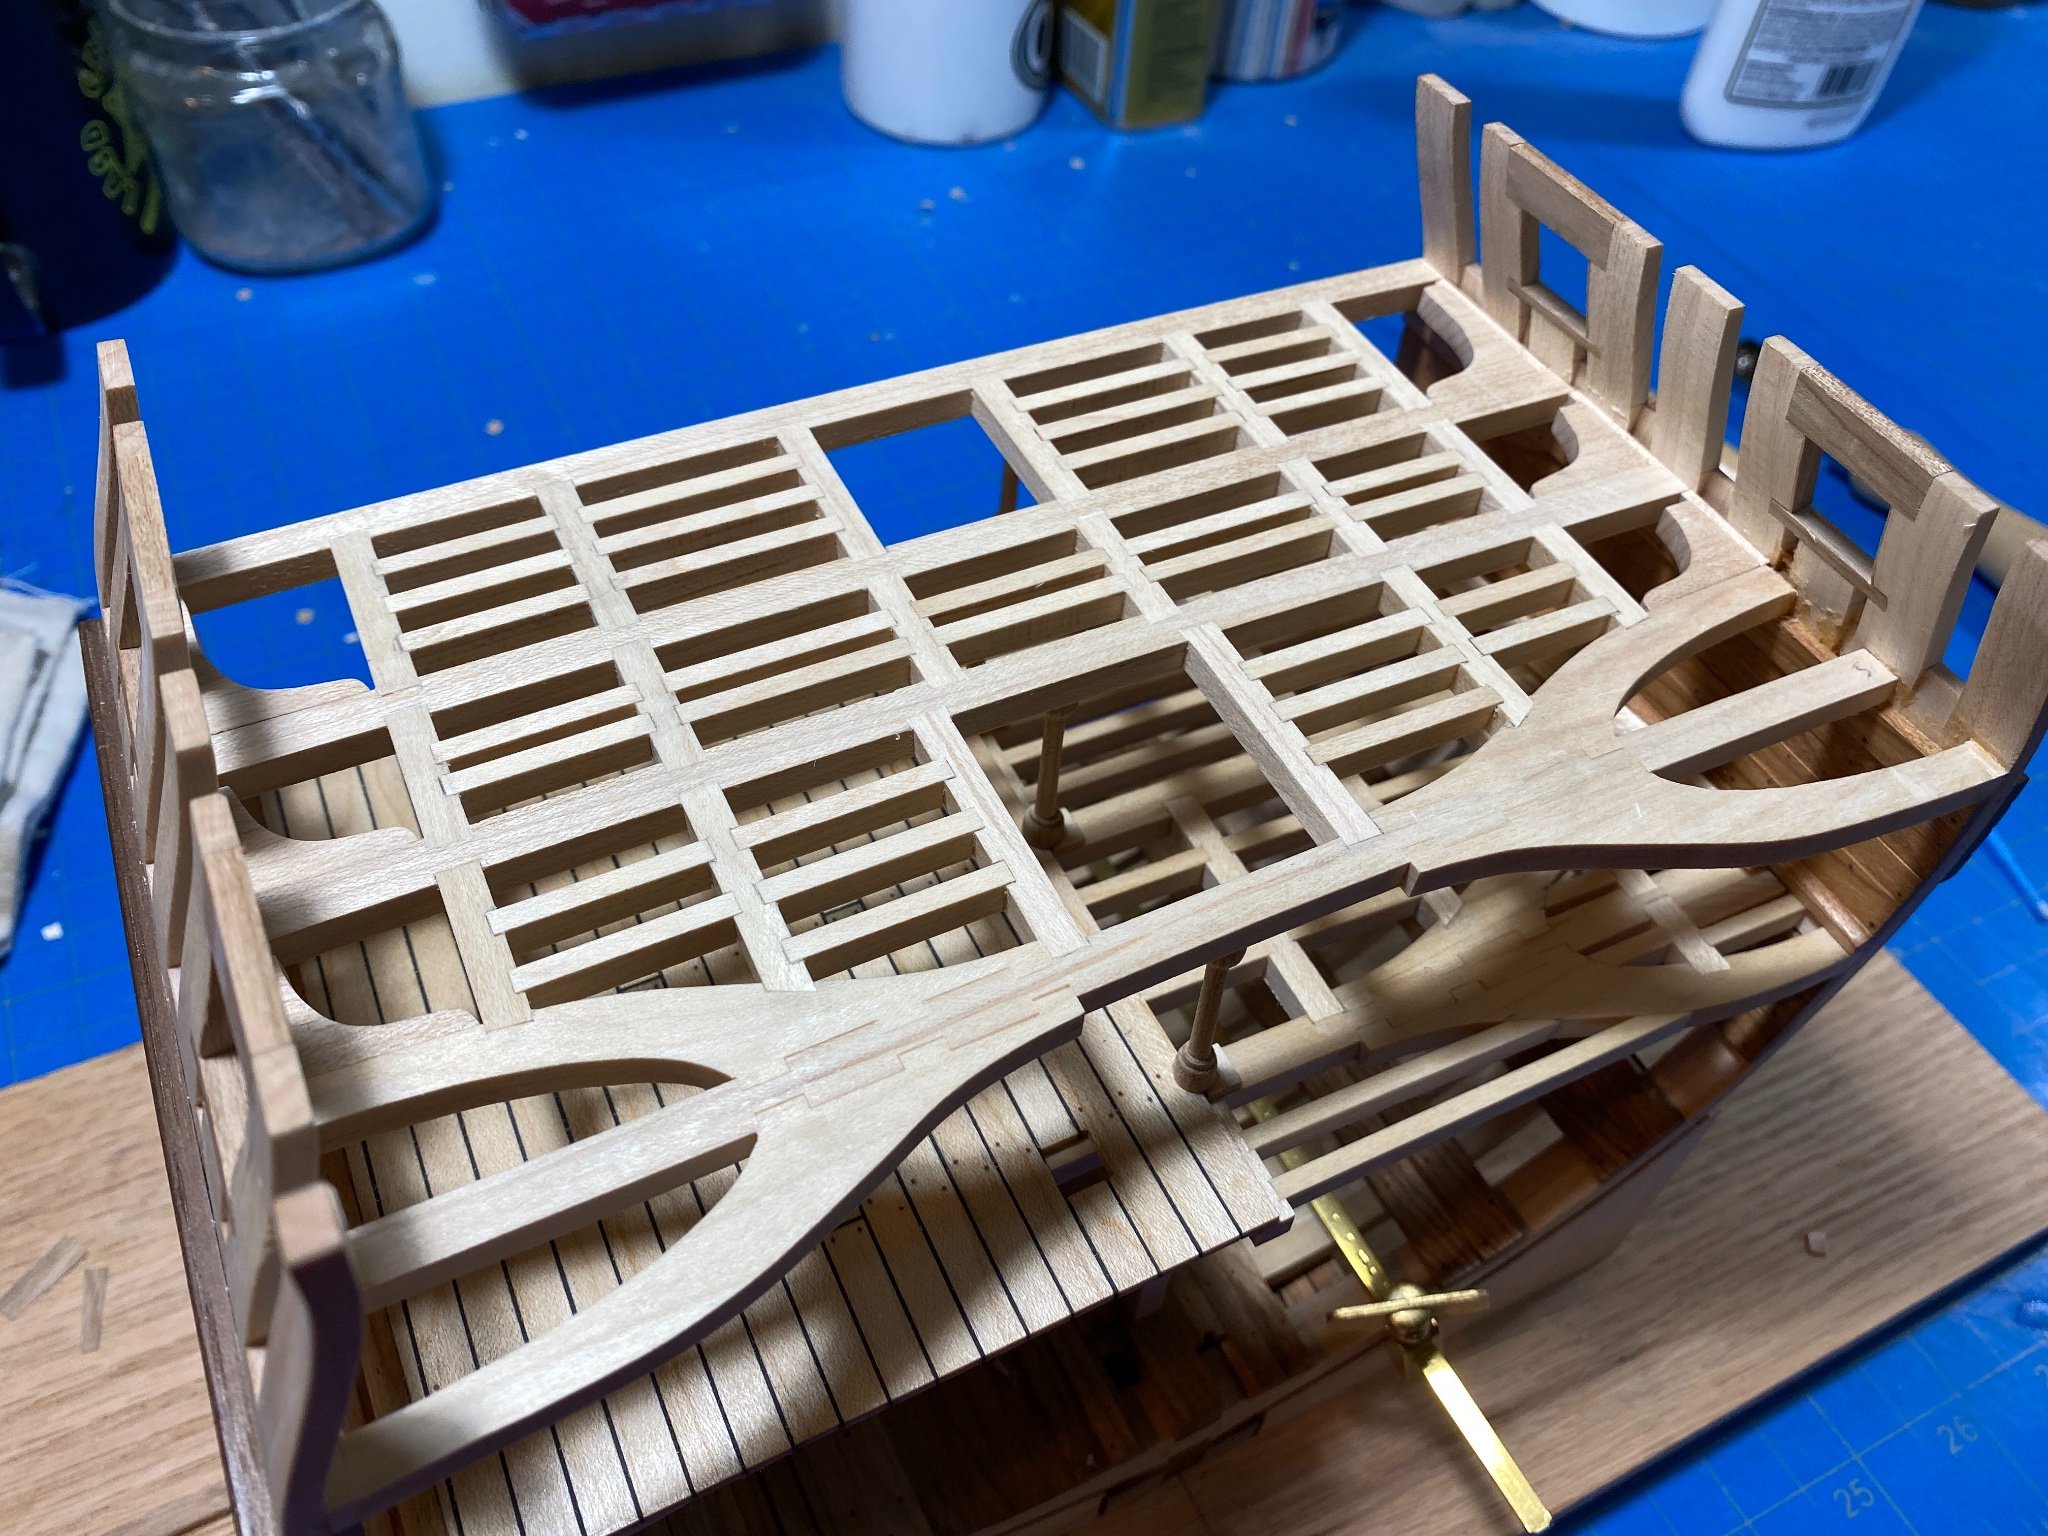
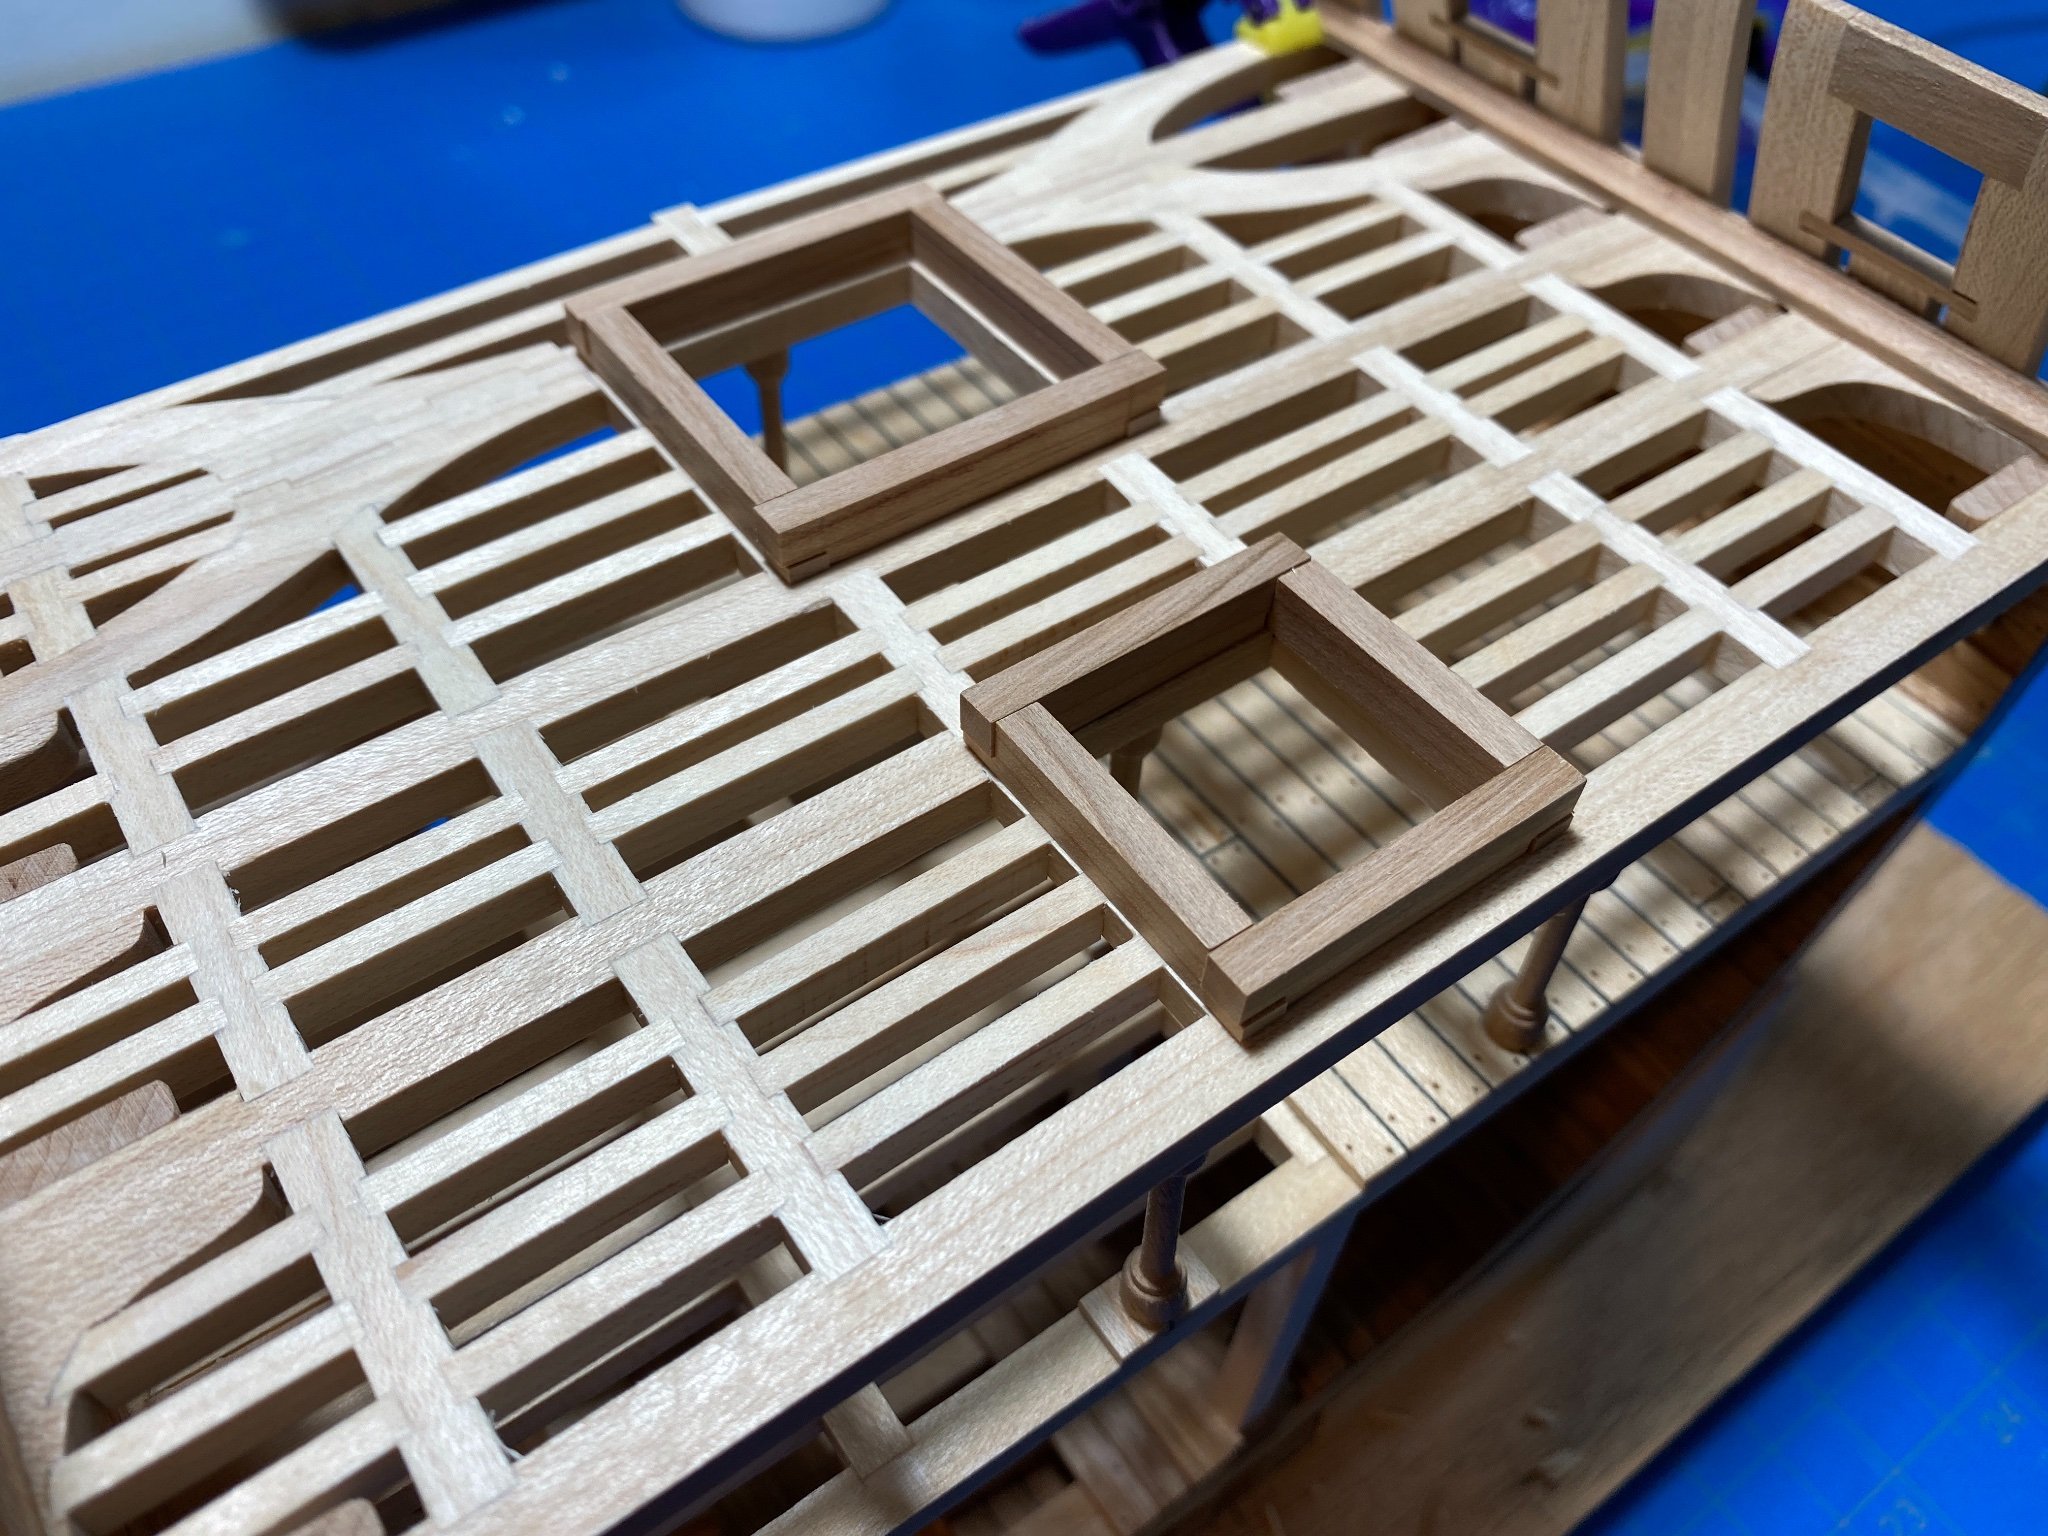
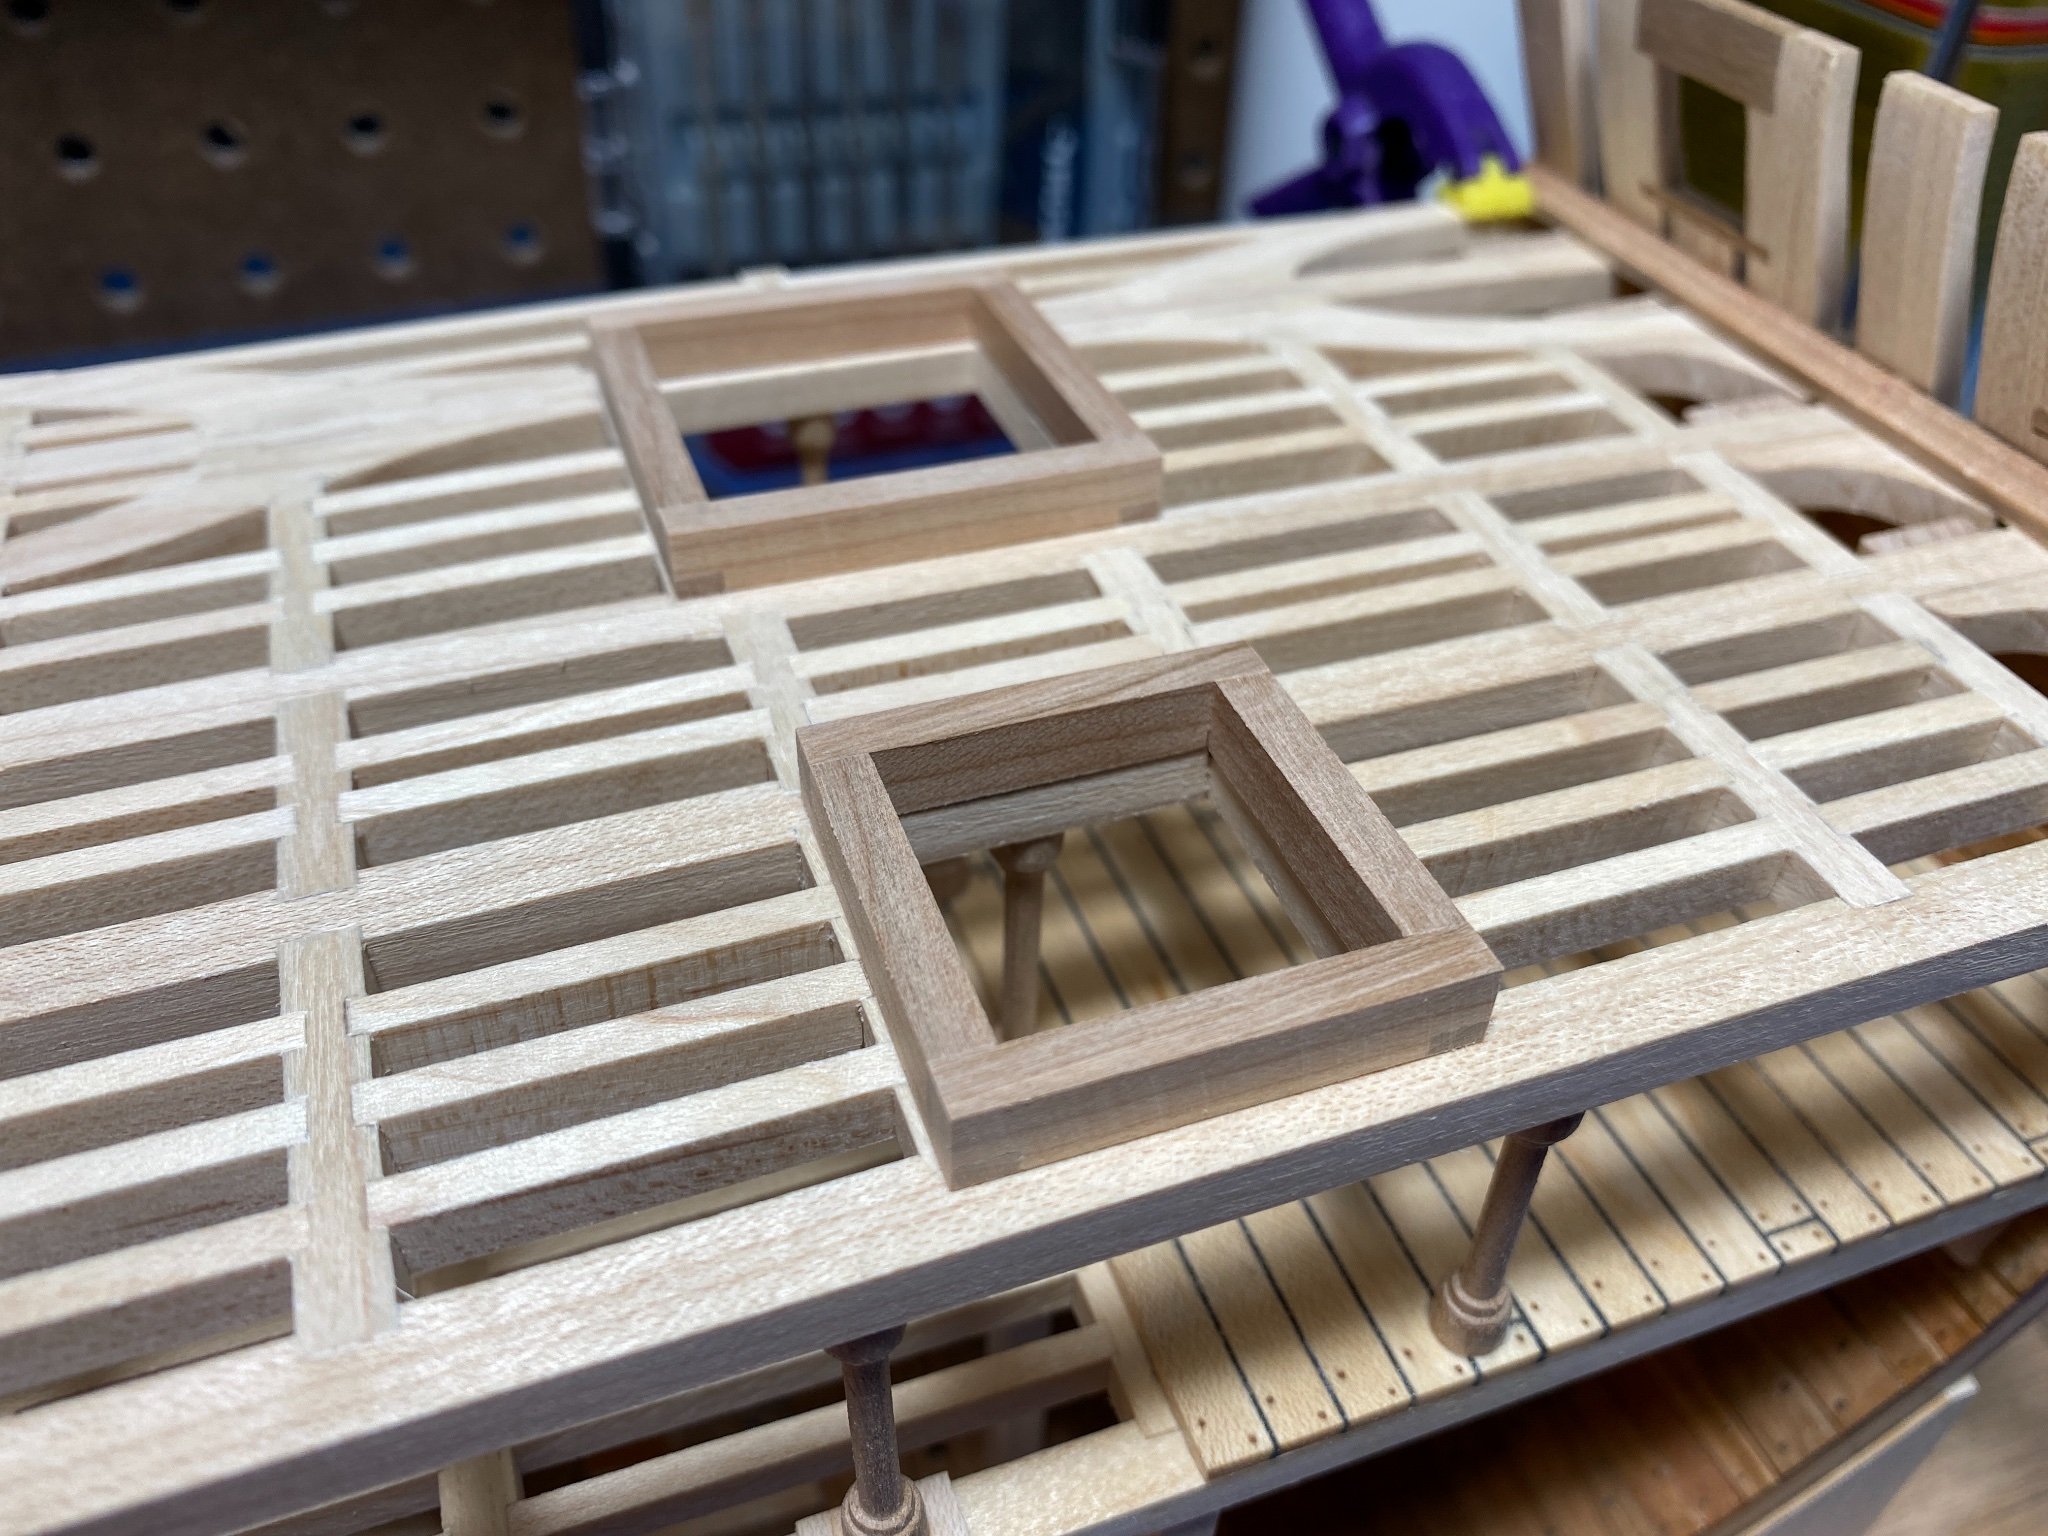
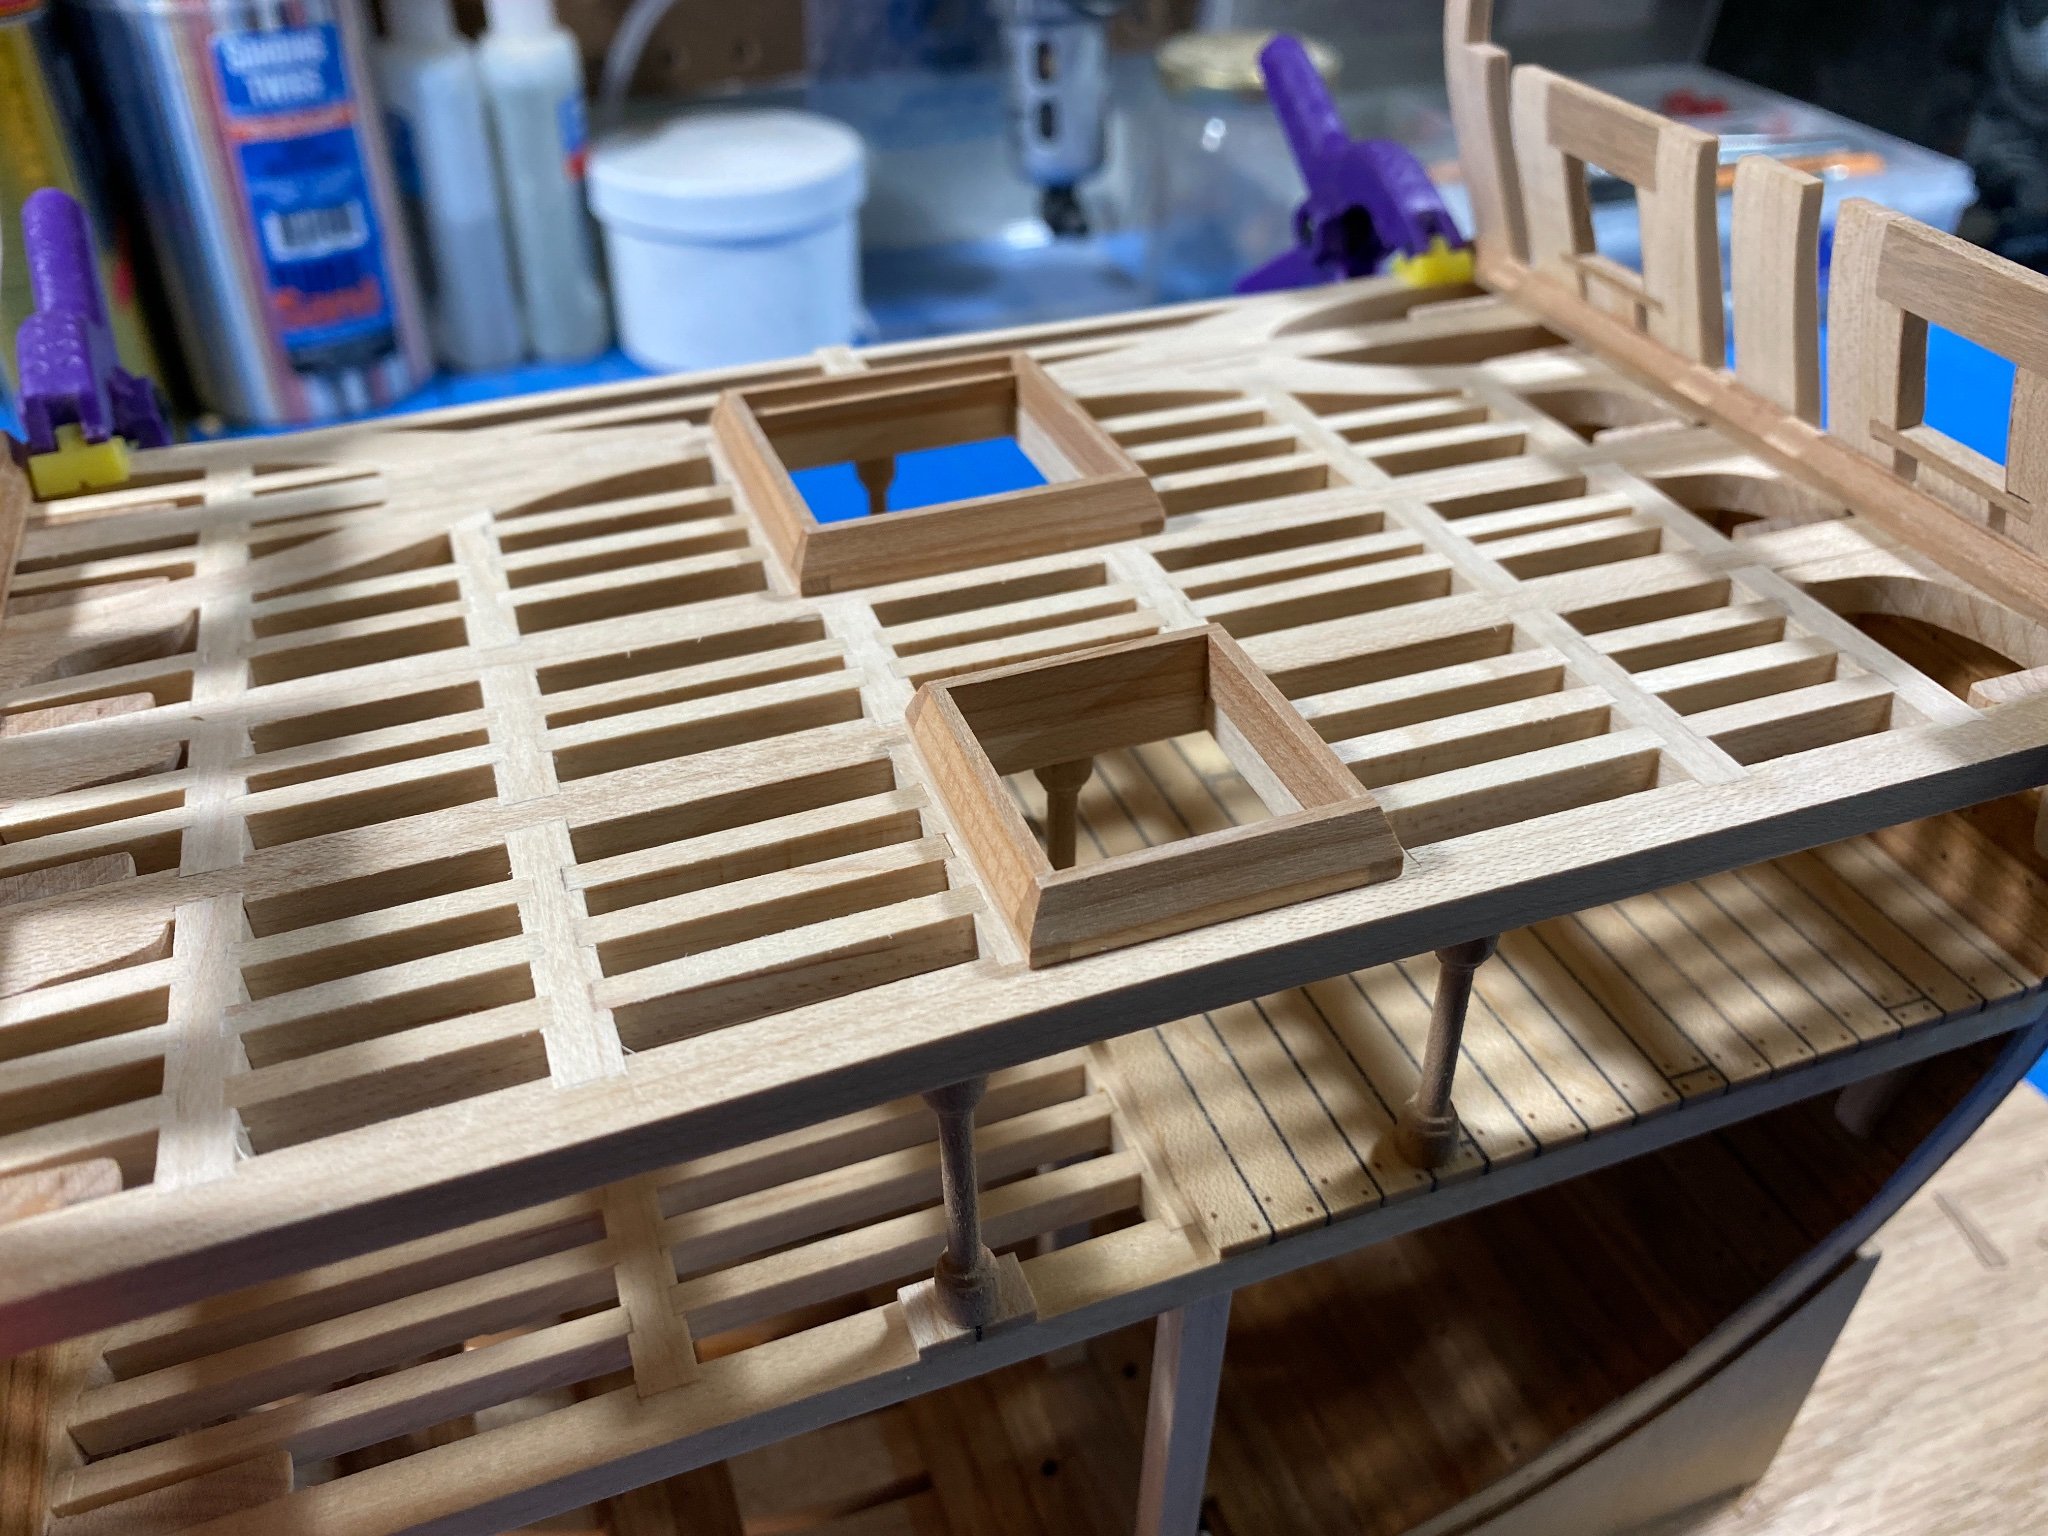
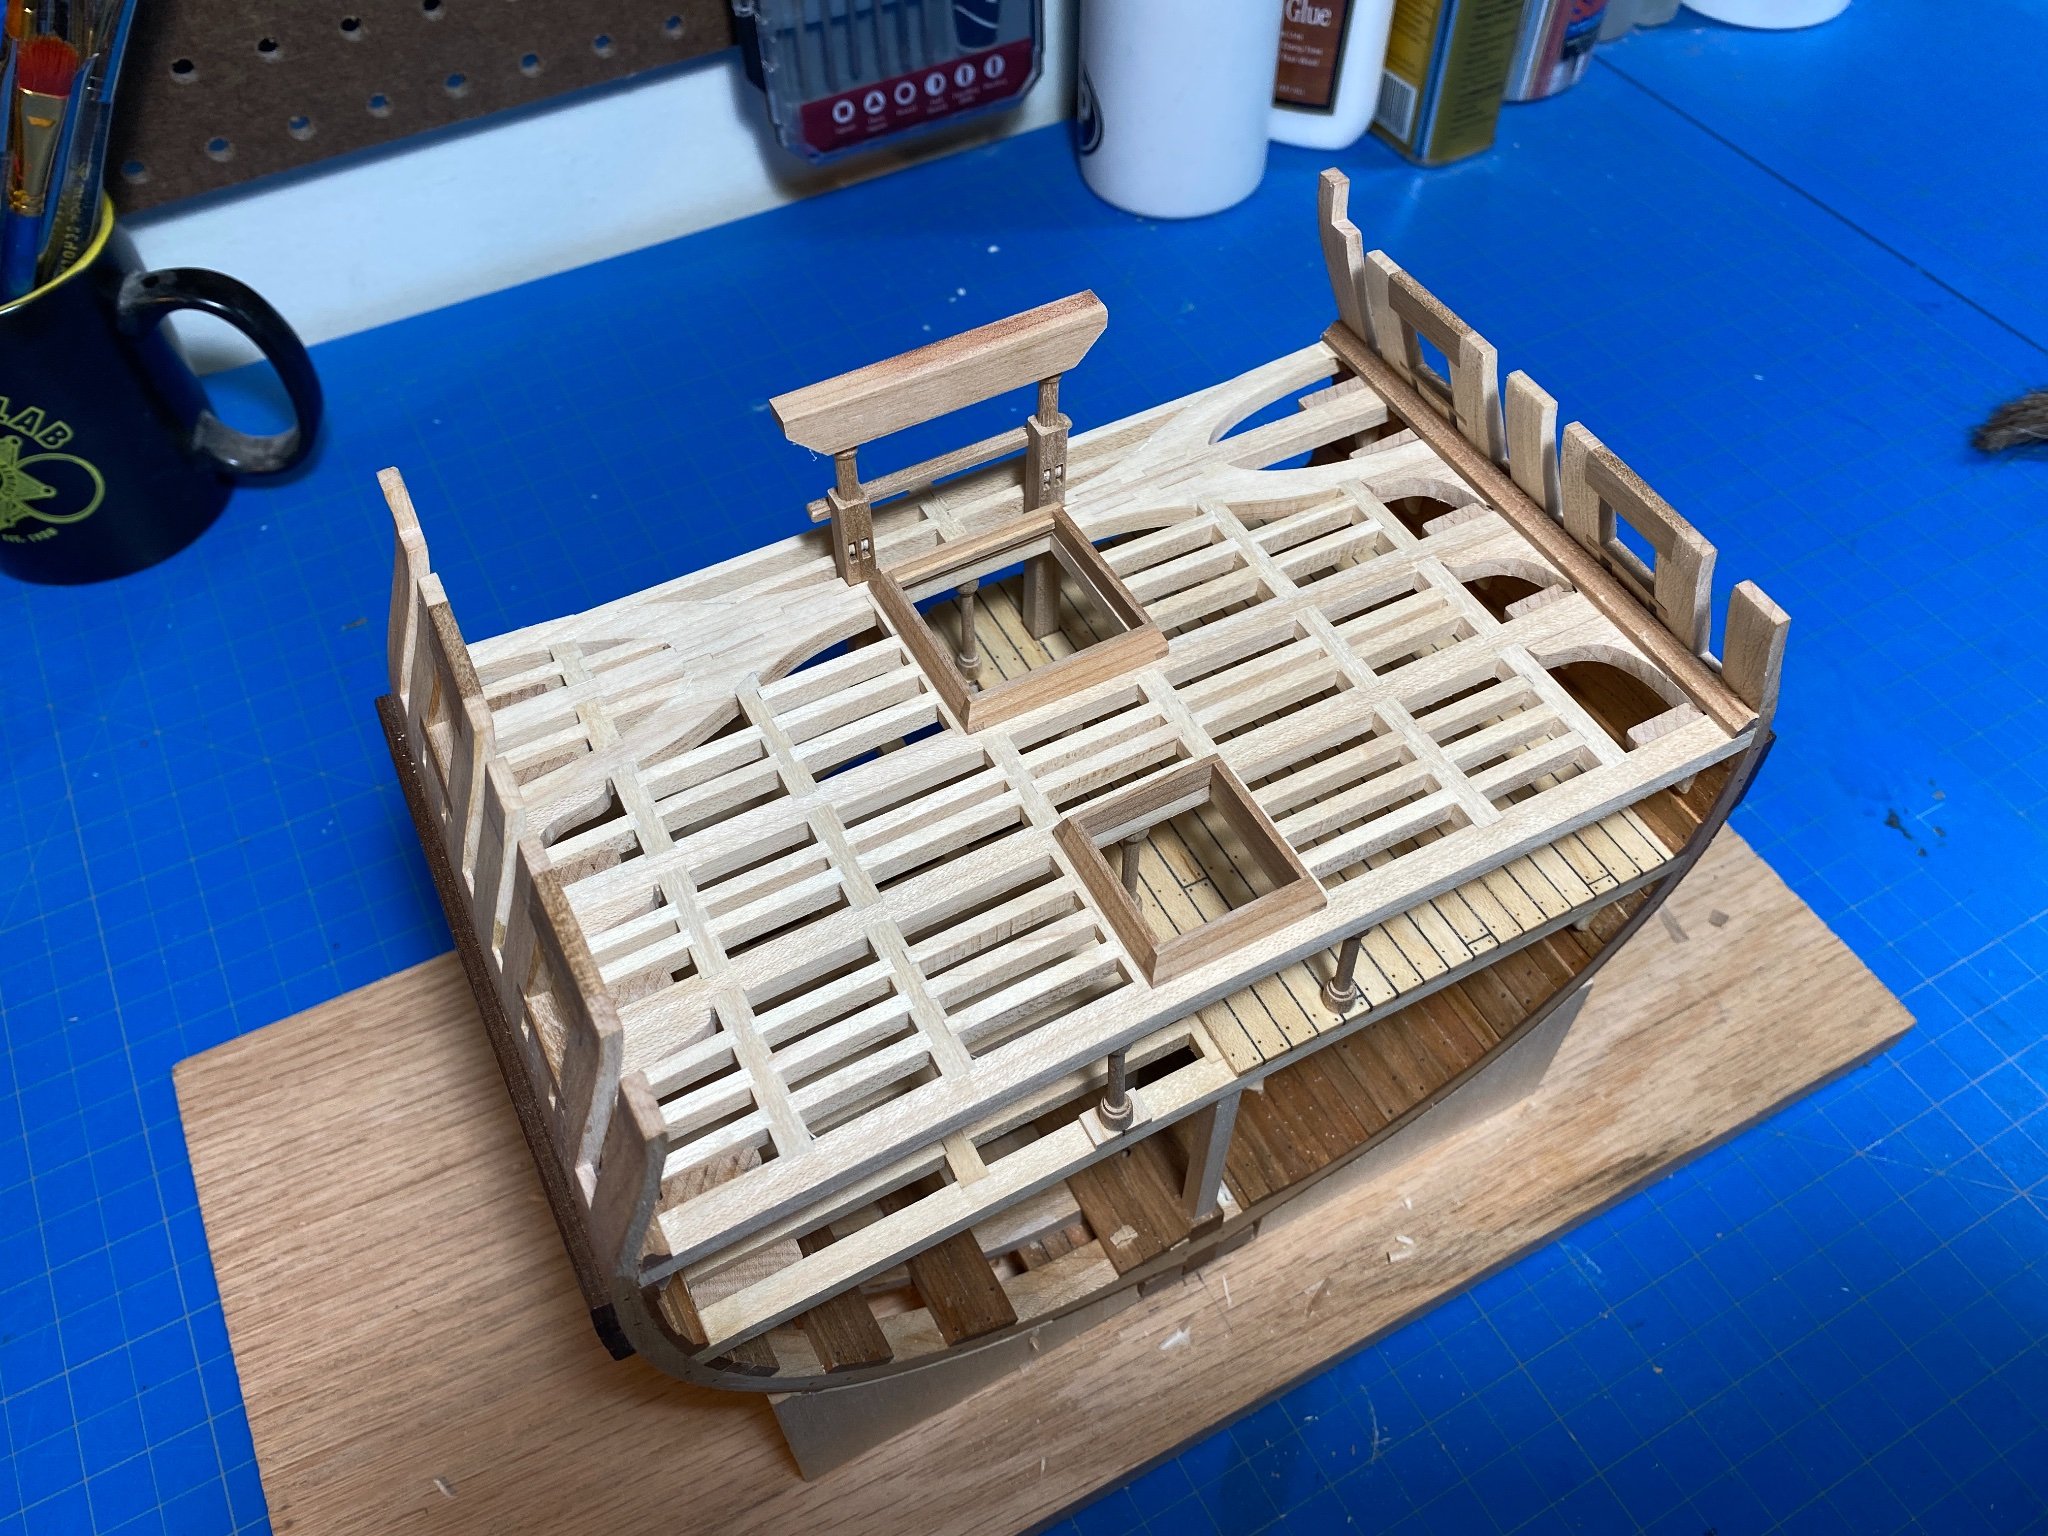
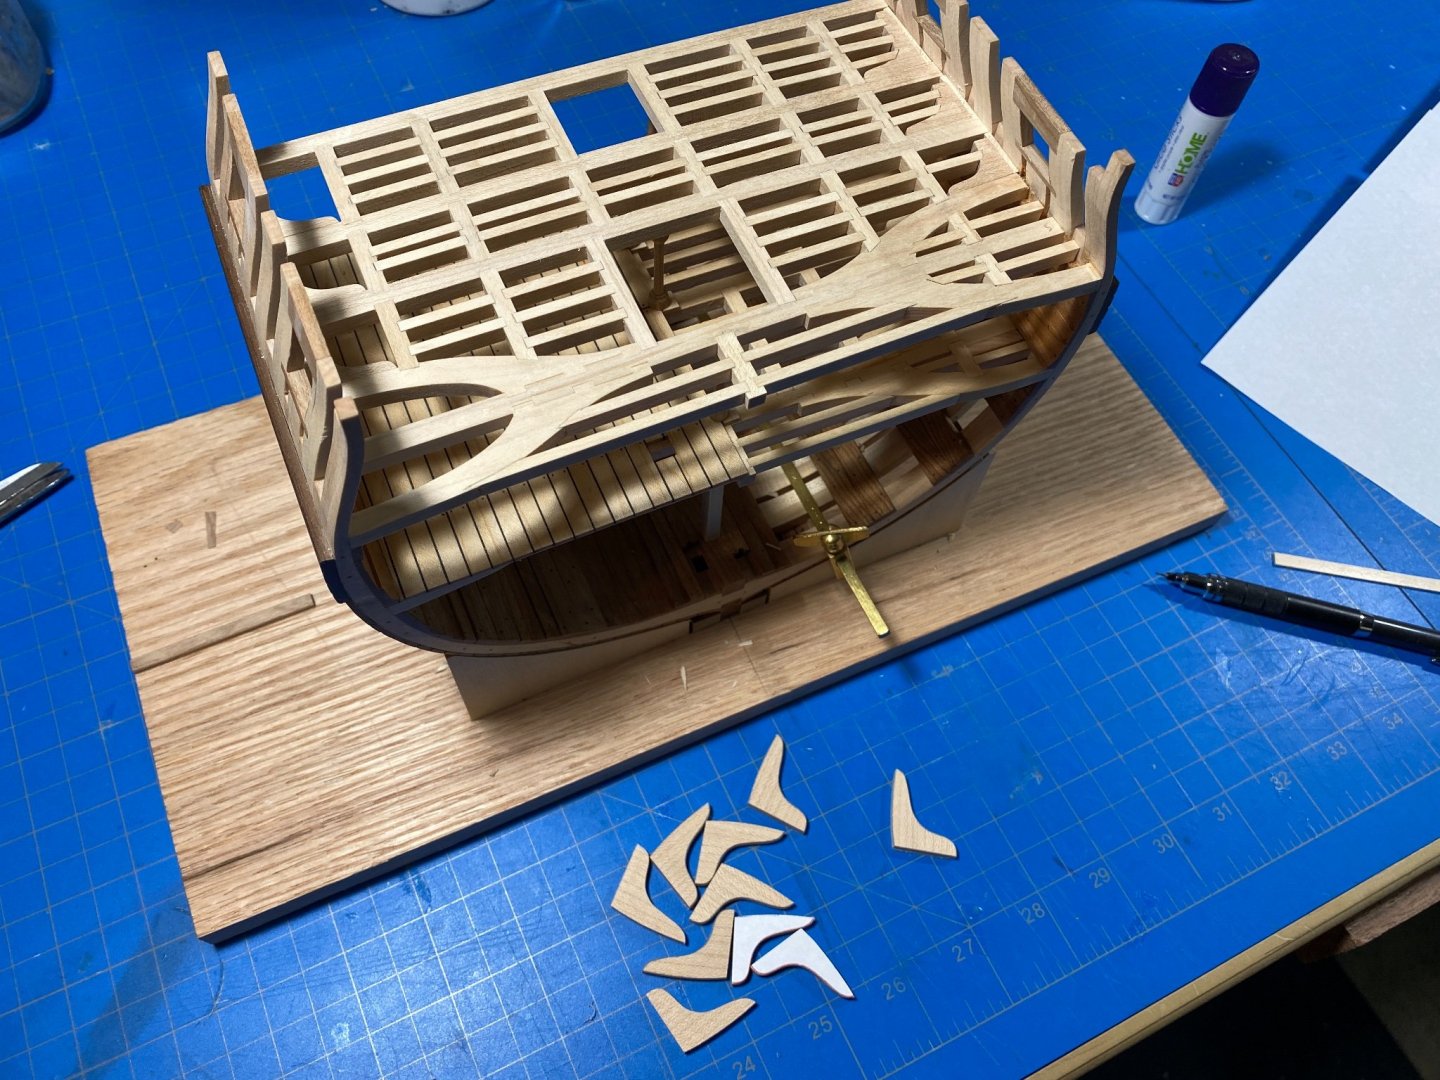
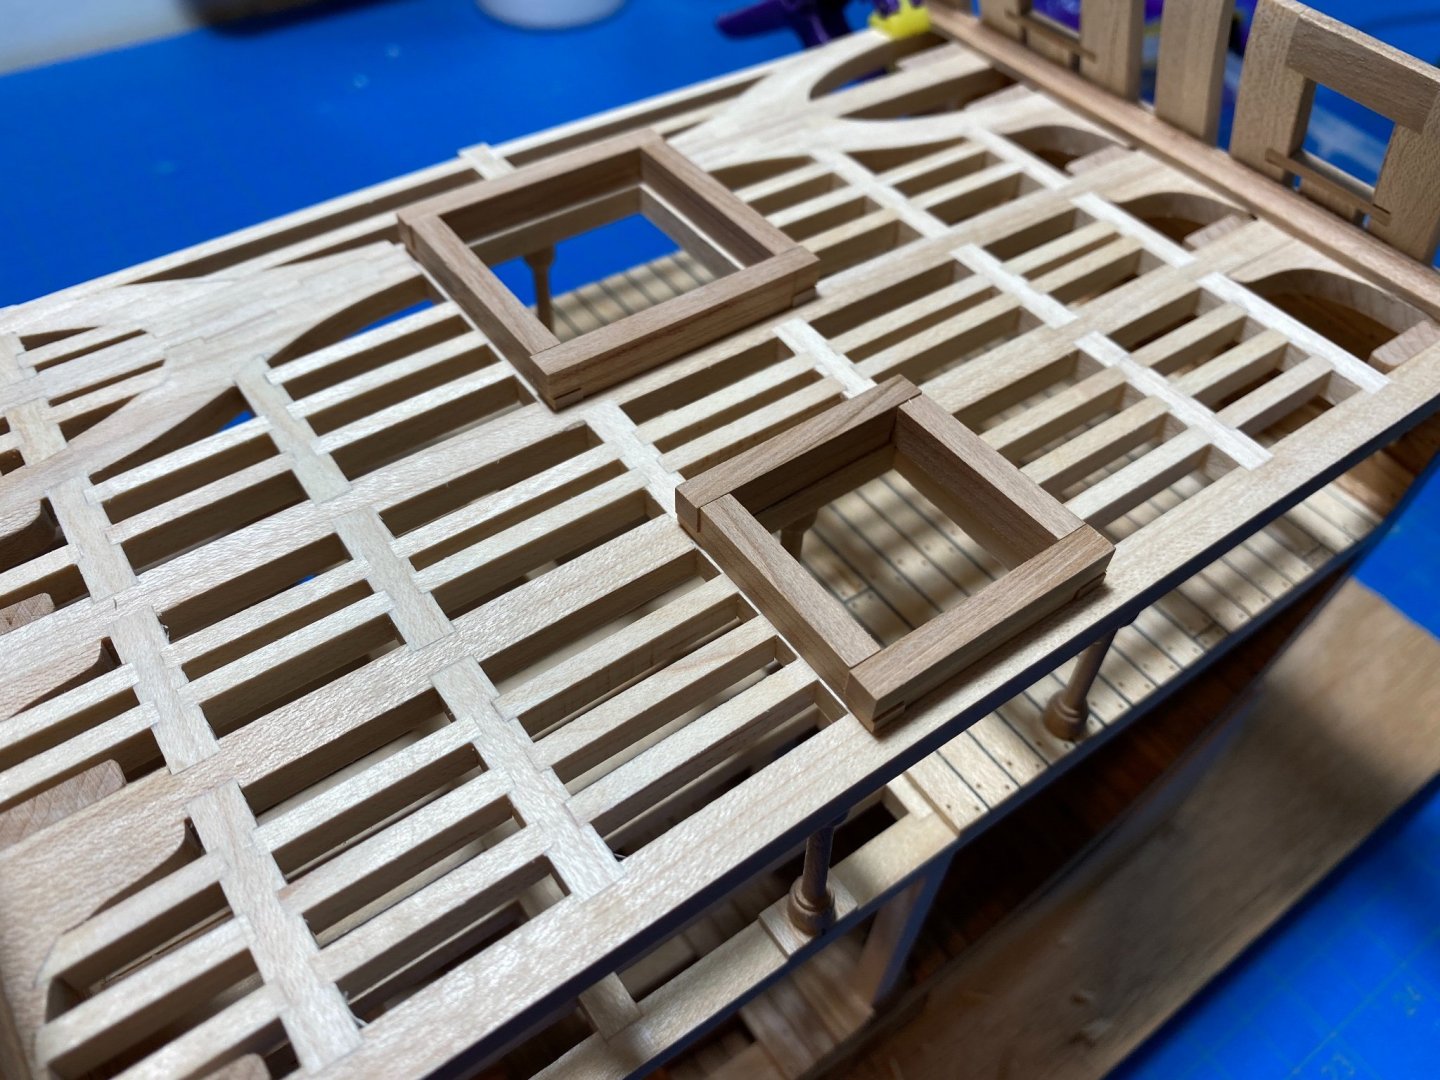
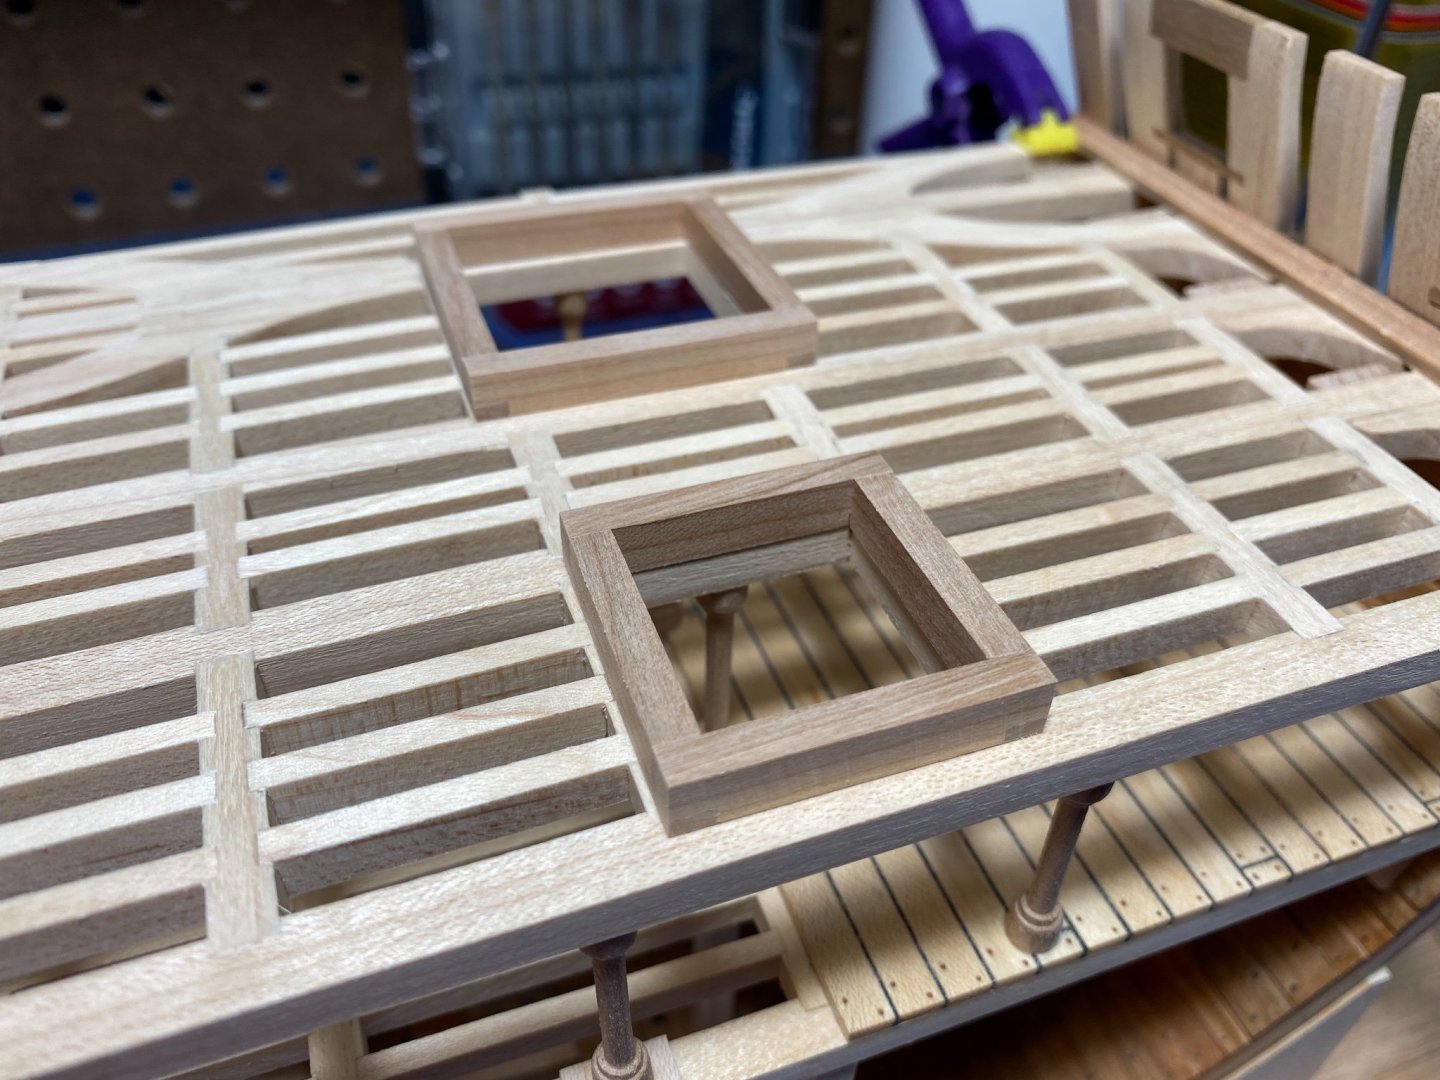
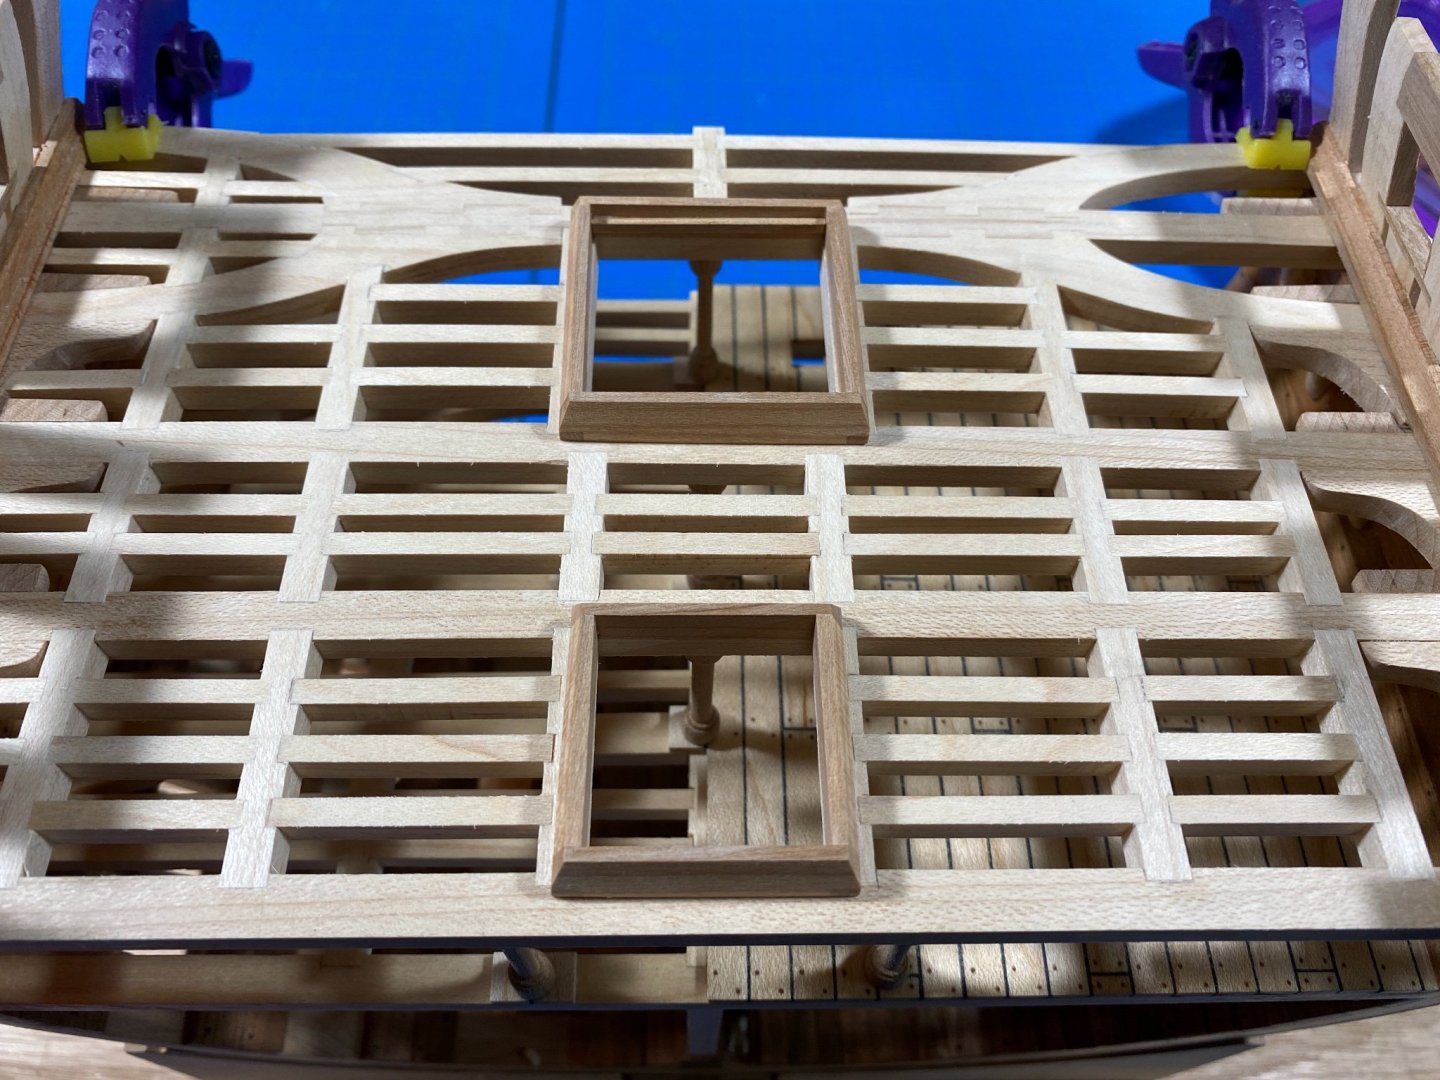
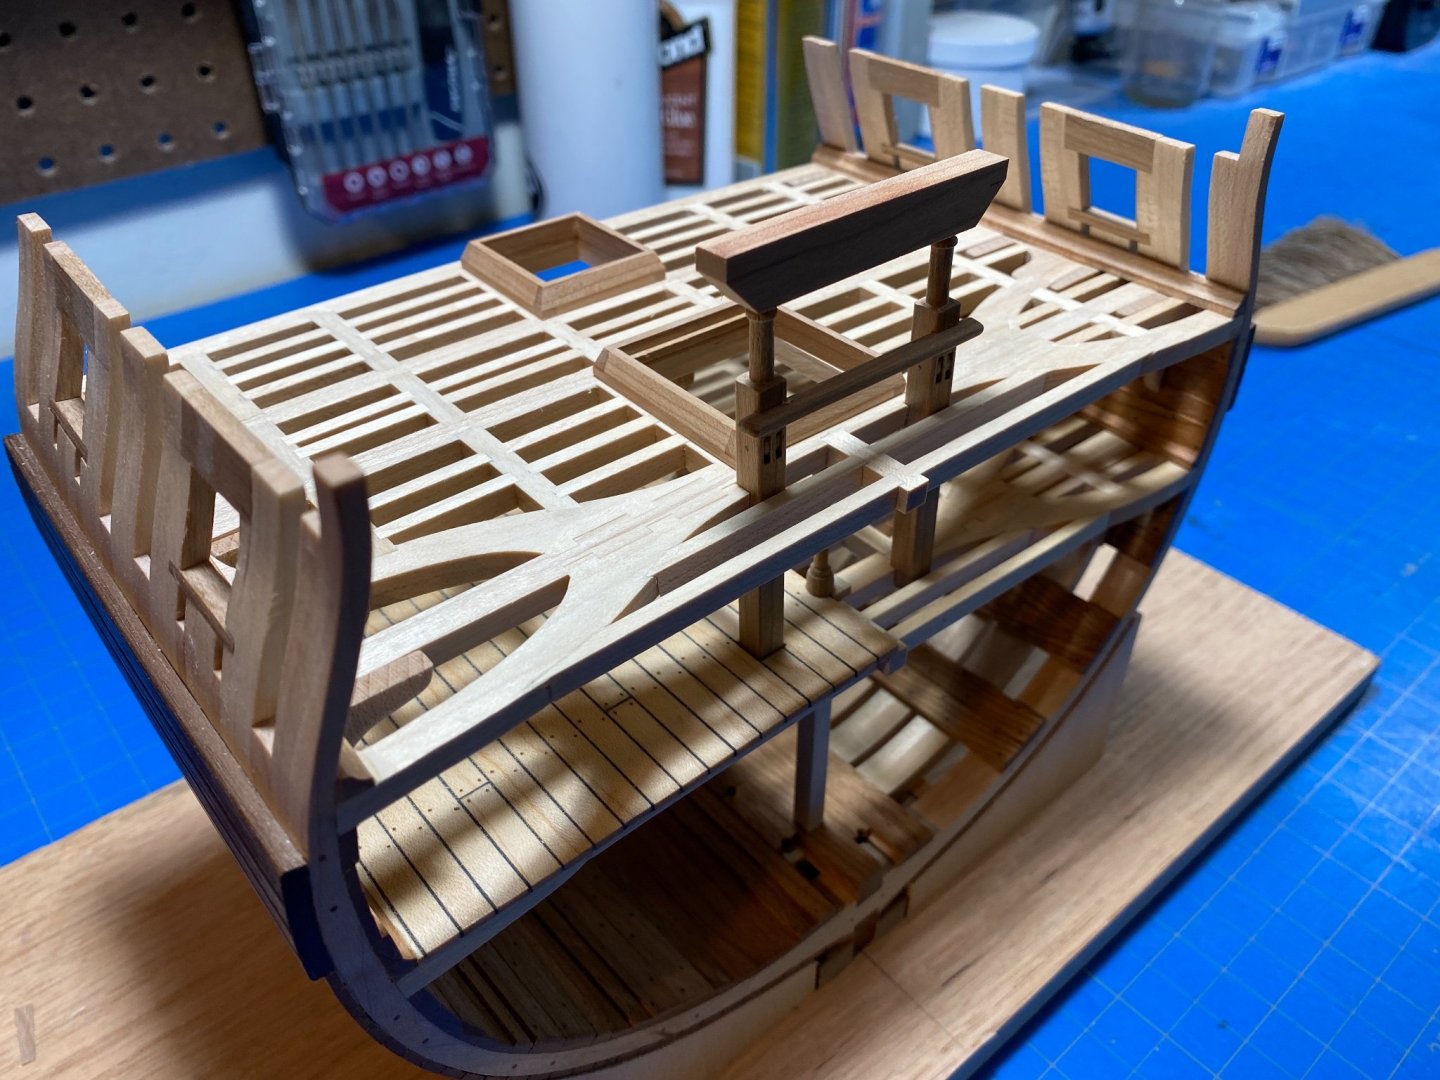
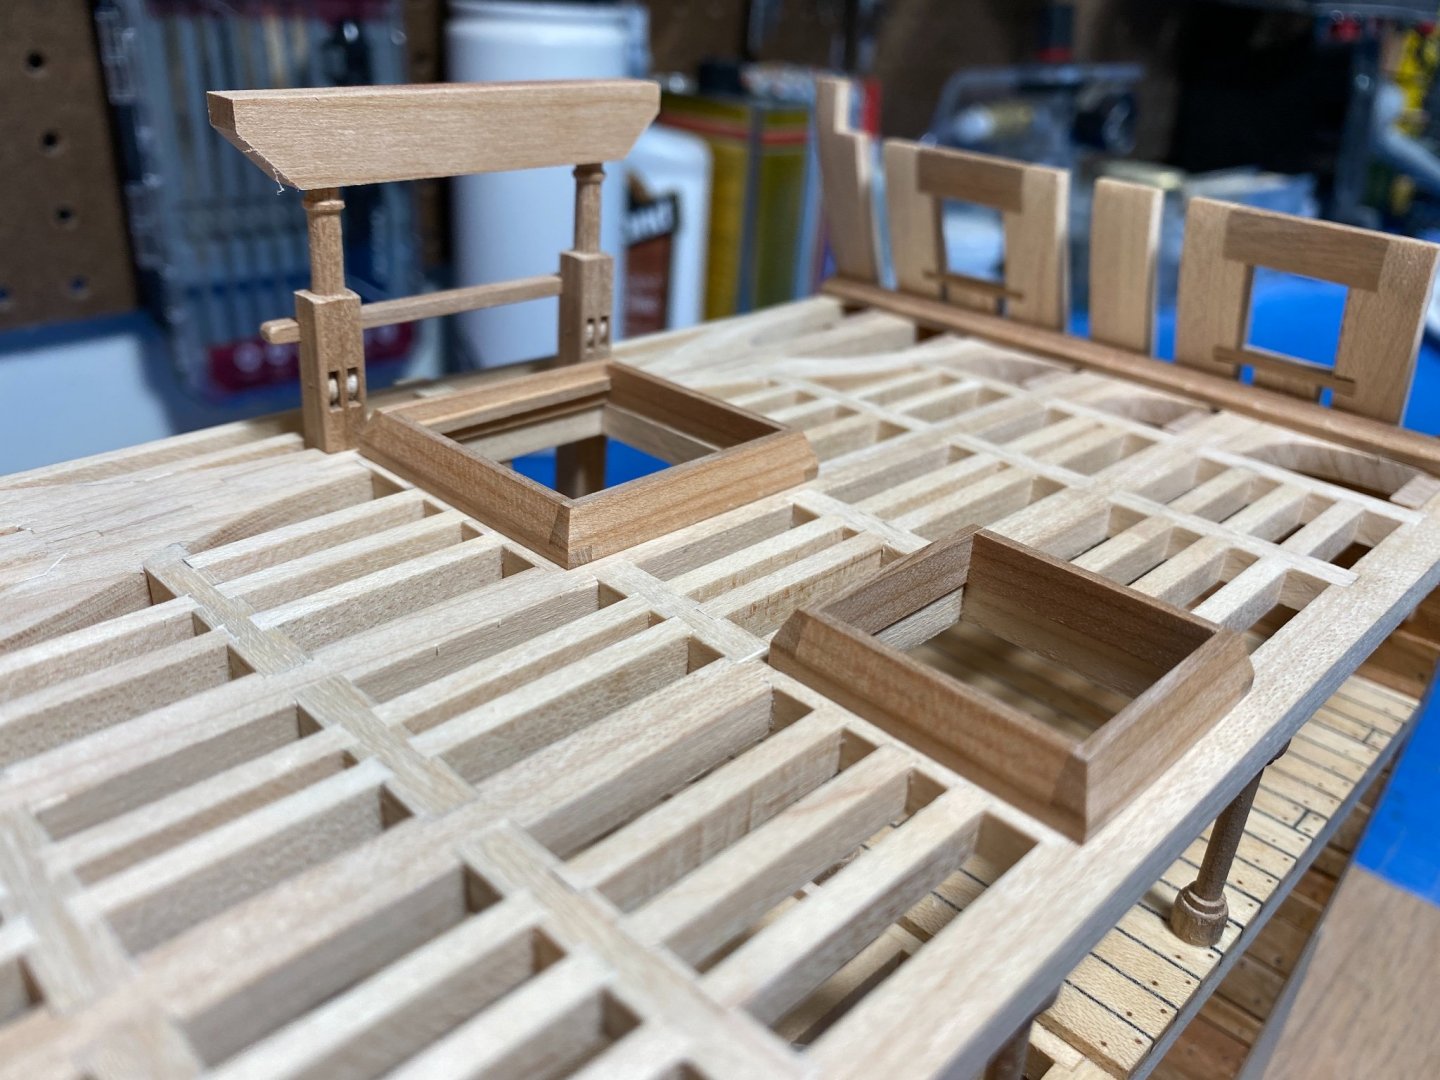
Thanks Matt, Ive been following your Winnie project and see that is going well too! Especially your coamings and gratings. I suspect I may have made an error in building out my hatch coamings BEFORE the grating, which you seem to have knocked out very nicely. I was reading up on Clare Hess' blog @catopower, and discovered that I may have trouble getting mine to fit as nicely as yours, I seem to have done them in reverse order. Ive been looking to see if the Syren gratings would suit Triton or if I should just go ahead make them myself. I might be making them over again now that I am stupidly reading up on gratings AFTER I made the coamings. So much to be said about planning out through your entire project (or at least 5-10 steps ahead) rather than step by incremental step as I seem to continually forget. The dummy gallows is just my latest attempt. Its probably my third or fourth... I kept shaping and trying to eek out something more graceful. I hated all of them. I decided to give it some time... ha.
-
Rotary tool recommendations, preferences
Justin P. replied to Steve116's topic in Modeling tools and Workshop Equipment
Agreed, perhaps I should have qualified my own comment above! I actually rarely use my own rotary tool (Foredom or Dremel) for ship modeling activities. But do love my Foredom regardless. -
Rotary tool recommendations, preferences
Justin P. replied to Steve116's topic in Modeling tools and Workshop Equipment
+1 for Foredom. Mine is over 25 years old, and runs like a top. Also +1 for the foot pedal which acts as a variable speed controller - lots of versatility. I also have a Dremel, with the various attachments - its good, but once you've tried the Foredom its hard to say its great. -
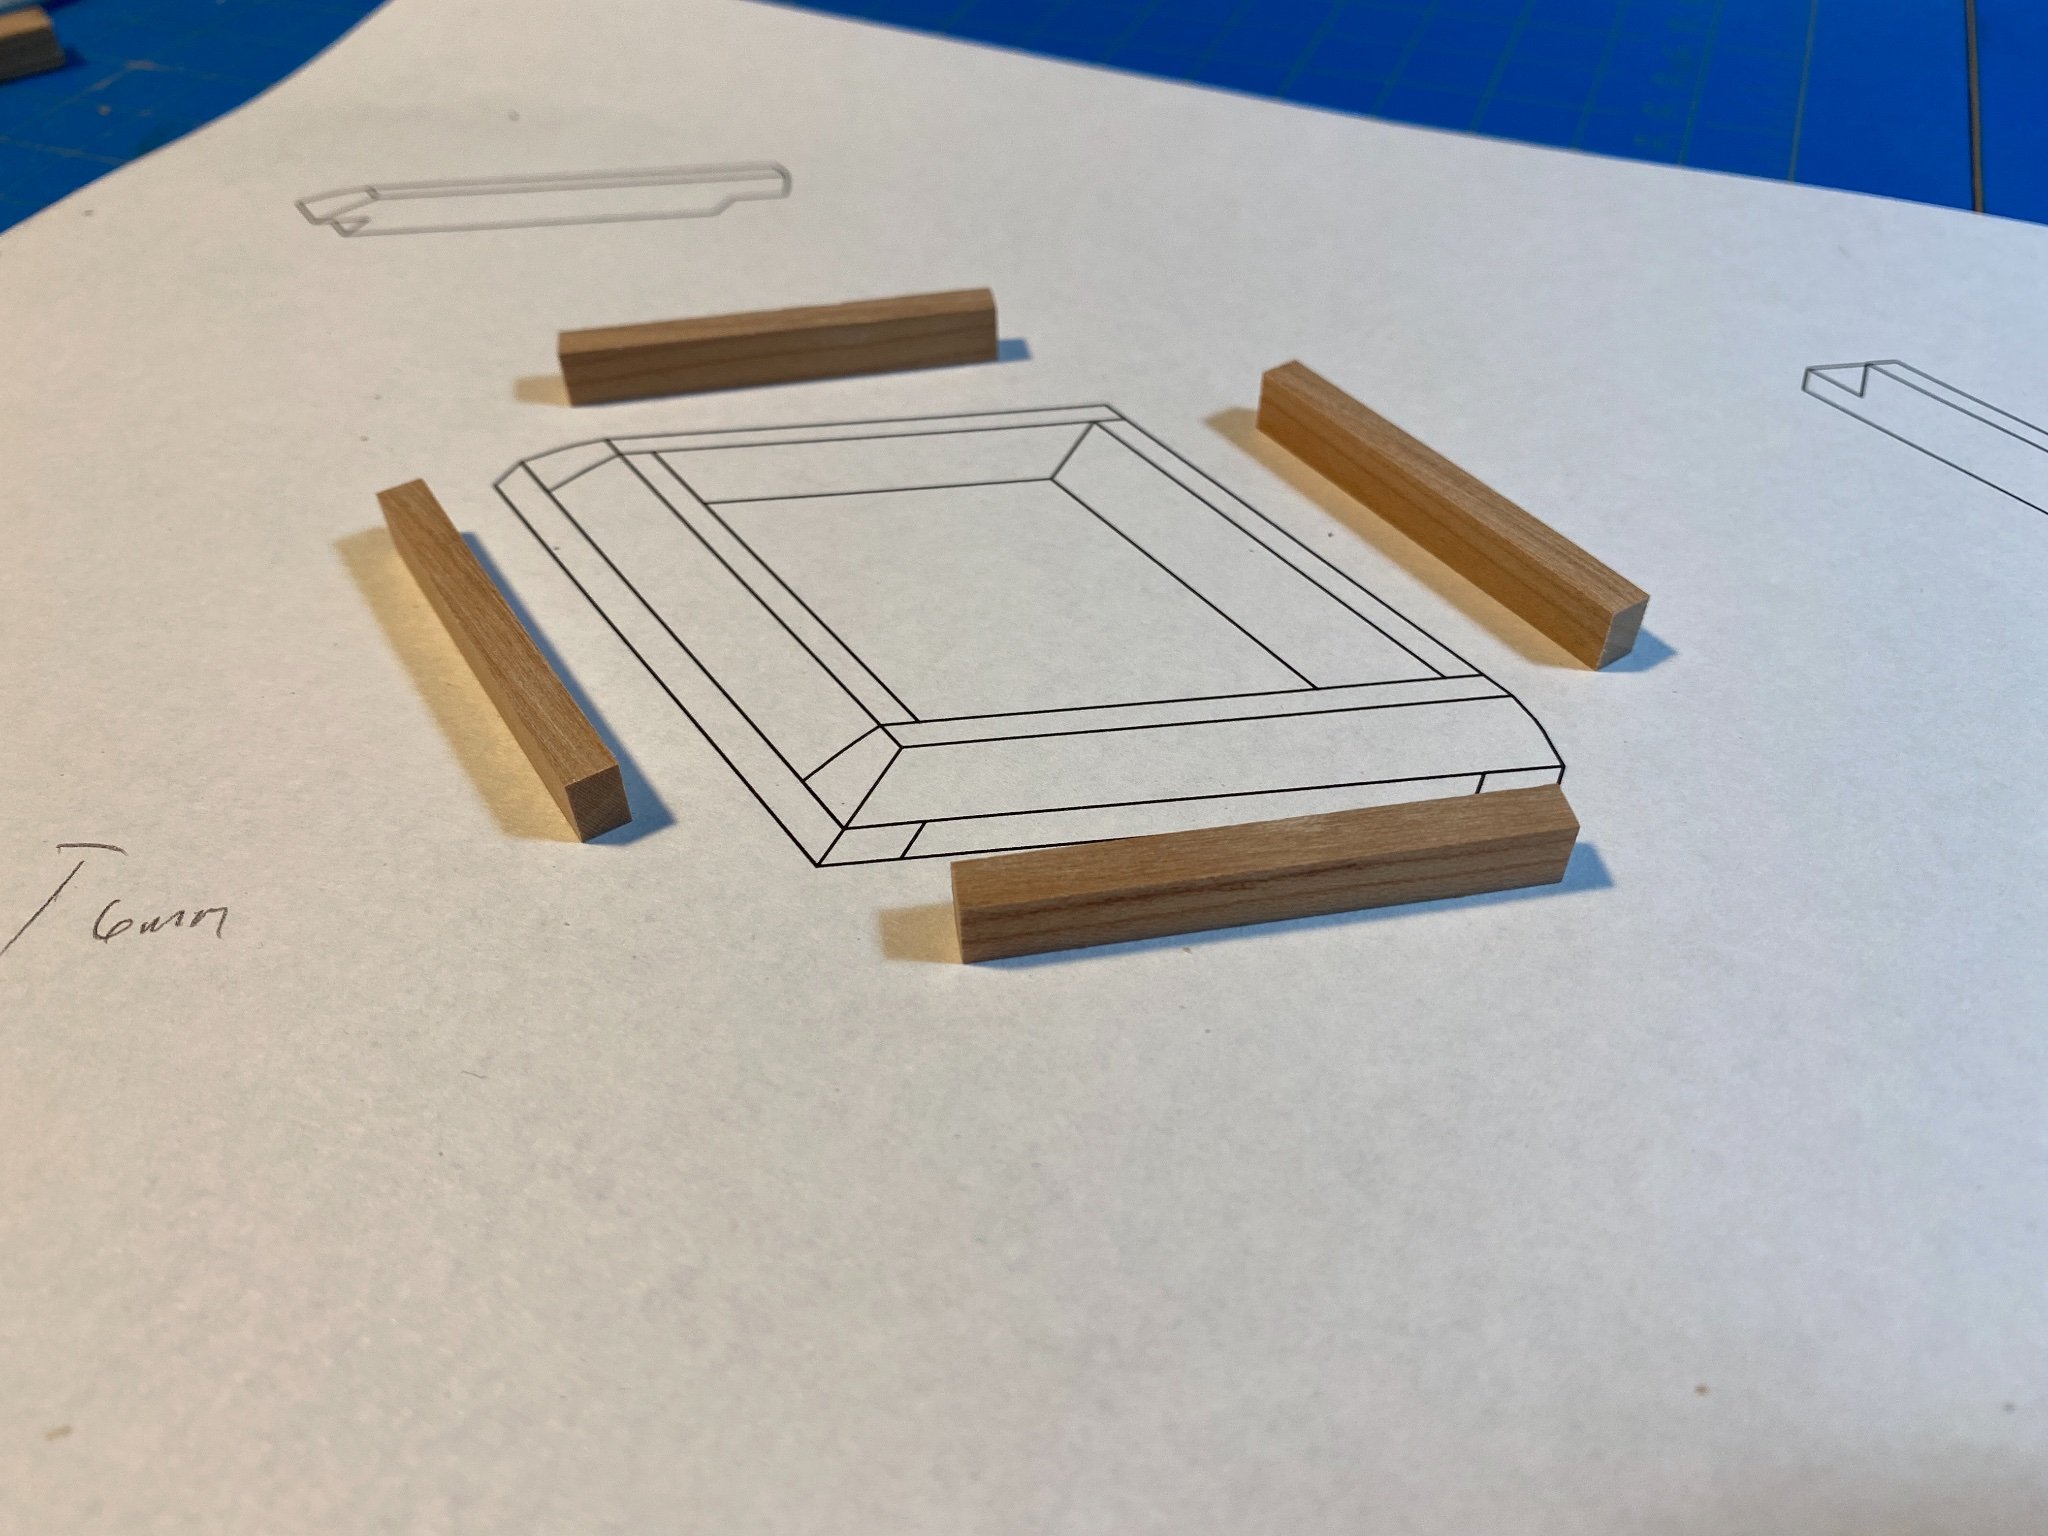
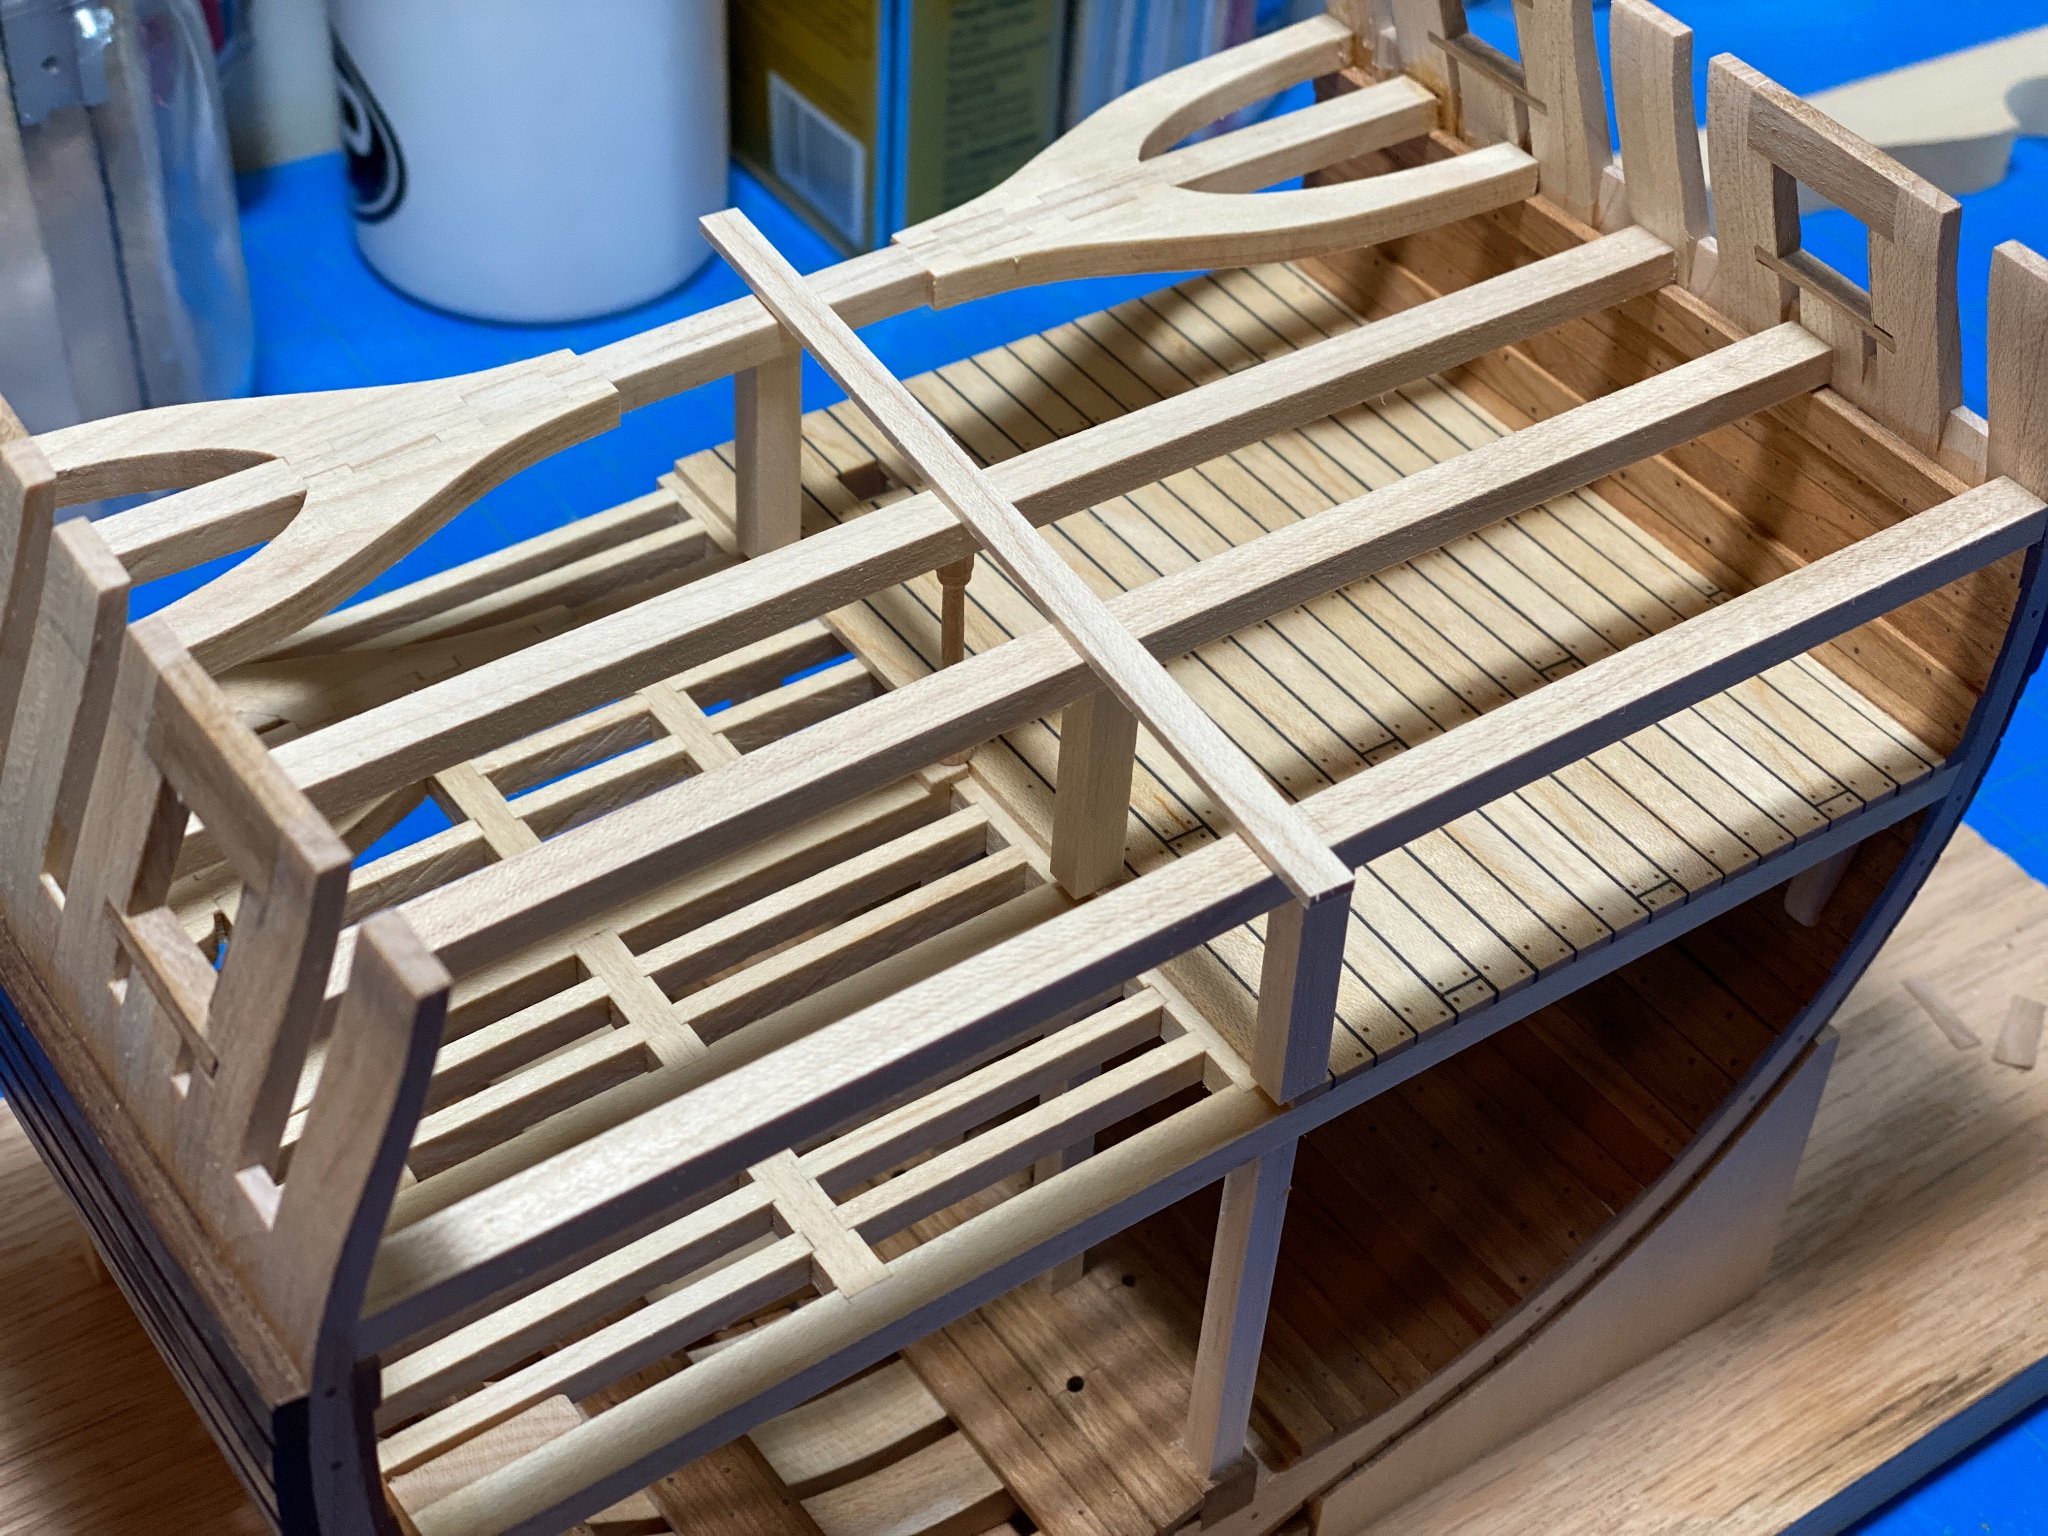
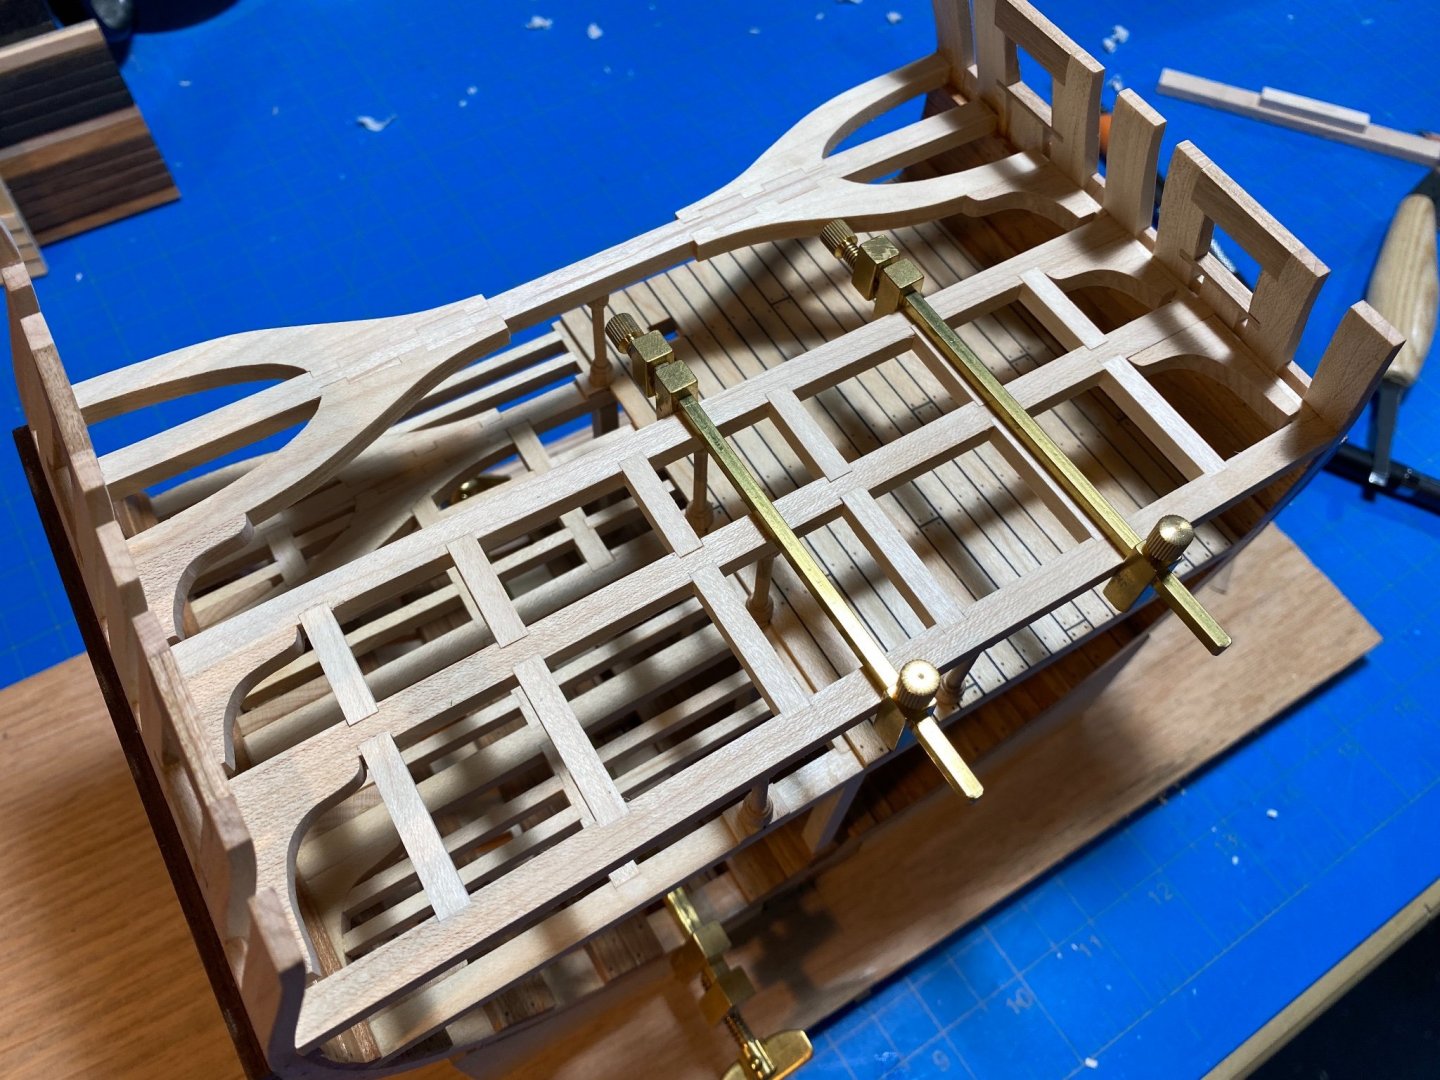
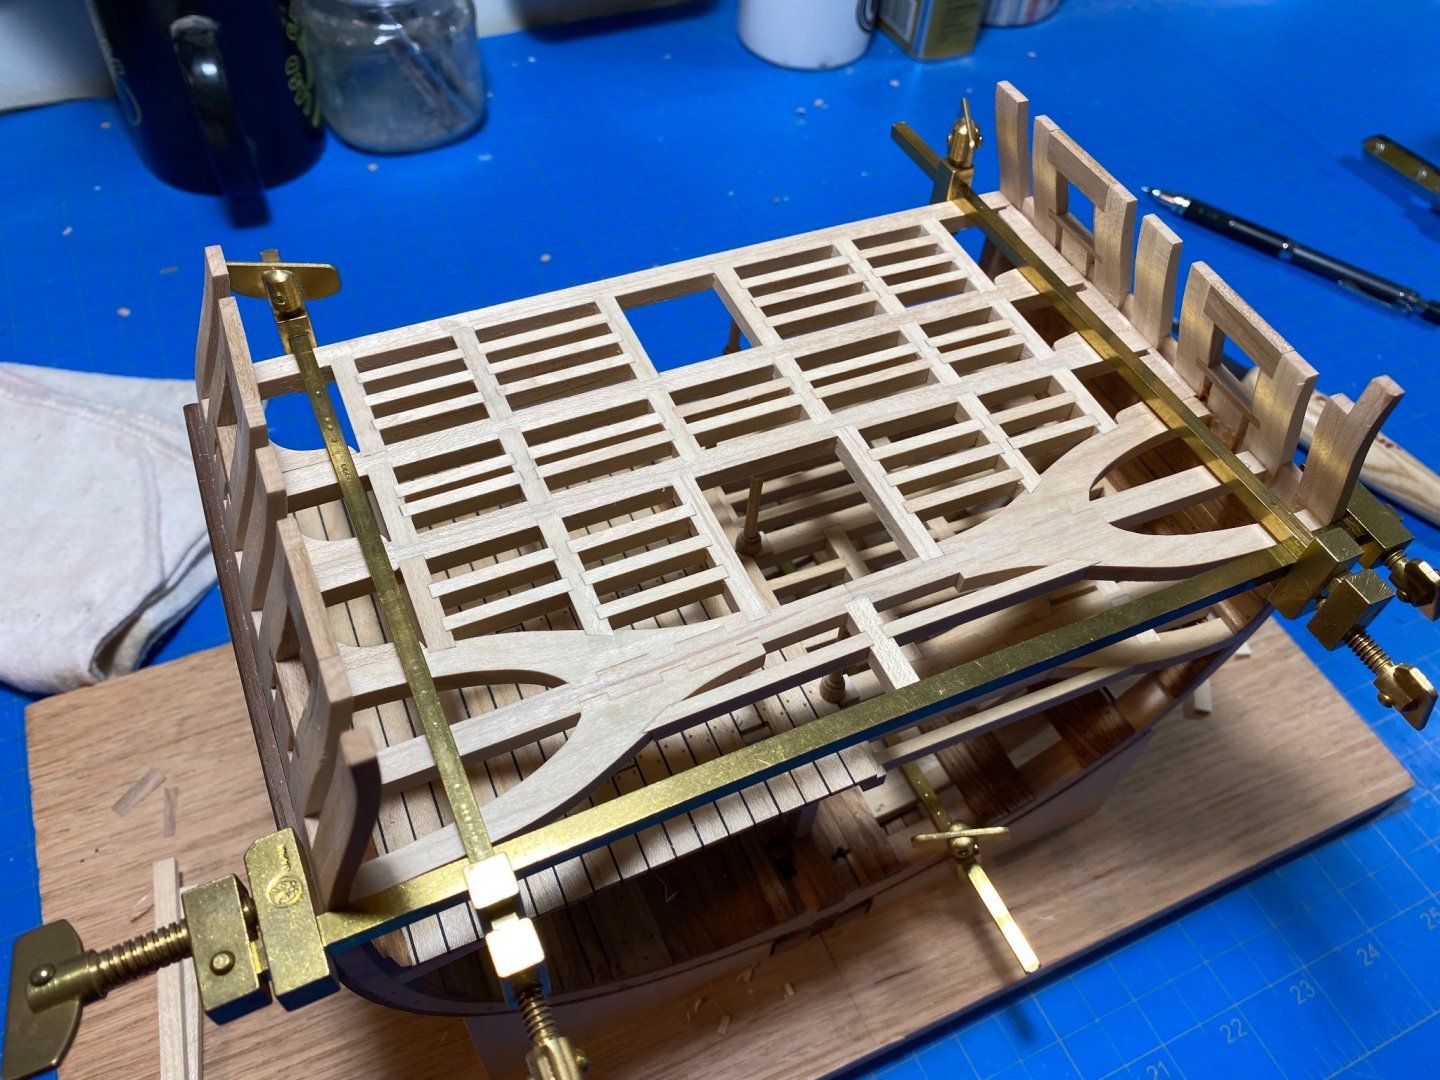
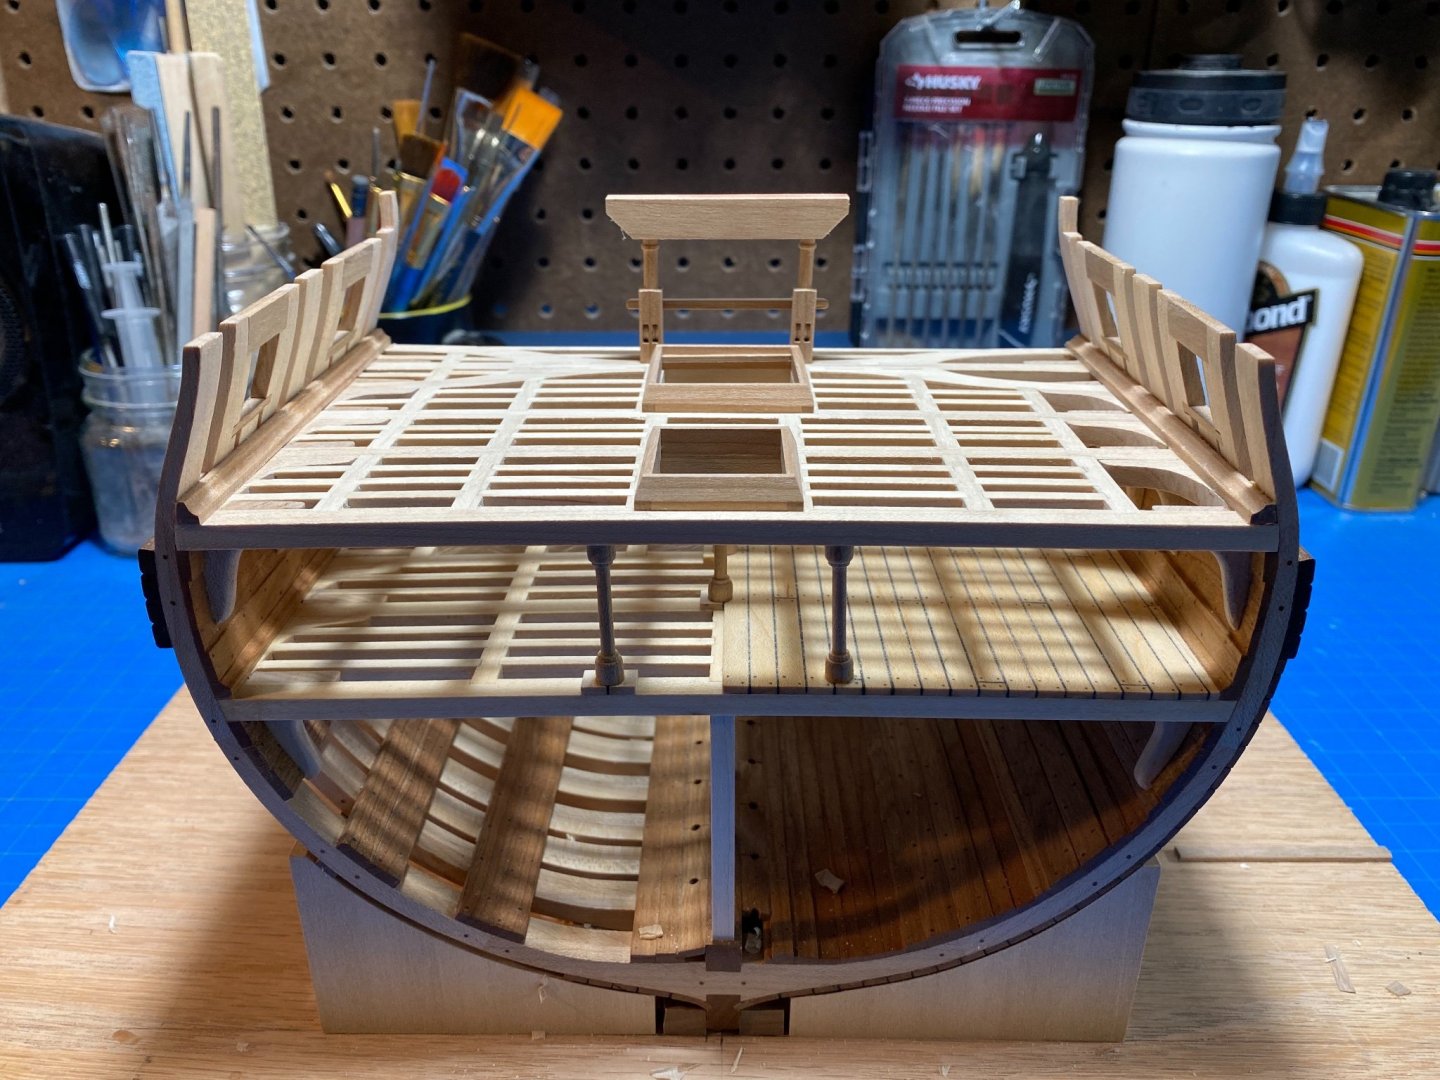
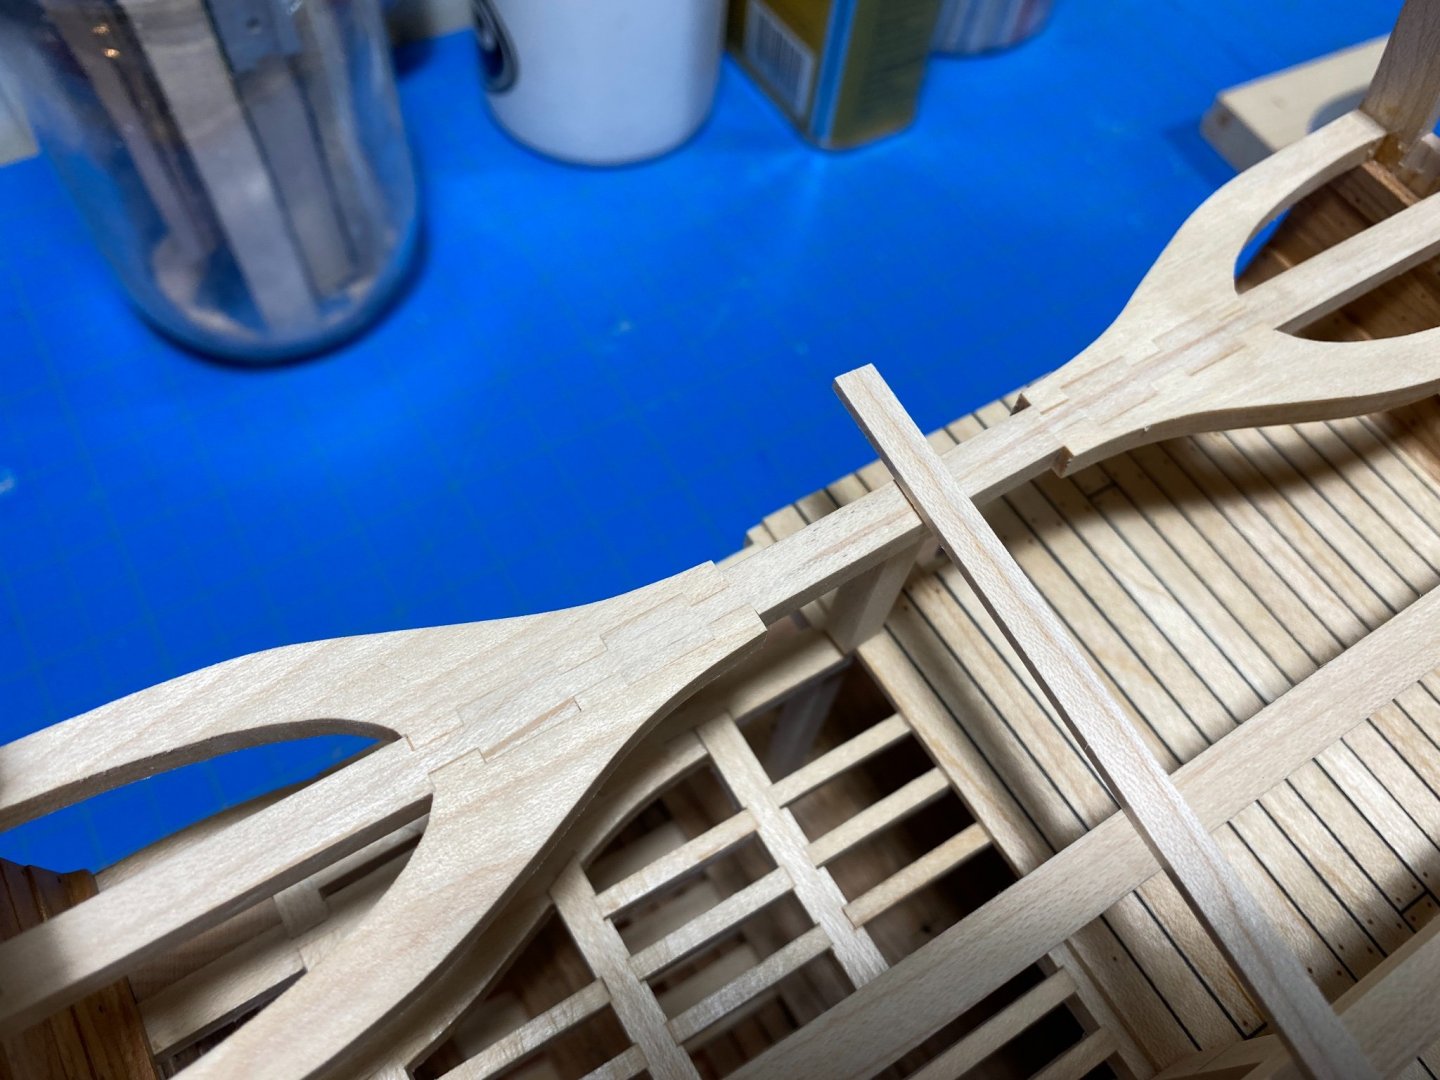
Progress is slow, but is moving forward! I think Ive complained broadly about this but work onsite has geared back up to five-days-a-week so my time at the bench has dwindled significantly. Add to that Fall family activities and well, things slow down. We also bought a camper, so getting all that sorted out and clearing a space on the property to park it has taken quite a lot of my weekends over the last couple months. Anyhow.. since my last post Ive gotten all the gun deck framing completed and started in on the hanging knees. I have to say that the hanging knees are one my least favorite activities. For whatever reason, working though shaping all ten really had my hands ache. Happy with them for now, but as with my lower deck knee's they are subject to later perspective and could get rejected. After those, and cutting and shaping the gun deck waterways (which Ive decided to redo), I jumped into the hatchway framing. This I thoroughly enjoyed. Really any extended use of my Byrnes saw is just a joy. All the notching and cutting was done on the saw. Last thing for this update was the installation of the bitts. I left the gallows for later though do have a dummy placed in the picture. I need to look back over TFFM for some ideas on shaping the gallows.


-
MSW’s HMS Triton Build in Shapr3d
Justin P. replied to Justin P.'s topic in CAD and 3D Modelling/Drafting Plans with Software
I thought so! I wasn't sure. -
MSW’s HMS Triton Build in Shapr3d
Justin P. replied to Justin P.'s topic in CAD and 3D Modelling/Drafting Plans with Software
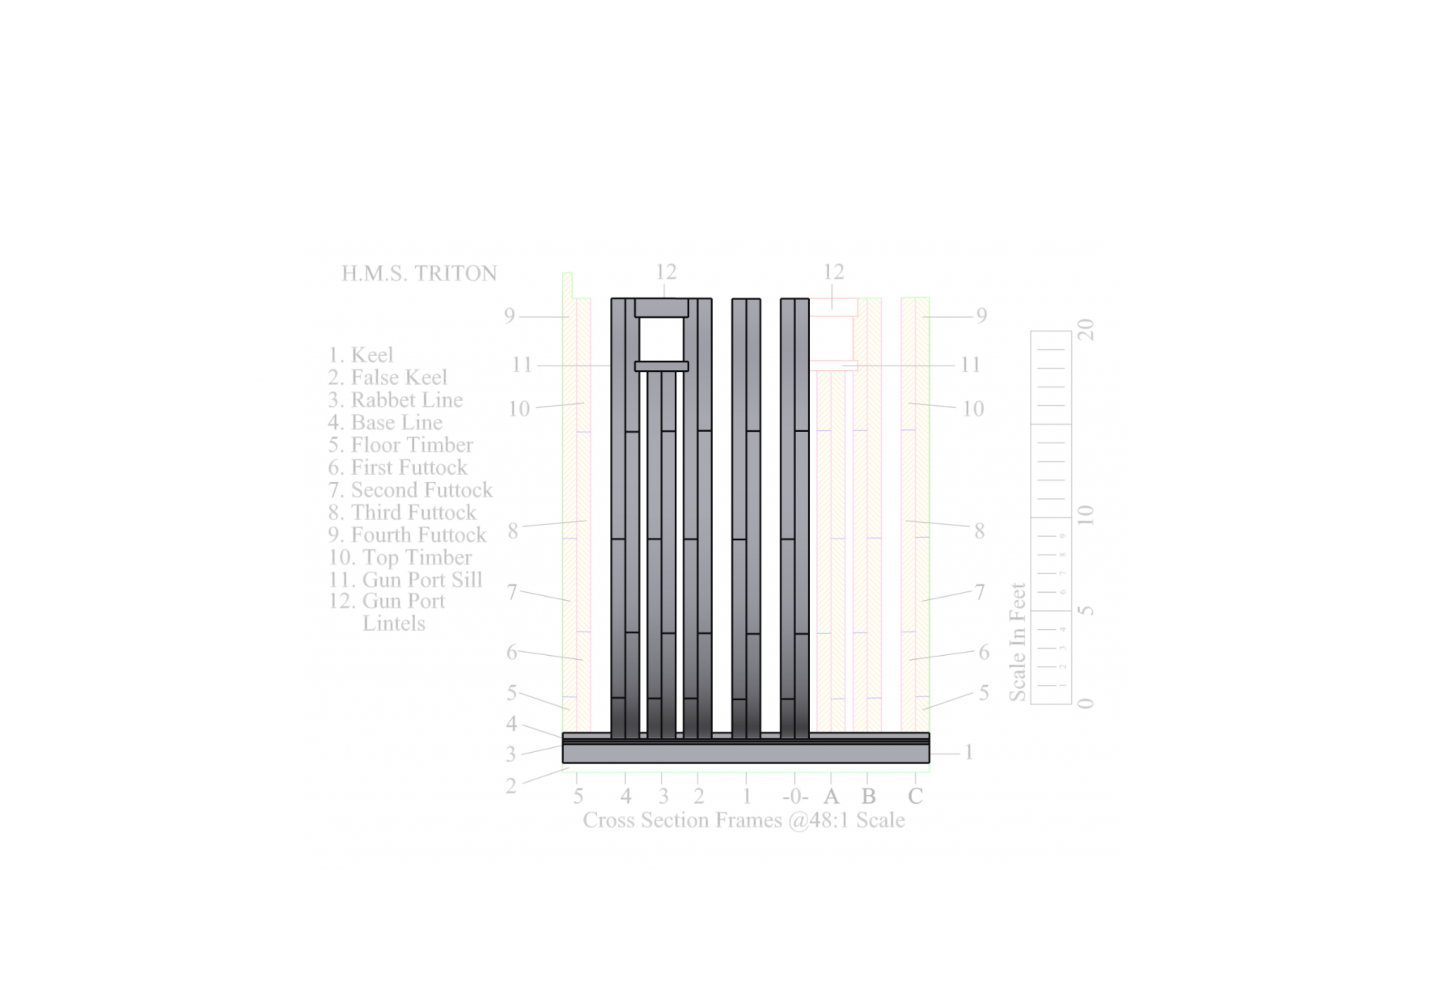
Jorge, The Triton plans are part of the excellent resources here at MSW, go to the top of your page and select group projects. There you will find the “HMS Triton Group Project.” These are the same plans I’m using in Shapr3d. I’m not doing any original work. I’m using the Trtion plans to learn the software. Just for fun. -
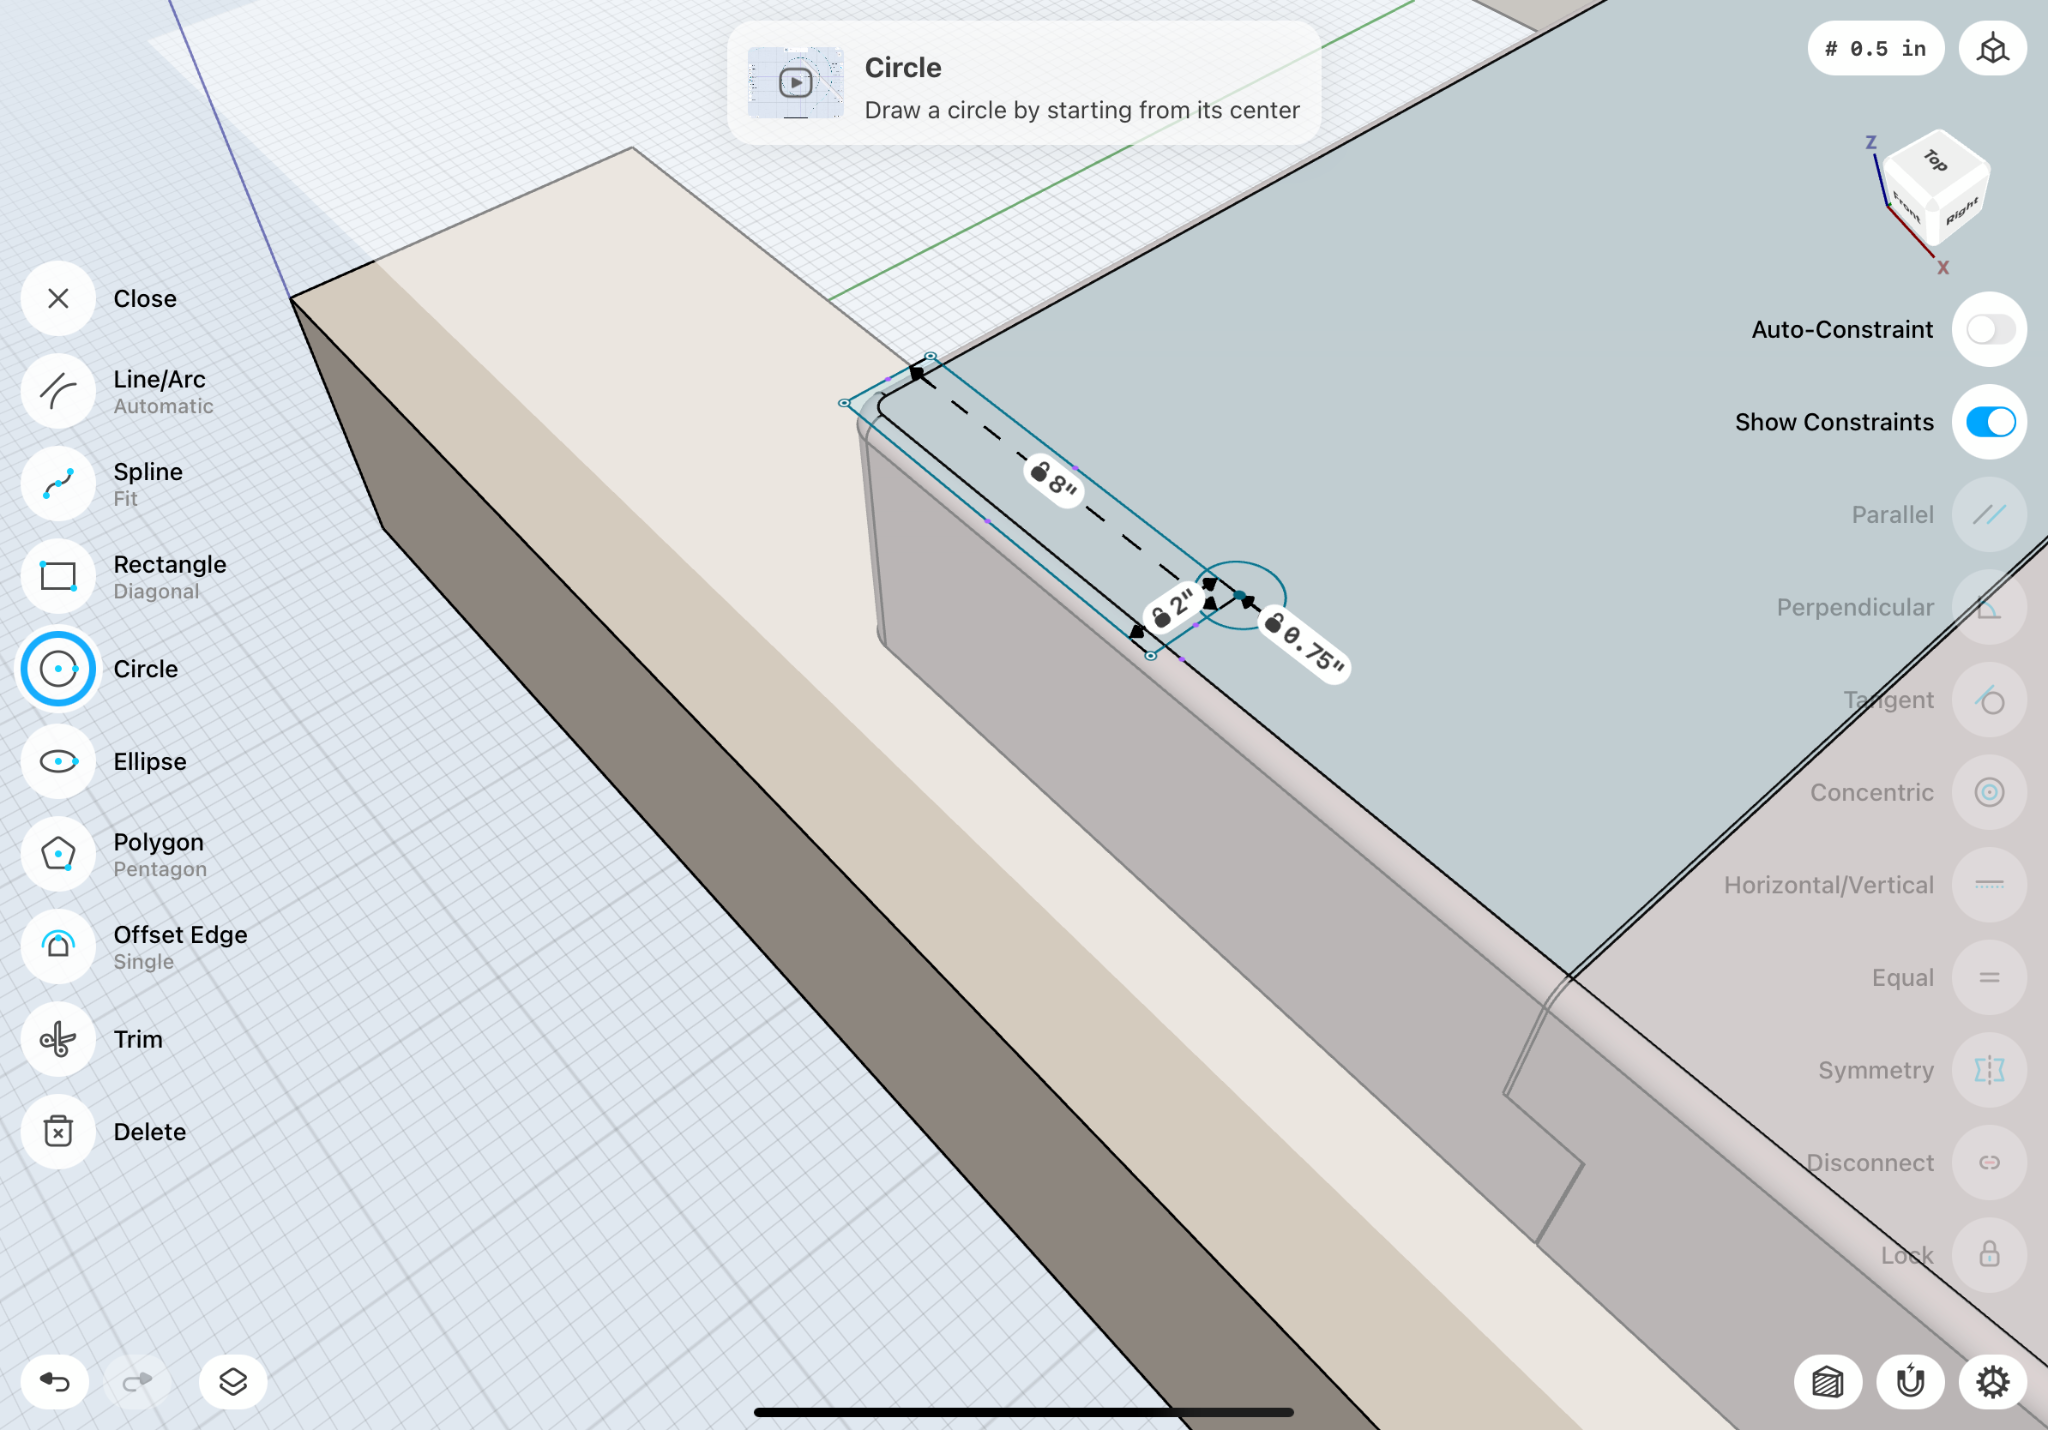
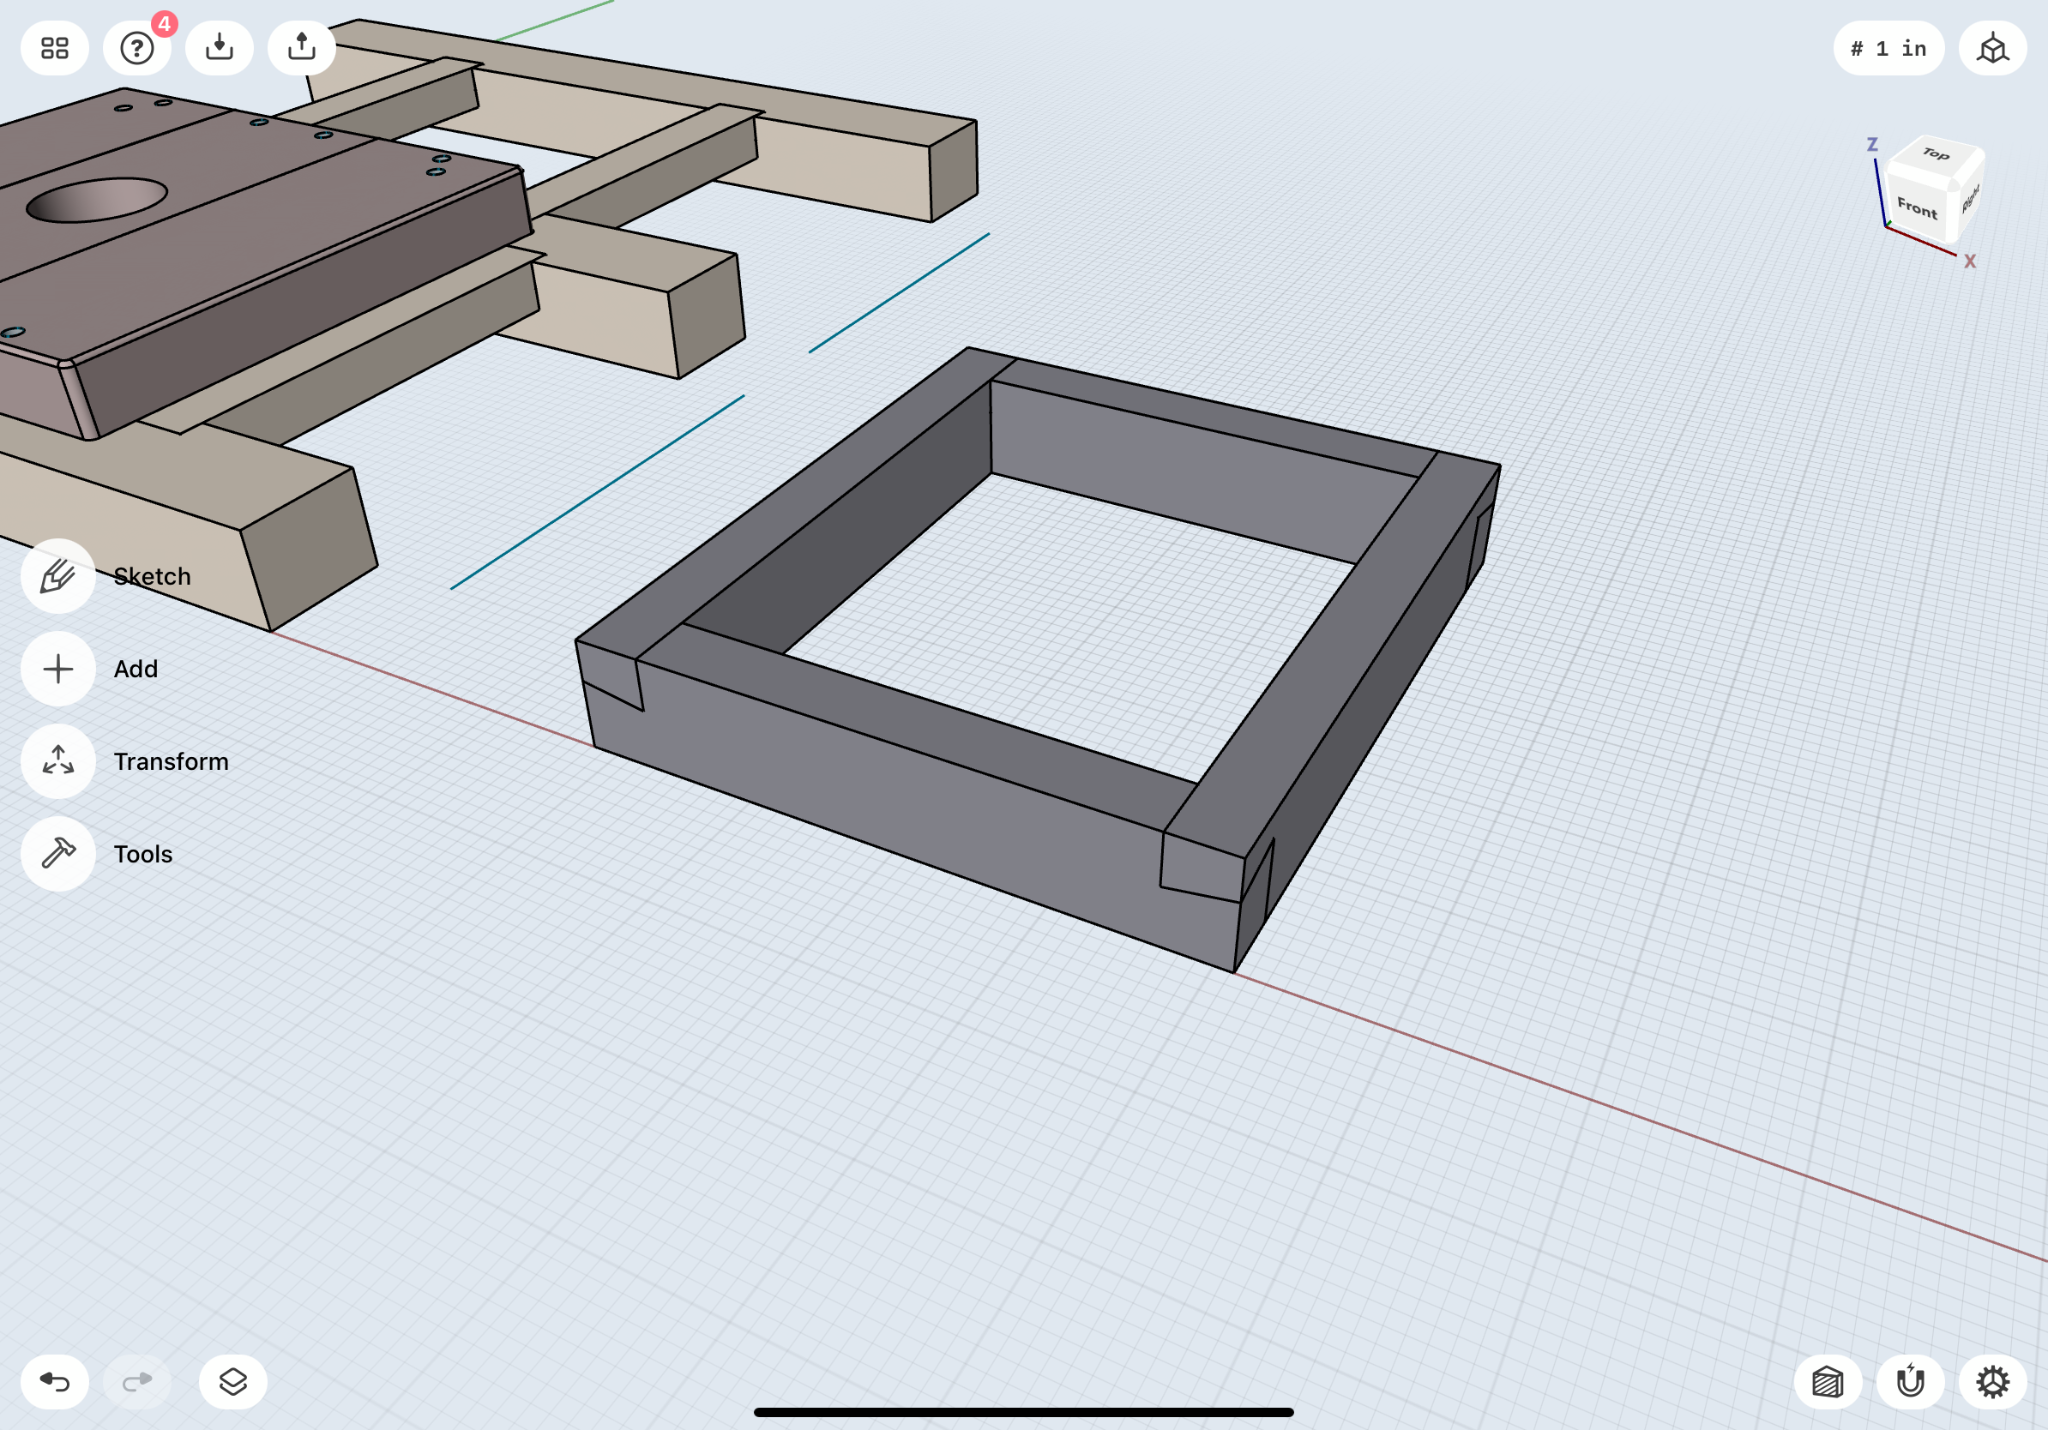
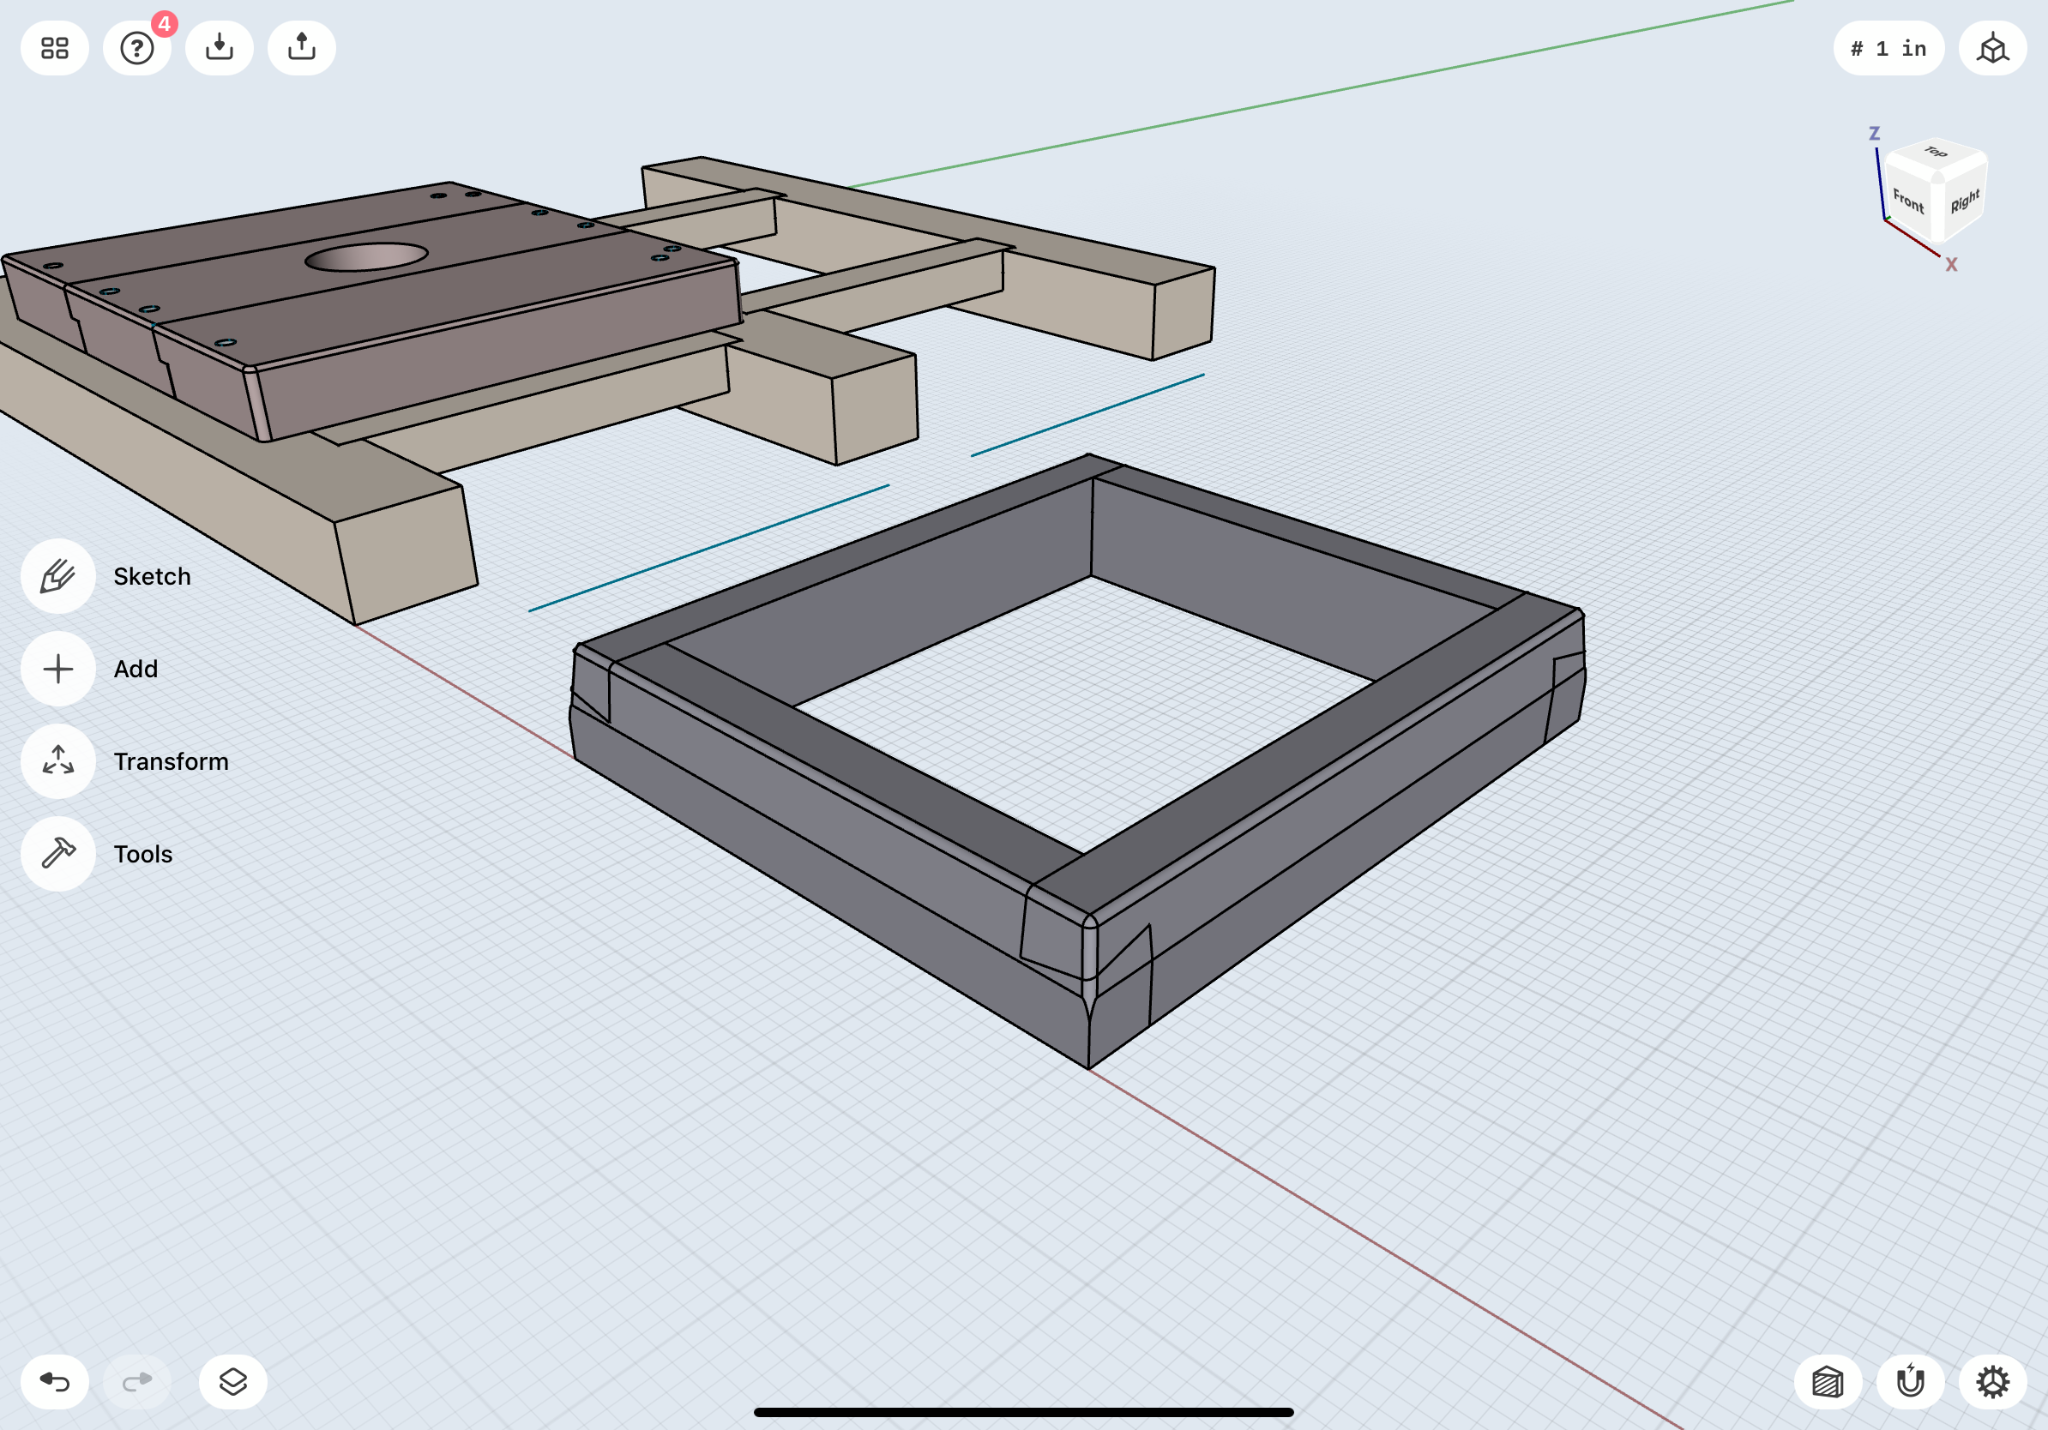
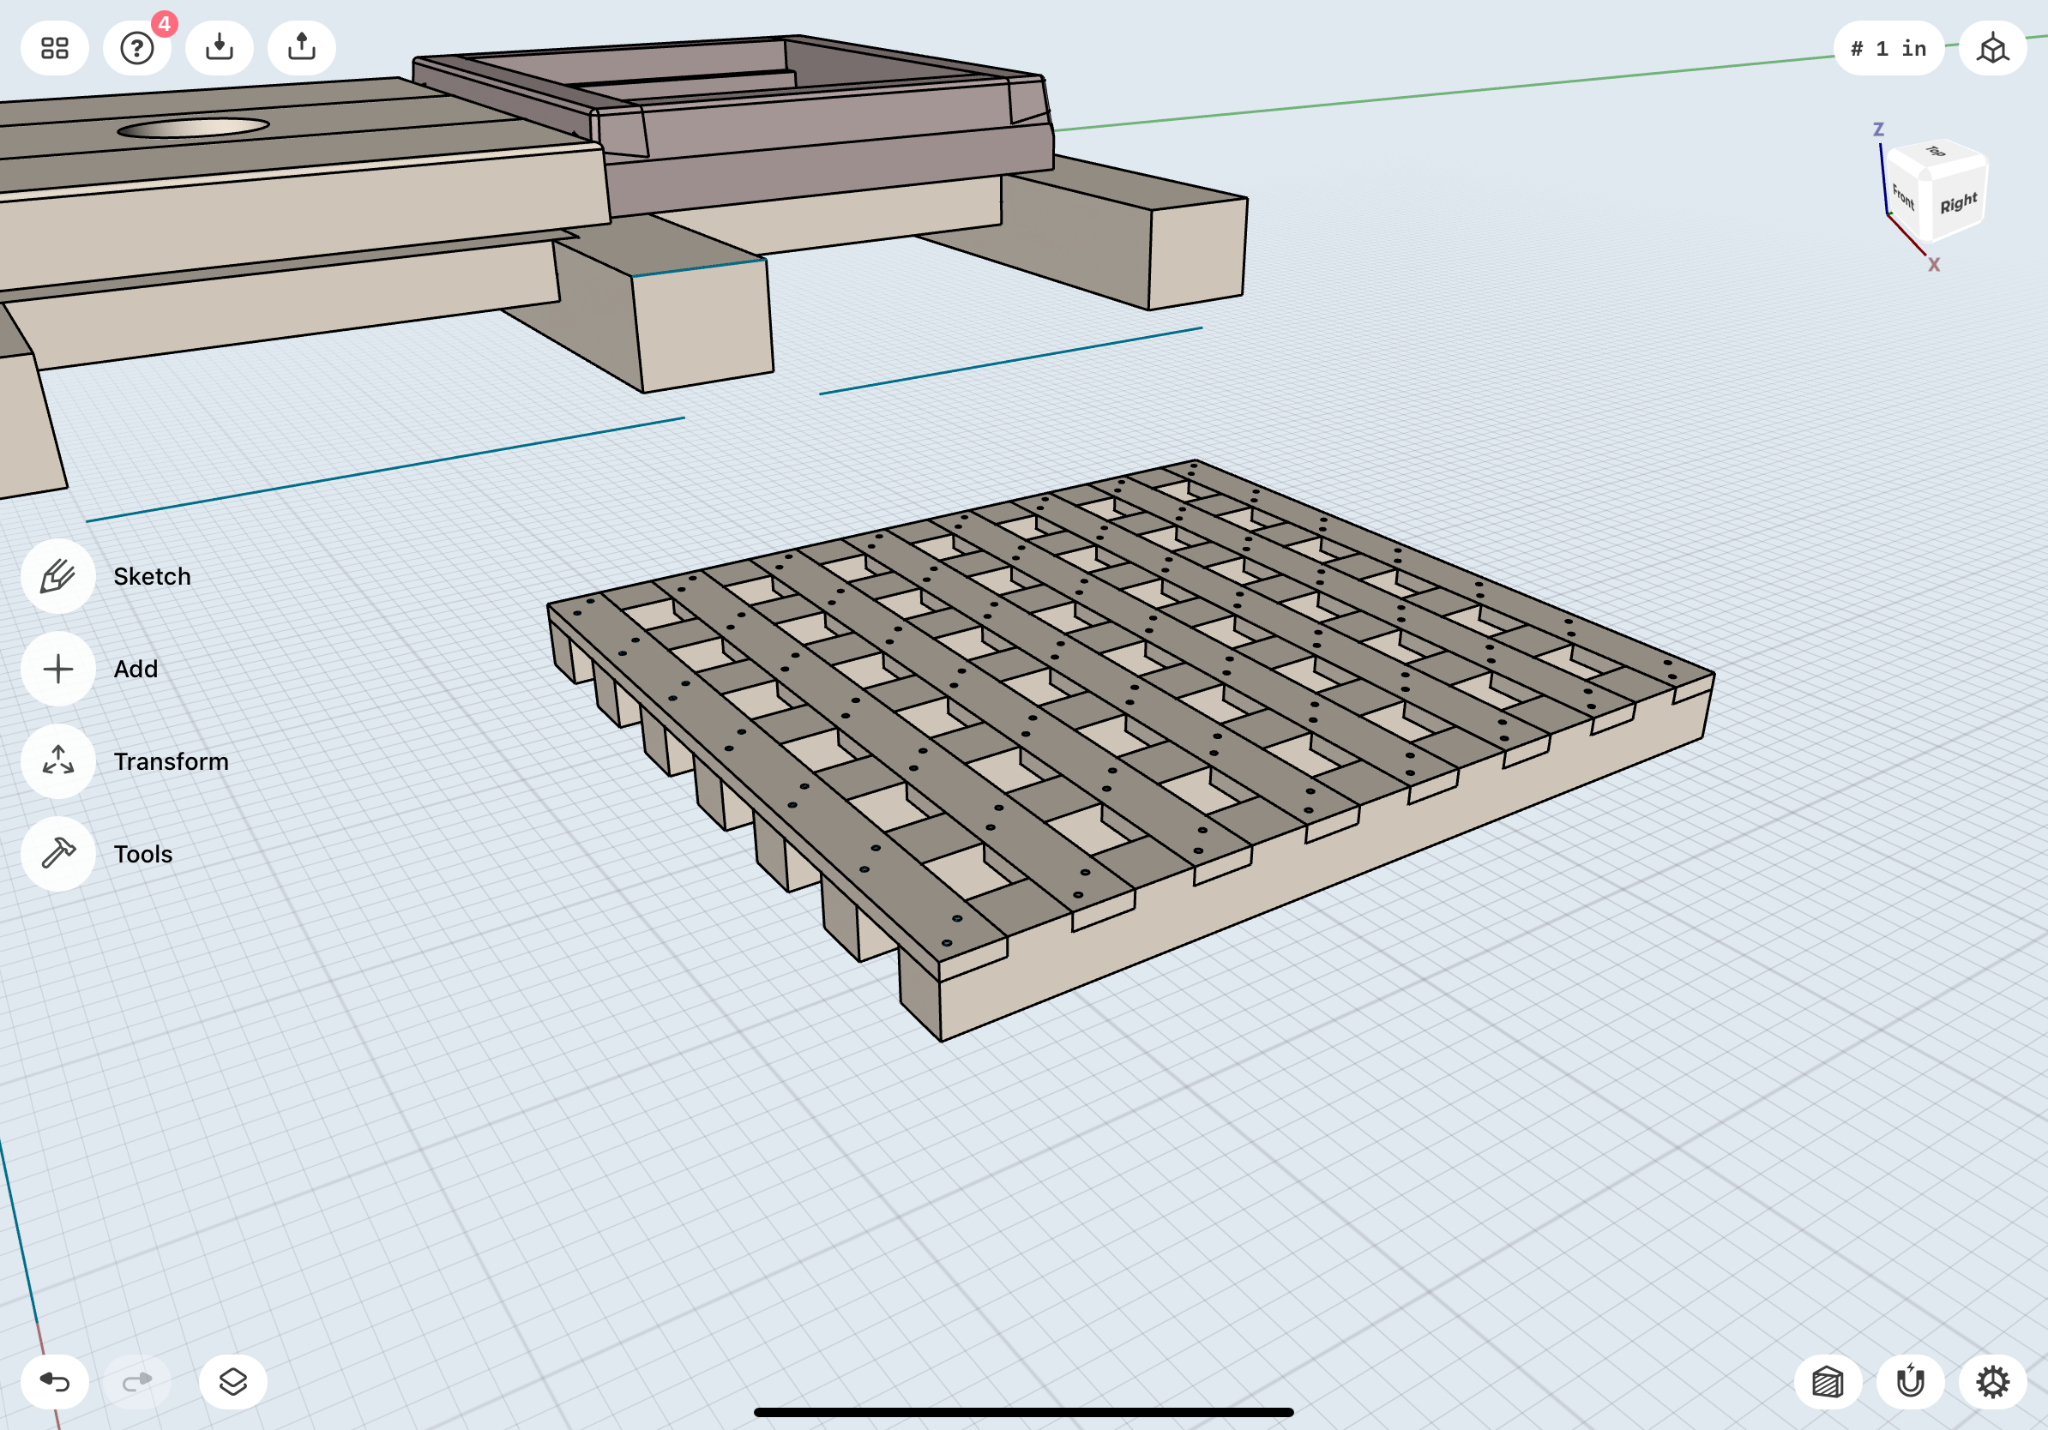
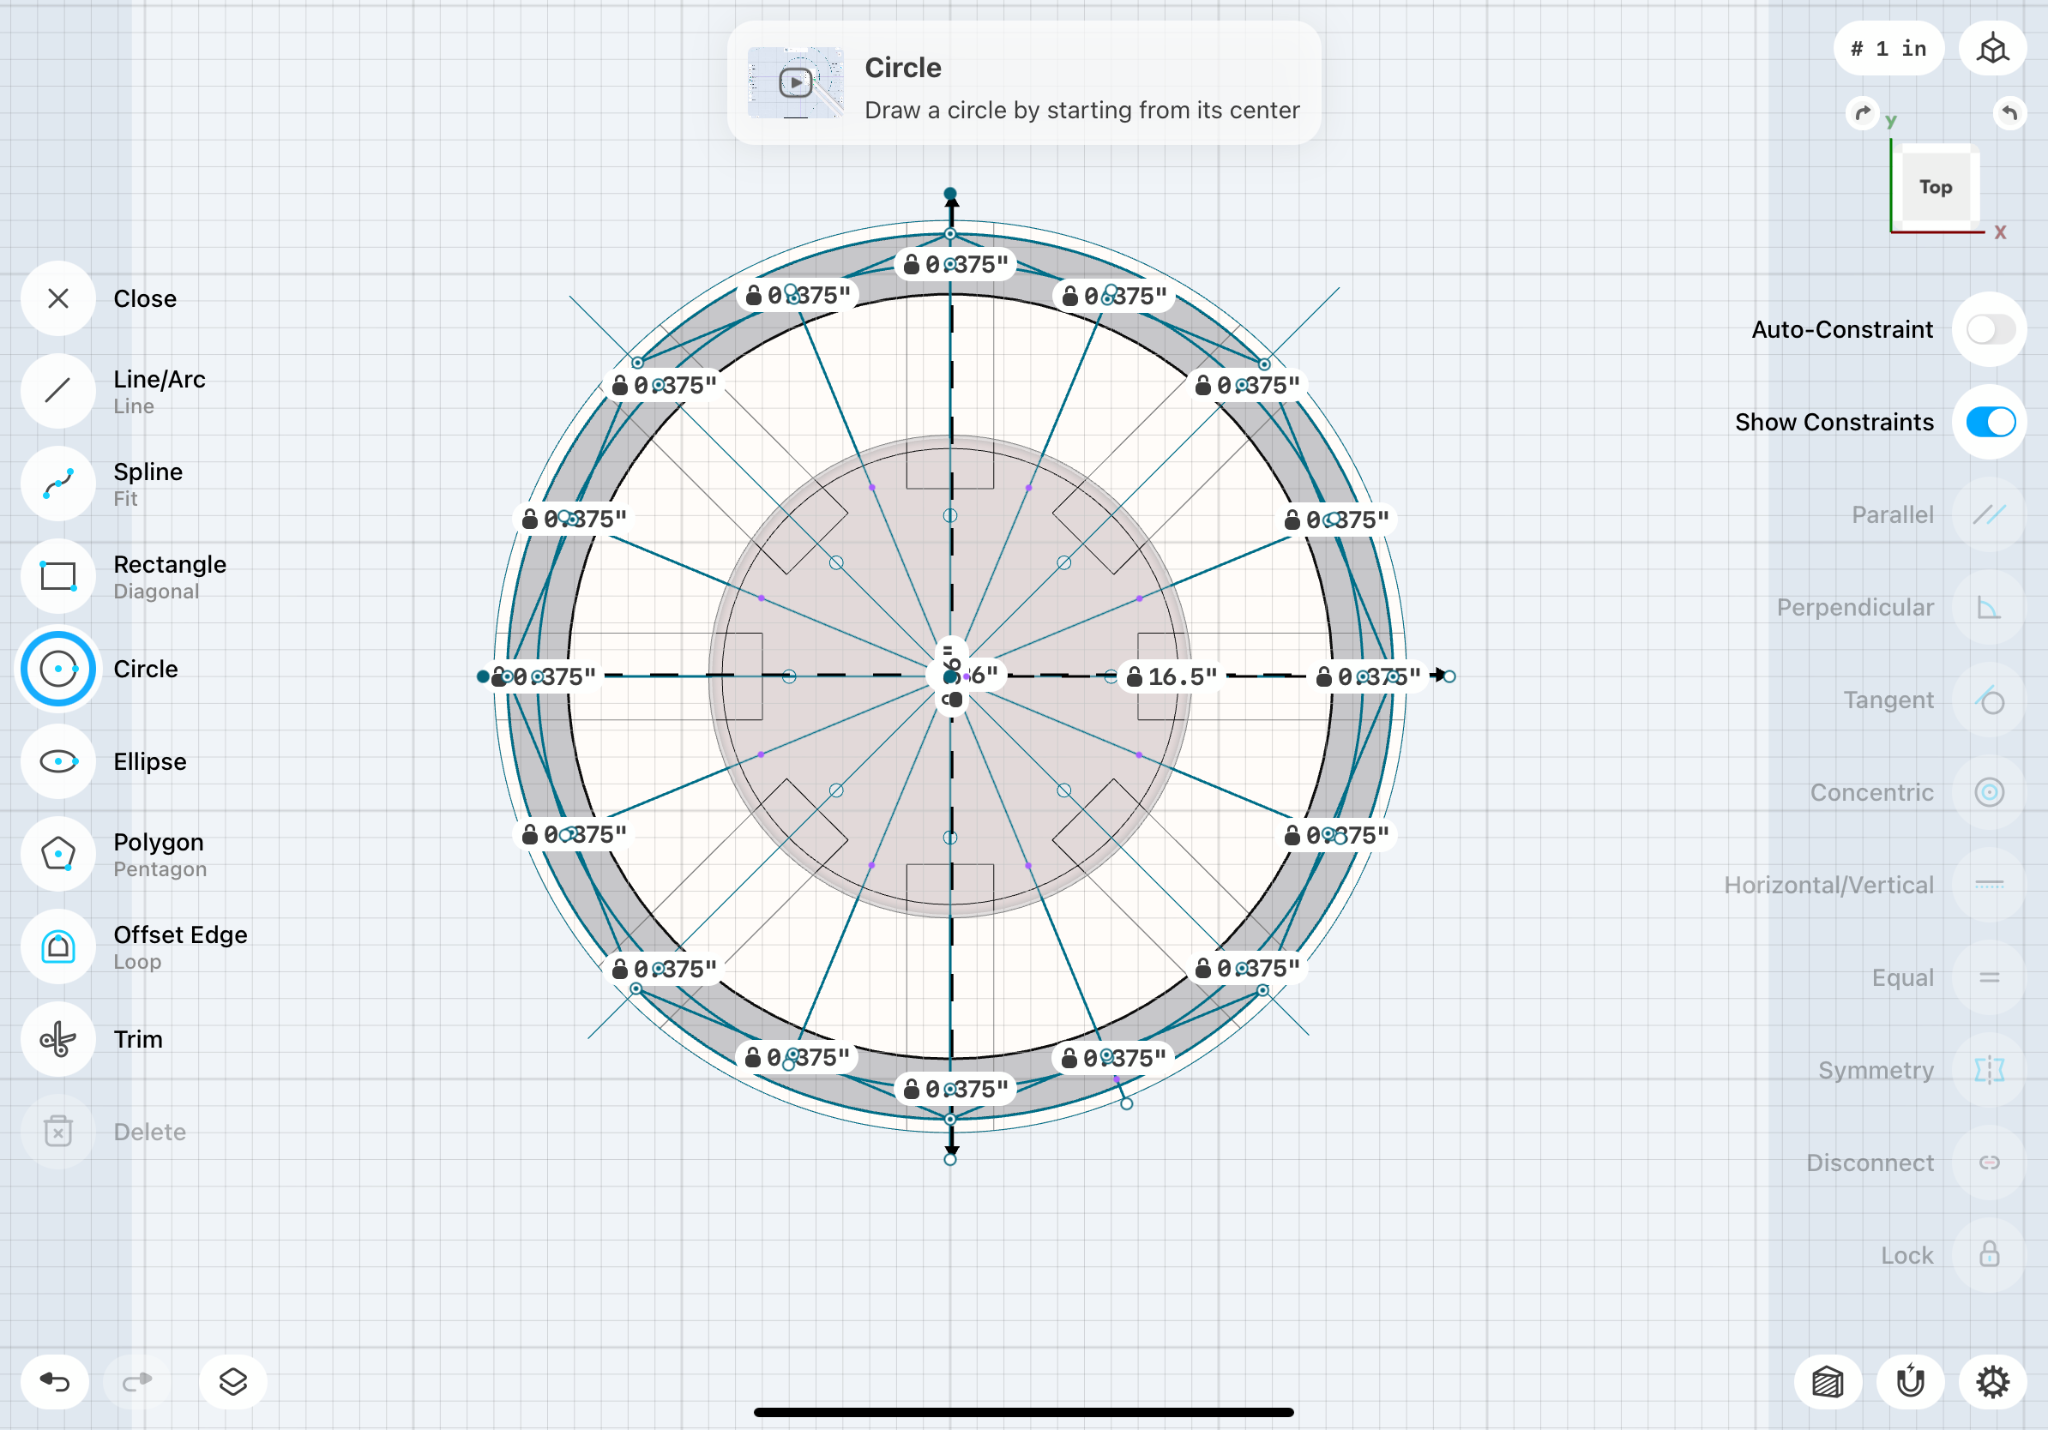
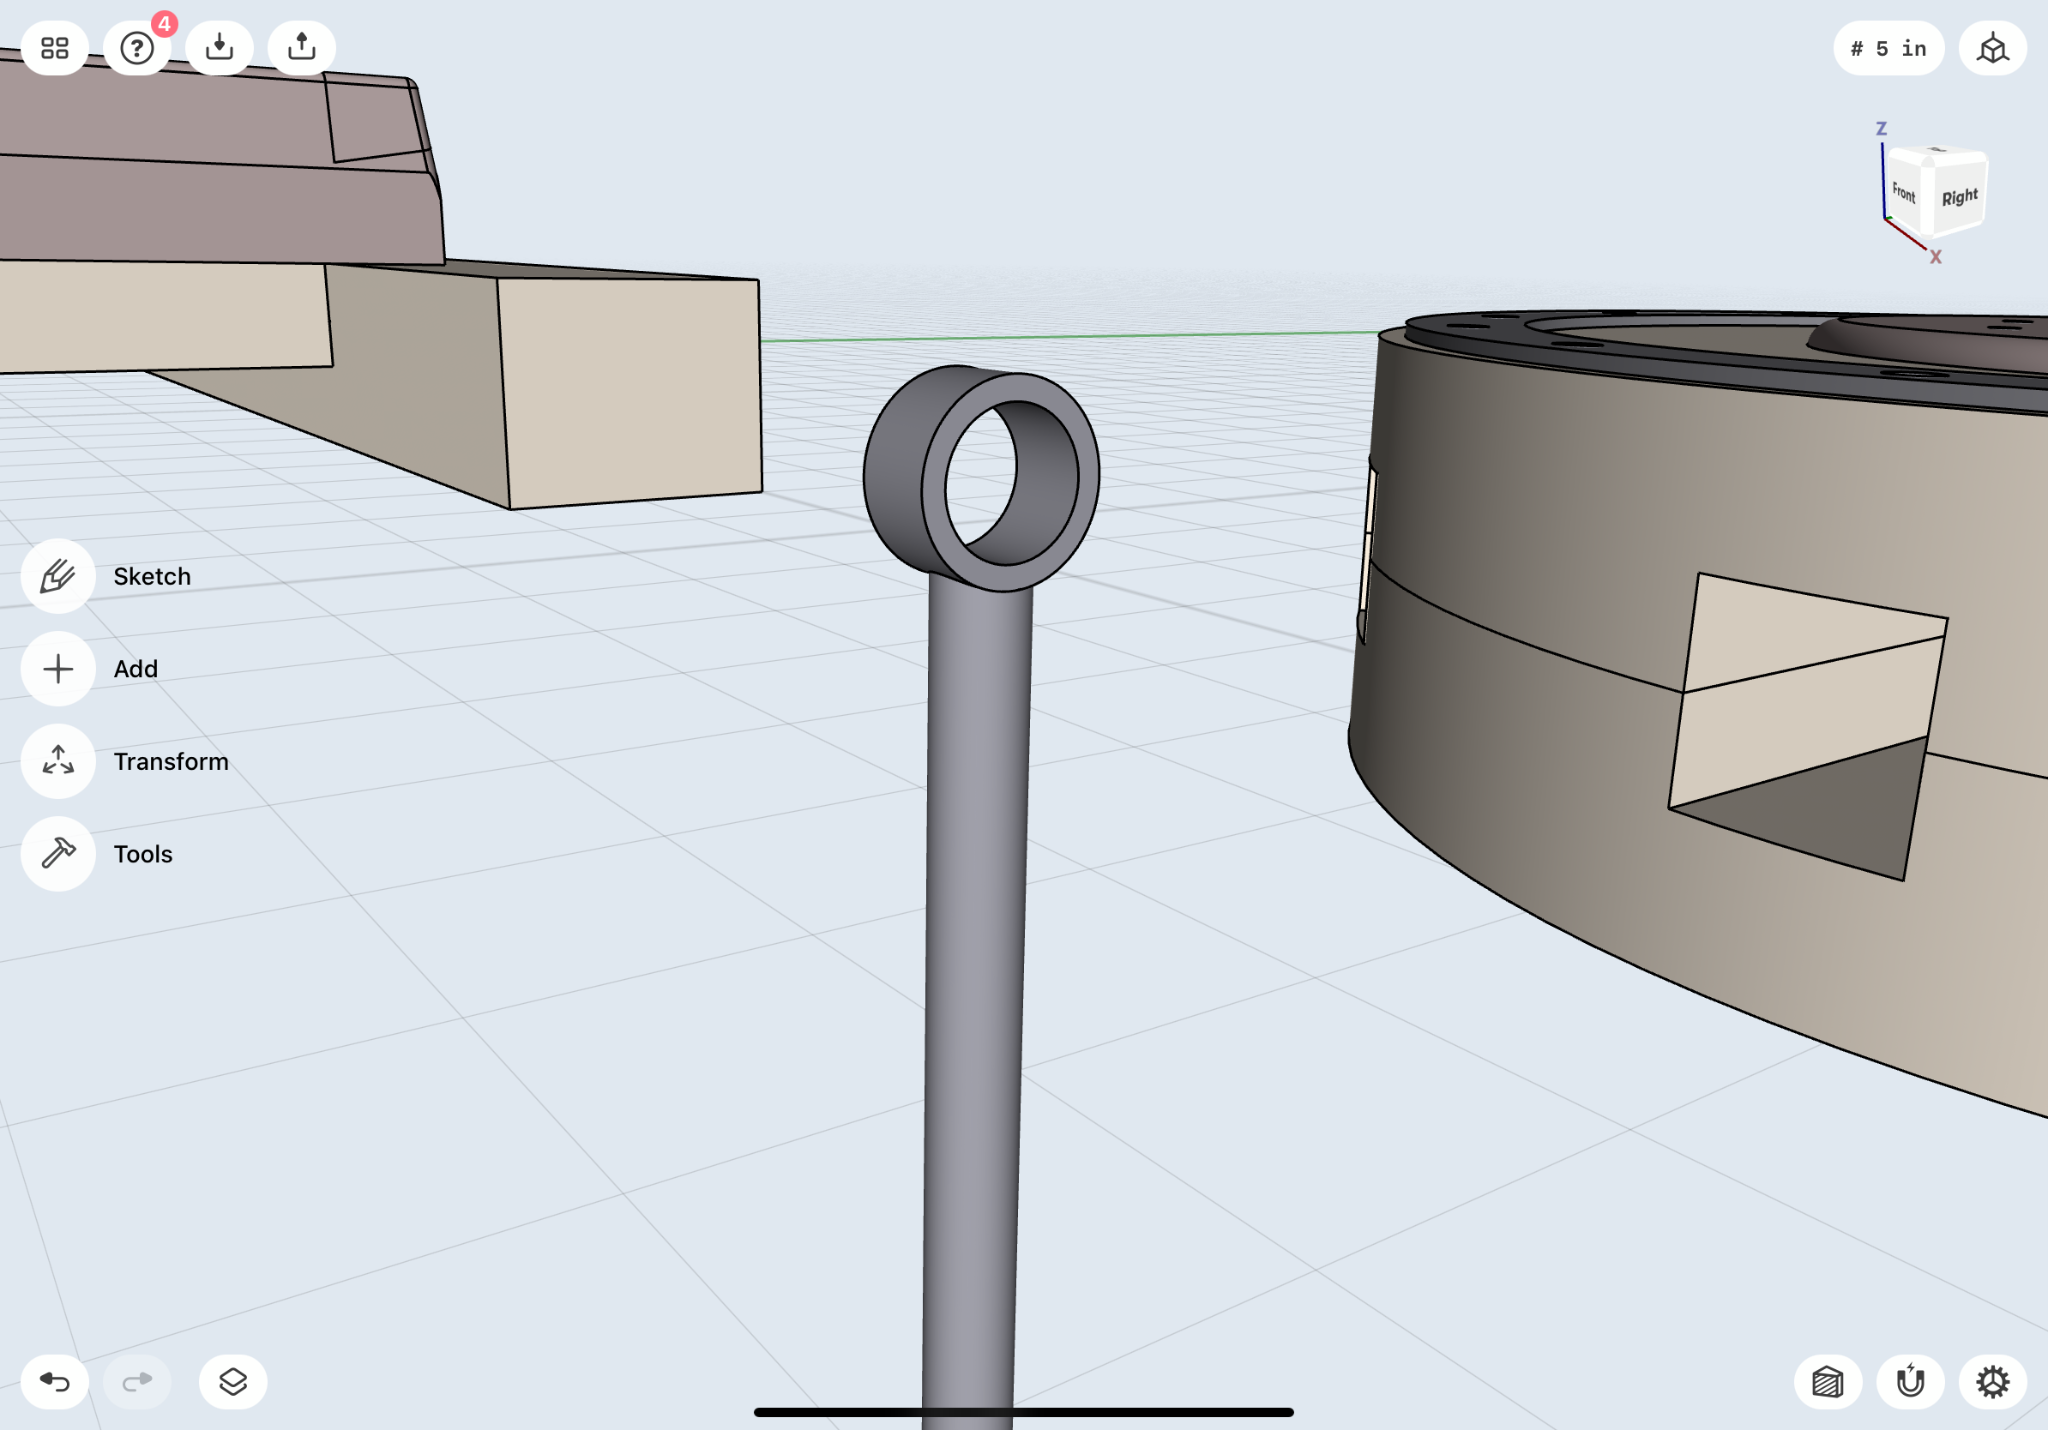
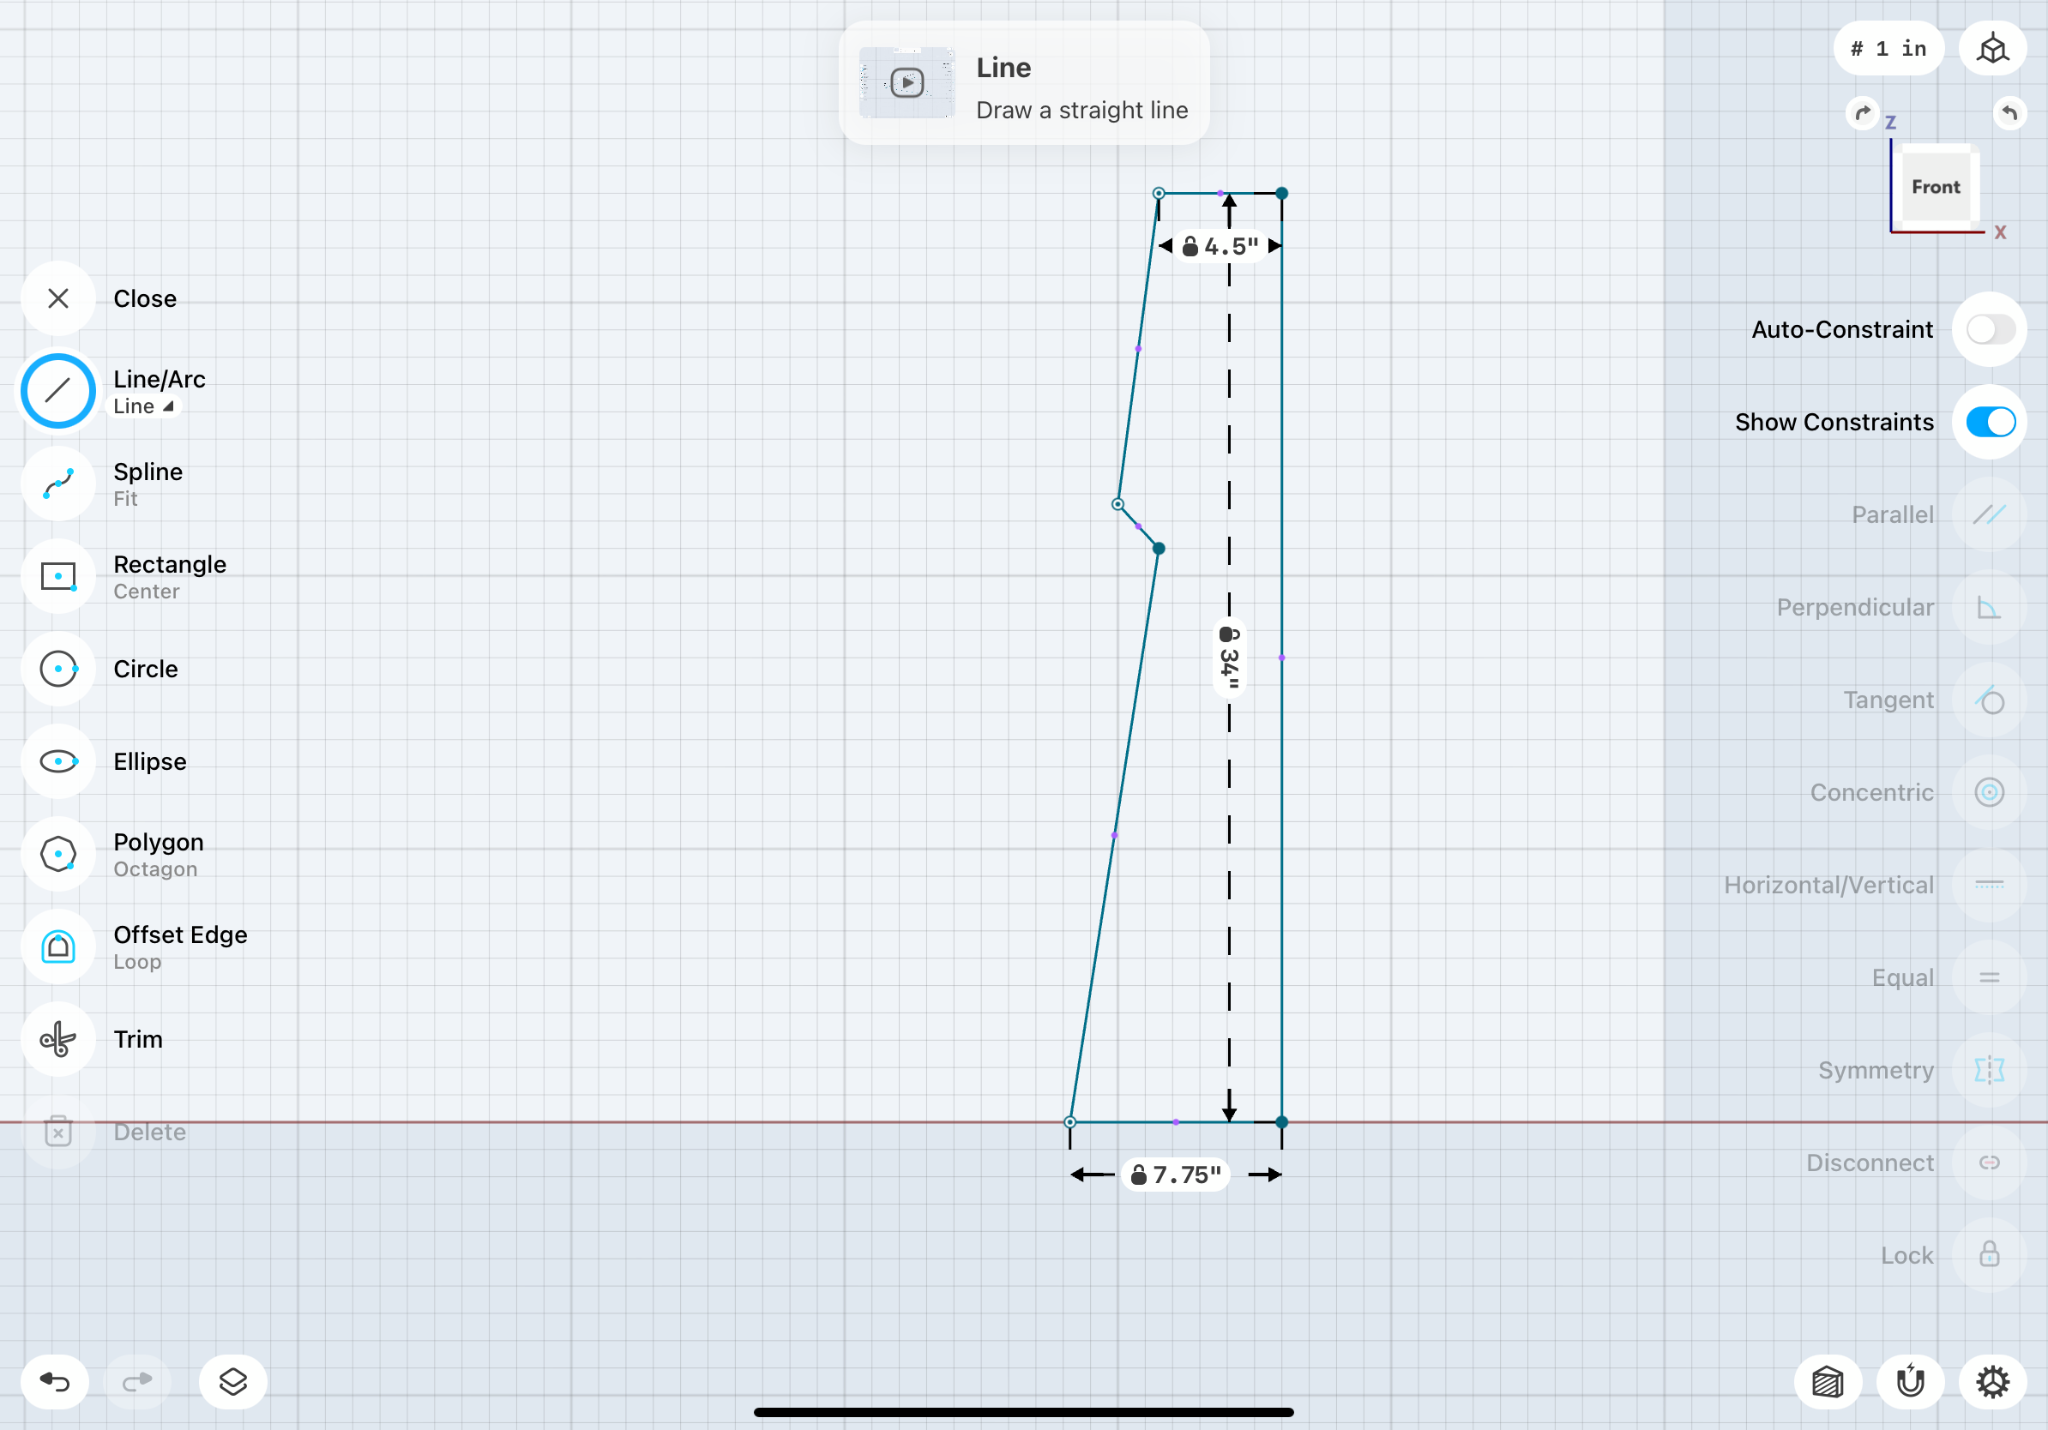
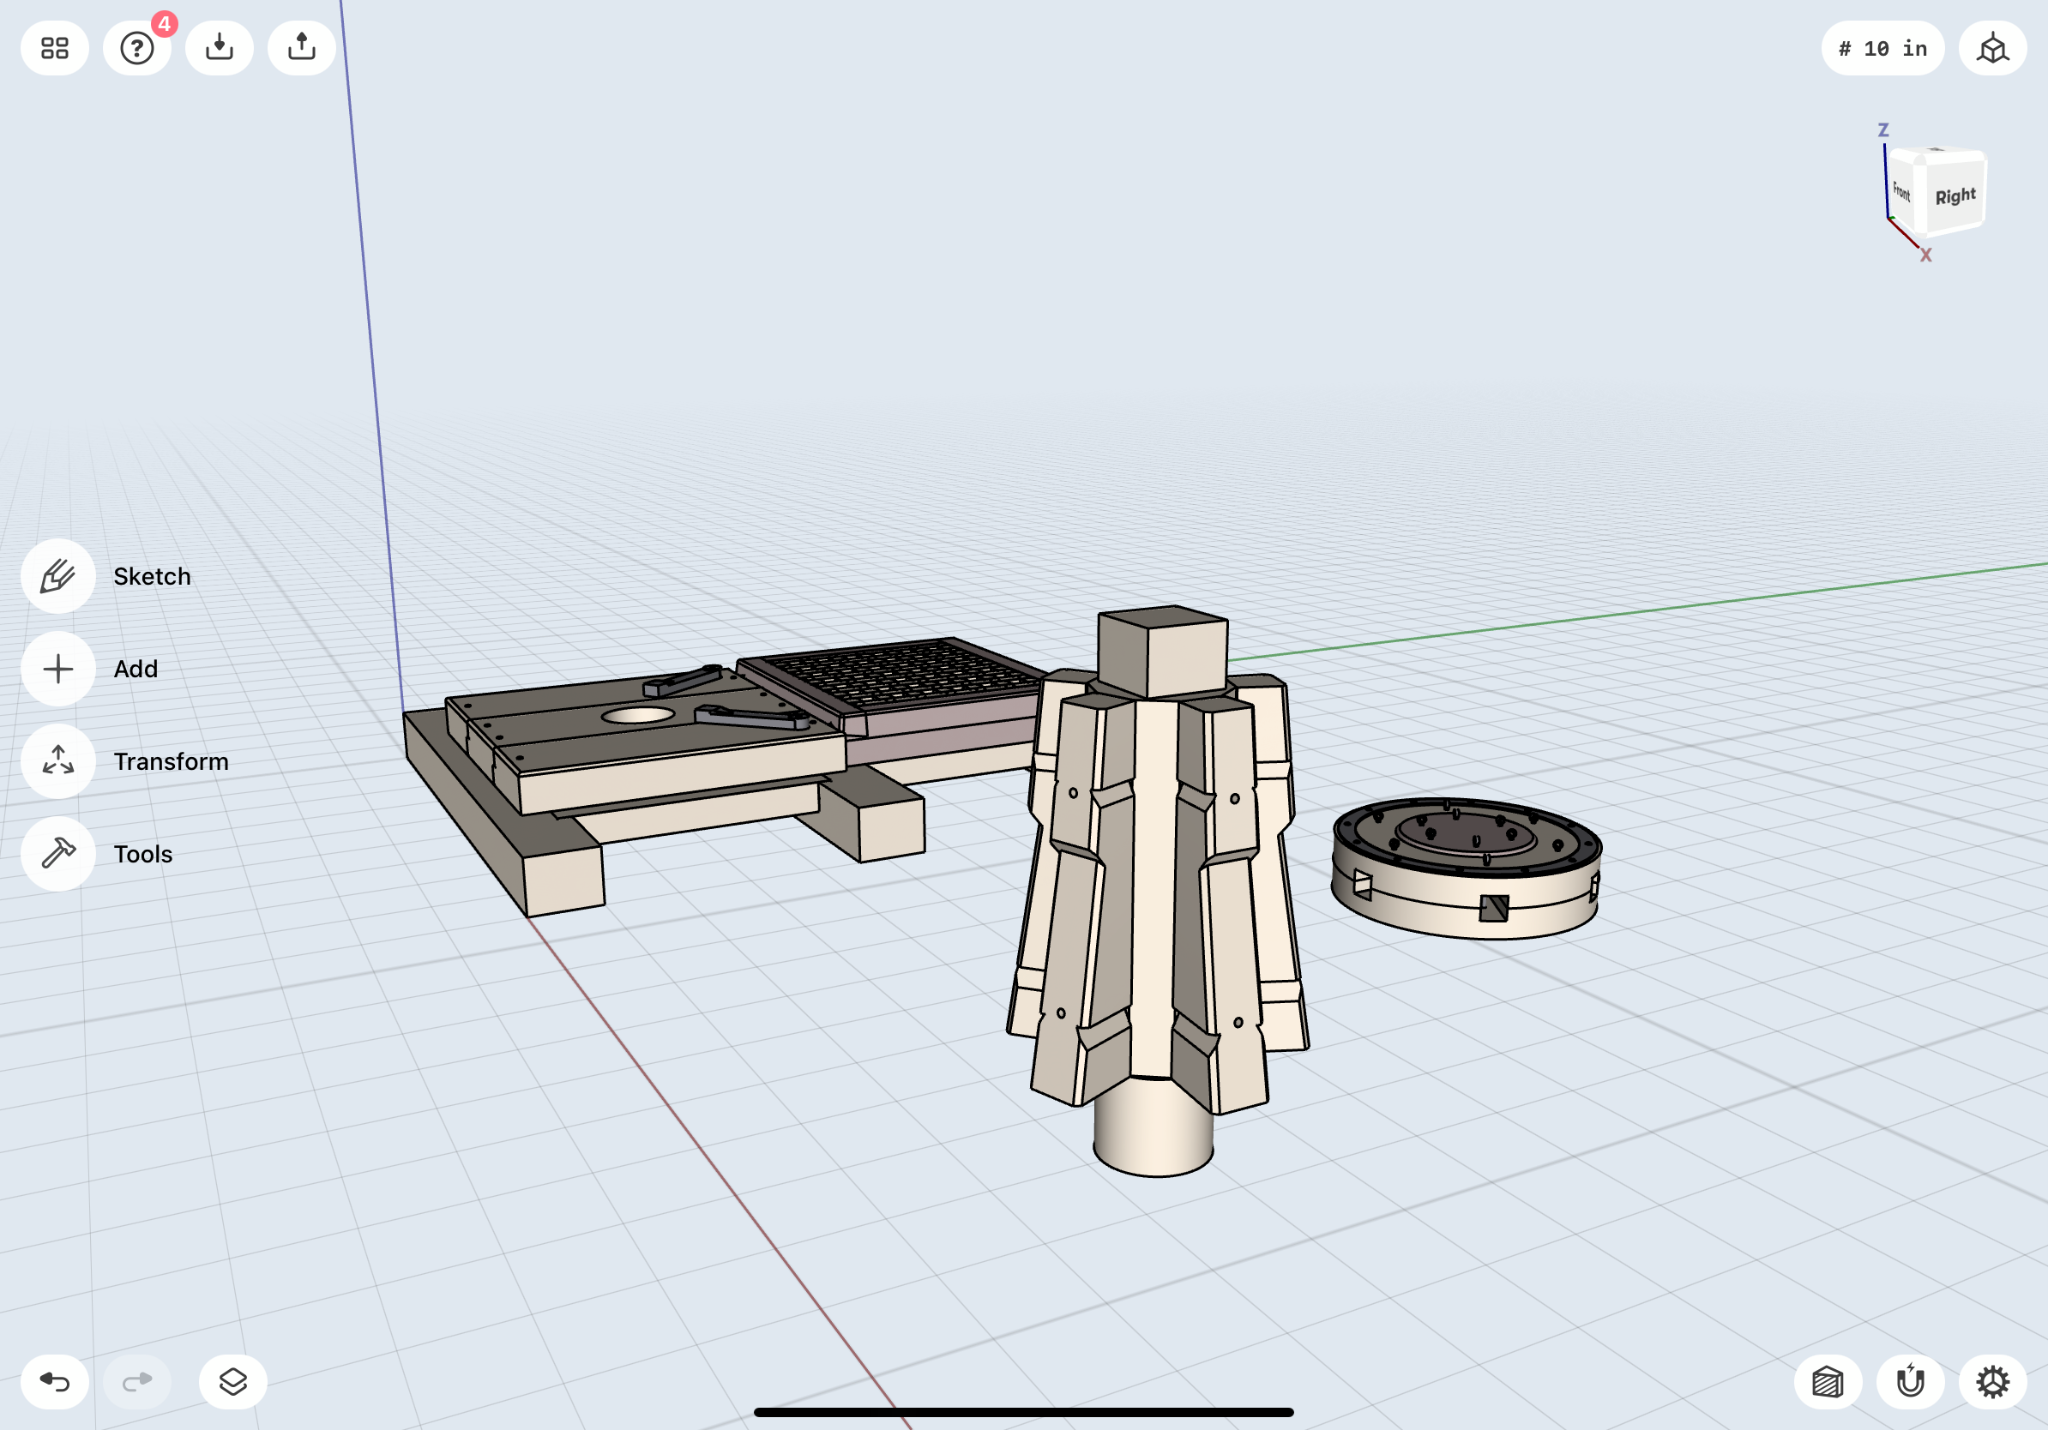
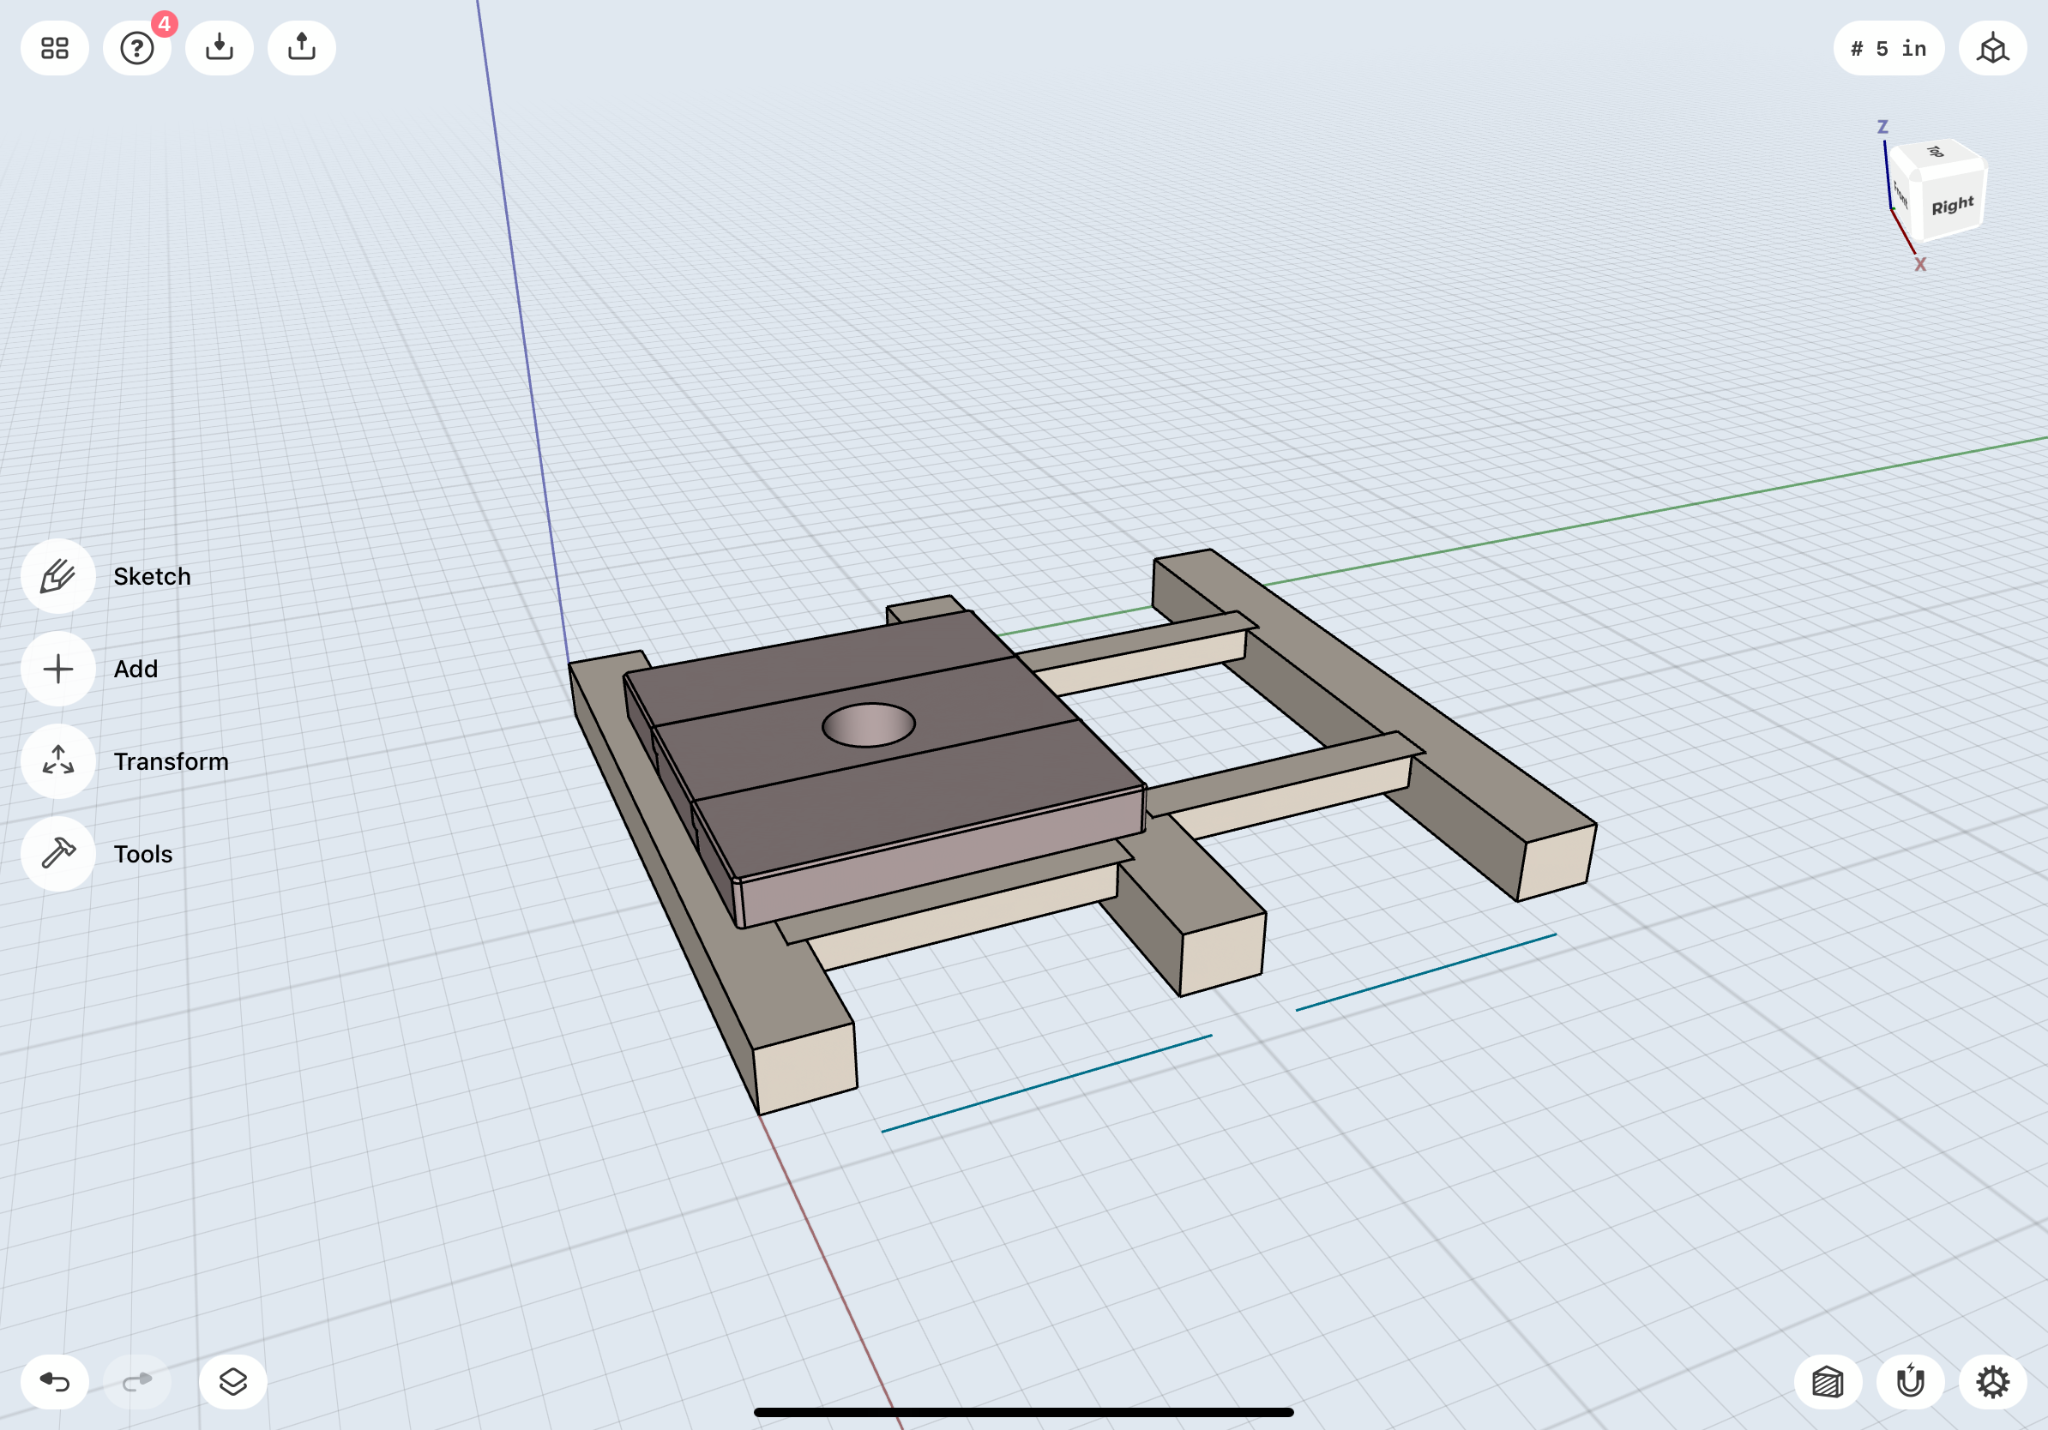
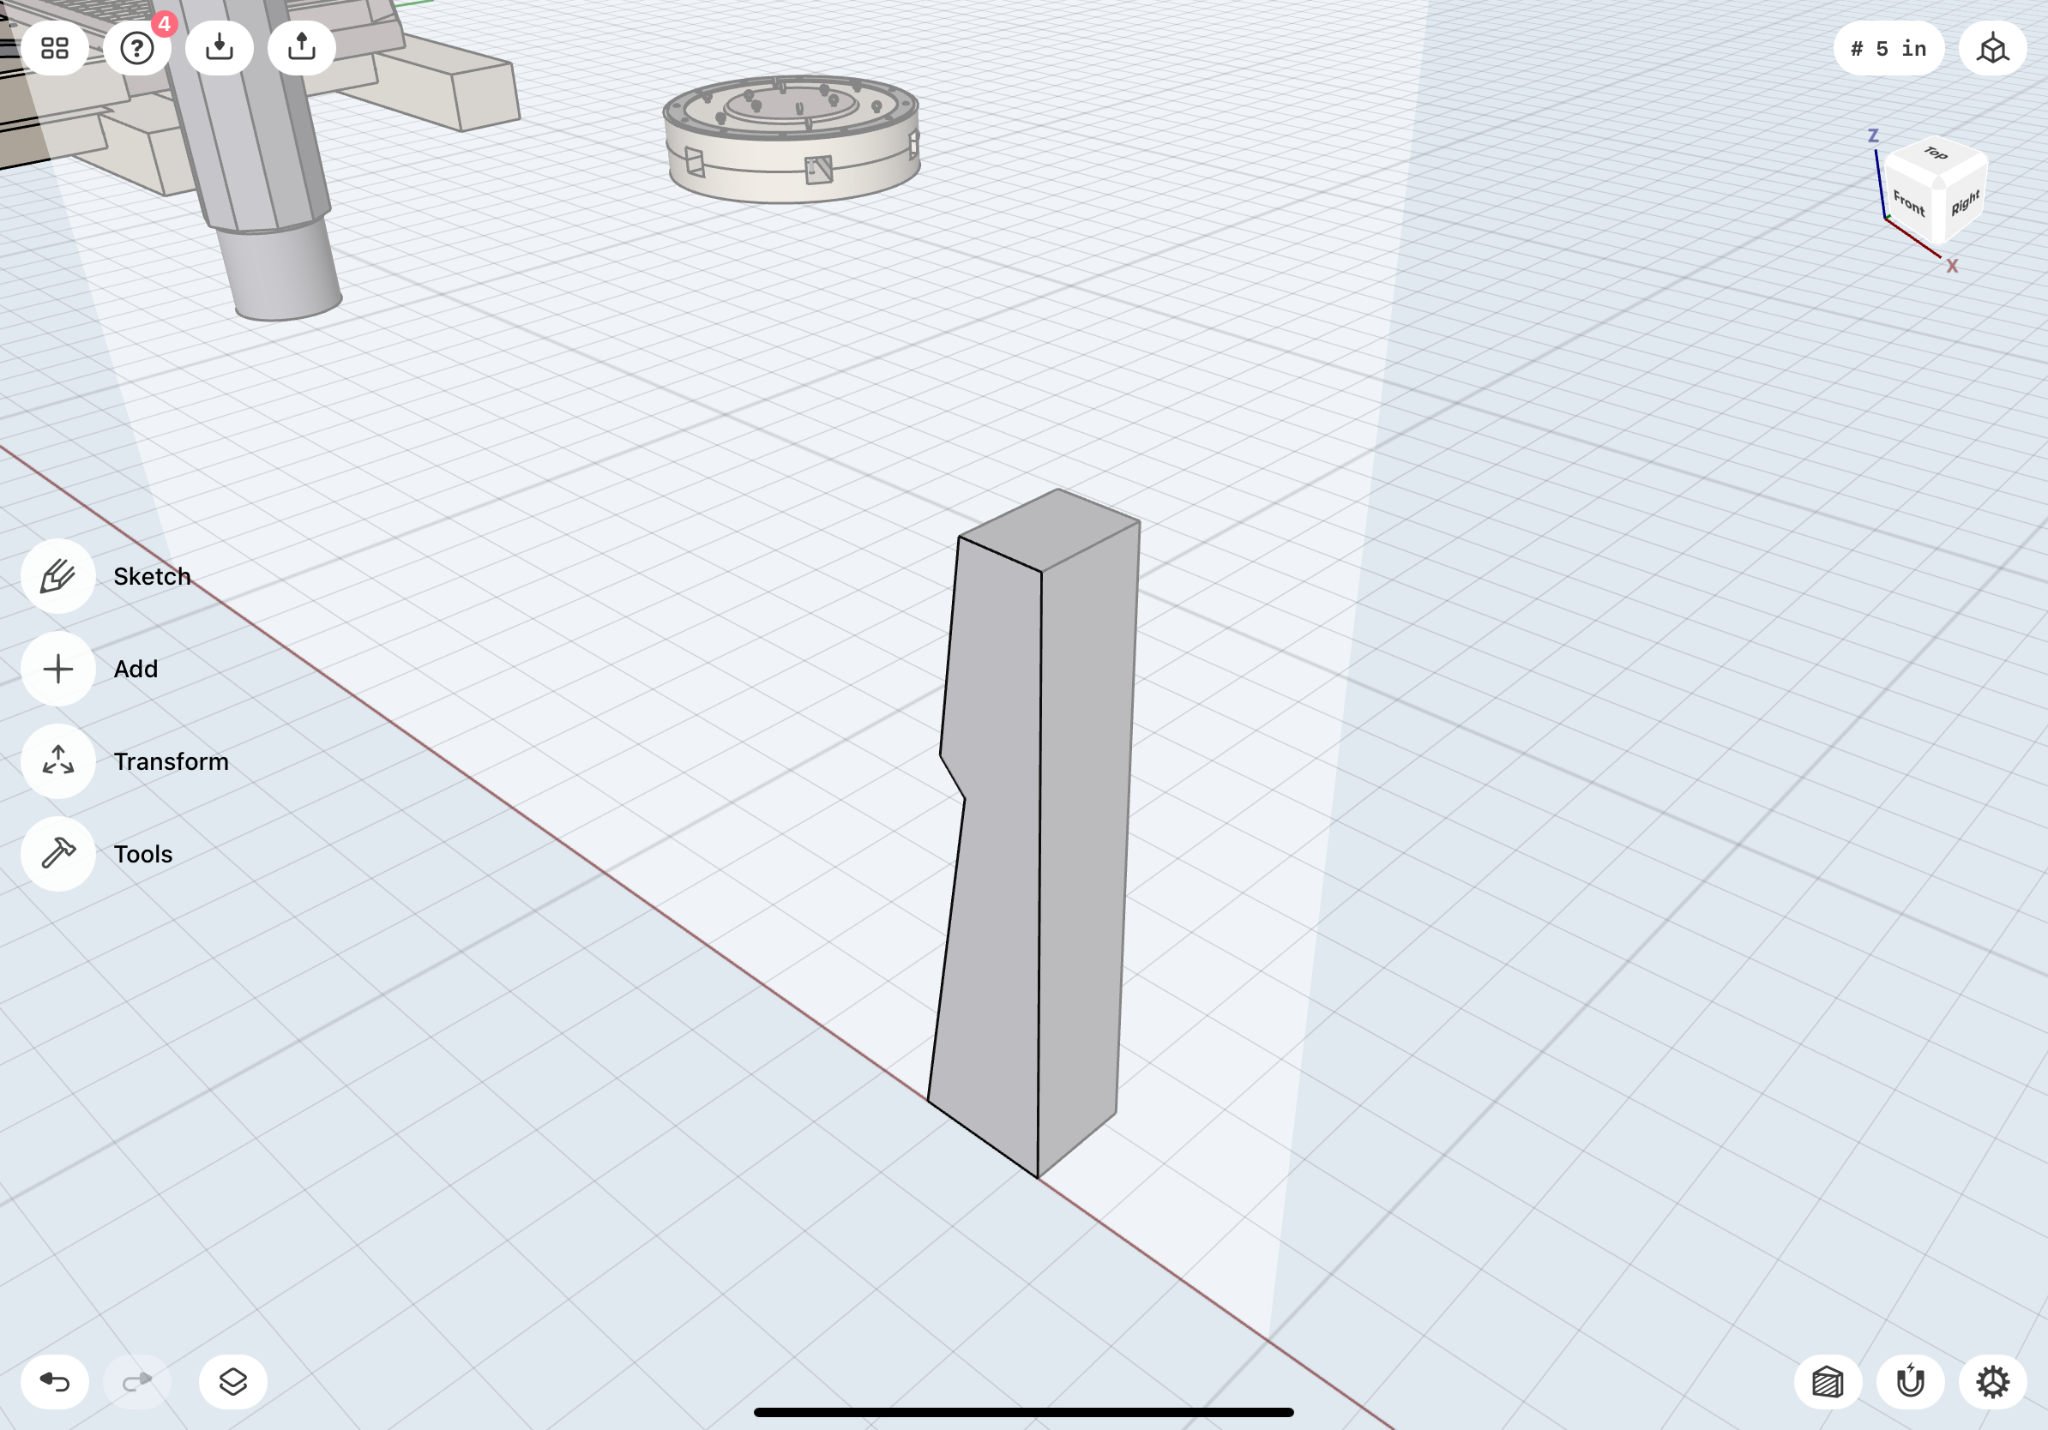
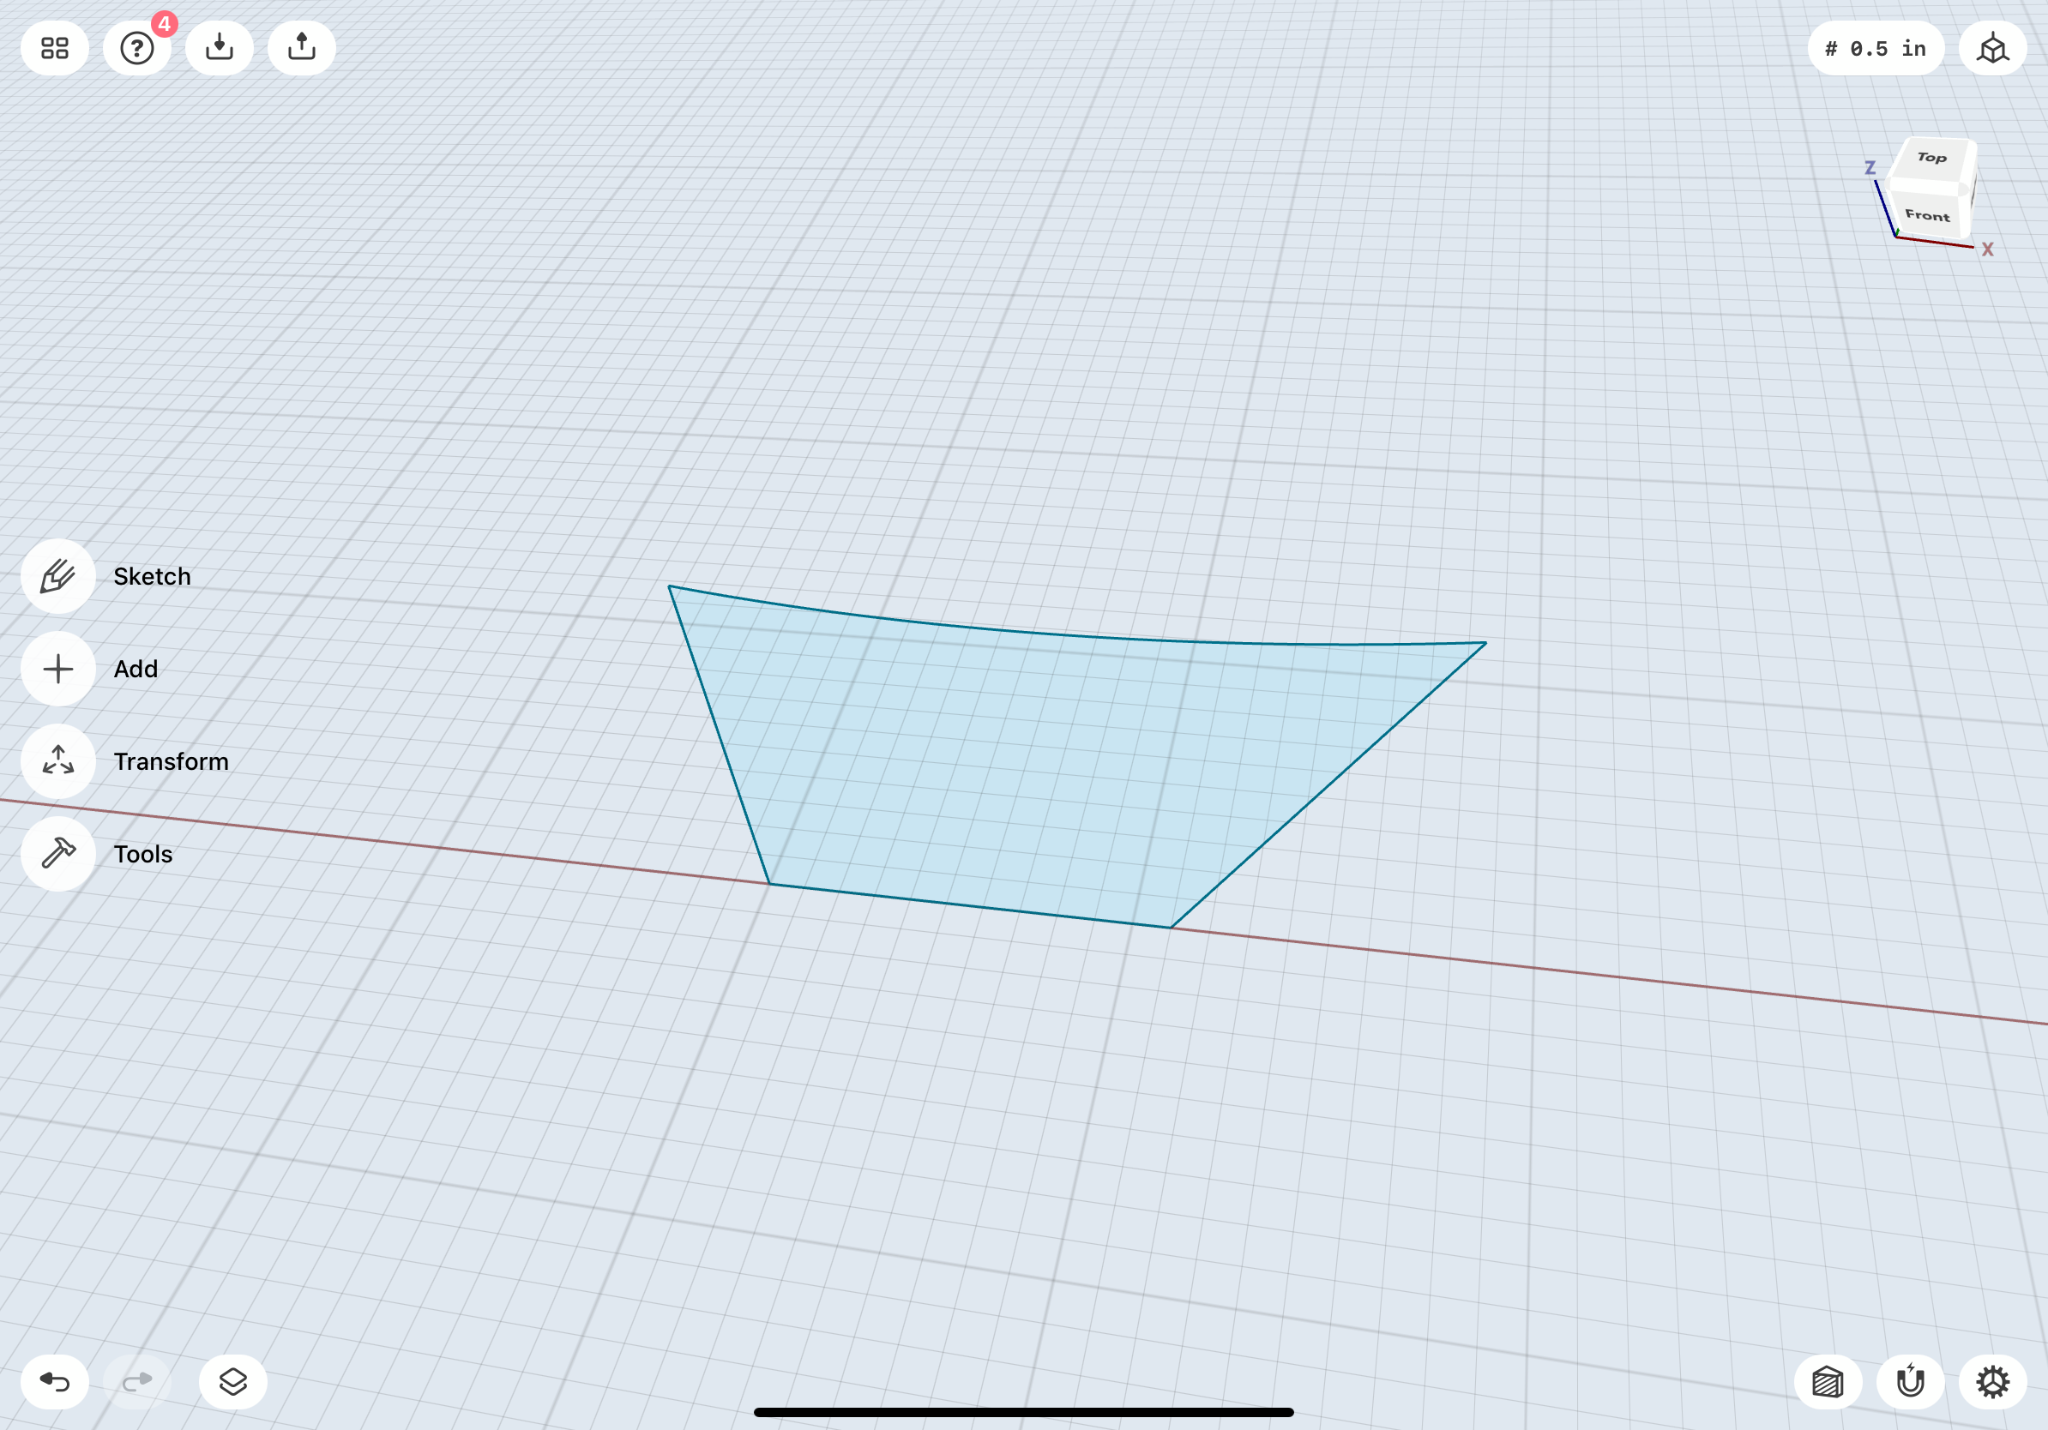
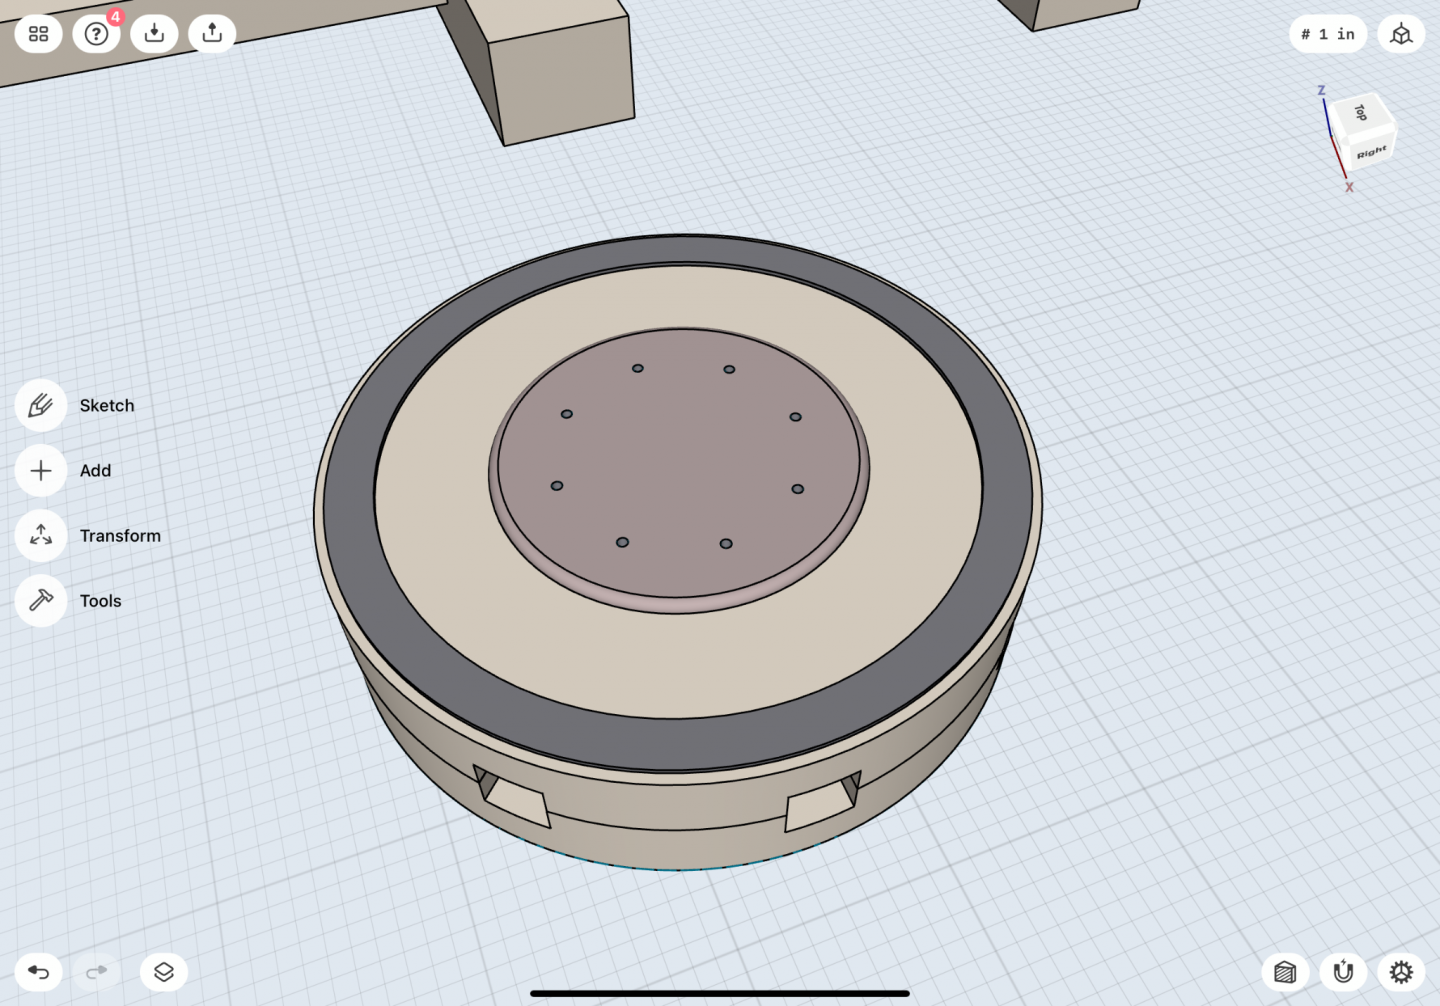
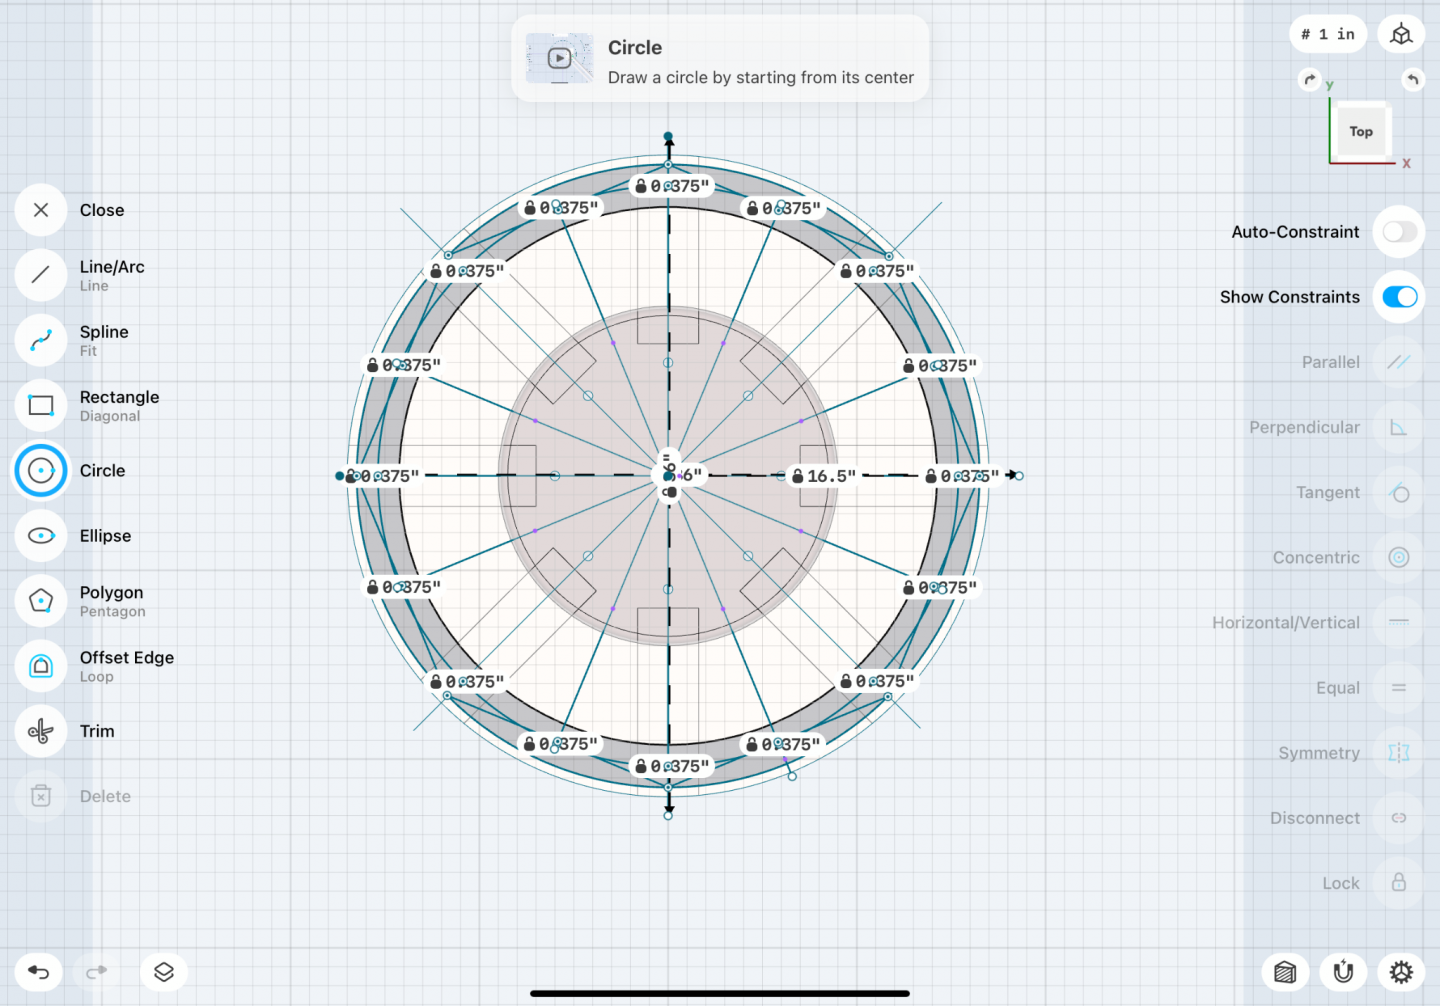
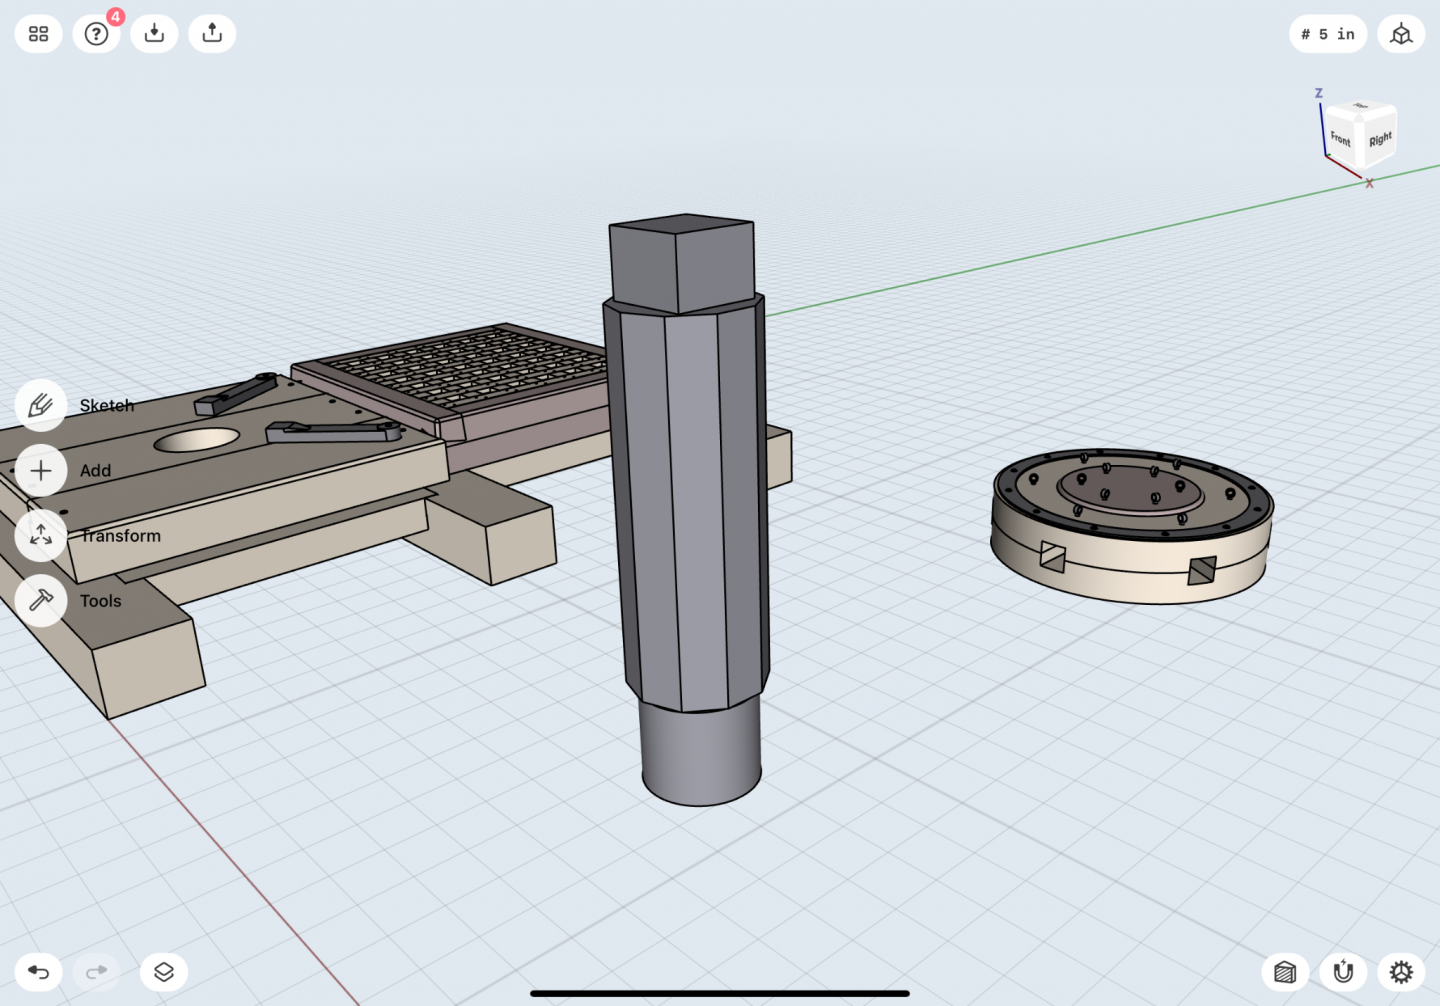
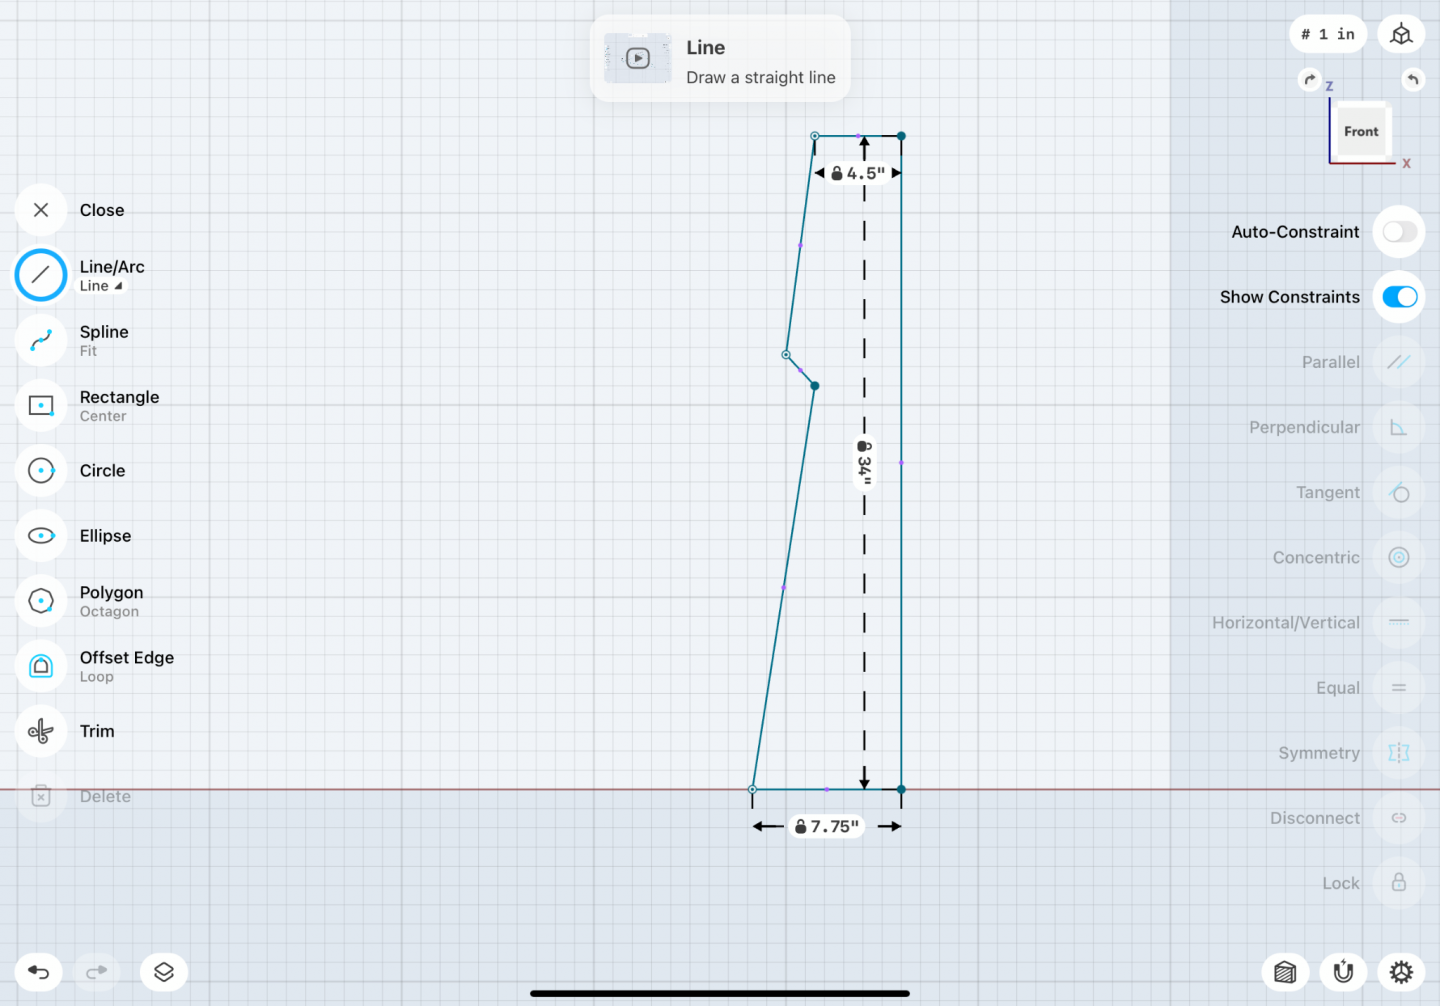
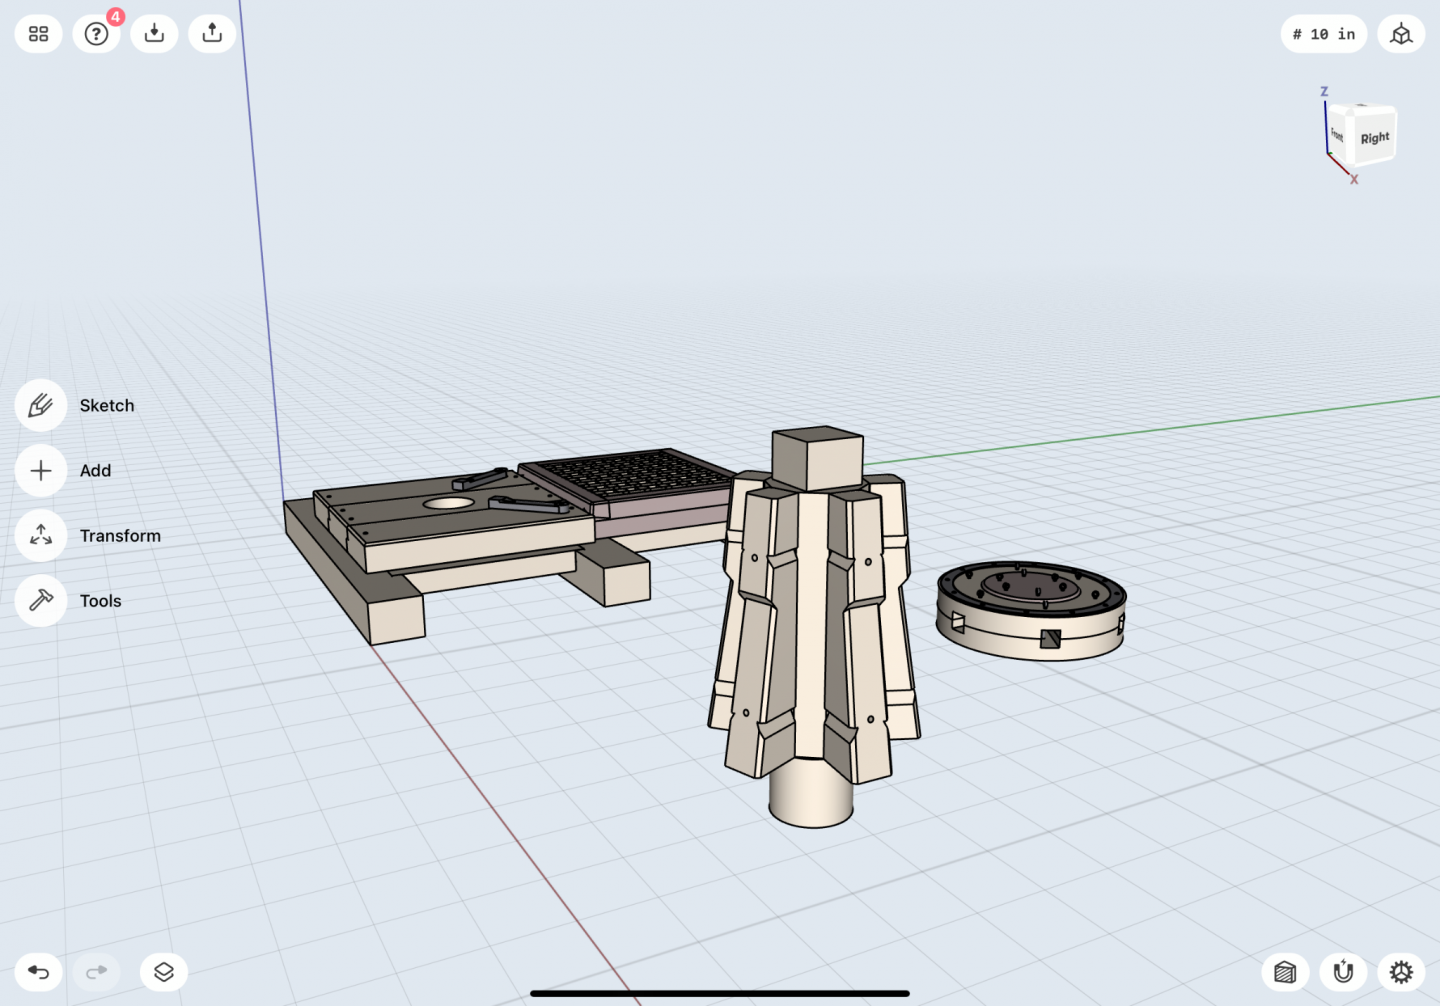
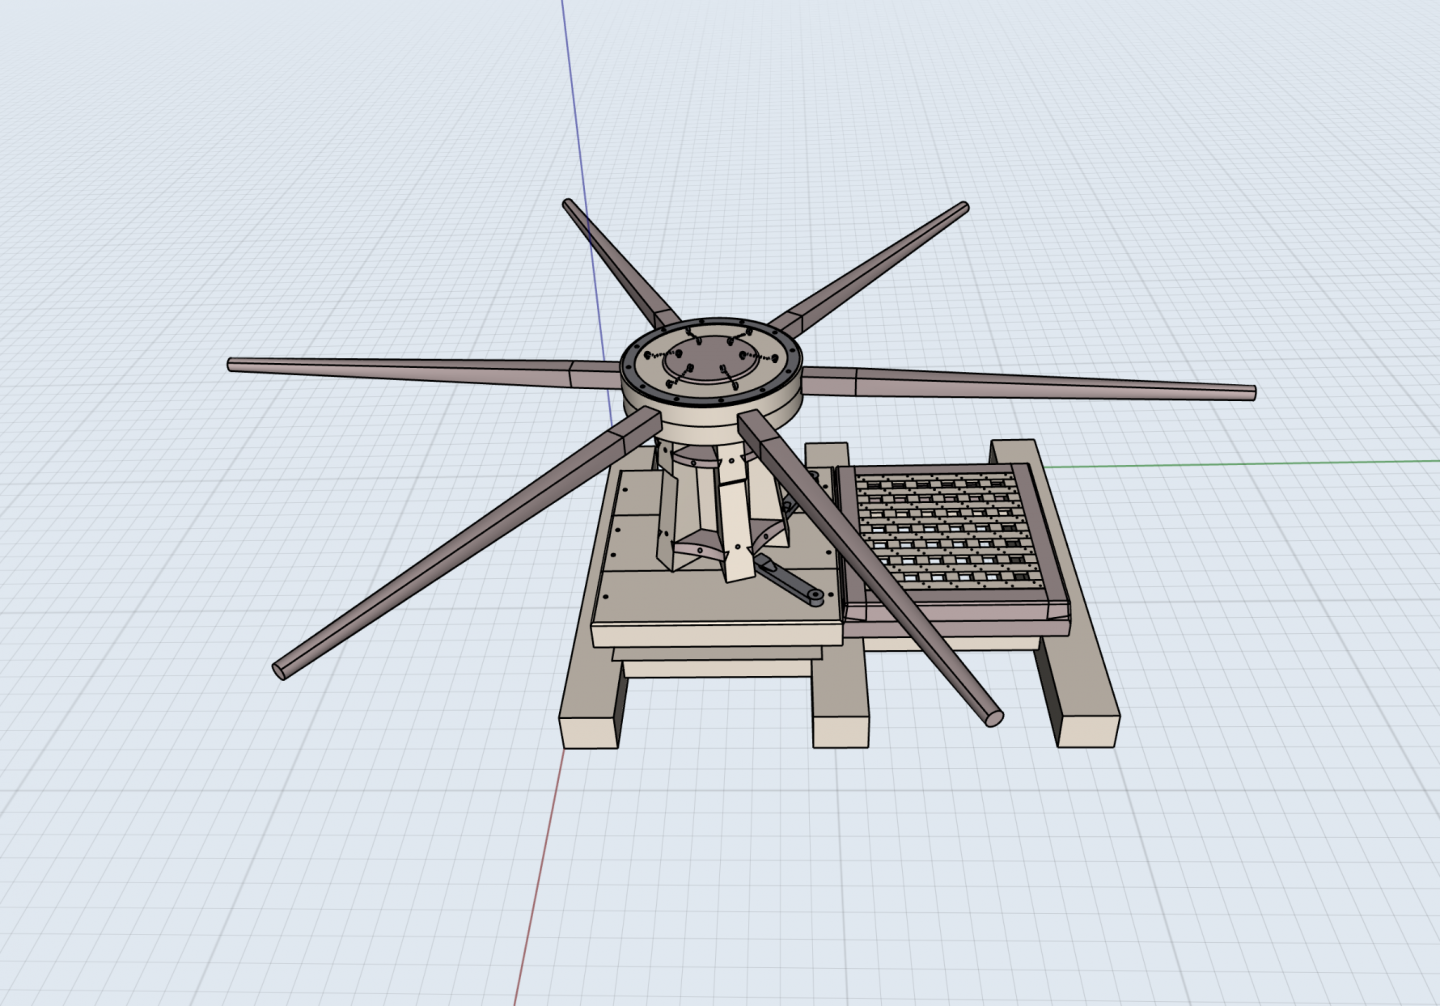
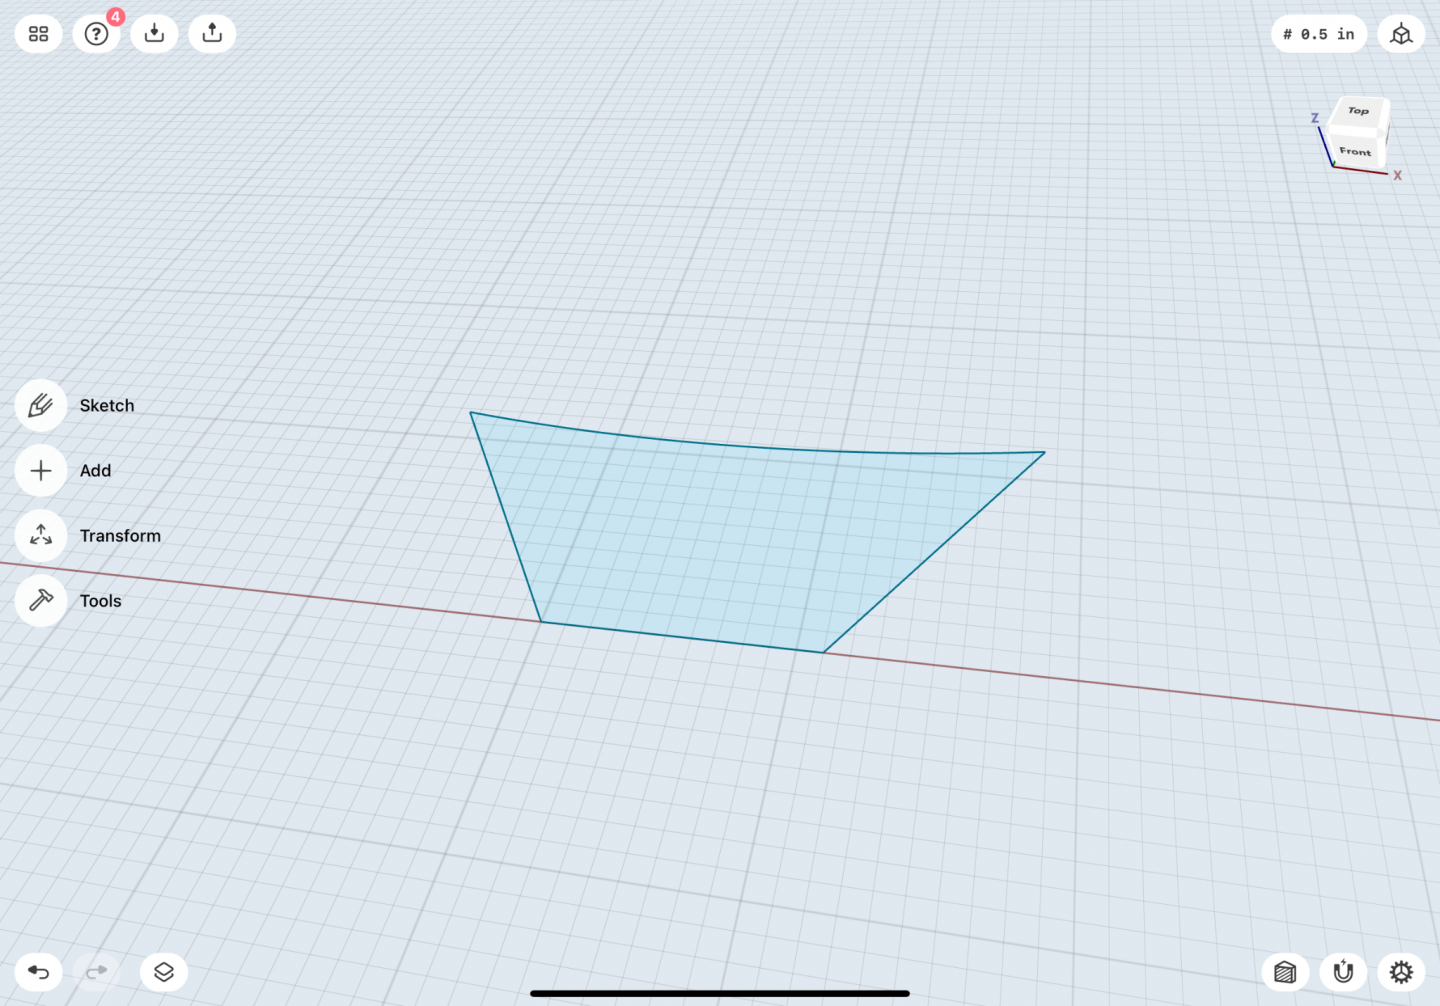
I wanted to put the iPad software through some more complex modeling of ship hulls. After my work on the NRG Capstan project, I was pretty interested in trying something a bit more complicated. This is in part an exercise to learn the full capabilities of the app. This model is still in early stages, but I think if one were to start from original plans on another subject, you could conceivably draft full plans for an actual build.


-
Hi All, Perhaps a few points of clarification.... Steve Davis turned the manuscript over to my care some time ago. I don't think he ever intended to remain a member of MSW, rather I think he was looking for an appropriate place to pass on a precious thing that he has cared for since his family retrieved it from the side of the road in the early 60's. It was/is important to him, and by extension is important to me. The story is too good, and whats more, the manuscript itself is marvelously drafted and highly detailed. Whoever the author was, they were very knowledgeable and highly detailed, and most definitely a draftsman/engineer or both. I haven't spoken to NRG about doing anything with it, nor had I intended to do so until I'd given a good effort at resolving the authorship question (for all the aforementioned reasons). I have communicated to several members using the PM system but never on the subject of distribution. Steve did have a mind to get it scanned and disseminated, and I think that would be reasonable at some point - however, as Kurt and Toni mentioned, it may not be appropriate until all reasonable effort has been made to establish authorship and copyright. I also have access to quite a few copyright lawyers (and their professors) and have been getting, I think, pretty satisfactory advice on the matter. I have spent considerable time and effort chasing down leads and still have a few open lines of inquiry that I hope will go somewhere. Some quite silly like the very random contacting of every "Hal" alive or dead in the ship modeling world that I can find (and their friends). Some others more in depth - to include the Hahn and Underhill legacy's and some very complex and ongoing queries to include M&H Valve Company, the University of Glasgow, a pre-WWII heating contractor and many, many emails with archivists in the corporate as well as academic world. I have no idea if this will go anywhere, or what I can legally do with the manuscript if I never track down the author (which is likely). However, it would be a terrible shame for it to go unappreciated. I apologize that I neglected to update this thread with all this since last October when it was transferred to me. Lots of plates spinning and all that... Anyway, suffice to say the matter is ongoing and if anyone has any ideas Im all ears! It currently lives in the book safe in my lab here in the Northwest, and Id be happy to show it to anyone who happens to be in the area.
-
Indeed.
-
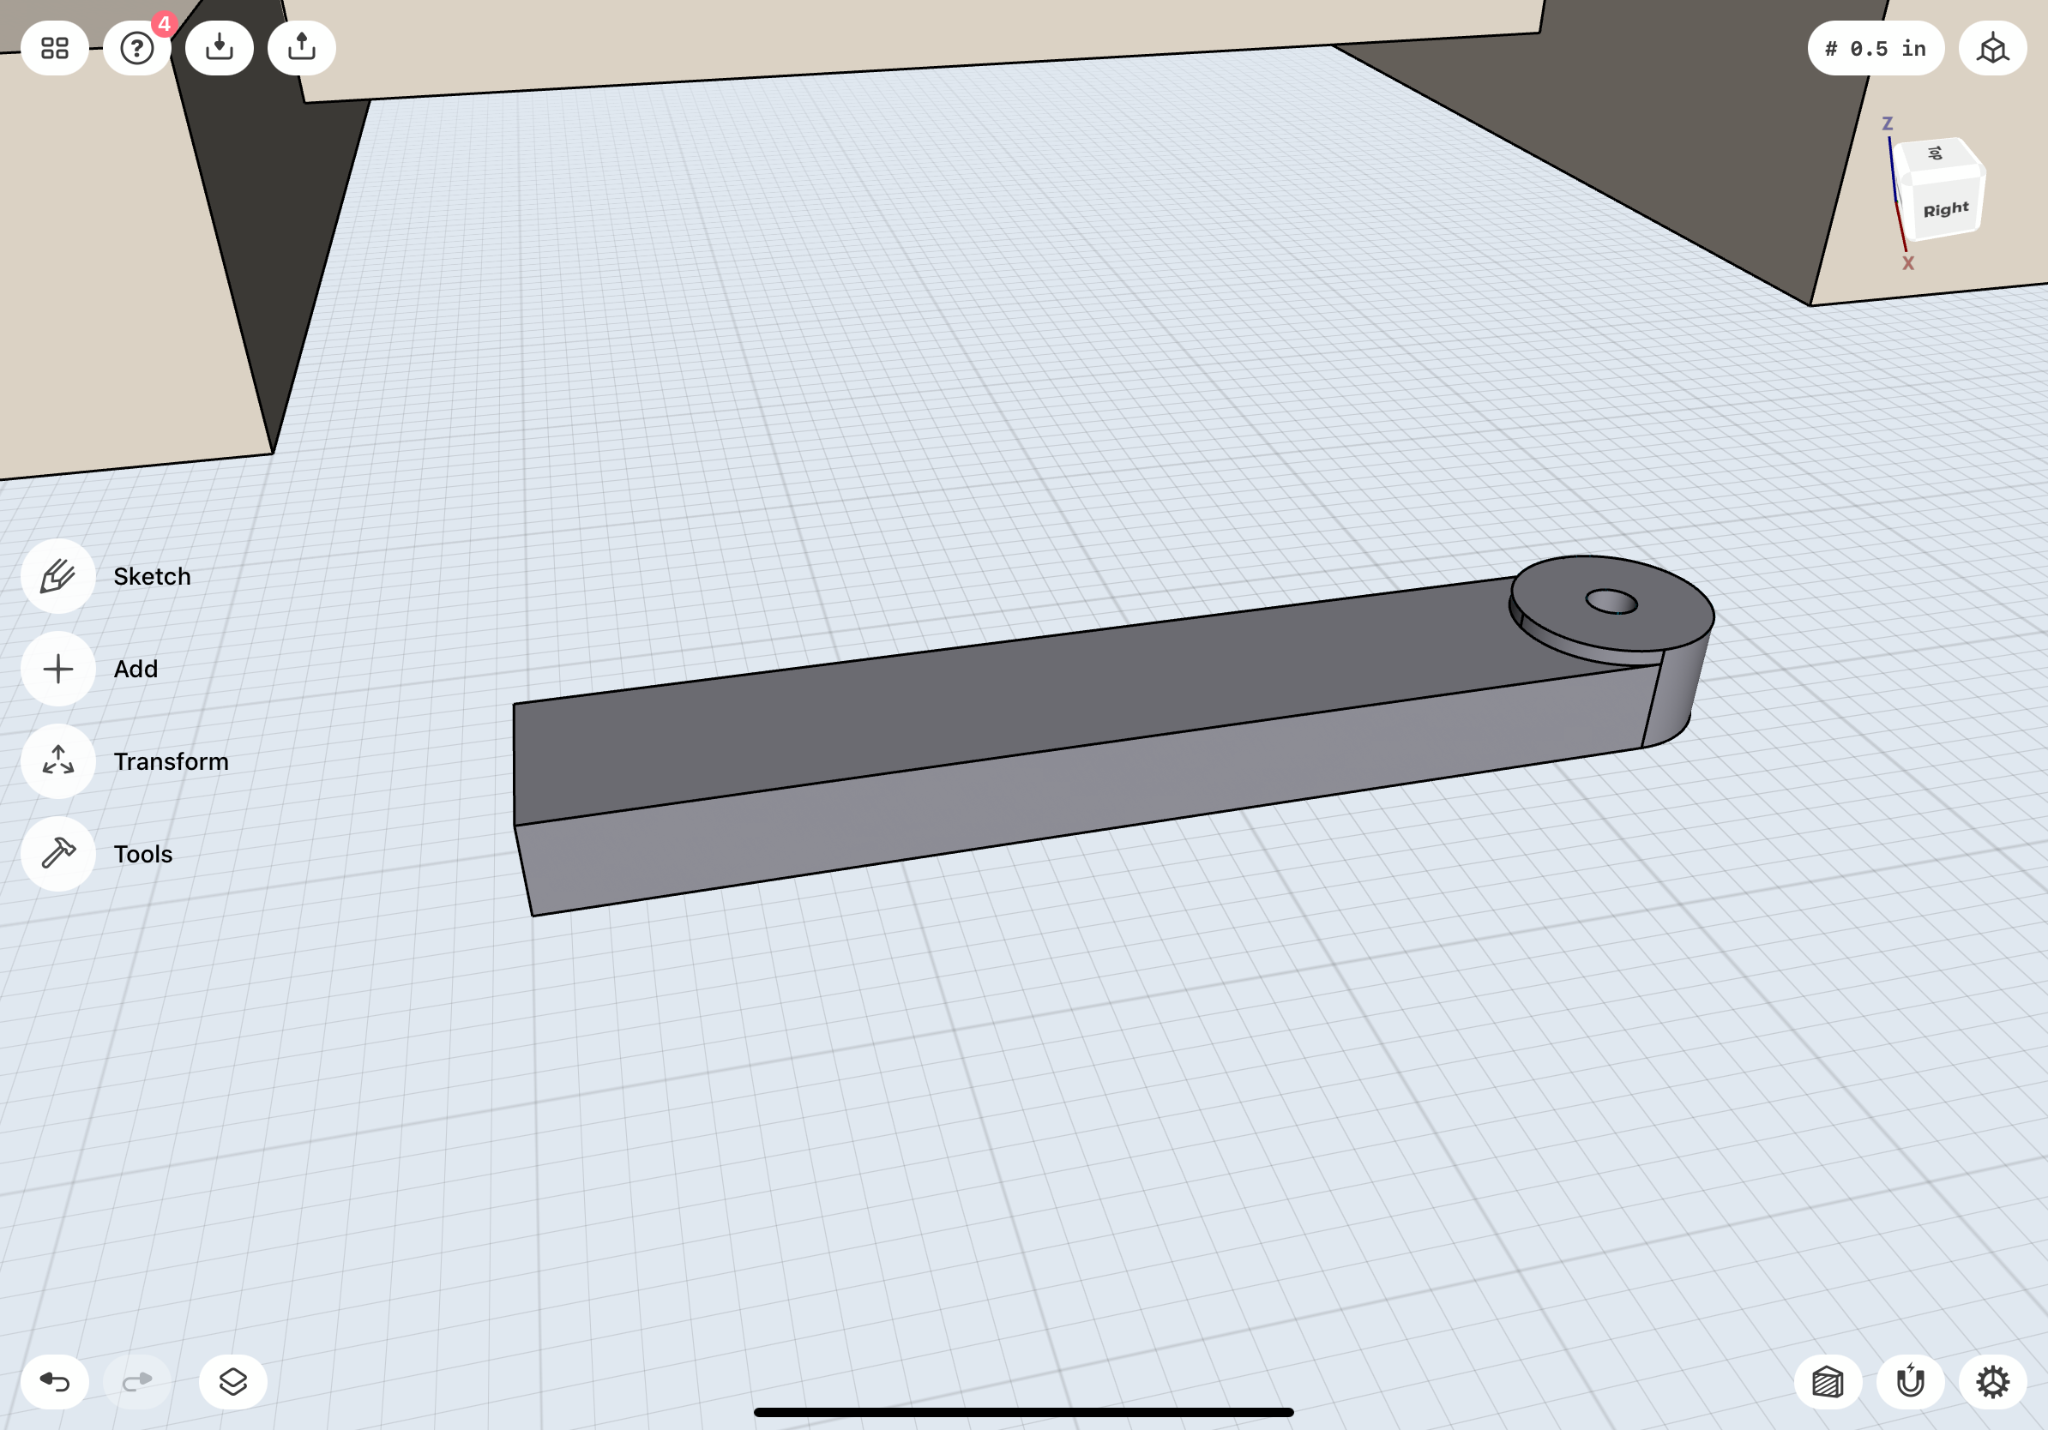
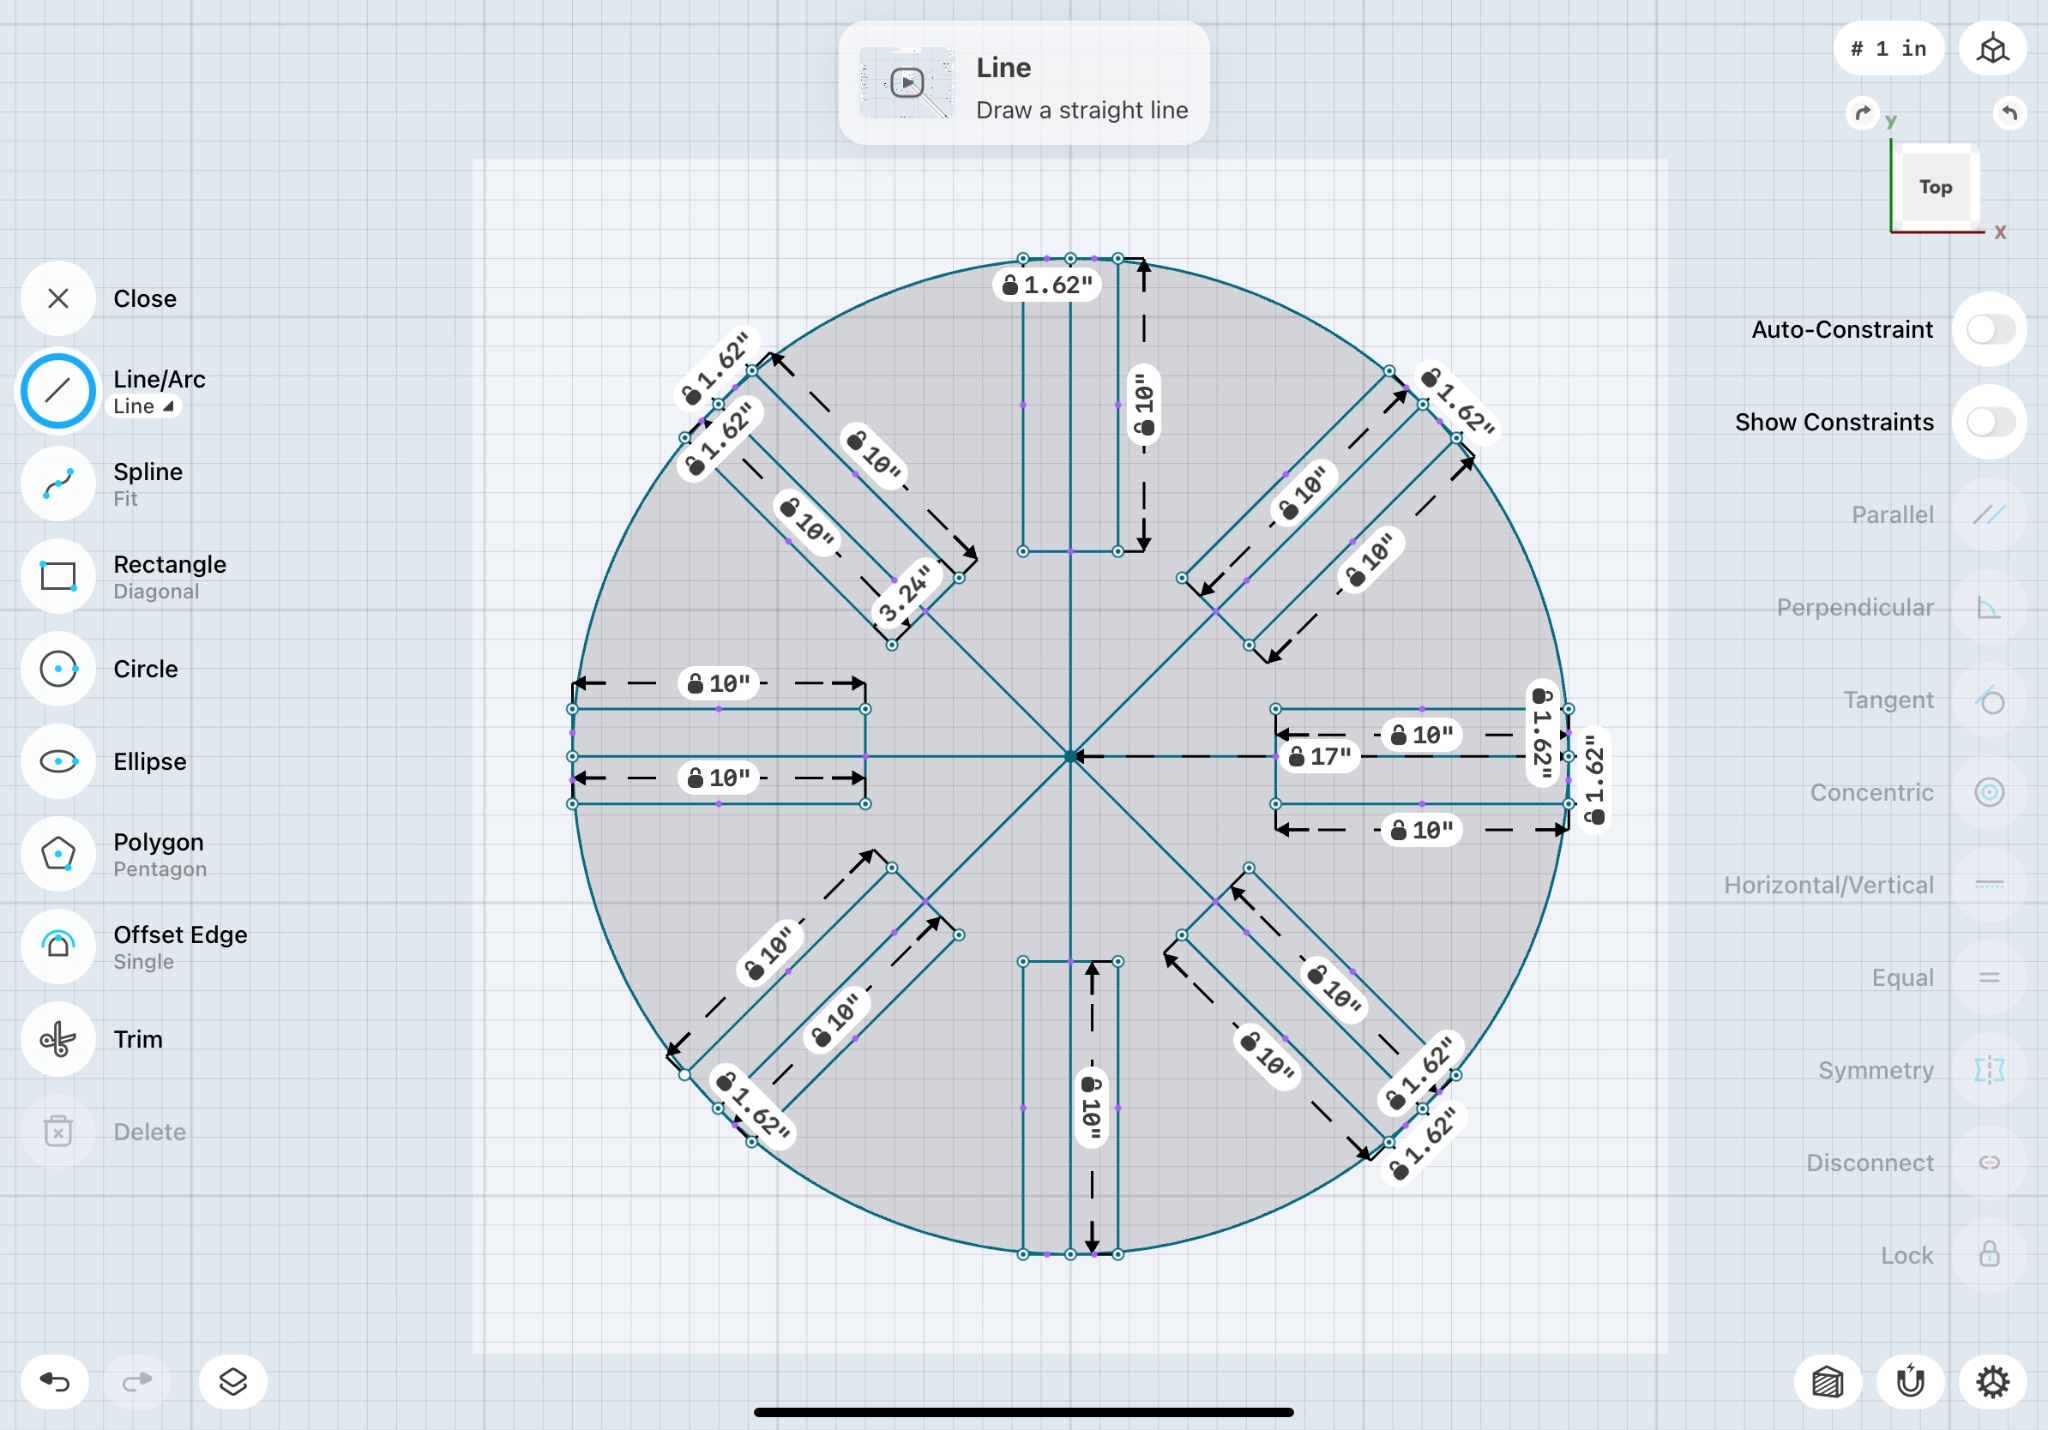
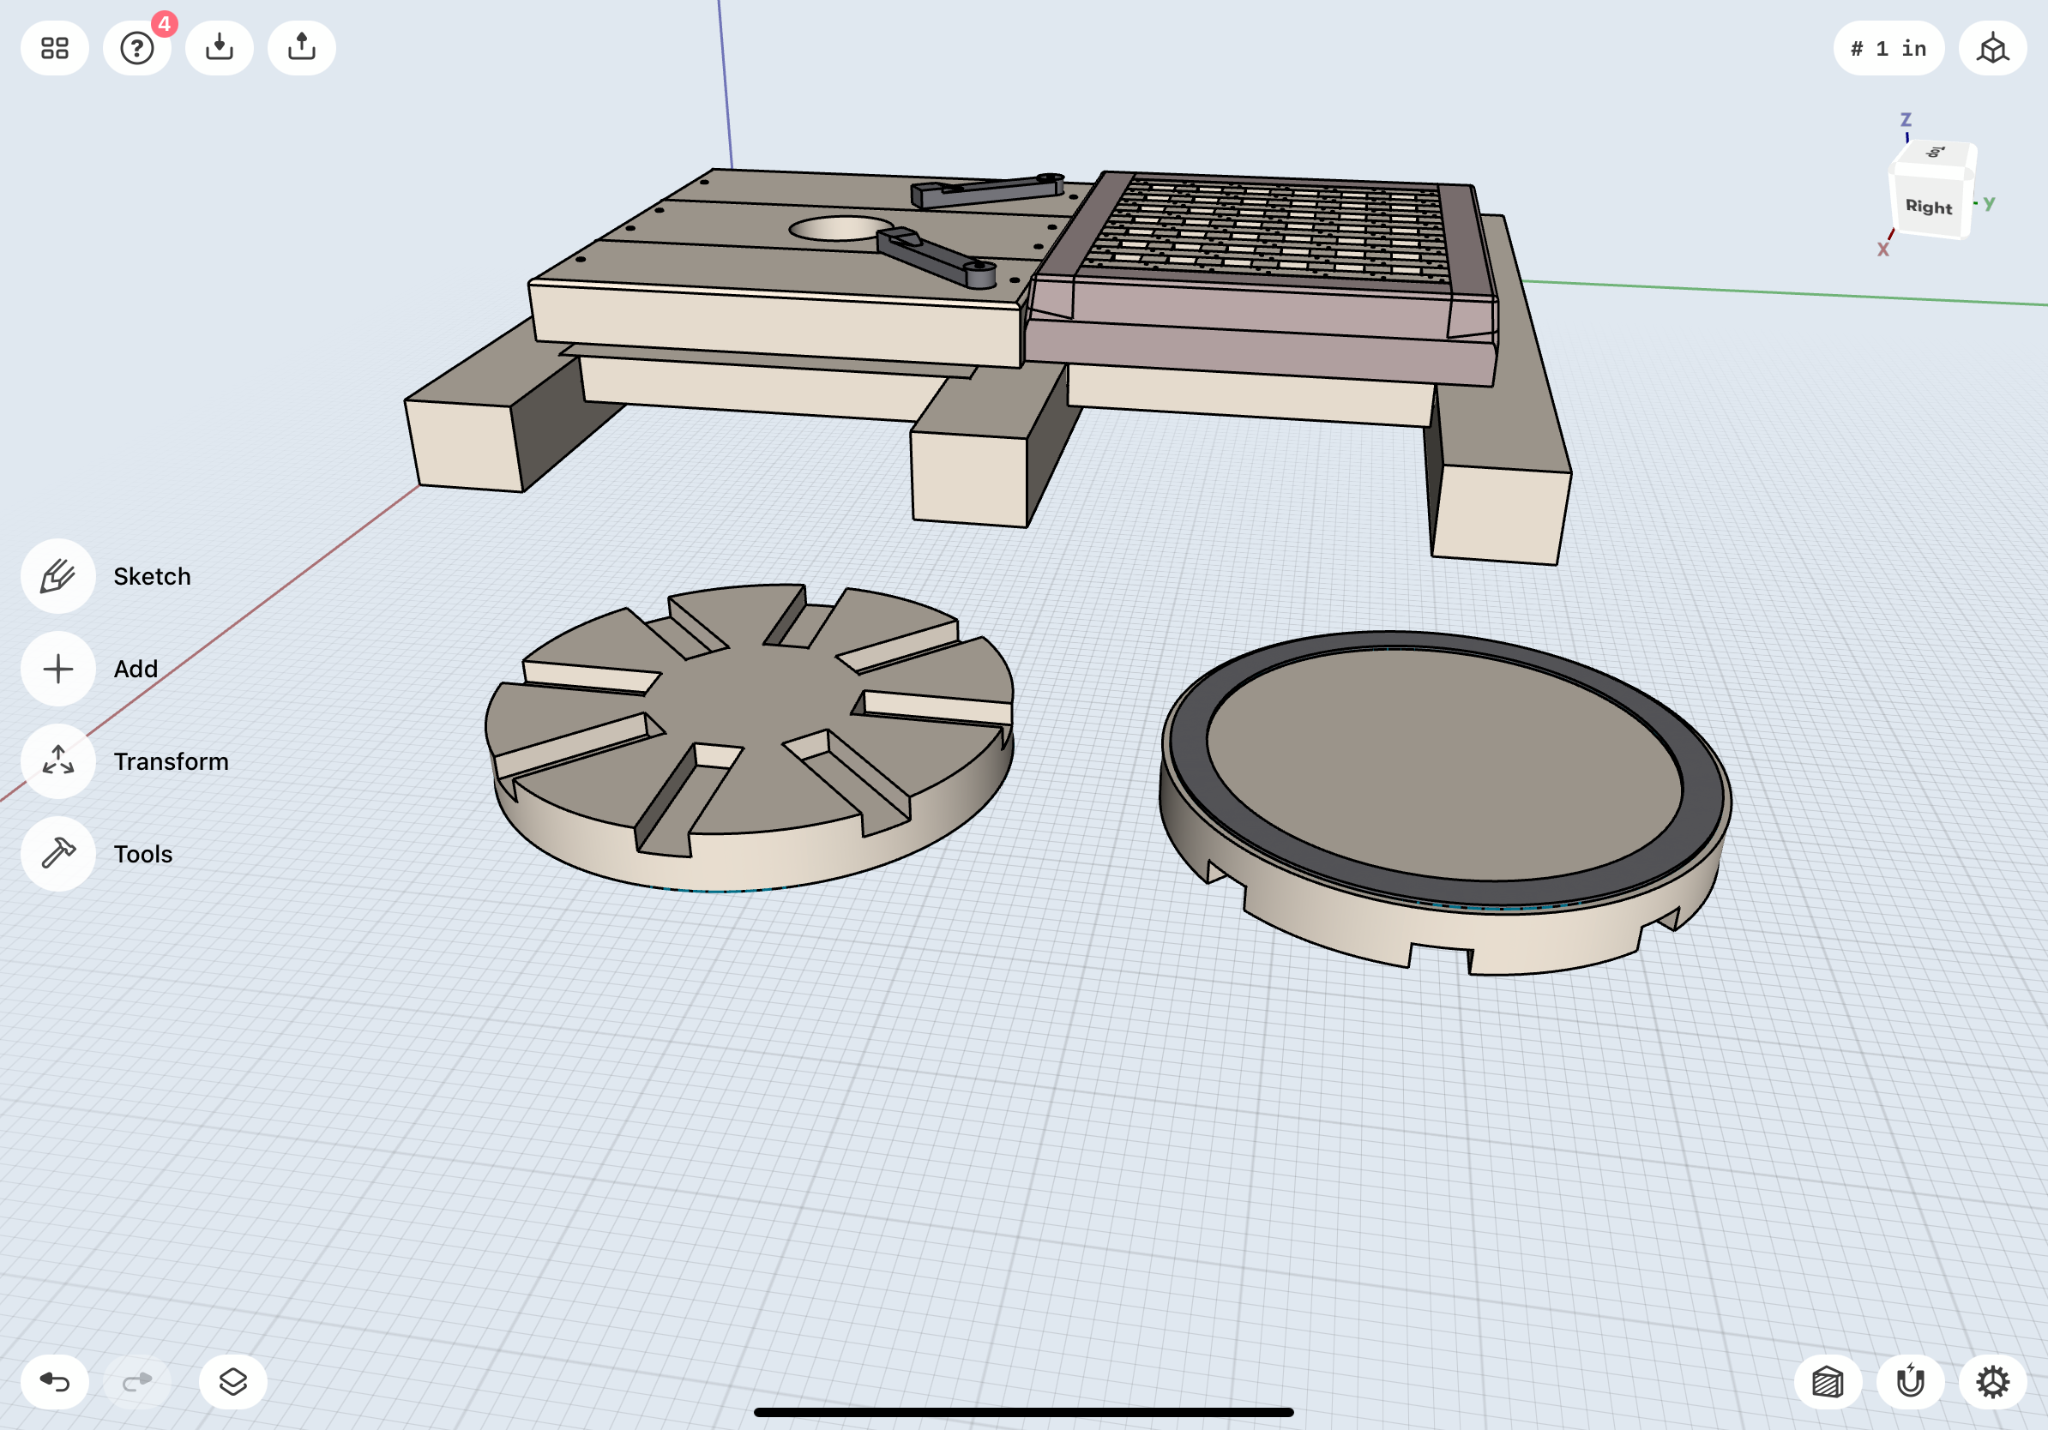
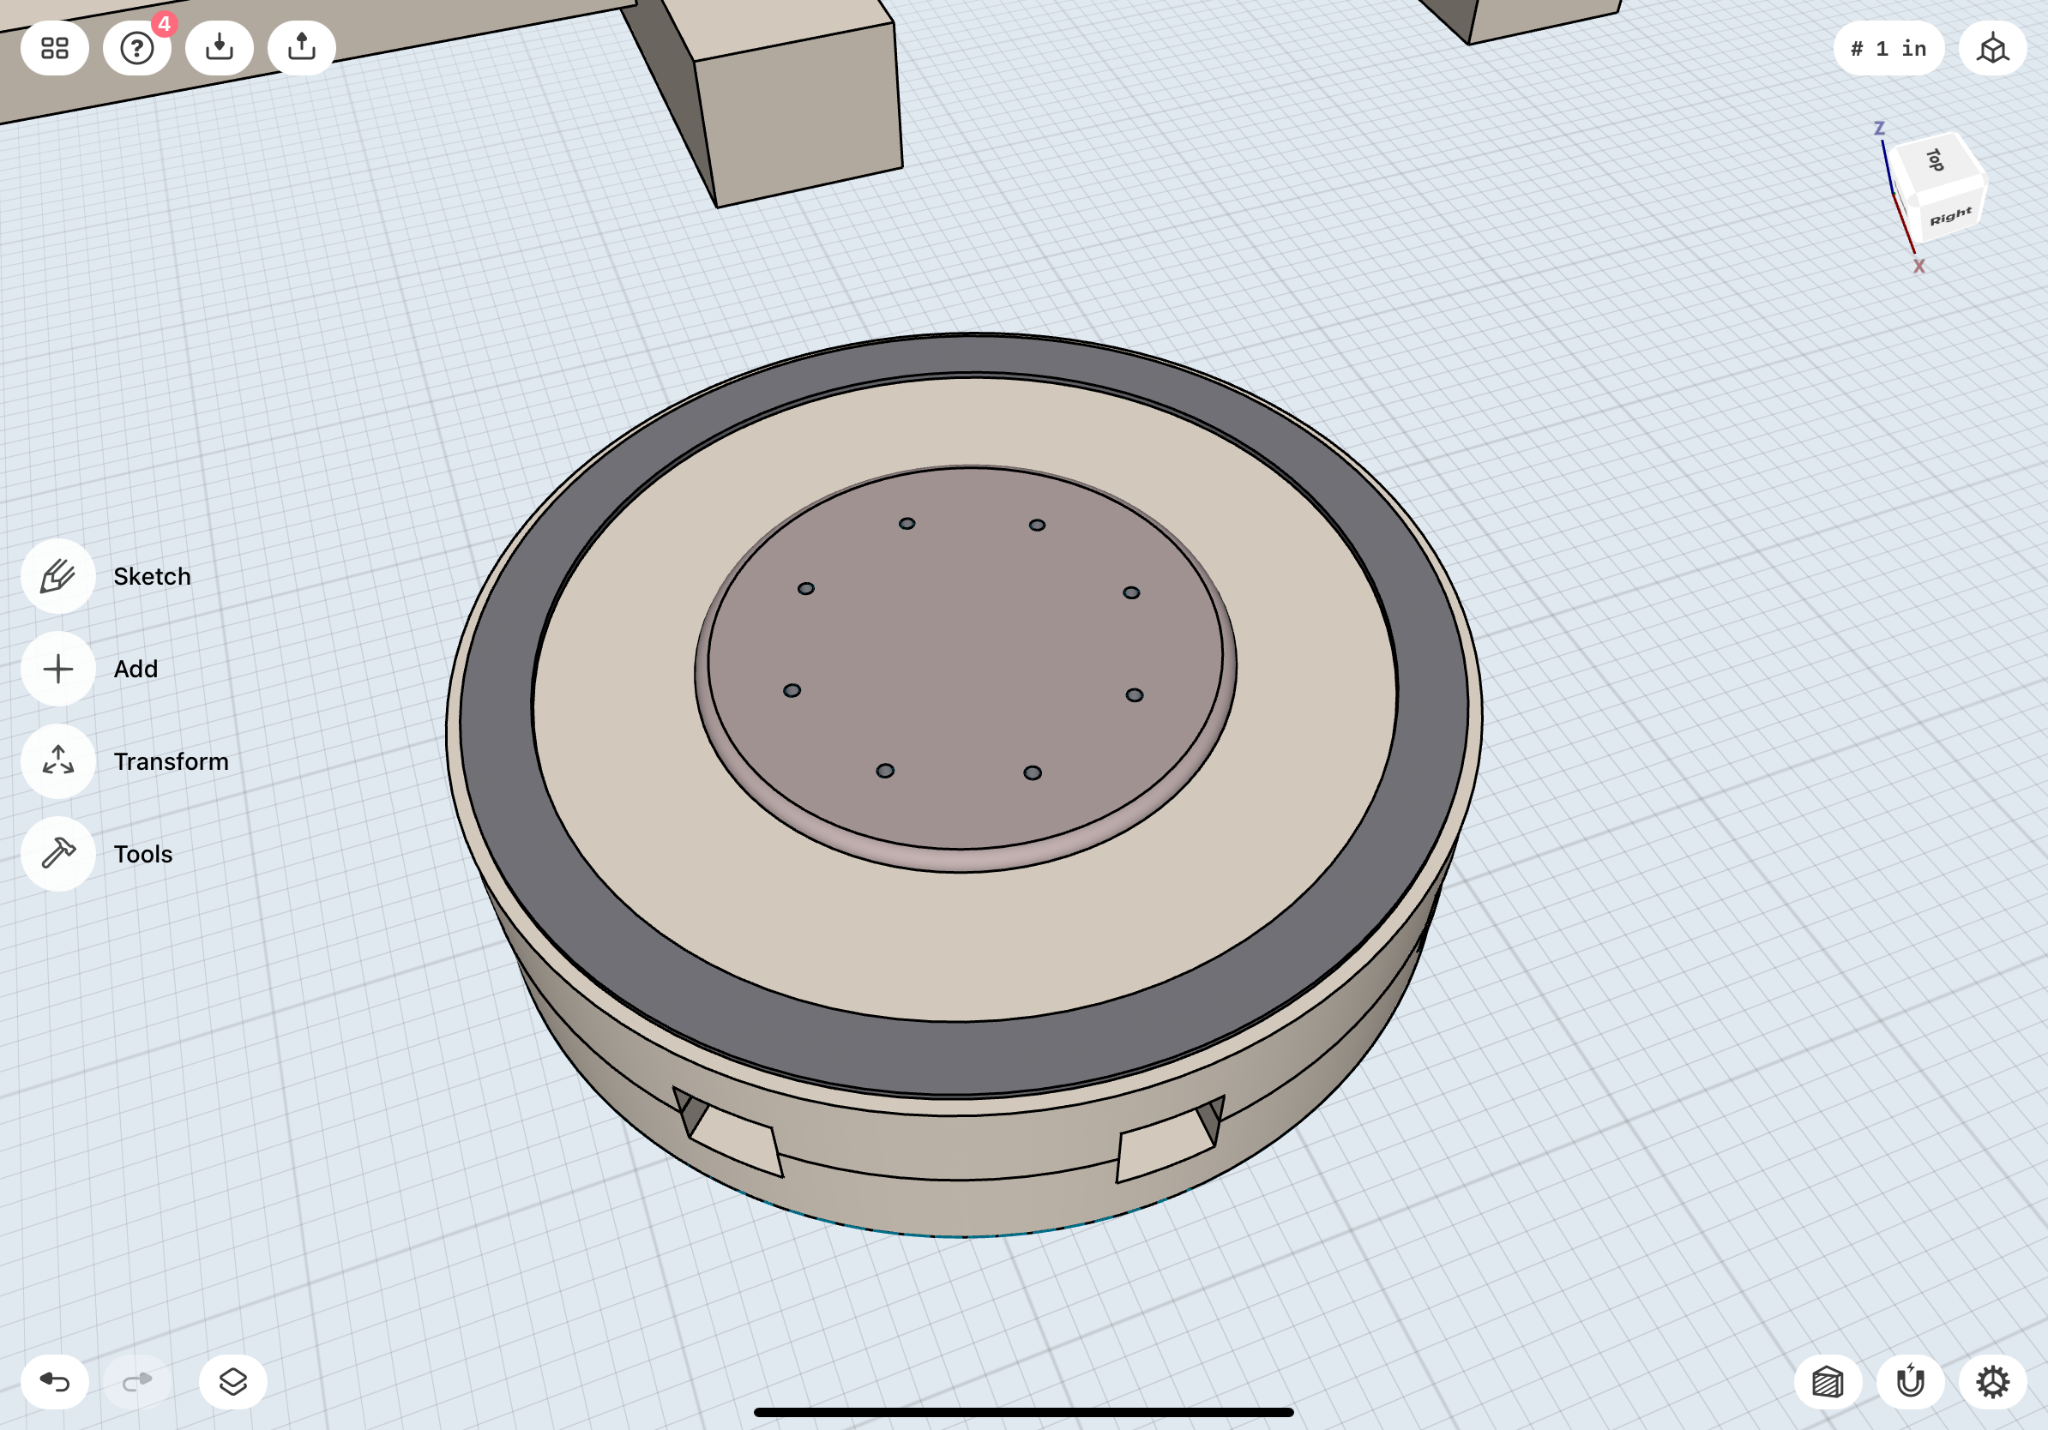
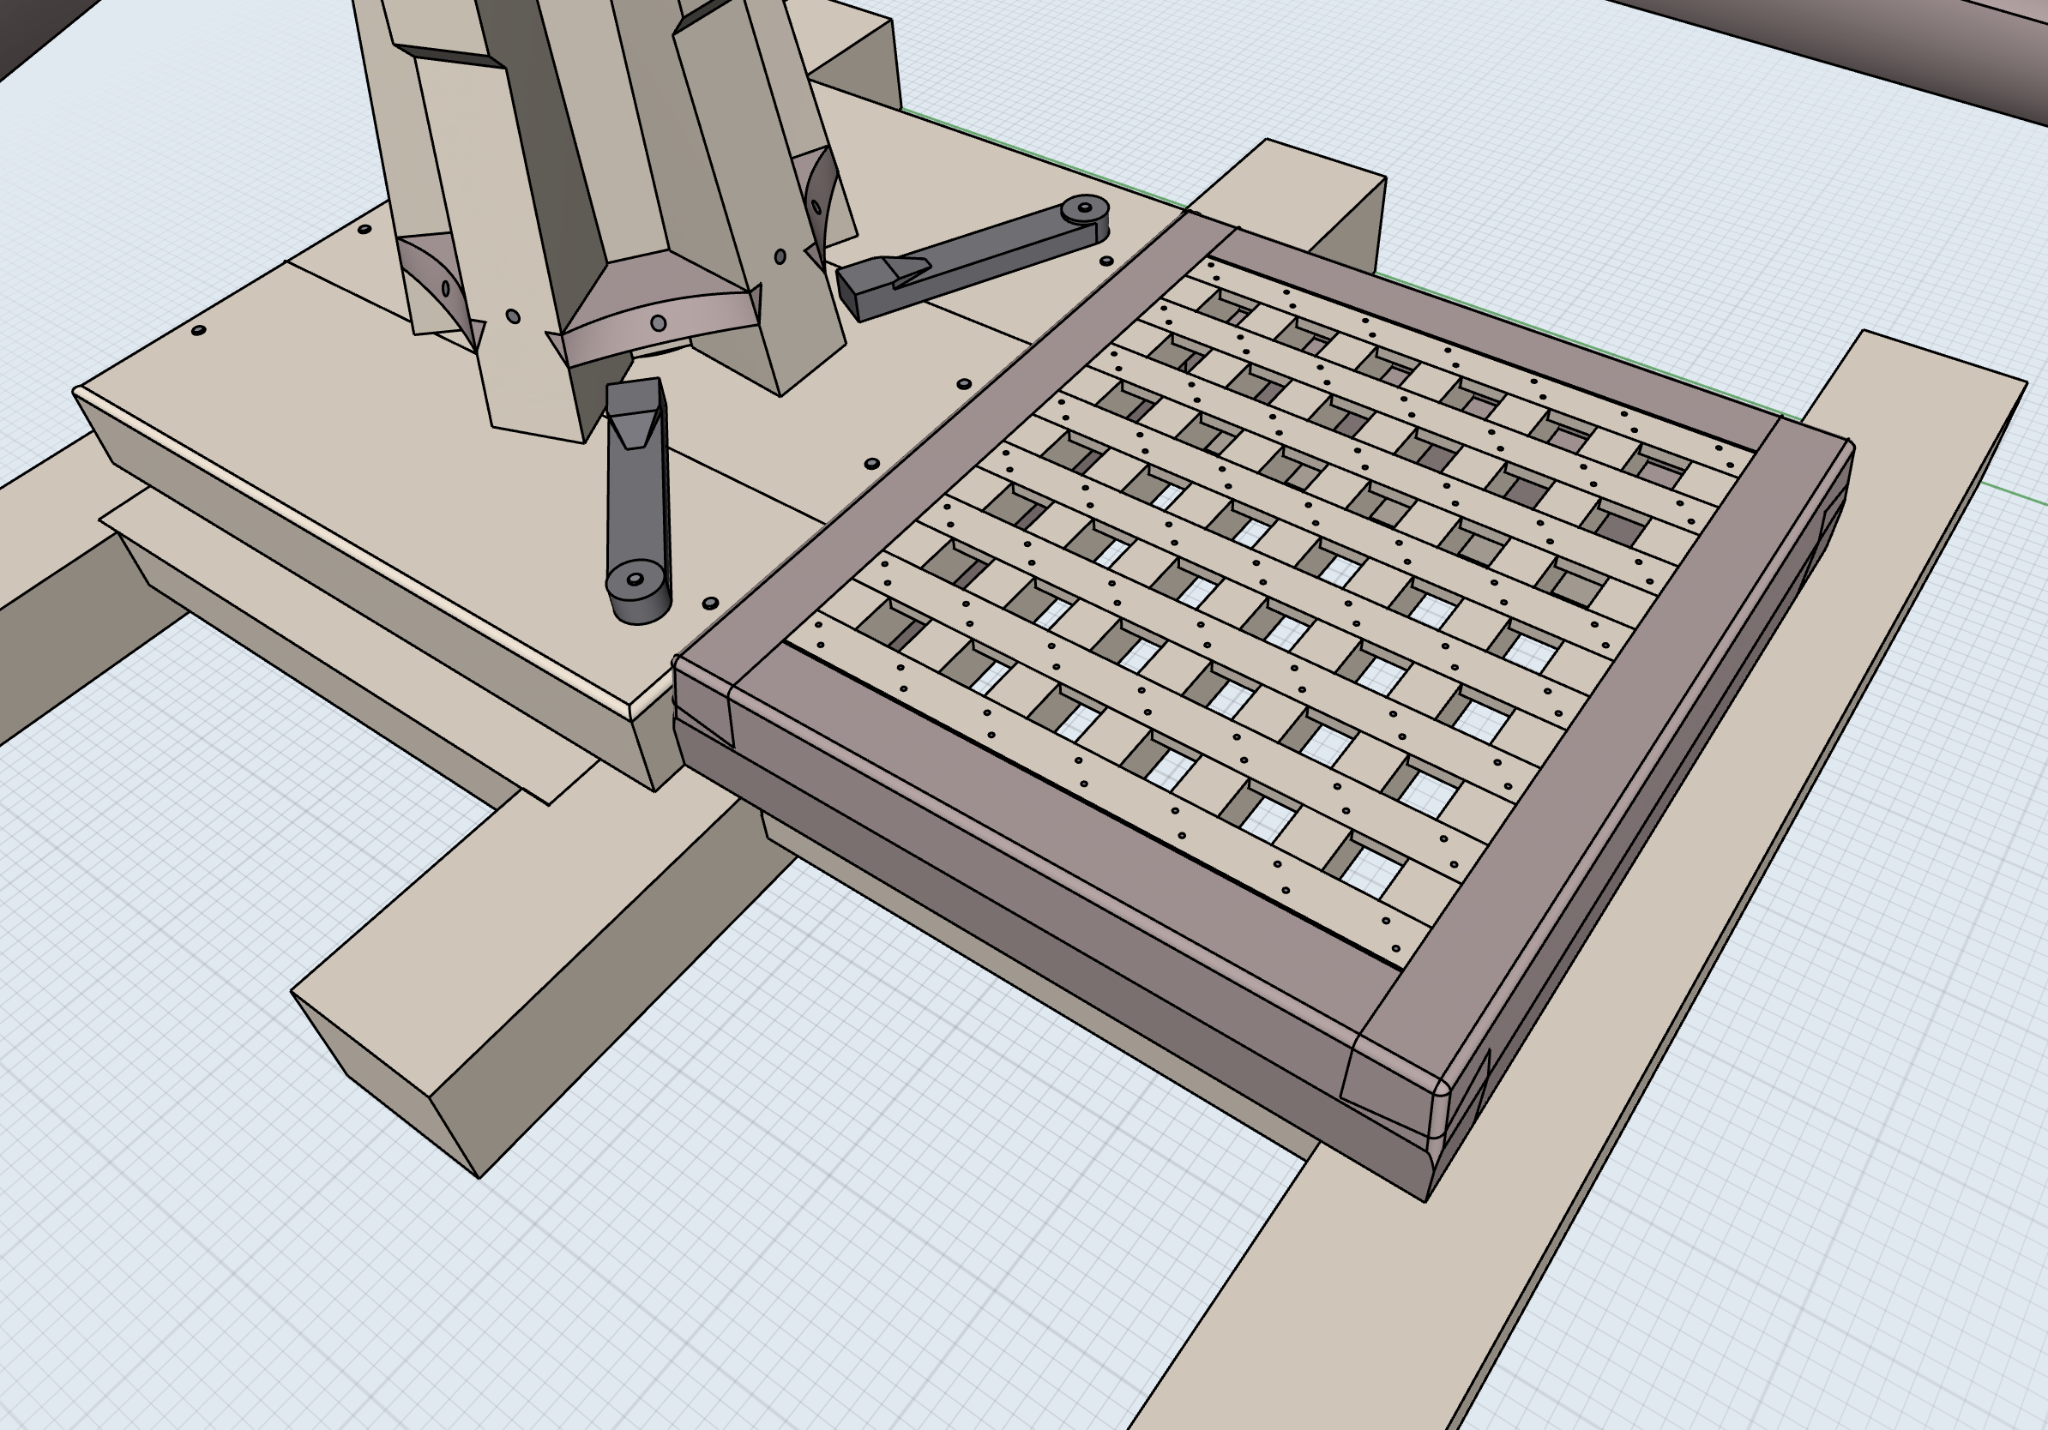
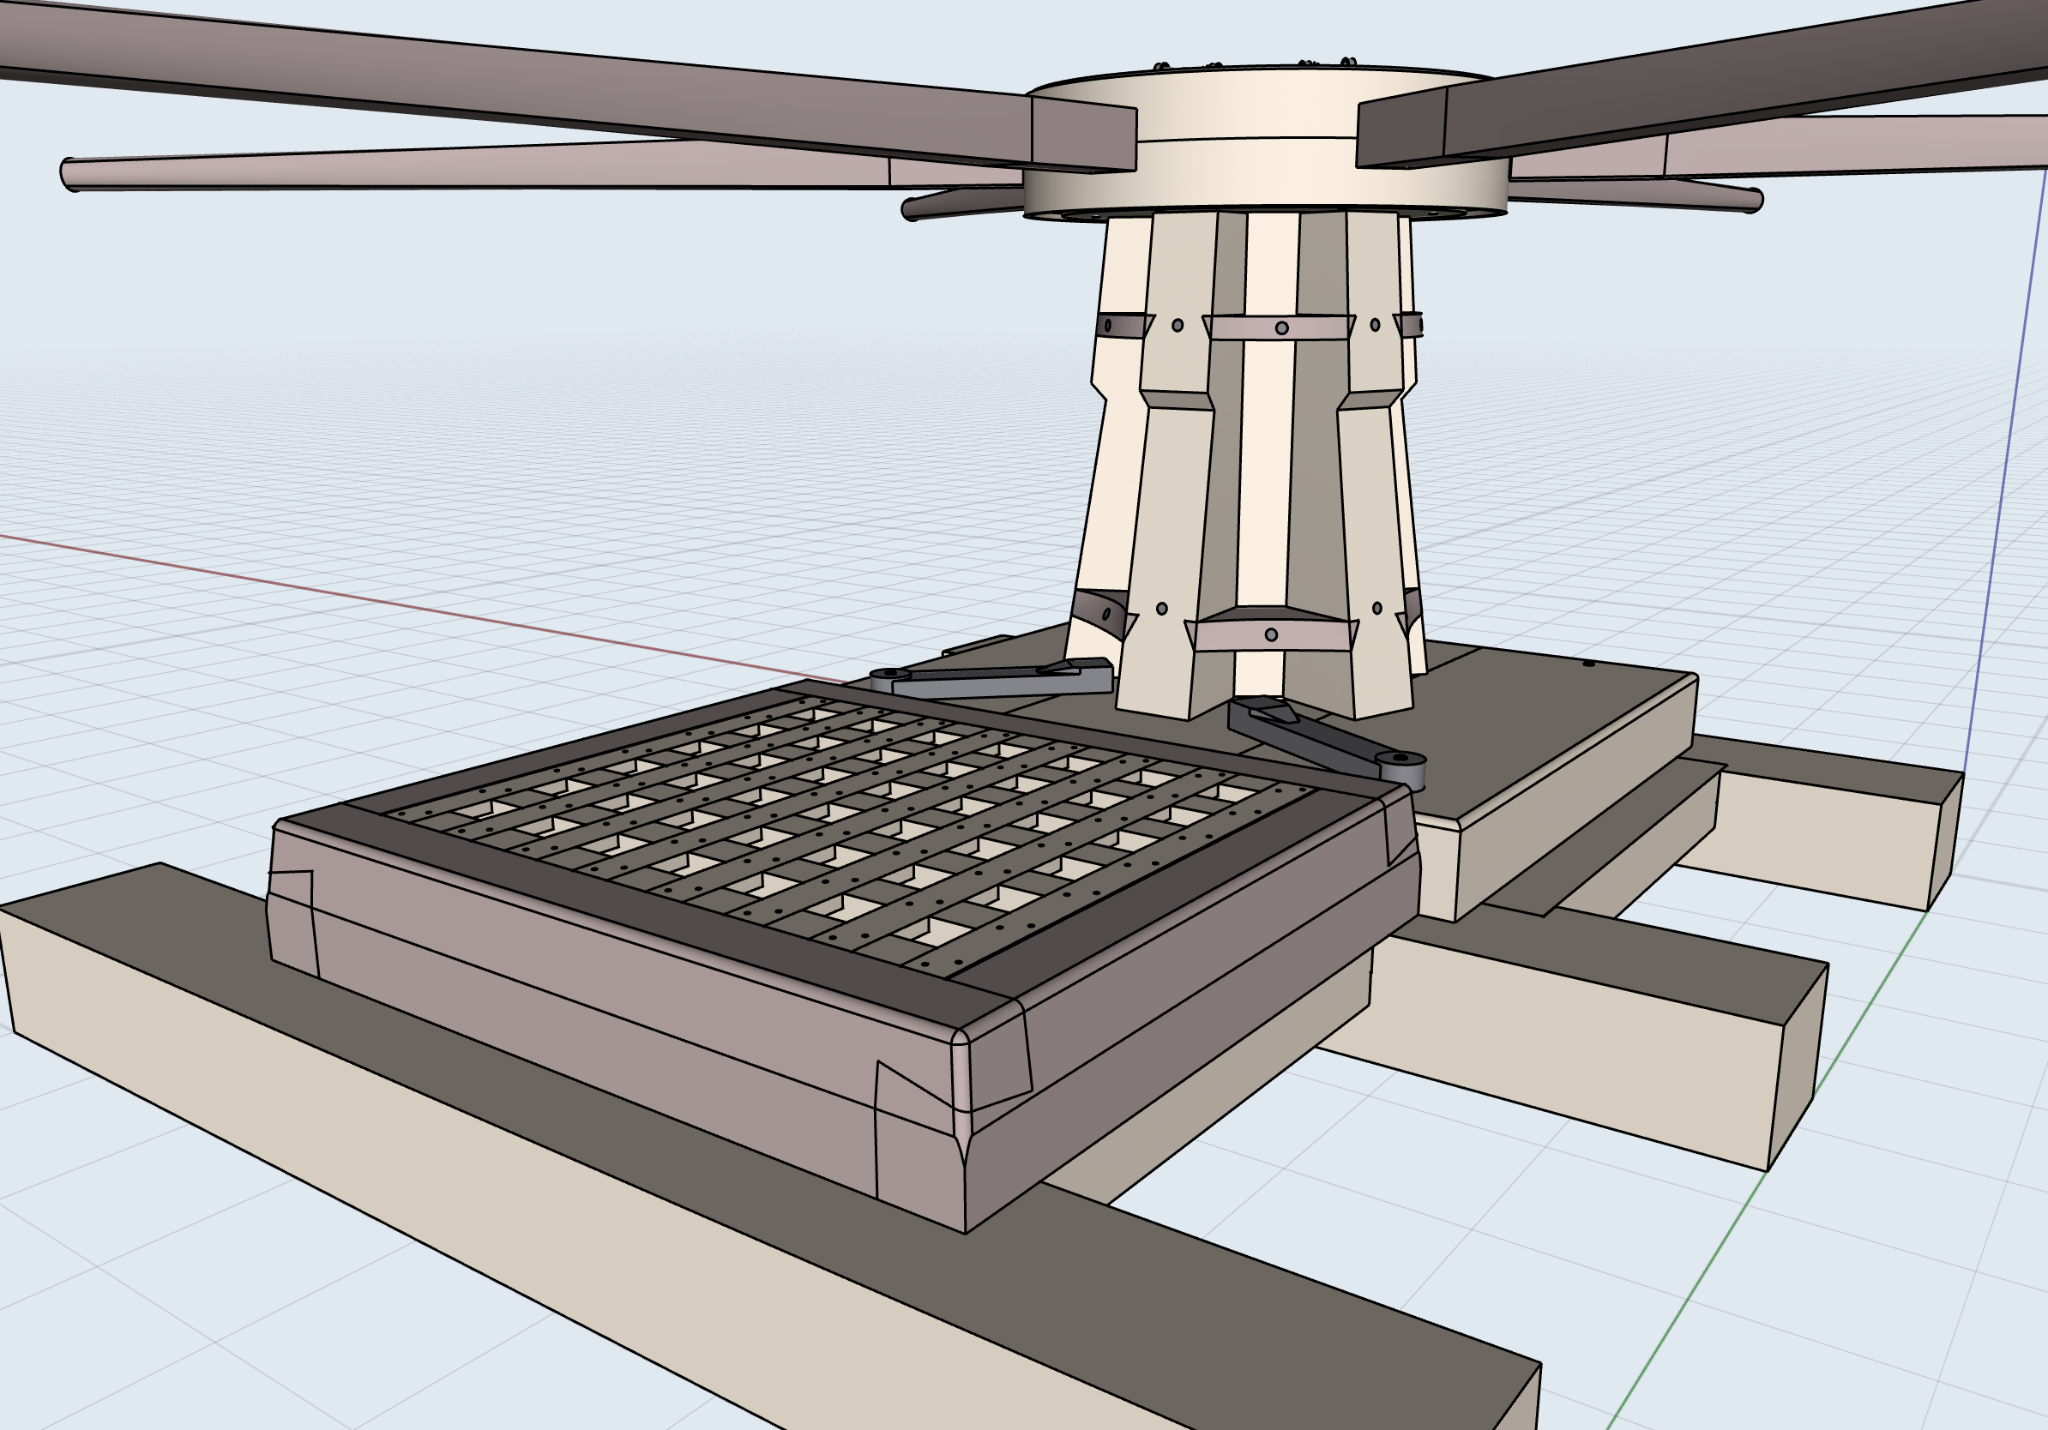
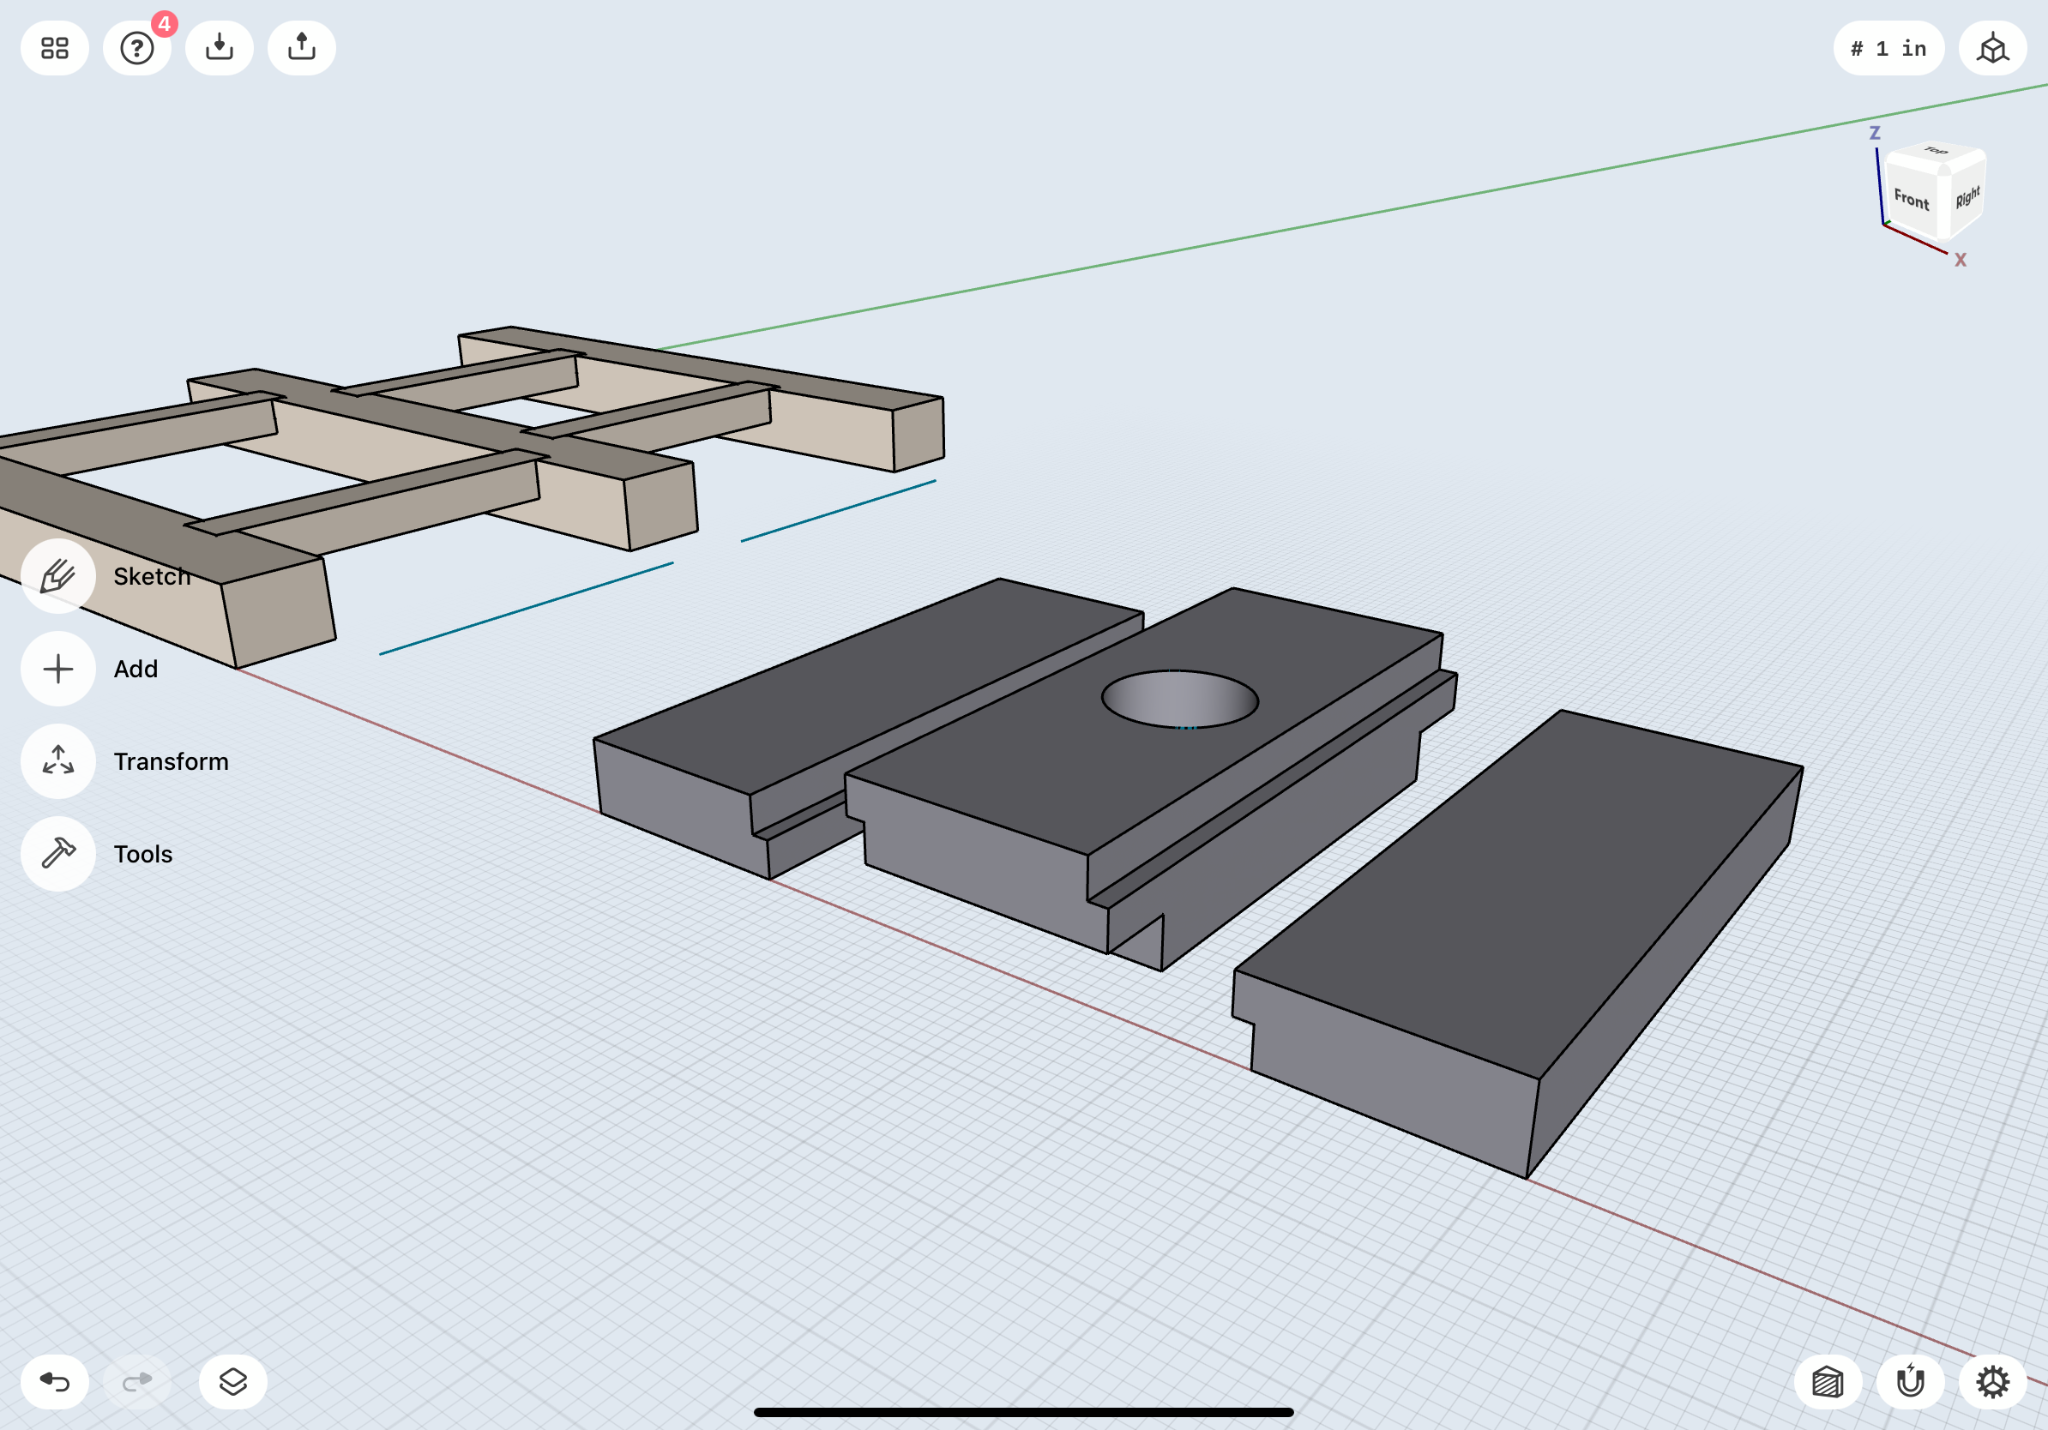
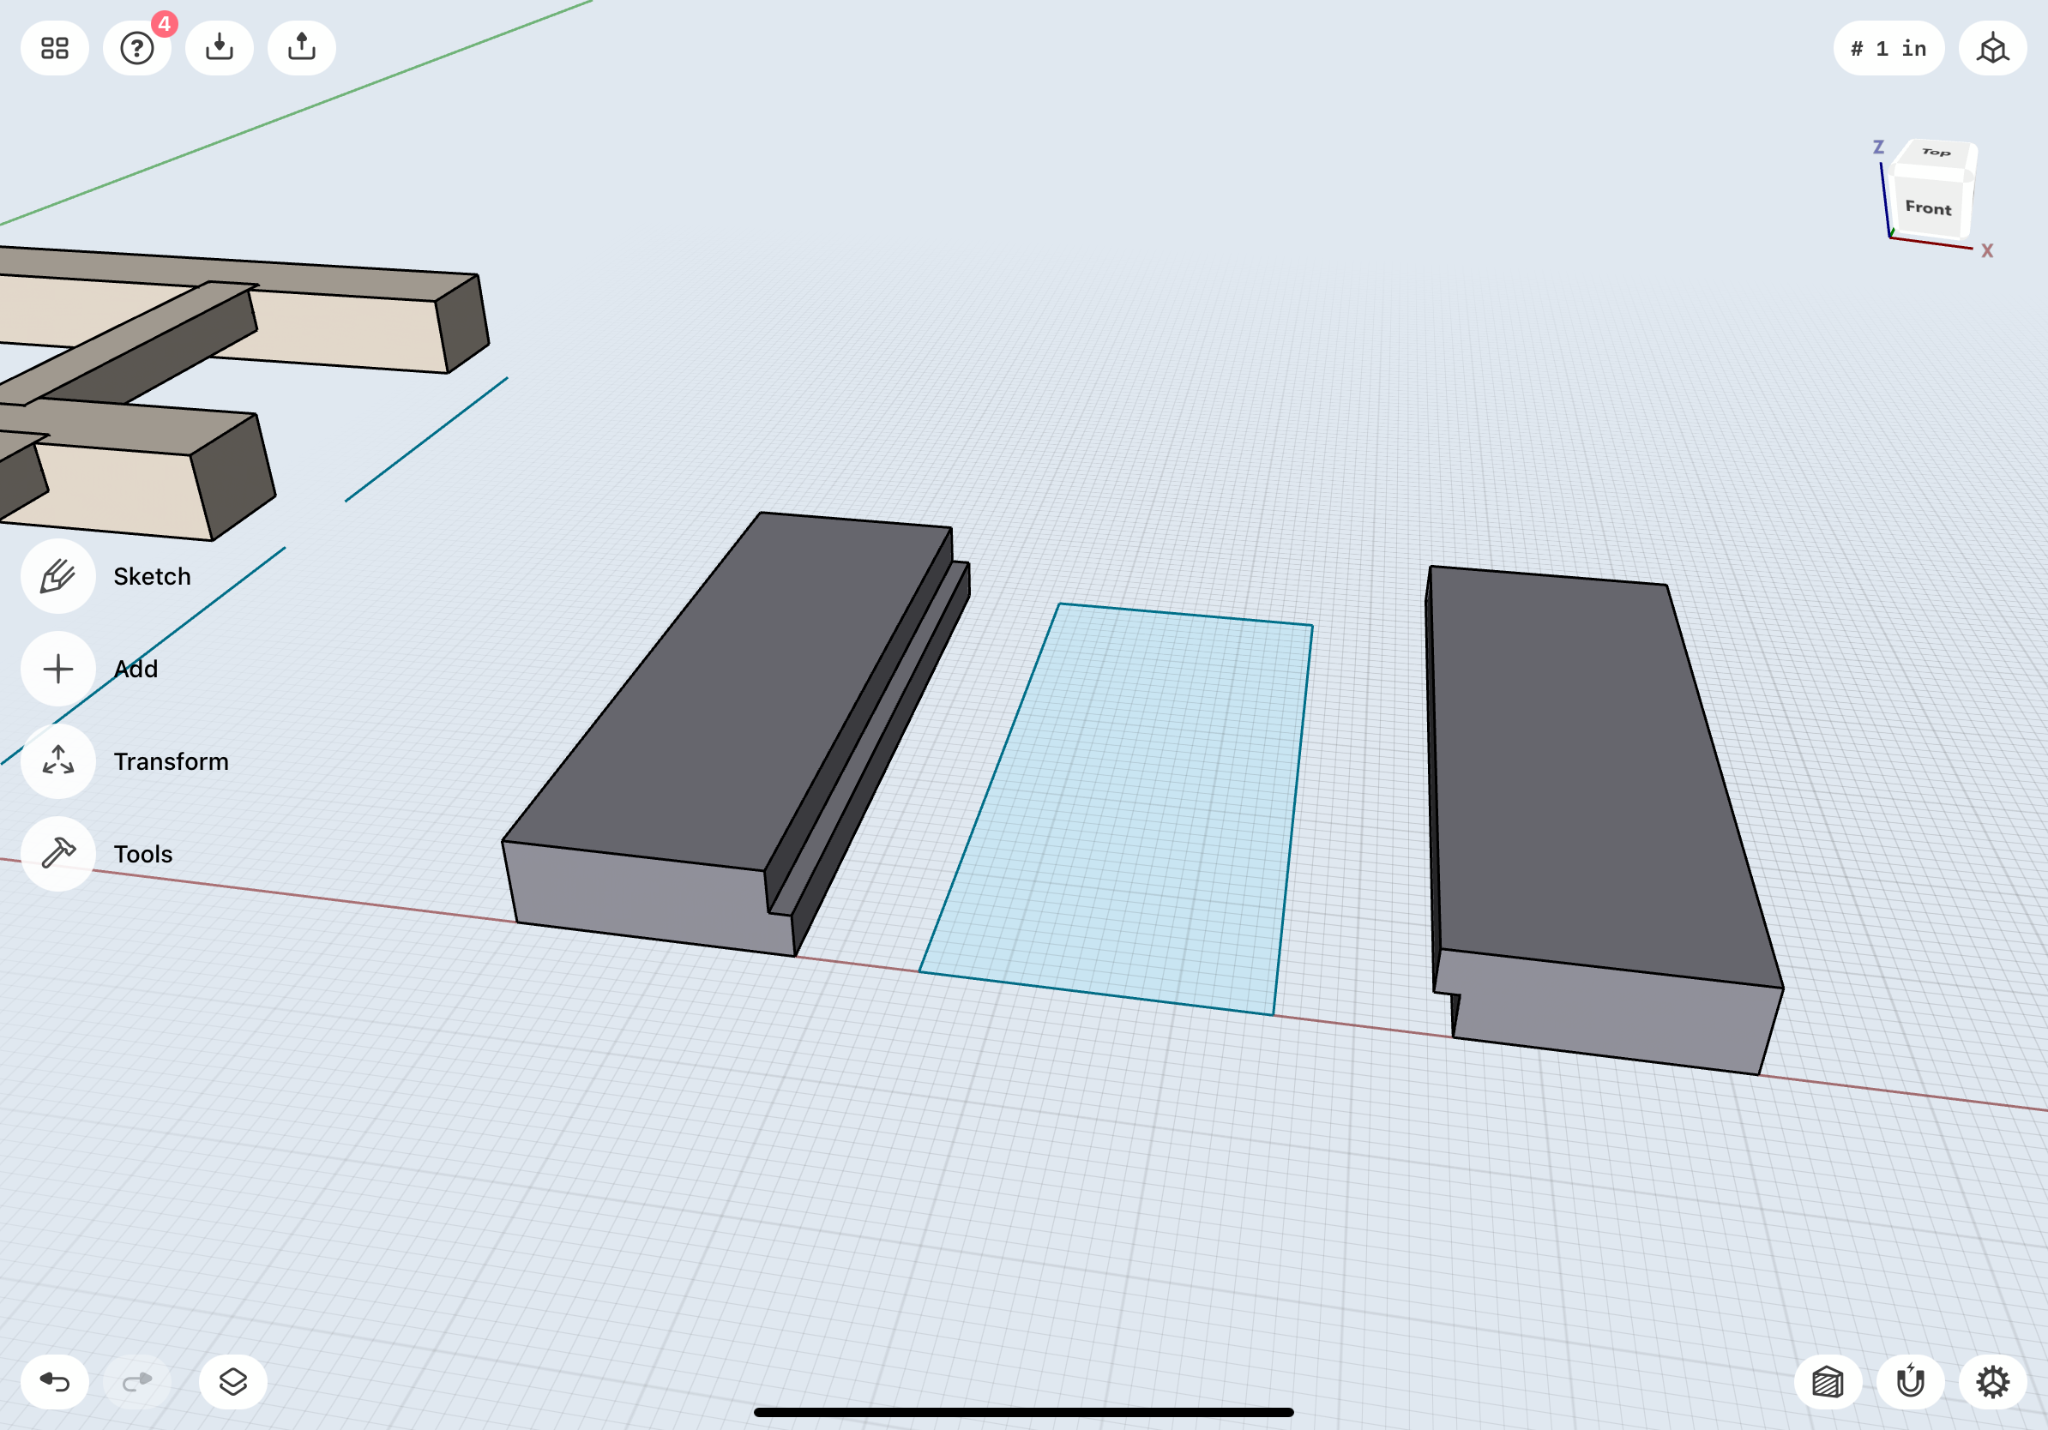
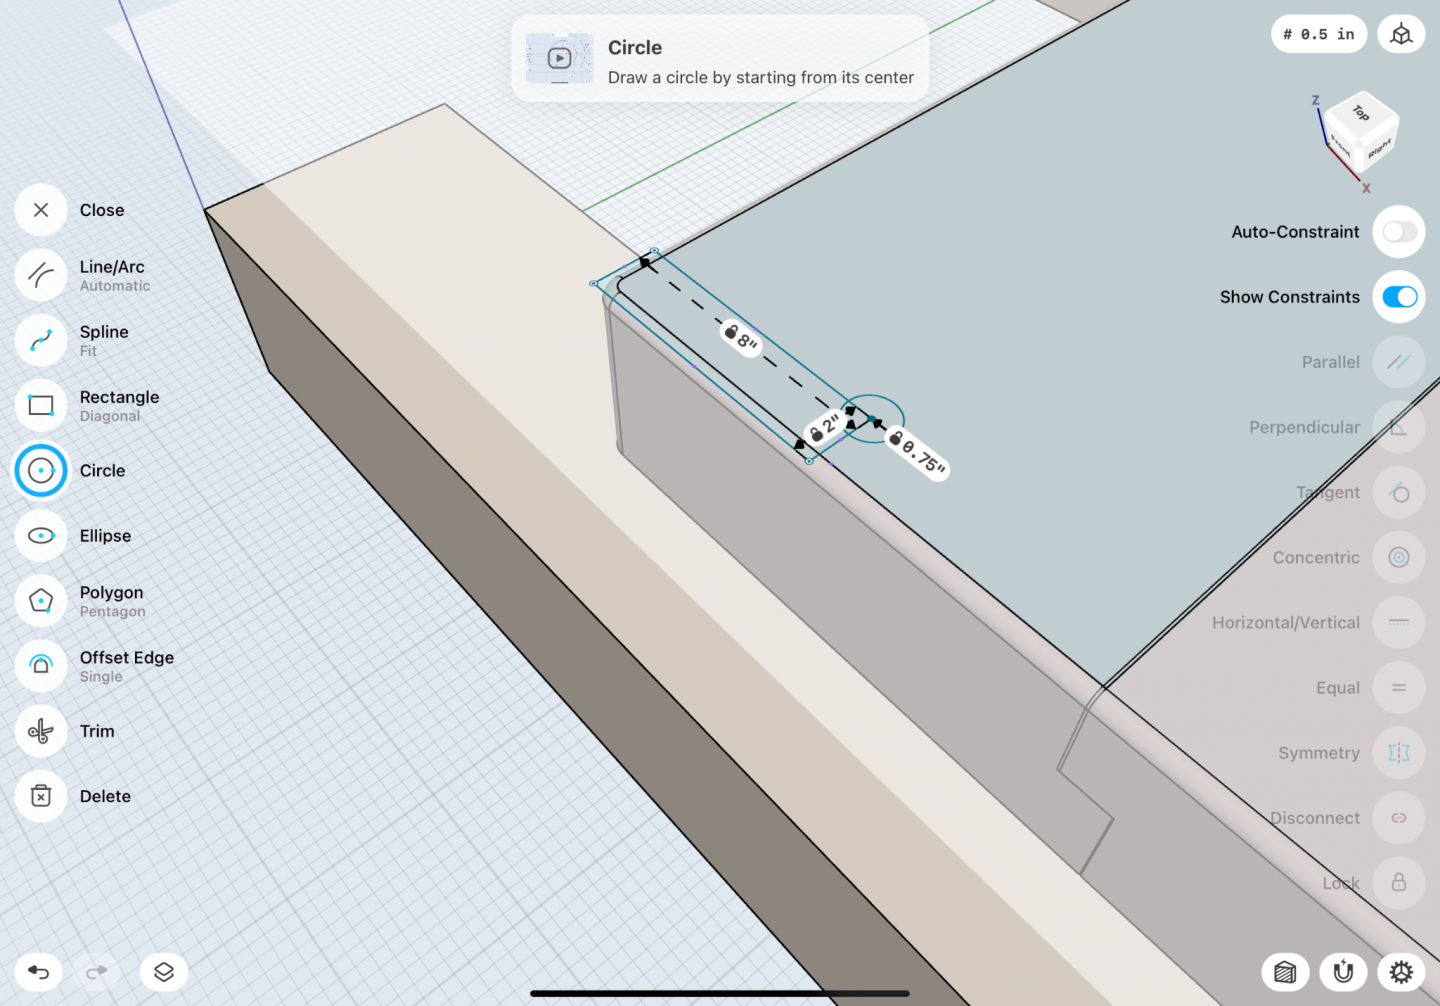
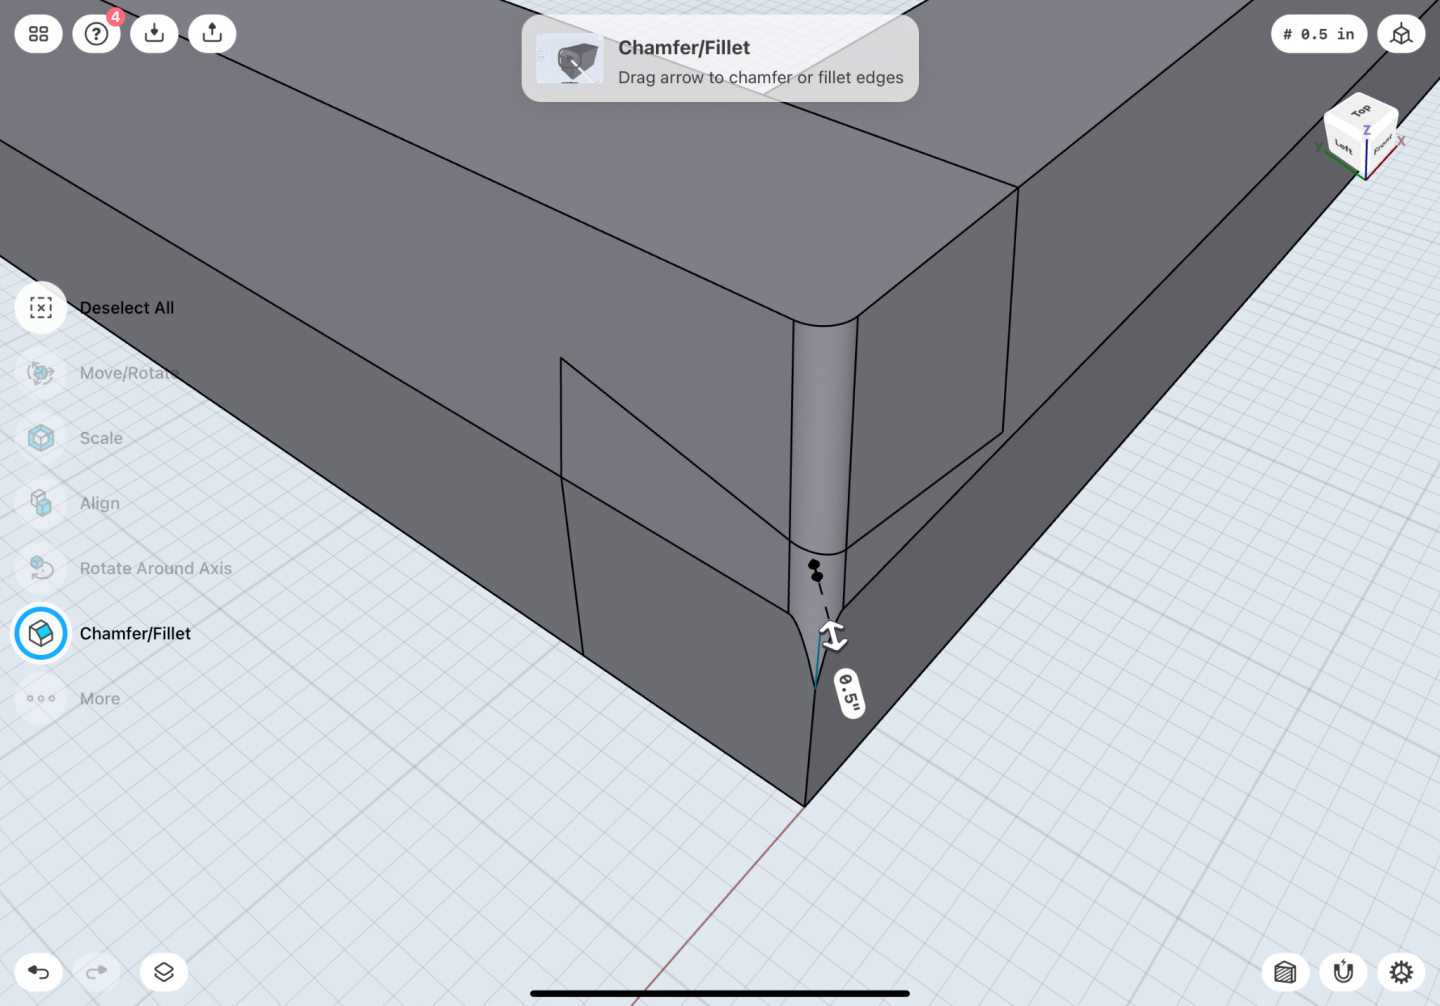
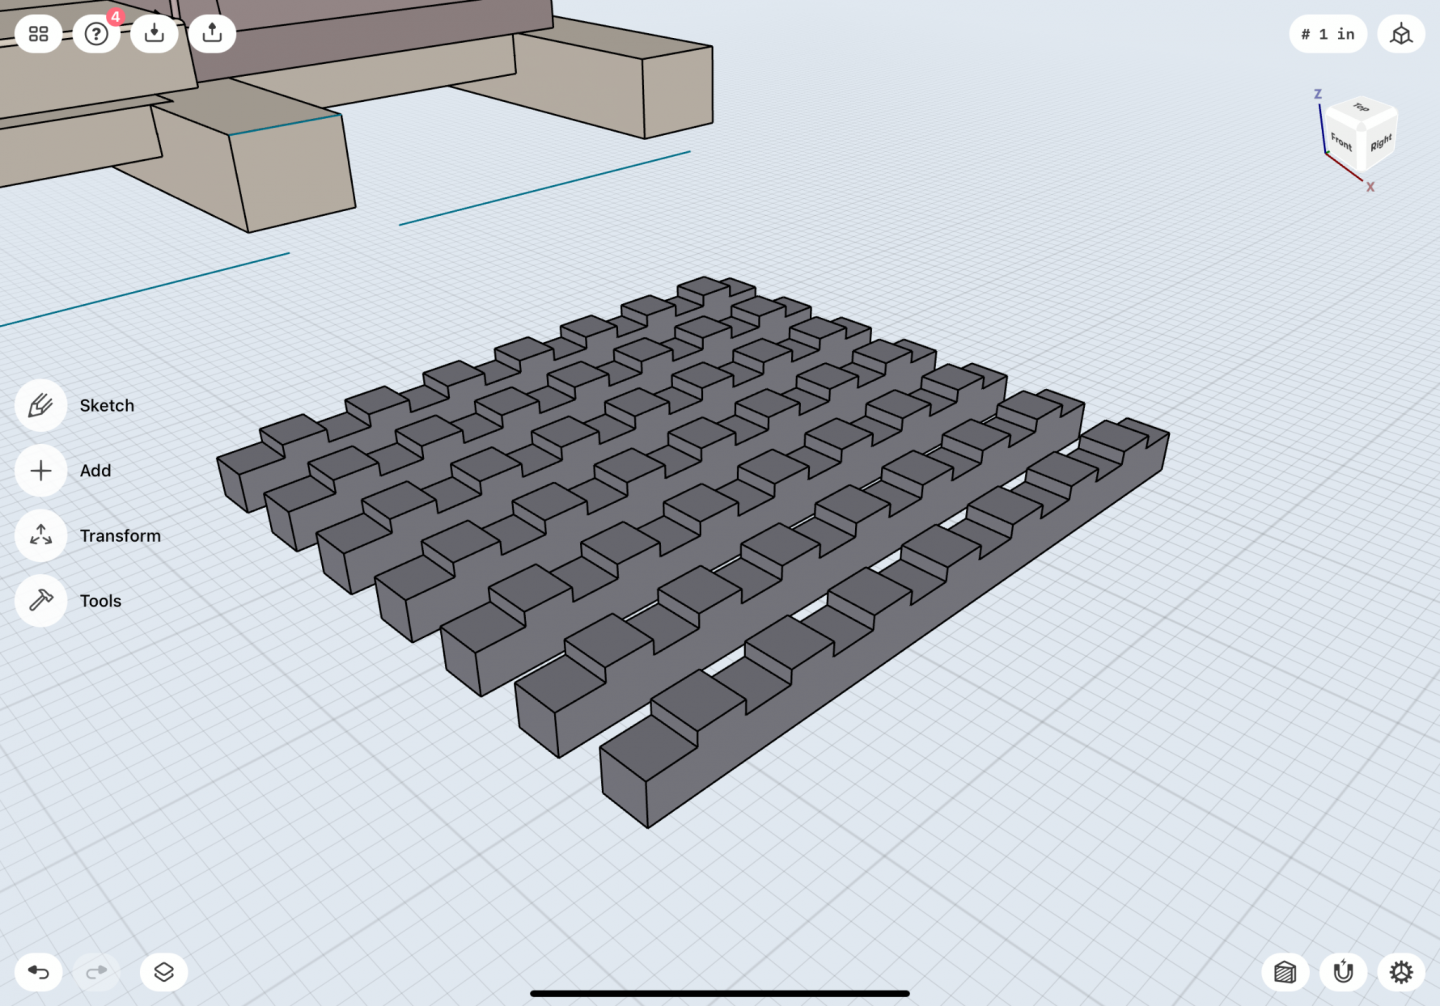
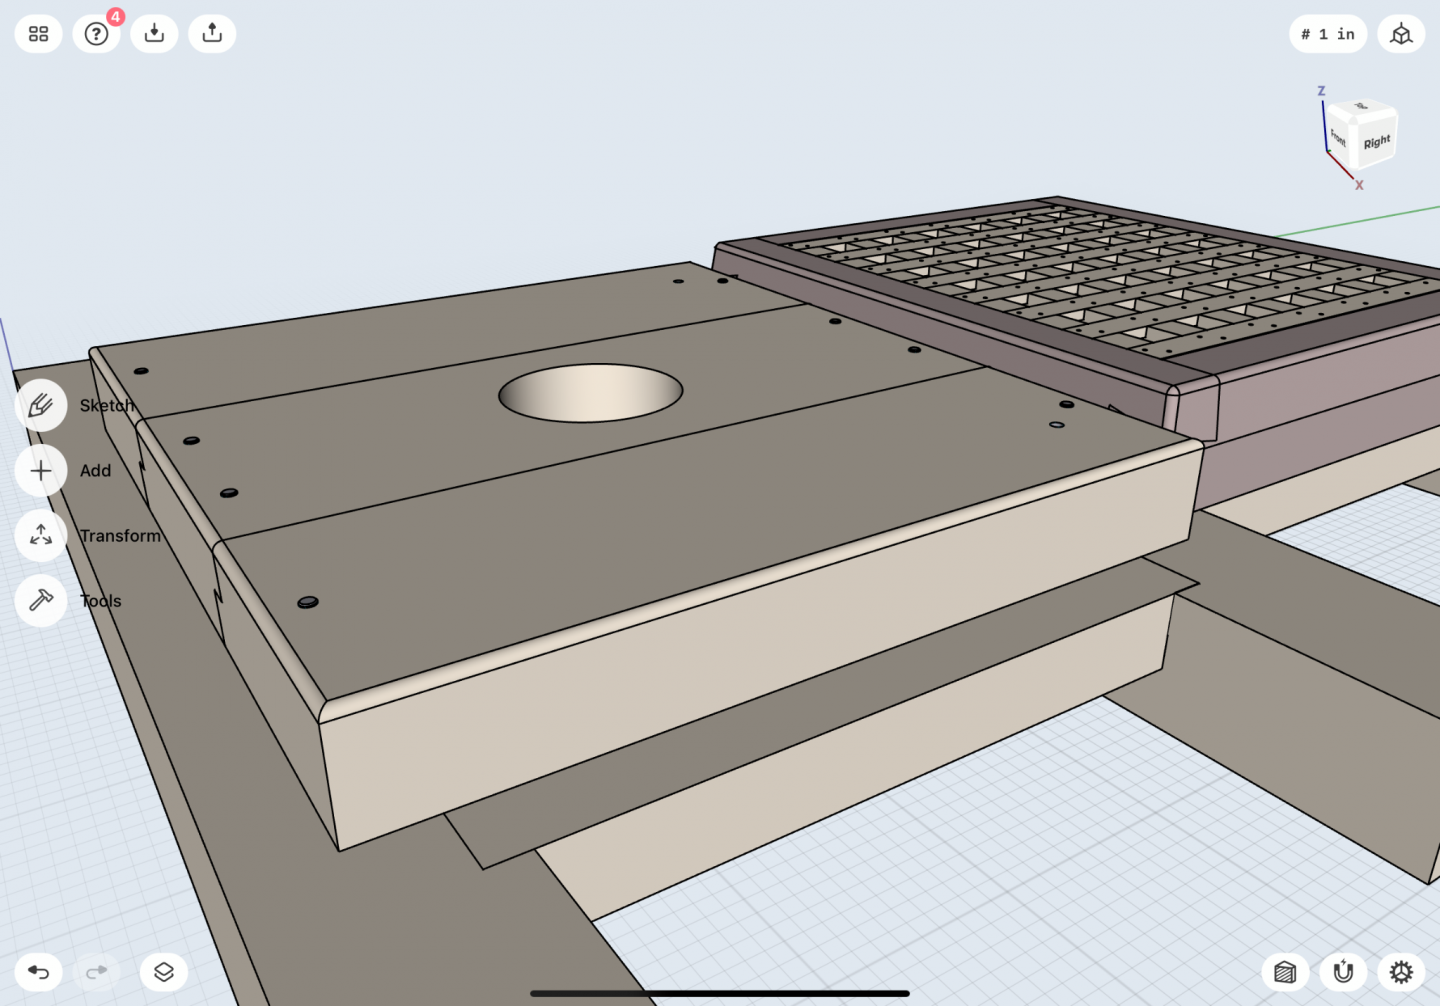
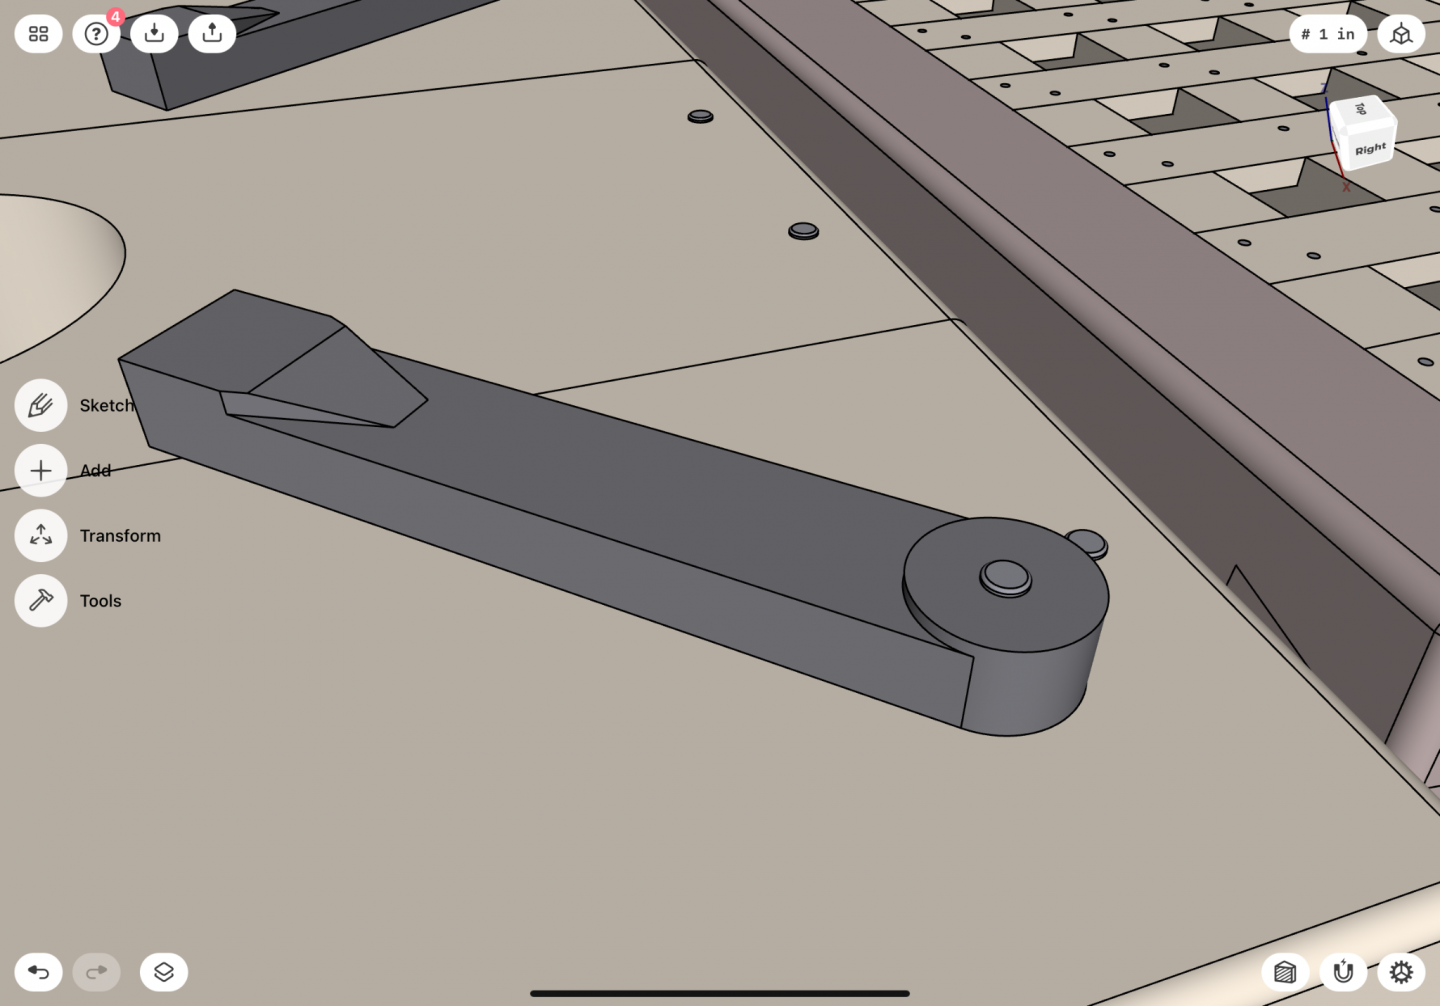
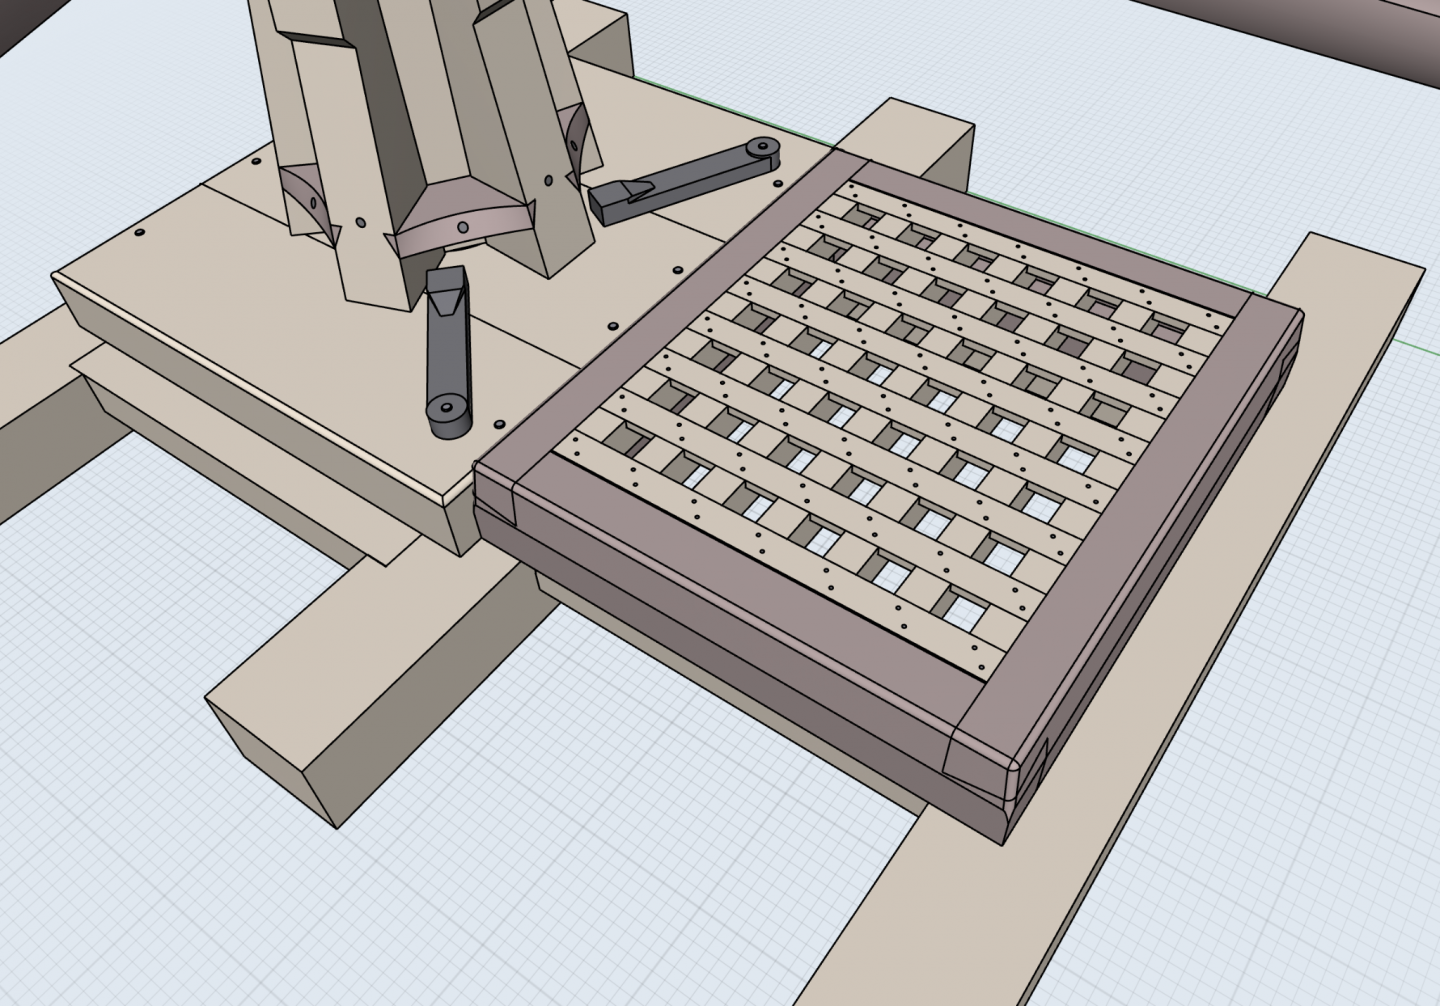
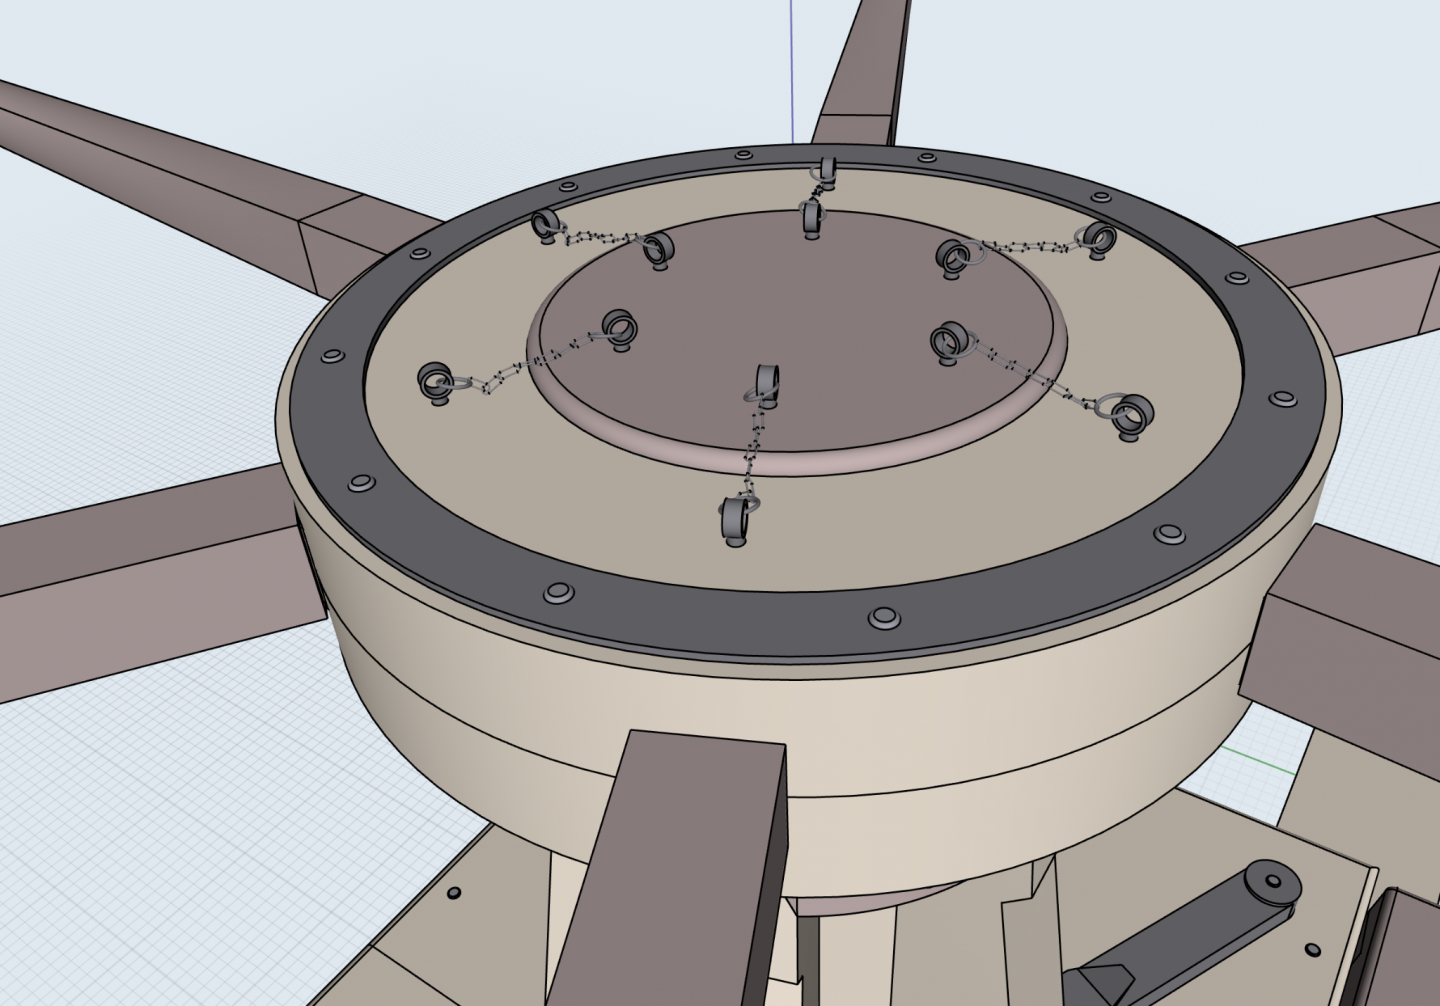
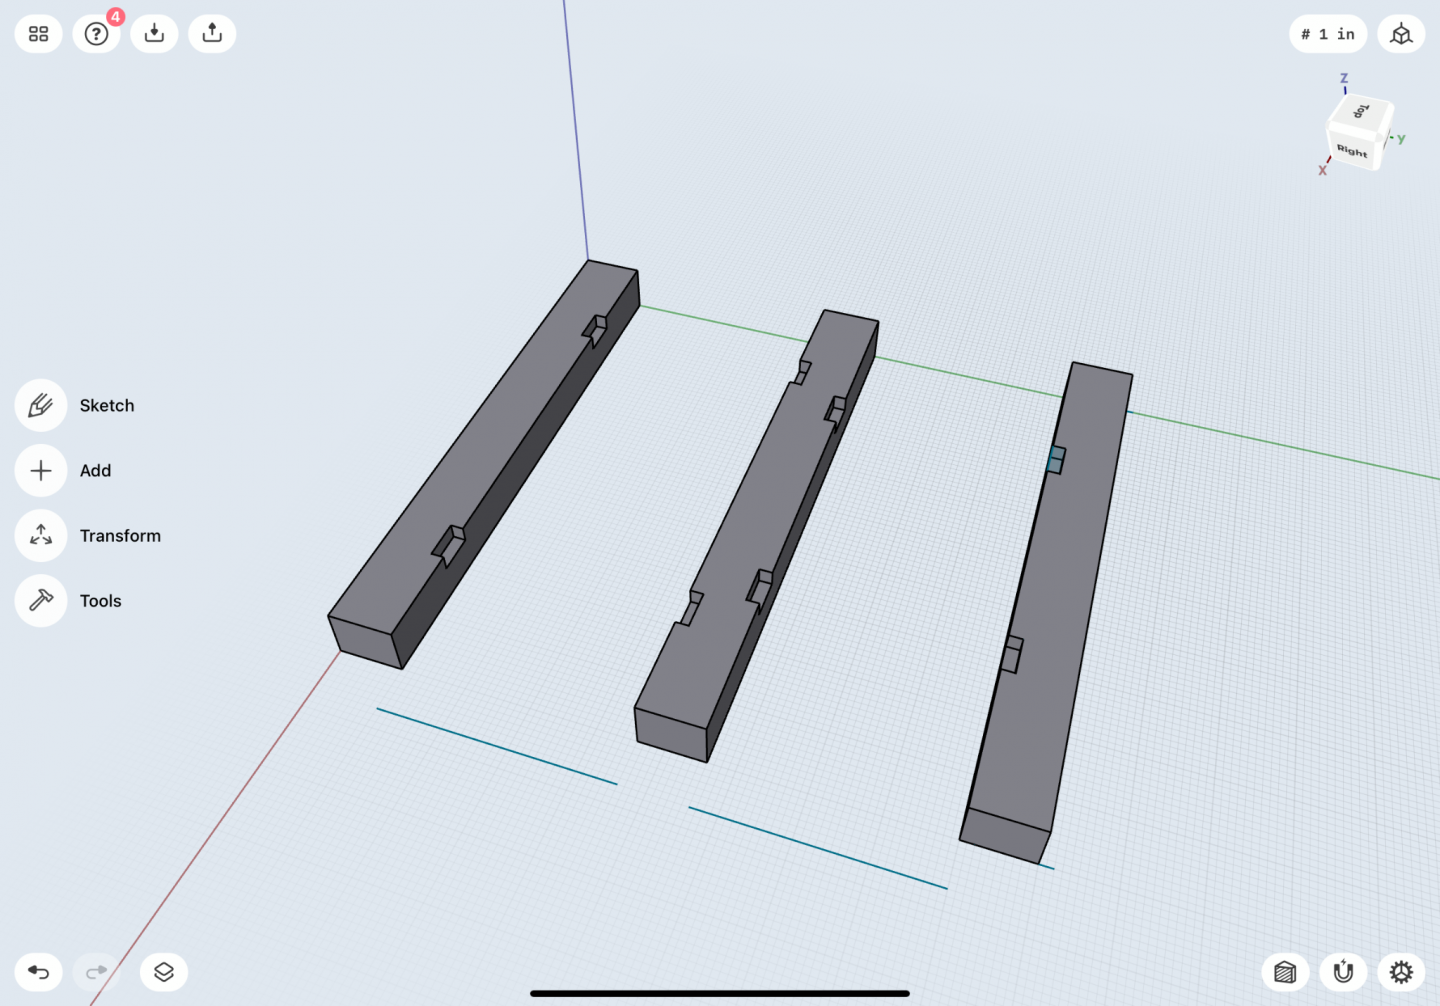
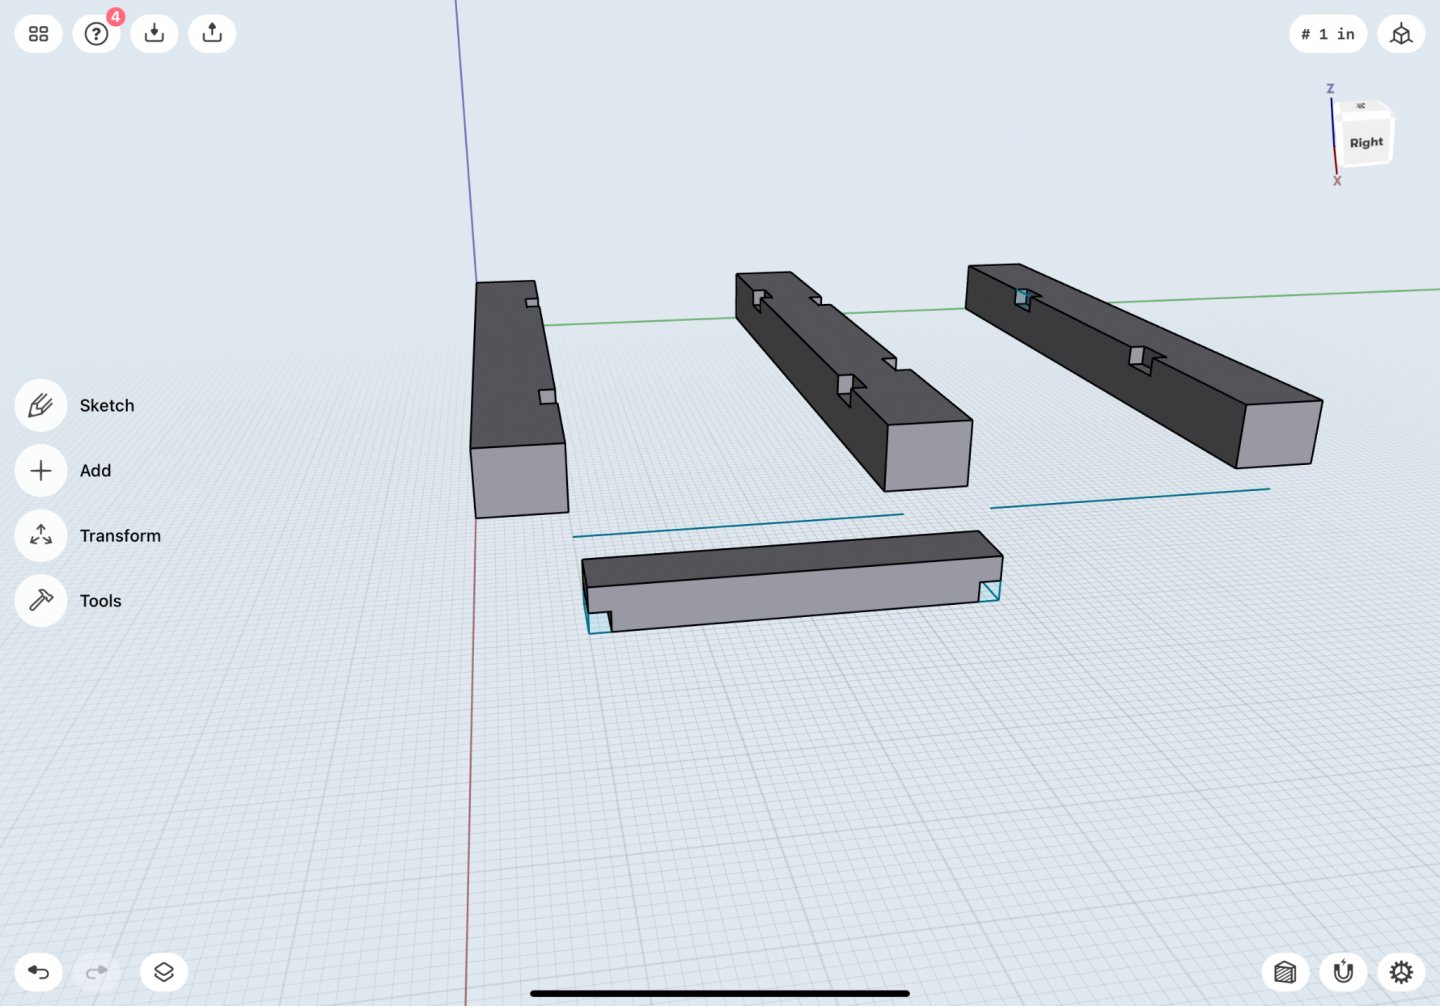
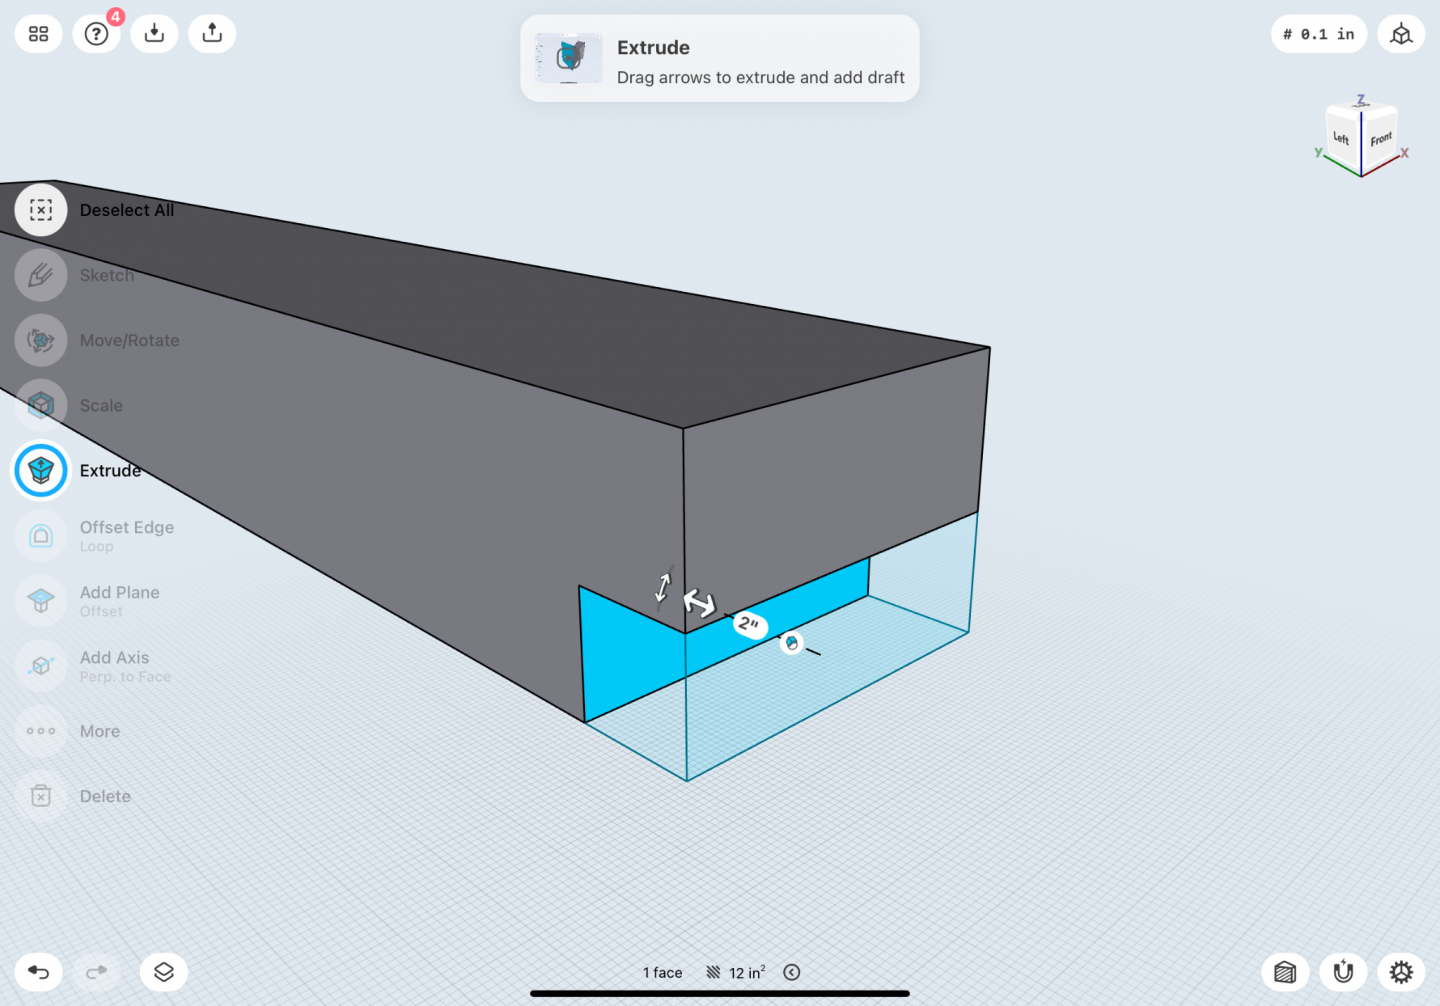
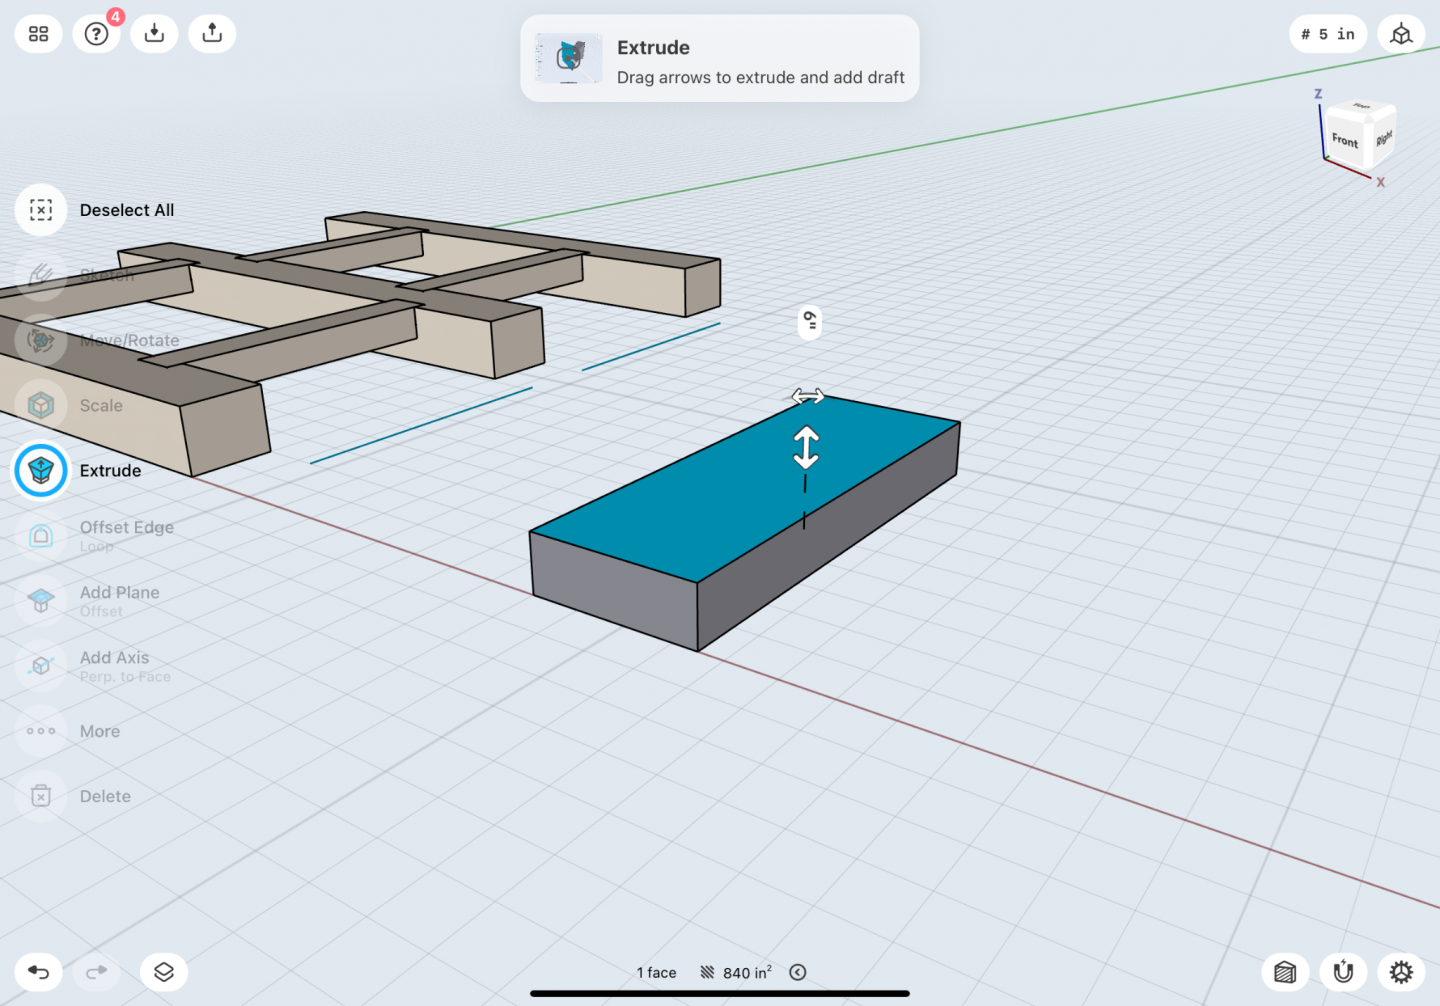
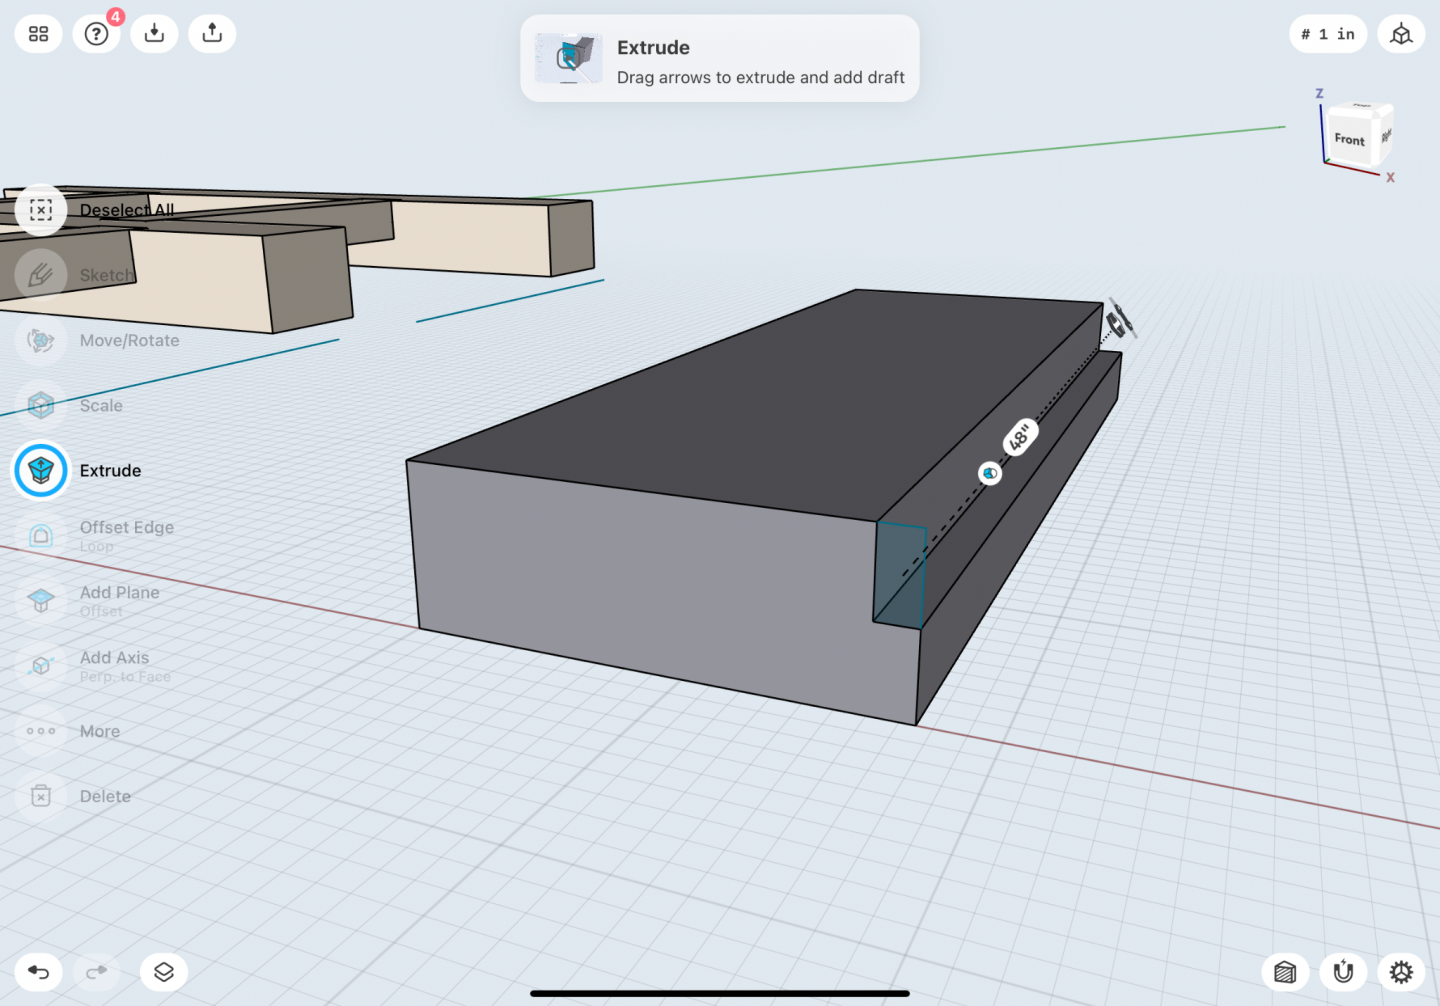
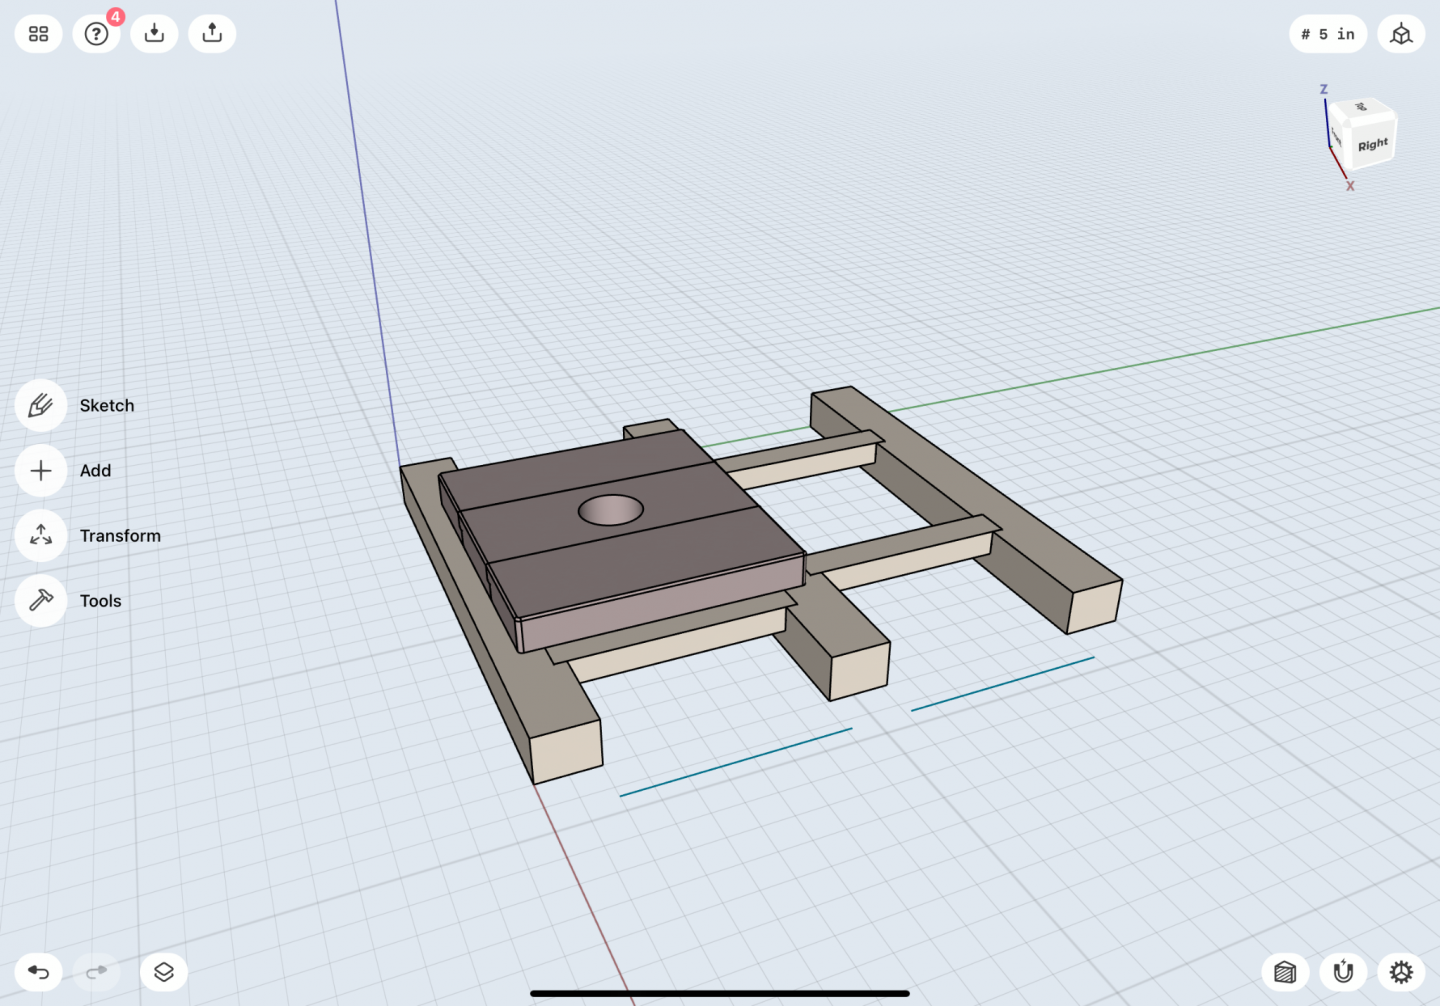
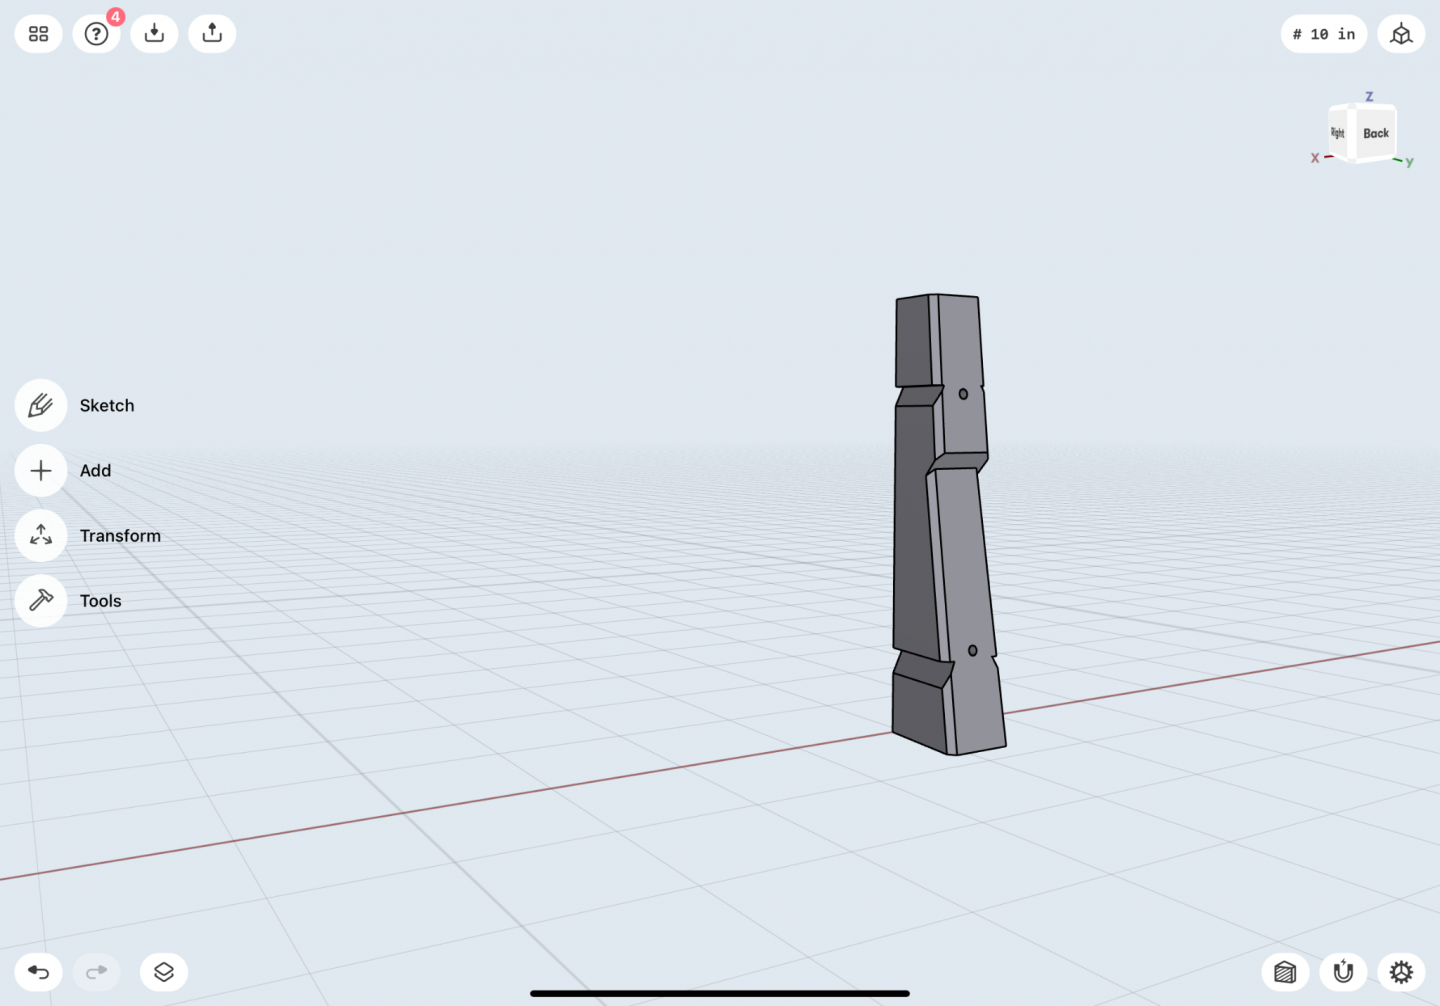
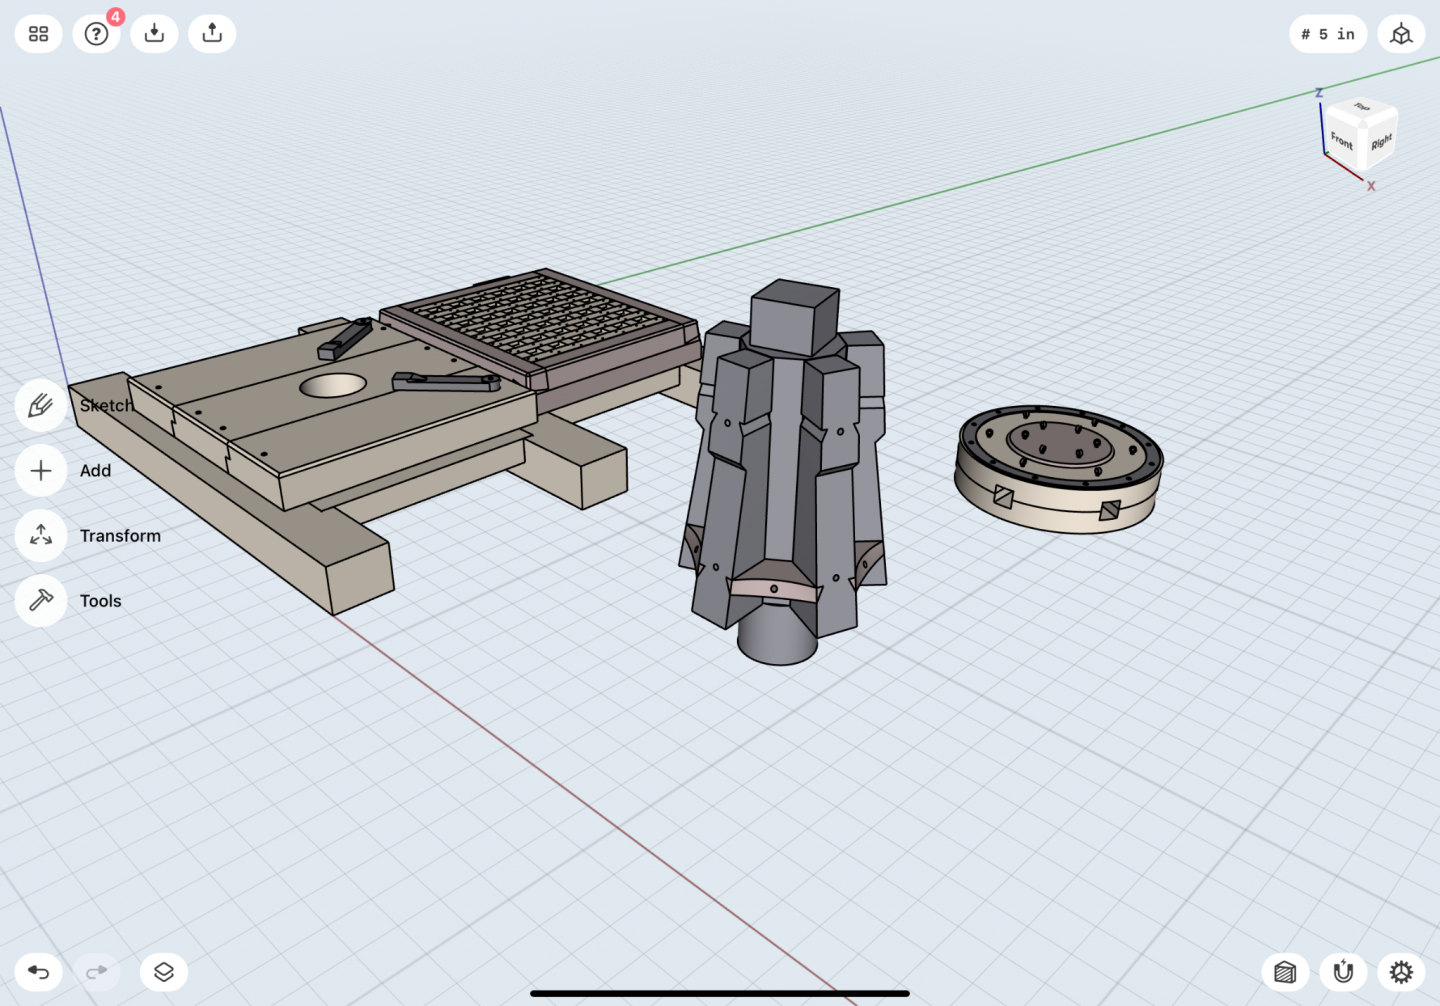
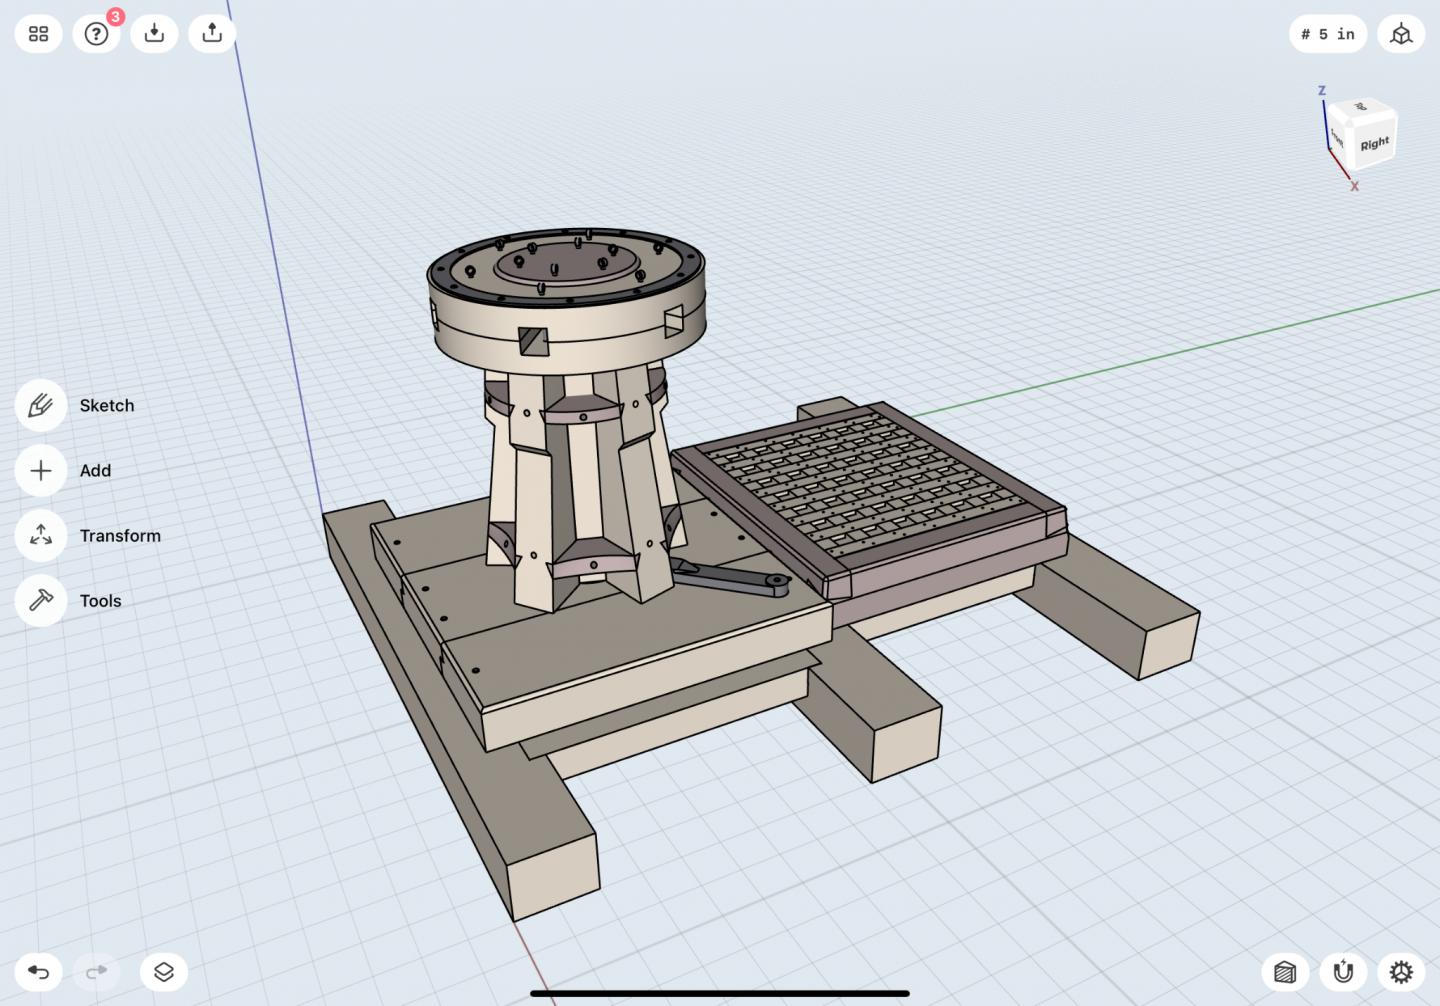
Hi All, With a return to onsite work slowly approaching full-time, my modeling at home has taken a severe and gut-wrenching slow-down. For context, I commute 2.5 hours each way, 5-days a week. I take a bike, a bus, a boat and a train - so lots of down time just sitting. Ive been looking for ways to scratch that itch and express my interests in ships and ship modeling when I cant be at the bench at home and started messing around more seriously with available "soft-CAD" programs available on things like iPad. Some time ago I discovered Shapr3d and used it to design and build my home workshop and found it incredibly useful and very intuitive to use. This is not a full-featured CAD program, and it is likely that a seasoned CAD user will likely find it limiting. However, if you simply want to tinker casually without being bogged down by 1000 features you'll never use, and are looking for a way to build things when you cant be in your workshop than this is a great option. When I first picked it up I had ZERO experience and learned the program pretty quickly. The available online tutorials help a great deal. In the last week, I used the practicum designed by @tlevine available at NRG to build the British capstan project virtually. I did all of this work in 2 hour stints while traveling to and from work, using the pdf of the plans to model each component and then assemble. I still intend to build this project in wood very soon, but for the time being found this little exercise well worth it. In either case, its a great way to prototype ideas and work out designs. I tried to build as close to the specs and steps outlined in the practicum. In a way, I think Im better prepared to have a go at the real thing as now Im intimately aware some of the complicated aspects of the model design. Modeling the beams and carlings... Modeling the capstan step, marking out, bolt holes and brakes... Grate ledges, grates.... Barrel, Drum Head, Welps, Chocks, Chains Final Assembly, Completion


- 5 replies
-
- 10
-

-

-
If anyone is willing to part with Volume 1, or part with the complete two volume set - please let know. Thanks.
-
NRG Capstan Project
Justin P. replied to tlevine's topic in - Build logs for subjects built 1751 - 1800
Hi All, Just a quick question about the recent update to the Capstan documents. It isn't immediately clear to me which part was updated, and as Ive already printed everything out Im wondering which part was updated so that I can simply reprint the effected sections. Thanks, and apologies if I missed the update notes somewhere. -
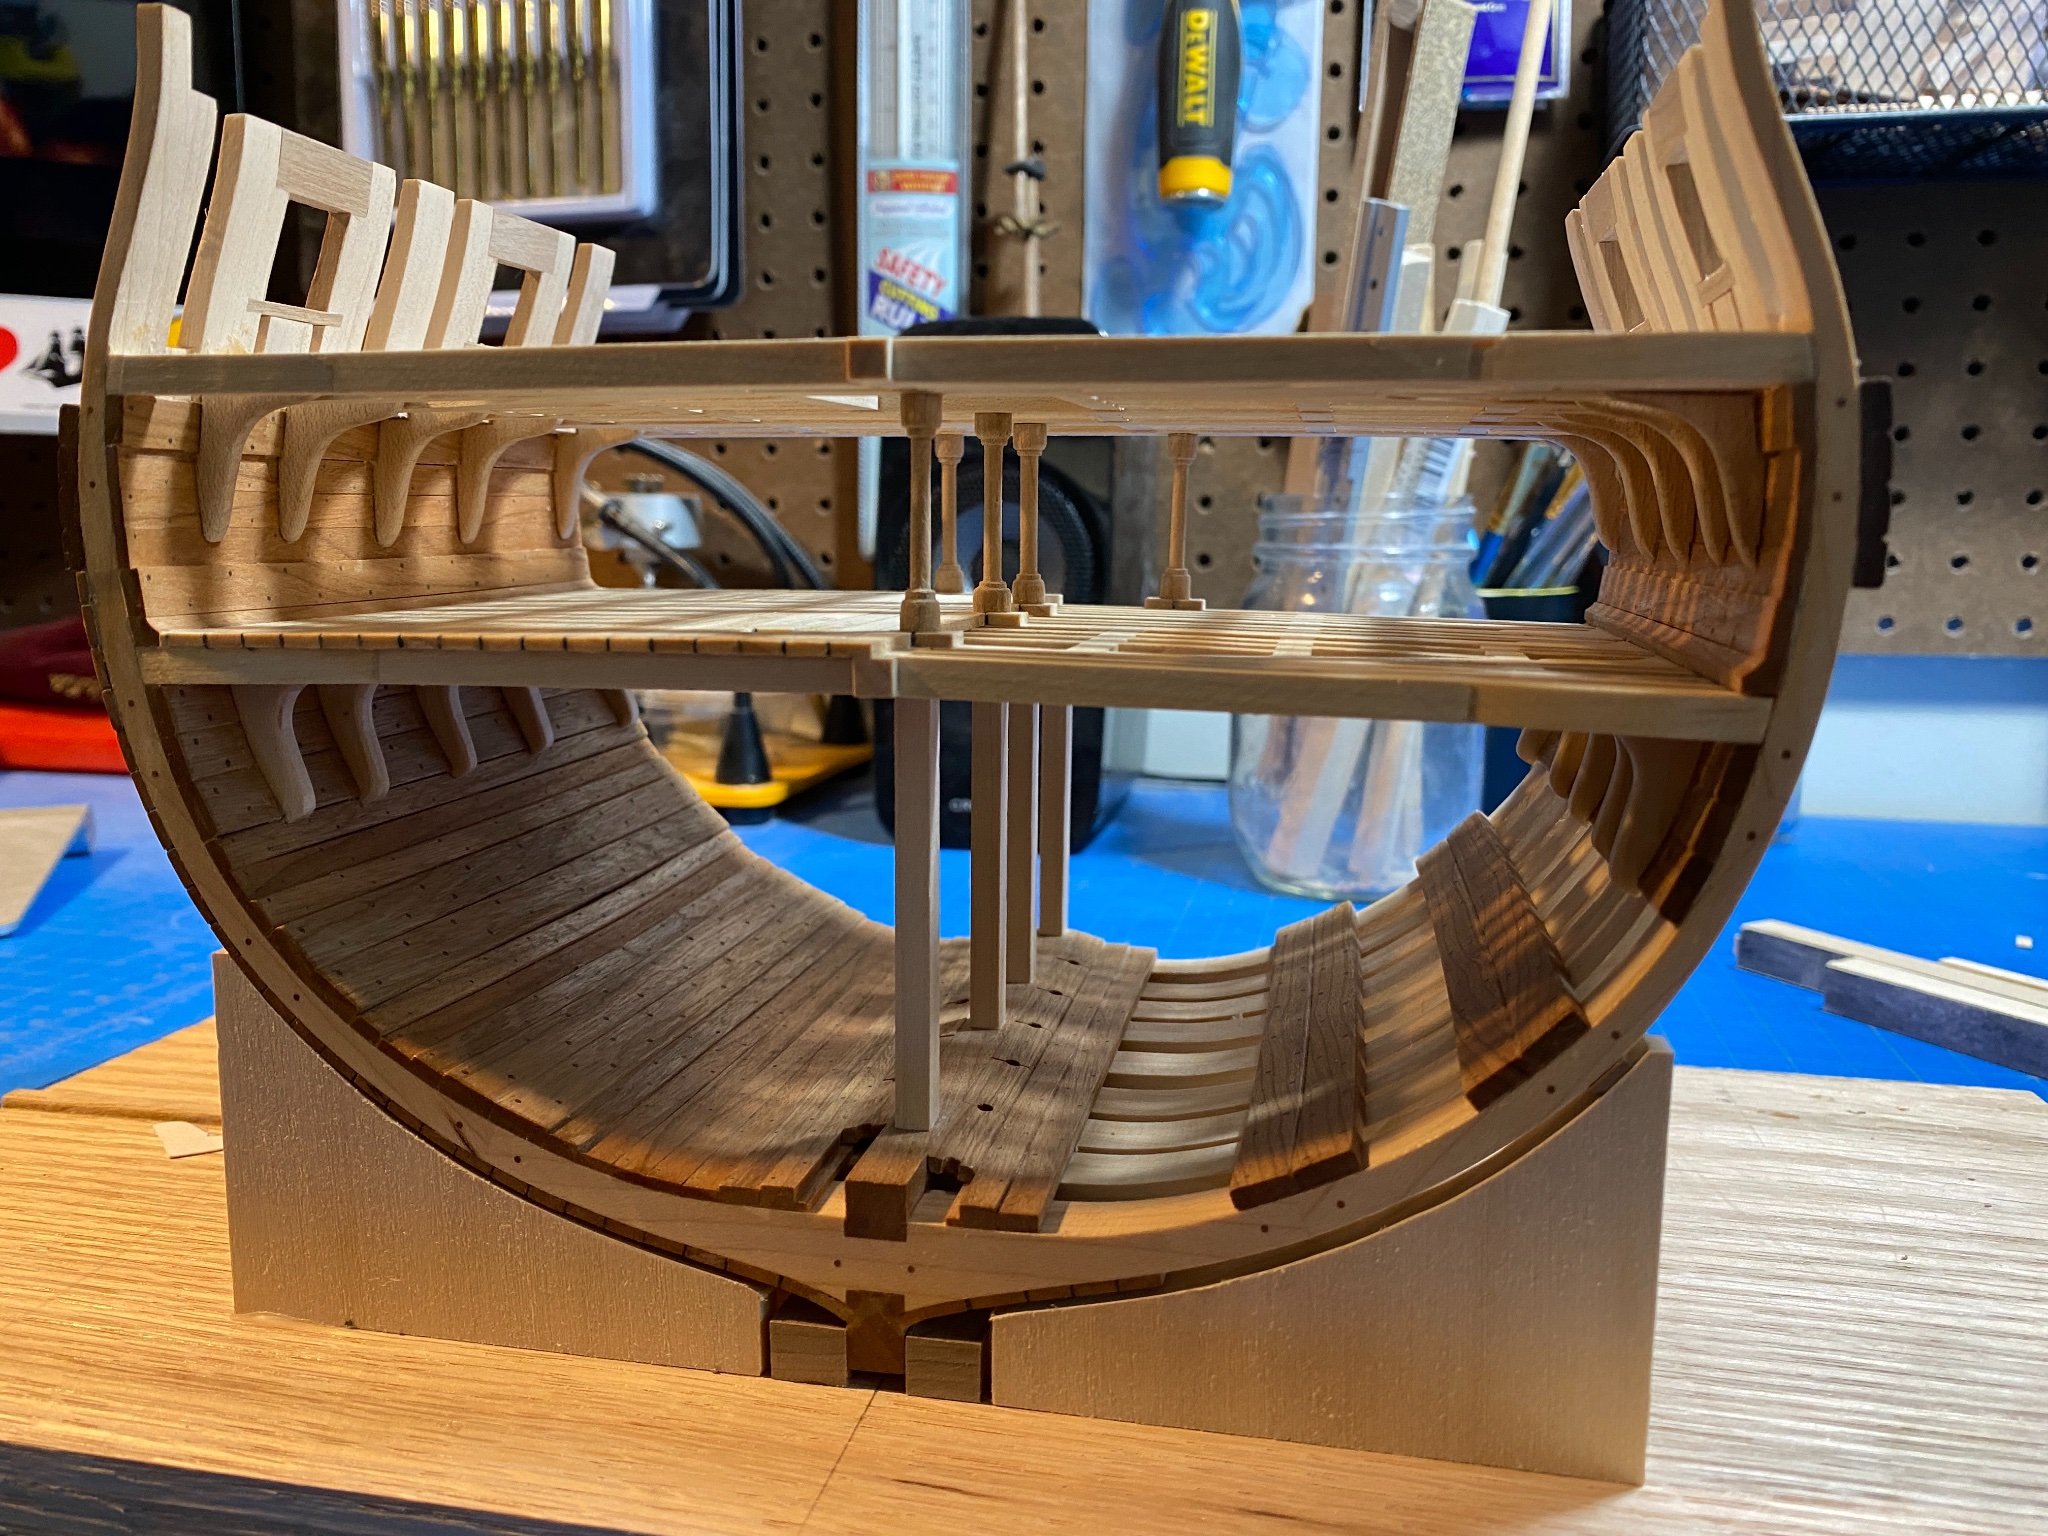
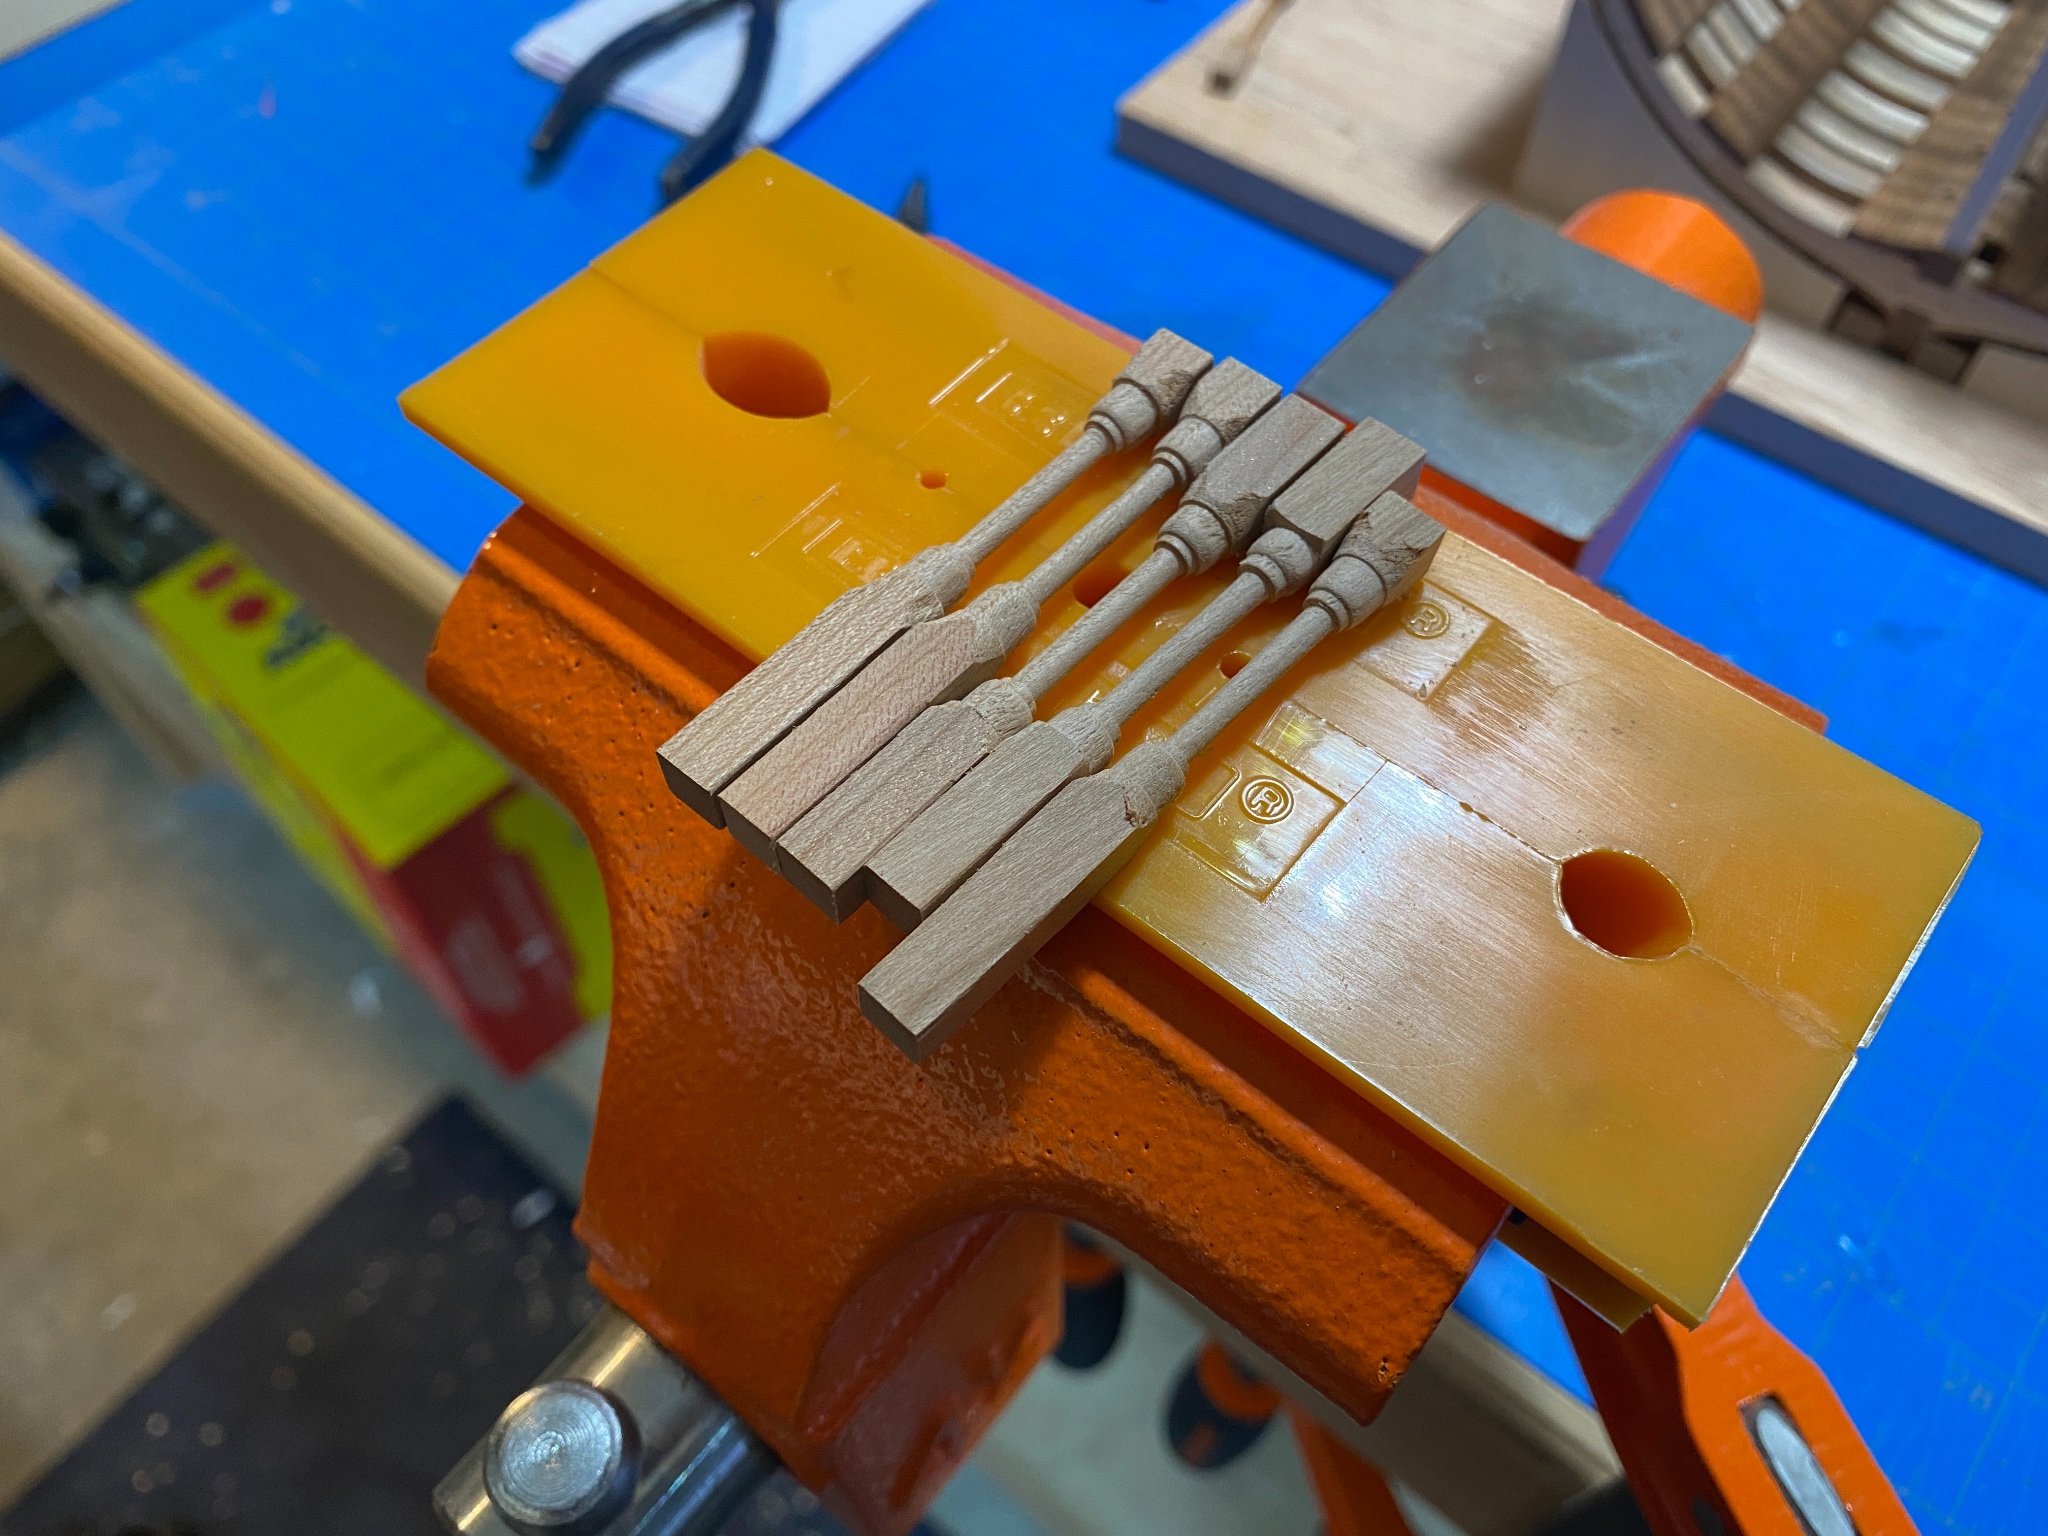
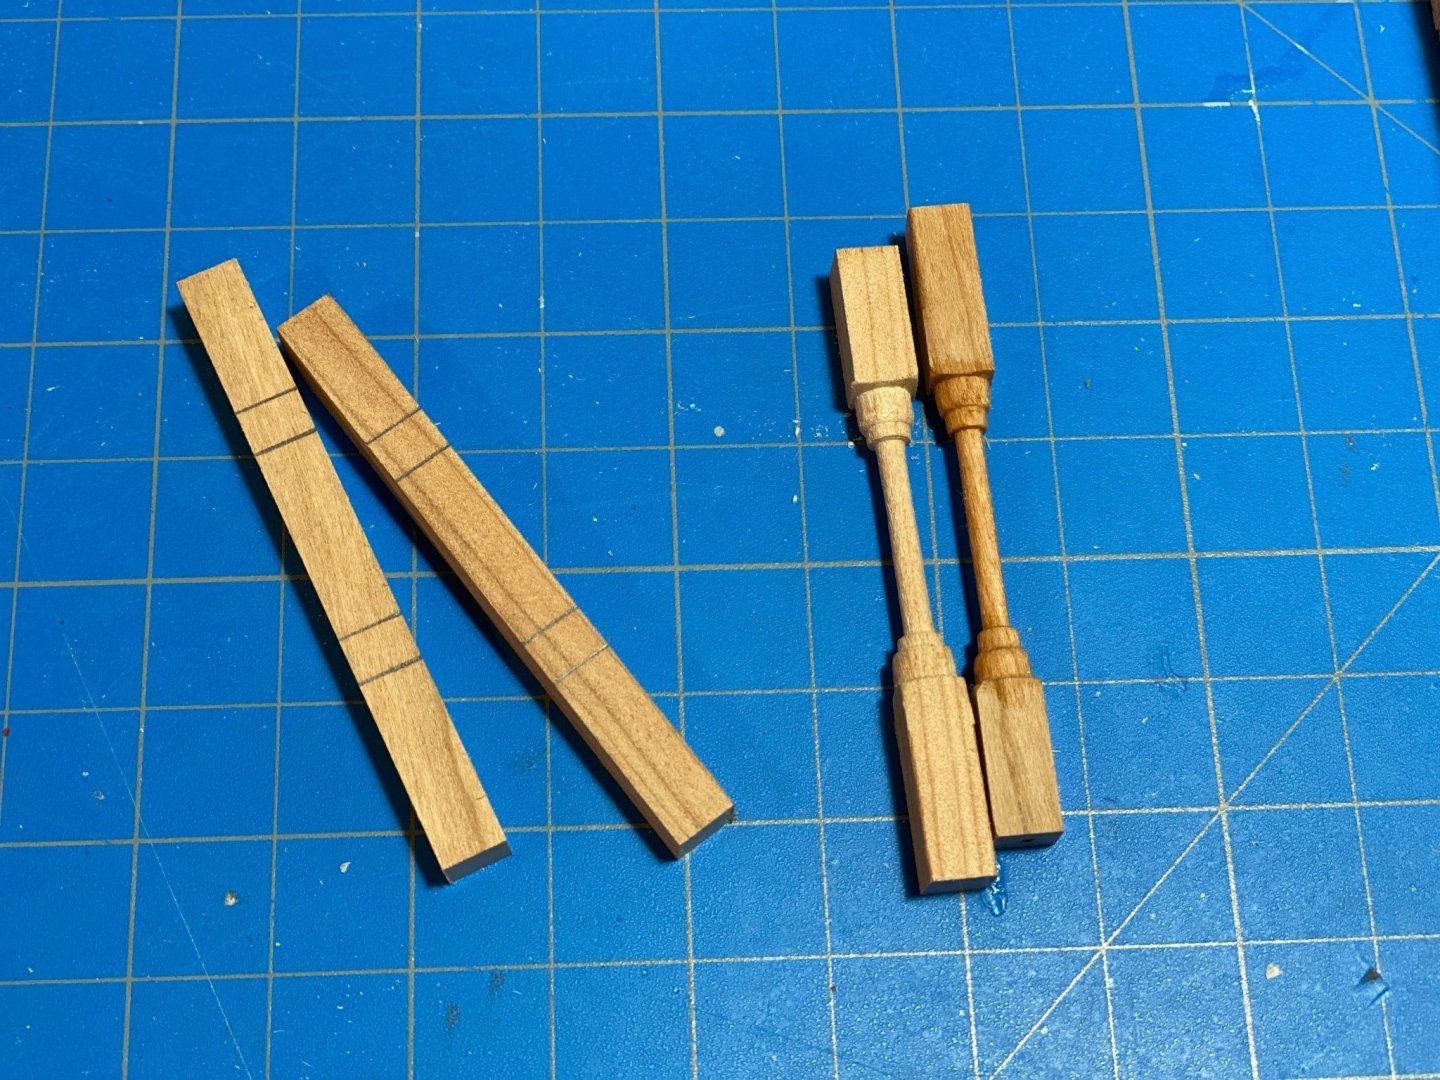
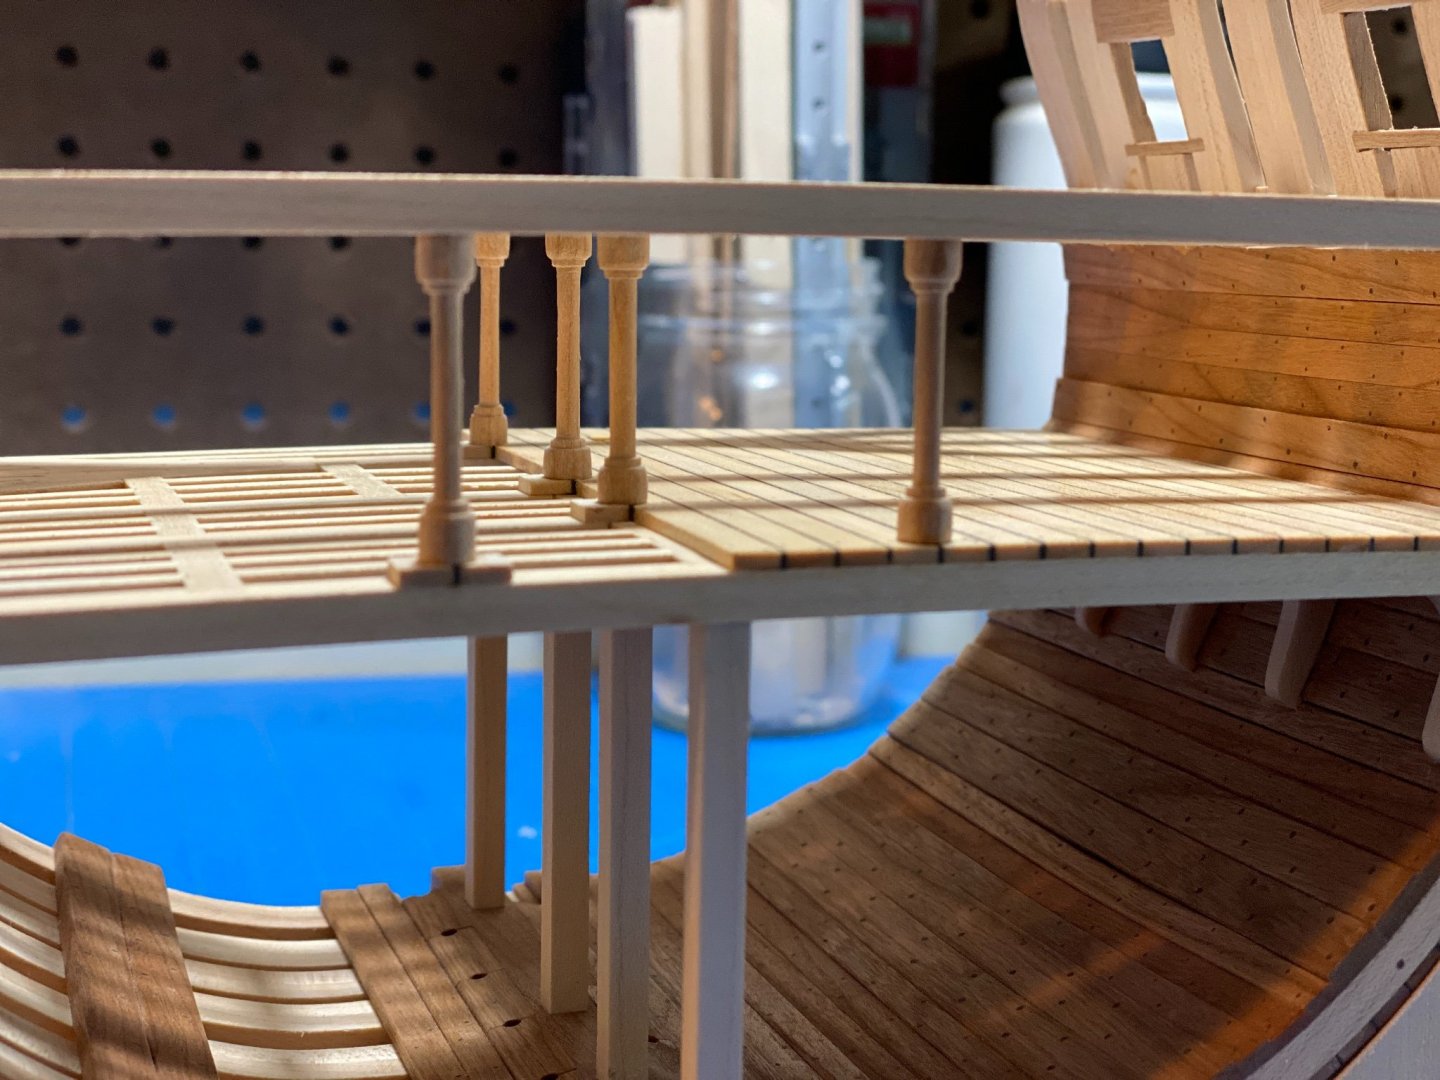
Ive been spending the last few weeks working on stanchions and the upper deck beams. I probably turned about 20 of these before I settled on something I liked and could reasonably repeat. I dont have a lot of turning experience so it took some time get into a rhythm. Otherwise, I'm happy with progress.


-
To each his own I guess. There are a few items in that listing that I consider to be indispensable and are used frequently. The rest, would just take up valuable real estate. But for my $1000, the Byrnes Trifecta is a no brainer, toys they are not. That said... my wife only accepts "Model Machines" on our card statement every couple of years, ha. After 6 years, Im 2/3 of the way to completion! I think the fellow might have done better to make it an auction rather than try to unload the whole lot for such a steep price (not including shipping).
-
That is a lot of stuff for sure. Wish I could make on offer on a few items and not the whole lot.
-
Can someone confirm that submissions as late as the evening of August 1st PST would still be eligible? Thanks.