-
Posts
1,008 -
Joined
Content Type
Profiles
Forums
Gallery
Events
Everything posted by Justin P.
-
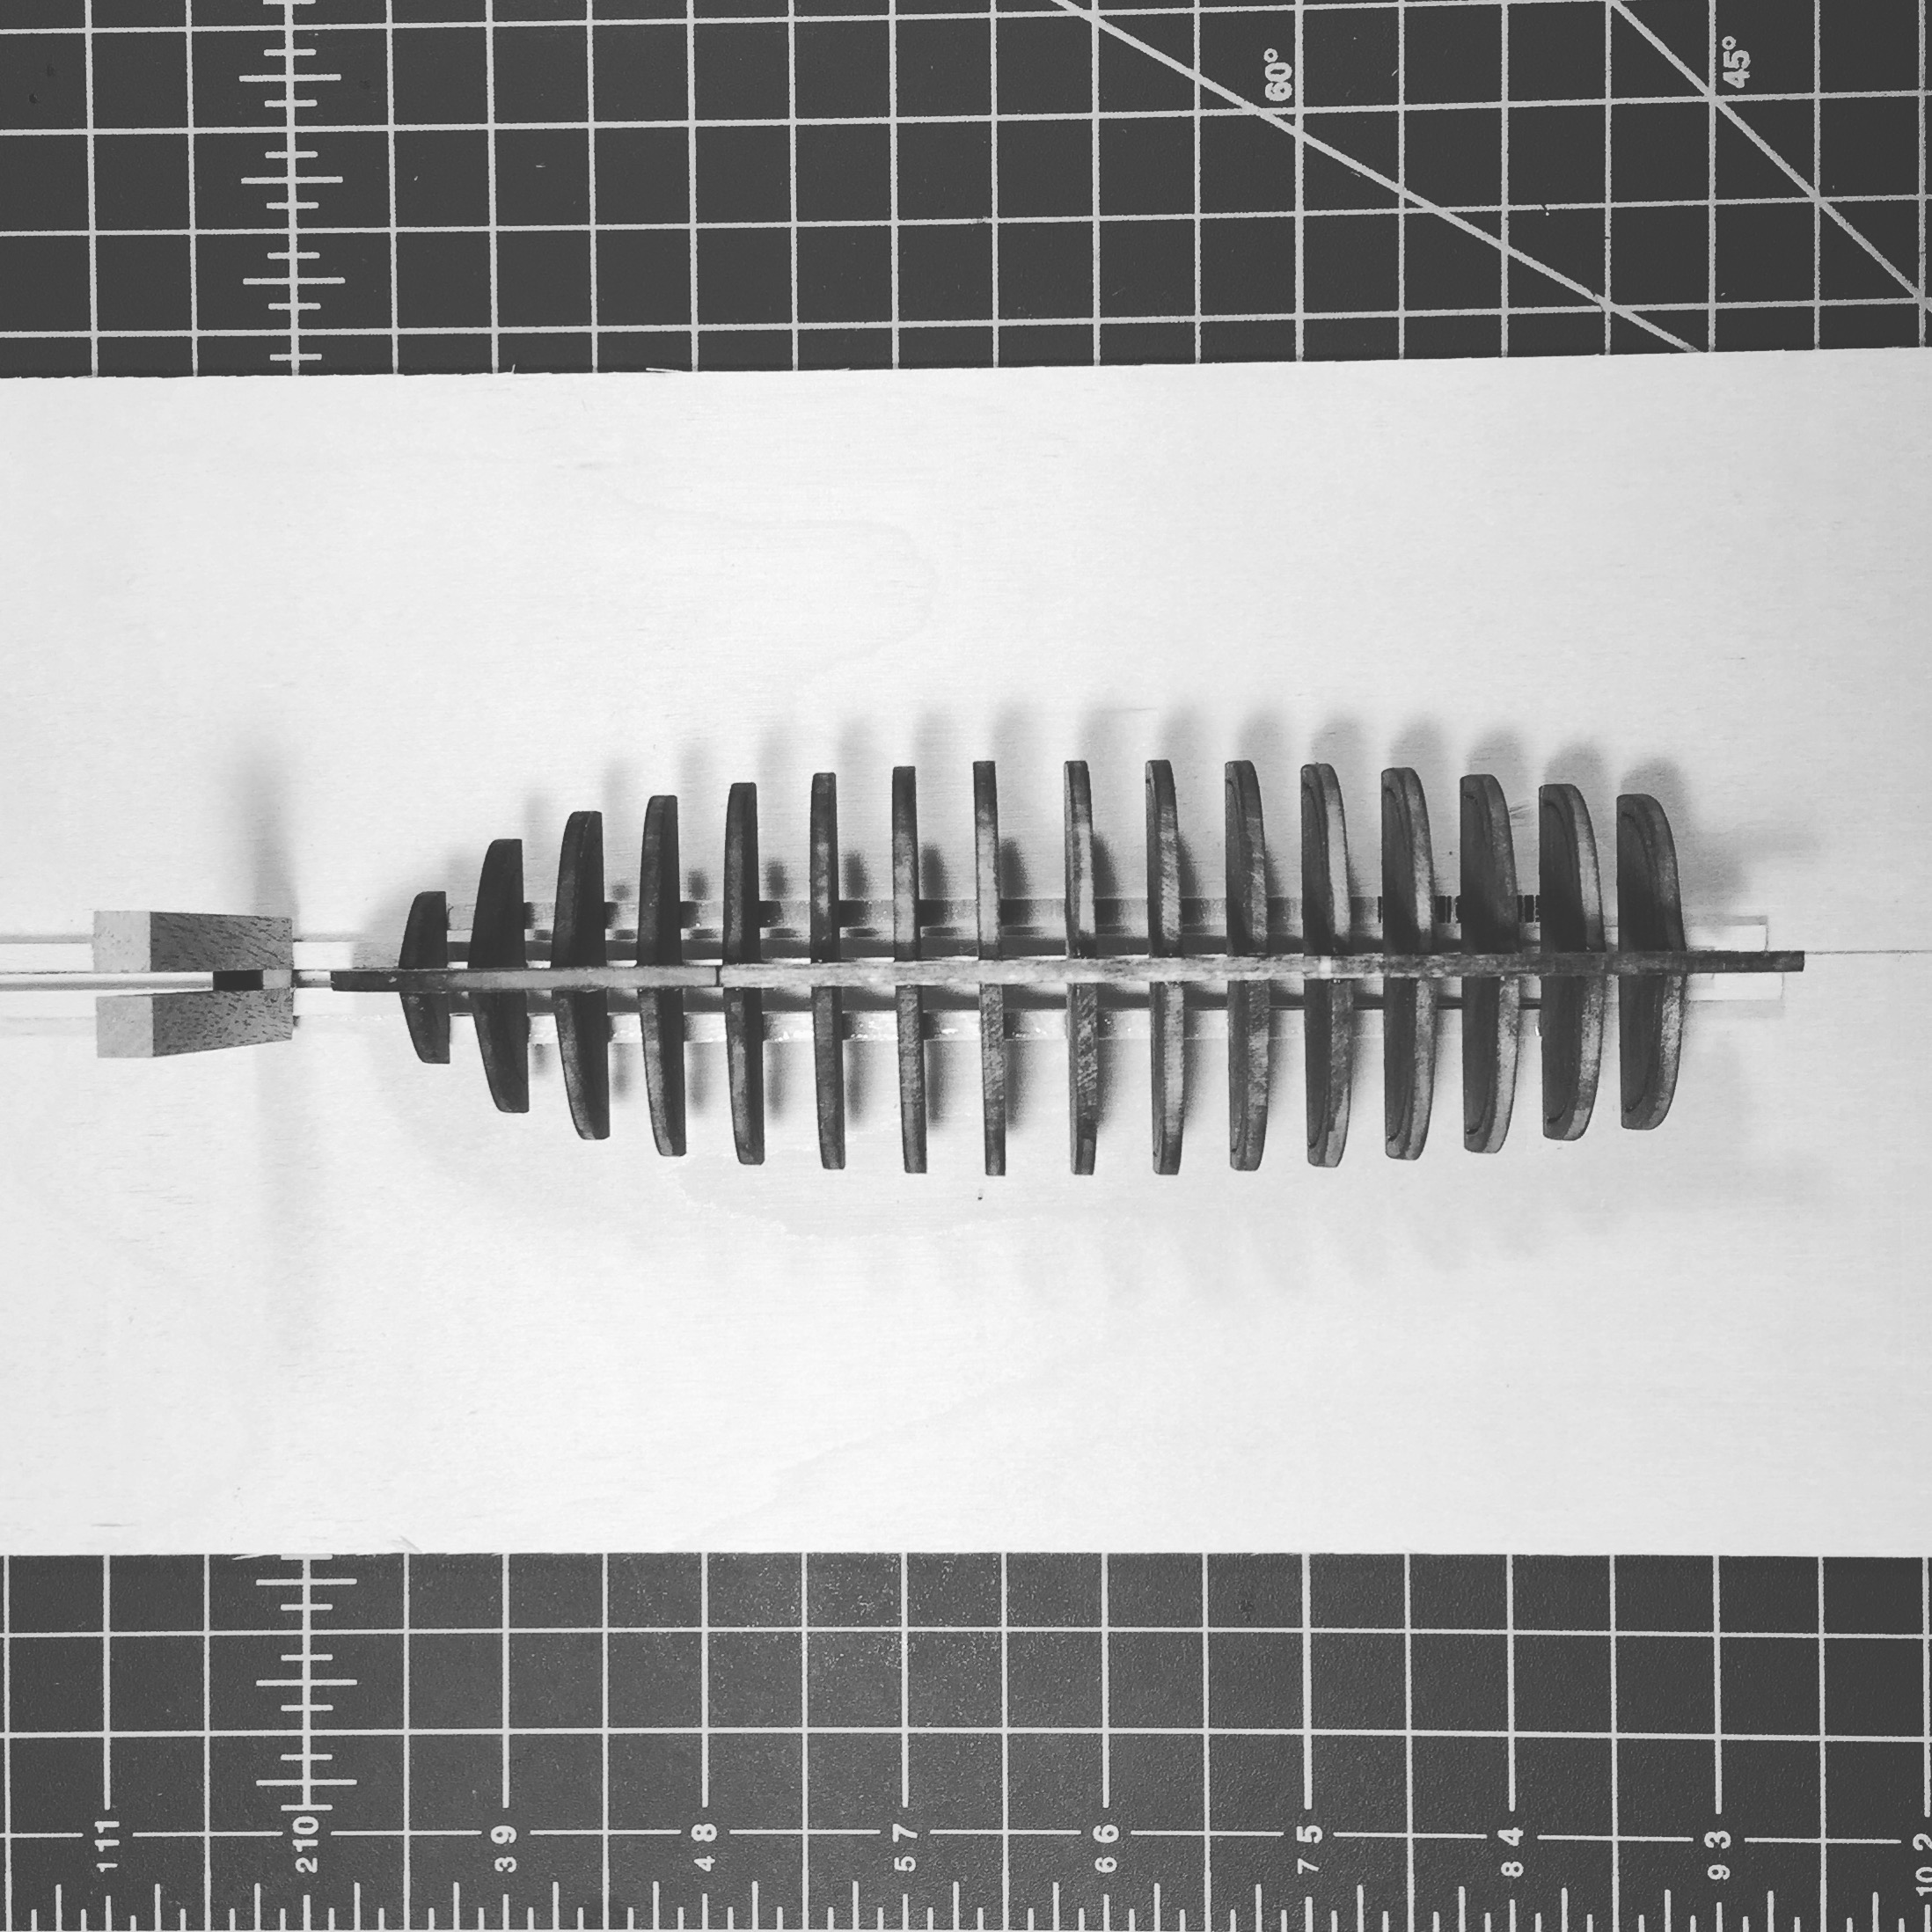
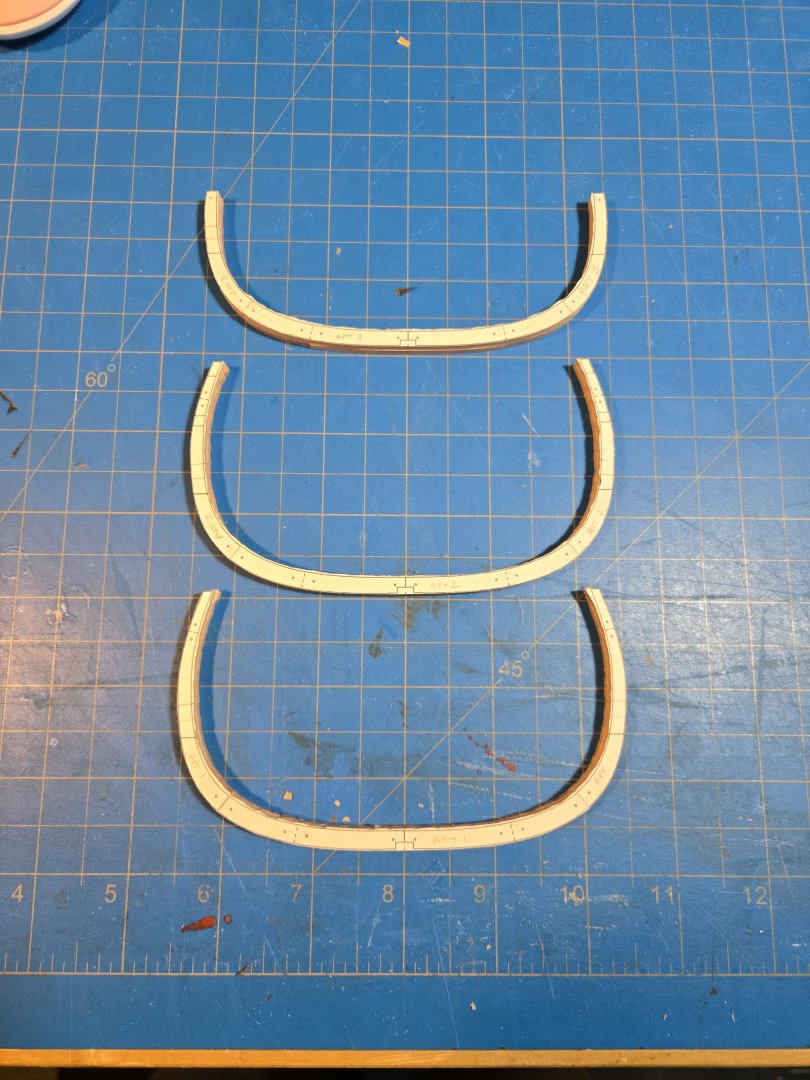
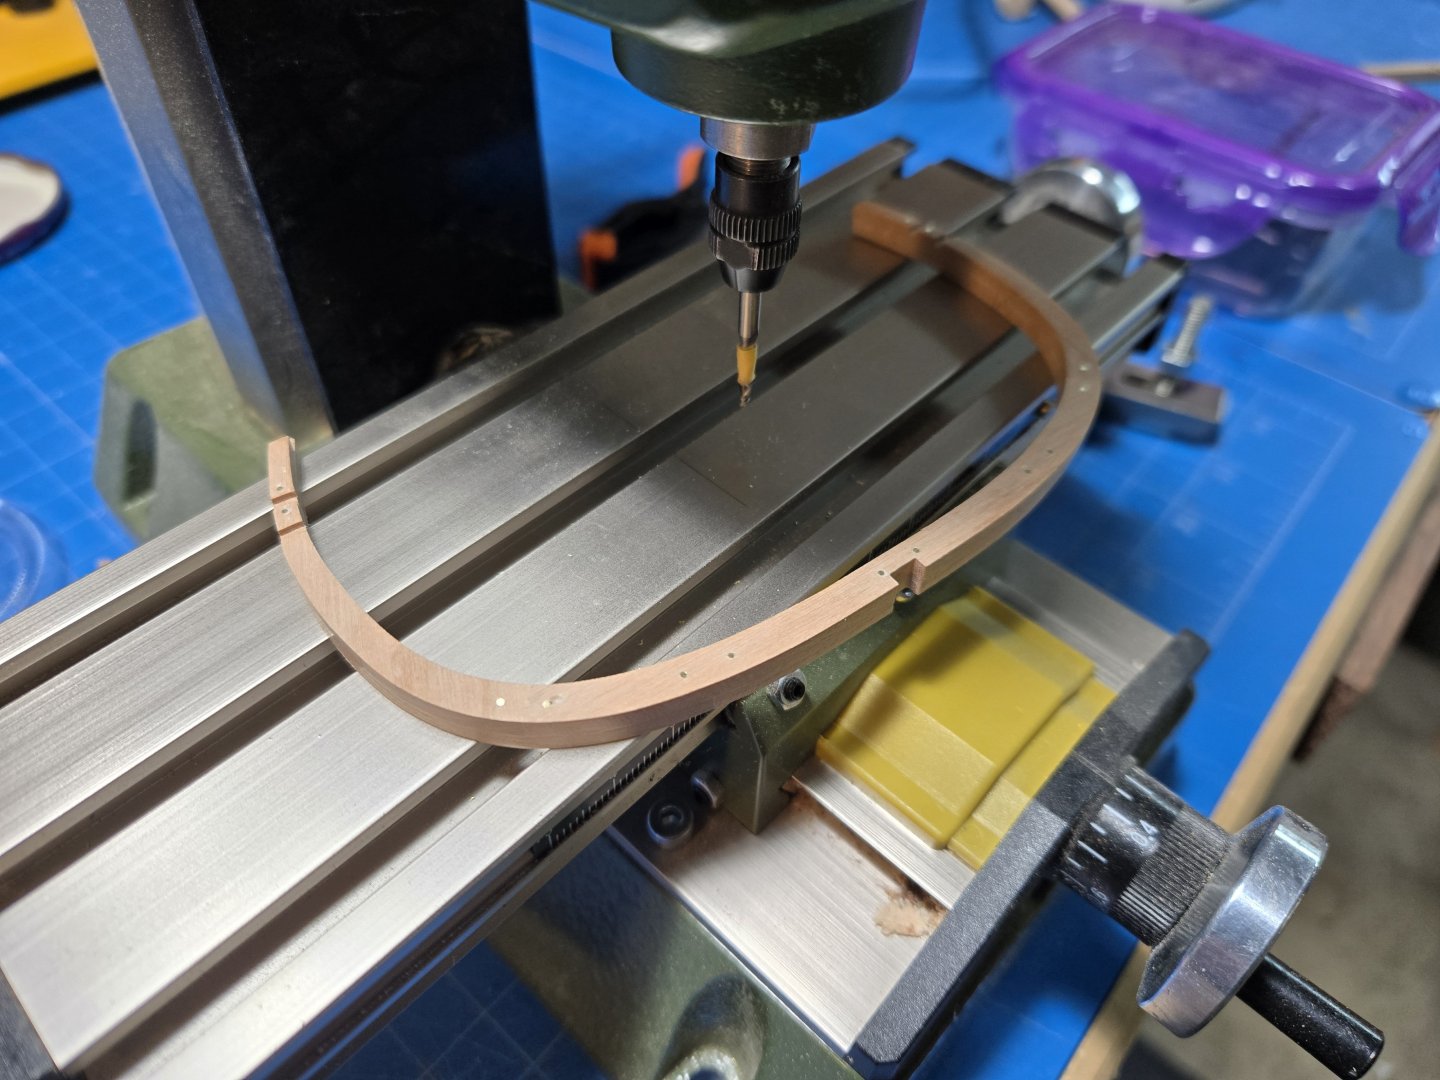
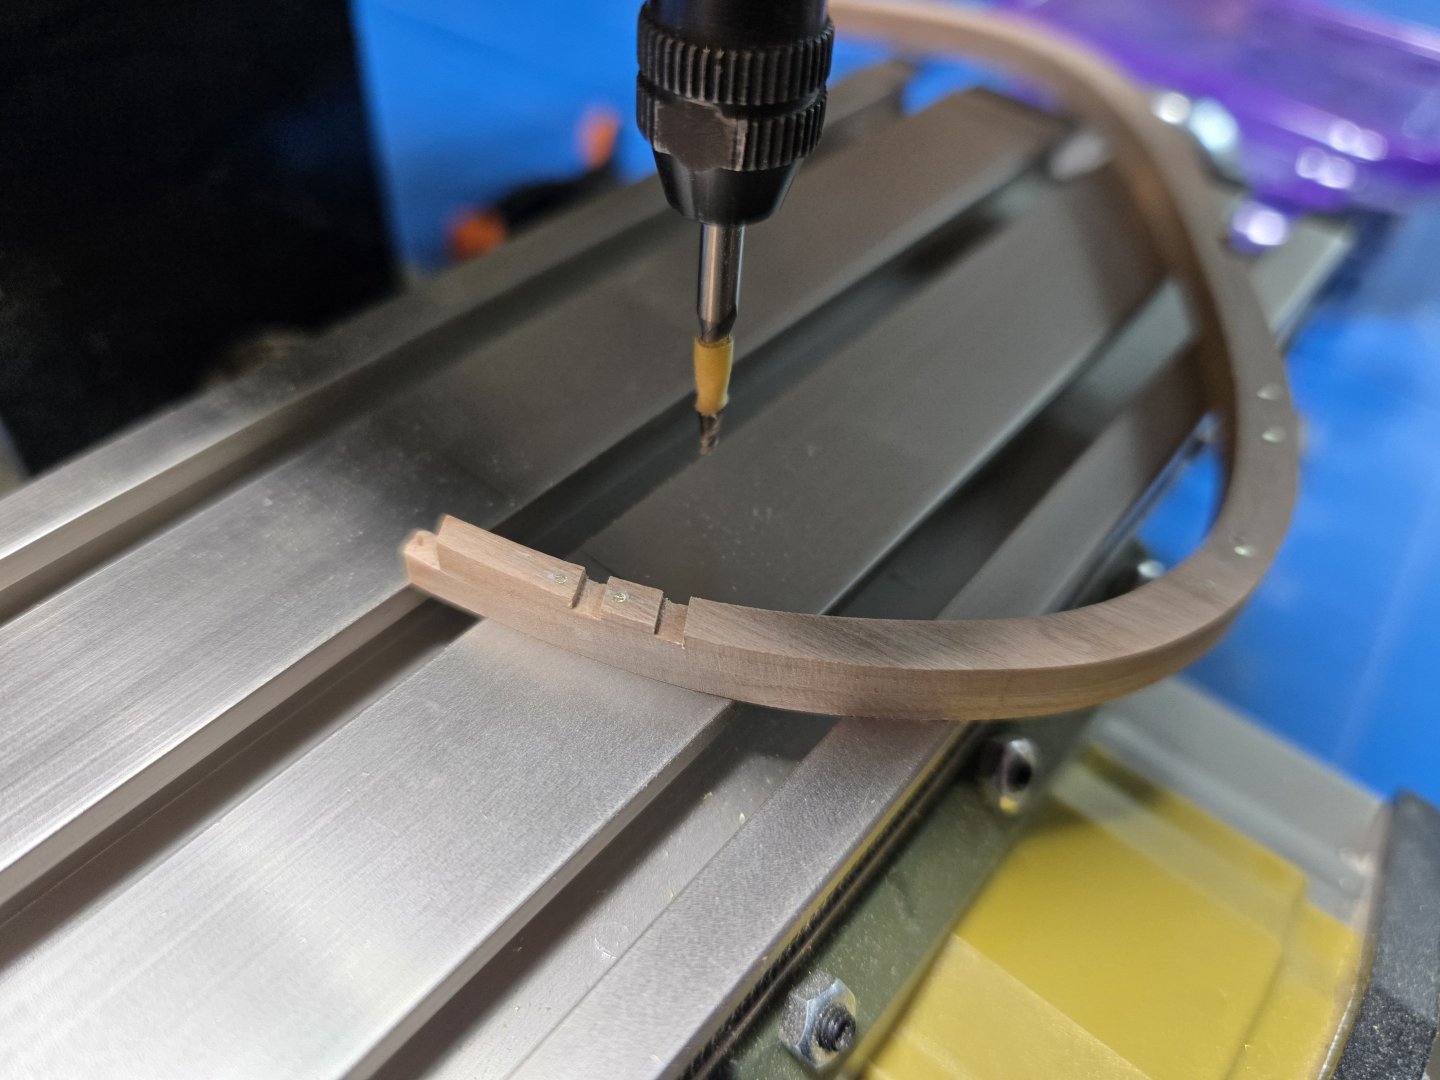
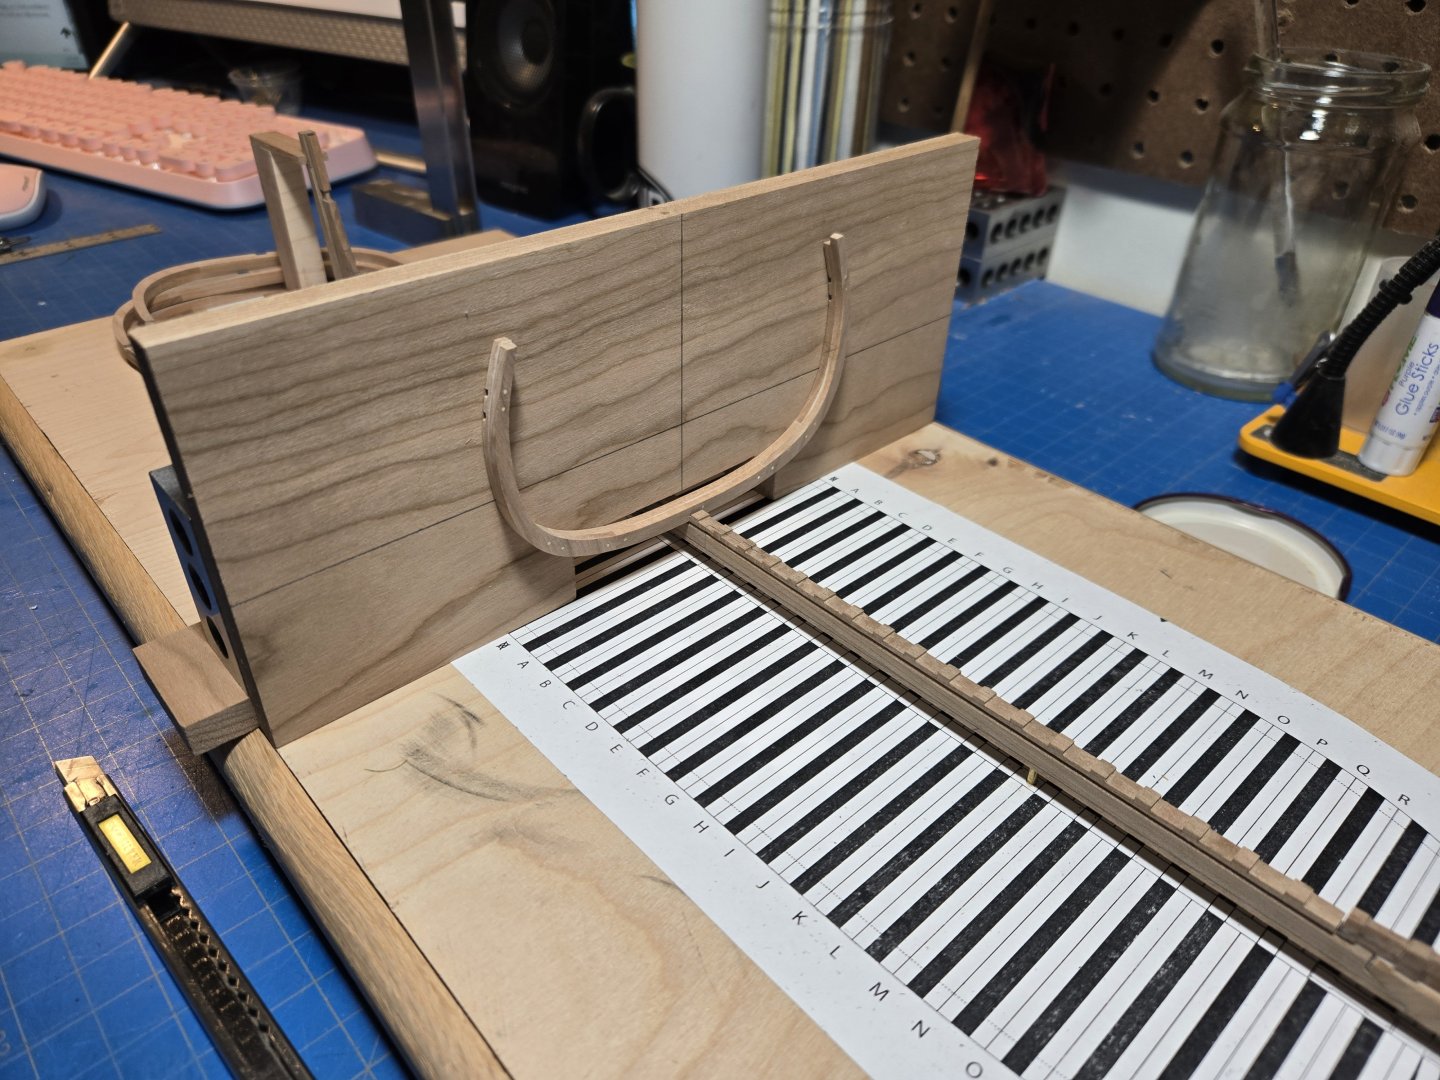
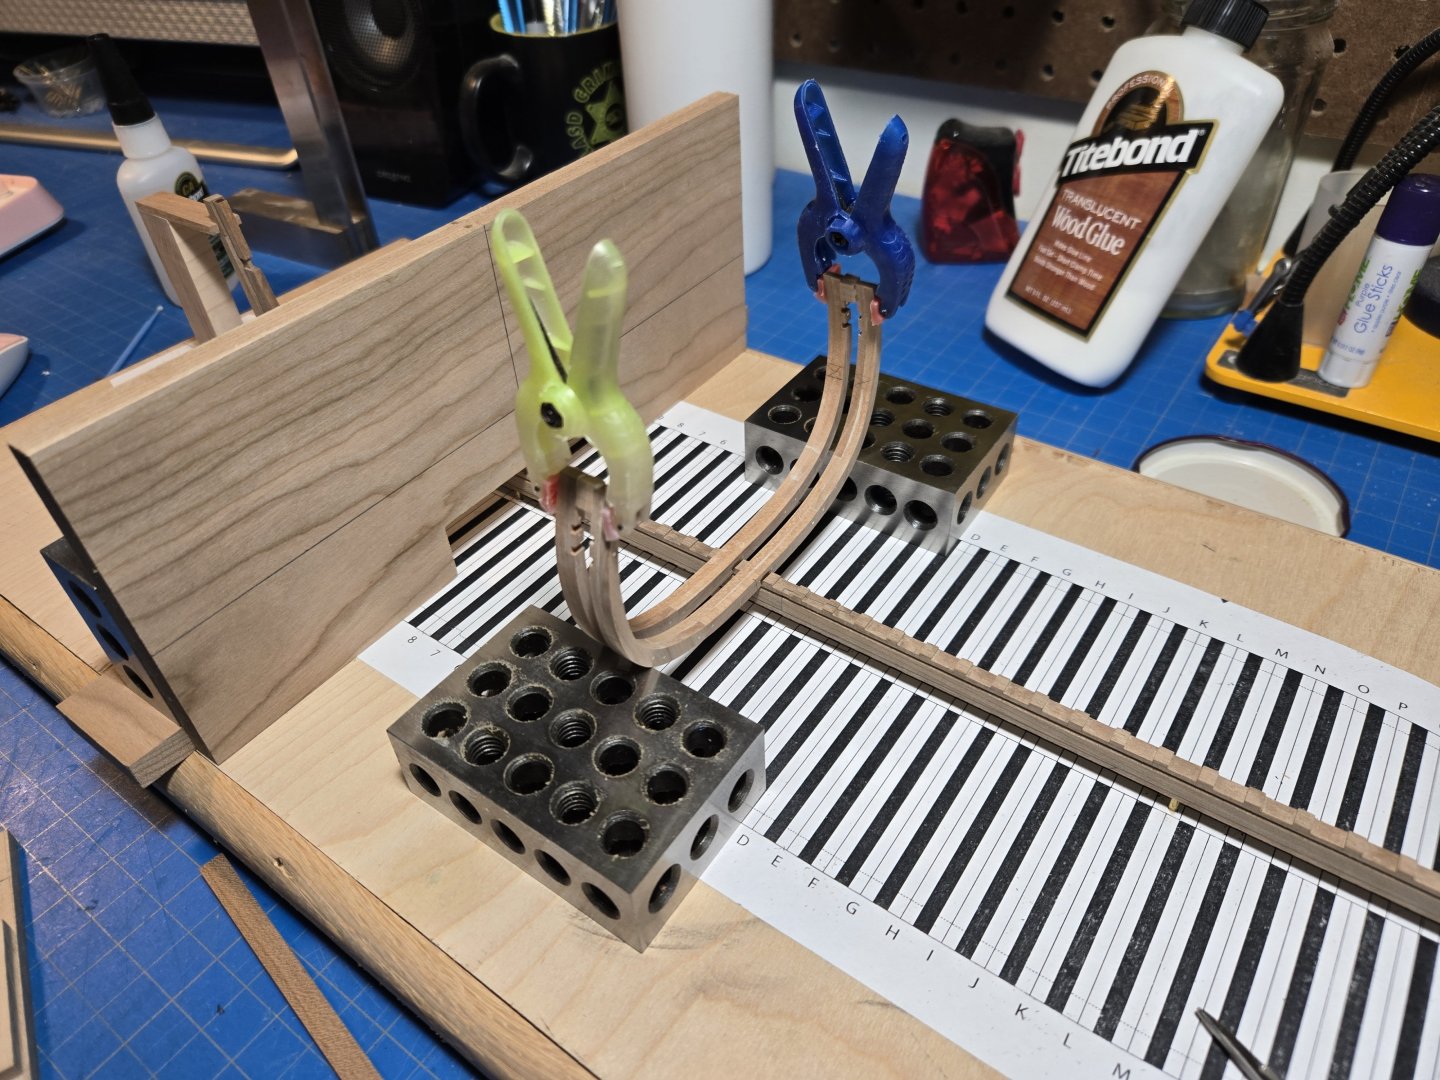
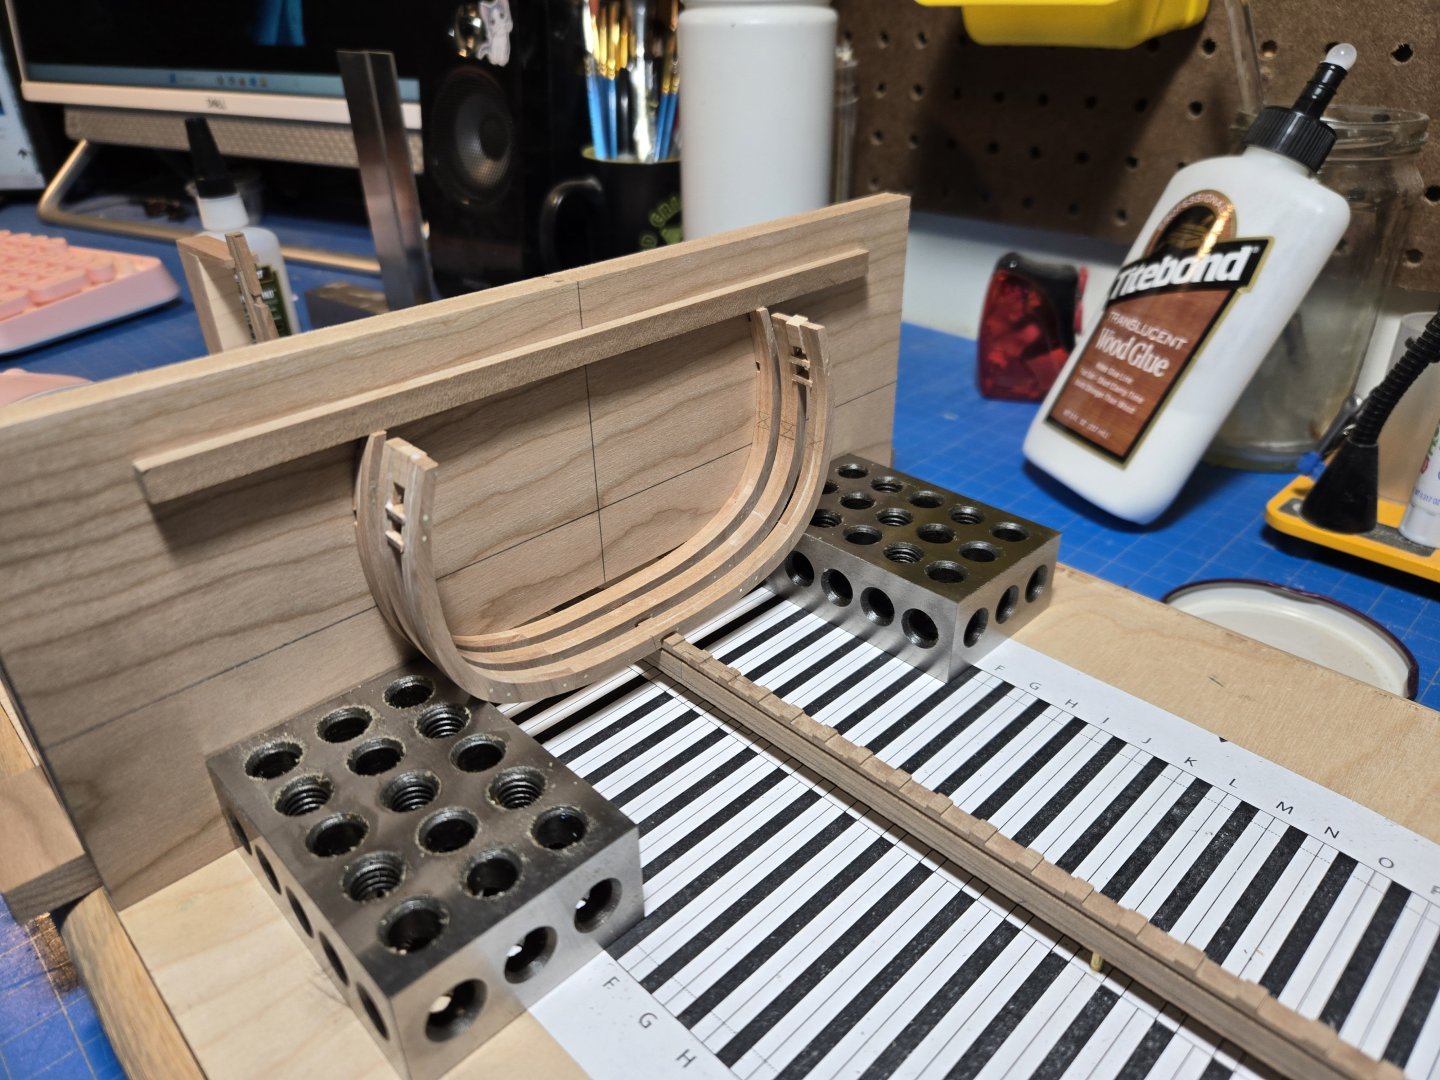
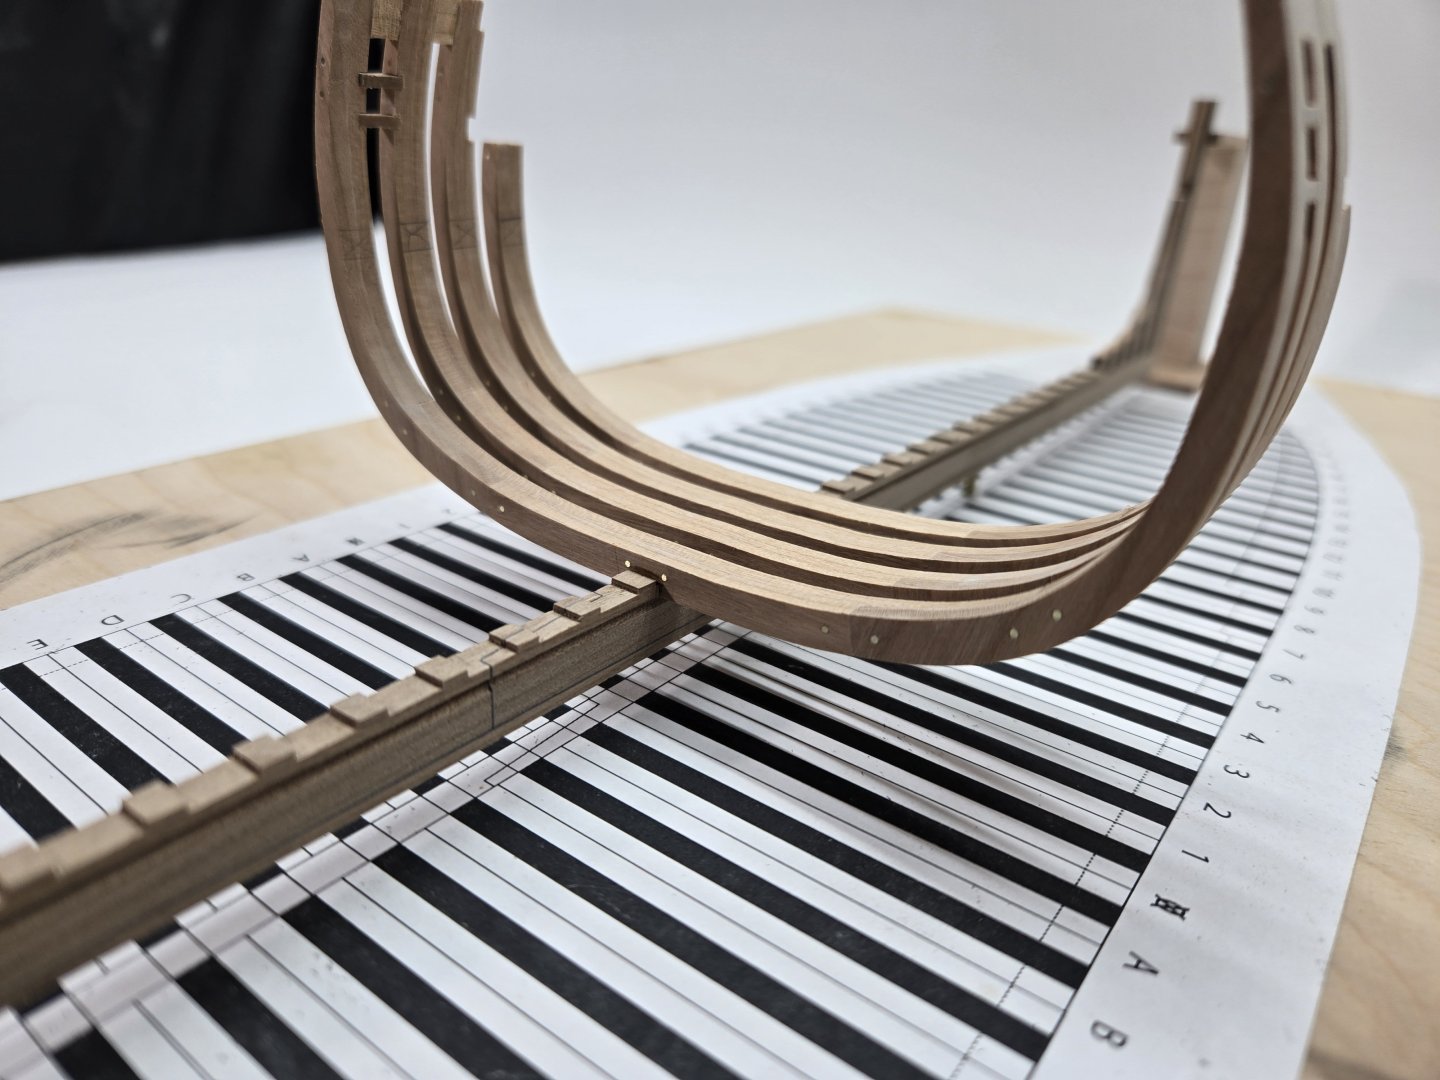
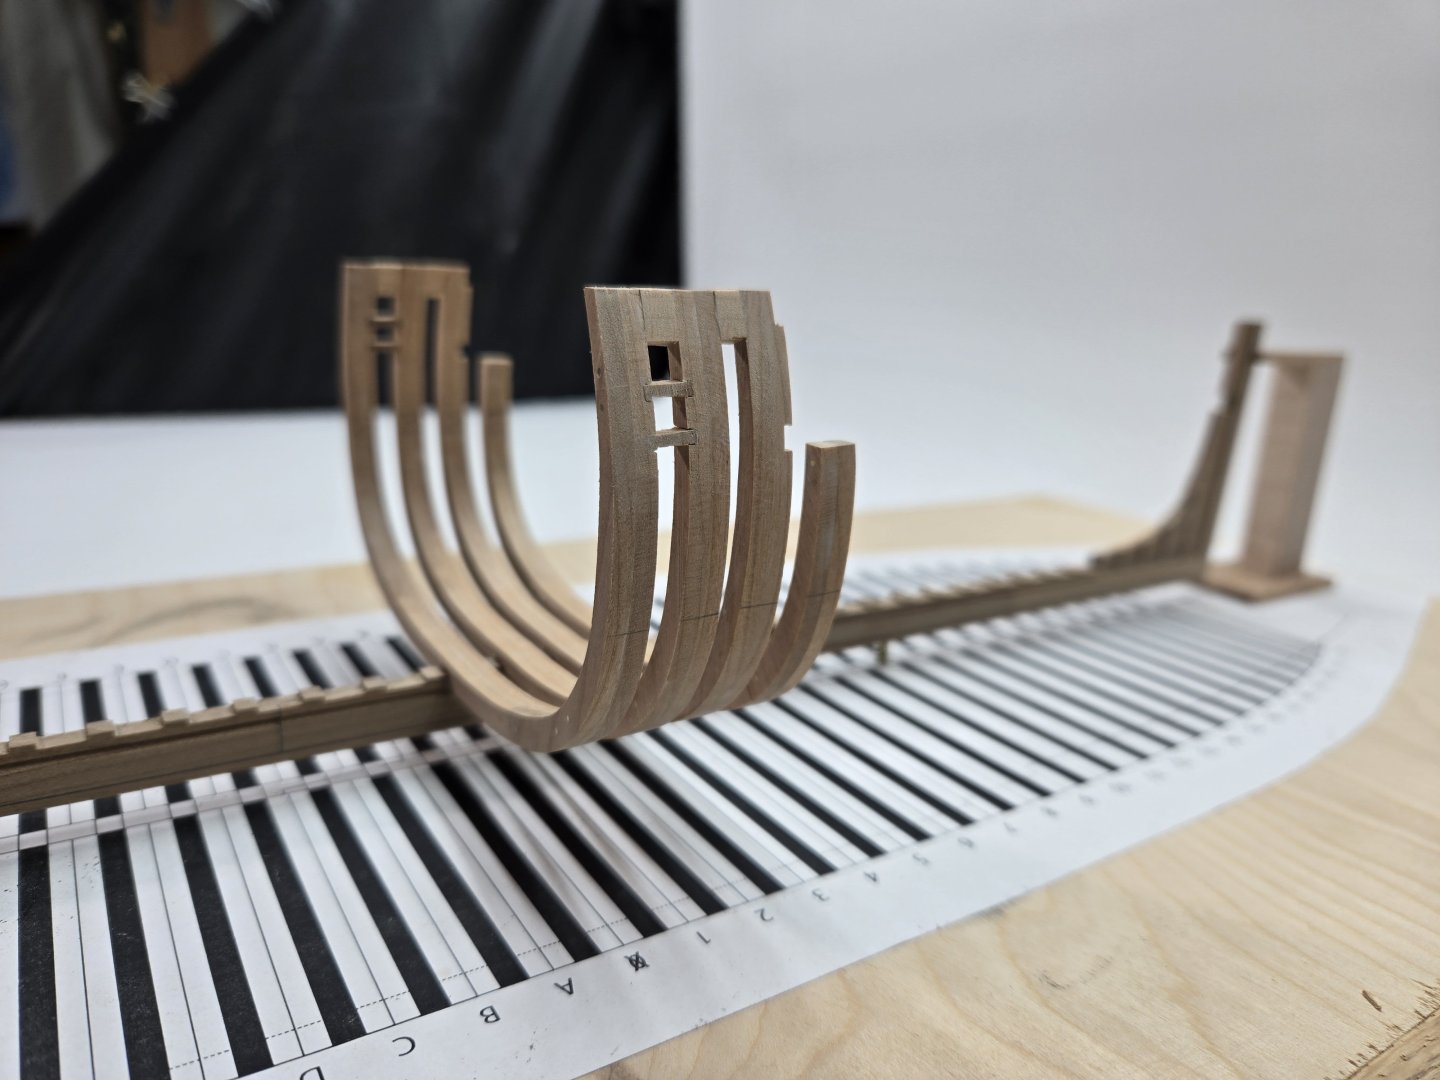
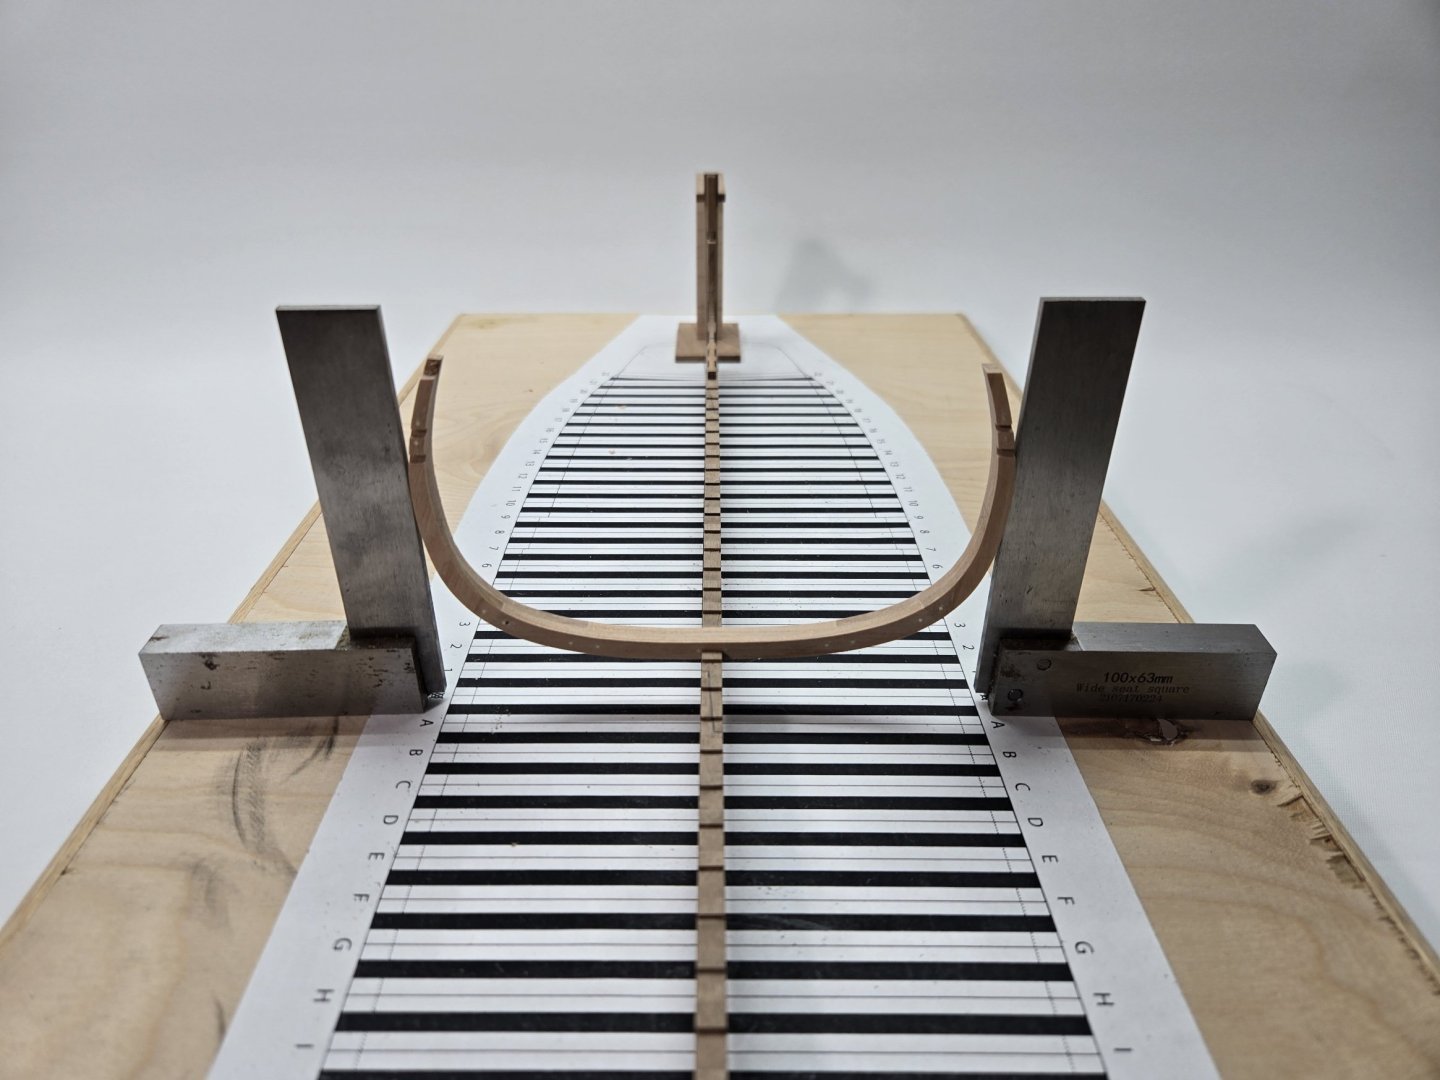
Things are moving along well, and I’m learning some hard lessons along the way! Turns out I can’t build three frames in the same time it took to build one. That said, over two weeks, I only had two full workdays, so my bench time wasn’t bad. I had been tracking about 6–8 hours per frame, but building three took around 12 hours—with errors. I also had to build the frame-squaring jig, which took some extra time. Rushing remains my biggest challenge. My biggest issue was not thinking through the grain direction carefully enough, which resulted in at least one inherently weak frame snapping. Unfortunately, it didn’t break until the very end—after I had already mounted it to the keel. I’ll likely need to redo this one. I also need to refine my build sequence. I initially tried fitting the filler pieces and sweep ports before mounting, but that approach didn’t work well. Cleaning them up without the rest of the hull in place made things much more complicated, which contributed to the breakage. For now, I’ll focus on building everything out and hold off on cleanup, even if it means dealing with a messy look for a while—something that’s challenging for me. I have a strong impulse to do as much as possible upfront to minimize work later, but I need to adjust my approach. I decided to set up my Proxxon to mill out all the gun and sweep ports, which has saved a tremendous amount of time. Since there is so little material to remove, I conducted some tests and determined that I can accurately guide the pieces under the bit by hand, rather than spending extra time mounting them. This approach proved to be very successful. These metal squaring blocks have turned out to be a blessing. I have four, and cant tell you how versatile and useful they are. I probably use them more than any right-angle. I bought as a part of larger pack of things, and it turns out I could have thrown the other stuff away! The half frame at the gunport of frame three is the one I snapped. Its glue at the moment, but not well and its ugly so I may just go ahead a discard it. We'll see.
-
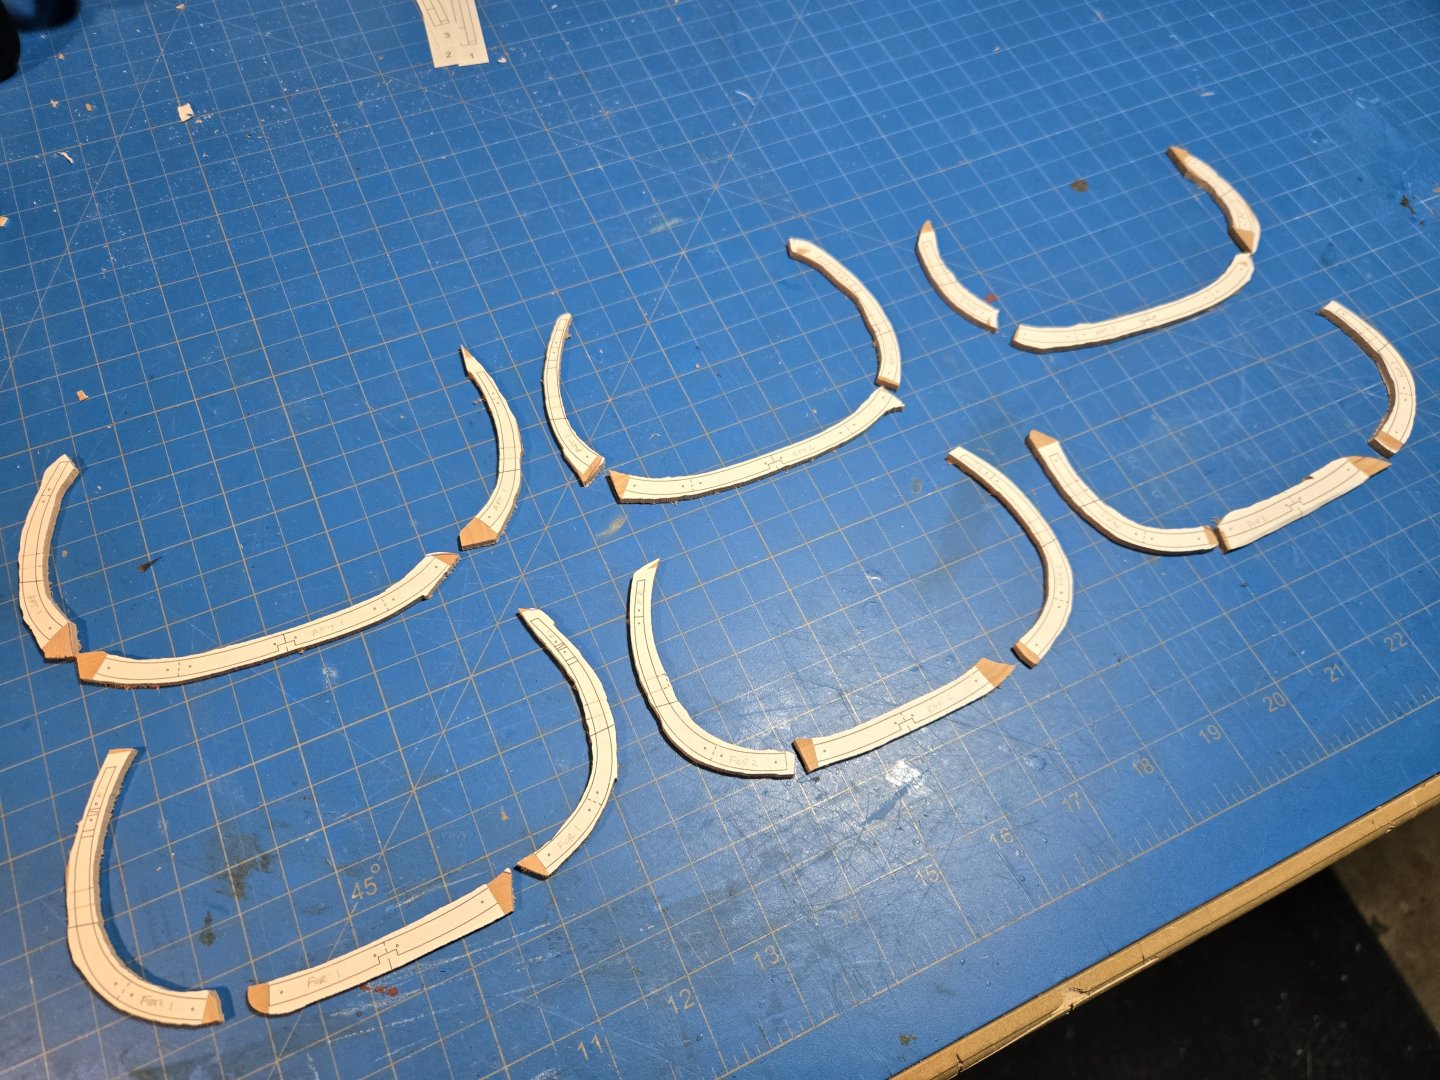
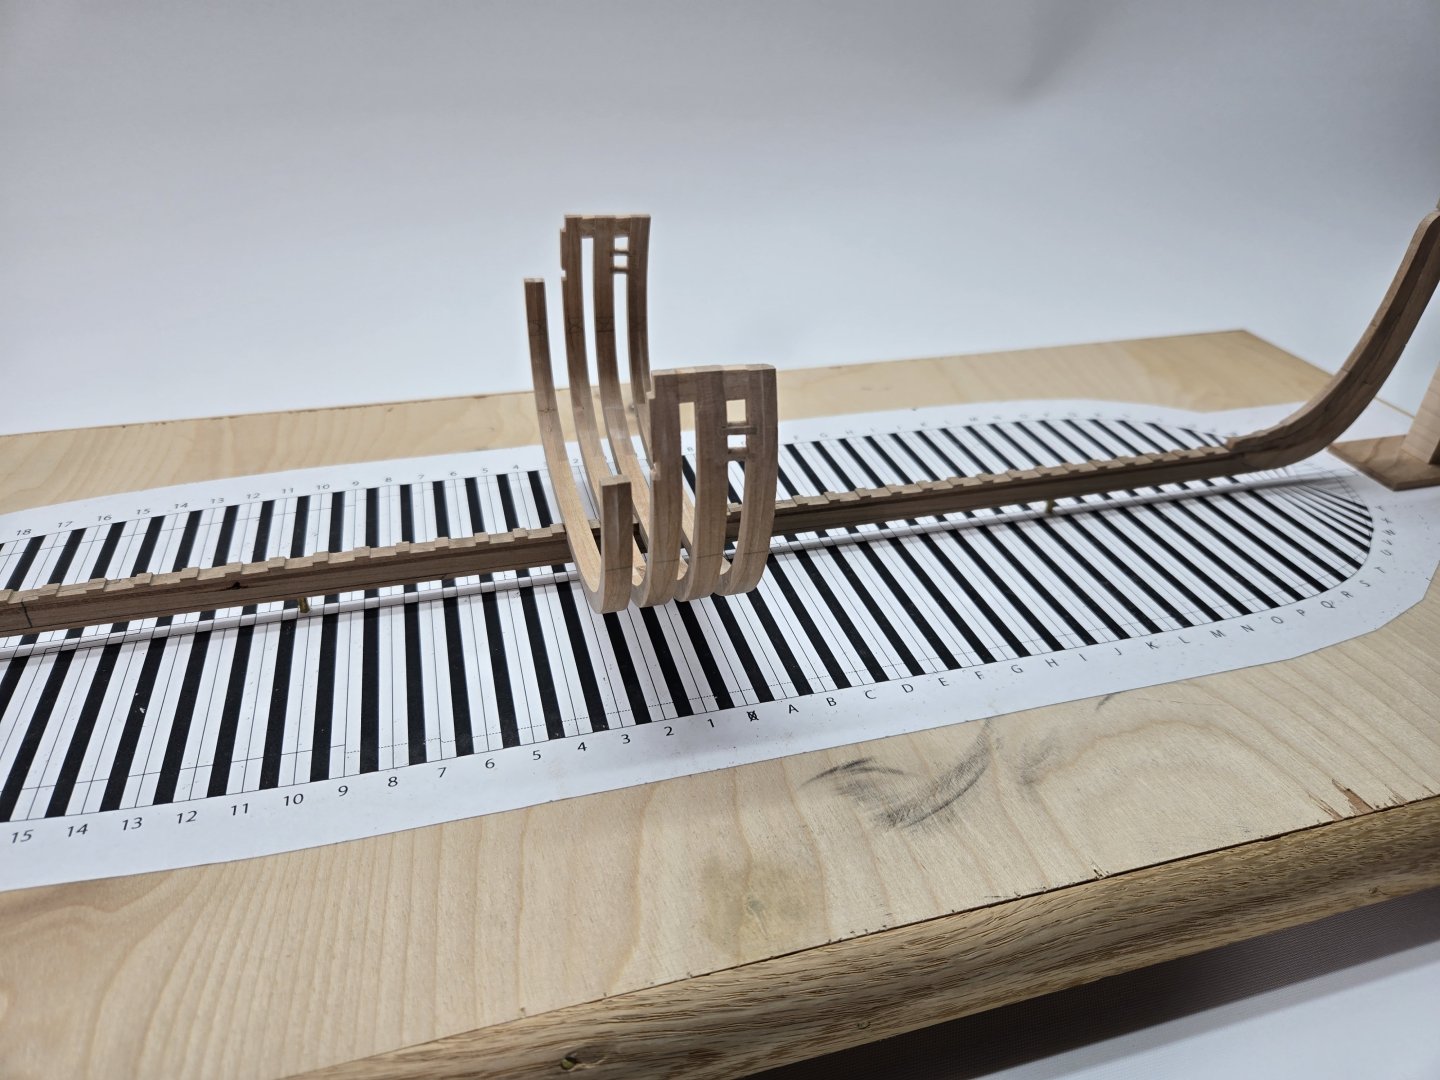
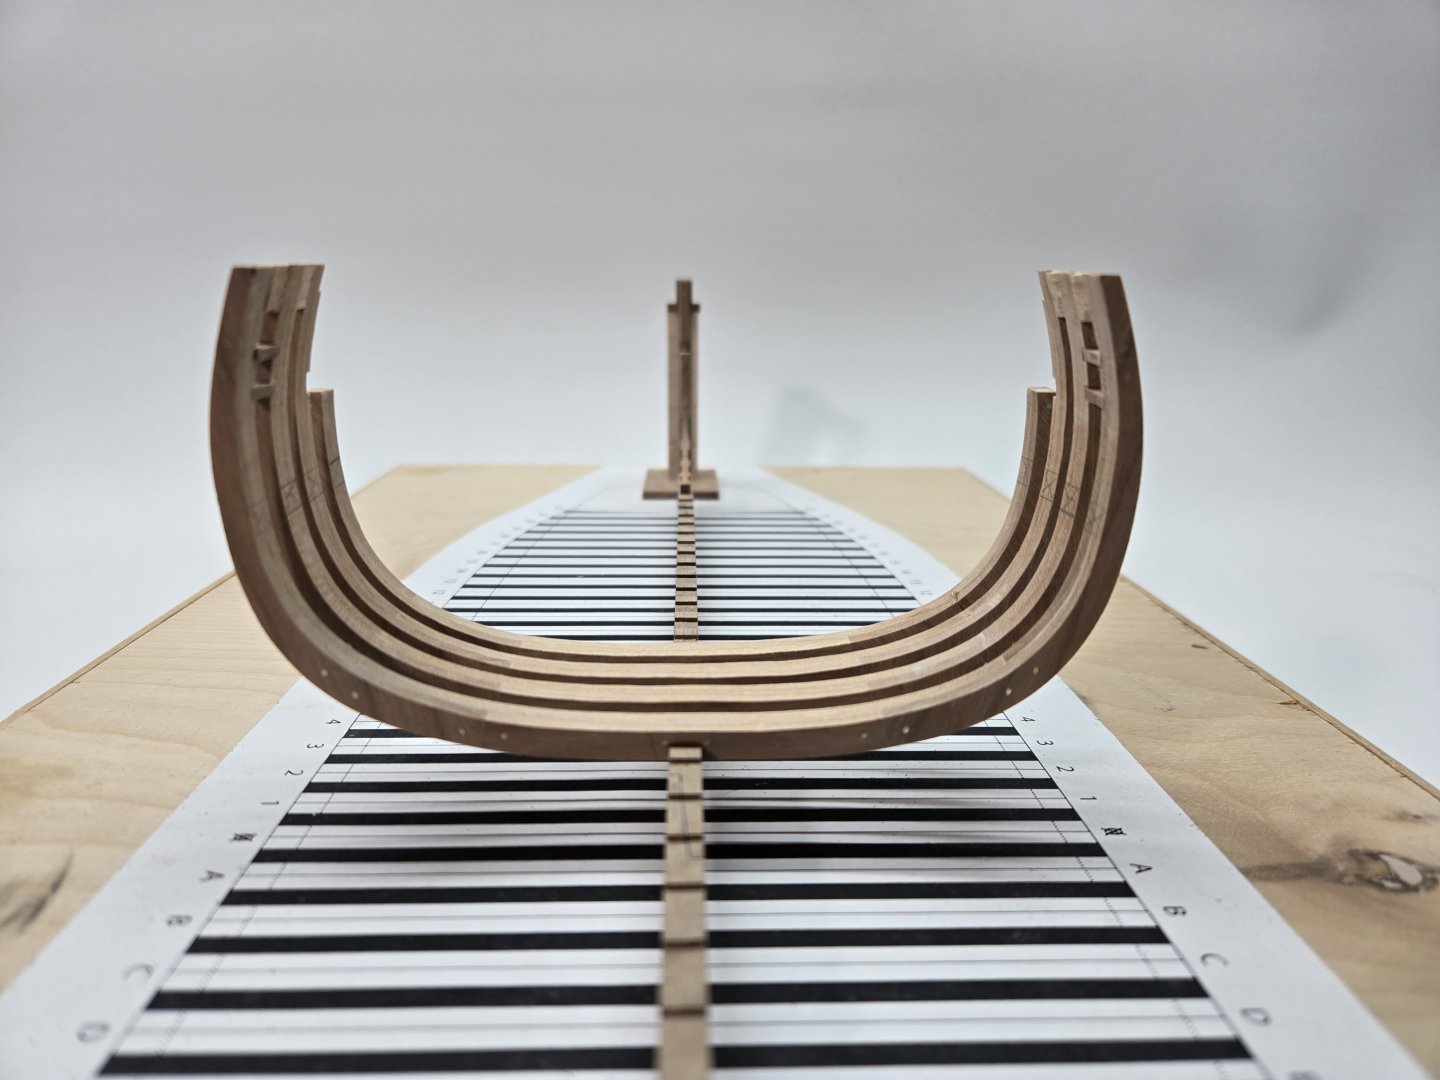
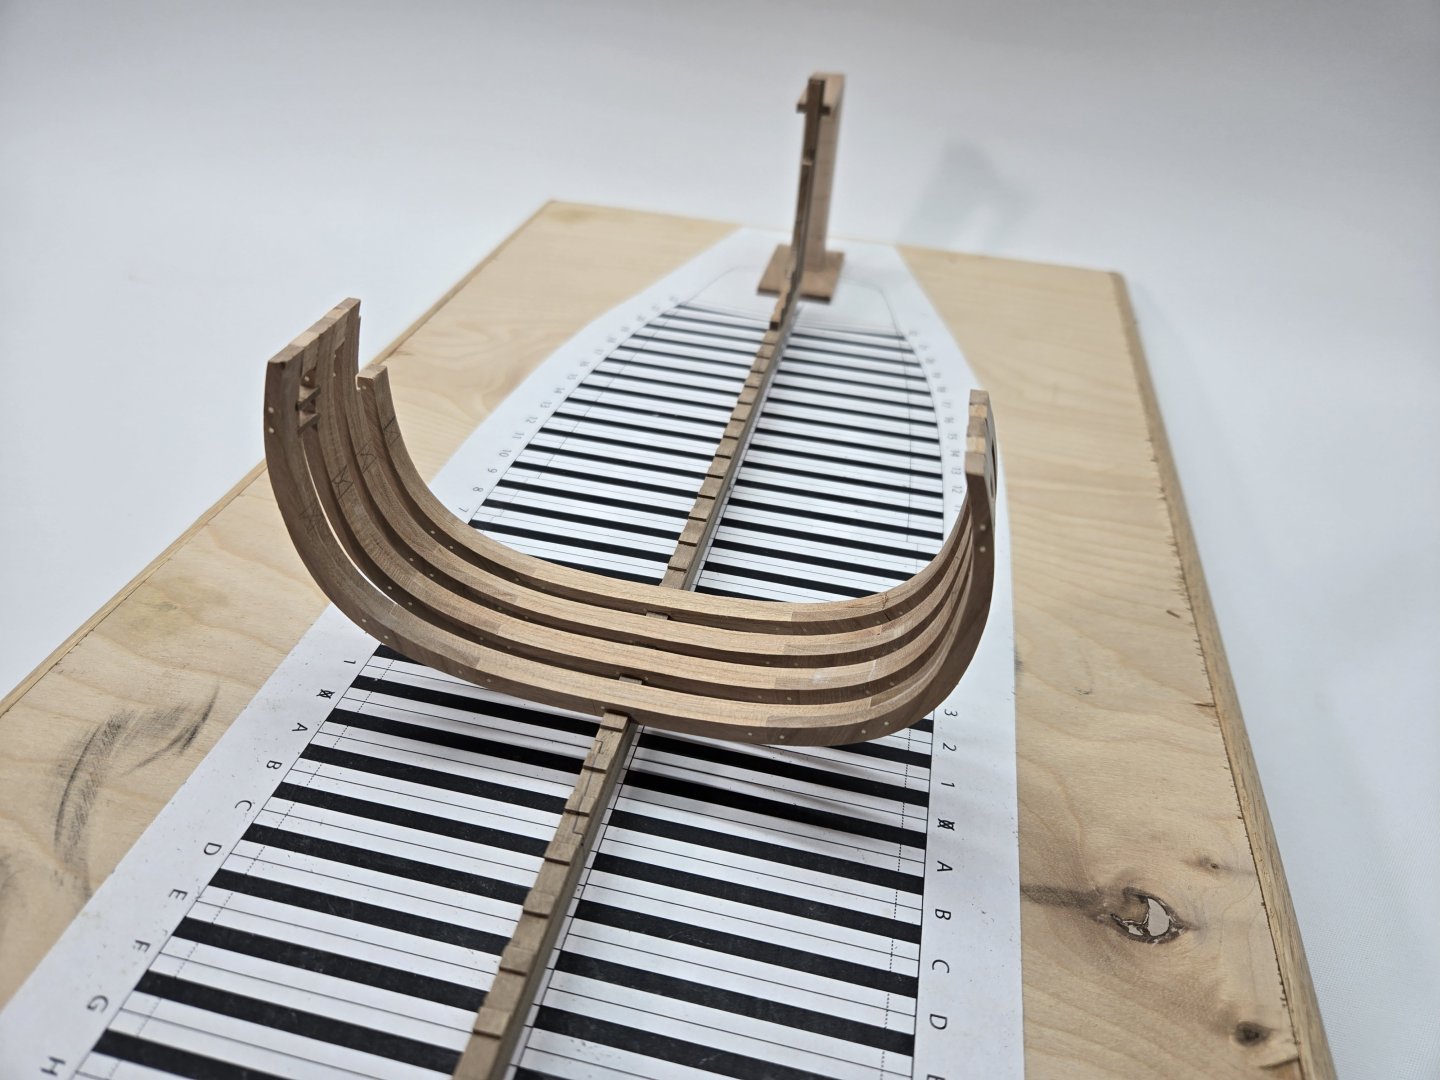
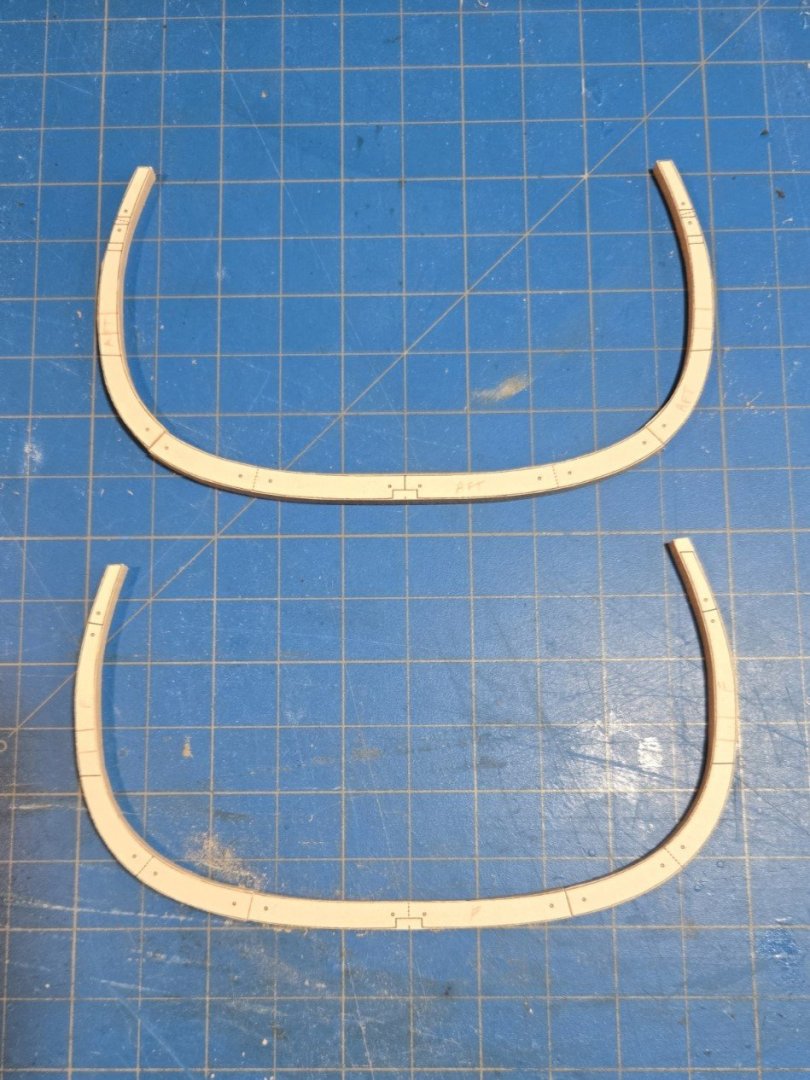
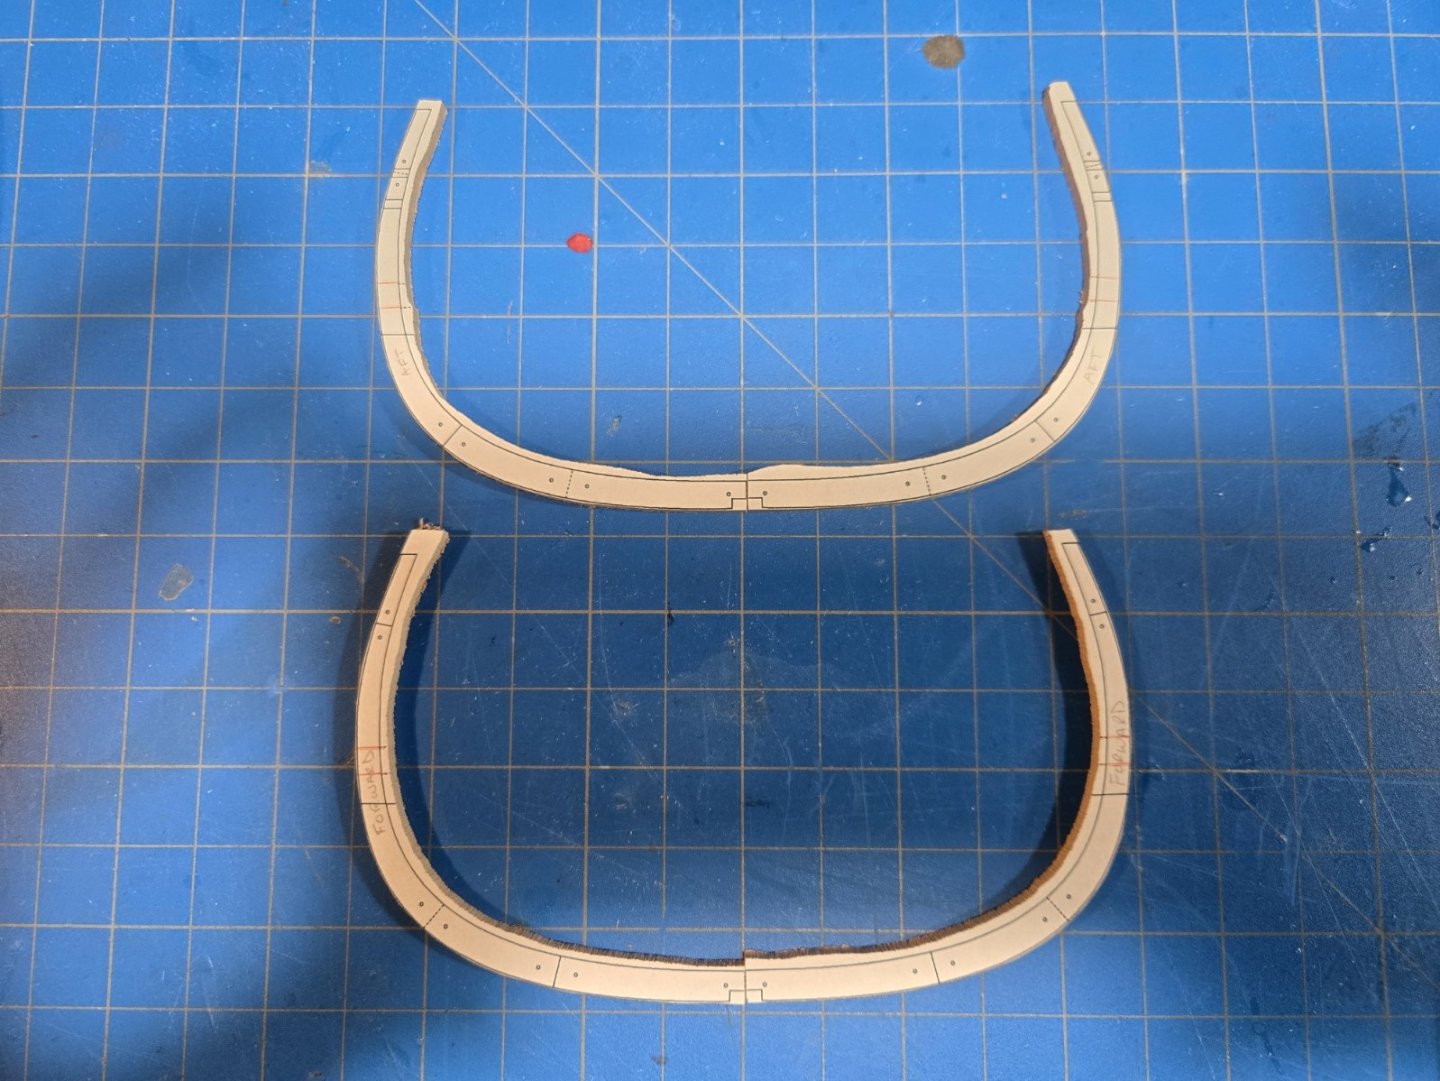
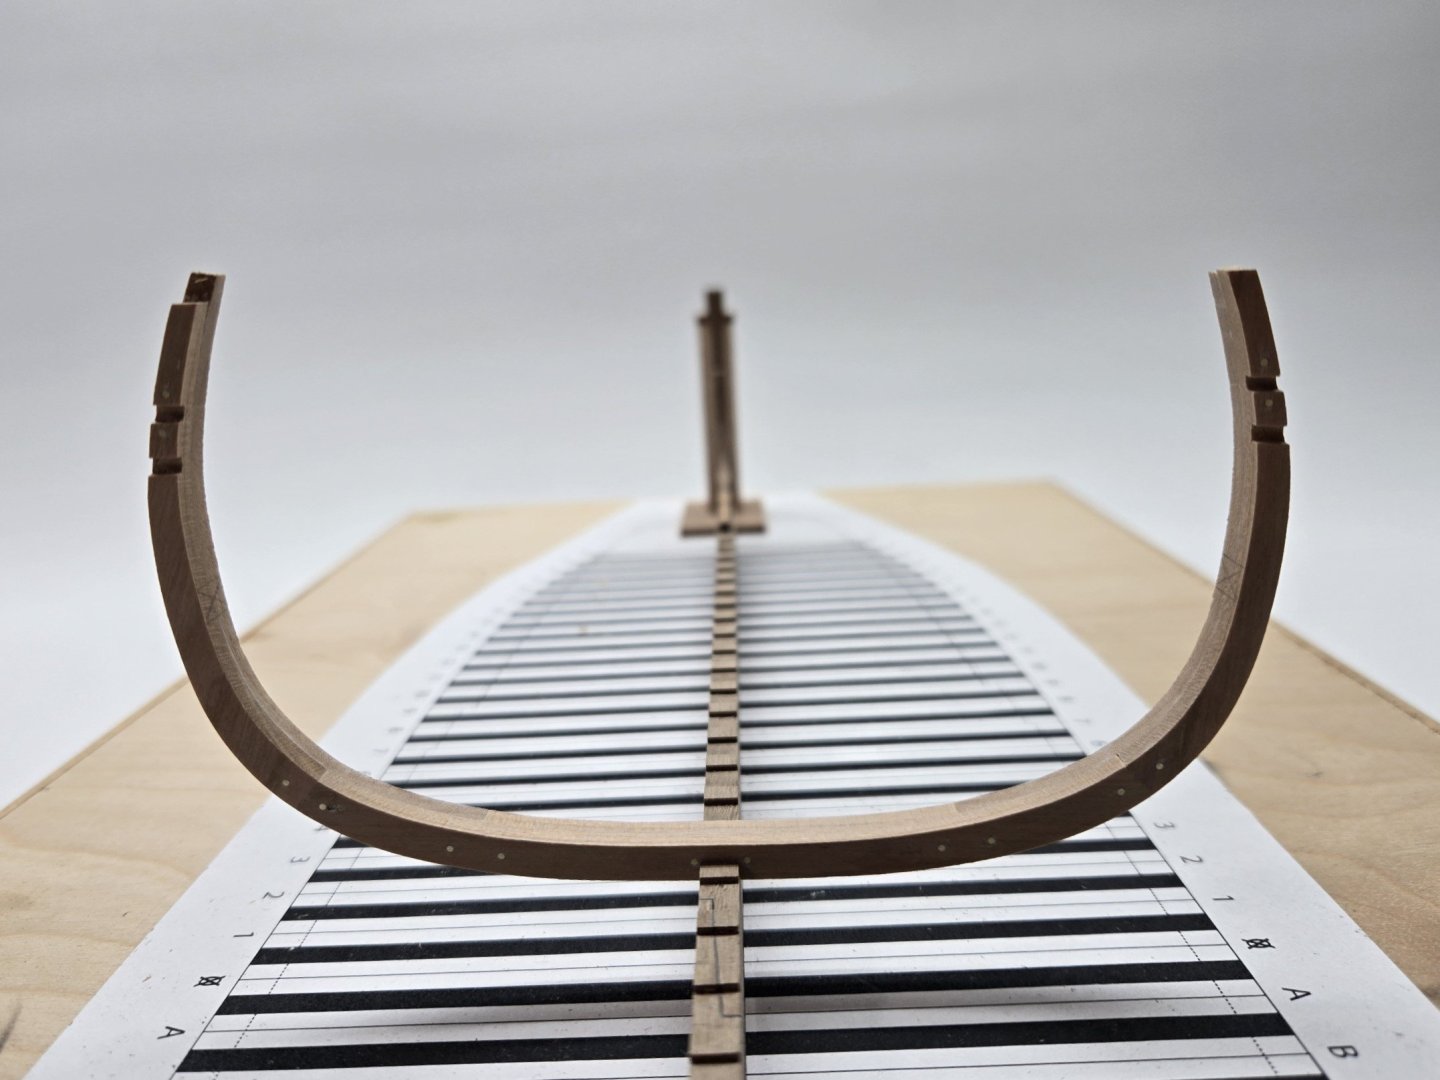
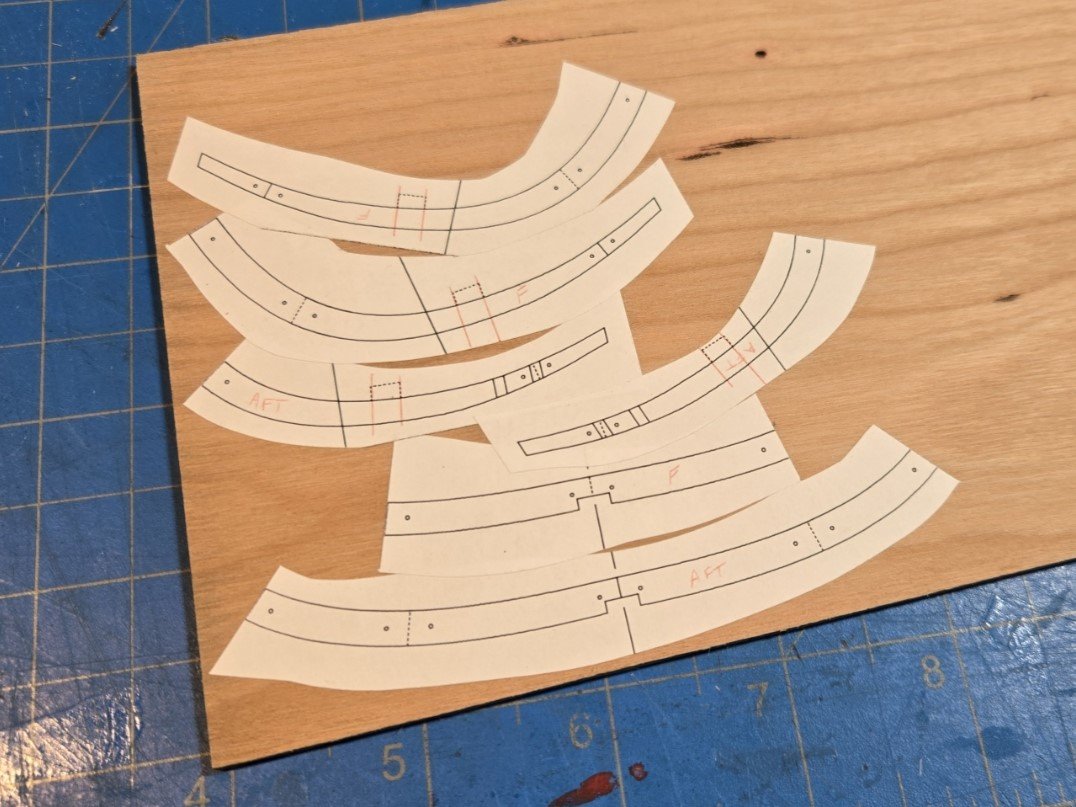
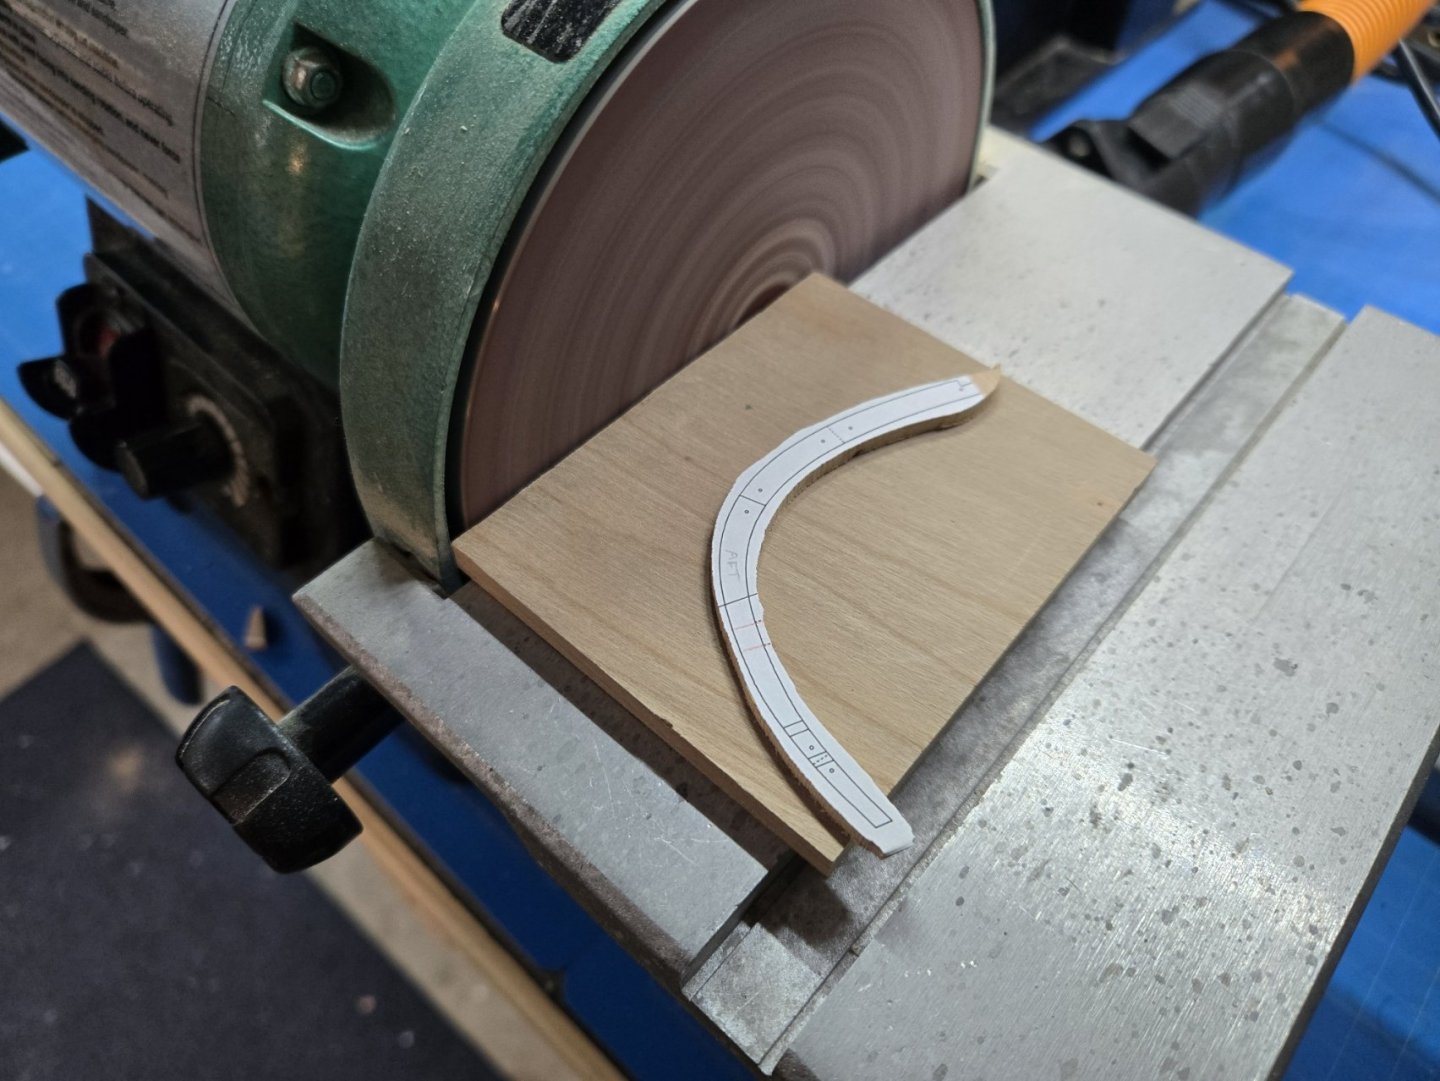
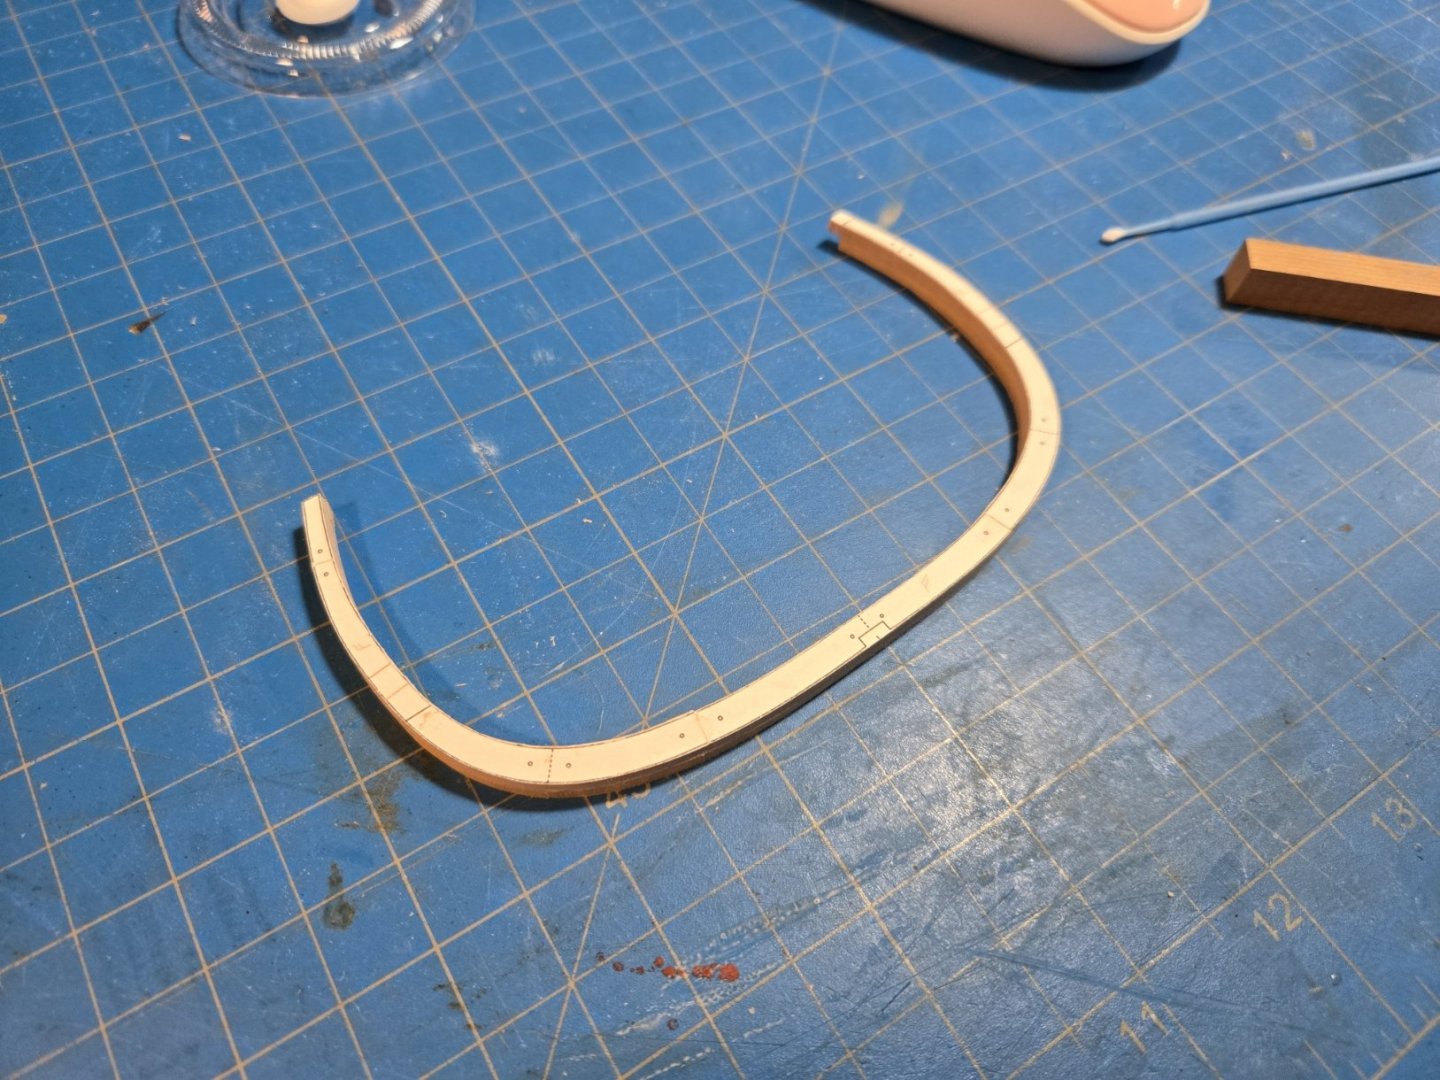
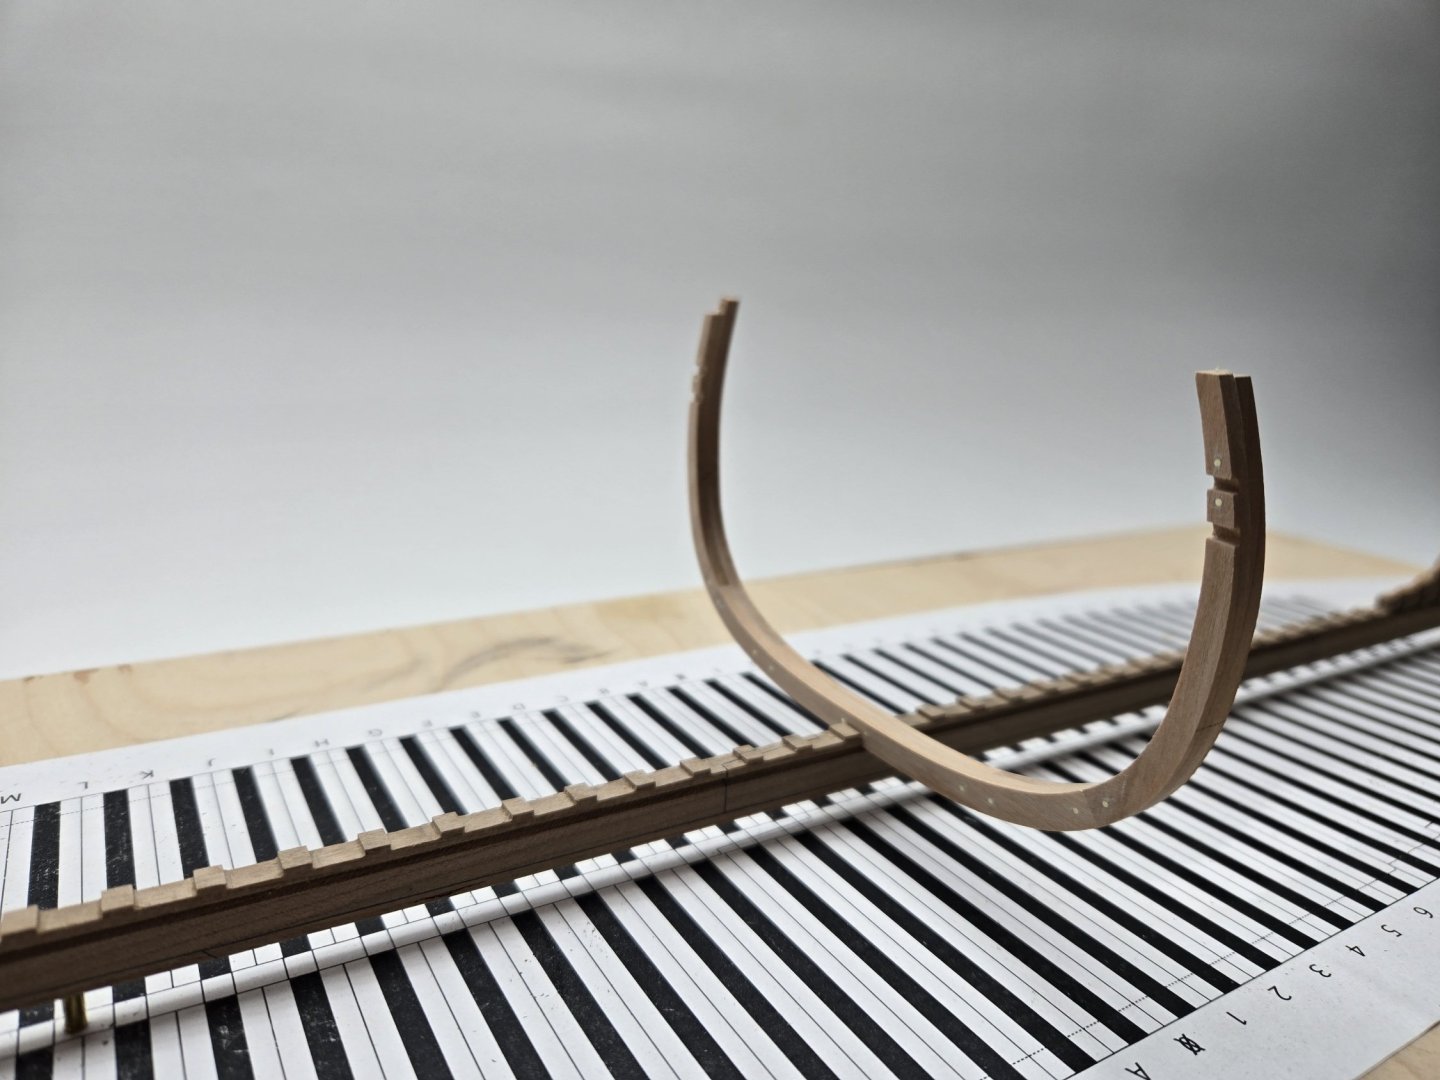
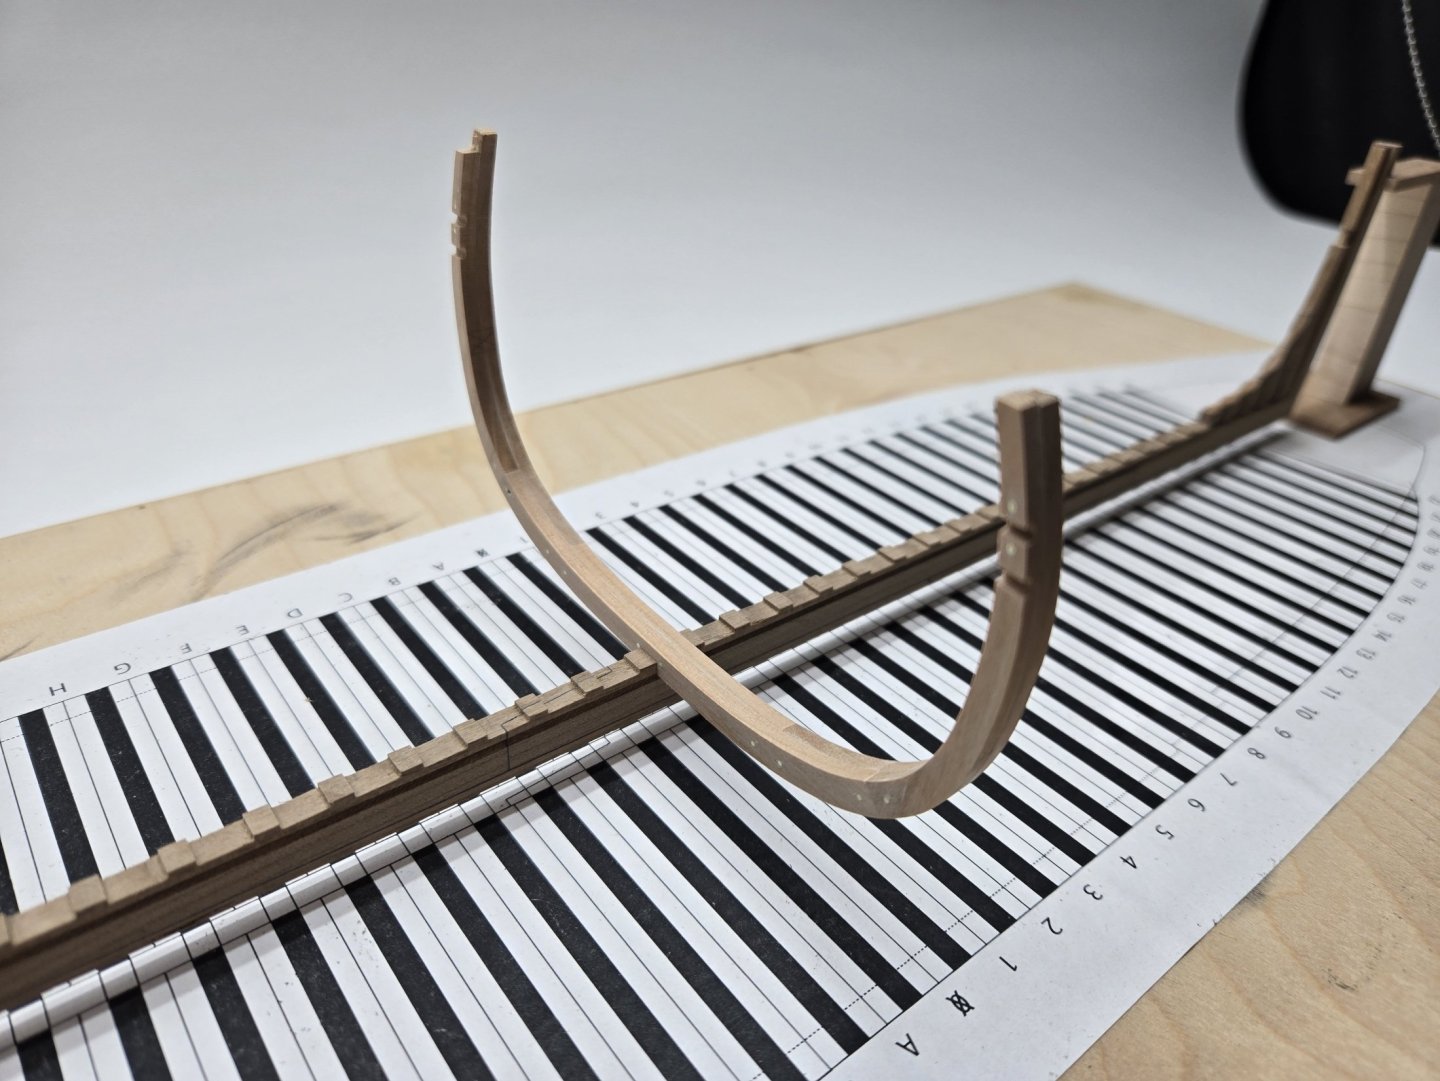
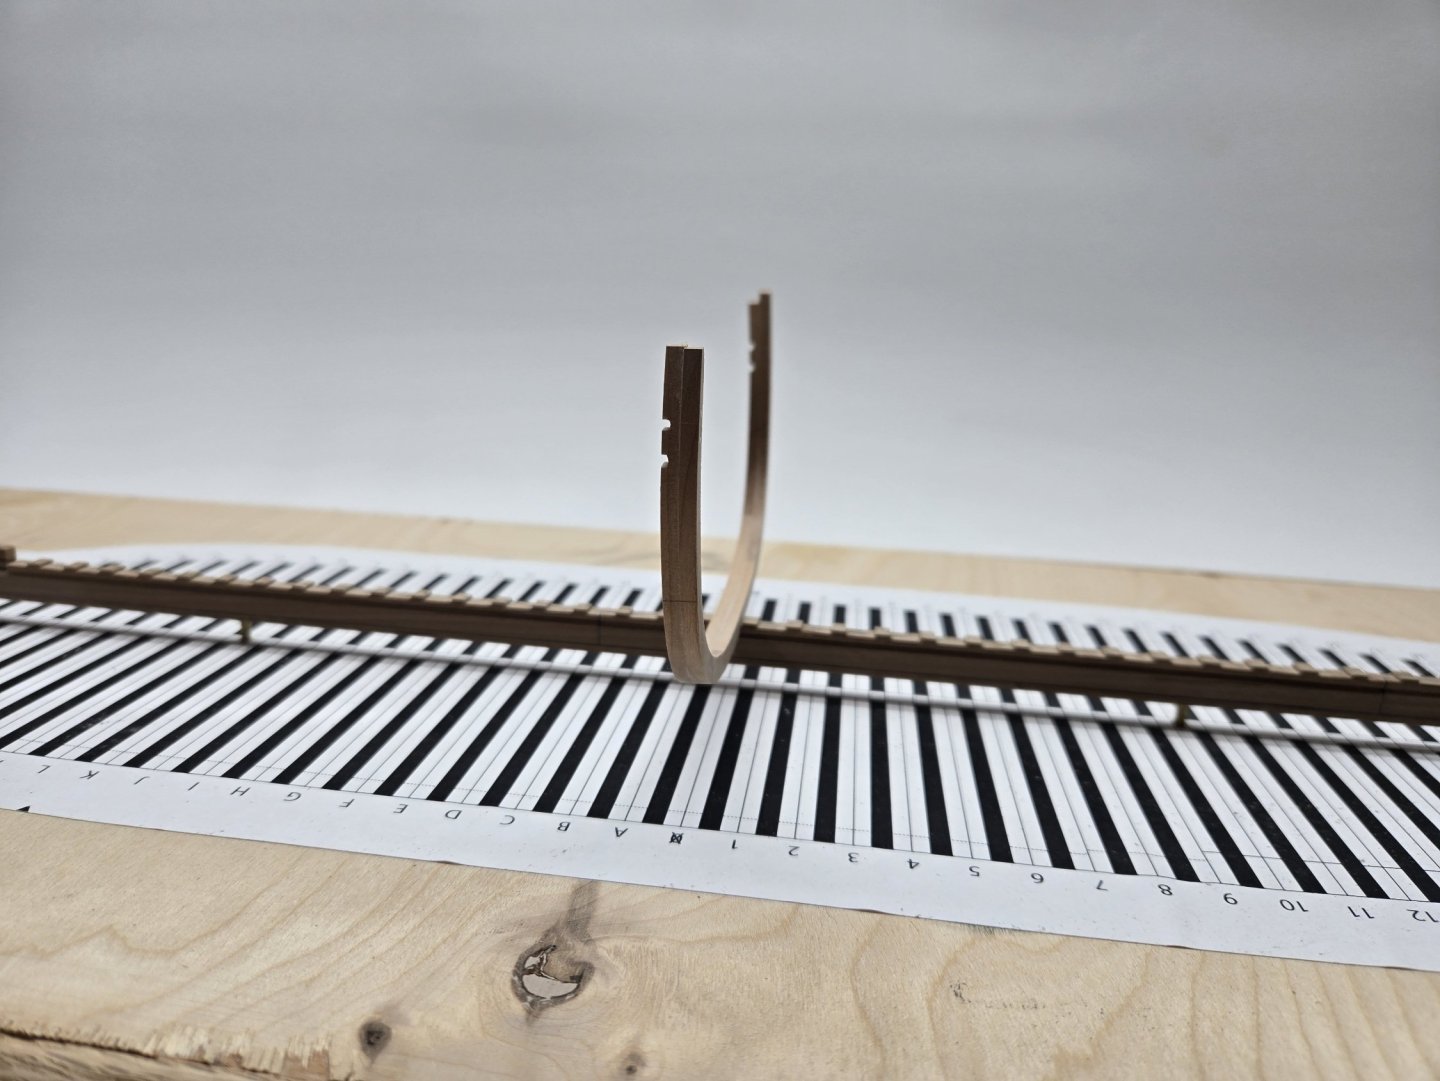
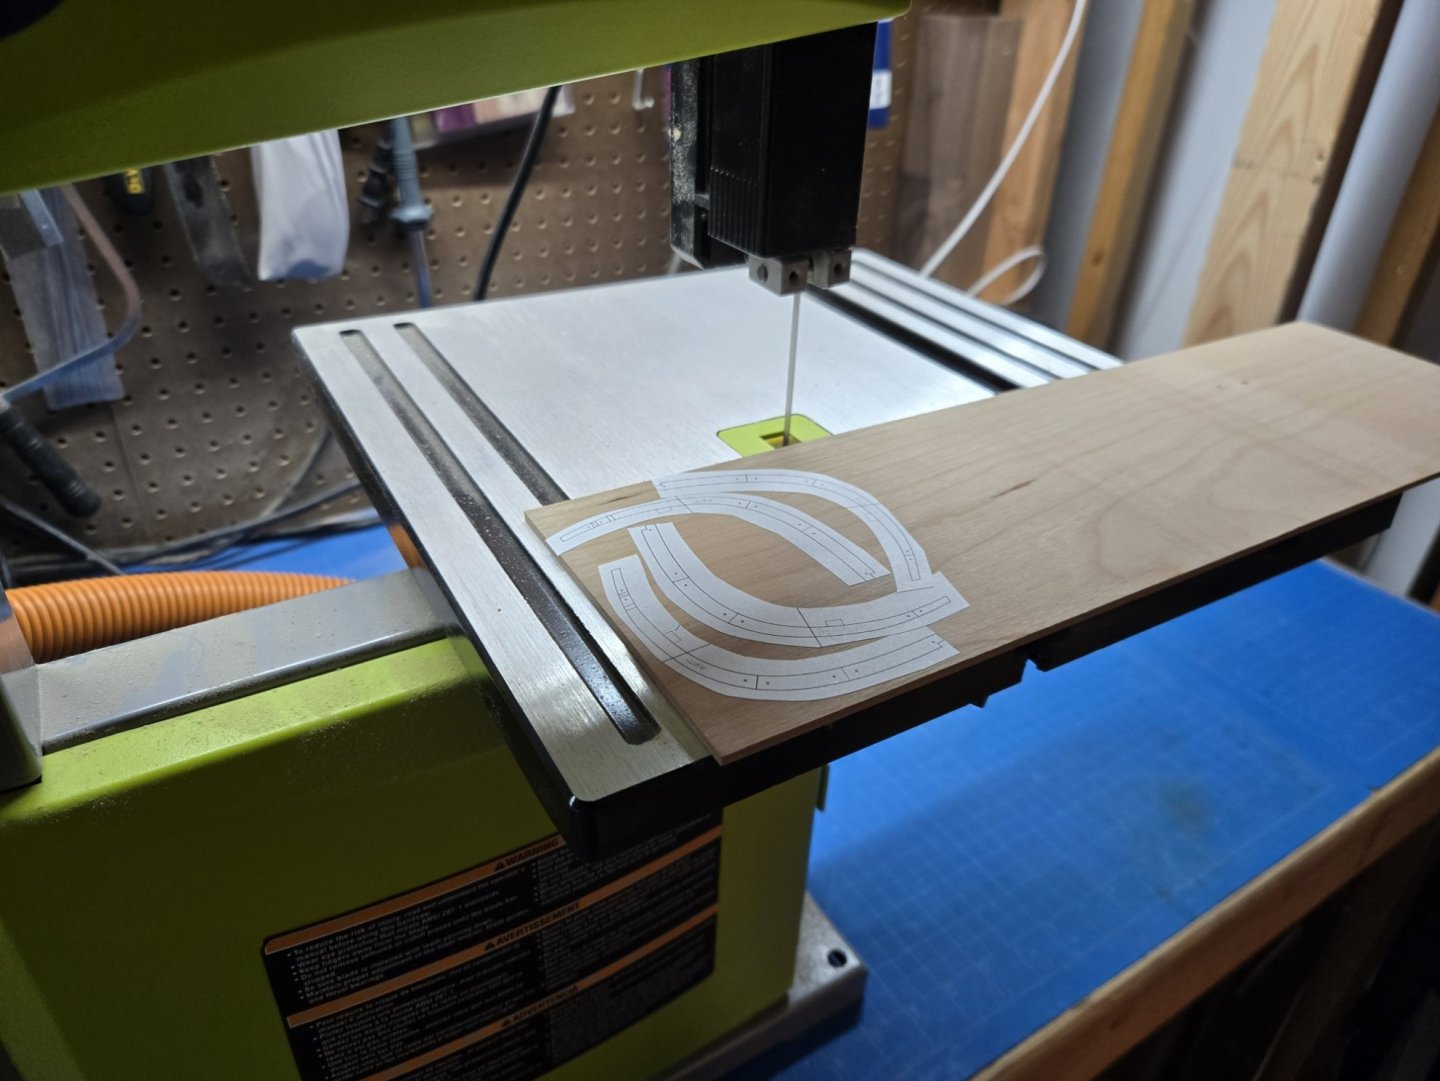
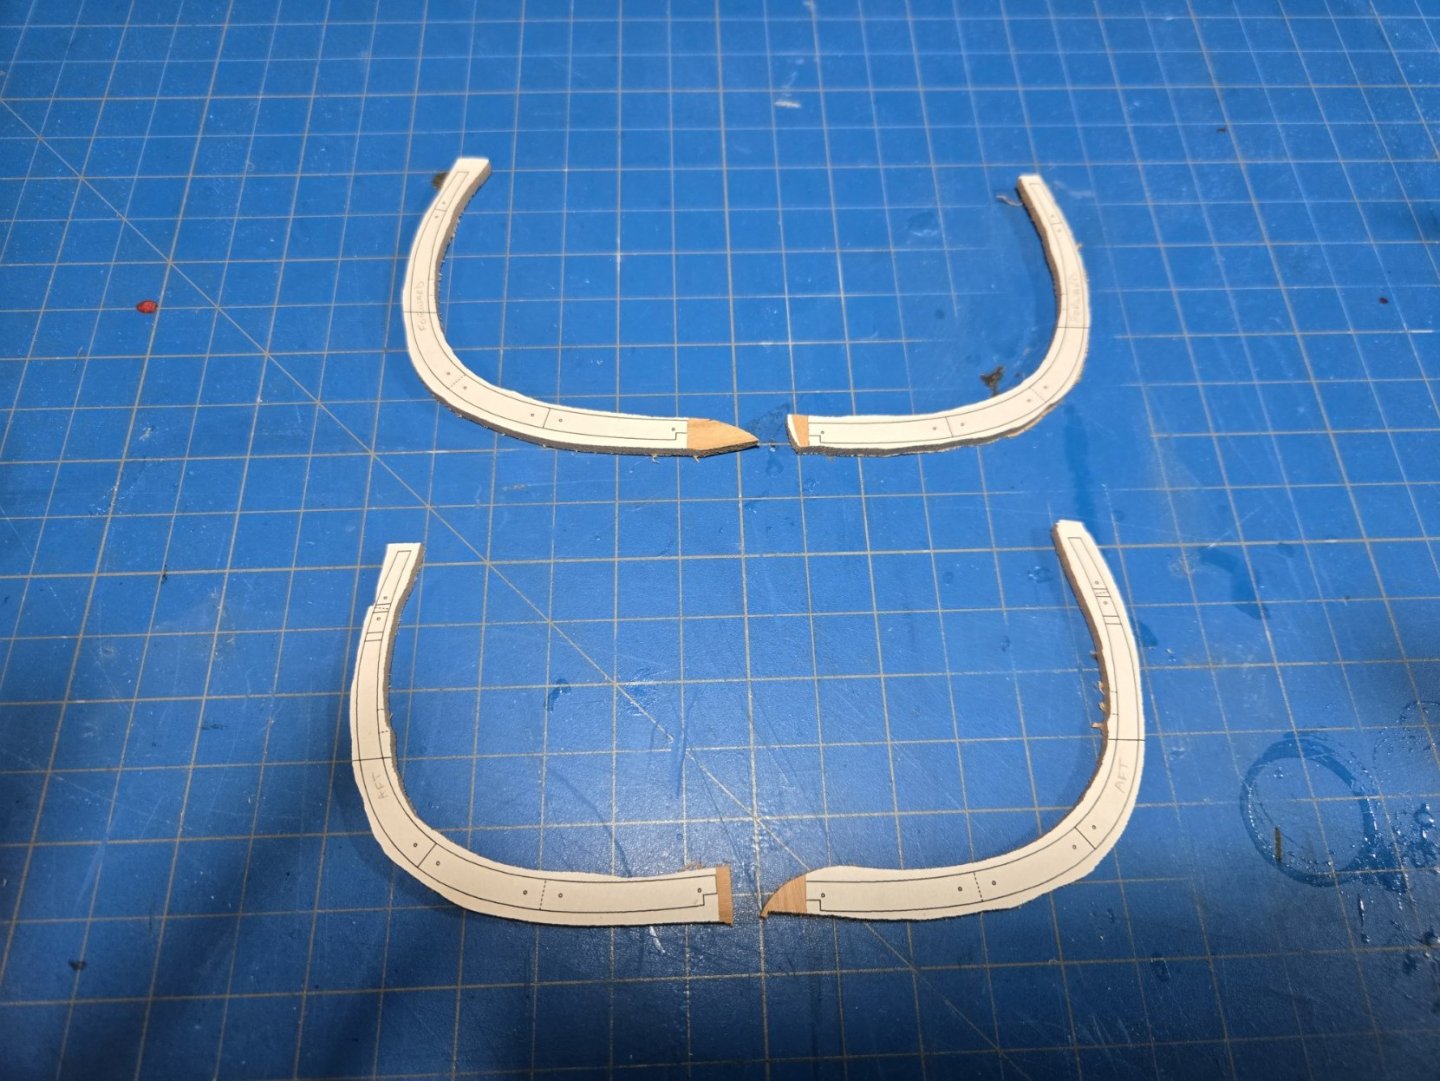
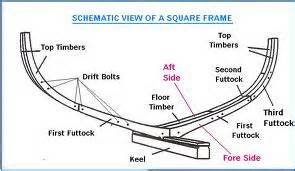
Chess Tourney's. MLK Day, Inauguration's and a bit of shipyard mayhem... What a weekend! Friday and Saturday were entirely spent at a High School State Chess Championship in Seattle. It was an intense marathon, with my kids playing nearly 20 hours of chess over two days. Last year, we placed 4th, but this year, we tied for 1st! Everyone was ecstatic about their performance, and I couldn’t be prouder of them. It was a fantastic way to head into a three-day weekend, with Sunday and Monday spent in my shop. This weekend, my focus was on establishing an efficient process for building the many frames I need to complete. Drawing from my experience with the TRITON build—which has a very similar framing structure—I had a clear idea of which tools and order of operations to use. However, I quickly realized I had forgotten some of the finer nuances of clean, efficient work. In general, my process involves a 9" bandsaw with a 1/4" blade, followed by a disc/belt sander and, occasionally, a spindle sander. The first midship frame turned out well, but as I examined it closely, I spotted a critical error in the construction—can you see what it might be? This error would have resulted in an incredibly weak construction, so I had no choice but to start over completely. It’s amusing to think I could make such a mistake, especially given how many frames I’ve built using this method. Thankfully, I was able to laugh it off, rebuild the frame from scratch, and end up with a much better result. If you guessed that my mistake was cutting the frame down the midline, you’re absolutely correct. The plans include lines indicating the layout of the first futtocks, futtock risers, and so on. It’s entirely possible that the real ship would have been constructed with a split between the floor futtocks, similar to the illustration below. However, for a model of this size, such a design would be far too fragile. Instead, it’s better to construct the floor futtocks as a single piece, while assembling the rising futtocks according to the plans. This approach ensures greater stability without compromising the overall design. I rebuilt the frame, this time keeping the floor futtocks intact, which also helps ensure proper alignment during assembly. Pictured are the aft and forward halves of the single midship frame. Once I finished the frame with the drift bolts installed, I was pretty satisfied. However, after reviewing the pictures repeatedly and comparing them to the actual model, I’m starting to second-guess my decision to stick with the original drift bolt plan. I’ve always liked the look of brass for the contrast it provides in highlighting detail, despite the obvious realism issues. That’s why I went with it initially. But as I consider the model more holistically, I’m beginning to have doubts. In person, it’s more pleasing, but in the pictures, it looks a bit out of place. I had previously experimented with black monofilament, but I didn’t think it would look appealing when multiplied by potentially 1,000 bolts. I’ve also experienced the painstaking process of making trunnels with a draw plate (and thoroughly disliked it). So I opted for brass because I enjoy the contrast it provides. Now, though, I’m wondering if I made the right choice. This is the time to decide, and I don’t mind redoing it a third time if necessary. I think I’ll sleep on it, but I’d love to hear your thoughts. For now, it’s only dry-fitted, as I’ll be building out the ports and other details between the frames before permanently mounting them to the keel. I plan to work frame by frame, one at a time—a process that will likely take the next three months! Two days spent on one frame, I can only get faster from here.
-
I would use a UV active clear resin personally. Its sands well and will blend very nicely with the rest of the finish. It wont react with any glues or other finish you've put in and wont shrink like like other fillers might. You can get a bottle of it and a UV flashlight for under $25. Easy stuff to use.
-
I use both and appreciate the purpose of each. Many builders never create a build log but instead share their finished work in the gallery, giving those of us who are interested a chance to see and learn from their creations. Even without a build log, the gallery serves an important and informative role, as there is much to learn from how builders choose to "finish" their work, stage it, or display the final product. I’ve noticed that many build logs end without showcasing that critical final step of presentation and display. Additionally, the clutter of build log photography often detracts from the quality of the work itself. In contrast, the gallery offers a unique opportunity to declutter and focus the photography on the finished piece, free from the distractions of the workbench. Ive never thought of it as repeating something from my build log, but an entirely separate contribution.
-
I agree with above, I always appreciate the historical context and envy your planking job - looking forward to seeing it through.
- 284 replies
-
- Chile
- Latin America
-
(and 5 more)
Tagged with:
-

Bit of a problem! HMS Speedy, Vanguard Models
Justin P. replied to JohnEvans's topic in Masting, rigging and sails
If I haven't made 50% of a Model at least twice then I'm not sure I've really built it. I think the other guys are right... remake it. -
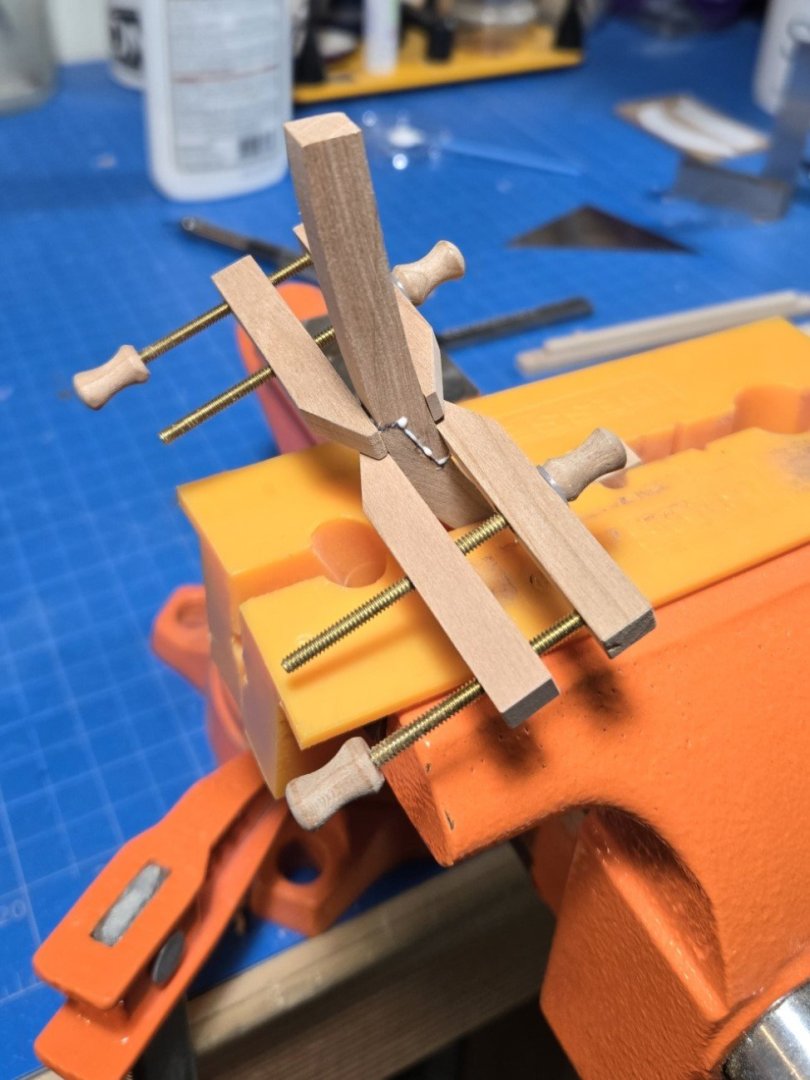
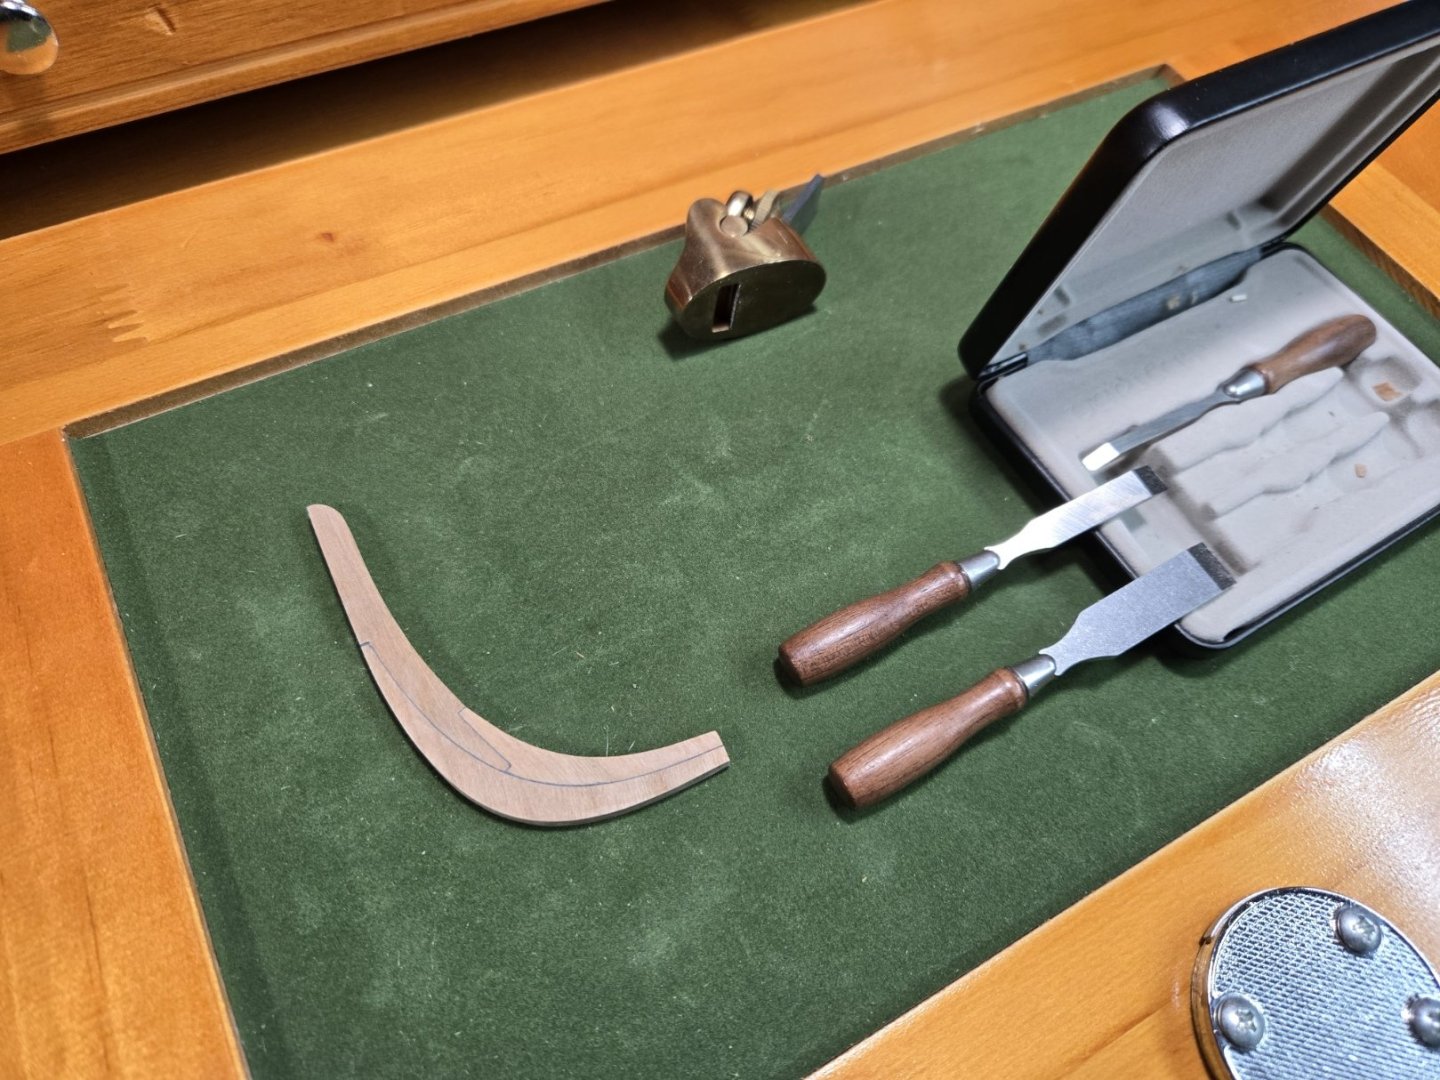
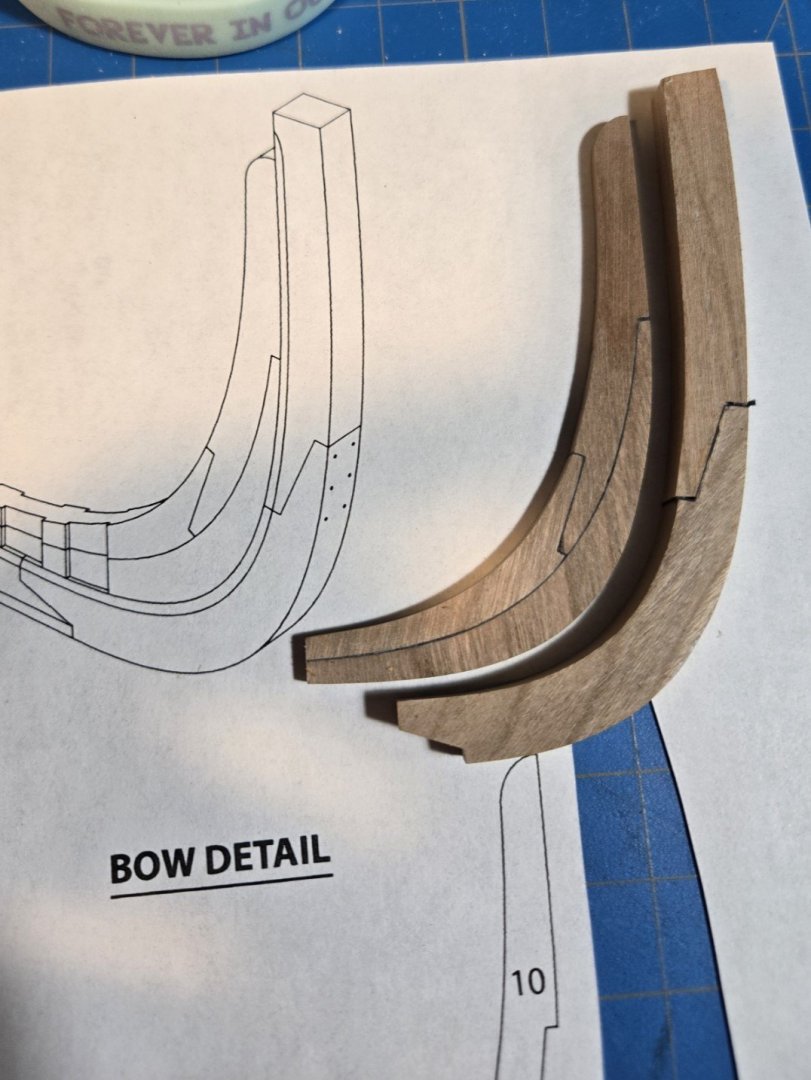
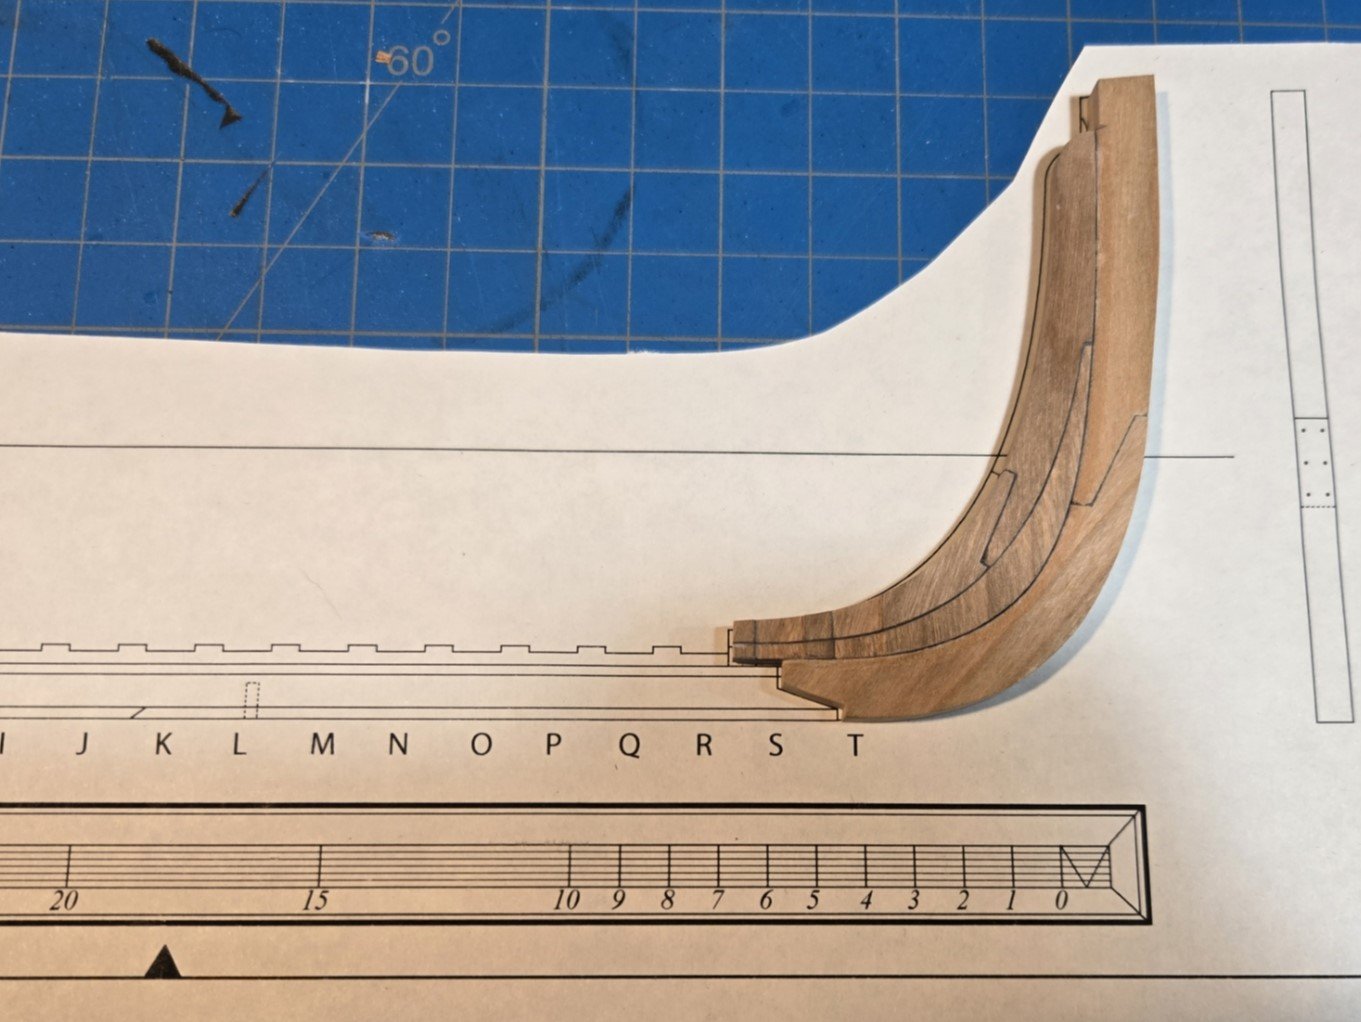
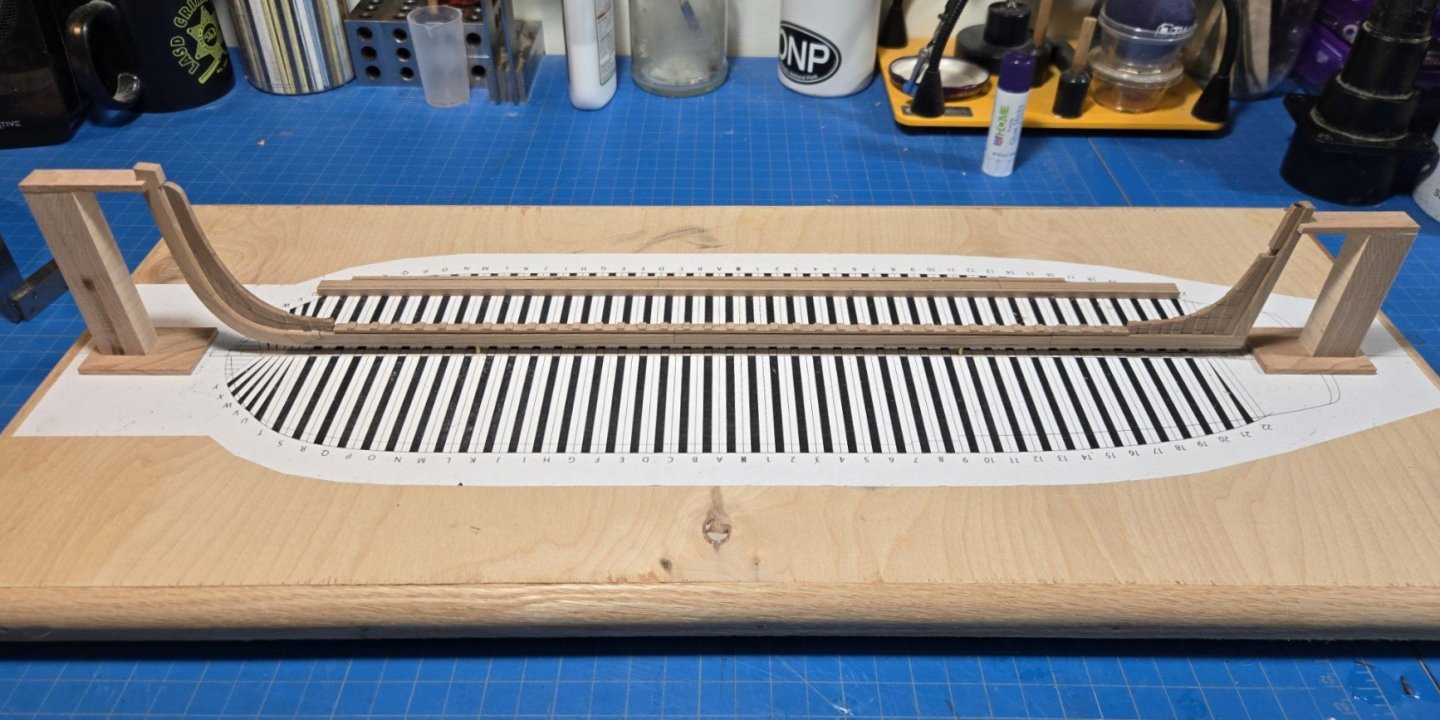
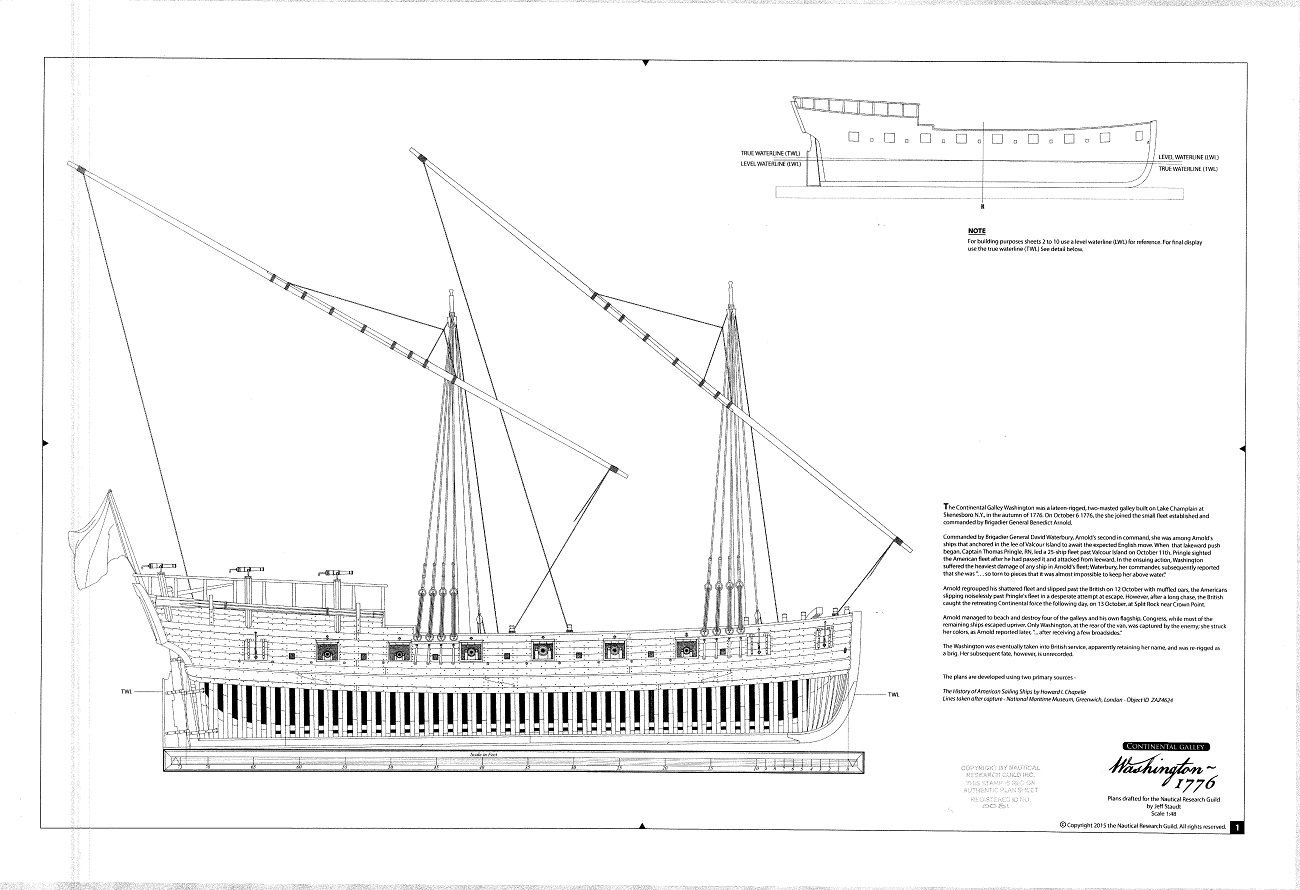
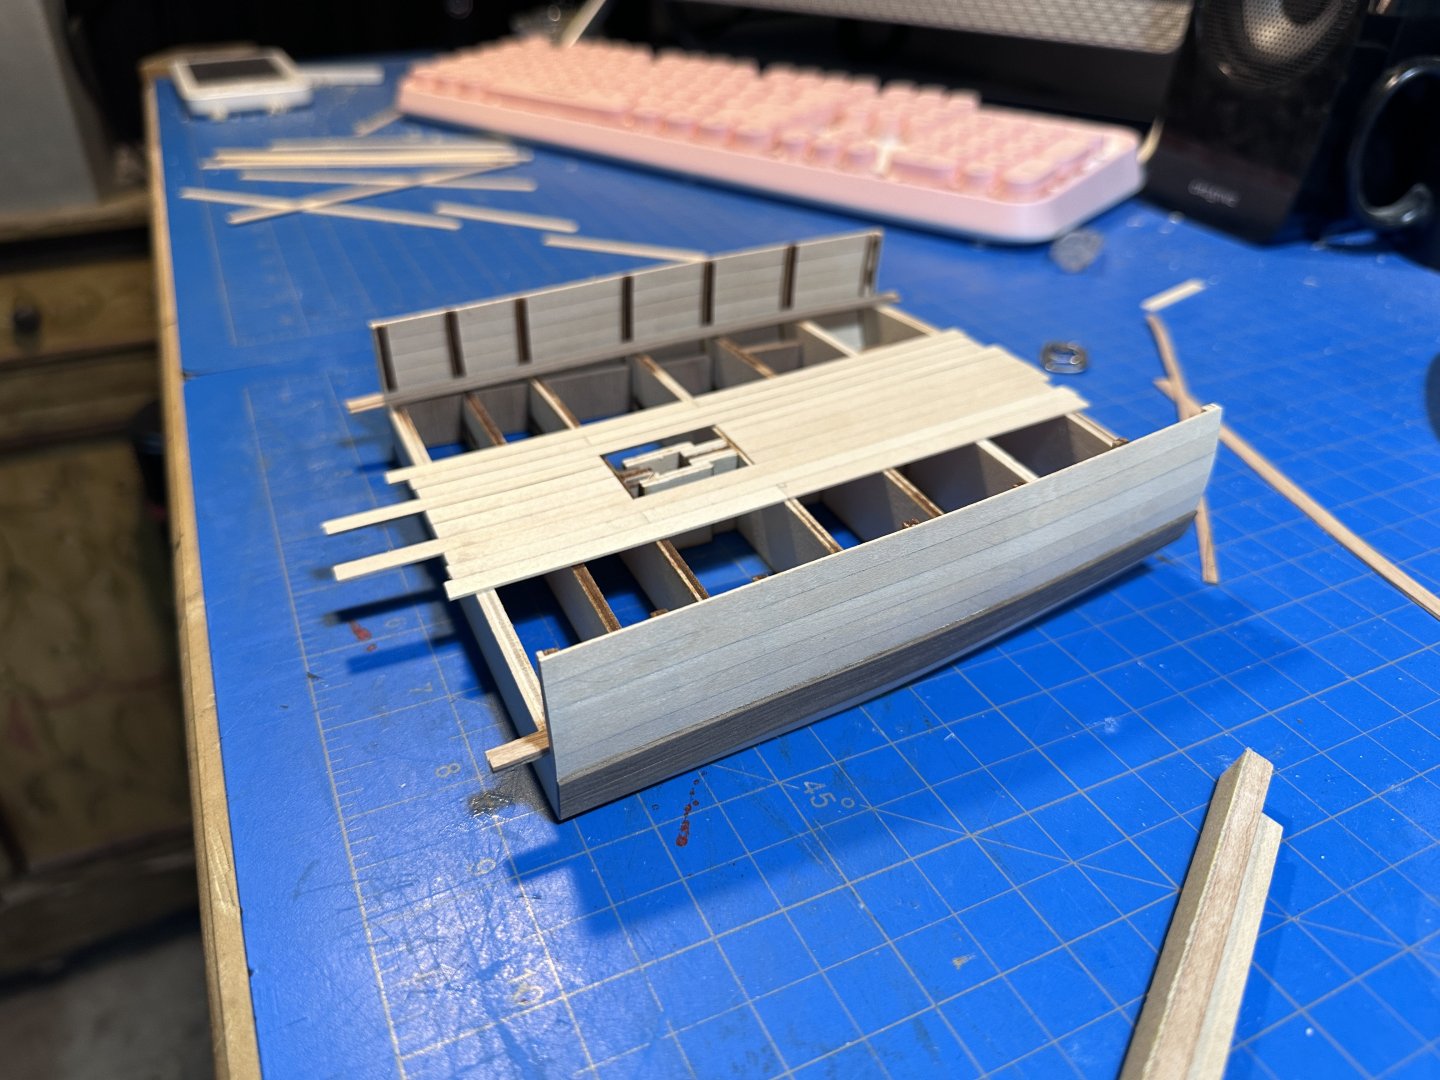
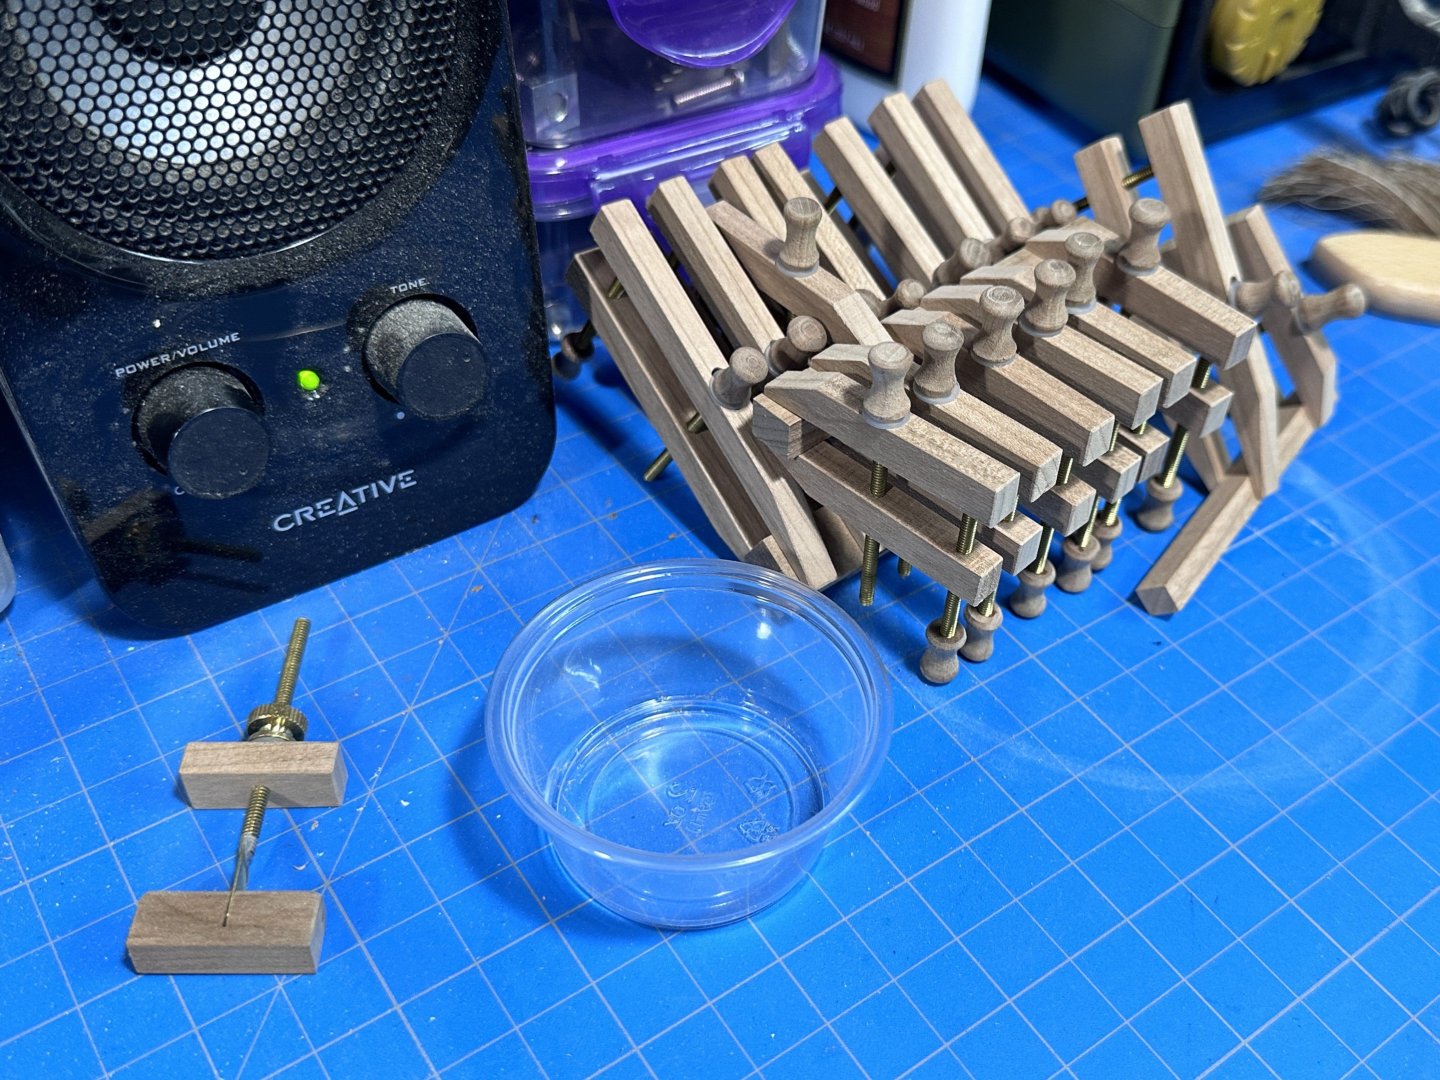
To say it’s been a while would be an understatement. After completing my TRITON build, quite a lot has happened to pull me away from the shop—only recently have things begun to settle down. I embarked on an entirely new career, teaching high school full-time, completed my teaching preparation courses (endorsed in Art, ELA, Social Studies and Middle Level Humanities), earned a second master’s degree, and took our high school chess team to the state competition three years in a row. It’s been a wild ride, but I’m happy to report that I can finally get back to work. As I neared the end of my TRITON project, I knew I wanted to take on a full-scale build. However, I also wanted to be careful not to become overly ambitious. With that in mind, I moved away from the Swan series and the Hayling Hoy—both excellent and well-documented options—but ones I feel I should save until my skill set matches the level of preparation that has gone into those designs. In the interim, I dabbled with a couple of smaller projects that were more manageable given my limited time. I built several Tosti clamps (both parallel and plank clamps), brought the NRG Capstan project to about 90% completion, and started the Masting and Rigging project. The latter two, developed by Toni Levine, are fantastic exercises and absolutely worth finishing—I’ve been selfishly using them to scratch the itch whenever I could dip into the shipyard. During this time, I’ve also been slowly preparing everything for my WASHINGTON build. Initially, I ordered one set of plans, but after some consideration, I decided it would be more practical to buy a second. This allowed me to keep one set for markups and notes while using the other for cutting. I highly recommend this approach—it has saved me the hassle of dealing with copiers and printers. I also created a timber list, settled on wood choices, placed a substantial order through Modelers Sawmill (which I highly recommend), and gathered a few additional materials based on what I found useful during my last scratch build. Once I sourced a build board according to the recommended specifications and set everything up, I jumped into keel construction. The truth is, I actually started this project back in May, but I held off on creating a build log until I was sure I was making steady progress and had fewer outside commitments. Unfortunately, there are many unfinished WASHINGTON build logs out there, and I didn’t want to add to that list. While they remain valuable resources on MSW, it always pains me a little to see them end without a conclusion. Having spent so much time away from the shipyard definitely showed in the early stages—I ended up building my keel three times. It was a frustrating and humbling experience, especially considering it’s just a few long, straight sticks! Getting the scarf joints right was a relearning process, and I also experimented with using paper to simulate oakum. I tried lightweight black construction paper, but it was too thick to bond well, so I switched to black tissue paper, which worked much better. Once I had a keel I was satisfied with, I moved on to the stern details, which also took a few attempts before I started seeing success. Fortunately, assembling and final routing for the frames went smoothly. Once they were attached to the keel, I started to feel that excitement again, confirming I had made the right project choice. The stem proved to be another challenge—I think I built three of them before finally accepting my limits and committing to one. Getting all the curves and joints to fit together while maintaining the correct proportions was another lesson in humility. I wrapped up this stage by adding the bow and stern support fixtures, which will remain fixed to the building board for the foreseeable future. Next up is frame construction—thankfully, my TRITON build prepared me well for this stage, so I feel confident I can tackle it with relative success. Thanks all for bearing with the long story, and wish me luck as I dip my toes back in the pool....
-

NRG Masting and Rigging Project
Justin P. replied to tlevine's topic in NAUTICAL RESEARCH GUILD - News & Information
Ordered! Thanks Toni for another great mini-project! Just finally getting round to finishing up my capstan project! -

kit review 1:10 Turbofan Engine - Teching (build review)
Justin P. replied to James H's topic in Non ship-related reviews
Man Ive wanted one of these for awhile, but could never justify it to the family... jealous! Following along! -

Next NRG Conference
Justin P. replied to YankeeClipper's topic in NAUTICAL RESEARCH GUILD - News & Information
I second the suggestion that a hard look at the PNW be made. Aside from Bremerton, which has historic ship museums, an undersea museum as well as a healthy maritime tradition it also has the Center for Wooden Boats, the School of Wooden Boat Building and the annual Wooden Boat Festival. Im positive a location could be had at reasonable prices with choice accommodation collocated. I also live here... which is a bonus for me :). -
Chuck, Ive been away from the Hobby and MSW for the last 9-months or so as I adjust to the new realities of teaching high school. Ive been poking my head in a little now and then as I start preparing for two luxurious months off back in my shipyard and must say its comforting to see you still at it - amazing everyone with your innovations and selflessly working yourself to the bone to our benefit. Congrats on the ten years - and get well soon!
-

3D Printing Cannons in Resin
Justin P. replied to thibaultron's topic in 3D-Printing and Laser-Cutting.
Great thread thus far. Ive been thinking of experimenting a little as it relates to ship modeling. Incidentally, in the last year Ive take over a High School program teaching metals design. We run a fleet of Anycubic Mono 6K's. I teach lost wax casting and lost resin casting using Sirya Tech printable casting resin. Our parts go through a burnout process and the printed parts are then cast in bronze, brass etc. Fun stuff! Following with interest! -

Jim Byrnes Thickness Sander Operation Tips
Justin P. replied to ChrisLBren's topic in Modeling tools and Workshop Equipment
I haven't tried bits that are that long, but have found that success comes when not being really aggressive. I take more passes that take less material. Also mounting the paper and holding your work carefully helps a lot. I usually need two hands to run a piece successfully. One feeding or holding a push stick and the other guiding / holding the piece flat against the bed as it comes out the other end. Most of my errors happen near the end of the feed so the opposing hand becomes critical to keep the work from being manipulated by the drum. You might also try sequencing your mill work differently. For instance, I usually rough cut my work before the thickness sander - which is likely why Ive never had to feed 24" stock. -

Helping Hands recomendations in the uk
Justin P. replied to DaveBaxt's topic in Modeling tools and Workshop Equipment
I cant imagine there would be. Maybe the plate is larger? I only have the 4 arm model and found that to be plenty. -

Helping Hands recomendations in the uk
Justin P. replied to DaveBaxt's topic in Modeling tools and Workshop Equipment
Hi Dave, I use the QuadHands as outlined here: It looks like the QuadHands unit is available via Amazon UK, but is much more expensive. To answer your question though, it is a VERY robust unit that does not move at all. The magnets are very strong and the units anti-slip feet are quite good. Its also pretty heavy so it can take some leverage without tipping or moving. https://www.amazon.co.uk/QuadHands-Deluxe-Workbench-Helping-System/dp/B01MZG2D99 -
Strange! Was the option not available in the lower corner "CC?" I just checked and it works for me, the captions are actually really good. I have enjoyed my Sherline so far, though the rigamarole assembly and squaring everything up had me a little confused. The nice thing about the Proxxon is that it is more or less plug and play.
-
Completed. Sadly, all of the photos I took of the last stages of this build were lost. Im still not sure how this happened, but as went to update this build log I noticed they are all gone. Im supremely disappointed but happy to report that Ive completed my Triton. What a project. Im excited to have completed it, and looking forward to moving forward with a new project. Thanks to everyone for your kind words, support and assistance through this project. A relative has kindly volunteered to make a case for it, a challenge I think they welcome and are looking forward to, so I won't be taking that piece on. I did however make a temporary mount seen in the below photo and accompanying gallery. GALLERY Onward!
-
No you didn't. I perhaps incorrectly confused my launch and longboat (the terms have been interchangeable to some degree). As the longboat in this case was a painted transom I did not plank it. With the launch however, I did as not doing so didnt seem quite right. I recall as well, that particular kit manufactuer chose to laser etch a part number onto the transom that was difficult to remove or cover up. As I could not find a readily accessible reference for it, I simply did some google searching. I have also seen many open boats with transoms constructed from planks so just went with it.
About us
Modelshipworld - Advancing Ship Modeling through Research
SSL Secured
Your security is important for us so this Website is SSL-Secured
NRG Mailing Address
Nautical Research Guild
237 South Lincoln Street
Westmont IL, 60559-1917
Model Ship World ® and the MSW logo are Registered Trademarks, and belong to the Nautical Research Guild (United States Patent and Trademark Office: No. 6,929,264 & No. 6,929,274, registered Dec. 20, 2022)
Helpful Links
About the NRG
If you enjoy building ship models that are historically accurate as well as beautiful, then The Nautical Research Guild (NRG) is just right for you.
The Guild is a non-profit educational organization whose mission is to “Advance Ship Modeling Through Research”. We provide support to our members in their efforts to raise the quality of their model ships.
The Nautical Research Guild has published our world-renowned quarterly magazine, The Nautical Research Journal, since 1955. The pages of the Journal are full of articles by accomplished ship modelers who show you how they create those exquisite details on their models, and by maritime historians who show you the correct details to build. The Journal is available in both print and digital editions. Go to the NRG web site (www.thenrg.org) to download a complimentary digital copy of the Journal. The NRG also publishes plan sets, books and compilations of back issues of the Journal and the former Ships in Scale and Model Ship Builder magazines.





.thumb.jpg.c90ebb5a9c30fb9e30a62a322d786ed0.jpg)
.thumb.jpg.044070ffe19b46f073cb93bd1da76089.jpg)
.thumb.jpg.520cce6e297757e8a429916940ba46f1.jpg)
.thumb.jpg.d67895670444a4bbb0fd873d783a0356.jpg)
.thumb.jpg.2702c1b6b787ca3498ed700724d2f4b8.jpg)
.thumb.jpg.85d14e4ae35e110a287f53204bc6c06a.jpg)
.thumb.jpg.70222e010af7e26c77856f741de9cc5d.jpg)
.thumb.jpg.70a2bca5293c40a89807846d36226203.jpg)
.thumb.jpg.2898de82629426ffc240dcc56e52be66.jpg)
.thumb.jpg.049440457f4fc619d427aa25959ca1d7.jpg)
.thumb.jpg.fb2ee0c26068168bbc4a669e1b16c8dc.jpg)
.thumb.jpg.2a8fa8f4f2df2e08bbf4471f291315c2.jpg)
.thumb.jpg.b6514b8ad97ffb08b17b26ed3a640efb.jpg)
.thumb.jpg.30f46f1e13fe0c2116c984096af59778.jpg)
.thumb.jpg.3eb8cf8bac7726fe1099ade53d5a4ec9.jpg)
.thumb.jpg.cebfb1f817bf4a743c7a115ab1a05047.jpg)
