Justin P.
-
Posts
1,008 -
Joined
Content Type
Profiles
Forums
Gallery
Events
Everything posted by Justin P.
-

This is what it’s like to be a newbie
Justin P. replied to Laggard's topic in Masting, rigging and sails
This is some sage wisdom right here... quotable. -
Focus Stacking
Justin P. replied to Dennis P Finegan's topic in Photographing your work. How to do this.
I dont know if this is necessarily true. I think depending on your standard, and your capacity you probably can get away with both. However, I perform technical photography for documentation and examination purposes on medium to large size three-dimensional museum/library objects all the time. One facet of these workflows generally include focus-stacked images that can span up to 12" or more of depth and I use a rail. Doing so provides images with far fewer anomalies. Much depends on how you setup your workflow and how you plan your post-processing and the capabilities/resolution of your camera as well as your proficiency with purpose built software. -
Focus Stacking
Justin P. replied to Dennis P Finegan's topic in Photographing your work. How to do this.
Good focus stacking requires a rail in my opinion. They can be had for small amounts of money. In this way you are not adjust the focus of the camera, but it’s distance from the object providing greater clarity. Helicon Focus software is a great purpose built option if your looking to take focus stacking seriously. -
This is what it’s like to be a newbie
Justin P. replied to Laggard's topic in Masting, rigging and sails
I remember when you first posted photos of that hull all painted and finished... it was a treat. Well worth the effort. -
Just to throw a bit of snark in: given what Ive seen of Victory as a model kit, I would say the best one is the one you think you can complete.
- 36 replies
-
- 14
-

-

-
This is what it’s like to be a newbie
Justin P. replied to Laggard's topic in Masting, rigging and sails
I dont know Kurt, there are some out there that I think are simply imbued with magical powers. -
This is what it’s like to be a newbie
Justin P. replied to Laggard's topic in Masting, rigging and sails
This is a good one. I have learned that I am somehow compelled to absentmindedly destroy things Ive spent hours on. Newly completed parts now are put almost out of the room so I won't stupidly grab them. Moving slowly is good advice... not only in your build but also in your body. Learning exactly how your arms and hands are not inherently compatible with the structure of 1:48 rigging, yards and masts is a tough lesson. The model has its space and you have your space, and when the two meet: hope it's voluntary. -
The Master Korabel kit I completed was very accurate... I found the precut planks to be well made and true (though not a particularly challenging model). The other I completed was the Model Shipways Bounty Launch, which was less accurate, I wound up having to spile several of my own. However, as @VTHokiEE mentions, much of this is dependent on accuracy in initial steps.
-
That looks like a great way to get an even taper on the stem, I hope I remember it when the time comes. I read on your instagram feed that you were using Fixogum (rubber cement) to adhere the templates. How are you applying it? Does it apply evenly? How difficult is it to remove. How would you compare it to something like a regular glue stick? (Picture 3, post #9): Can I also ask how or to what purpose are you using the pencil lines? Seems like you penciled them in after removing the template, but then sanded them away? What was their function? (Picture 3, post #8):Final question... looks like your're using the Proxxon mini mill, but the motor mount looks different than mine... or maybe that is a lamp? I agree with @druxey, that pear looks wonderful. Where did you source it?
-
It’s Veritas, you’ll need to use it a LOT before it needs sharpening. Strop a lot though…. I’ve had mine almost two years, I’m real careful with it and it’s still extremely sharp. Having good blade etiquette goes a long way…. The bed of mine never goes on the table. Always goes back in the case when I’m done. Otherwise, I think you just approach like you would any plane blade.
-
Thats actually the only one I have, I also have the small shoulder plane... I use them a lot. Great tools even if small.
-
Nice! That plane jig looks great, is that the Veritas? I love that plane, I use it all the time. Ive never tried a jig though, now my mind is racing! Ill follow along if you dont mind.
-
NRG Capstan Project
Justin P. replied to tlevine's topic in - Build logs for subjects built 1751 - 1800
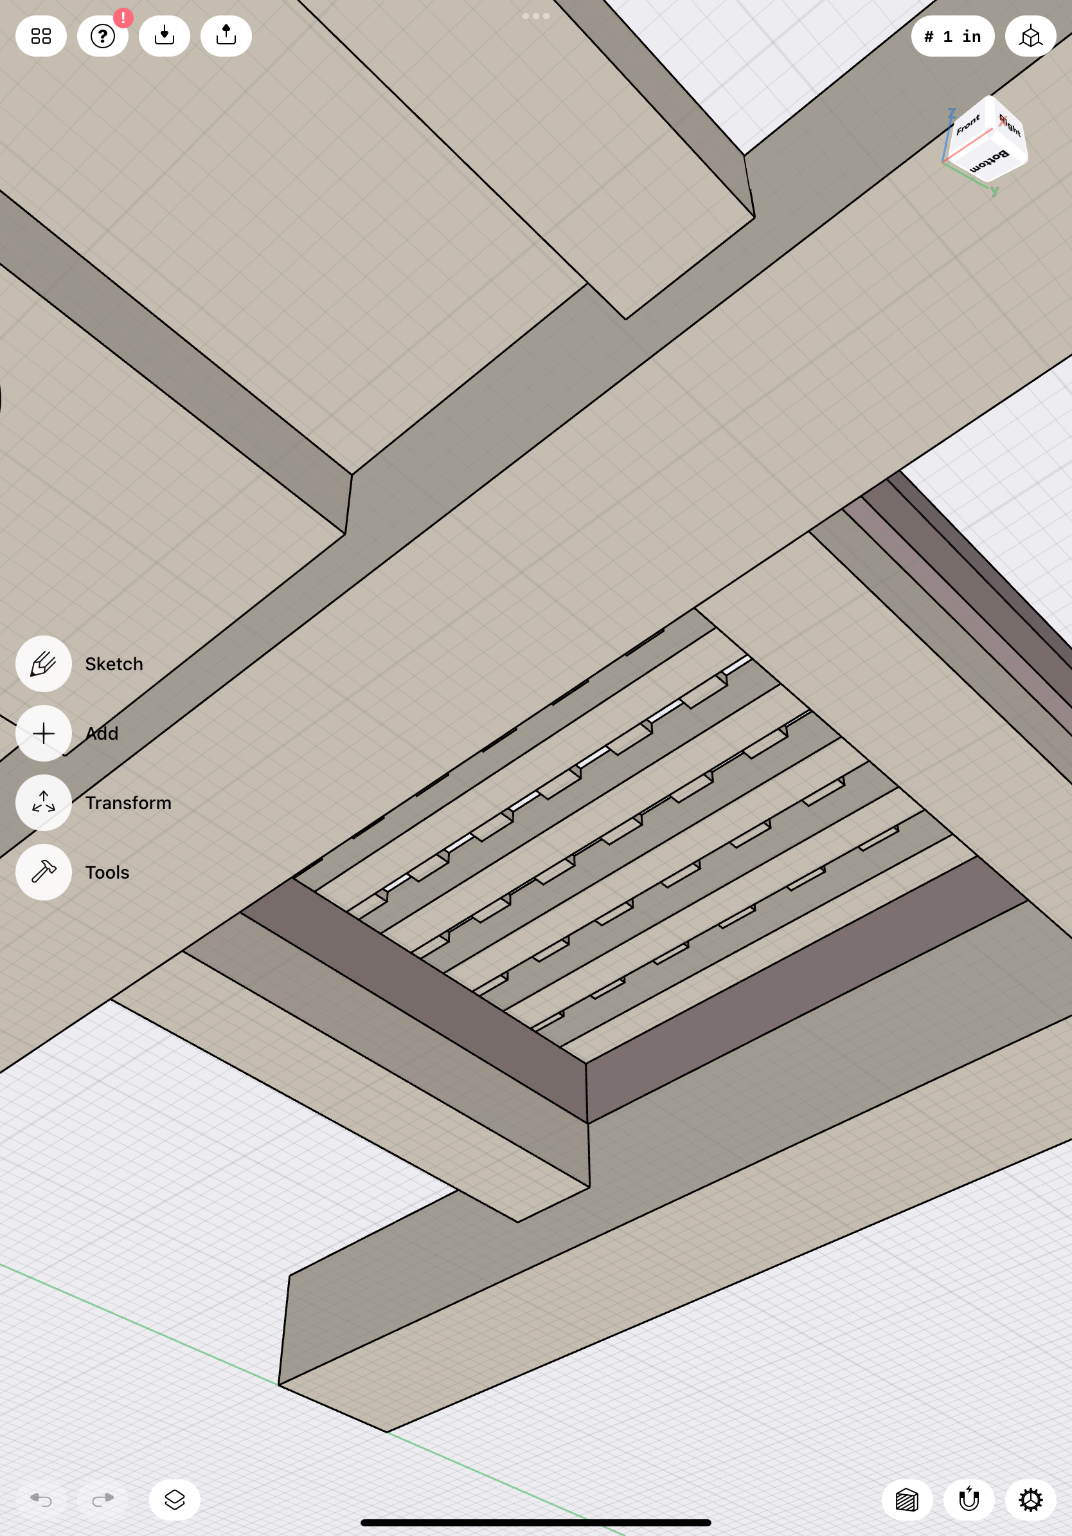
If I recall I chose to fit my coamings, grates etc to fit the interior dimension as given dimensions would have decreased the sized of the opening and was not in keeping with other plans of similar period ships Ive seen. I too went around and around with this. I decided the interior wall of the coaming should align with the interior face of the carlings and beams. This should be born our in the plans, even if not necessarily in the tutorial. Seen from below:
-
Oliver! Finally discovered this build log and realized it is the same as the one I’ve been following on Instagram! Happy and grateful to find this build on MSW.
-
Looks like real clean work. That lobster trap is great…. The fun and frustrating bits go hand in hand!
-
2021 NRG CONFERENCE
Justin P. replied to kurtvd19's topic in NAUTICAL RESEARCH GUILD - News & Information
Has there been any update as to the virtual alternative this year? I cant recall if I received a notification and cant seem to find in my email (which means nothing if you know me at all, ha). -
Yep... same. Ive been thinking a lot about the cannon for my Triton project and opted to buy them. I have every intention to make all the rope needed, but will admit that I bought some (just in case).
-
NRG Capstan Project
Justin P. replied to tlevine's topic in - Build logs for subjects built 1751 - 1800
Looks like you are using Shapr3d. As I did here: Im sure that Toni will respond in due time, but to answer a couple of your questions, yes I noticed a few inconsistencies in the plans with regard to stated measurements. However, this I think falls within tolerance, at least in so much as the intended build is in wood and therefore some amount of final fitting will be required. When you assemble according to accepted practice you should be creating your grate first, then fitting your coamings to it This ensures a good tight fit. I look at ship model plans as approximations to be finessed as you build (in wood). So I think you can apply the same principal here (as I did too with my own 3d work). Secondly, yes the battens are supposed to run fore and aft (or at least that what Ive read in various places). -
Is that the same Norman Swales who has also done a lot of illustrative and figure work for the games industry? You might try a different company, or possibly one his co-authors/contributors. There seem to be quite a few (if its the same person. Unique name...
-
It would certainly, but I dont think it impossible. I do however think it would be expensive!
-
Great Job! I cant wait to start this project, you've done a wonderful job.
-
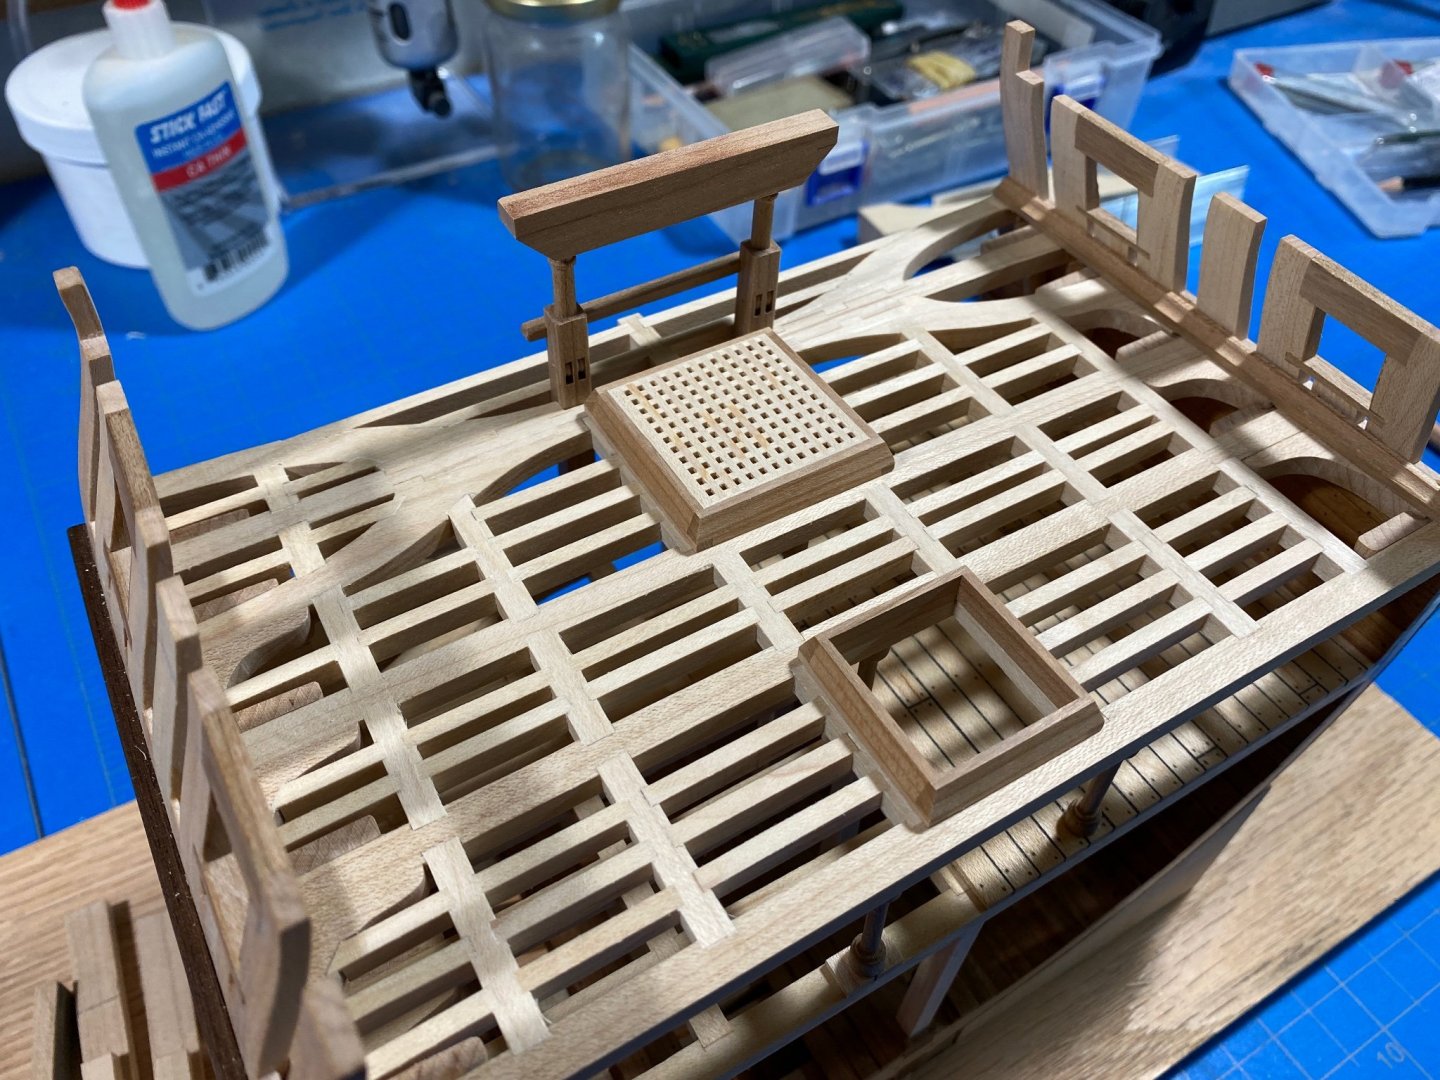
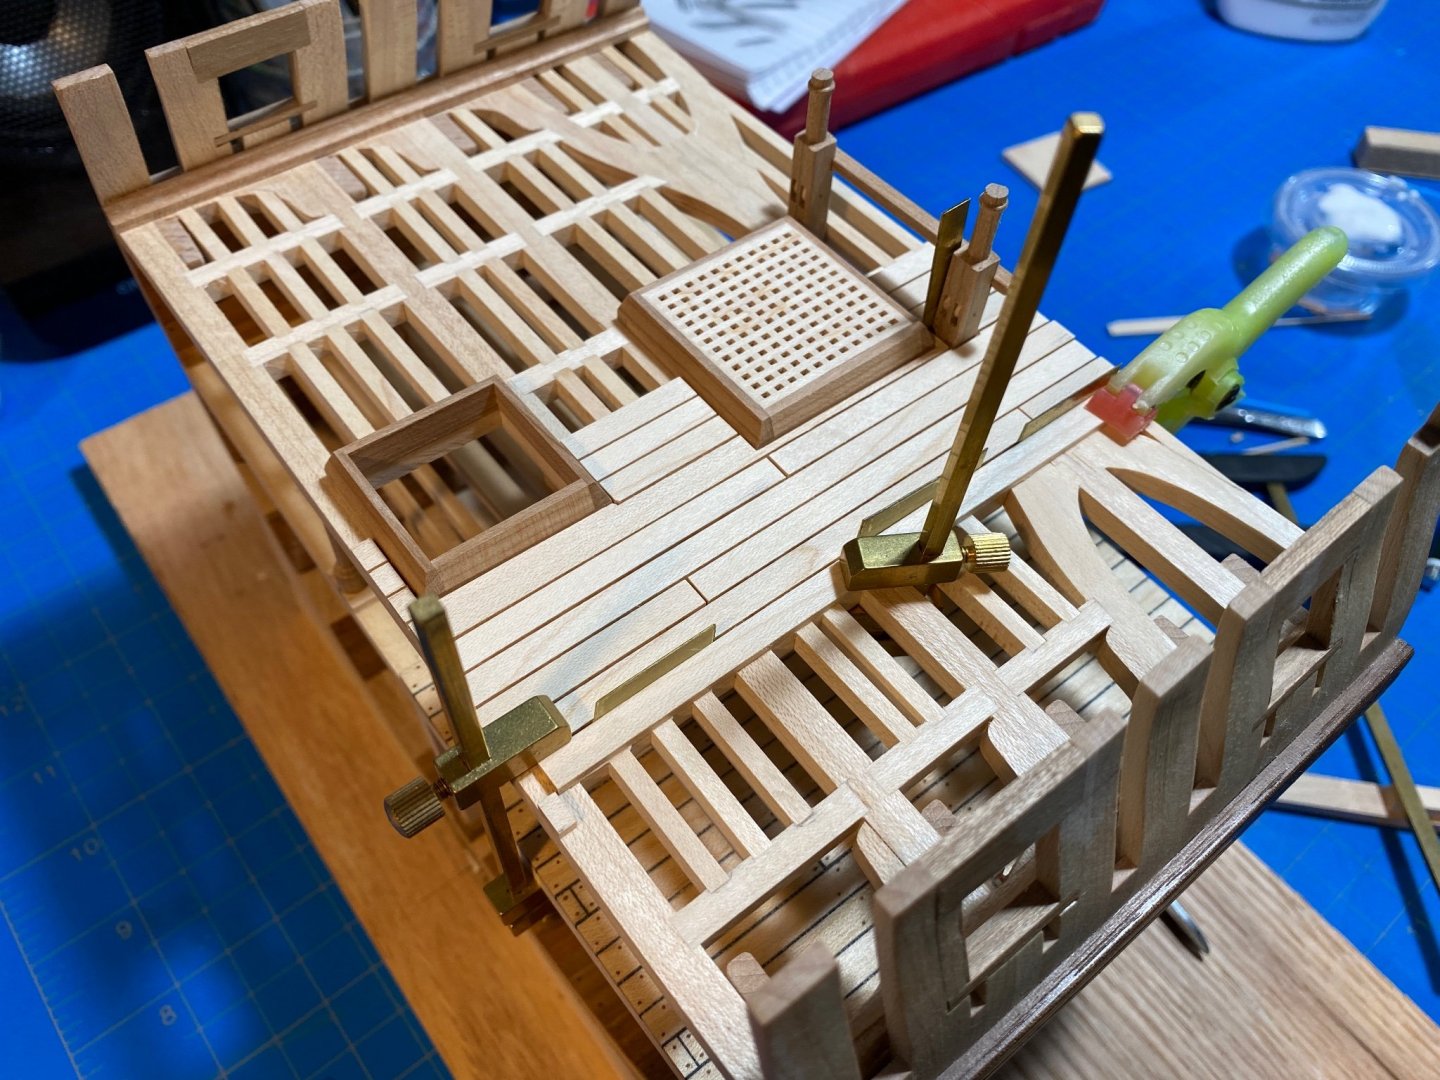
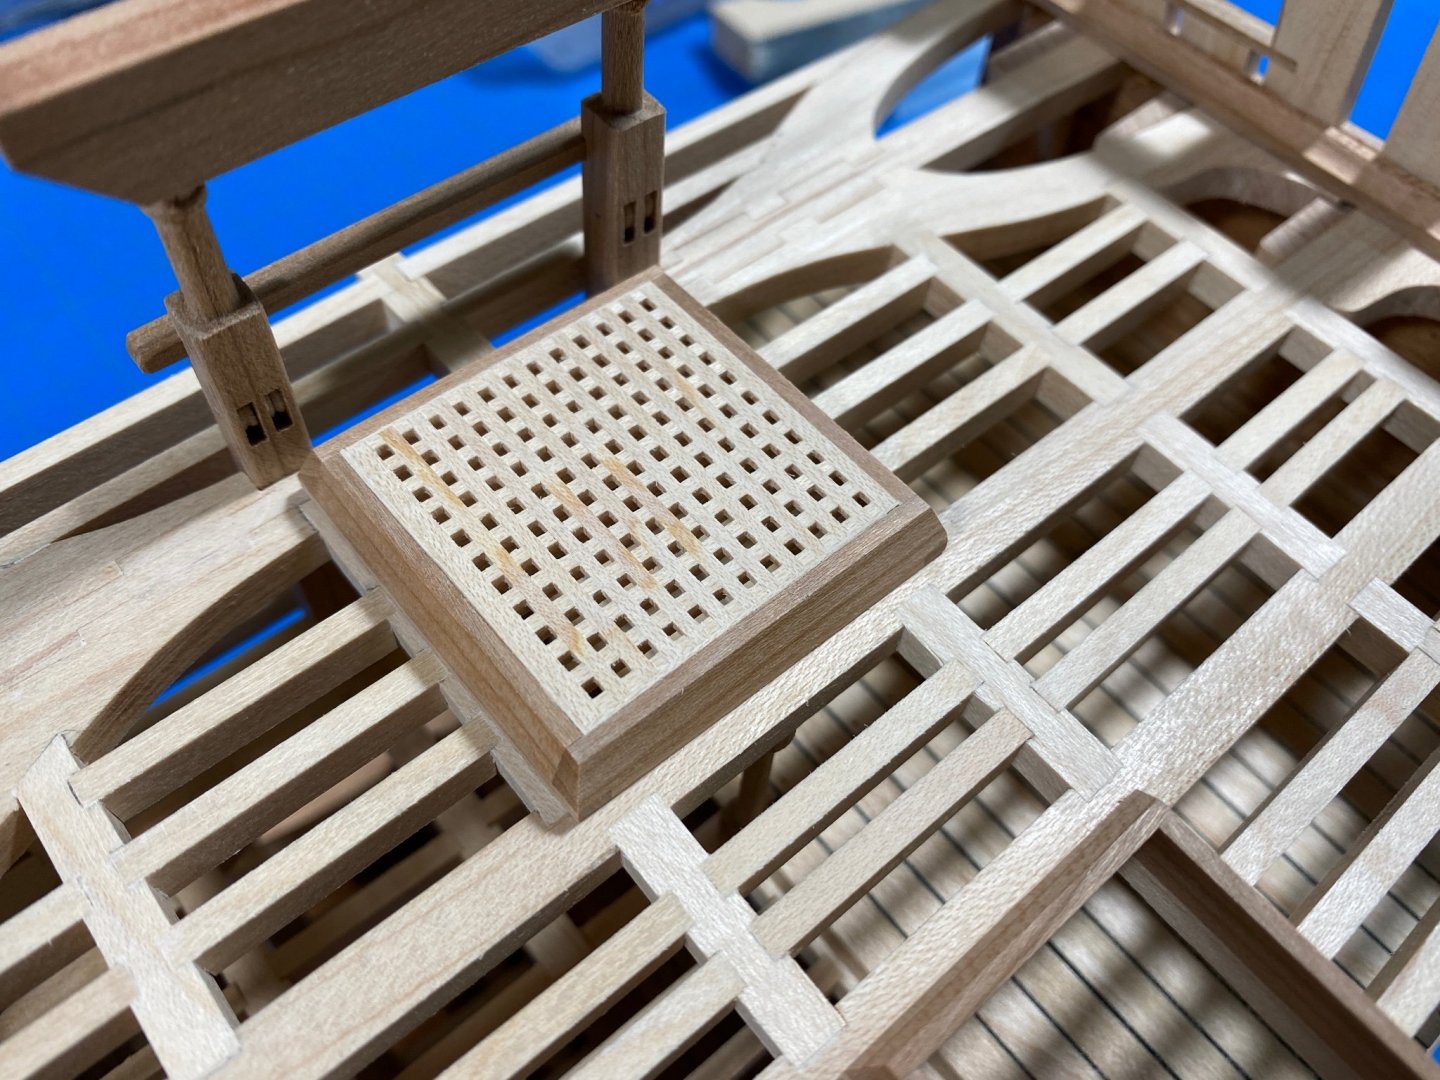
Grating. I thought I had taken more photos of the process, but apparently I did not. I spent the better part of the weekend on this one hatchway. I managed to make one in about 2-hours, which was ok-ish... then spent the next 10-12 hours over two days trying to make another. Getting the tolerances right so everything fit well and was consistently cut made the process that much harder. Im happy with the result though. I had thought I was going to get a bit farther with the planking of the gun deck, until about 12:30 Sunday a huge broad-leaf maple came crashing down from the area just off my property line and completely pulverized my fence... So the rest of Sunday and part of yesterday I was clearing and fence building. Fun times. Deck planking going in...
-
Are you adding a burr as you would with a traditional cabinet scraper or just using the blade as is?
-
48pdr cannon
Justin P. replied to Thanasis's topic in Discussion for a Ship's Deck Furniture, Guns, boats and other Fittings
"The captain mounted the schooner Terpsieore with eleven guns, five on each side and one in the bow, to which were joined eleven other hydro-vessels. The largest of these vessels carry no more than twenty guns, nor the smallest less than eight. The strongest caliber of these guns is twelve pounds, a few single full guns are usually thirty-six pounds and sometimes even go up to forty-eight." -
Ive used/tried many of suggestions above. For whatever reason every time I use something with a soft structure like the emery sticks or pads, sponges, I end up rounding over parts. I pretty much stick to hard shapes now, but take the point about going any higher than 400. I have enjoyed using an aluminum oxide brand called Gator, but their sheets come with that proprietary backing intended for their sanding tools which cant be removed. This makes it difficult to get a purely flat surface.