HOLIDAY DONATION DRIVE - SUPPORT MSW - DO YOUR PART TO KEEP THIS GREAT FORUM GOING! (Only 24 donations so far out of 49,000 members - C'mon guys!)
×


Justin P.
-
Posts
1,008 -
Joined
Content Type
Profiles
Forums
Gallery
Events
Everything posted by Justin P.
-
 Signed up, and subscribed to the podcast. Sounds very good.
 -
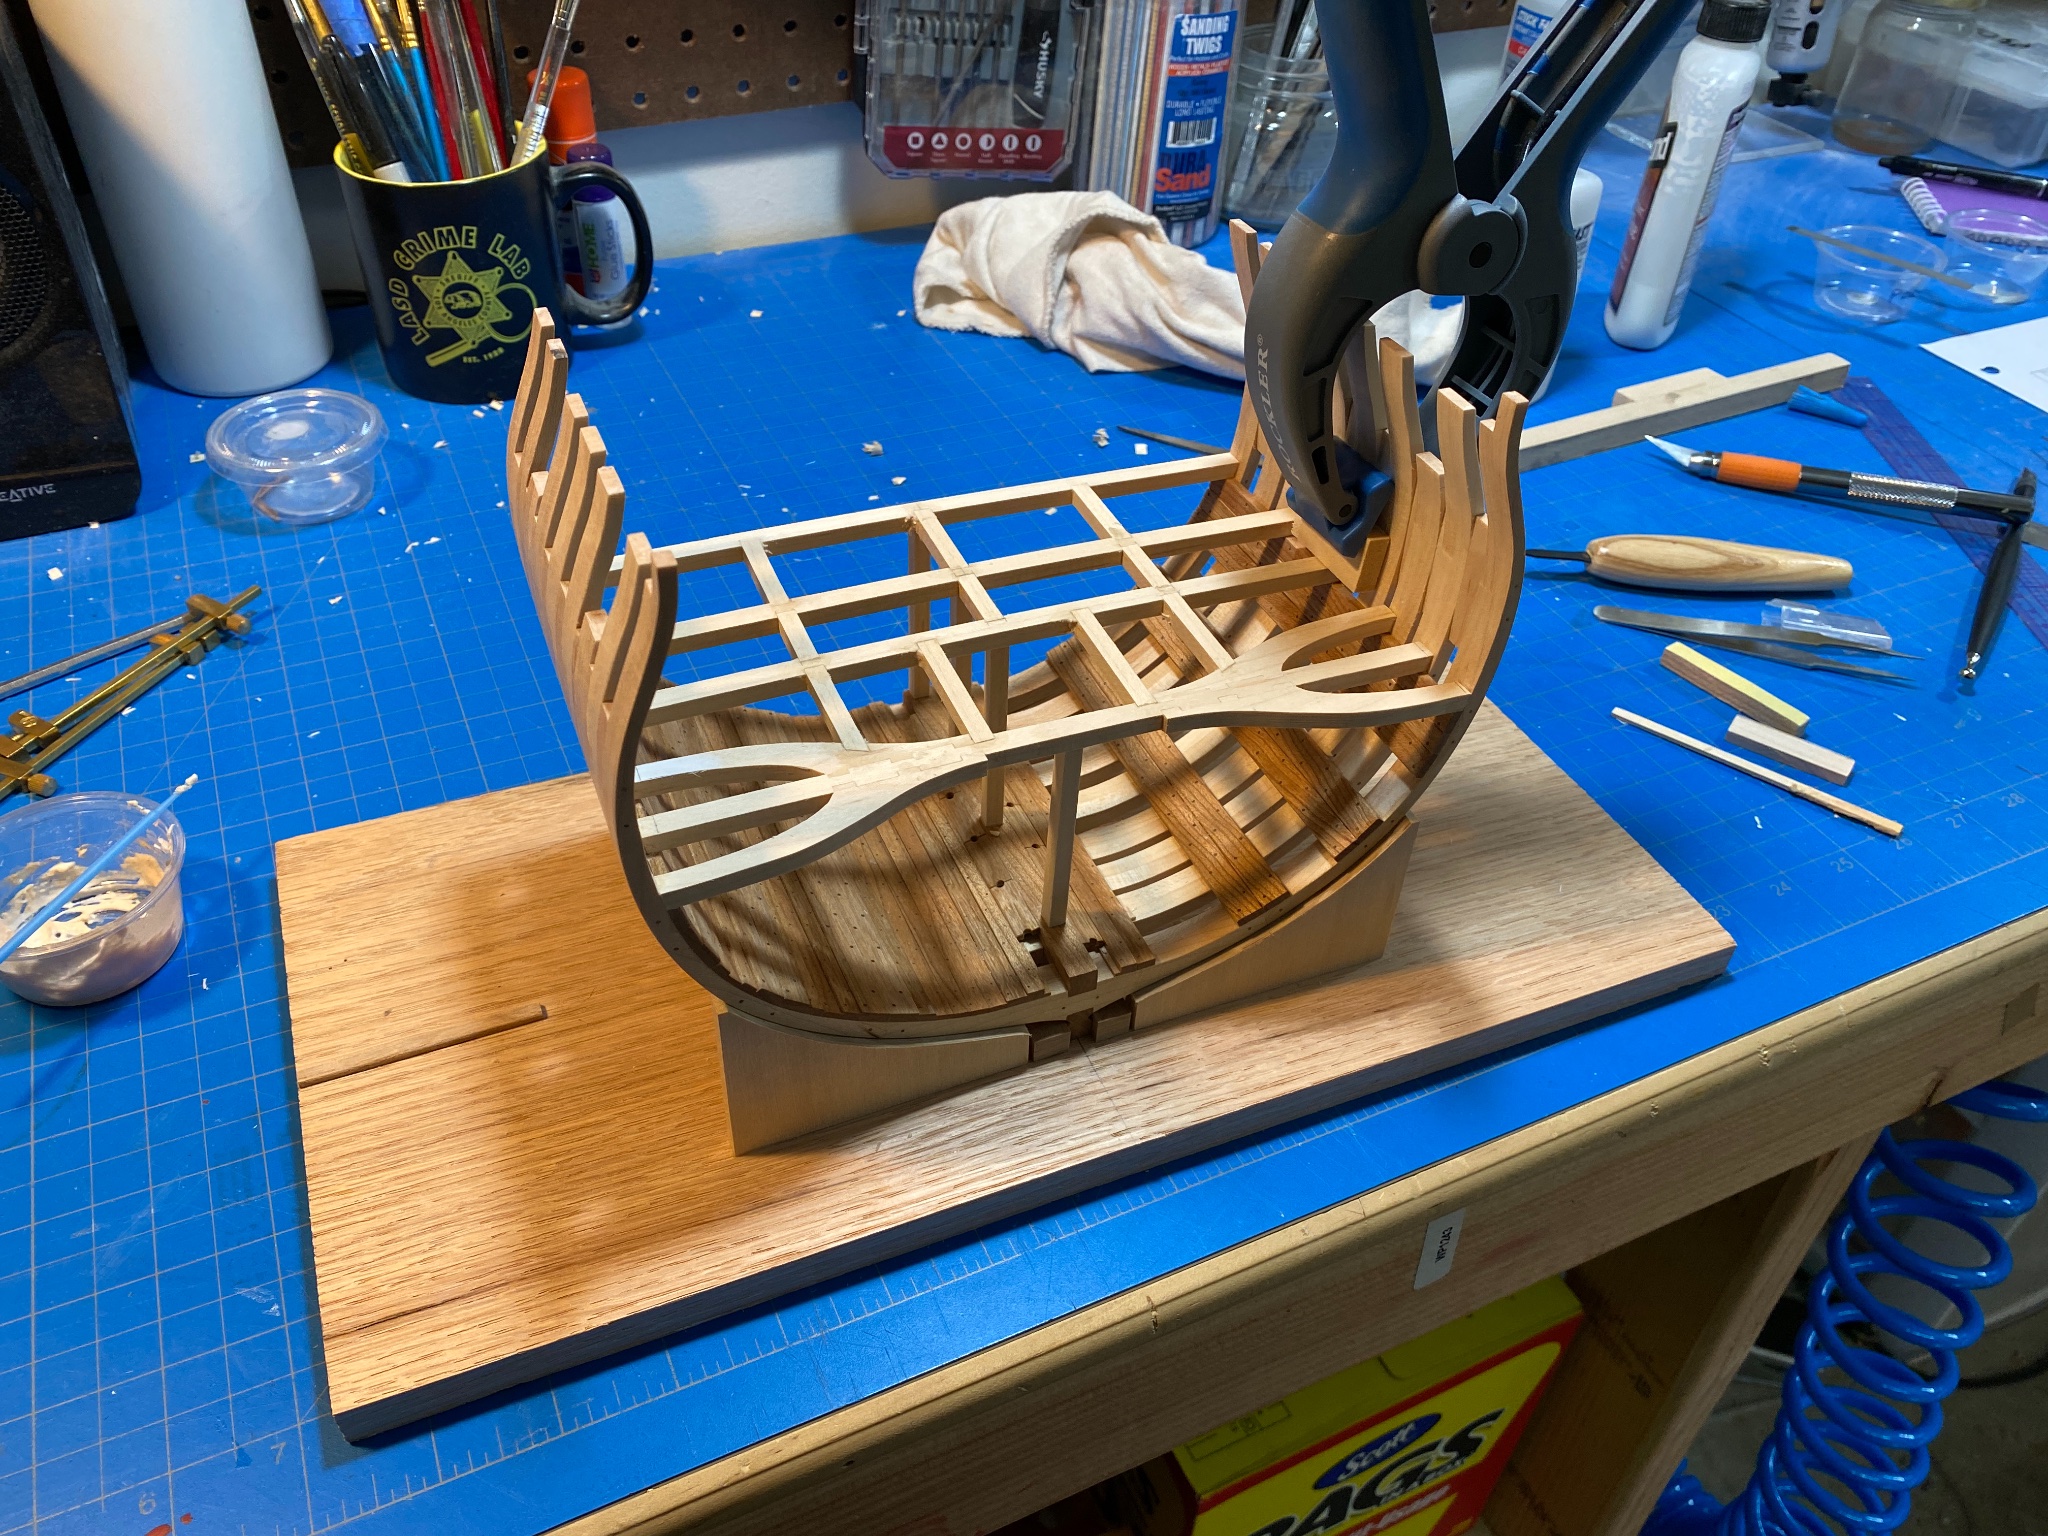
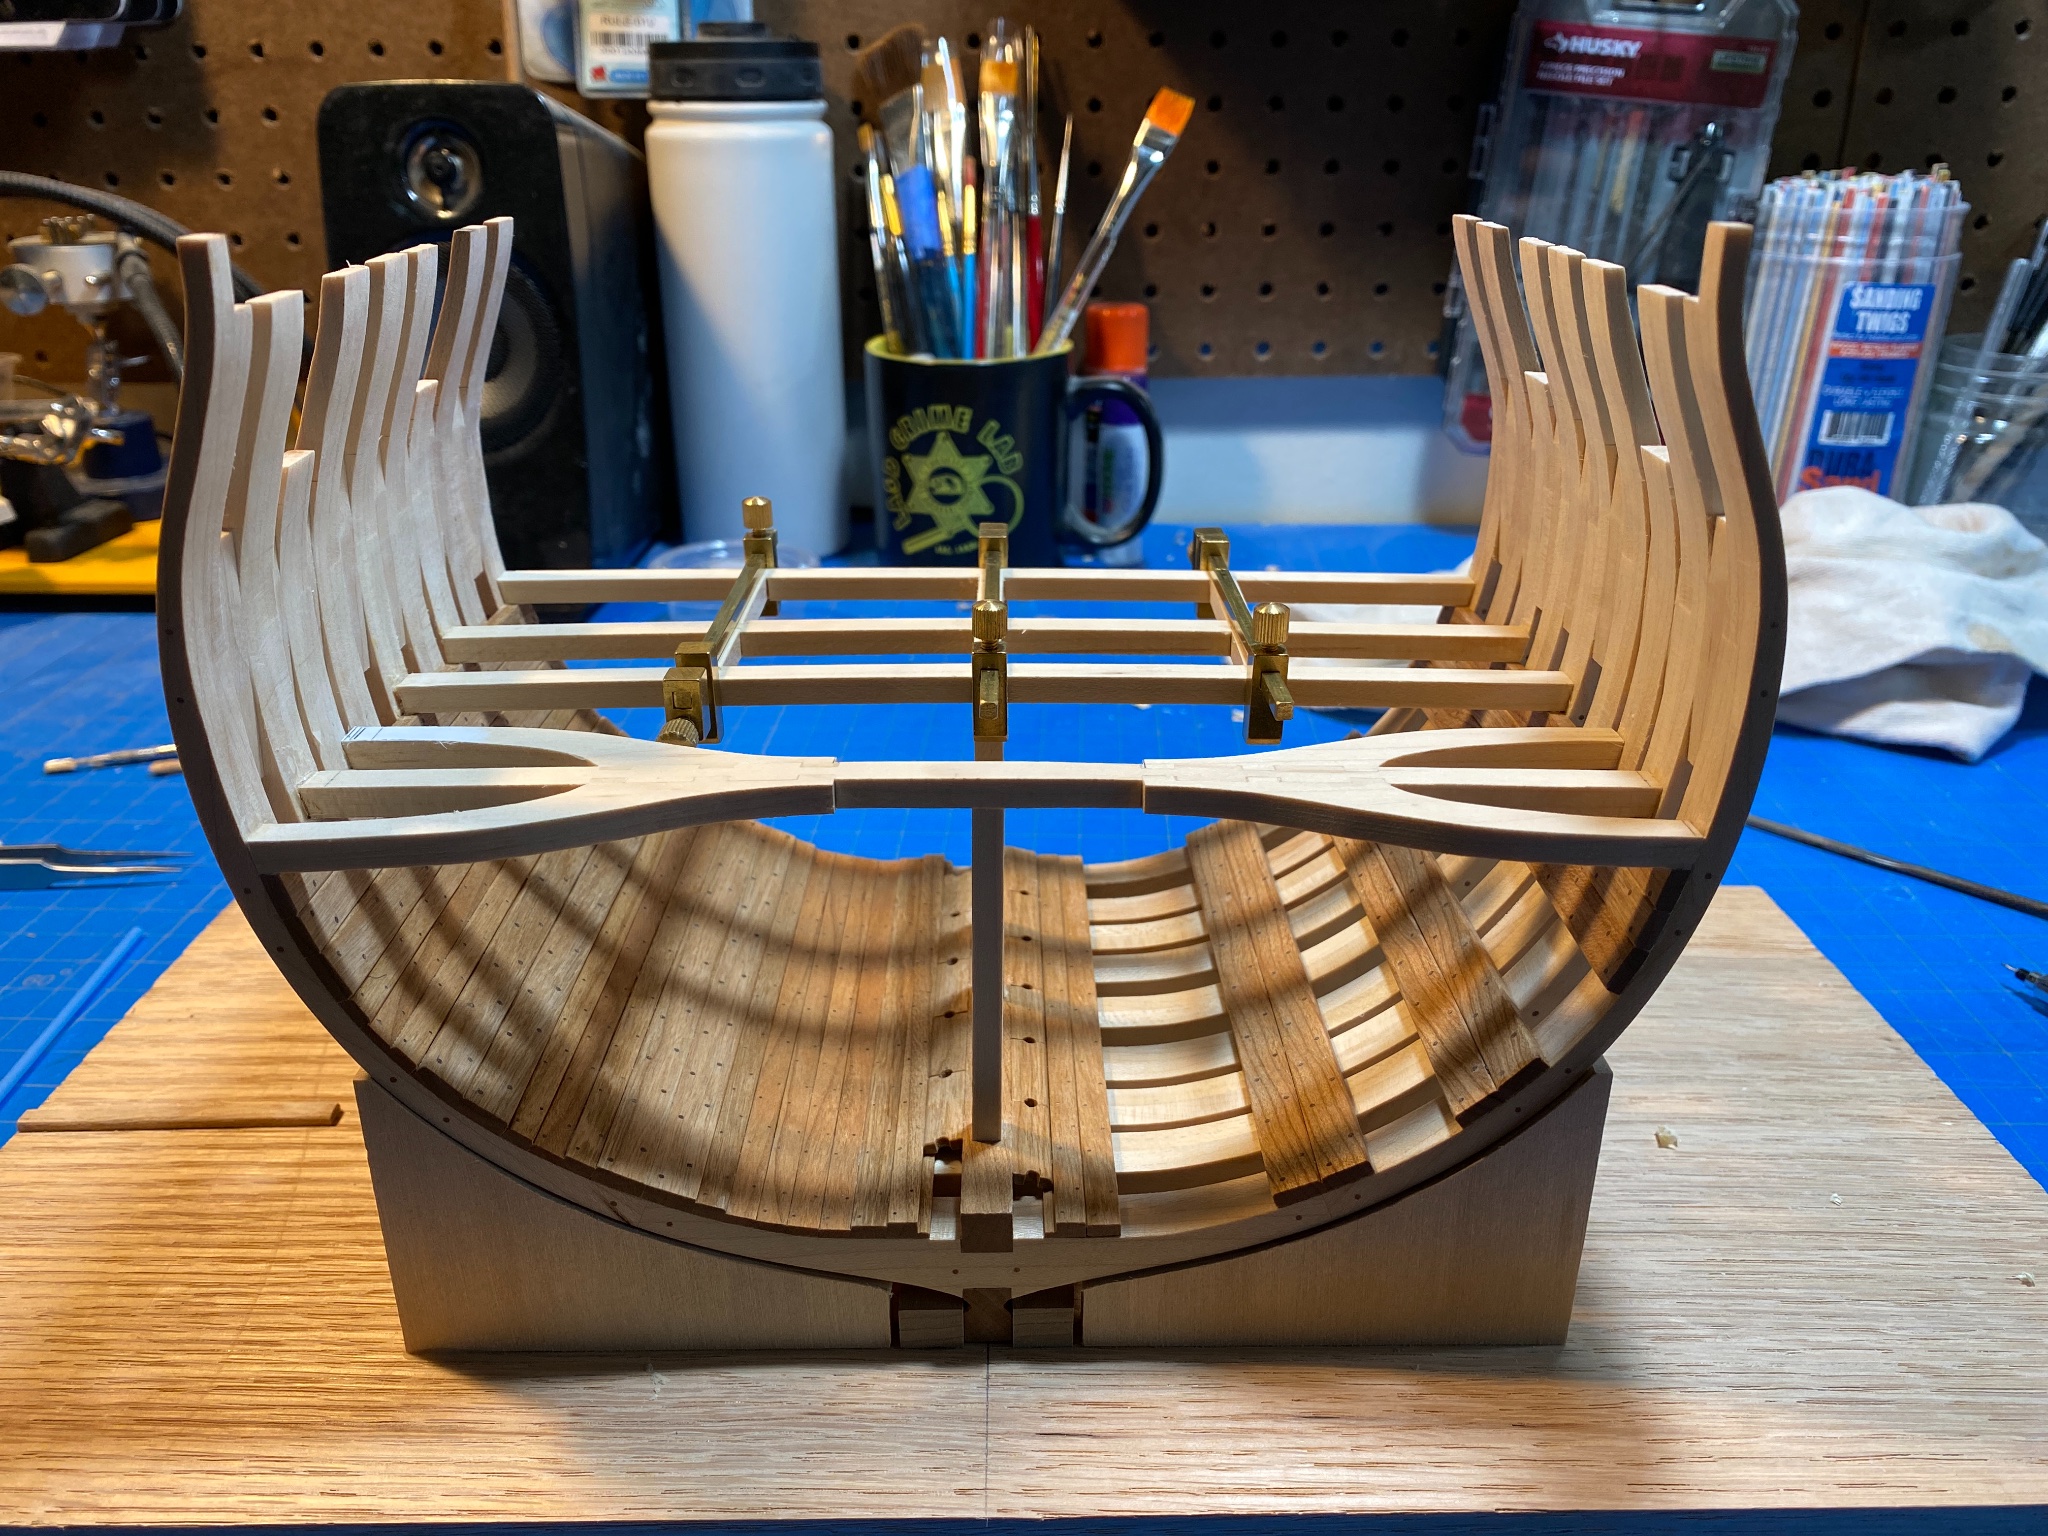
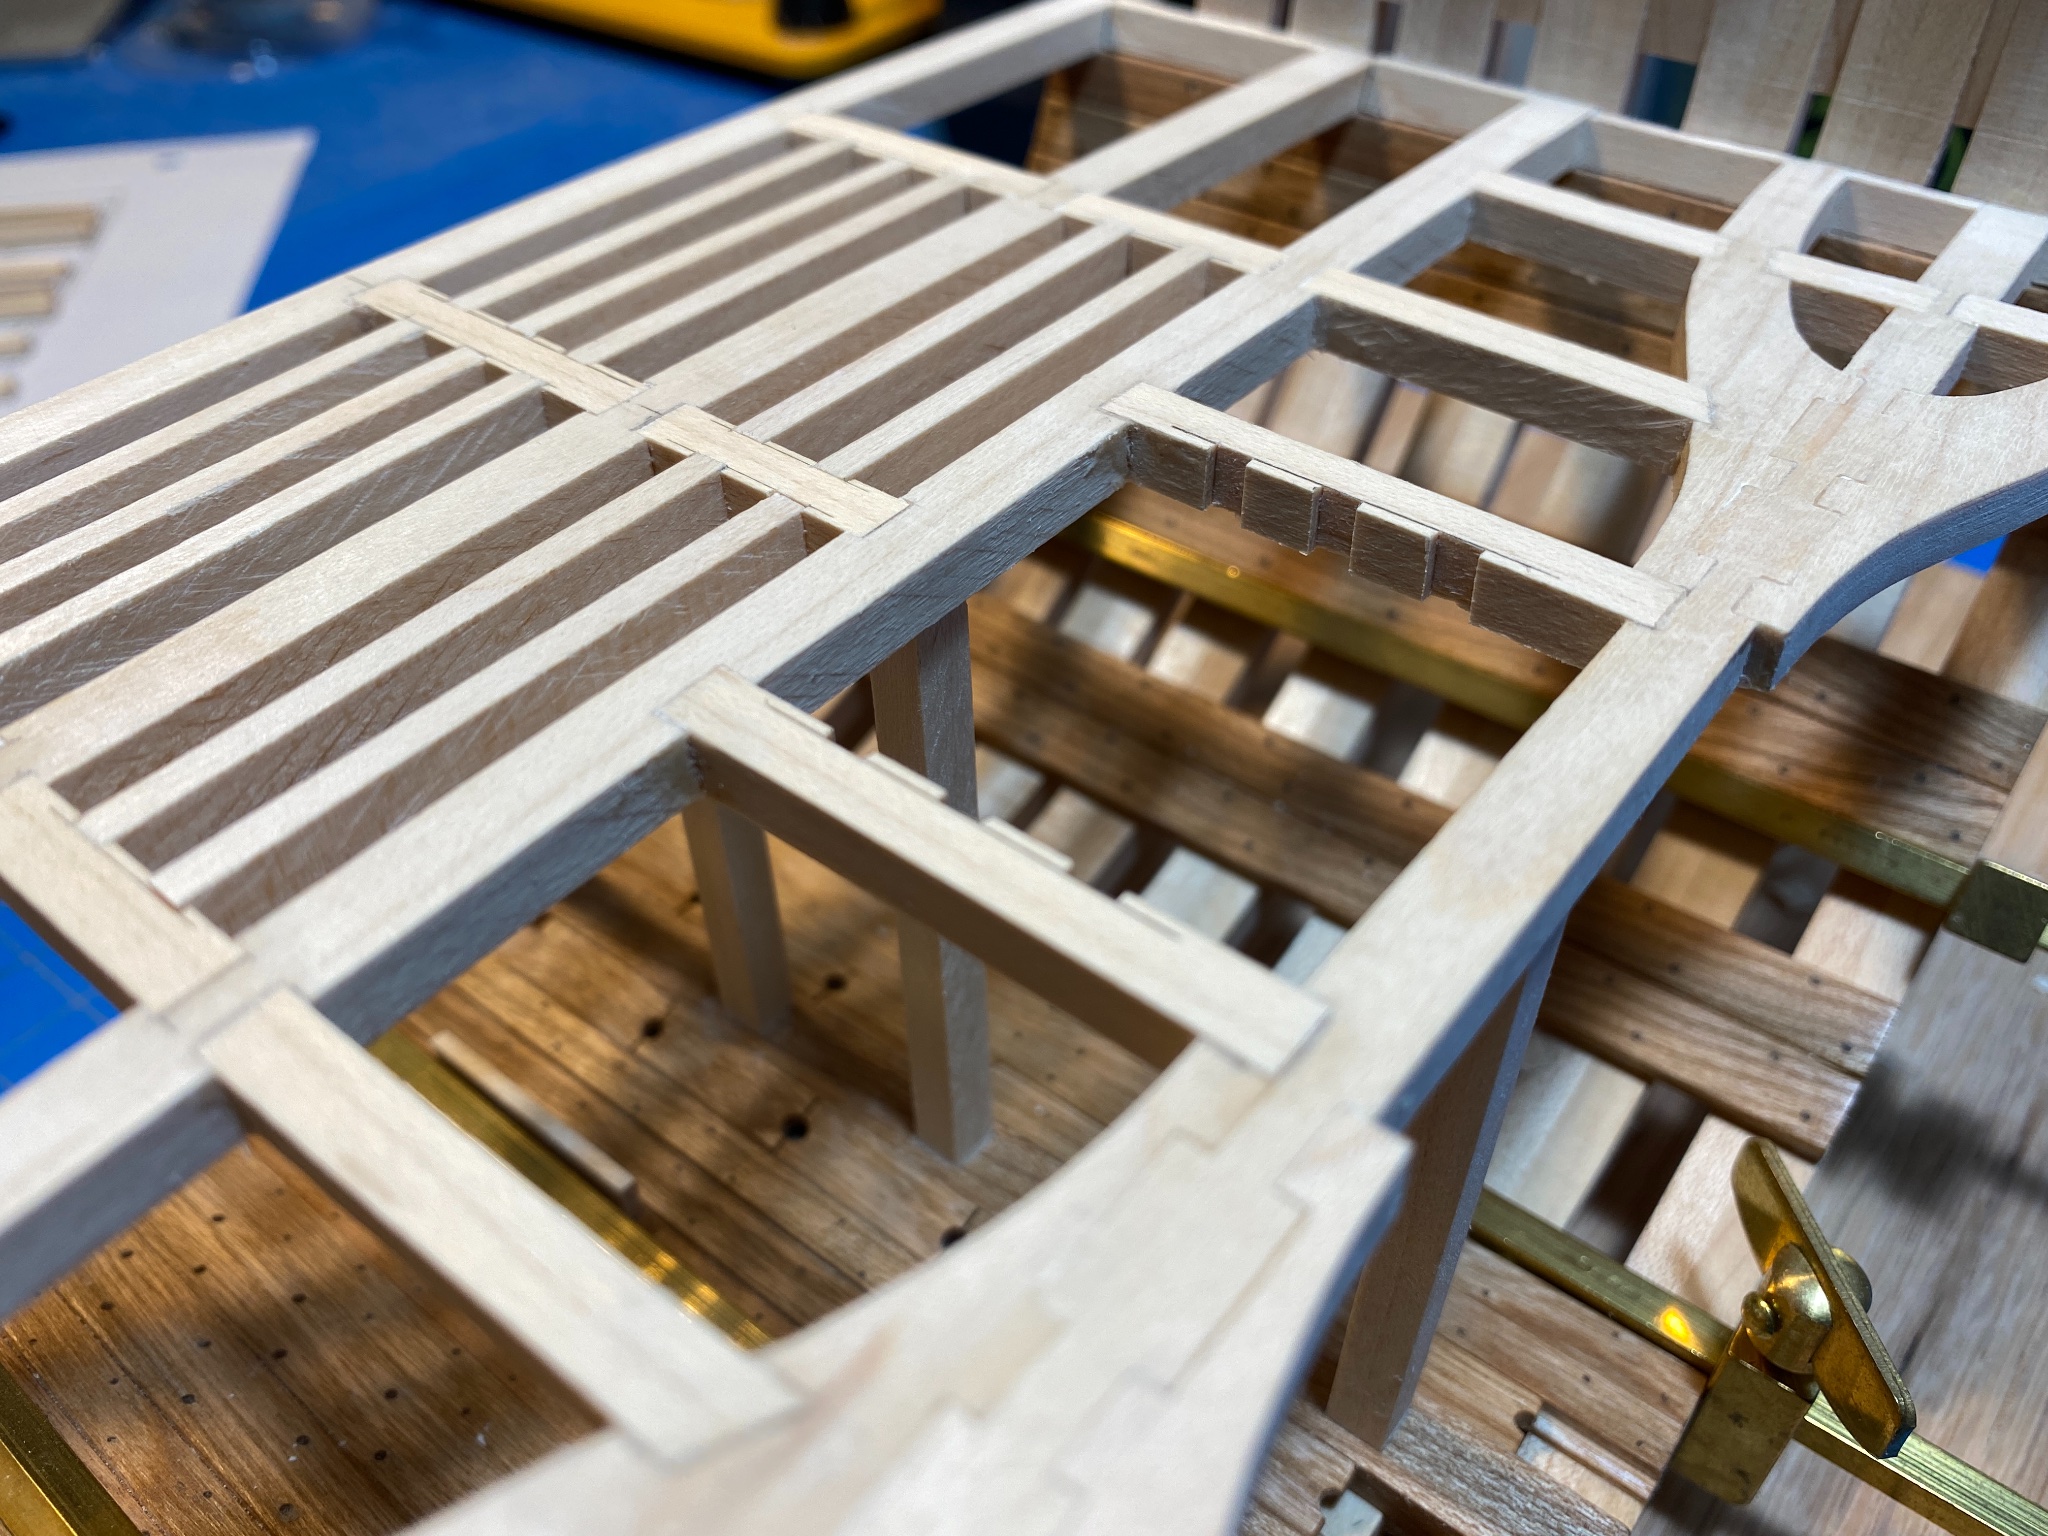
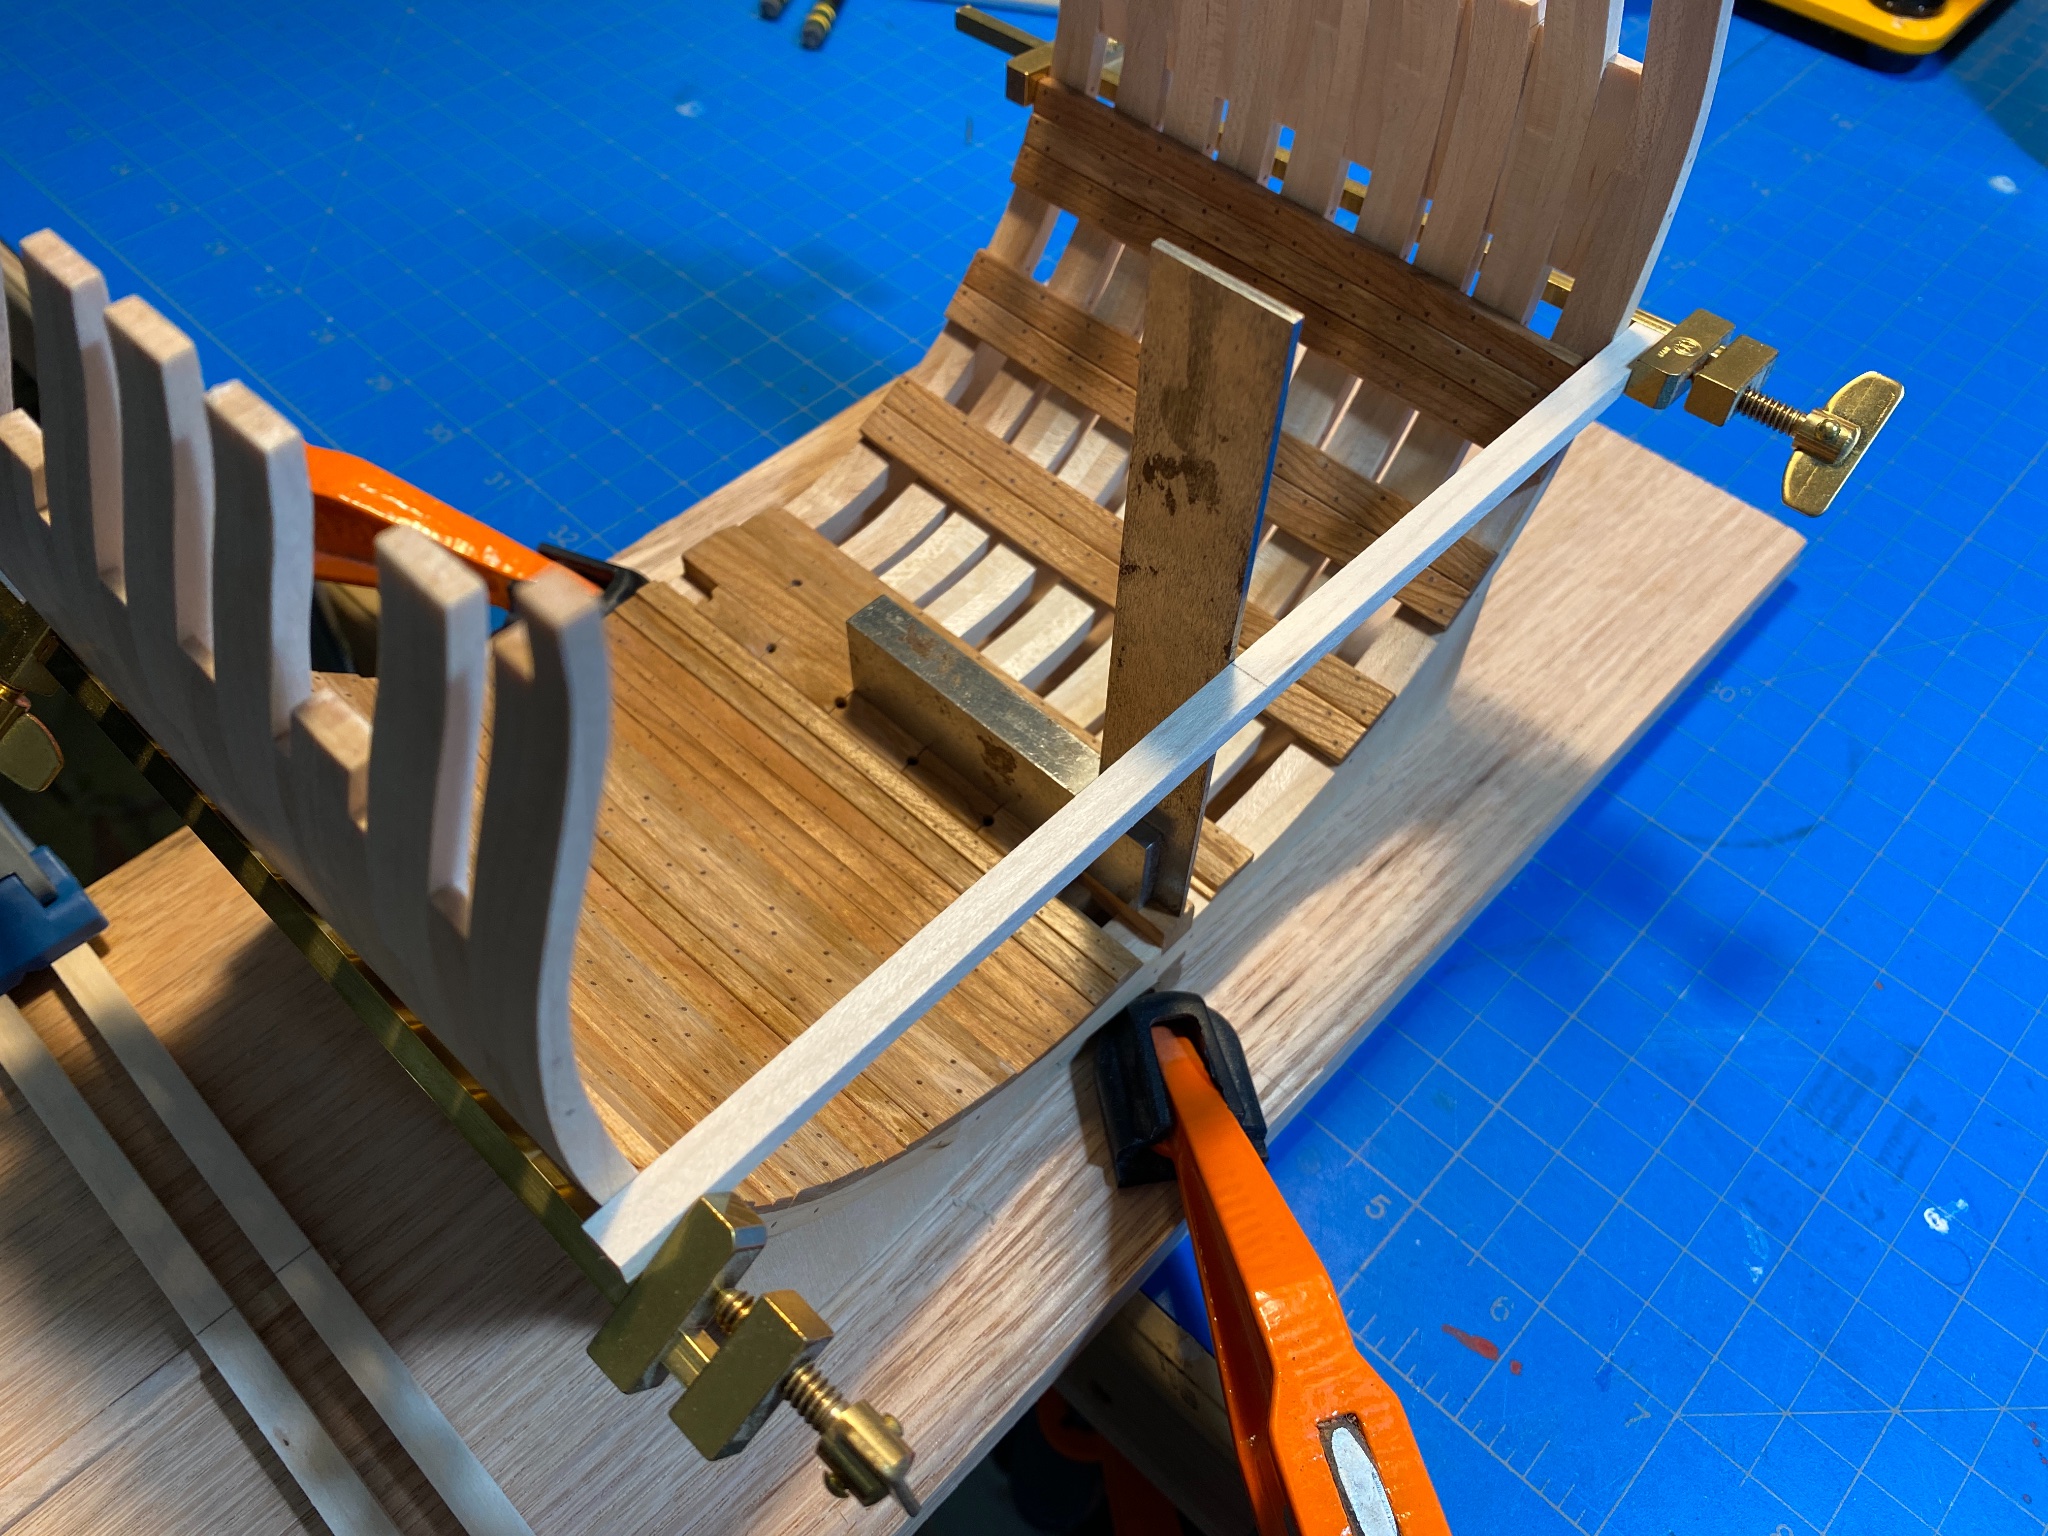
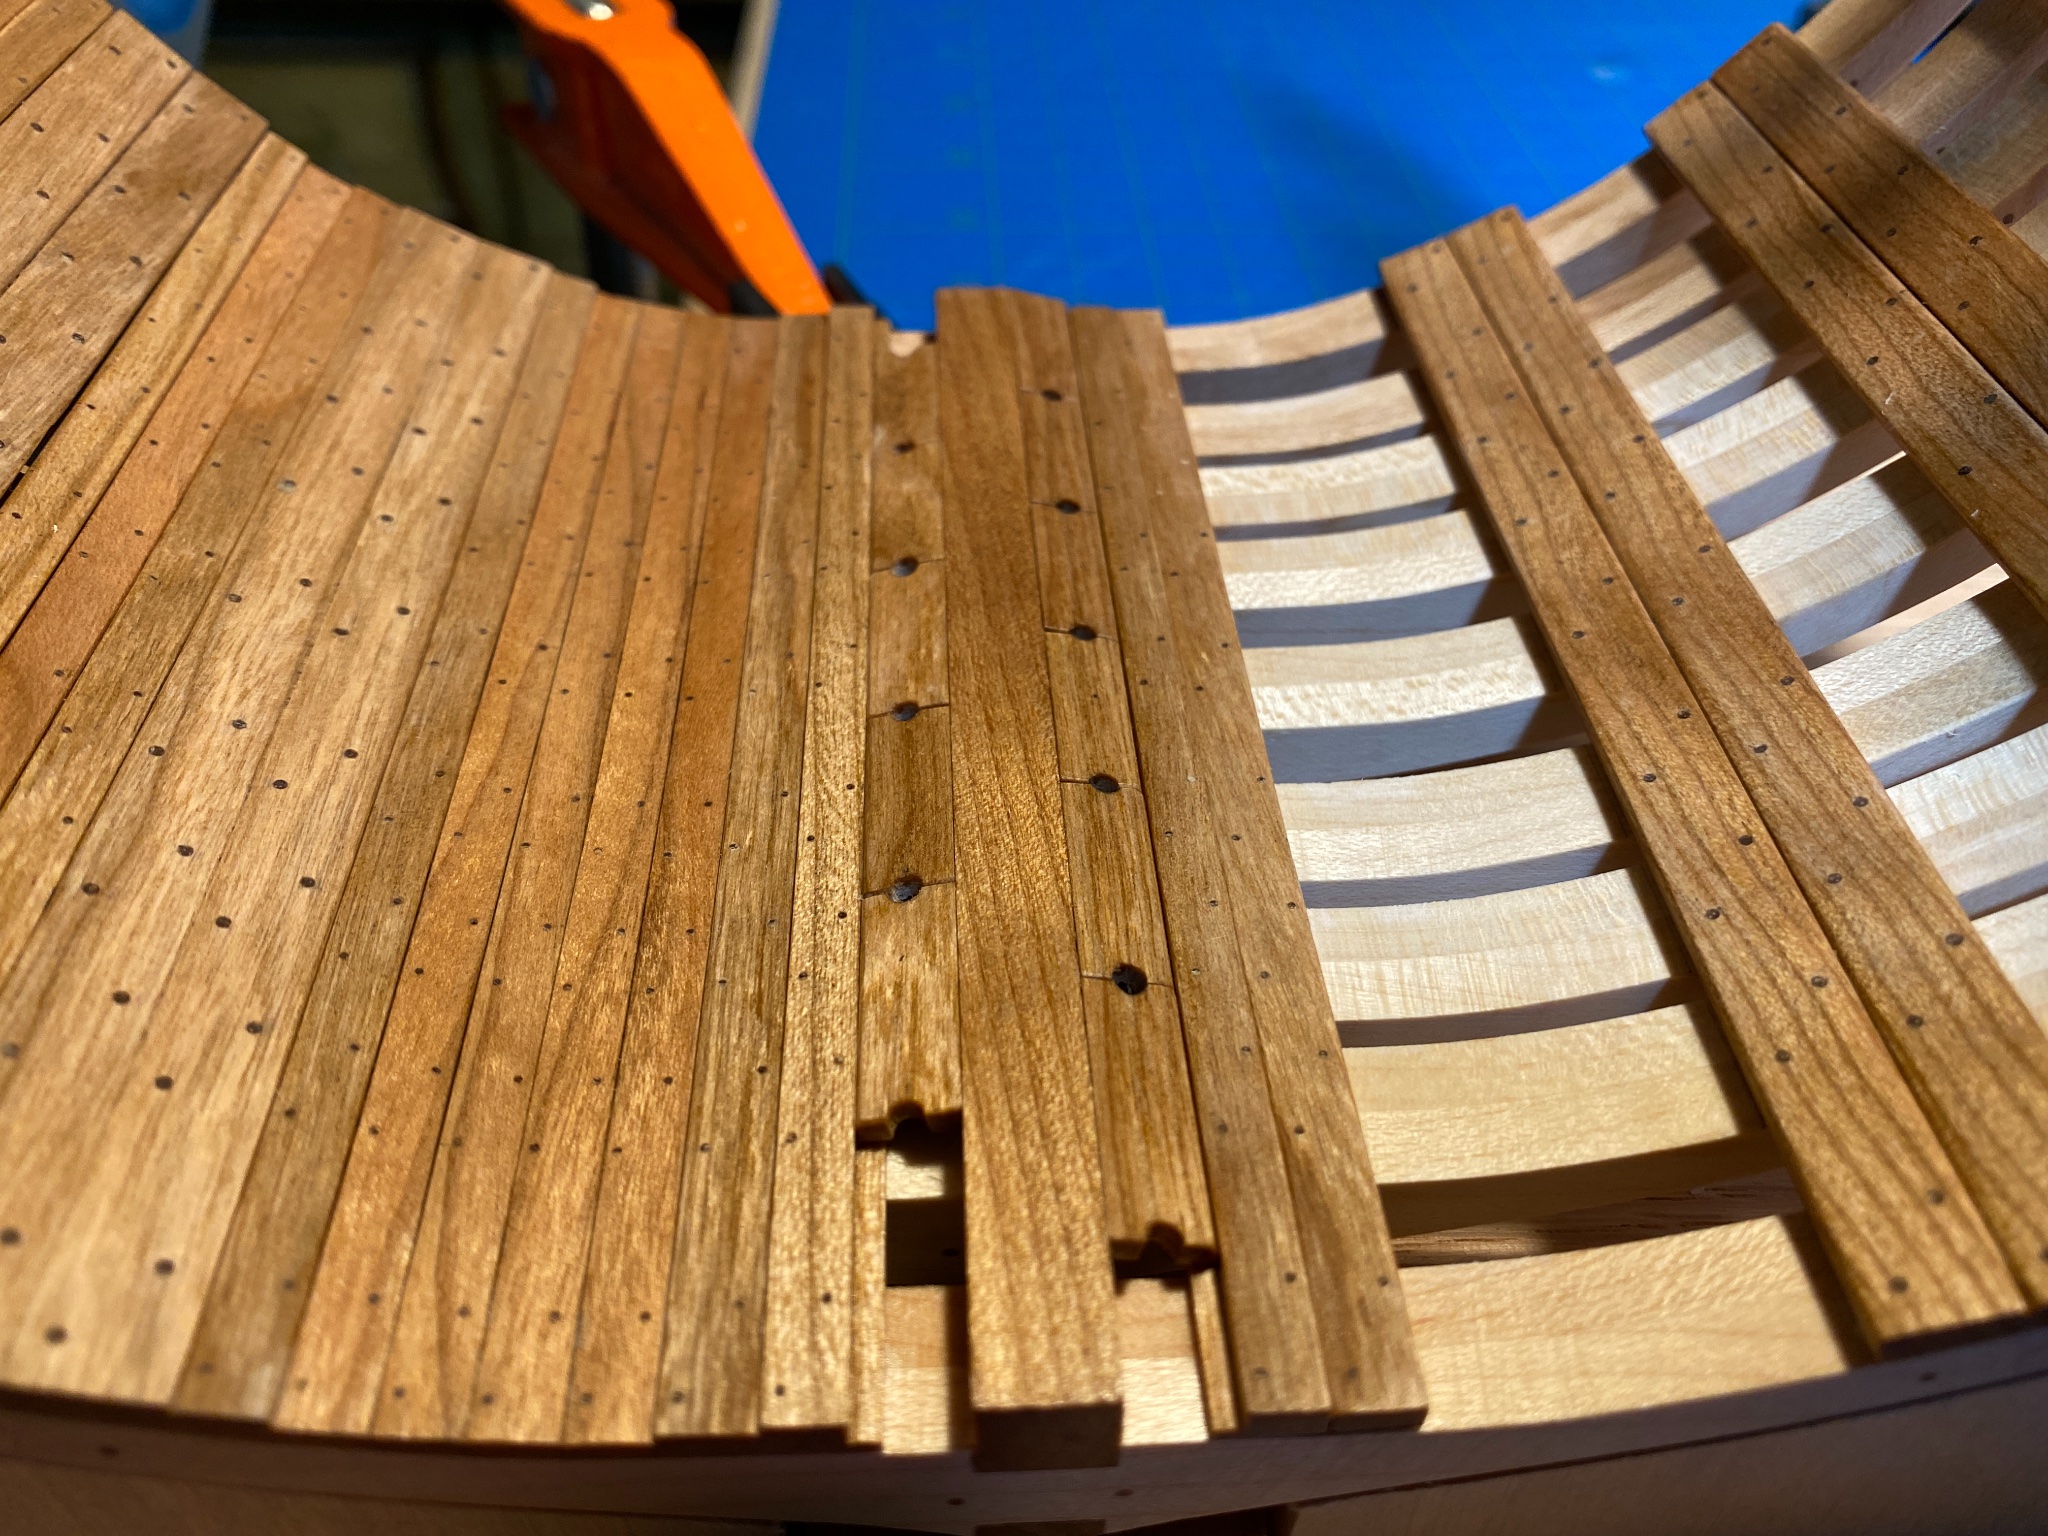
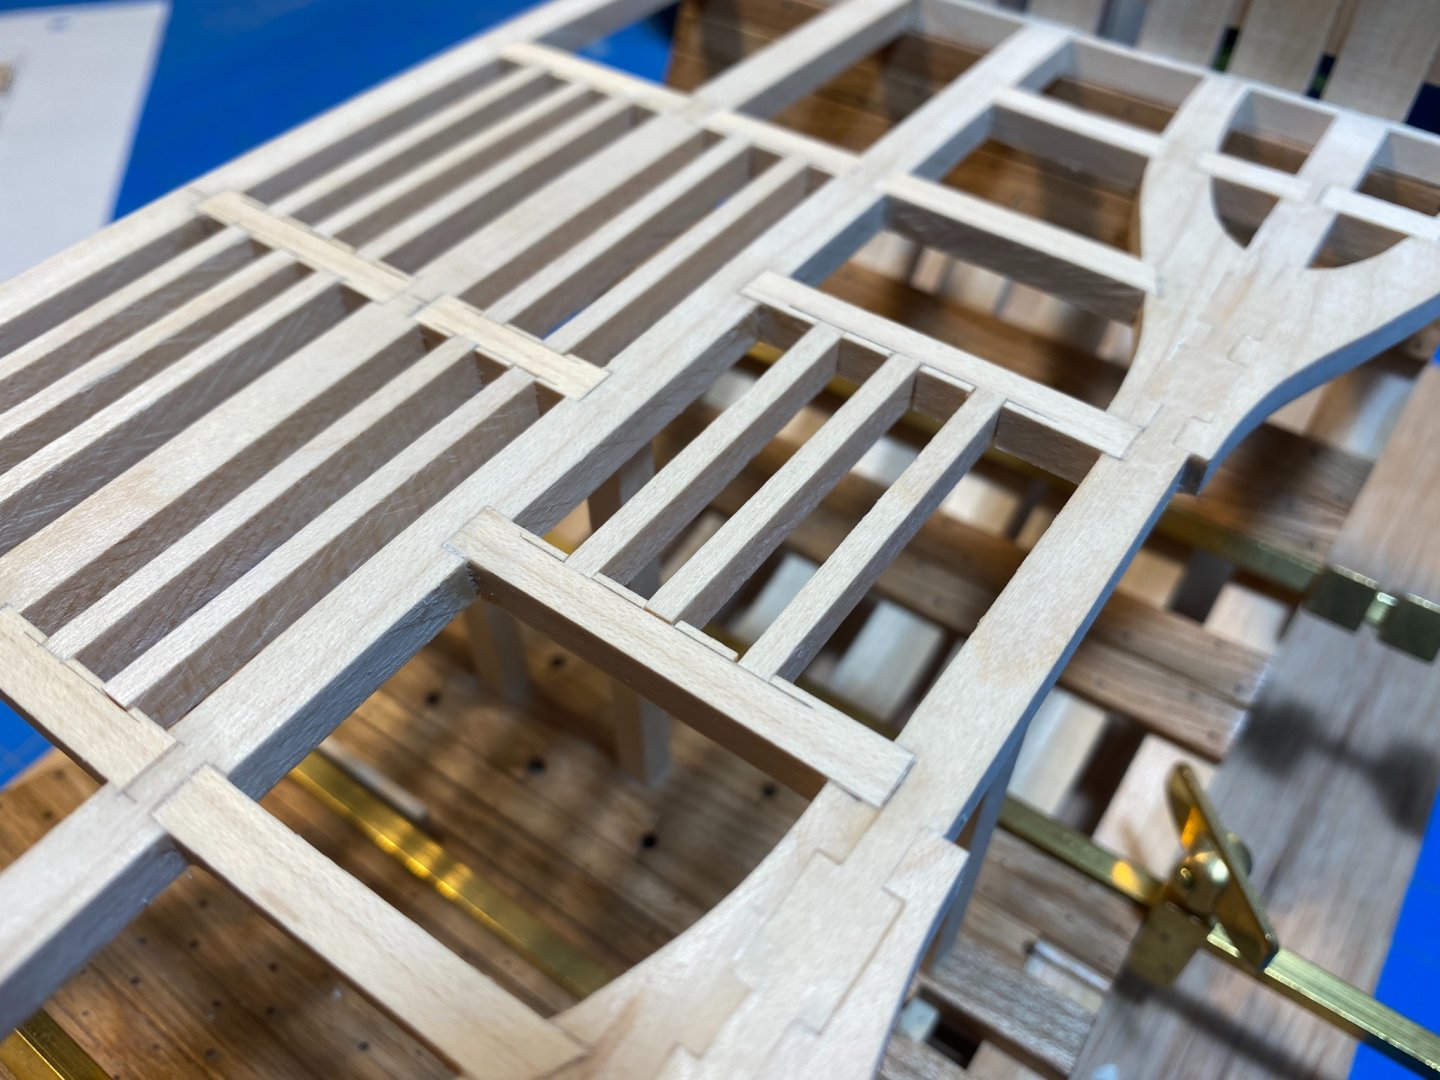
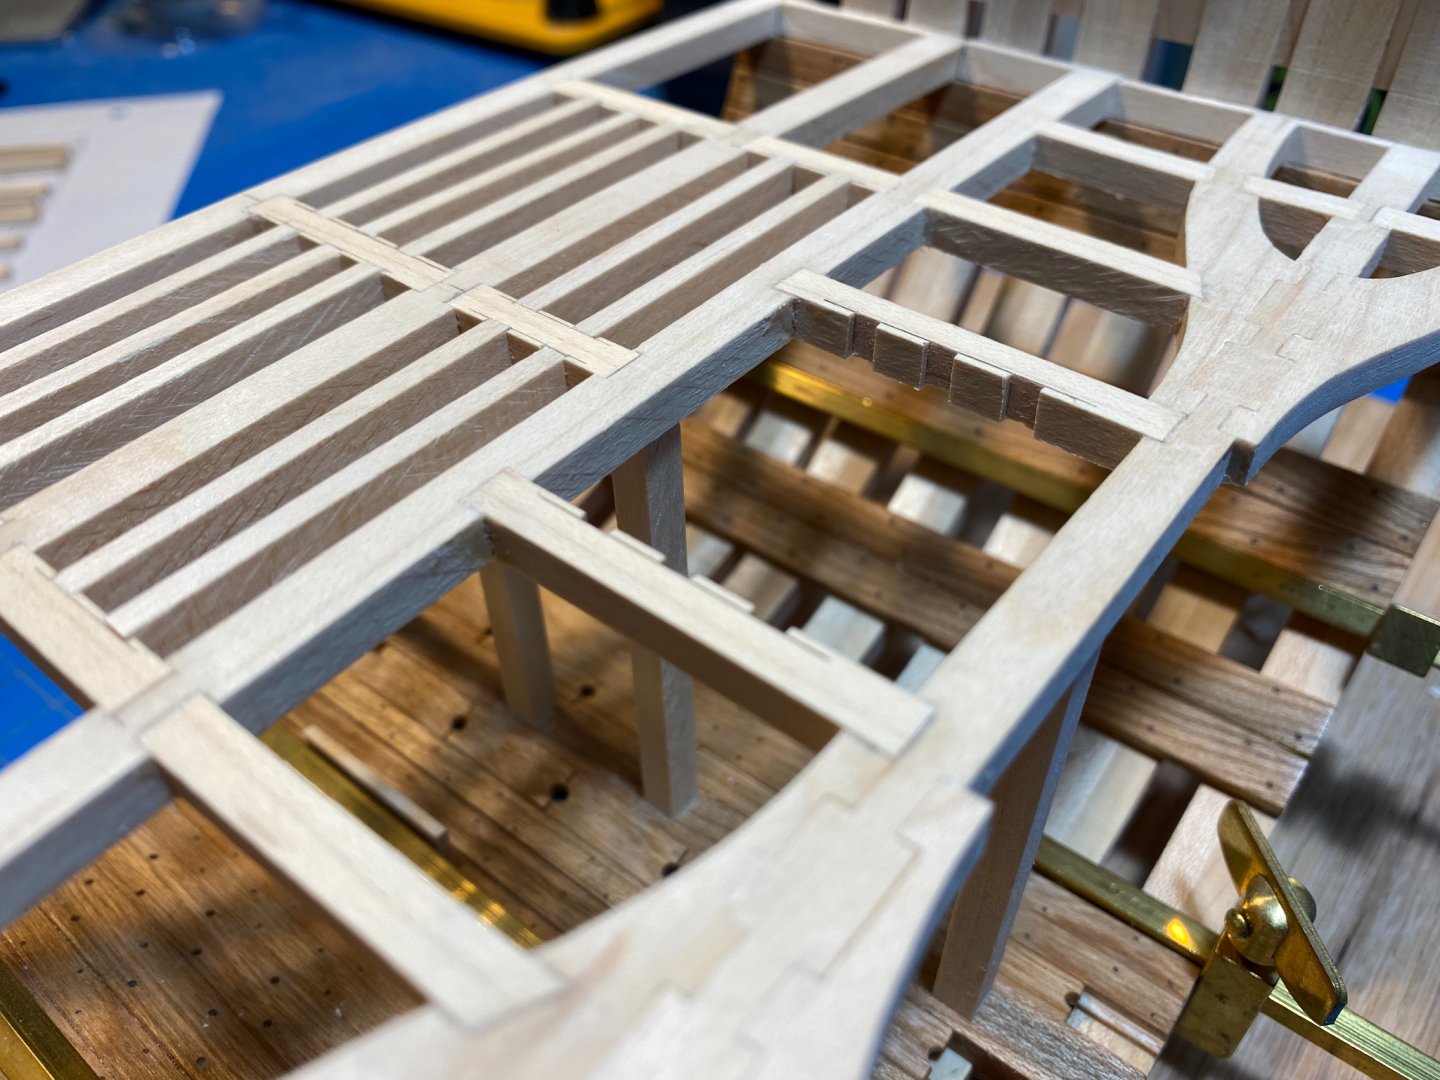
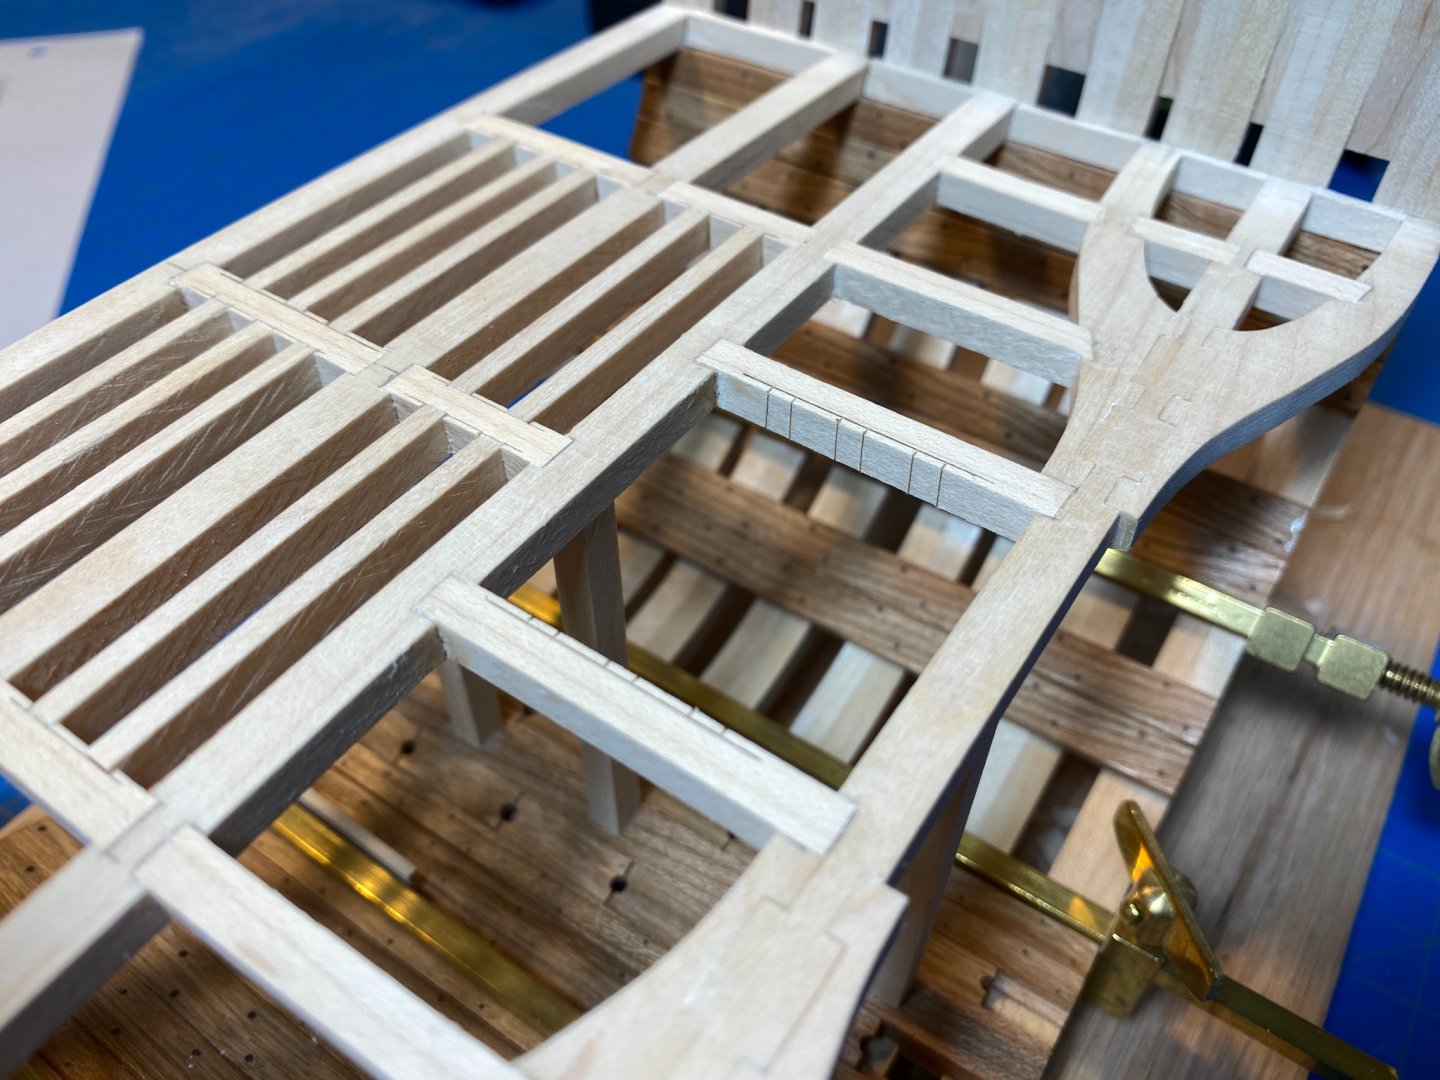
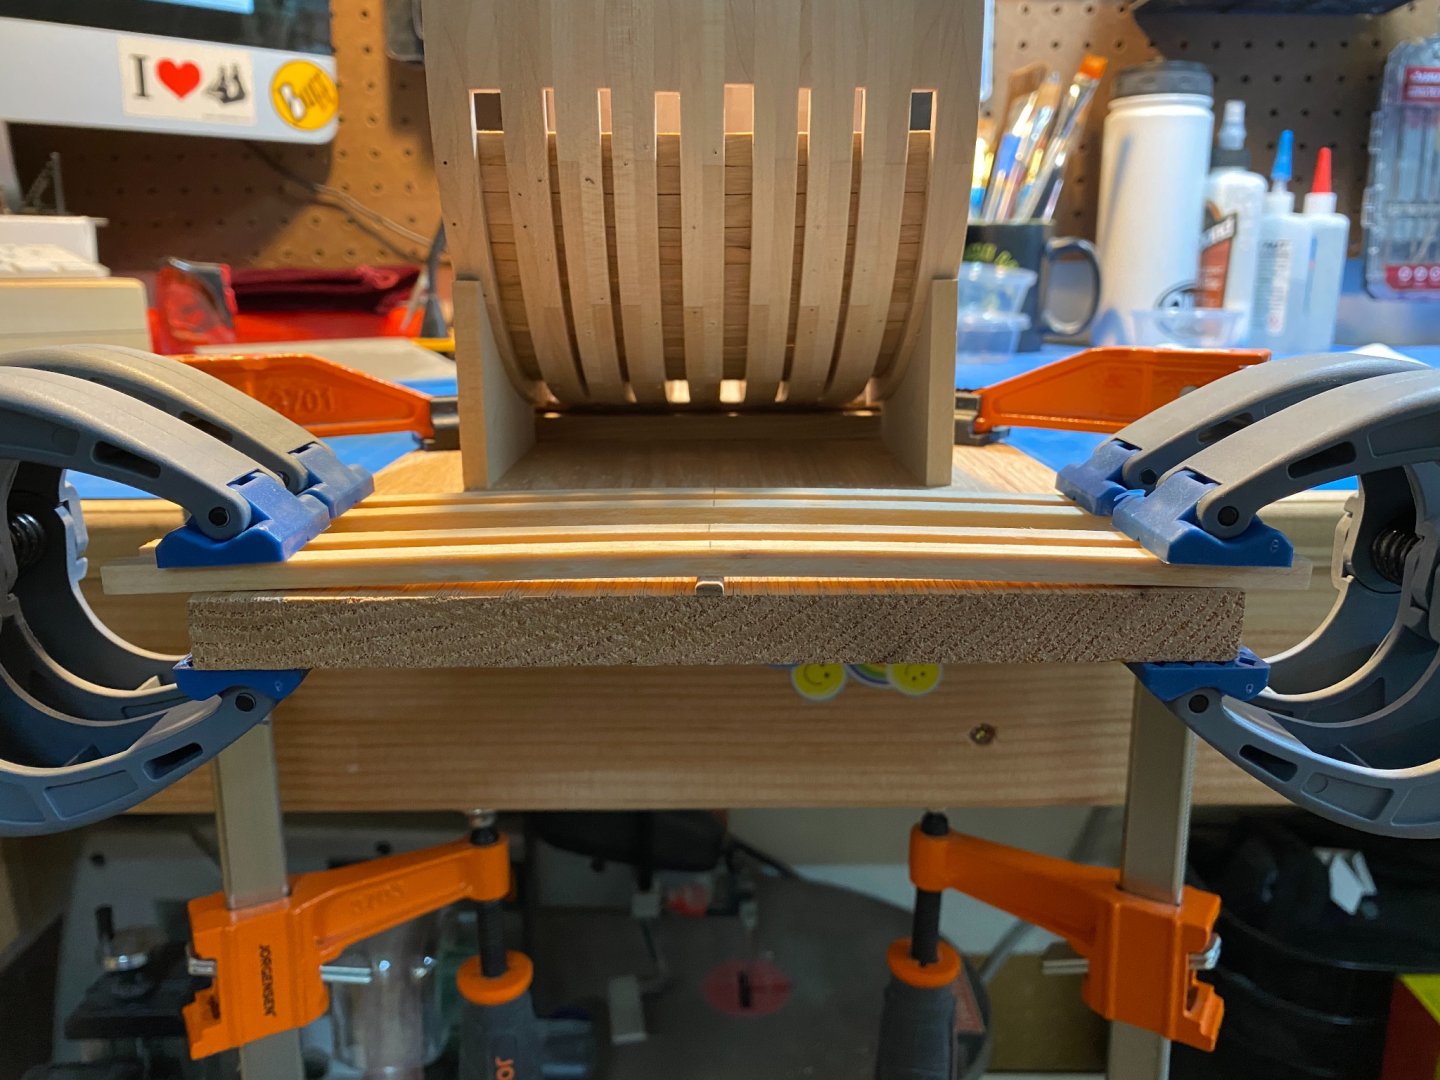
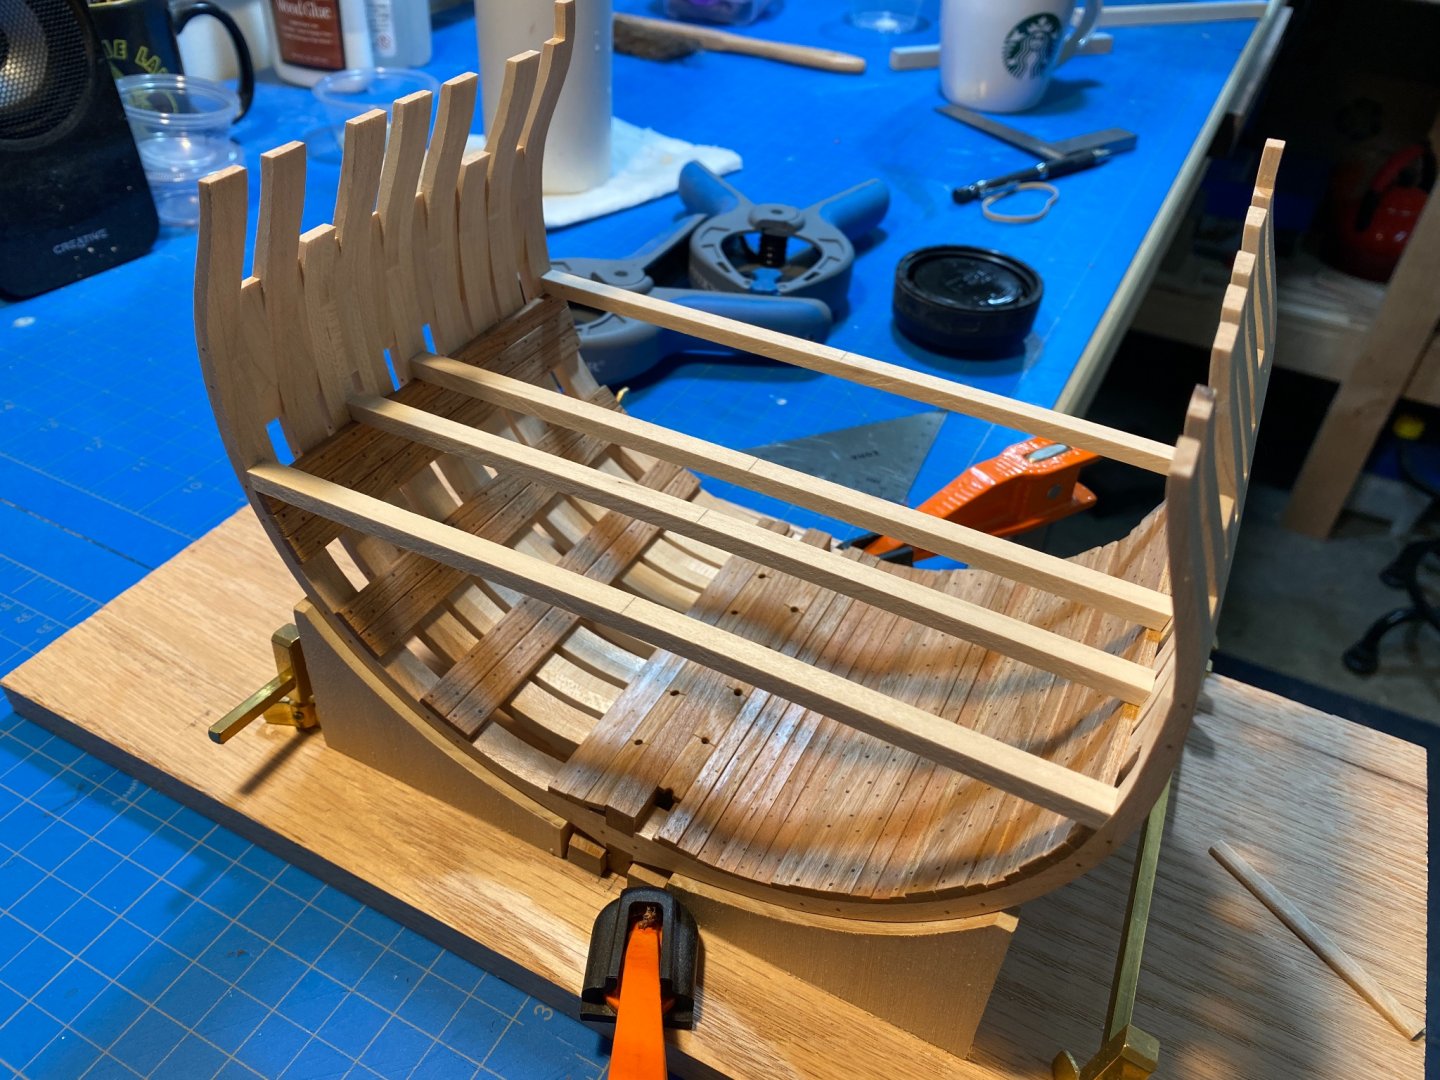
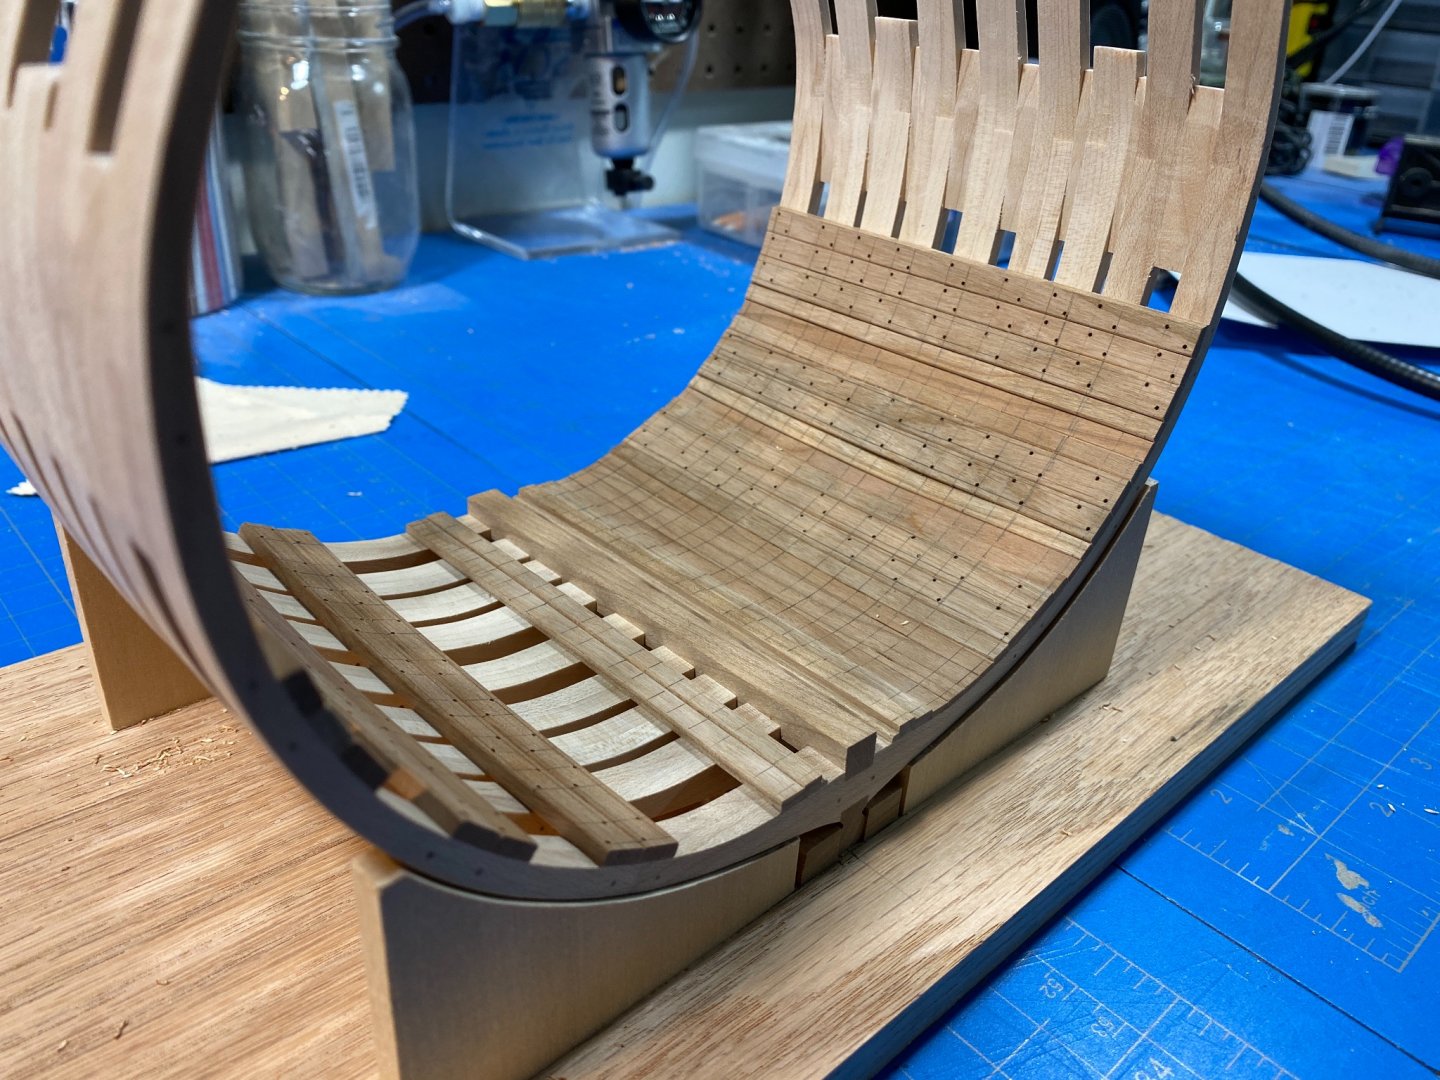
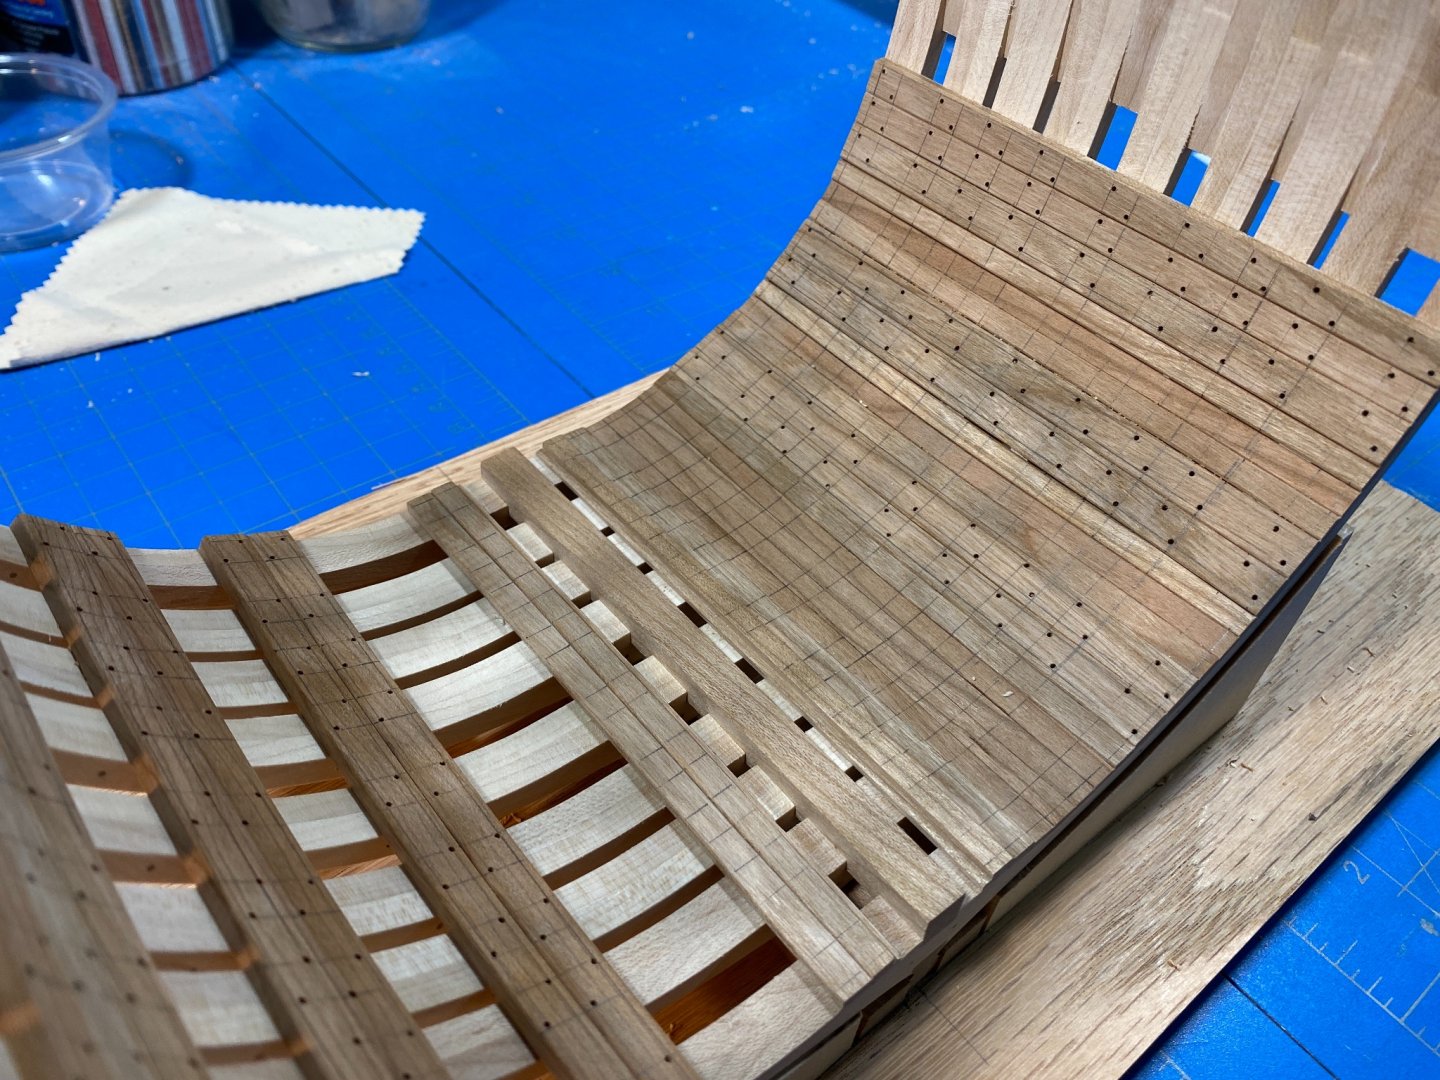
Progress continues... I decided to build the lower deck in-situ as I could anticipate trouble in trying to be certain all my notches and fittings aligned well. Of course I encountered a wholly different set of complicated steps that Ive noted for the future build out of the gun-deck. There are definitely parts of the layout that I feel would have been much easier and more accurate had I made the notches off-model, as well there are some that almost certainly are more accurate having been on done in place. As a result, many are done to the plans, while other notches were imitated in favor of less accurate flush joints. Im committed to thinking this through a bit more next time... a commitment I seem to make a a lot in ship modeling ;). I also rather stupidly overlooked the need to notch out for the gallows prior to fitting the aft ledge and carlings, despite reminding myself many times! So I still need to work out a way to get that done without wrecking everything. For the carlings, I used a razor saw which became a favorite tool and a small chisel. This process worked well until I got into areas where even my razor saw was too large (hence areas that should have been notched ahead of time). Otherwise, the process was basically as pictured below. Once I got the deck built out I had to add the hanging knees, which I more or less improvised on. The plans provide a template for the gun deck knee's which aren't anywhere near the right shape to be used in the hold area. So I sort of winged it... They may be changed... for now Im happy with them.


-
I use white PVA wood glue for the reasons stated above. I generally try to make a 1:1 ratio and then dilute with water which can help with the "too dry" to use issue.
-
Again, great photography and a really superb model. Approaching these end-days must be a nice feeling for a complex project like Syren. I wish I had more to say that hasn't been said already - it really is great piece of work.
- 950 replies
-
- 2
-

-

-
- syren
- model shipways
- (and 1 more)
-
Good to hear! Welcome back! Looking forward to some new posts. Fairing isn't my favorite process either... sometimes perfection is the enemy of progress.
-
NRG Capstan Project
Justin P. replied to tlevine's topic in - Build logs for subjects built 1751 - 1800
Just got my Capstan download off the NRG store, WOW! Everything looks really great, and well produced. Thank you to everyone involved. -
Just about everyone has done this at one time or another, some of us more than once... its like a right of passage.
- 100 replies
-
- 2
-
-
- Syren
- Model Shipways
- (and 1 more)
-
NRG Capstan Project
Justin P. replied to tlevine's topic in - Build logs for subjects built 1751 - 1800
This looks great, can’t wait to dive in on Monday! -
HMS Discovery 1789 by Don Case - 1:48
Justin P. replied to Don Case's topic in - Build logs for subjects built 1751 - 1800
Indeed. So far as I can tell, the transom matches the primary source for Bounty's launch drawings that I have seen. Curious why Model Shipways version of the Bounty Launch omits this design element. My only thought is that one design is the "launch" and the other the "longboat," with various sources using the terms interchangeably. -
Looking fantastic! You are inspiring me to carry-on with mine!
- 950 replies
-
- 2
-
-
- syren
- model shipways
- (and 1 more)
-
Justifying the purchase of a mill
Justin P. replied to Captain T's topic in Modeling tools and Workshop Equipment
I agree with pretty much everyone. I bought one years ago, then promptly sold it to another MSW member as it really wasn't as useful for what I was trying to do at the time and it became an expensive paperweight. Then I got another MF70 in the last year as a gift, and now I use it all the time. Probably when I don't need to, and likely more often than not incorrectly. However, it is a joy to use and can make very nice precision parts in harder woods as demonstrated above. I can't comment on value, at one point it was too expensive for me to have laying around and now that I haven't paid for it, I love it... -
HMS Discovery 1789 by Don Case - 1:48
Justin P. replied to Don Case's topic in - Build logs for subjects built 1751 - 1800
I did some work on this as well some time ago. I ended up contacting the Center for Wooden Boats who run a full size "replica" of Peter Pugets launch. They told me at the time that there were no definitive resources available for the actual design of the Discovery's boats and instead used lines taken from plans available for HMS Bounty's launch and then modified the look and fitting out based on contemporary accounts by Puget and Vancouver. https://www.cwb.org/program-boats/discovery -
This is more or less what I would expect. Im thinking through some options to do a bit of a hybrid... maybe there is a way to temporarily fix items as I go? So that I can do a bit of both.
-
Thanks Matt! Though in the spirit of full transparency, they "look" tighter than they are. An old trick I learned was that some gaps can be made less obvious if you cut your PVA with about 1:1 glue to fine sawdust of the wood you are joining. So I ran a piece of scrap maple through a thickness sander and collected the dust, mixed that into a very thick slurry and applied liberally in the joints before clamping the pieces together. the end result comes out looking much better than my skills could otherwise achieve :).
-
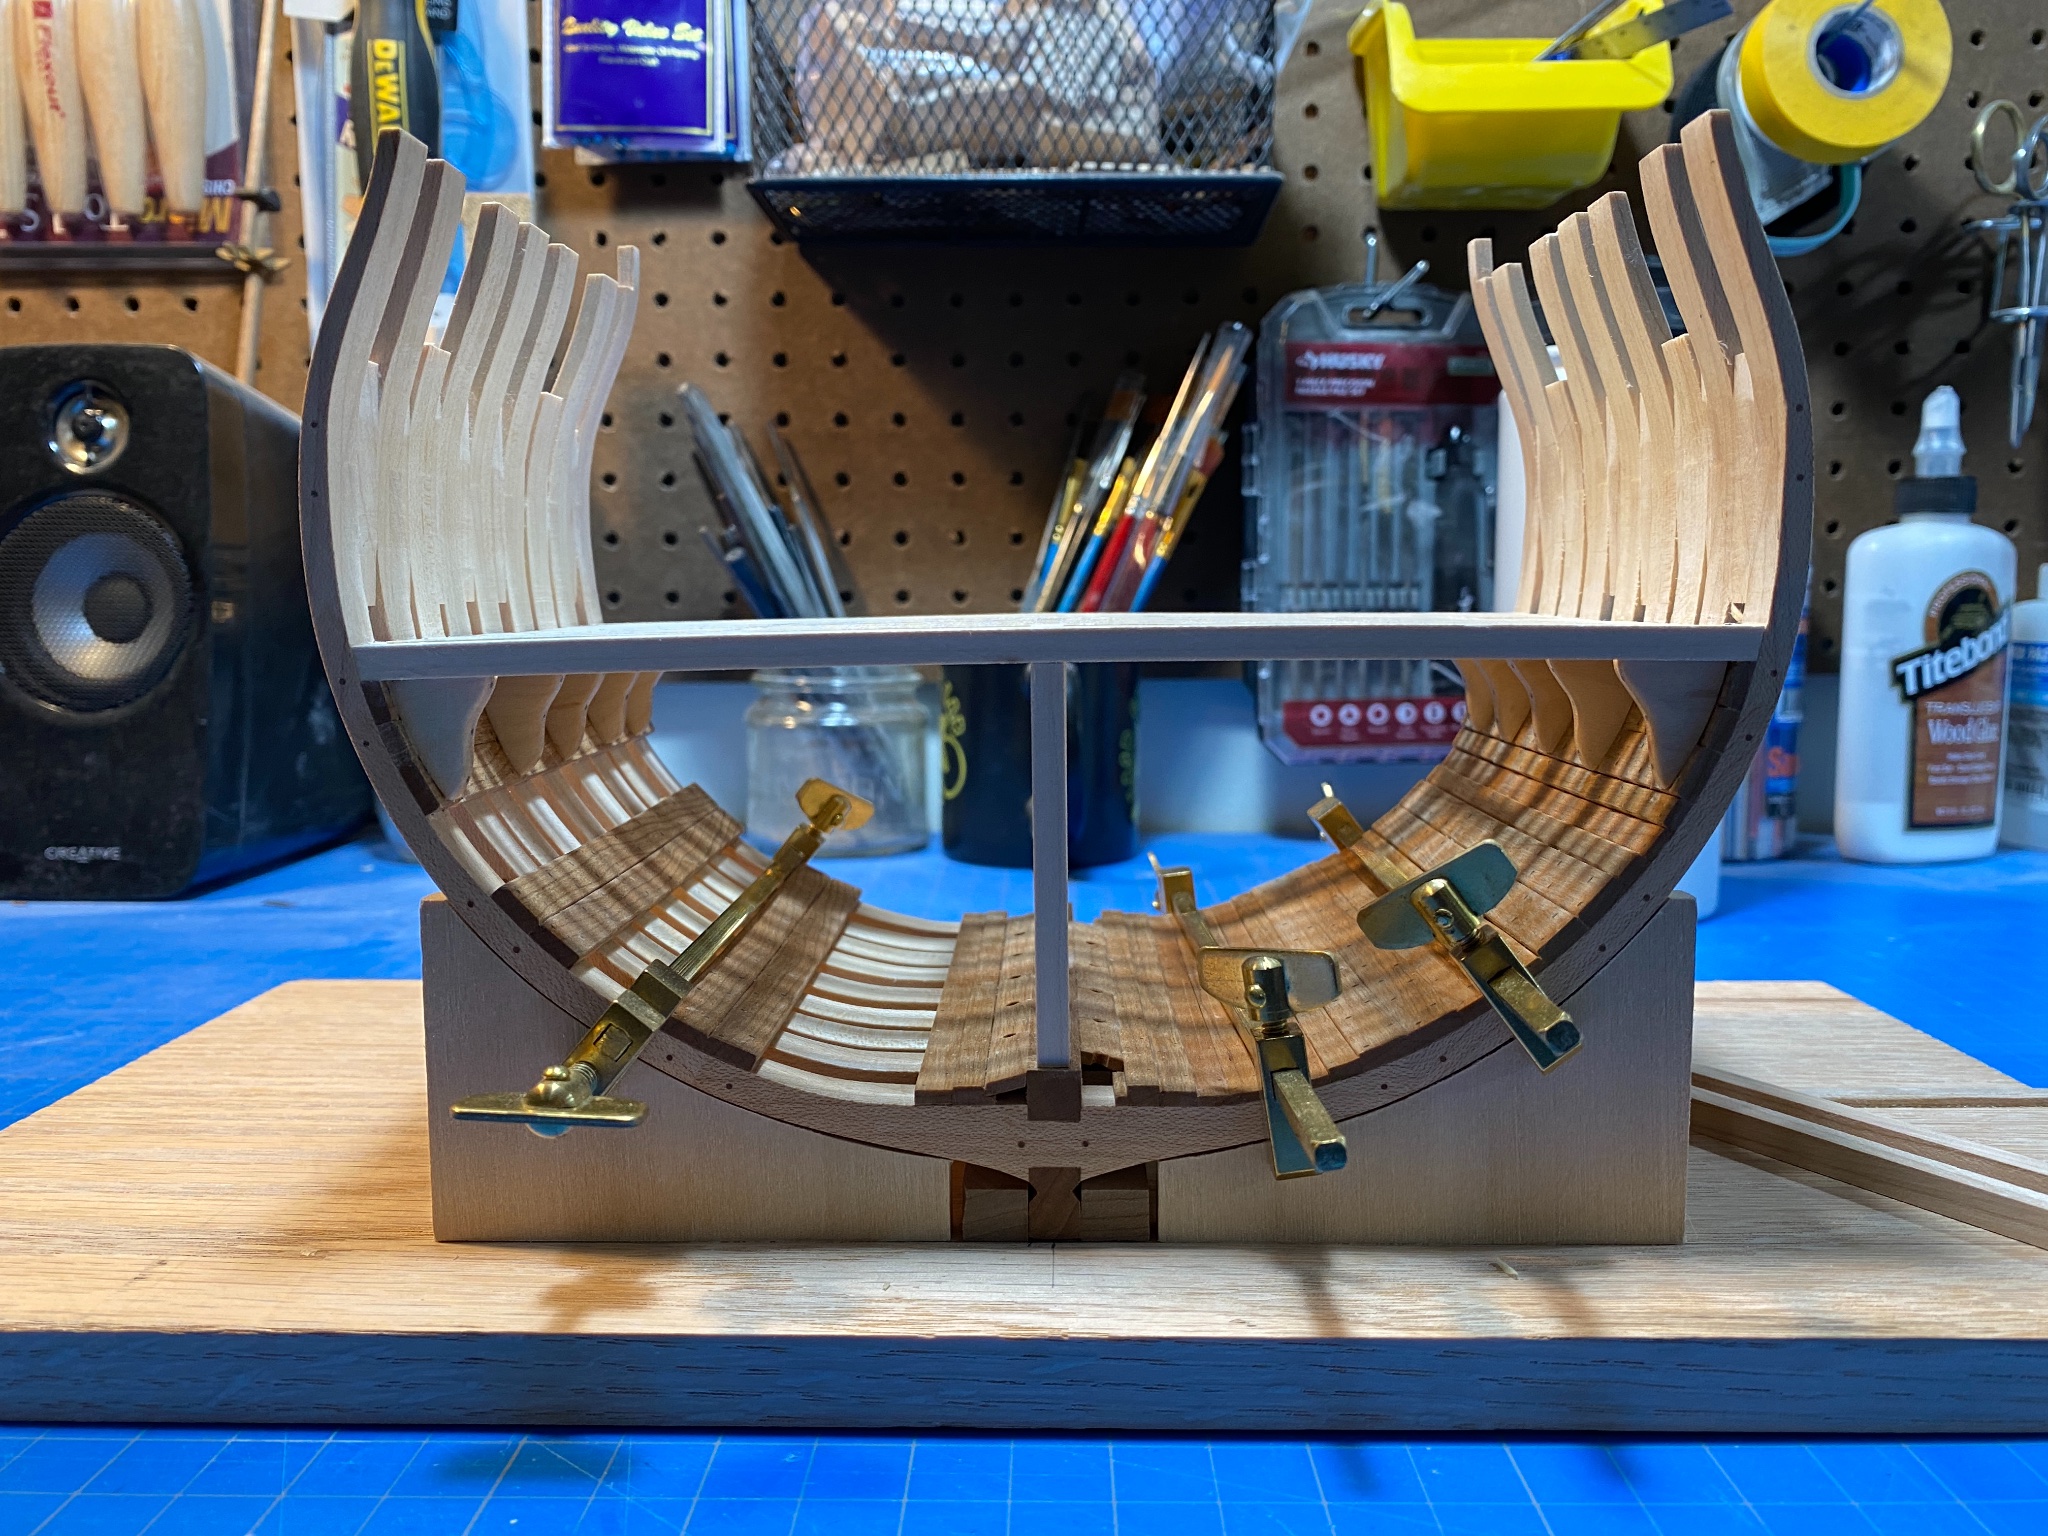
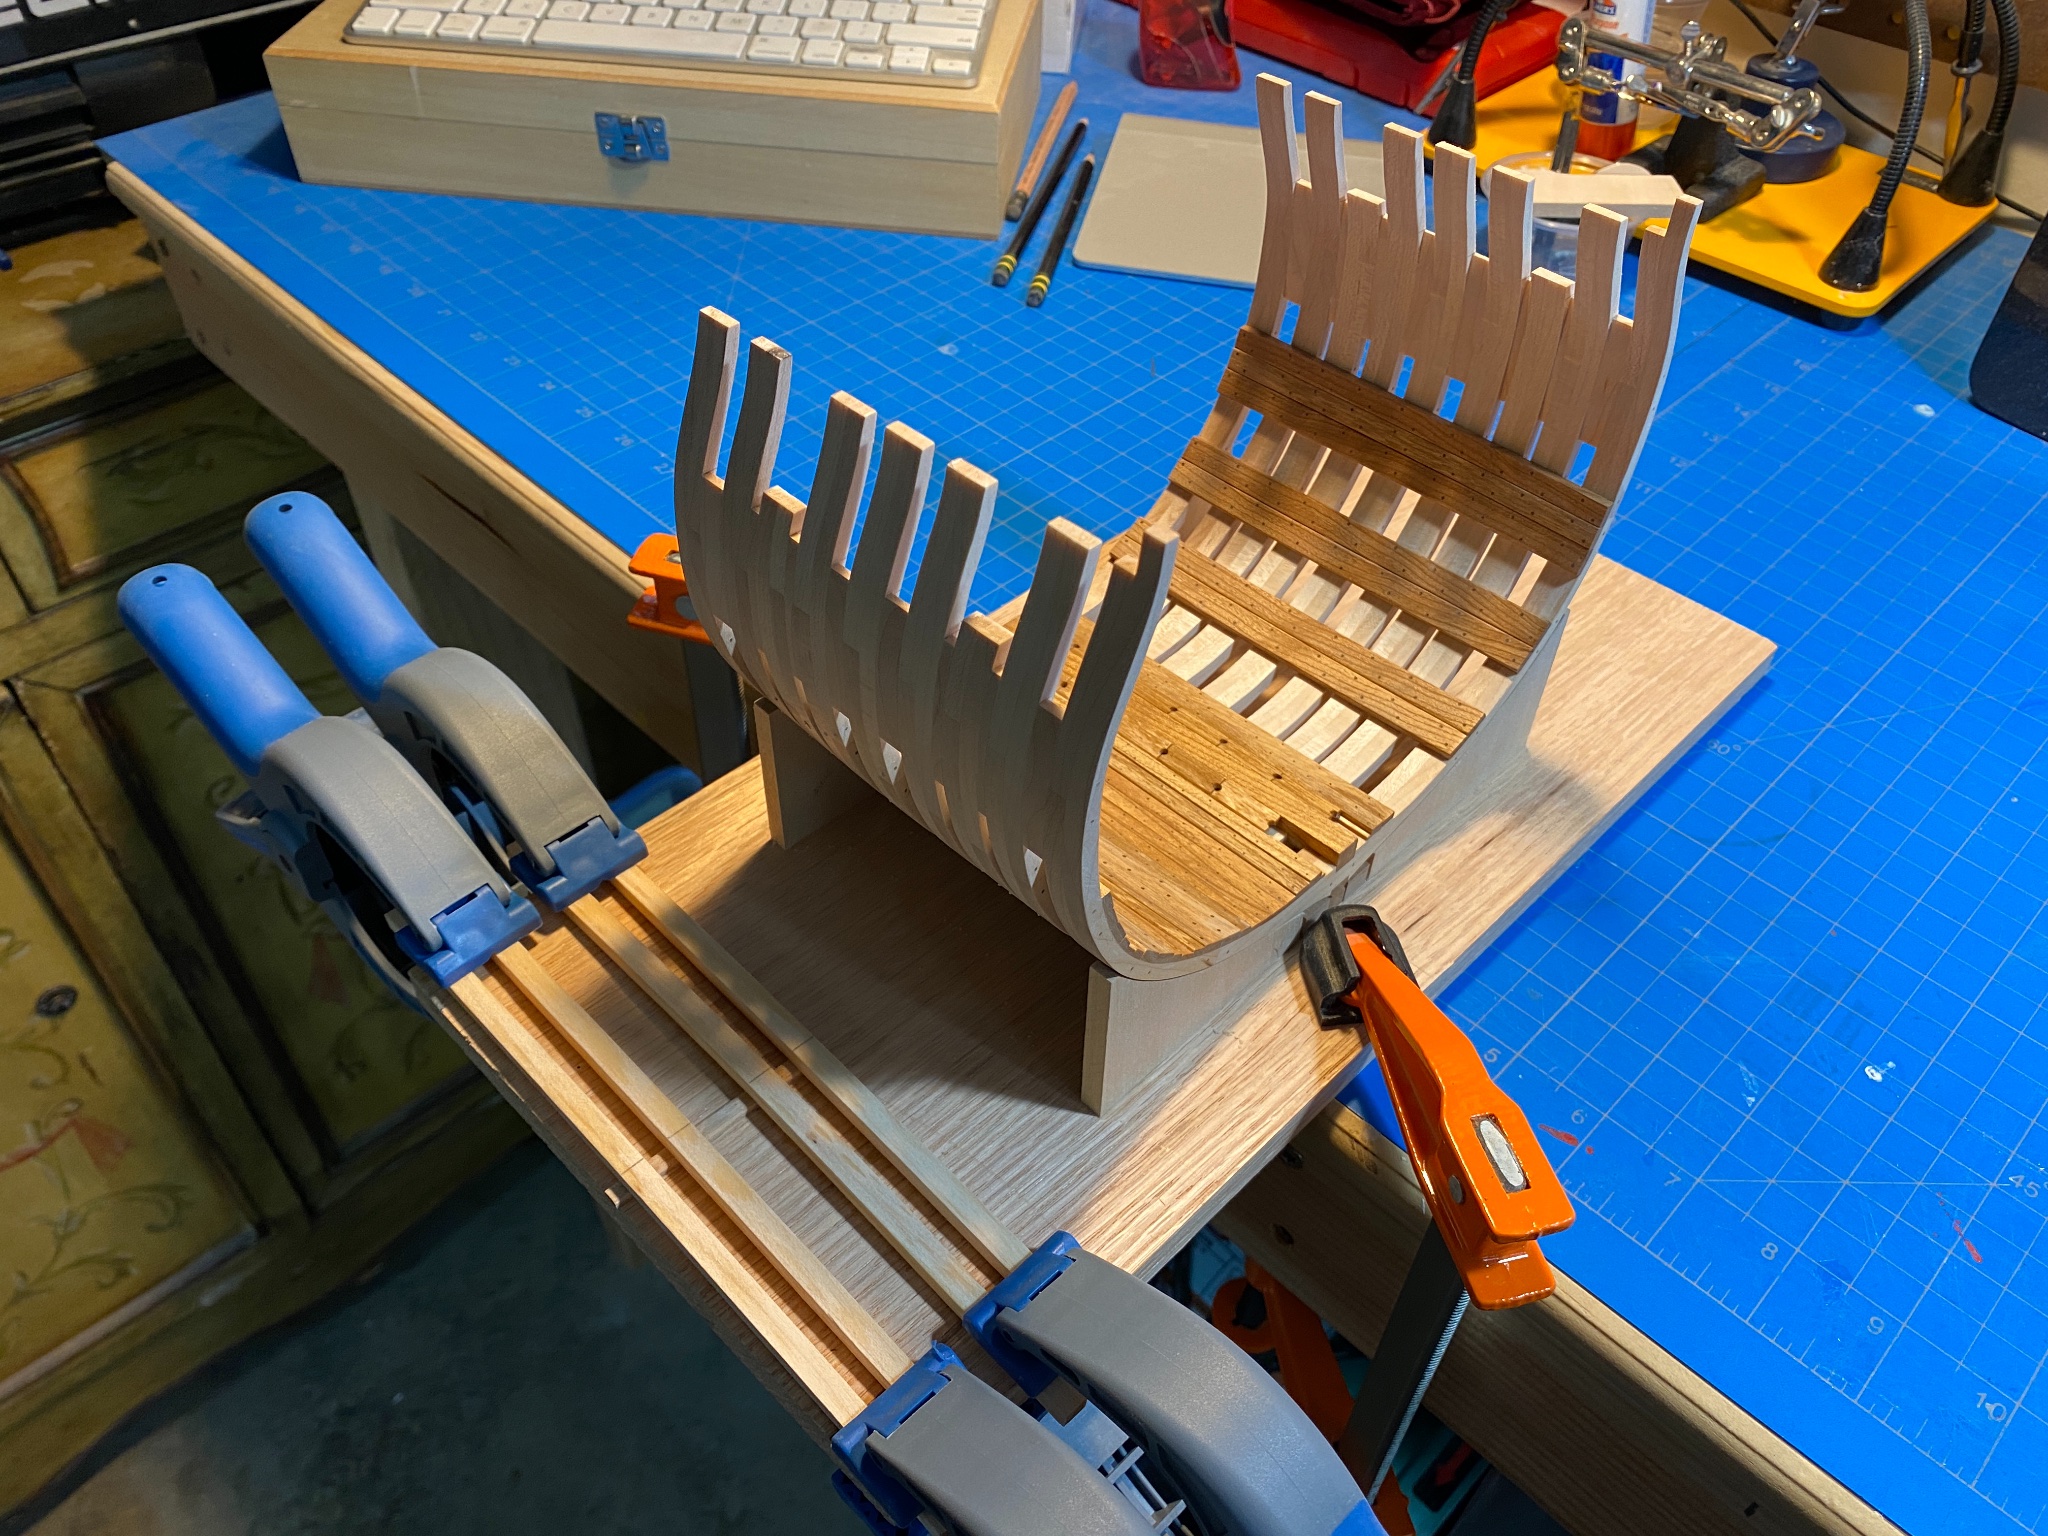
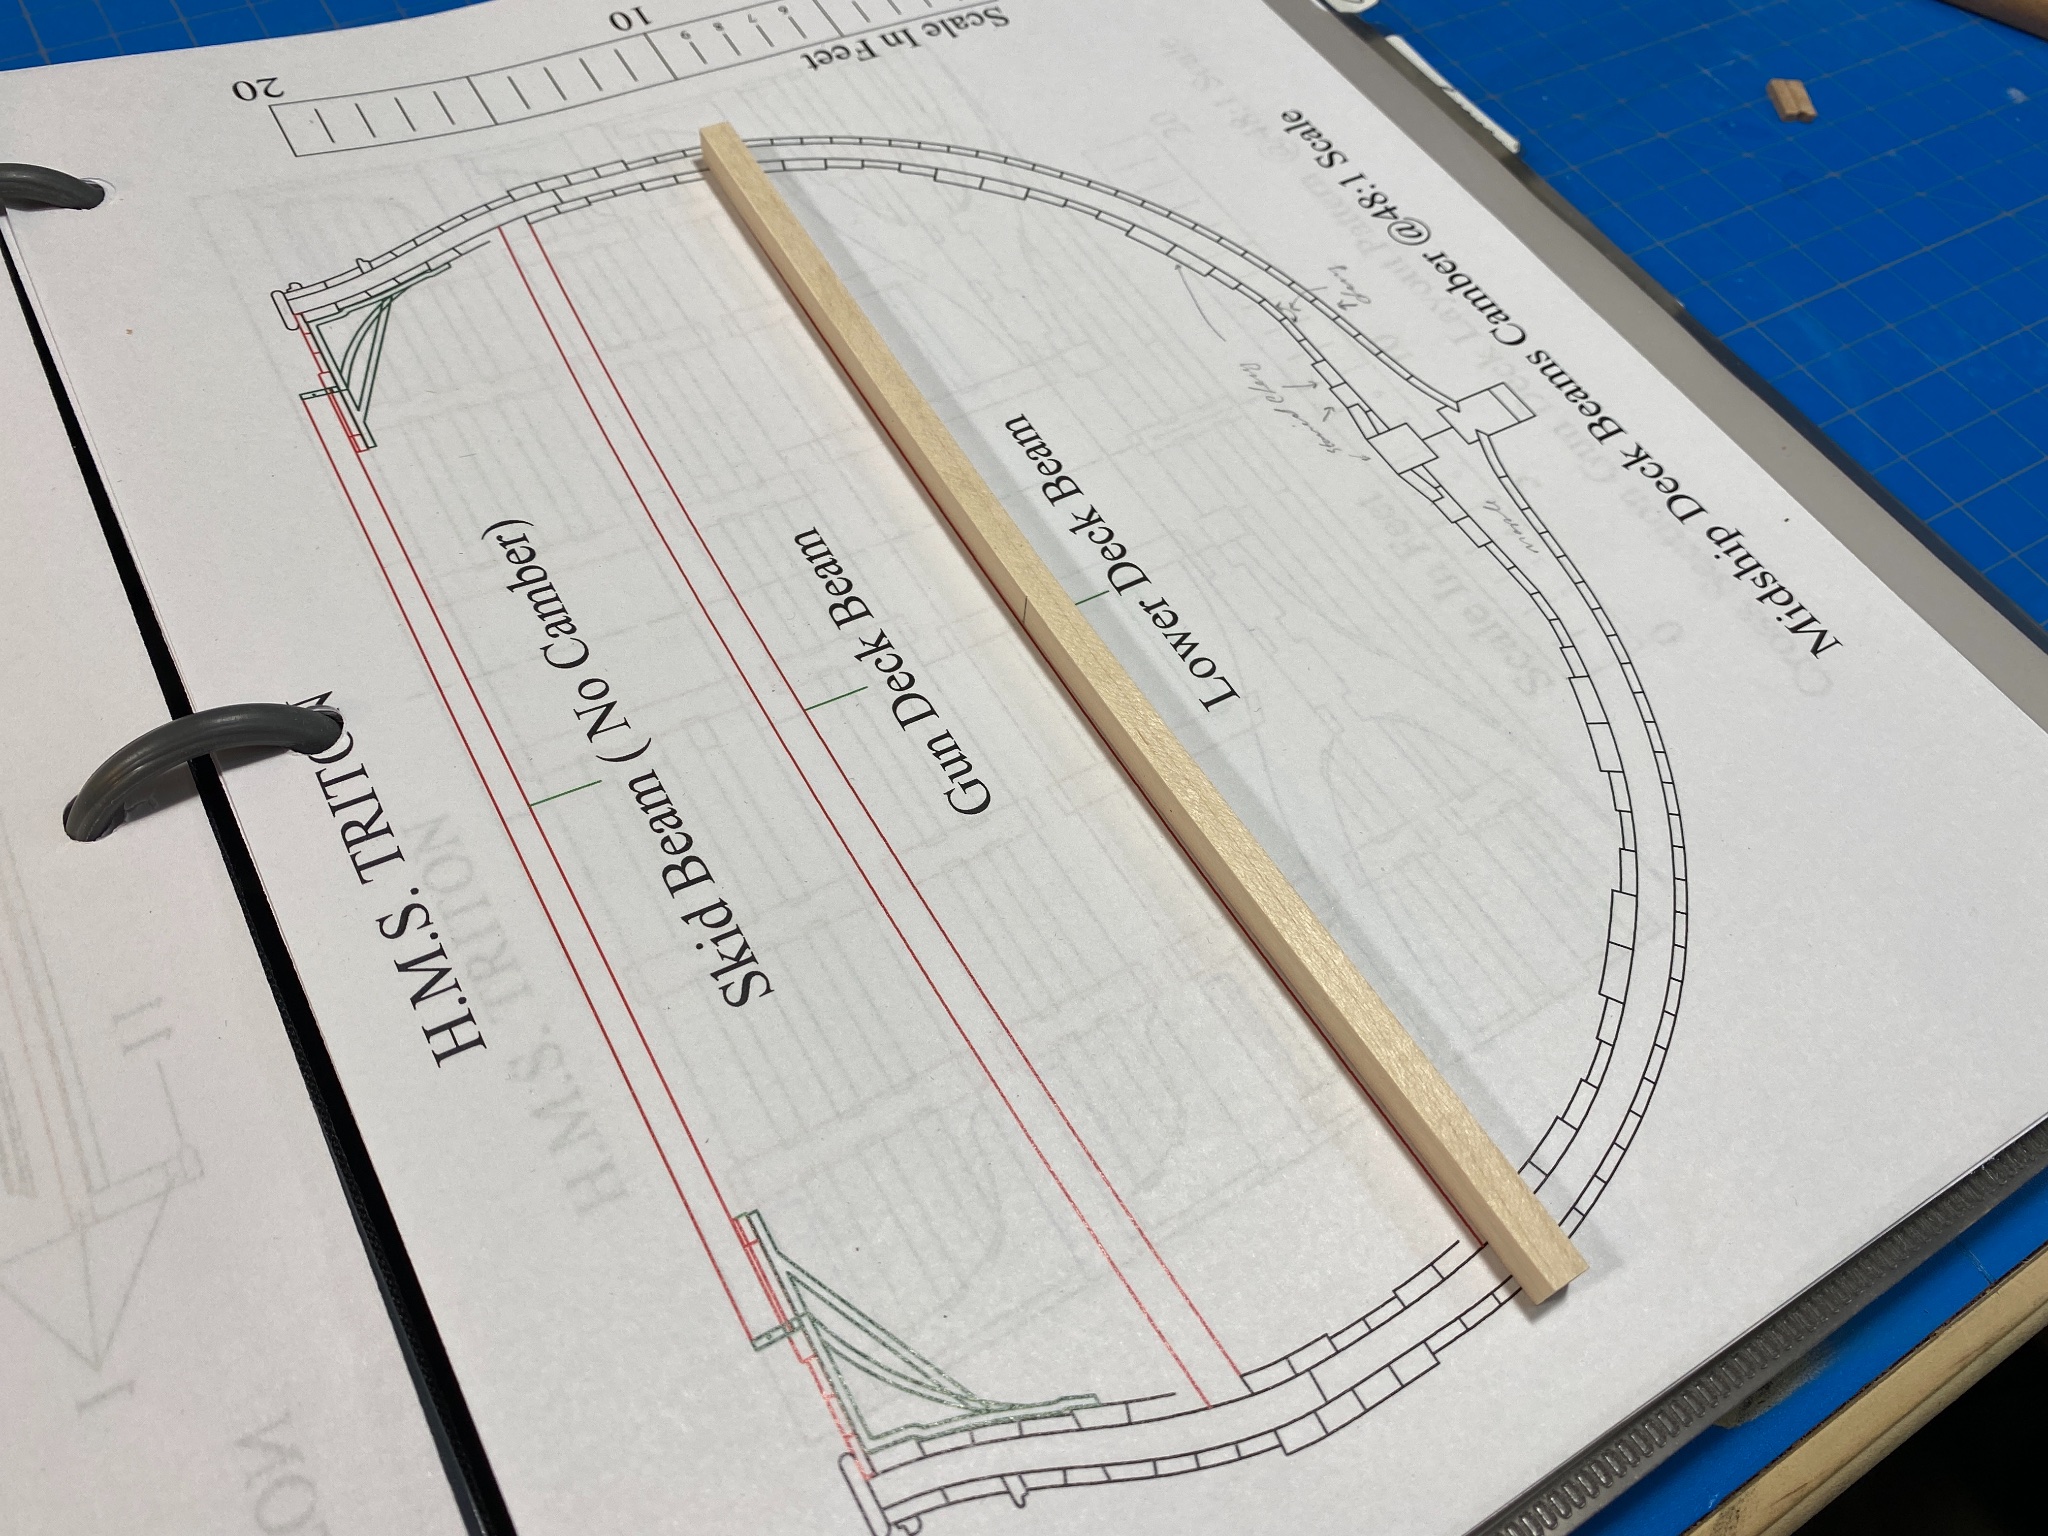
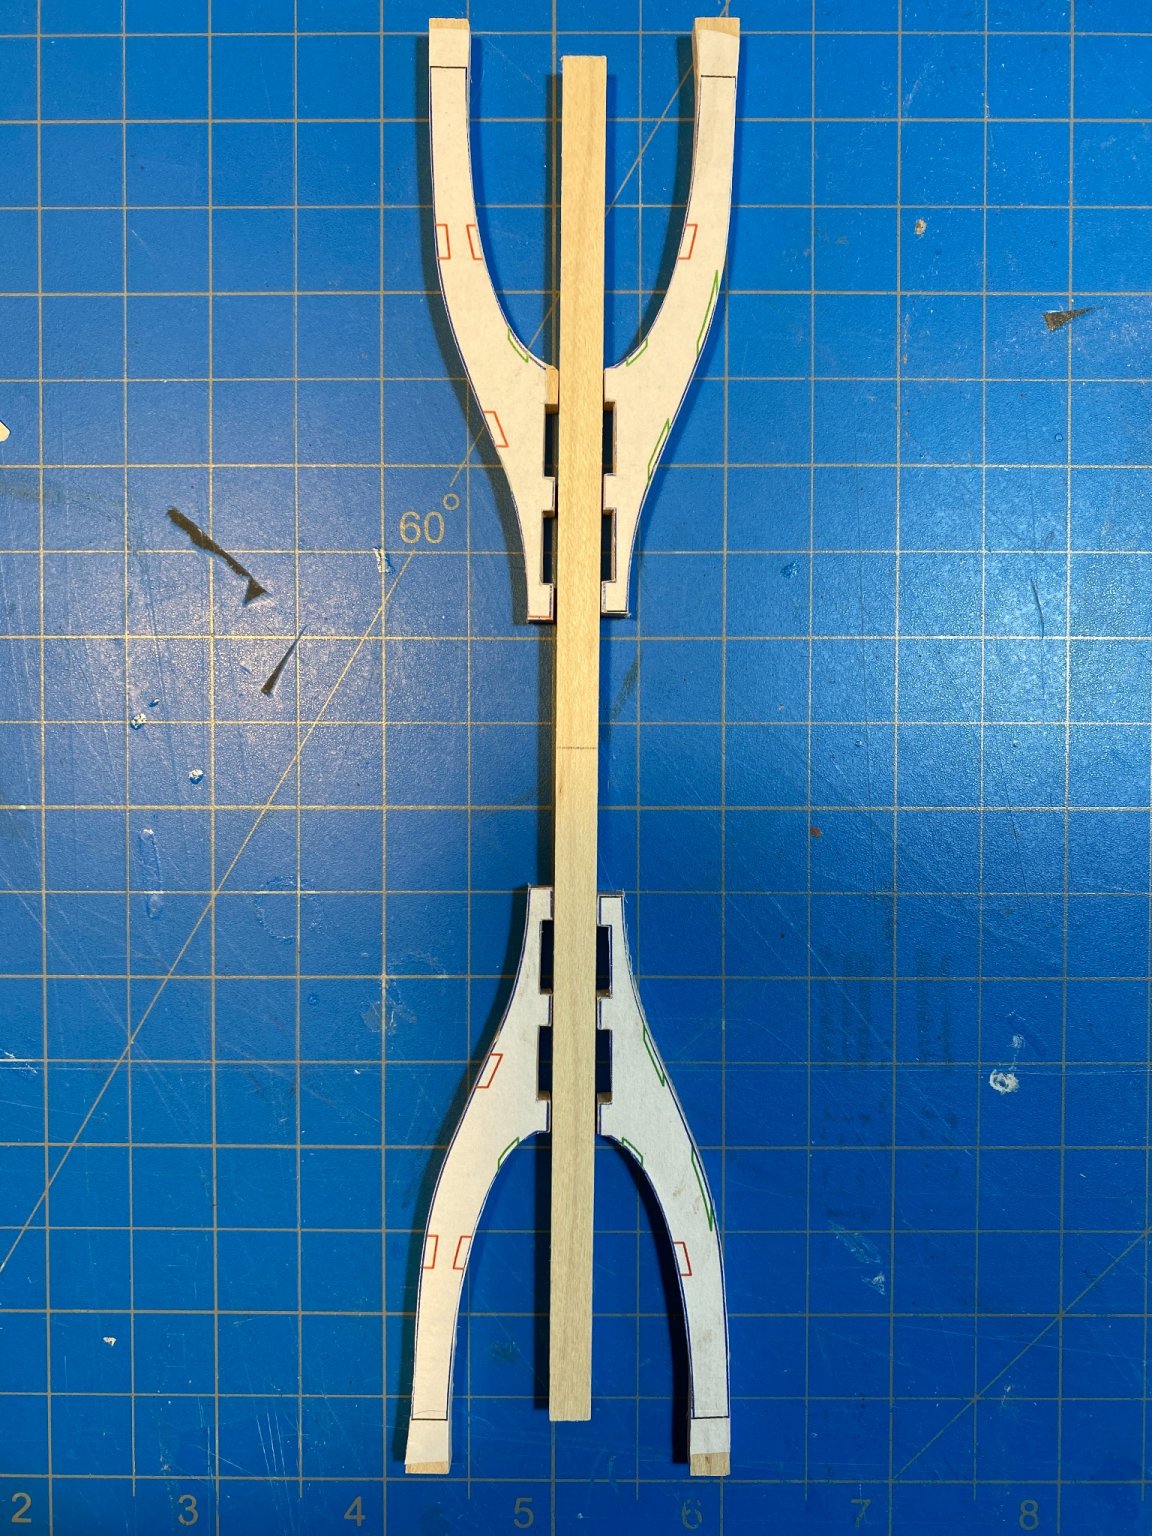
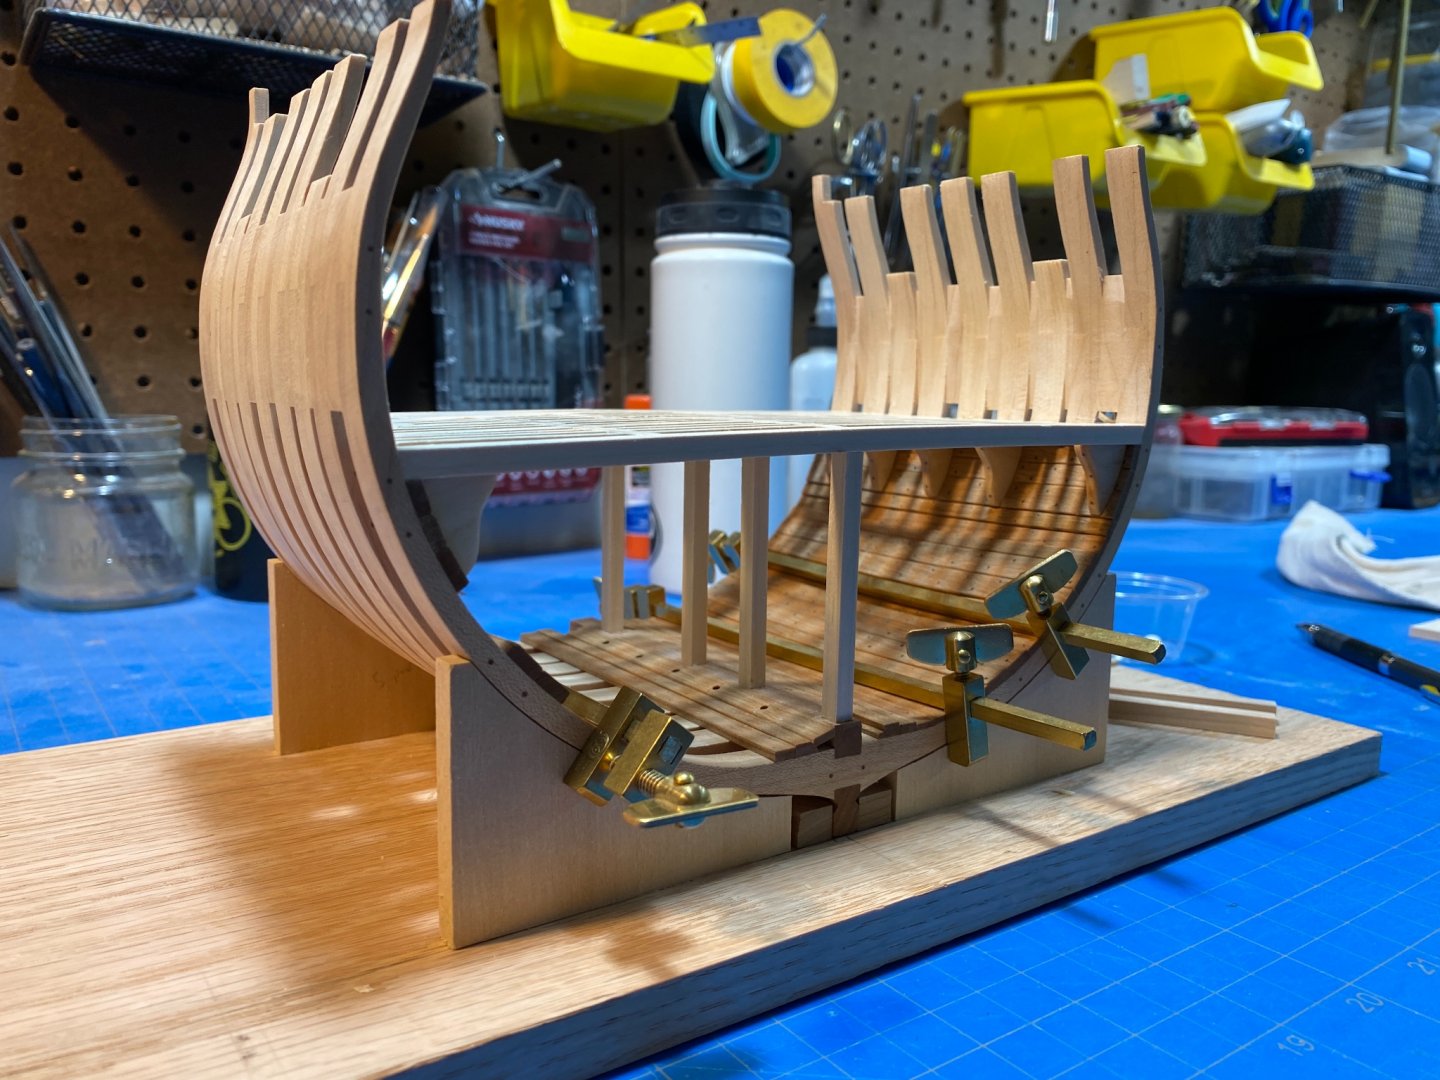
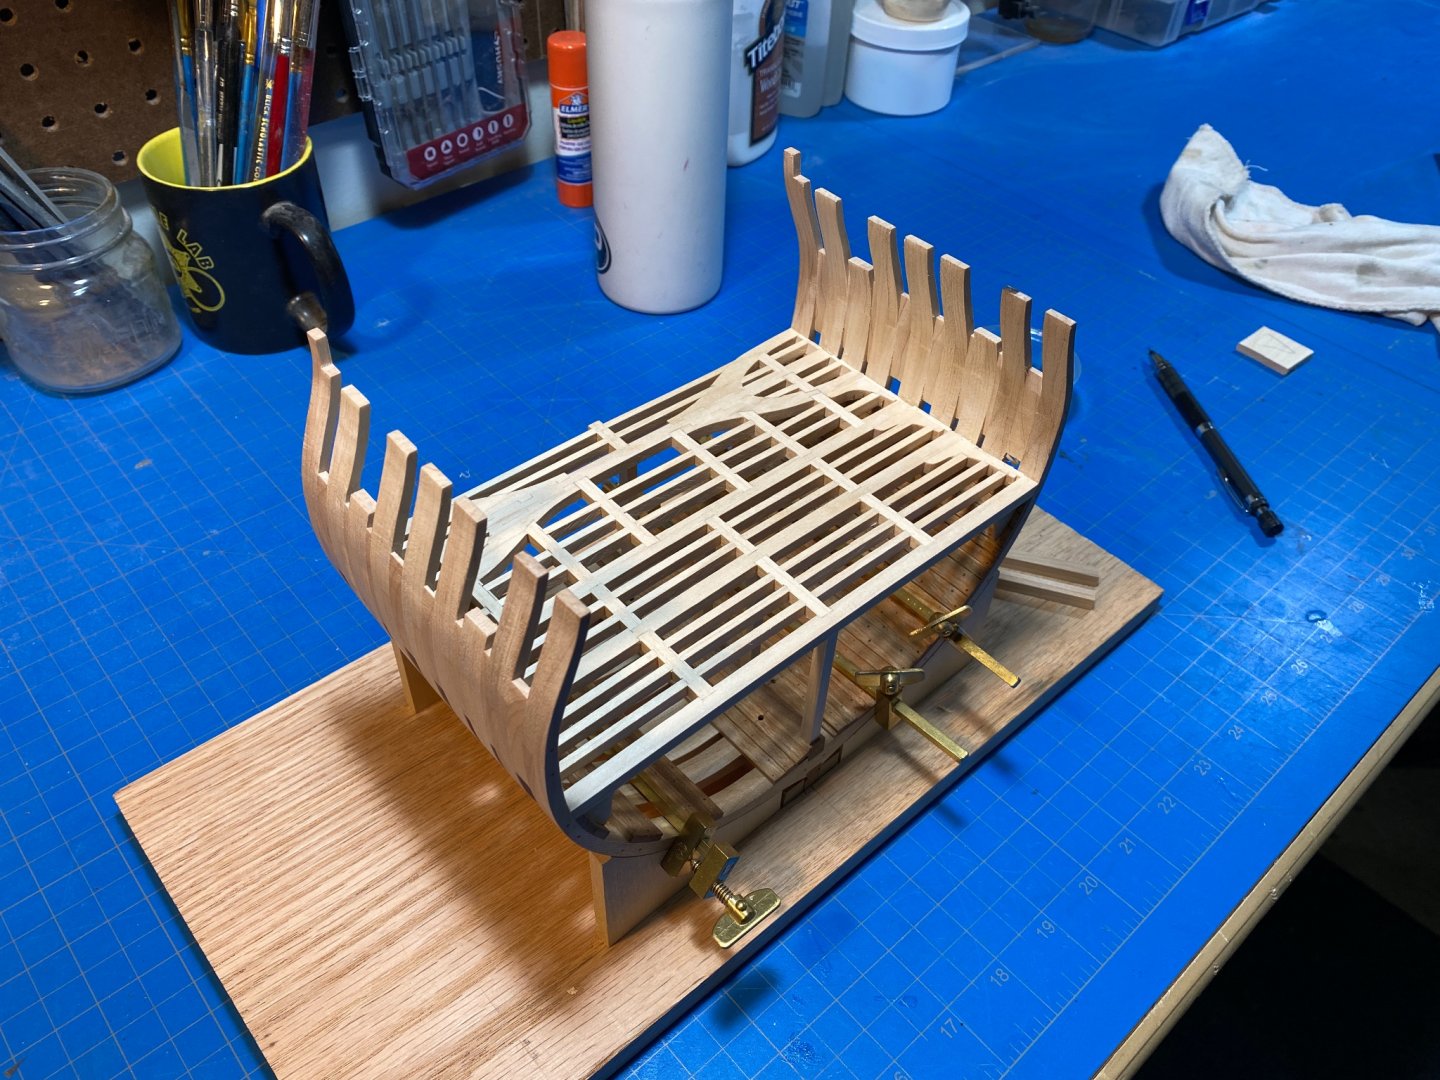
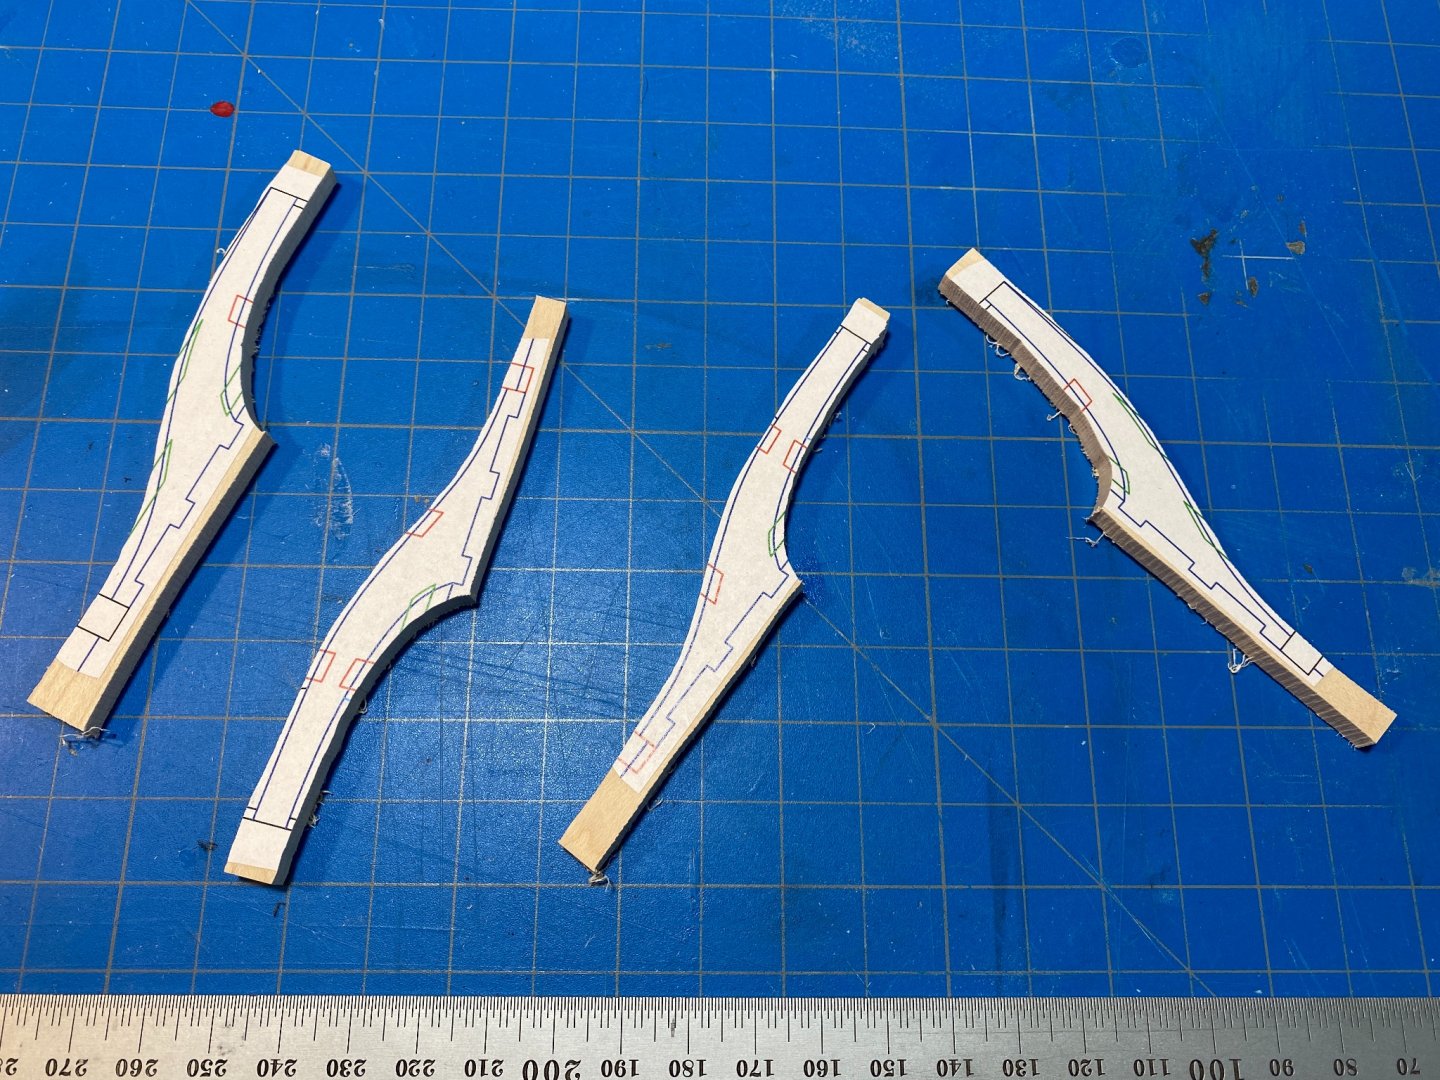
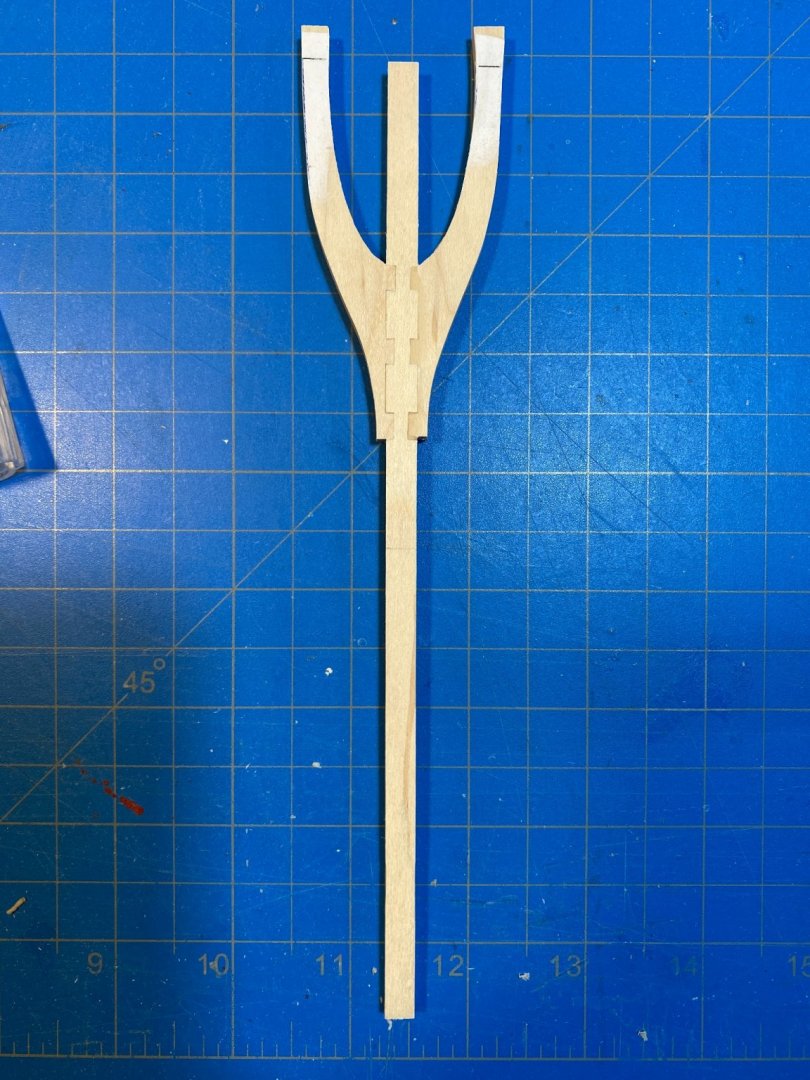
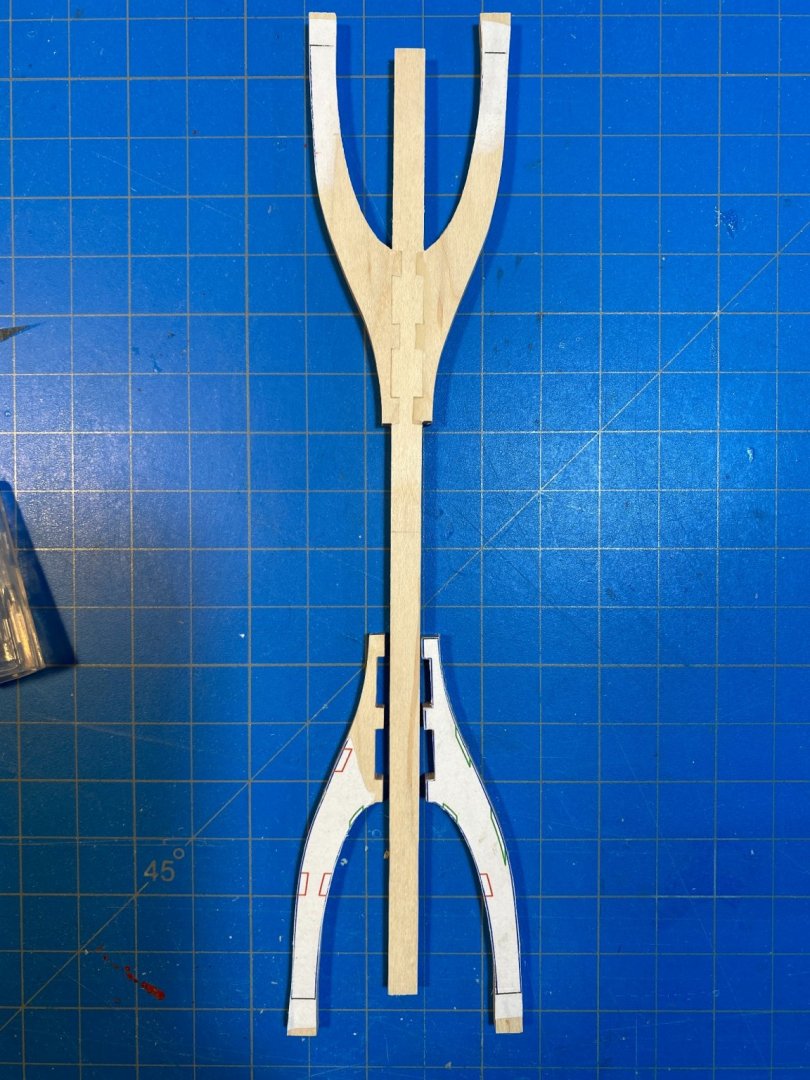
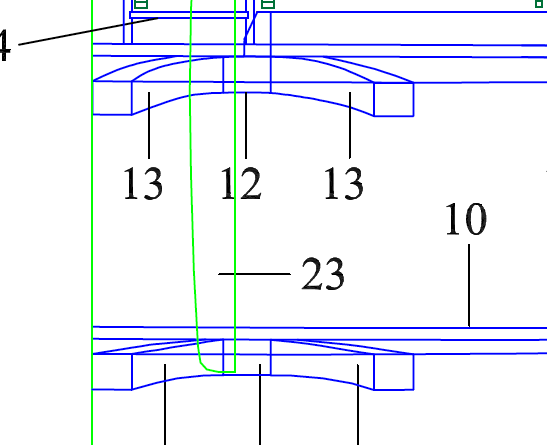
First phase of treenails done. Thankfully. Doing 10-20 of these is kind of fun, doing 500 and at the smaller diameters, not so much. (After a light application of wipe-on poly.) At this point its a little unclear where I should start on the next phases, so I just went with what appealed to me and started construction of the lower deck. I still don't really know what the best approach is here. Once the main deck beams are cut, cambered and ready Im not sure if I should attempt construction of the rest of the structure (carlings, etc) in-situ or off the model and hope I can fit the completed deck into place. Its so much easier to get precise cuts and chiseling outcomes if done off the model but Im worried it work end up fitting properly. (Bending the deck beams gently, note the mishap holes in my frames where my drilling for treenails got a little sloppy. Thankfully those will get hidden). I started in on the beam arms as well. Which has gone better than I expected. One complication I have been hassling over is the camber of the beam arms matching the camber of the deck beam. In the end Ive left them flat and decided I would just sand and shape as needed after joining them. The plans show a clearly cambered shape of the this component but I don't know... Im not sure it needs to be as dramatic as it looks in the profile drawing.


-
I would too, simply because I would image that through handling the tackiness of the line will be prone to picking up (and retaining) all manner of dust and debris thereby making your end result a bit messy?
-
HMS Discovery 1789 by Don Case - 1:48
Justin P. replied to Don Case's topic in - Build logs for subjects built 1751 - 1800
Ha! Looking great. Did I miss what wood choice you've made for the frames? -
Indeed! It seems like this build is moving along at a faster pace each week! Its really looking great.
- 950 replies
-
- 1
-
-
- syren
- model shipways
- (and 1 more)
-
It really is. I found that optivisors were absolutely essential.
-
HMS Discovery 1789 by Don Case - 1:48
Justin P. replied to Don Case's topic in - Build logs for subjects built 1751 - 1800
Its looking really good, must be satisfying to see it come together in the form of a real ship! Can I ask what you inevitably did about the McKay drawings? Did you find a source? Are you using them? -
Thanks! I don’t know if my experience is anything to learn from. I probably used 10 more tools than I really needed, I tried a lot of different things. Ultimately the most wood was removed with a #11 x-acto blade(s). At one point I was using a dental burr between my fingers. It was a round-a-bout method, which I’m sure will get better with experience...
-
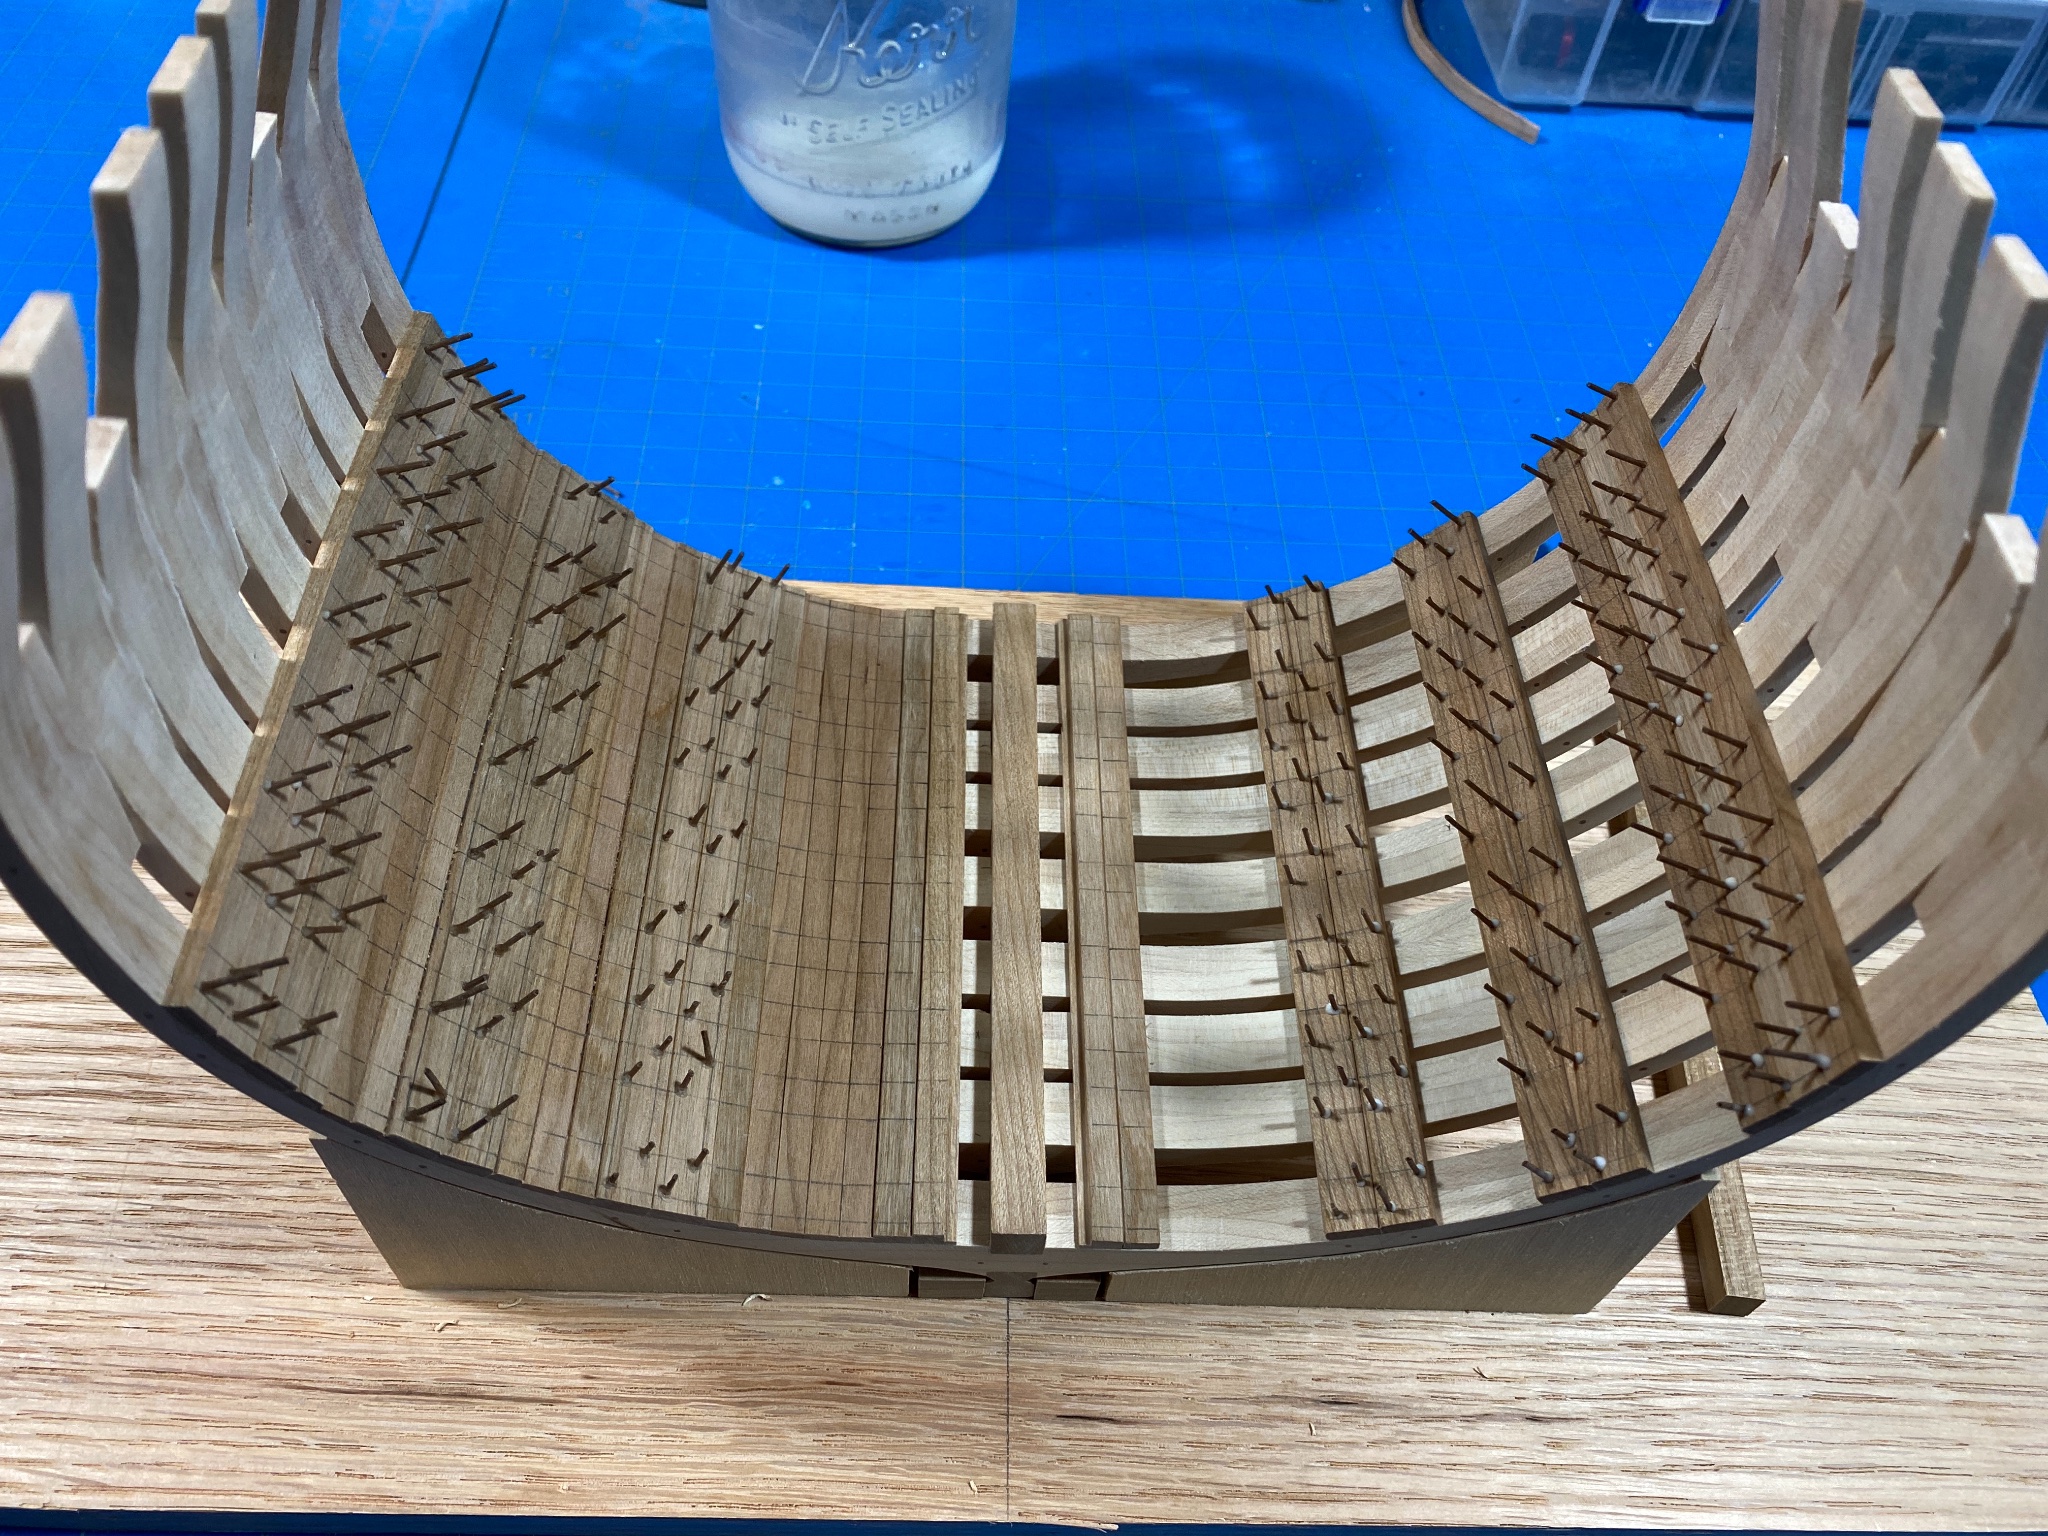
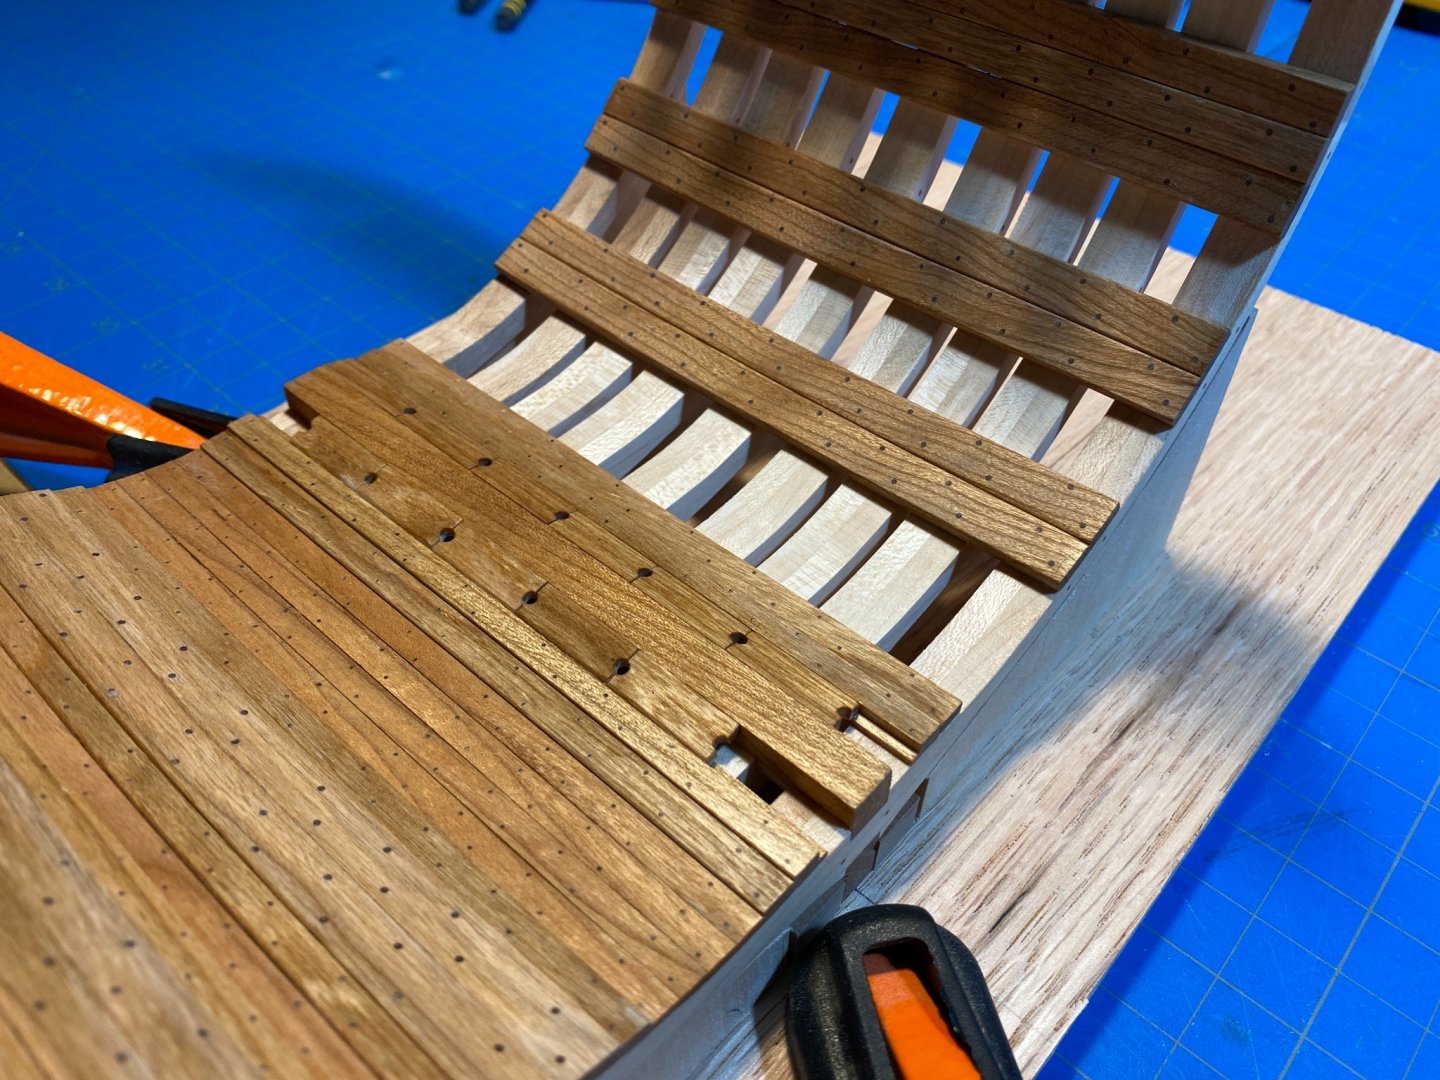
Started in on the inner treenails ala @ChadB, after flushing up the planking to the frame face. Used a very similar approach to him, and followed his practice of 1mm for the thick stuff and will go down to .5mm for the planking. I very much appreciate his build log for the guidance which has acted (among others) as a sort of manual for my first fully scratch build. It will help tremendously I think for future builds where there might not be so much previous work to rely on. Ill be using Walnut for the treenails. Which provides the nice step down in color from the cherry.
-
Appreciate the kind words, Im trying. As always there are still little errors here and there that tend to be all I can see but it helps to be reminding that others are seeing some sort of success! Thanks.
-
Indeed it does. Thanks.
-
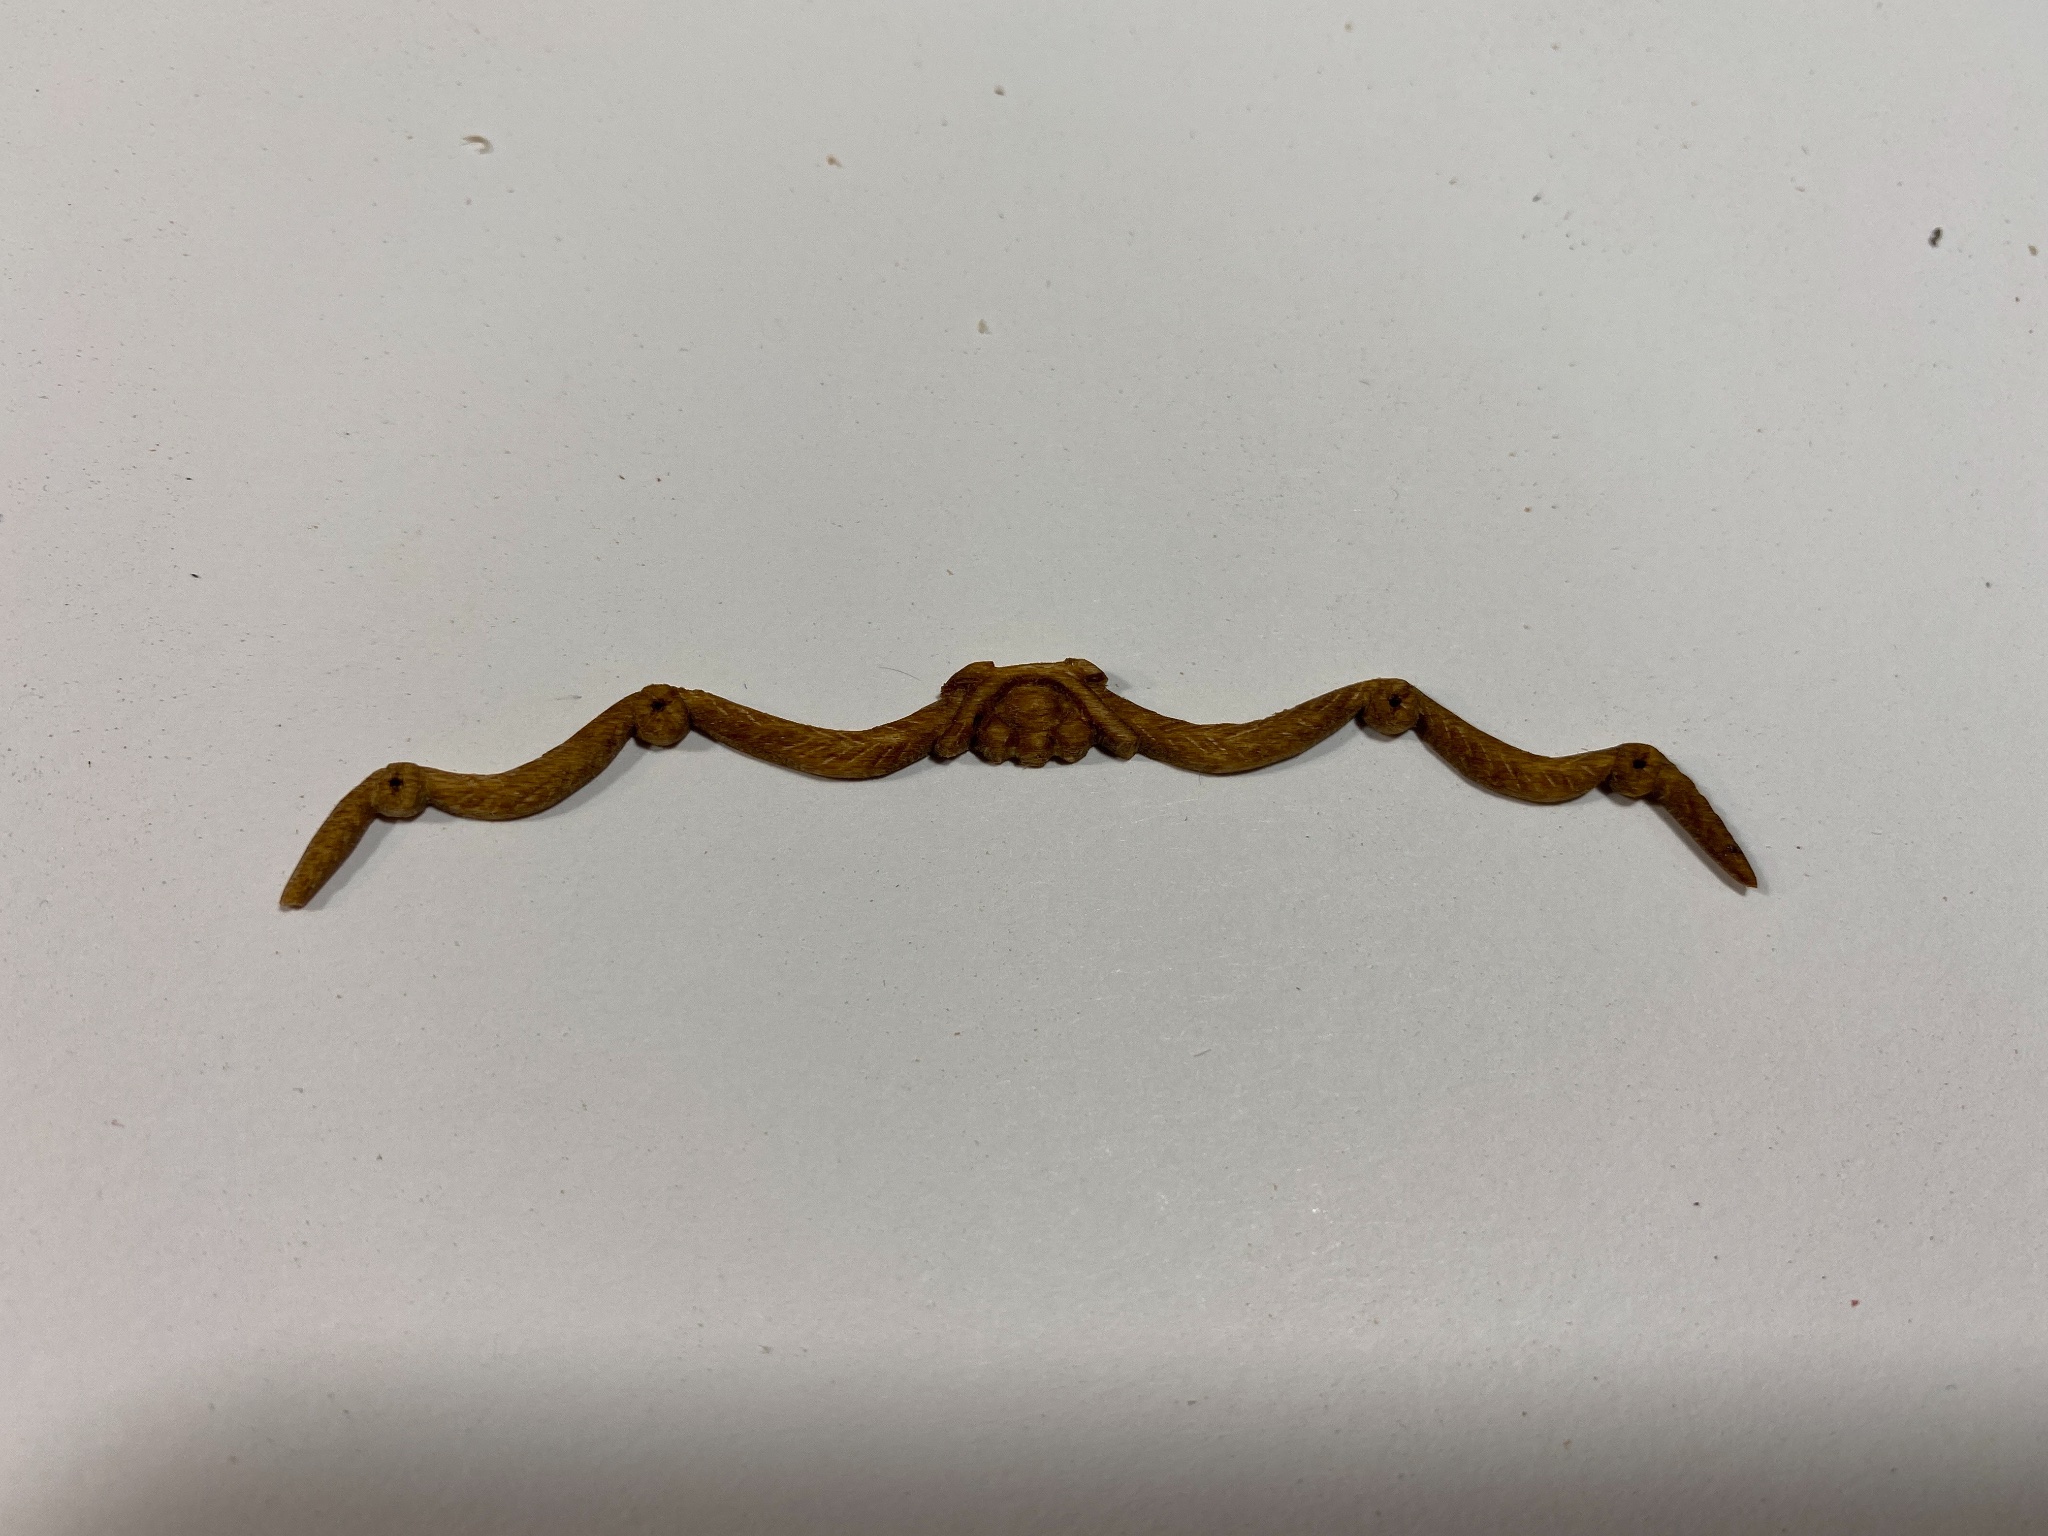
Well the final stain came out quite a lot darker than I hoped, but all in all for a first time carver of what I would call a "micro carving" Im pretty happy. Bummed that the stain sort of took it down so far, but glad to be over the hump. All things considered, I am NOT a fan of carving at this scale, ha! I tried to get more detail out of it, but I just couldn't and once I got to certain point the inner voice started squeaking "Don't let perfect be the enemy of good!" So I left it, stained in Golden Oak and it just sucked it right up! I also really wanted it to have a scale look and not be overly meaty but the thinner I went the farther I moved from confident I would break the damn thing just handling it. I learned a great deal.