HOLIDAY DONATION DRIVE - SUPPORT MSW - DO YOUR PART TO KEEP THIS GREAT FORUM GOING! (Only 24 donations so far out of 49,000 members - C'mon guys!)
×


Justin P.
-
Posts
1,008 -
Joined
Content Type
Profiles
Forums
Gallery
Events
Everything posted by Justin P.
-
 It was just a guess. I admitted to not knowing at all - and will admit it was probably a stupid guess.
 -
I dont know about historical references, I just went with a pretty standard look based on images I searched for on the internet. Possible in real practice a form of tongue and groove? No idea.
-
This is wonderful work. Thank you for sharing, really inspiring!
-
At least you are using the Calligraphy solution and not the drawing. The calligraphy is considered "lightfast" so you can at least be sure of a consistent color over time. However it is not waterproof and will reactivate so best be sure you dont somehow get your model wet or it will be a mess! Any glue use can possibly reactivate it as well, particularly PVA - so be careful!
-
I used a Proxxon for several years before recently upgrading to a Sherline (4-axis). The Proxxon is a great little workhorse, but it is a bit noisy and there is lots of slop in the table. The slop is easily mitigated if you are even a little bit mechanically inclined. This video is great for calibrating and upgrading it to a precision tool. After doing some of these modifications the slop is nearly gone on mine.
-
I love watching this come together, thanks for bringing us along!
-
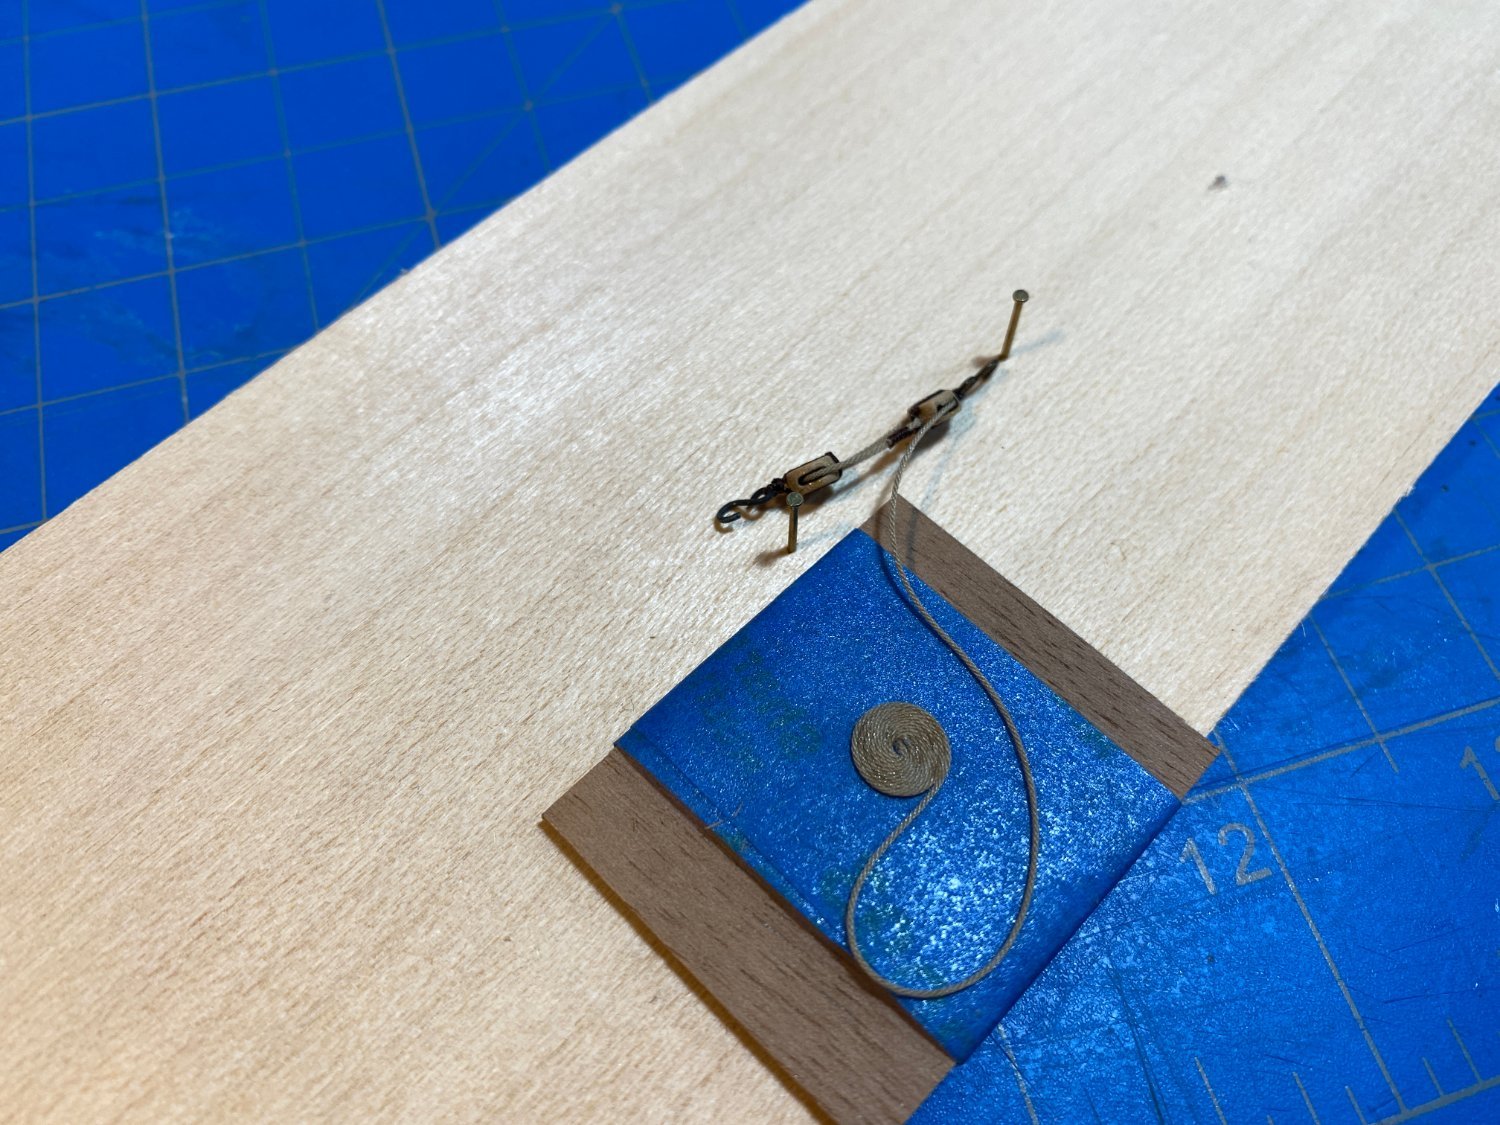
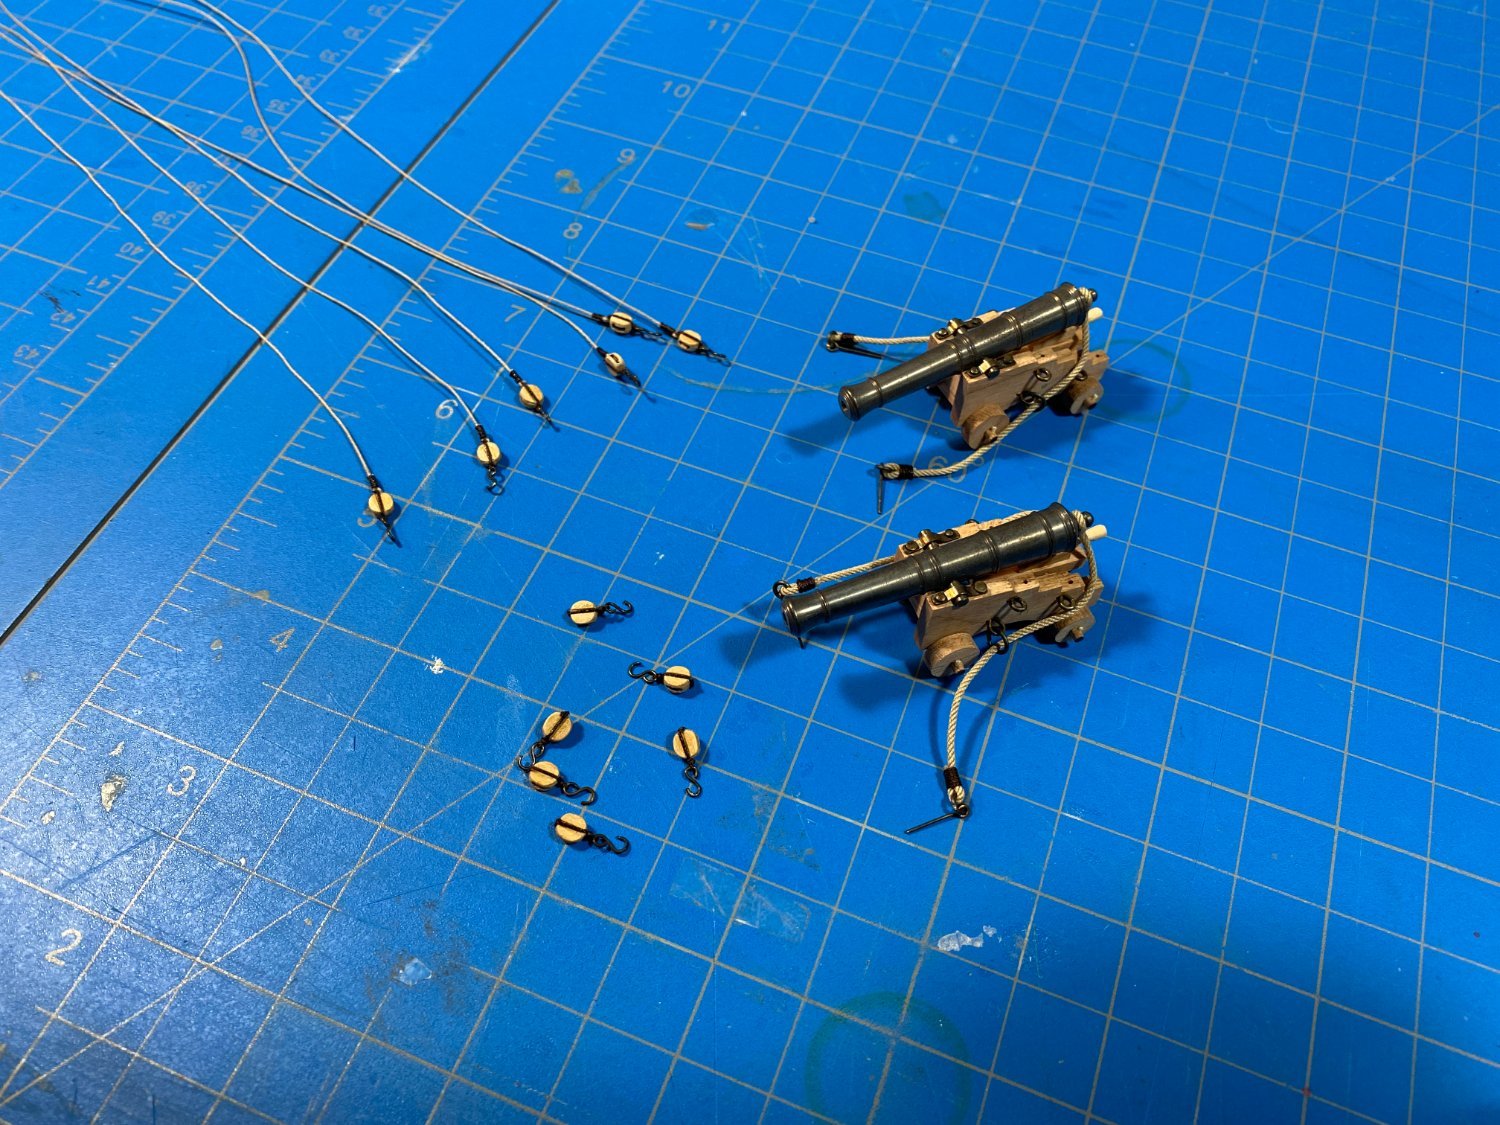
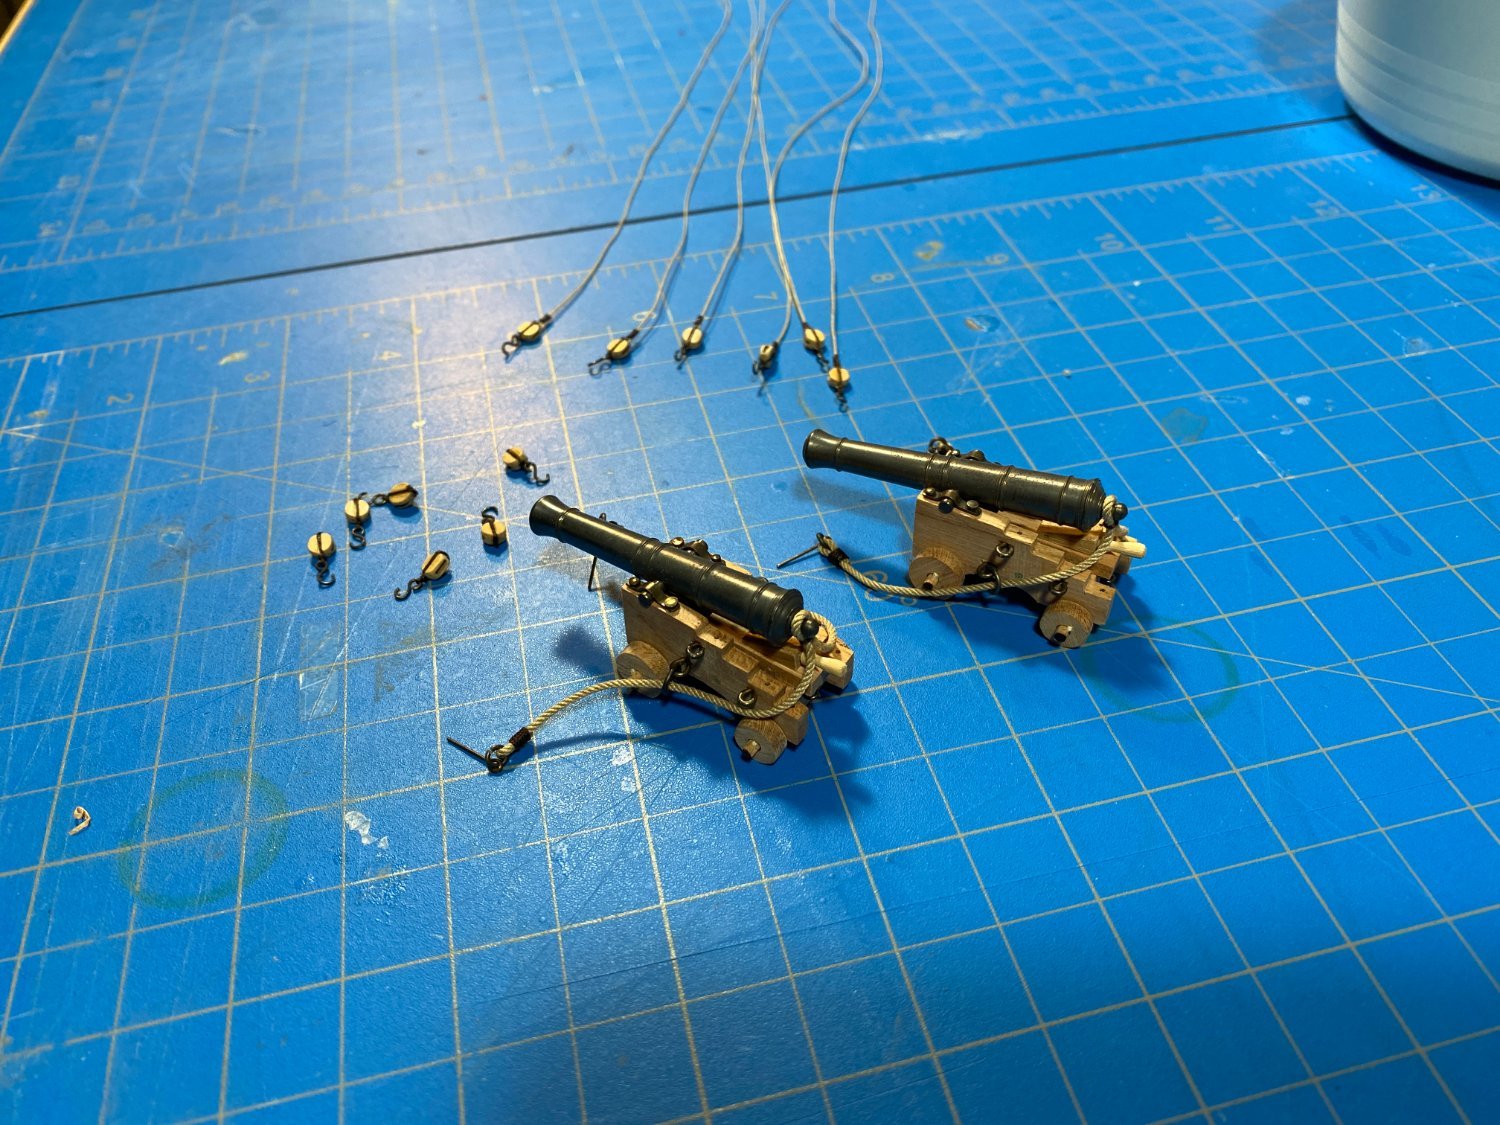
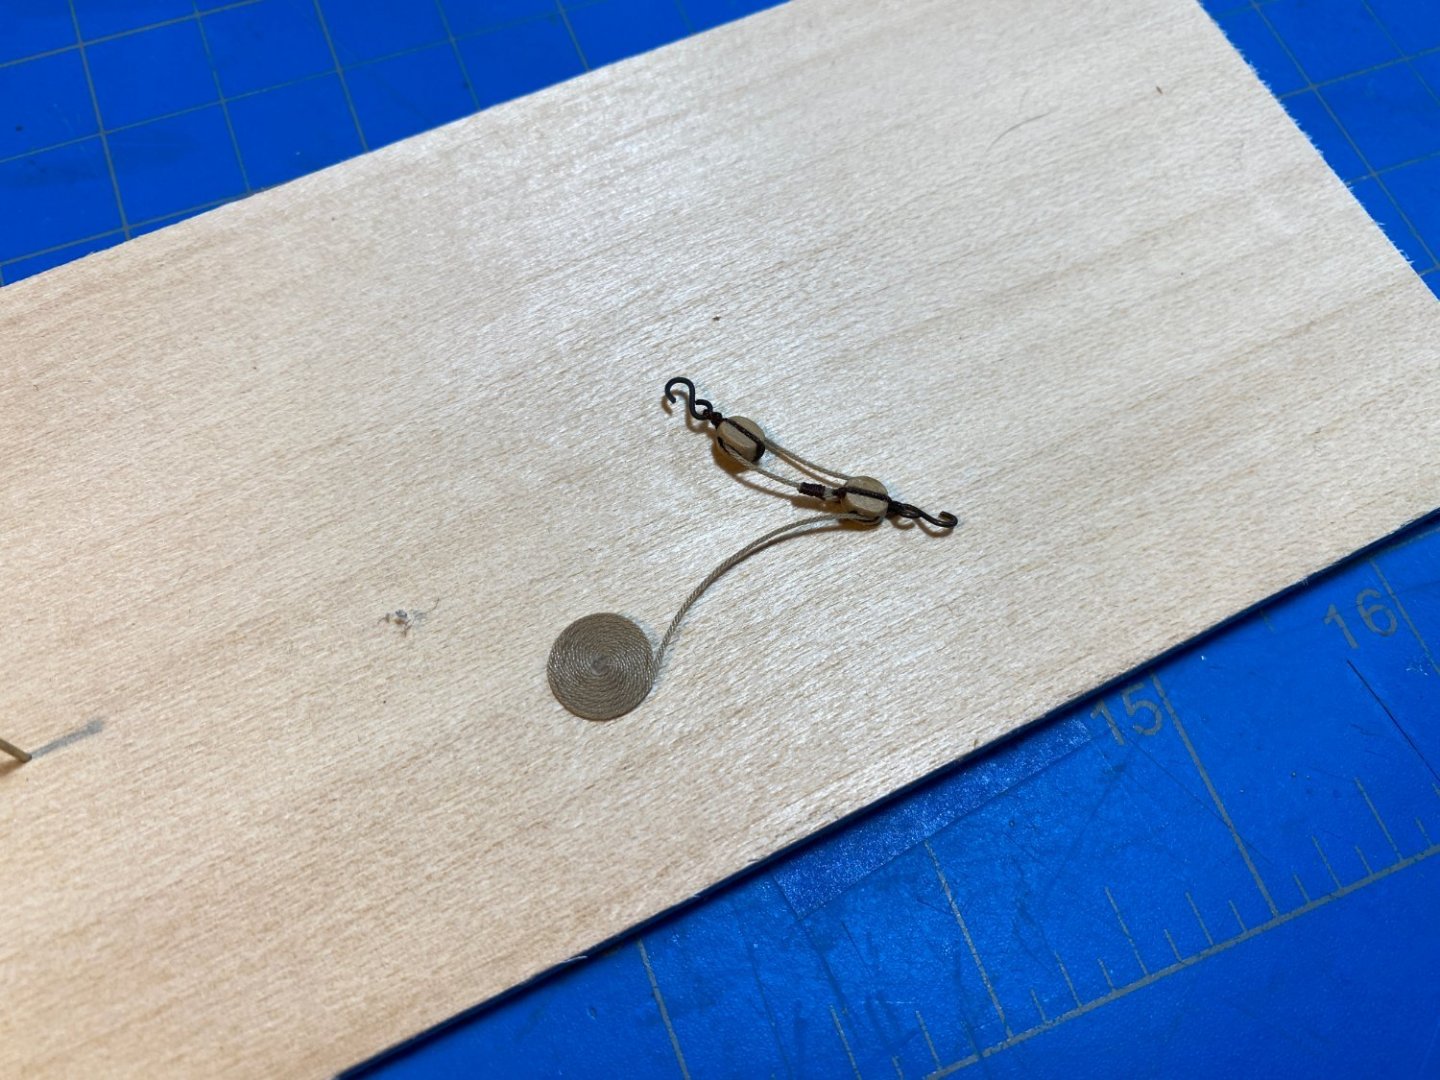
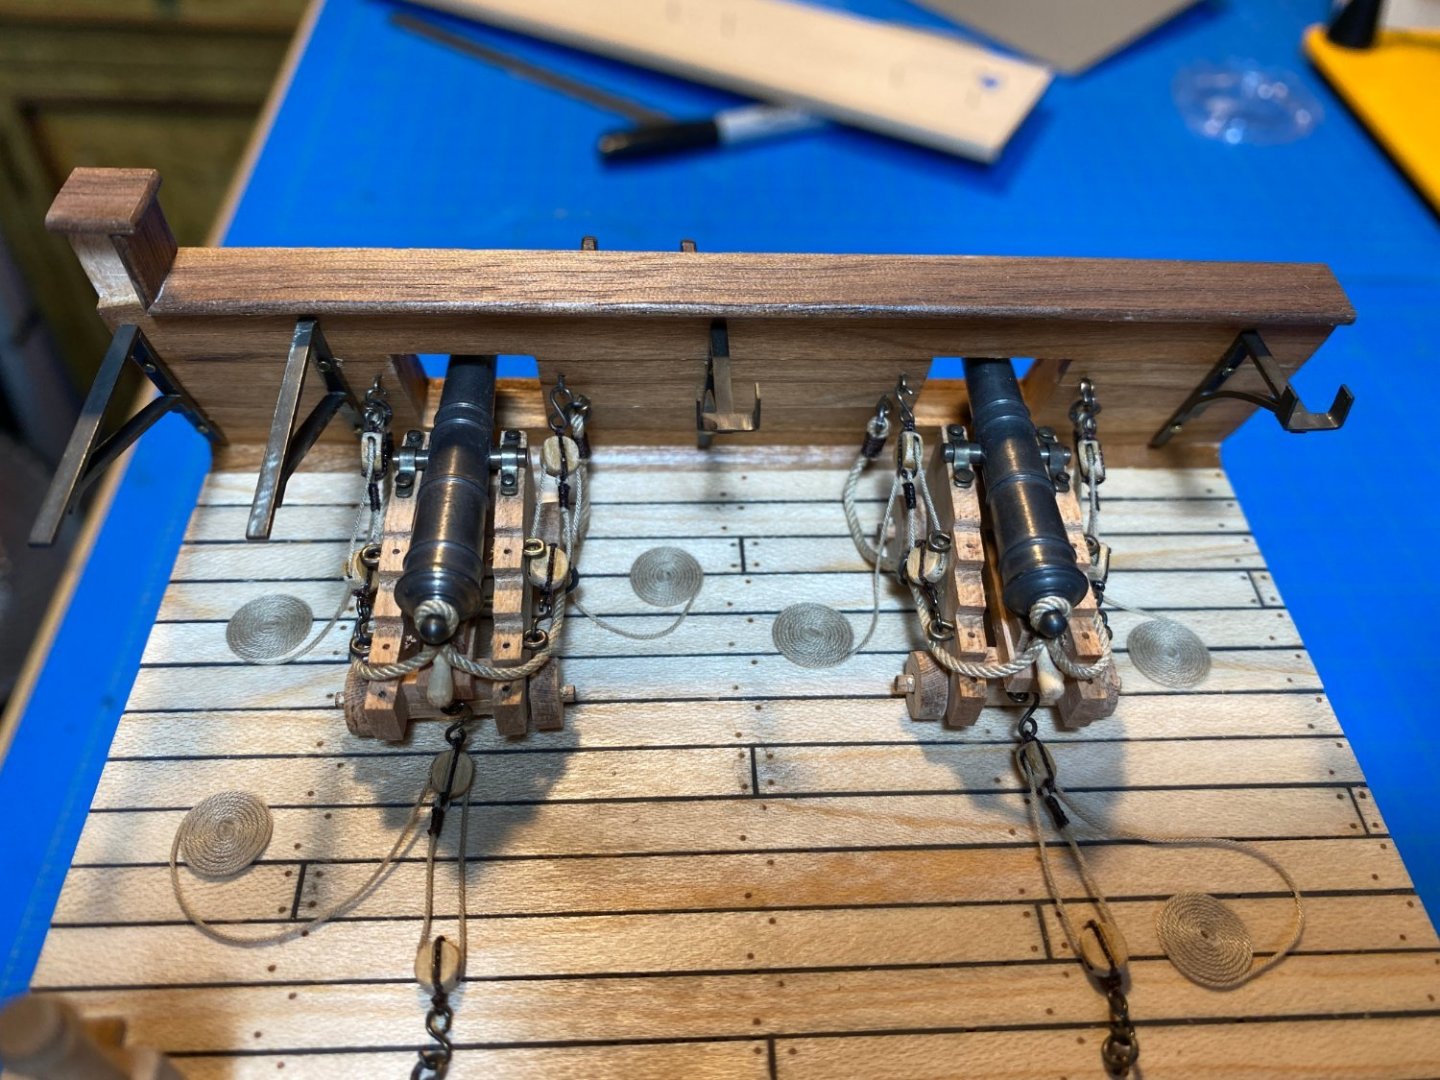
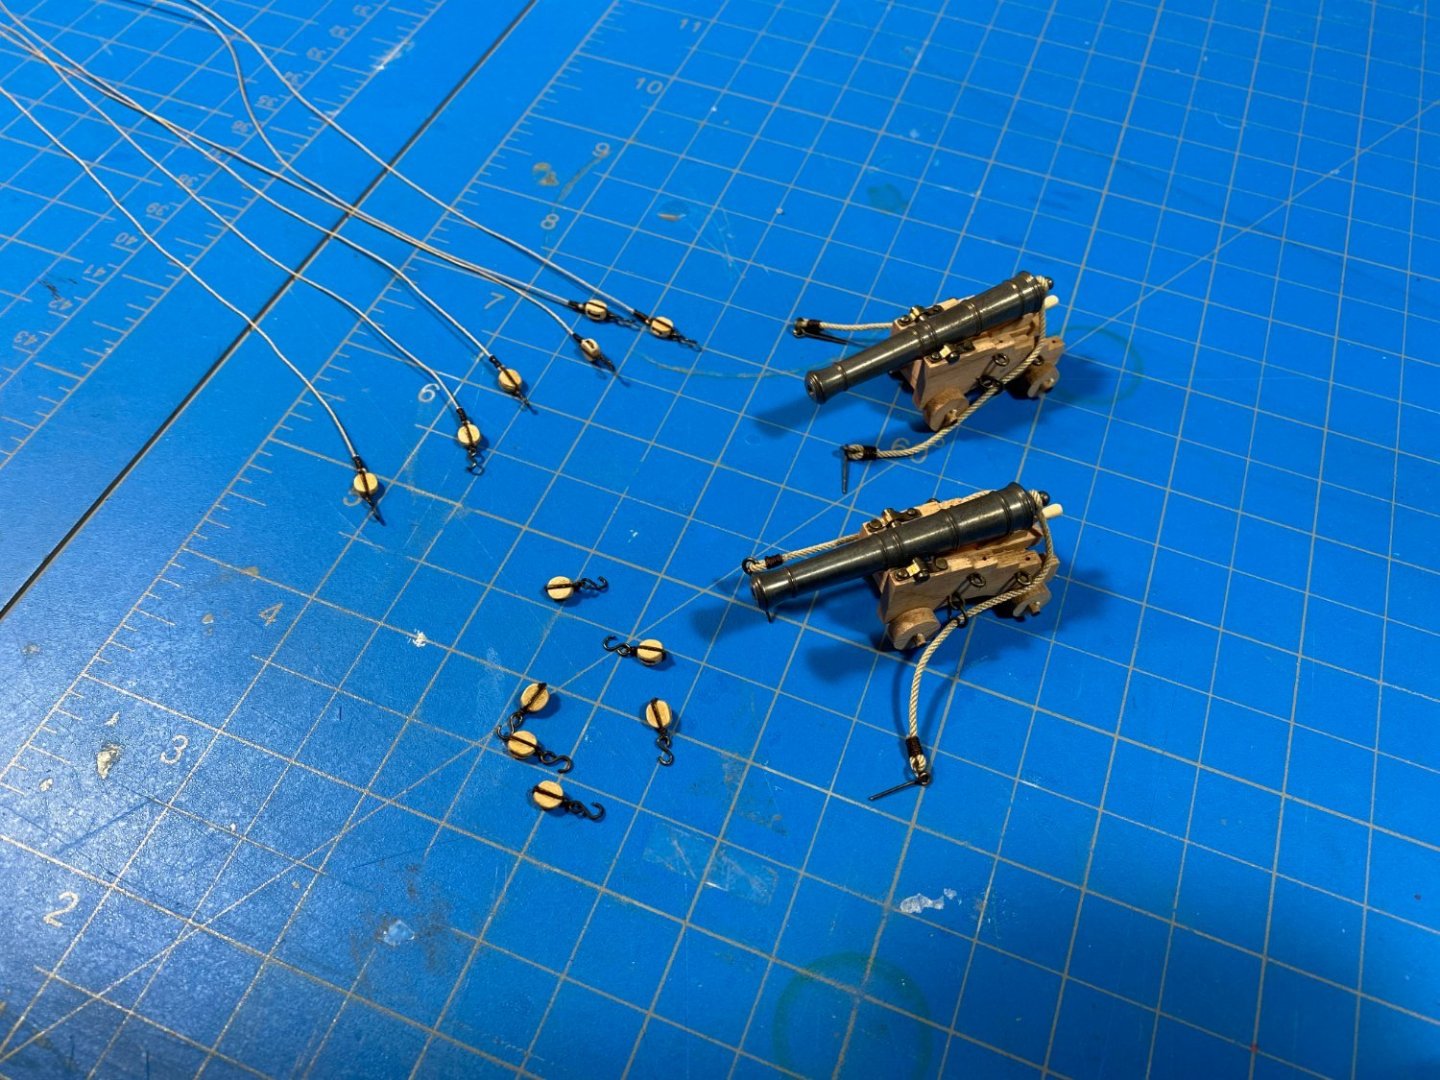
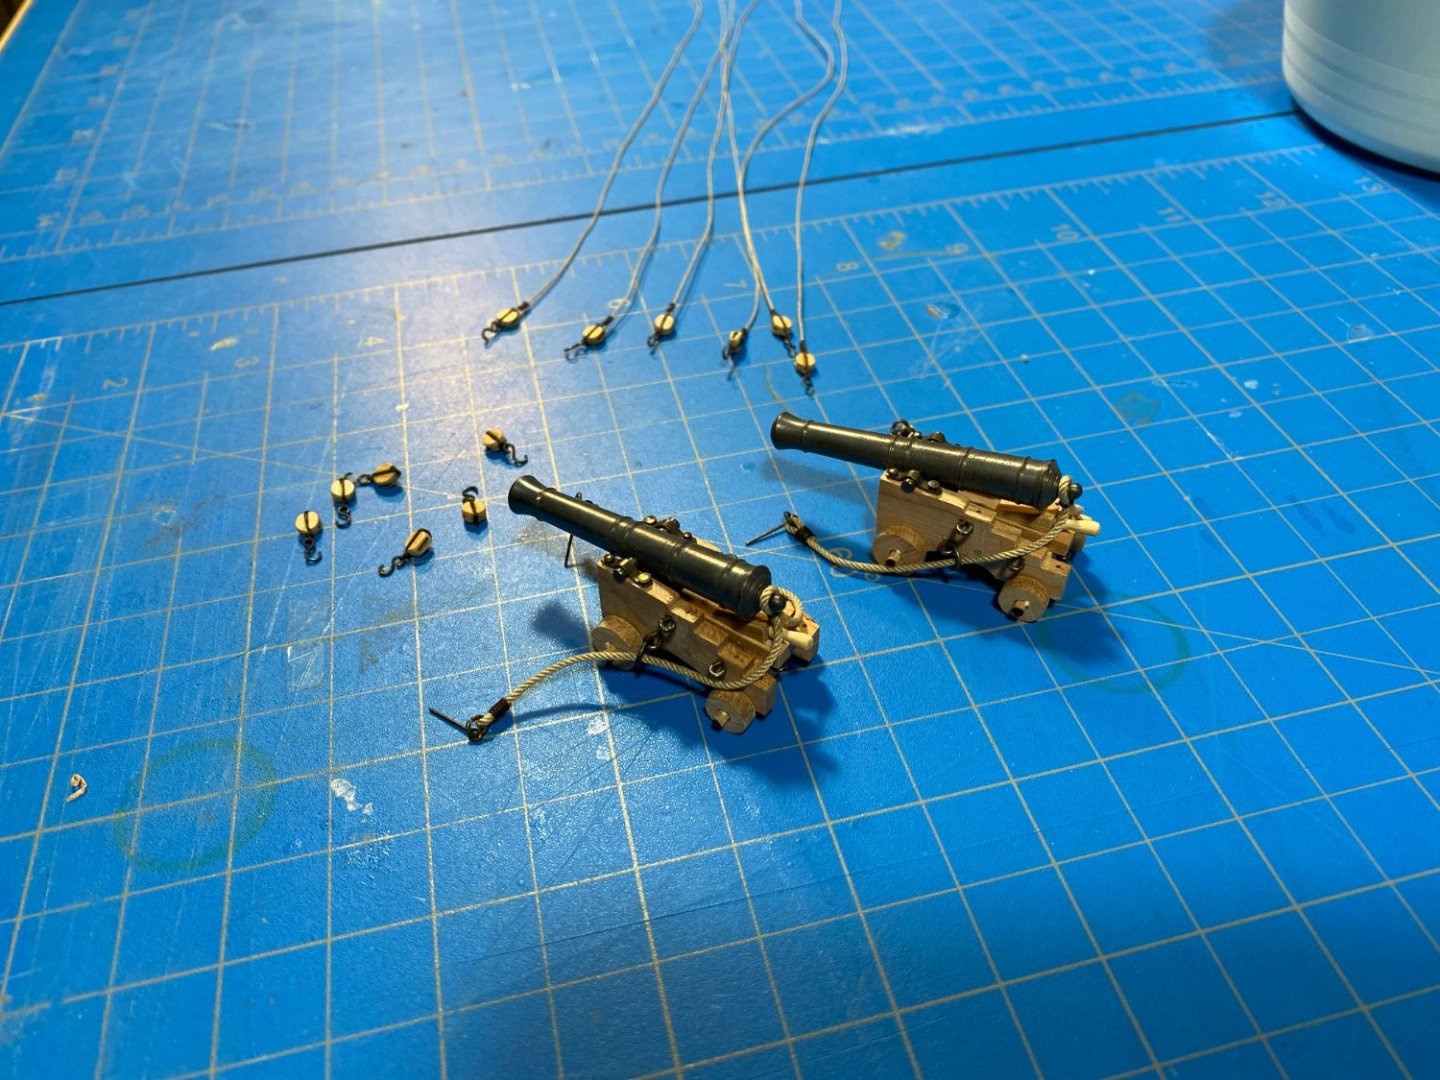
This past weekend I got the guns assembled and set in place. It was a fiddly job, but I'm happy with the result. In the first photo you can sort of see my process. I used a couple of nails placed exactly the distance apart that the hooks would hang on the model and then set all that with a tiny bit of glue. This way the lines don't fight themselves and will hold on the right distance. Then I coiled the extra upside-down onto some blue tape and used some tiny bits of glue to hold the coil. After flipping back over the whole thing was set. Then everything was attached.

-
Geez, I dont know if I'm ready to commit myself out loud yet, ha! Ive been looking at a few, ranging from subjects like the Echo cross-section, Hayling Hoy, Euryalus, NRG Galley Washington to a few smaller boat projects that have grabbed my attention here and there. NG Herreshoff's personal day sailor Coquina is an open boat that Ive always loved and think would make a splendid model, as well as Ronald Young's Poulsbo Boat. Either of these might make a nice contribution to the NRG Journal - something Ive wanted to try as well. Ive read virtually all the books, practicums and have been collecting/studying plans for all of these options. For me its really about getting a sense for where I am, how complicated the project is and what is likely to hold my interest. I intend to build the NRG Capstan project almost immediately after this as something fun and different to do while I gather materials and get ready for another months/years long project. I think the Capstan project will be the first I try to do using the more exotic woods. I dont have a lot of experience with Pear or Boxwood and am interested in doing something manageable to get a feel for the material before investing in q larger quantity. If I dont like it, then I will know better what I want to commit to with the next longer build. Im probably over thinking all these things, but that's only because I'm so obsessed with the hobby all I really do is think about it - ha! Of course, I also have to try and build a case for Triton! One thing at a time I guess.
-
Indeed! This is a great little kit. I had a lot of fun building it. Looking forward to your progress! Also happy to help if you run into any questions.
- 36 replies
-
- 1
-

-
- Morel
- master korabel
- (and 1 more)
-
Ha... Im not sure how I would describe it. I would say there are certainly a lot of aspects that are "easy." But also quite a few that were at least confounding to me. I would say the biggest single difference is the lack of traditional instructions. I did a lot of things out in a sequence that I would not do again precisely because I wasnt thinking the steps all the way through, and had no real manual to follow. Now that Im this far along Ive gotten better, but do still think I could do things differently. Having all the build logs for the Triton on MSW definitely eases the transition from having instructions as those builds provide plenty of reference when you get stuck somewhere. Im a little worried about this for the next build to be honest.
-
Indeed Mark. Going forward, I think Triton might be the project I would suggest to anyone starting out in scratch work. Much of it is "just right" as an introduction to many different aspects.
-
Dugout canoe build
Justin P. replied to reklein's topic in NAUTICAL RESEARCH GUILD - News & Information
At the time I was witness to the process, there was an all night bonfire and ceremony to heat stones that were laid into the dugout. Due to the cultural importance of the ceremony I was not invited to see this part, but I believe the dugout was filled partially with water prior to placing the stones into the water or was otherwise saturated with water. Then a series of battens were pounded into place to widen it as it steamed. During this build, if I remember no clamps or other modern tools were employed. Only traditional tools and processes. -
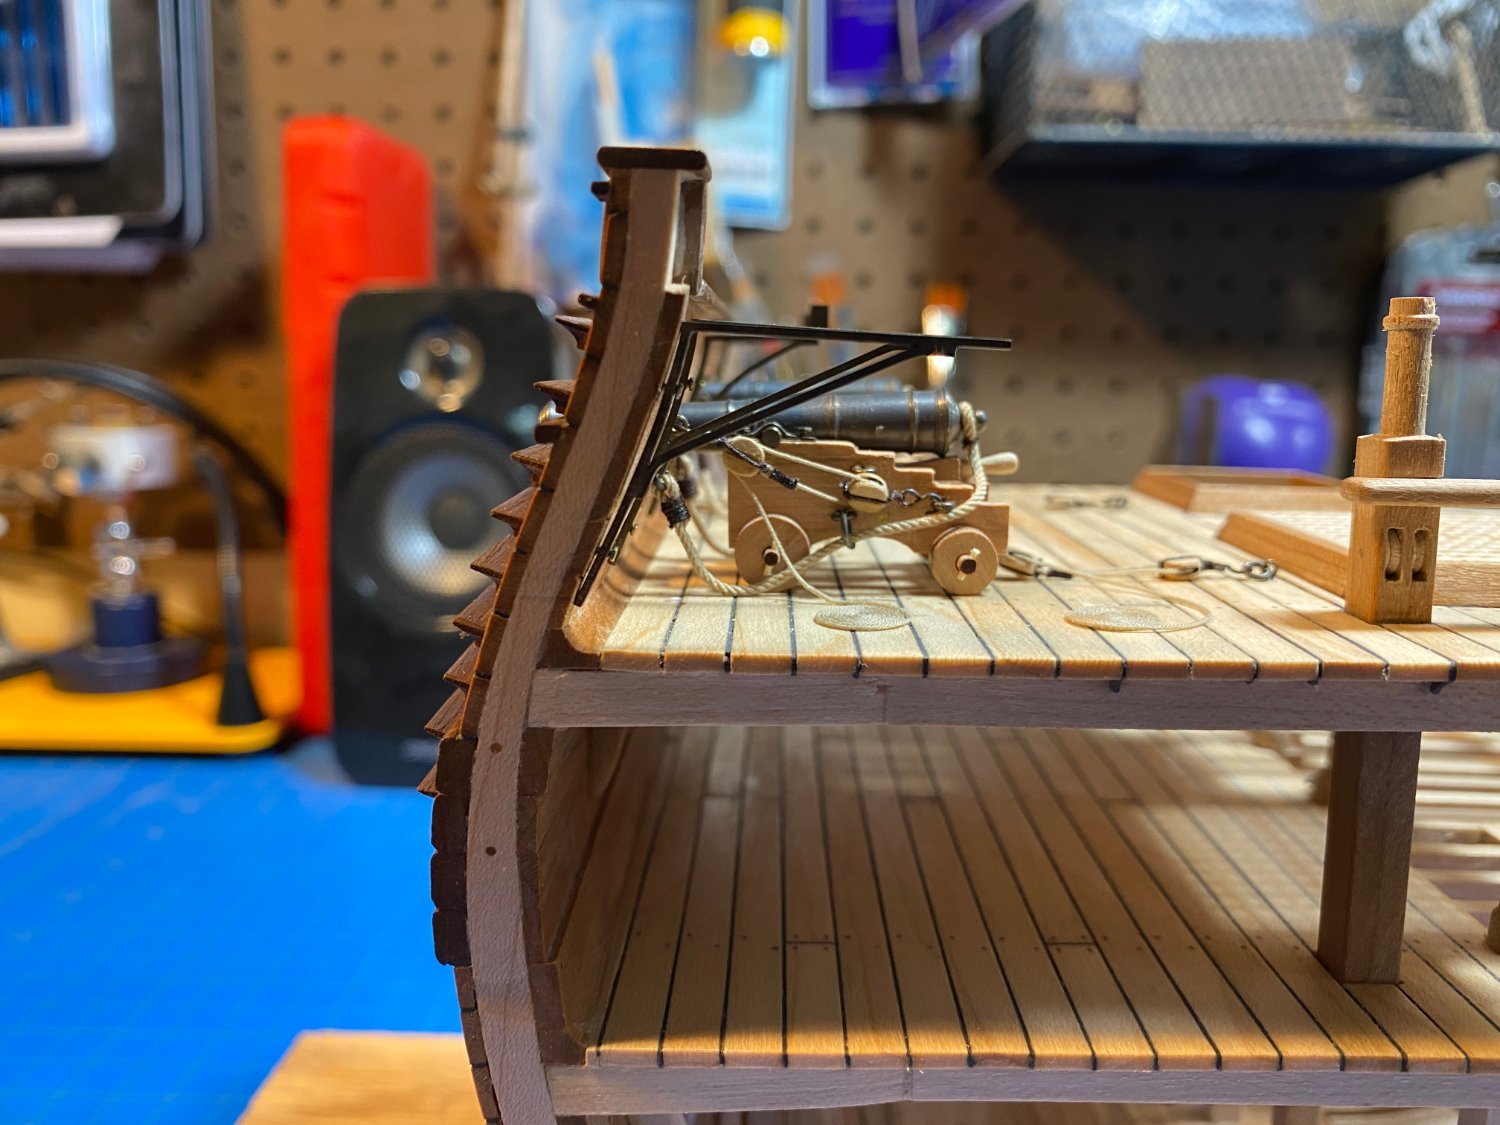
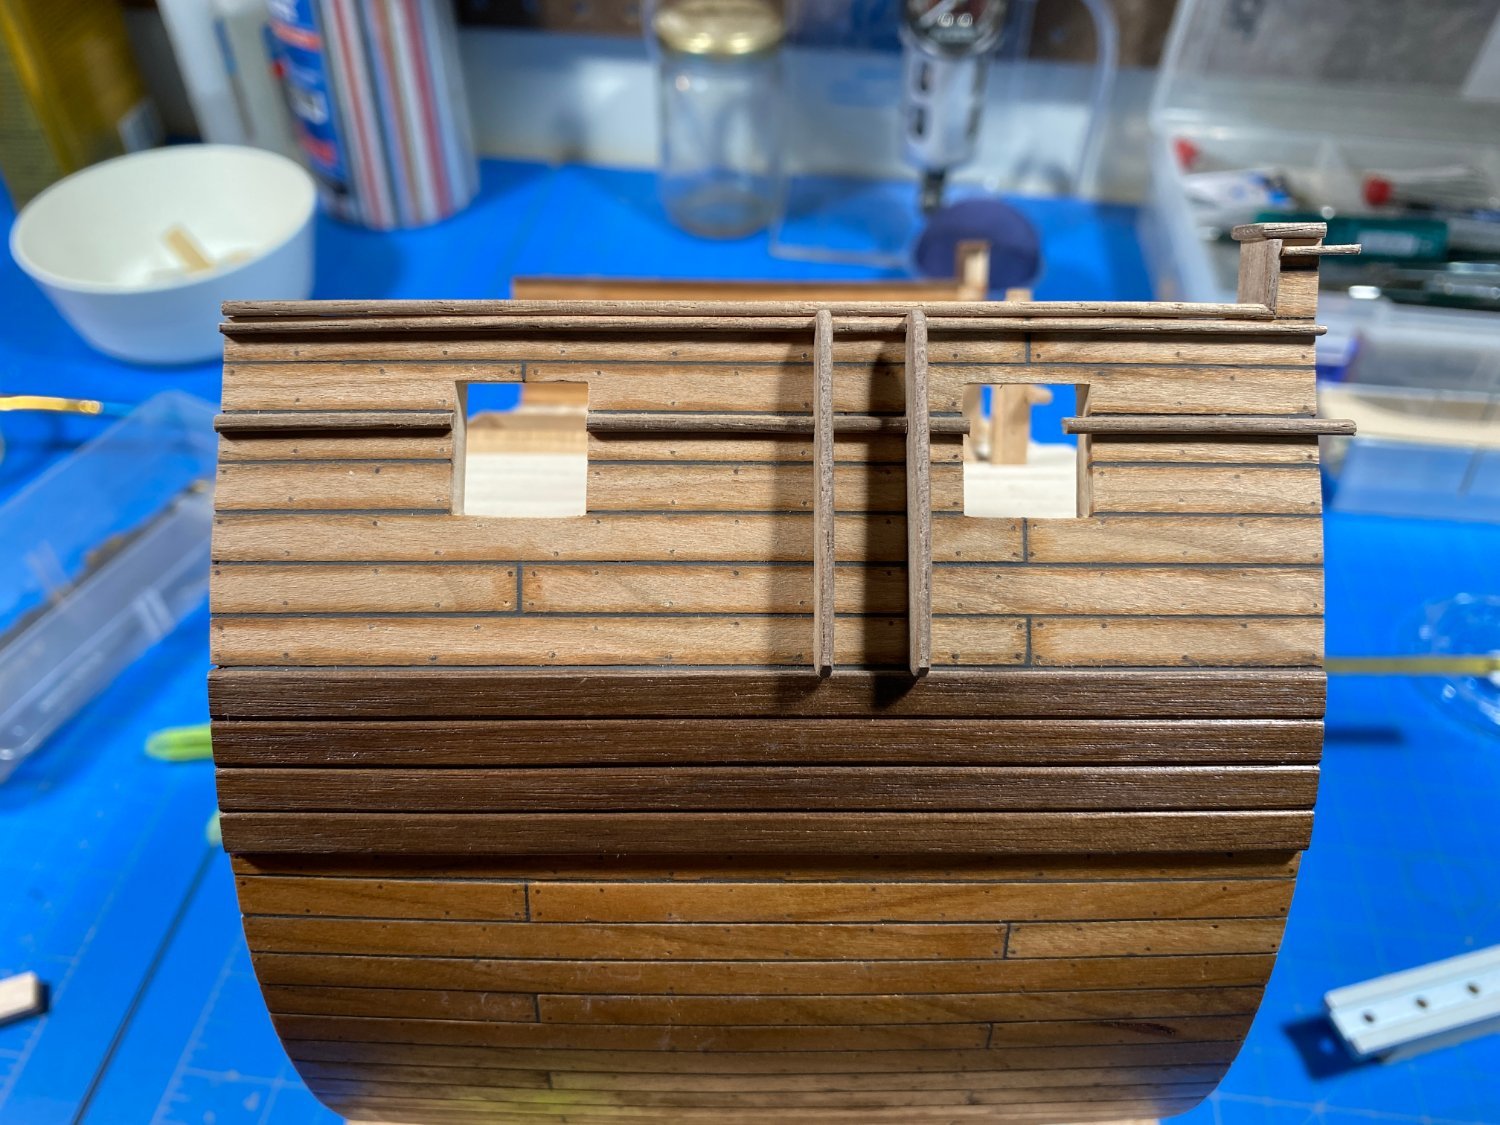
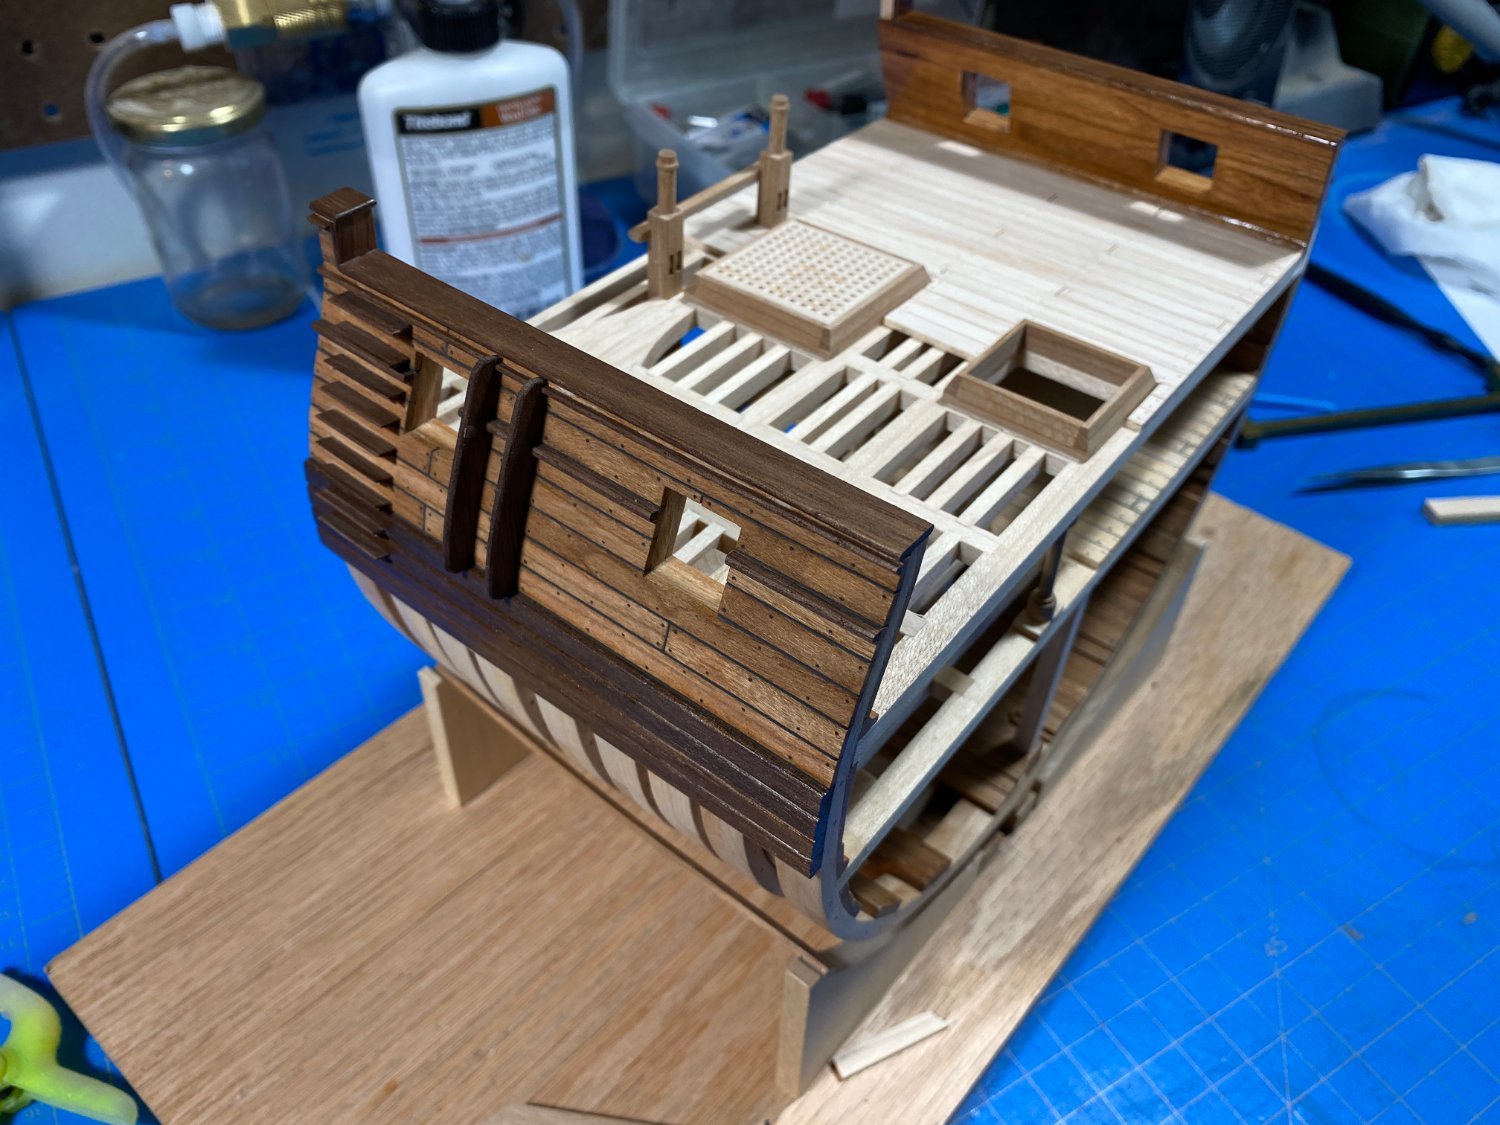
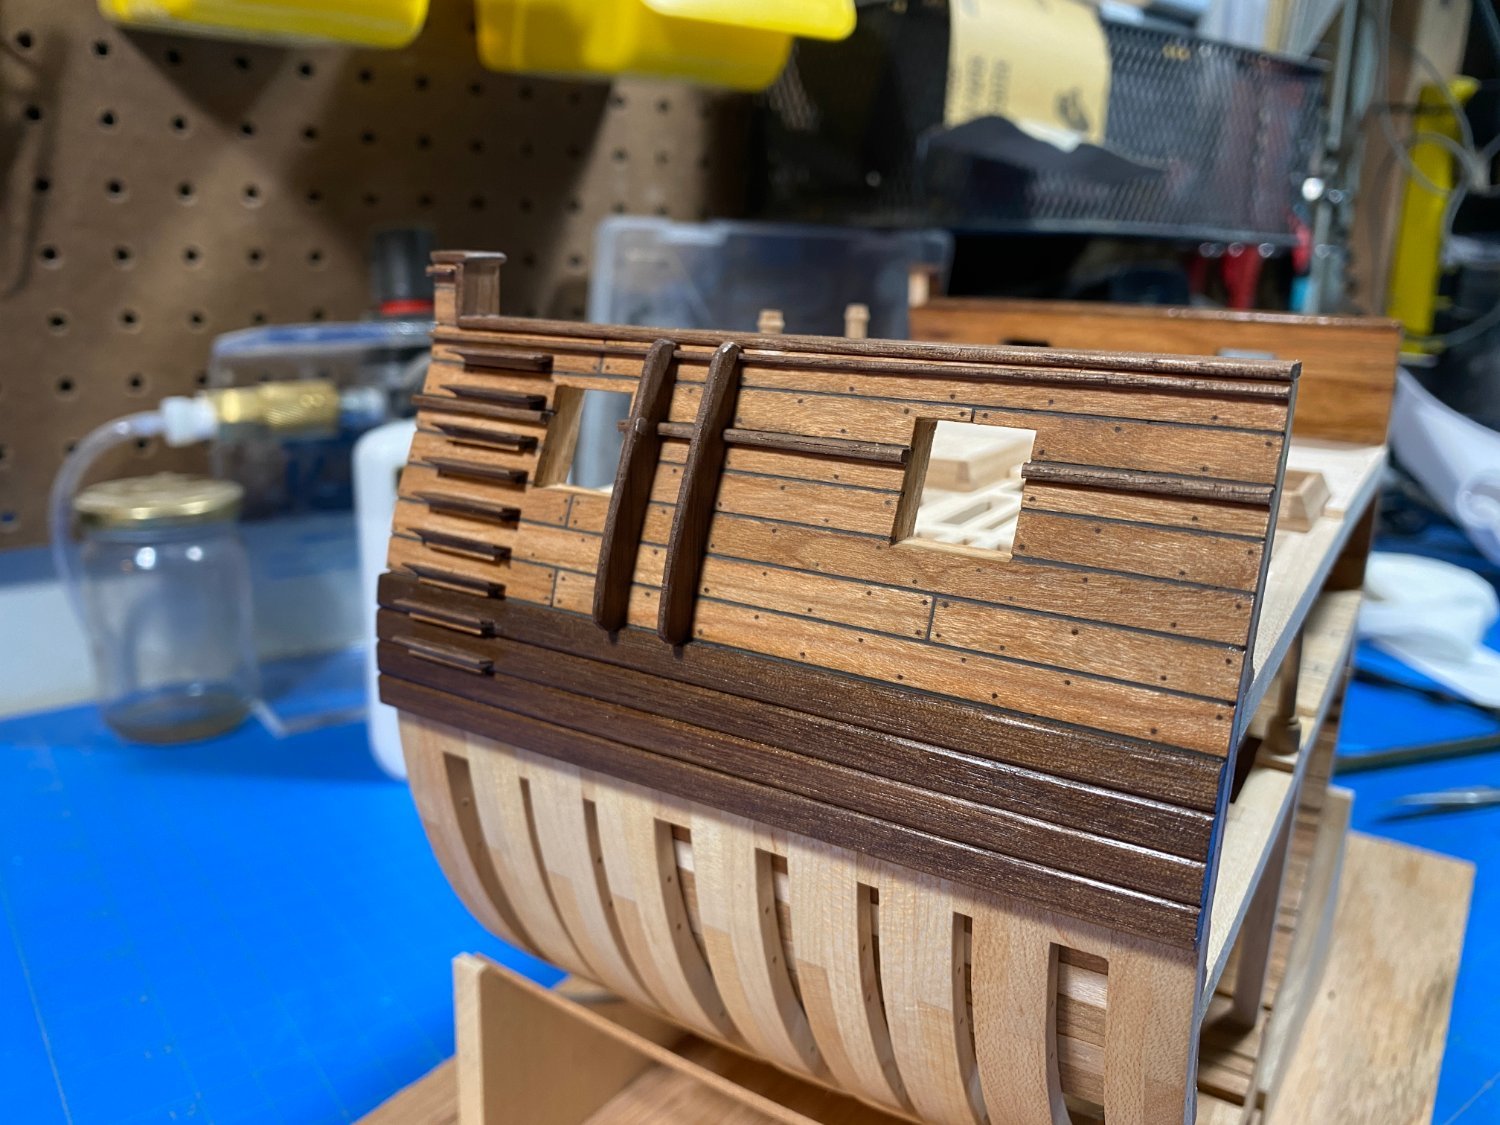
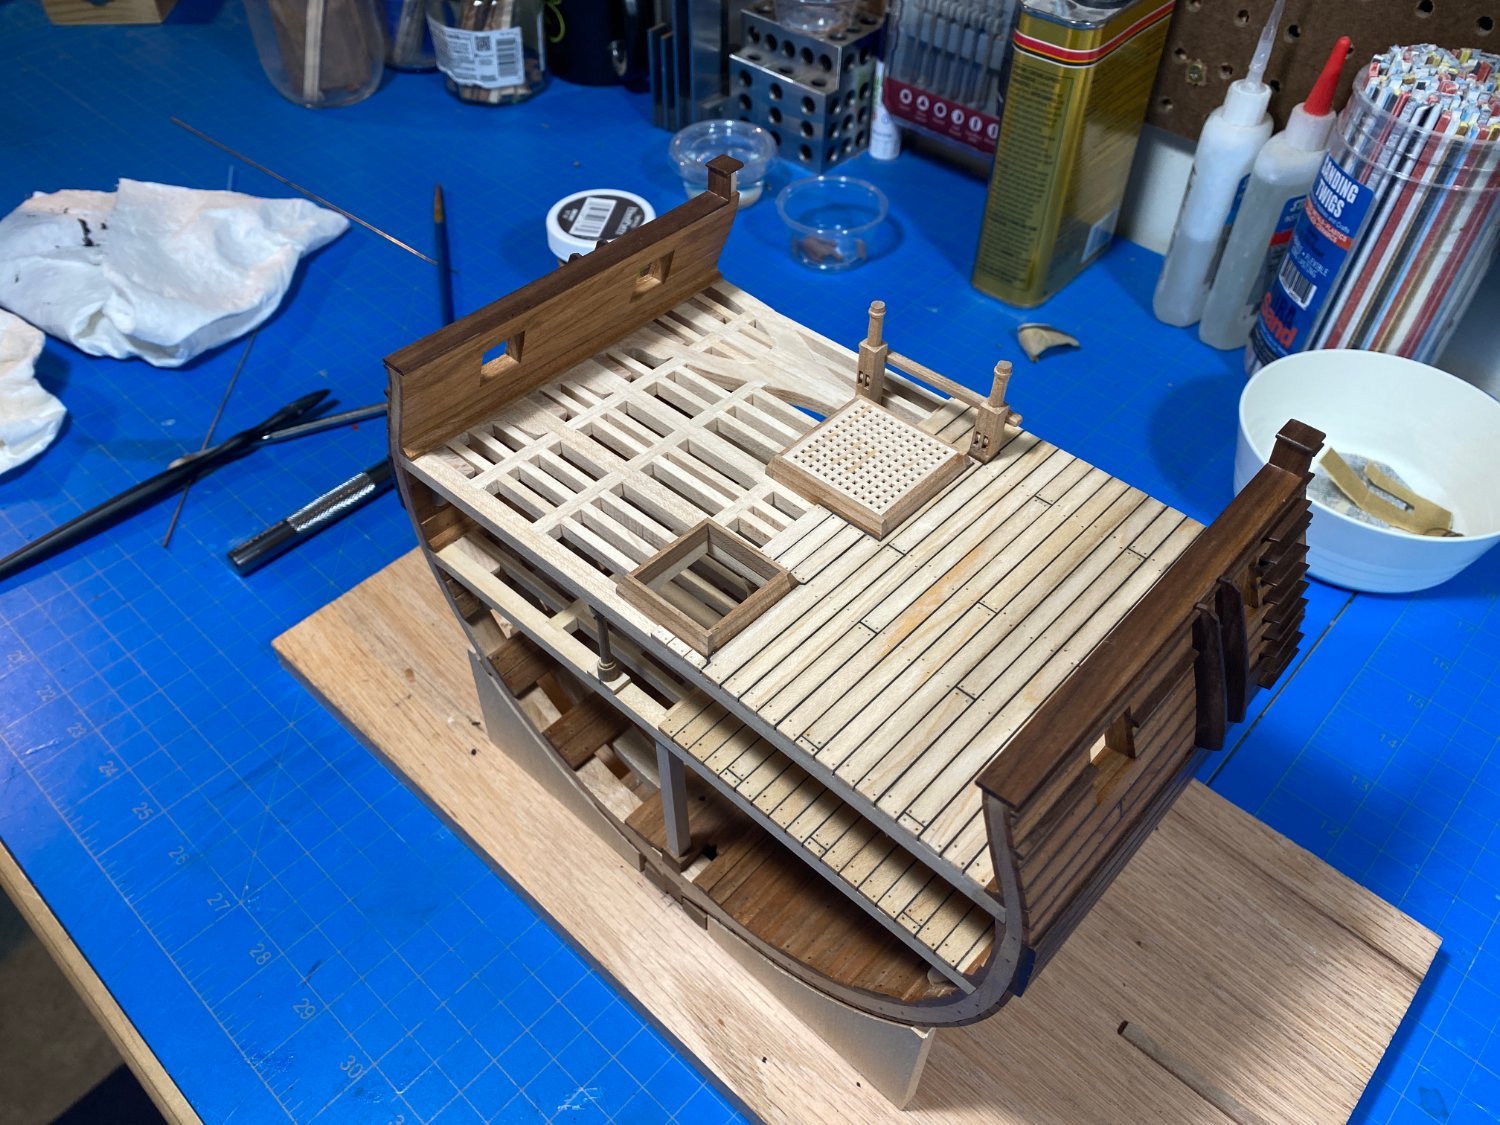
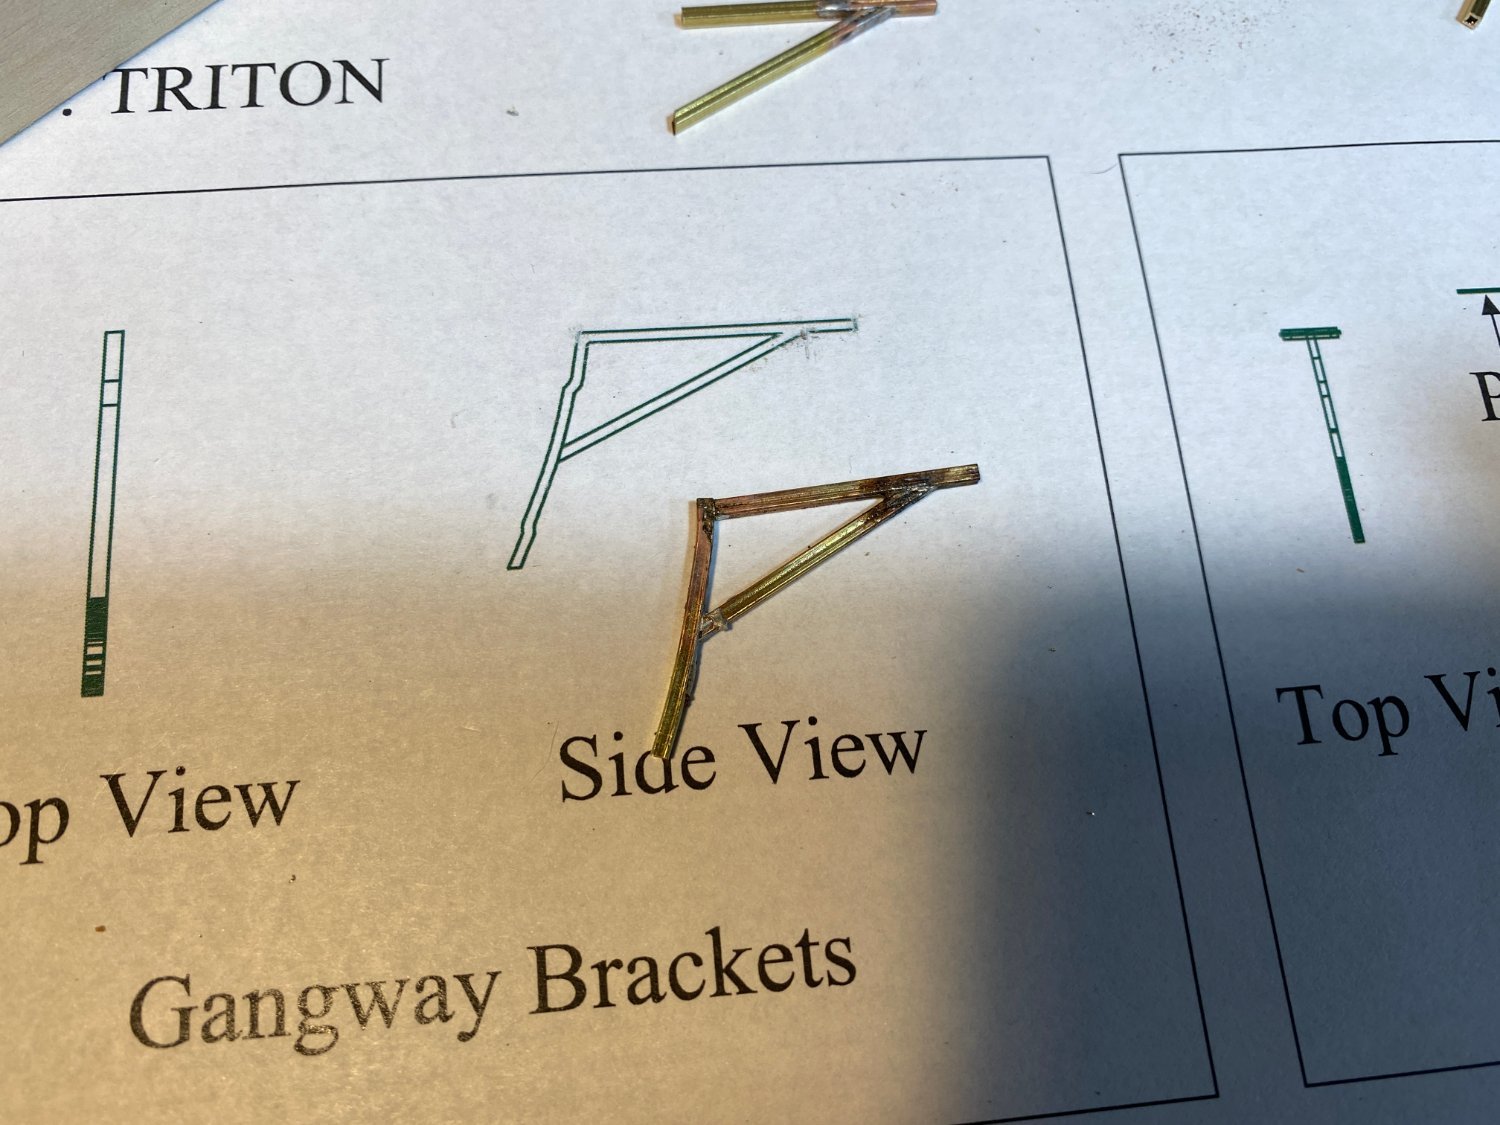
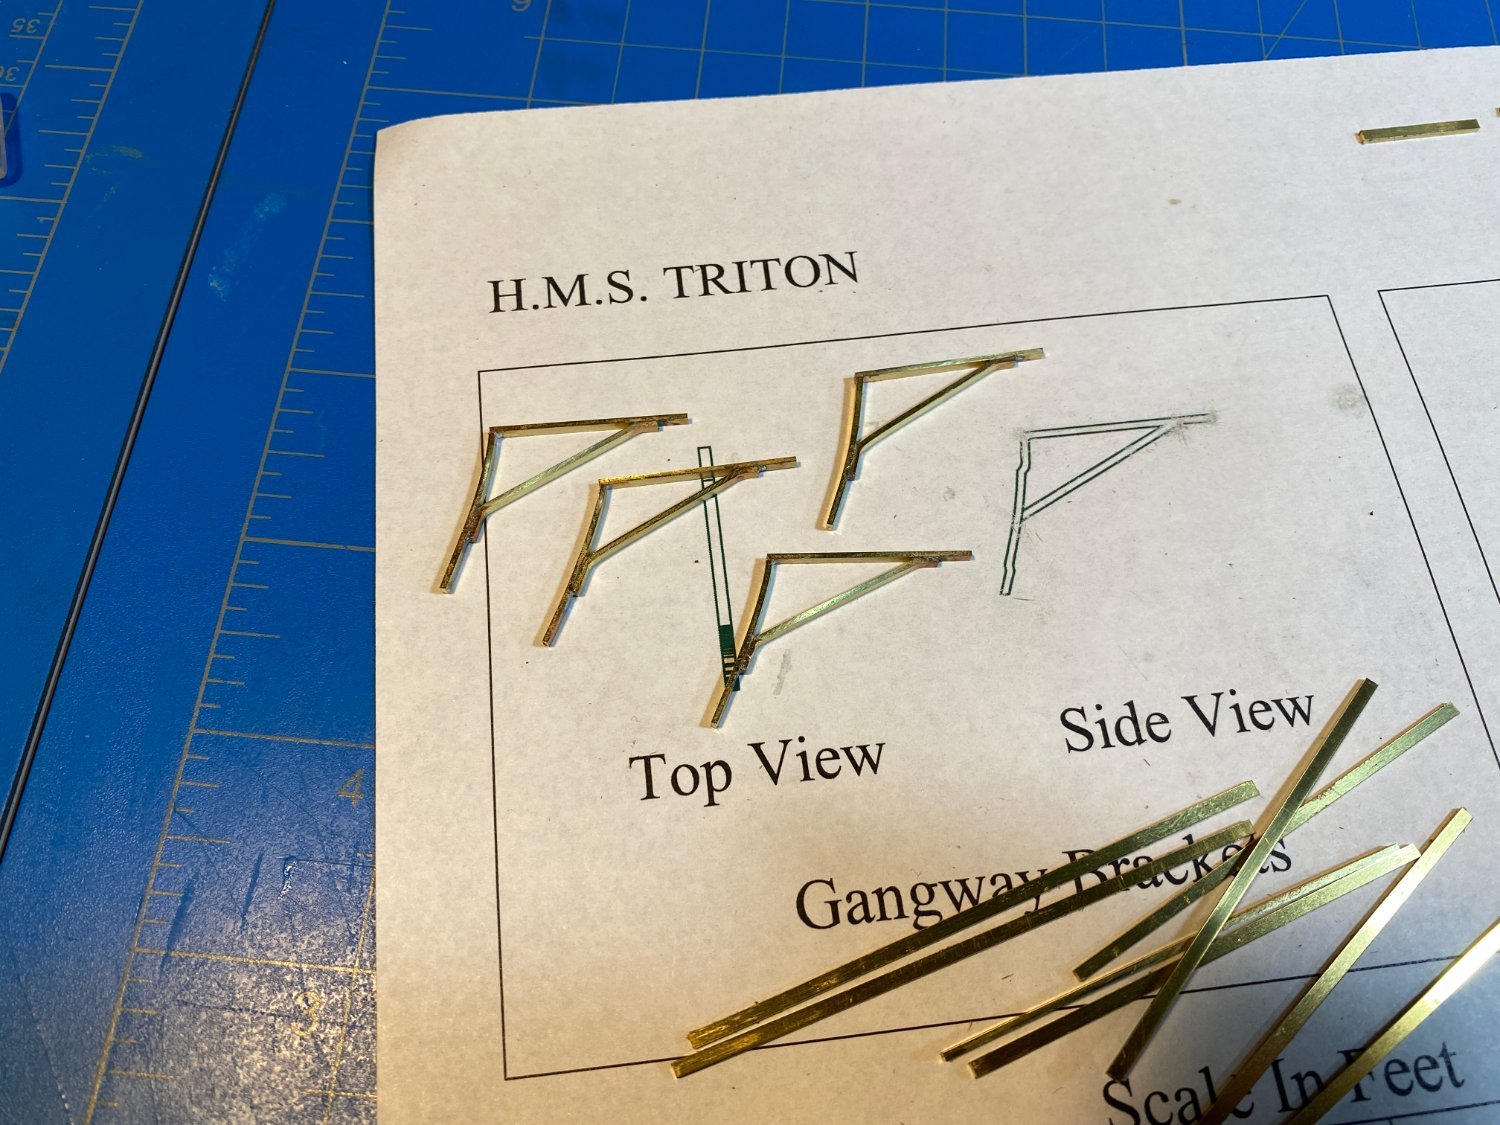
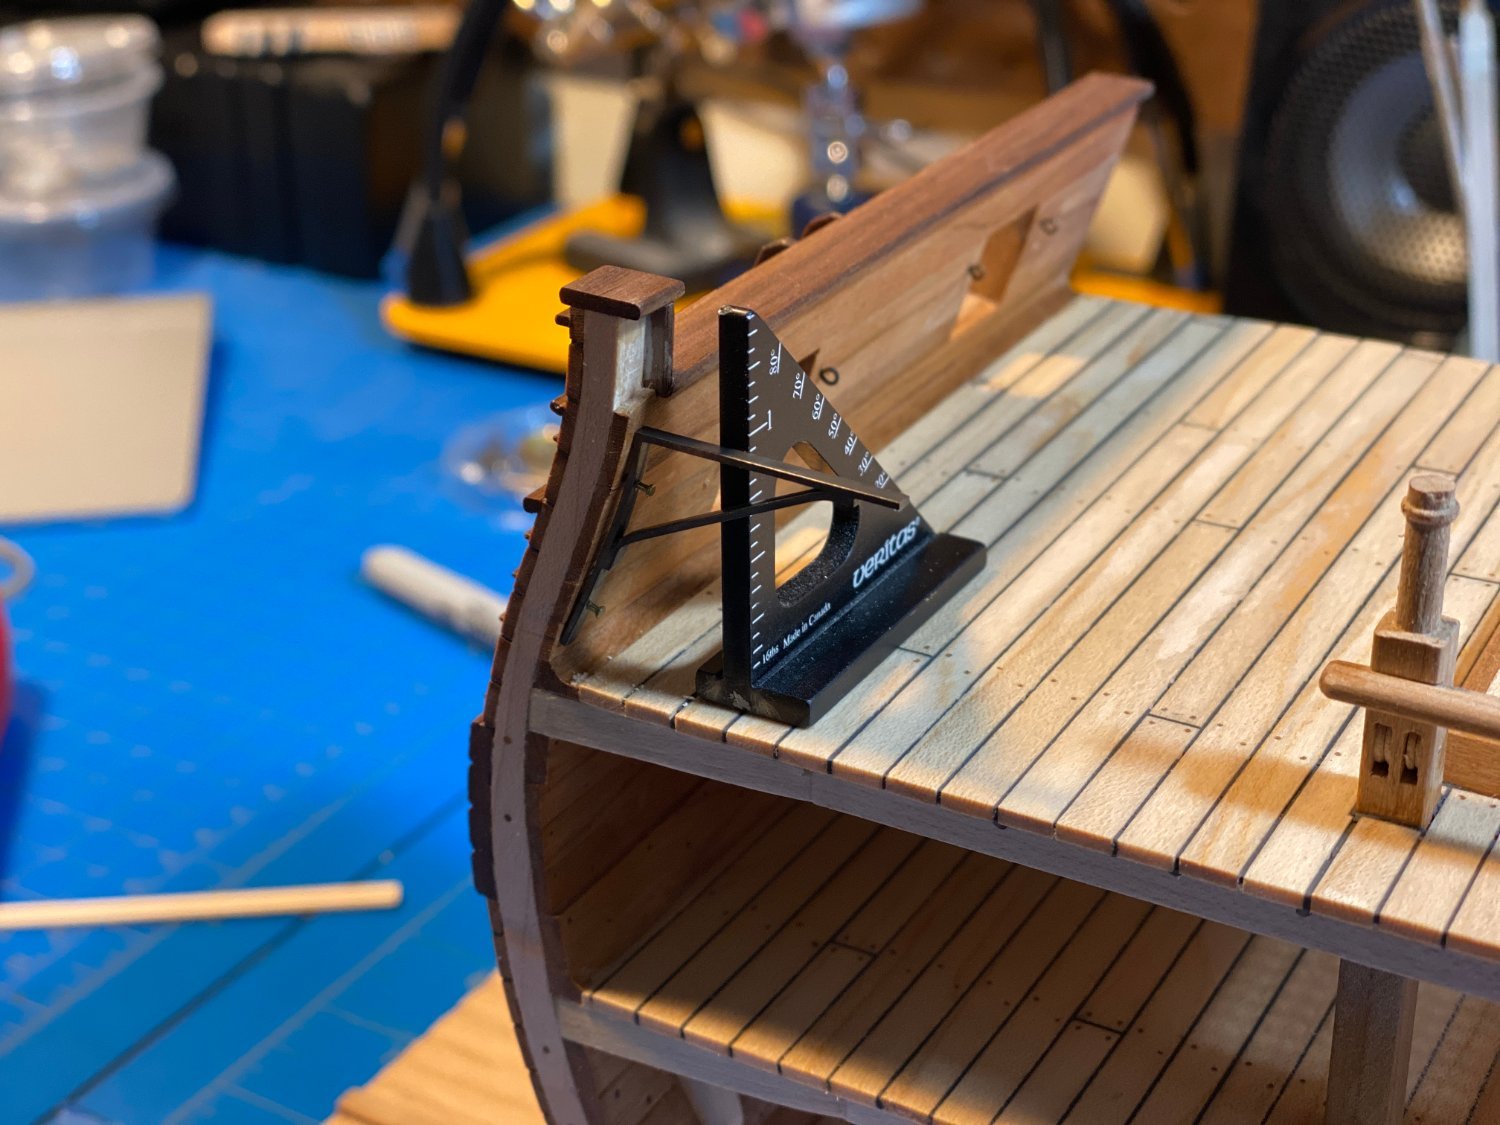
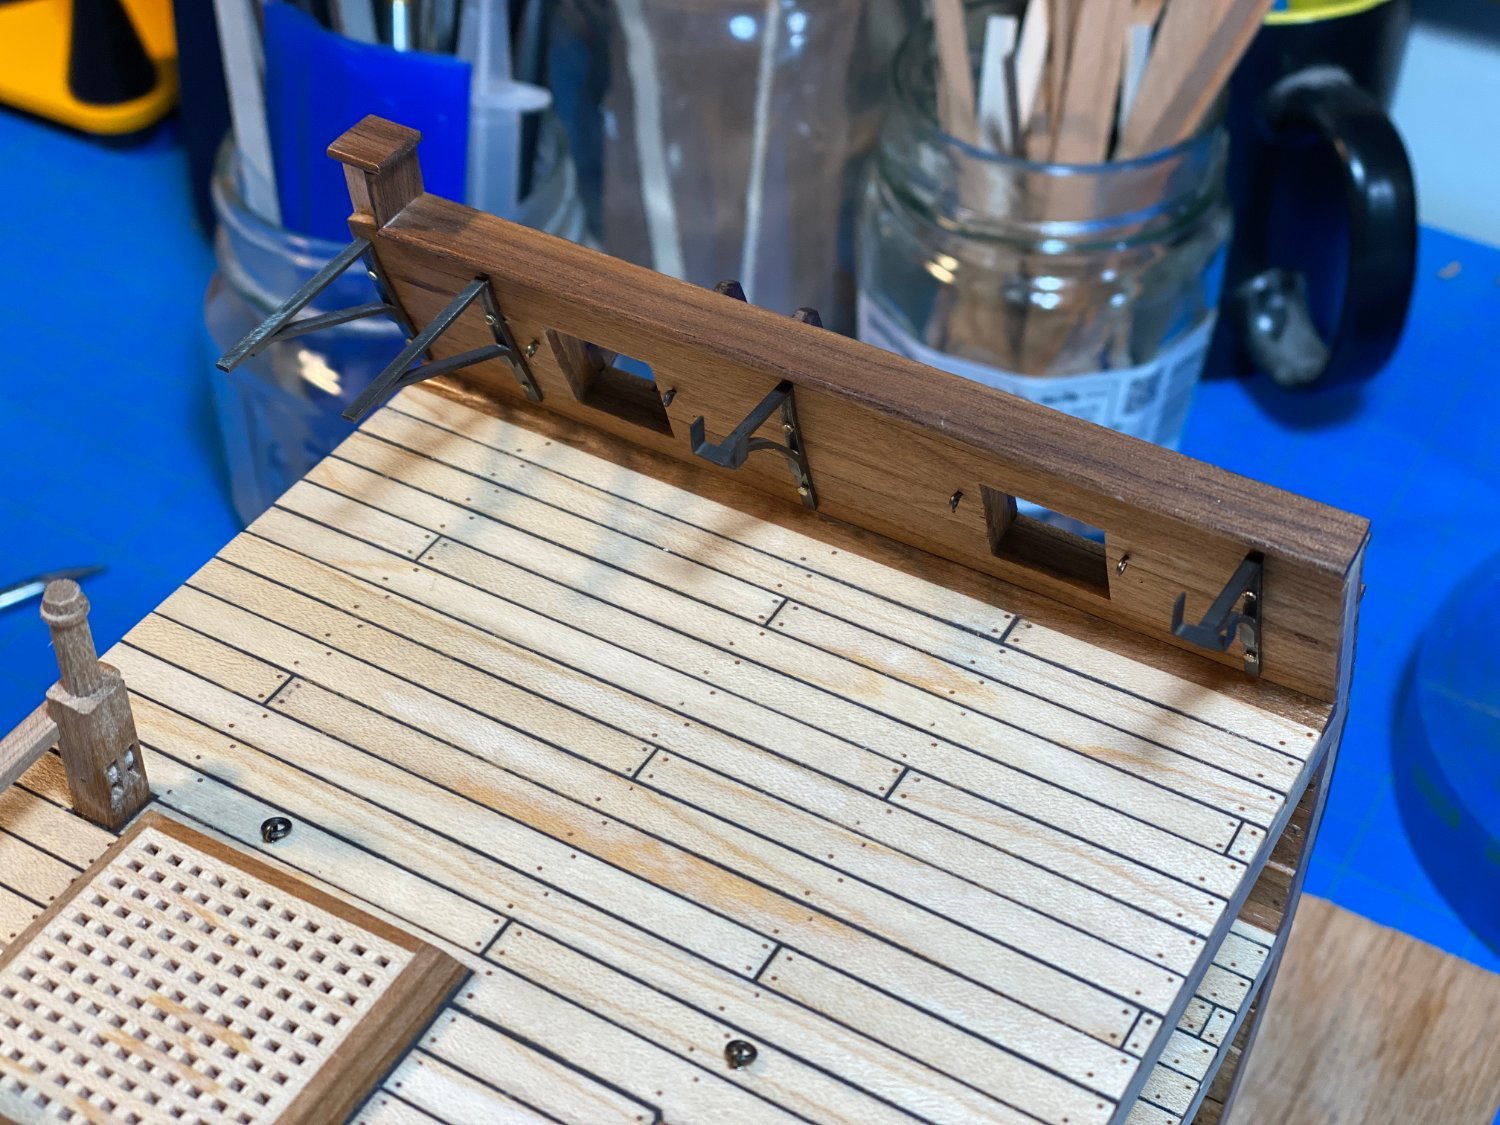
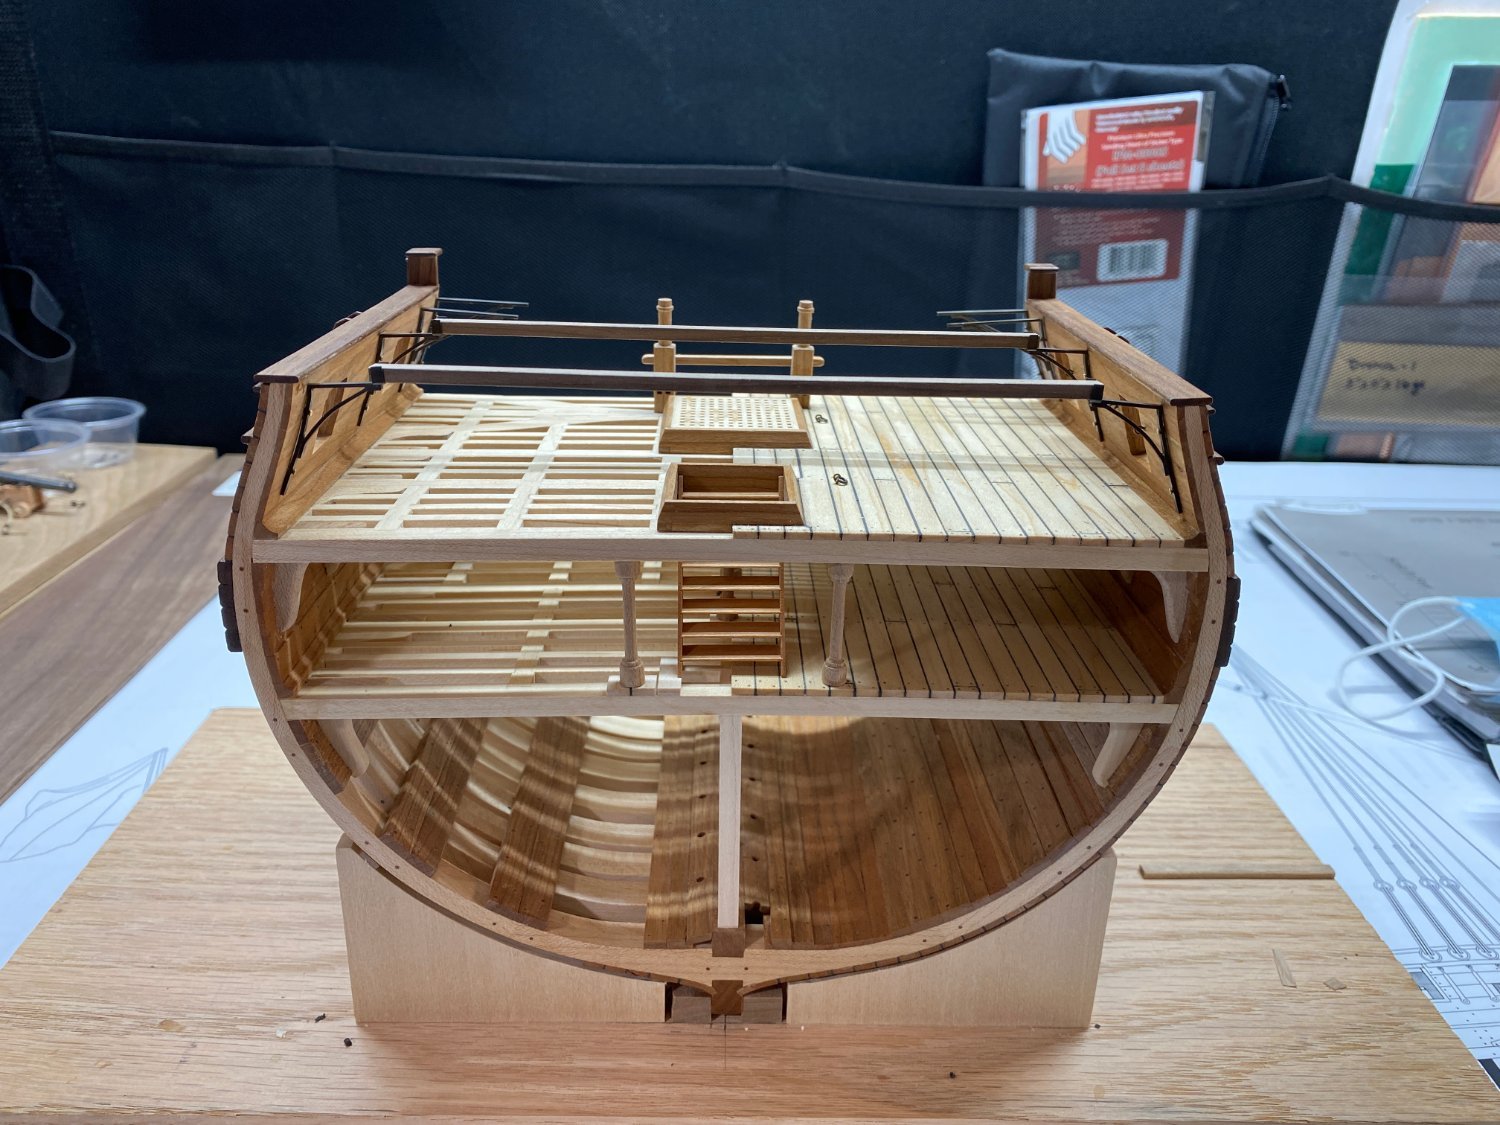
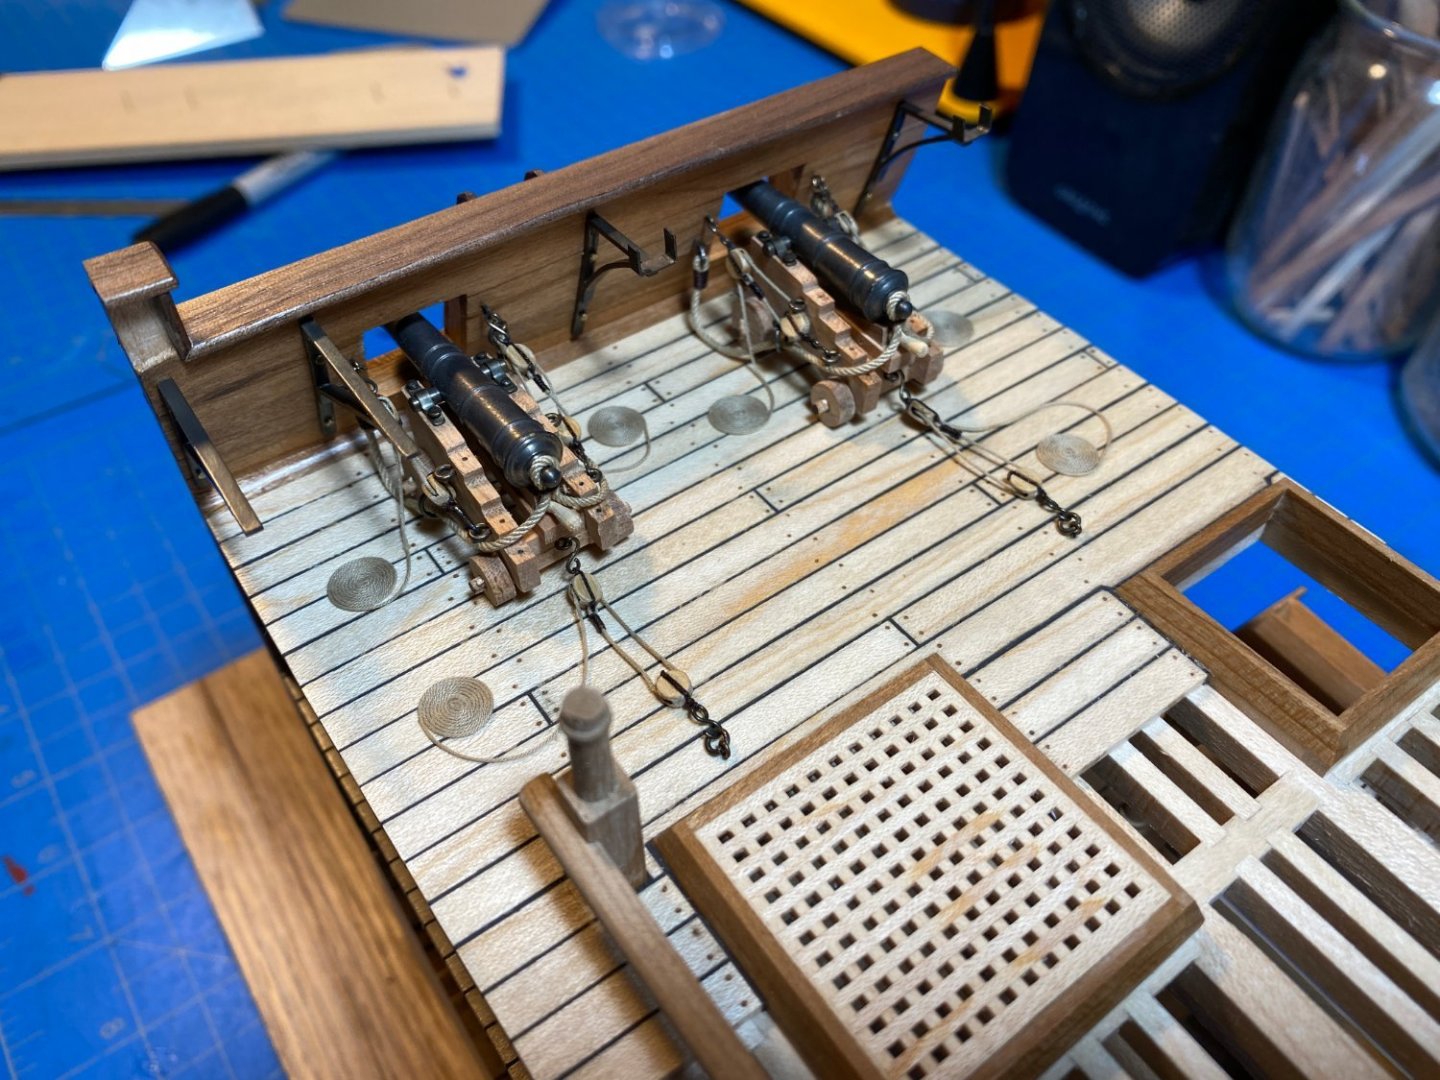
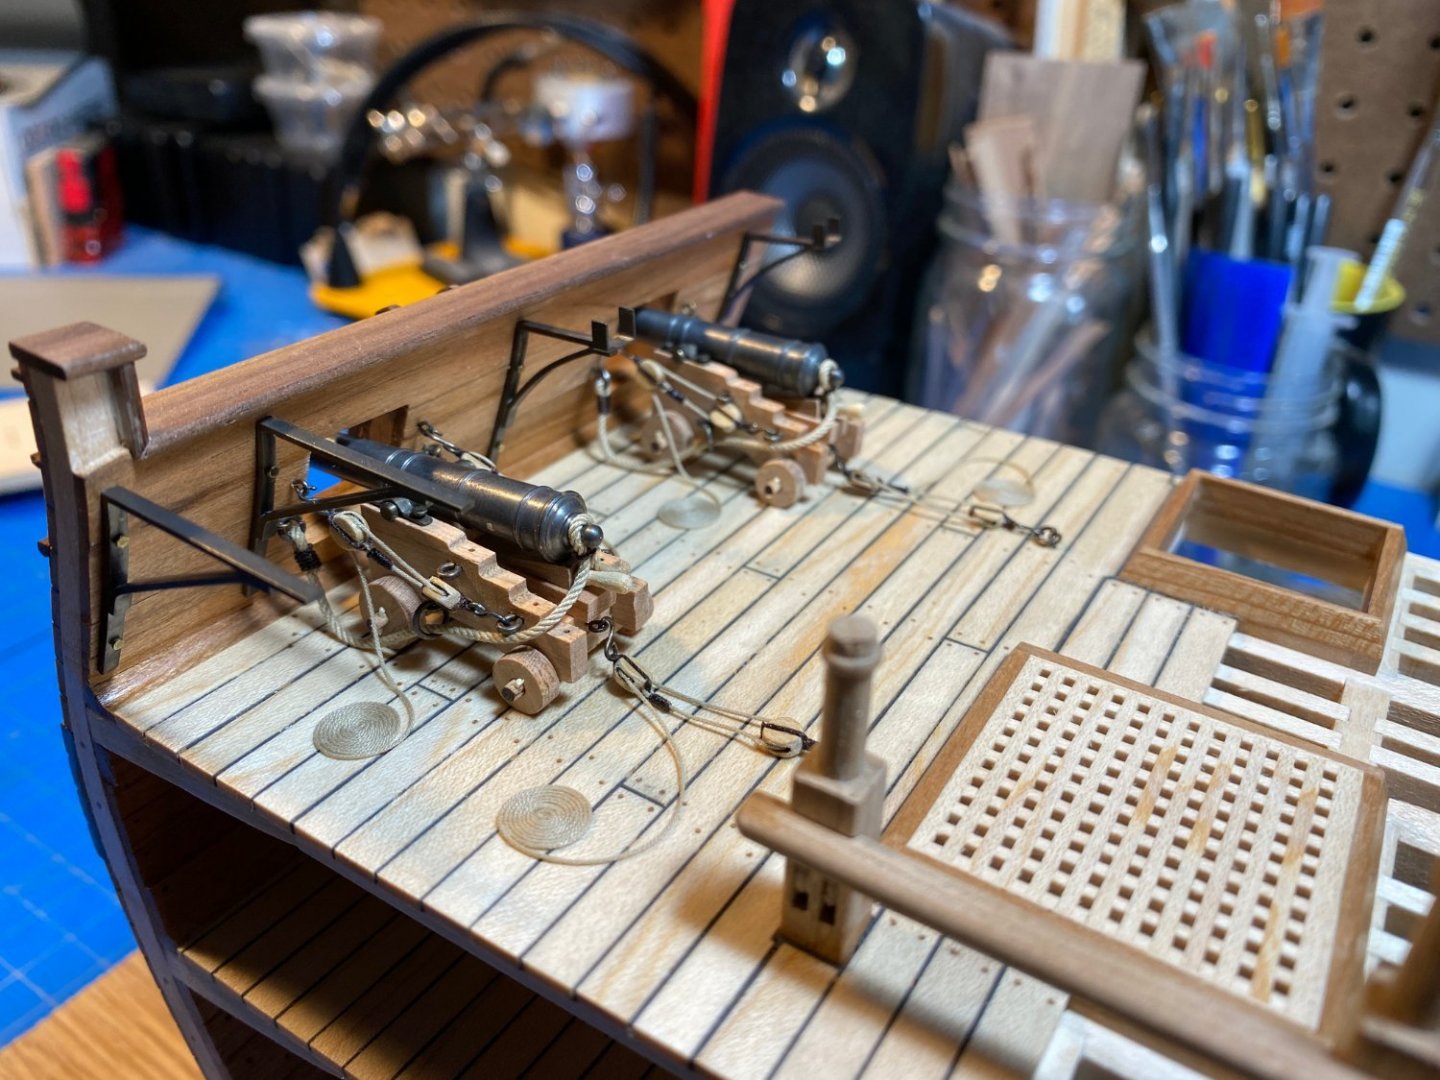
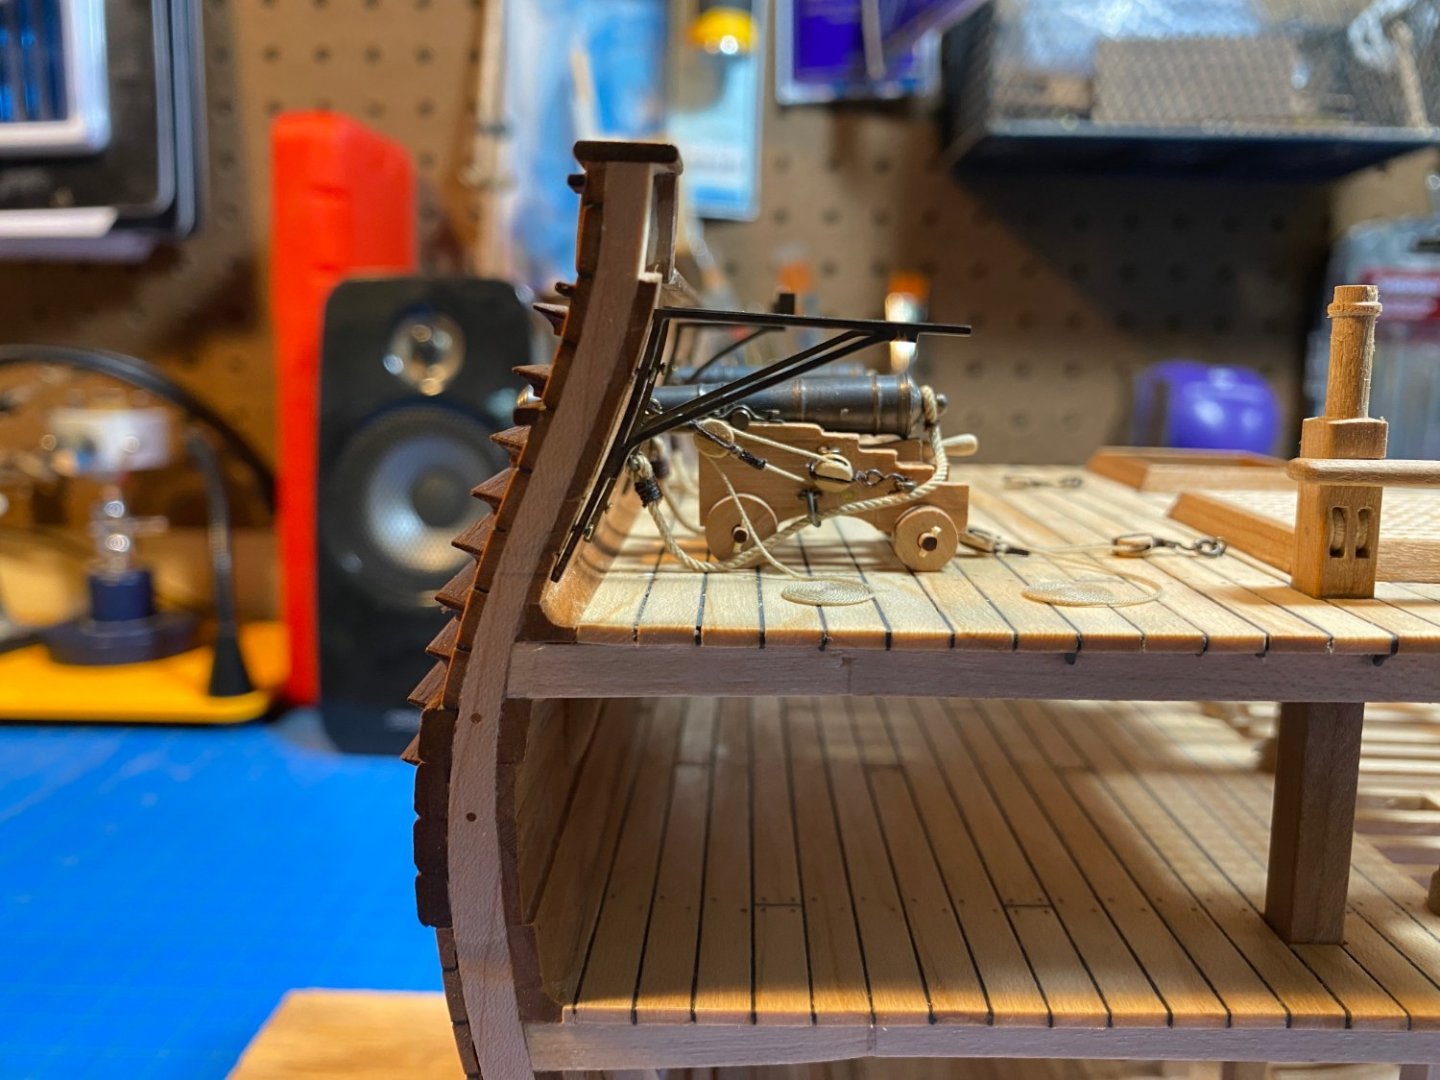
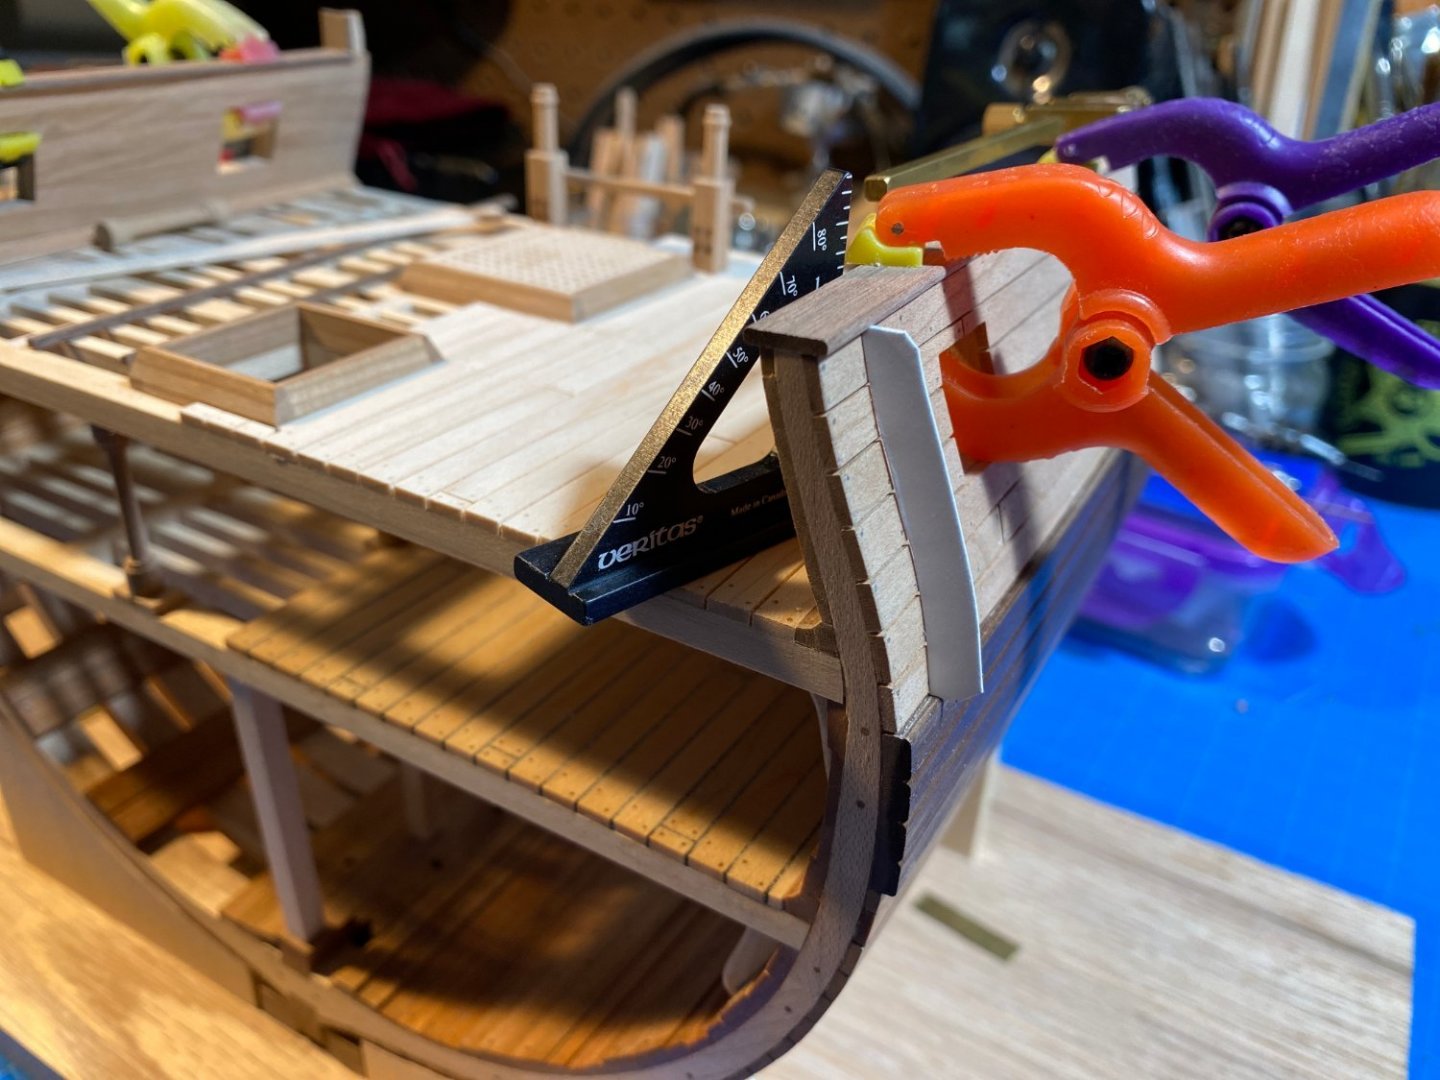
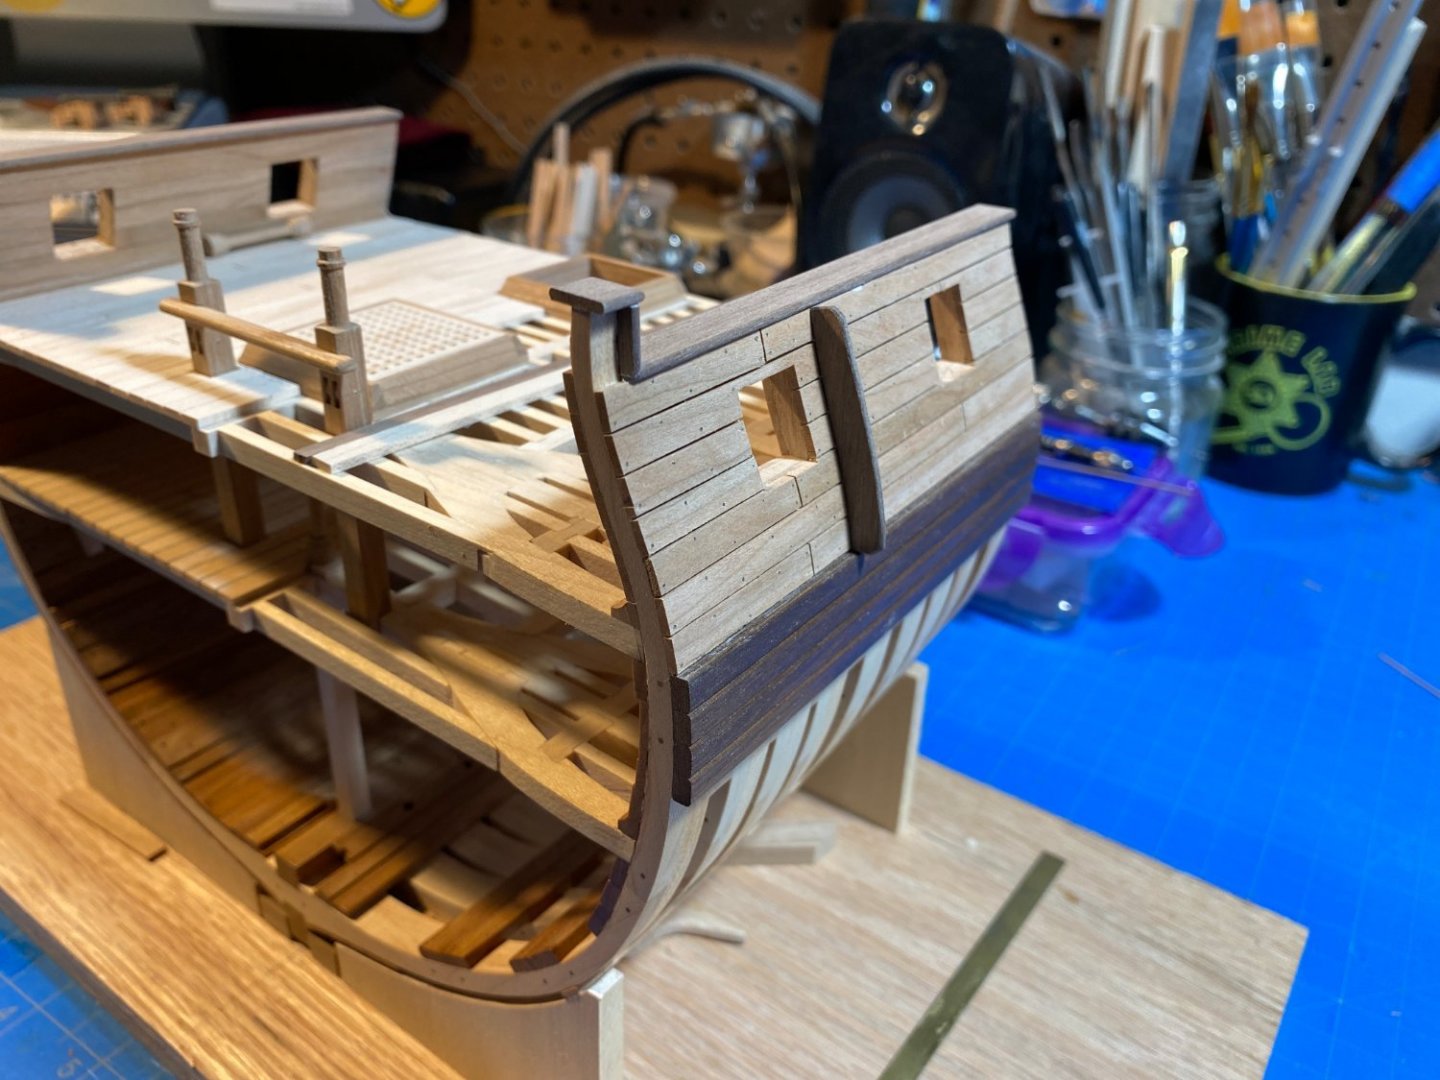
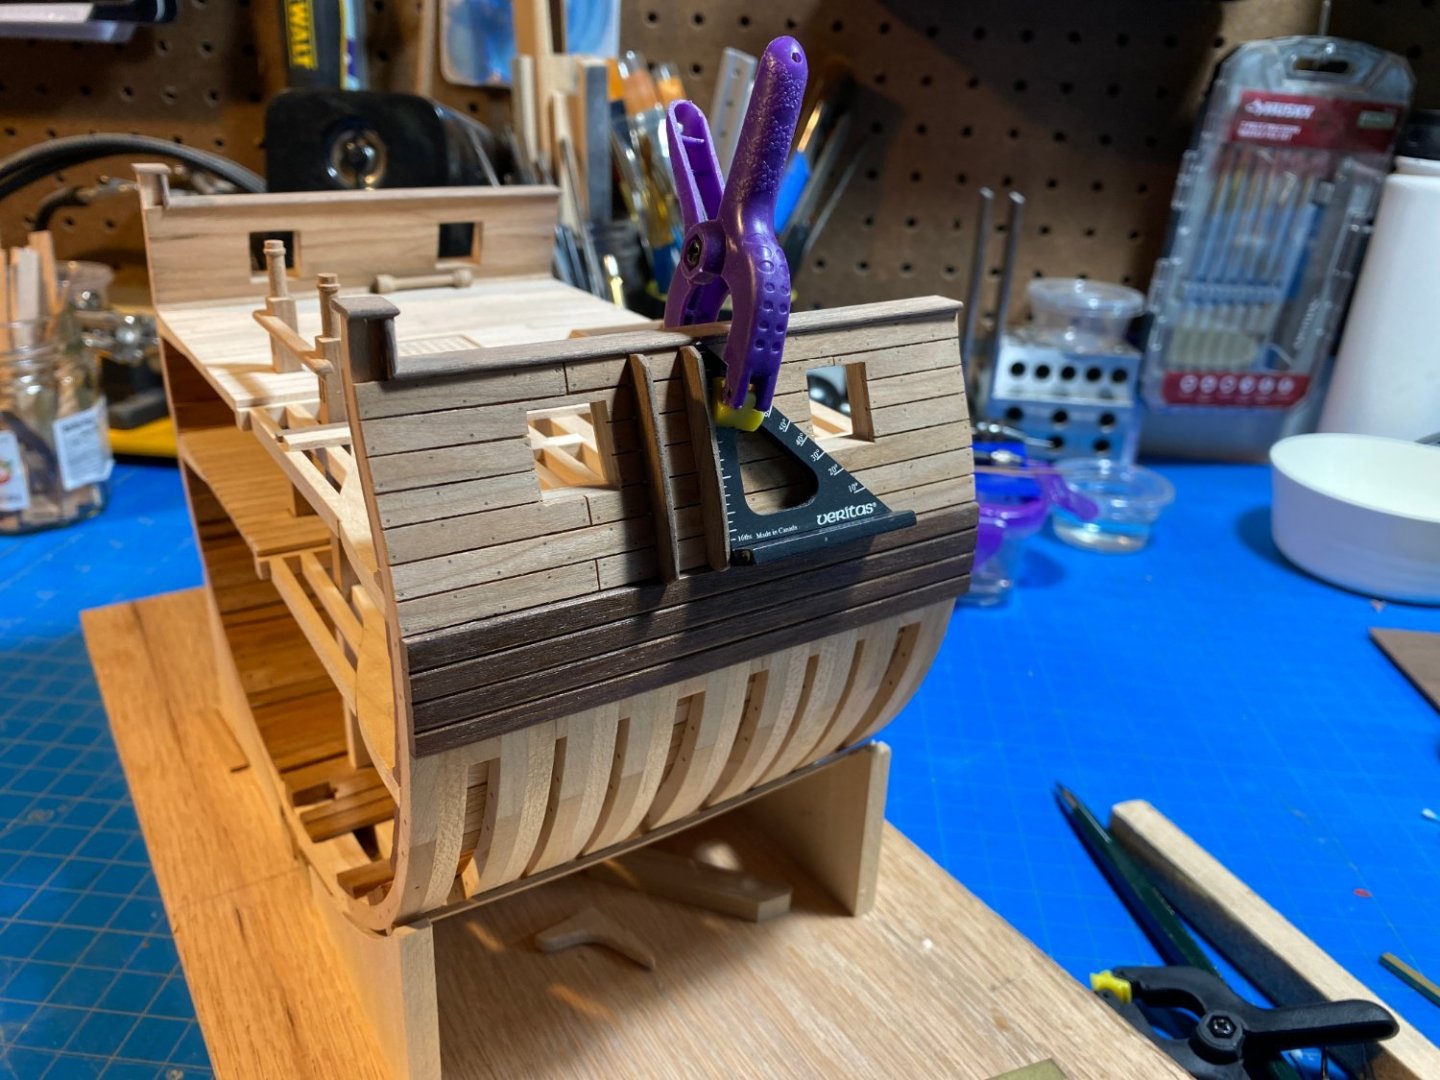
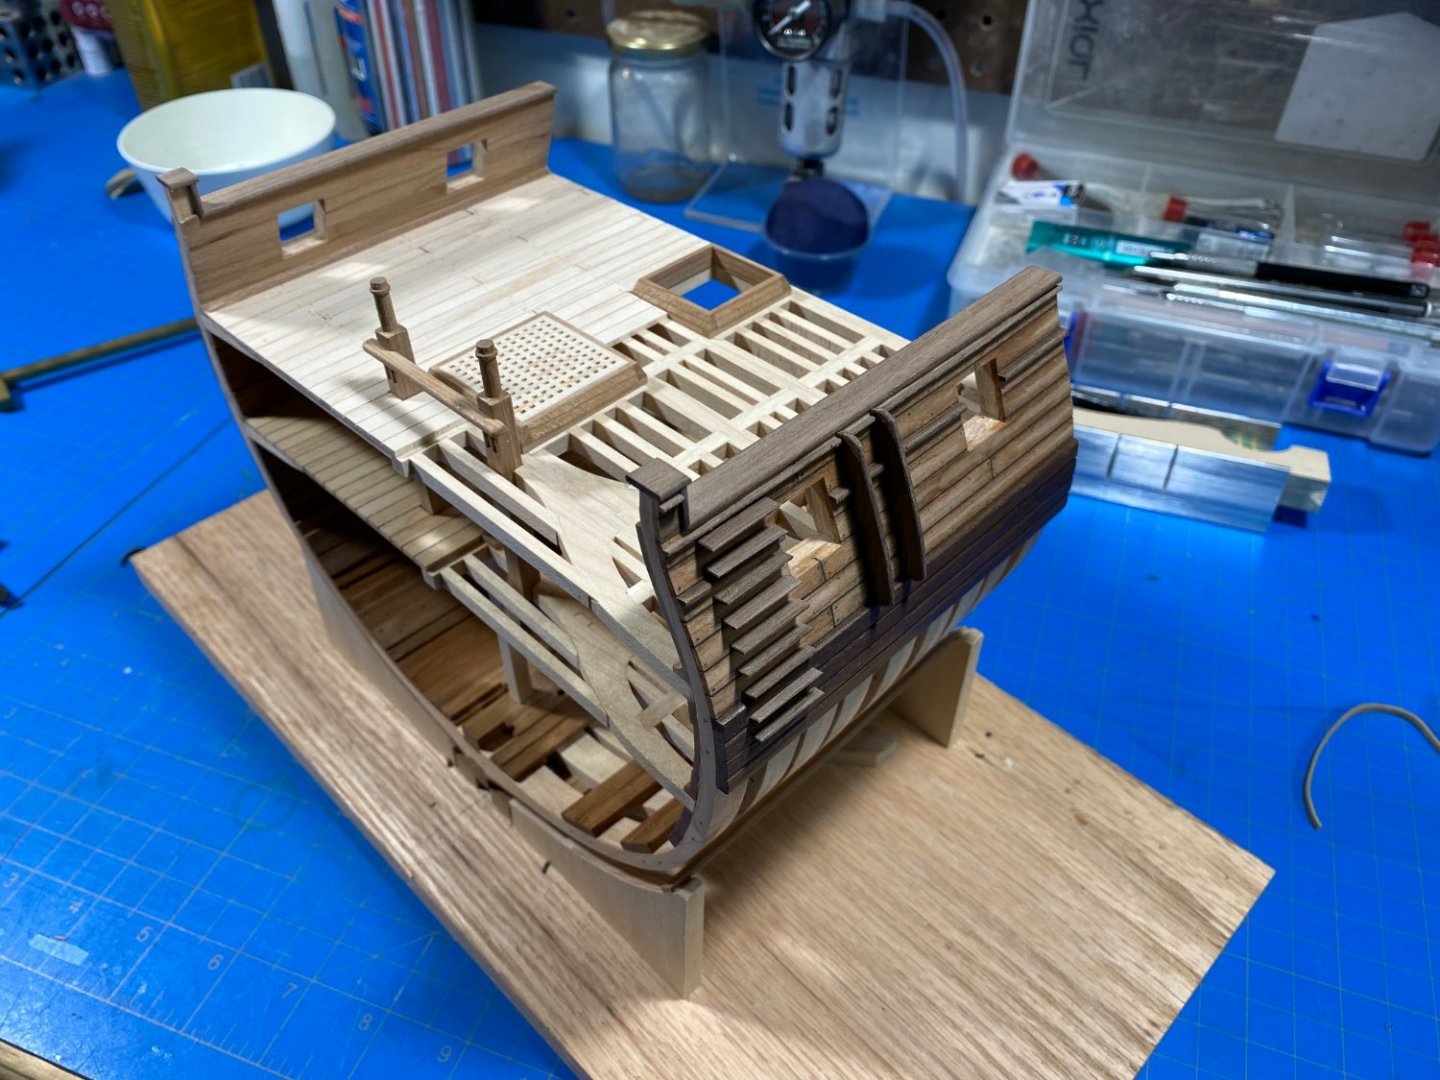
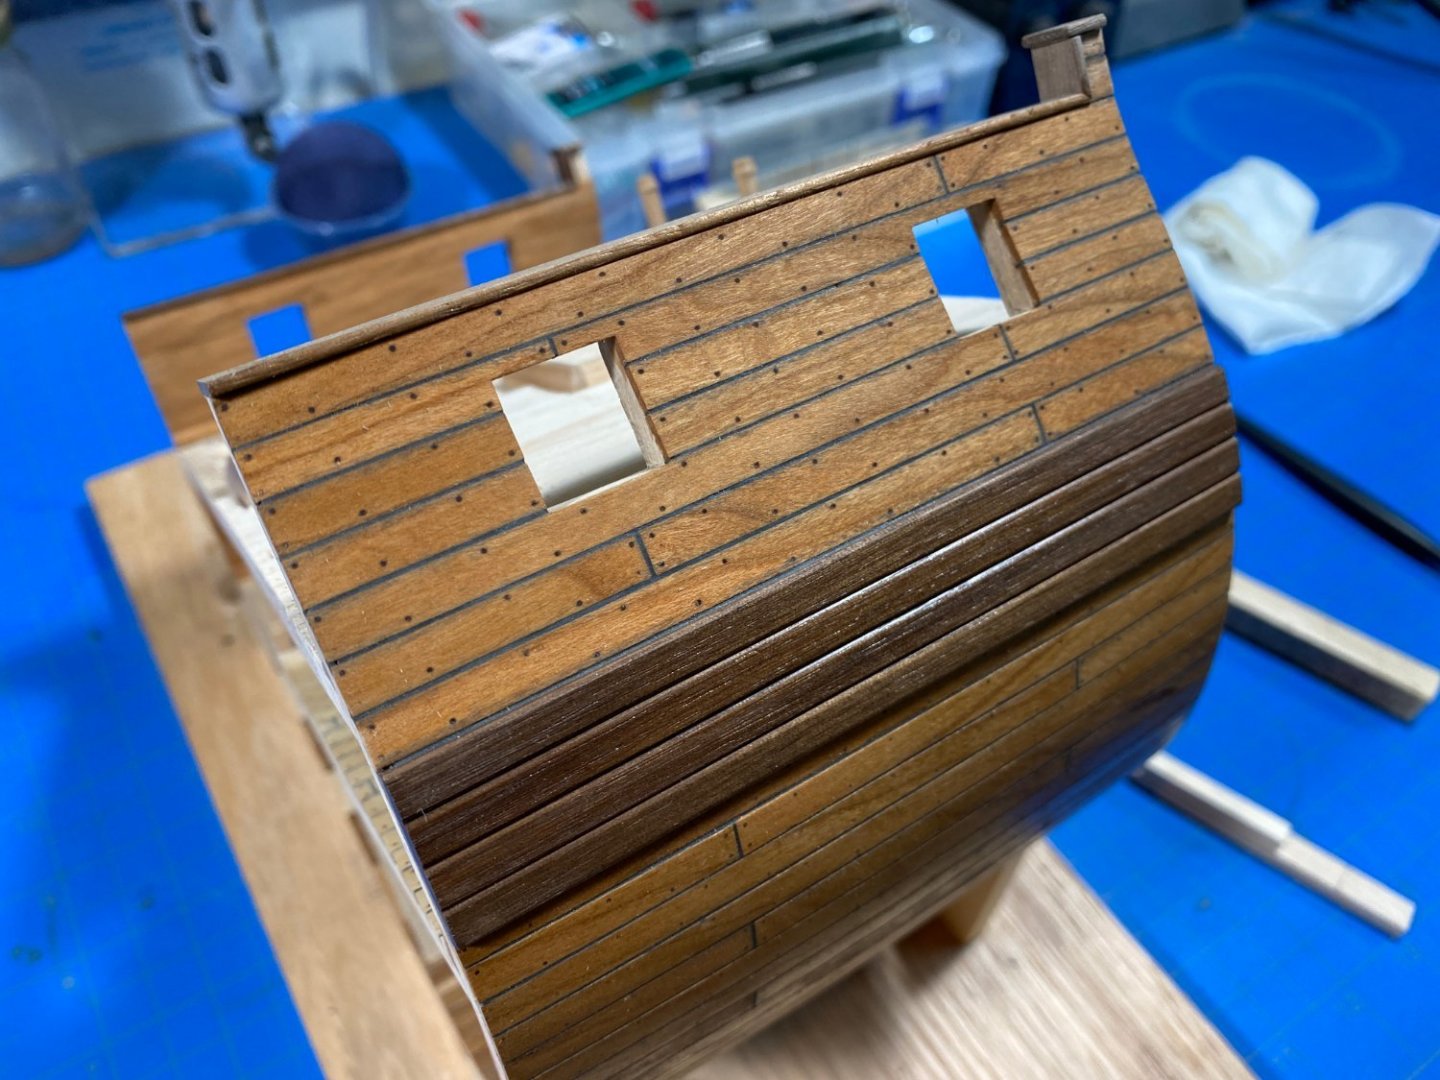
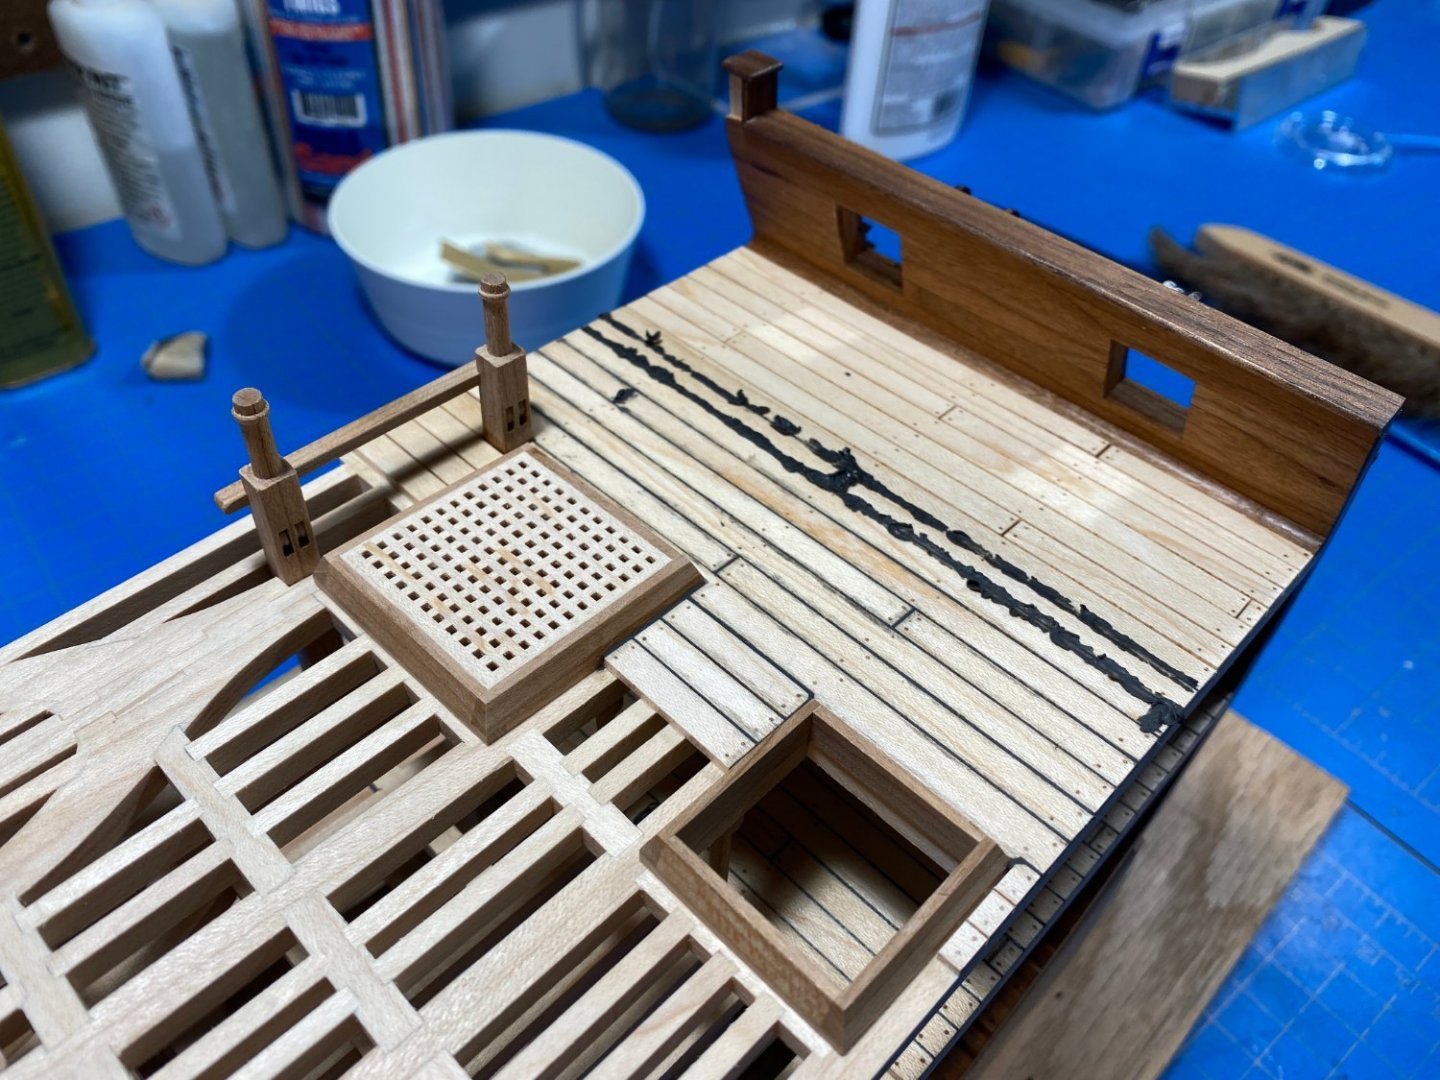
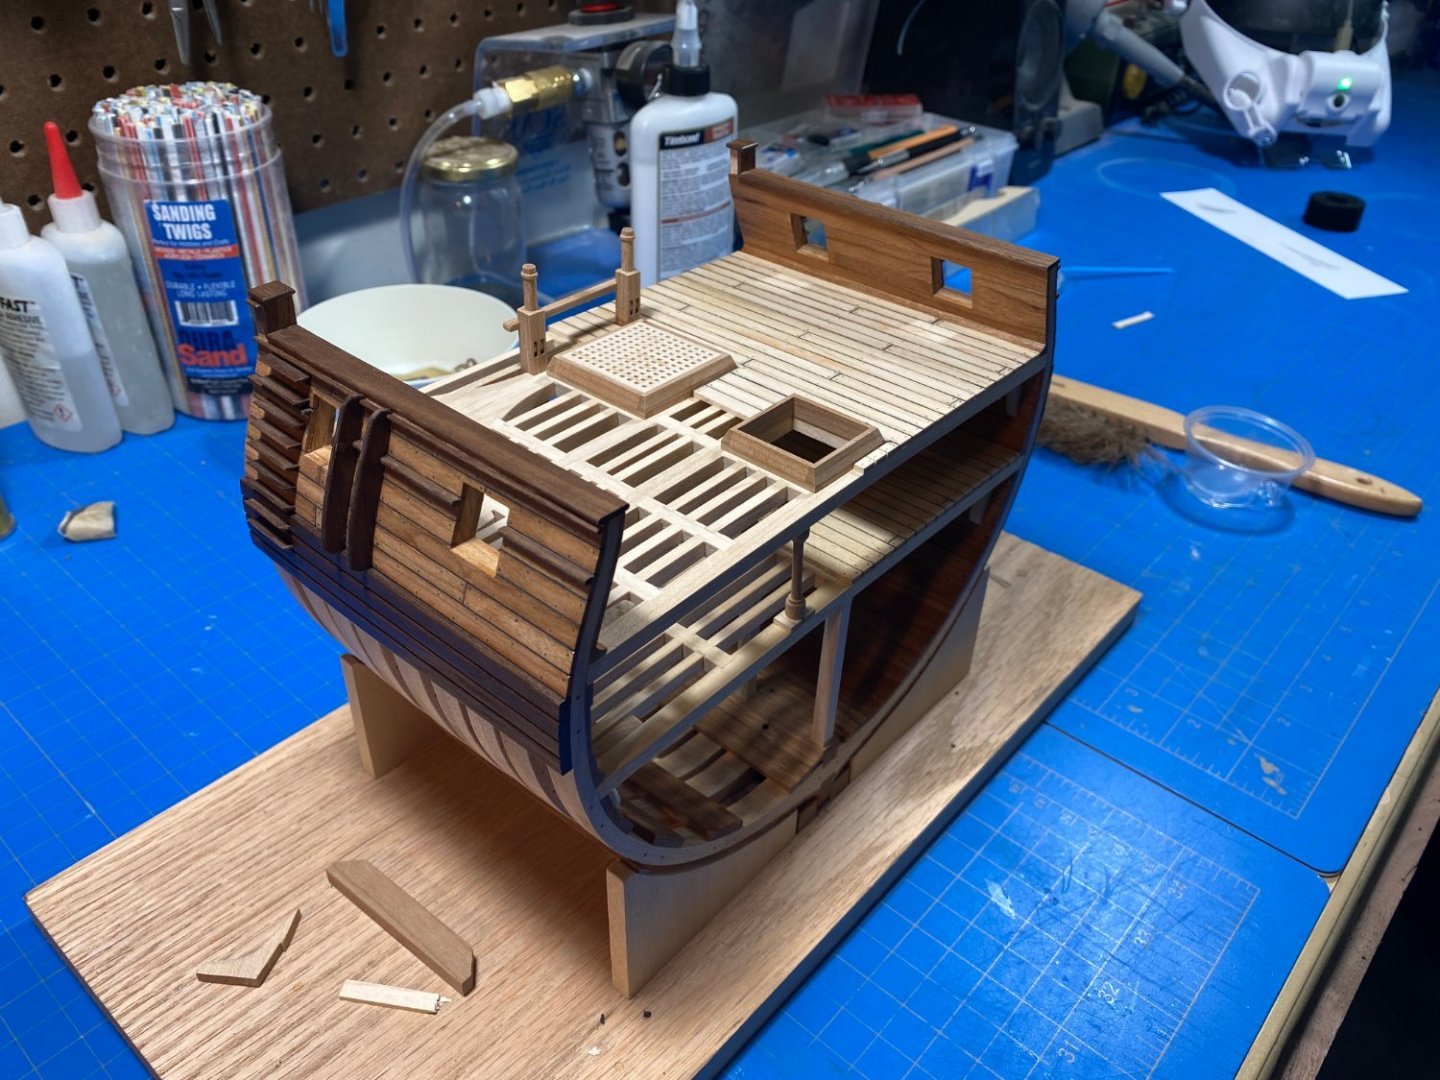
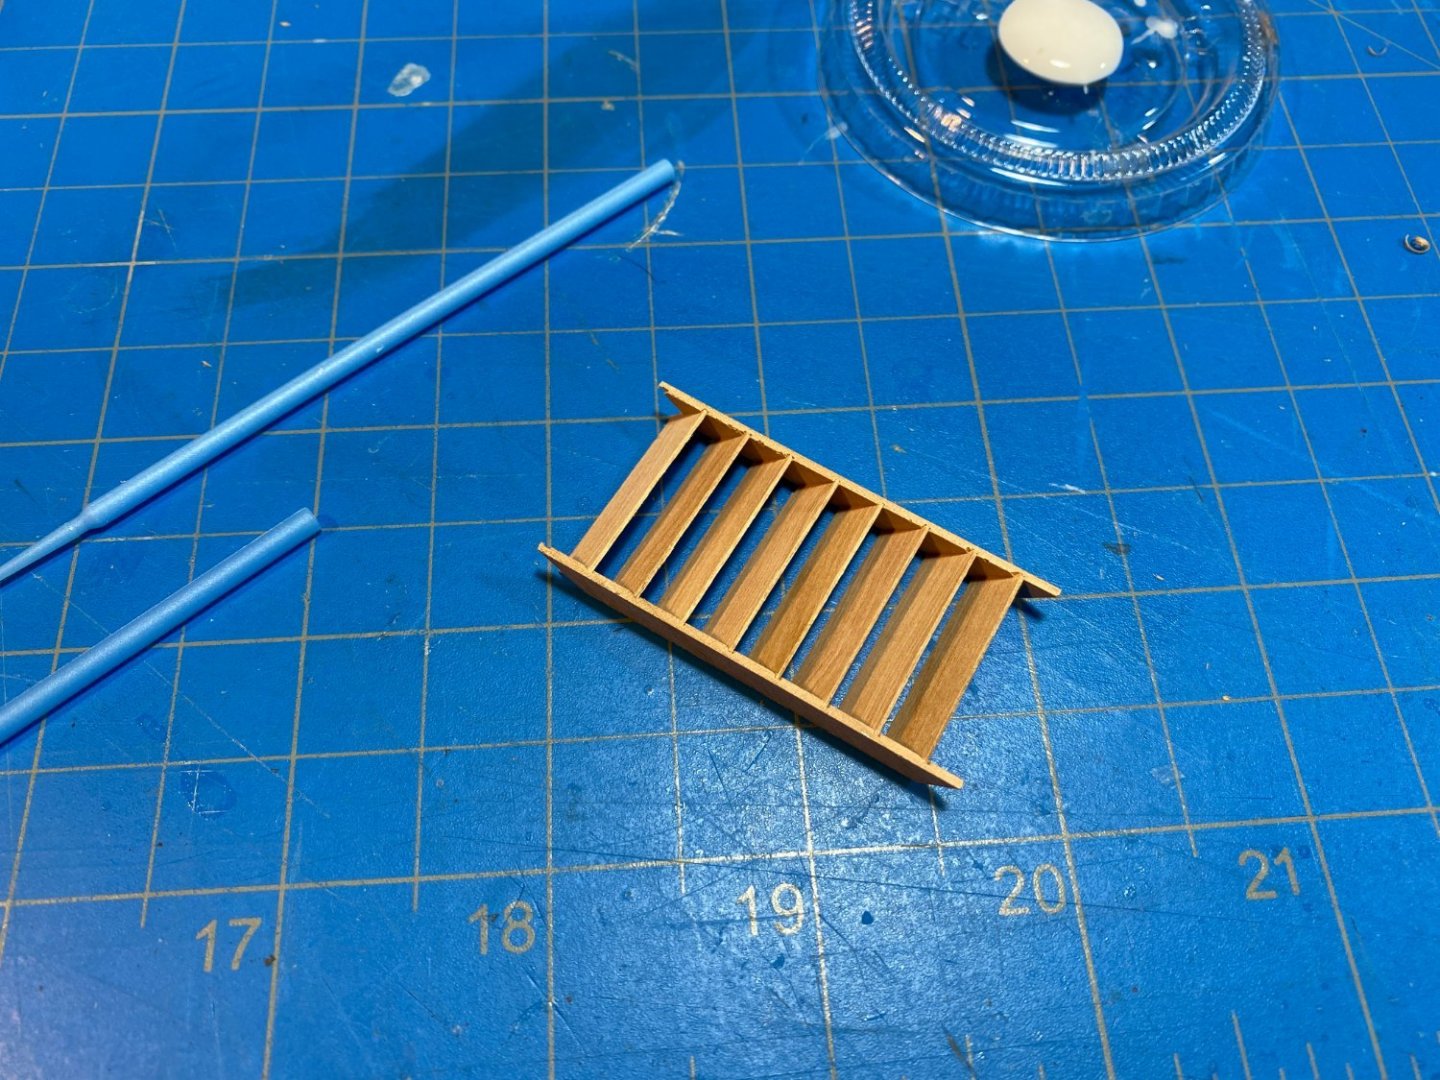
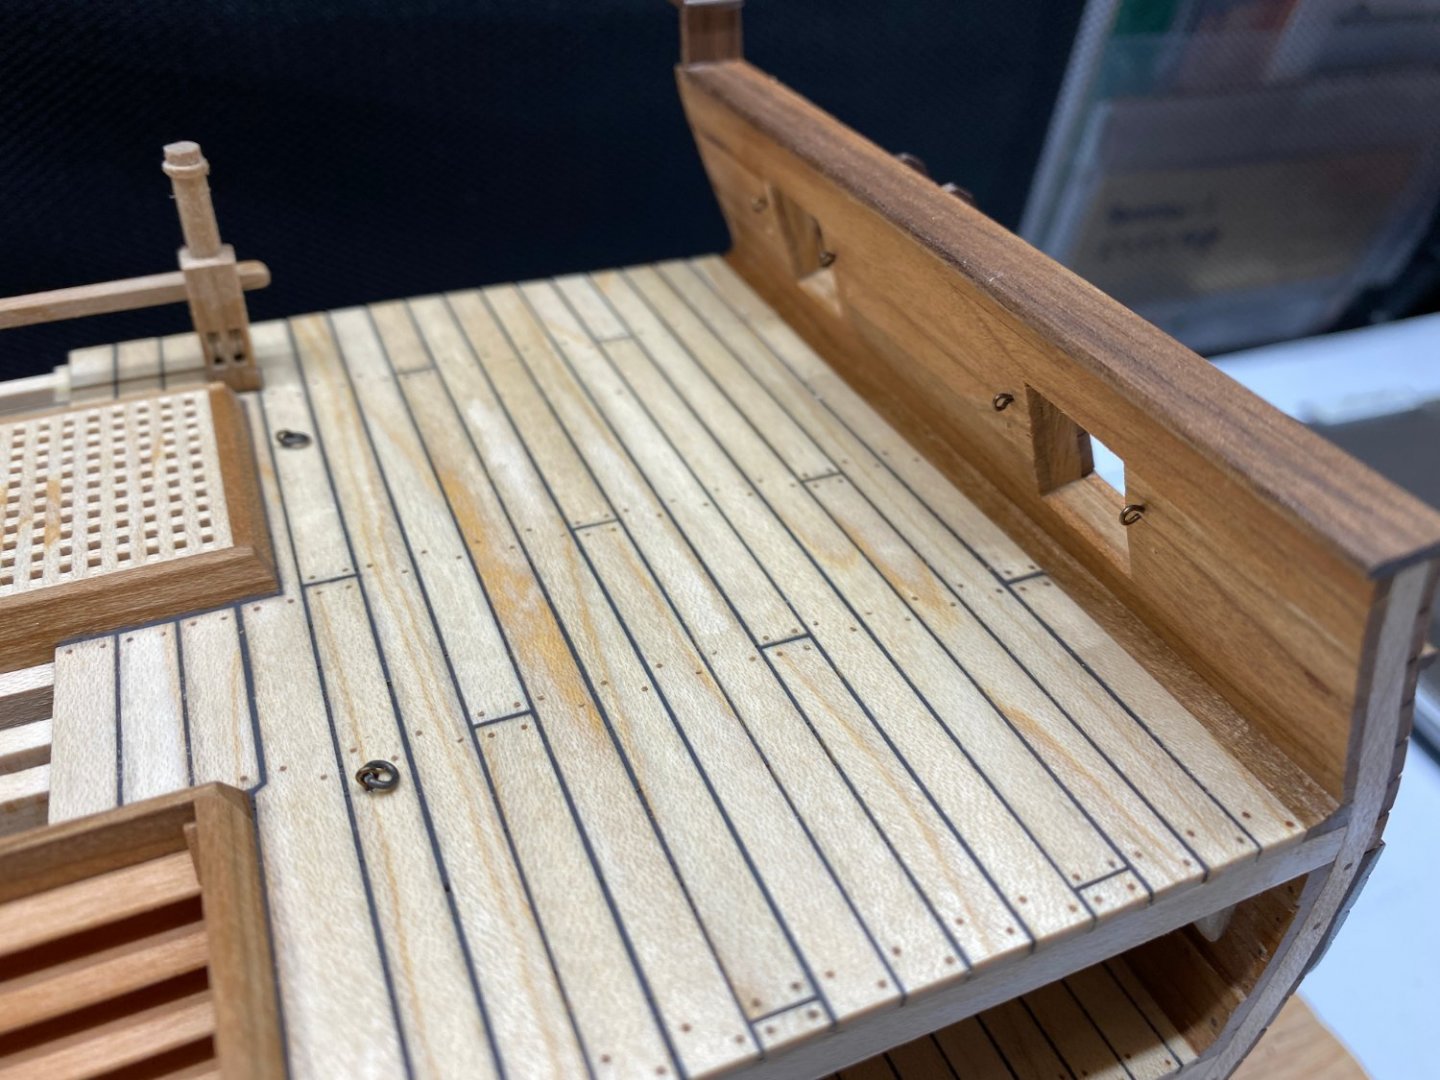
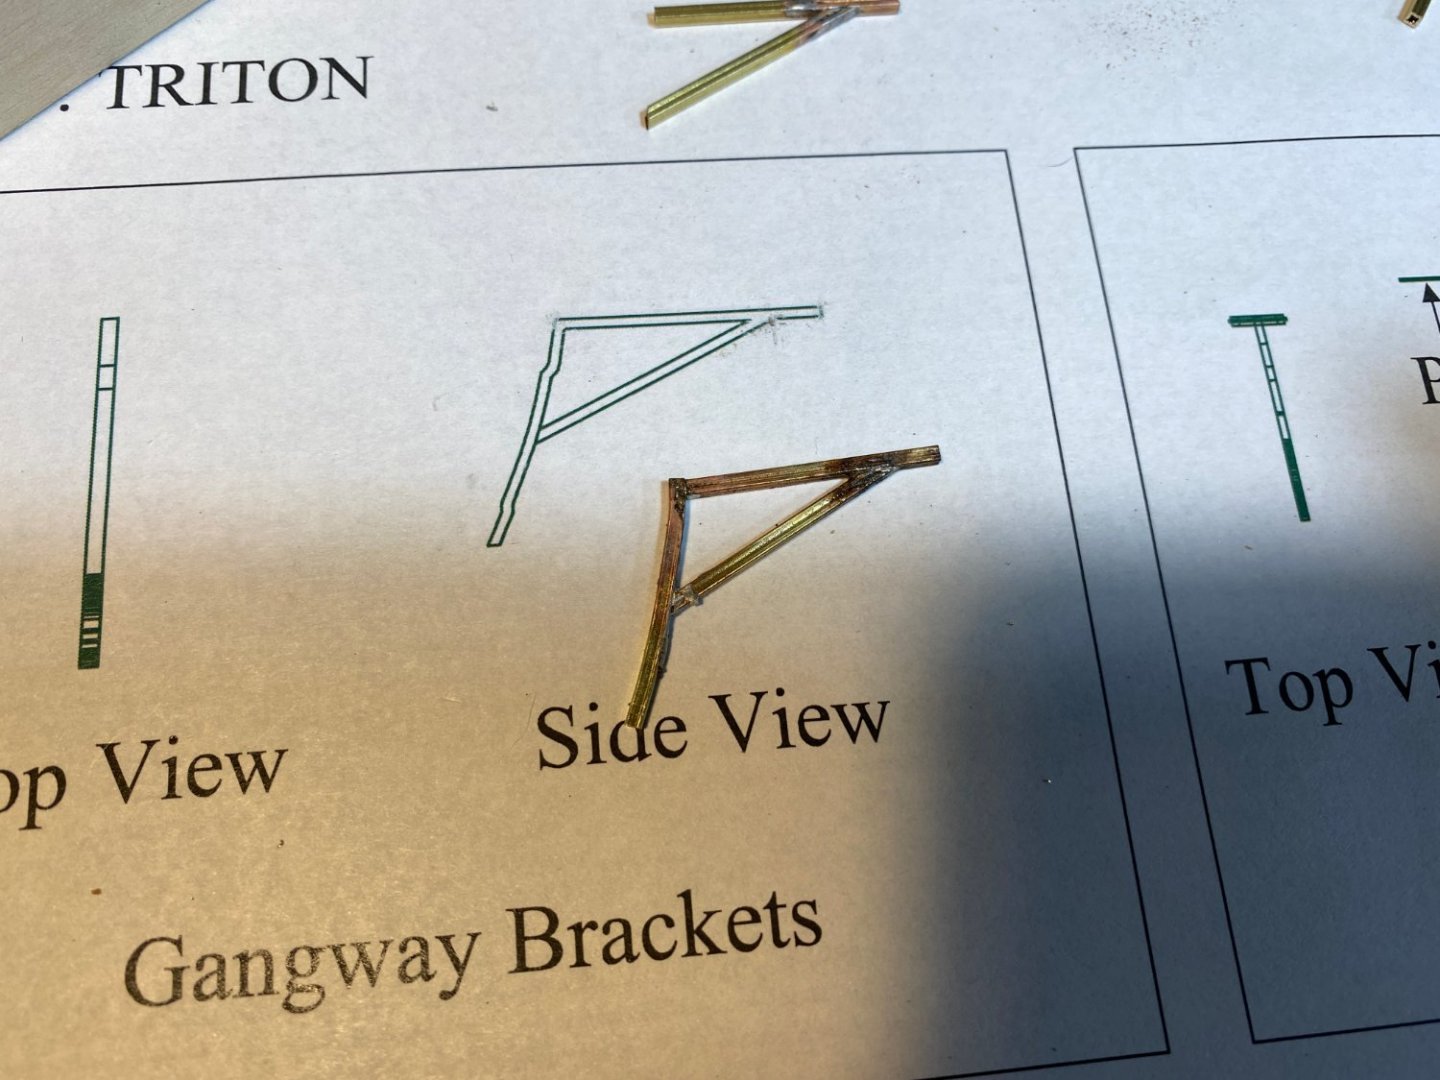
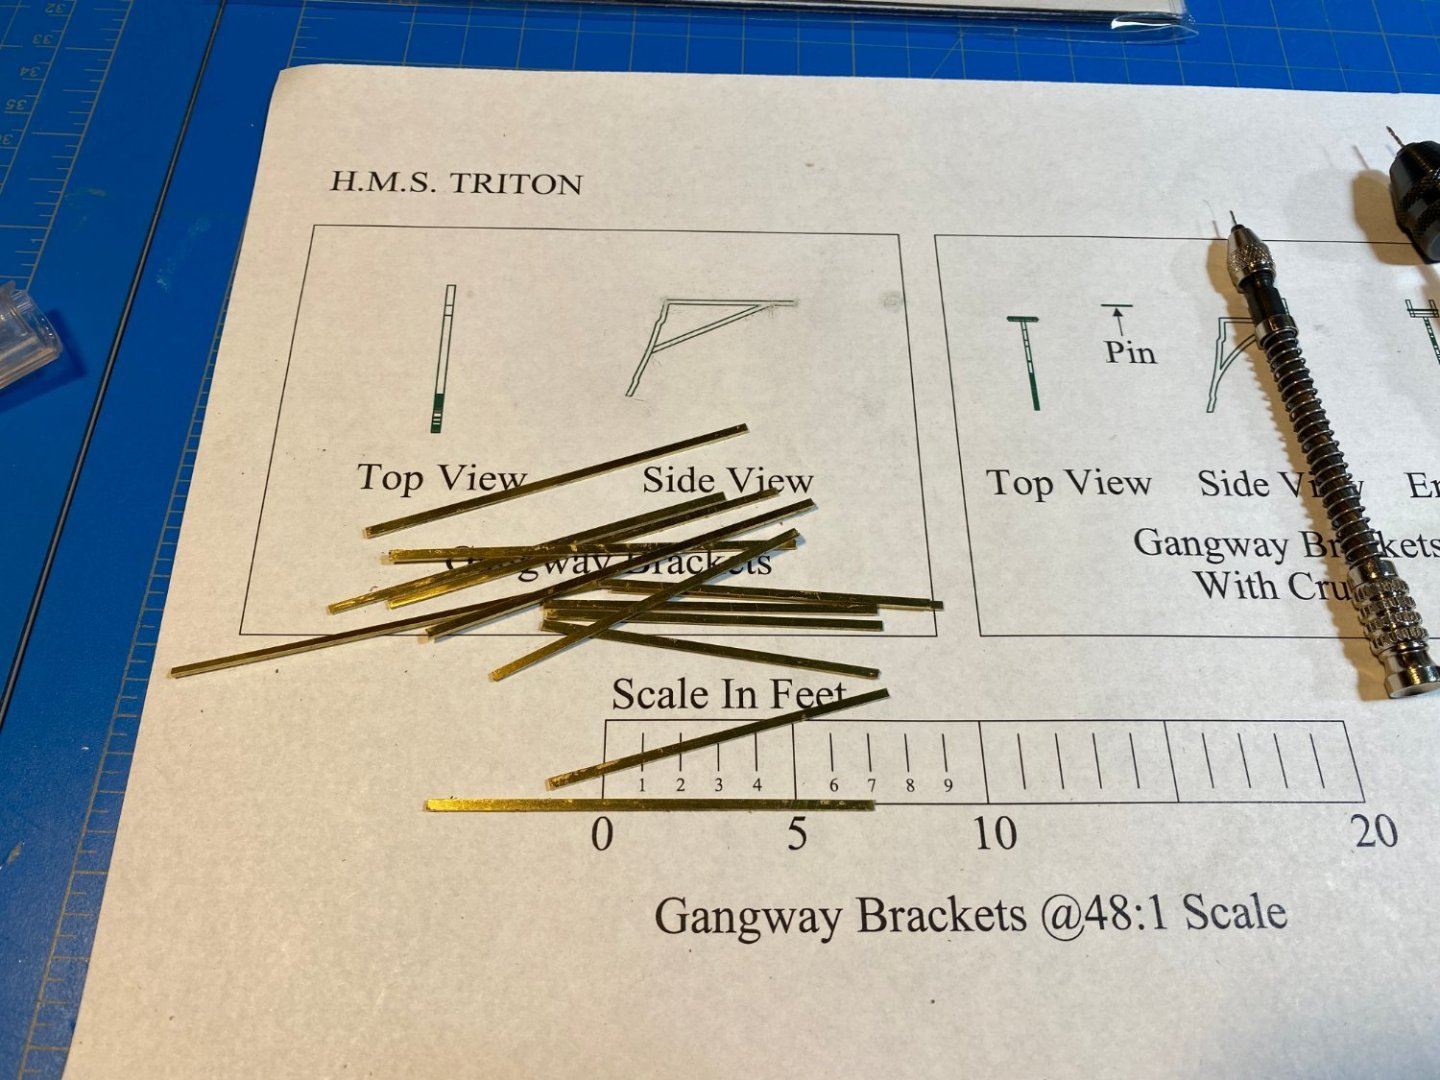
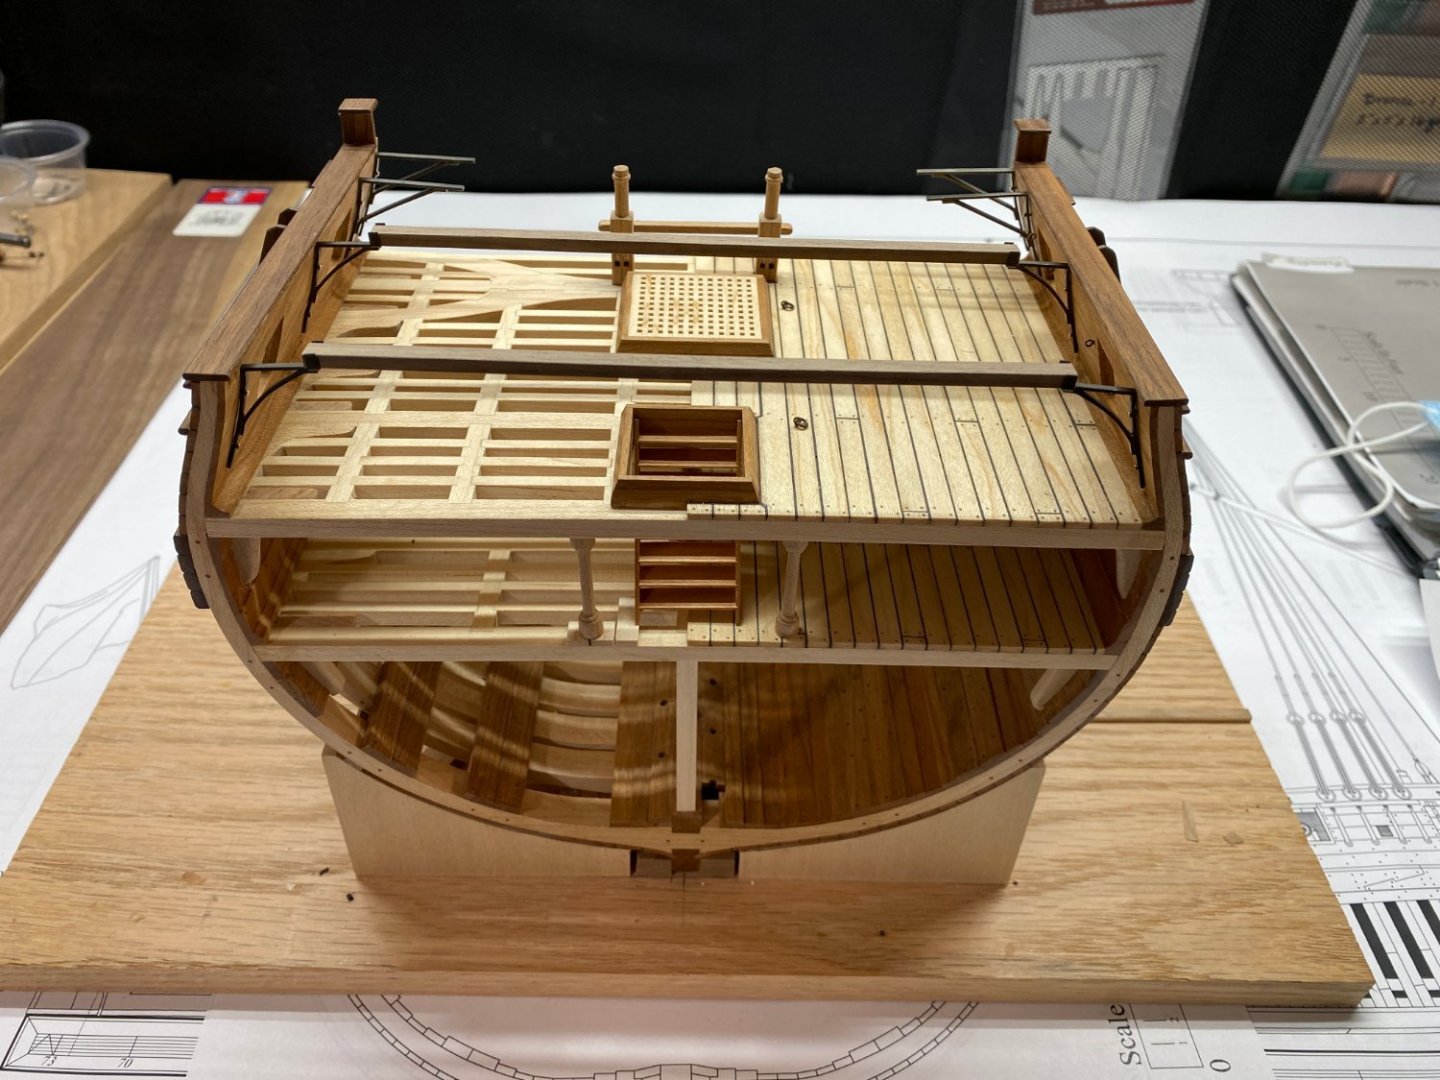
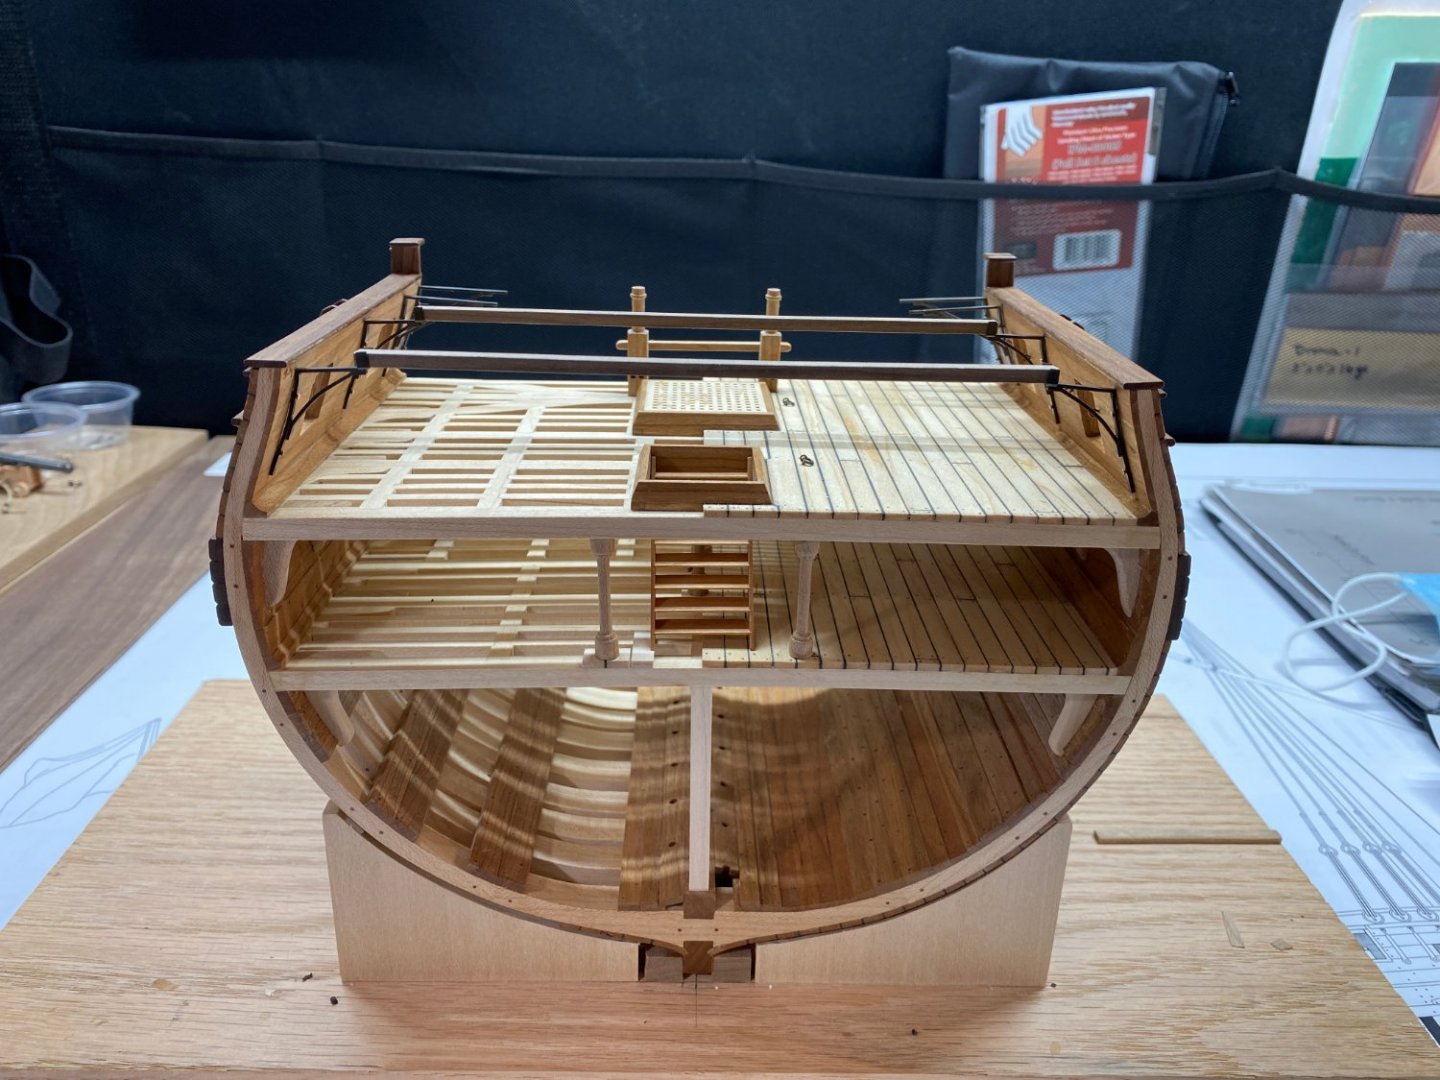
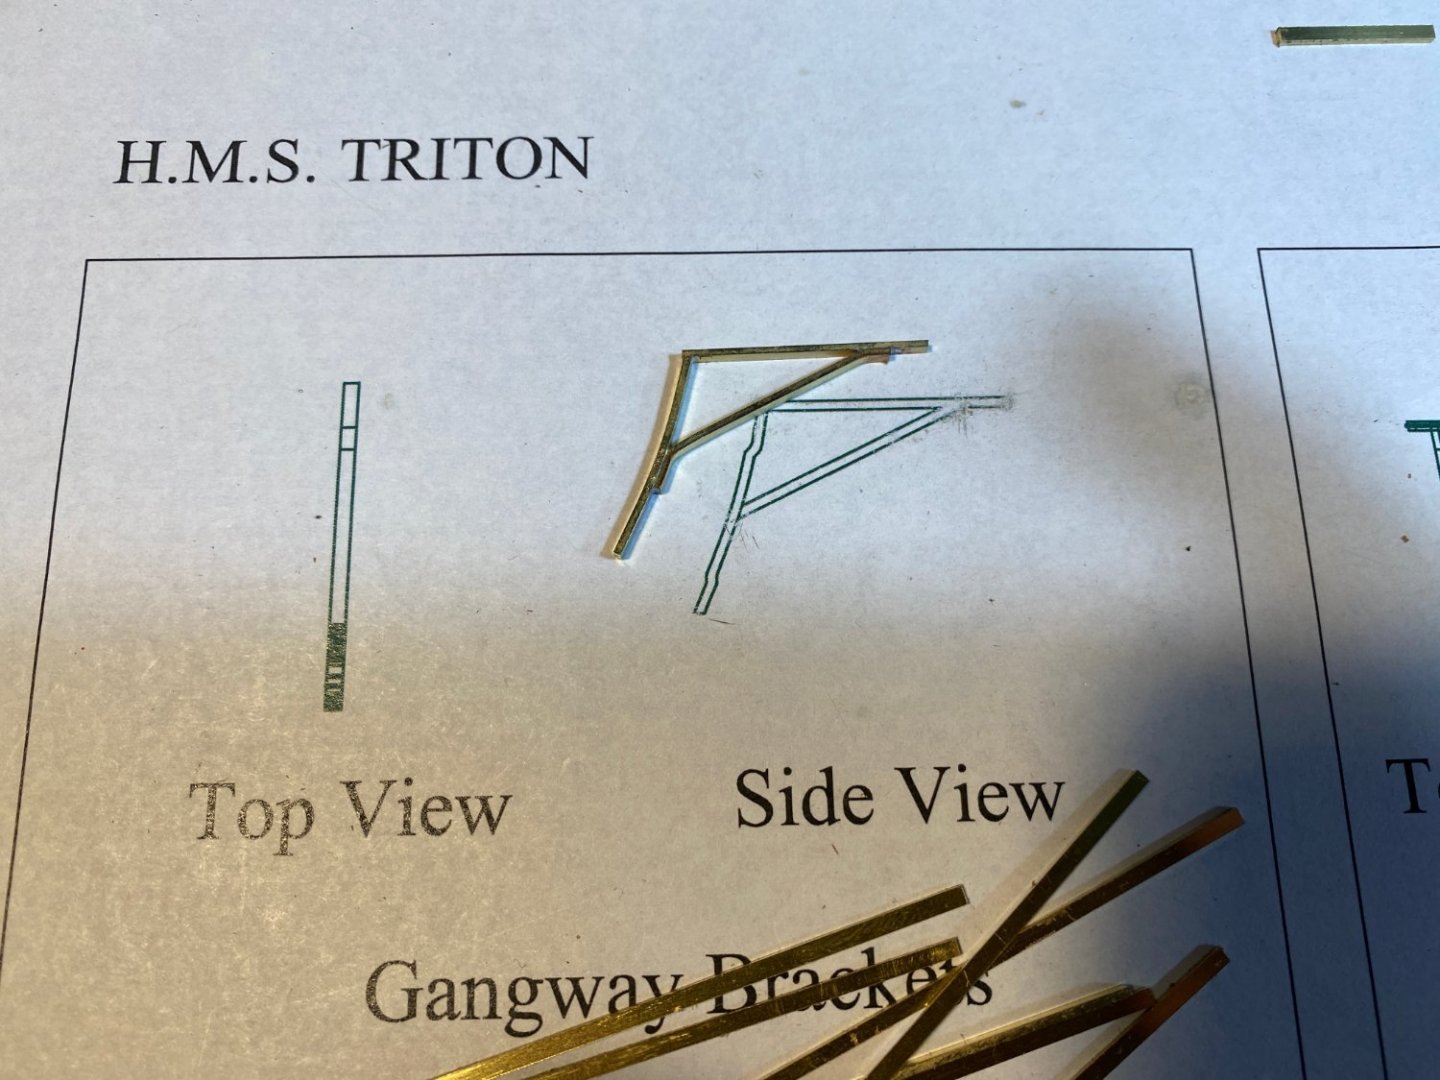
Almost 3 full months since my last update! Oh man... this "return to normal" stuff has really caught up with me. With the holidays, the new year, and a bunch of hiring, chess tournaments and the start of the basketball season (I am my daughters BBall coach) Ive had so little time to update. I have, however, continued to steadily work on my Triton. I think I'm starting to see the end game a little clearer and am starting to think about the case a little more earnestly, thanks to the encouragement in the above comments. Since my last update much of the detail work has started. After planking the exterior and interior of the hull, along with the gun deck I chose to carry on with hull details. I chose walnut as a contrasting material and haven't found the grain too distracting. As Ive said prior, I take it as a point of pride to make something beautiful from relatively sustainable materials and have resisted a desire to use the more exotic (and likely more beautiful) hardwoods. This being a first full scratch project for me, I also wanted to limit the damage to the pocketbook, knowing full well I was likely to burn through a lot of material on screw-ups! After wrapping-up the cannon carraiges: The rail cap, fenders and trim were all made from this walnut, which was the same as used in the wales. In the first photo you can see my paper mock-up used to template the fender shape. A sharp eye might also note that I screwed-up in sequence and neglected to include the outboard trim as I was planking the exterior. Thus I had to mount the trim over the planking. A small error that I intend to make sure not to lose track of in future builds. You'll also notice some weird sequencing as I decided to do one side in a slightly different order (caulking, details, etc). One thing I learned again, having learned it earlier and then entirely forgotten, is that you must seal the wood prior to the caulking step otherwise the excess will not wipe away as cleanly. I then began work on caulking the gun deck planking, and started assembling the gun tackle per the plans. Ive always enjoyed the process of preparing block and rigging so took some enjoyment in this step. I decided it better to do only some of the gun prep and not mount them as it seemed much easier to complete the rest of details (gangways, ladders) prior to mounting and setting the guns and tackle. I also opted to not treenail the interior gunwales despite having done so with lower decks as there is a concentration of detail in this area and I was worried it would end-up creating a cluttered look. I'm still confident in this decision. I also made a few ladders before settling on the below iteration. I now know much more about this process and hopefully will have better luck with the gangway ladder later. The last few weeks Ive been struggling through the brass work for the gangway supports. I first made a set using the entirely wrong brass material and stumbled my way through an appropriate soldering technique. My first attempts are in the first picture where it can be clearly seen that too much solder is being used, too much heat and just a generally poor construction method. I then switched to strips I had to cut myself (as opposed to pre-milled brass stock) and dialed in my soldering until I got consistent and clean results. The gangway supports in place, I just cut and temporary set the skid-beams. I'm starting to work on assembling the gun-tackle components now in preparation of final fitting. Now that things in my life have settled a bit I'm hoping to be posting a bit more regularly and look forward to catching up on all the great builds Ive been missing!


-
Dugout canoe build
Justin P. replied to reklein's topic in NAUTICAL RESEARCH GUILD - News & Information
While in college, I had the honor of interning at the Squaxin Island Museum and Cultural Center here in the PNW, USA at which time a tribal member was returning to his family's tradition of canoe making. As an oral culture, the museum at the time decided to document the process as there were no other existing documentation of their tribal canoe traditions. It was a fascinating process that culminated in the canoes use in the local "great canoe journey" which occurs here every year. https://en.wikipedia.org/wiki/Tribal_Canoe_Journeys I wouldnt know how one might try to model such a thing using a similar process, or even what wood might be suitable. The process employed for widening the hull after hollowing could be problematic. I suppose you might just carve out the completed shape rather than try to widen the hull! -
Something different-infra red
Justin P. replied to RegAuthority's topic in Photographing your work. How to do this.
We use IR photography at work in our technical documentation. We use a converted digital Nikon D800, which has had its its internal filtering removed and is thus made "full spectrum." We also MUST use older glass lenses without the modern treatment layers found on newer lenses. Halogen lighting sources and an IR filter over the lens. All images are B/W. There is such a thing as false-color infrared photography, in which spectral wavelengths are mapped across RGB values. As such, you can achieve a "color" IR photograph. Whether or not that is being used in the photo above, I dont know. -
Very sorry to hear about your wife Steve. Hopefully the work on Syren can be a small comfort, you're doing a wonderful job.
- 157 replies
-
- 2
-
-
- model shipways
- syren
- (and 1 more)
-
Hey Matt, Ive been away for the last few weeks only sparing a minute to pop in, here and there but your build is looking great! Those guns look well done. The extra care in the finish will pay off in the end I think!
-
You know what, I think you did such a nice job that the Amati plates would have been a mistake. If I thought could have done it this well with that material and a stamp I might have stuck with that method myself. The Amati plates I think were a bit of a cheat. Yours turned out really fantastic.
-
What a beautiful result! So clean and uniform... you must be proud of that job!
-
Looks fantastic though... slow and steady, thats the way.
-
2021 NRG CONFERENCE
Justin P. replied to kurtvd19's topic in NAUTICAL RESEARCH GUILD - News & Information
I think we confusing things, or I am at least. The annual meeting is this Saturday - I received a notification as recently as Sunday about this. I assumed this was the virtual alternative to the conference where an annual meeting would have otherwise been held. I have received nothing since that says this meeting is cancelled. To be clear I’ve known the in-person conference has been cancelled for some time. -
2021 NRG CONFERENCE
Justin P. replied to kurtvd19's topic in NAUTICAL RESEARCH GUILD - News & Information
Did this get announced? The only notice I’ve received was the email about the meeting this Saturday (11/20) - and that was only a week or so ago I think. -
I have used this too. Sometimes referred to simply as "black monofilament." Not always associated with fishing...
-
Trying to understand white balance
Justin P. replied to Gaetan Bordeleau's topic in Photographing your work. How to do this.
I actually quite enjoy the needless overthinking that happens within the hobby - and in particular, the granularity that can be achieved when that overthinking becomes a communal endeavor. Certainly a something that happens often here at MSW. 🙂 -
Trying to understand white balance
Justin P. replied to Gaetan Bordeleau's topic in Photographing your work. How to do this.
This is very interesting. Im suprised that after a lifetime you can still notice. A relative of mine is colorblind and never knew it until he was told by optometrist - lived a full 45 years without a clue. He still doesnt really believe it - until he got his hands on those glasses that are meant to reveal what the rest of the world see's. Which now seem a bit dubious having read some of the comments here about color and subjectivity. Not wanting to get off-topic but your situation reminds me of those people with certain eye deficiencies where they are given only one corrective lens, with which the brain can use to correct for both eyes - or some such thing.