HOLIDAY DONATION DRIVE - SUPPORT MSW - DO YOUR PART TO KEEP THIS GREAT FORUM GOING! (89 donations so far out of 49,000 members - C'mon guys!)
×

Siggi52
-
Posts
1,155 -
Joined
-
Last visited
Content Type
Profiles
Forums
Gallery
Events
Everything posted by Siggi52
-
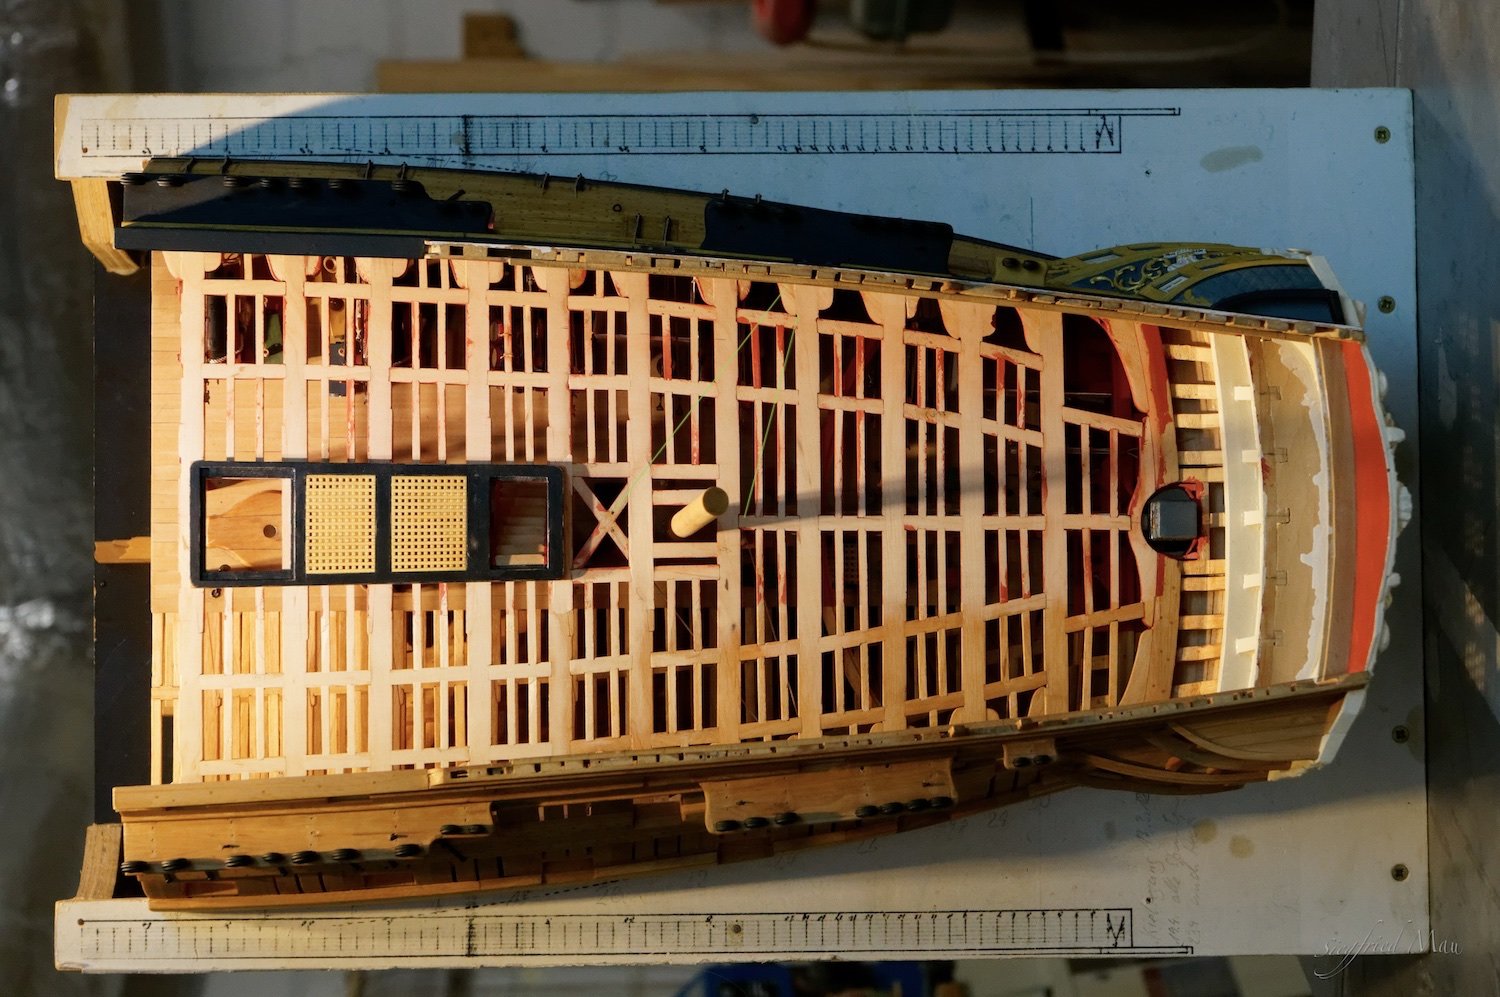
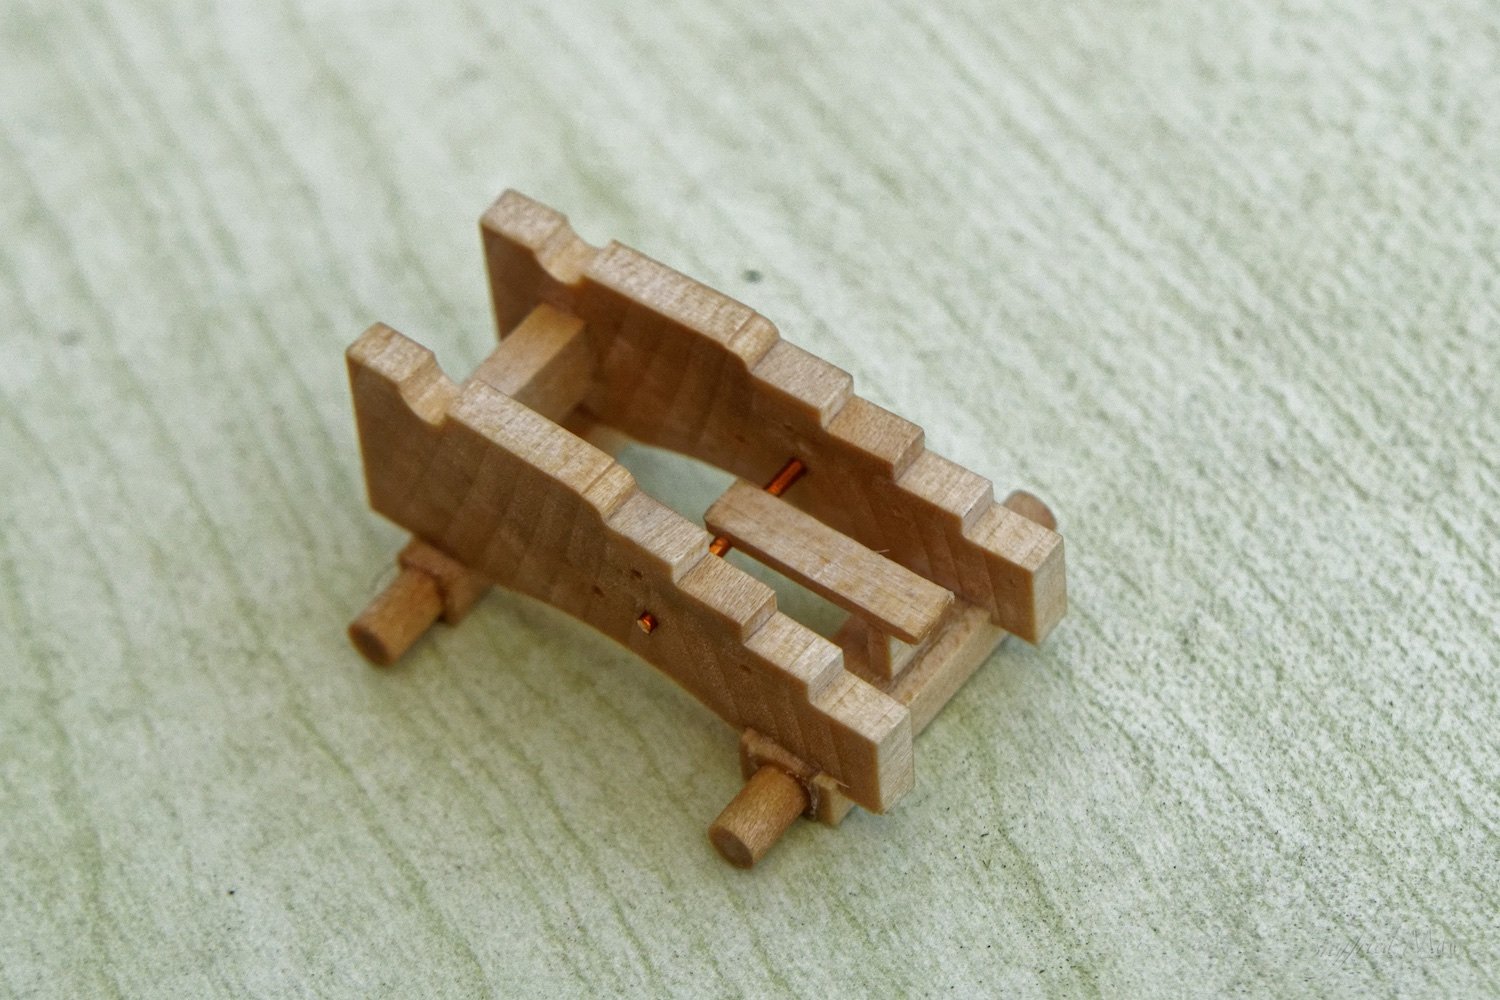
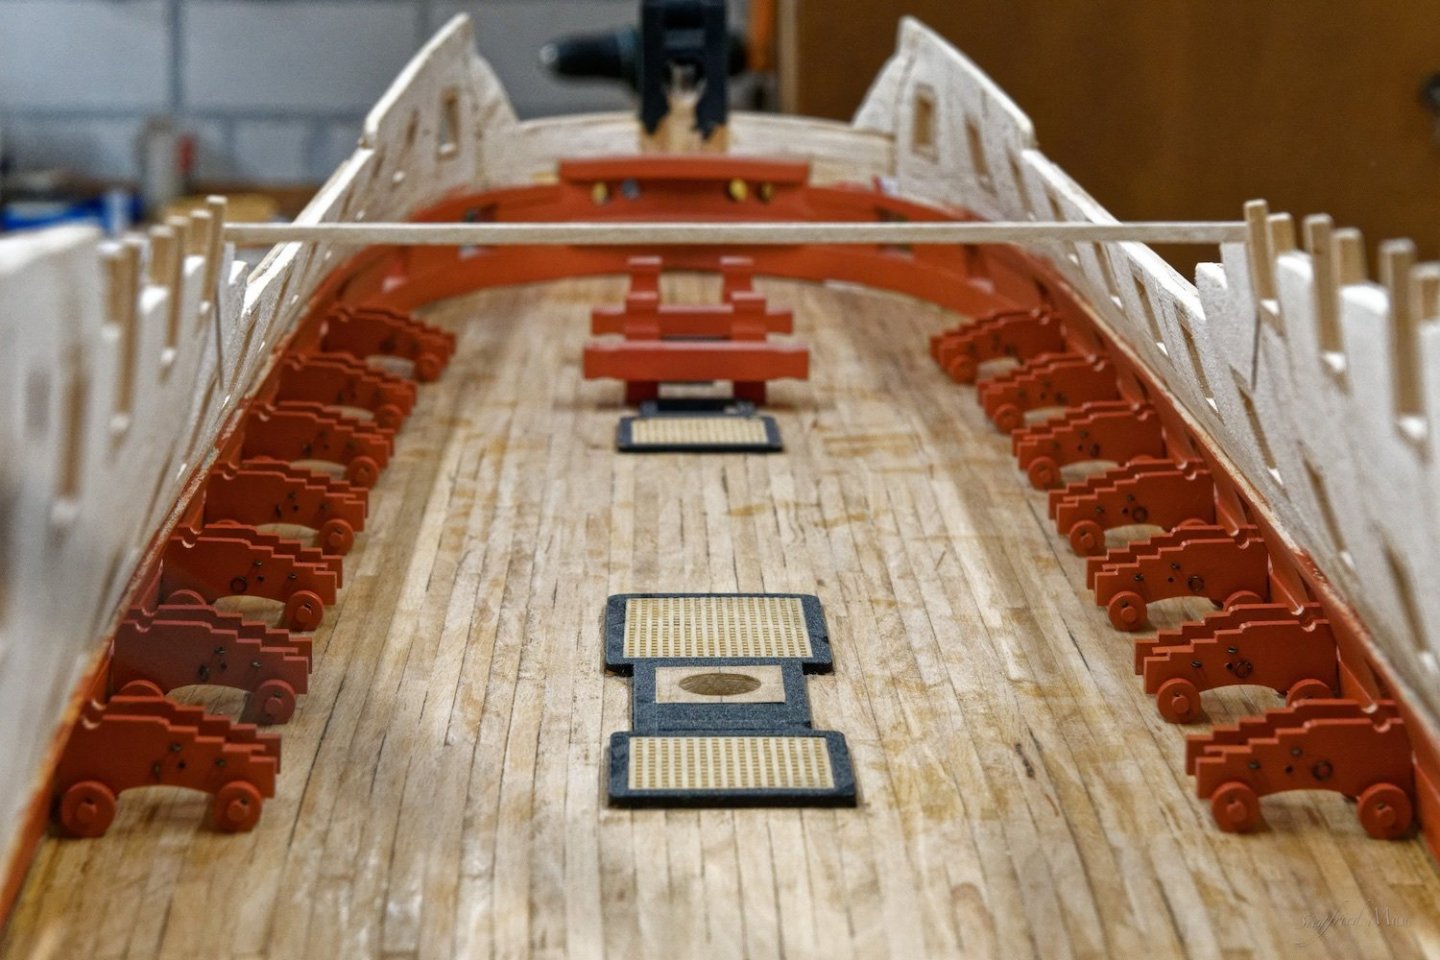
 Hello Mark, I made some changes in your drawing, so that your drawing fit the Dorsetshire drawing. The sweep is there totally between the beams. For the Dragon I build the lip under the beams and only the upper part between them. And yes Gary, the structure below the beam is the sheave for the tiller rope. In my drawing I put it a little forward to get free from the tiller, whom I also shorten a little. But Mark, may be you find a way not to shorten the tiller. And so looks the sheave for the tiller rope at the Dragon Mark, one question about the layout of the carlings and ledges. I went here with Lavery, page 52/53 in his Bellona book. From where did you get your design? It looks strange when you cut of the tops of the knees for the carlings.
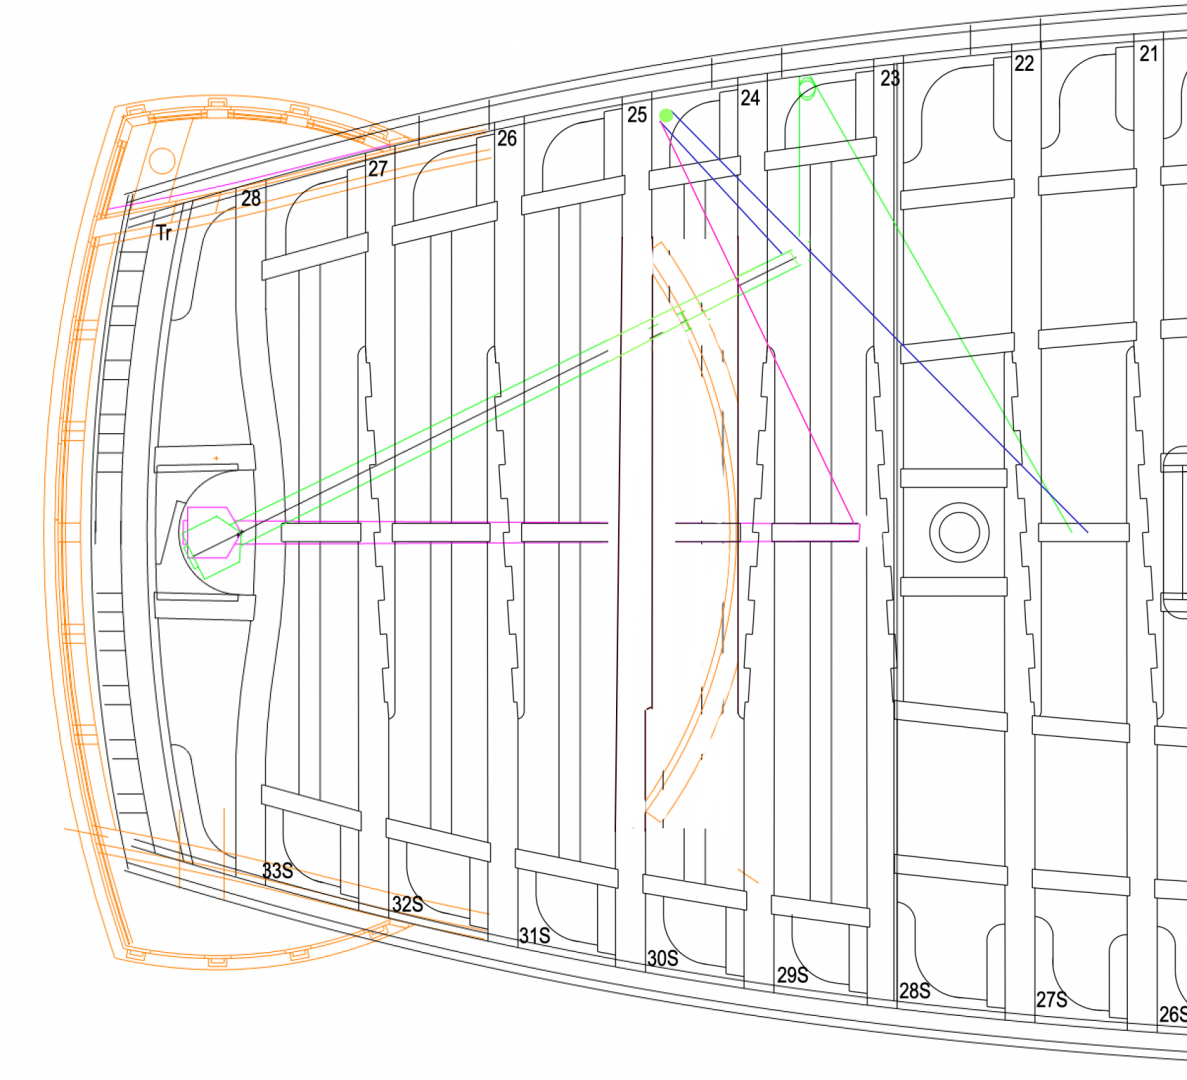
-
Hello Mark, I would agree with Gary, that you should set back the sweep between beam 24 and 25 and follow Lavery's sketch at page 65 of his Bellona book. But I set the blocks for the tiller rope in front of the 24. beam and fitted my sweep between the beams and then it works. I hope the picture explains better what I mean.


-
Thank you for your kind words, and yes, many nations ships had in those times lions as figureheads.
-
Hello, and many thanks for the many likes and nice comments. I do my very best to satisfy you. @Karl, as Greg already mentioned, you could see these red muzzles on many models of that time and also at paintings. Not only at english ships, but also the „Wappen von Hamburg III“ has that future. Lt. Gabriel Bray At least I did't post here for a long time. I got the Corona Bluse, but good luck not the infection. Because the summer here in the northern part of Germany is more or les cold it is much colder in my basement. So I'm fixing this and that at my house and garden, and when the sun is shining I relax in the garden and doing nothing. 😊 So, Mark, you did't miss anything. Stay all sound
.jpg.c2174edcb99e26de4c71bfe8252a00bc.jpg)
-
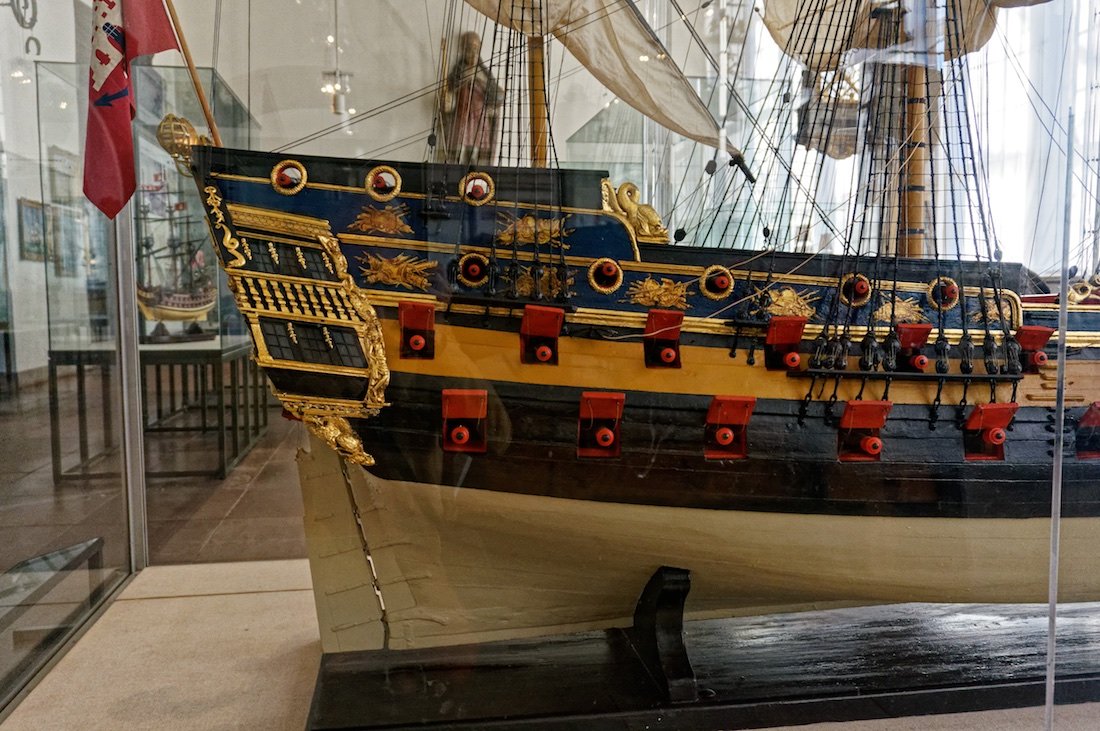
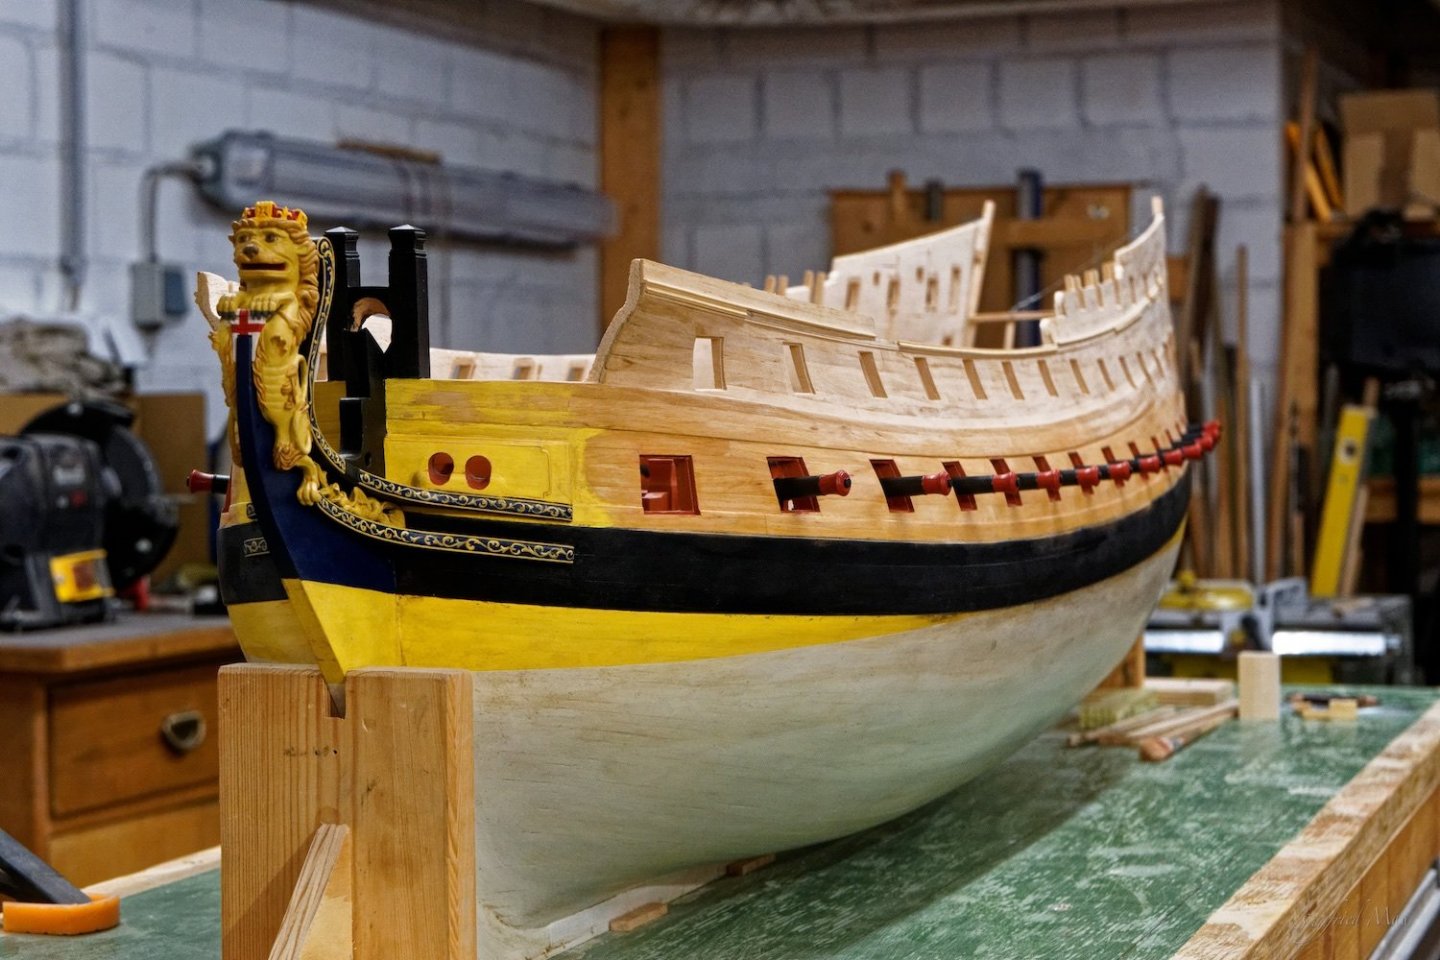
Hello Mark P, that picture with the black spirketting is the model SLR0472, a 60 gunner ca 1745, 1:60. The pictures of the Ajax I think I have from this web site and are may be from you. NMM SLR0311 https://collections.rmg.co.uk/collections/objects/66272.html The Minerva is from the NMM SLR0317 https://collections.rmg.co.uk/collections/objects/66278.html There are a lot more models, but I think you are right, mostly they painted the spirketting red.
.jpg.0eaec969d56a986704a17109938a87b7.jpg)
.jpg.5388cbe60f7b33f52d1955991d04d179.jpg)
-
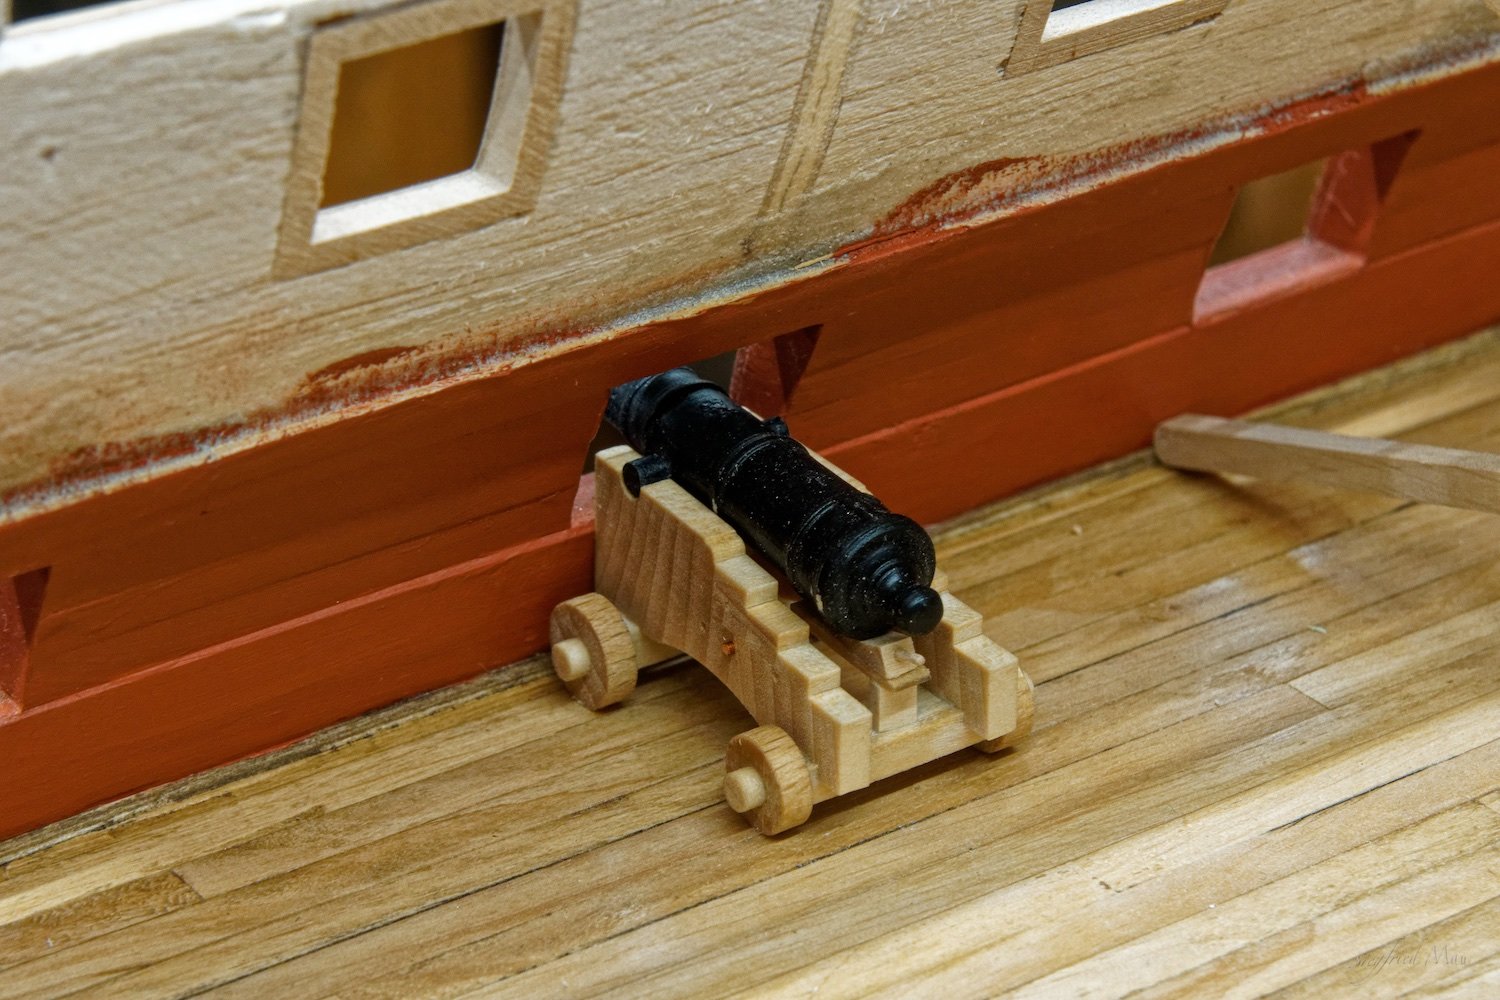
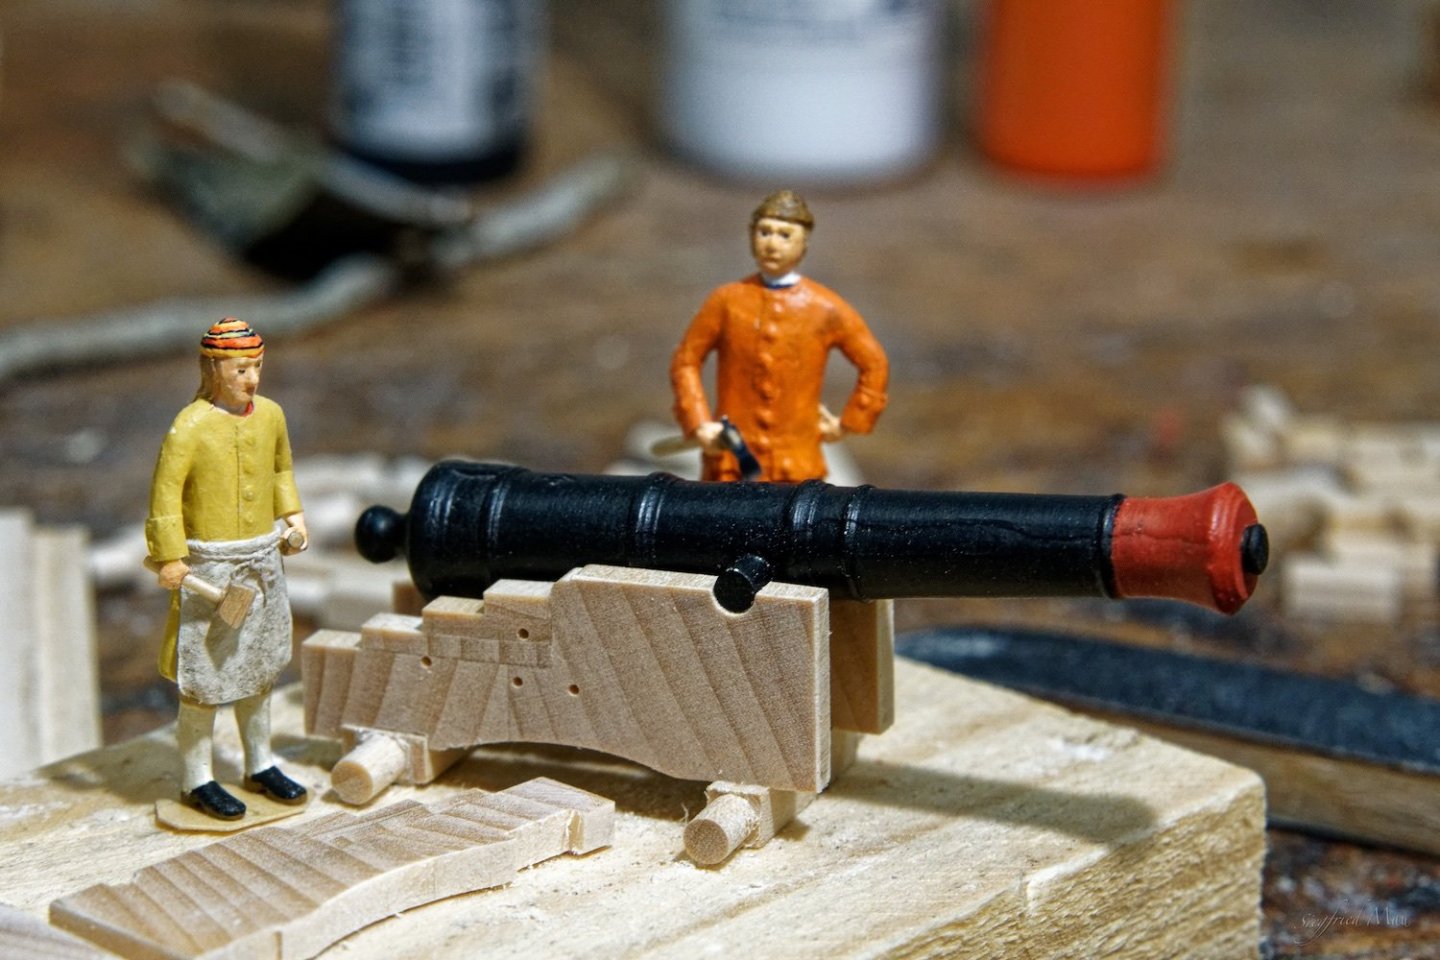
Good morning Mark, I'm not sure, but I think that all these ivory parts where in reality not always white. If you look close at the pictures of the Victory, there the wheels are red! But because you could turn ivory better then wood and it looks pretty good, so they leave it white. And all the wooden parts who where'd painted, where in reality may be ocher painted like the figures at the stern. You have to paint wood that is exposed to the sunlight to protect it.
-
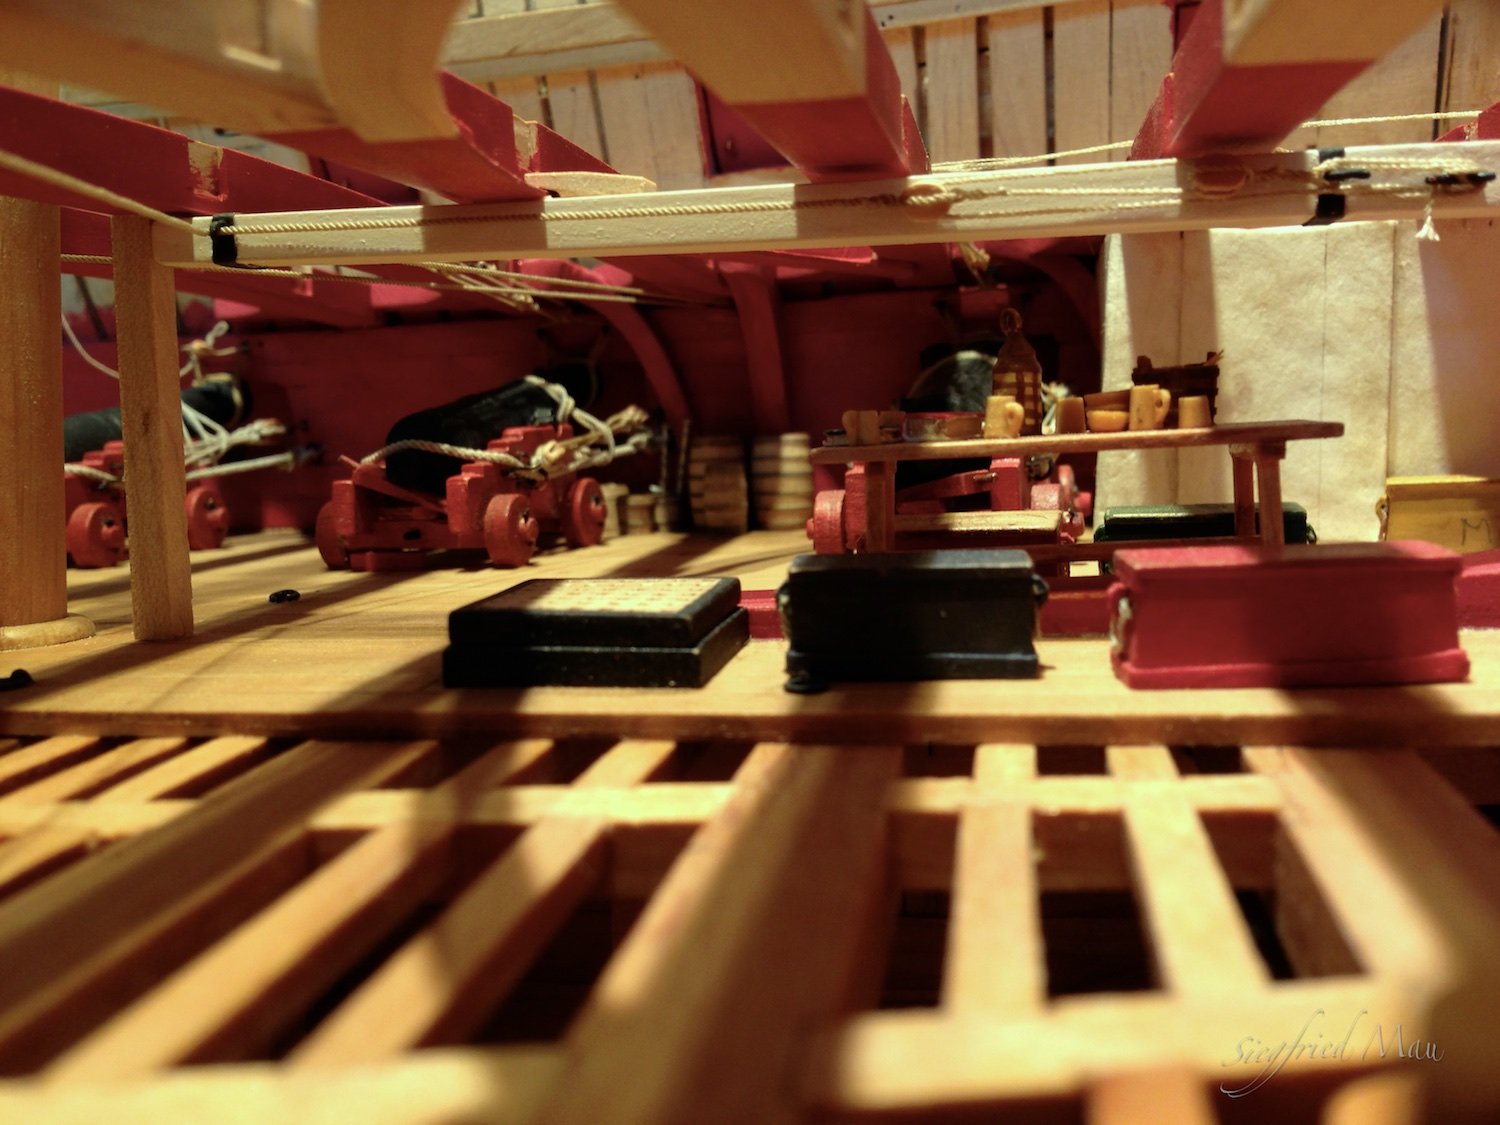
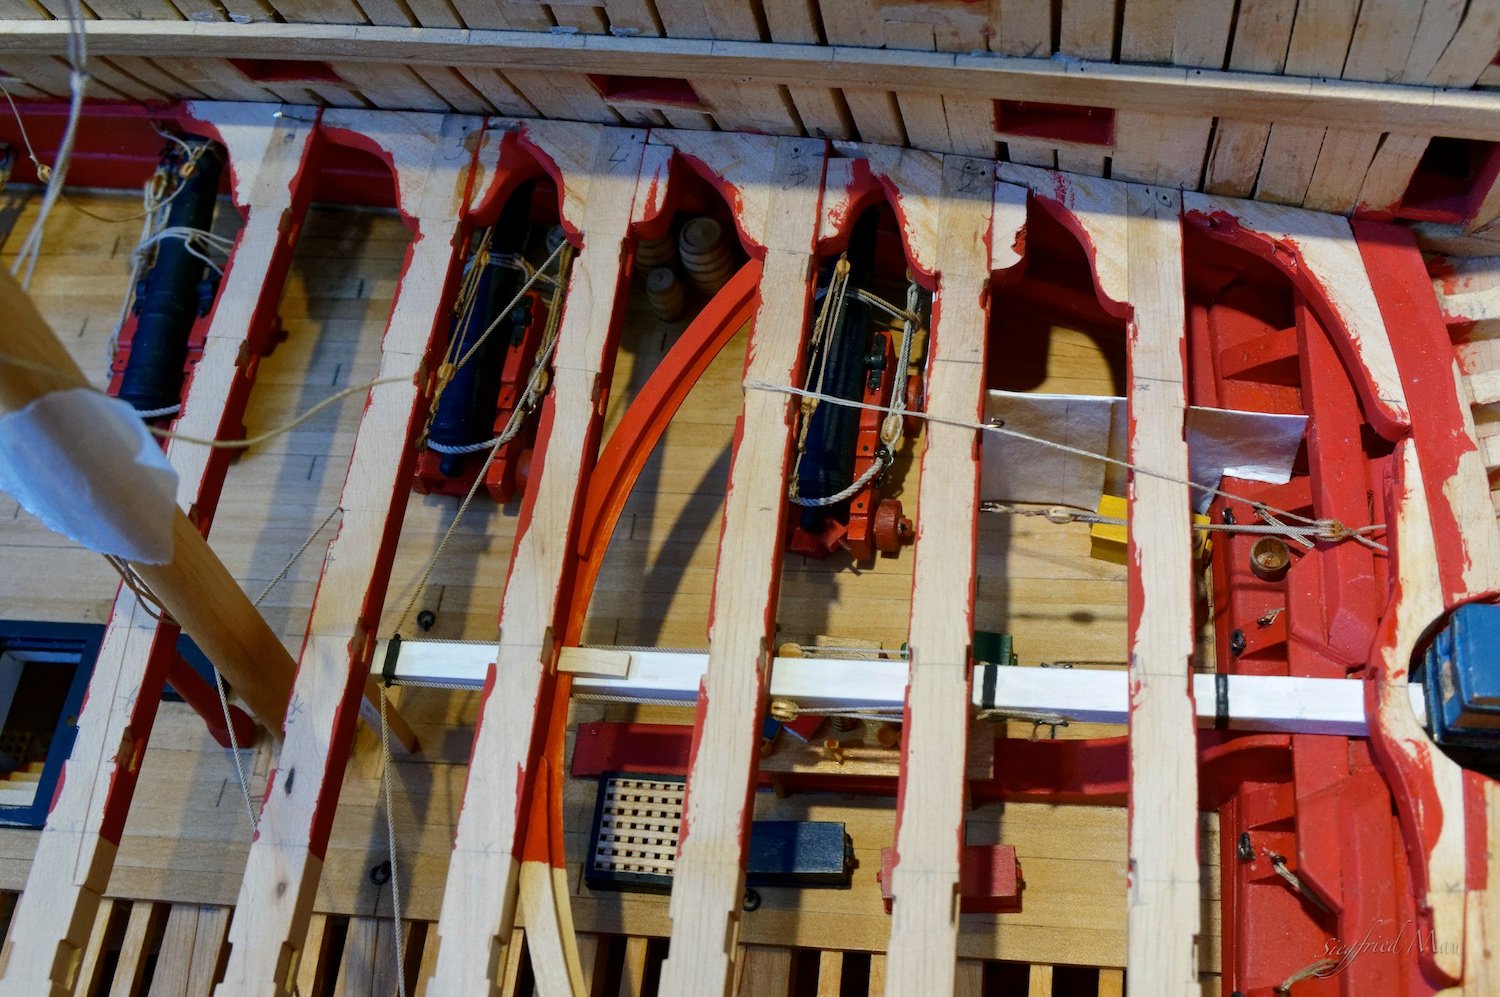
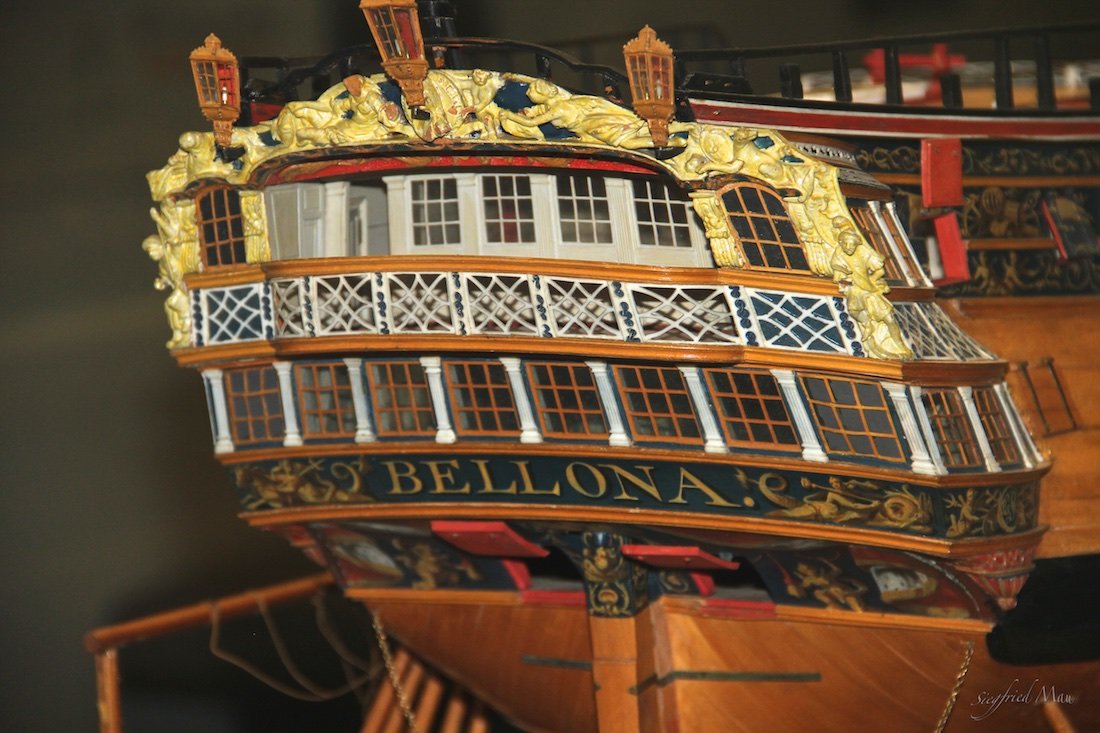
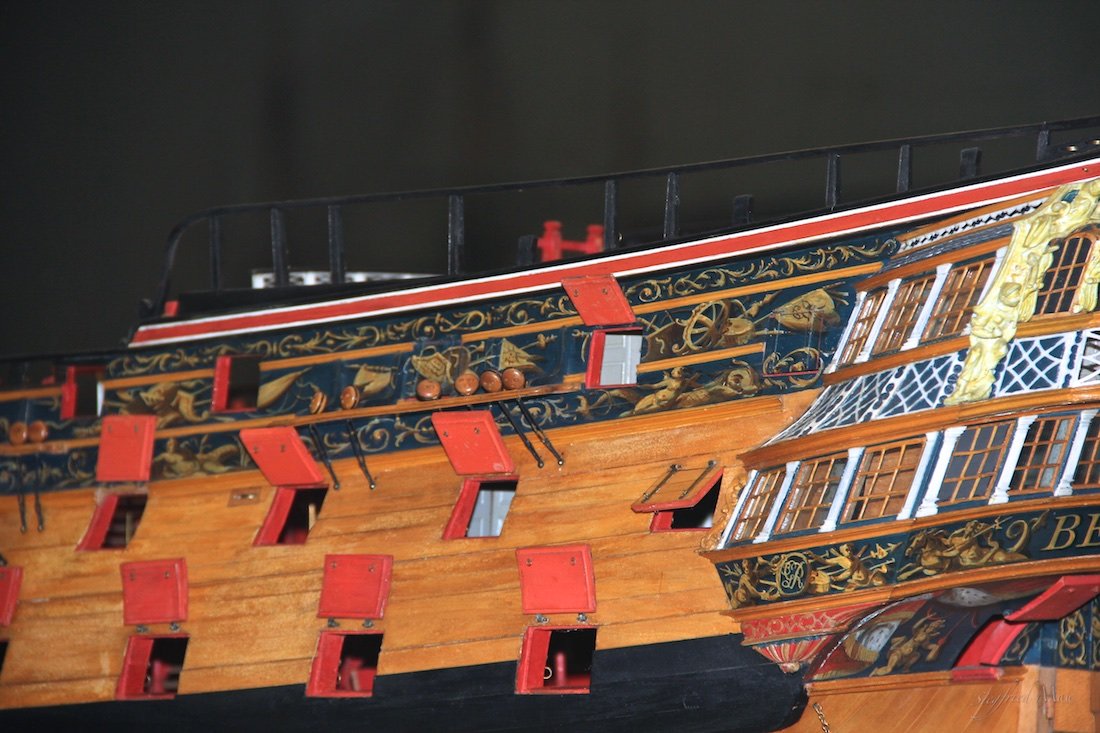
Hello, Mark, the officers quarters at the upper deck and the captains cabin where painted white at the Bellona. I thought that I send you all my pictures I have of the Bellona! Here you could see it also at the deck beams. That light blue or green color was very popular during the 18. century and even before and later. The color I used for the Dragon is from Humbrol „Matt 65" A good example for colouring a ship is the Victory model SLR0512 https://collections.rmg.co.uk/collections/objects/66473.html Here you could see the whole middle deck is painted white inside, the cabins at the upper deck are blue and at the quarter deck green. The spirketting you could see is black and the planking above it is red. The last thing you could see at many models like the Ajax, Warrior, Minerva and the model SLR0472 I saw at Chatham. So it is not very unusually.
-
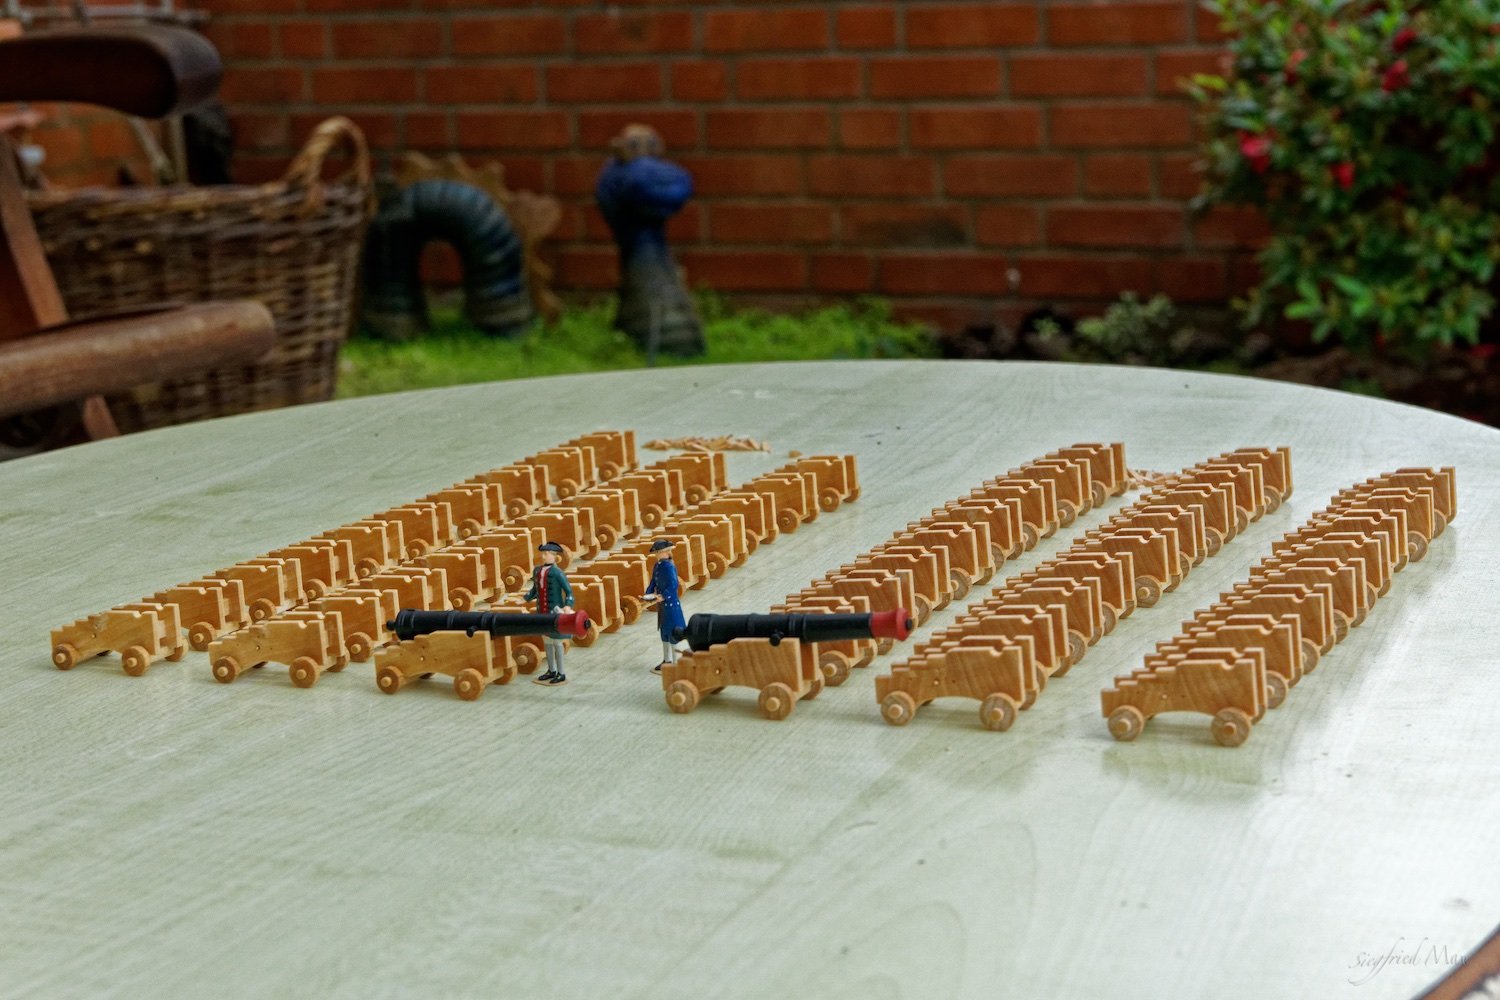
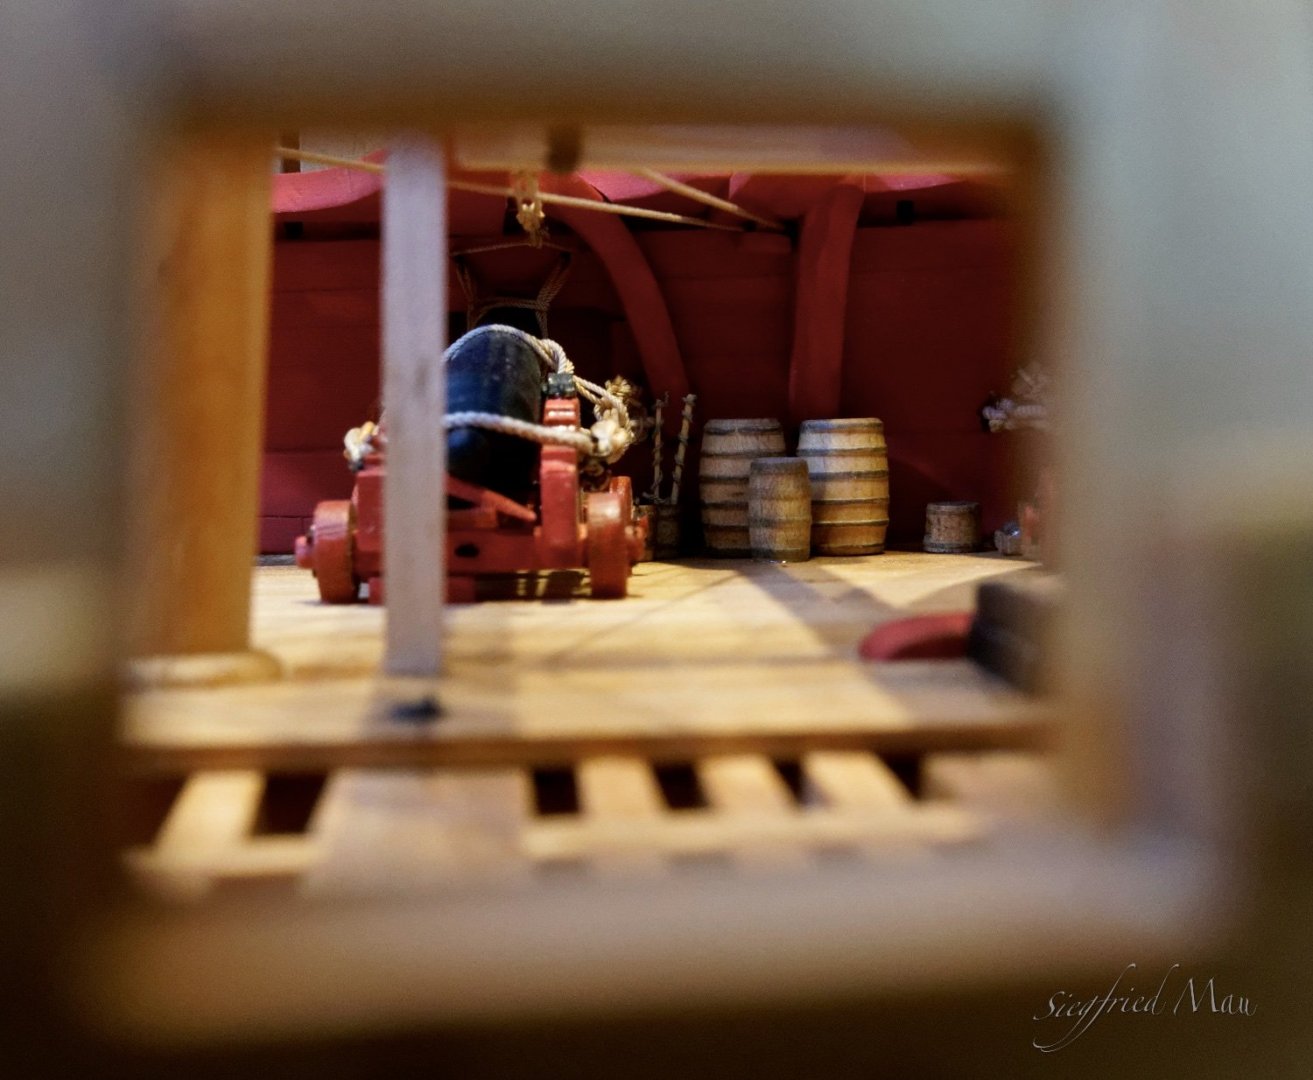
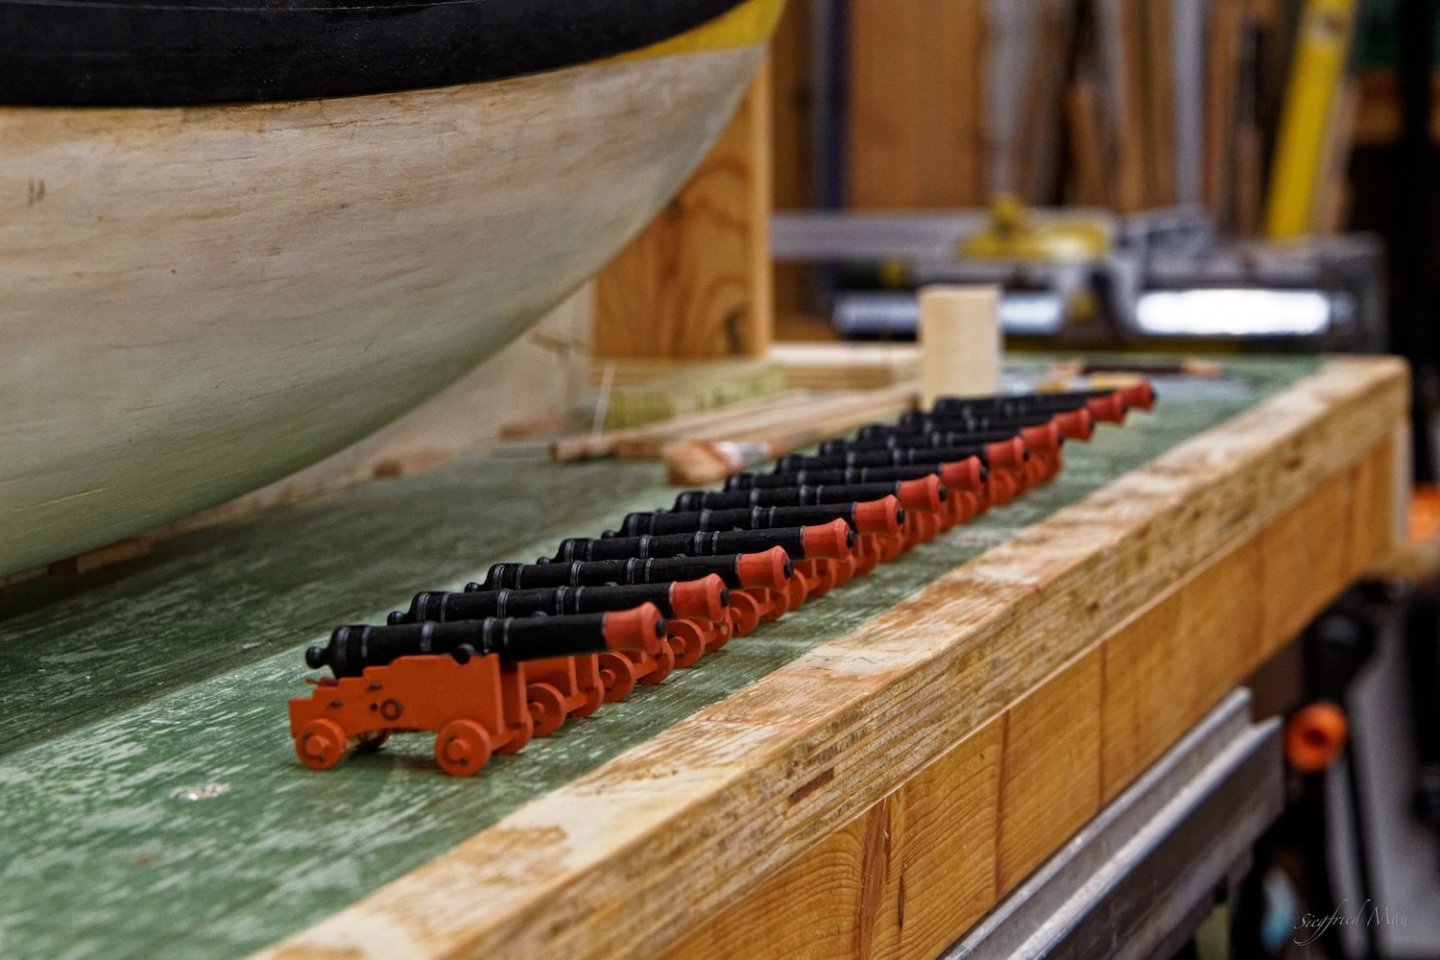
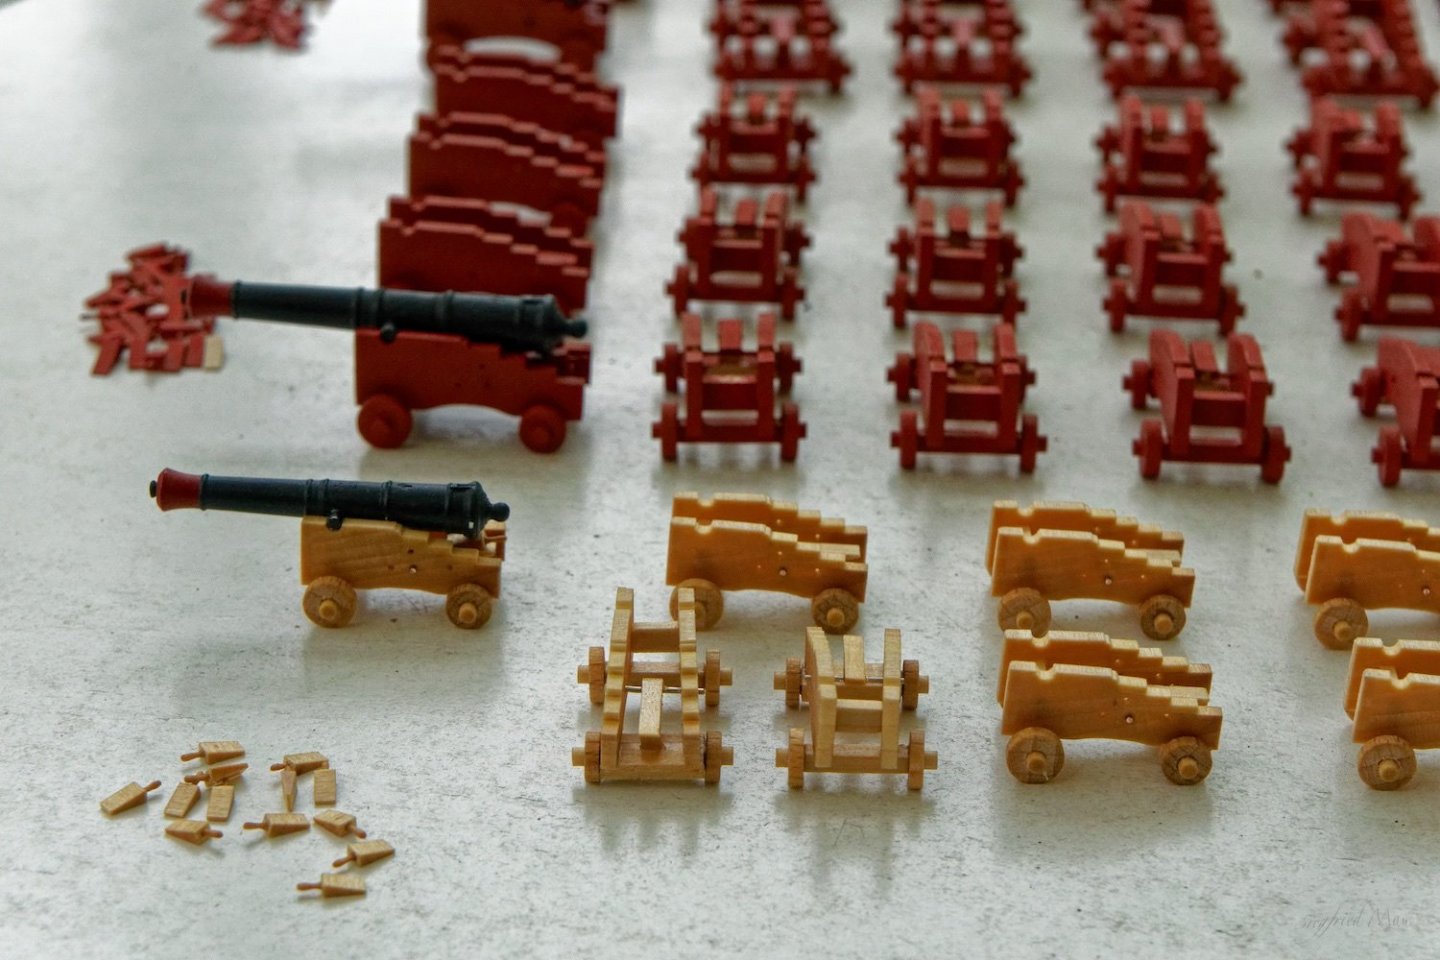
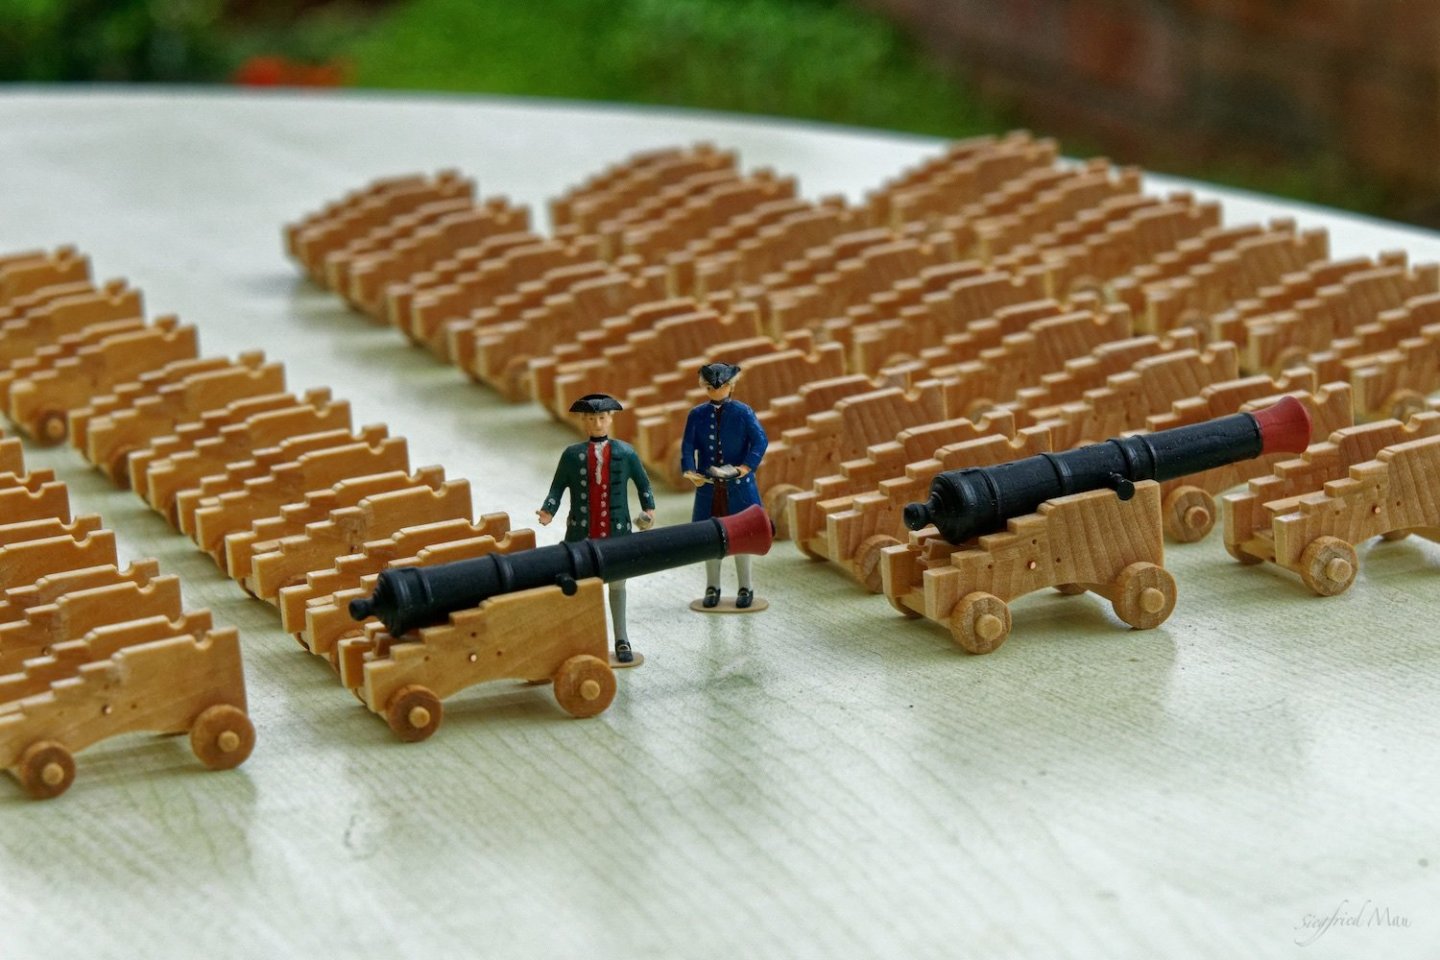
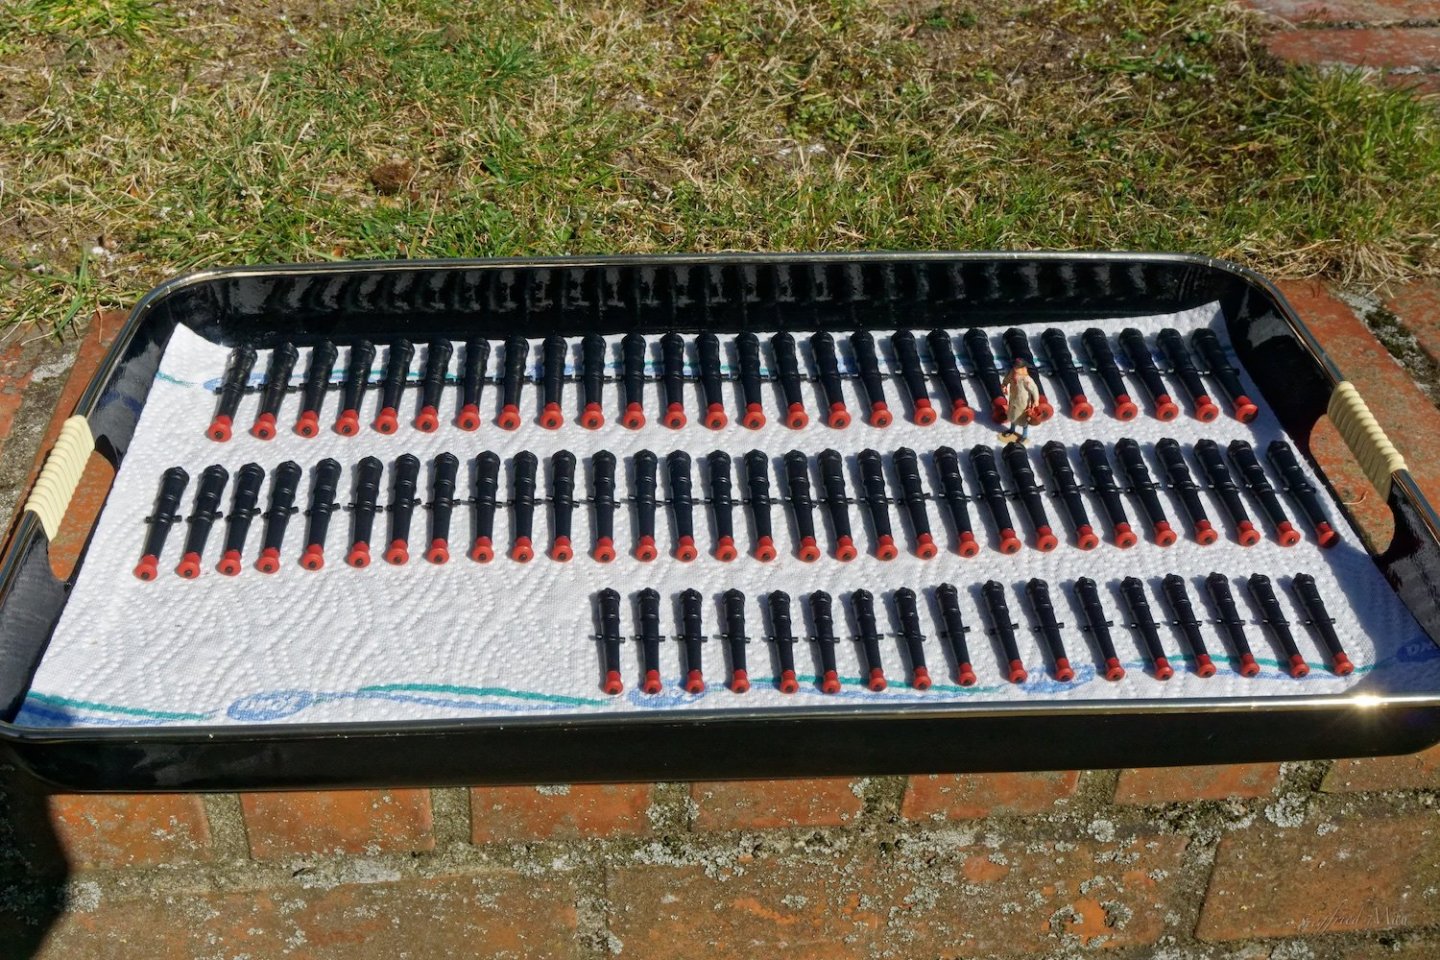
Hello and many thanks for your likes, it is done, all cannons are ready! Here they are all together at the gun deck, or at least there carriages. And that they are I have one question to an administrator. Did you change there something with the likes? They did't turn up in my notifications. There are now only the comments listed. The last time I have much trouble to open this site, I think because of too much traffic when in the US starts the day now in the Corona time. So some times I shut down this site when it was't open correctly. It takes sometimes up to 10 minutes with a traffic of 1-5 KB/s. 🤨 Many thanks in advance


-
Hello and many thanks for your likes and comments. today I finished the 12 pdr's. Because the deck is't ready, I can't install there barrels. But the two extra guns are ready for display. Now only the dozen 6 pdr's are left. 😃 And that are the carriages for the guns of the ship. That was a lot more work than expected.
-
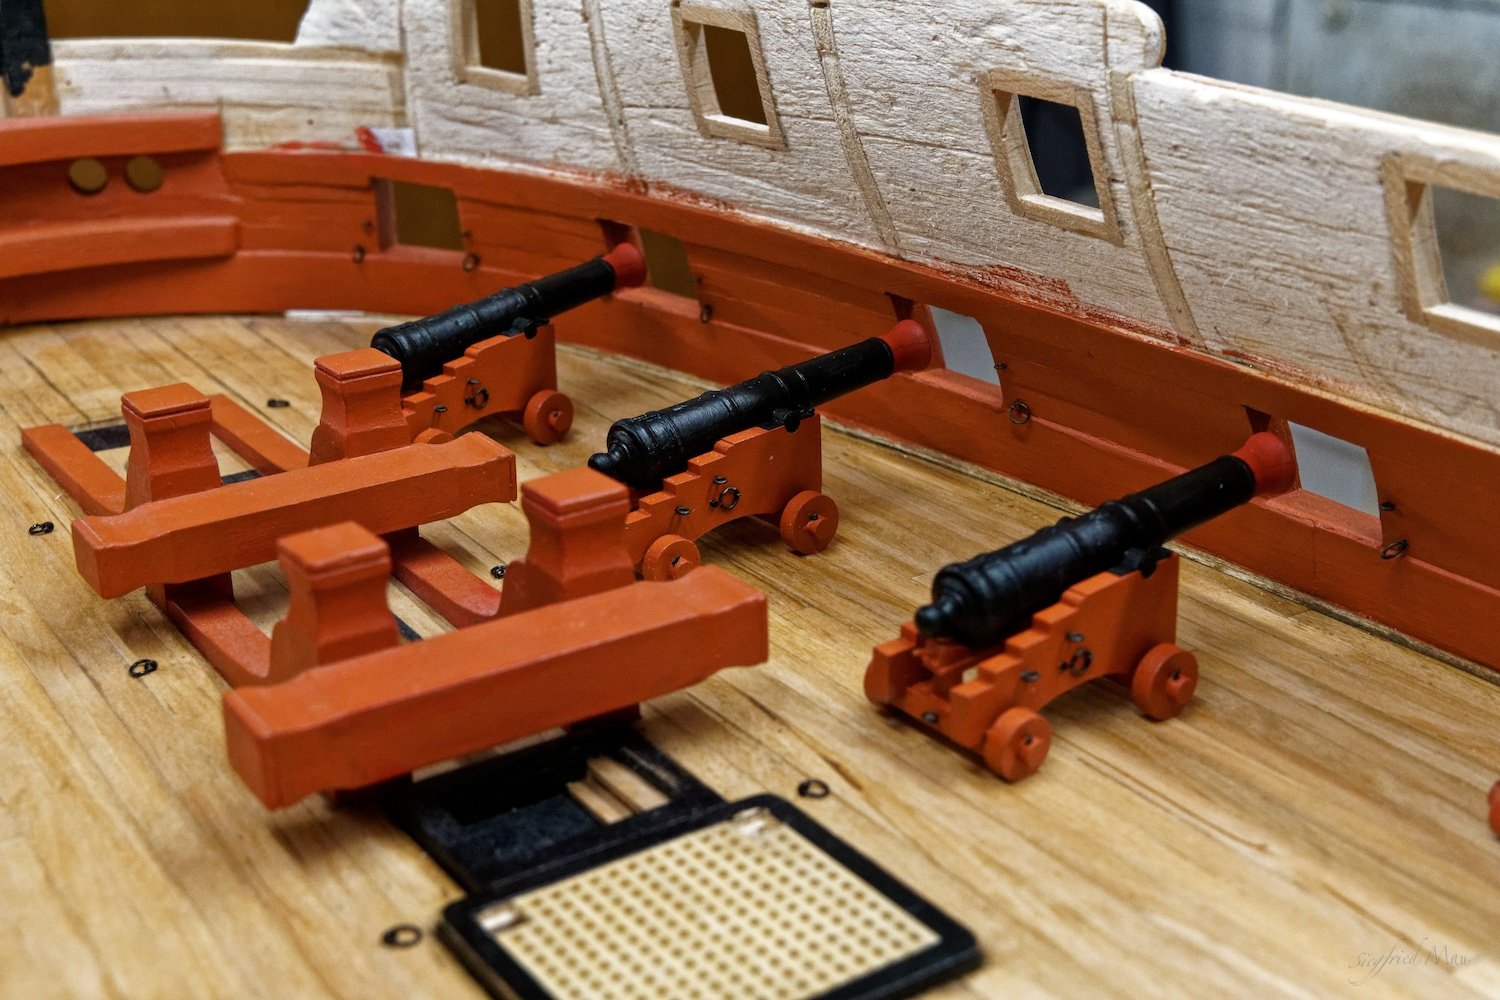
Hello, and many thanks for your likes and nice comments. That encourage me a little more to build all these tiny little eye- and ring bolts. It is done, the gun deck is fitted with cannons. Next I will build all the other cannons more or less ready. Then all cannons could go back into there garage and wait until there permanent installation.


-
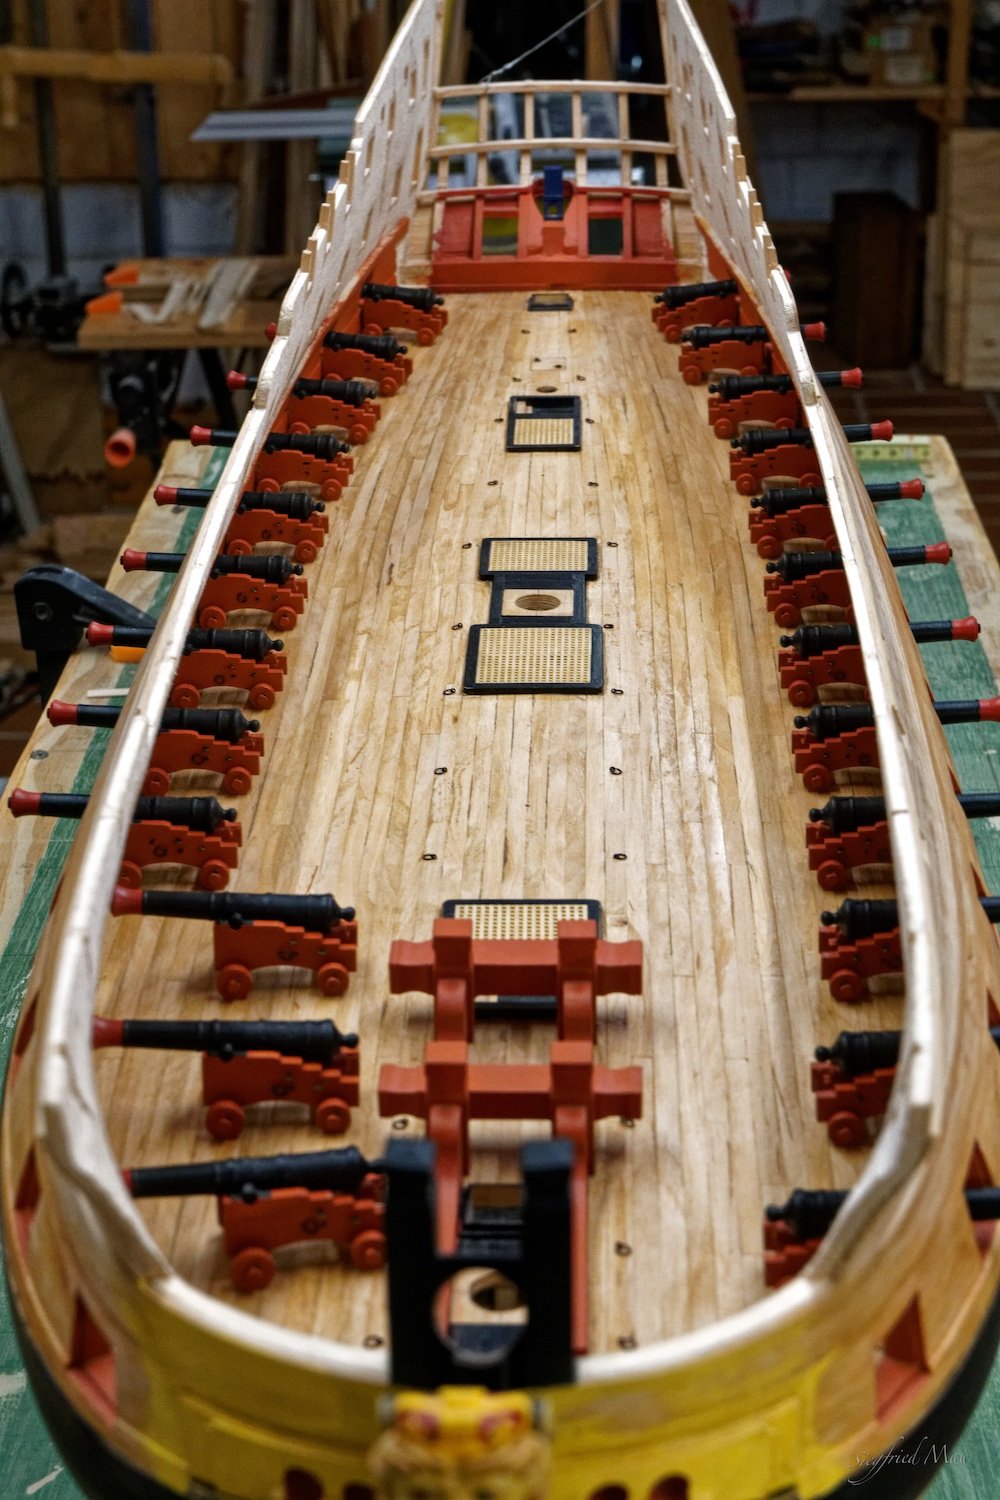
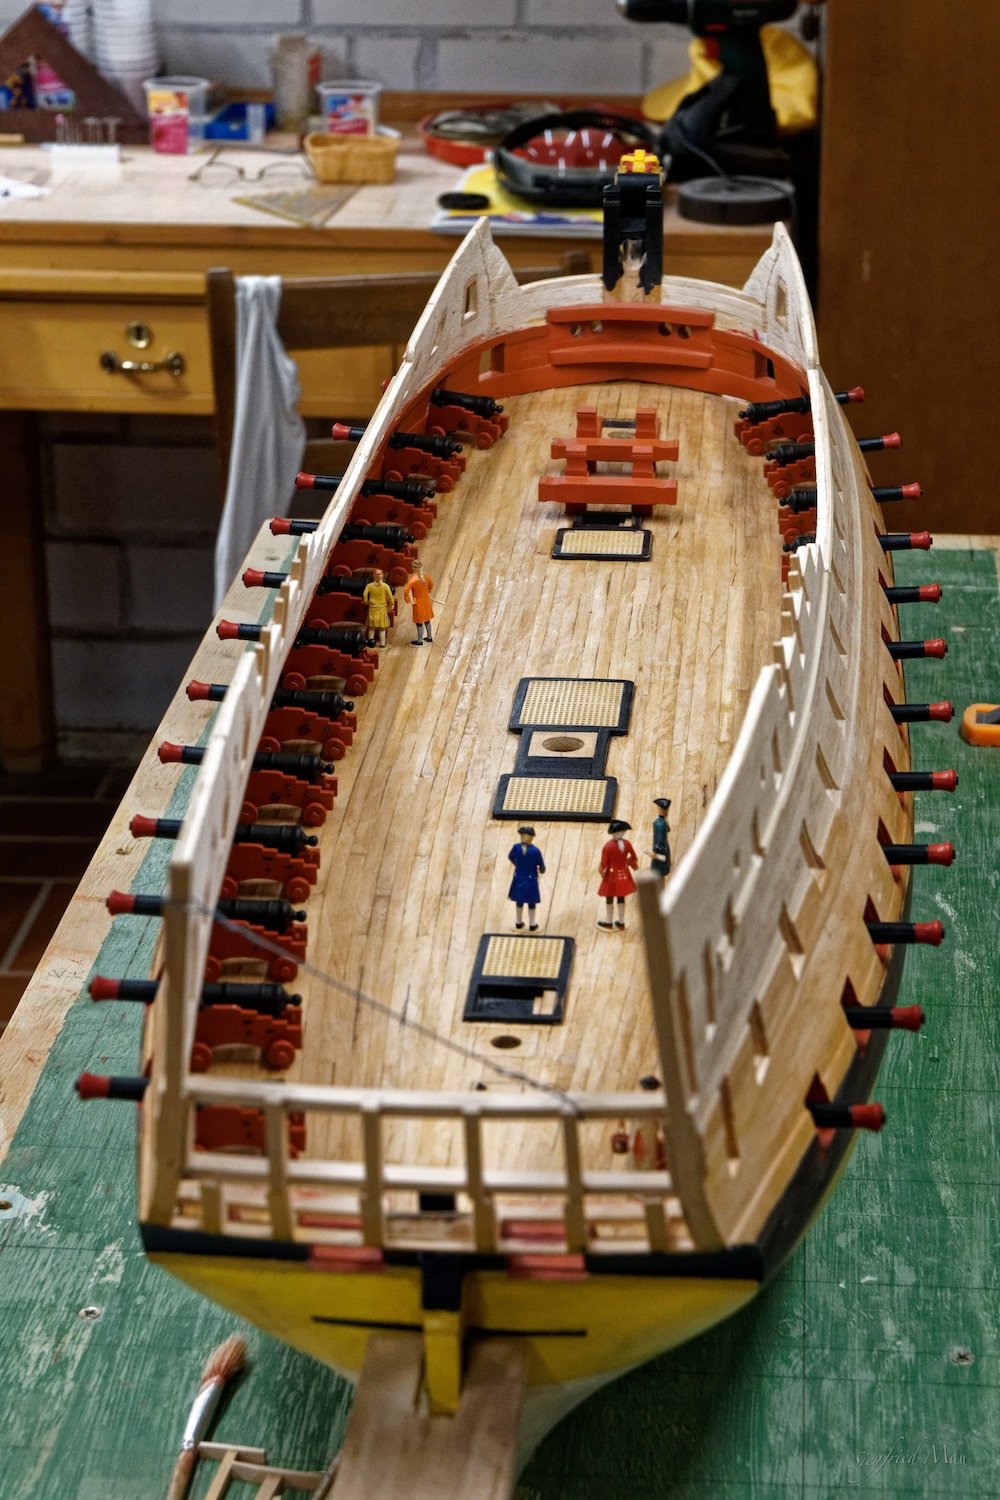
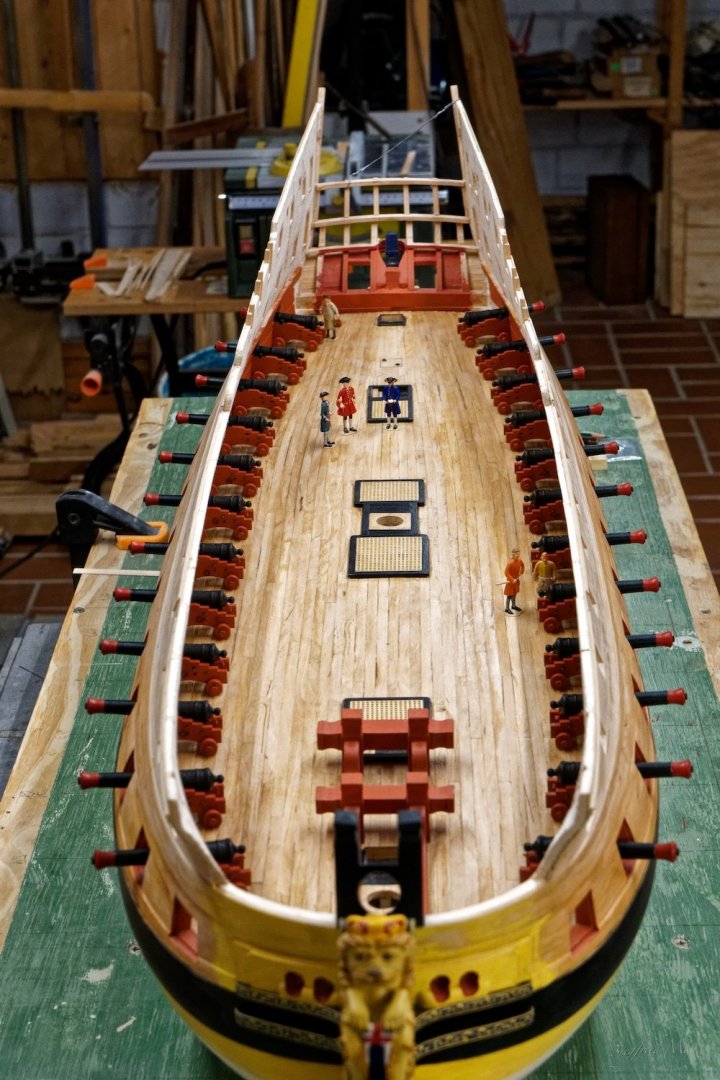
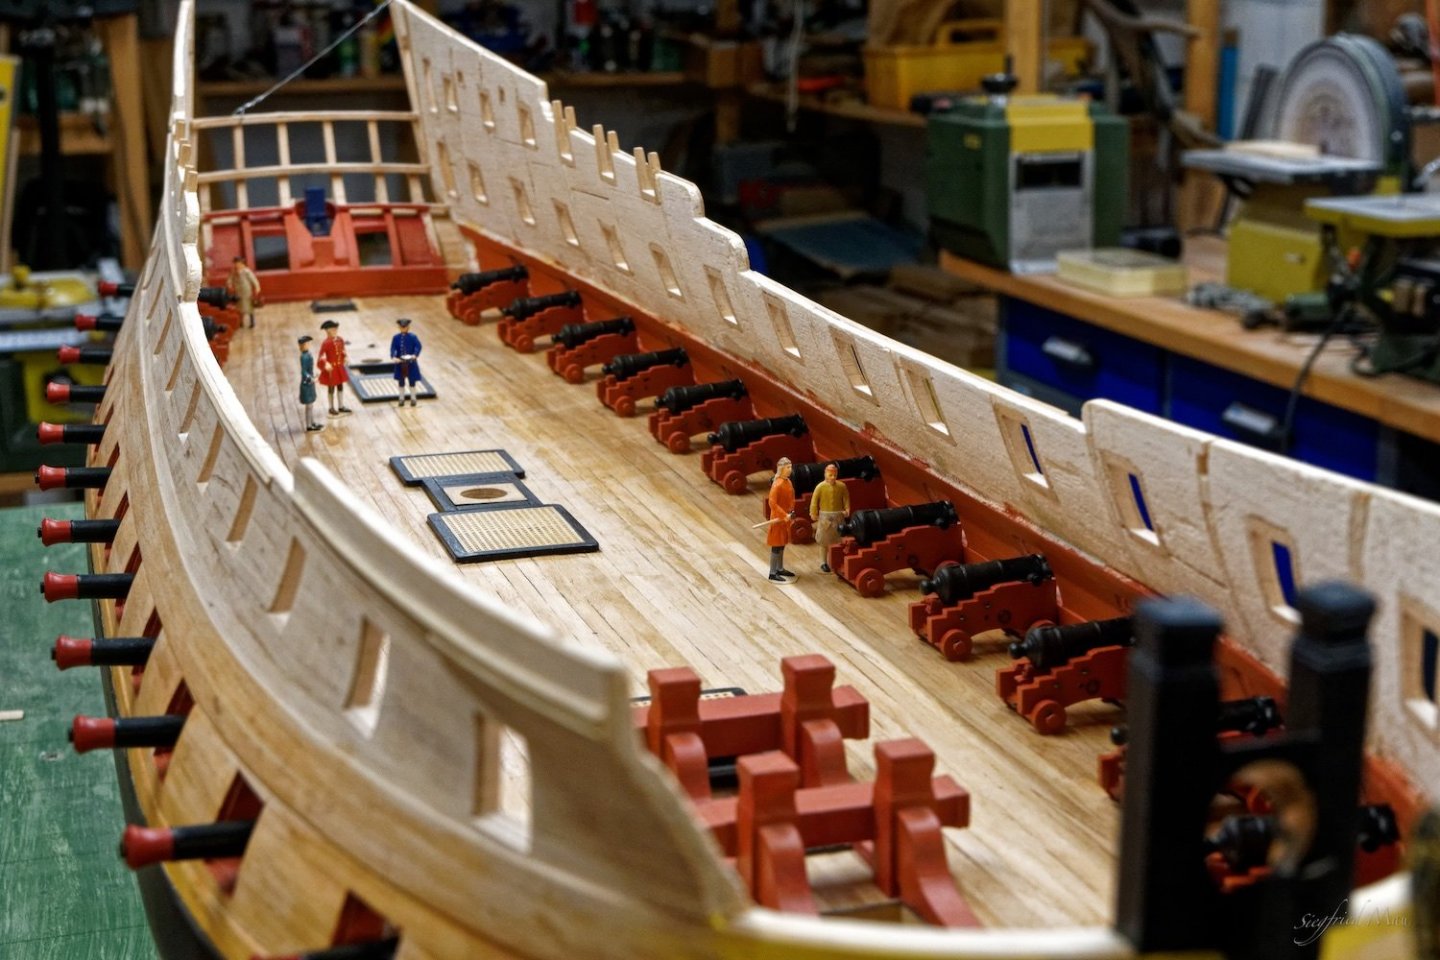
Hello and thank you all for your likes and comments, today, the gun deck got his guns 😊 To get all at the same high and that they are The port side guns, from my mothers side I'm Prussia And here they are on board. The decks where very curved in those days

-
Hi Mark, and if you make the spear from metal. I read, I think in Old Ship Figure-Heads and Sterns, that at some ships they removed all things from the figure head who could get lost by a heavy sea. Even arms!
-
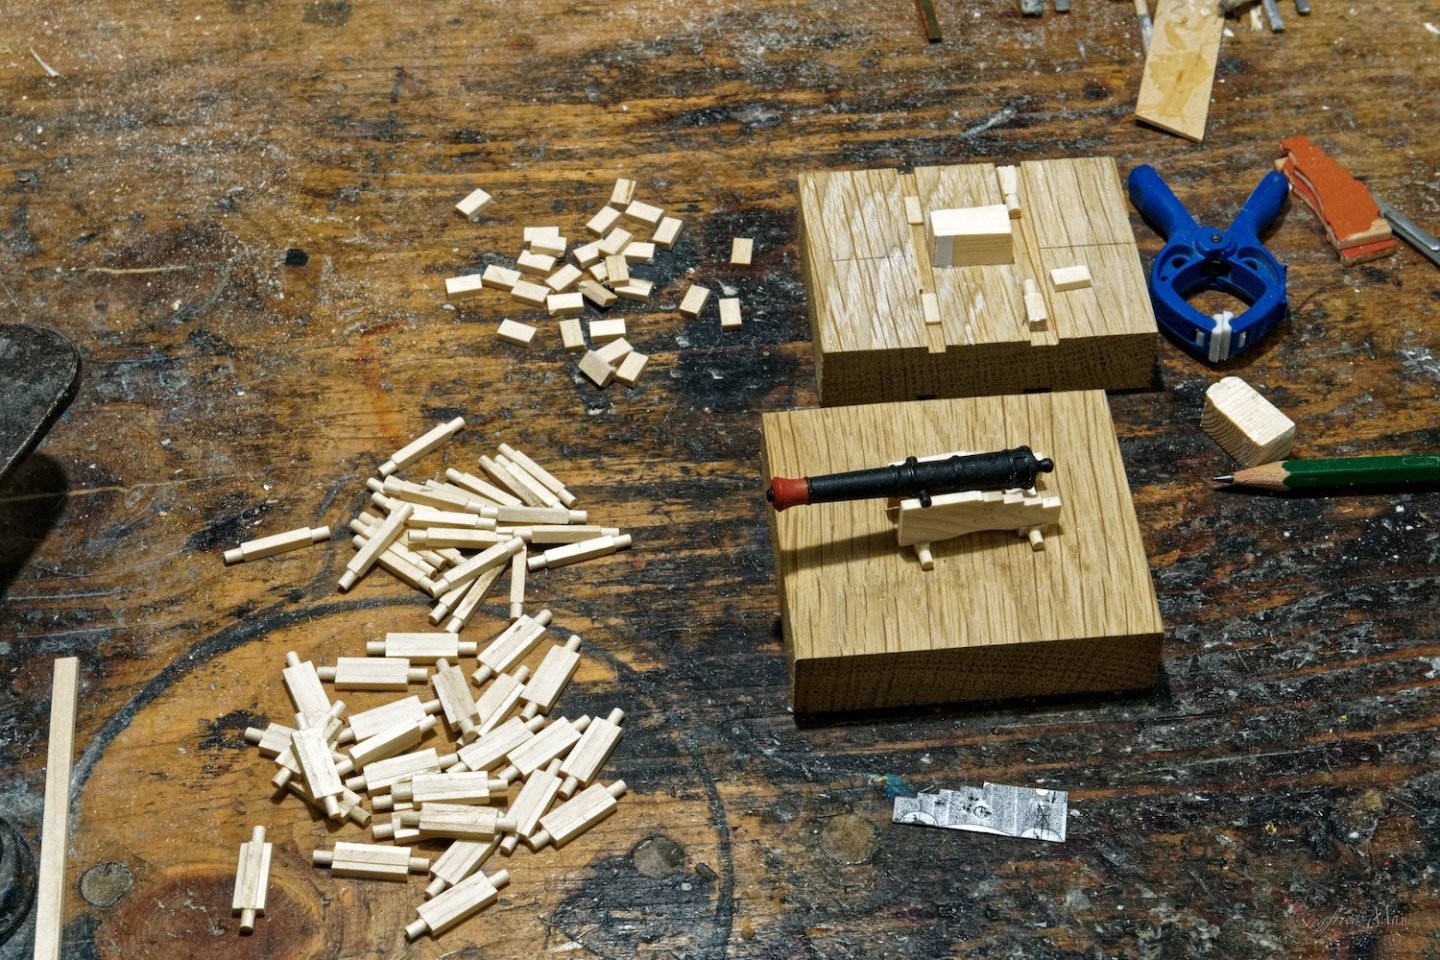
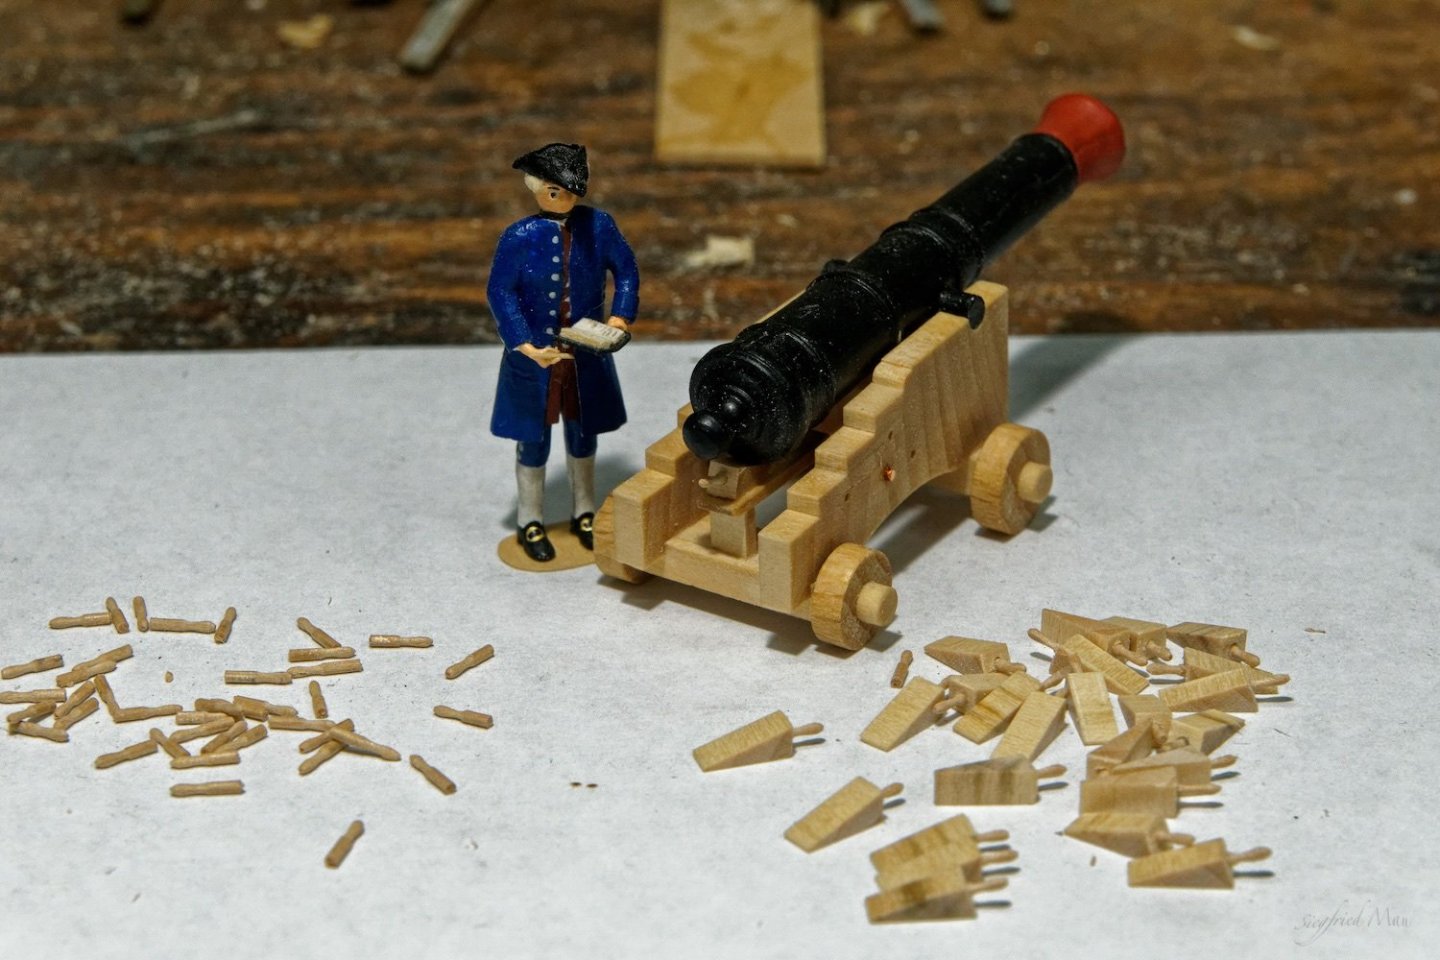
Hello and thank you for the many likes and comments, yesterday and today I was busy bending eye- and ringbolts. That is not my world, mass fabrication and this is just the beginning 😧 But here the first results. For the gun deck I would't fitting out more cannons with these bolts, because you would't see them later. But I have to install at least the bolts for the ship.
-
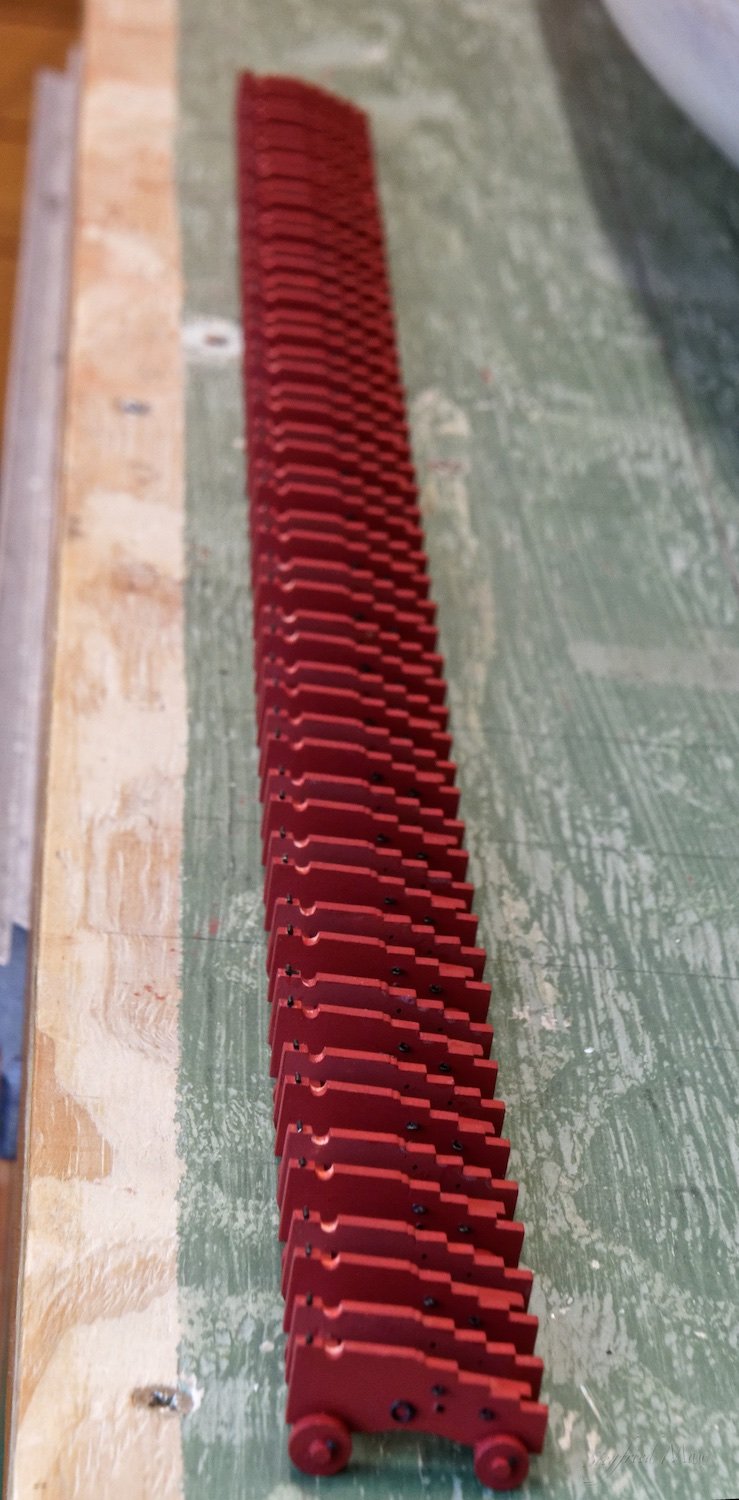
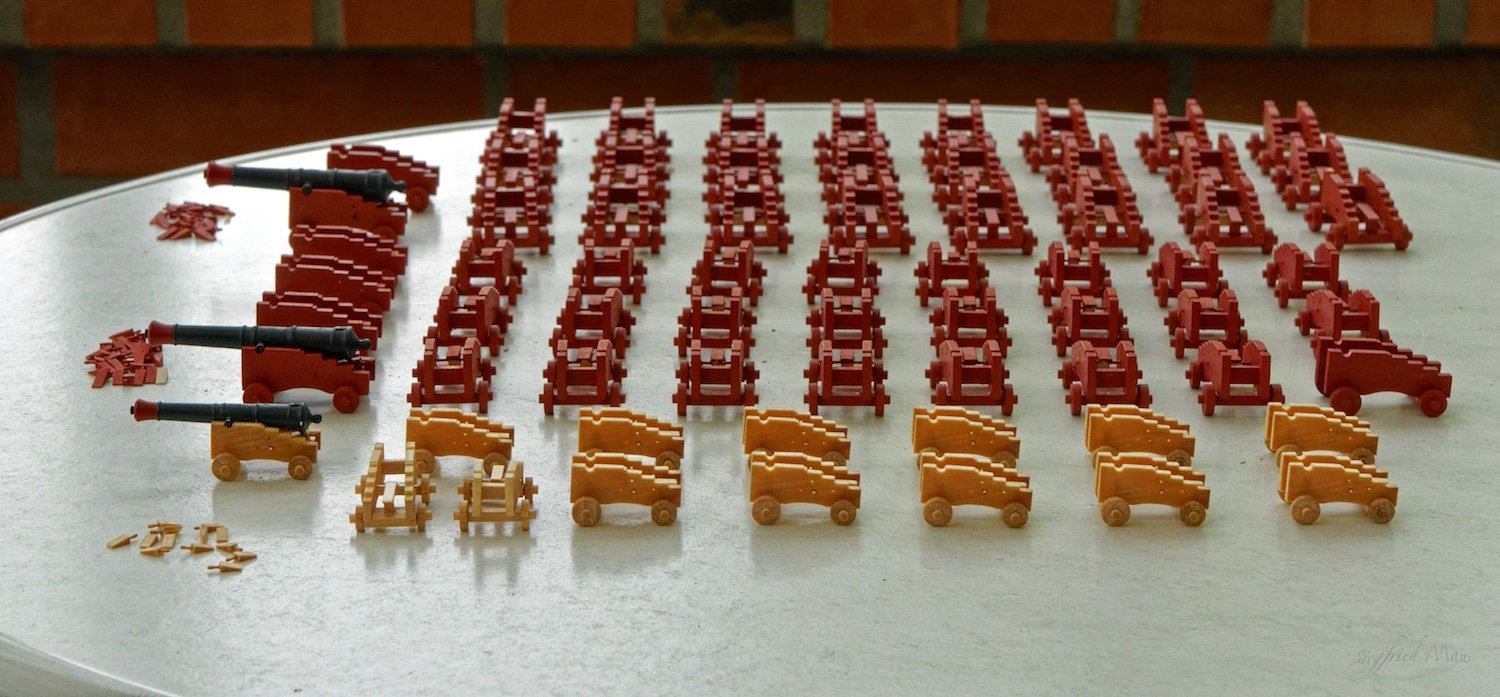
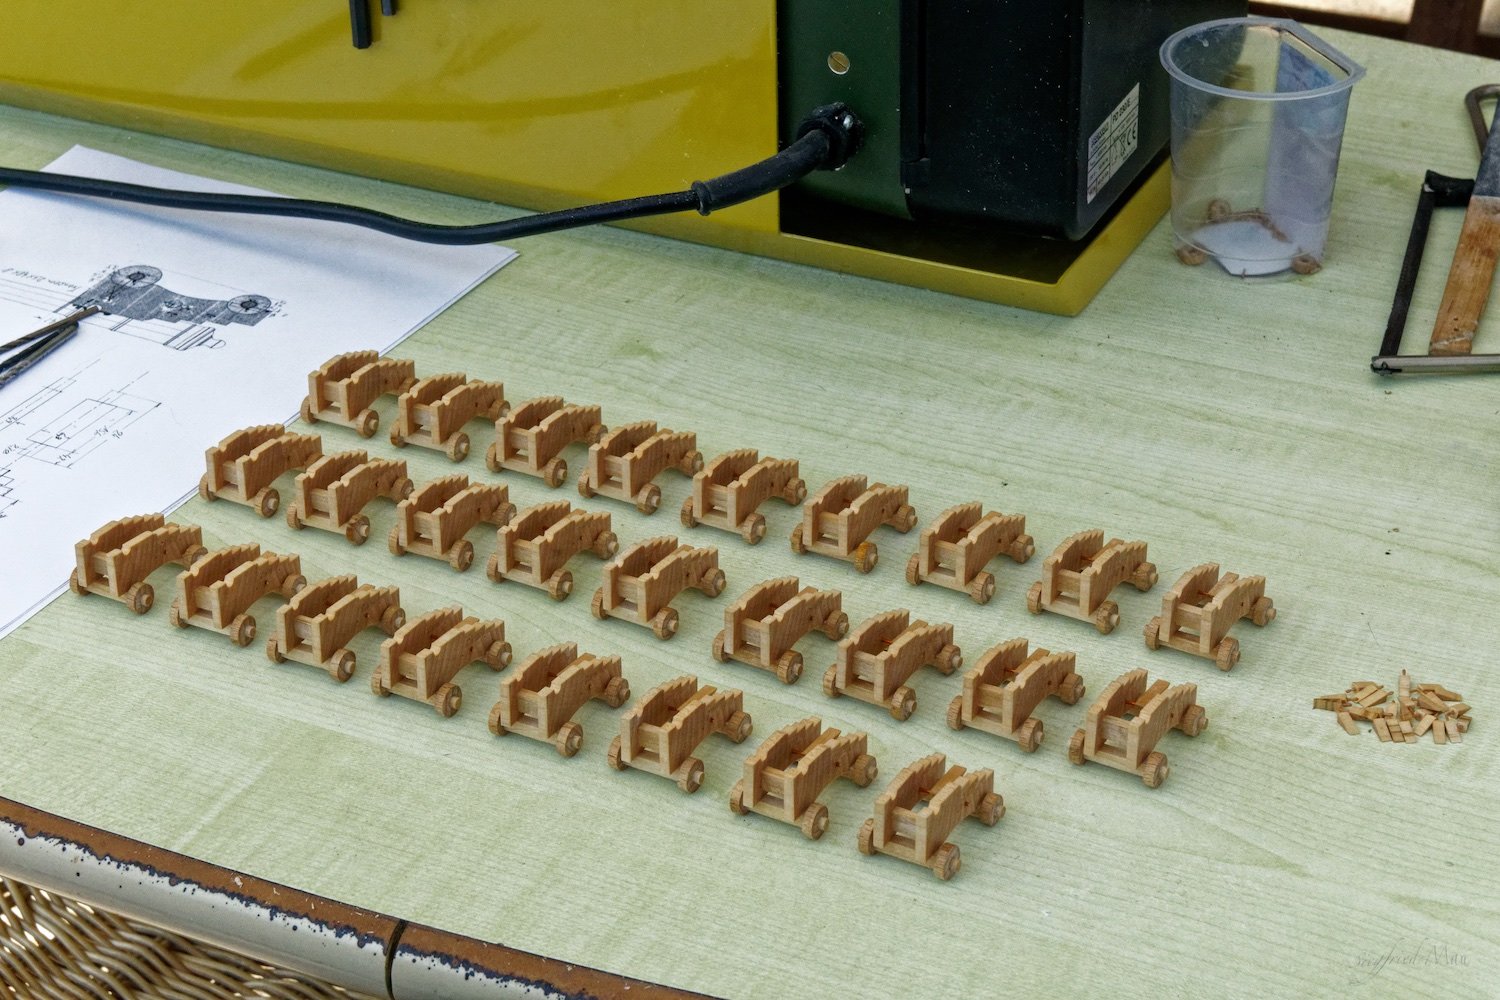
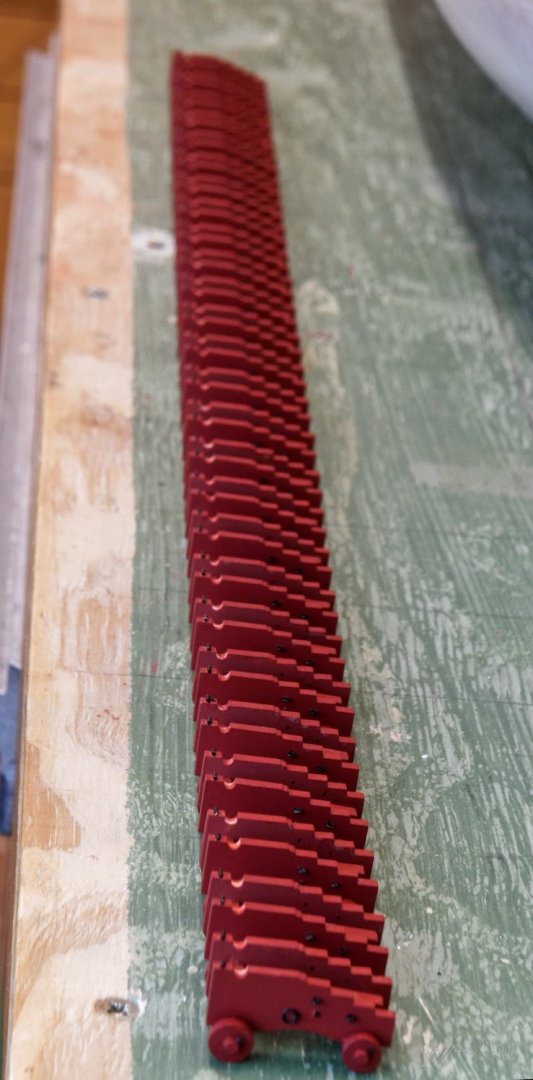
Hello and many thanks you for the likes and comments, it is done. At least all carriages so far ready. If you count them, I made two extra of every size. The next thing will be to made all the ring- and eyebolts.

-
Hello and thank you for the likes and comments, today I finished the carriages for the 12 pdr. The master shipwright was very pleased. Now only the dozen 6 pdr's are left. 😀 But after that comes the paint job and all the hardware 😟

-
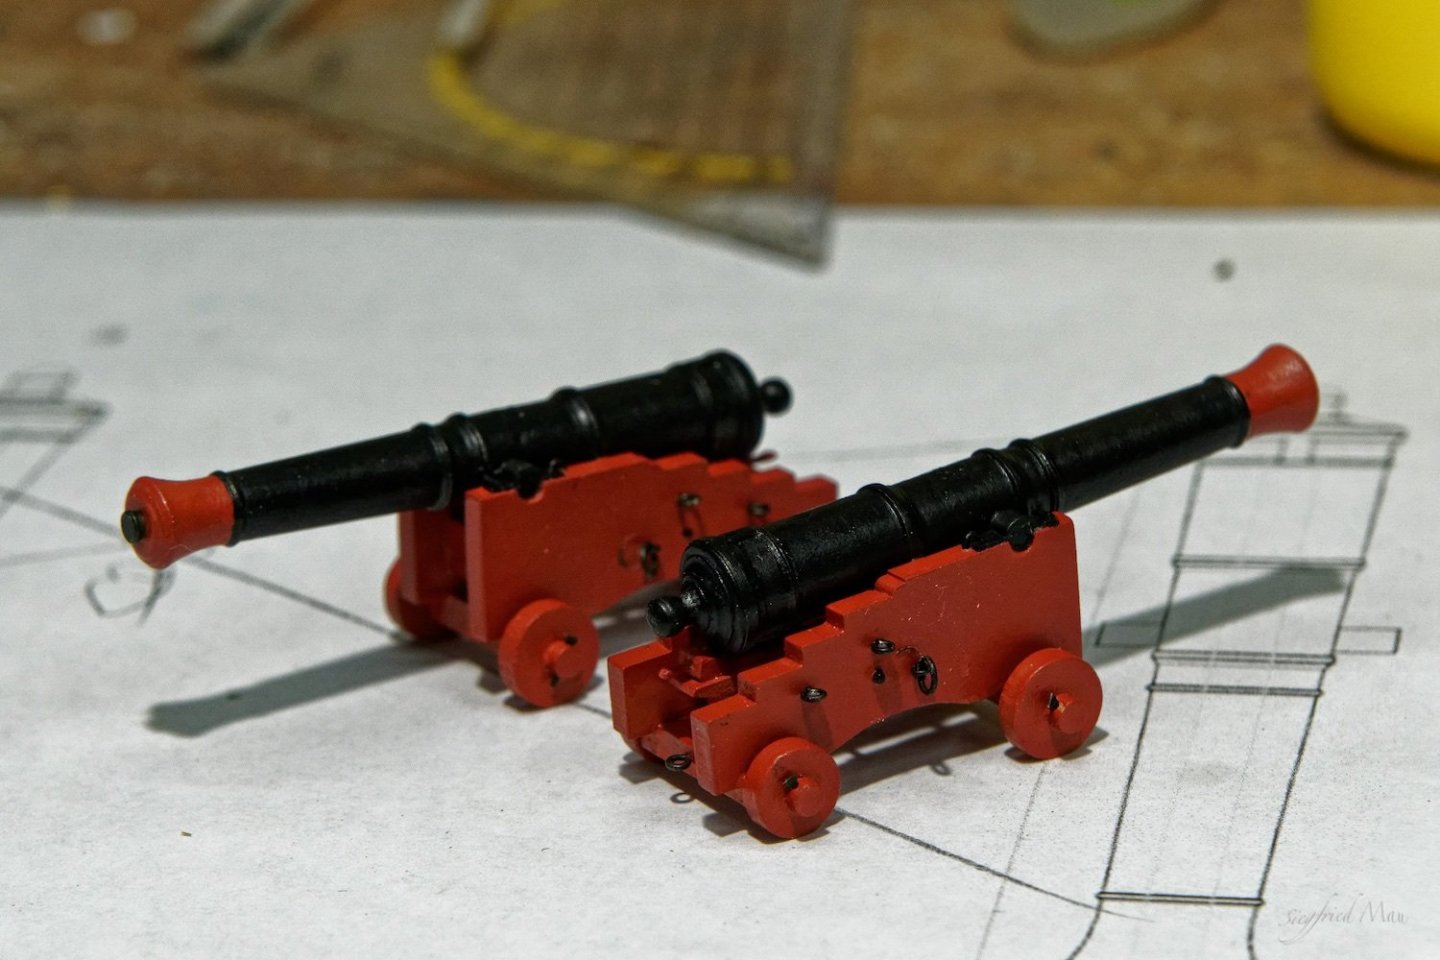
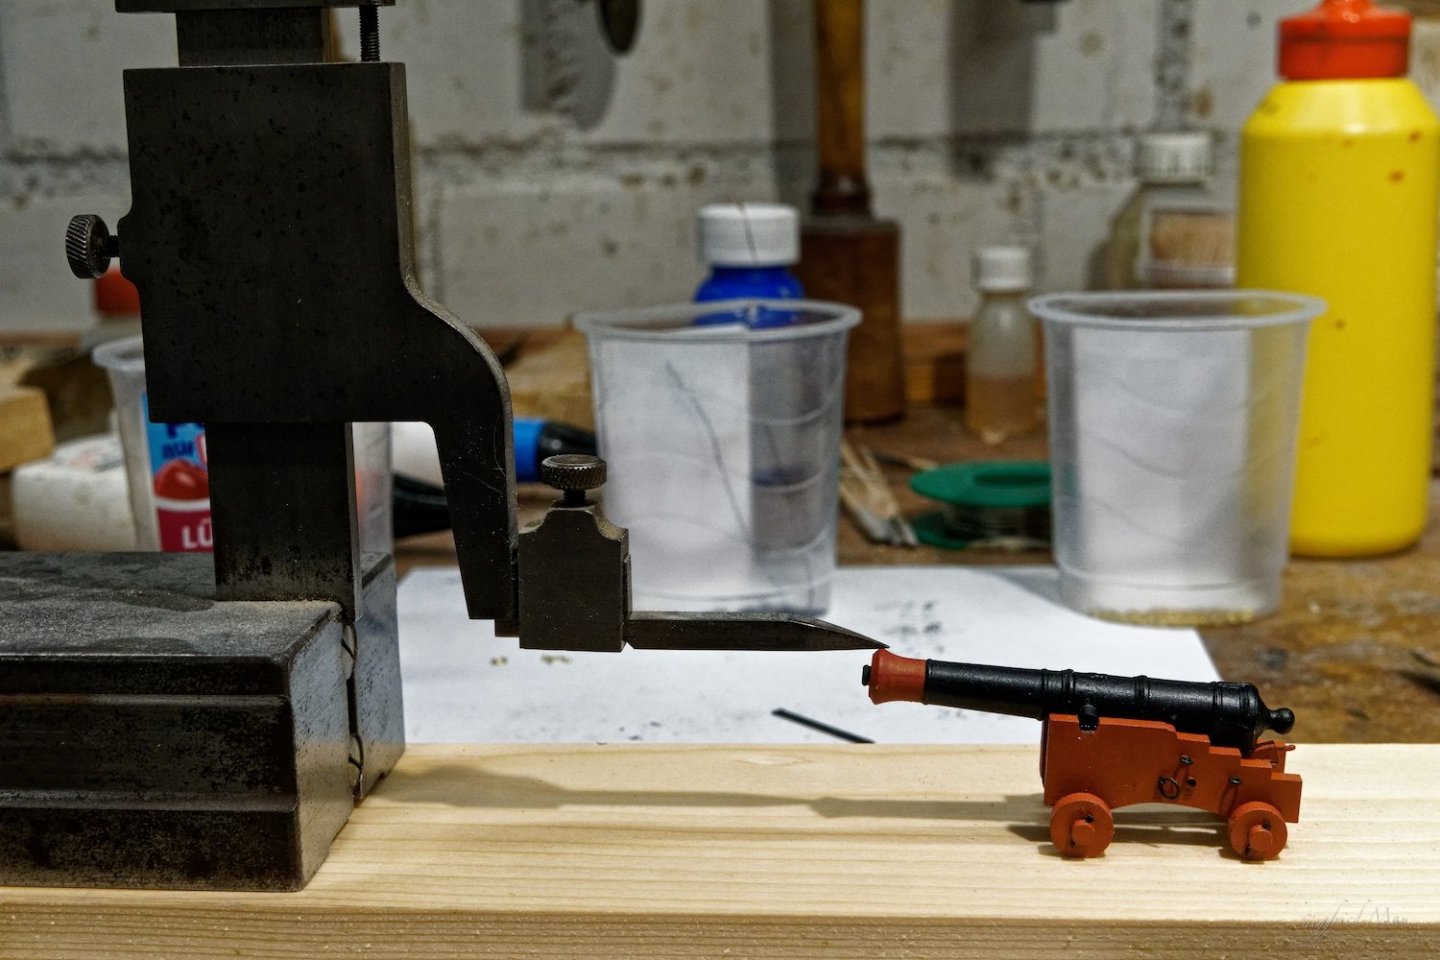
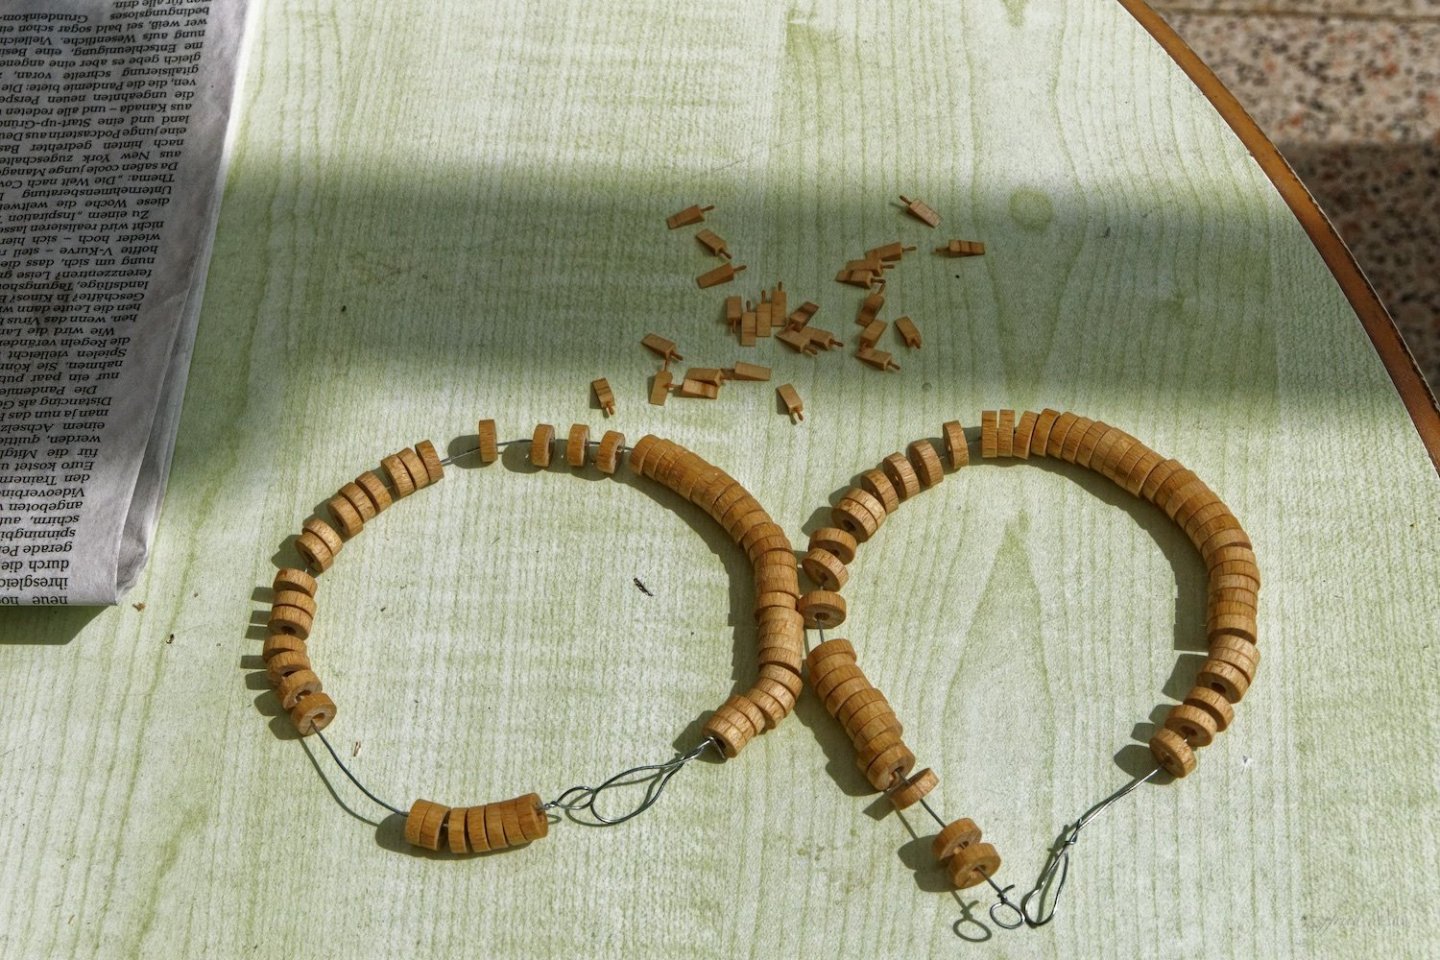
Hello and many thanks for your likes and comments @Learner, please do not make it toooo thick. I do not know so much and then only about ships from the middle of the 18th century. 🤥 I'm back in the basement, it's raining here! 27l/qm yesterday, wow. Next week I have to mow my lawn for the first time this year. But back to the arsenal. I turned the wheels for all cannons and made the axles for the 12 pdr. That is not my world, mass production. Just that I say it now, I do NOT rigg the cannons! Most of them you would't see at all. But here some pictures from today. All the sides, the axles, transoms and the wheels. And one assembled cannon, the rest will follow tomorrow.


-
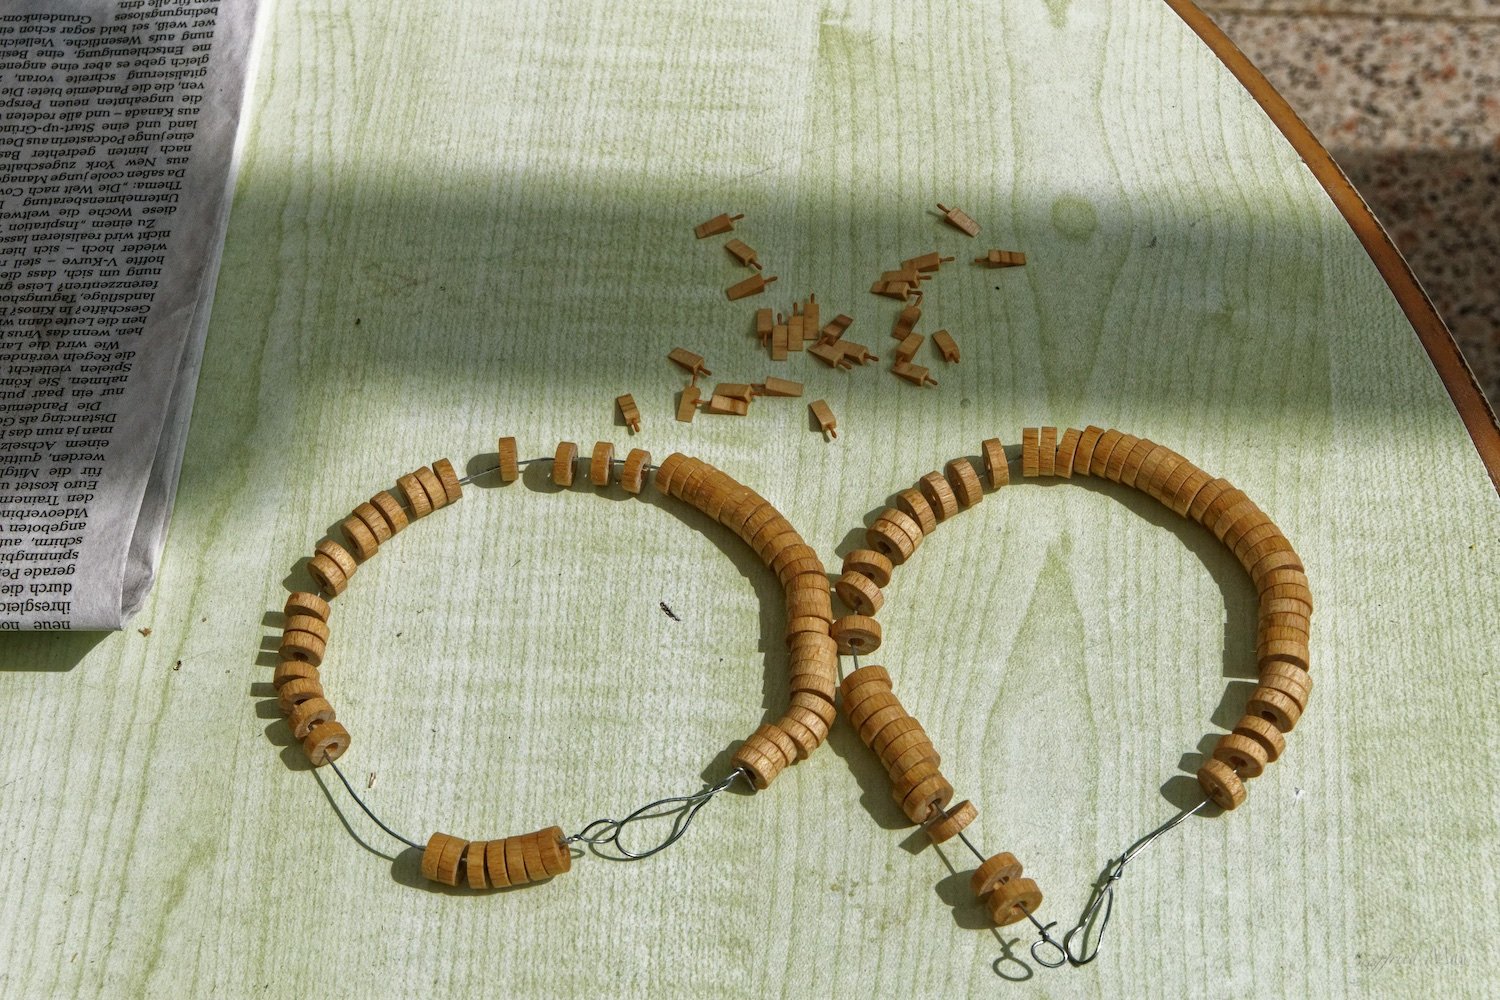
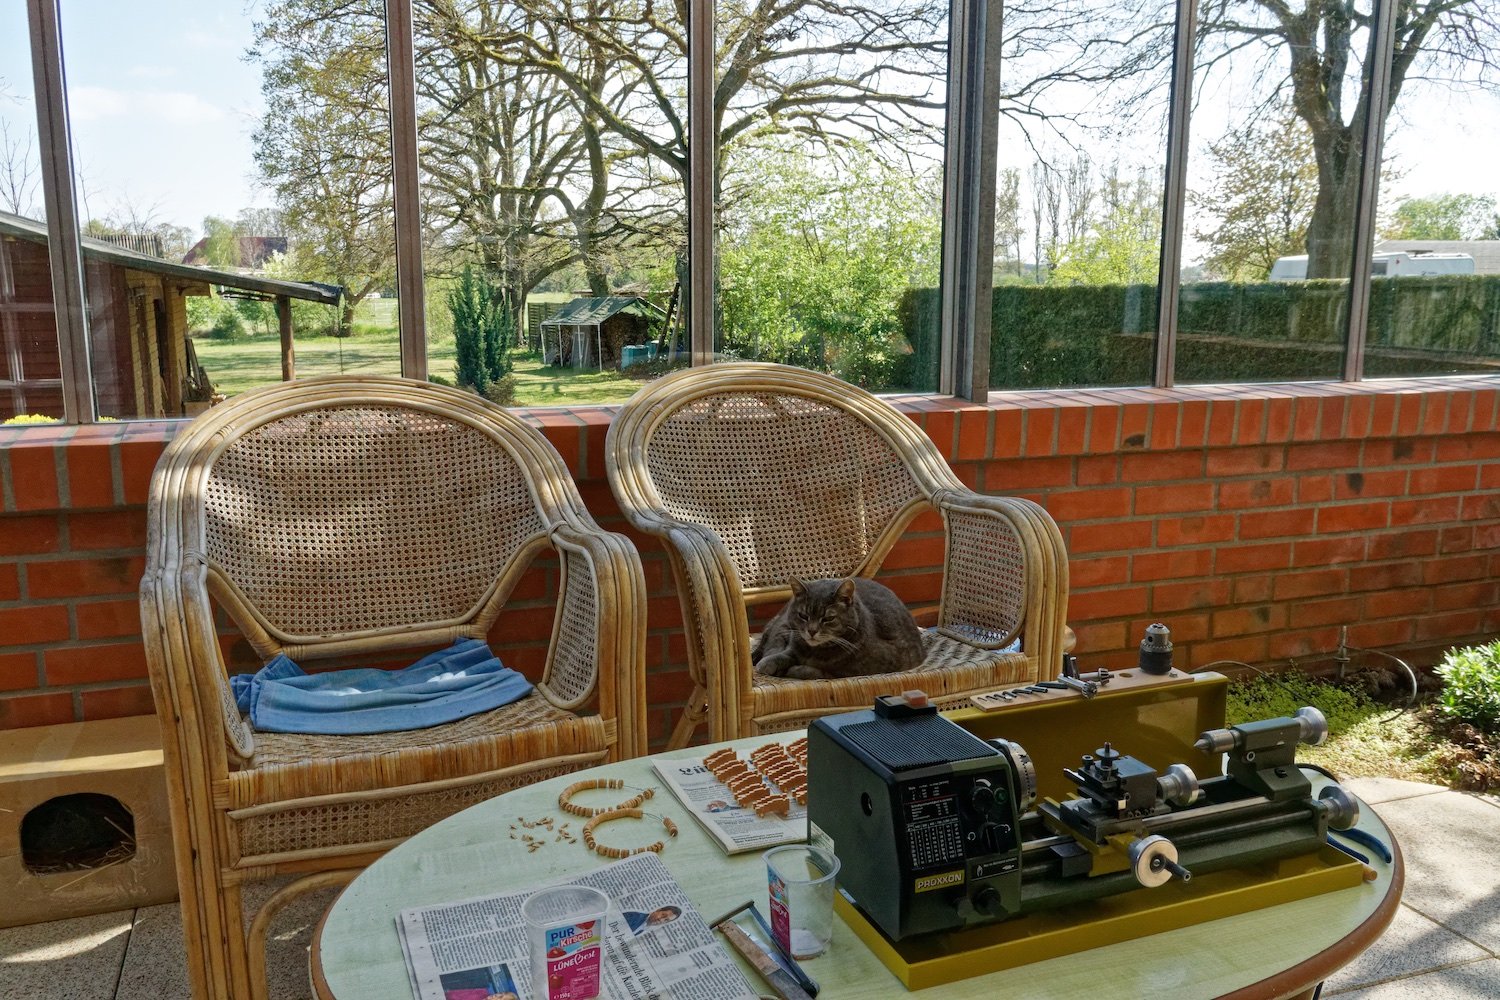
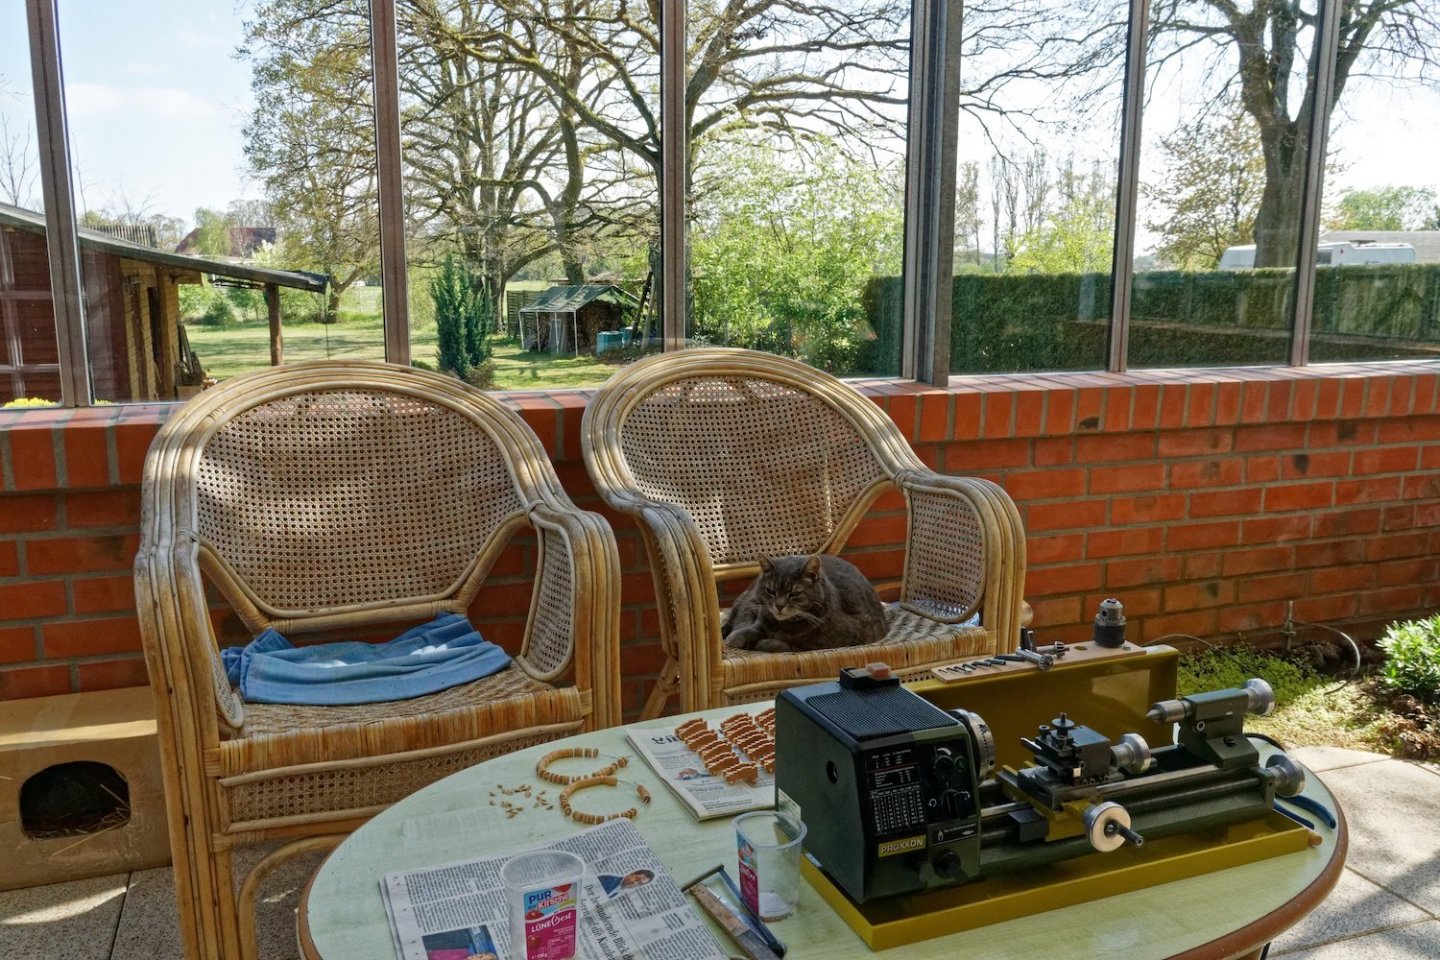
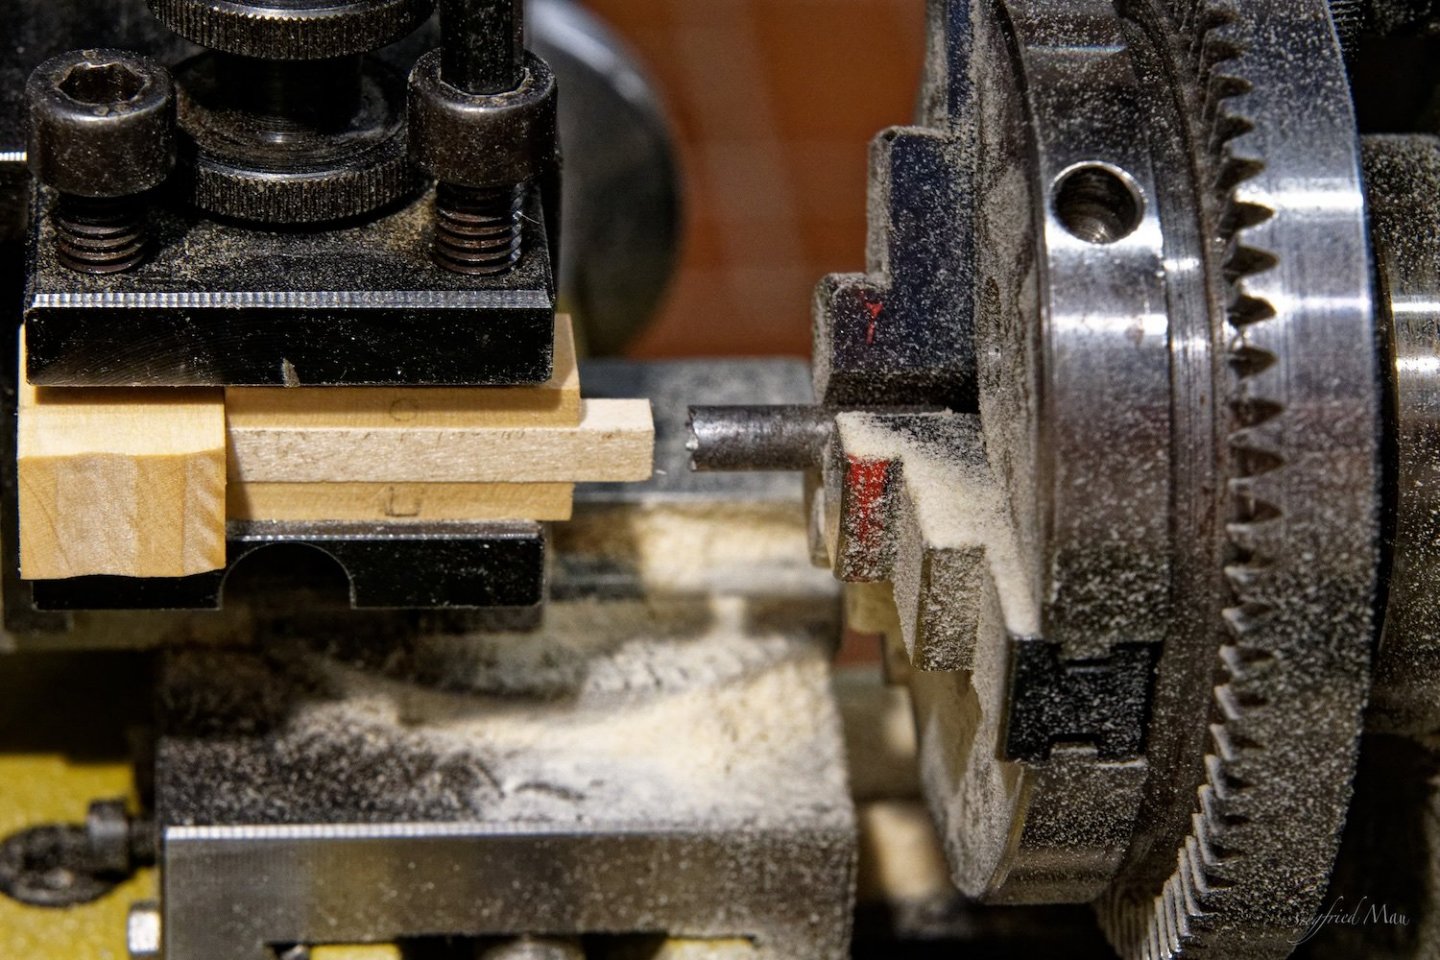
Hello and many thanks for all the likes and comments I'm still working at the arsenal. But because we have here the best weather since ever, no rain since six weeks, and always sunshine, I took my lathe and reside now in the conservatory. Here I turned all the wheels. That took me two days busy. Then I build the stool beds down in the basement, I would't bring up my whole equipment and the wedges. The handles are from 1 mm rods I made for the Dragon. And here the result Tomorrow I have to buy new material and then turn the wheels for the other canons. These are now oiled and could dry in the sun until I paint them red. That is a drawback from the LED lights, they have no UV radiation in there program and most oils need them to harden.


-
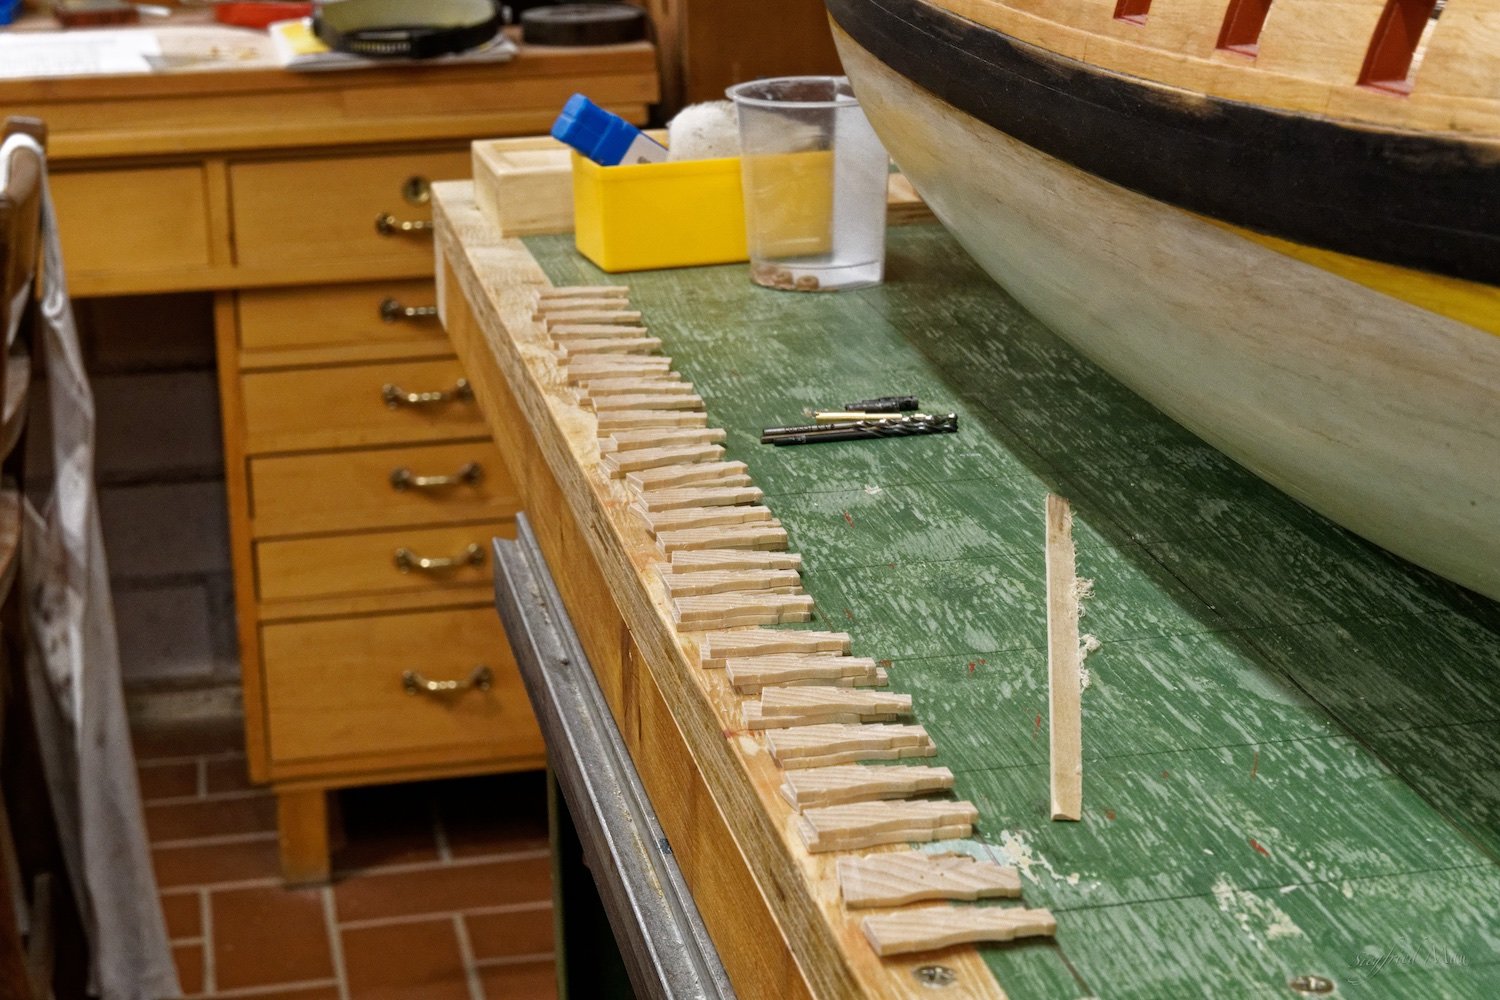
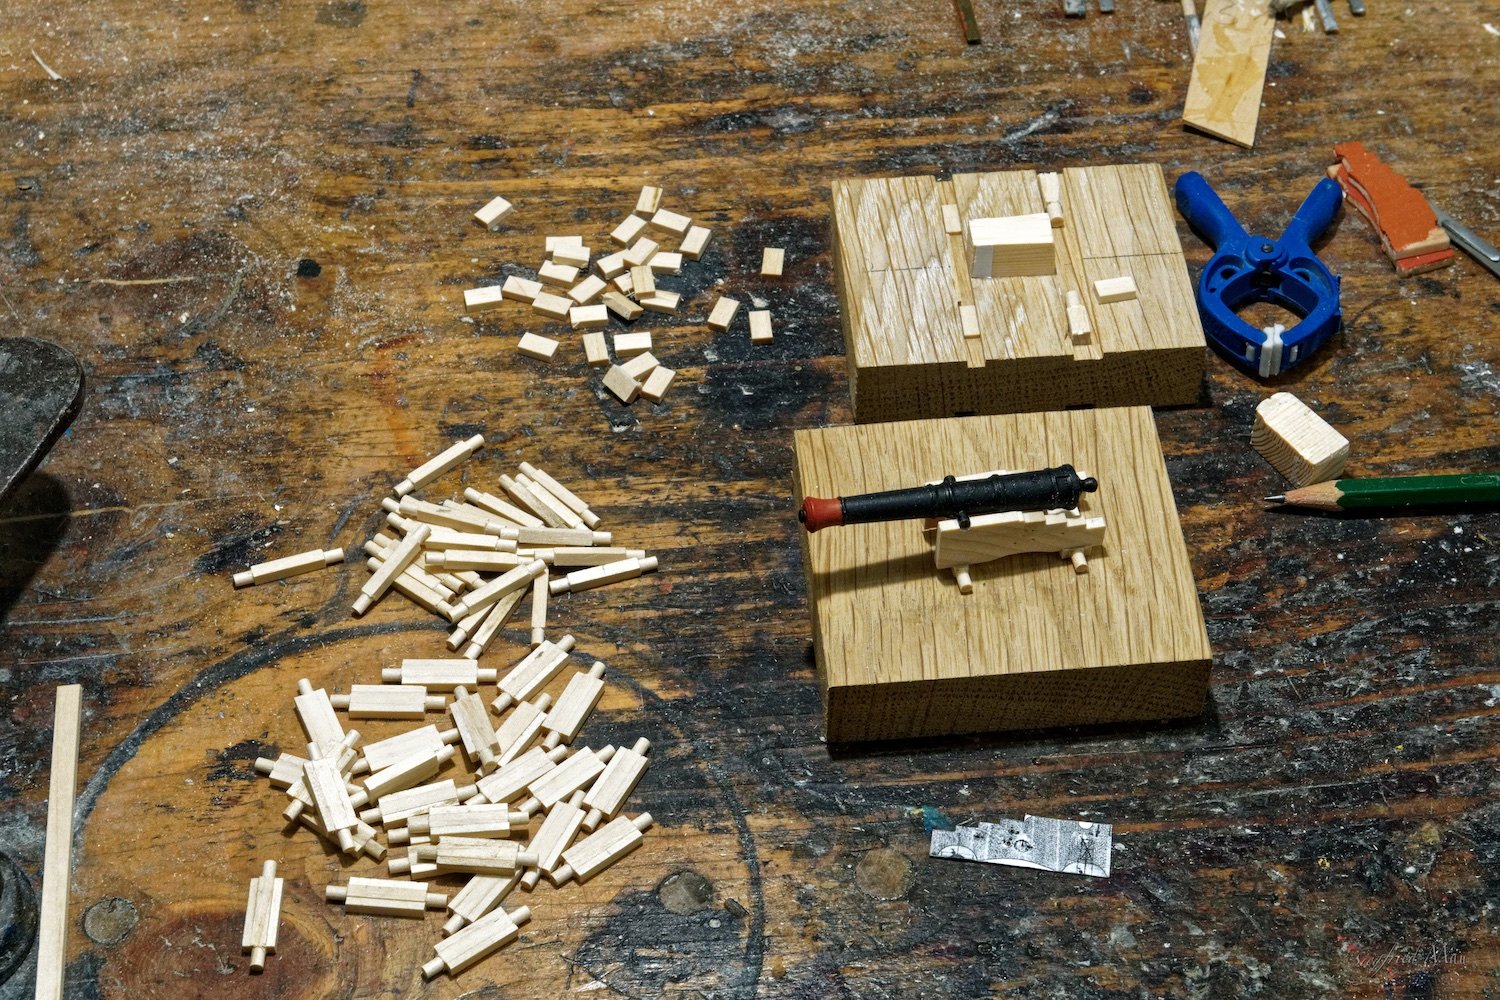
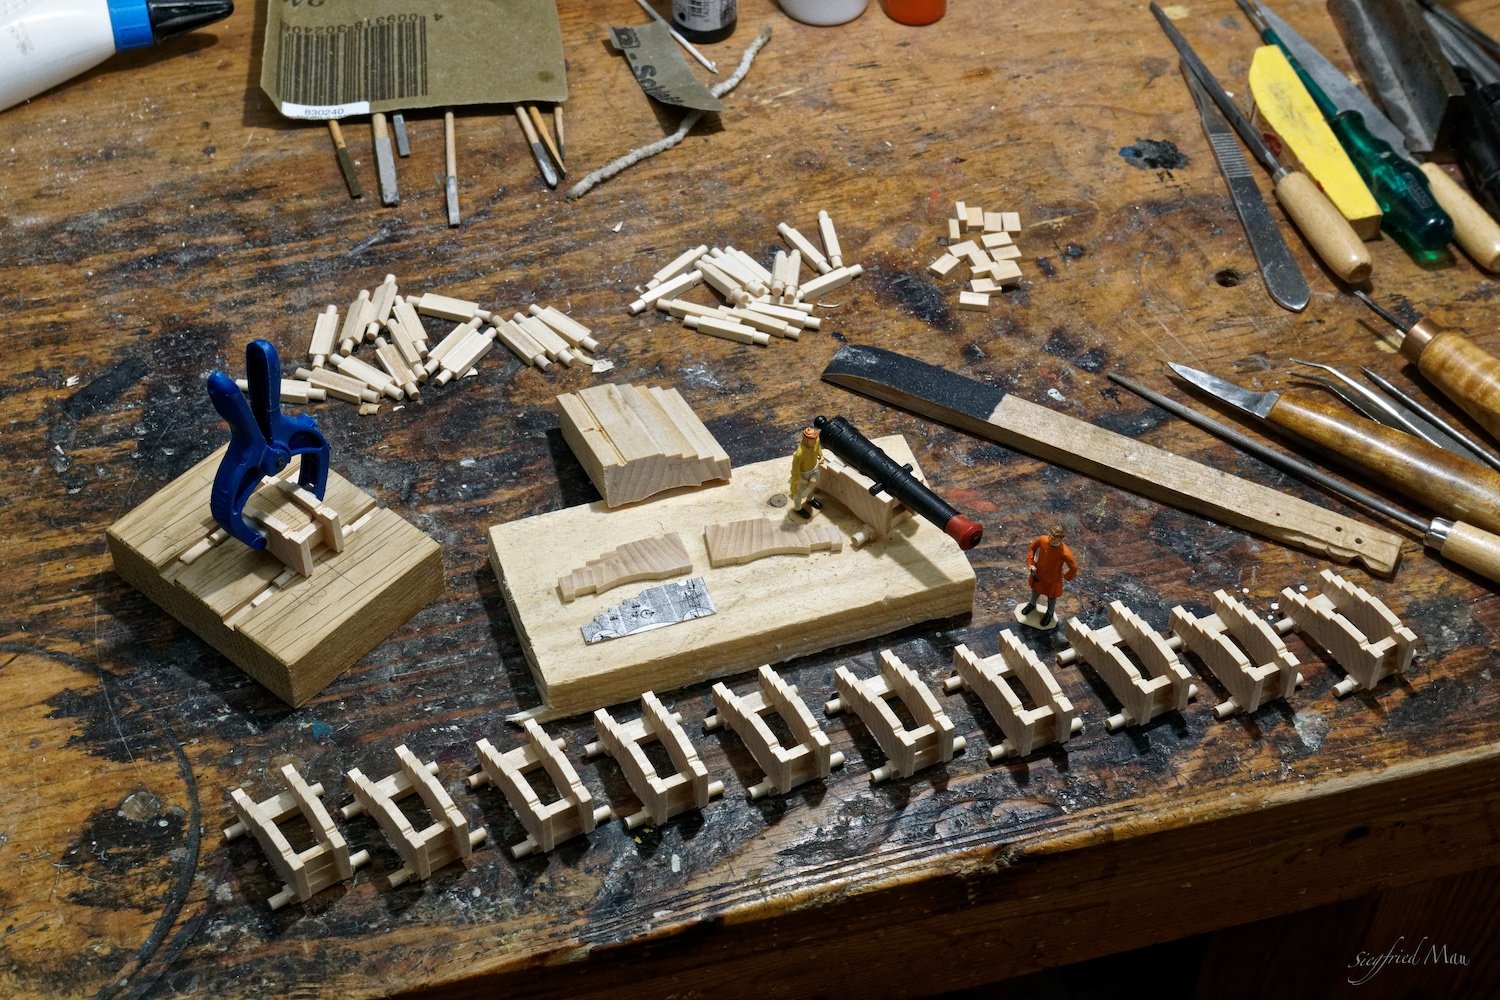
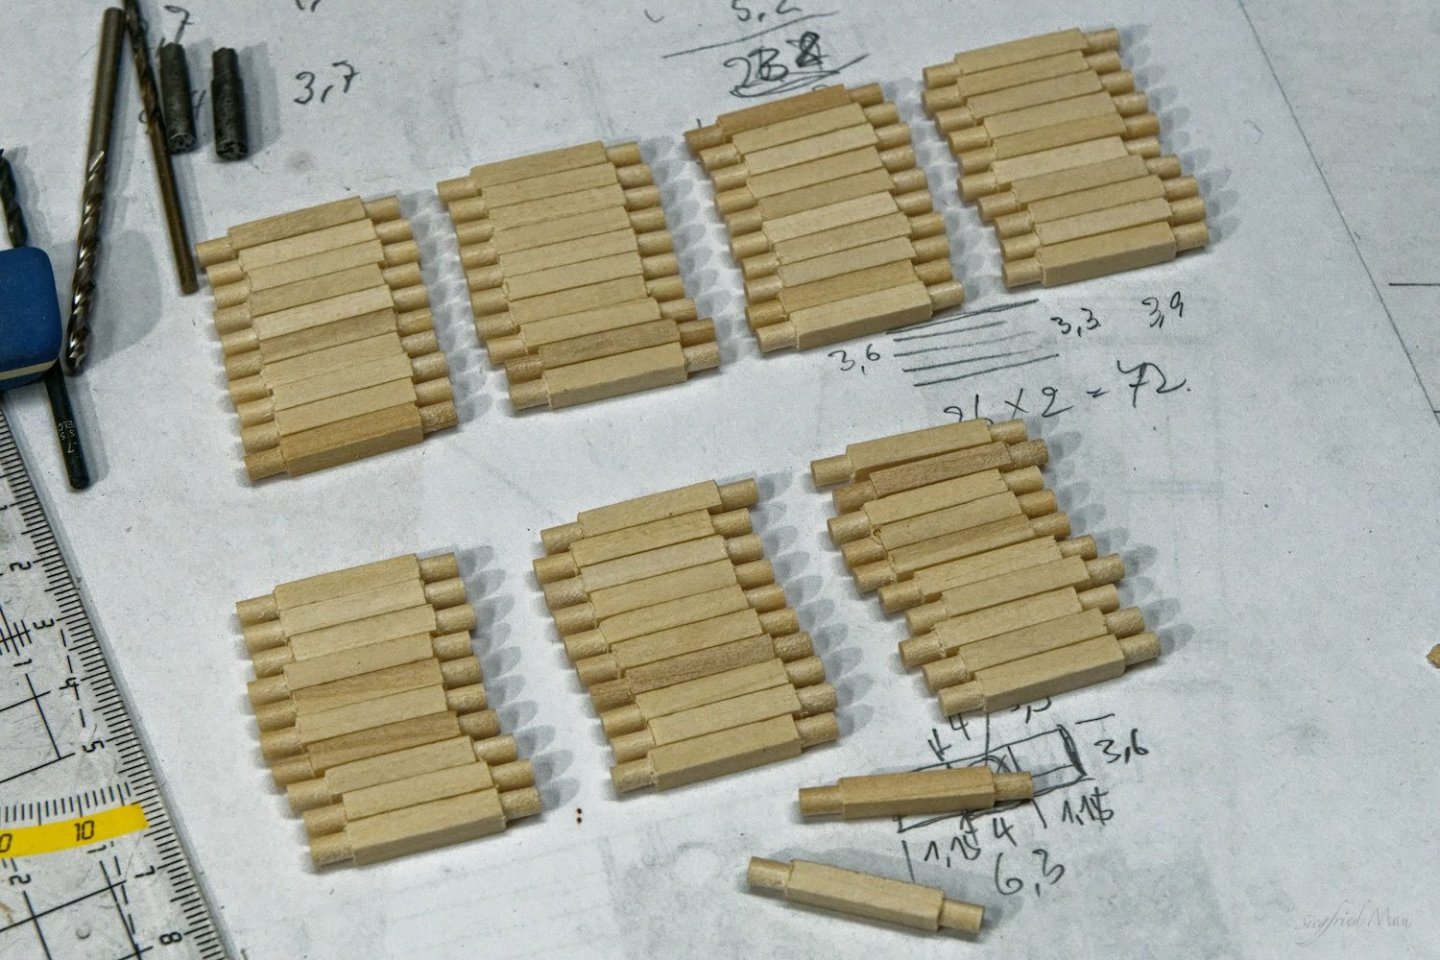
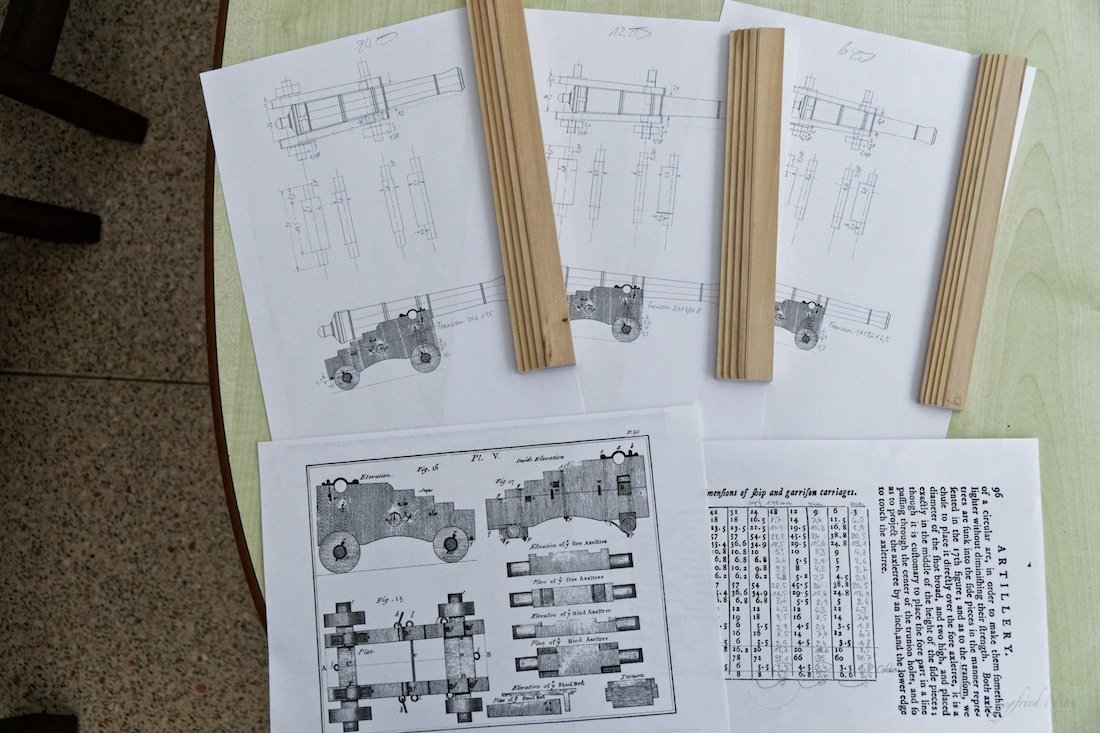
Hello, and many thanks for all the likes and comments I had been a little lazy the last days, but today I assembled the first carriages. First I turned the arms to the axles. For that I build that little thing you see to the right. It is hollow and has the diameter of the arms. I'm sorry, my english ☹️, but I hope you understand what I would say. And today I started to assemble all the parts. To build the jig was most time consuming, but then it war an easy working. And here the first 24 pdr, now without wheels. They come later and tomorrow the last carriages. You could see here also how I build up the sides. The form for the 24 pdr canons has a defekt I did't see when I made the form. Later I had not enough material left to correct that. But in reality it is hardly visible. So I left it so.


-
Hello, yesterday I build up the side pieces for the cannons and today I made the drawings for the axles, so that the carpenters tomorrow have enough to work. I work here after Muller and his list of dimensions.
-
Hello Tom, if it is the Leopard of 1790, then I would paint the figure head in natural colors. Do not guild it.
-
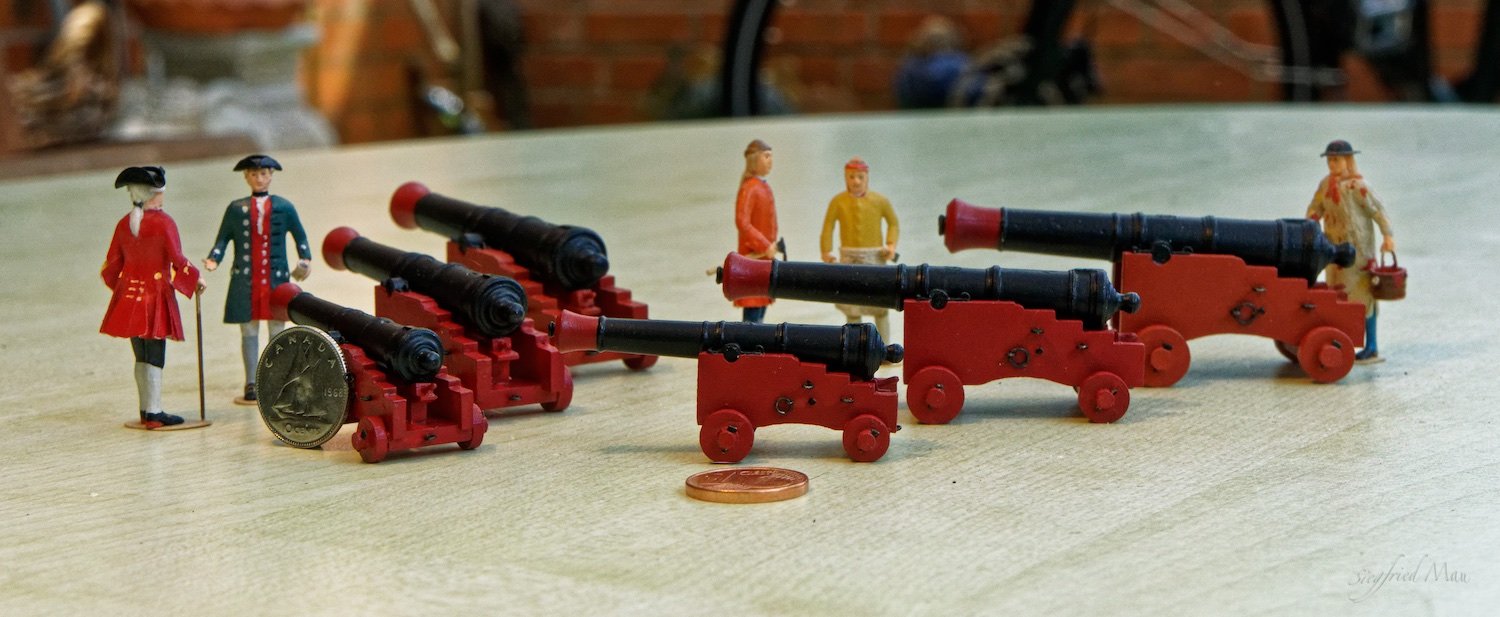
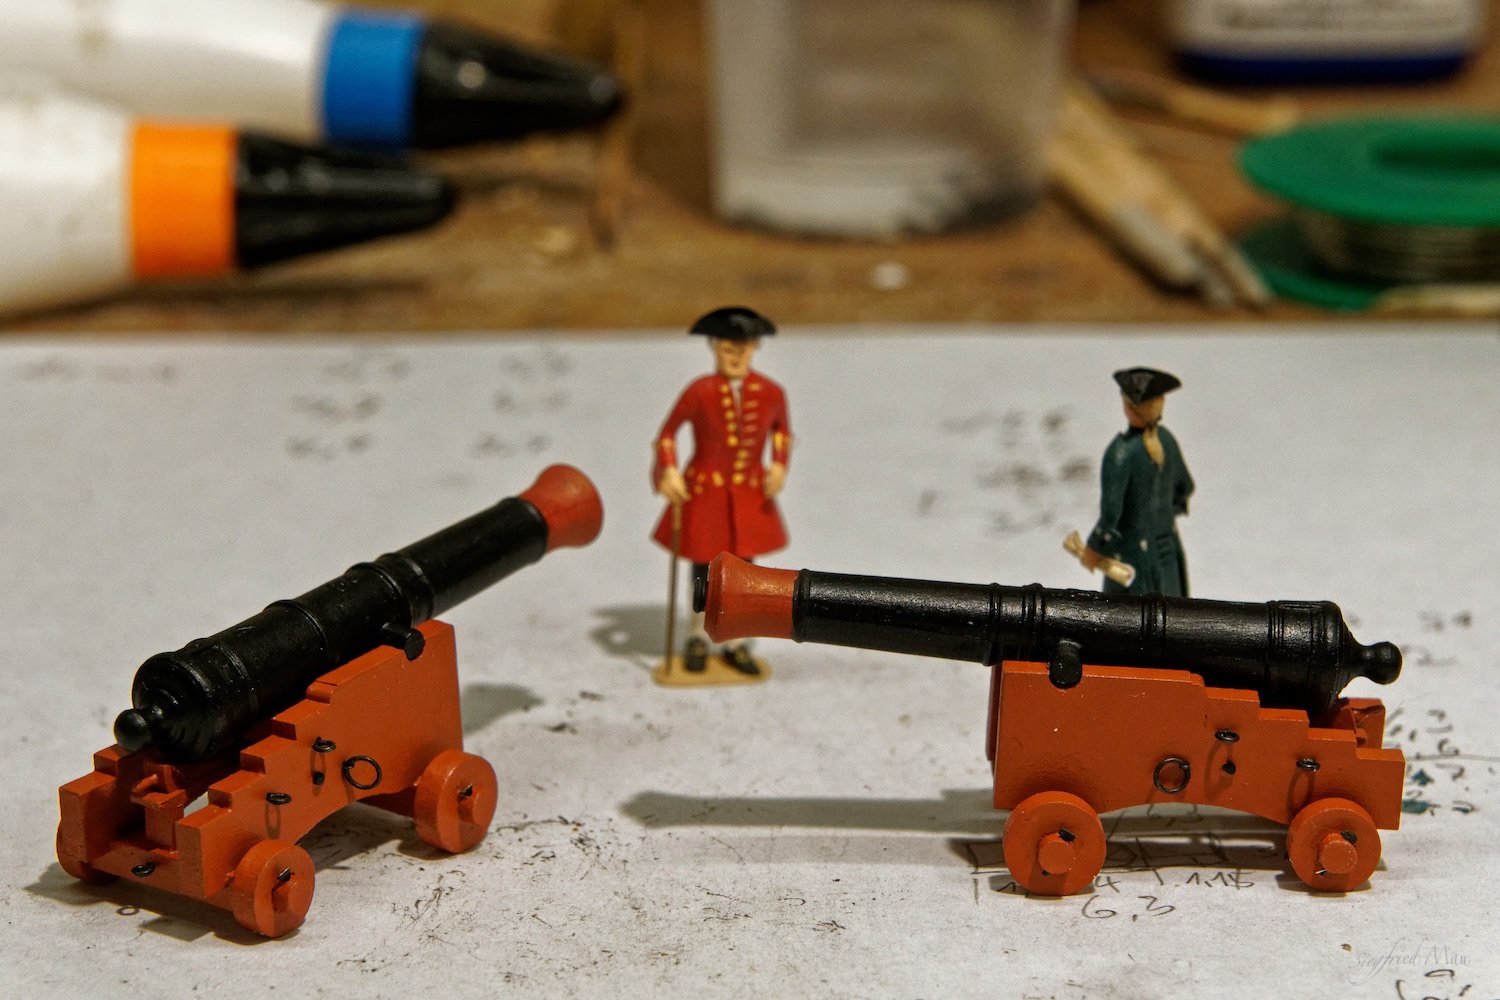
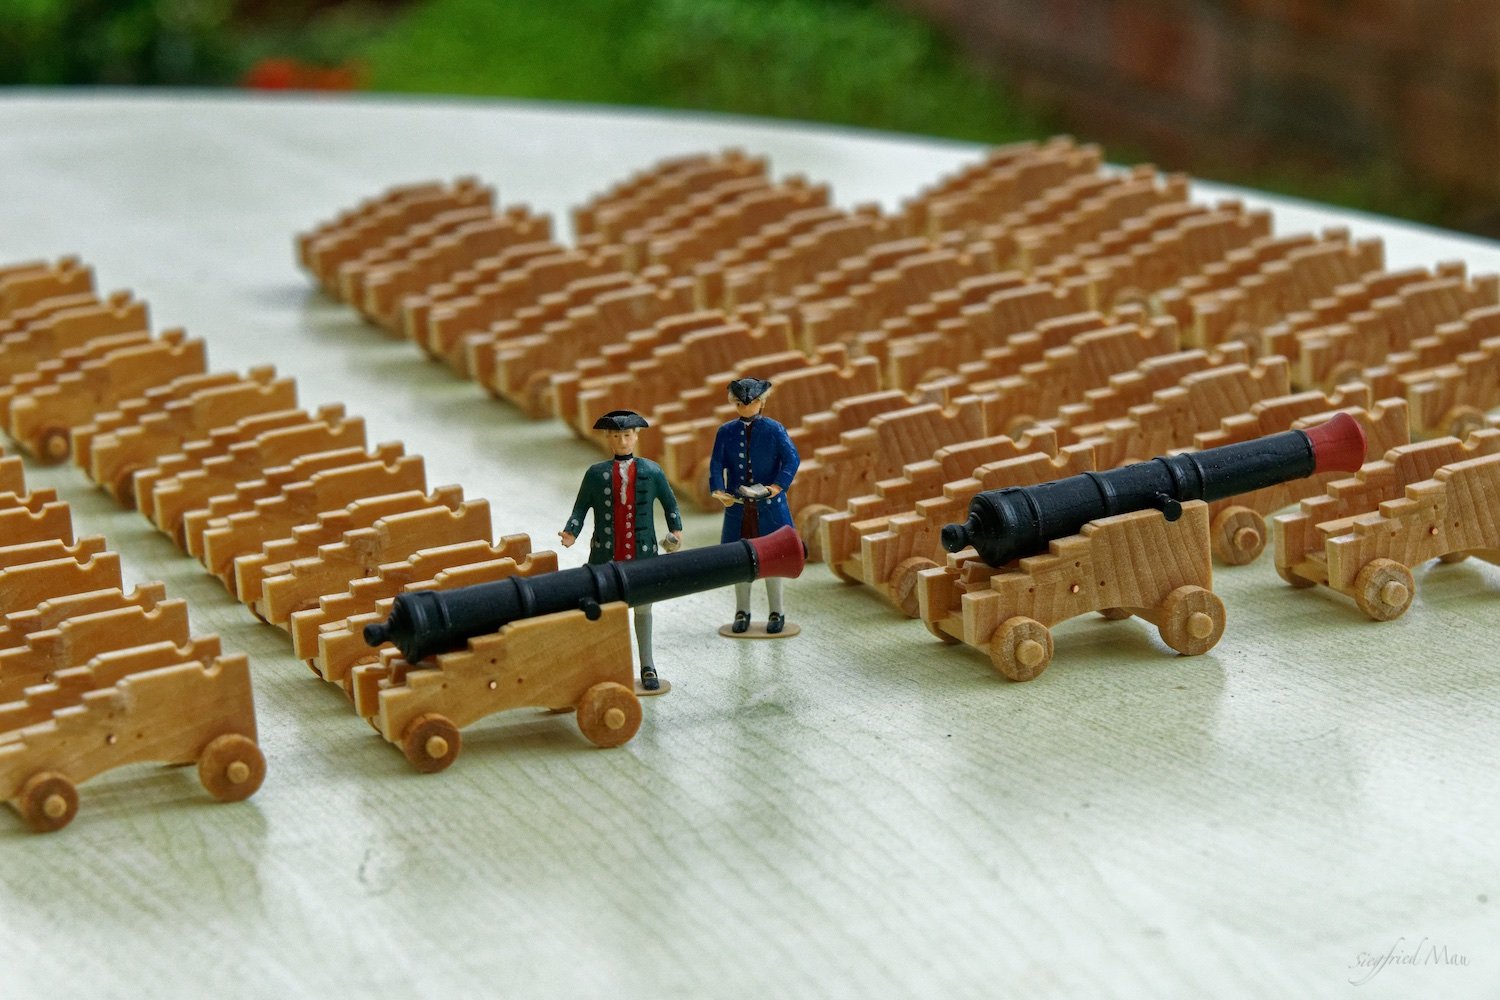
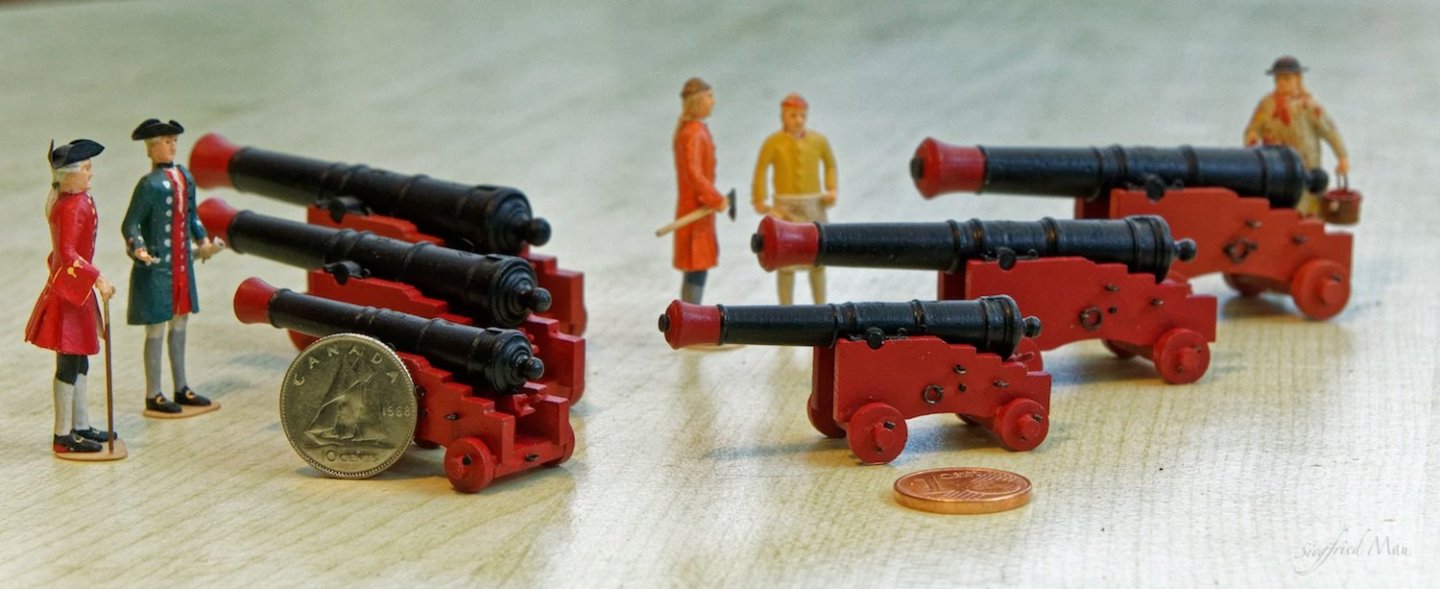
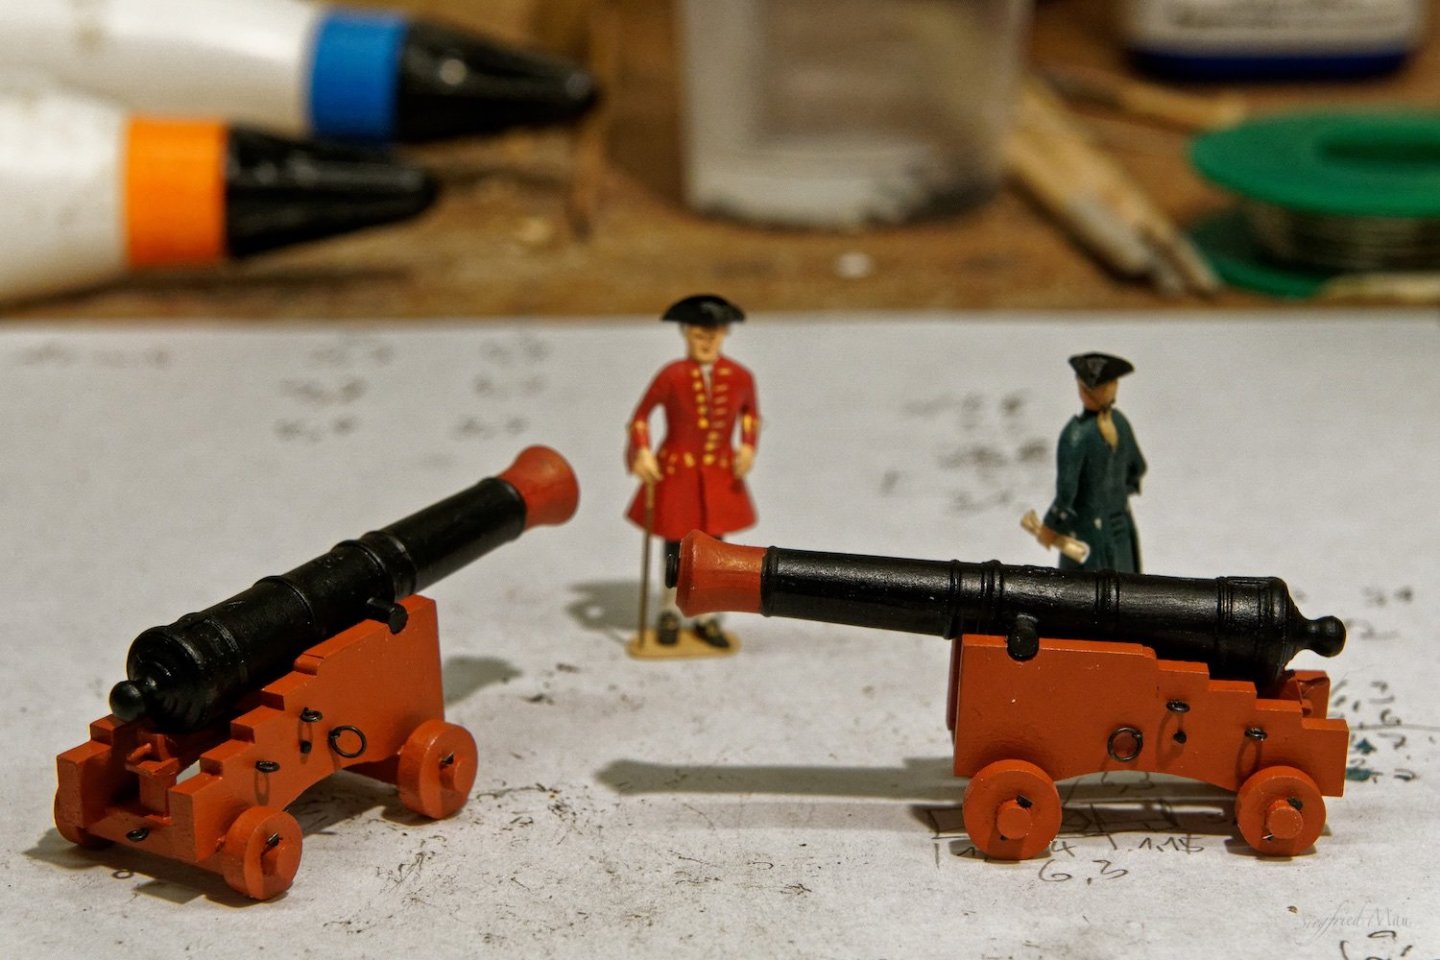
Many, many thanks for all the likes and friendly comments. At least, the cannons looking in reality much better then here at the pictures, 3,5 times larger then in real. It's like you are look at a polished surface through a microscope.
-
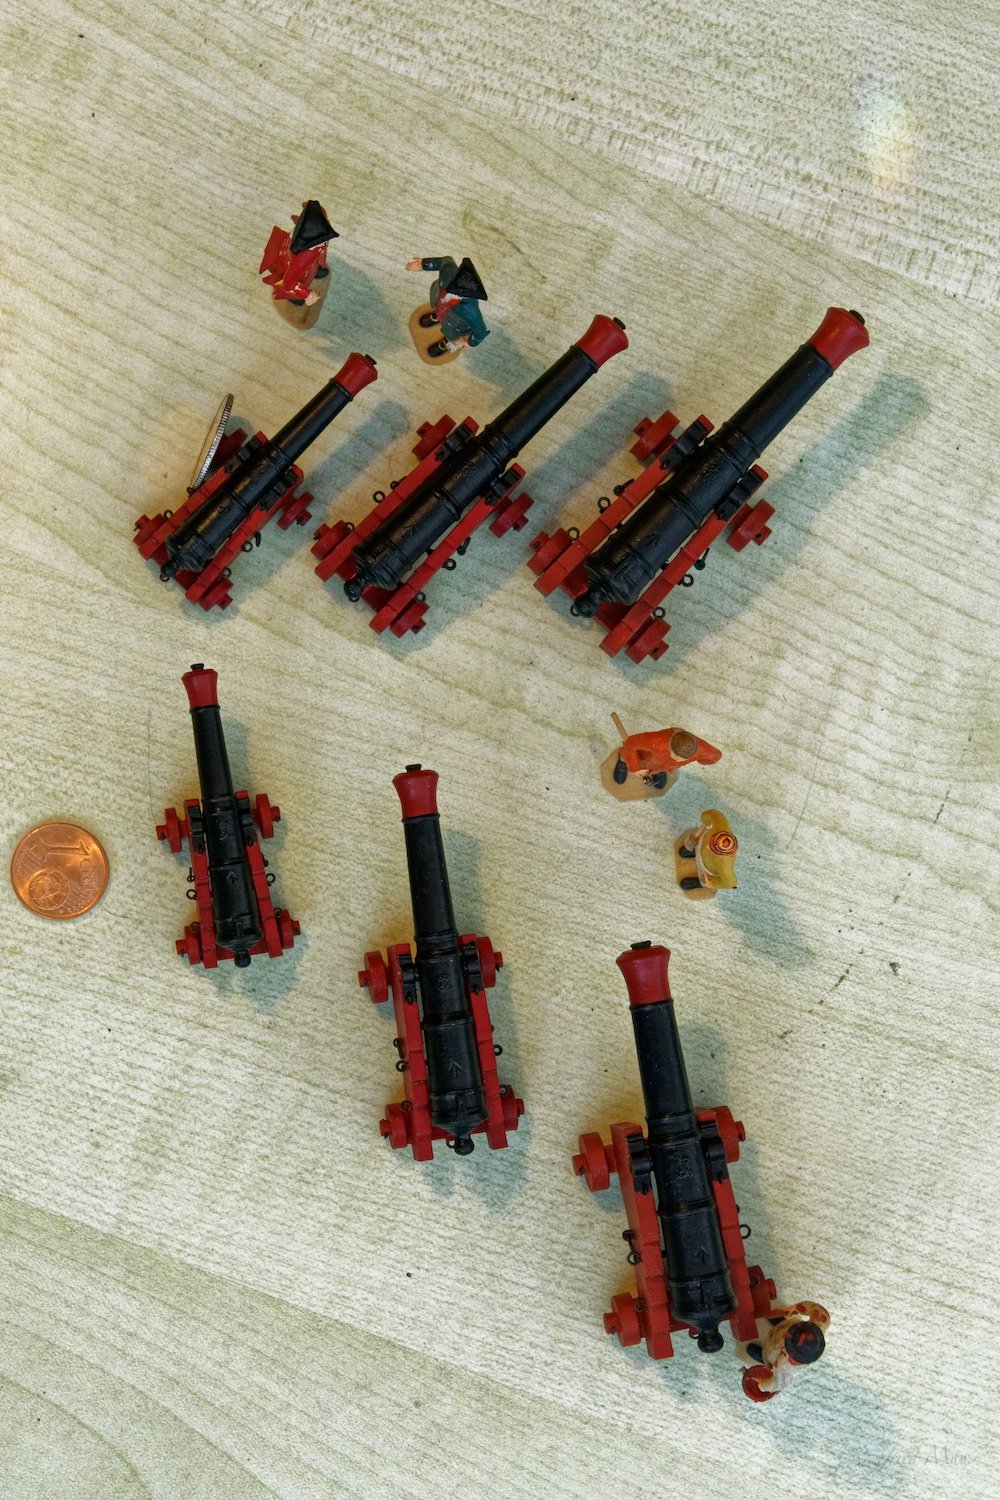
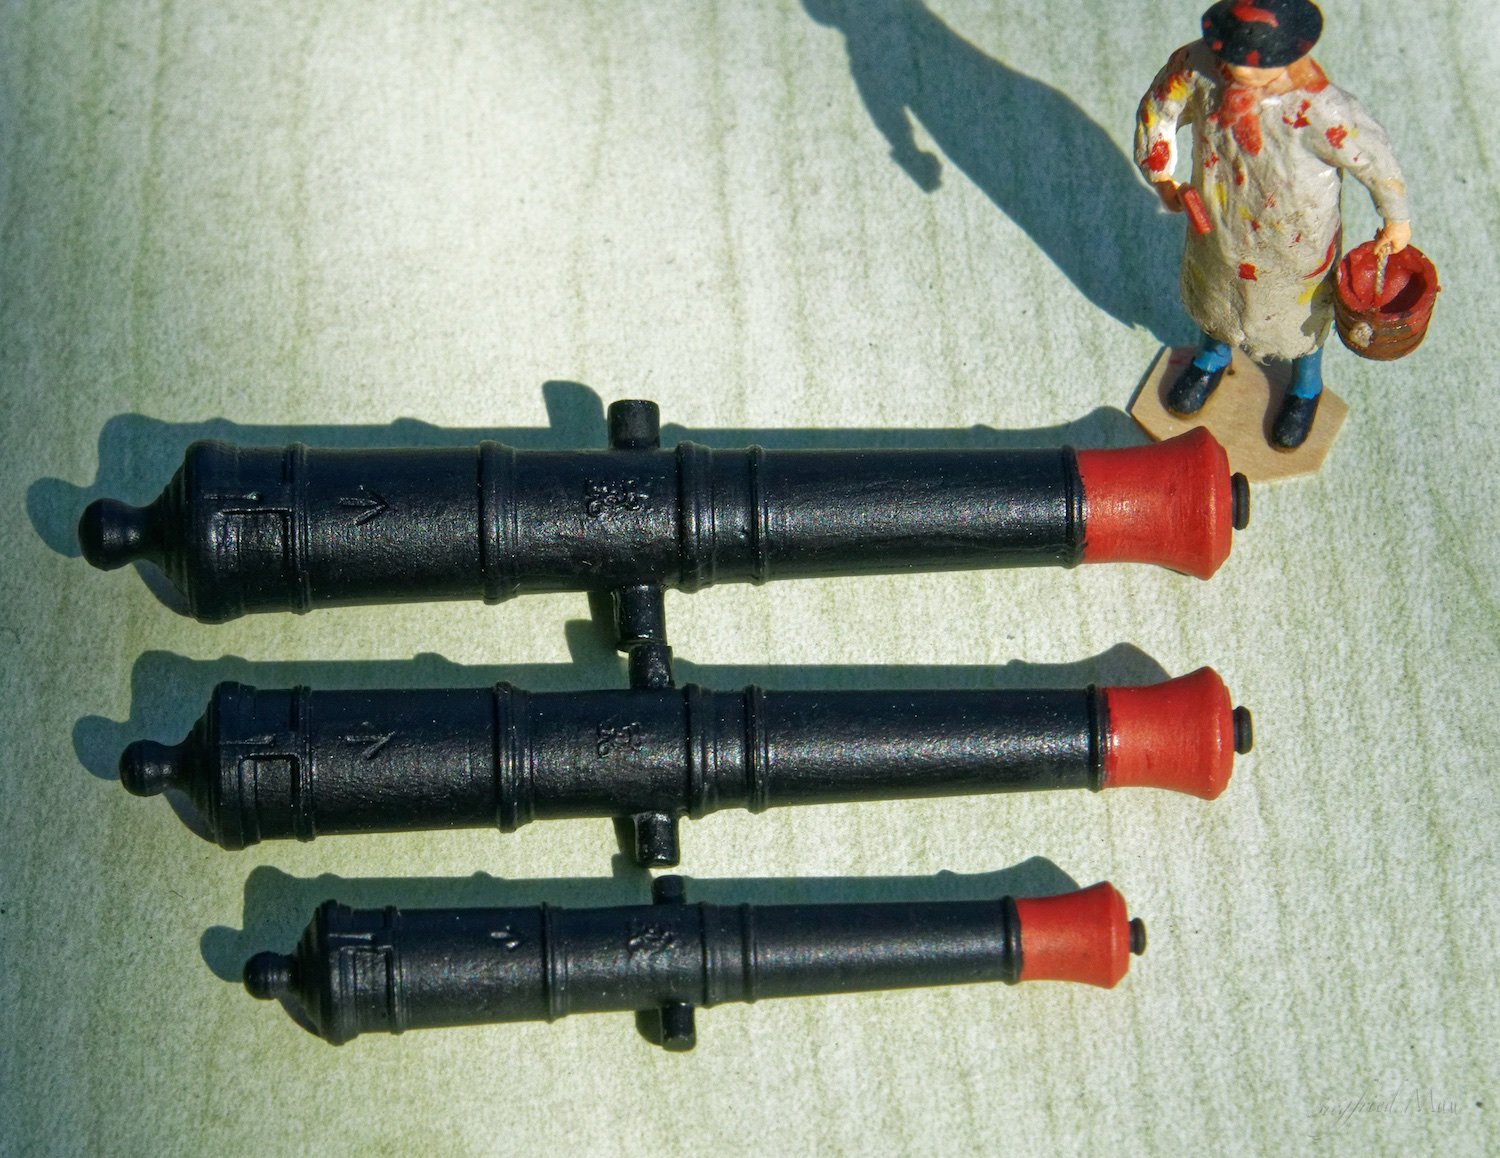
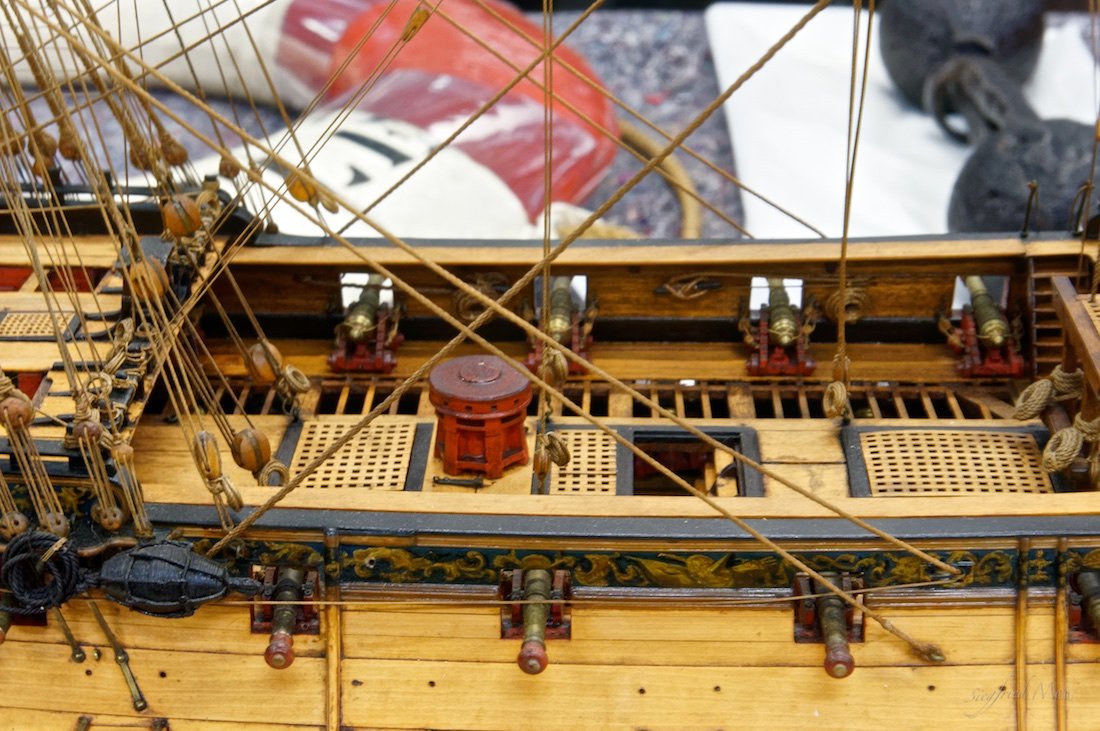
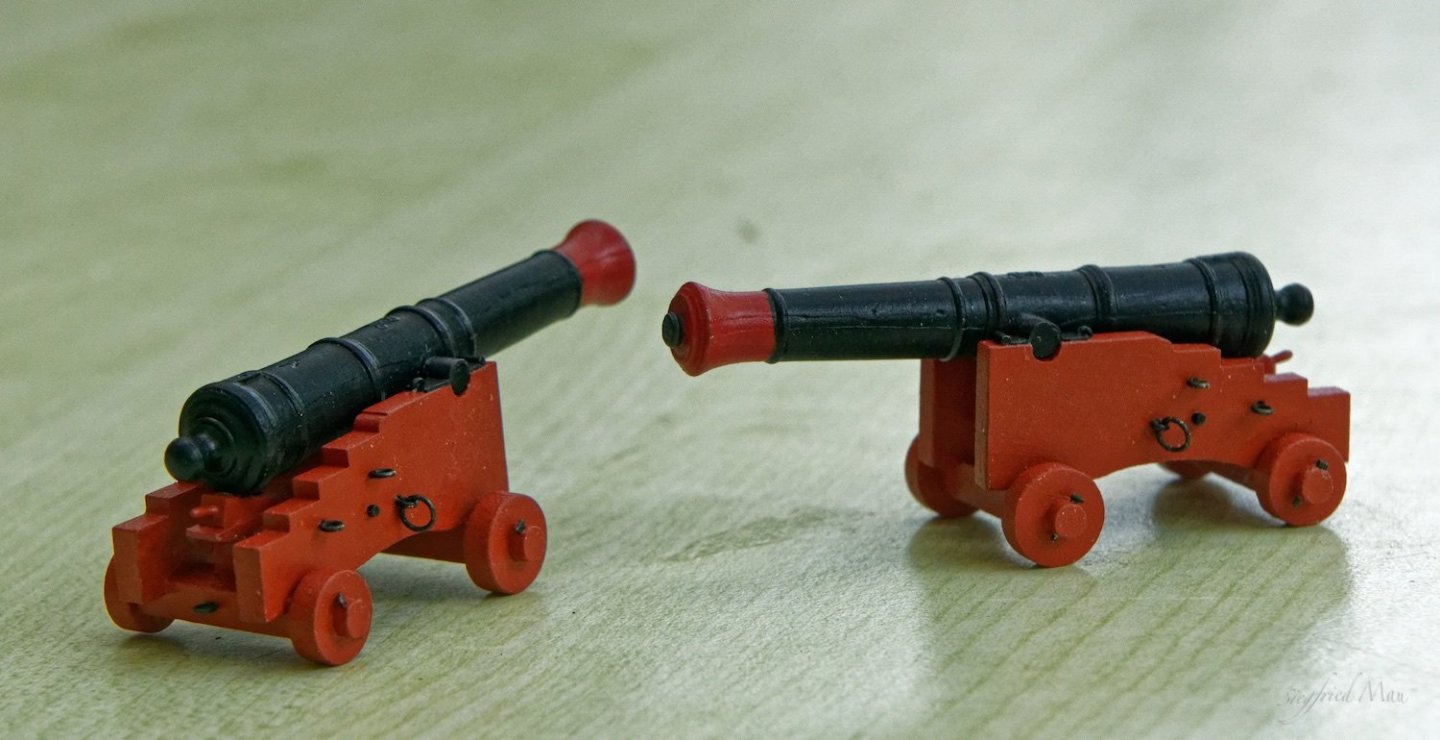
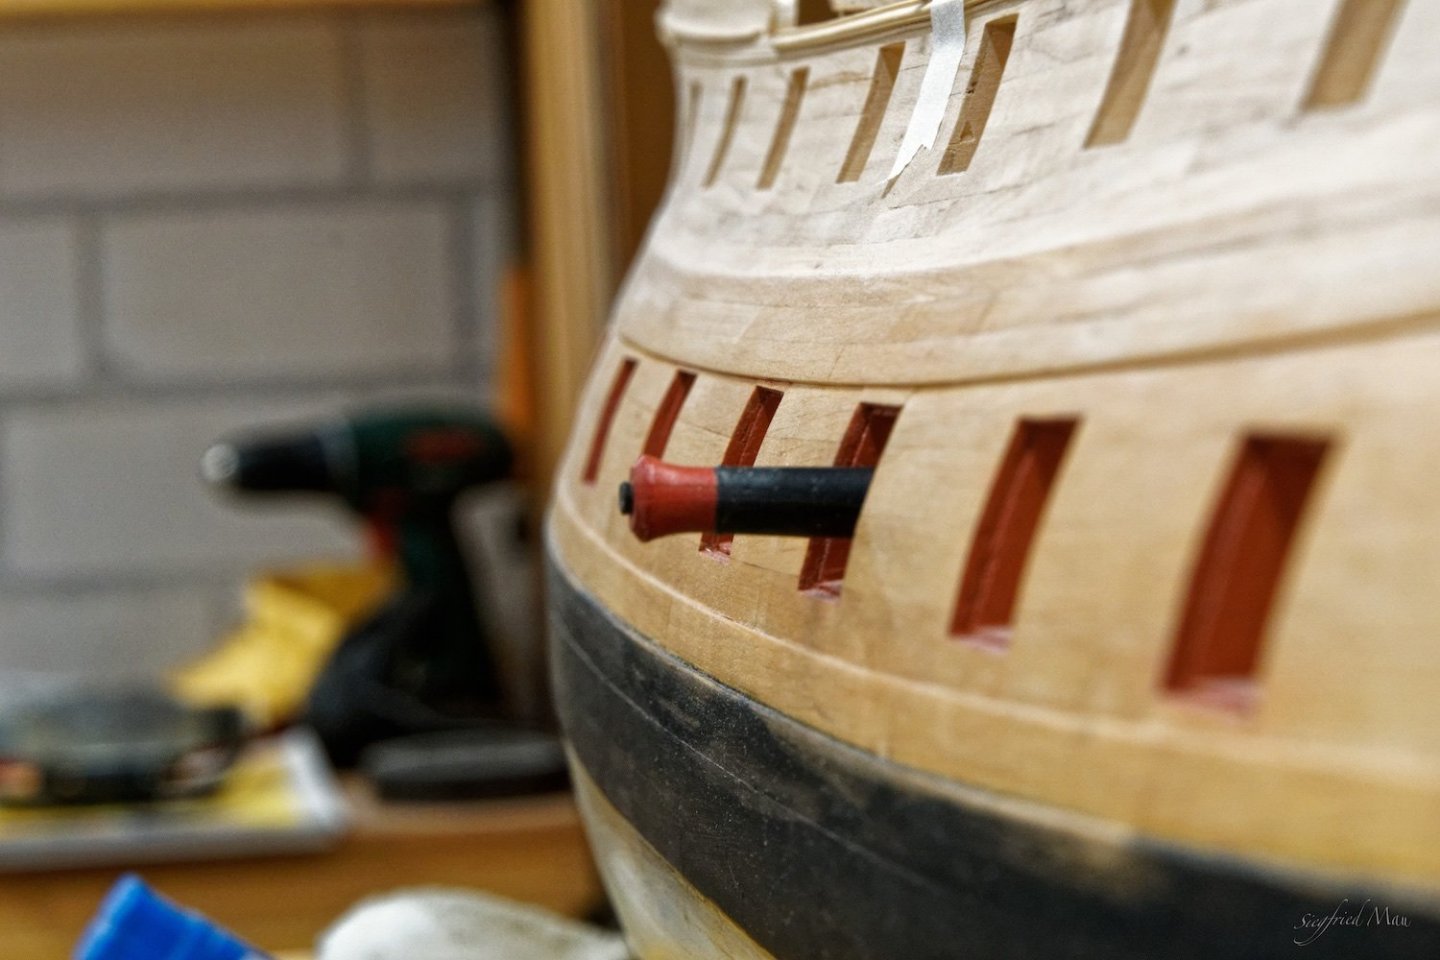
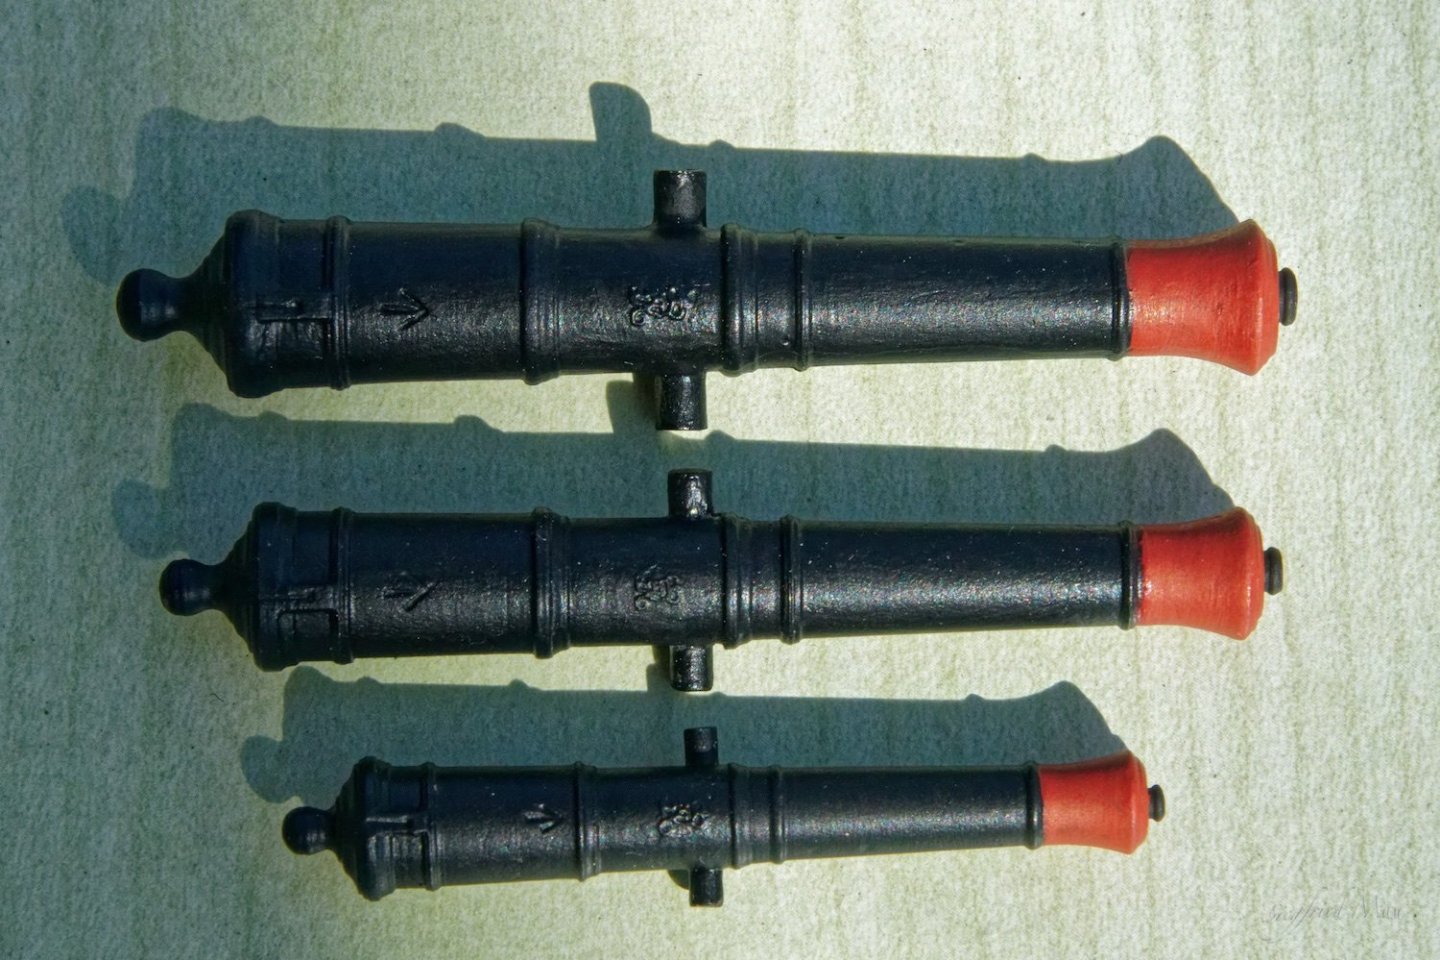
Hello and again, many thanks for your likes and comments it is done, the cannons are ready! The next thing to do are the carriages for them. That would take some time, but always better then finishing the port lids 😙 That are now all cannons with some plus. The painter painted the tompions black. I had a look at models from that time and when the muzzles of the cannons are black, then the tompions where red or white. If the muzzles where red, the tompions are black or in some cases white. For all of you, a happy and sound Eastern 🐣

-
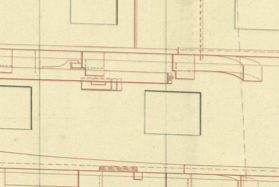
How should that go? Explain that please for me. Please see also: the Construction & Fitting of ... by Goodwin, page 199. The floor is build into the quarter rails, and they follow the sheer of the galleries.
-
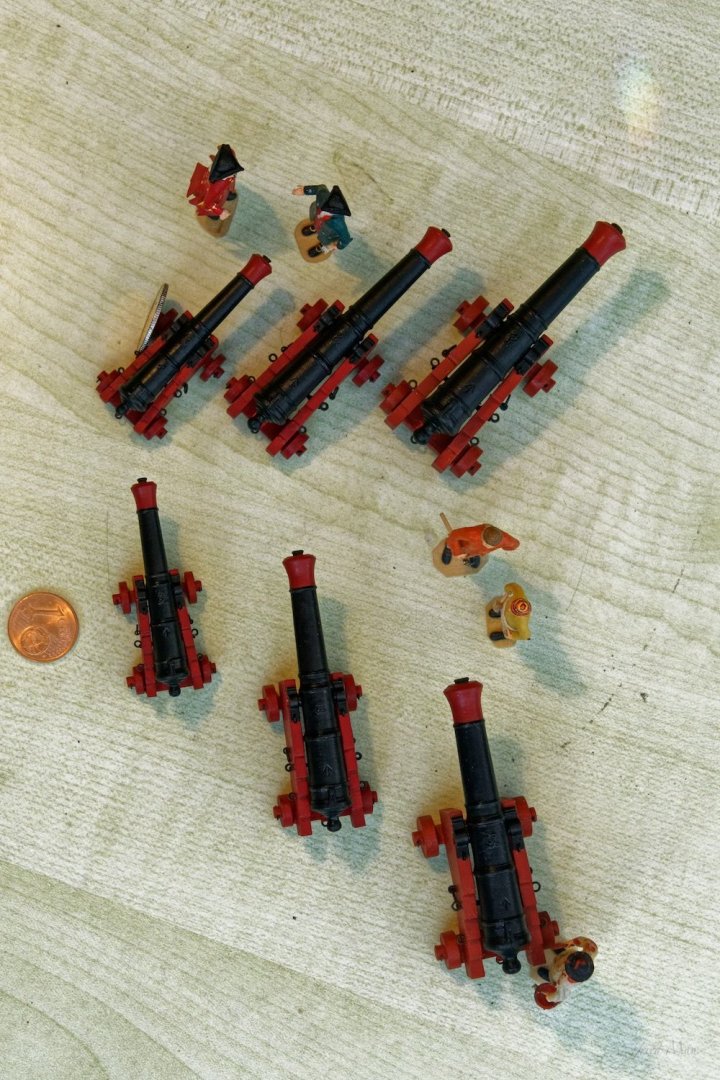
Hello, a short update. The painter is still working and has a lot of work waiting for him. This is the first batch of cannons, the second batch is casted but not ready painted. When all the paint is dry, I cut the cast cone. The cannons will then look like the two to the left.

-
Hello Paul, yes, the become the same color as the muzzle of the cannon. May be more red.