HOLIDAY DONATION DRIVE - SUPPORT MSW - DO YOUR PART TO KEEP THIS GREAT FORUM GOING! (89 donations so far out of 49,000 members - C'mon guys!)
×

Siggi52
-
Posts
1,155 -
Joined
-
Last visited
Content Type
Profiles
Forums
Gallery
Events
Everything posted by Siggi52
-
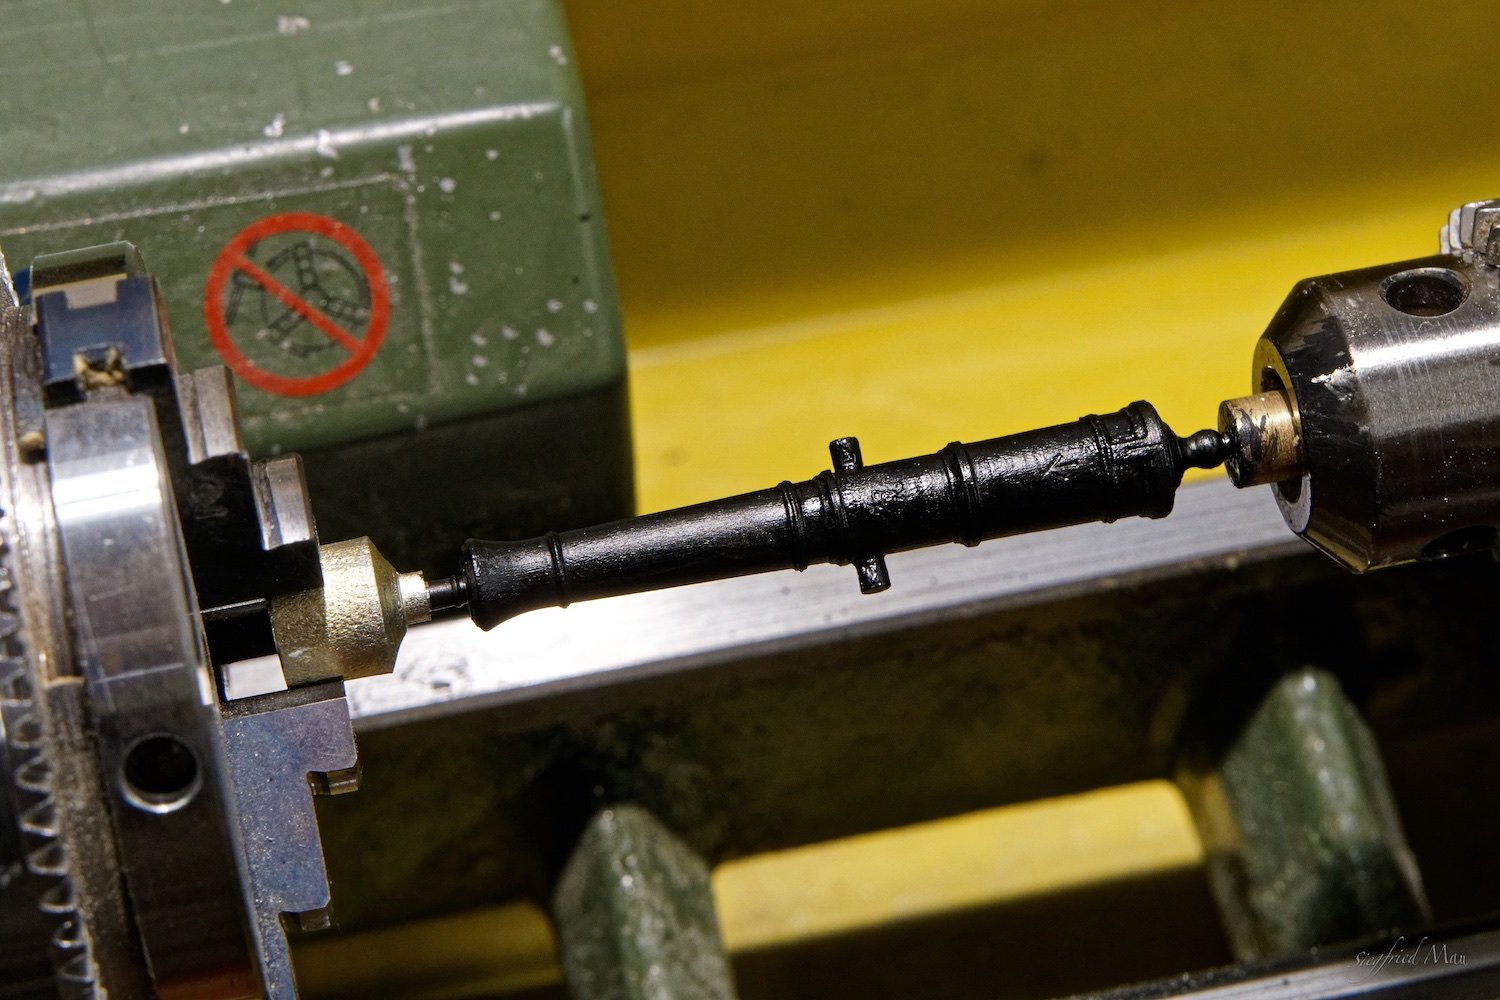
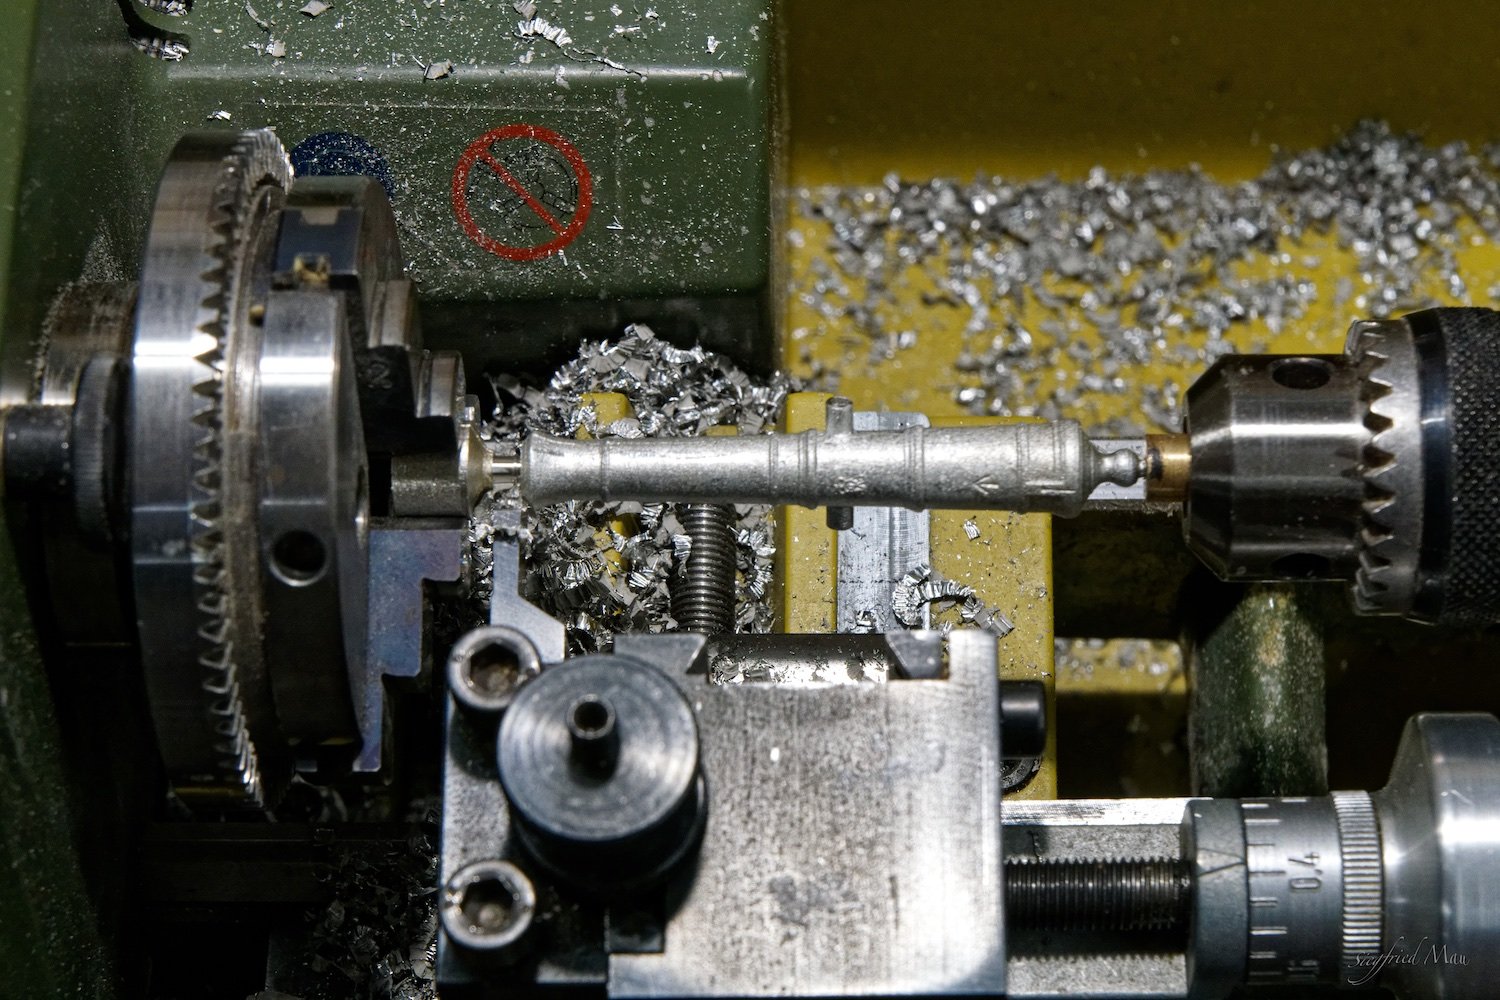
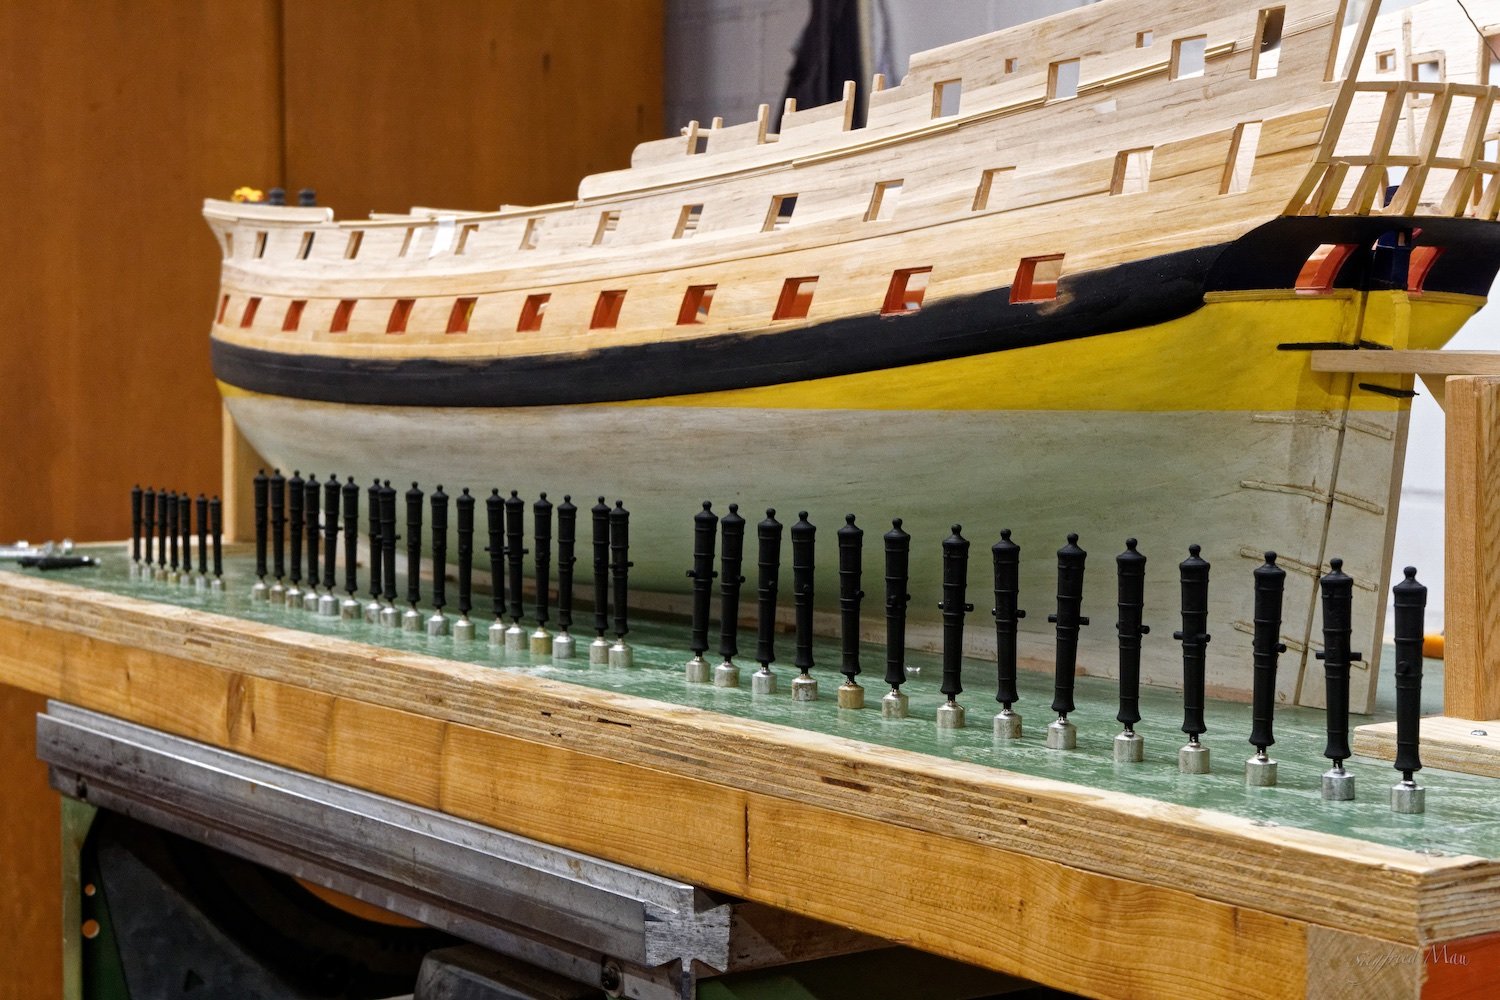
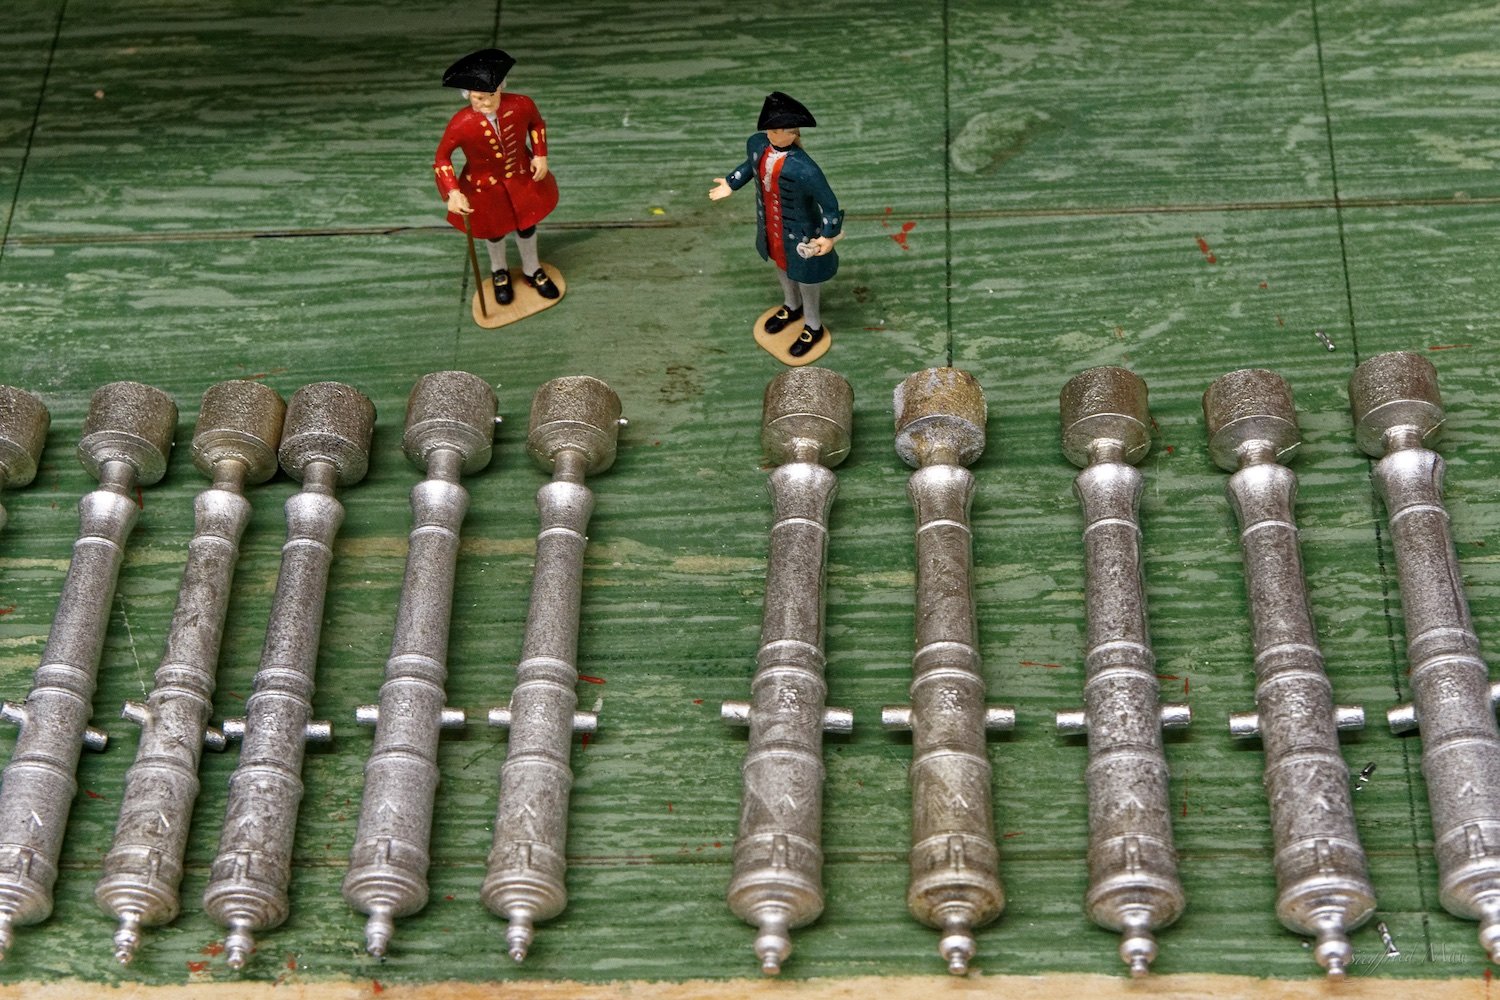
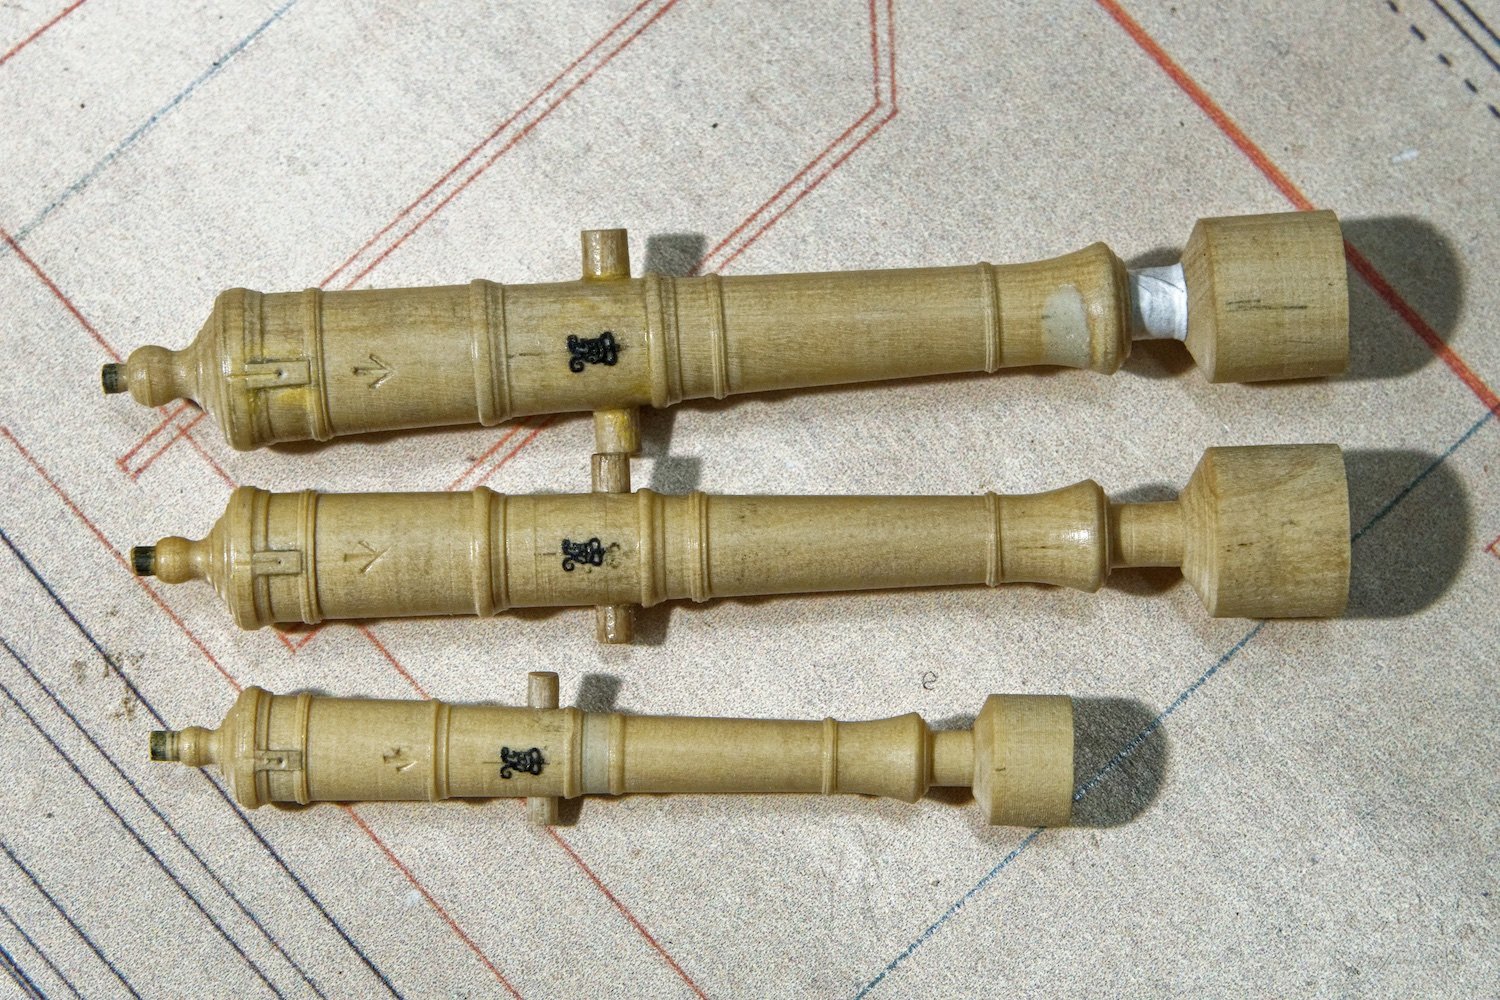
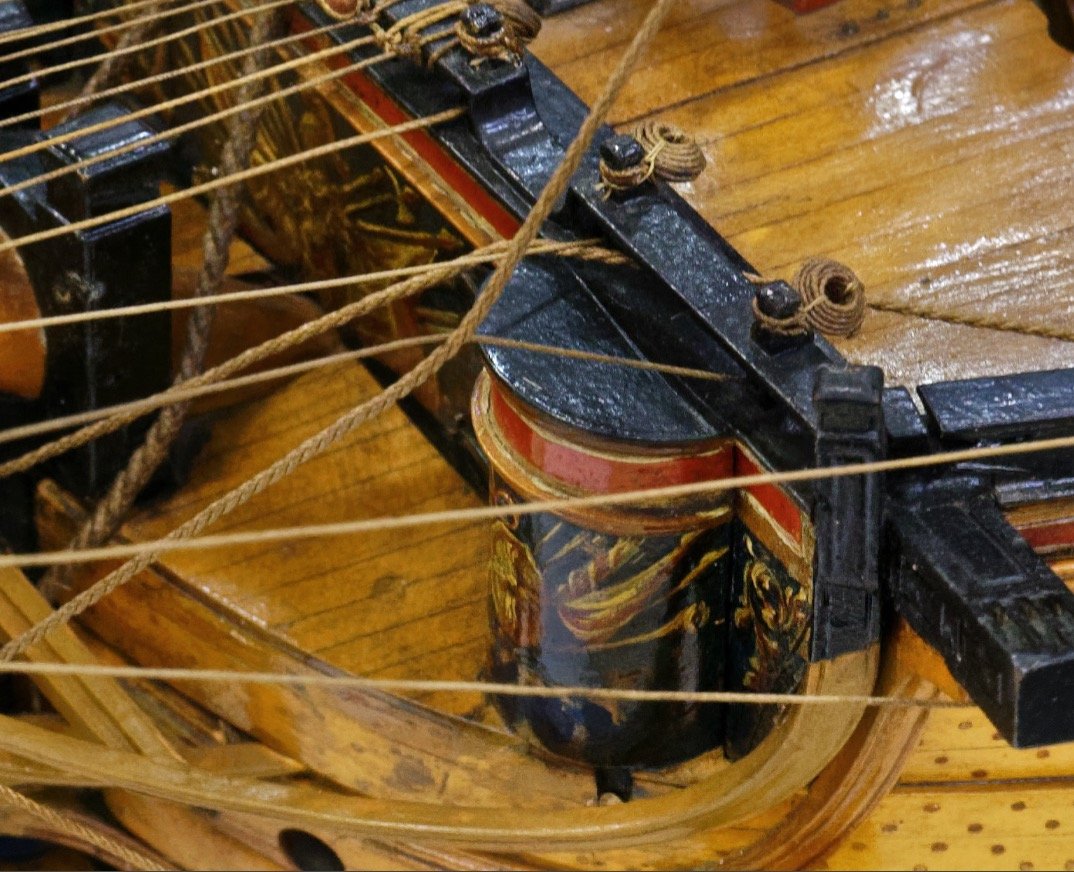
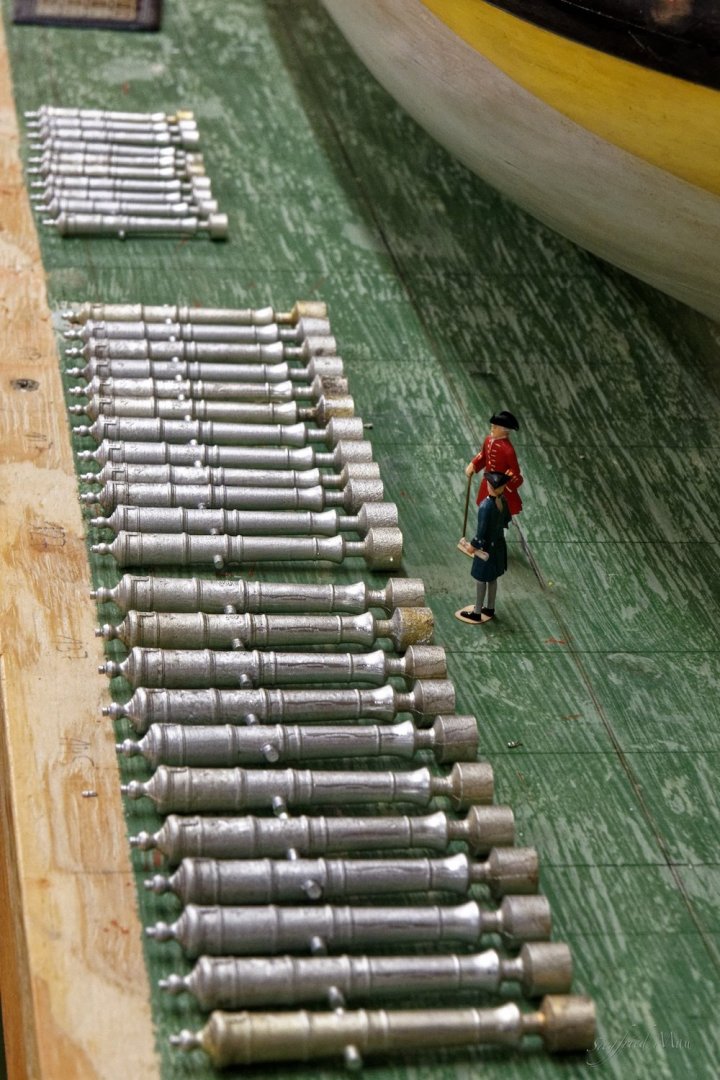
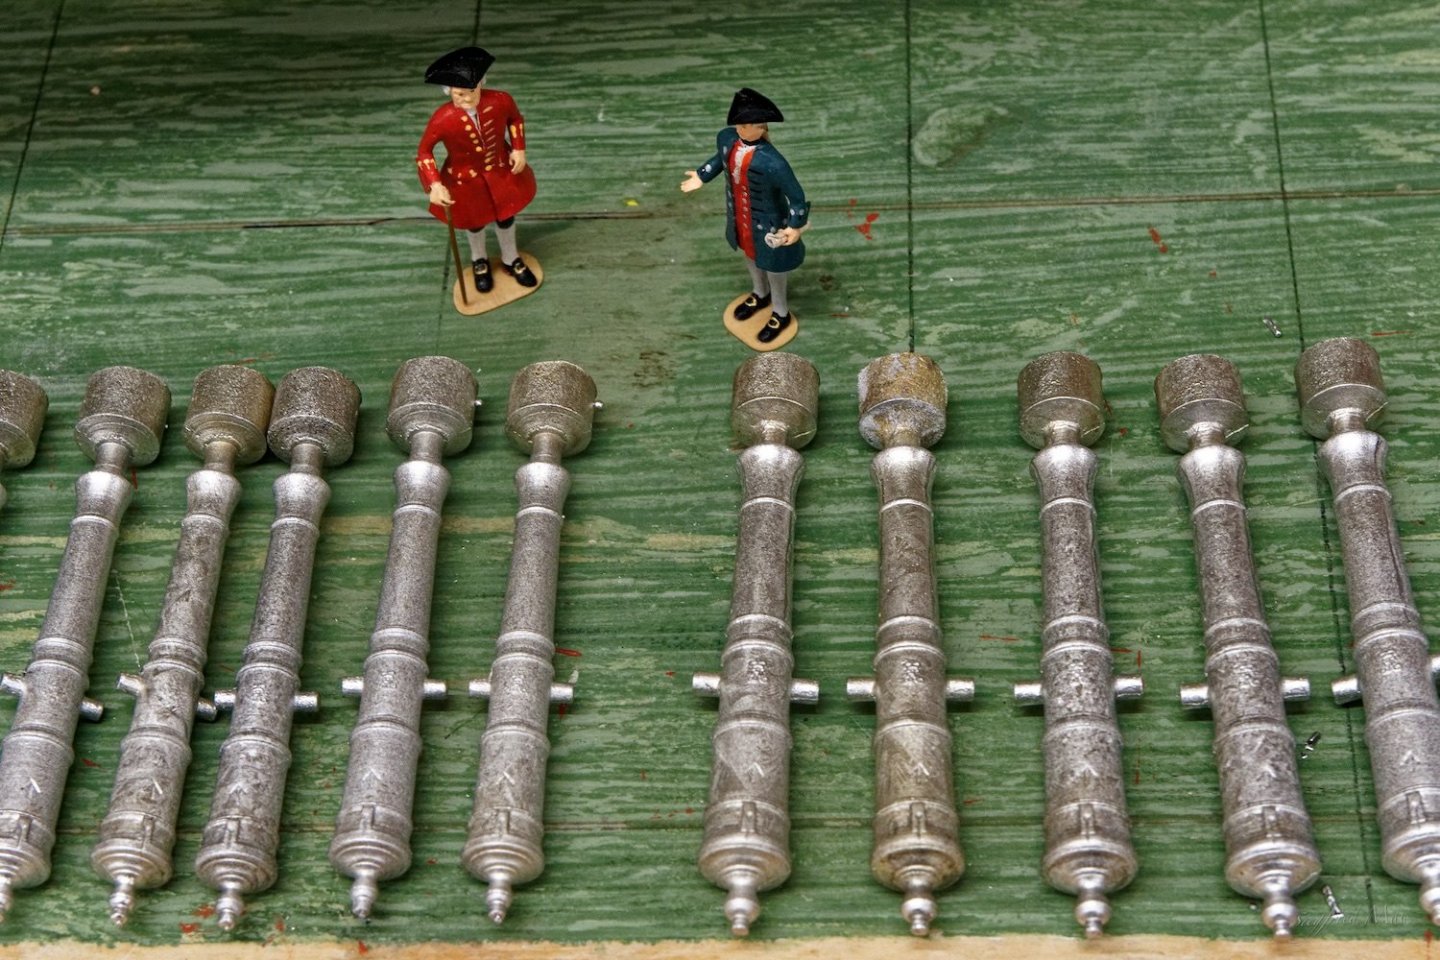
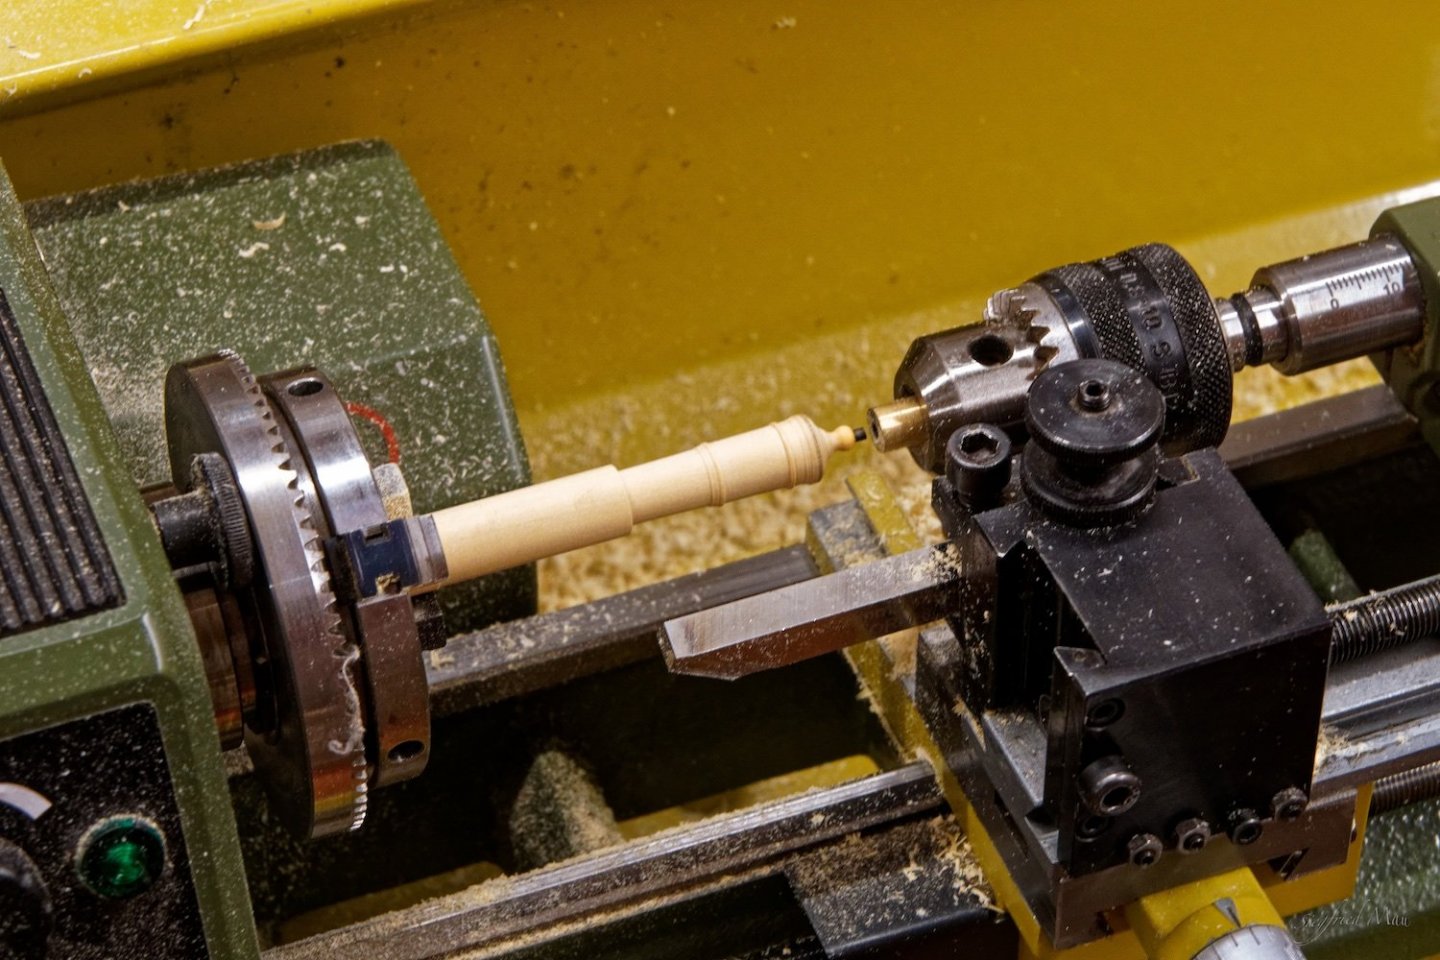
 Hello and many thanks for all your likes and comments, the foundry stand still, no more tin left for casting. But I ordered new one. In the meantime I'm got frustrated from painting the first batch of cannons. I don't know why, but the paint at some places just wipe away. This morning I washed all the paint away with acetone and hoped that this was it now. I painted all the cannons new and let them dry till tomorrow. Here some pictures of that what I did yesterday and today. At the first picture I turned the tompion to the muzzle. At the second picture you could see it better. Later I cut it in front of the the ring. Then I painted the cannons and at the third picture from today all the cannons had there cascable filed to shape and are new painted.


-
Hello Steven, you are right, it's rice paper. But I did't rub it, it's just because I wetted it before I painted it. Two pages before this one I have written little more about building these little guys.
-
Good morning Mark, and thanks for your explanation. Even when many models have cannons at the first port at the gun deck, I would't place there a cannon. But also then, the number of cannons vary from ship to ship. Even then the Tiger has 62 ports and others much more!
-
Hello, and many thanks for your likes and comments The whole winter we had no snow, but now in spring this I painted some of the cannons just to see how they look. You could't see much of the details without paint, it's all sparkling.


-
Hello, and thanks for the likes. It seams that nobody knows more about the number of cannons they really used in those times. All I know is, that they sometimes reduced or increase there number. Ok, it's not now important. This afternoon we worked at the foundry. That are now nearly half of the cannons I need. So tomorrow we will cast the rest. Not all cannons are first class, but most are better then I first expected. I will cast some more cannons, so I could sort out the not so good.
-
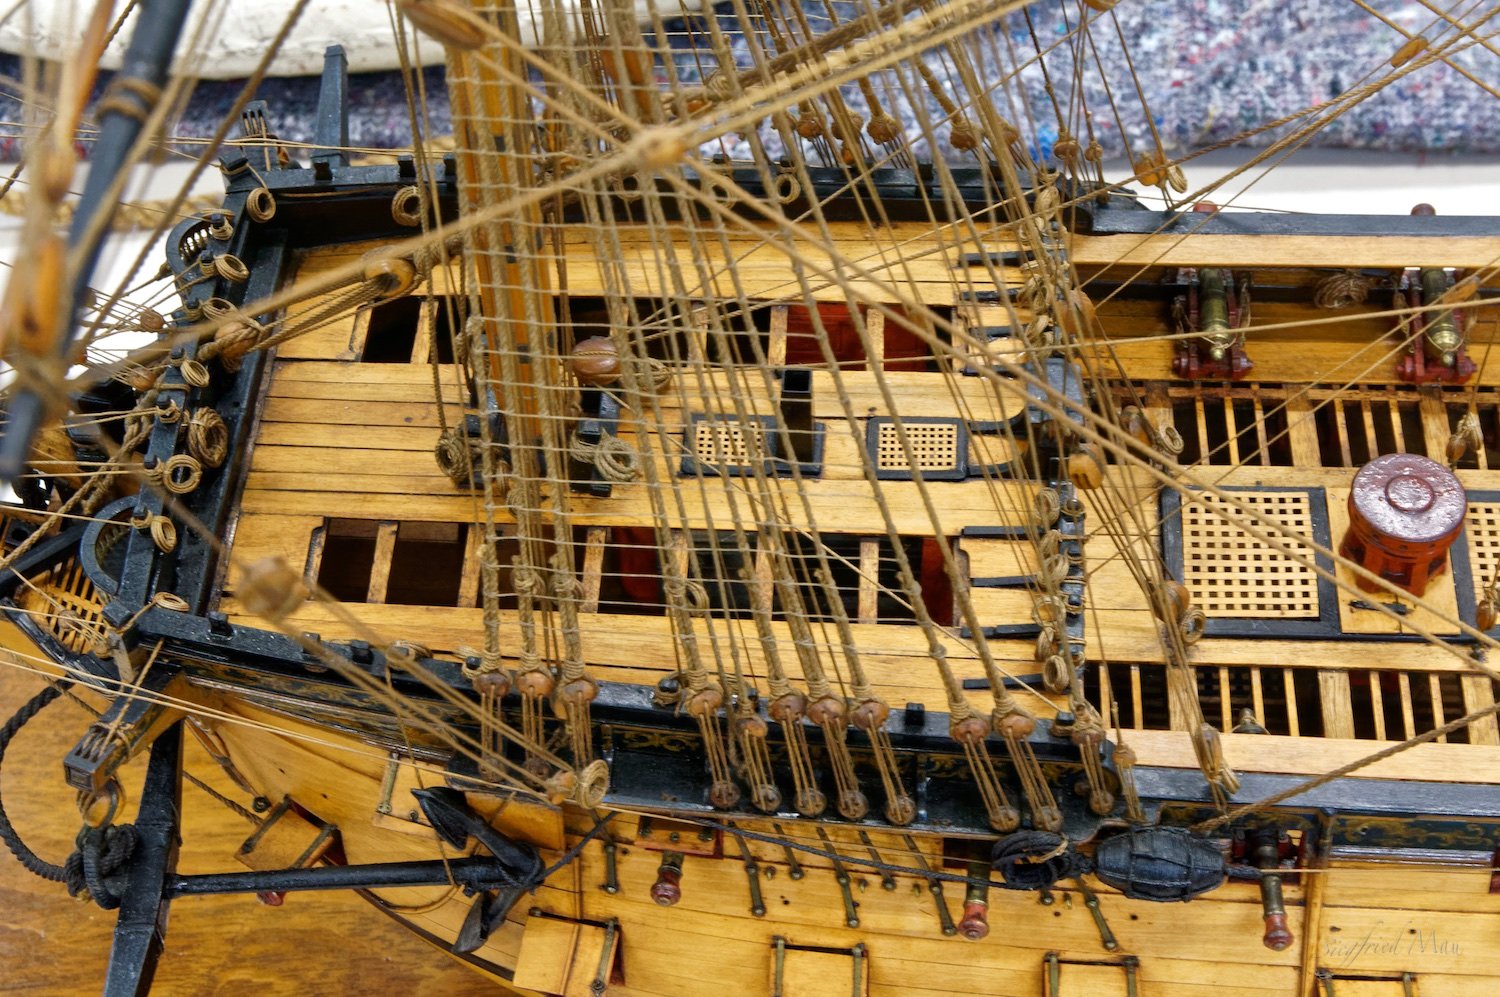
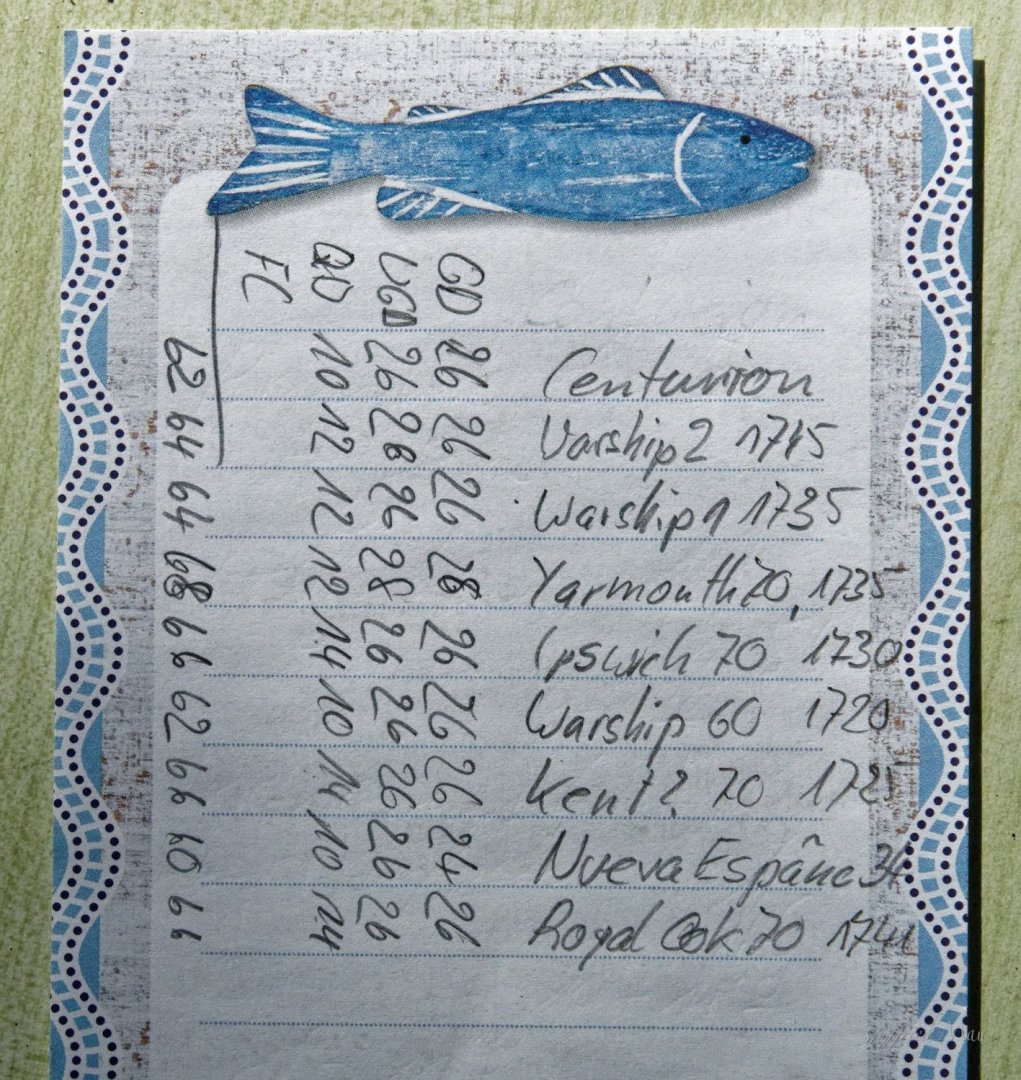
Hello and many, many thanks for all the likes and comments, today I finished the molds for the cannons. Only the vent channels have to be cut. I leave them for the rest of the week seasoning and then I will start casting. But there is something I did't really know. For the 60 gunner Rif Winfield state: GD 24x24pdrs, UD 26x12pdrs, QD 8x6pdrs and FC 2x6pdrs. For the 70 gunners: GD 26x32pdrs, UD 28x18pdrs, QD 12x9pdrs and FC 2x9pdrs. But when I count the cannons at the models, I get other numbers. I counted mostly only the ports, because not all models have cannons installed. What is most unusual, there are no cannons at the fore castle and mostly no ports! At the gun deck (60 Gunner) there are 26 gun ports and I think that the first at each side are chasing ports. But also there have some models cannons. At least most models have more cannons, or the space fore more cannons then Rif Winfield says. The 70 gunners have at least less then 70 cannons! What is now true? The Tiger has ports for 64 cannons without the fore castle. When I say that the first ports at the gun deck are chasing ports, then 62. The space there is very limited, because of the manger. Here the Centurion, the only one, with chasing ports at the fore castle but no ports to the sides, and no cannons there. And at the gun deck 26 cannons. and here the other 60 gunner, Warship 2. Also with 26 cannons at the gun deck, but no ports or cannons at the fore castle.

-
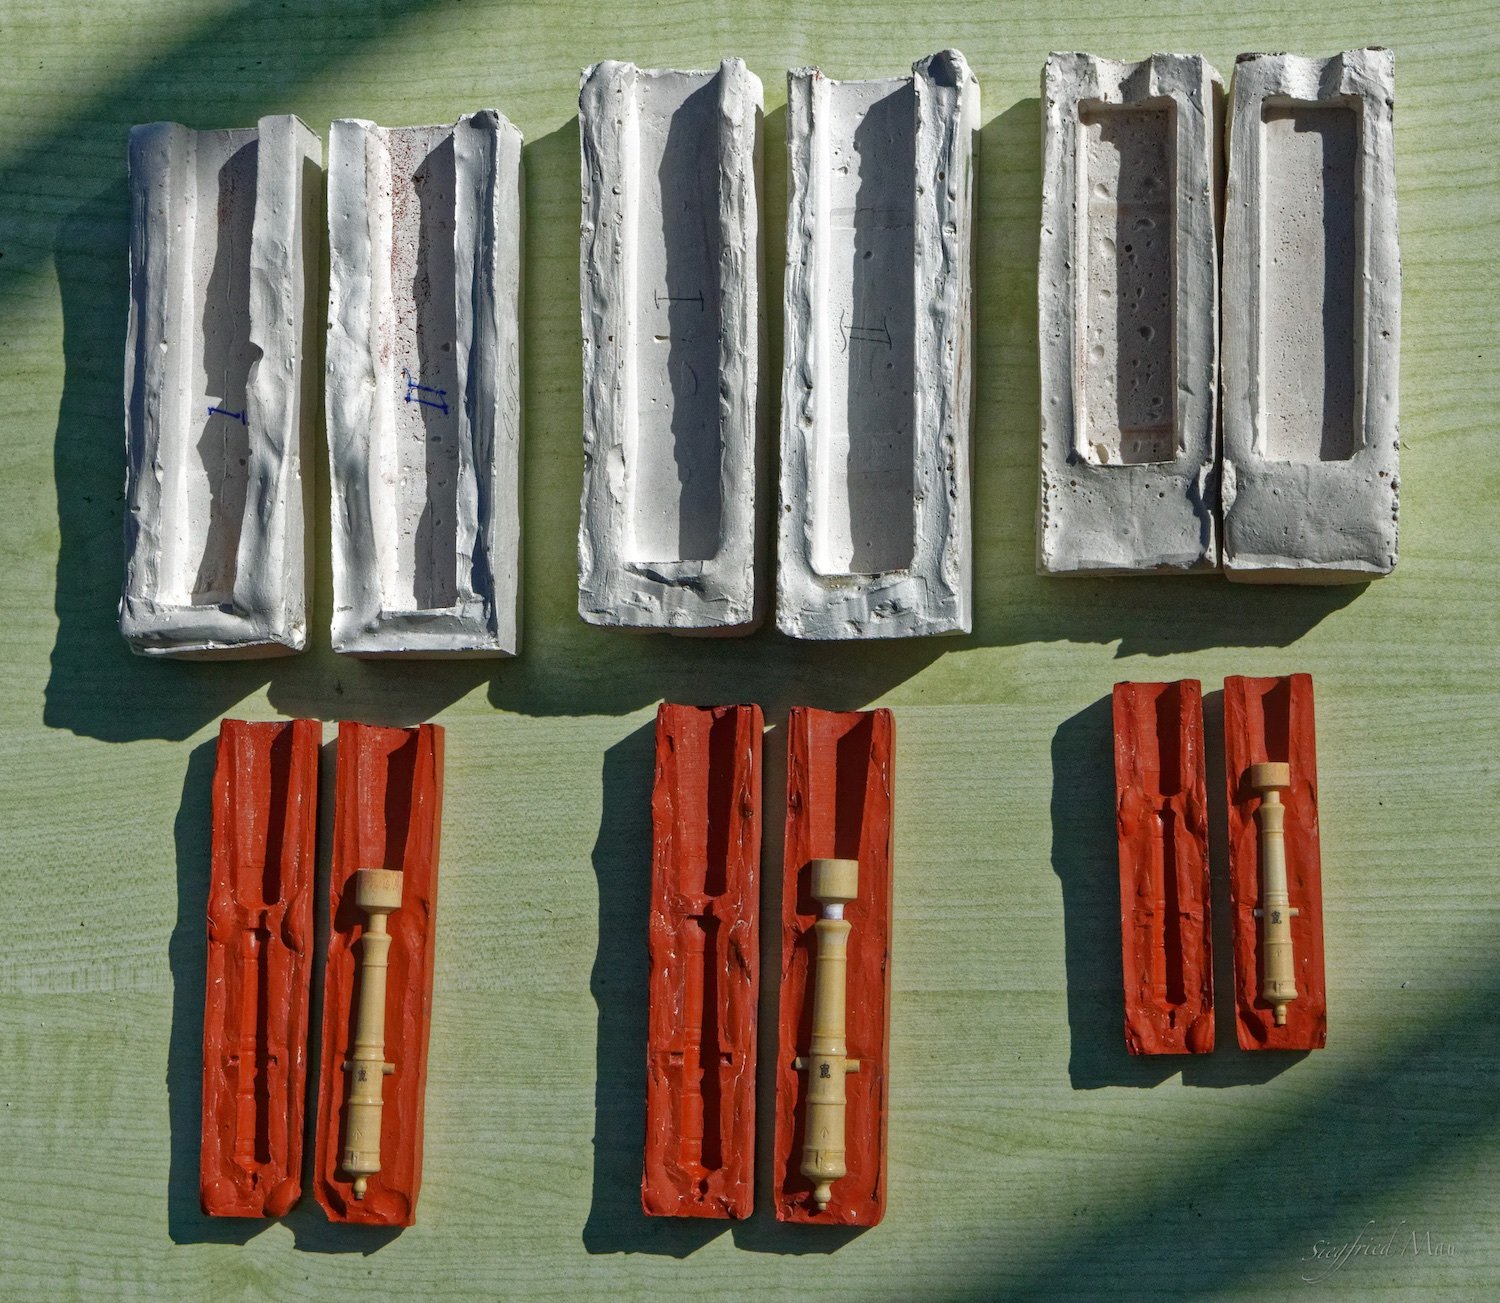
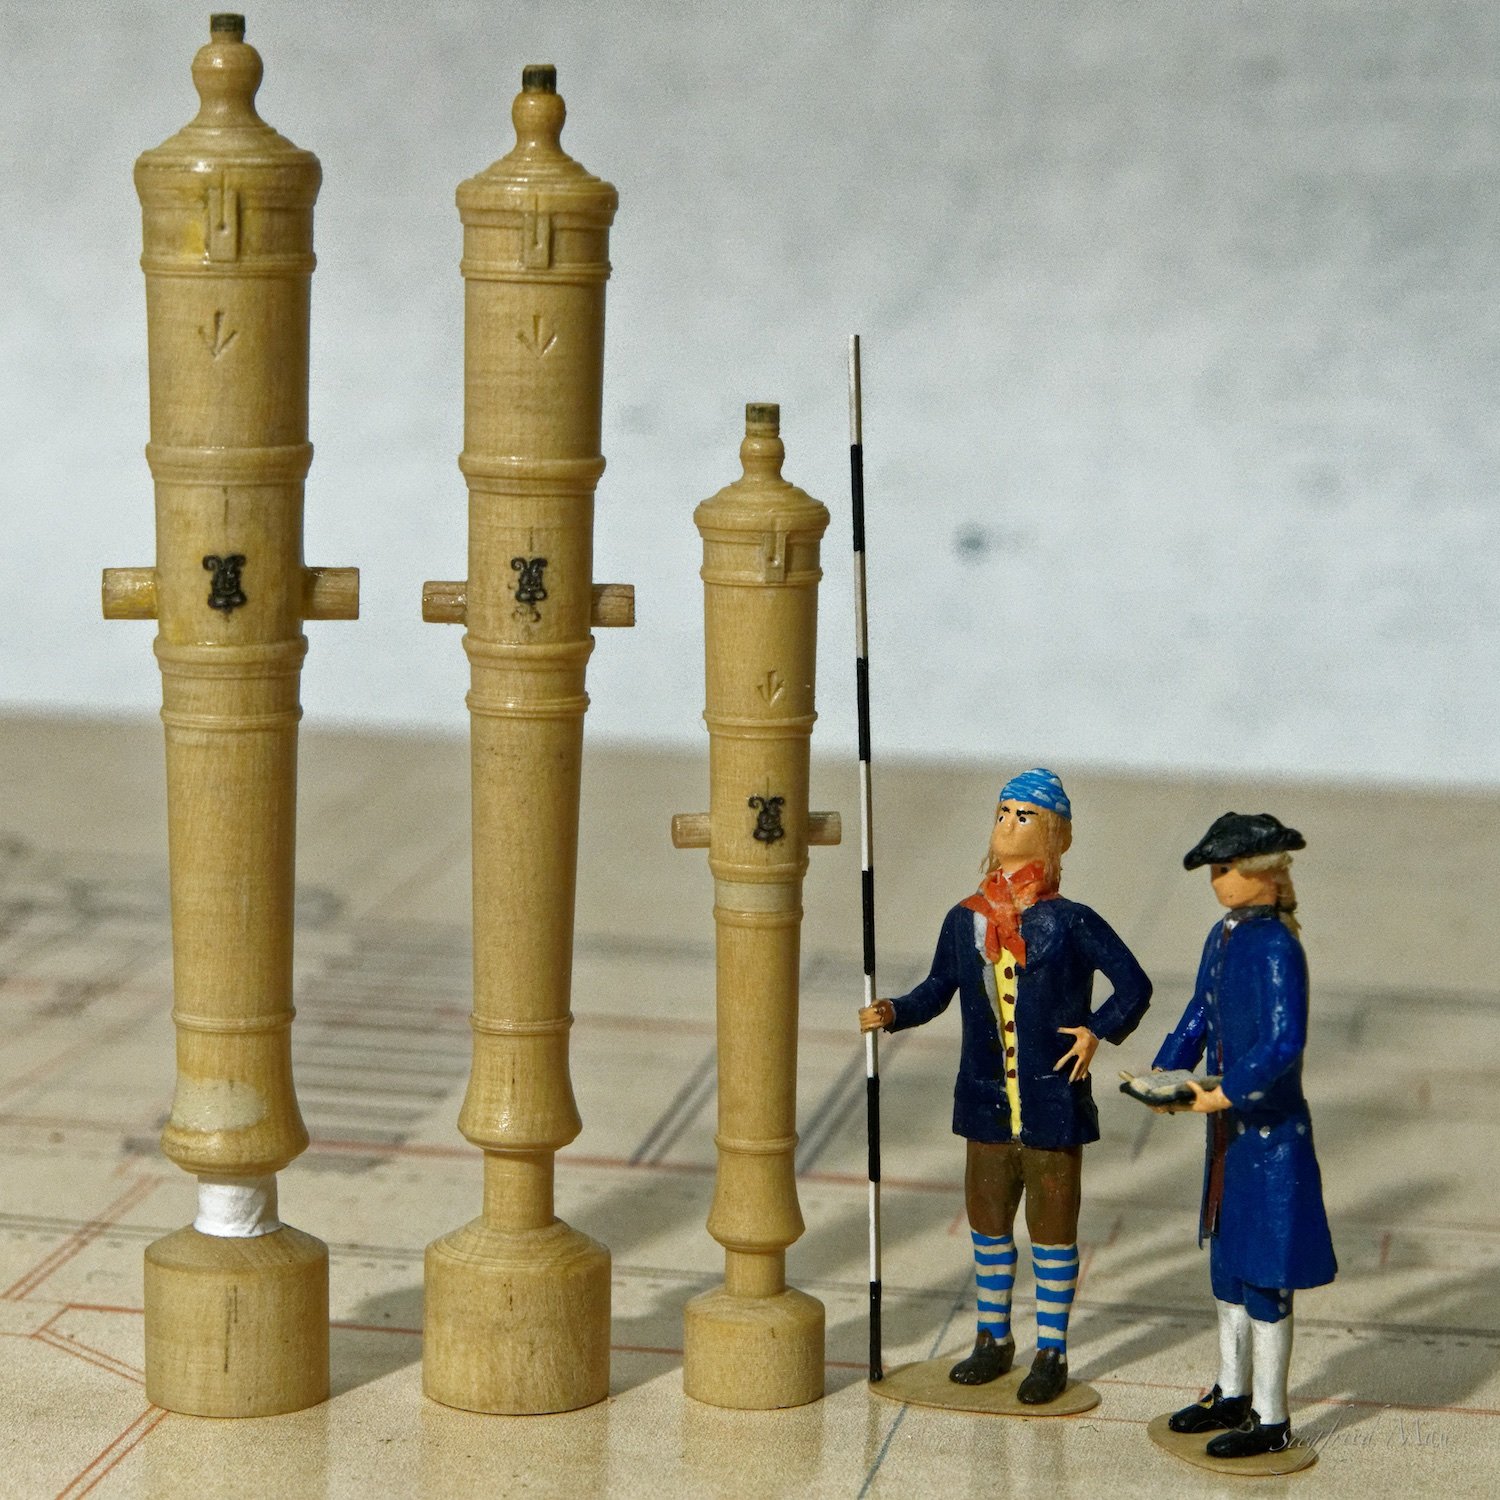
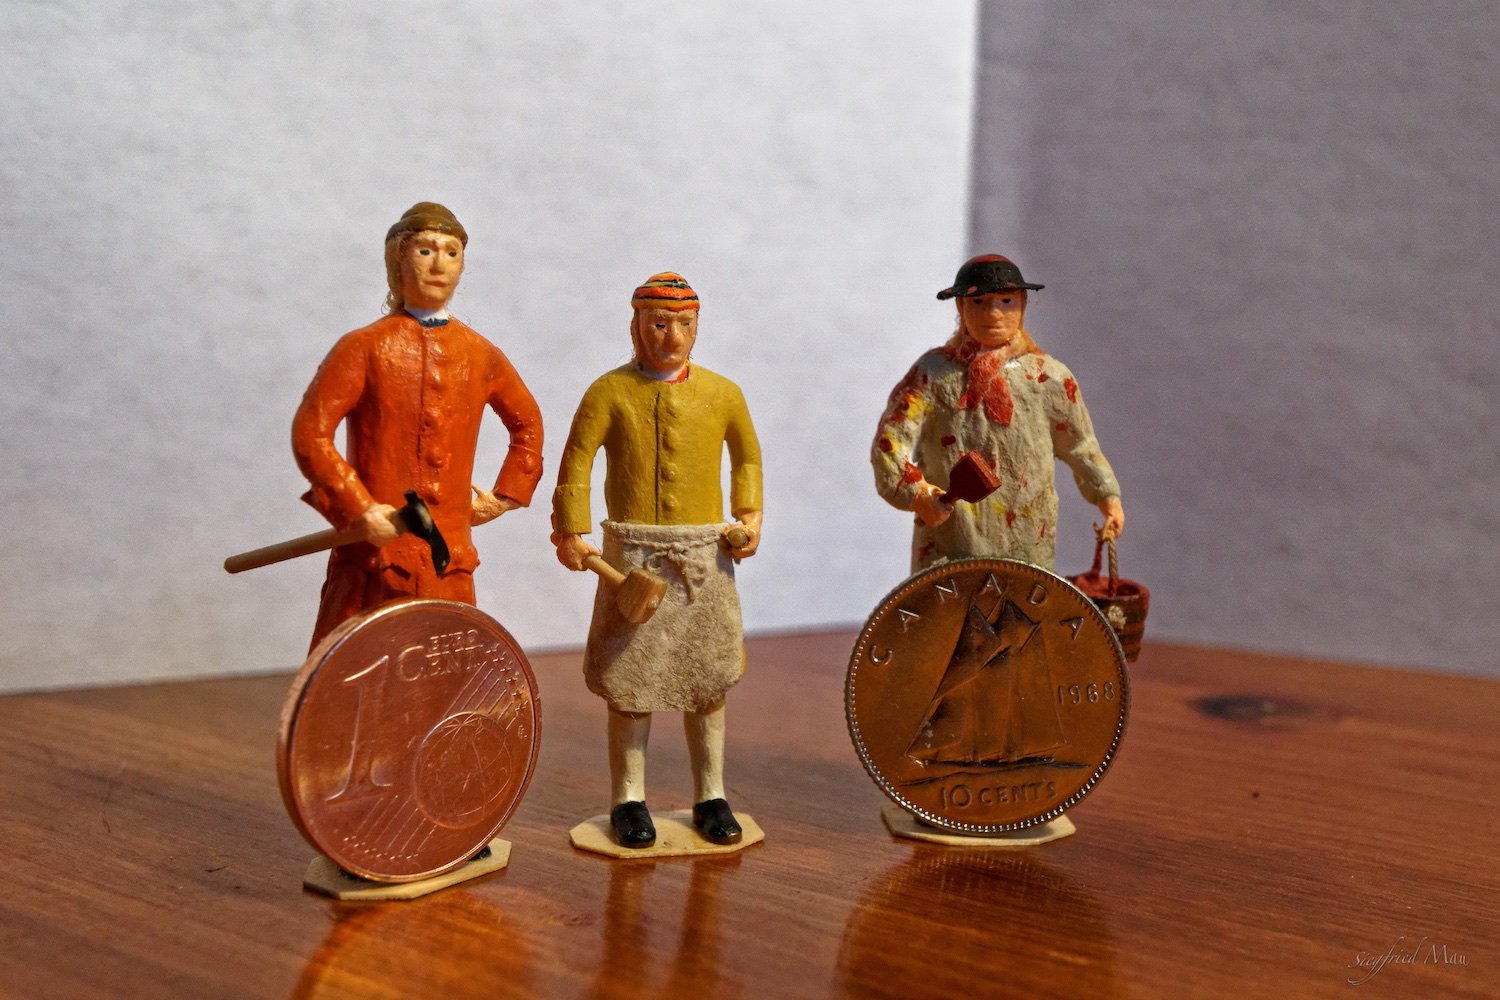
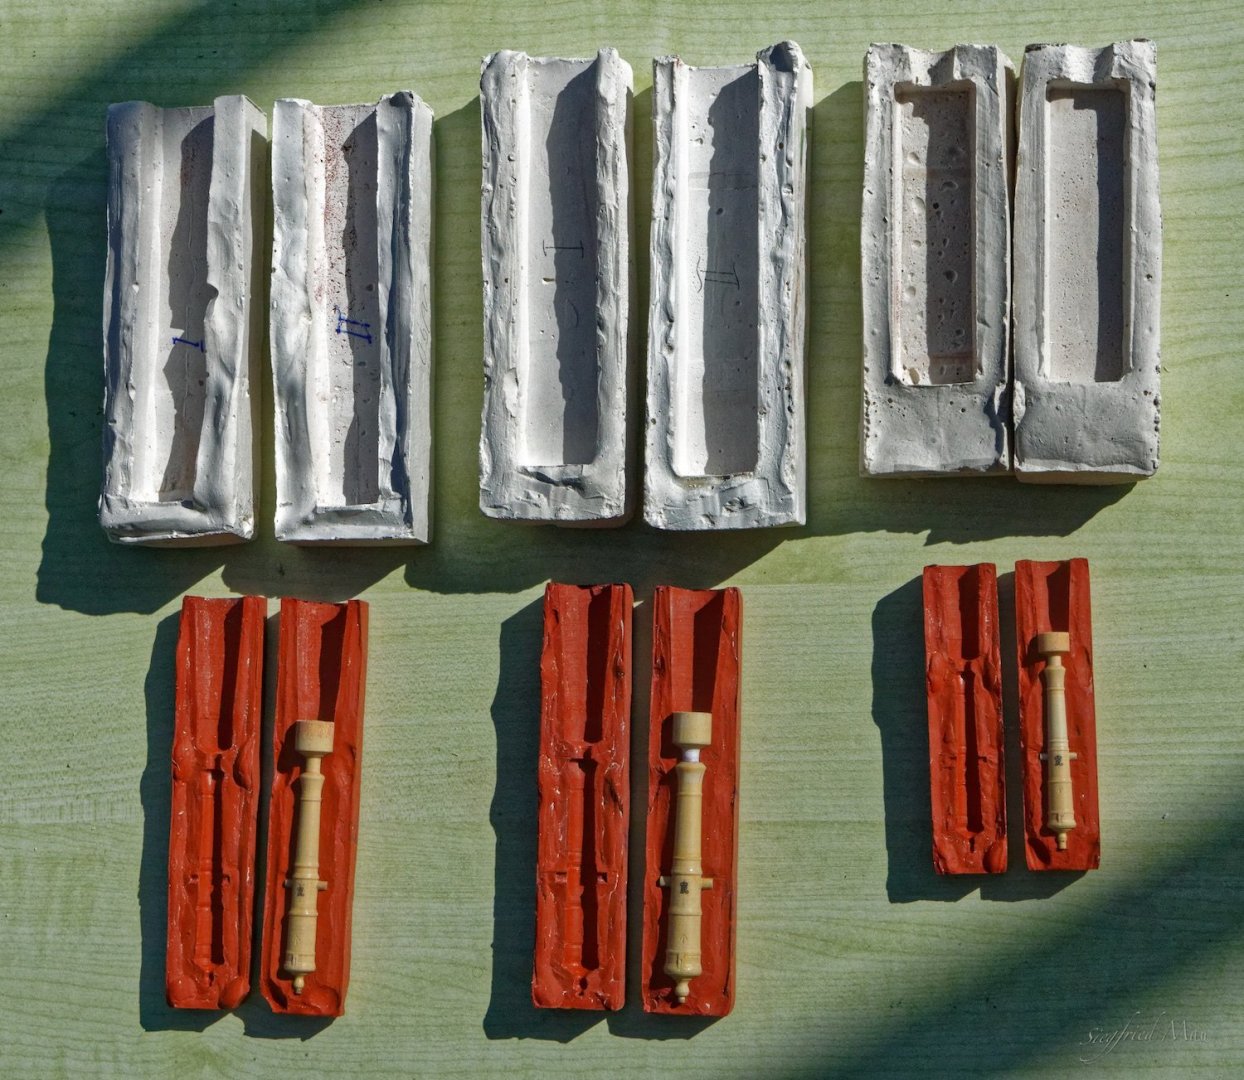
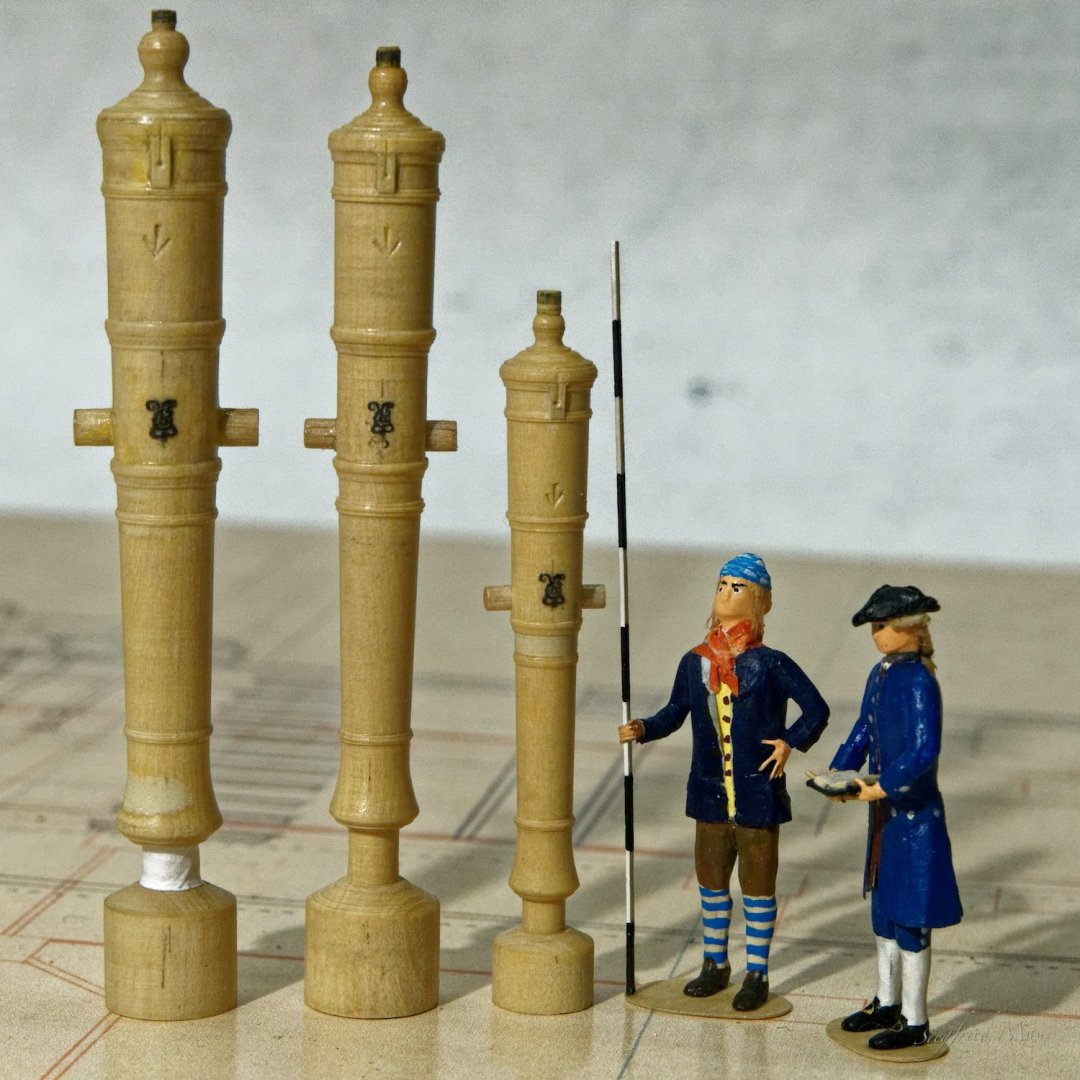
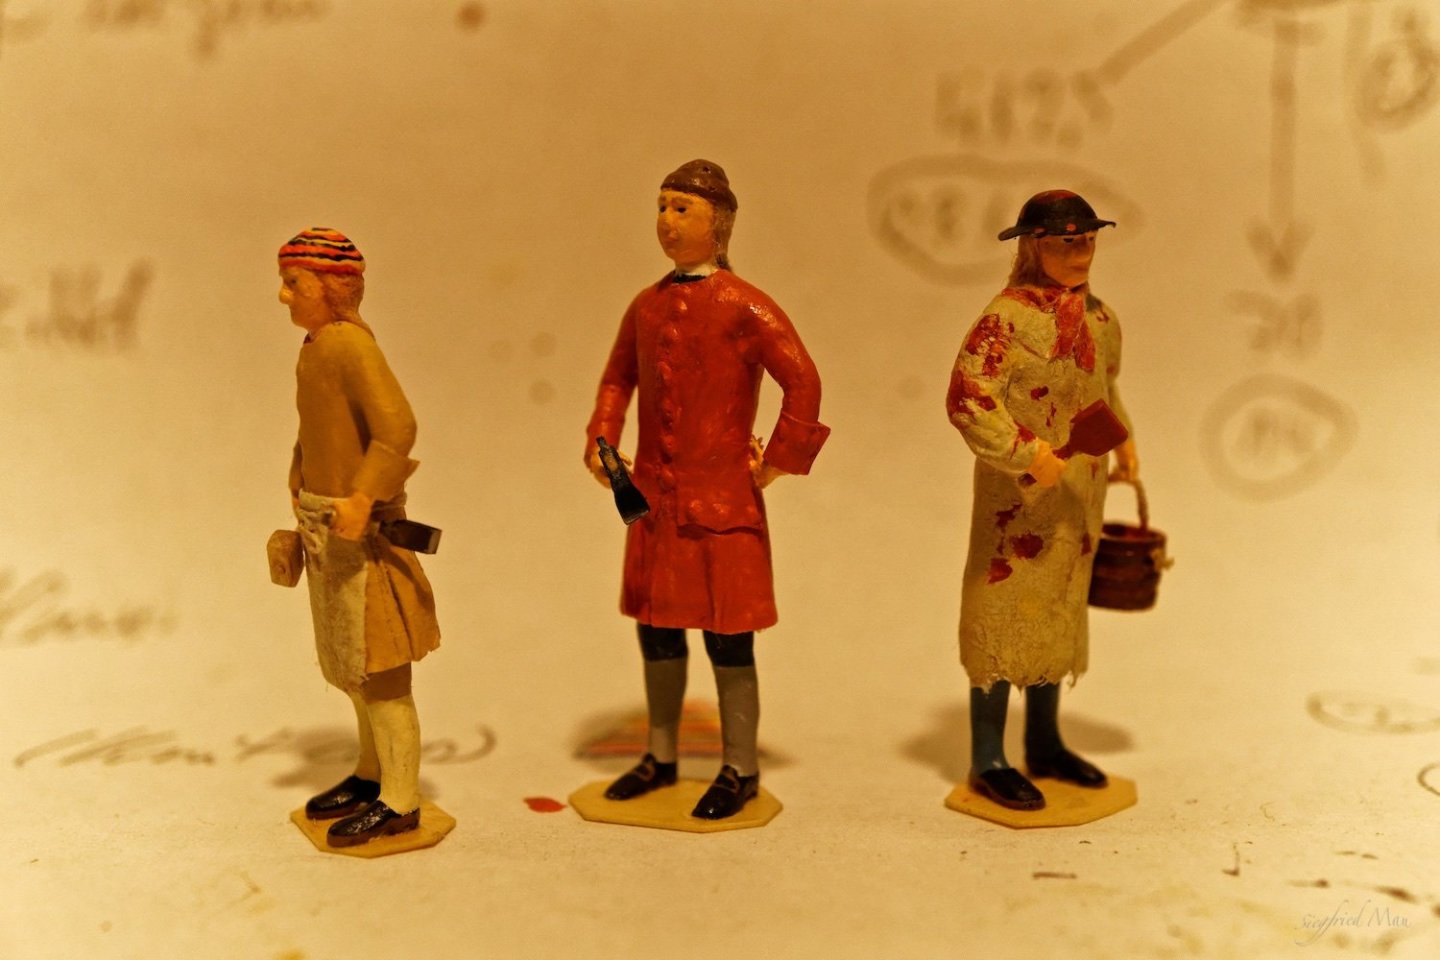
Hello, and many thanks for all the likes and comments. The models of the cannons are now ready and the man from the shipyard gave the ok to cast them. From left to right a 24, a 12 and a 6 pounder. Here they look really great, the 6 pounder is at least 7 ft long, but in reality that cannon is just 45 mm long and made me much trouble. I think I started 3 times to get it 🤨 The next thing would be building the moulds and then casting them.

-
Thank you Druxey and Mark, talcum powder I used also before. I don't know if graphite will work too, I will try it. Because talcum did it not always. Your cannon looks very good Mark. When I see the details at my cannons, I turned just the 12 ponder, I wonder if I could cast also these details. We will see, said the blind! Have a nice day, I stop work for today.
-
Hello Mark, thank you for the explanation. Because I use pure tin only with antimony, I think it will work. Did you had any trouble with the GR badge when casting? I had a look at your blog, but there it looked all ok, even if the pictures are very small. So I could't see very much. 😐 The next cannons are smaller, so the work gets not easier.
-
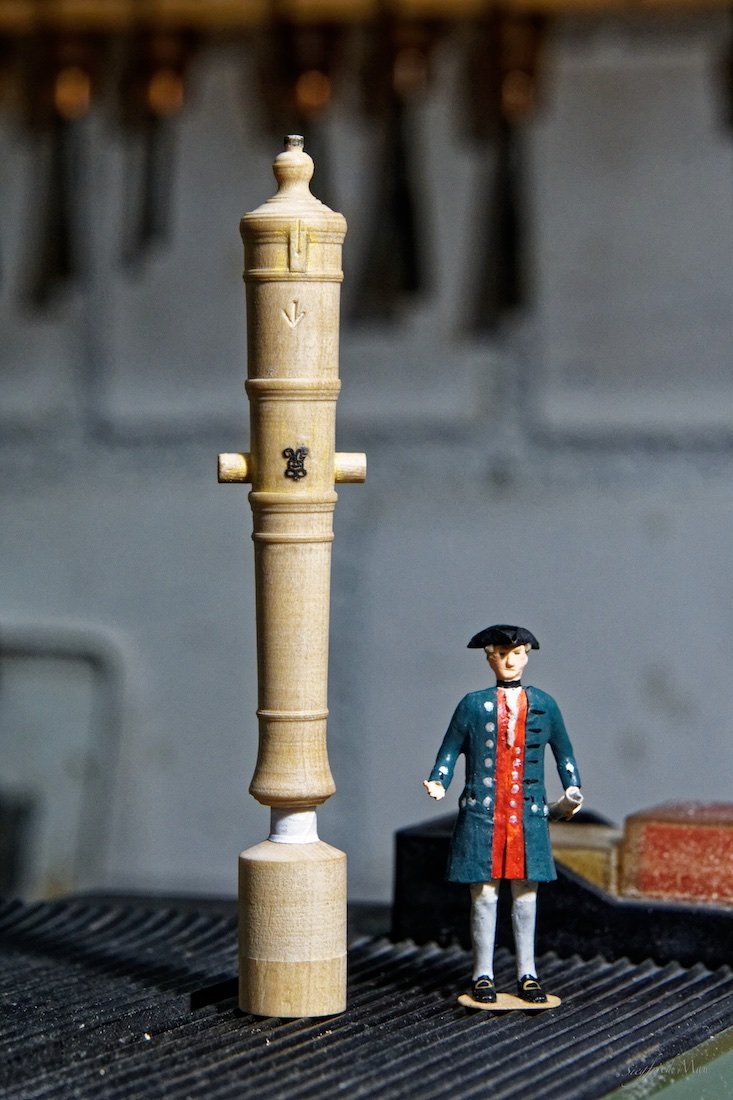
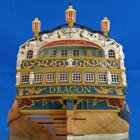
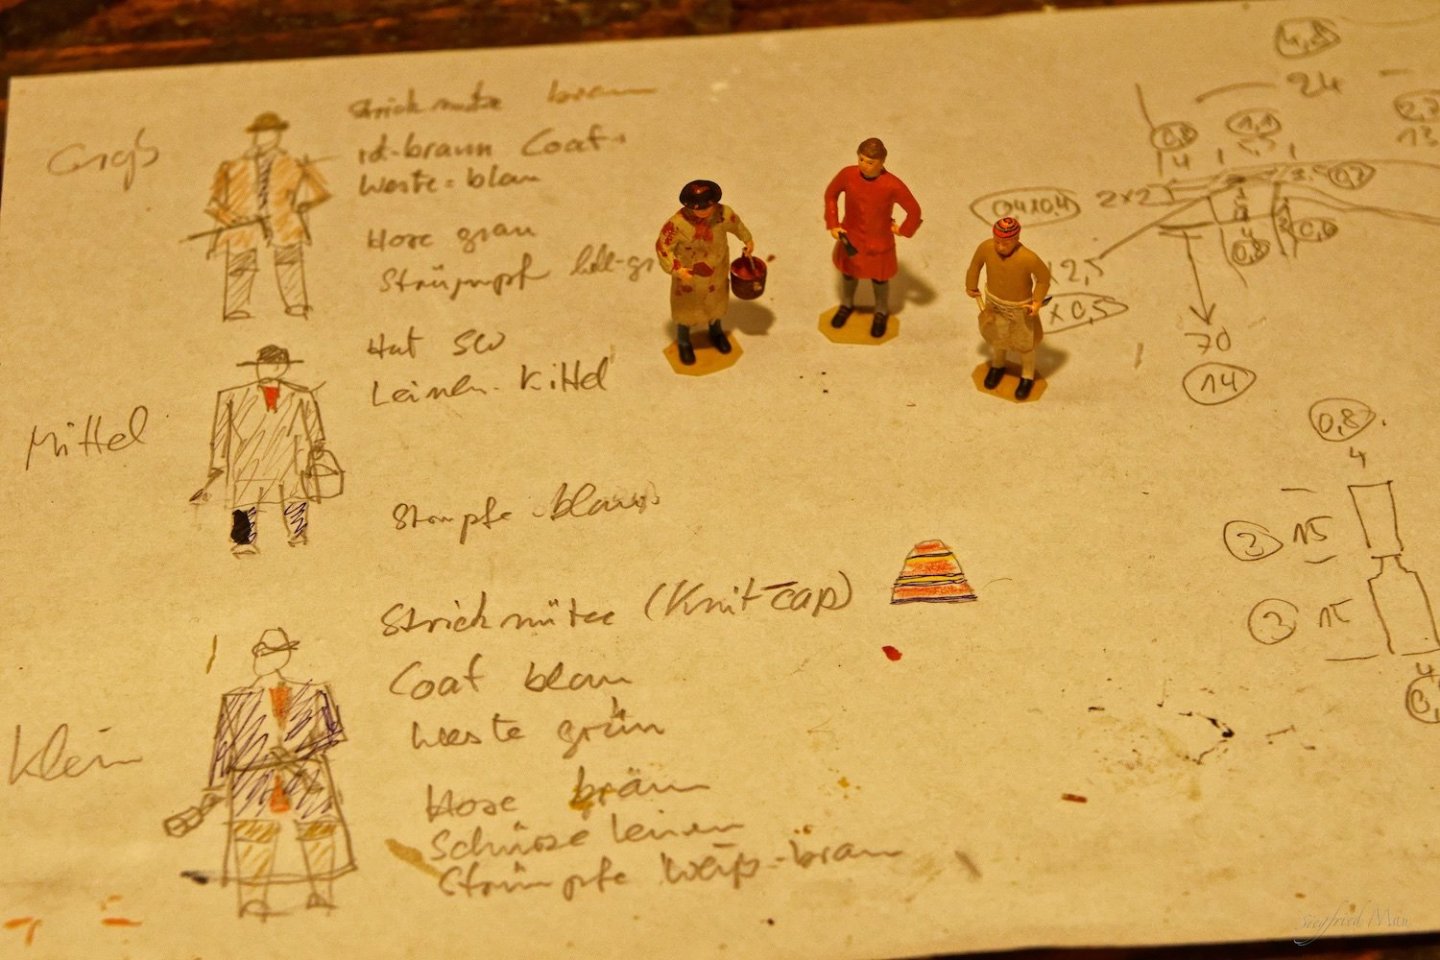
Hello and many thanks for the likes and your comments, Nils, you are welcome to look them live in the eyes 😄 Mark, you answered your question already by yourself. Yes I will cast my cannons, like those of the Dragon, in tin. I know the word pewter for dishes but I read it here also for all other things cast in tin. What is there the difference? And here the model for a 24 pounder.

-
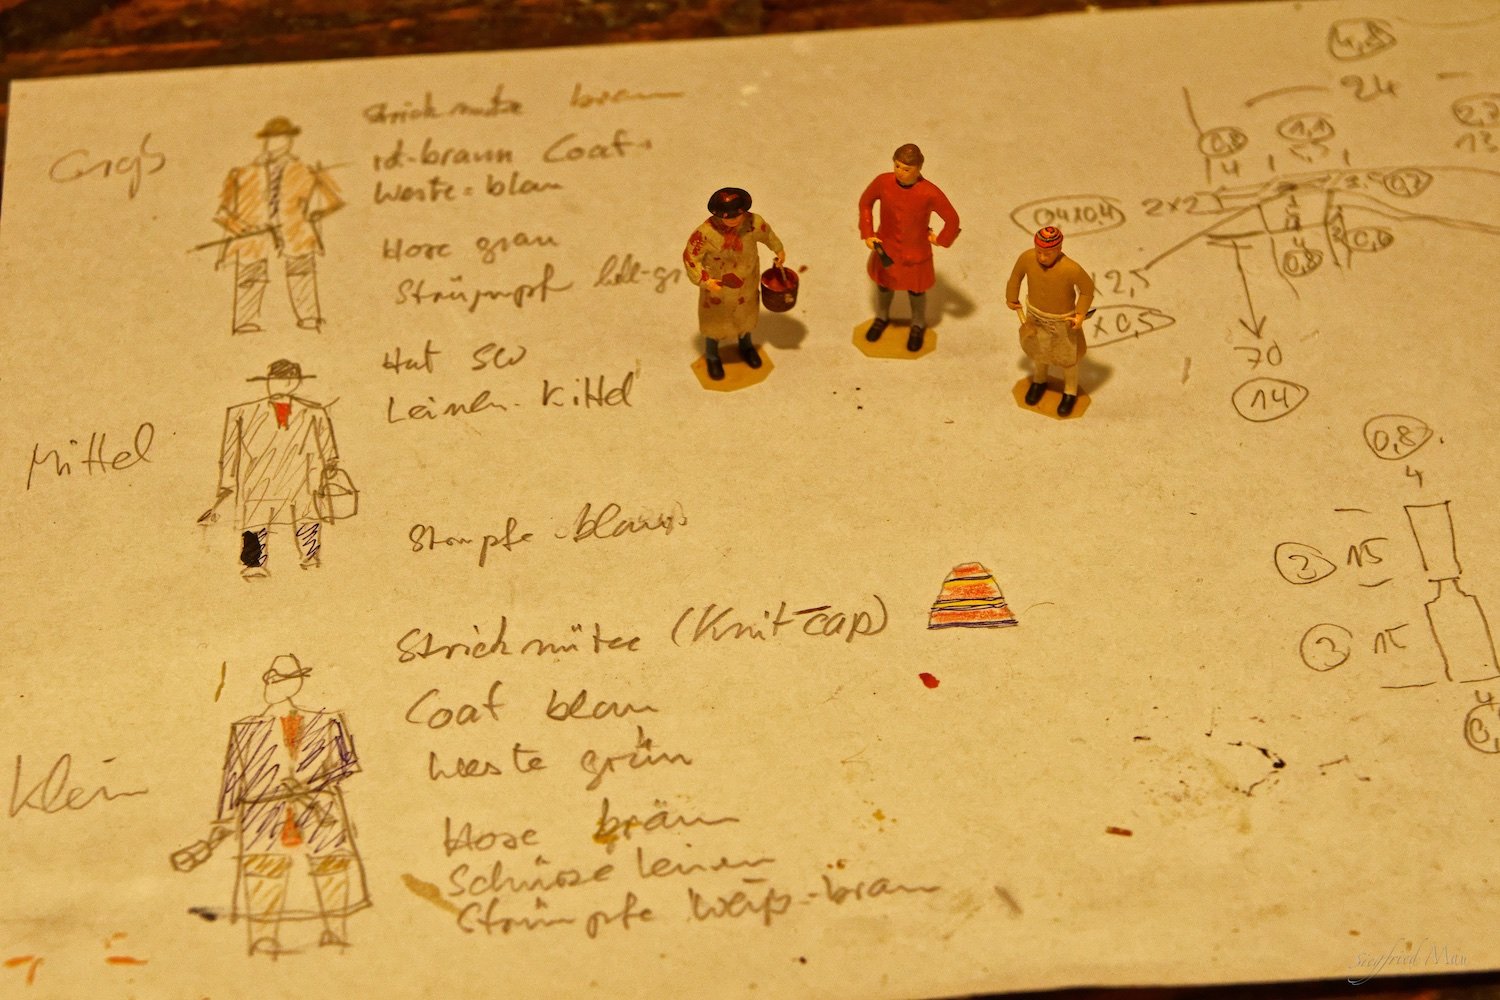
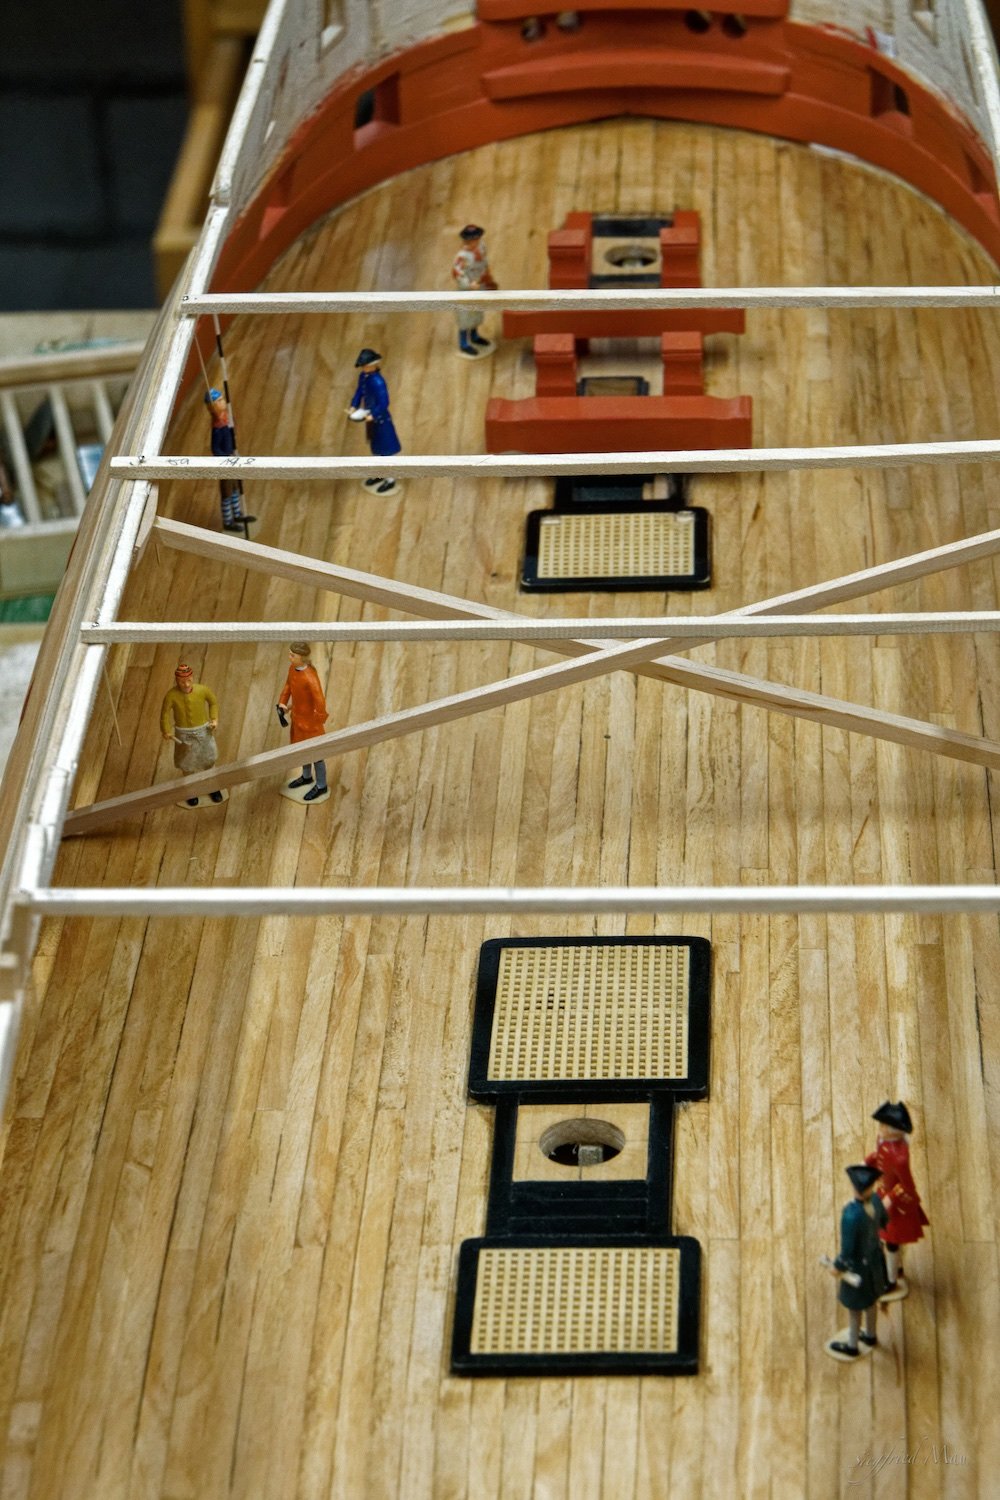
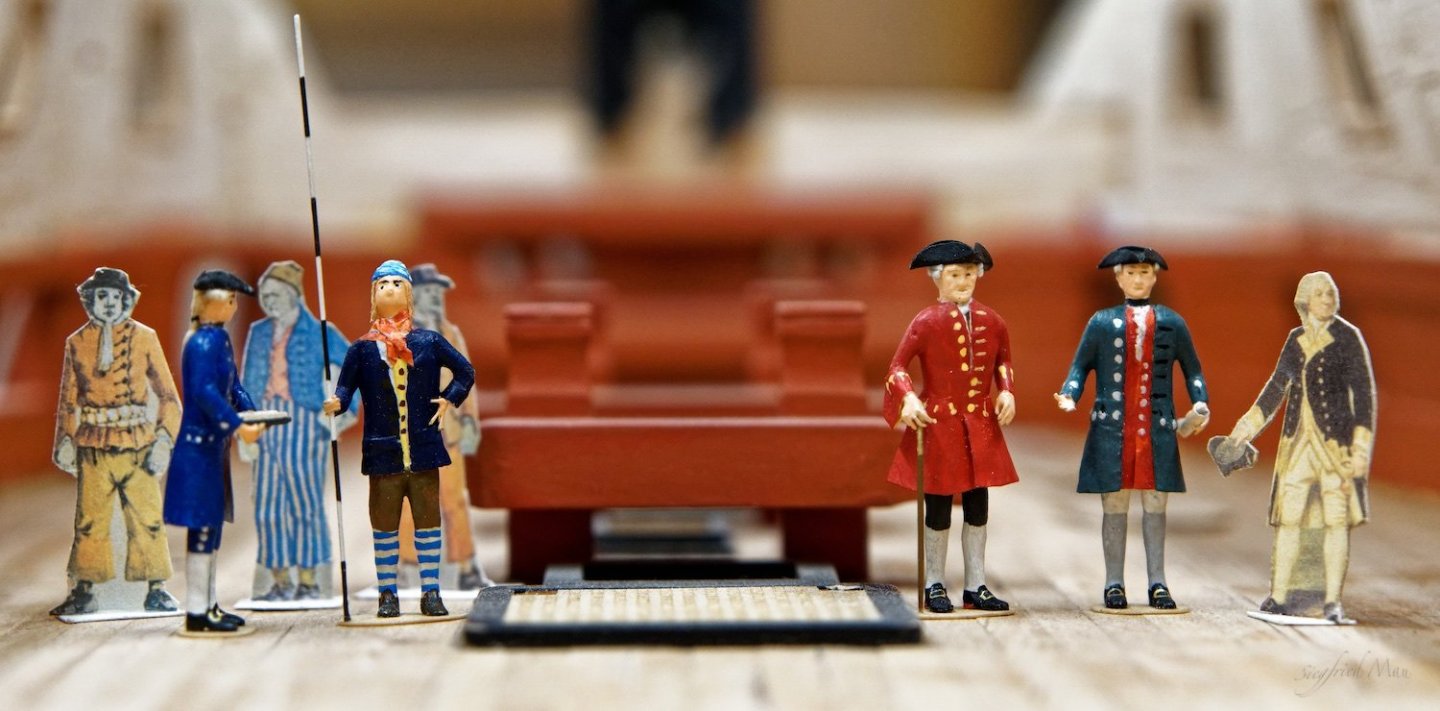
Hello, after a longer brake in building, I started now again. The new crew is complete. We have a new painter and two carpenters. But first they have to make them self familiar with there new working place. I started turning the cannons. Because I have opened a can of heat resisted silicon rubber for these little guy's, I think it's better to use it before it's getting hard.

-
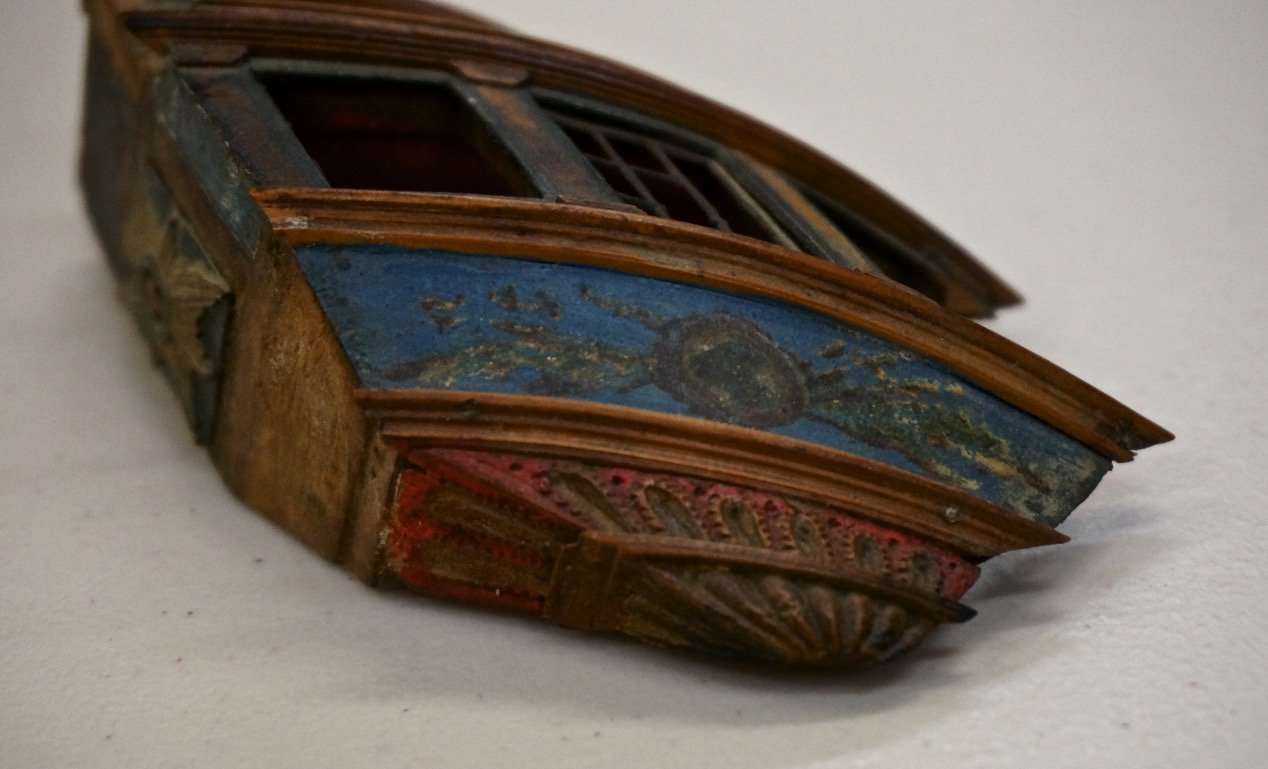
Mark, why would you use mica? It's not easy to work with. I made the windows for the Dragon with it. If you give your black wood panel a good coat of clear lacquer, you have the same effect and it's authentic. Jason, if you send my your address(PM), I send you the rest of my mica.
-
Hello Mark, I looked through my pictures and books again and found all, 1. real windows, 2. fake windows with glas or mica and 3. just black painted backgrounds. So you have the choice. 1. I don't know how they did it. But because there is the door to the gallery, you have not to build the channel wales up to the back. They have there no more function and if you make the space between the windows here a little larger it may work. 2. I don't think that they build that in real, as some stated also earlier. No one would see it and I think it's only for the beauty of the model. 3. Because the paint in those days based on linseed oil, it would shine after some layers. How you build your model is now your decision.
-
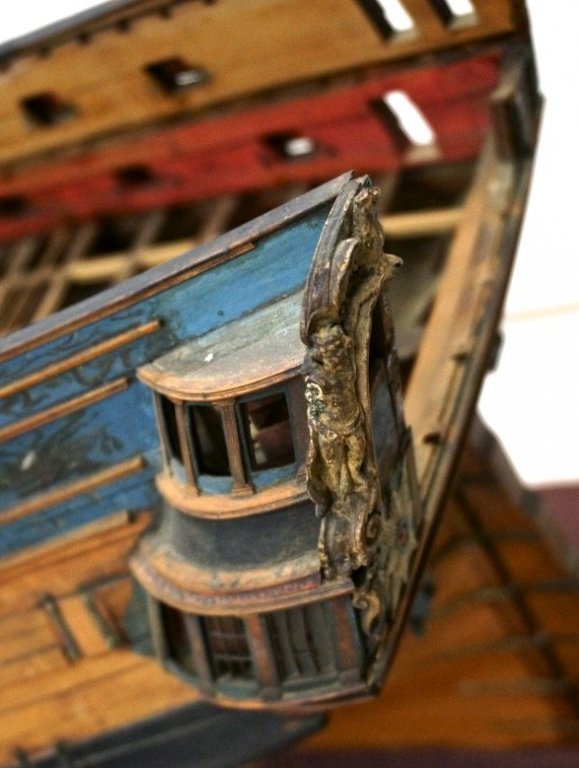
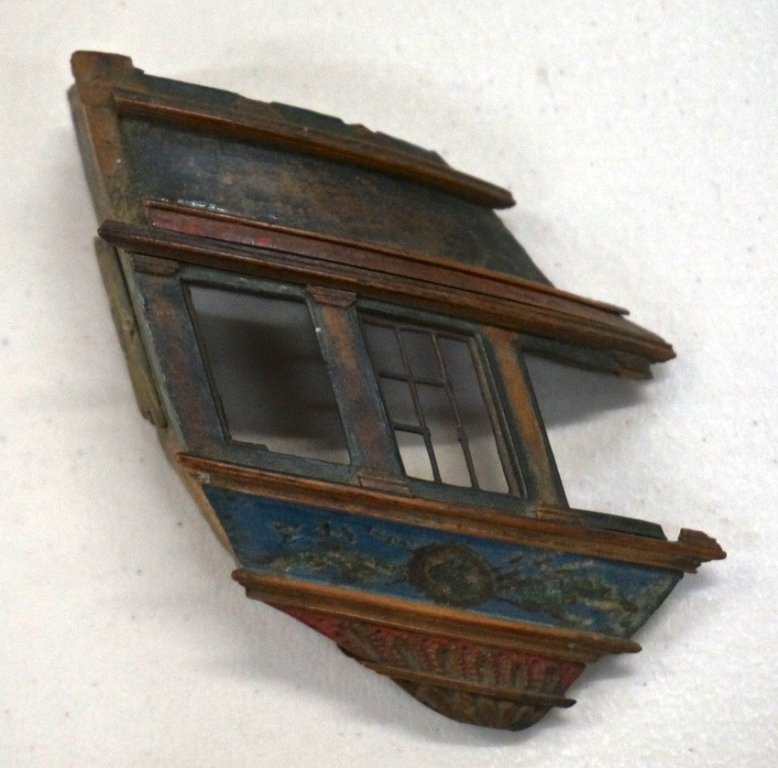
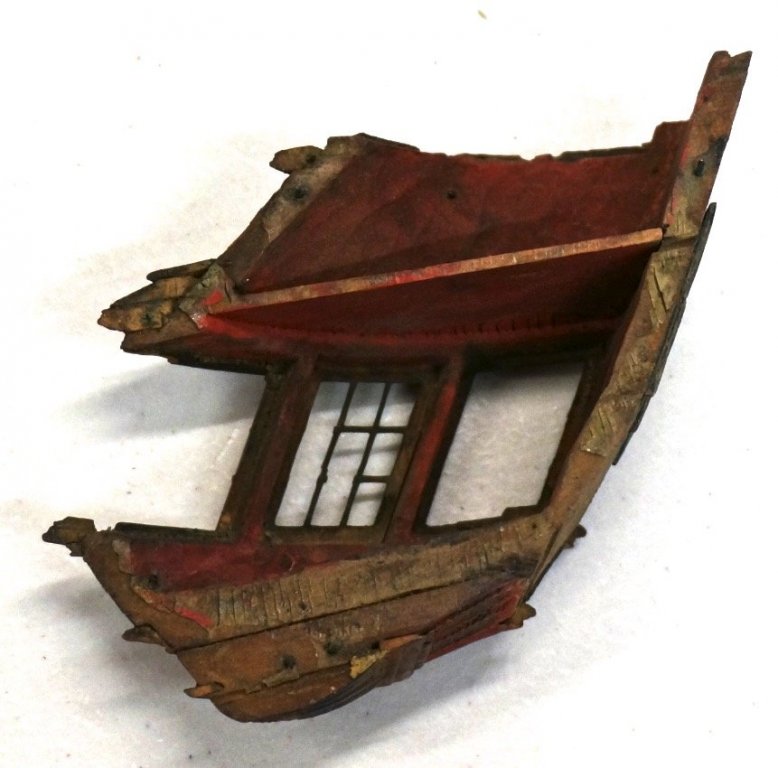
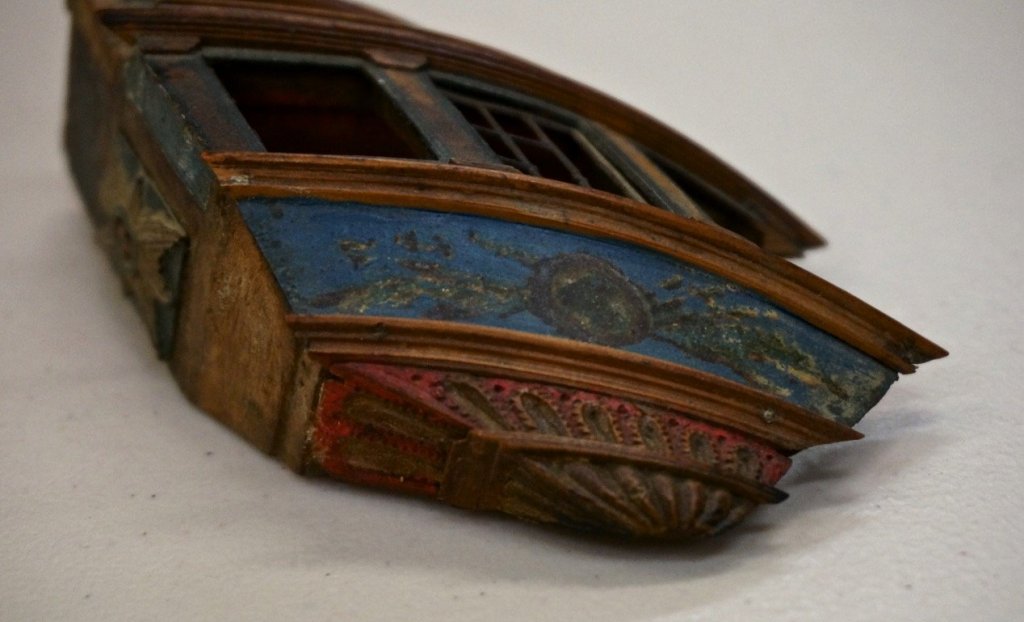
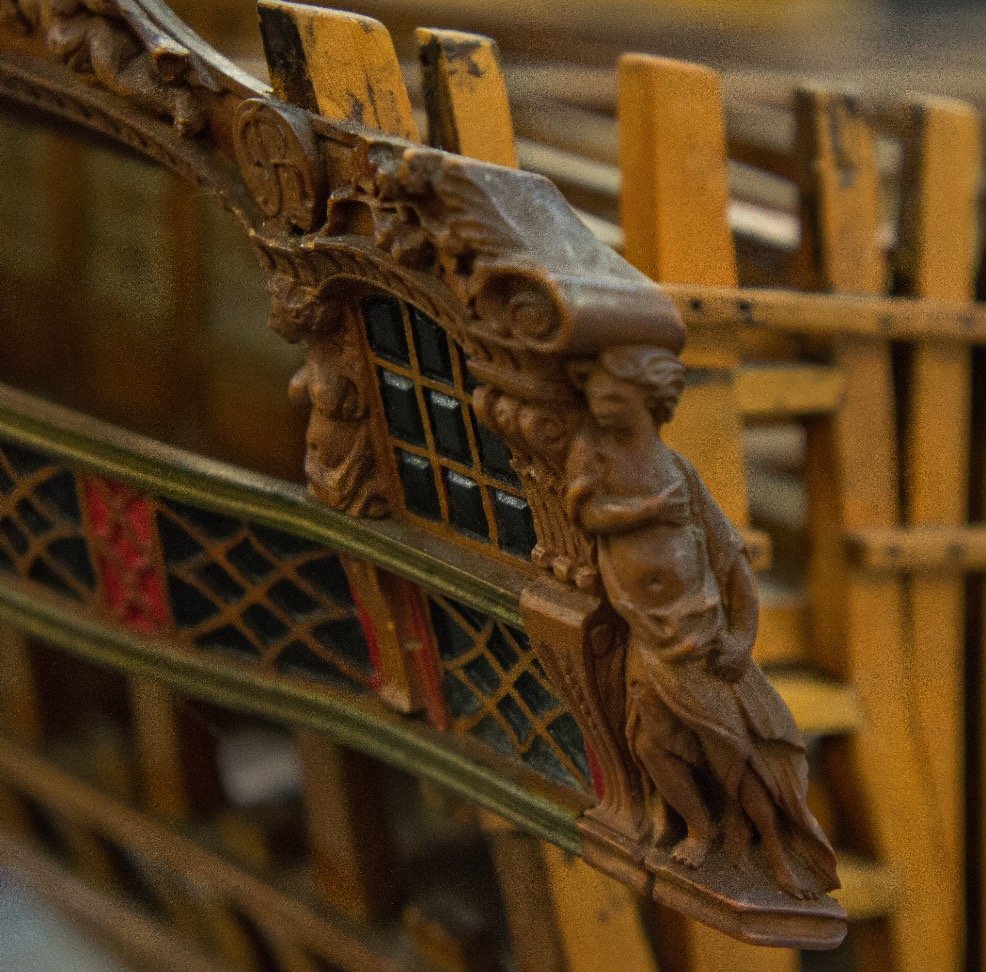
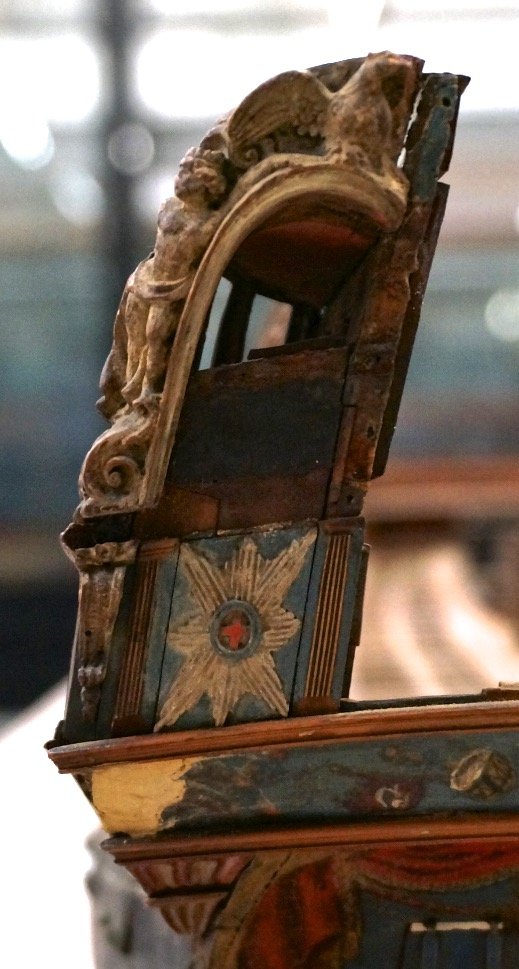
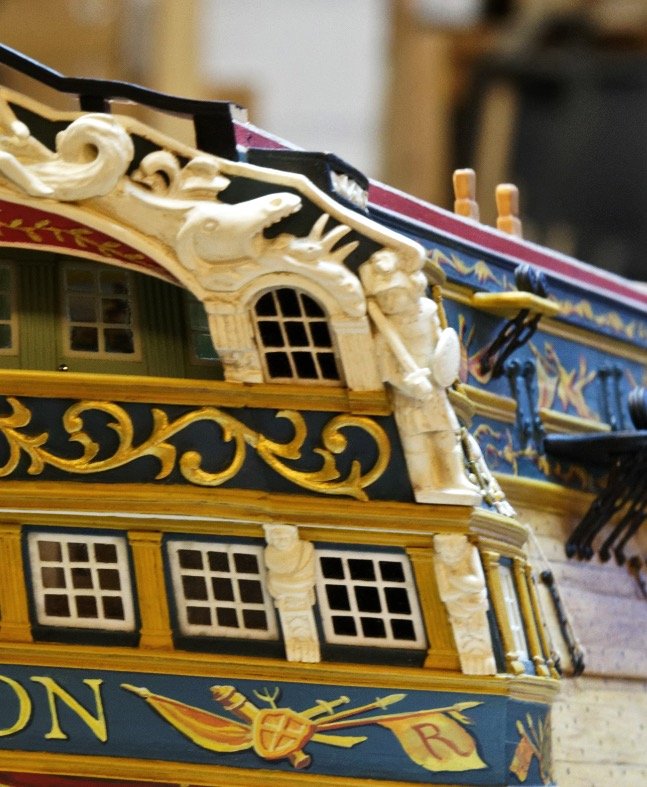
Hello, Druxey, there are always exceptions from the rule. With other words, there are no rules. Here some pictures from my collection. At the Dragon I painted the wood behind the window frames just black, but if you look from the side it glazed a little The Bellona, it did't look like glas. There is no glazing! and the other Bellona, Mark you did the picture and the Superb, without any window to the back and the last window to the side is blind without glazing
-
ancre La Belle 1684 by Nenseth - 1:36 scale
Siggi52 replied to Nenseth's topic in - Build logs for subjects built 1501 - 1750
Hello Hans Christian, or you buy here, ist's nearer to Norway 😃 https://www.edelholzshop.de/de/search/buchsbaum/ -
Hello, and to all a happy new year 2020 best wishes from the yard crew and me. The old crew say goodbye and retired with the new year. But I hope that I could get some new crew members and then we start again with work.
-
Hello Paul, at least I feel better now. After one other health issues. But the energy is coming back slowly. The last time my house and garden took my attention. But I'm now and then back in the basement and working on my crew figures 2.0, and I hope that I start next year again with my Tiger. With the right crew 😉 Just some short sentence to the port discussion. For me the discussion has an end. For all those who will take part in it, please read it from the beginning. Then some things would be more clear. My english is't so good and I do not like to sit here for hours to repeat what I have written also earlier. At least the coppered Bellona and one other model of unknown origin are the only models at the NMM I know, who have a rabbet at the ports. For me is right what I posted under #227 with the sketch from #233 at the end. For me it is not from interest if druxey, I or anyone else is right. You may build your models as you like, or as you ever build them. If it's right or not. Then even that could be someone right, as I know too badly from the reenactment scene. I try to build my model right. Thank you for your interest
-
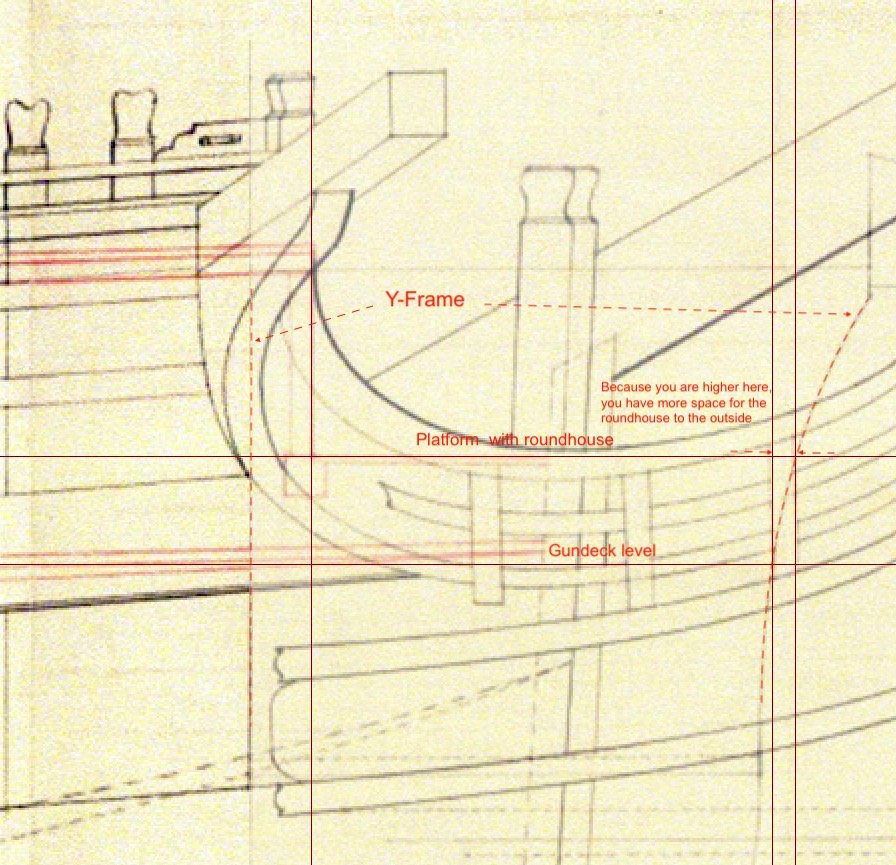
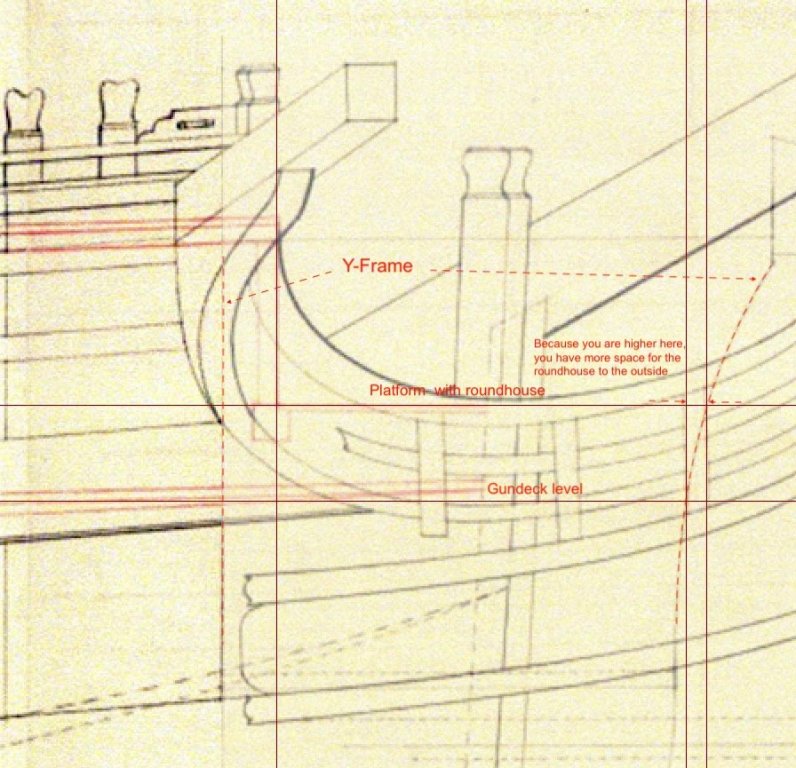
Good morning Mark, my reply goes more in the direction that you feared that there is no way in, because the dog leg frame is there in the way. So that would be eliminated when you build the roundhouses directly at the platform and not so far outside as you showed us with your paper platform in post #1357/8 The outside planking goes there also in a curve down, so you could only build the roundhouse at the platform. The problem with the high, it's only 5ft and some inches under the cattail beam, is an other. There I could only speculate. May be the stool is lower to the floor and the person who would use it had to stay outside at a step and sit down? Shame in these things was in the 18th century not already invented. I saw uni sex toilets behind the kitchen tract of a mansion for the servants. There was a long bench with 6 or 8 holes in a row without any screen between them and no wall in front. So they had always a good sight in the woods and fresh air. That is luxury!
-
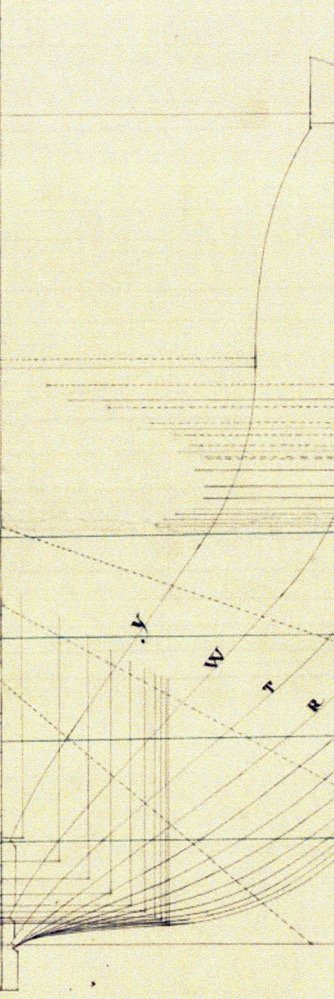
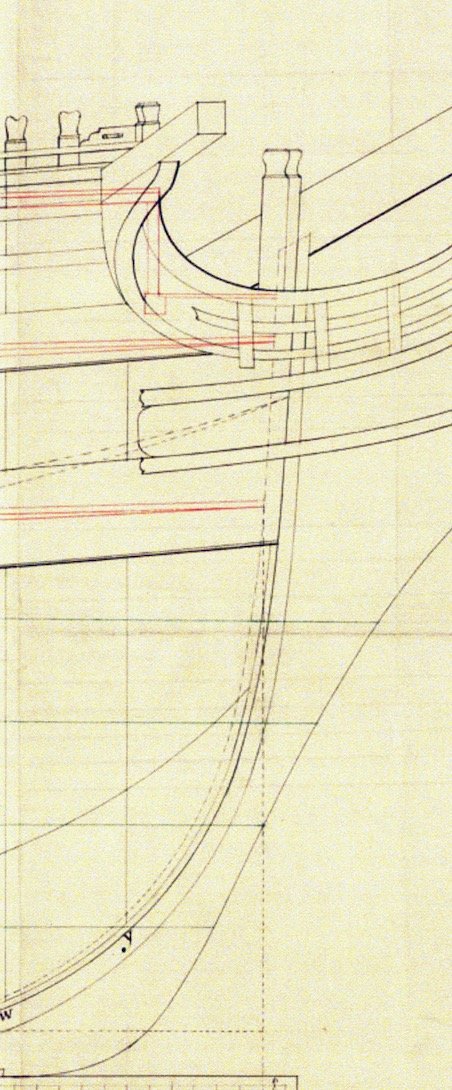
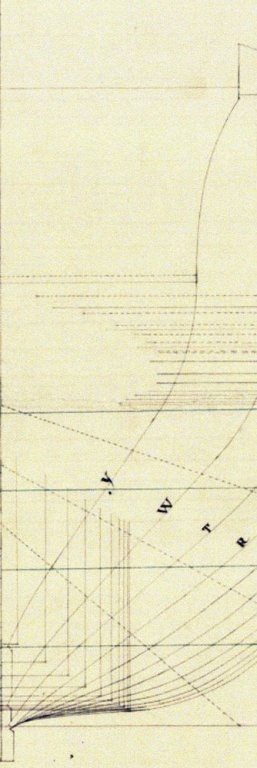
Hello Mark, the floor plan of the gun deck is lower than the platform with the roundhouse. I tried to make a sketch. The sheer plan and body plan here I laid both plans together at the Y- frame At least should the roundhouses be at this platform, as the picture of the Superb (sister ship of the Bellona) clearly shows. At the picture, where you made this paper platform, the front part of it is the gun deck, a little lower and smaler. So I think you have there a problem with the scale. The beak-head bulkhead should be narrower there.

-
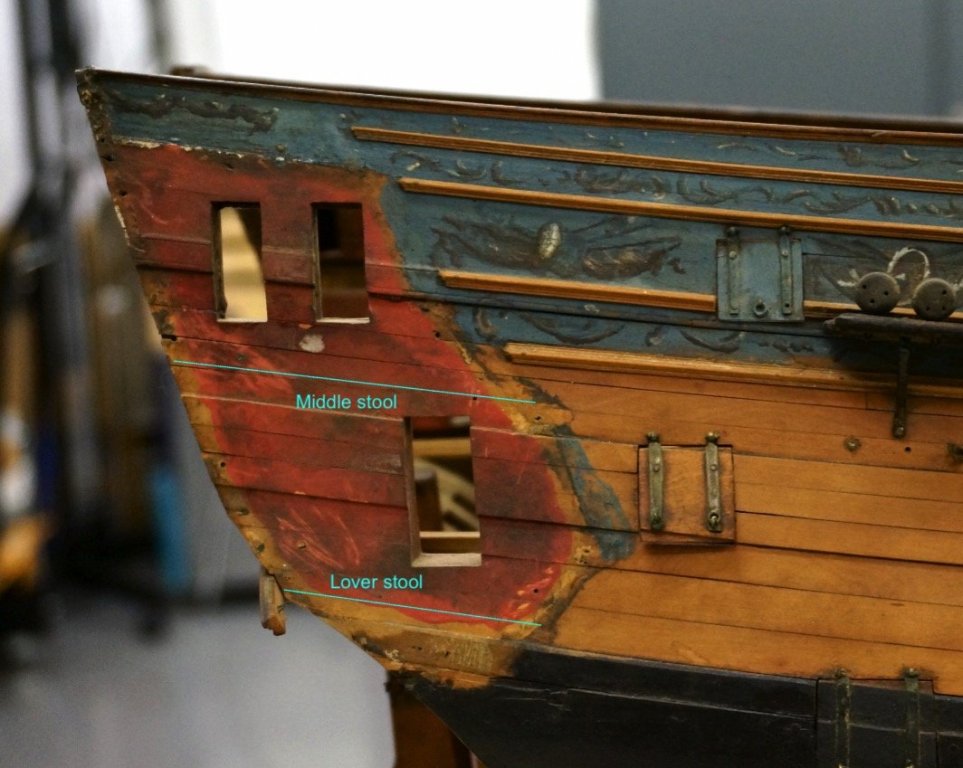
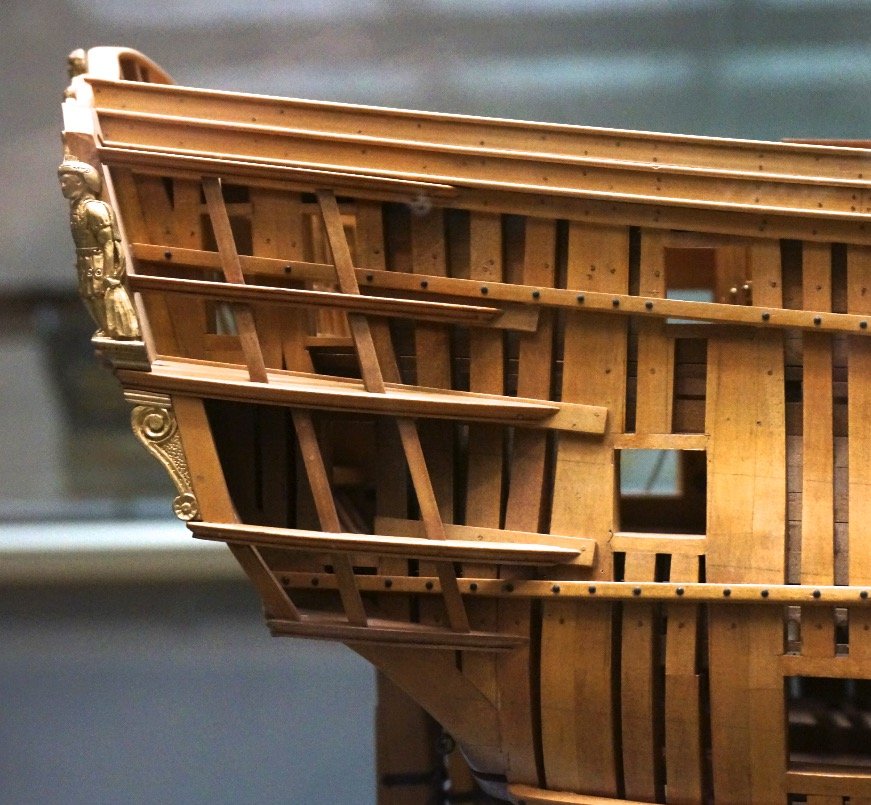
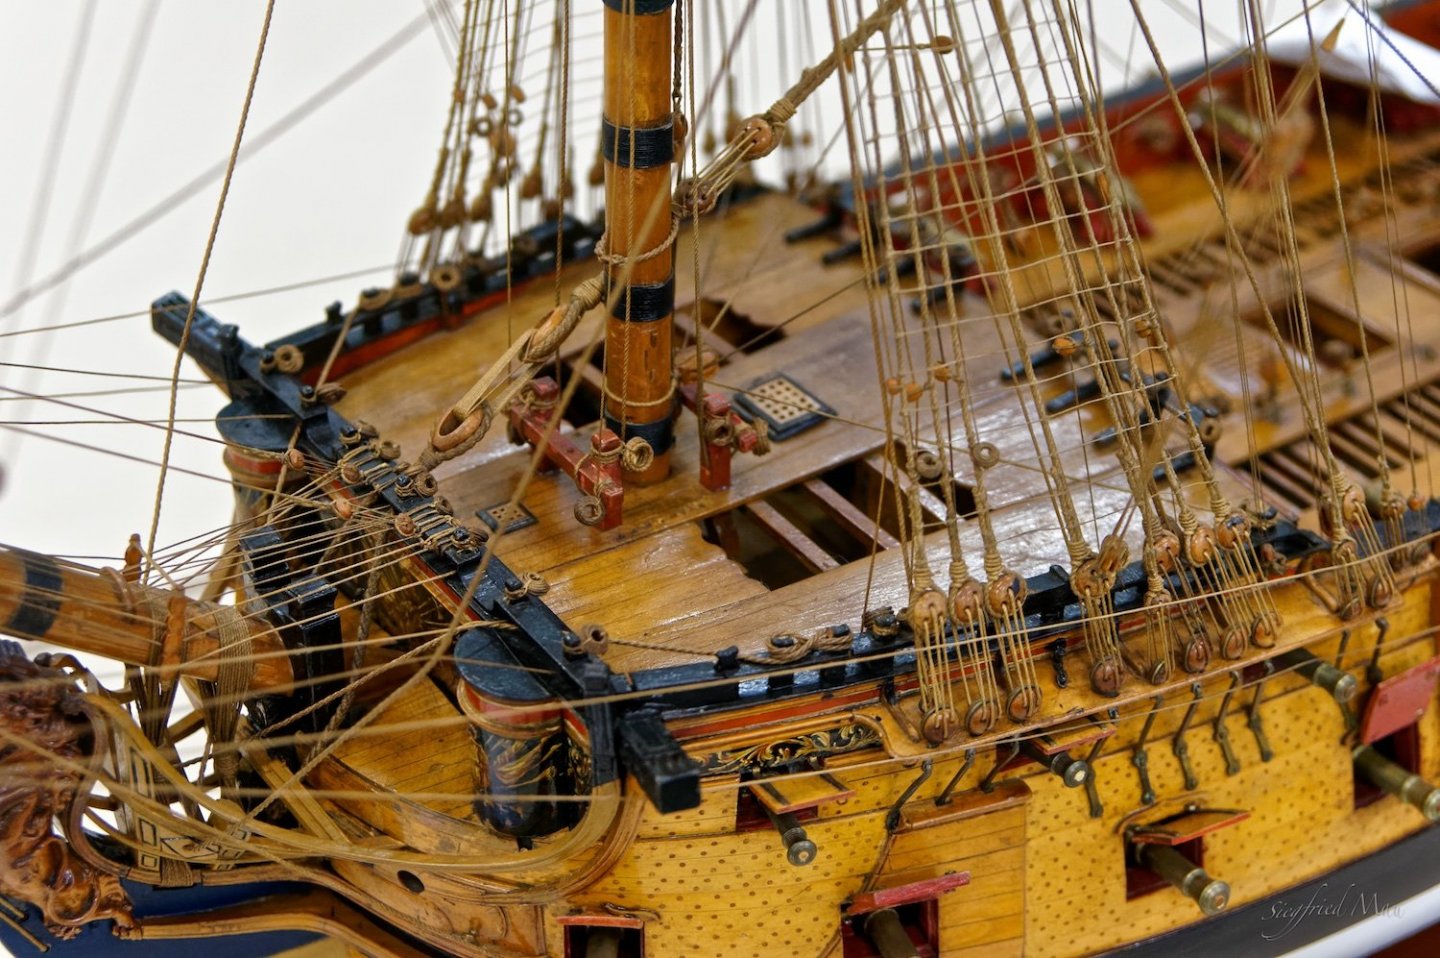
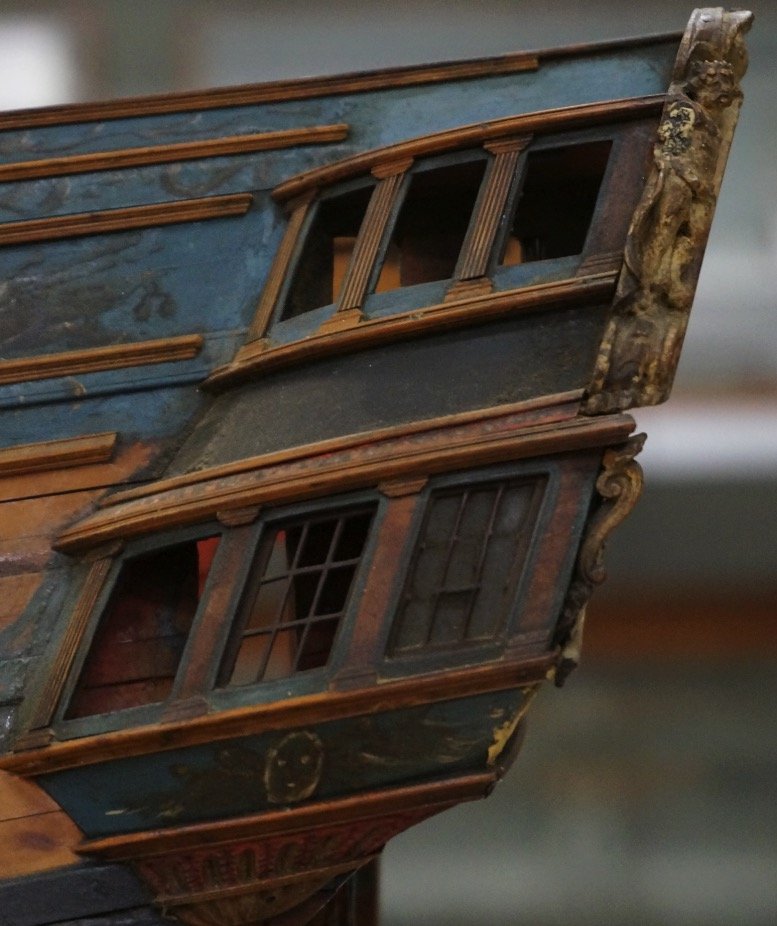
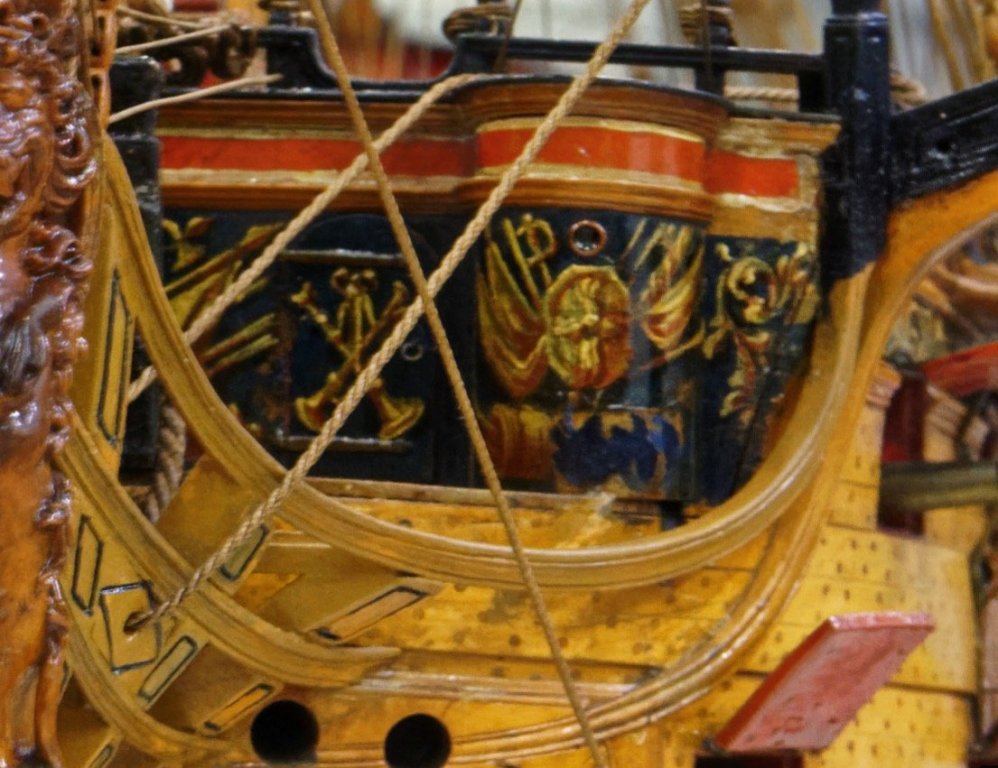
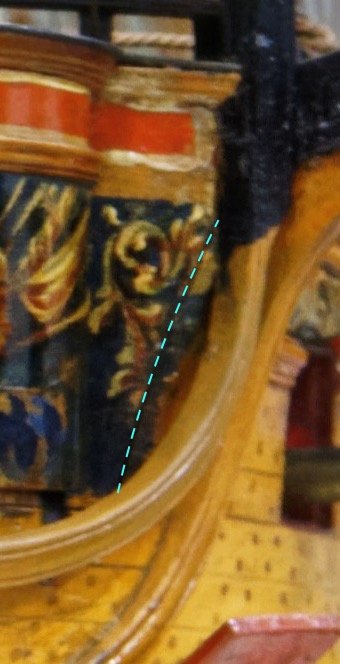
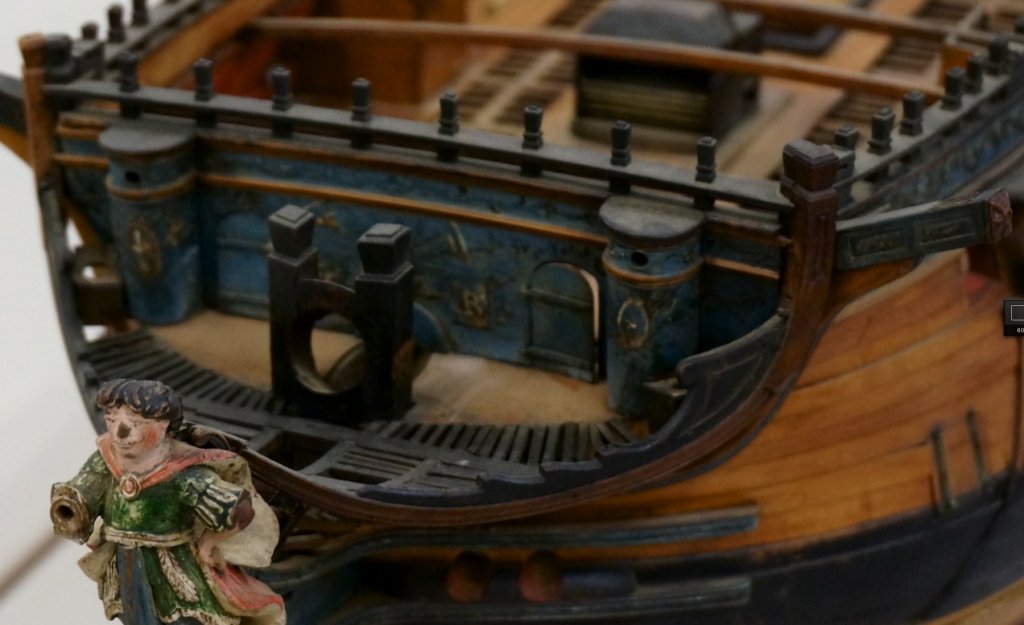
Good morning Mark, may be these pictures will help you. It's the Centurion 1732, 60 guns The same picture as above, but here I marked where the outer planking meet the bulkhead. Also seen at the picture below. The other Bellona and the Superb. I hope that these pictures will help you.

-
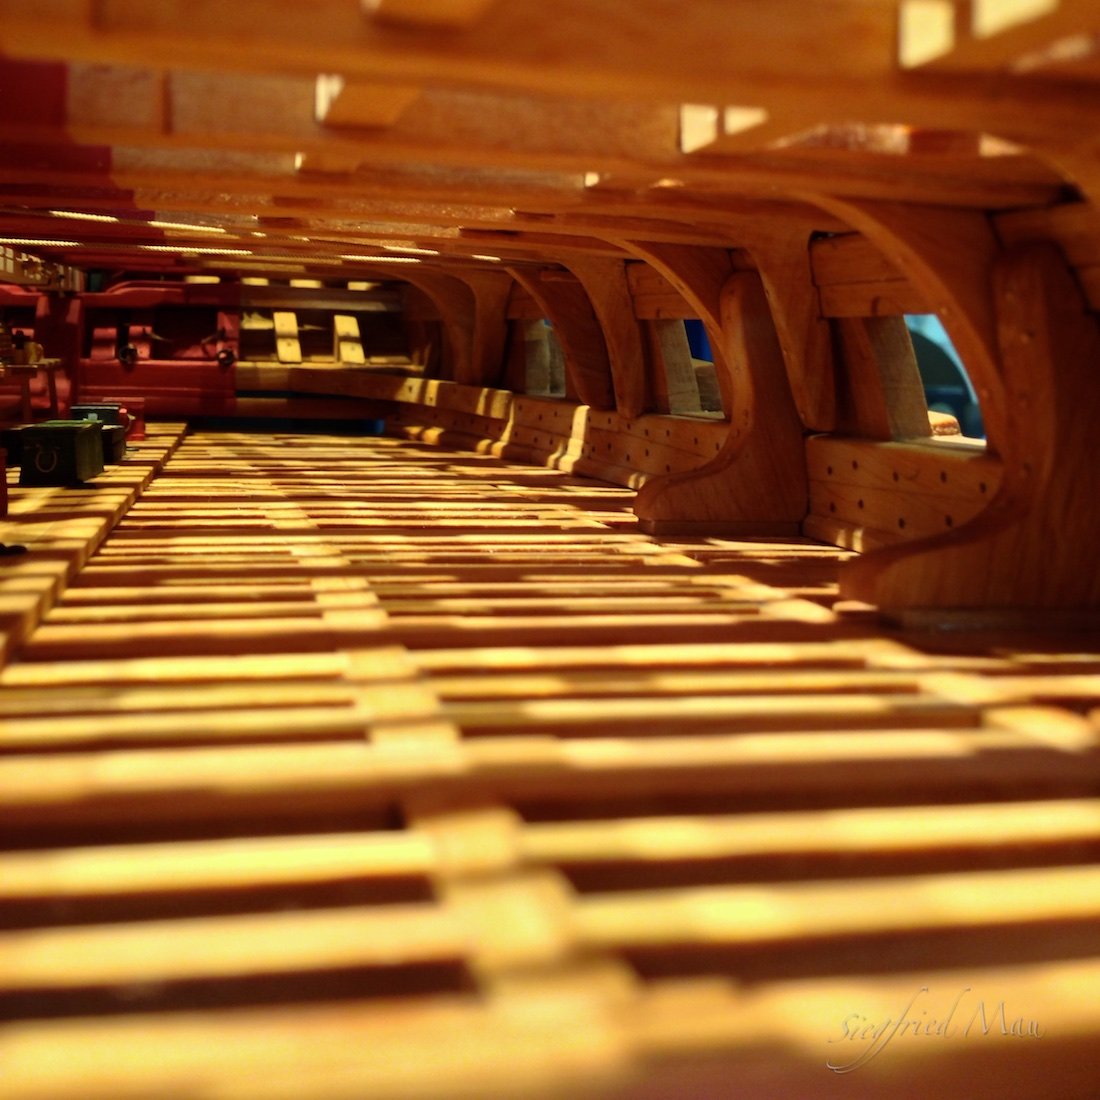
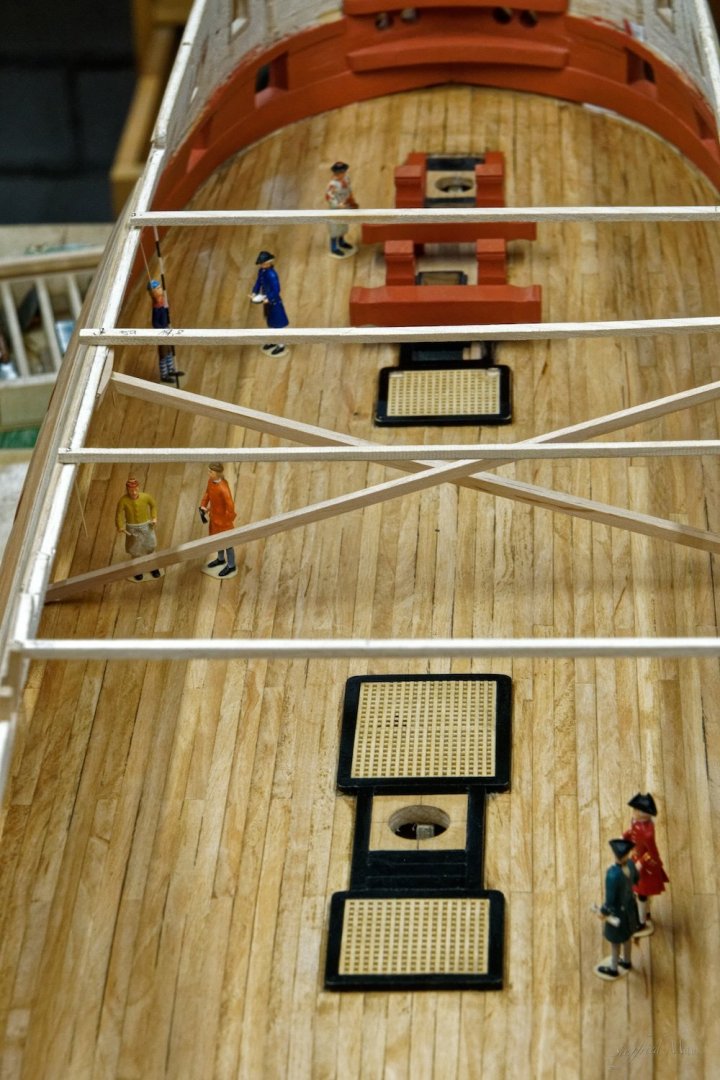
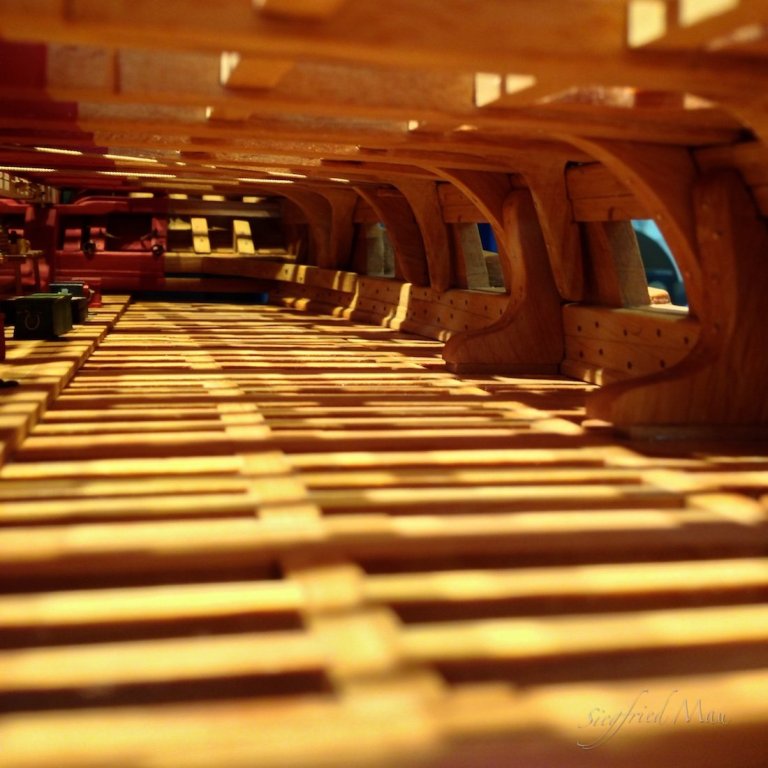
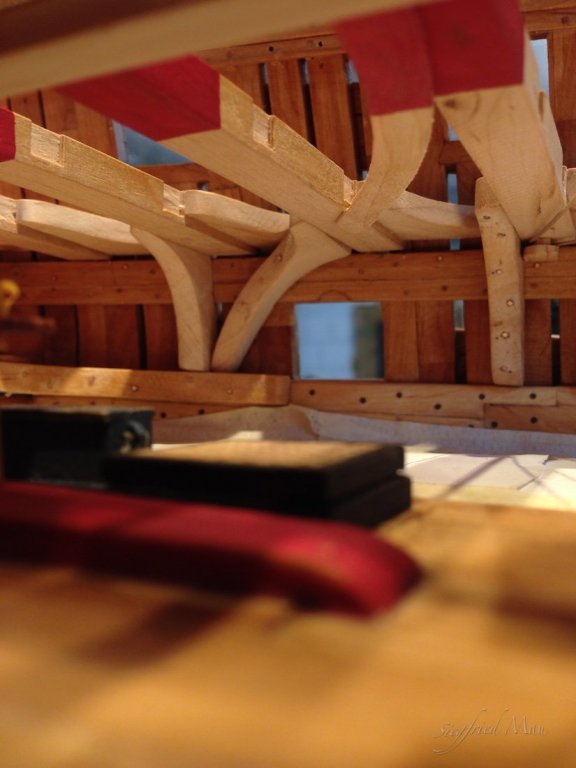
Hello Mark, these knees at the gun deck where the worst knees ever! Because they are so deep down in the hull. I'm still not sure, if I build them in the Tiger. If you wont to see the plan of the Berwick as a whole: https://collections.rmg.co.uk/collections/objects/370801.html That plan helped me a lot. And here some impressions when they are ready installed.
-
Hello HJX, I would prefer your last sketches, but without the step. The stools are deeper than the decks and then you have also more freedom for your head. As in your plan of the Warrior then 7 ft if you measure from rail to rail. In Gaetan's post #455 are two steps down to the stool. Here are an other picture of the Egmond

-
Hello Gary, I think you build your Alfred as shown in the plan. With no extra floors ect. Than you are at least right. All other things are speculation. And so step are the stools not, that a seamen would get seasick when entering the gallery. @ hjx, from wich sources did you get your information of the raised stools ore floors? I think that you mixed up there some things. At that picture is the lower stool not build. And when you raise the middle stool, than the captain should not be larger than 4,5 ft, ore you have to build the upper stool above deck level 😉 All the stools are build at the inside of the rails and on top of it is a massiv block of oak, the upper stool. Have a look at Goodwins man of war... page 199.

-
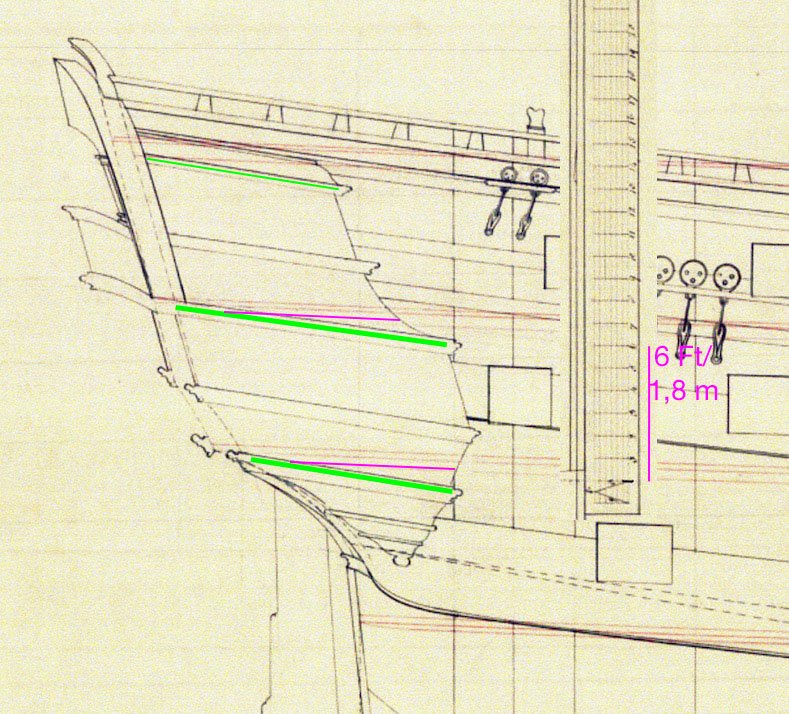
Good morning Gary, it would be interesting if Druxey has any historical information for his proposition. Fact is, that they build more for beauty then for comfort. Otherwise they would have build the stool directly after the sheer of the deck. In the plan Gaetan posted, there are also two steps down drawn in! At the other hand, you would get problems with your head if you build in there an other floor. That is the plan for the Dragon and also the Superb. The green lines are the stools and the violet ones the extra floors Druxey prefers. With the stools only, you have there a high of ≈6 ft, ore 1,83 m. So for me, and most people of the 18th century, just enough. With your extra floor in front of the gallery only ≈5.5 ft, ore 1,67 m!
-
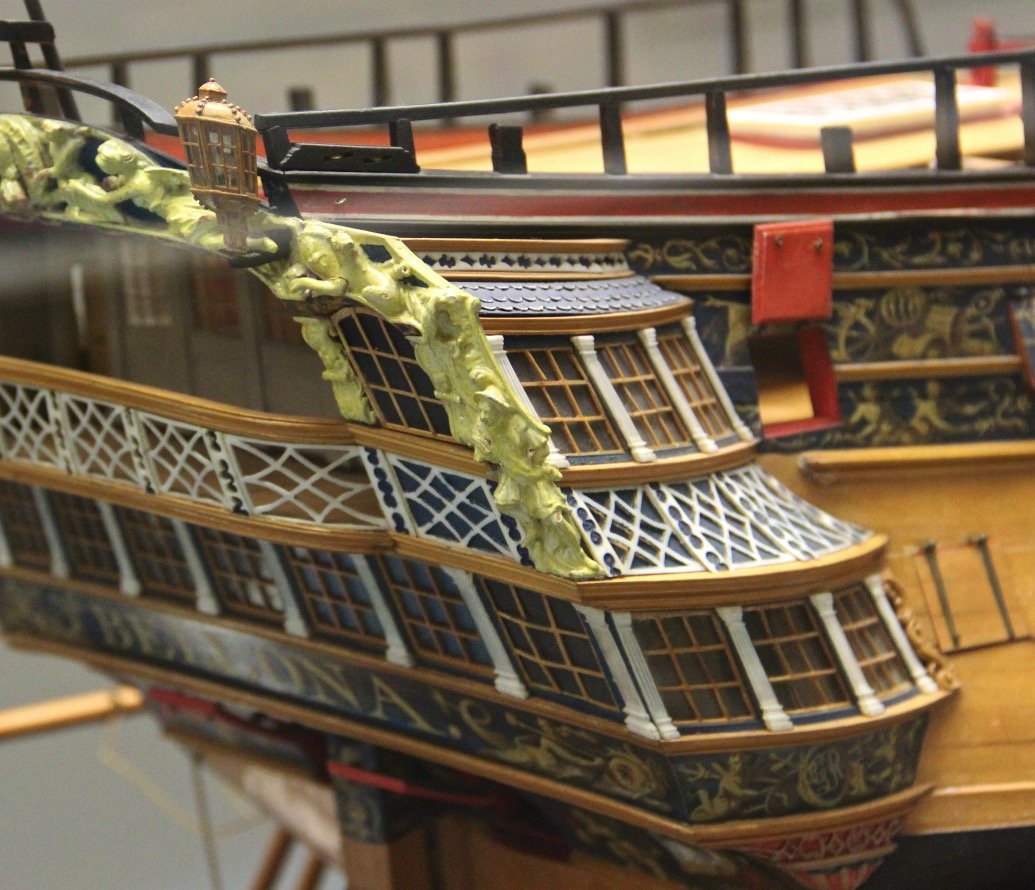
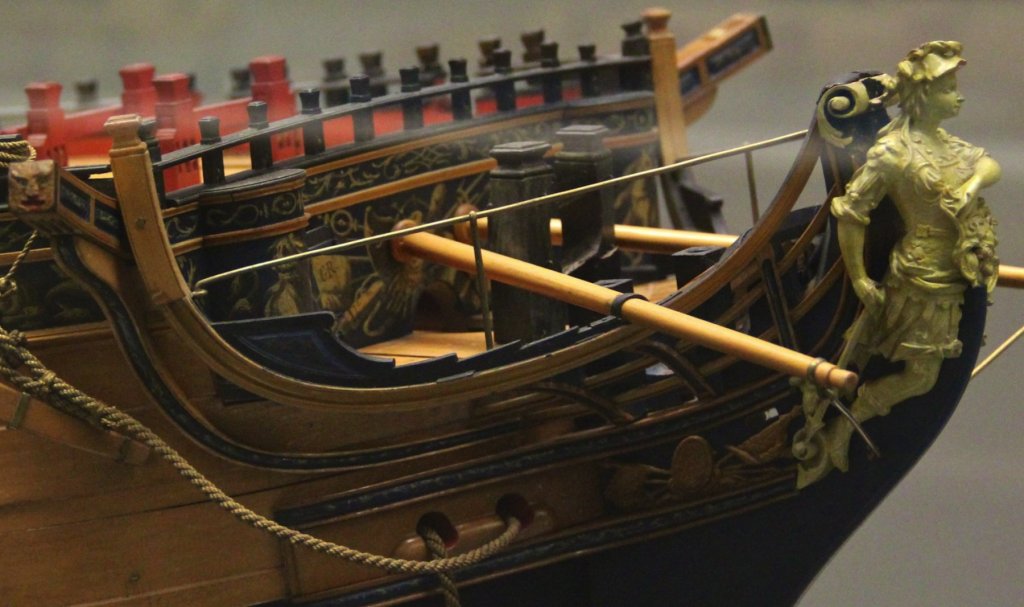
Hello Gary, I do not really understand what Druxey means, but there is no extra floor as hjx means. The stools going also with the sheer and not with the deck. Here some pictures I made from the Superb (1760), sister-ship of the Bellona. The modellers did't work like we do, and build every beam as they are in reality, but you could see the middle stool is build in the direction of the rail and the sheer. (sorry my english!) Here you could see the outside of the ship and where the stools should be. And so it looks complete. Opposite you see the entrances to the side galleries and the direction of the decks.