HOLIDAY DONATION DRIVE - SUPPORT MSW - DO YOUR PART TO KEEP THIS GREAT FORUM GOING! (83 donations so far out of 49,000 members - C'mon guys!)
×


palmerit
-
Posts
1,056 -
Joined
-
Last visited
Content Type
Profiles
Forums
Gallery
Events
Everything posted by palmerit
-
I did this in parallel with other kits. It helped me understand the geometry you’re trying to achieve when you edge bend and regular bend strip planks used on most models. It might actually be more useful after you try building a model with strip planks since the Smack does not use them. My first model I started was the Vanguard Sherbourne and my planking was absolute garbage. I did the Half Hull because I wasn’t getting it. You might do a strip plank model, read about how to do planking, and if it all comes together then maybe you don’t need to do the Half Hull. I needed it. Note that the Half Hull has you create templates out of paper or tape or tag board which you then use as a template on large flat basswood sheets. No other model I’ve seen does that. You kind of are building from scratch the hull pieces that are lasercut on a model like the Smack.
- 84 replies
-
- 3
-

-
- half hull planking project
- NRG
- (and 2 more)
-
While I haven't build an Occre model, I understand that the Polaris is intended as a beginner model from a good company. And there are lots of build logs here to learn from. I don't know if you can get more basic than that - except for doing something like a Dory and Pram from Model Shipways / Model Expo. What company is the viking boat from - avoid buying garbage cheap kits you might find on amazon. They'd be more of a headache and the opposite of a learning experience from everything I've read. Is the viking list listed as a beginner kit? One think I've learned is that size and the seeming simplicity of the finished model is not an indication of its difficulty. One of the kits I'm working on now is the Maine Peabod, just a little canoe, simple in form, and it has been the most difficult planking I've yet to do - I wasn't surprised by that, I got it because it used lots of little strip planks and I wanted the challenge (though I've seen some comment that maybe they would get that as their first model, which would be a serious mistake). Some viking boats might have clinker planking, which would add a whole other layer of complexity. Make a build log. It can be as simple or complex as you want. I just post from my iPhone. Sometimes I write long entries. Sometimes it's just a brief progress report and a few photos to share. People who have built the Polaris before might click on "Follow topic" and then any time you post they will get a notification - so if you do hit a rough spot, someone who built the kit might be able to chime in with a suggestion. I tend to follow builds of kits I've built - not that I'm an expert by any means, but I just built some of those models in the past year and might be able to share a suggestion, or even commiserate if the instructions are confusing or a part does not seem to fit right.
-
Good 'Hobby Quality' Metal Lathes
palmerit replied to tmj's topic in Modeling tools and Workshop Equipment
I’m curious if lathes are either sized for small work (like on a model ship) OR larger work (like turning a bowl, or if here are lathes that do both. Is it simply a trade off of small for precision at the price of limited diameter of a piece vs larger for the power (with less needed precision) to turn something many times larger than what you’d need for a model ship. Or does BOTH mean paying 10x the price? -
Half Hull Planking Kit
palmerit replied to DGraley's topic in Building, Framing, Planking and plating a ships hull and deck
I built it but don’t remember the details. I’d recommend checking other build logs and see if someone commented or there’s a photo. I remember having to adjust some things, confirming with other build logs, but I can’t remember if this was a step I had to adjust. I definitely had to do a lot of sanding to fair this half hull - a lot more than any other model I built, which was actually a useful learning experience on getting a hull shaped just right (and in the end my version was not quite right). -
Good 'Hobby Quality' Metal Lathes
palmerit replied to tmj's topic in Modeling tools and Workshop Equipment
I asked something similar a while back - don’t know if there’s anything here that’s useful: I did not end getting a lathe or a mill. Maybe someday. -
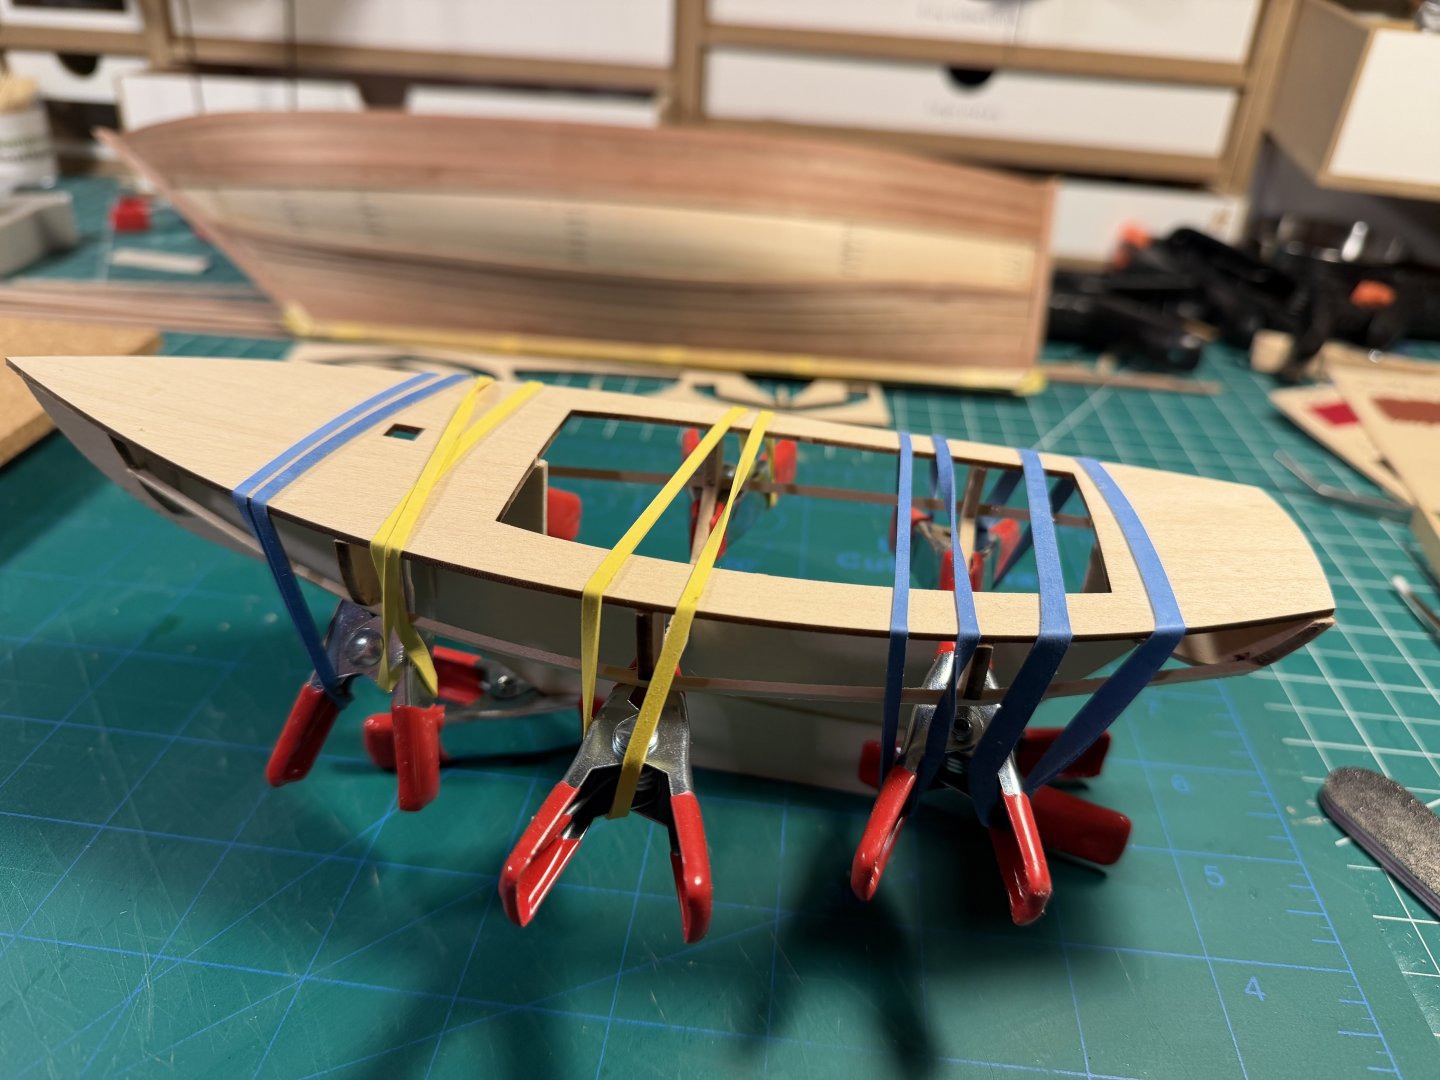
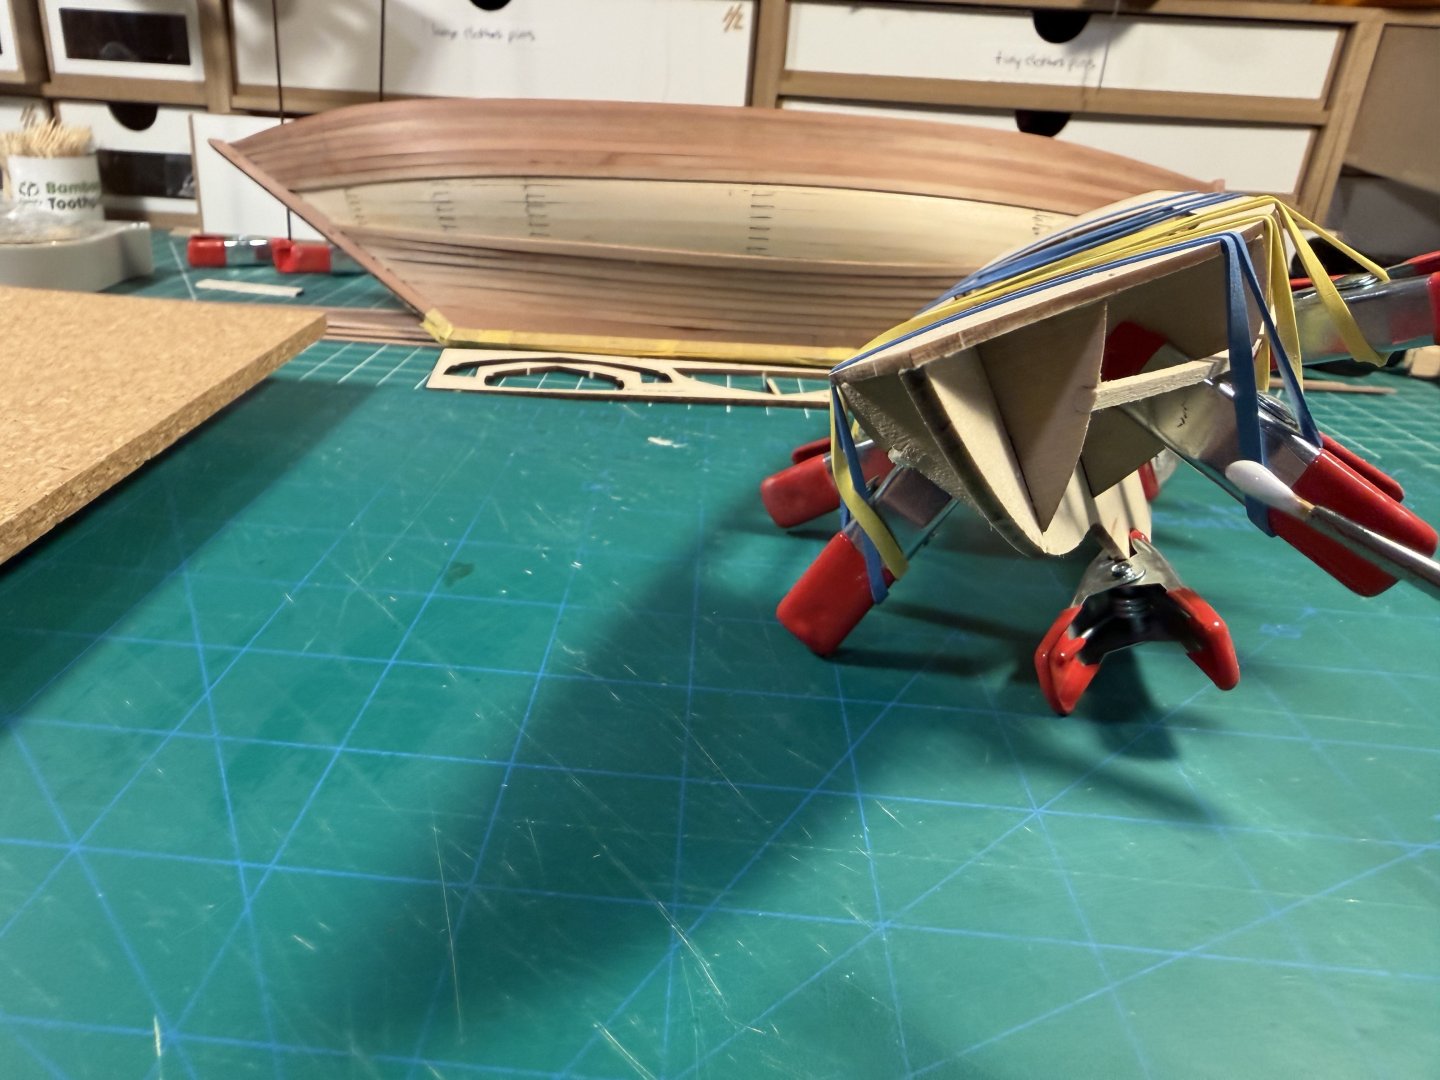
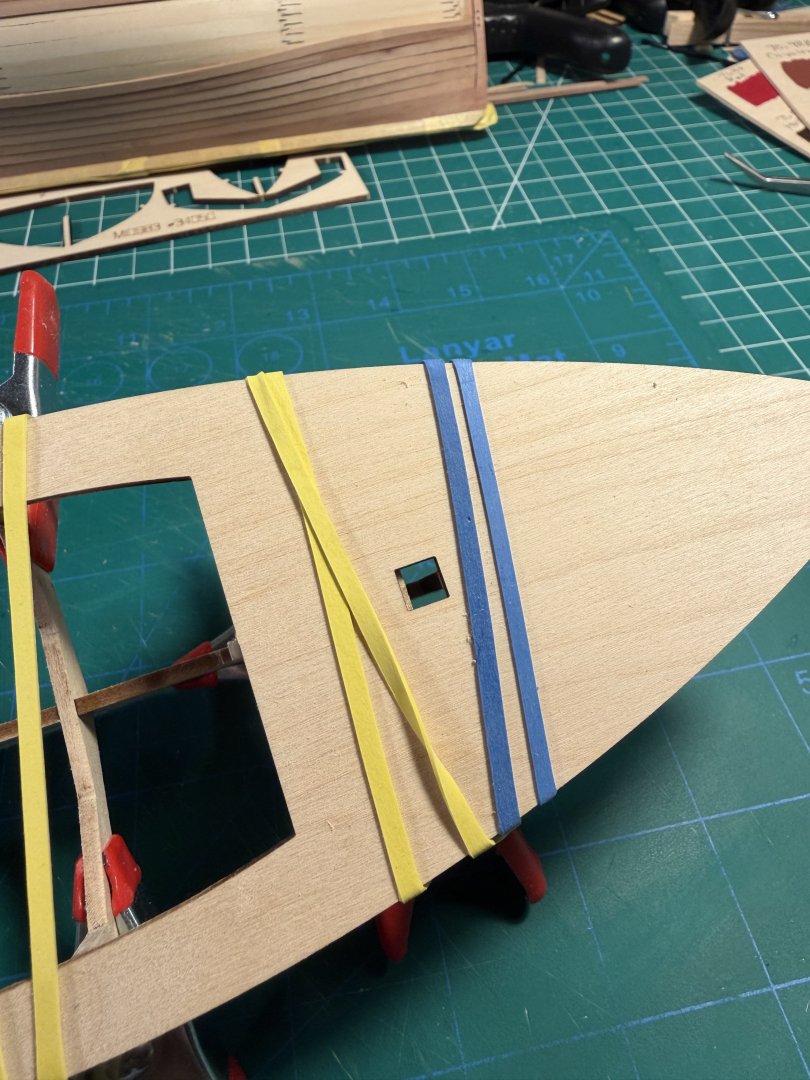
Definitely. I’ve used what I learned combining rubber bands, clamps, clips, and lately hair pins, on these smaller kits on bigger builds. Basswood is (too) easy to sand and it gets fuzzy (can combat with sanding sealer or shellac and a light sanding). It’s used in all Model Shipways / Midwest kits - some people replace with other wood. The Vanguard models I’ve built only have something like basswood (lime wood) as the first layer of planking and it’s a good bit thicker, with the rest stronger wood.
- 32 replies
-
- 2
-
-
- Dory
- Lowell Grand Banks Dory
- (and 4 more)
-
I started on the Vanguard Sherbourne and paused part of the way through - after having a tough go at planking it - to do the Shipwright Series (Dory, Pram, Smack). I was surprised at how different those three models really are - especially in terms of planking - from the Sherbourne (or other strip plank-on-bulkhead models I've worked on). These small simple (and relatively inexpensive) models do give you some practice at sanding, shaping, and beveling wood, which is useful certainly on large kits. But they face some unique challenges you do not have on larger kits. Building these also forces you to find creative solutions to clamping (clamps, rubber bands, clips) pieces of wood into place to dry and cure, which is also useful on large kits to be sure. I started these in part because I was a bit scared of the rigging on the Sherbourne. The Dory (at least the Model Shipways Dory) has no rigging, the Pram has minimal, the Smack a bit more. After finishing the Smack's rigging I felt like I could tackle with some research what to do on the Sherbourne.
-
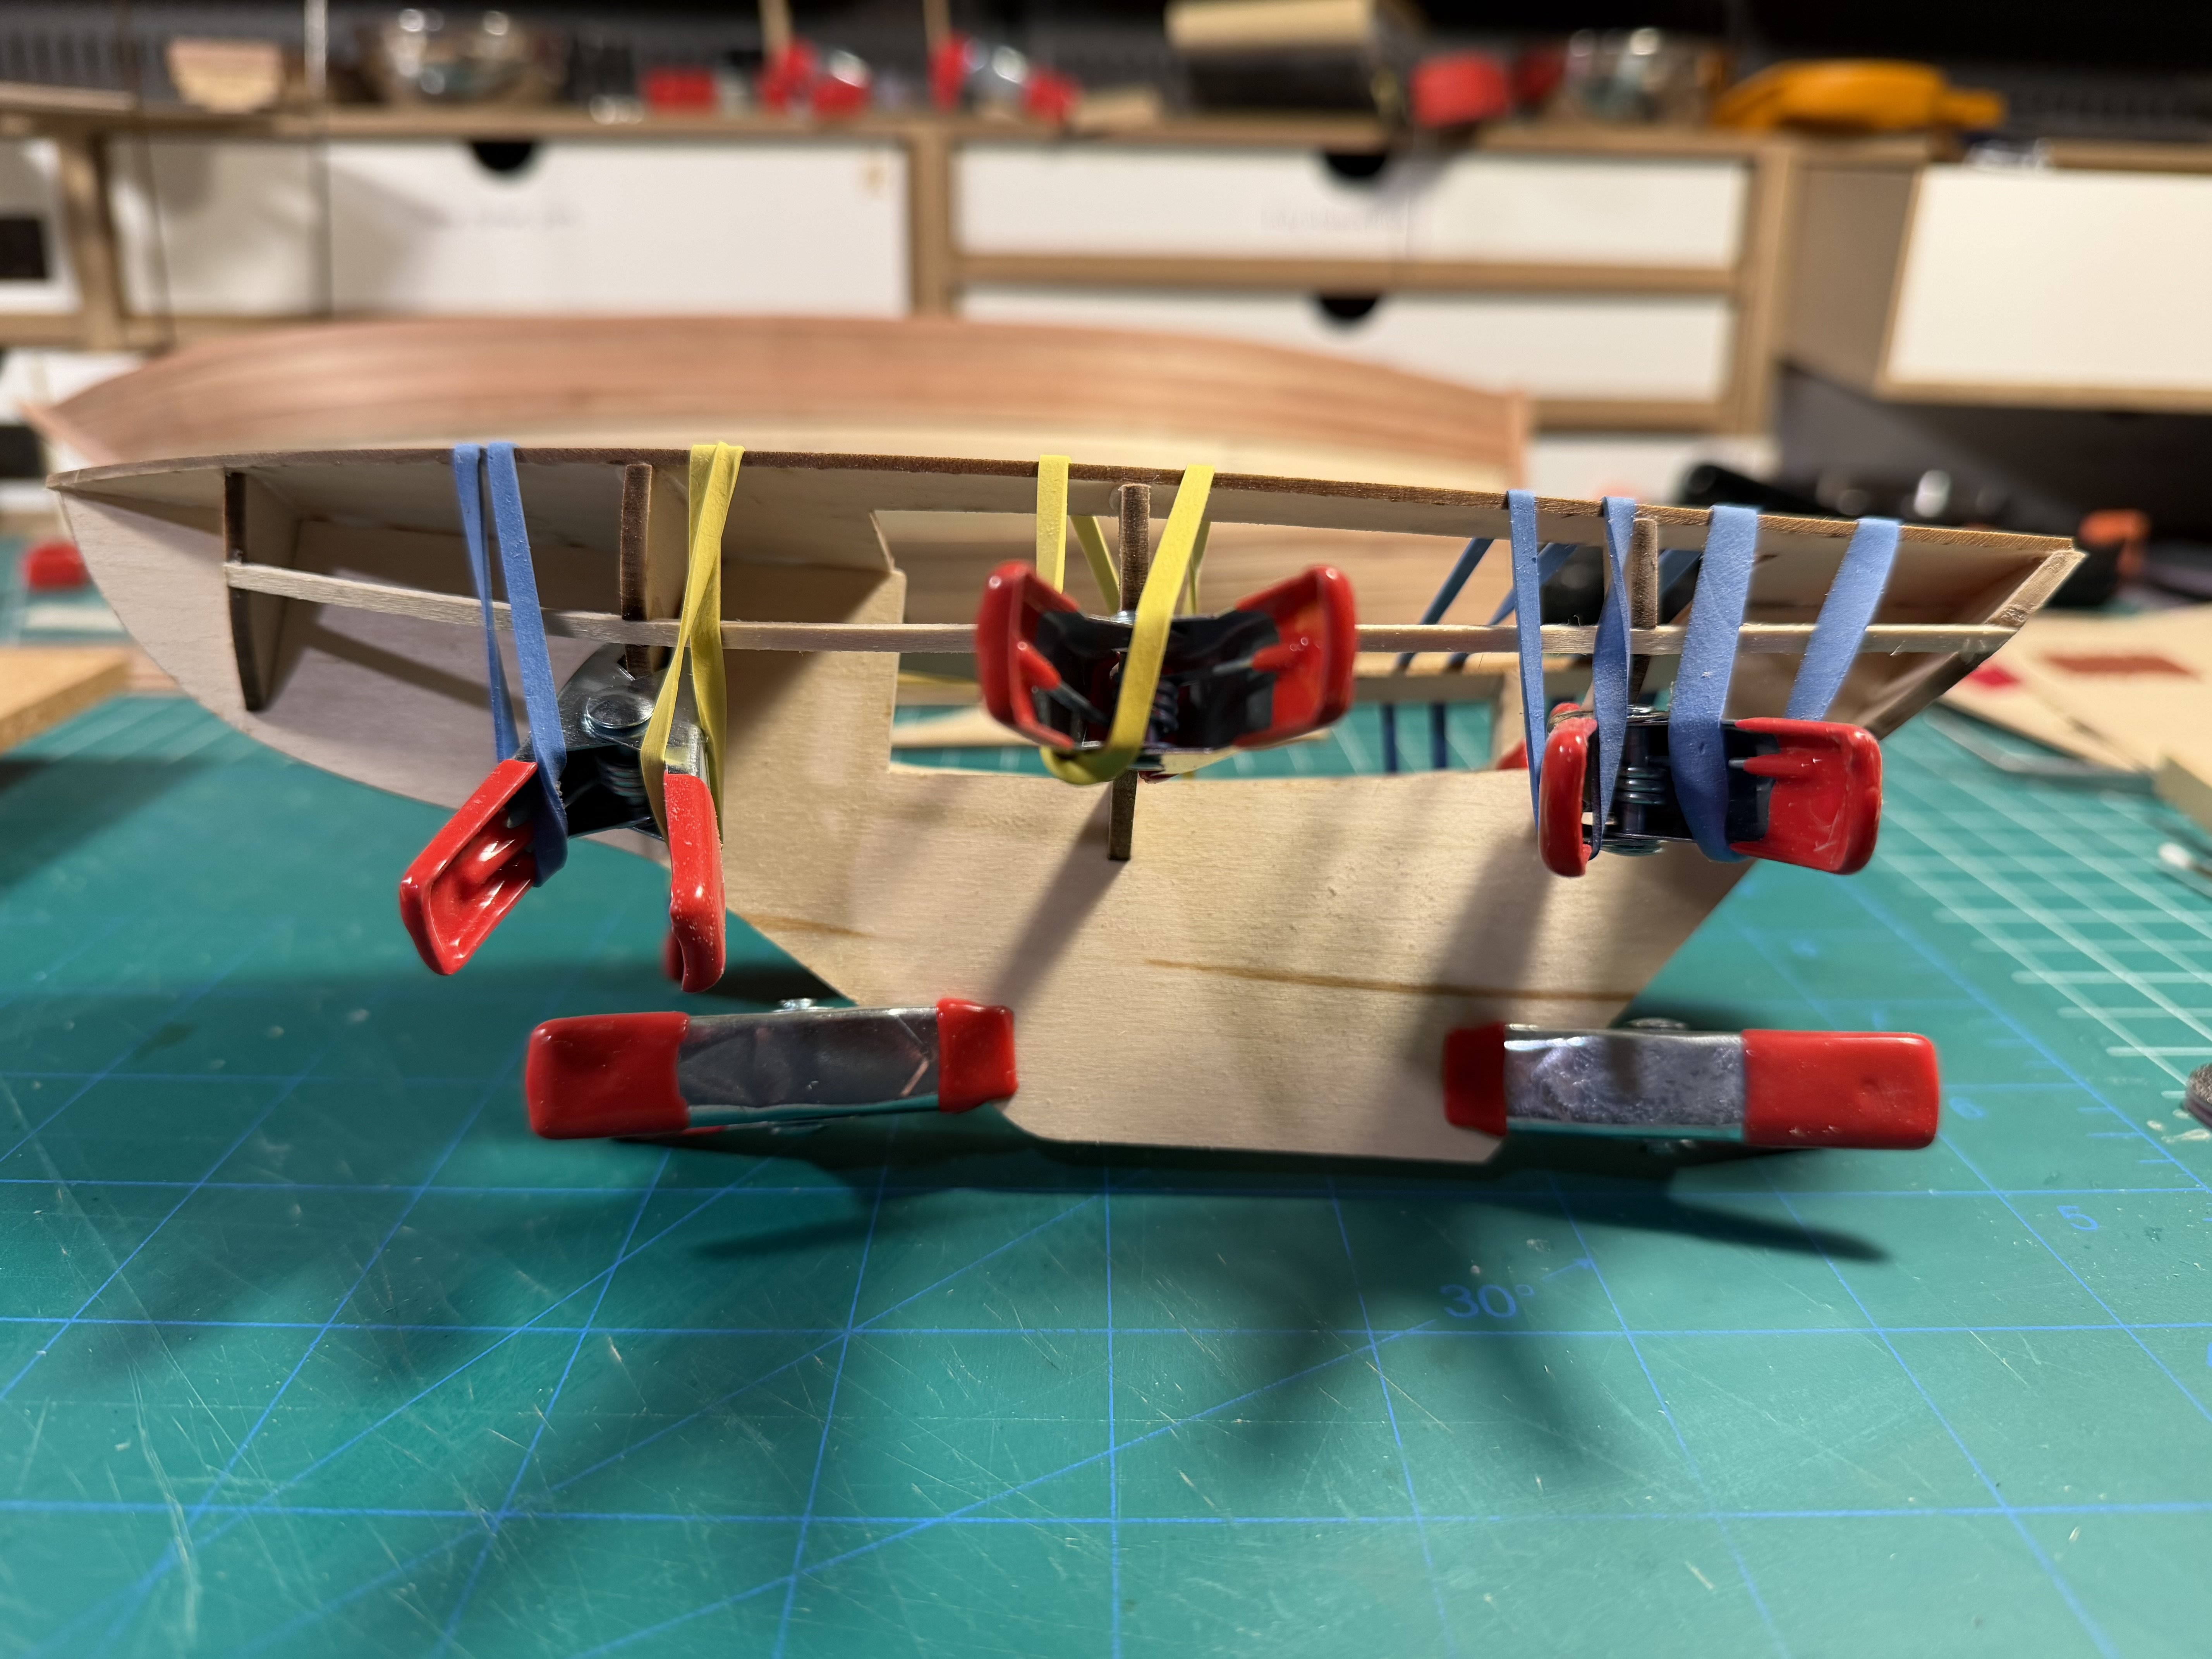
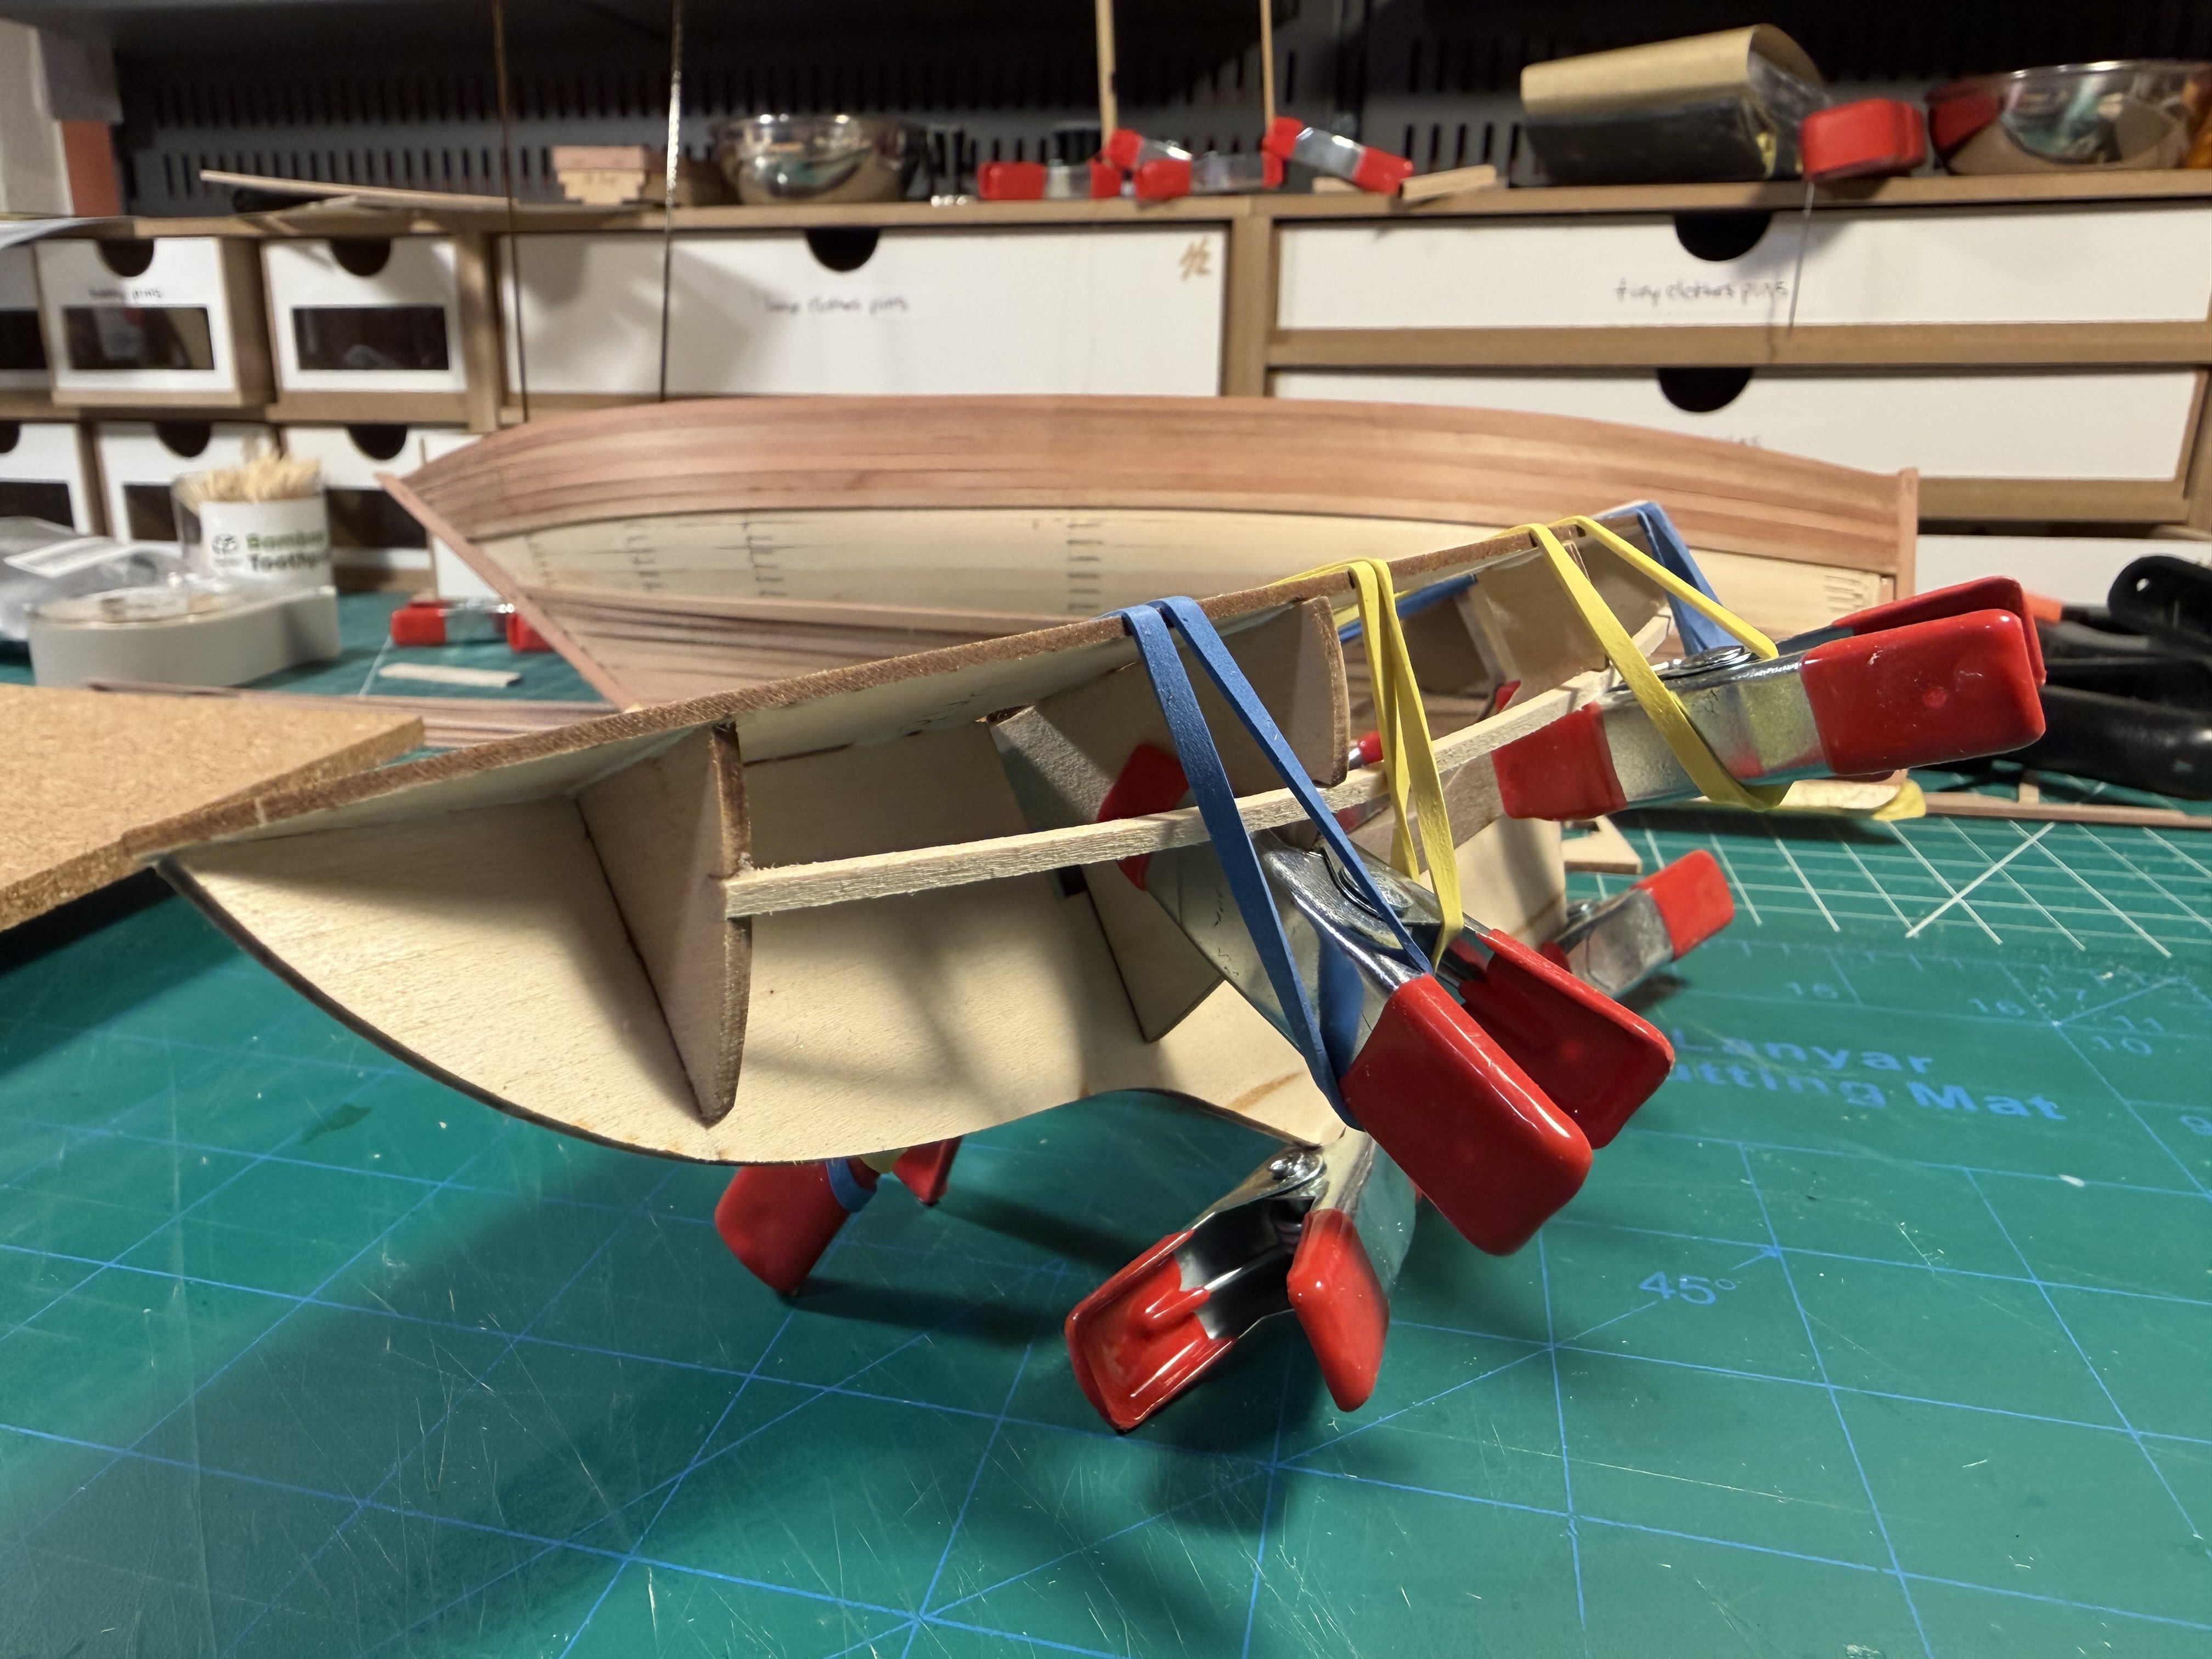
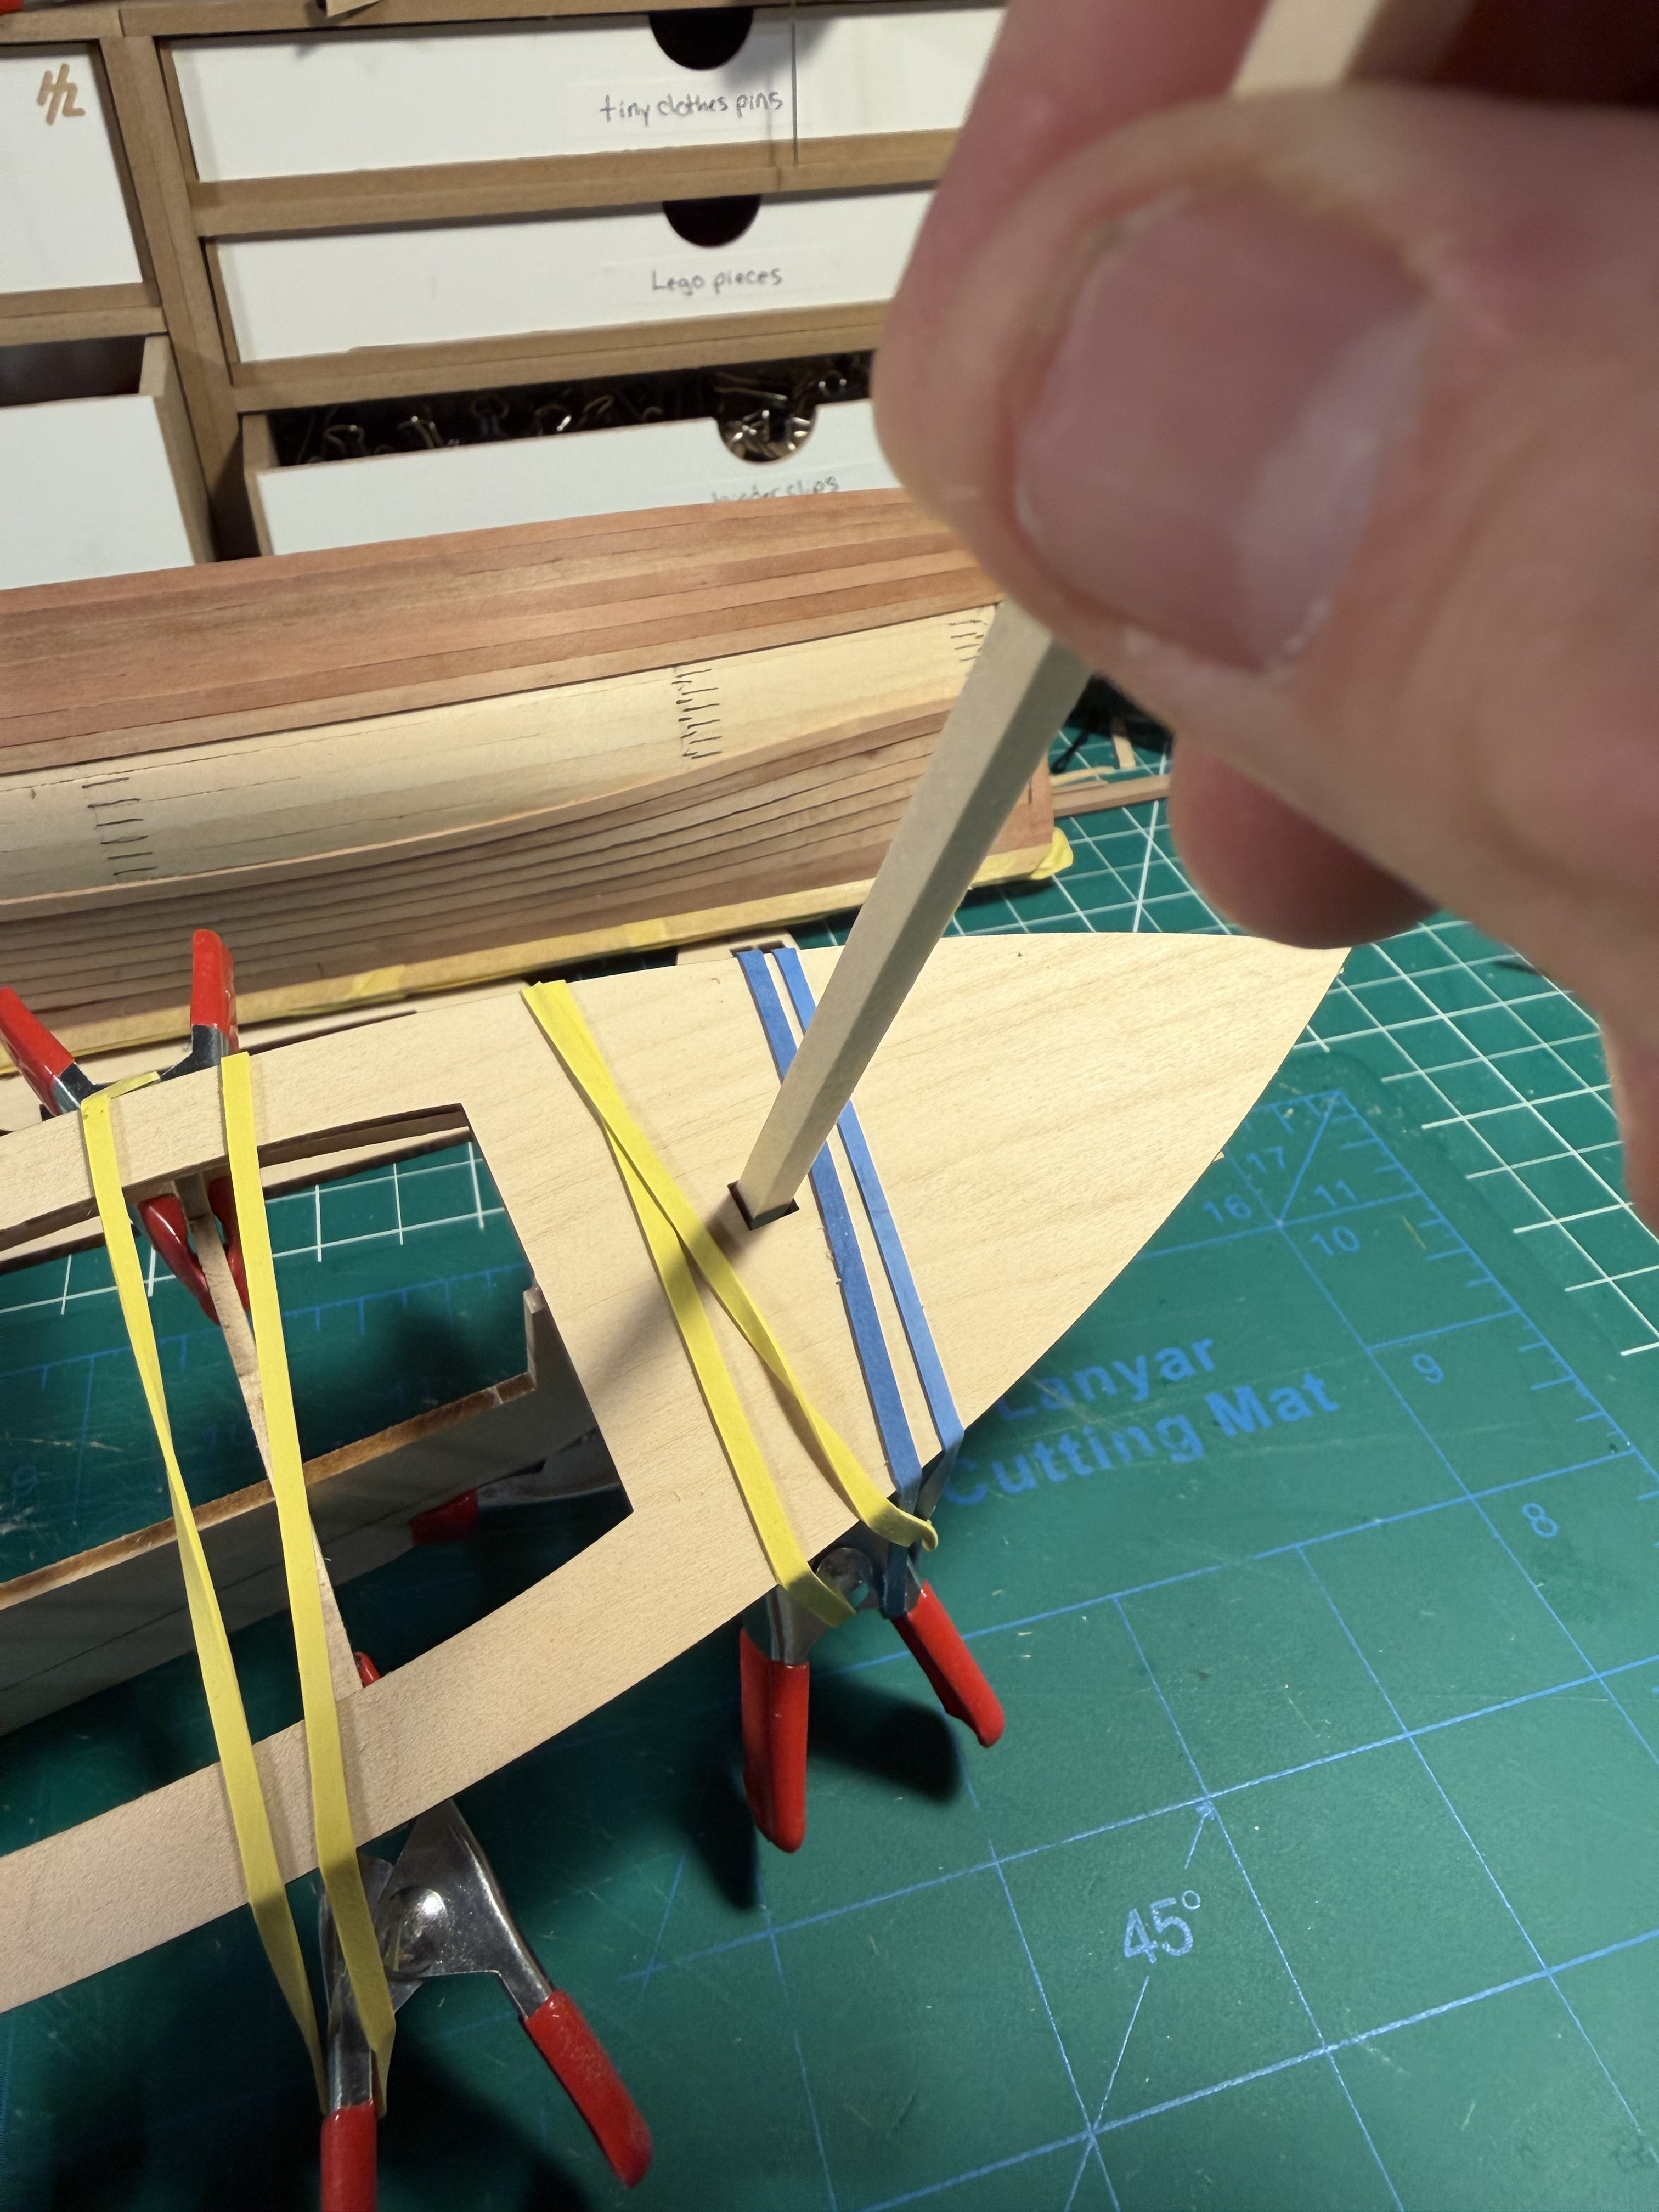
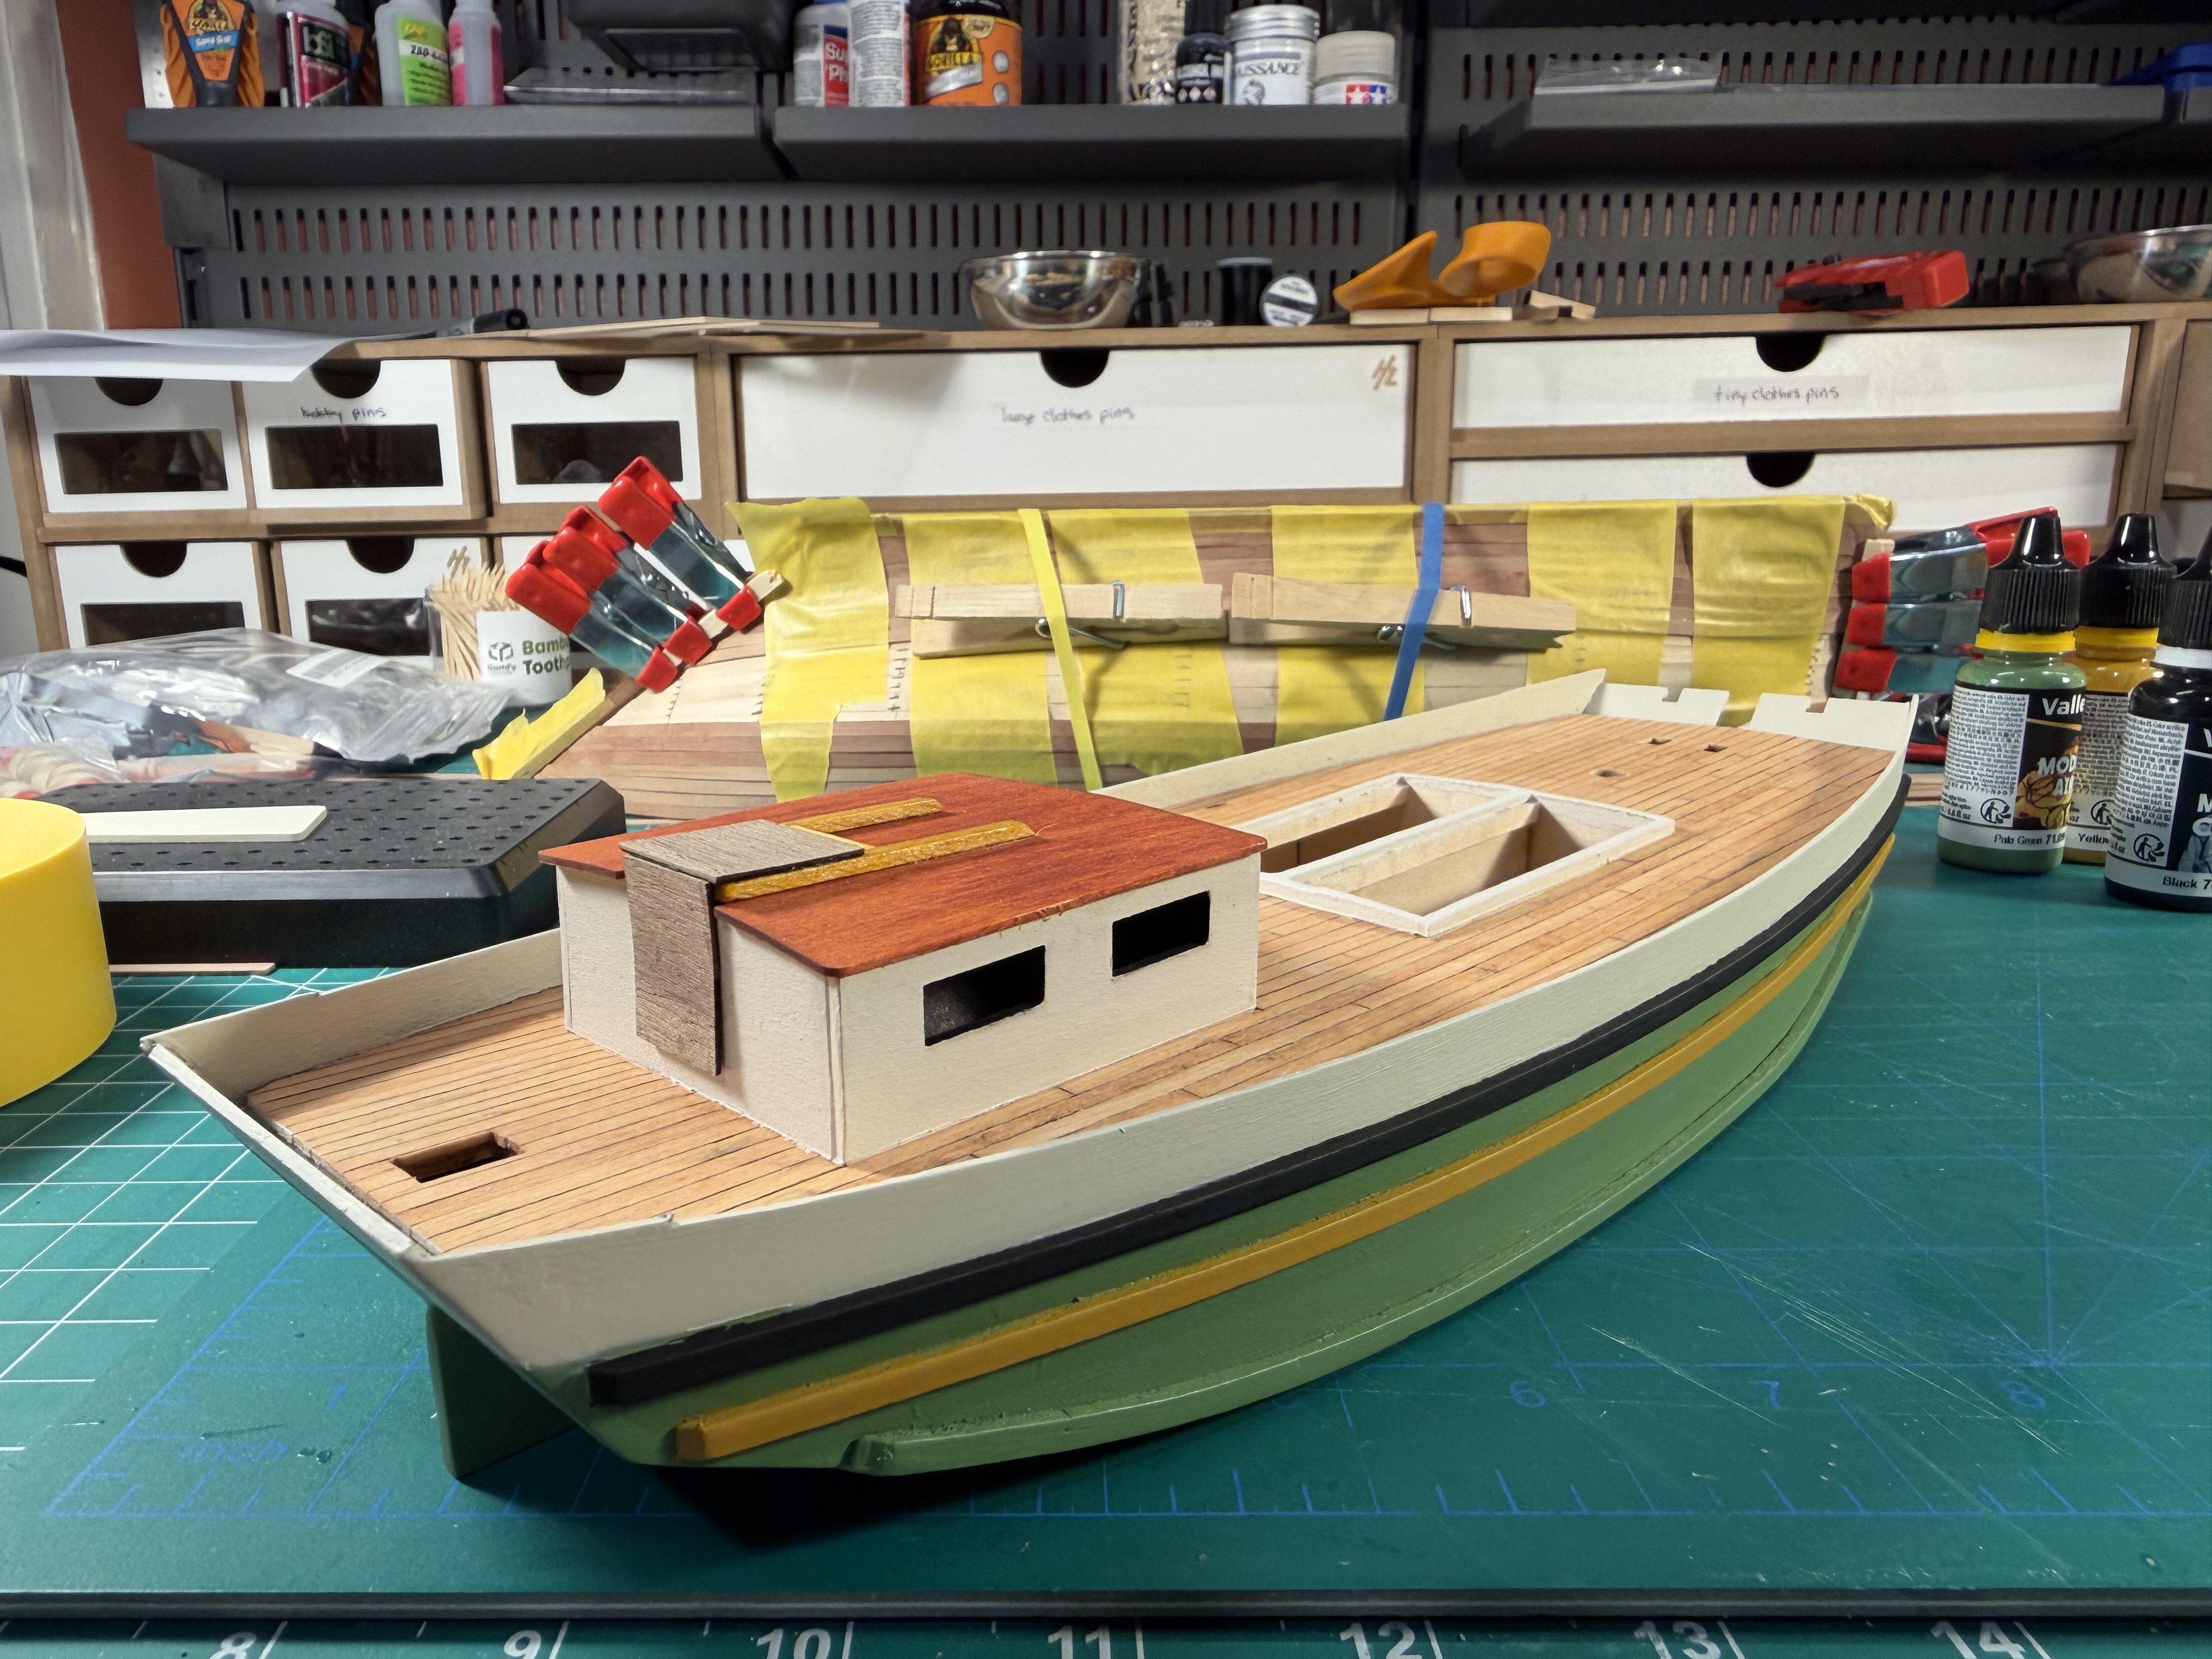
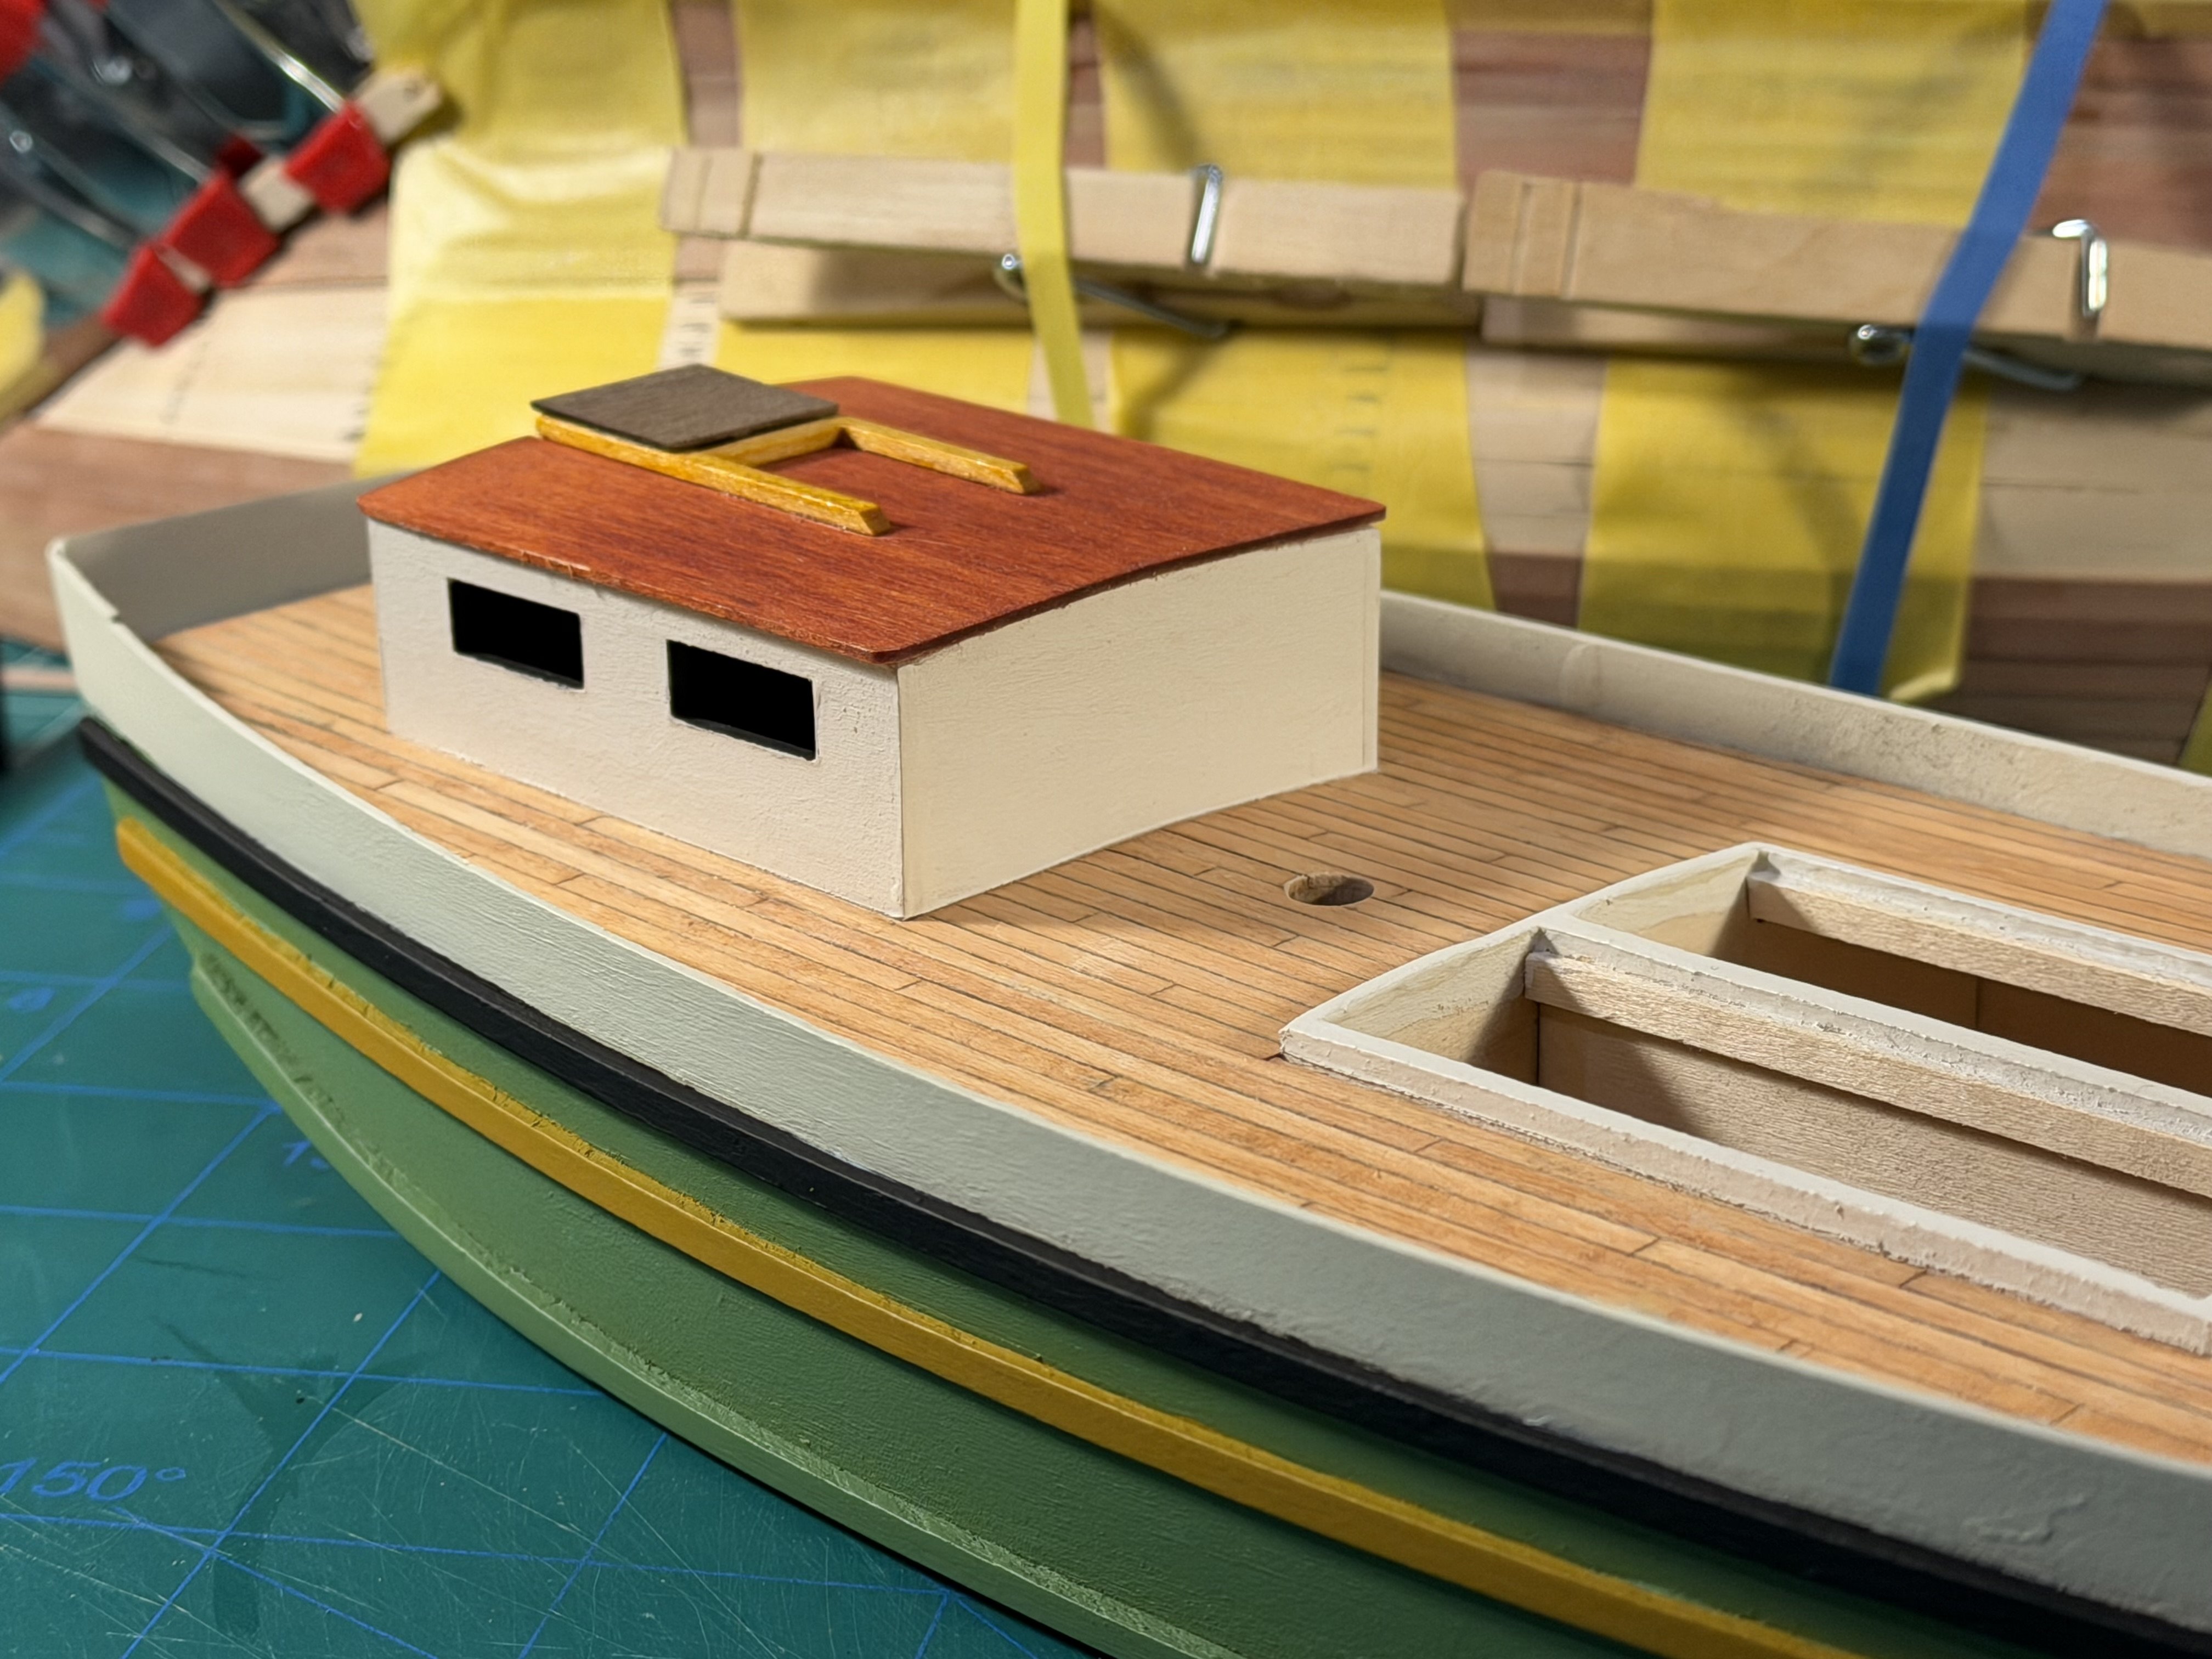
Adding the deck. I had to sand down the tops of the bulkheads a bit so that the deck laid flush along its length - the instructions obviously point out that you need to sand down the transom, but you also need to sand down over the length of the boat. It will have a bit of a camber. You need to make sure the hole in the deck is lined up with the mast step, even though that means that things don’t line up quite right in the interior seating section. It would have driven me nuts except that I saw that Olha had the same issue in her build. This will take some repairing later. You need to do some creative clamping to hold the deck in place flush with the bulkheads to glue. A combination of clamps holding rubber bands that wrapped around the deck worked for me. After securing, I added some more glue underneath for extra strength - a trick I learned from Vanguard model instructions.


-
This? I don’t see it on the shop. It was there several months ago I think.
-
Occre doesn’t go on sale very often - unlike Model Expo, which is like one of those stores that has had “Going out of Business - Everything Must Go” sign on the store for a decade. I bought a model from Occre last Thanksgiving during a sale (Endurance) that is still in my stash.
-
@James H is the NRG rigging project available still?
-
I haven’t had much luck bending basswood (used in probably all Model Shipways and Midwest models) using heat (with something like a plug in plank bender). That work well - for me - with the harder woods (like pear) used in Vanguard models. I just wet the basswood with hot tap water and secure it in place with clamps and rubber bands (making sure the clamps do not directly touch the wood but with a scrap piece of wood between because the wood is so soft) and let it dry overnight. You wouldn’t want to try to glue even damp basswood (it soaks up a fair amount of water and glue doesn’t like wet wood based on experience and things I’ve read).
-
I’ve learned that even doing a next model at the “same level” as ones I’ve done gives me an opportunity to try something new or get better at something I wasn’t happy with in an earlier model. The peapod I’m working on now is small but has some tricky thin planking. The scow schooner gave me a chance at “kit bashing” in its simplest form - I planked the deck instead of drawing pencil lines. I did a little “kit bashing” with the crabbing skiff, correcting for some ugly mistakes in the model. On both, I tried some different approaches to masking and airbrushing. And the Zulu is one more step to getting a little better with strip planking. I suppose I could just jump up to a $500-1000 kit that would take 2-3 years or more to build, but I’m preferring now to hone my skills and try new things on a model that I wouldn’t be upset throwing in the trash. I’ve almost done that with the peapod a couple of times. With these small kits, I haven’t found the need to have the kind of passion for the subject matter that I’d need for a model that would be a several year commitment. For now my passion is in learning new skills and turning off the part of my brain I need to use in my stressful day job.
-
I’ve been picking some simpler smaller models since I’m still a relative novice. I’ve also picked some that have lots of build logs or YouTube videos to learn something new from. At first I planned to go big, bold, beautiful and complex right away but then decided to do some simpler models first. I bought the Occre Endurance for my stash (its look and its history), the Vanguard Duchess (its look and it’s a more complicated Vanguard Model), and Pavel Nikitin’s Oseberg (it's cool looking, different from most other models, and history), and my boys bought me the Model Shipways Syren - it’ll be a while before I get to these since I still have some other “simpler” models in my stash (and that I’m currently building). I often have a few projects going on in parallel. I’ll work on one while others have glue or paint drying, or if one of them have steps that will require a more complicated bit of work.
-
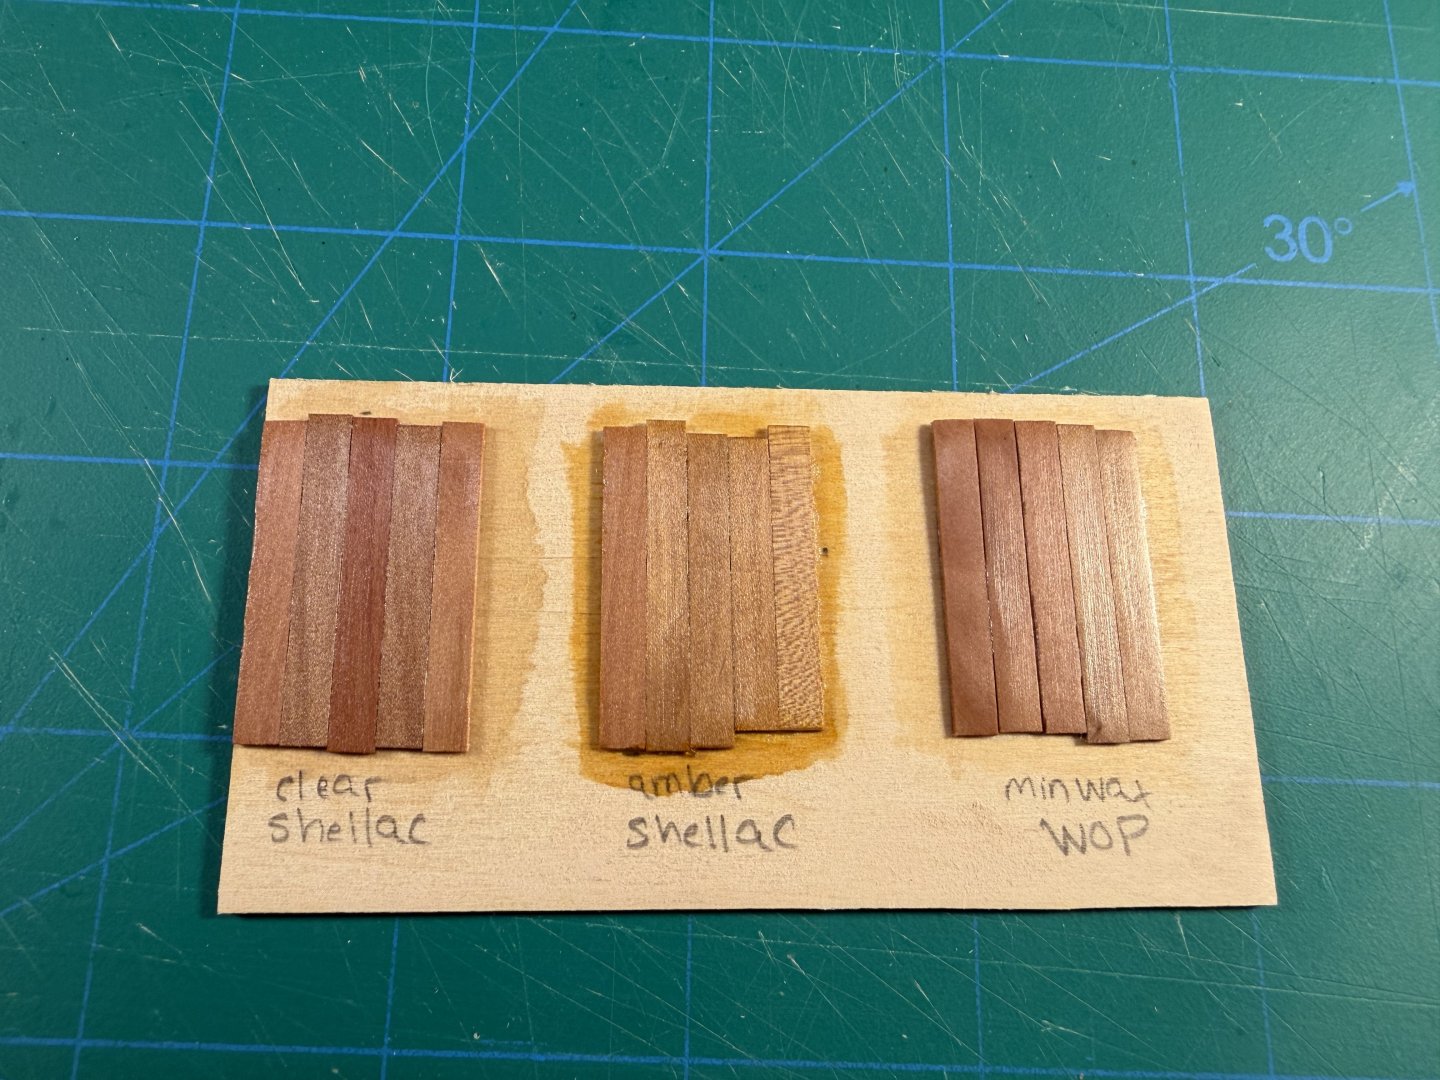
Googling around, it looks like you can use WOP over "de-waxed" shellac, but if you use WOP over shellac that has not been "de-waxed" it will not adhere. The Minwax shellac I have has not been "de-waxed". They do make a special de-waxed version. I think the "wax" comes from the shellac itself, but you can find de-waxed chips to make your own shellac. And I found this video (granted, not about wooden ships, but about wood more generally). For example, it notes that the Zinsser Bullseye Seal Coat (a thinned shellac) is de-waxed (it says 100% wax-free shellac on the can); the regular Zinnser shellac contains wax. The video also notes that the shelf-life of an opened shellac can is only a few months. BT&C shellac flakes (that he shows) are de-waxed. I bought shellac from Lee Valley and they are also de-waxed. The video also gives a nice formula for making shellac flakes. They're using expressed as a "2 lb cut", which would be 2 lbs of flakes to 1 gallon of alcohol but who makes that much at one time. His formula uses a 4:1 formula, with 4x the alcohol in liquid ounces to 1x the shellac in weight ounces. So a 1/2 pint would be 8oz (liquid) of alcohol and 2oz (weight) of shellac.
- 43 replies
-
- 1
-
-
- Lady Isabella
- zulu
- (and 1 more)
-
Minwax wipe-on-poly is oil based.
-
Two coats each of clear shellac, amber shellac, and WOP (on pear wood that’s the 2nd layer of planking). The amber is my least favorite. I think I like the clear shellac the most - and it has both the advantage and some would say disadvantage of coming off with alcohol). But that could be more the particular strips of wood than shellac vs. WOP. I have not been able to get a clear sense of whether shellac or WOP is better - and have seen completely opposite recommendations about doing WOP over shellac, from never do it to do it. Lots of posts with strong opinions here and elsewhere. If anyone has objective thoughts on (1) shellac, (2) WOP, or (3) both, I’d love to hear.
- 43 replies
-
- 4
-
-
- Lady Isabella
- zulu
- (and 1 more)
-
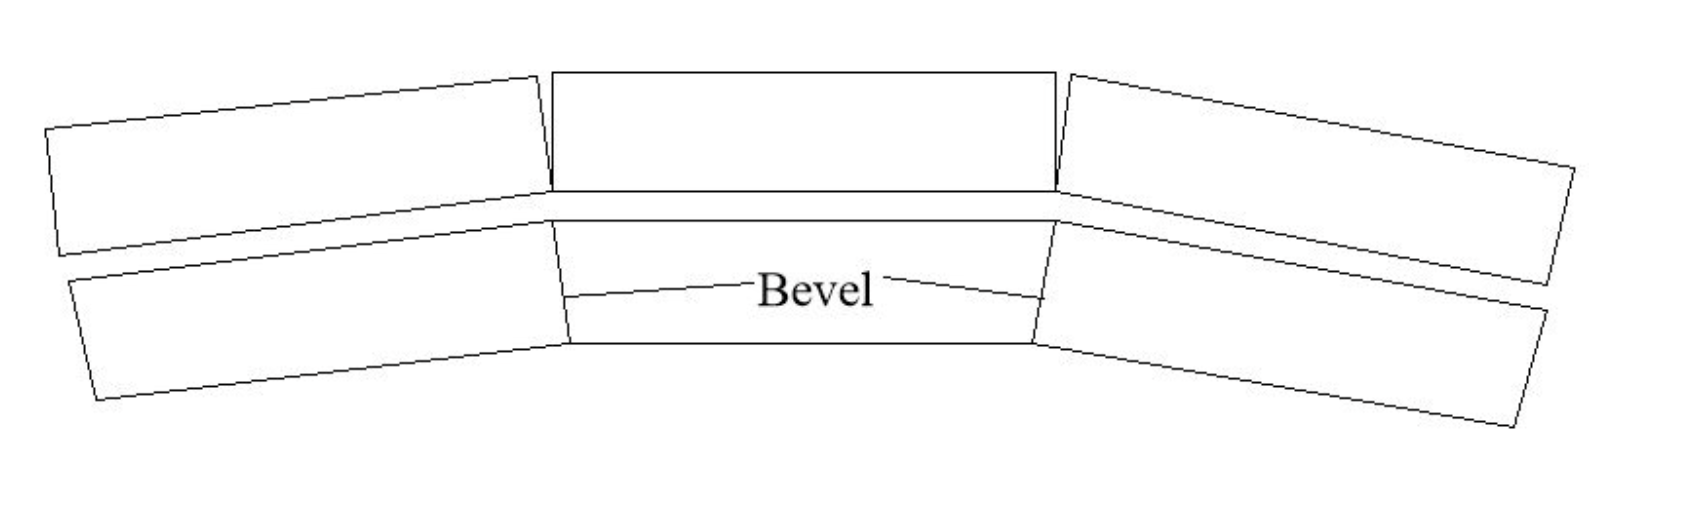
A few thoughts wrt planking - from a non-expert: On a double-planked hull like this, use the first planking as some practice for the second. It's not going to show, so it's easy to do it in a way that gets the job done. The Modelkit Stuff videos are great, though Jason kind of takes that approach likely because he doesn't need the practice and because he has videos to make; he said as much in a recent video on his current build. Treat every plank as a mini-project. Just know that it's likely that the first go around - of both the first and second planking - could well look terrible. Mine certainly did on my Vanguard Sherbourne. I learned as I went, but it still looked terrible. My second model with strip planking (Vanguard Ranger) was a bit better. My third with strip planking (Vanguard Zulu) a bit better. Even if the planking does not look great, on this model - really any model - you can paint the hull, which means that you can add a bunch of wood filler or bondo and sand and repeat. My Sherbourne hull ended up looking way better after all the filling and sanding and painting. On my current Zulu model, I am considering possibly leaving the top part unpainted. It's not even close to some of the plankings I've seen in other builds, not by a mile, but it's good enough for me to consider just adding some shellac or WOP to it. On my current Zulu, I used the approach you see in the Vanguard instructions and James' build log. I laid each plank until it rubbed against the one that was there and tapered from that point, kind of doing most of it by feel and by eye. That's fine for a first planking, or for one where you are definitely going to paint the whole things, but since this model could have the upper part unpainted, I wanted to try something different. So on my current Vanguard Zulu, I've been using Chuck's planking fan, which I think you can find in the Articles Database linked at the top "Lining Off Your Hull Planking, Tutorial and Fan". I put some tamiya tape at around 5 places across the hull, figuring out the maximum number of full-width planks that will fit at the widest point, marking the extent of the planking area on each piece of tape, and then used the planking fan to determine the equal spacing of widths. The planking fan essentially eliminates the need to divide some small number by 10 or 12 or how many planks you have and then hope that you can measure out those equal widths. Then I copied the marks from the tape onto the first layer of planks on the model. You don't ever want the width less than 1/2 a plank. On more complicated hulls, you can either end up having to drop a plank because the width would get too narrow (drop plank) or add in a plank because it flairs wider (stealer). I did not do measurements of the planks, but compared them to the marks I made on the hull and either cut or sanded, comparing the plank to the hull and repeating until it was the right width at the marked locations. On my current Zulu, I kept a couple of planks in the middle full-width. I probably could have just had one (this model does not have a specific wale part, but I kind of used that as a concept). On my Zulu, the hull being kind of small and simple, I did not mark off bands of planking, where you'd work on each band separately. I guess in a sense I did in that I had to plank about the wale (middle) and below the wale to the garbourd, so kind of two bands of planking. After doing a bit, I retaped and brought out the planking fan again, and adding new marks. You also want to bevel the planks, though that's not something I do enough of. It eliminates the small gaps that can appear between planks. I've pasted a photo from another build log (https://modelshipworld.com/topic/25391-stealers/.

-
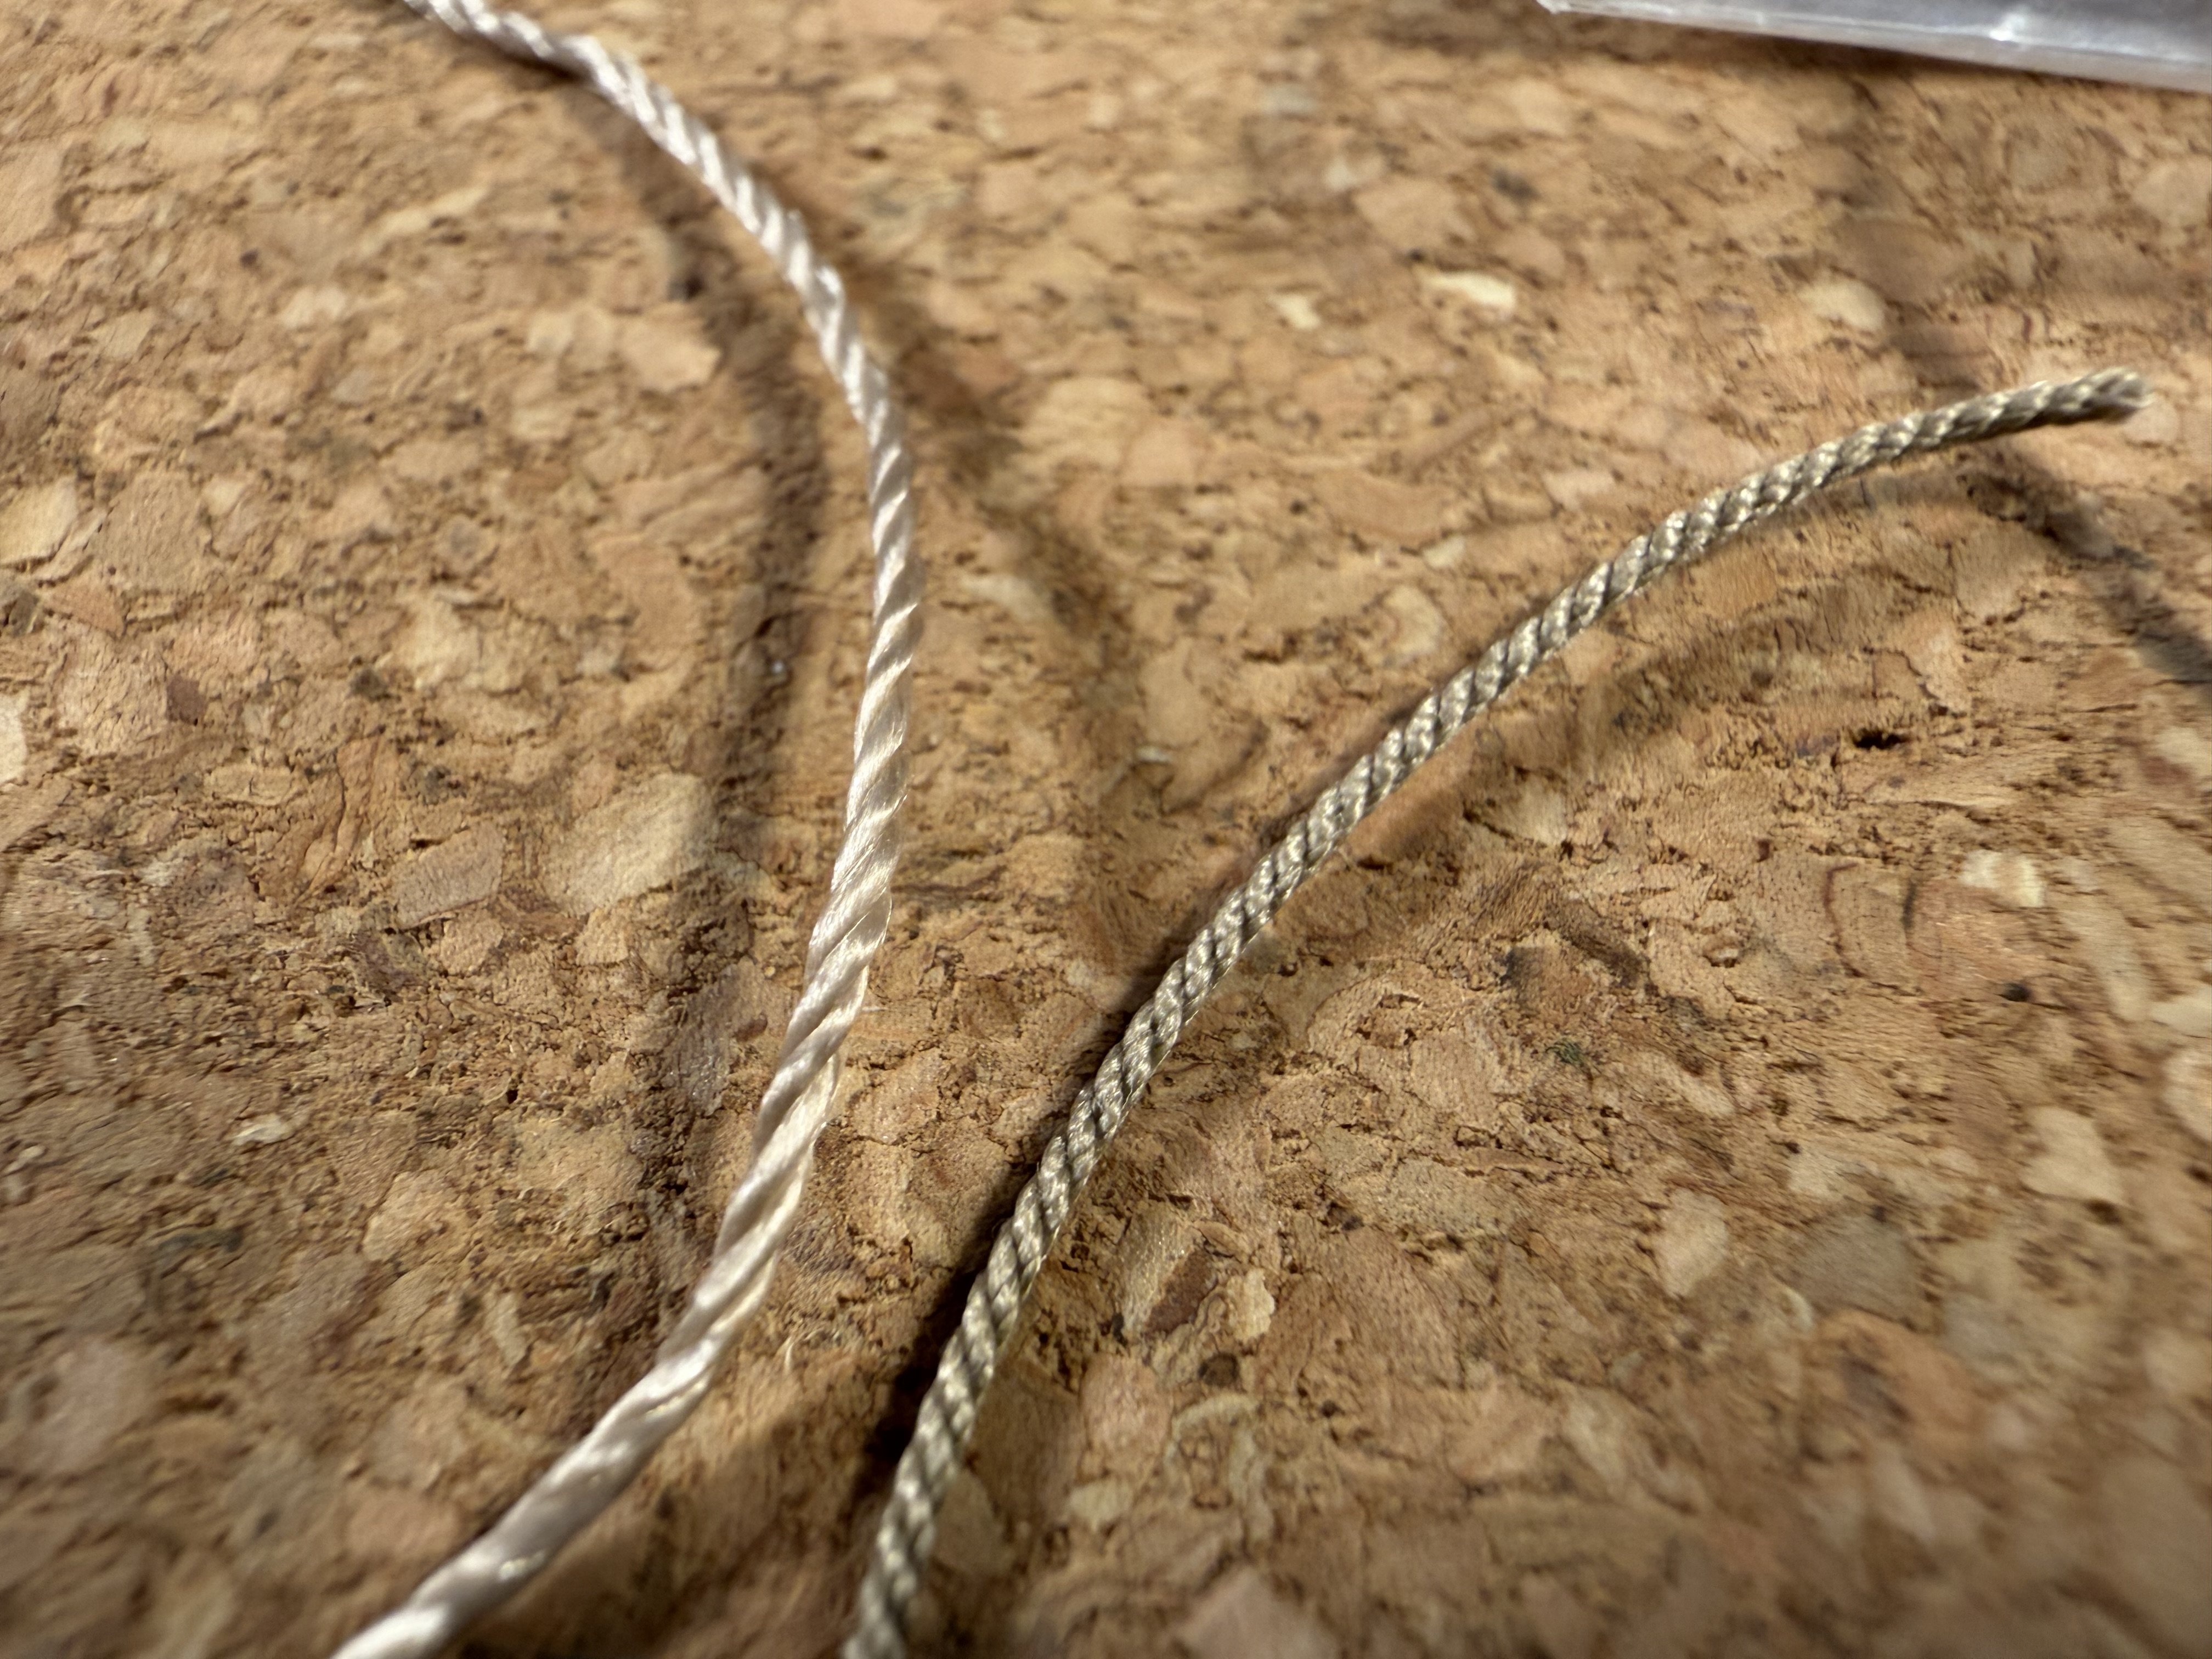
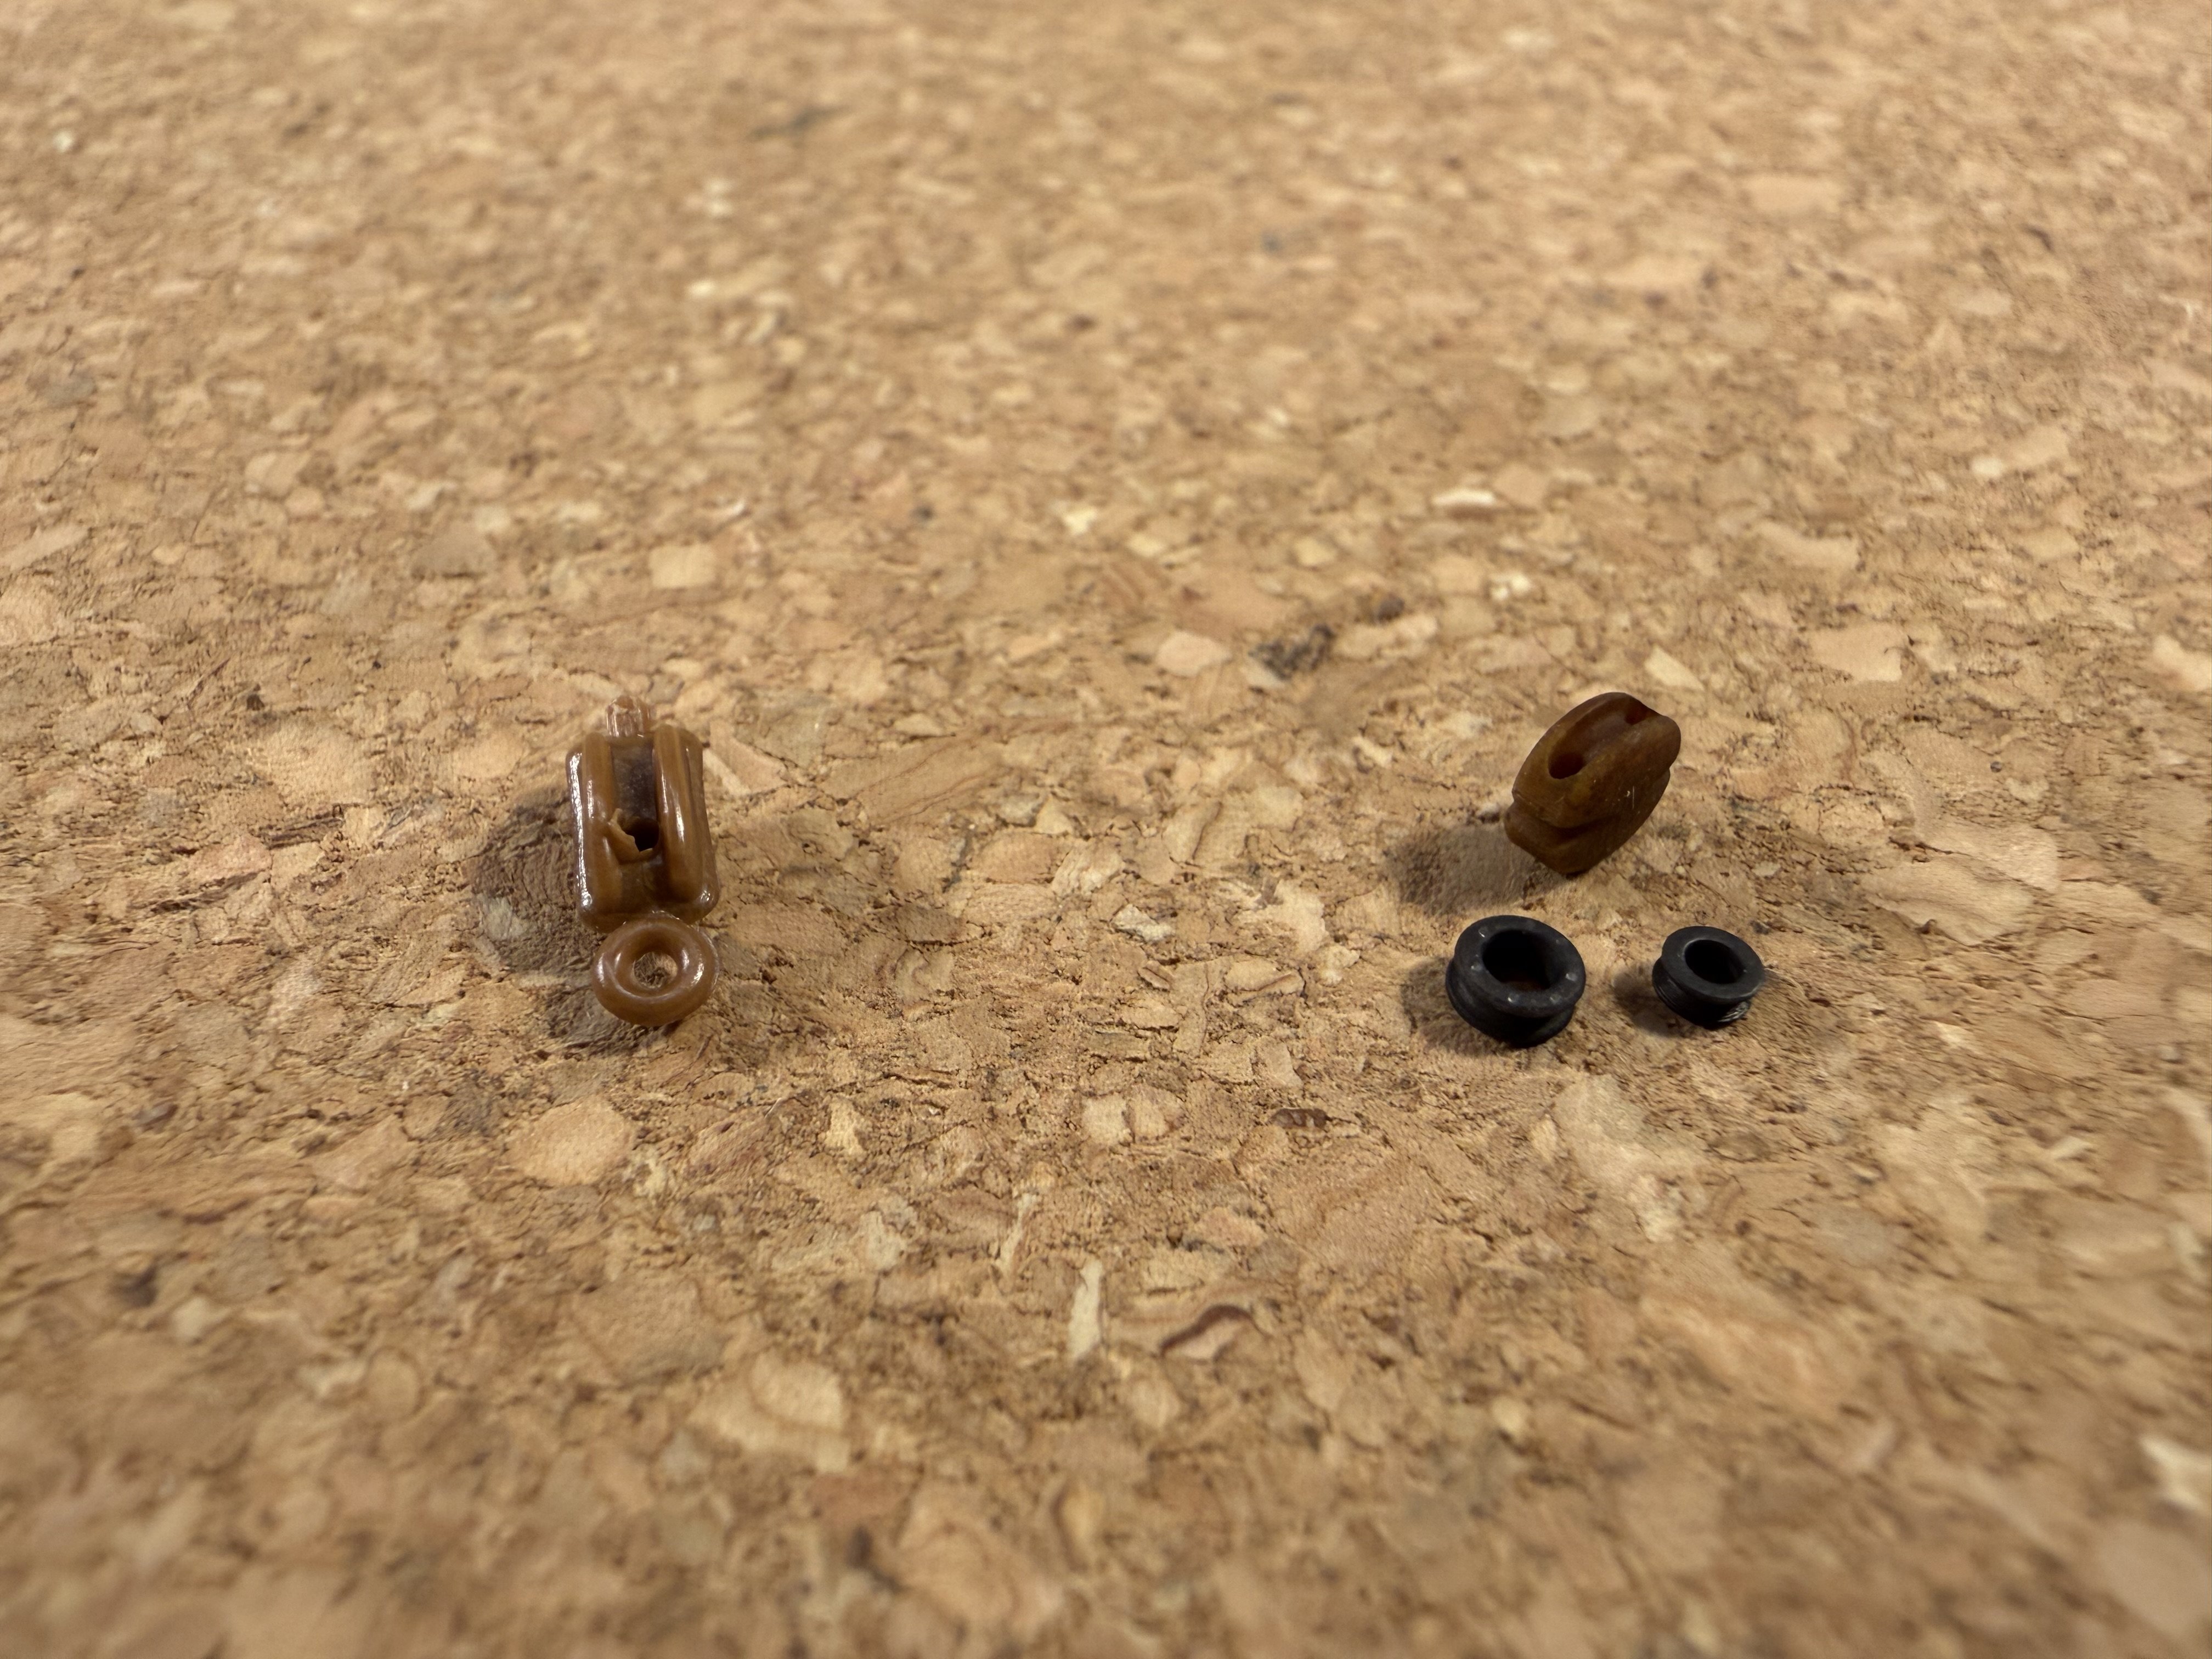
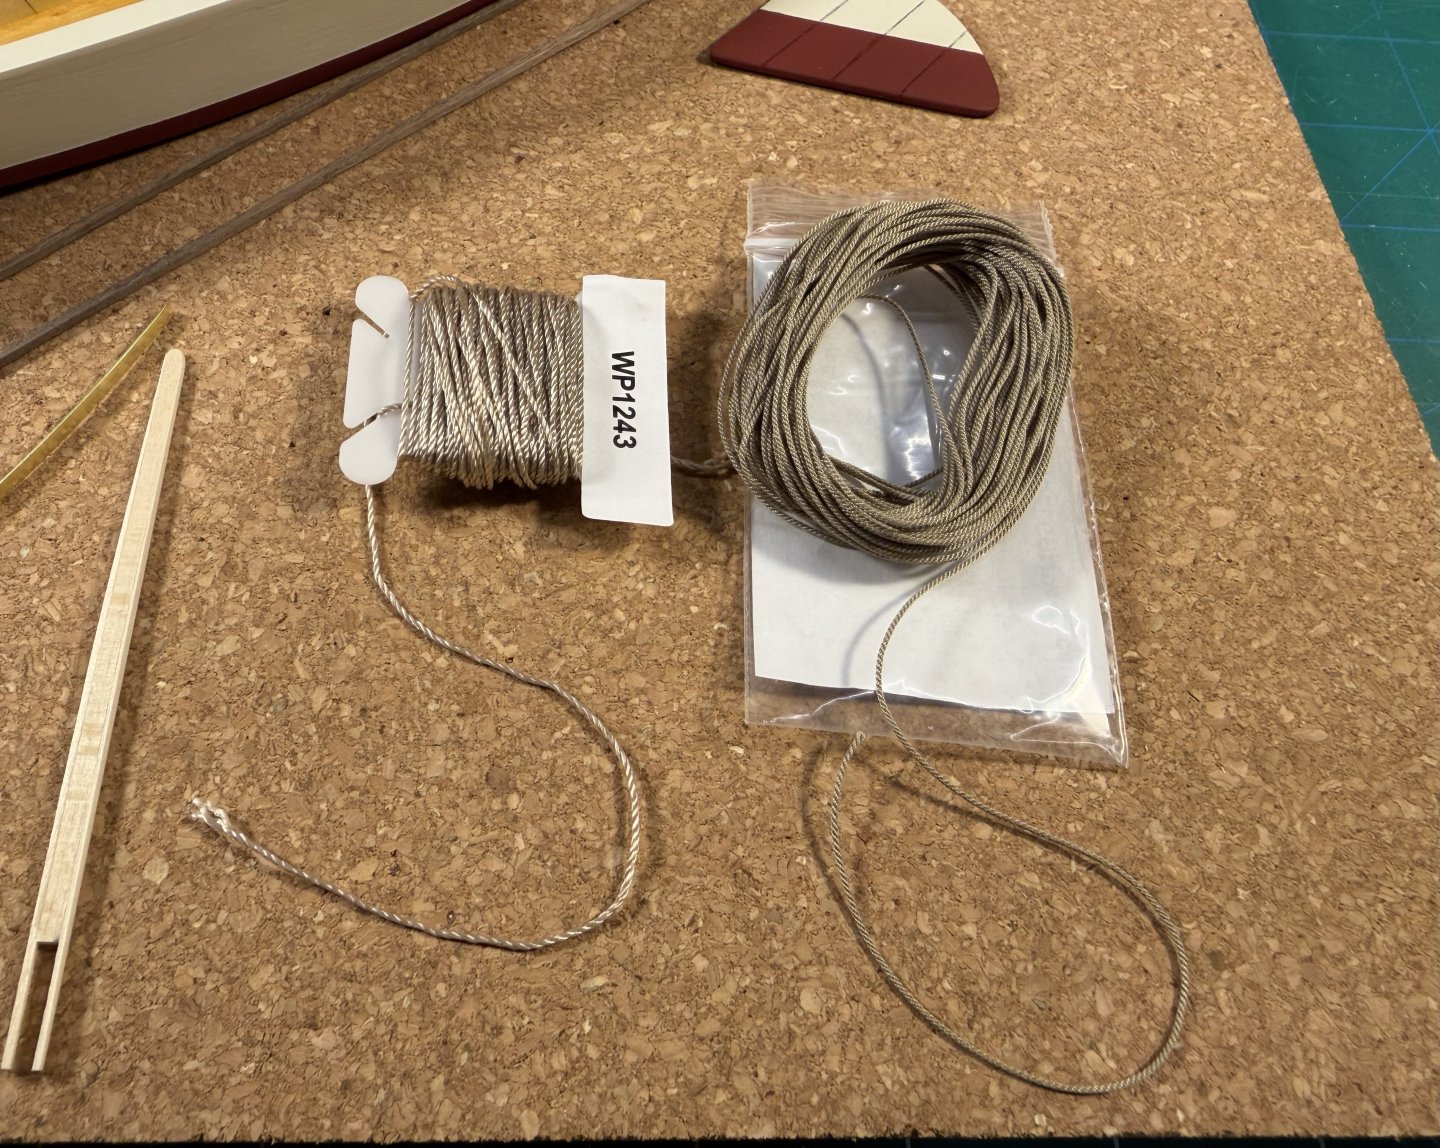
I’m replacing the Model Expo rope and blocks with ones I bought from Syren. In each photo, Model Expo is on the left and Syren is on the right. Obviously, no comparison.

- 33 replies
-
- 5
-
-
- crabbing skiff
- Chesapeake Bay crabbing skiff
- (and 1 more)
-
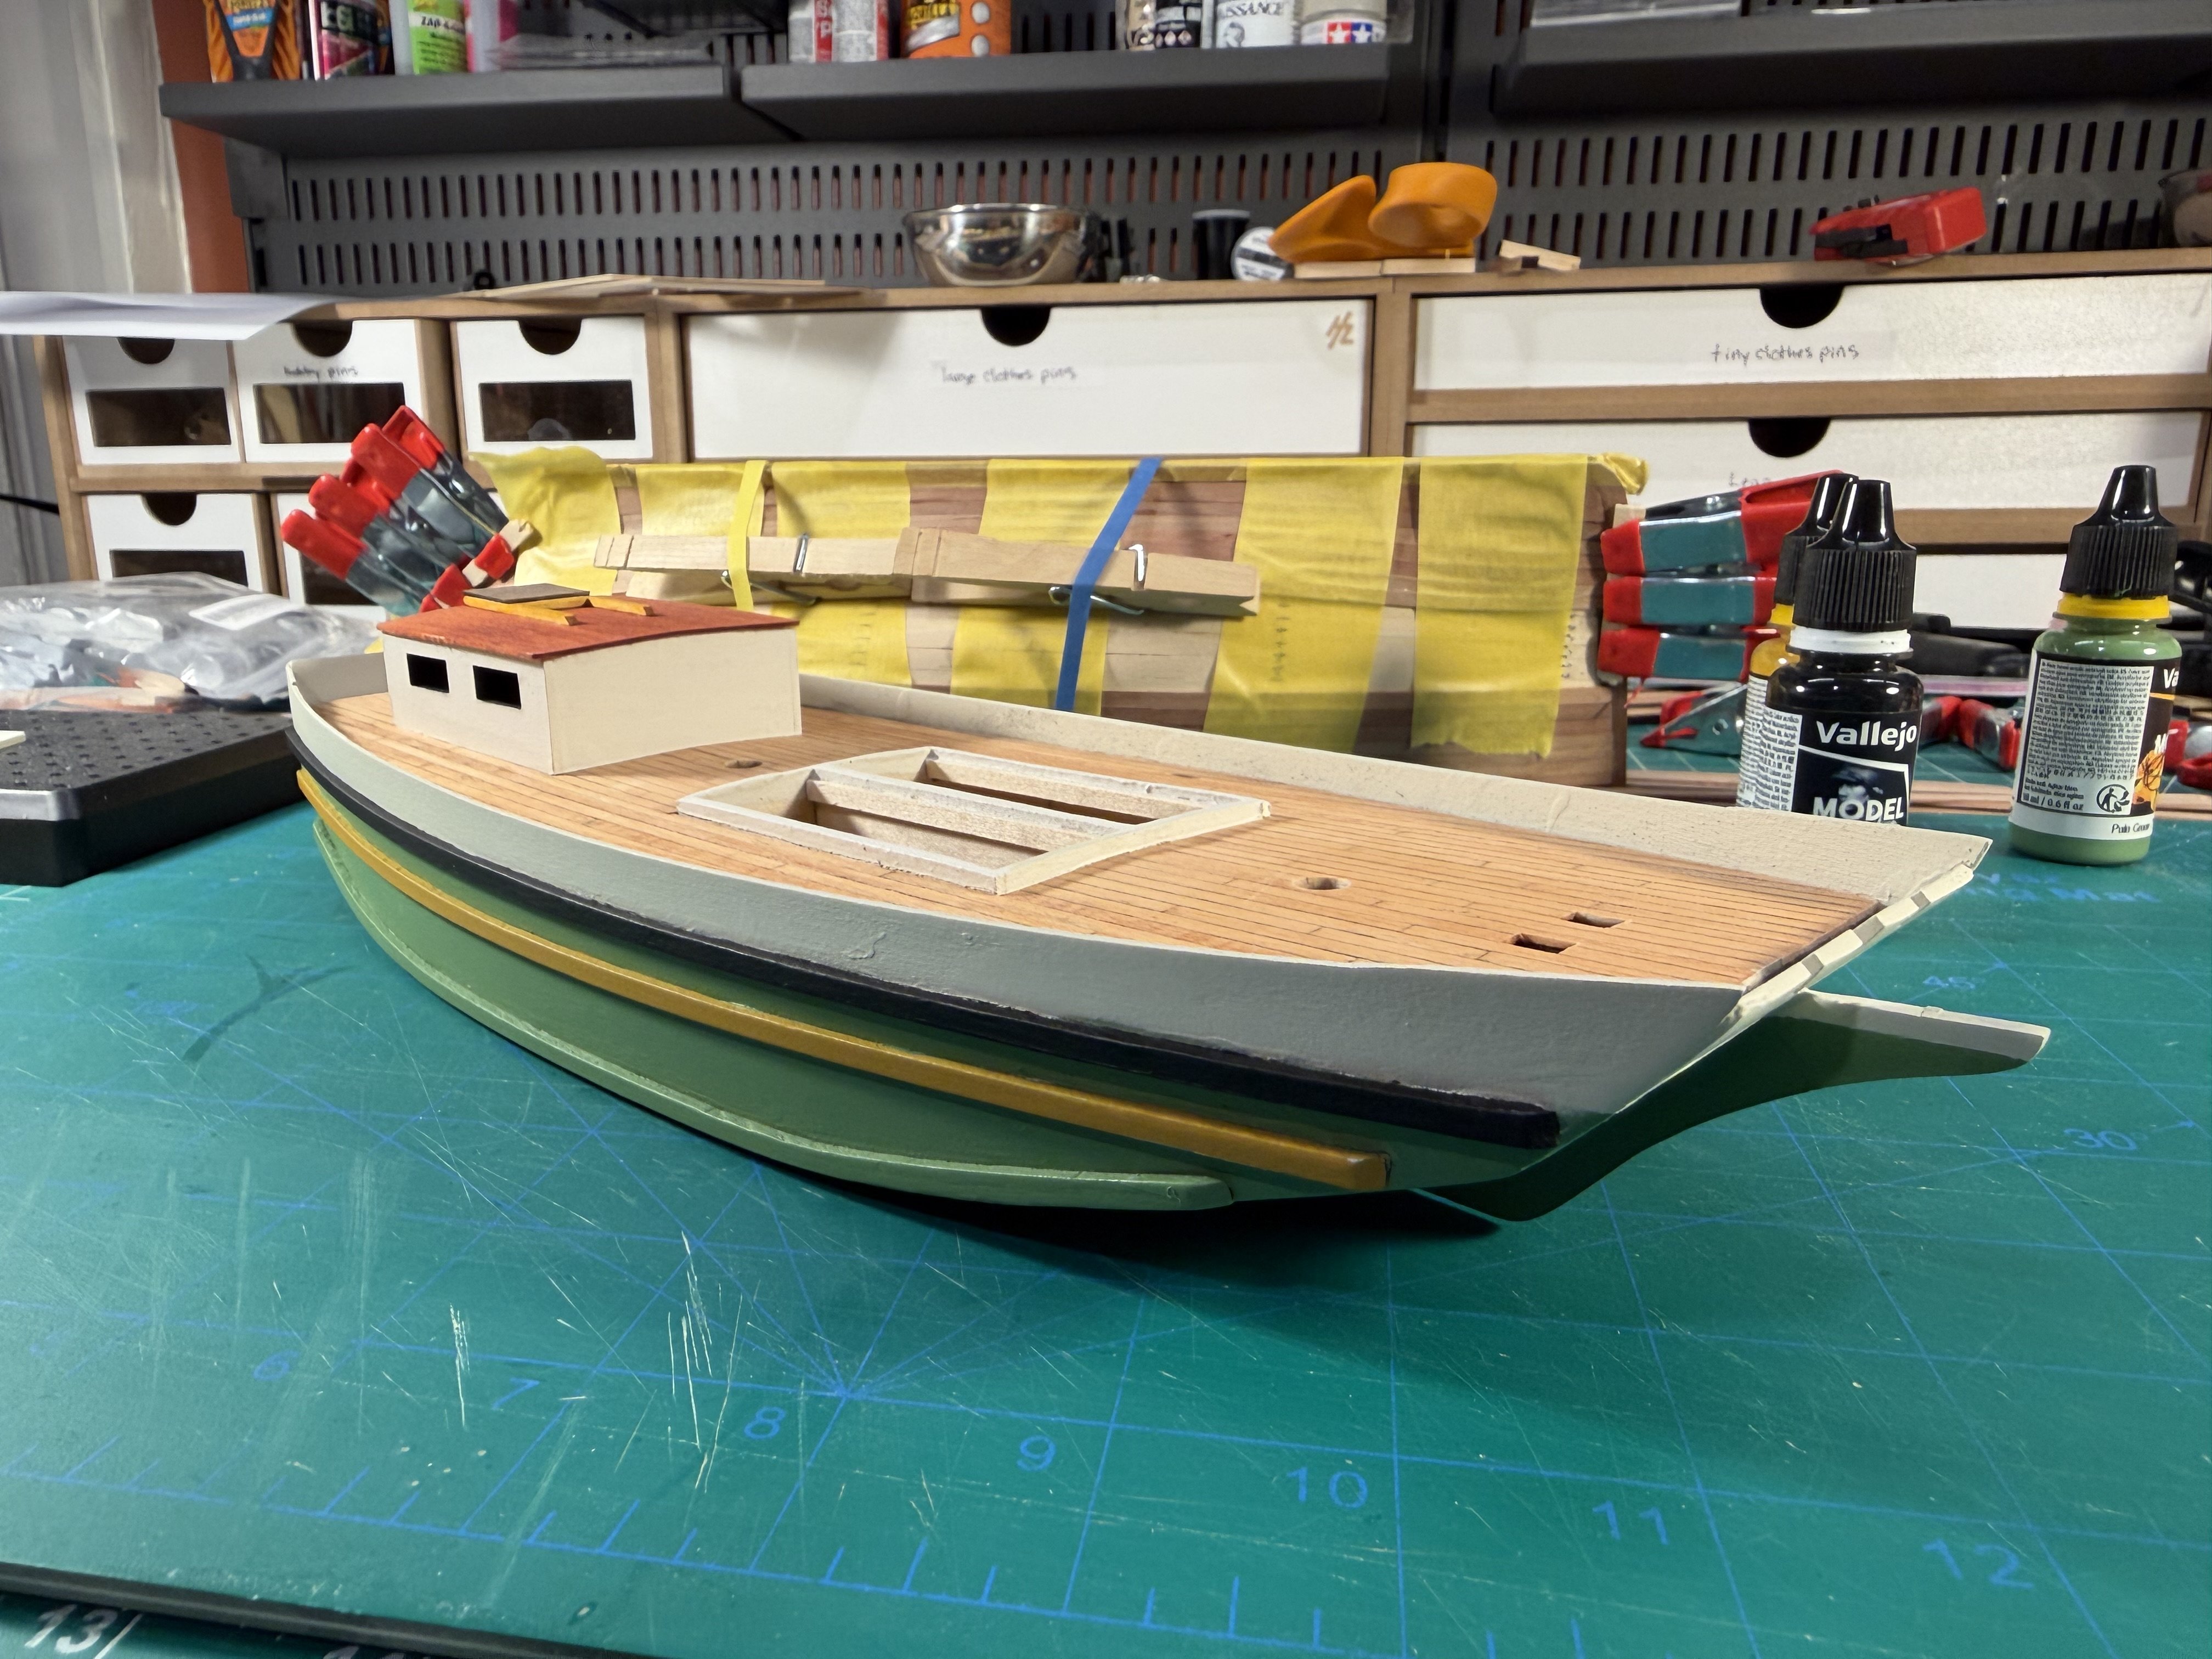
Completed the painting of the hull. It’s gone slow because I painted this when also painting some other models. Next steps are adding pieces to the deck. (Still have a bit of cleanup to do with a 000 brush. Nearly all the painting was with an airbrush and masking.)


- 37 replies
-
- 5
-
-
- San Francisco Bay Scow Schooner
- Scow Scooner
- (and 1 more)
-
As @Thukydides said, check a lot of build logs on how to do this. I didn't try rigging the guns with my Sherbourne and haven't built a ship yet that required rigging them. As @Thukydides also said, you definitely want to build these off ship with a job. In general, always think of ways you can rig something (a block, a line attached with a seizing, cannons) off ship. Sometimes you just to do it on ship, but it's way harder. Tight space plus lots of things in the way. Also decide what look you want. I personally am not a huge fan of seeing all the cannons each next to multiple rope coils when the cannons are fully rigged. I like a bit simpler look. My next ship, I'll definitely do breeching lines since the cannons on my Sherbourne seem a bit naked without them. Don't know if I'll add any more than that.
-
I hoping to leave the upper portion natural wood. I'm leaning toward using WOP by itself. I've seen some recommend shellac instead. Despite reading a whole bunch of posts, I haven't been able to figure out the relative strengths and weaknesses of the two options. I know shellac is dissolvable with alcohol. And I believe you can use PVA glue with shellac, but likely not to WOP. The planking is pear, so I know I don't want to use a stain. I've seen some recommend a tung or danish oil, but some posts have recommended against using those.
- 43 replies
-
- 1
-
-
- Lady Isabella
- zulu
- (and 1 more)
-
Agreed. With my youngest in college, there was a lot more free time for me. And hitting 60, I was looking for a new hobby that I could carry into retirement. I had lurked on here a decade or more ago but didn’t have the time, the space, or the money to take on this hobby. (I also learned to scuba dive last year, which has young people and surprisingly a fair number of older folks too).
-
I agree that it's useful having lots of build logs of the same model. In fact, I recommend people starting out to pick models with lots of build logs. While some are really good about giving lots of detail, writing them almost as full tutorials, even the lesser detailed and less frequent logs are useful. Someone might hit a new problem and come up with a new solution. Someone might take a photo of a step that a more detailed log left out. Sometimes someone does a build log who has lots of experience and does not have the same issues that someone with less experience might have. And selfishly, I like just being able to document my builds. Sometimes I give details or talk about what I've done to solve a problem. Other times it's just an update with a few photos. It's nice to see the projection for each model I build, even if no one else ever builds that model and finds other build logs more useful.
-
Never heard of Fiebings dye before. Guessing this is a good black dye, is that right? Which one would someone use: https://fiebing.com/product-category/leathercraft/dyes-stains/