HOLIDAY DONATION DRIVE - SUPPORT MSW - DO YOUR PART TO KEEP THIS GREAT FORUM GOING! (89 donations so far out of 49,000 members - C'mon guys!)
×


Dilbert55
-
Posts
170 -
Joined
-
Last visited
Content Type
Profiles
Forums
Gallery
Events
Everything posted by Dilbert55
-
 Hope it helps. Have you seen Ken's log where he shows how to use needles for applying CA. Looks like a really good idea. PS. Pasted the Greek address because it was close to Cyprus, did not scan their entire dealer list to see if there's a dealer on your island. Was able to pick up a 14.2 oz bottle of this CA yesterday at my local hobby shop for 13.99 CDN (9.19 Euro).
- 317 replies
-
- 1
-

-
- hermione
- artesania latina
- (and 1 more)
-
Looks like it's globally available and there are numerous places to purchase online, here's the web-site link. http://www.bsi-inc.com/ A quick check using the dealers search feature had this place on the first page. You can't search specifically if you are not in the USA but have to scroll thru the entire list. Name: S. Koutsos Model Hobby Address: R-C Model Prod. Import & Dist. City: GREECE State: 00 Phone: 011 30 210 6834783
-
Noticed this online yesterday... "SUPER-GOLD™ eliminates the irritating fumes from the evaporating monomer that make repeated use of CA unpleasant at times." Haven't seen it in my local hobby store yet.

-
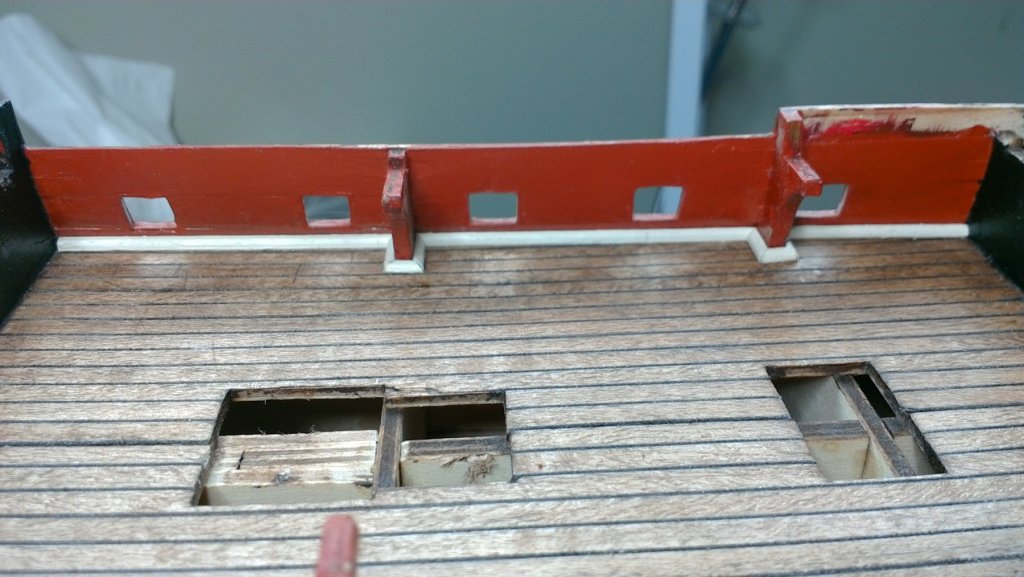
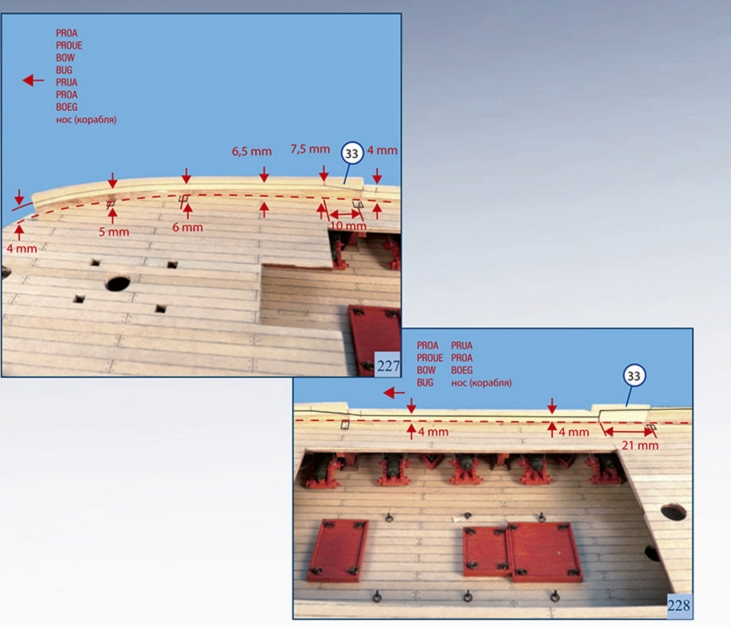
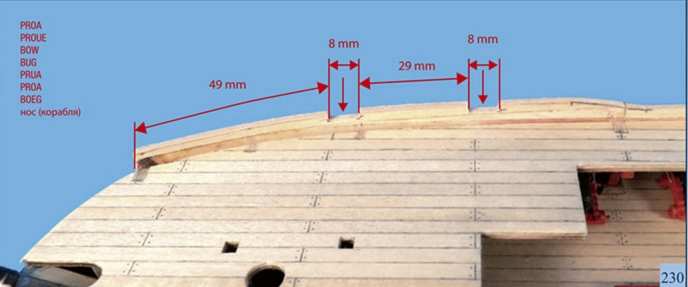
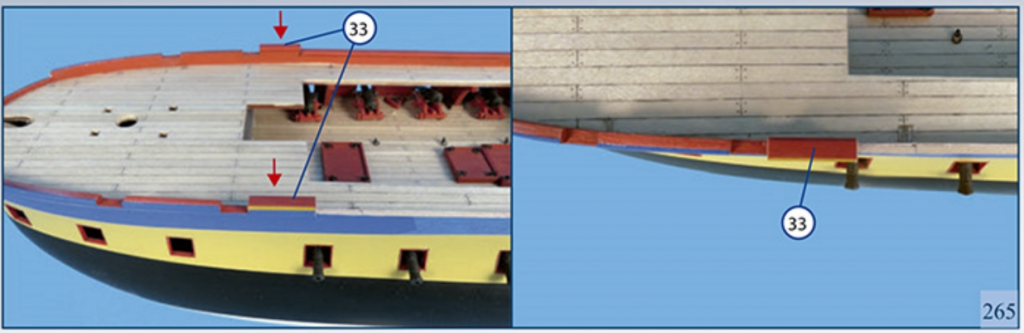
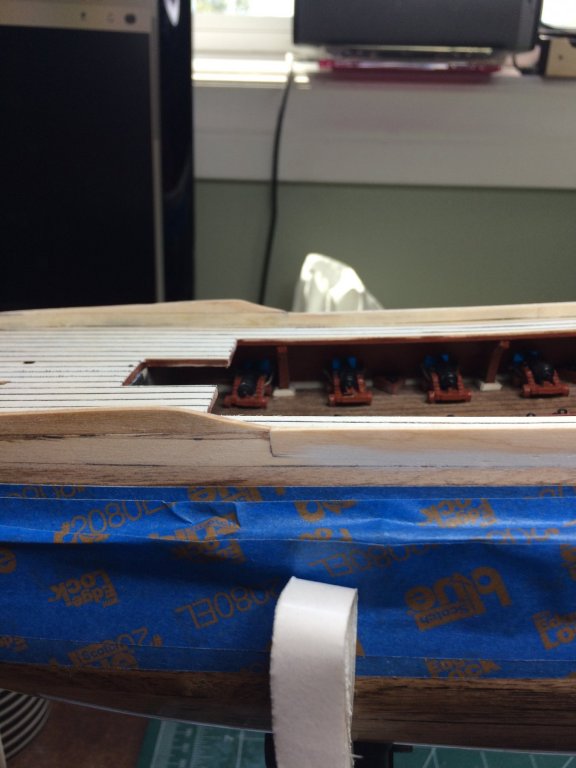
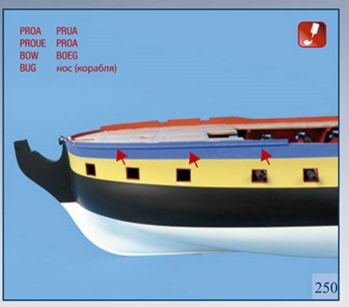
Heads Up - The instructions for the last pieces of planking on the upper hull are a bit miss-leading. When adding the final planks, instructions P227-228 show a sloped transition between the FWD and MID sections of the top planks, going down from 7.5mm to 4mm. The resulting slope is then shown in all pictures UNTIL you get to P265 when the cap moldings are being added. Now it's show as a square (step-down) between the FWD and AFT sections. The step down looks to be in-line with the edge of the opening to the gun deck so I think I'll be OK but only noticed this because I was checking ahead to see if I had done everything needed before painting the blue section. Will add the moldings mounted on the exterior of the top plank, fix this area detail and then cut the gun ports before painting the blue.
-
Canadian Admirals seem to accept indoor shipyards, lucky for me.
-
For those interested in 3D modeling historical ships, if you have not seen Michel Saunier's Soleil Royal, take a look, it's incredible. Imagine modeling that.
-
Eager to see your progress on coppering the hull. Had not thought of trying it myself mainly because I know nothing about it, but now its on my future to do list.
-
Tools You Can't Live Without
Dilbert55 replied to Justin P.'s topic in Modeling tools and Workshop Equipment
Hands, eyes and a bottle of rum, yohoho -
Looking very nice, both the large and small versions!
-
Incredible work!
-
Totally-wet-behind-the-ears-noob question
Dilbert55 replied to jpooch01's topic in Wood ship model kits
Have been fascinated by PC's all my life and could not avoid getting tech'd up given the job I used to have. Now retired but still have an IPhone and pretty much use it only as a phone. Never have had the urge to become one of those phone zombies you accurately described. Agree with you, cell phones are a public health hazard. On the other hand, my IPhone does keep me from getting bored while waiting in the car for the Admiral to return from shopping. Not preaching too you!!!!, this last word is only because you won't be able to fully experience this fantastic website without pictures....skip it if you like.... ...You can get a webcam for a few bucks and hook it directly to your PC and only connect it when you need it. Please forgive me if this last word was not wanted. -
Hi Herask, you want to keep all your fingers if you're a 3D driver! My time estimate is based on making a fully representative 3D model of a 74 gun ship like Gaetan builds. Must confess I'm not a 3D modeler myself but was responsible for software and training at one point in my career. Made some time studies on designer productivity in order to justify upgrading our 3D software and as this experience was with designing aircraft, the level of detail and accuracy is very high.
-
Creating a good 3D model is basically the same as building most things, you make the detail parts, build sub-assy's, then put them all together into the main assembly. The time required to create a 3D model of this complexity from scratch would take at least as long, if not longer, than building the real model itself. If you already had a 74 Gun ship model at hand, you could scan existing parts using a laser tool rather than model them from scratch in 3D. A good 3D model would permit you not only to visualize how planking would touch the hull but also let you simulate shaping, bending and installing the planking. Gaetan and I live quite close to an aircraft assembly plant that has just completed spending billions $$ designing and simulating the build of a new commercial aircraft using Catia V5-Enovia, so if we can get enough of those skilled 3D jockey's hooked on model ship building, perhaps we can coax them into creating a 3D model.
-
Totally-wet-behind-the-ears-noob question
Dilbert55 replied to jpooch01's topic in Wood ship model kits
You don't need any fancy digital camera, any cell phone camera will do the trick. There are lots of You Tube "How To" videos on how to get pictures off a cell and onto your PC or tablet. Once the pics are on the PC, it's as simple as clicking on "choose files" below to add a pic to your post. It's not easy to show your work to begin with but don't be shy, you'll see it's worth it once you start. -
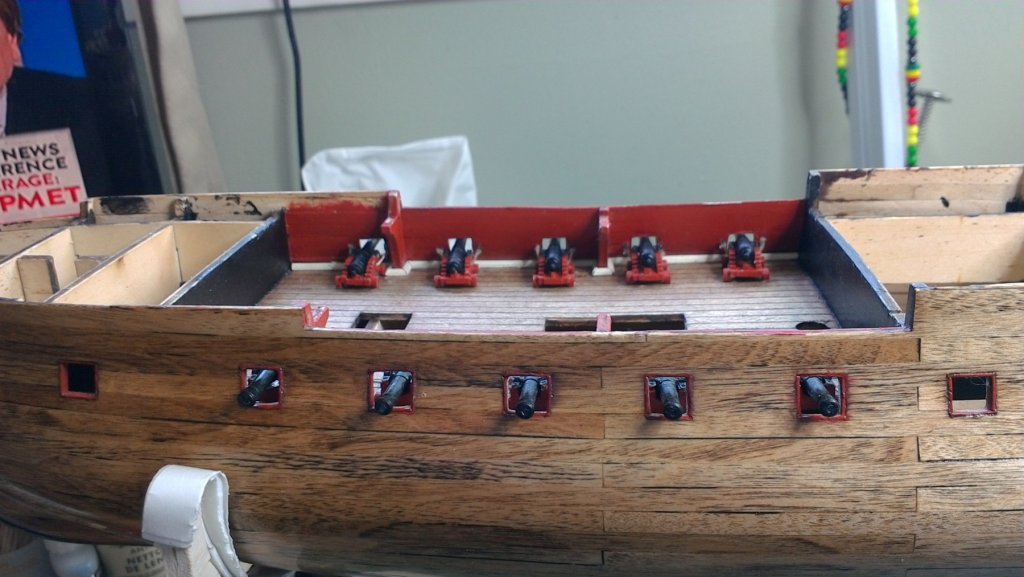
Guns mounted on the lower deck. Need to find a more consistent means of getting a clean cut on lines attaching to eyebolts. Can see more tools coming in the future
-
Believe the winch is only there to lift the anchors (as in a fulcrum), not store all of the anchor rope.
-
Bonjour Complex, welcome and be prepared for great experience. Check this out
-
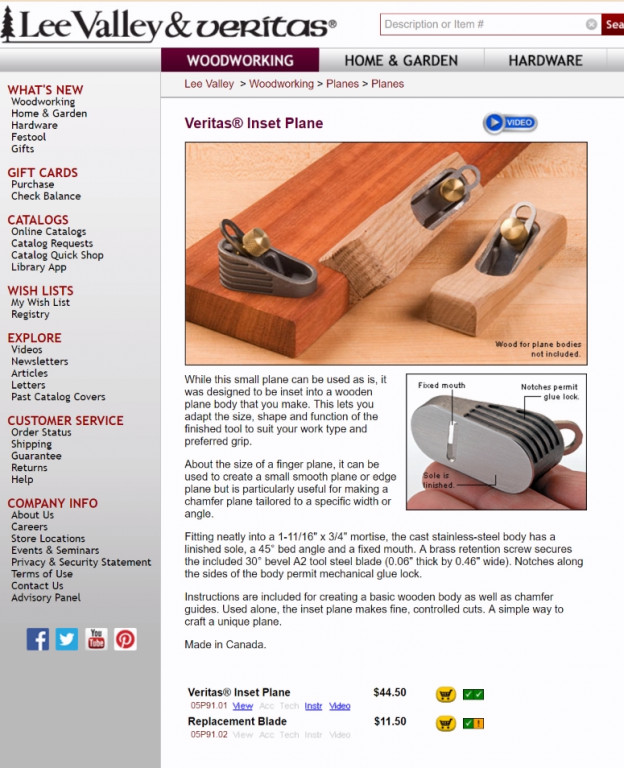
This plane is a specialist's tool, so it should be packaged as it is, specially.
-
Fully understand your decision. You will see over time that this site is a wee bit fixated on tools of all sorts and only a few come "Supplied in a French-fitted embossed leatherette box,.."
-
Jack12477 - Is this the Lee Valley micro plane you were referring too?
-
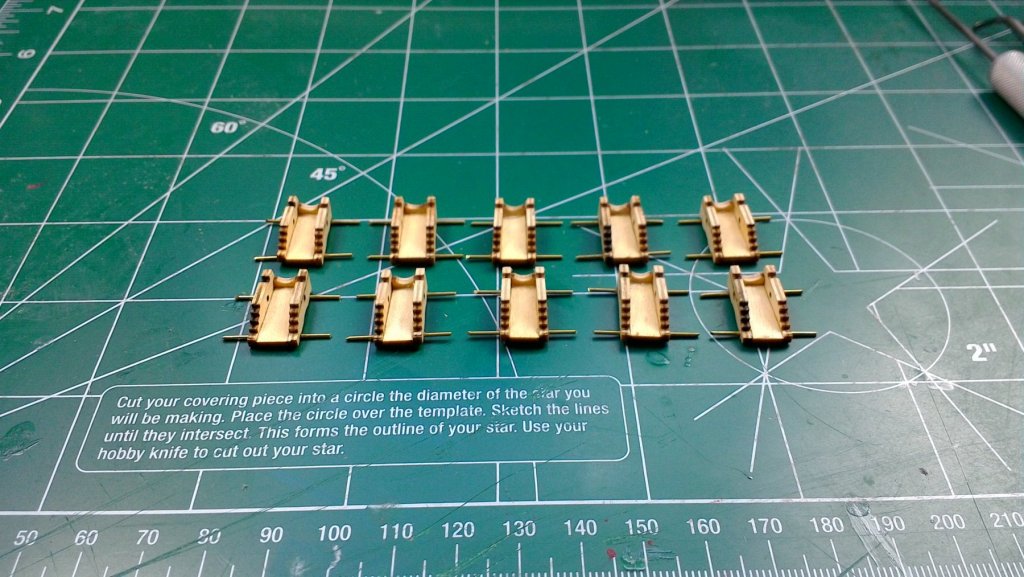
Going to deviate a bit from the instructions sequence, prime and apply the 1st coat of red paint before attaching the carriage wheels.
-
My master carpenter brother-in-law told me there is no problem using Minwax water based poly over Minwax oil based stain, so I used the wipe on satin poly over oil with no problems at all when finishing my hull 3 weeks ago.
-
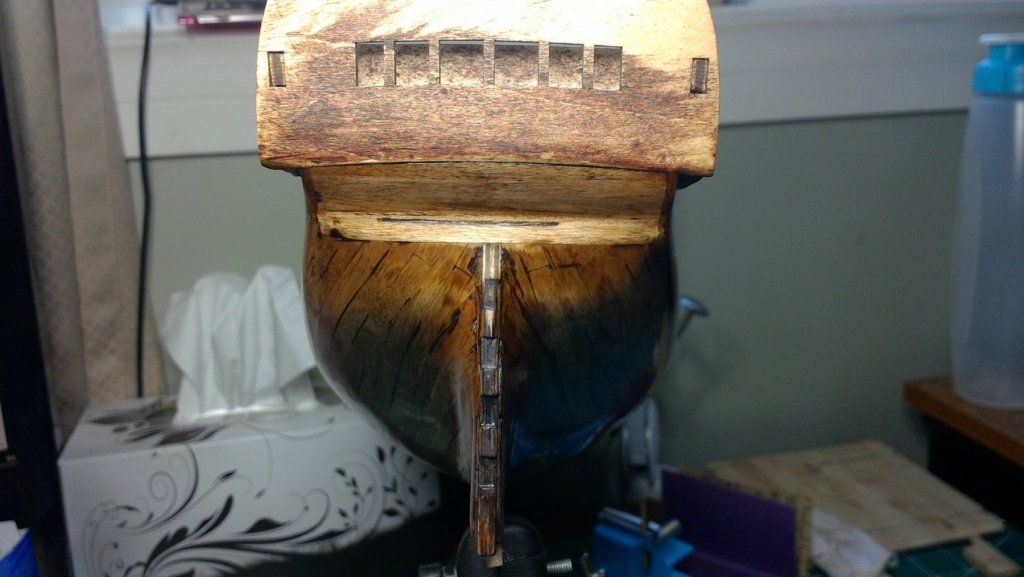
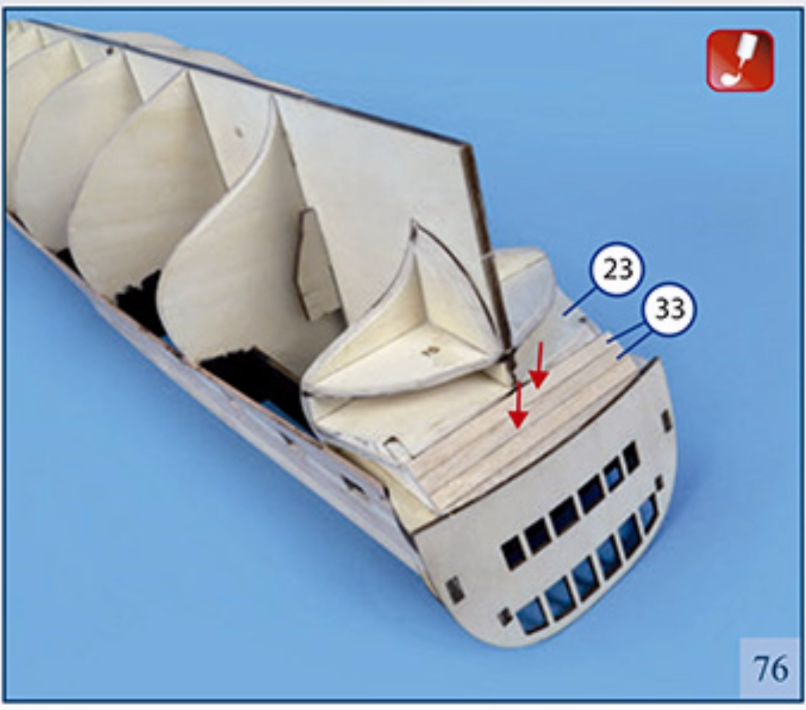
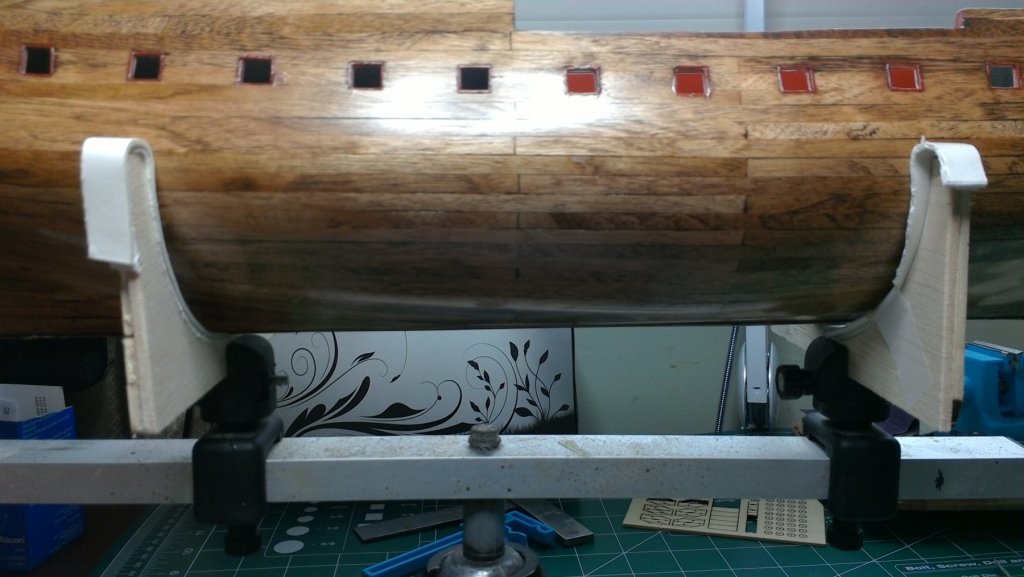
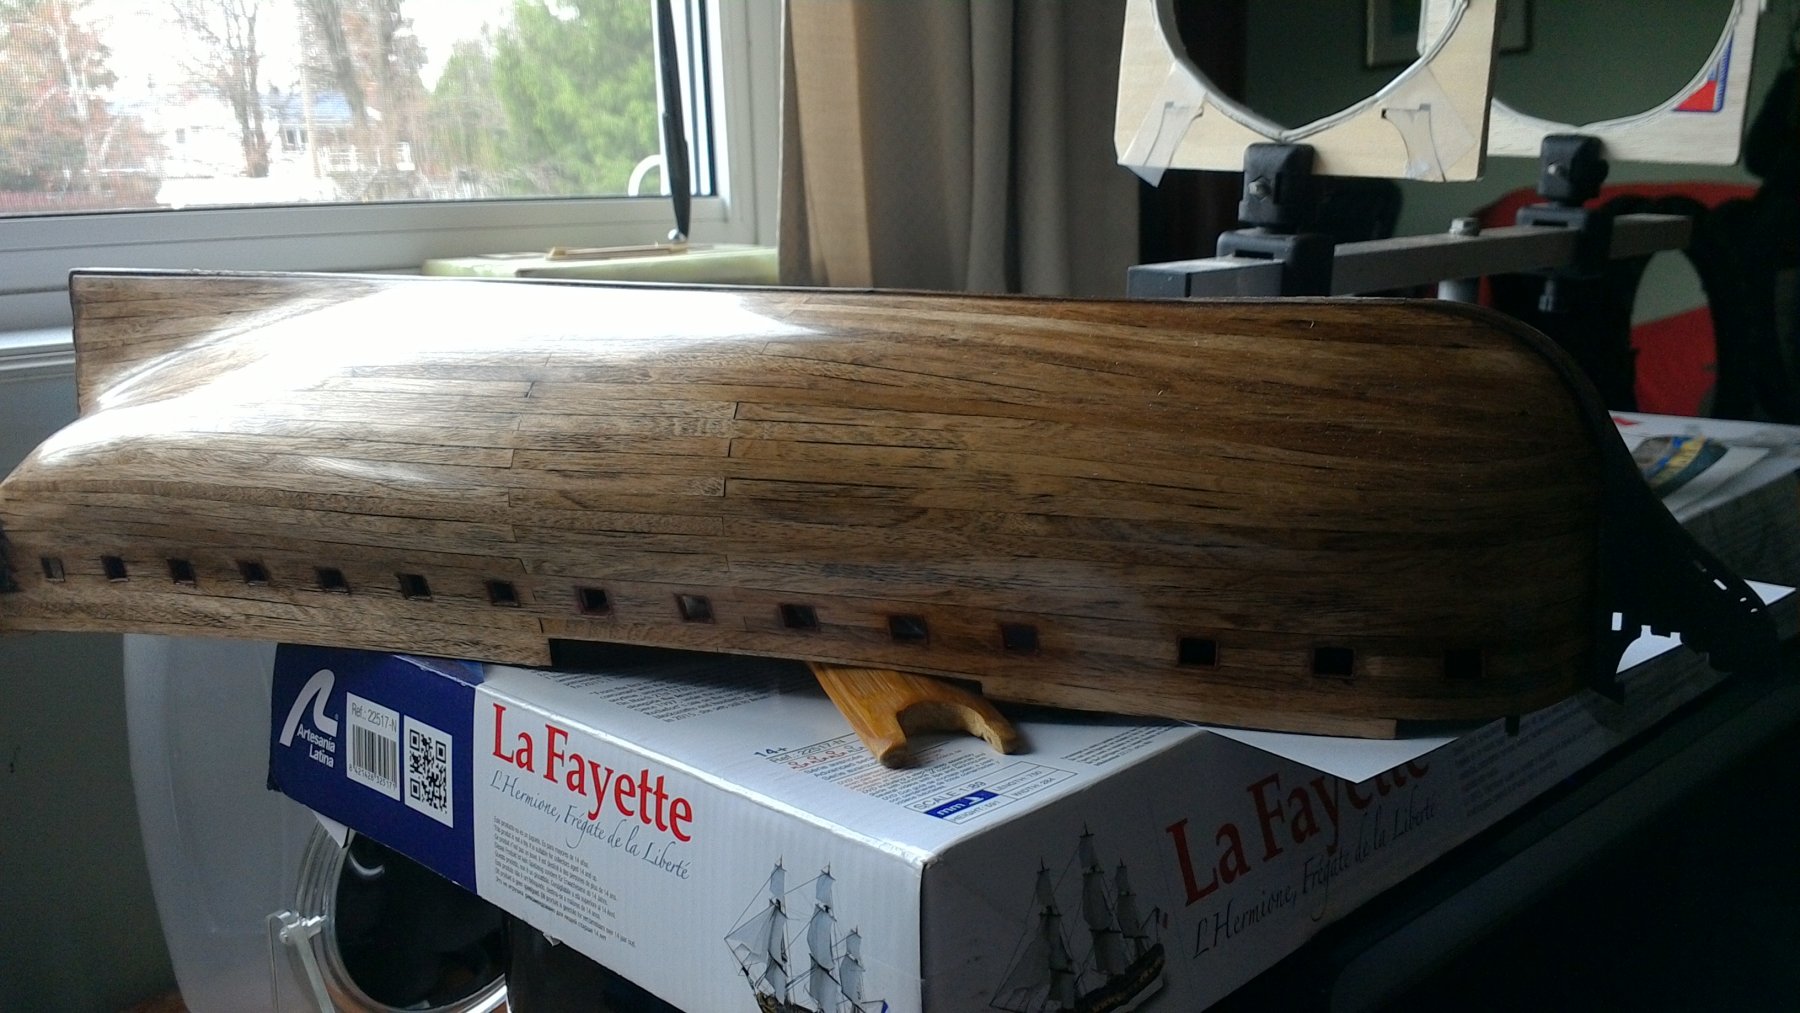
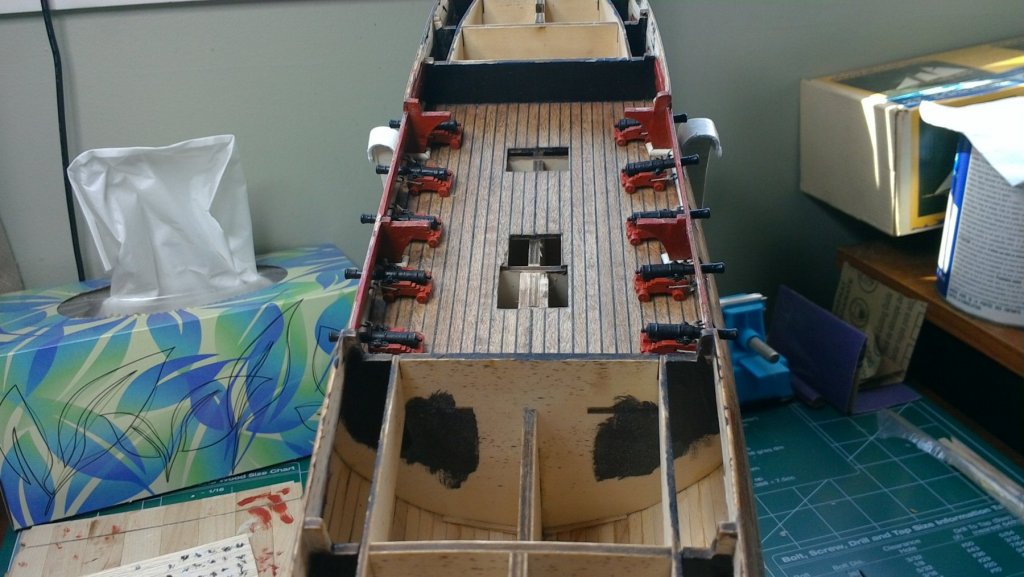
Perhaps its the lighting, as I probably sanded too much in a few places. Note the color difference between FWD/AFT in this picture. Here's a few larger pics of the moldings, Forgot to include this pic of the stern in the initial set. As the plank stock pieces provided are not long enough in all cases for aft hull, cheated a bit and added an piece of plank on top of the lowest strip (#33 on illustration) on the lower aftercastle to make it easier to make a blended joint between the planks and the lower aftercastle. Made some cradles out of the leftover wood around frames 7 + 8, balsa and weather stripping foam. One thing I definitely learnt for my next hull is to color match each raw plank before using any particular plank. I didn't do this here so you can see some real color differences between some adjacent planks.