Louie da fly
-
Posts
7,993 -
Joined
-
Last visited
Content Type
Profiles
Forums
Gallery
Events
Everything posted by Louie da fly
-
 A clever solution to the problem of the too-wide aftercastle. The whole build is looking very good. Steven
 -
HMCSS Victoria 1855 by BANYAN - 1:72
Louie da fly replied to BANYAN's topic in - Build logs for subjects built 1851 - 1900
Looking very good, Pat. It's a pleasure to follow the progress of this superb build. Steven- 1,021 replies
-
- 2
-

-
- gun dispatch vessel
- victoria
- (and 2 more)
-
What can I say. This is a superb model, thoughtfully and comprehensively researched and exquisitely carried off. And beautiful! Steven
-
Beautifully done, Patrick. And a superb solution to the problem. Steven
-
HMCSS Victoria 1855 by BANYAN - 1:72
Louie da fly replied to BANYAN's topic in - Build logs for subjects built 1851 - 1900
And the same to you, Pat. On another subject, whatever happened to our hot Australian Christmas? It's only 15 degrees C (59 F) here, and it was 7 (44F) overnight. So much for a barbie at the beach! Steven- 1,021 replies
-
- 3
-

-
-
- gun dispatch vessel
- victoria
- (and 2 more)
-
HMCSS Victoria 1855 by BANYAN - 1:72
Louie da fly replied to BANYAN's topic in - Build logs for subjects built 1851 - 1900
Hi Pat. Glad you're getting better. I should have known you were aware of that swivel, but I thought I'd mention it just in case. Steven- 1,021 replies
-
- 3
-
-
- gun dispatch vessel
- victoria
- (and 2 more)
-
HMCSS Victoria 1855 by BANYAN - 1:72
Louie da fly replied to BANYAN's topic in - Build logs for subjects built 1851 - 1900
Very good news, Pat. Glad to hear you're ok. BTW, regarding the Victoria, are you aware there's a small part of its rigging preserved in a park in Queenscliff? A swivel joint, if I recall correctly. Steven- 1,021 replies
-
- 4
-
-
- gun dispatch vessel
- victoria
- (and 2 more)
-
Nice save! Steven
-
You've given yourself an interesting problem to solve. Looking forward to finding out what you decide to do! Steven
-
You might also like to look at Woodrat's 'hulc' build regarding these reef points. See Steven
-
As a novice at soldering (I've had lots of failures, few successes) I'm impressed. Steven
-
Beautiful work, Dick.
-
Interesting idea!
-
Beautiful work, Dick. I take it you're leaving some of the deck planking off to show what's underneath? Steven
-
Beautiful work as usual Patrick. Steven
-
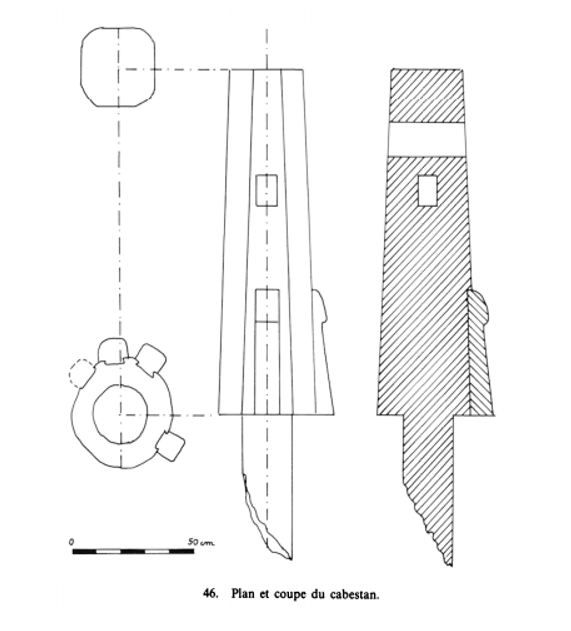
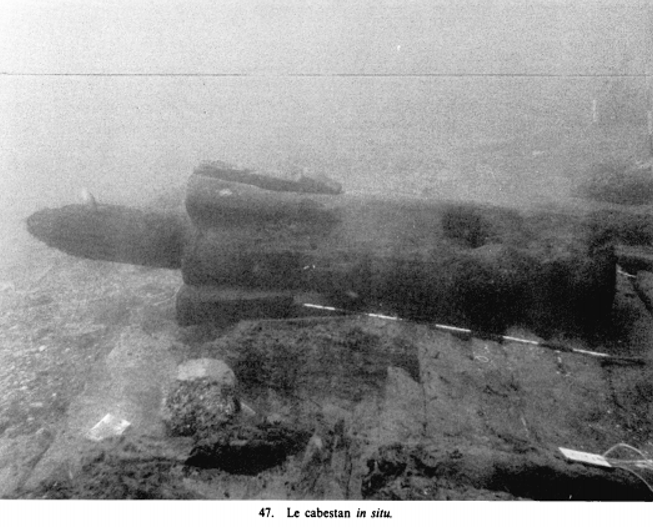
By the way, another point with the Lomellina is that she did capsize, so perhaps wasn't all that stable. But as we don't know the exact circumstances of her loss, that may not have been the problem. She was in harbour when a tempest came down from the hills and tipped her over. Was she in ballast or did she have cargo on board? There were some indications that she was not in full sailing condition when the tempest hit - IIRC the capstan was not shipped - but we just don't know for sure. What we do have is a fair section of her underwater lines. Steven
-
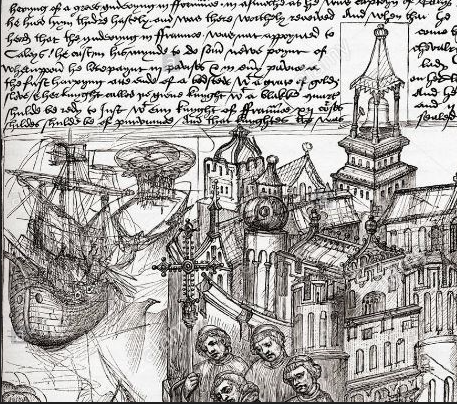
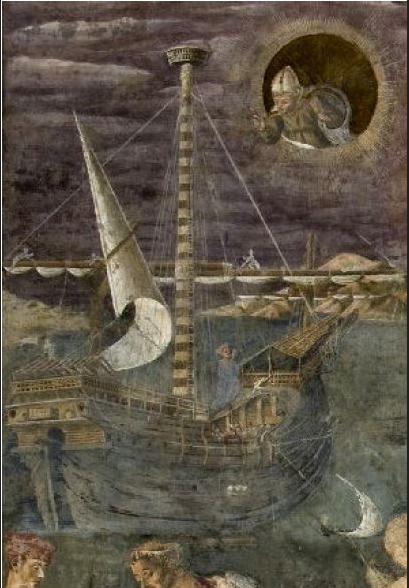
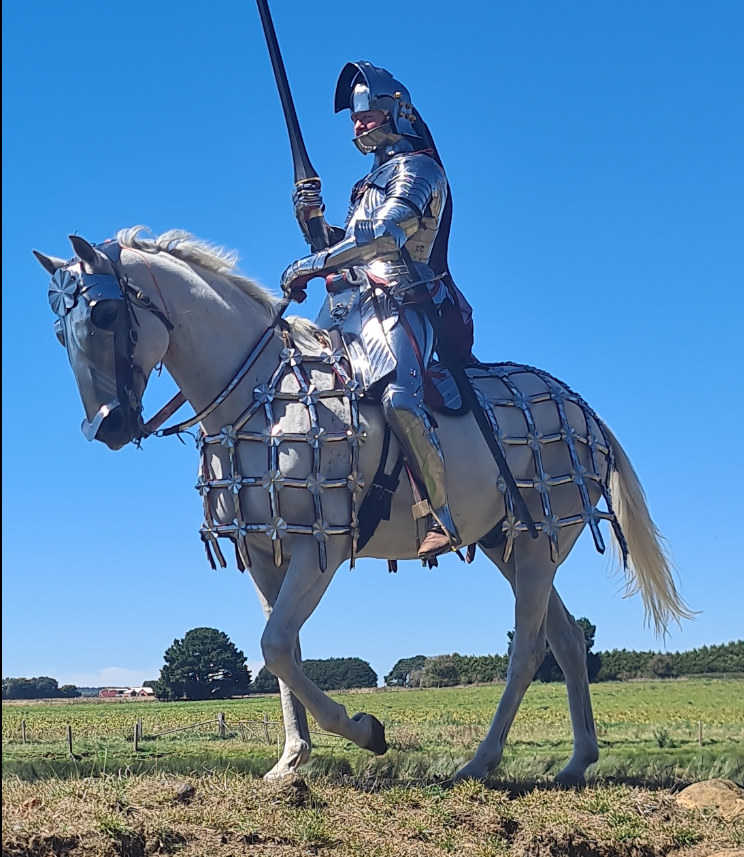
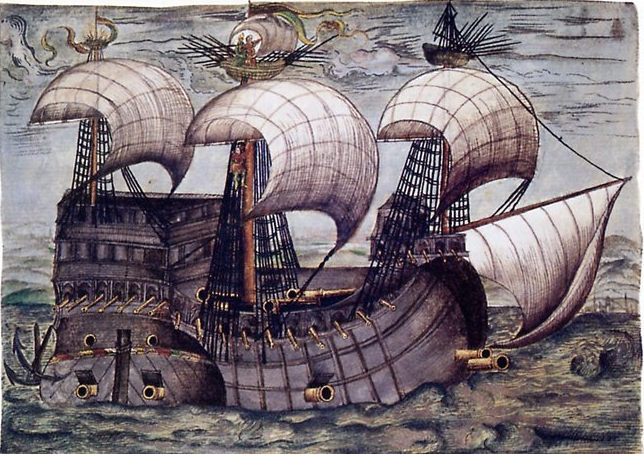
Thank you Lashenden. I agree with you in many ways. Apart from obvious mistakes, I'm inclined to accept pictorial evidence as being correct unless proven otherwise. But there are artists and artists. Some - the ships in Carpaccio's superb Ursula Legend paintings and Botticelli's Judgment of Paris I feel I can accept (almost) wholeheartedly - but even Carpaccio's pictures contain a couple of things I find hard to accept (the blocks that tighten the shrouds, the configuration of the wales at the bow) - because they don't seem likely to work in the real world. Similarly, there are a couple of details in the Botticelli that don't ring true - there is a ladder just behind the after hatch that doesn't seem to lead anywhere, for example. But overall, excellent. On the other hand, there are some pretty abysmal contemporary pictures out there. Oversize figures - certainly there's a tradition of showing people oversized, particularly if they're important. However, though I'm prepared to ignore them in general, every now and then an artist shows people pretty much correct size. Again, it depends very much on the artist. If I understand you correctly, by the 'bow-curve profile' you mean that the bow is shown very rounded, as in this picture from the Beauchamp Pageant, but Carpaccio and Botticelli show a sharper bow, and this is backed up by what archaeology is available. The current reconstruction of Lomellina's lines gives her a bow even sharper than this, though I'm not sure I agree with them. On the other hand, perhaps you're referring to the extreme slope of the forecastle and aftercastle shown on most of the ships in the left-hand pic below. Regarding the angle of the deck, there is great variation in how it's portrayed in contemporary images. I'm completely happy to accept some degree of slope, but artists of the time were experimenting with how to portray foreshortening, and I believe some of them overdid the angle. For example, in the left-hand image below, if you look at the ship in profile view the forecastle and aftercastle are shown with a fairly gentle angle, while the ones seen from bow-on both are considerably more extreme. I believe the right-hand image (1455-61 Benedetto Bonfigli. Saint Louis de Tolouse - Miracolo del denaro. Galleria Nazionale dell'Umbria) is a more believable representation. Fortunately, in the Lomellina we have a good idea of the slope of the main deck, as a good proportion of the starboard side has been preserved, including the deck clamps. Unfortunately the forecastle and aftercastle are lost, so there's a fair bit of guesswork involved with them. Though I'm not an expert on 15th century armour, I do understand what you are talking about. In fact I have made armour myself, and I have a colleague who has made himself a complete set of gothic plate which he wears in re-enactment combat. There is also a robust discussion regarding whether or not contemporary images of Byzantine lamellar armour are to be believed, as to how the stuff was put together. I'm an aficionado of the 'Yes' argument. Again, regarding hull shape, we are fortunate that enough of the Lomellina survived to give a good idea of her underwater lines, though the bow and stern are lost. Steven
-
I thought he was Bach. Nice work on the deck furniture, by the way! Steven
-
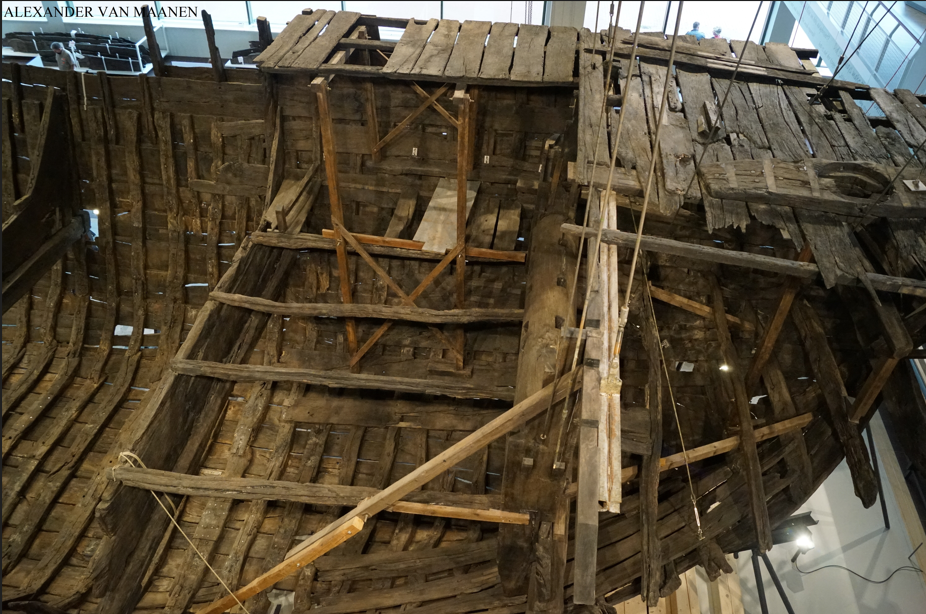
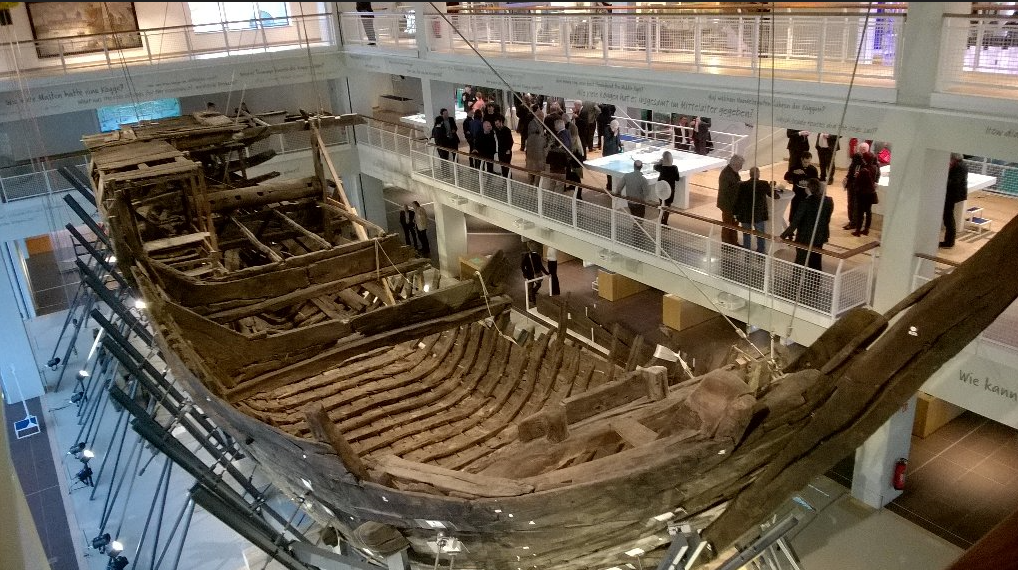
Interesting question. I was actually surprised to find true deadeyes as early as 1380 - I hadn't thought they'd been developed by that time, and contemporary illustrations (yes, I know they're not necessarily reliable) don't show them at all. I'm afraid you'll have to decide for yourself whether the Stralsund cog had them. Regarding deck planks, I doubt that the Viking method of planking was also in use further south - certainly the framing is completely different. The only planking apparently found on the Bremen cog was on the afterdeck, and its side to side, not fore and aft. The orlop(?) deck beams can also be seen, and they are oriented such that the planking would also be side to side. I don't think the through-beams can be relied upon as a gauge of the planking direction, as the attached photo shows - they don't seem to have any relation to the planking. Personal opinion, however - in the absence of any evidence to the contrary, I would be quite happy with the idea of the main planking running fore and aft. Steven
-
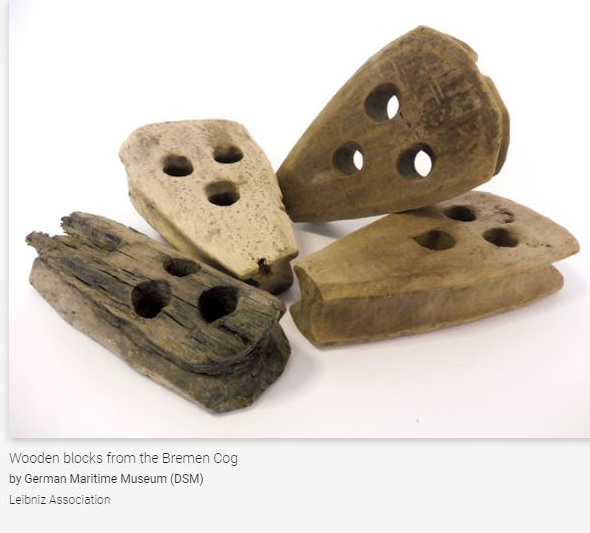
Hi Ferrus! I'd also refer you to the Bremen cog (c. 1380), the best preserved of all the cog wrecks. Google it for images - there are so many wonderful details in the photos, such as the windlass. I seem to recall she also had a capstan, but I can't see it in any of the photos, so perhaps I'm wrong. And here are three deadeyes from the same vessel - they're described as blocks but they're obviously deadeyes. Steven
-
Very nice. It messes with my mind.
-
You might be using the wrong kind of wood. Just because the manufacturer supplies it, doesn't mean it's right for the job. I've had great success bending wood using the technique you describe. Try experimenting with other timbers. Fruit woods seem to be particularly good because of the tight, fine grain. And, of course, boxwood. Steven
-
And as far as archaeology can tell us, this is the way it was actually done. 😁
-
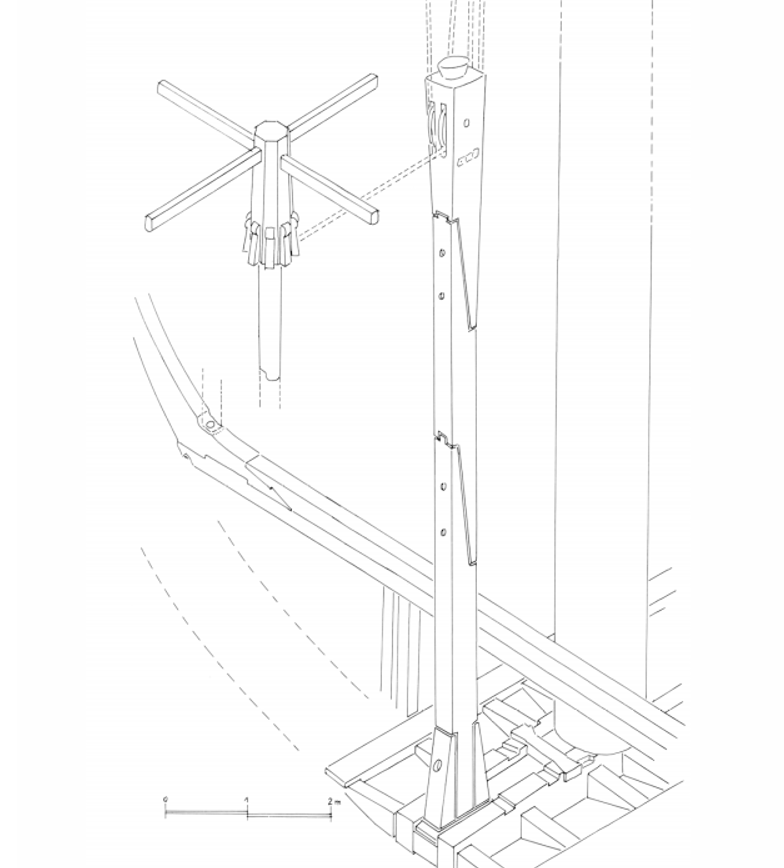
The Lomellina (Genoese, sank 1516) had a capstan a little aft of the mainmast, with a knight between the two. As the May Rose's mast appears to have been directly forward of the aftercastle, it would perhaps be a little differently arranged. But Generally I'd expect it to be similar. On my Great Harry, I put the knight and capstan on the upper deck of the aftercastle - see post #308 at but that's not to say my interpretation is correct. By the way, note that unlike later capstans, the holes for the bars pass right through the capstan and are at two different levels. So there are only two bars, each of which extends out from both sides of the capstan, so there are only four positions for the crew to push at the capstan. I hope that helps. Steven
-
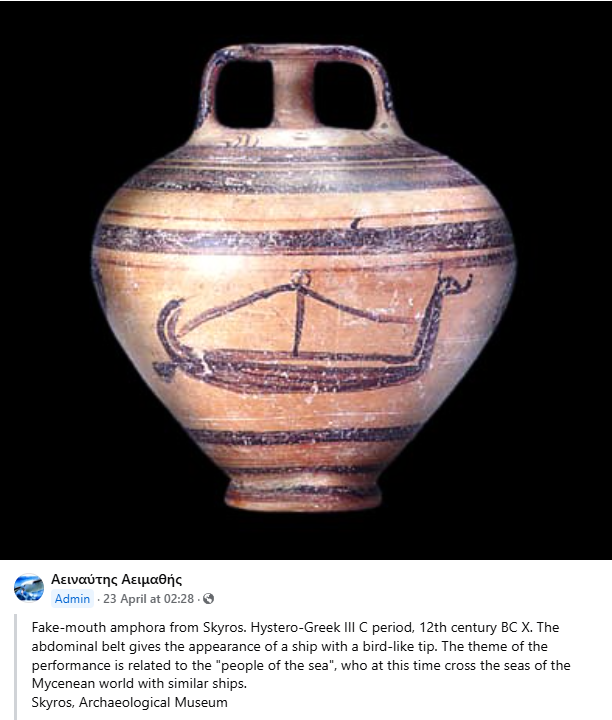
Just came across this on Facebook. Further evidence to support Woodrat's interpretation! Steven