DONATION DRIVE - SUPPORT MSW - DO YOUR PART TO KEEP THIS GREAT FORUM GOING! (91 donations so far out of 49,000 members - C'mon guys!)
×


Louie da fly
-
Posts
7,989 -
Joined
-
Last visited
Content Type
Profiles
Forums
Gallery
Events
Everything posted by Louie da fly
-
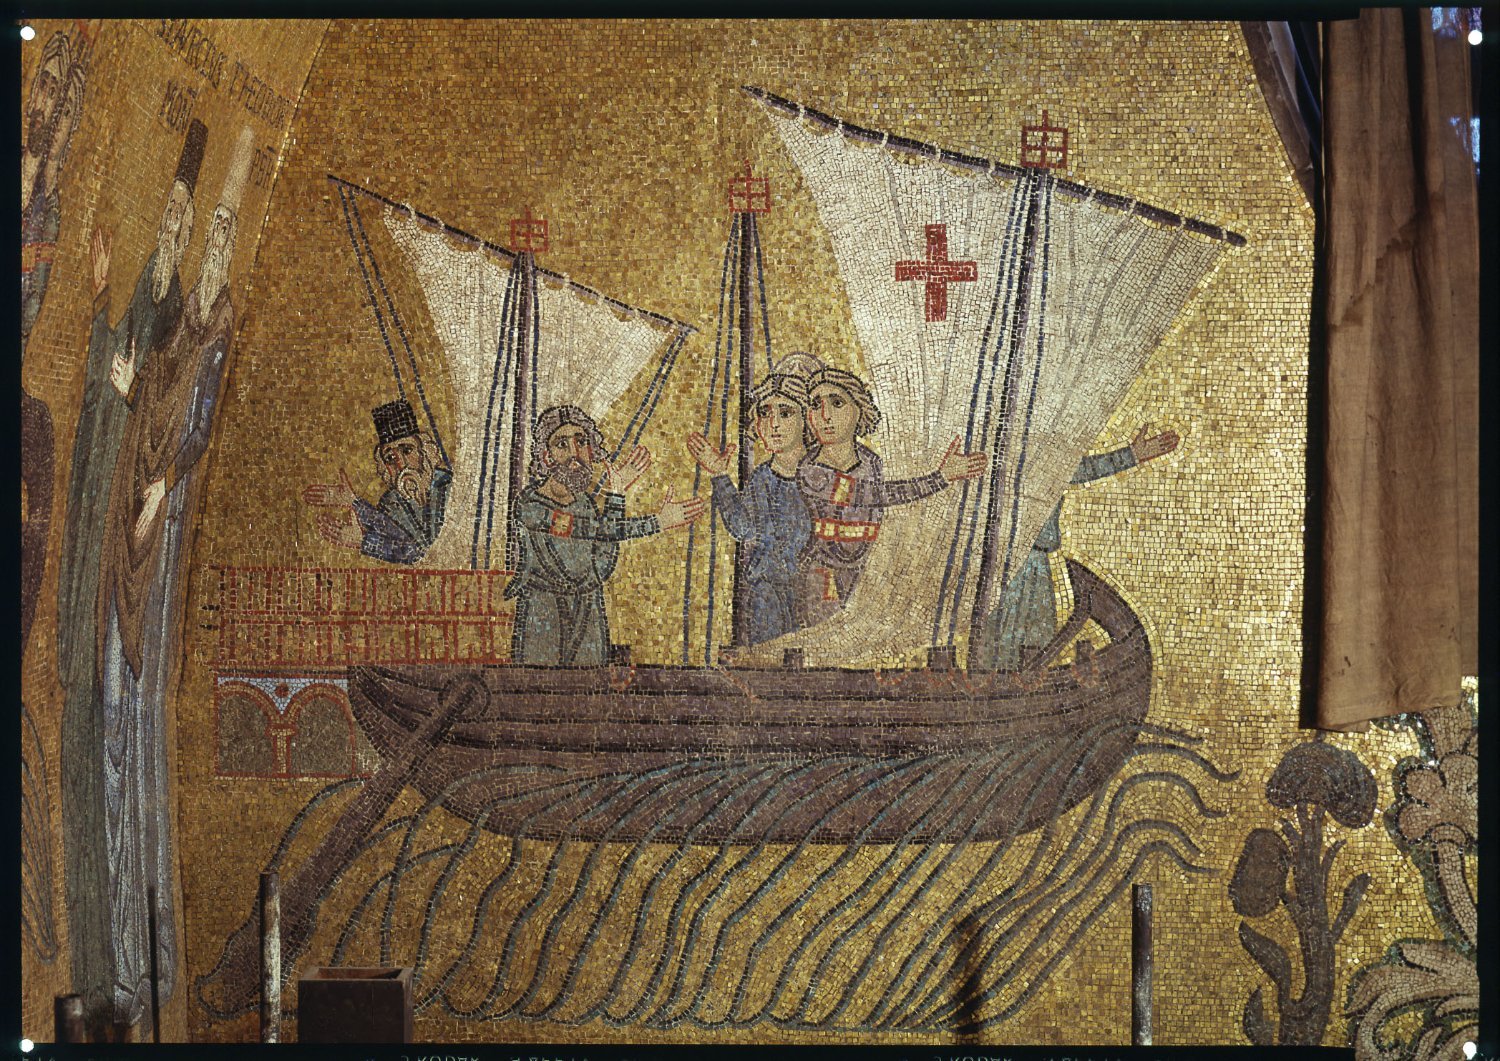
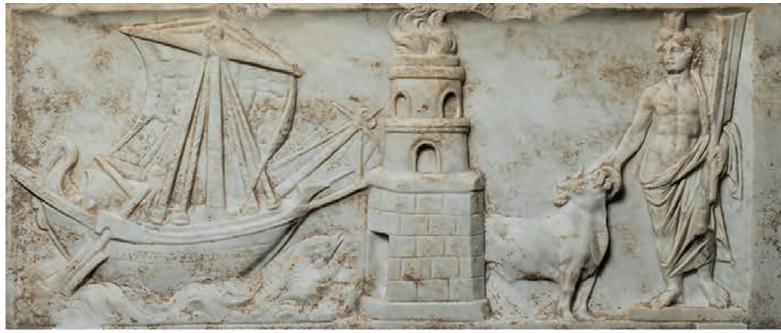
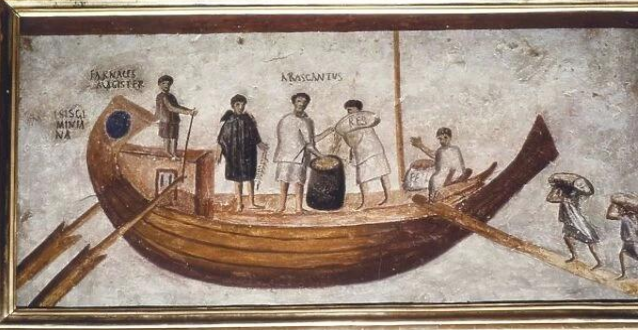
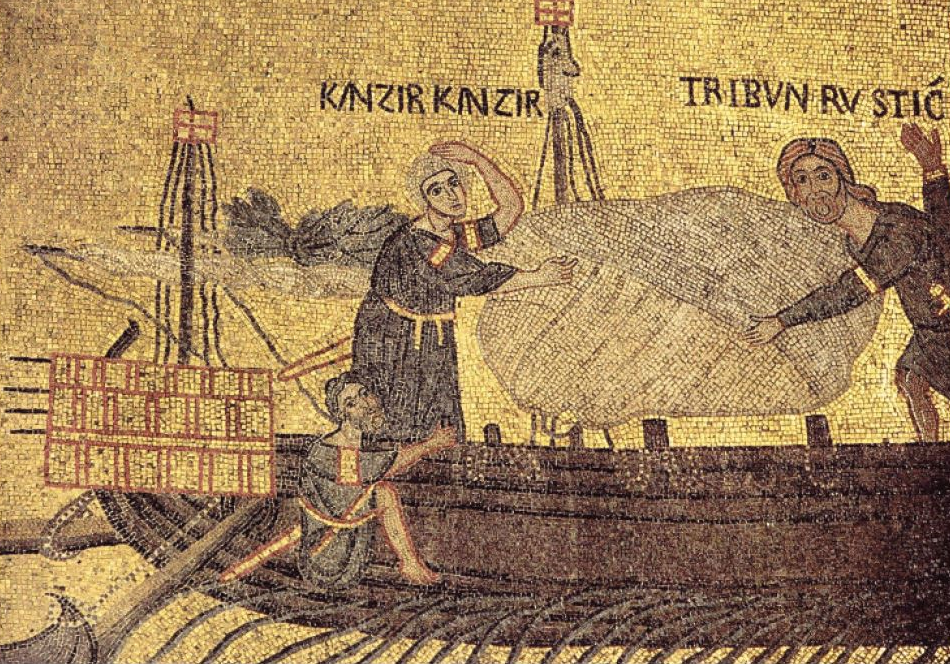
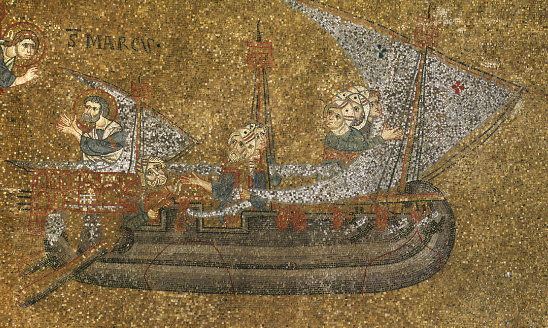
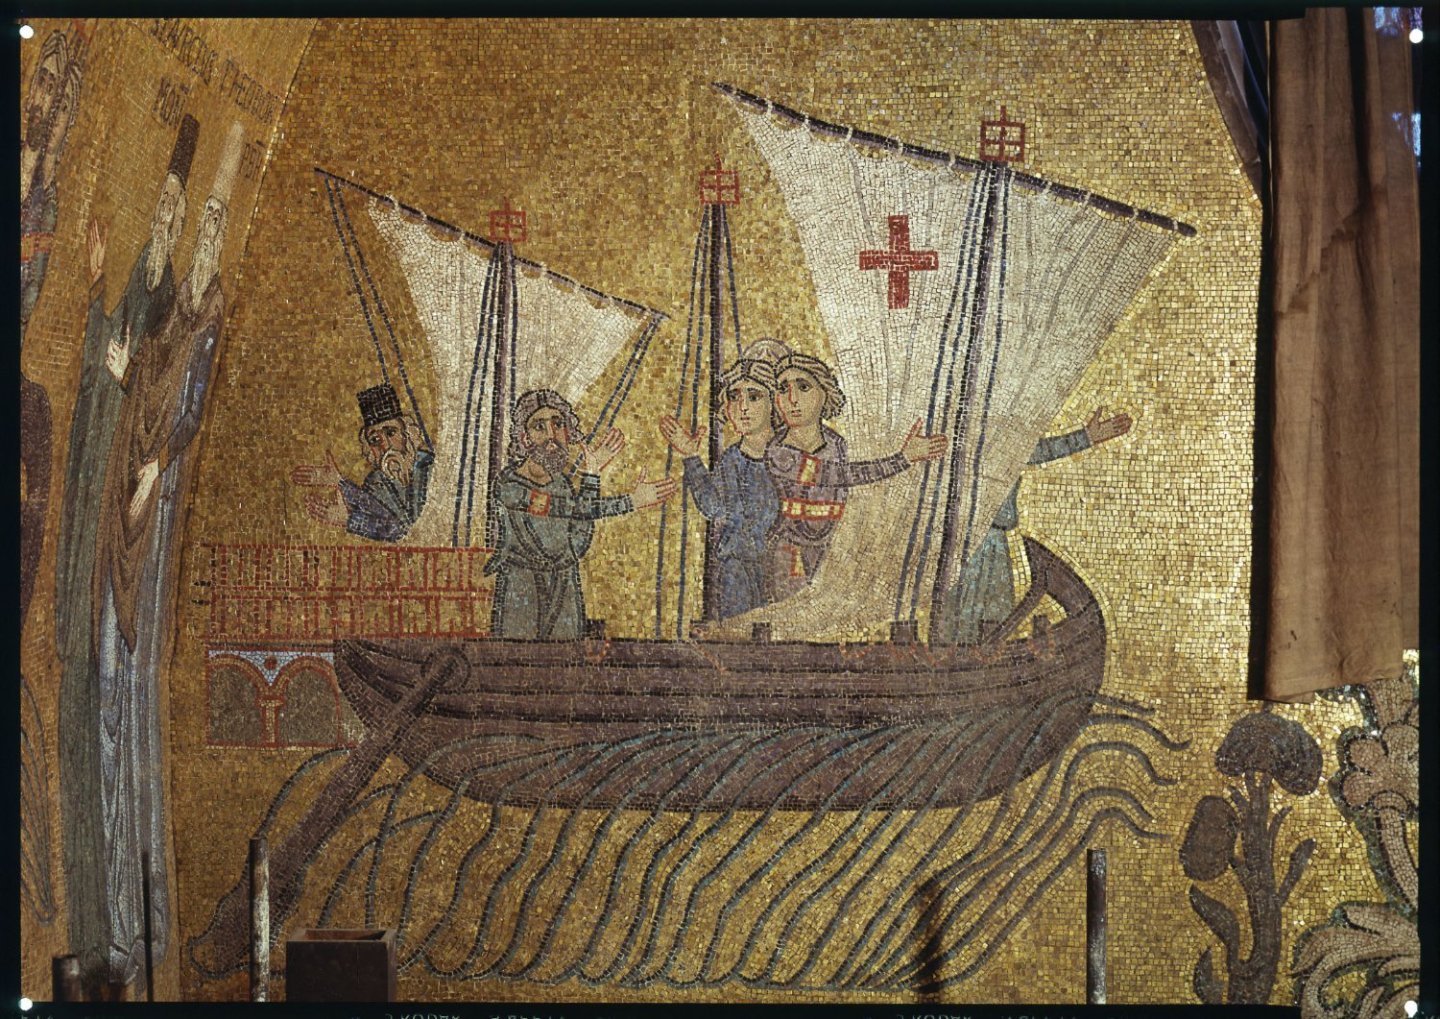
 Ah, interesting. I thought it might be this one Or perhaps this - all from Ostia. You may be right - that could be what the mosaicist saw and misinterpreted. I'm certainly not fully satisfied that the "hole through the hull" is completely workable. Here's a clearer view of the relief, by the way. Some very interesting details there, even if 1000 years away from the San Marco ship. Steven
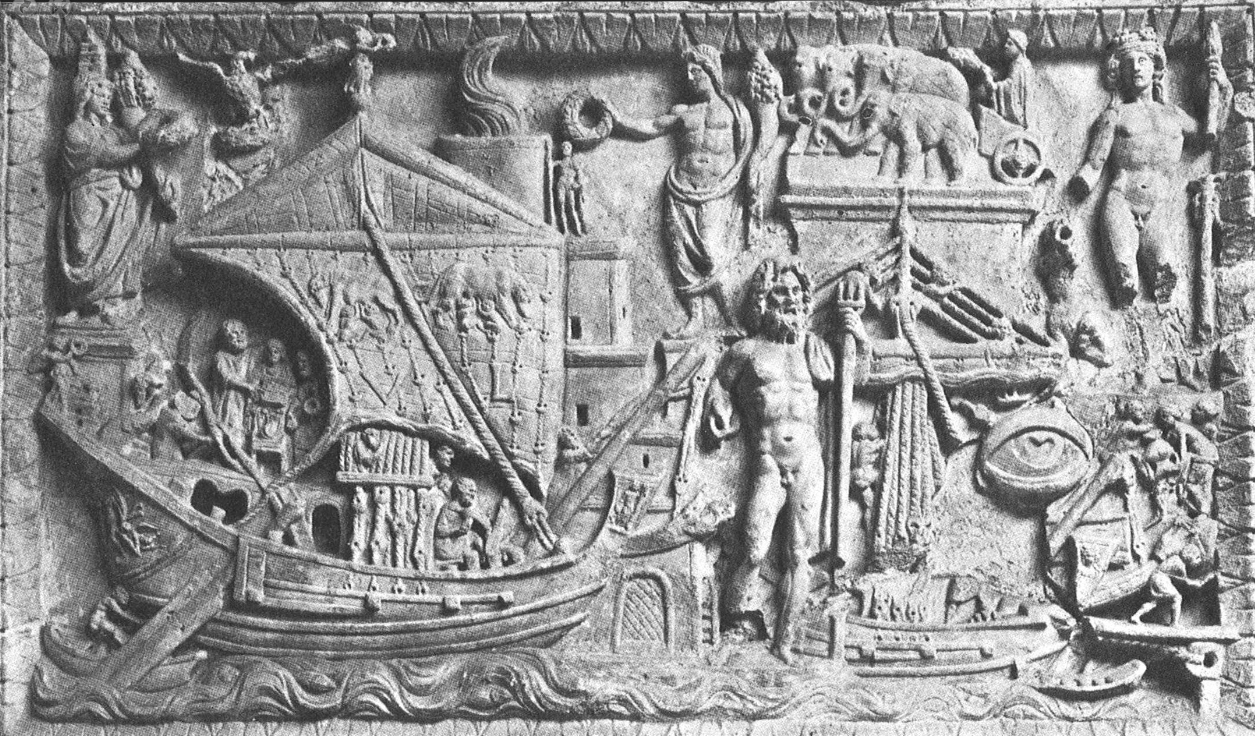
- 508 replies
-
- 11
-

-

-
Hi Ian, The height of the oarholes above water don't look excessive at all, but it was the heights at bow and stern that seemed a bit much. However, so far I haven't seen the full midships height once the superstructure is on so I don't have an idea of how it will look when that is added. Good luck with those rudders! Your 'disguise' idea might be the only workable answer. Anyway, looking good. Steven
- 536 replies
-
- 3
-
-
- Quadrireme
- radio
- (and 1 more)
-
Looking good, mate. I don't think you need to worry about a slight inequality between port and starboard. I'm tall, and I can't see the difference Steven
- 134 replies
-
- 2
-
-
-
- sea of galilee boat
- SE Miller
- (and 1 more)
-
Hi Dick, It's OK. I haven't definitively decided that just because something can be done, it's necessarily the way it was done. (You know my feelings about the incredible Hulc). I'm still keeping my options open. There are a number of ships that come up in a google search for Ostia Ship. Can you let me know which one you mean? Steven
-
Thanks for all the likes. Cathead, that's a good question. It seems to vary somewhat. I went with what looked like it would work best. Perhaps it might have been better to have it a little further aft, but it seems to be ok to go either way. The helmsman himself is stationed in front of the aftercastle in most cases, and as you can see, there is quite a bit of variation in the configuration of the aftercastle itself. And these are all supposed to be the same ship! Steven

-
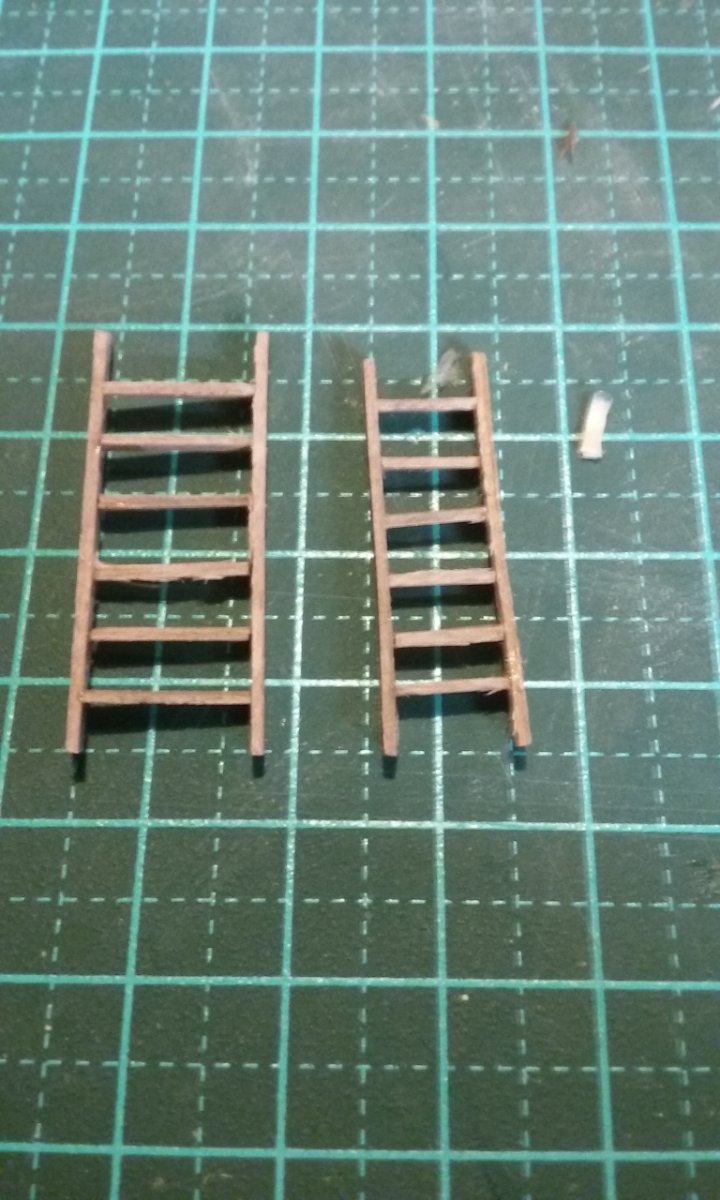
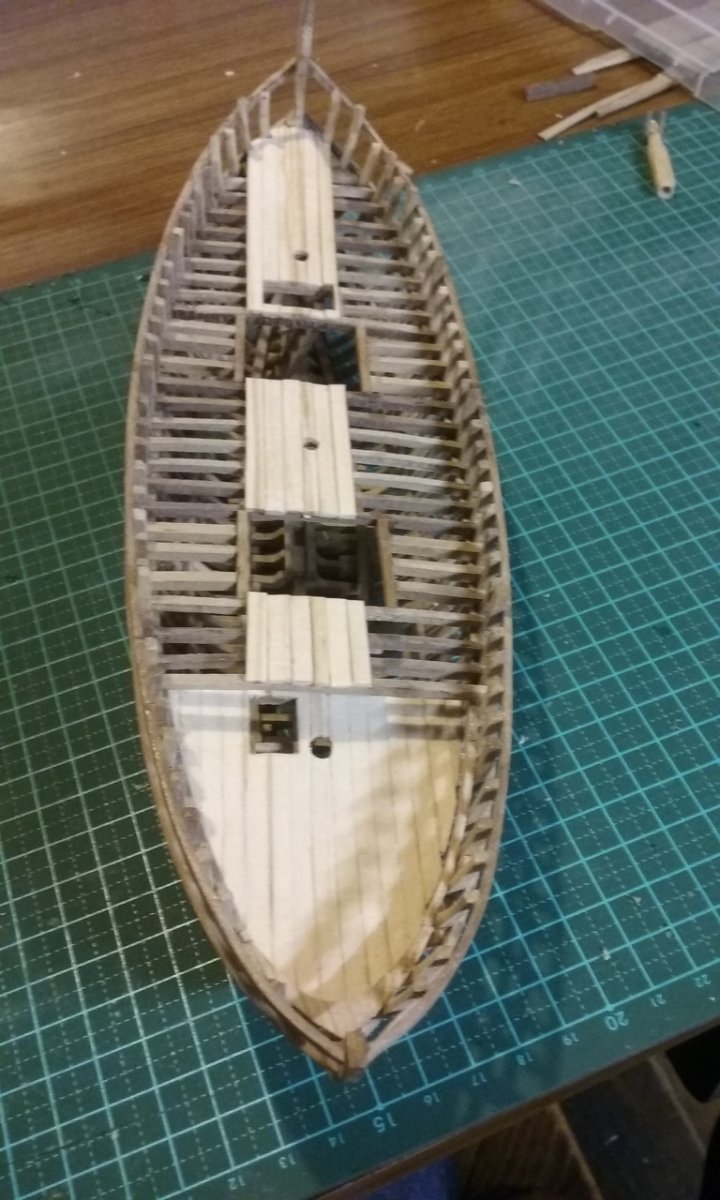
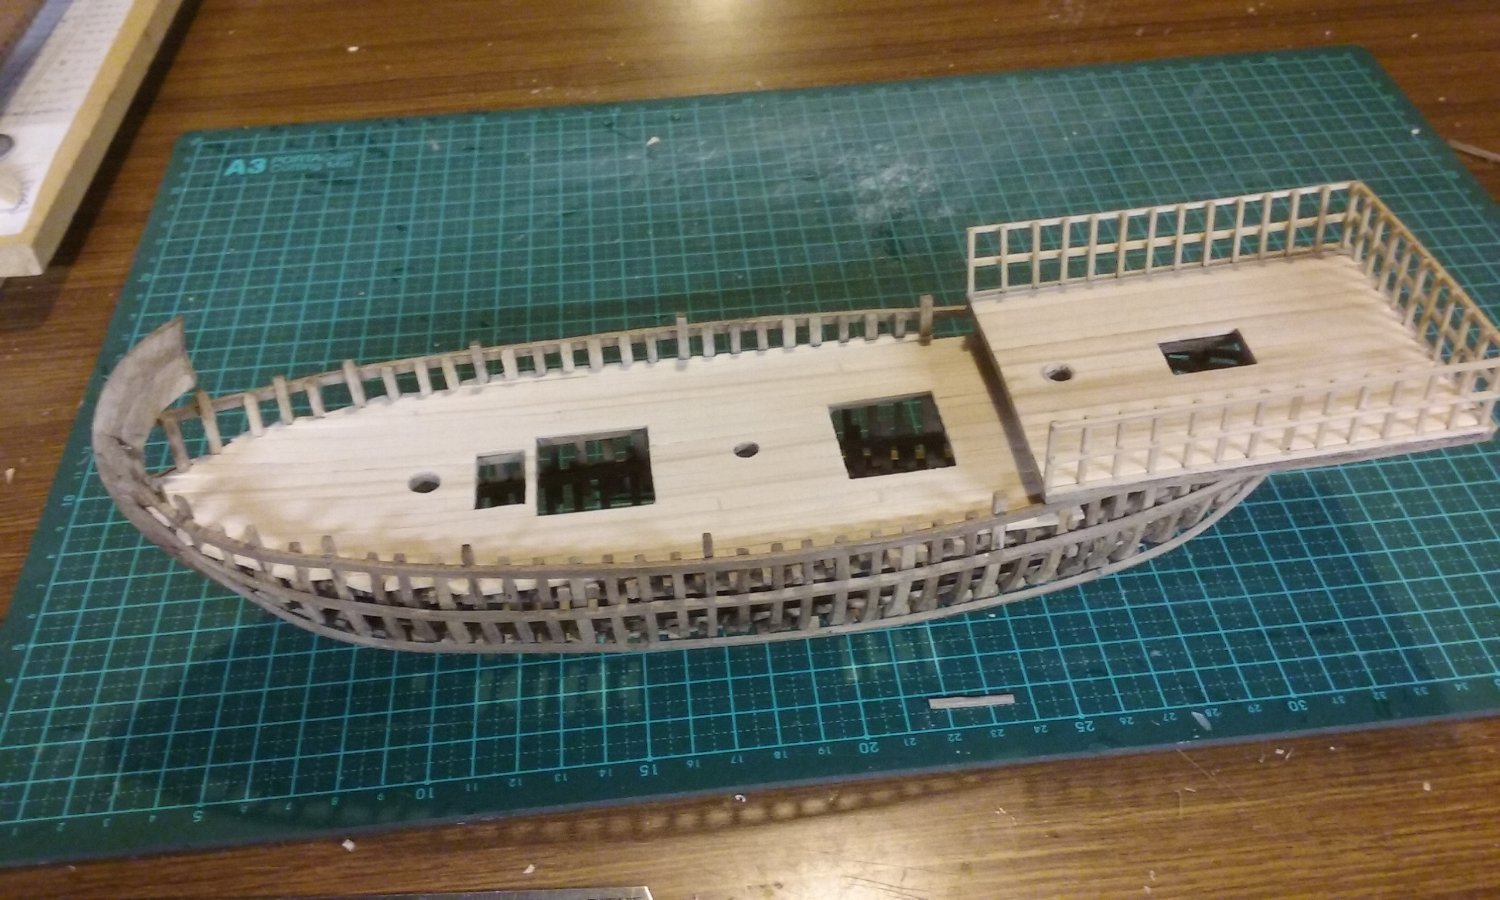
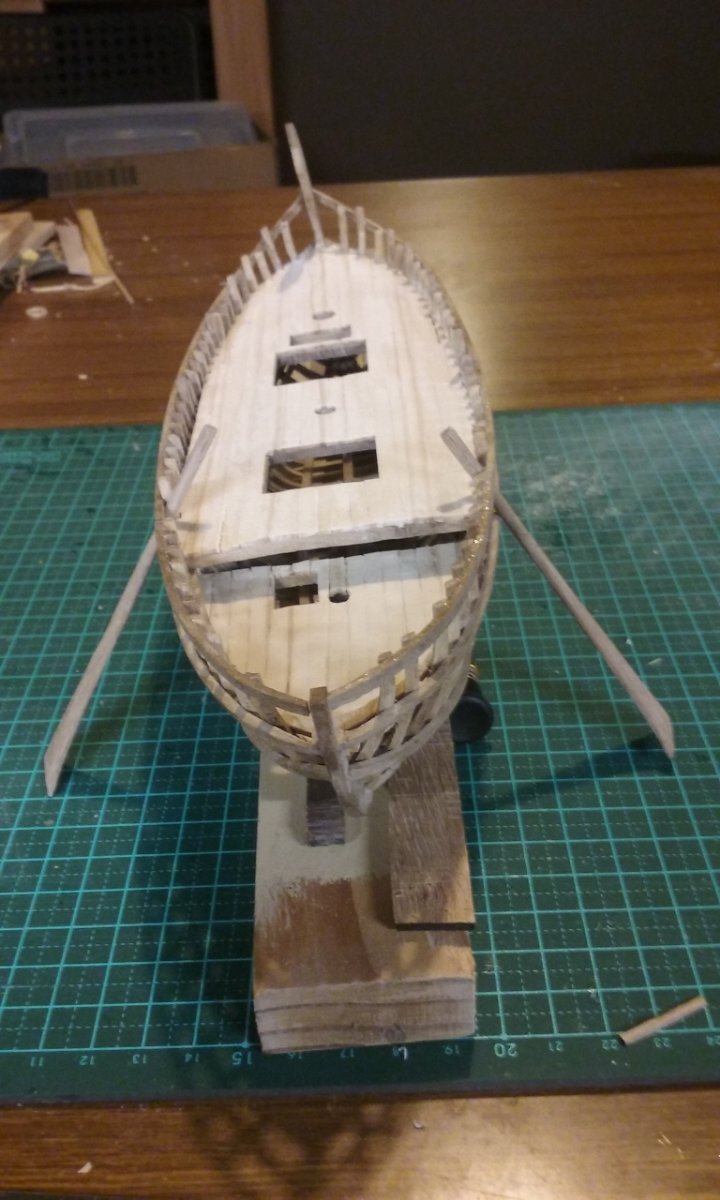
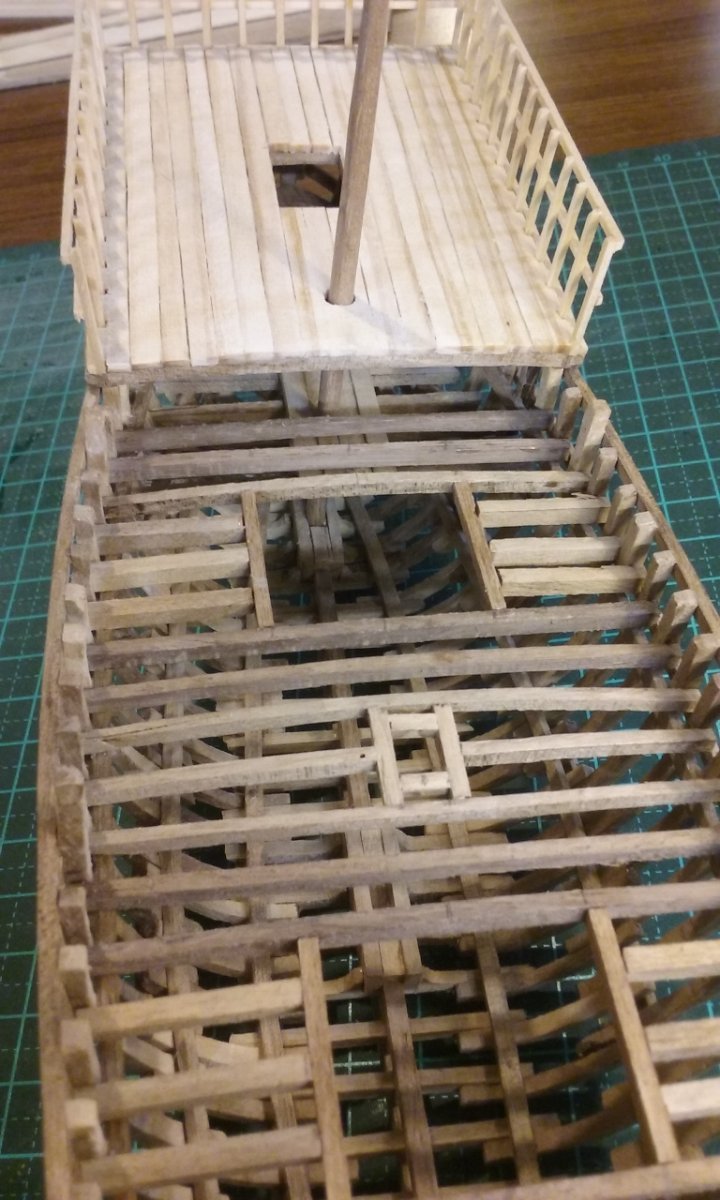
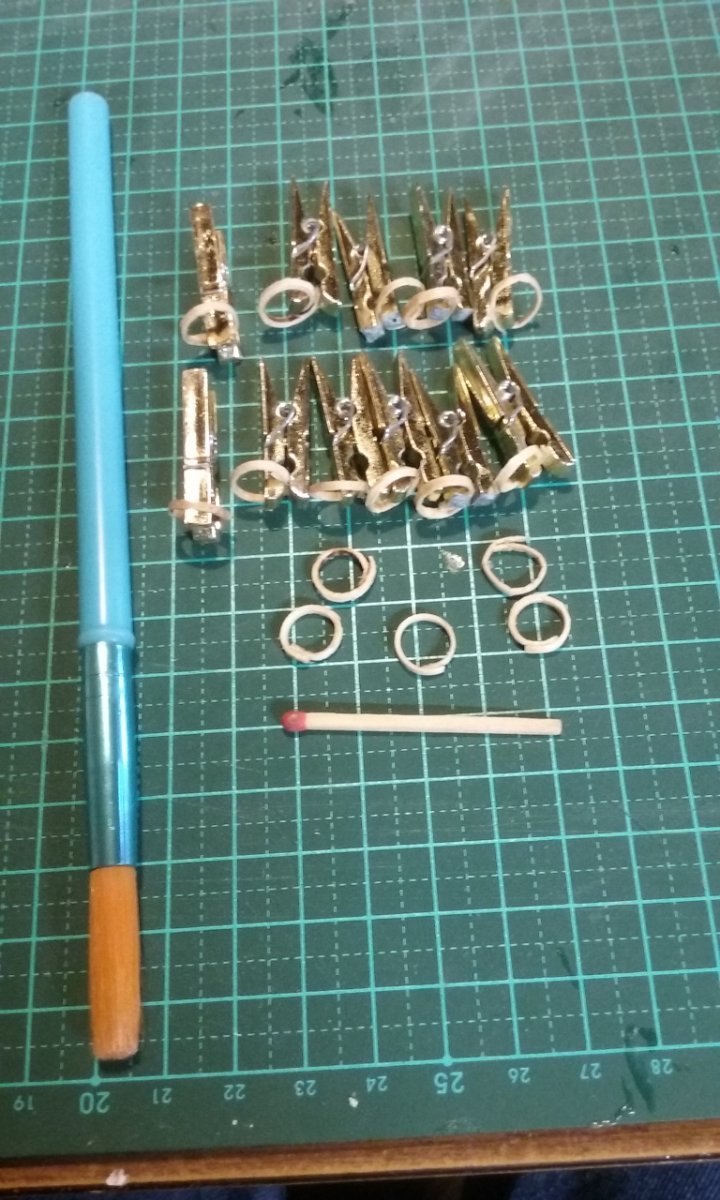
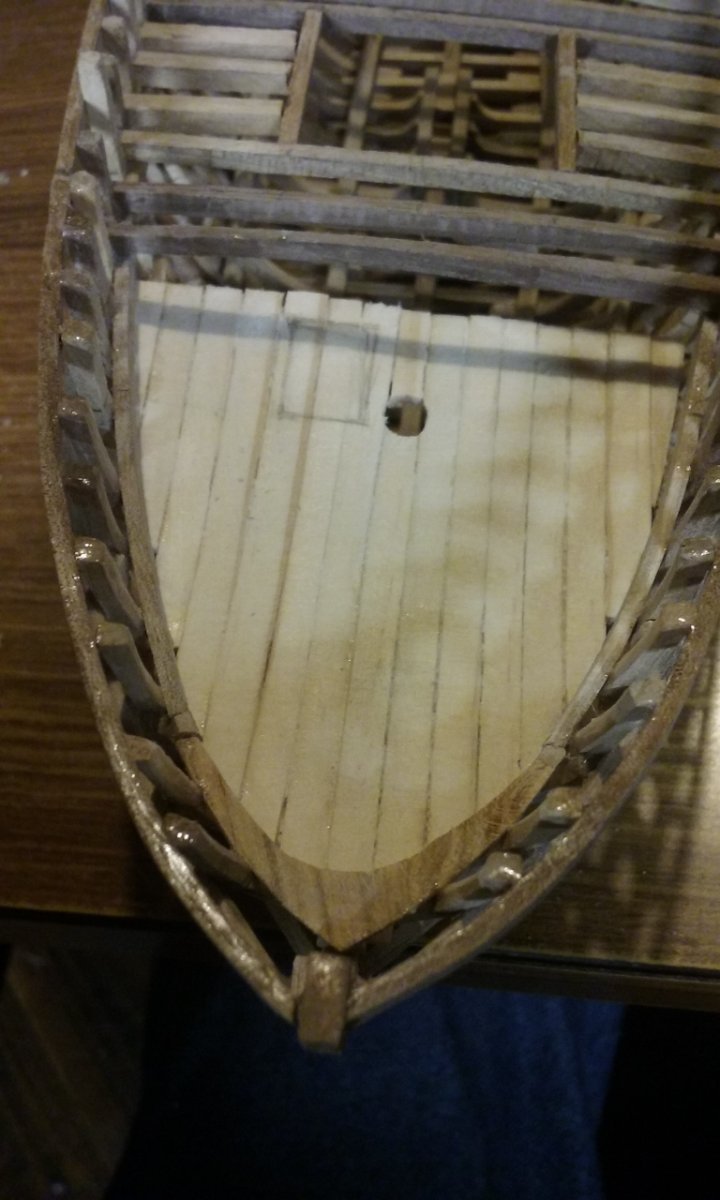
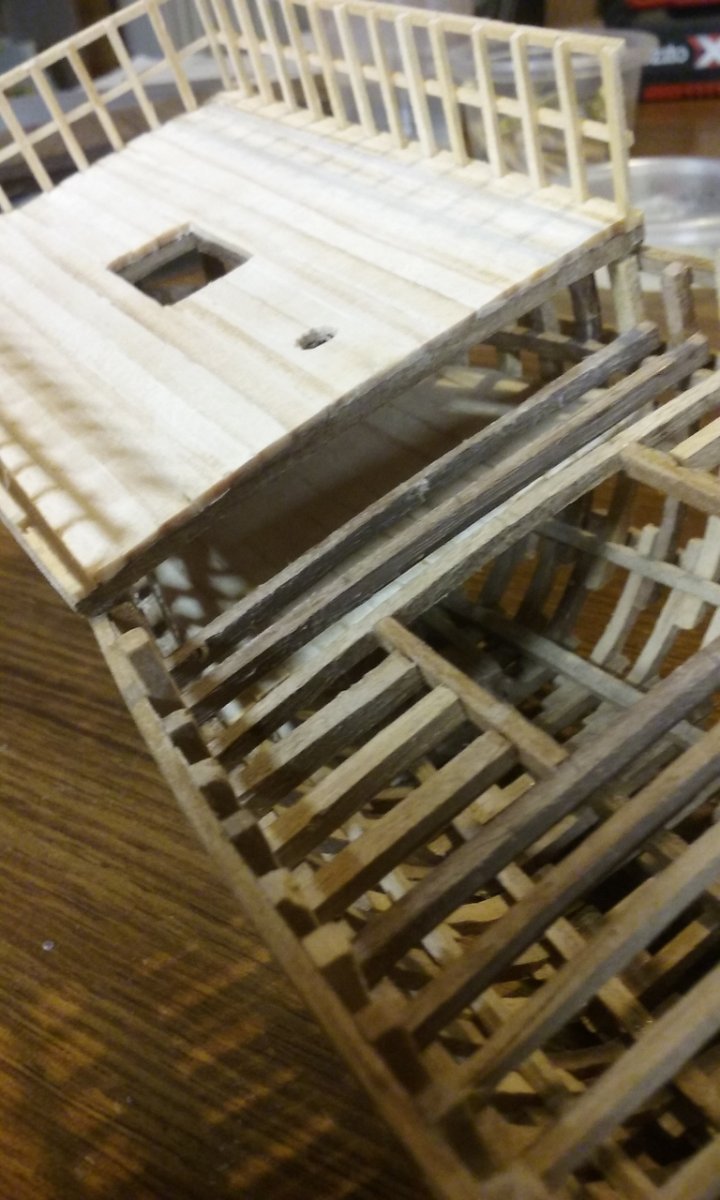
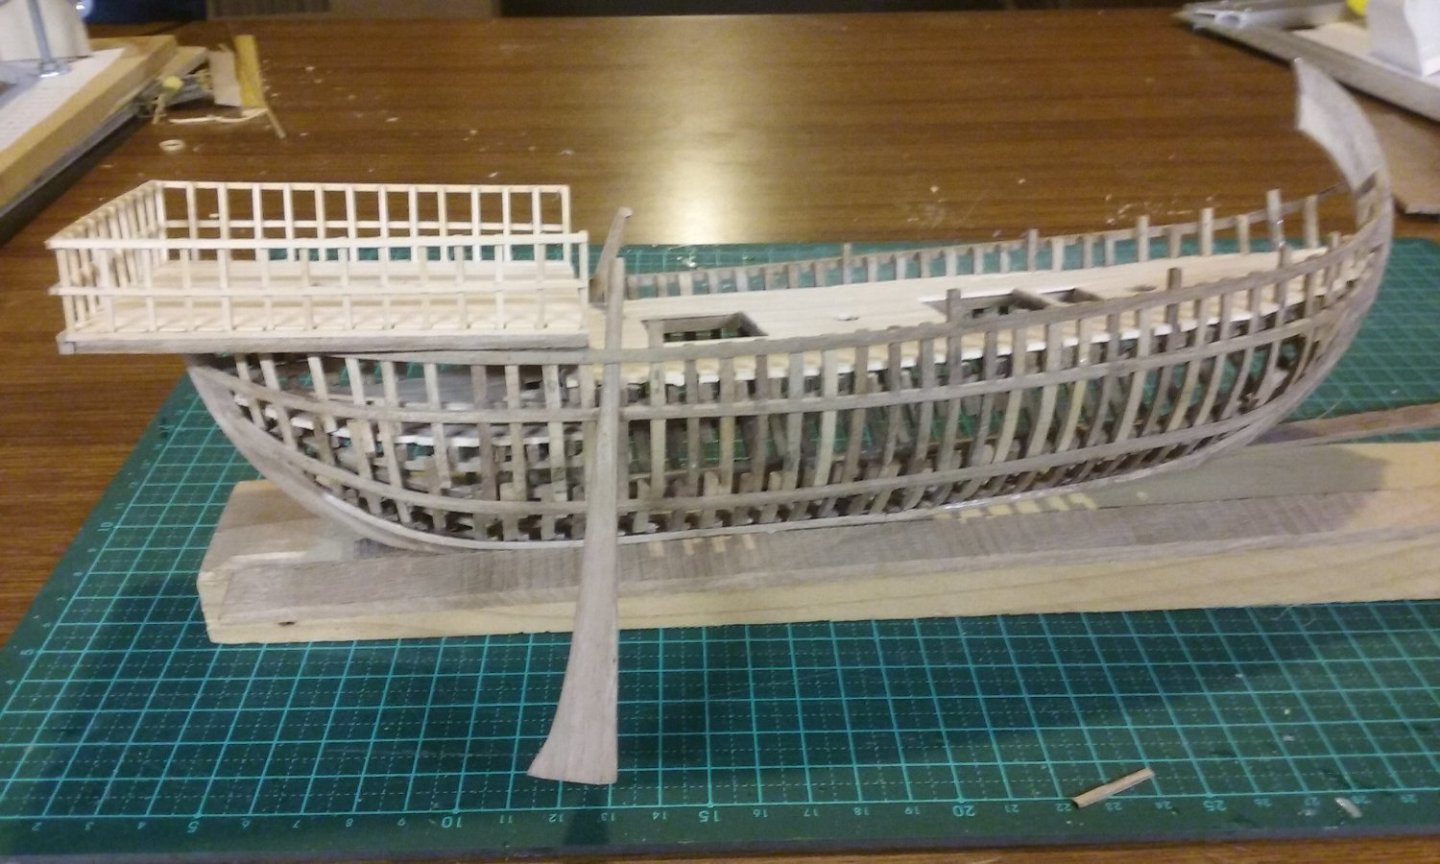
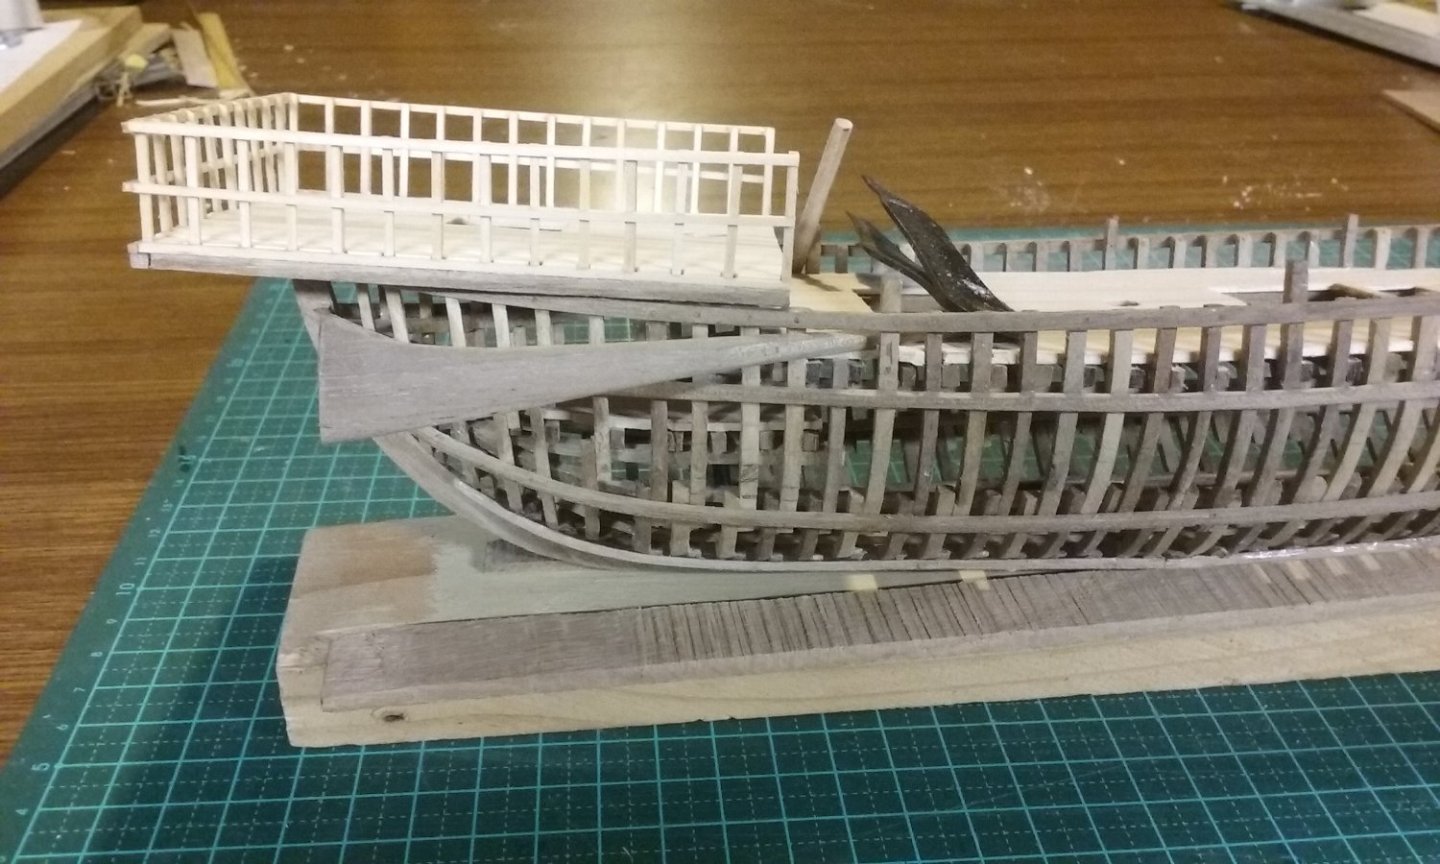
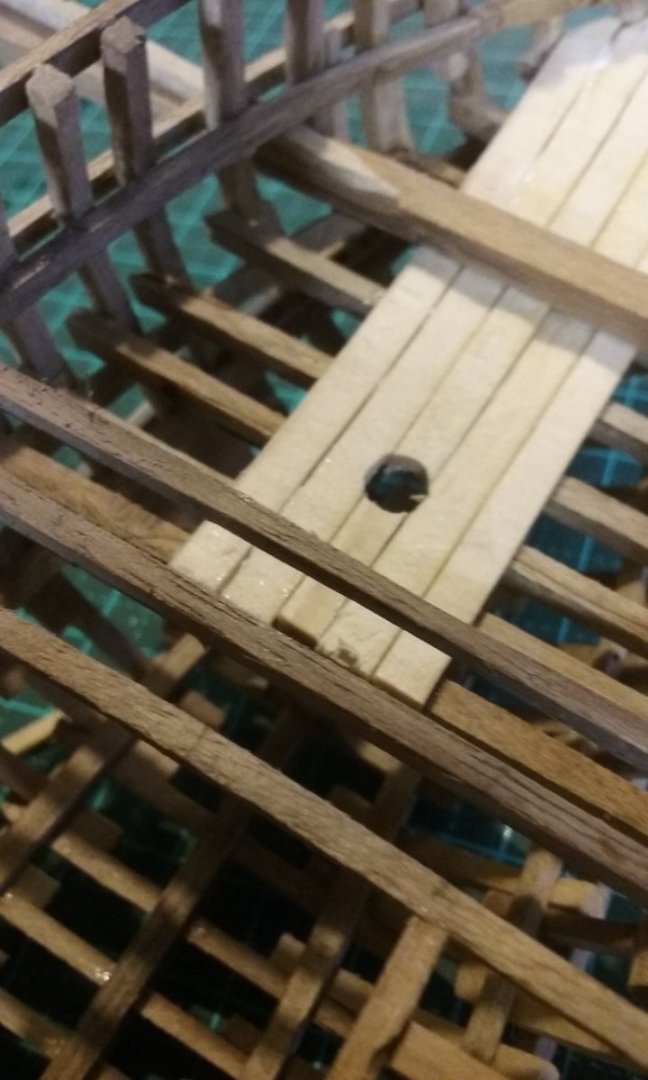
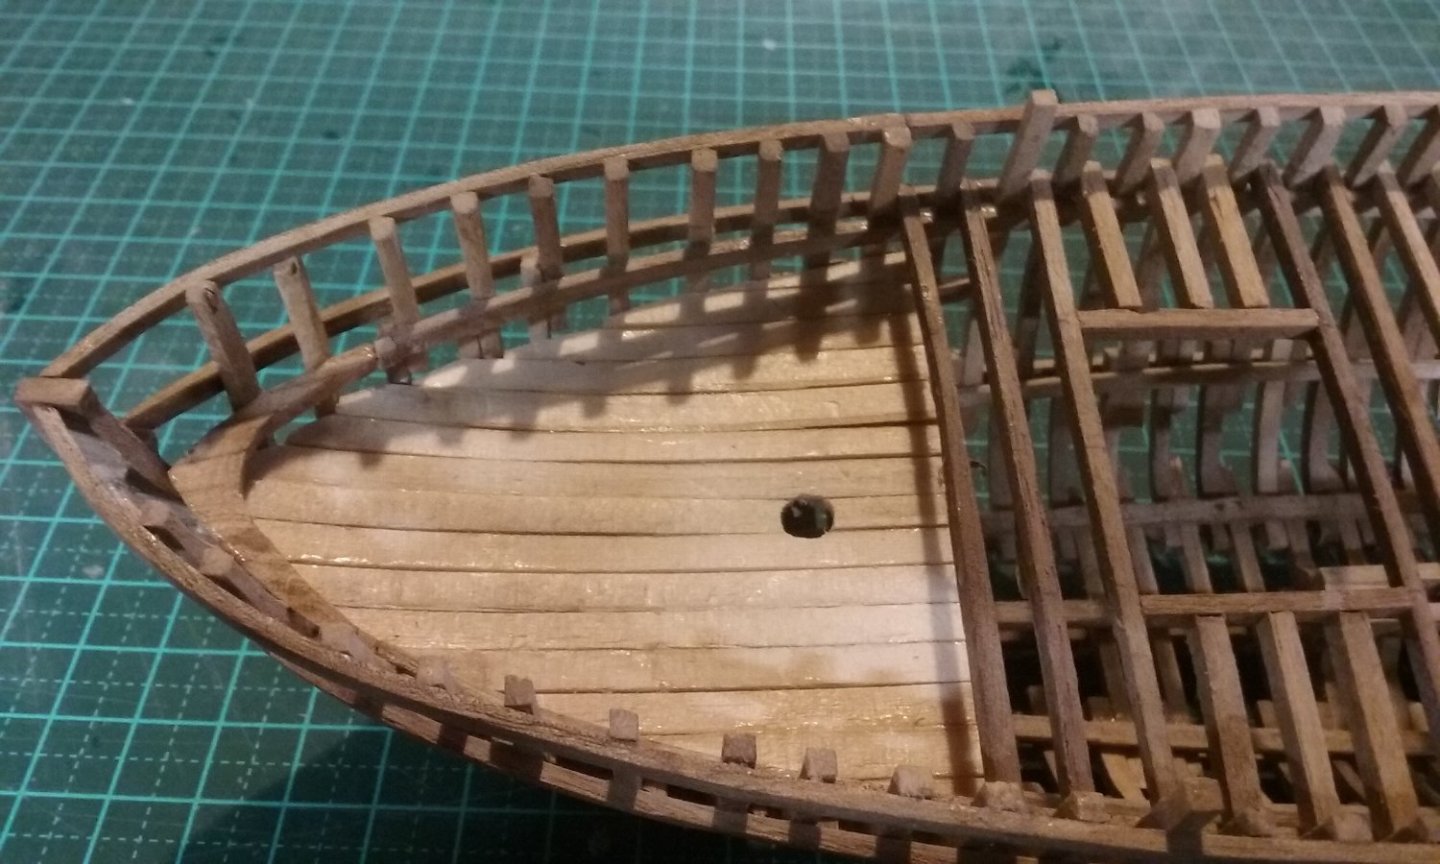
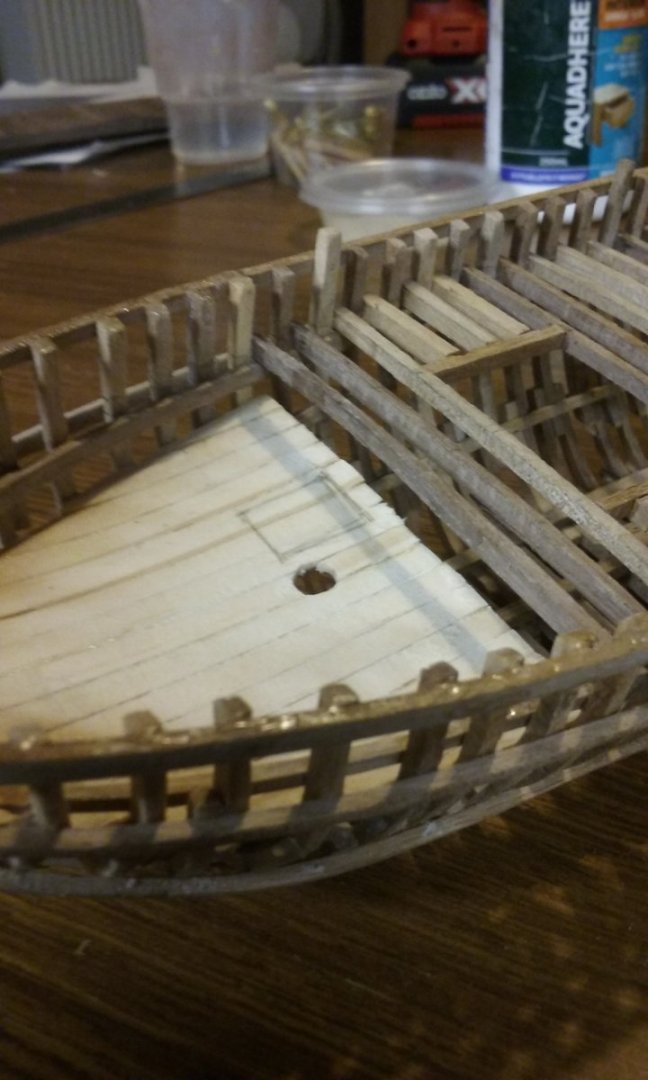
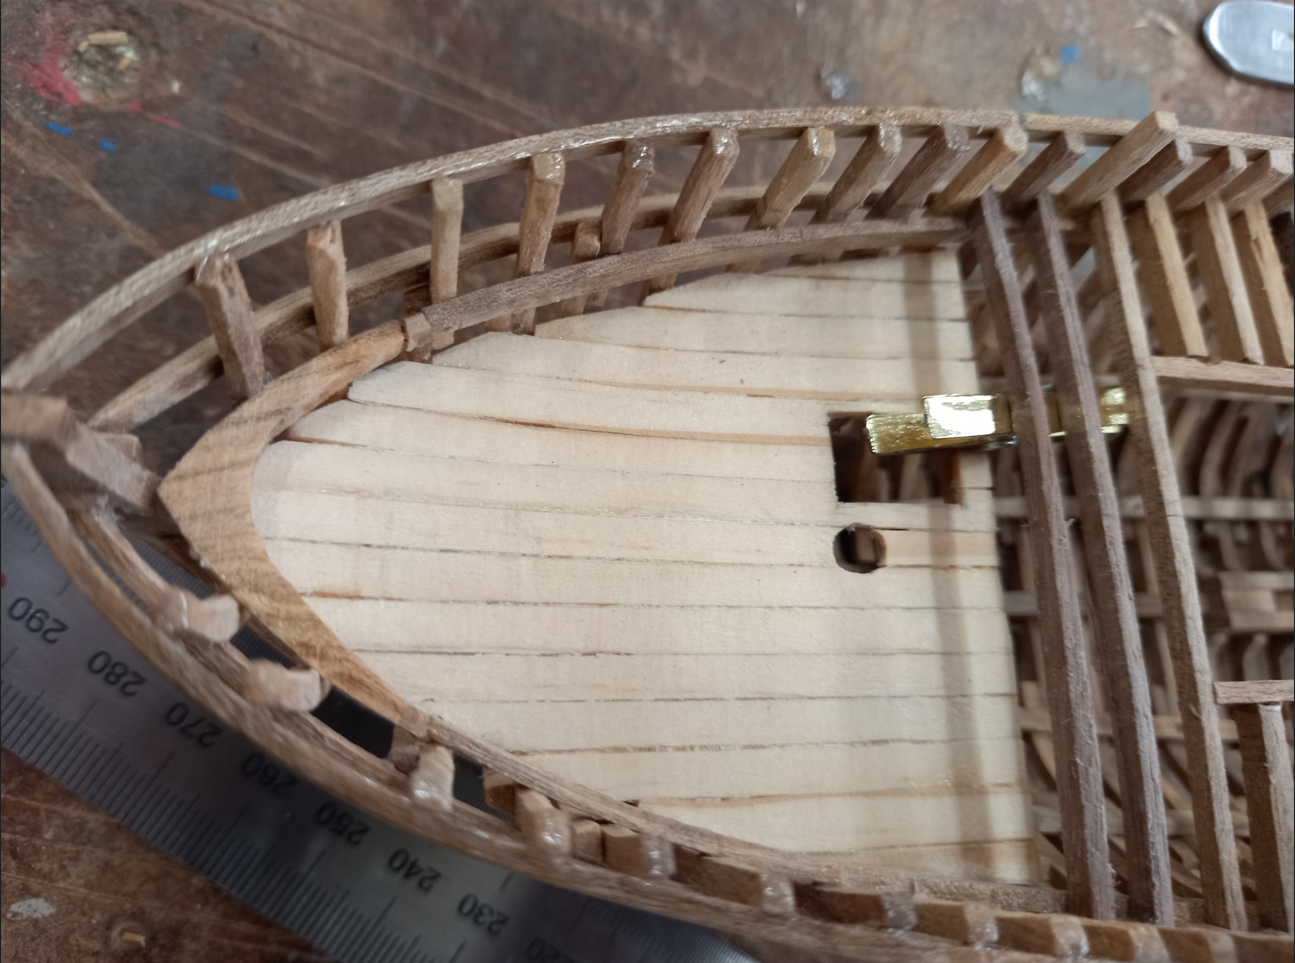
I haven't posted lately, but I haven't been idle. Staircase from the Captain's cabin down to the hold. I'd originally intended it to be going out through the fore end of the cabin, but discovered the break of the poop got in the way, so instead I found another place for it, where it still wouldn't intrude too much into the rest of the cabin space. Having this set of stairs means the captain doesn't have to go UP to the poop, DOWN to the maindeck and DOWN again to the hold, but can get there down a single set of stairs. Ladders - the wider one goes down from the poop deck to the Captain's cabin, the narrower one down from the maindeck to the hold. Making the tops. Tightly bent pine strips to make a "basket". Took a lot more work than I'd expected, but finally all complete to my satisfaction. And attached to the masts Maindeck planking. The 'crossbeams' in the second picture are my impromptu clamps to push the planking down into contact with the deck beams till the glue dries. And deck planking complete, with the aftercastle dry fitted. The stairs down from the maindeck to the hold will be in the oblong opening just in front of the fore hatch. Unfortunately I realised too late that with the decking in place it's going to be difficult to clamp the hull planking to the frames. To misquote the famous Eccles "I should have thought of that sooner, shouldn't I?" So I've given myself a bit of a problem. I won't be planking in this sequence next time. But I'm sure I'll come up with a solution. And now I'm going out on a limb. I had originally decided that the pictures in the mosaics showing the side rudders coming through a hole in the hull were unworkable, unlikely and anathema. But when I worked out where they were going, and the shape of the hull at that point, I decided to try it out and see if I could make it work. I first had to cut one of the frames short between the top wale and the gunwale to allow enough 'swing" for the rudders to be swung up out of the way. The hull would be a tiny bit weaker at that point (but nowhere near as much weakened as, say, cutting out gunports). The rudders do stick out at an angle sideways somewhat rather than being vertical, and at least in this configuration with a wale in the way there's no way to change that. This might affect the steering to a certain degree, but perhaps not as much as might be thought. The rudders can still swivel in the vertical plane just as does a stern rudder, so the ship should be able to be steered that way. Had I placed the wales differently, the rudders might have been considerably closer to vertical, and that would have been better still. But I'm quite happy with them as it is, at least for a first iteration of the design. I won't be changing it - it's an experiment, and I think I've shown - at least to my own satisfaction - that rudders coming through a hole in the hull would have been workable. There remains the issue of being able to remove the rudders when in port, in line with legal requirements (the authorities would hold onto the rudders while in port to discourage ships from doing a 'flit' without paying harbour dues). But that could be solved by having the tillers removable, so the rudder could be let down through the hole, to a boat (as in Woodrat's Venetian Round Ship). Steven


- 508 replies
-
- 23
-
-
Congratulations on your first sea trial! That sounds like a good idea. I'd agree: although the fulcrum for oars should be as close to the water as possible for maximum rowing efficiency, they do need to be able to be lifted far enough to avoid catching crabs on the return stroke. The action looks good - quite similar to that of the Olympias, so you must be on the right track. Perhaps a little slower would be good, to look even more realistic? I know this works for model railways - people always seem to run their trains too fast to look quite real. Yes - so is the Olympias. Apparently people have to be careful walking around on the upper deck because the vessel tilts alarmingly very easily. Your turning using backwater on one side seems to work well (though again, perhaps it would look better if it was a little slower). I can understand your issues with the rudders for lesser turns. Unfortunately I can't make any suggestions - you're right; not enough movement through the water to get the rudders to 'bite' properly, and this may simply be a matter of scale - she's 1/32nd of the length of the full-sized ship, so volume is 1/32 x 1/32 x 1/32 = 1/32,768 according to my calculator - miniscule effects compared to the real thing - perhaps even in relation to the water molecules? Certainly in relation to surface tension. Now that I see her in the water, she seems rather high in comparison with her length for a vessel propelled by muscle power. (extra height = extra weight) - at least at bow and stern. I just looked back at page 4 of your build log (posts #100 and #106) and your quadrireme does seem rather higher in relation to its length than the triere shown in post #100 (I realise they're not the same type of ship and that does make a difference). Might just be worth a thought. The weight difference surely doesn't make any difference to her performance, so long as she floats at the right level - and it would be totally pointless getting into a scaled power to weight ratio comparison between a fully loaded and crewed ship with the power provided by a crew, vs the weight of the mechanism you've put into your model and the power it provides. The carrying handle idea seems worthwhile - it'll be interesting to see if it works ok. Anyway, wonderful work so far. Looking forward to further progress. Steven
- 536 replies
-
- 3
-
-
- Quadrireme
- radio
- (and 1 more)
-
Superb work on your part. Something to be justly proud of. Steven
- 50 replies
-
- 1
-
-
- mary rose
- caldercraft
- (and 1 more)
-
Yes, that's what it means here. You might be confusing it with "flat out like a lizard drinking".
-
Nice shields. You're right, Viking shield bosses were of iron. http://members.ozemail.com.au/~chrisandpeter/shield/shield.html There are no traces of paint on the ones found in archaeology as far as I know, but that doesn't mean they weren't painted. I would have thought a silver finish (to suggest new iron) would be better, but it's your model and that means you get to choose. And who's going to tell you you're wrong? Steven
- 75 replies
-
- 2
-
-
- Oseberg
- Billing Boats
- (and 1 more)
-
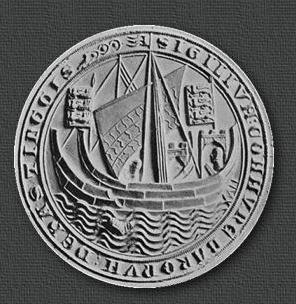
Probably a bit late to add this (and yes, I was on the hop when I answered you above, so I forgot to add lifts, halyards, and possibly tacks - the last one is uncertain, but a distinct possibility -if a beitass was used by Vikings to push the clew of the sail forward, it's likely a tack would have replaced it), but the seal of Hastings has reef points (who knew?). Steven
-
We don't know what the rigging of Viking ships was. We know they had a beitass from written records. All the rest is conjecture, mostly based on difficult to interpret pictures on standing stones. It's your model, and your decision. Steven
-
I'd recommend you keep it as simple as possible. Have a look at contemporary pictures of nefs and see what is shown there - https://www.pinterest.com.au/lowe1847/mediaeval-nefs/. I realise artists don't always show everything, but it's a good place to start. Shrouds, stays, braces, sheets, perhaps simple bowlines, and I'd probably stop there. If you want, you could also look at pictures of cogs, https://www.pinterest.com.au/lowe1847/mediaeval-cogs/ as these were coming into use about the end of the period. Steven
-
PVA (otherwise known as "white glue") - I use Aquadhere. BTW, isopropyl alcohol or isopropanol is also known as rubbing alcohol and can be bought at Coles of Woolies under the name of Isocol in 75 ml green plastic bottles - and 75 ml lasts for months. Steven
-
Would you buy pre-owned wooden kits?
Louie da fly replied to Frank Burroughs's topic in Wood ship model kits
The only caveat would be that if the wood is old enough it might have dried out, warped, cracked or whatever. Might be a problem if buying online where you can't inspect the kit first. Otherwise I know of no problems (except perhaps availability of replacement parts if the model is no longer in production or the company has gone out of business - but then wood is a very forgiving medium, and it's quite possible that you could make your own replacement part if needed). Steven -
Yes, despite my earlier comment, we must have more of this - it certainly enlivens the build log. And your progress on the hull is coming along nicely. Nice idea with the painter's tape. I'll have to remember that one for future reference. Steven
- 134 replies
-
- 3
-
-
-
- sea of galilee boat
- SE Miller
- (and 1 more)
-
Seems to me that this is just another excuse to procrastinate. Don't ask me how I know . . . Steven PS: Loved it!
- 134 replies
-
- 3
-
-
-
- sea of galilee boat
- SE Miller
- (and 1 more)
-
Not at all. Look at the time-frame on my dromon and restoring the Great Harry. I can be very slow indeed, but sometimes things move faster, for which I'm very grateful. On the other hand, I'm gobsmacked by your RC quadrireme. I'd love to do something like that, but RC and moving parts are a complete mystery to me. Regarding soldering irons, yes, I'm sure you're right, but I don't want to spend a lot of money if I can do it on a shoestring, and now I've found a workable method I'm prepared to live with the extra "fiddle" to achieve the result cheaply. I don't actually use the soldering iron for soldering anyway. Glen, yes I apply it to joints where the glue has already set and I want to alter it - either completely undo the joint or just give it a tweak. The isopropanol makes the glue go gooey so you can adjust the joint a bit (or take it apart completely), and it dries solid again (usually, though I often back it up with a bit more glue, just in case). It usually takes a couple of applications to get it to work properly, but I find a drop or two at a time is enough. By the way, thanks to everybody for all the likes and comments. It's encouraging to get them. Steven
-
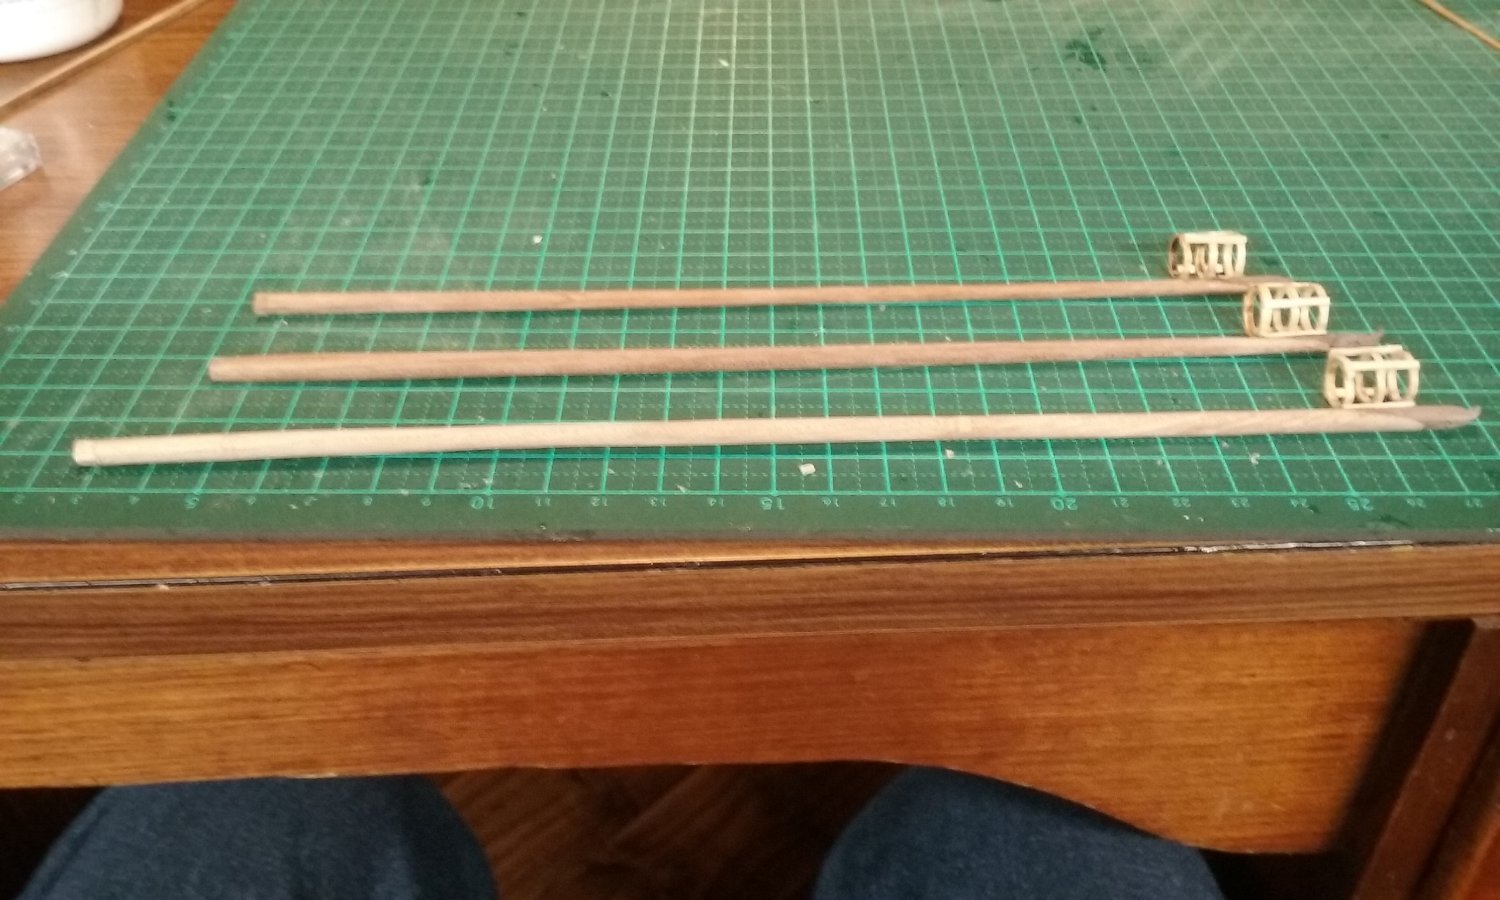
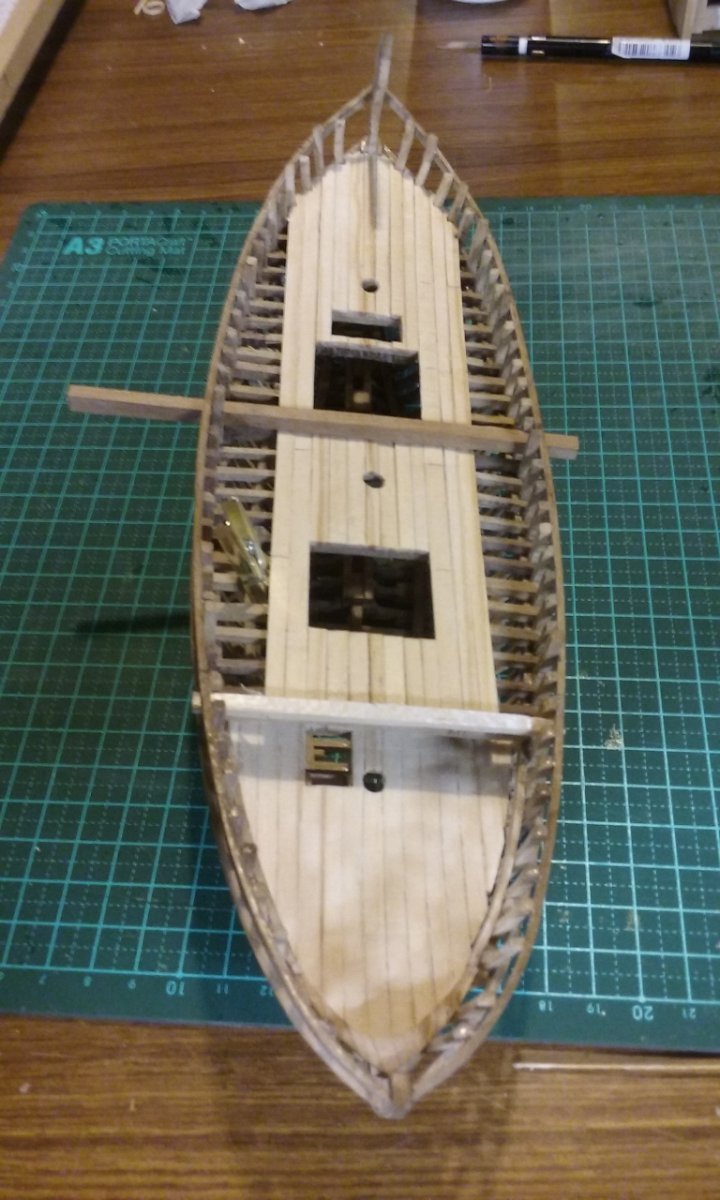
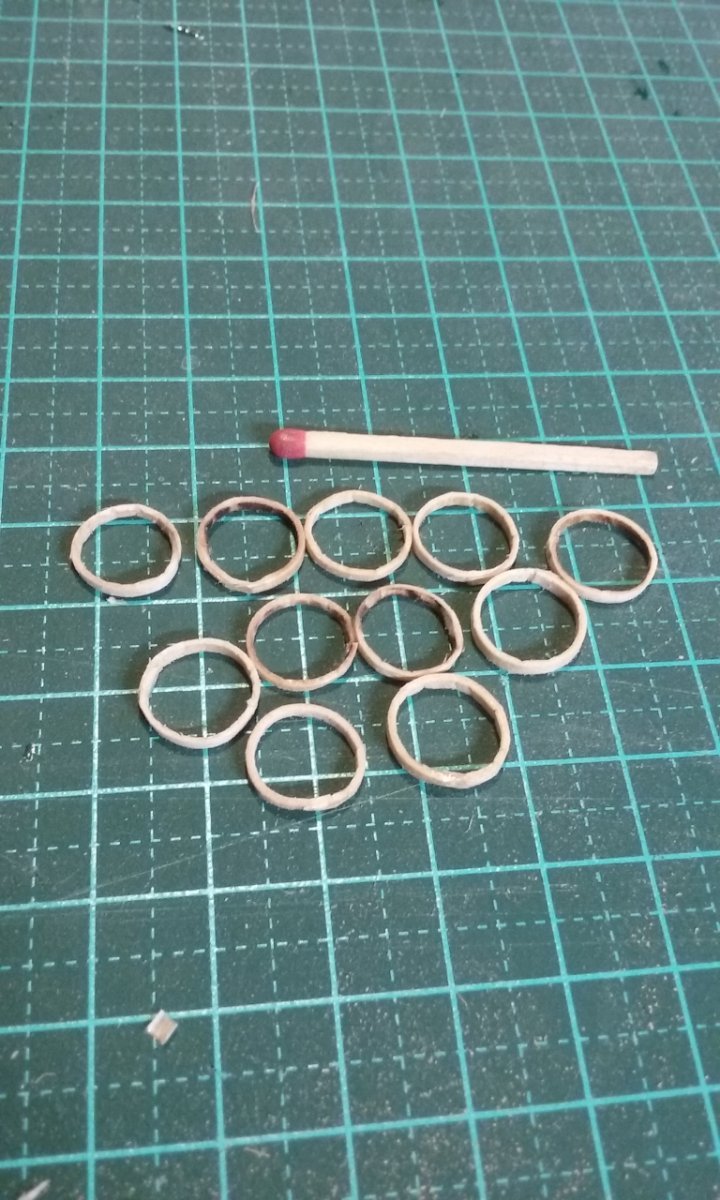
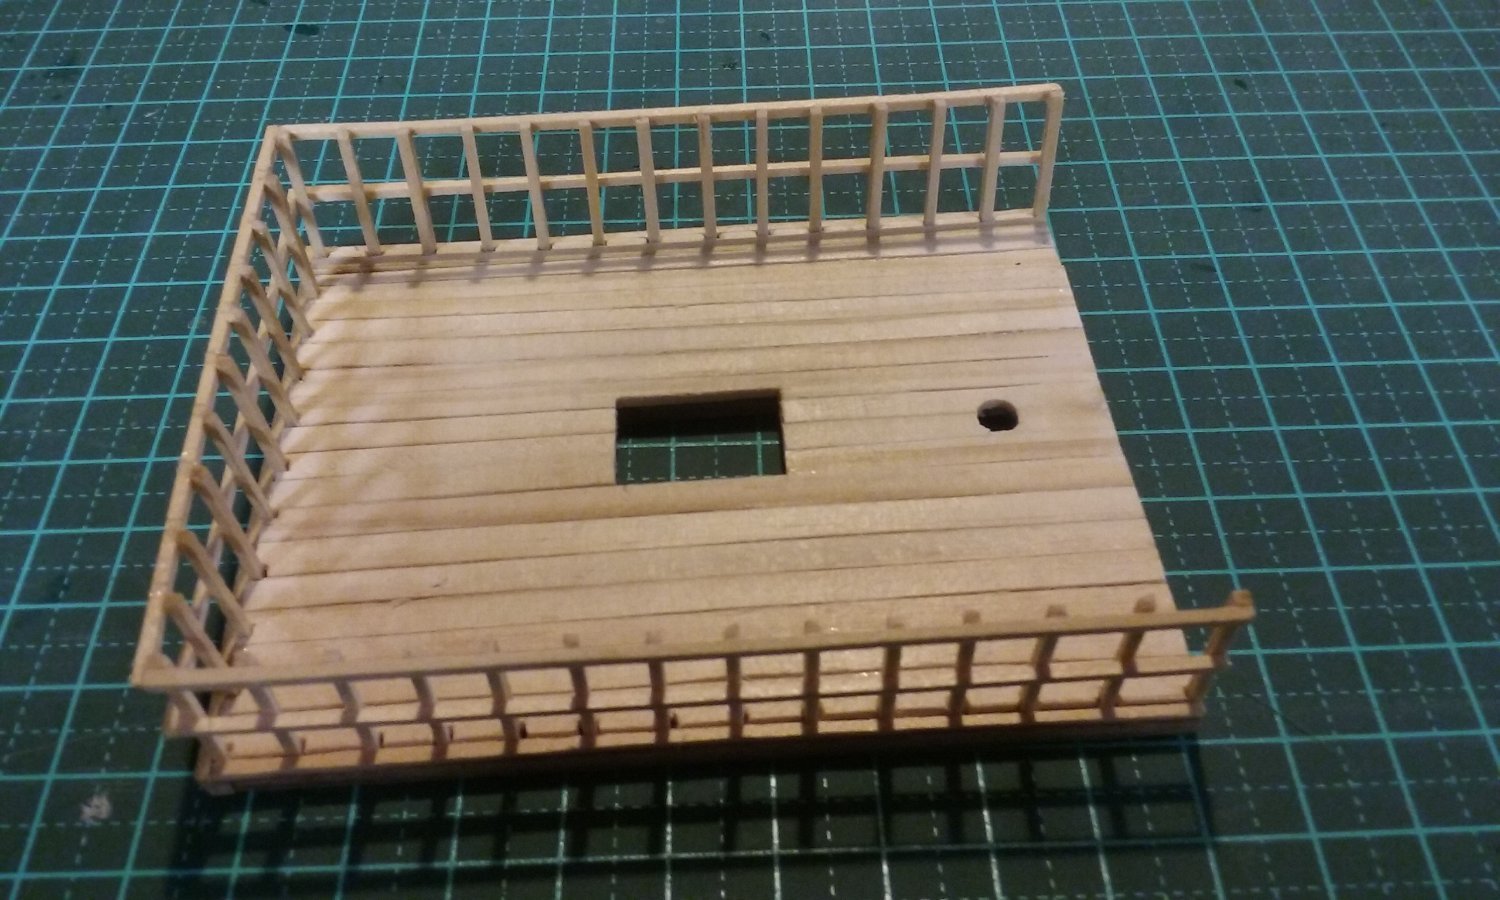
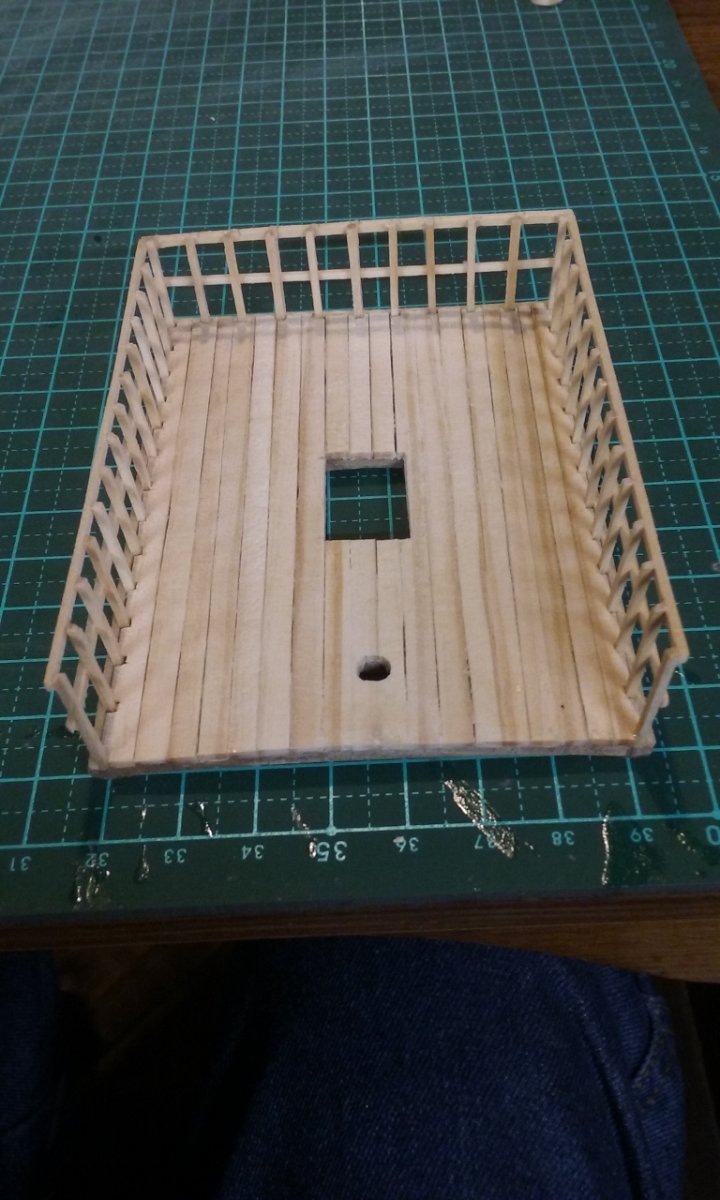
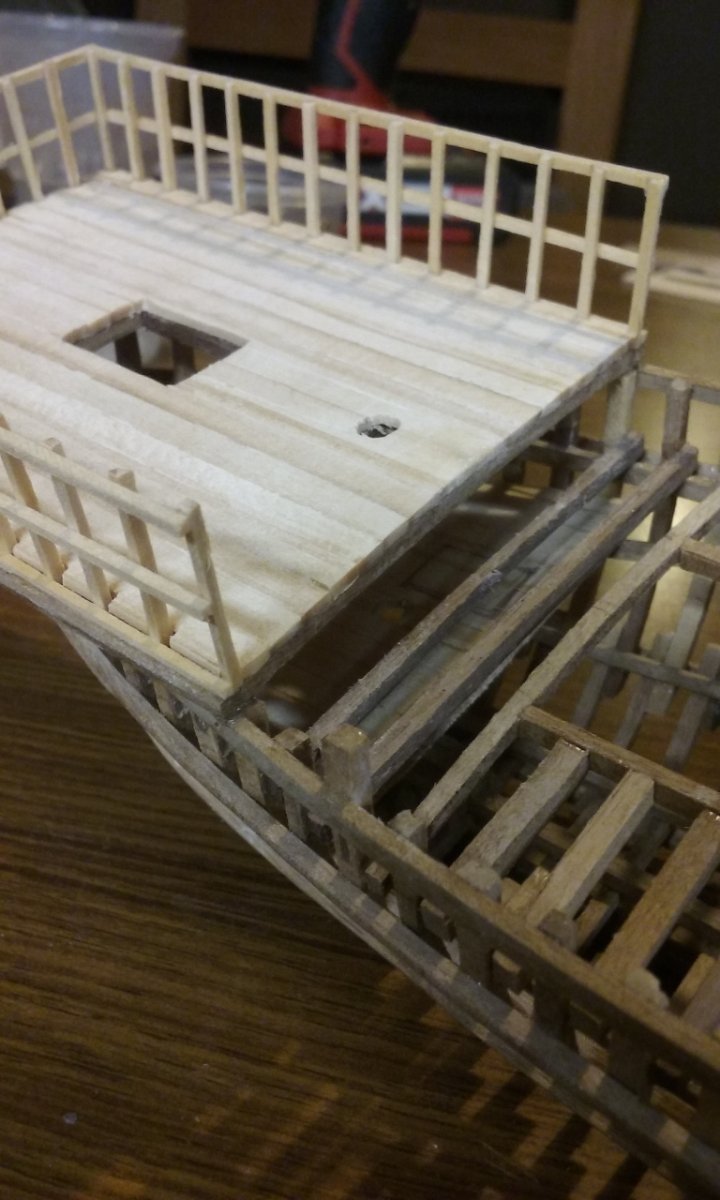
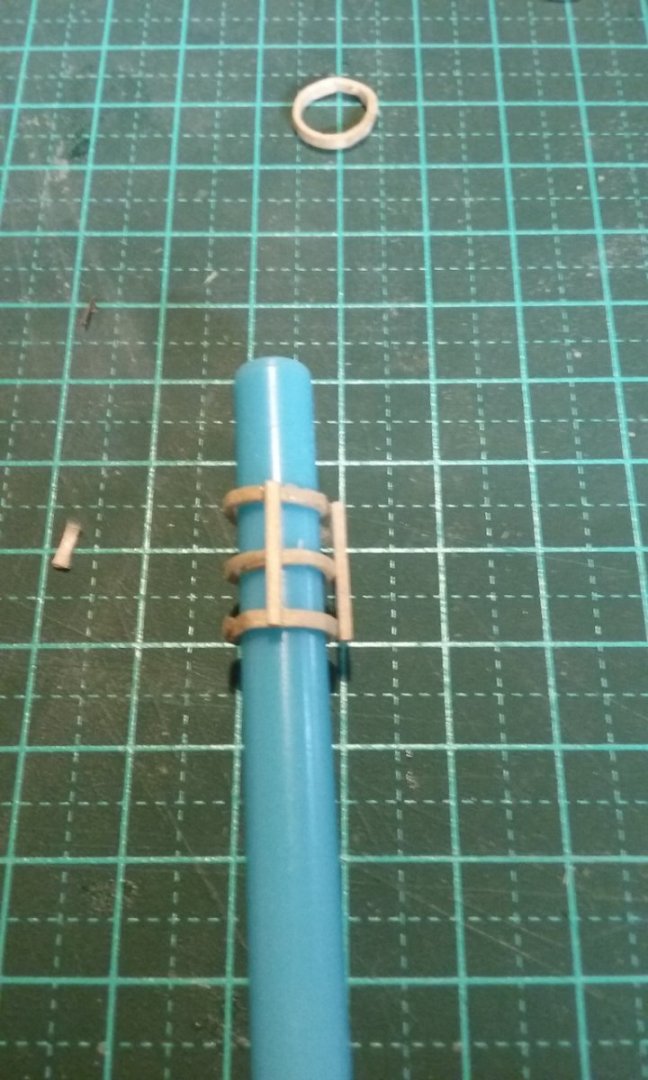
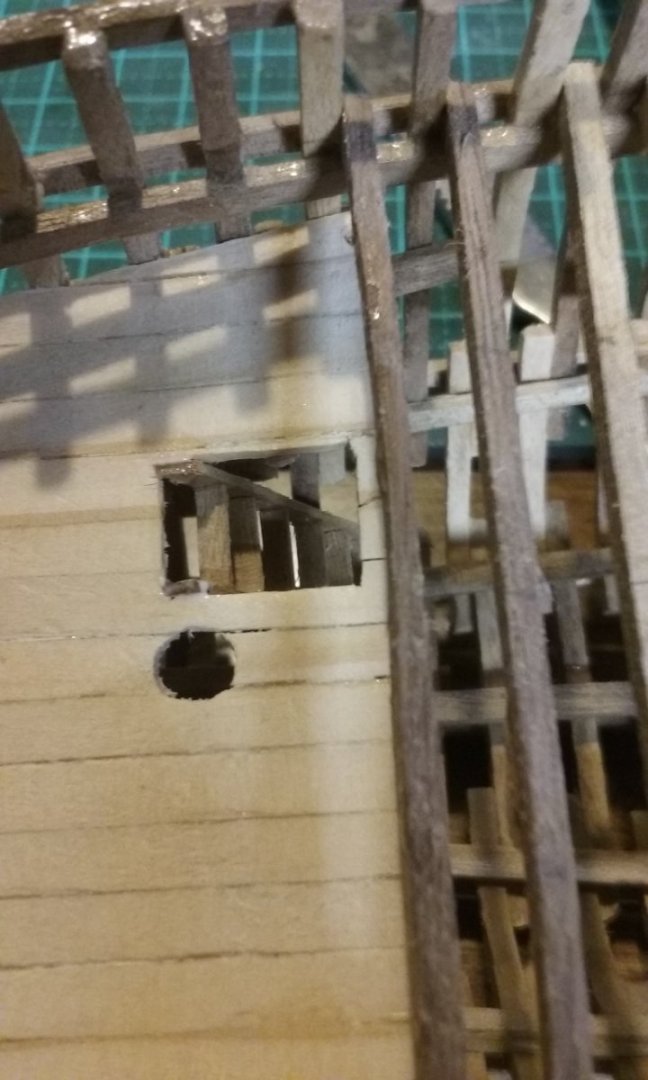
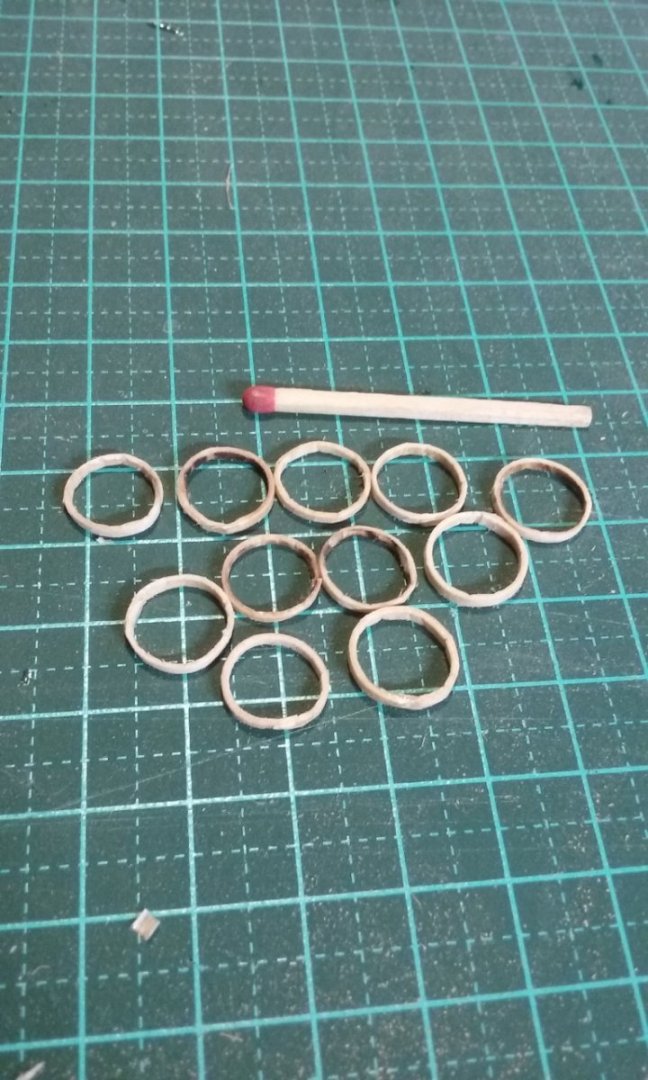
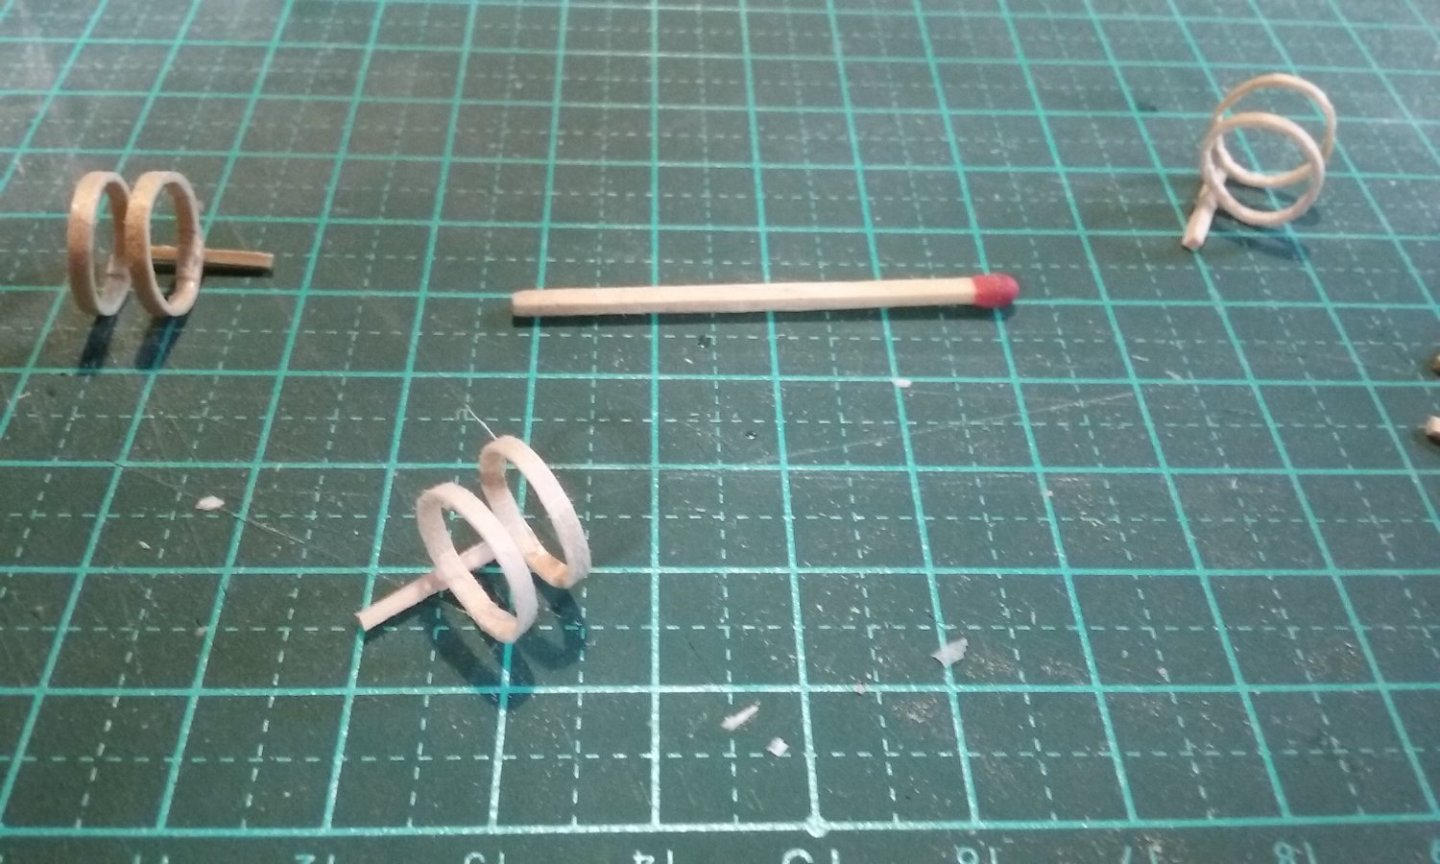
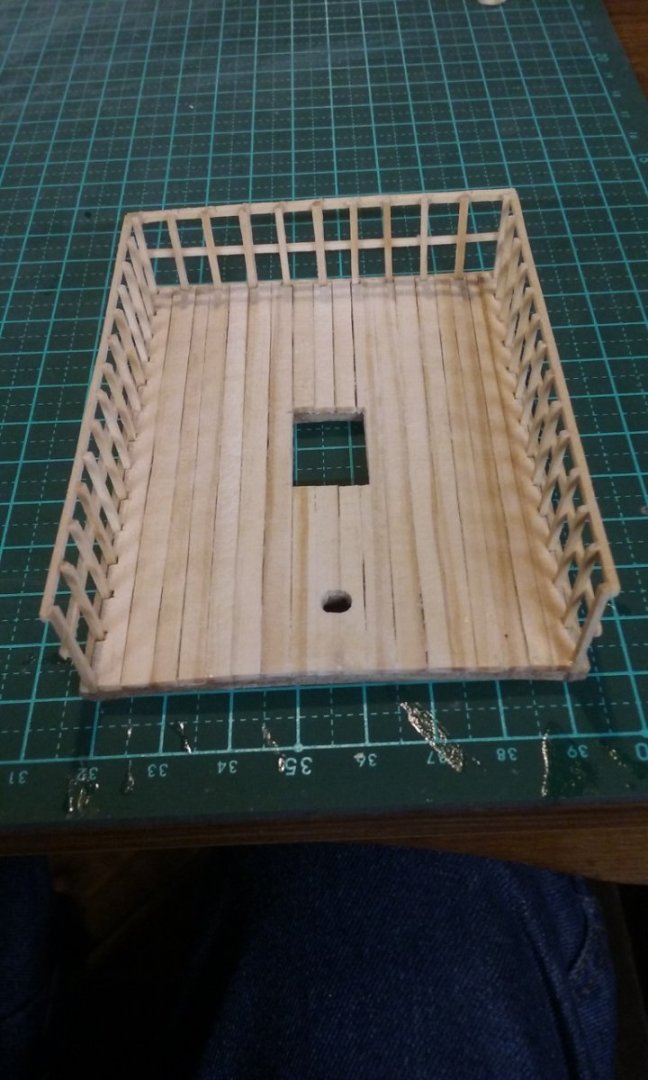
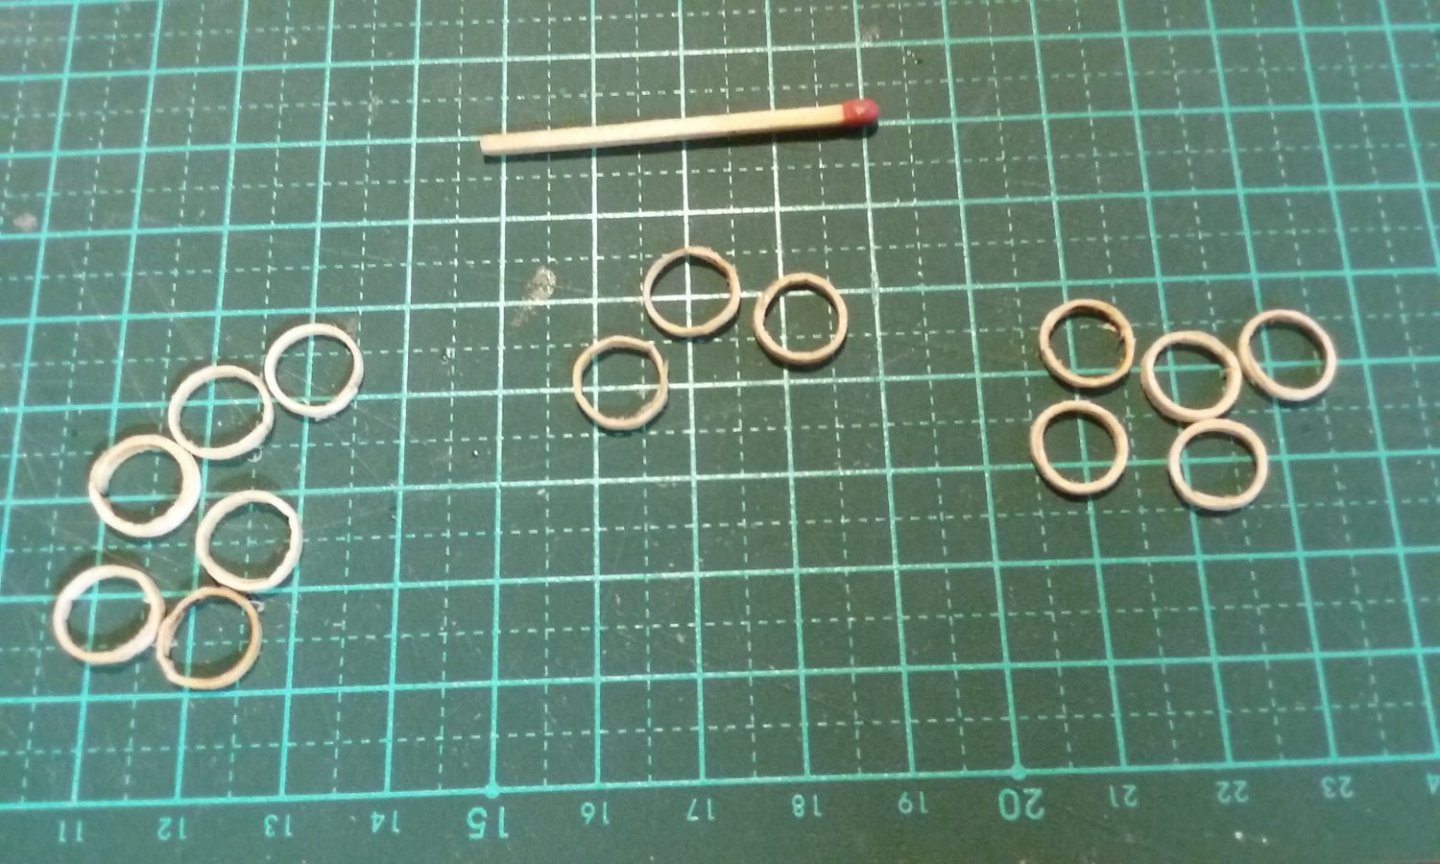
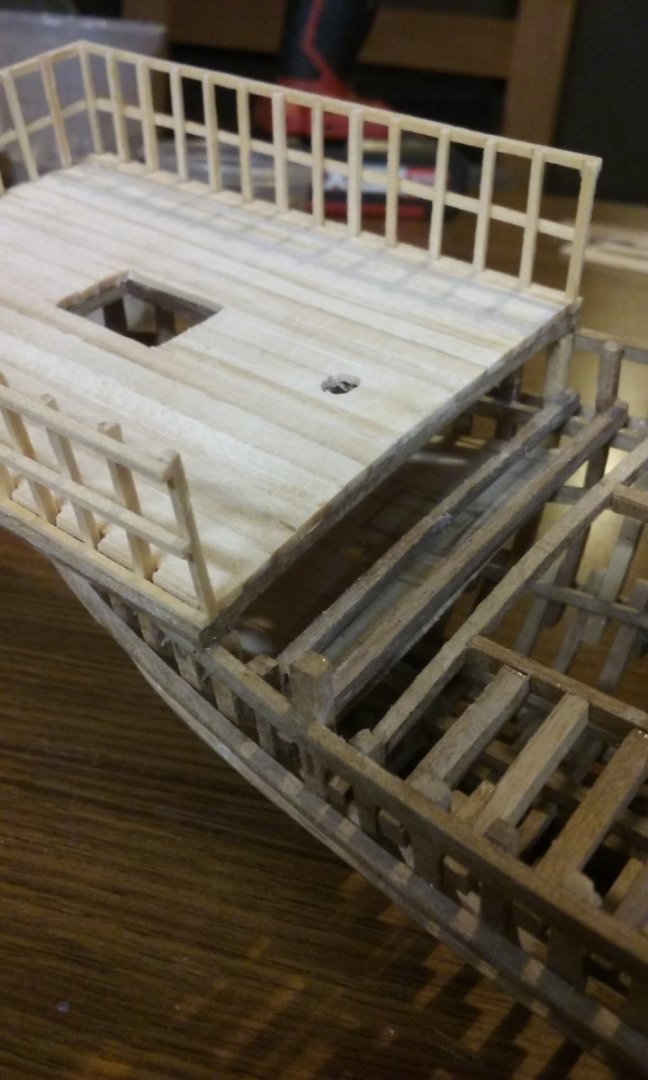
The deck beams are complete now, and the planking is finished on the aftercastle (poop) deck. The mizzen mast lines up nicely, too. The aftercastle is still dry fitted, until I have finalised some of the things that need to be done before it's glued in place. I solved the problem with burning the wooden 'rings' that are to make up the tops. I realised that if I turned off the soldering iron once it got too hot, I'd be able to make the rings without burning. And turn back on, then off etc to keep the temperature below burning. Turned out pretty well. I cut the rings to size, allowing a bit of overlap for gluing and glued and clamped. Here are the tops under way. Three tops, each with three rings per top - each one has two in place at this stage. Unfortunately, when it came to finalising the tops I discovered that having sized them 'by eye', I'd made the circles too big and I had to go back to the drawing board. So I made a bunch of new ones and disassembled the tops I'd made and cut down the rings I already had. This time I got the idea to keep them all to the same diameter by wrapping them around a paintbrush handle that was just the right size. There's still some adjustment to be done - in particular getting the frames straight and square. Again, I can use the paintbrush as a "jig" to get the rings parallel and in the right place, and to get all the uprights square. I find that isopropyl alcohol is my friend - it enables me to soften the glue of a single joint so I can slide the piece one way or another till it's all exactly right. Still in progress, but looking good. Planking for the "captain's/owner's cabin" below the poop. There's a bit of sheer in these planks, as I'd inadvertently put some sheer in the clamps, which then got transferred to the deck beams. Still, a nice problem to be solved, and it's turned out well. The large bit of wood crossing the planking is an impromptu wedge, as there's no room for a clamp, to hold the plank down on the deck beams so the glue would hold it in place properly. I trimmed the edges of the hatch in the poop deck. There's going to be a ladder/staircase down from here to the cabin. The poop and cabin decks have now been sanded smooth. I had intended to have a wall at the forrard end of the cabin, with a door leading to stairs down to the hold. But when it all came together I realised that there wouldn't be enough headroom for the door or the stairs - the beams of the main deck were in the way. I'll still have the wall at the front, but the access to the hold will be through an opening in the deck of the cabin (in a place that reduces the available deck space as little as possible). Next step - STEPS! Steven


- 508 replies
-
- 13
-
-