MORE HANDBOOKS ARE ON THEIR WAY! We will let you know when they get here.
×


Louie da fly
-
Posts
7,985 -
Joined
-
Last visited
Content Type
Profiles
Forums
Gallery
Events
Everything posted by Louie da fly
-
 Very nice. I think you've captured the shape of the figurehead (as shown on the far left fragment of the the first picture) very well. Steven
 -
To me it looks like the "collectioner's" vessel is too high - it would probably be crank and unseaworthy. Even though it pretty much duplicates the height of the forecastle on the Anthony Roll, I think Anthony got it wrong. AS far as I know, the aftercastle could be estimated from that of the Mary Rose; as she sank on her side, just about all of the upper works survived. There is still hope that they'll eventually get the funding to go and find the forecastle, but in the meantime we just need to work on 'best guess'.. Nice to know you got into doing "Hastings" at some point. The Big One in the UK is a real experience - I've done it twice and loved it. https://www.google.com/search?q=hbattle+hastings+2006&rlz=1C1NHXL_enAU770AU770&oq=hbattle+hastings+2006&aqs=chrome..69i57j0i8i13i30j0i390i650l4.7532j0j7&sourceid=chrome&ie=UTF-8#fpstate=ive&vld=cid:b1403b79,vid:EOwW04V4NA4 By the way, additional to the model Tudor figures I mentioned above, the sailors should be easier to obtain as their clothes were simpler - see http://gallery.nen.gov.uk/imagelarge69119-.html Steven
-
Linear-B make 1:72 Tudor figures - see https://www.1-72depot.com/1-72-scale-plastic-model-kits/figures/strelets-linear-b-012-age-of-tudors/ - several aof the poses aren't suitable for your ship, but quite a few are. Also Camisado has Tudor arquebusiers (musketeers) - most not suitable unless your ship is in battle, but a couple in civvies. http://camisado1500s.blogspot.com/2014/04/tudor-arquebusiers.html Steven
- 740 replies
-
- 5
-

-

-
- Tudor
- restoration
- (and 4 more)
-
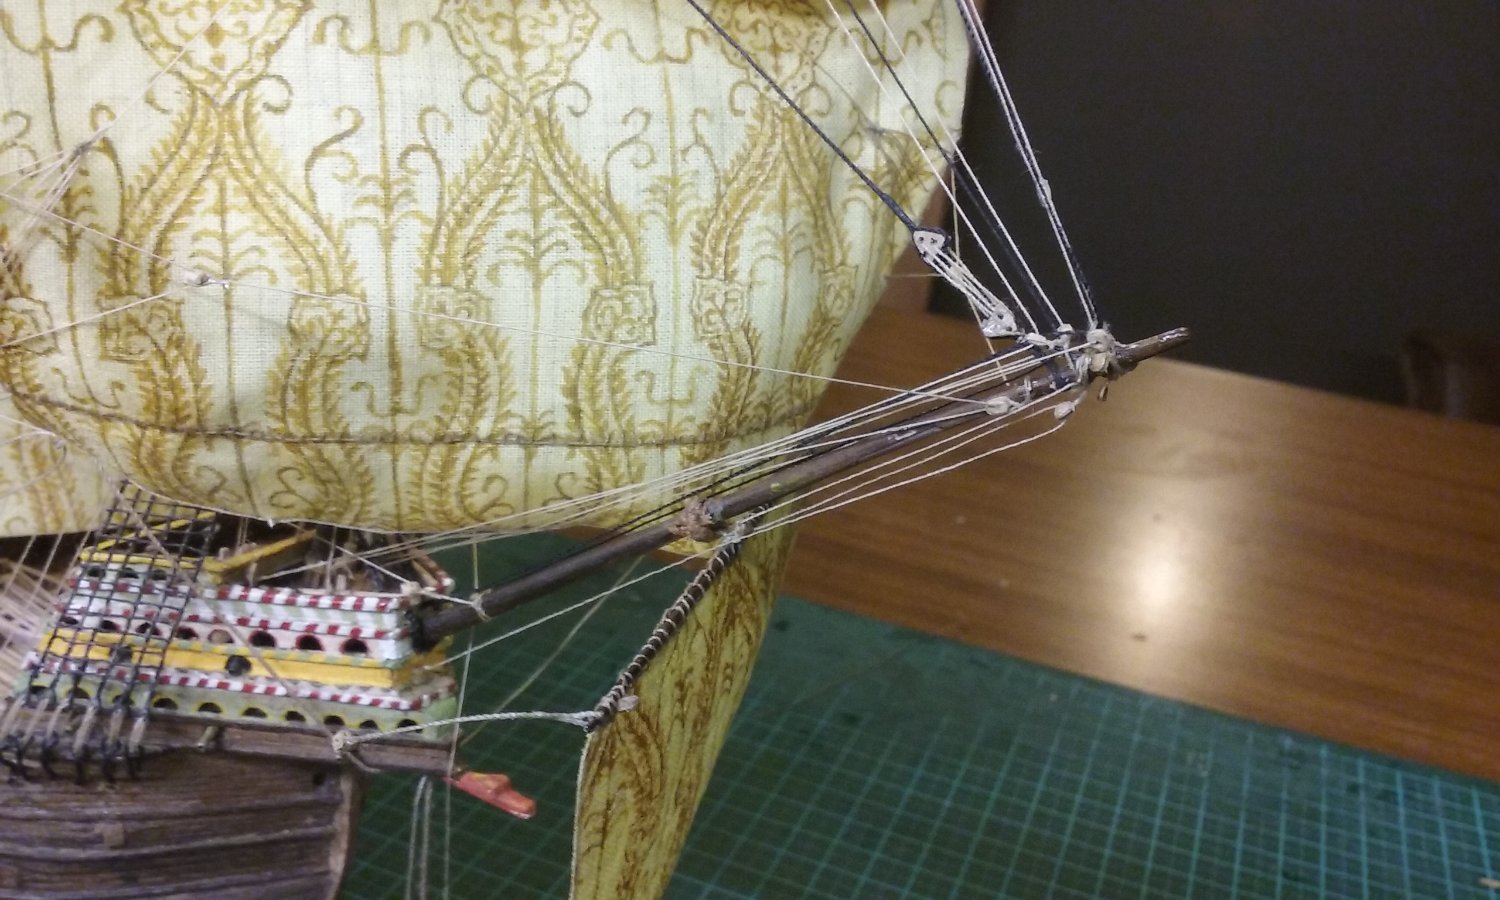
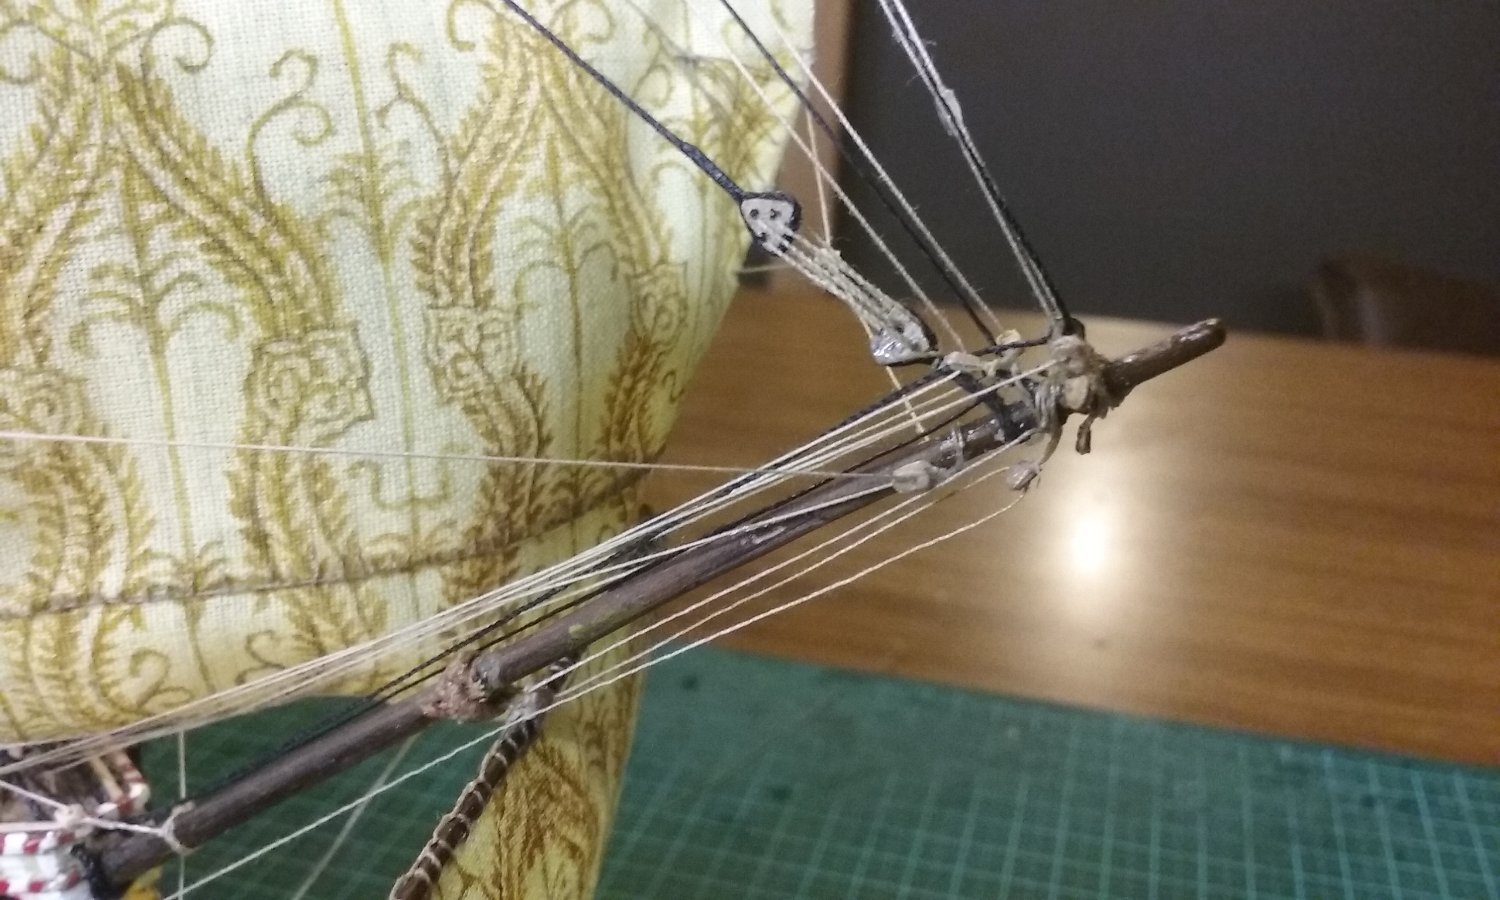
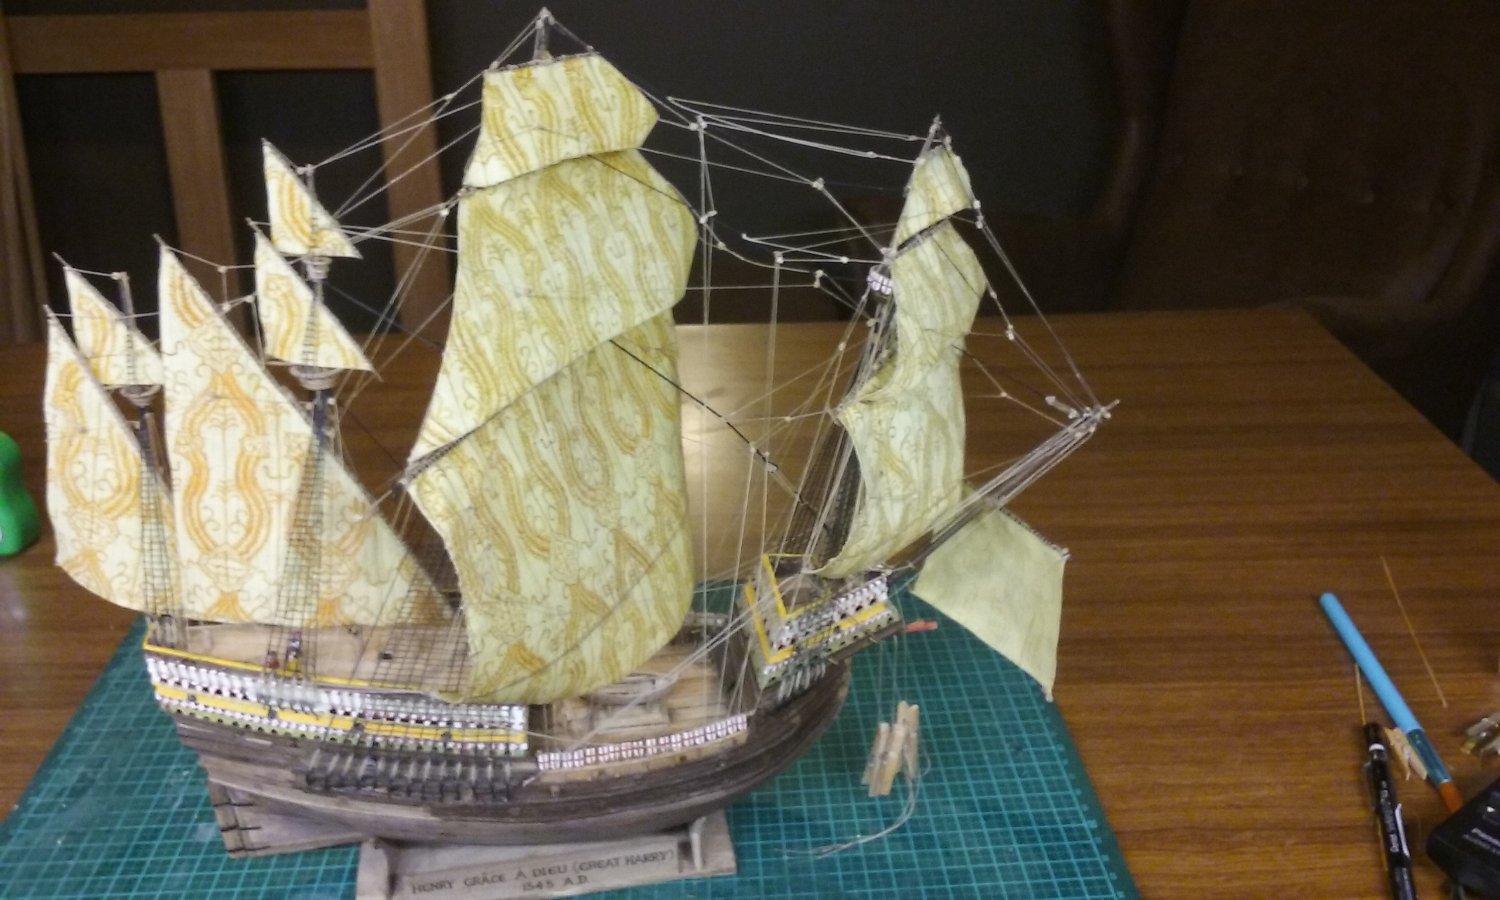
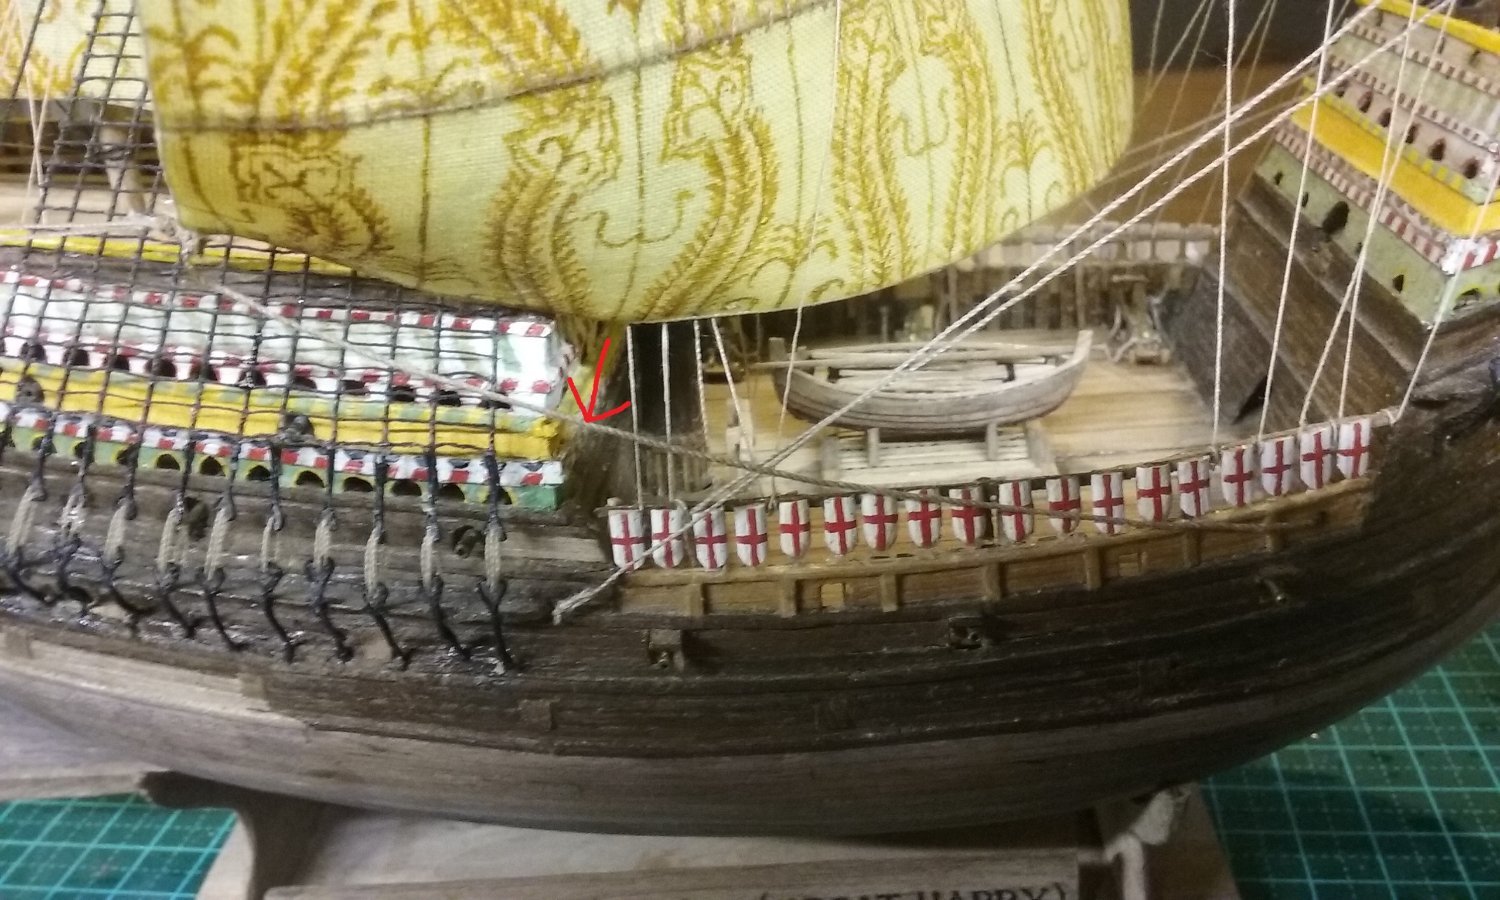
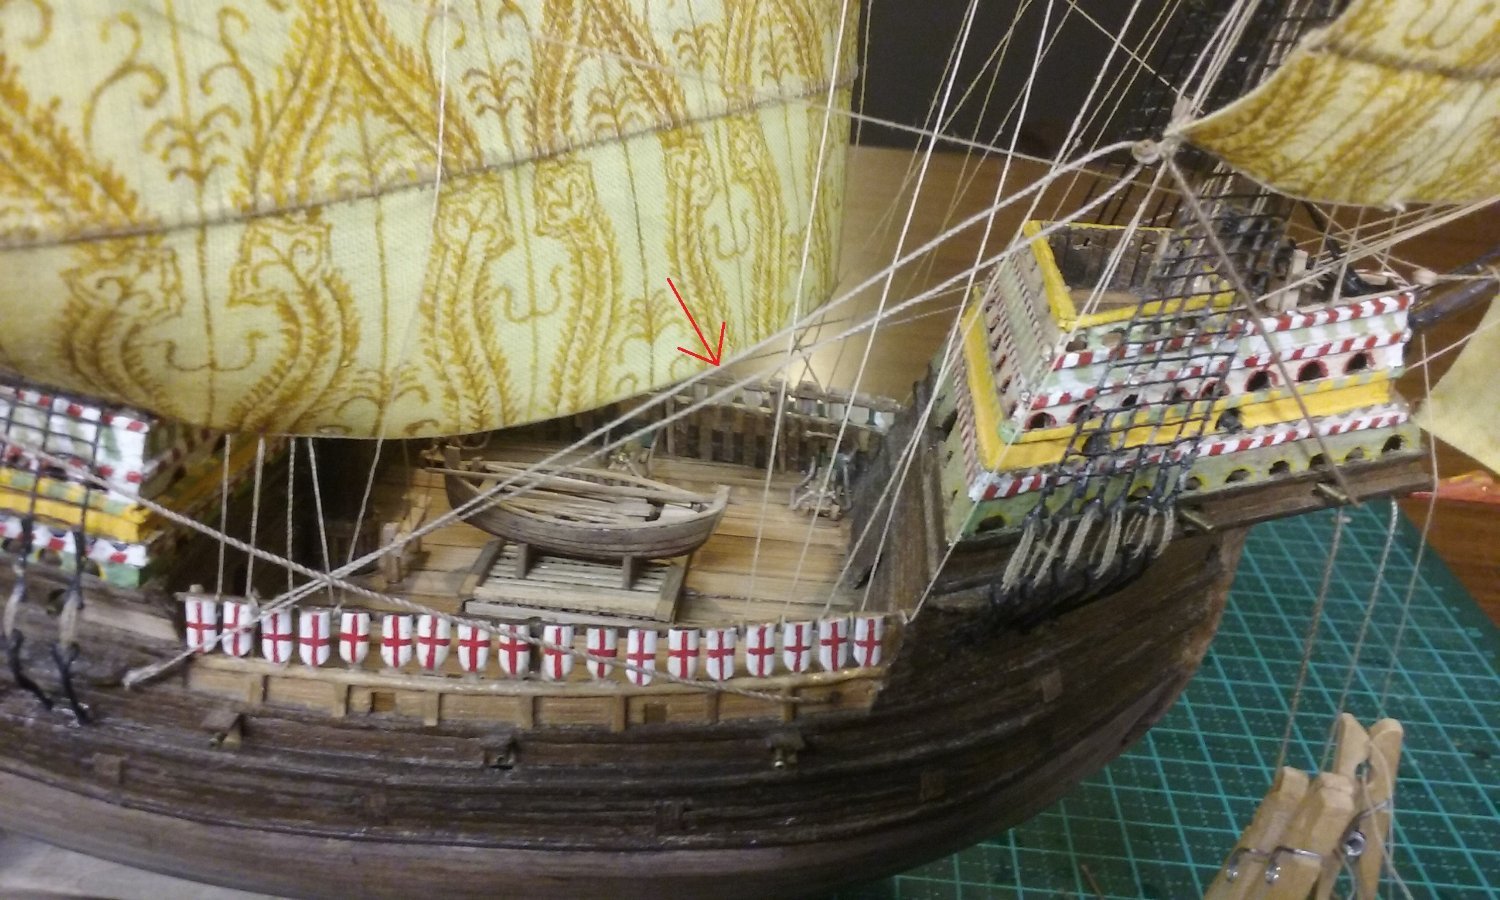
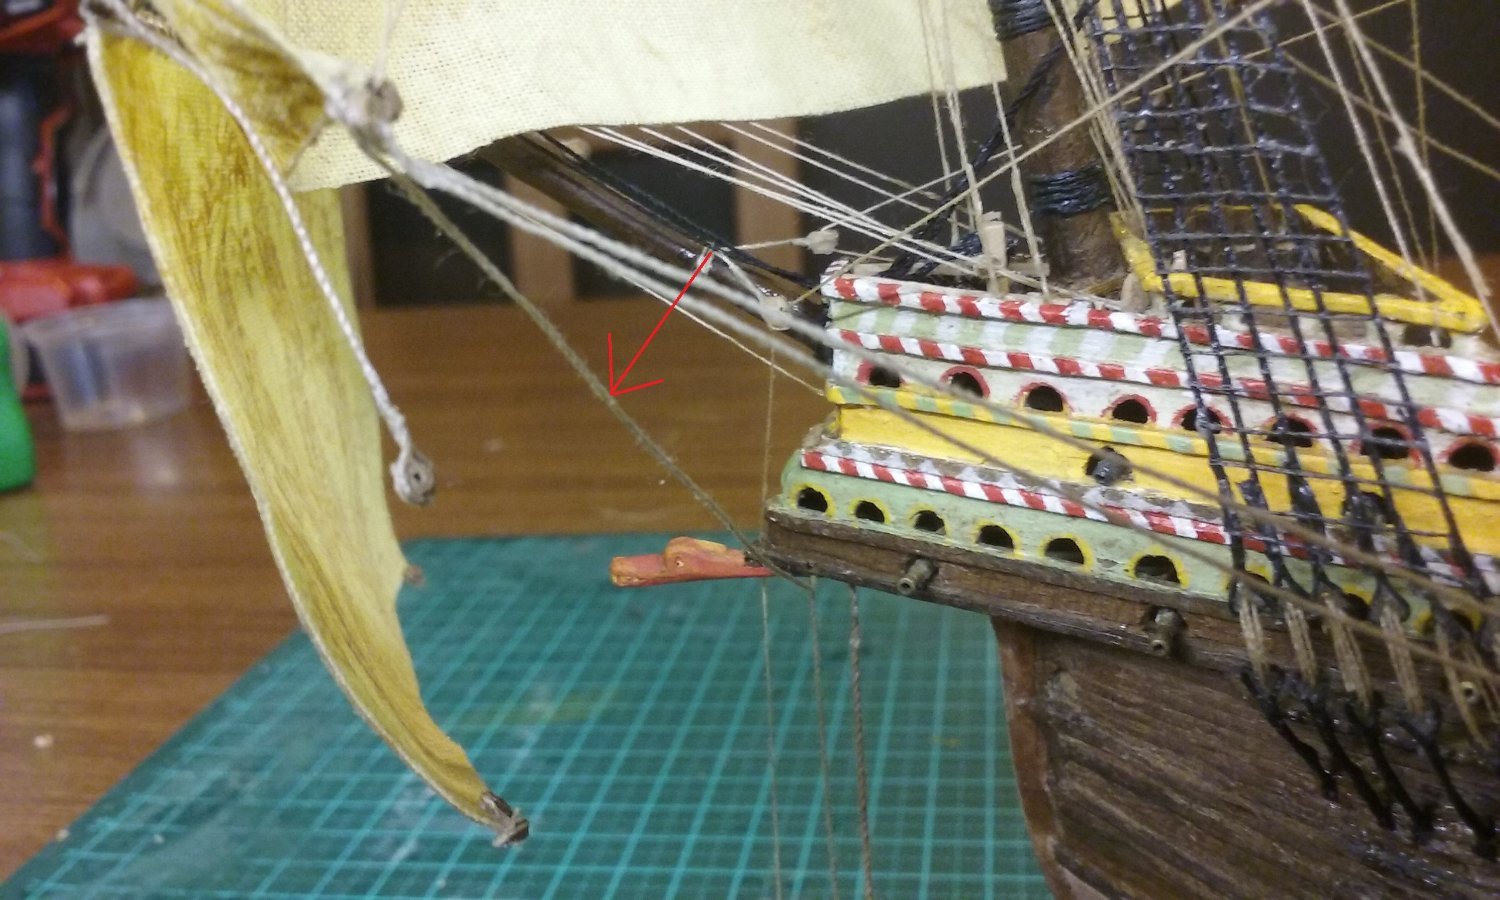
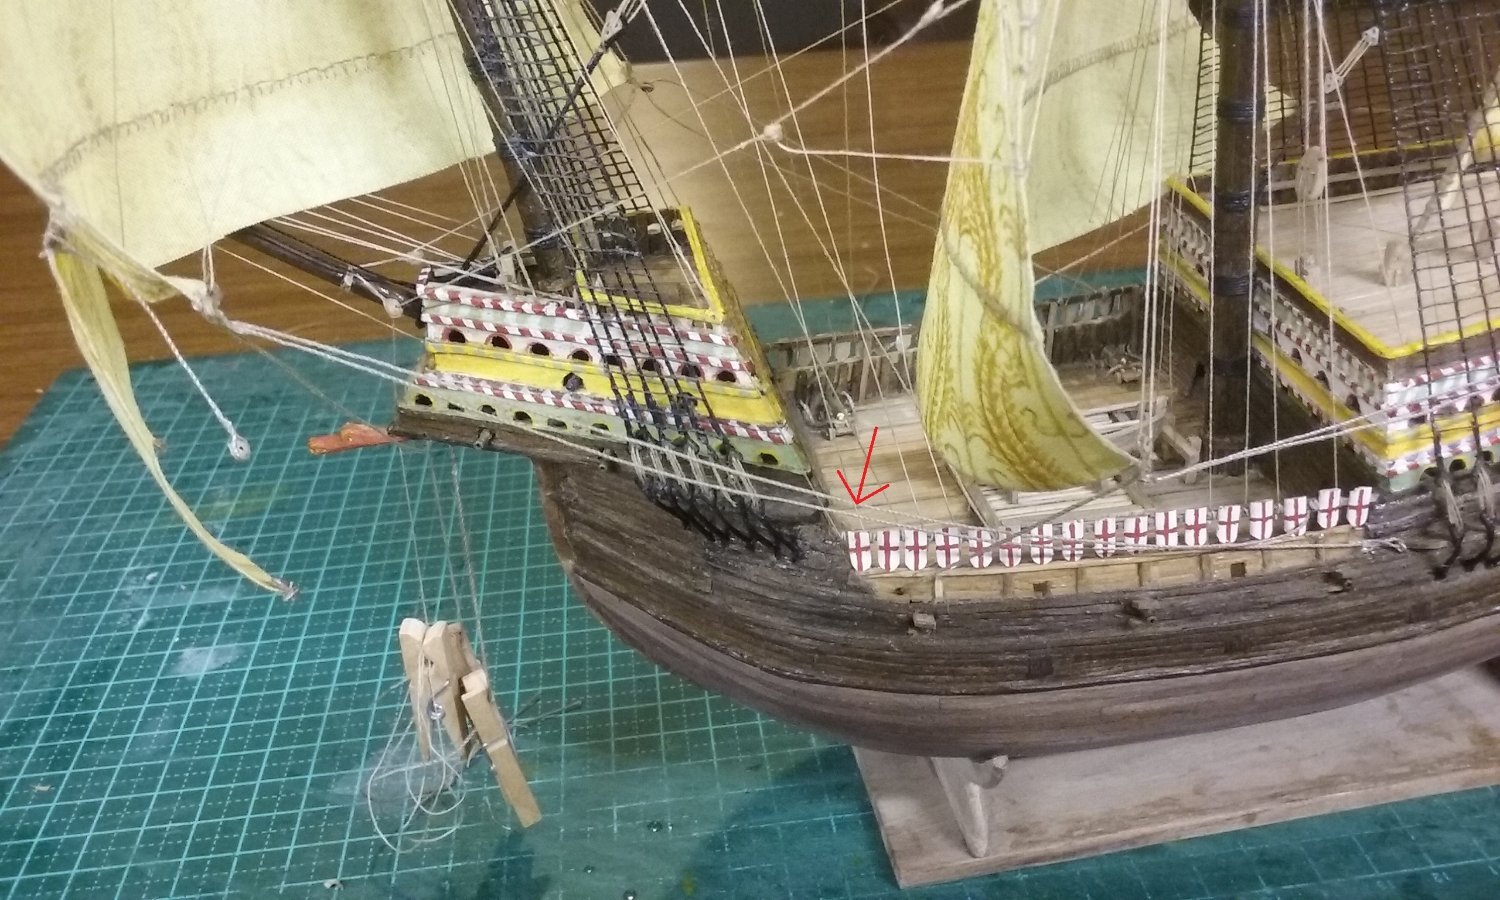
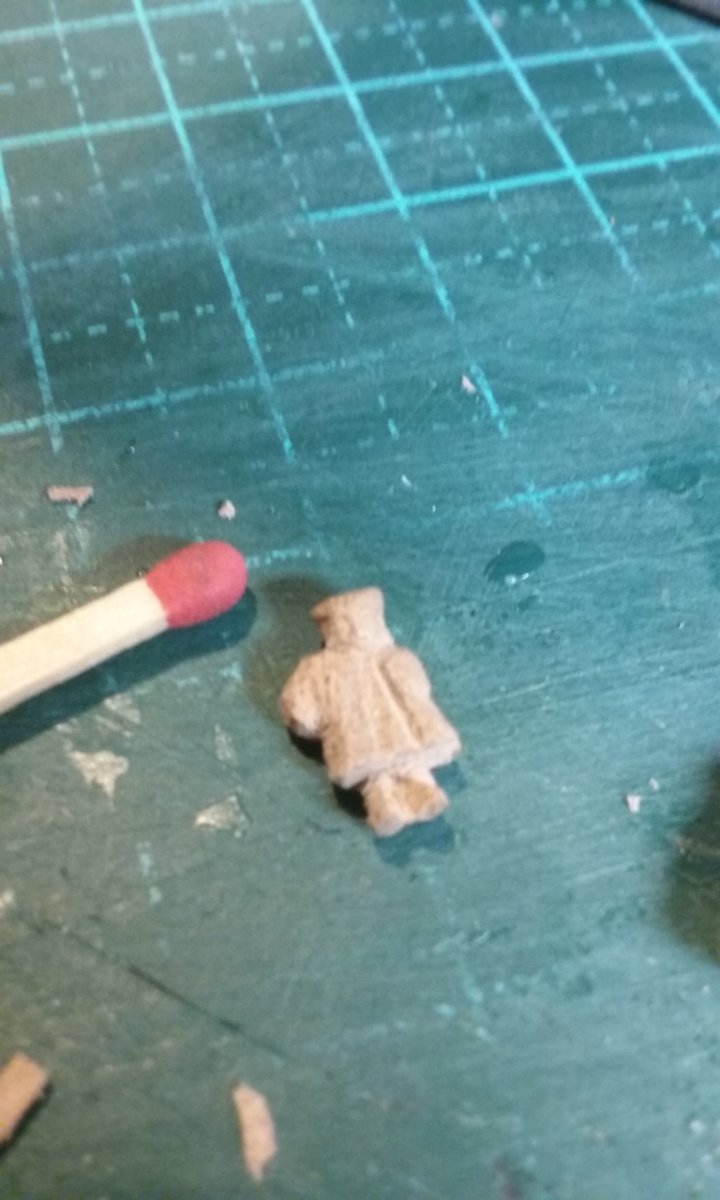
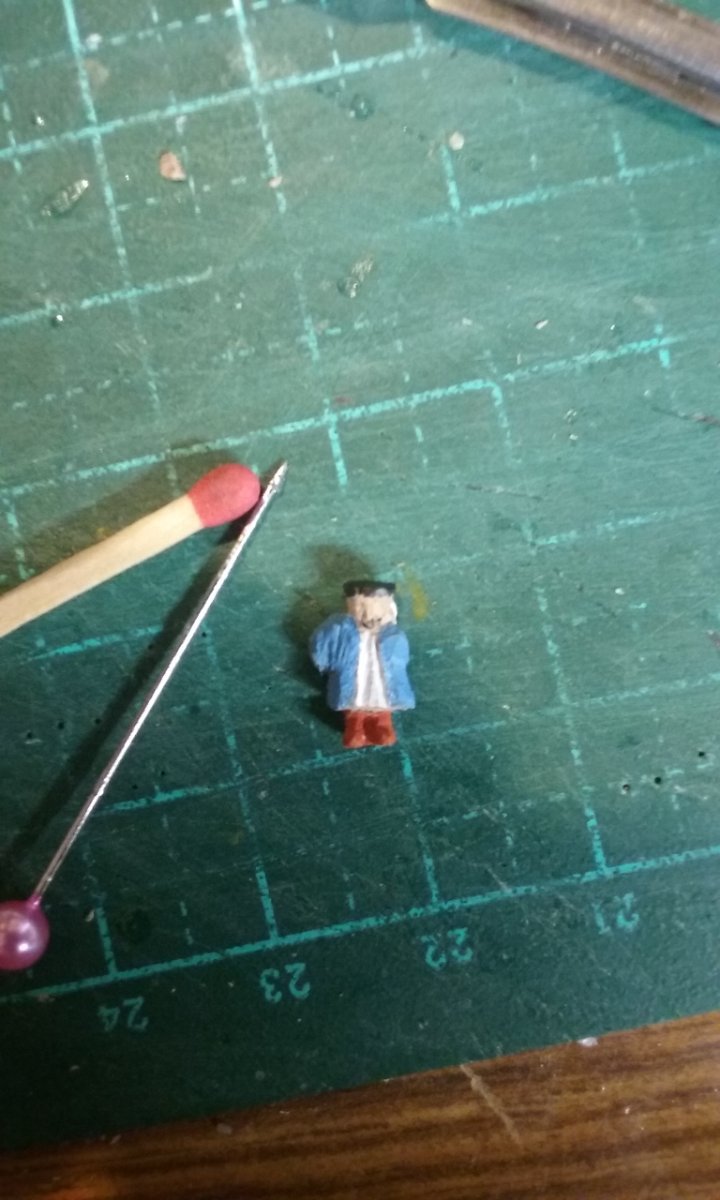
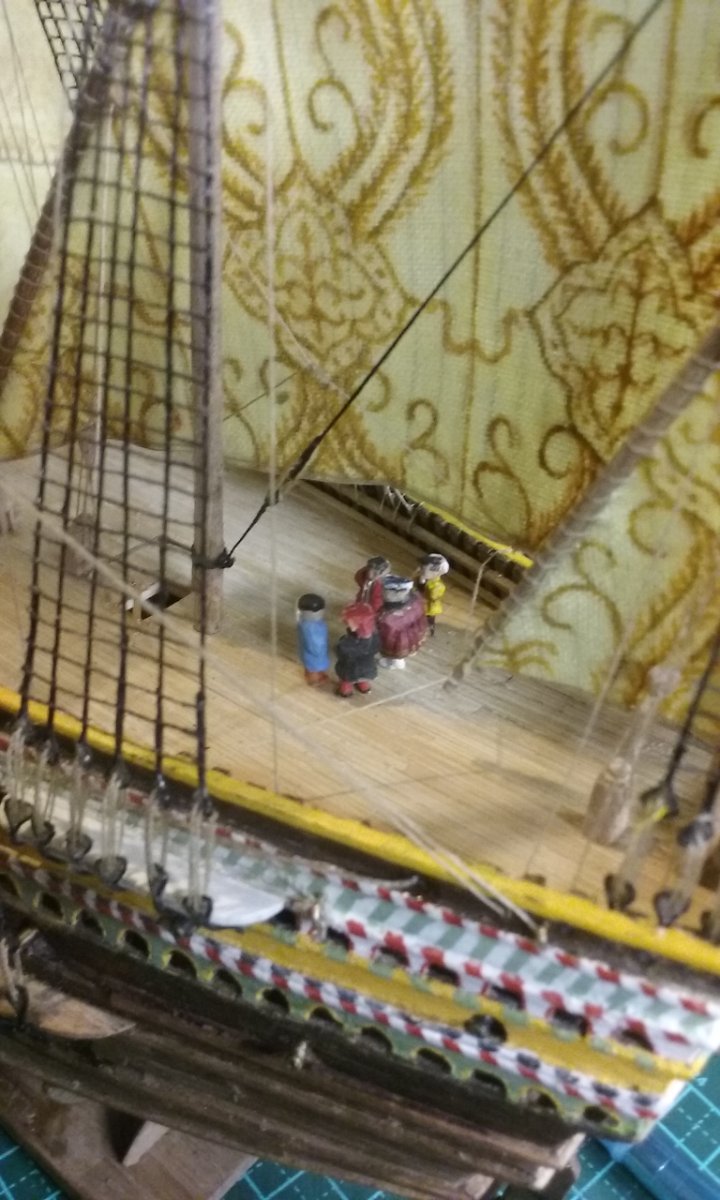
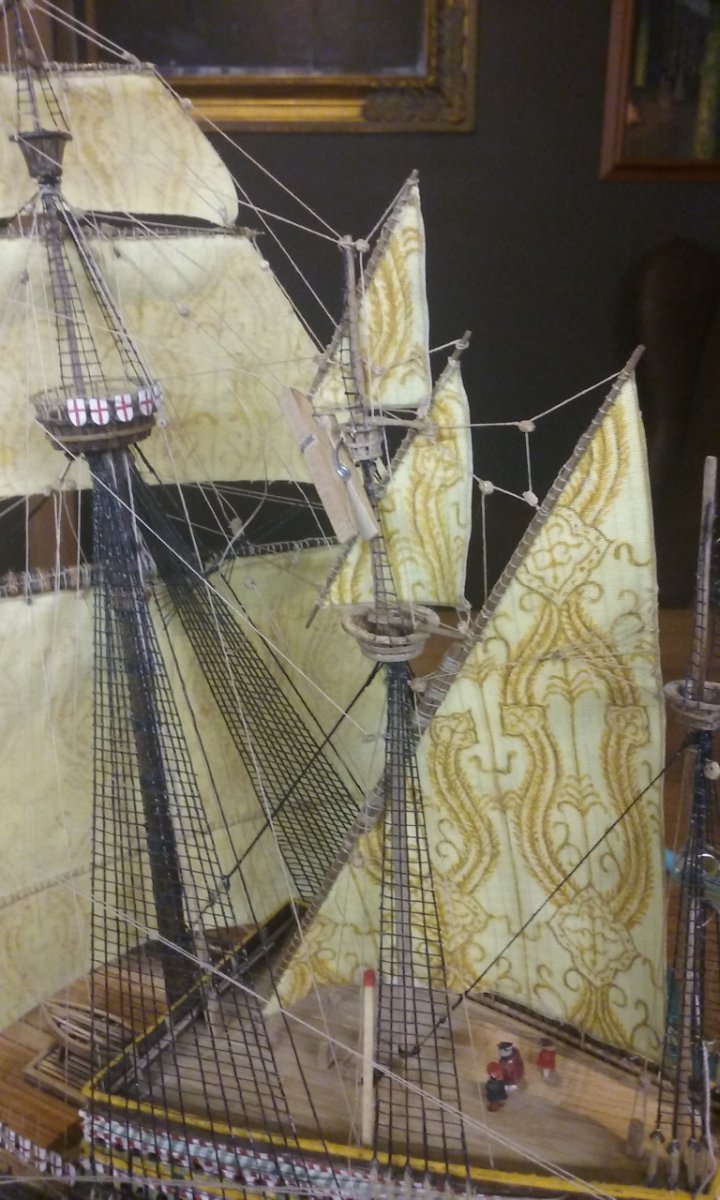
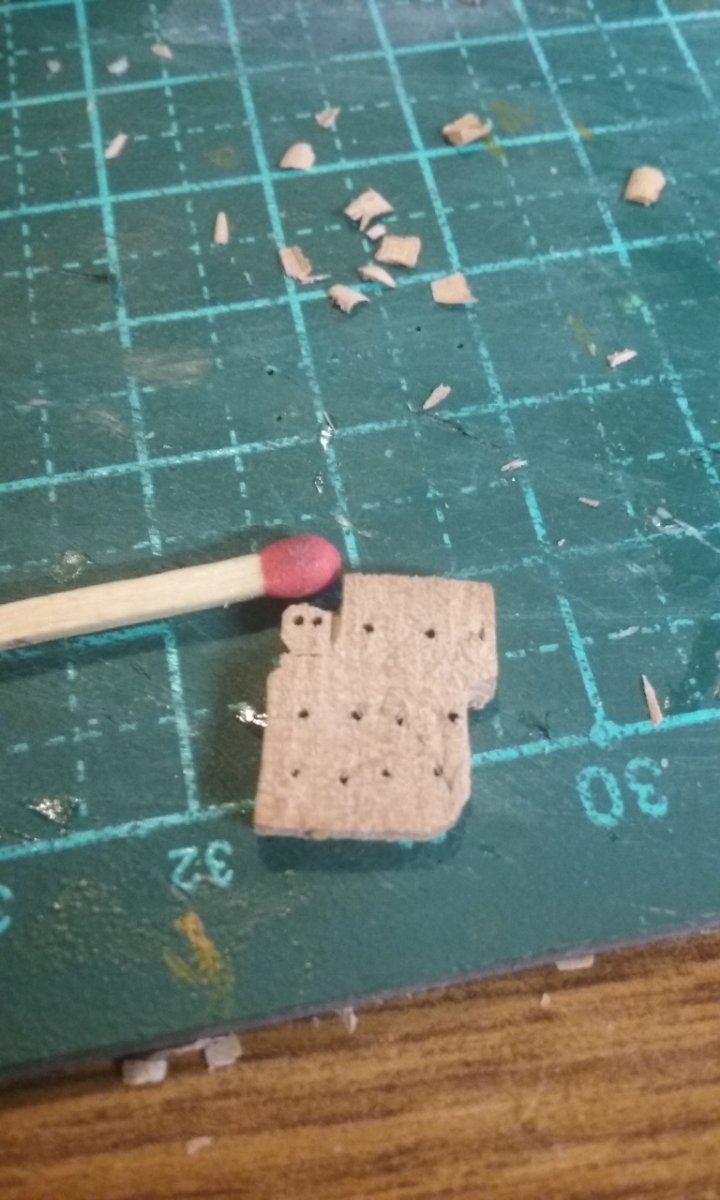
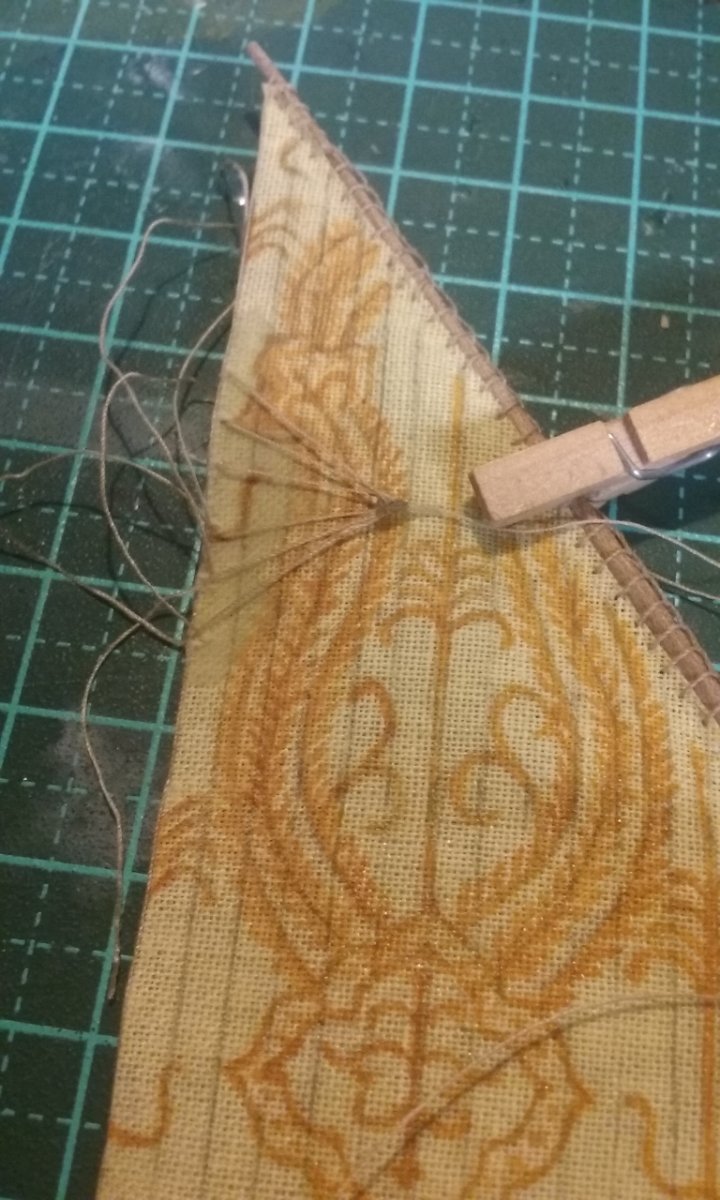
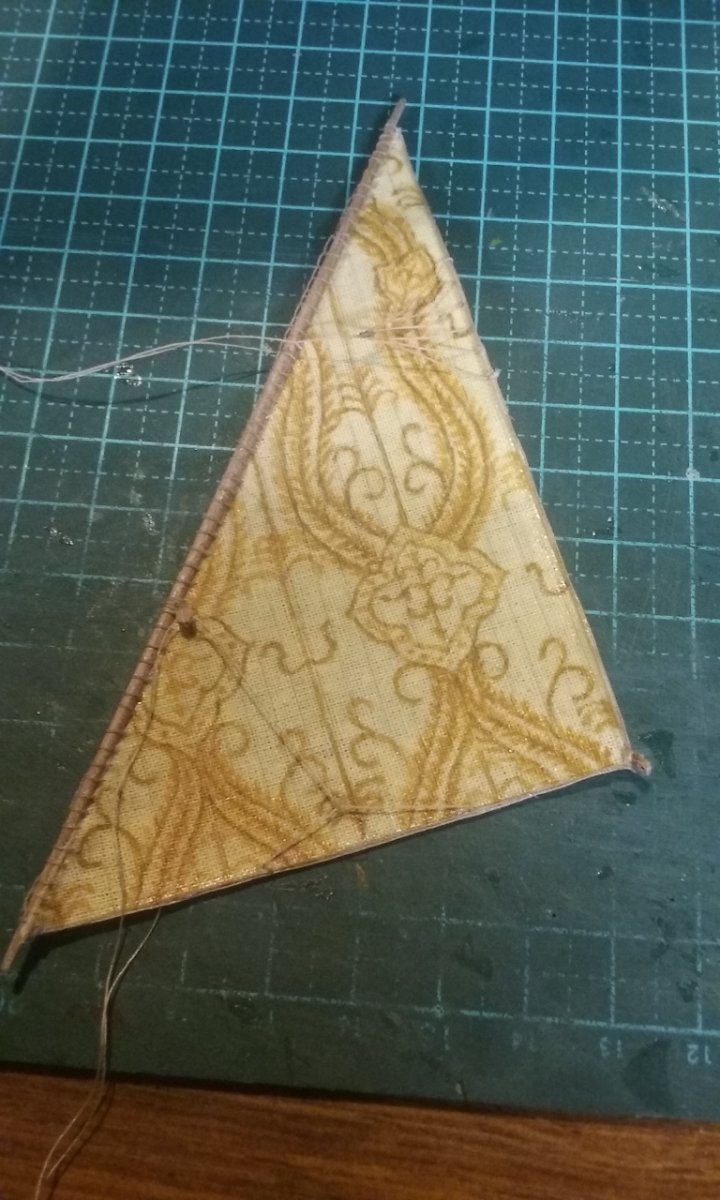
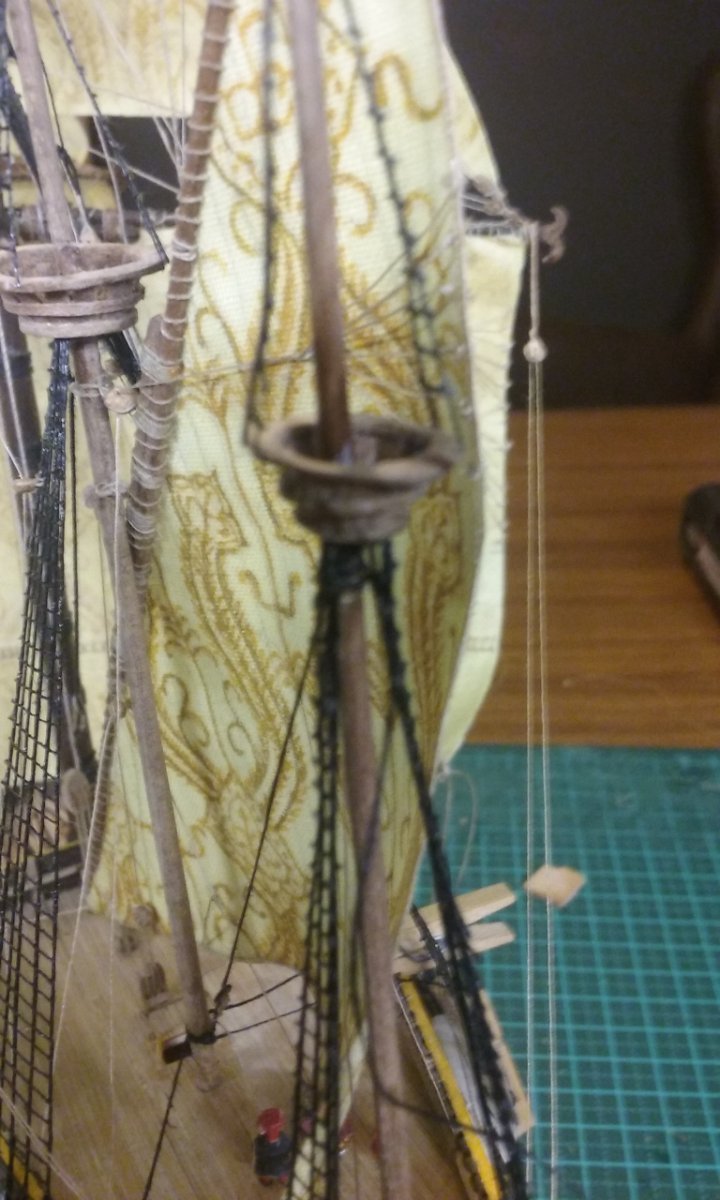
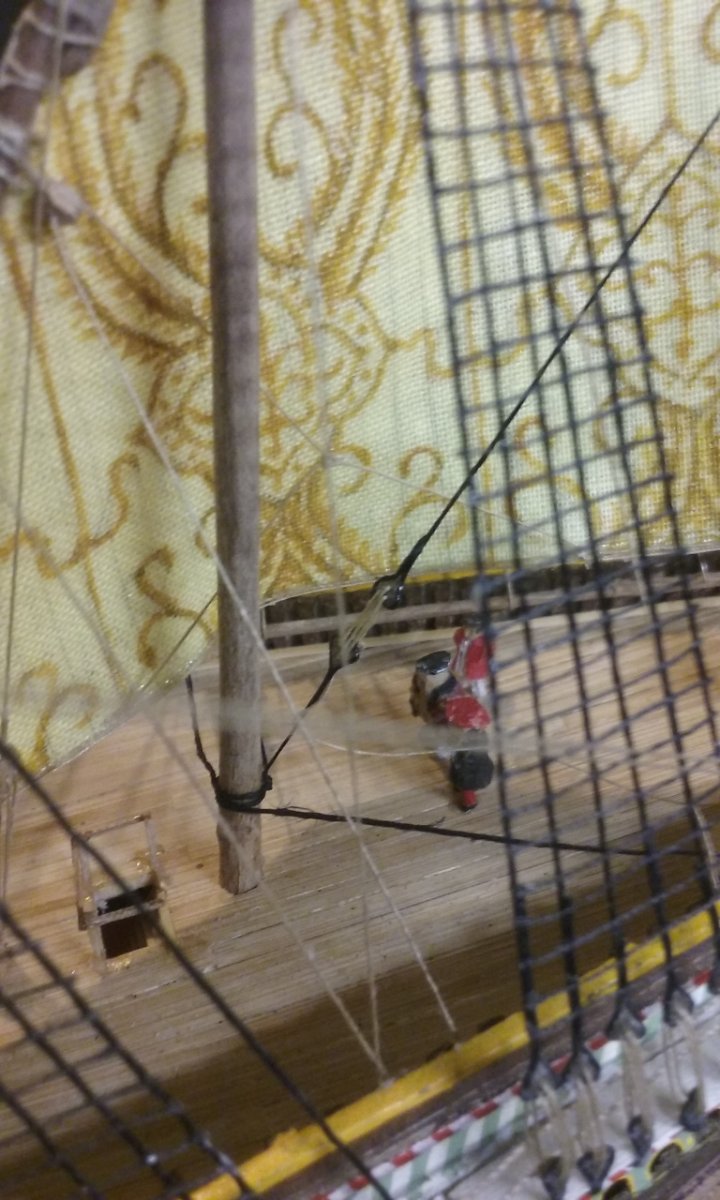
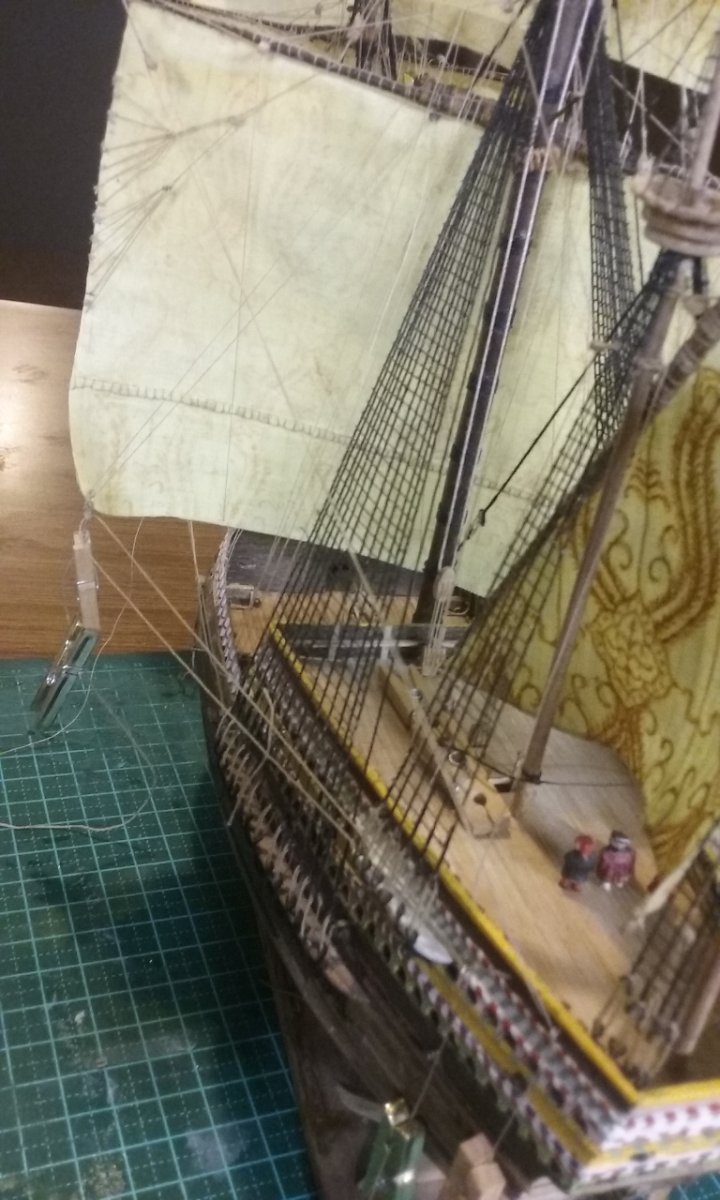
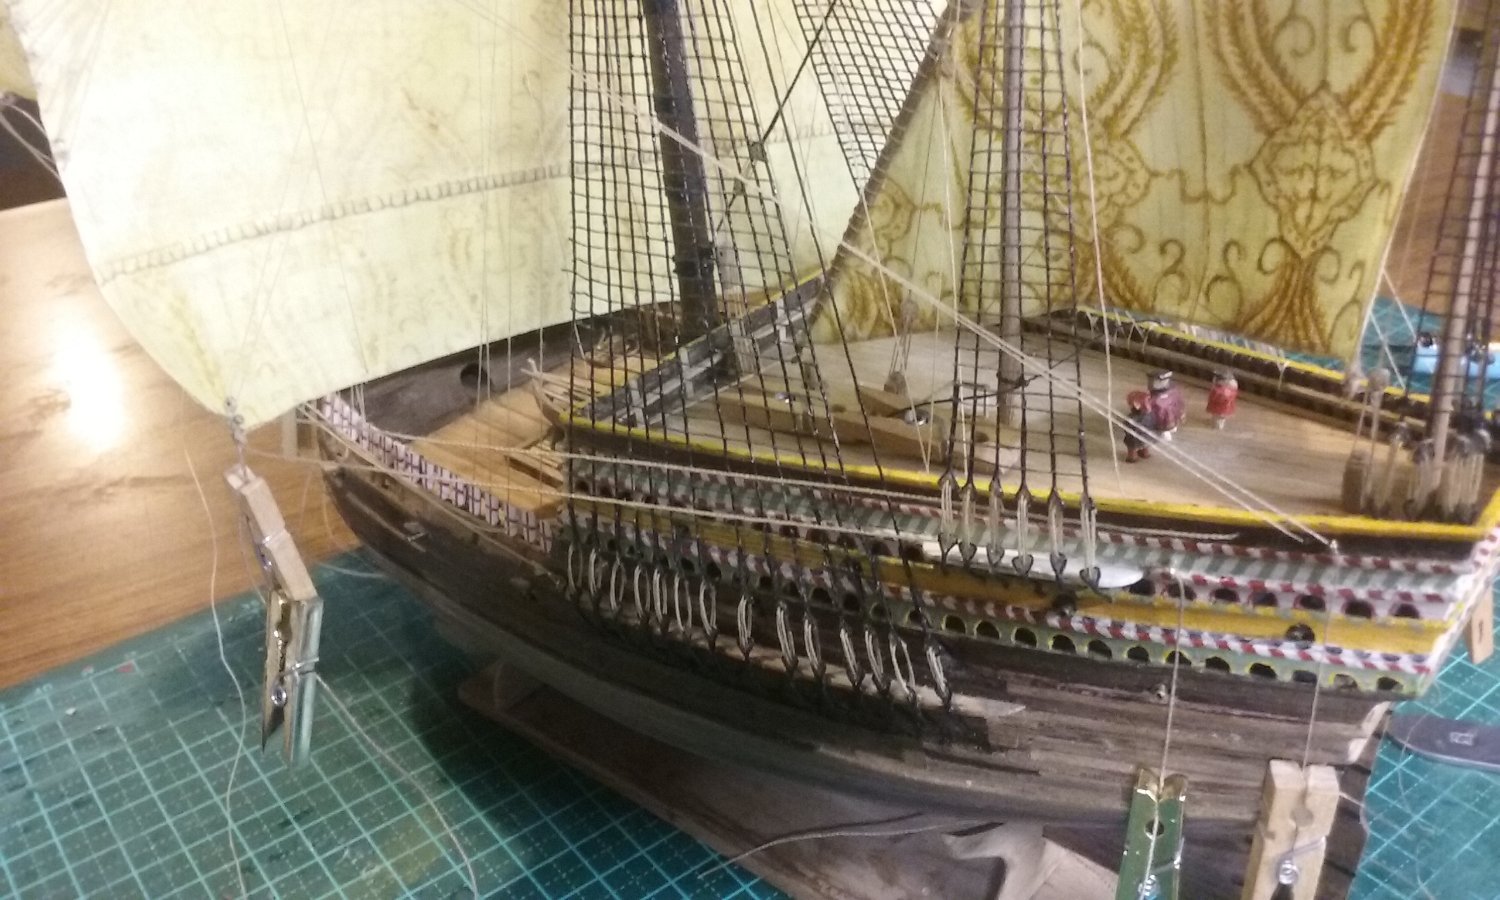
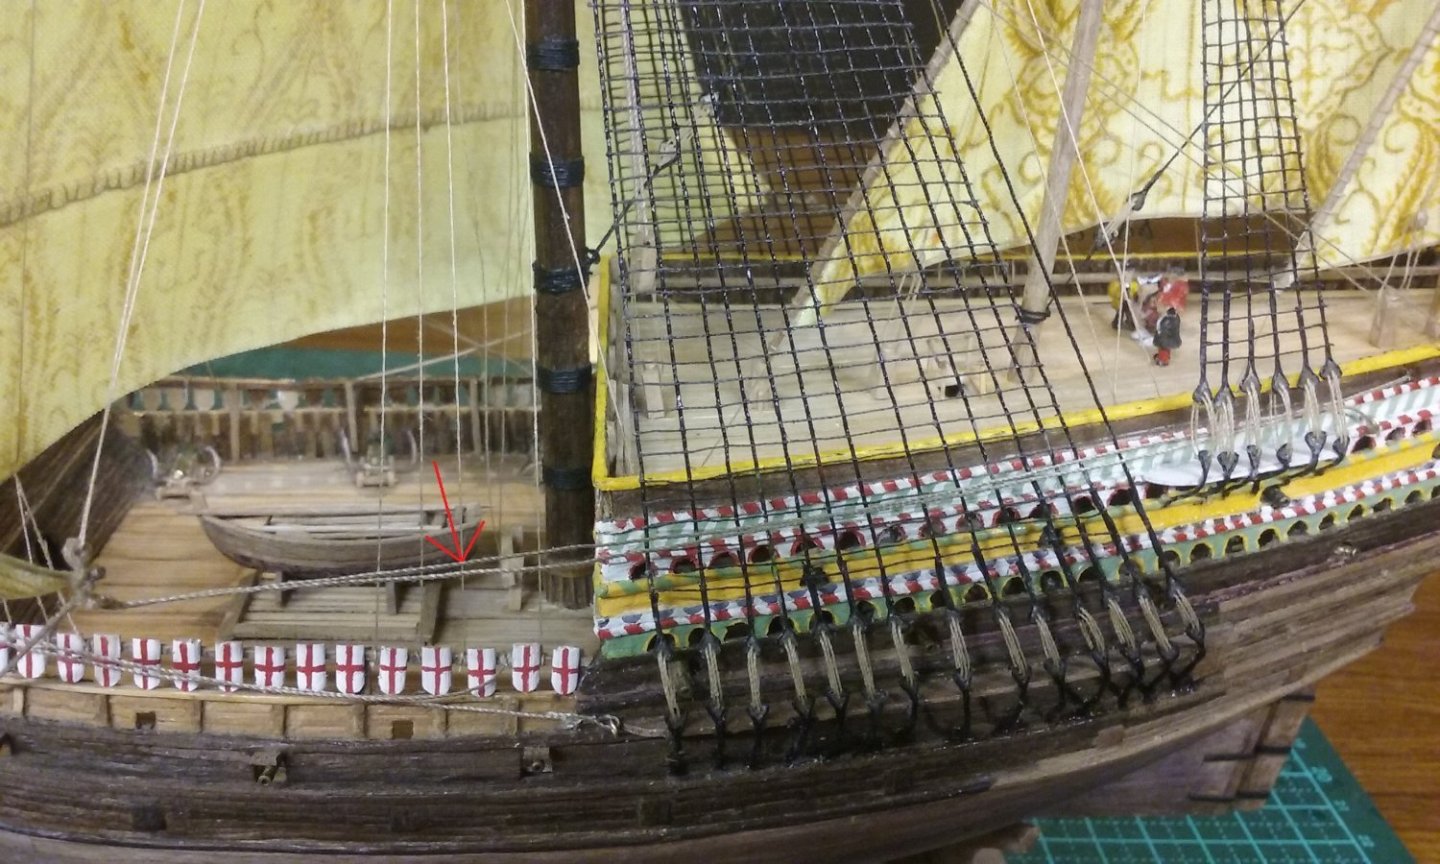
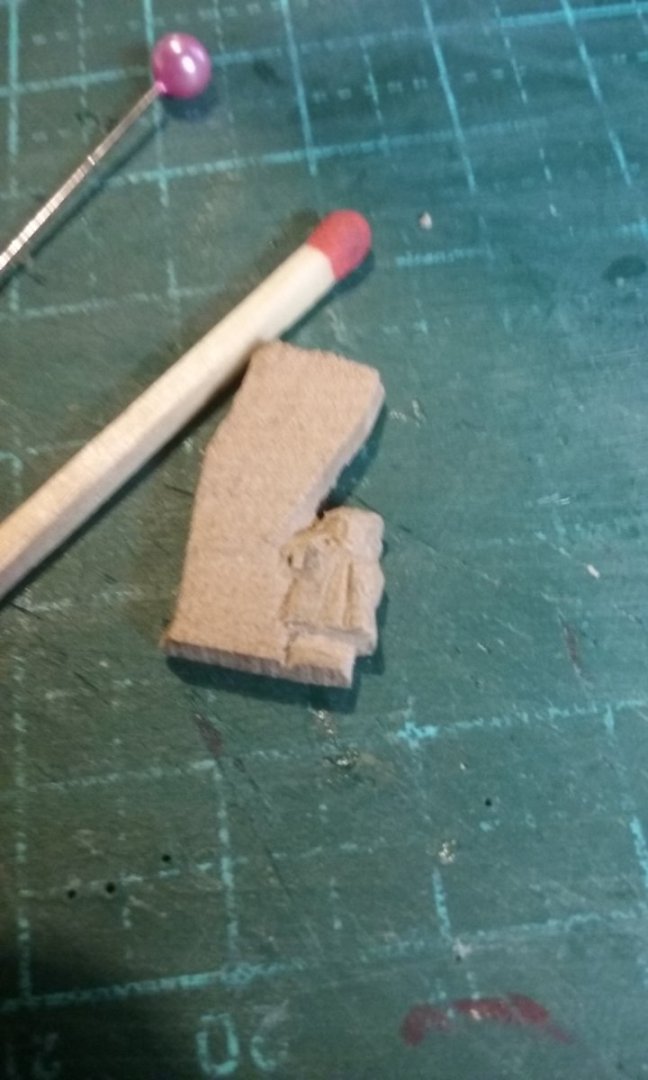
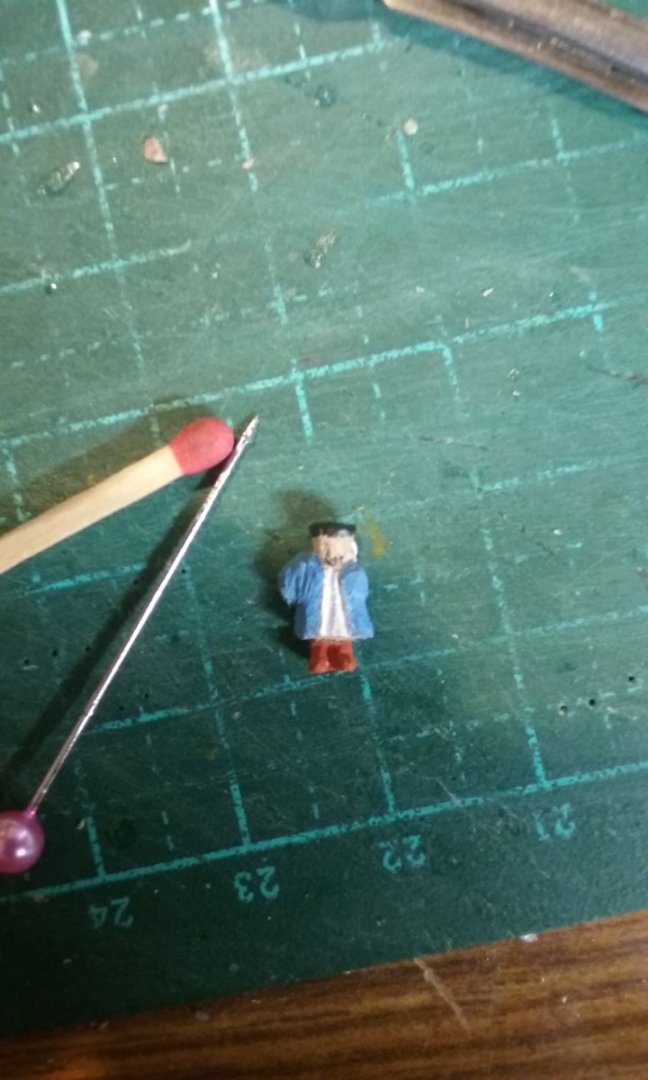
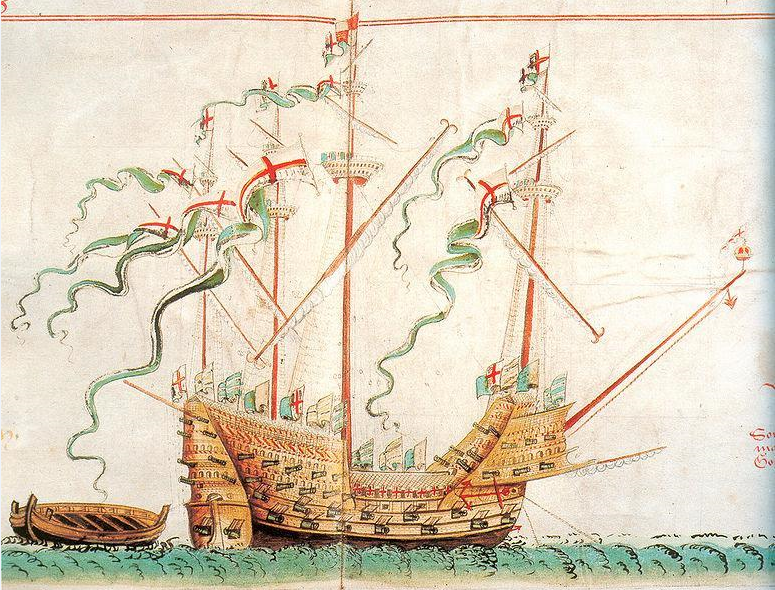
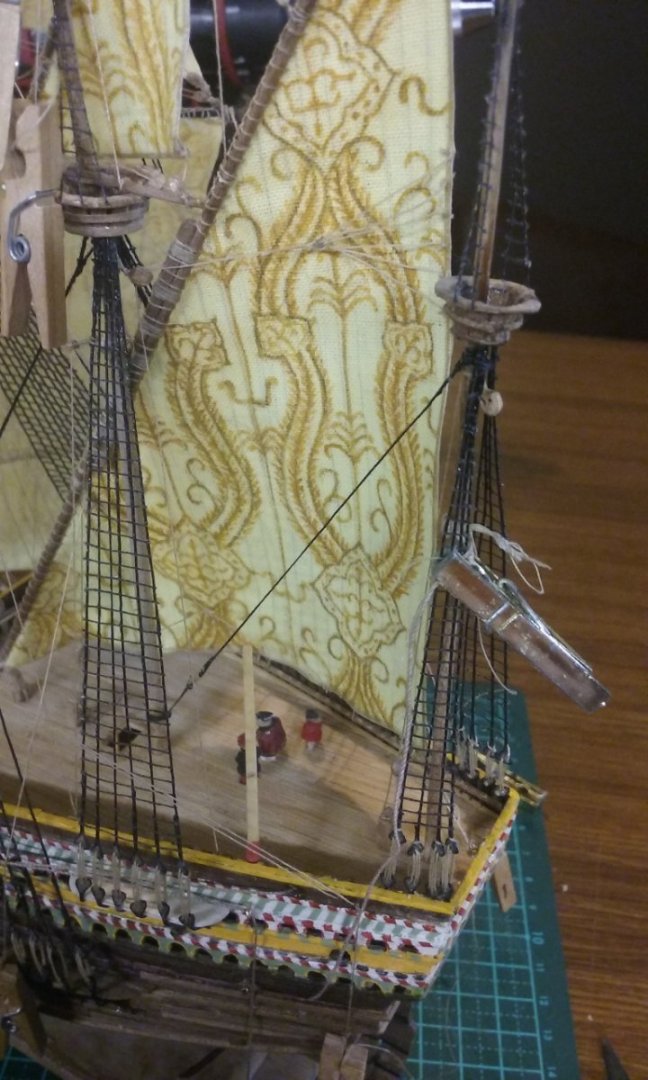
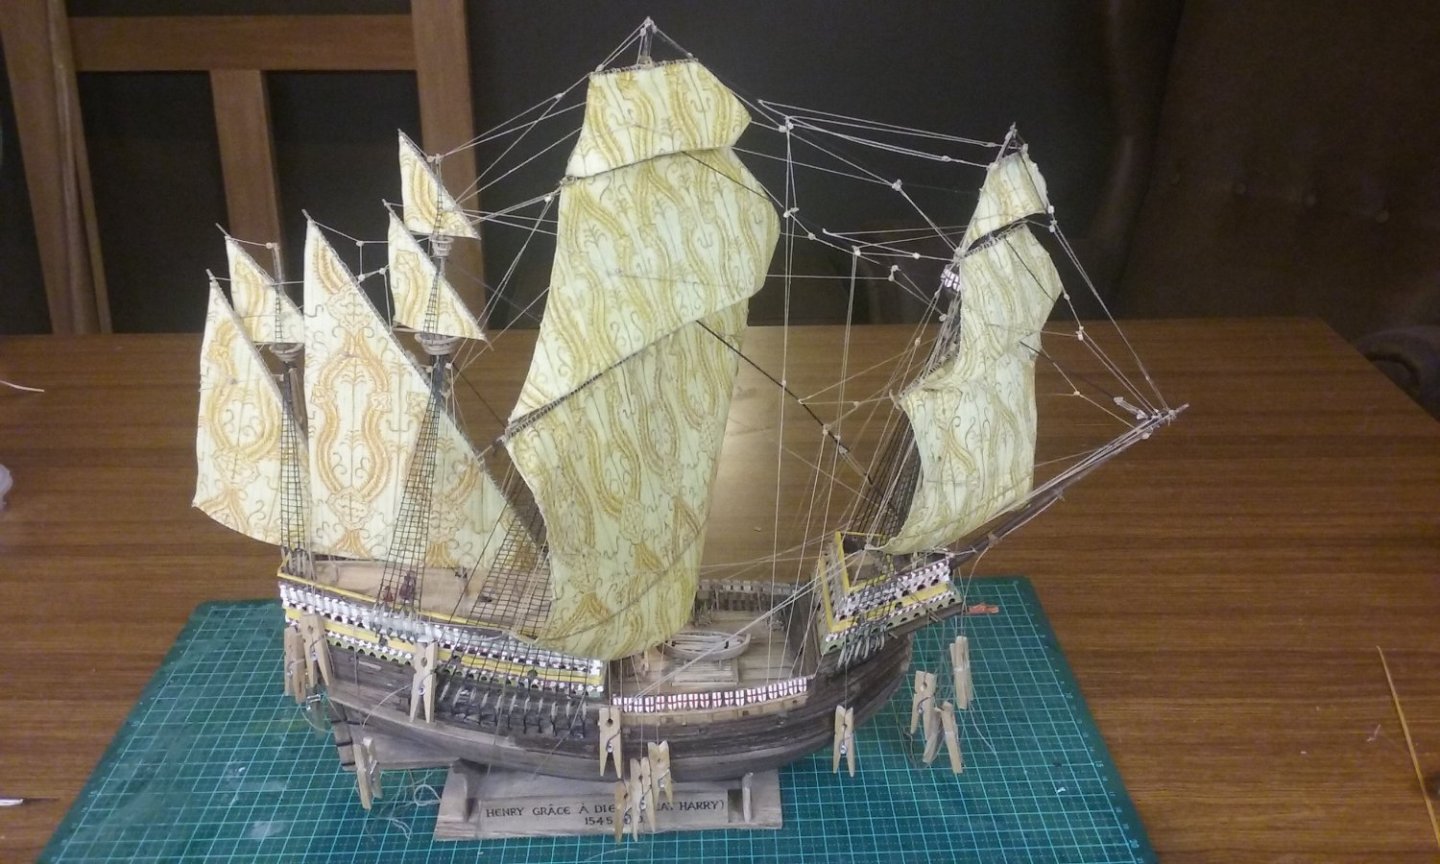
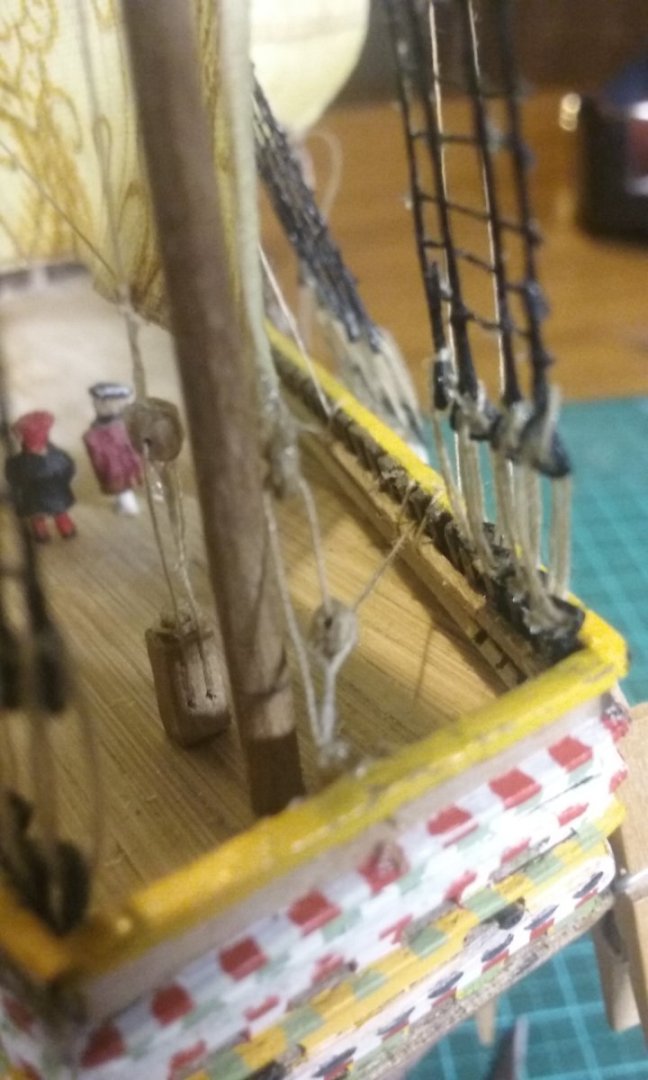
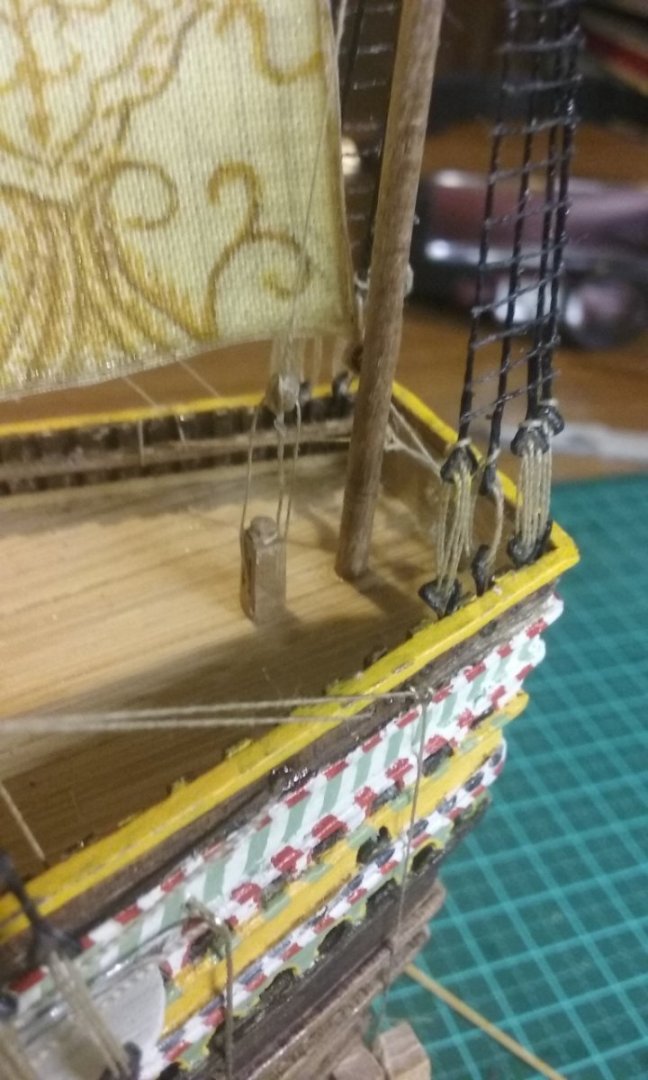
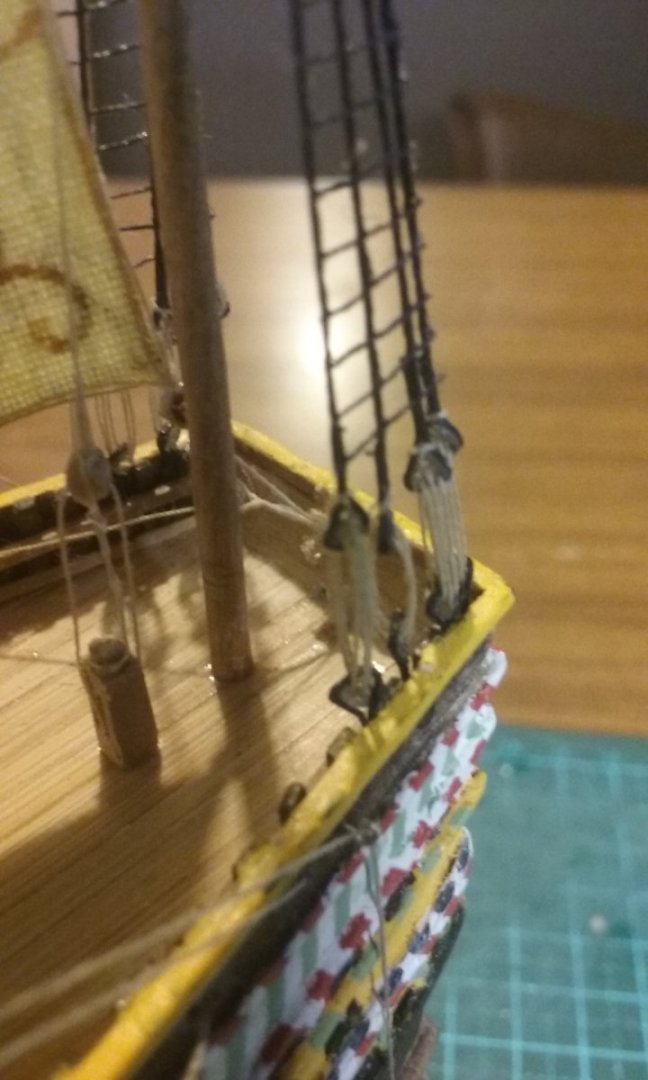
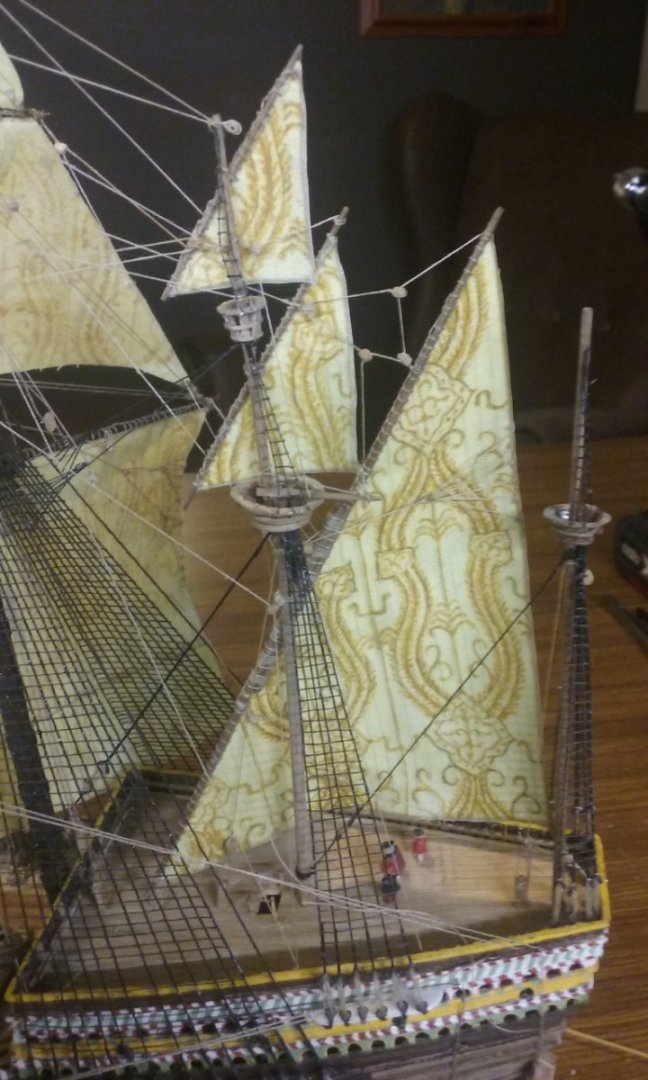
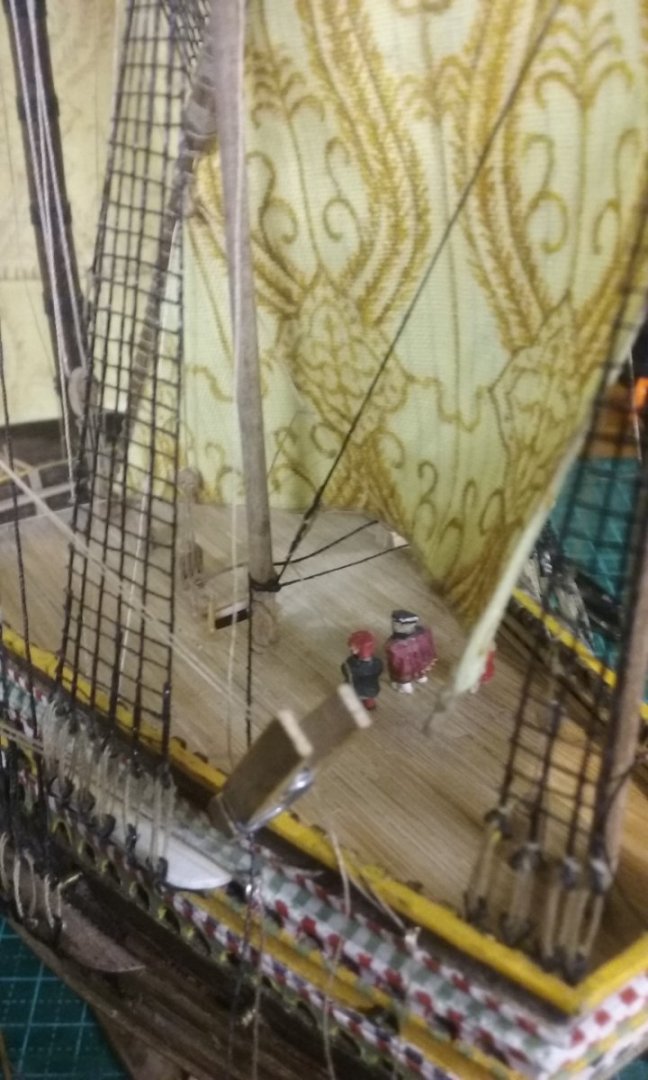
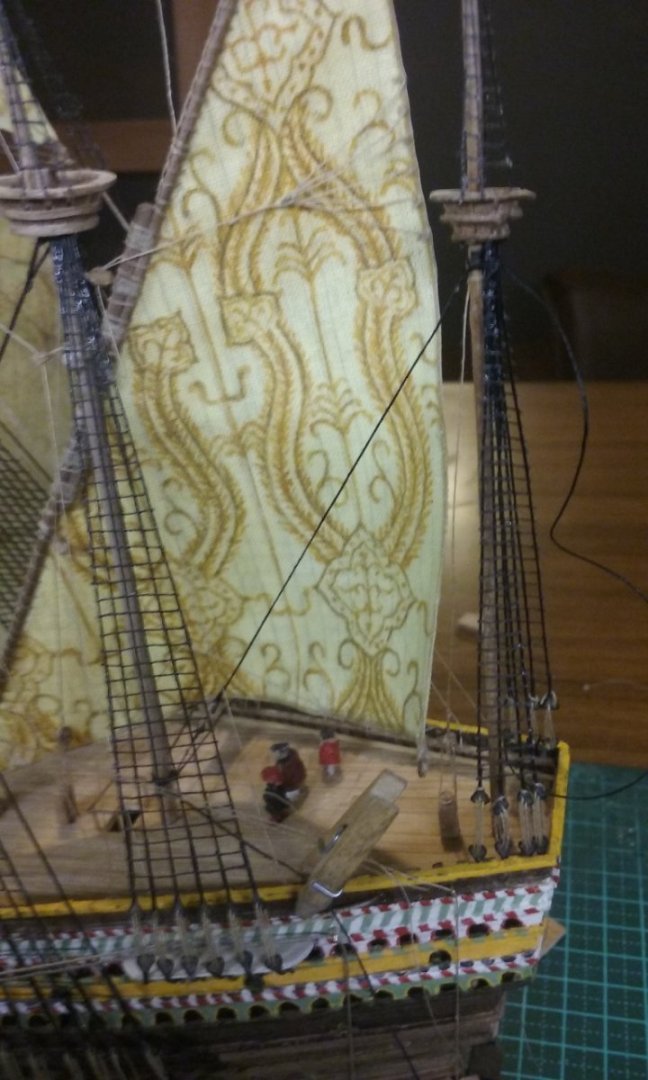
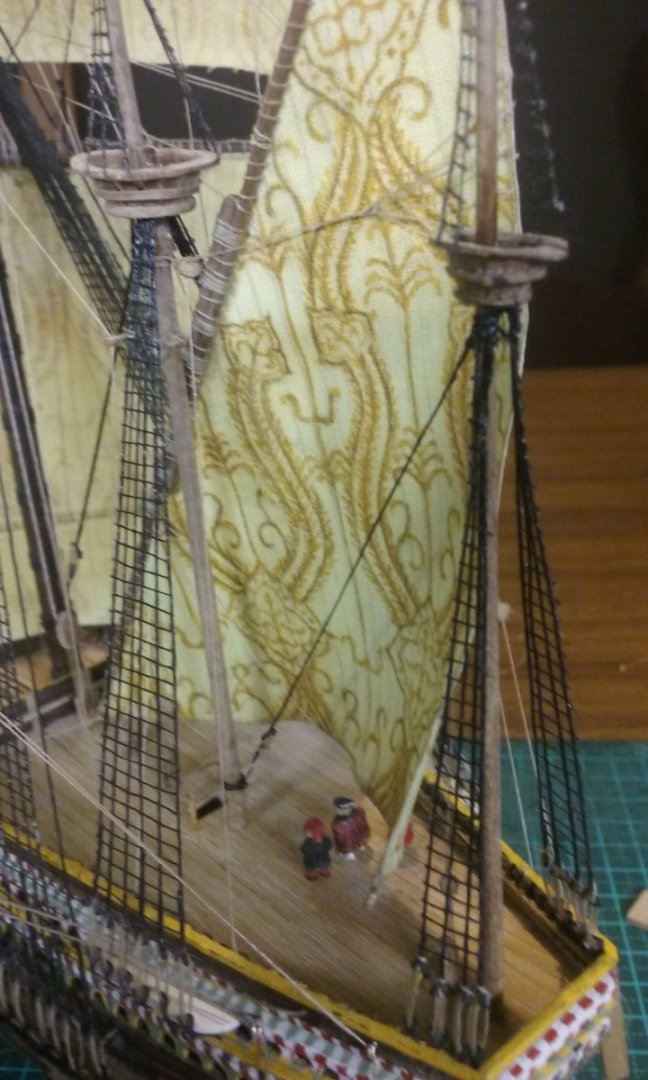
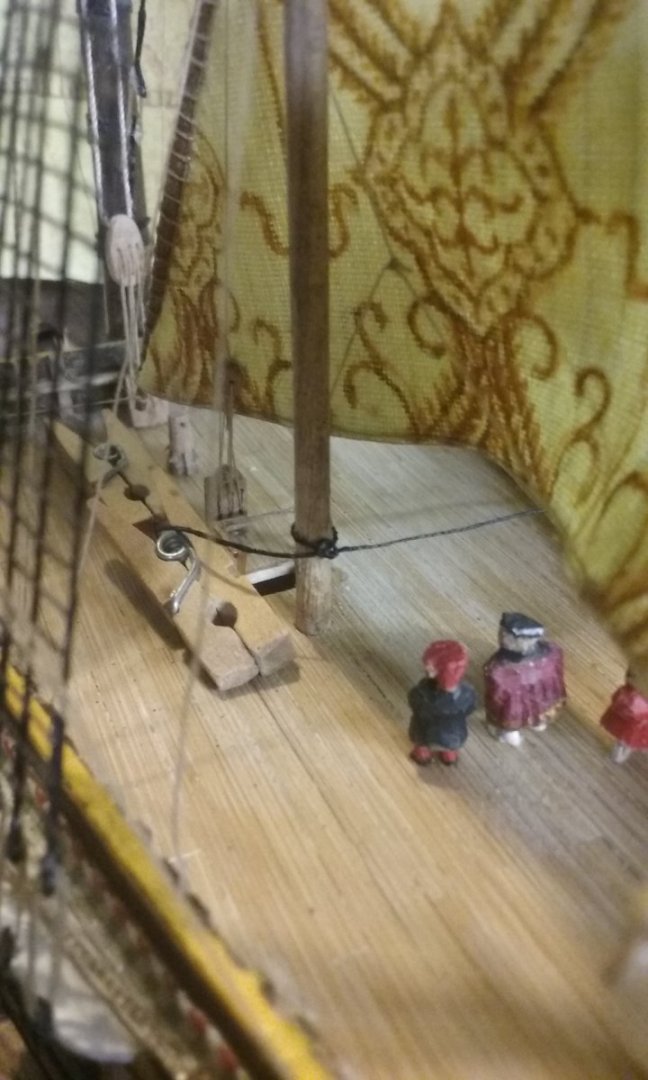
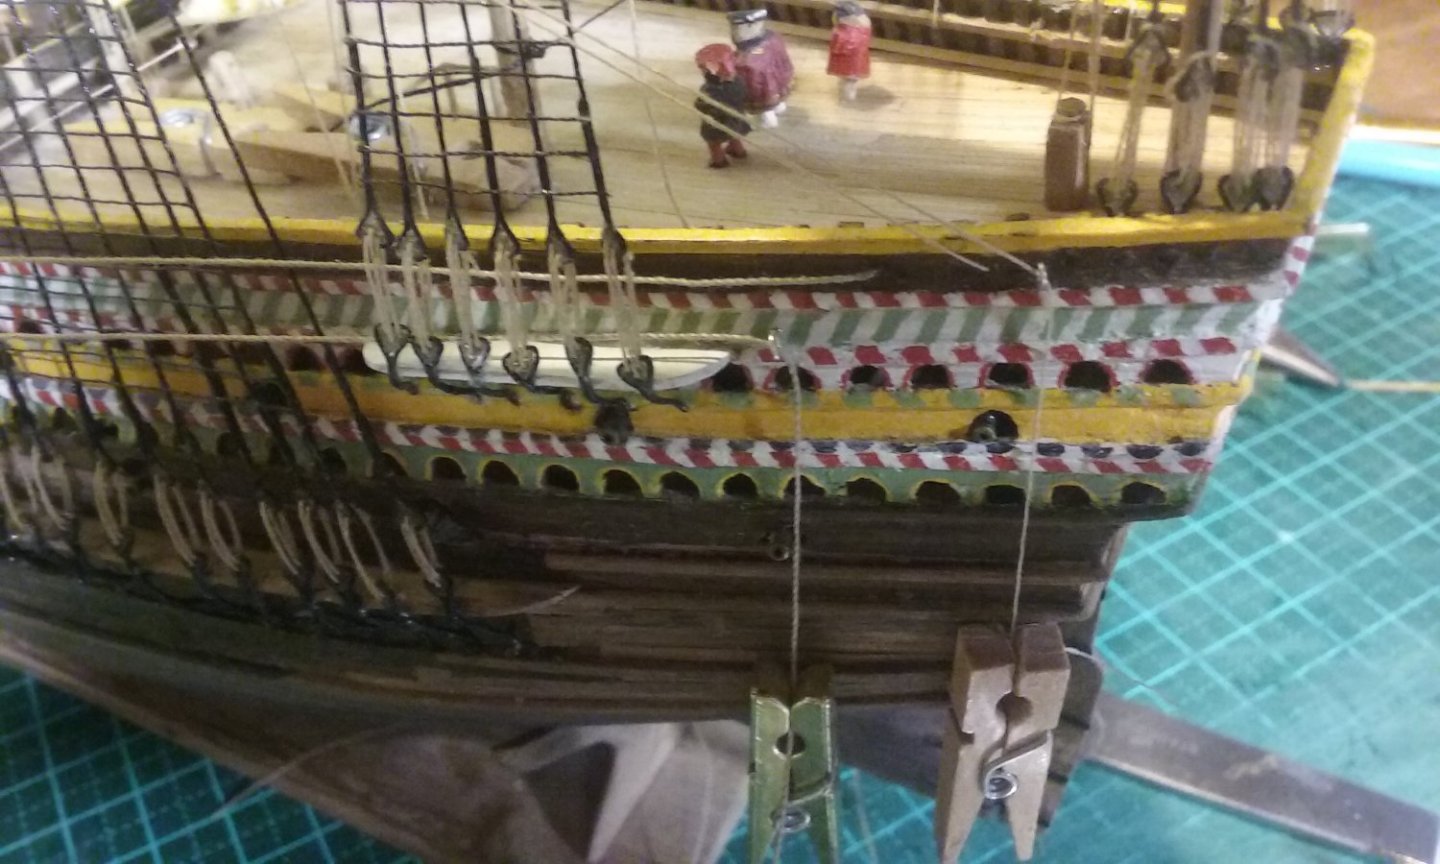
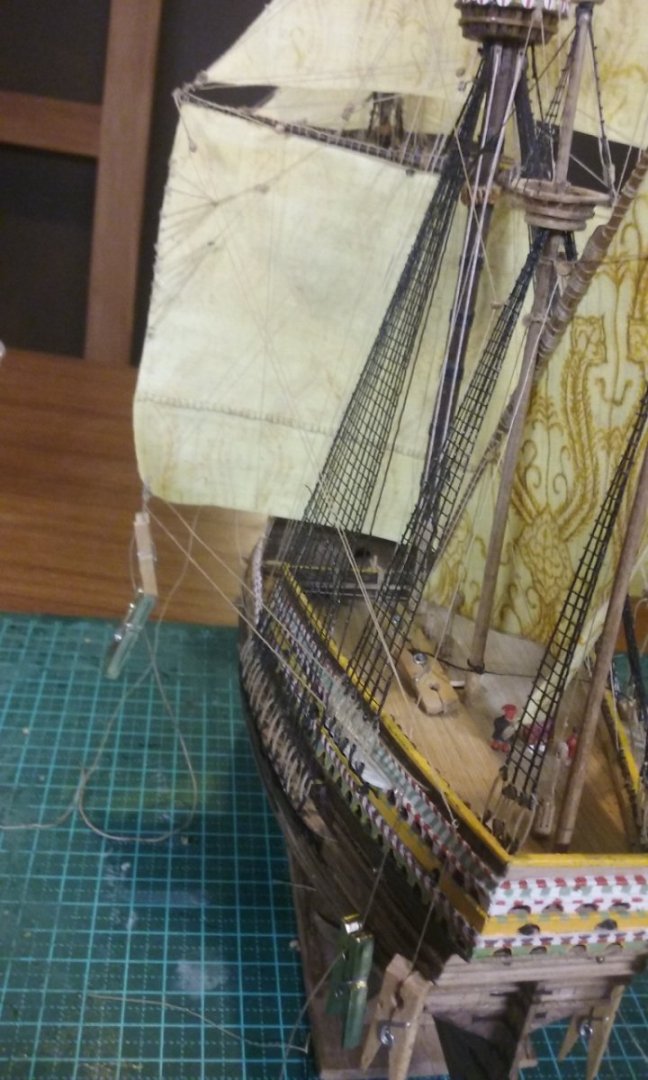
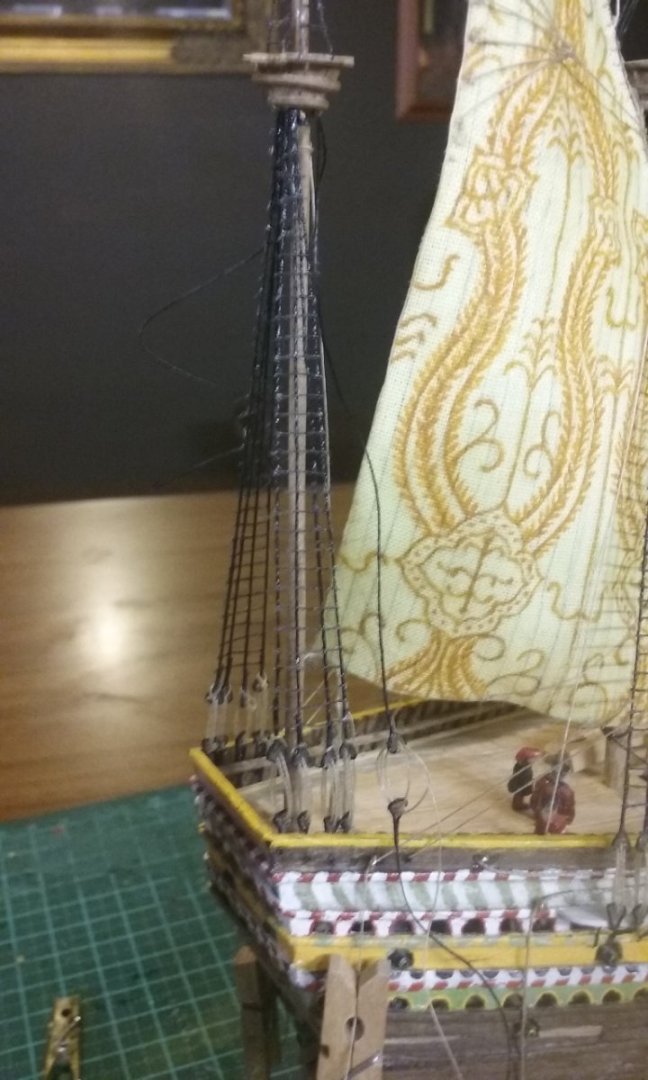
The spritsail - the last sail to be added. The spritsail is supported by a (fake) parrel truck and held in place with a halyard/ties through blocks at the end of the bowsprit and on the yard. The main sheets finally tied off and fixed in place. And the tacks And the foresail sheets And tacks Still working on getting those catenary curves in various ropes (not all that easy). I may have to just accept that some of them won't fall right. Ditto the sails at the clews - the tacks probably affect them differently in the real world, but that's all part of the learning curve, I'm afraid. And here's a new courtier being carved to go with the King (he needs friends around him, right?). Sorry about the definition - it's the best I could get with my phone. And here he is in place, with two others re-positioned (the guy in the yellow who I accidentally knocked off the deck while I was doing the rigging, and the one in red, who had to be moved because the mizzen sheet was running across his nose). And here's a (not terribly good) photo of the ship without most of those pegs hanging off it. Steven


- 740 replies
-
- 12
-
-
-

-
- Tudor
- restoration
- (and 4 more)
-
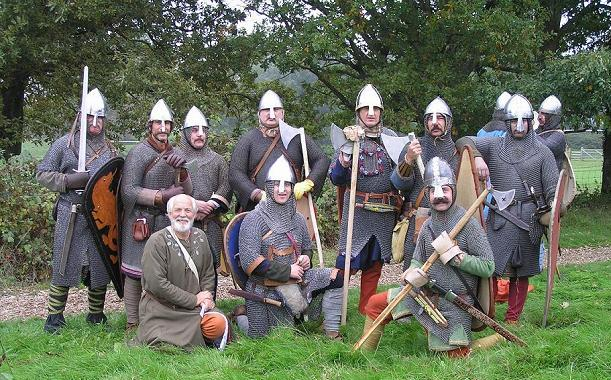
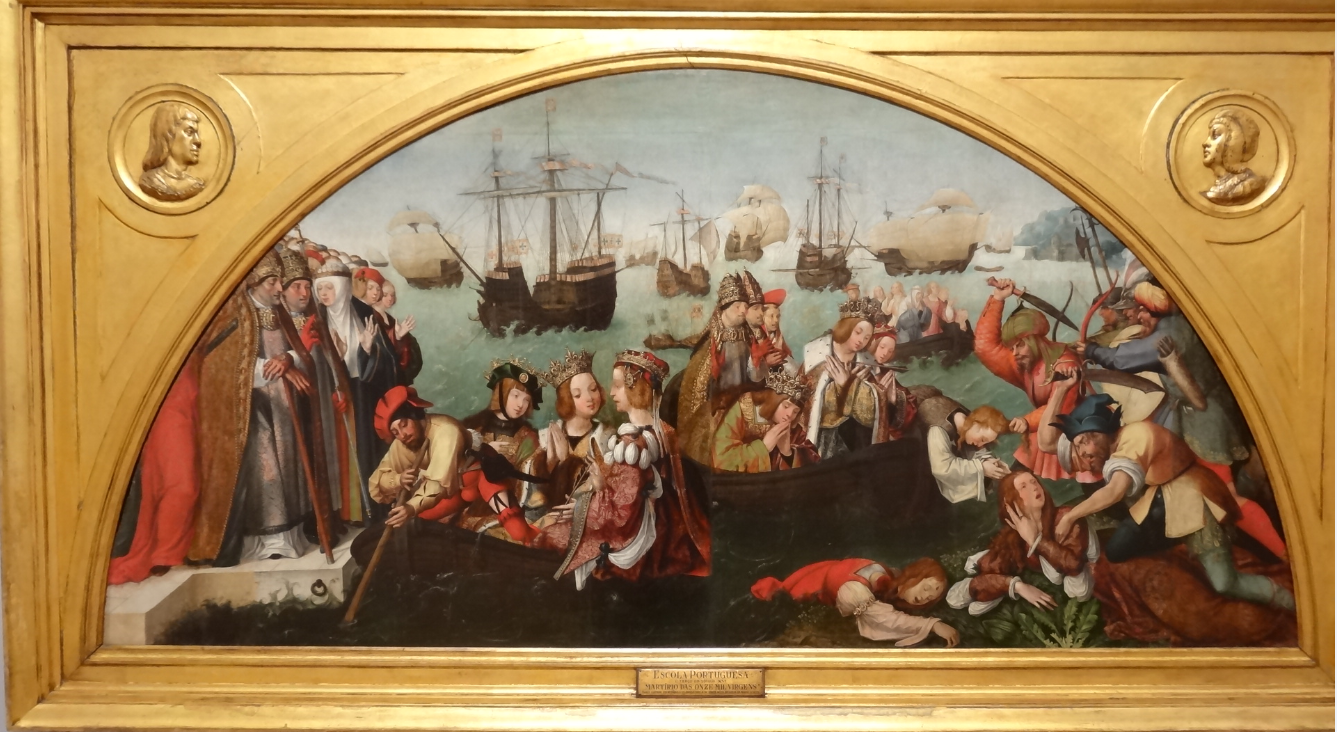
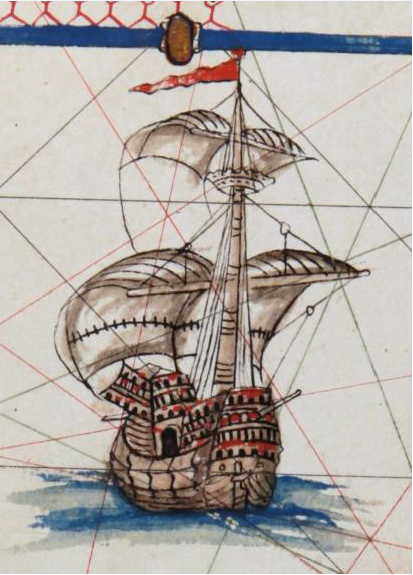
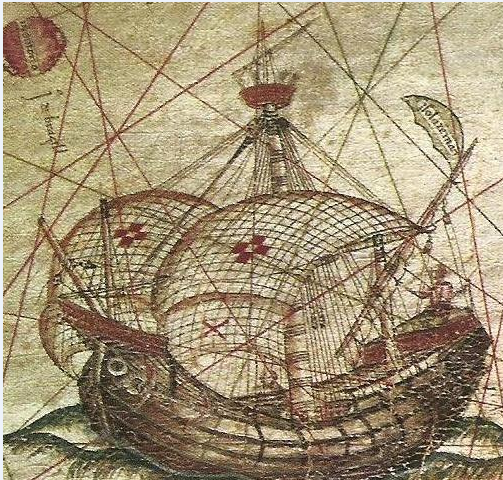
Ahoy Johnny! I hadn't realised you were a re-enactor. Me too, but mostly mediaeval - in particular 11th century Anglo-Saxon (my big triumph was getting to play King Harold's brother Leofwine and "lead" the English right wing at the Battle of Hastings re-enactment on the actual battlefield in 2006. Not re-enacting any more, but my wife and I toyed with doing Henrician (i.e. Henry VIII 1545 - same year as the Mary Rose went down, so a lot of artefacts available to reconstruct), got as far as a shirt and doublet for me (and underdaks) then changed our minds. Me with my hearth troop, Senlac Hill, 2006. I'm the tall one, standing third from the right, with red hose and a big axe. Regarding colours, the paintwork on the Anthony Roll picture is a bit hard to make out, but is either (as you propose) alternating red, yellow and white diagonal stripes or perhaps just red and yellow. And as you're doing pre-1536, the earlier you go, apparently the less paintwork, though it does depend on where - Bruegel's ships are completely without painted decoration, as is the "marriage" ship and the ones on the St Auta altarpiece of 1520 but others such as this one from a Portolan of 1521 by Iacopo Russo seem to show paintwork on the upper works. Regarding shield decoration, the Anthony Roll shows alternating "St George" (red cross on a white background) shields and pale blue shields with possibly a white band at the top. The definition is very bad, but the Embarkation at Dover painting (thought to have been painted around 1545, well after the event), http://gallery.nen.gov.uk/imagelarge69119-.html shows three shields any of which which might be what is portrayed in the Anthony Roll. They are all per pale (divided in half vertically) blue and white - one with a gold fleur de lis, one with a red Tudor Rose and one with a portcullis (which I think denotes London). It's a very interesting model. I'll look forward to seeing what you do with it. Steven
-
Pulling up a chair and putting the popcorn on the cooktop! It'll be interesting to watch this one - the assumptions Sergal made vs those of Landström in reconstructing the Great Harry, vs what is now known from the excavation of the Mary Rose. Are you planning to follow the Anthony Roll's colour scheme? If I had a time machine I'd go back and fix the colours on my own Great Harry. But everybody back then seems to have gone with Elizabethan colour schemes which though really cool, are maybe 30-40 years wrong. Steven
-
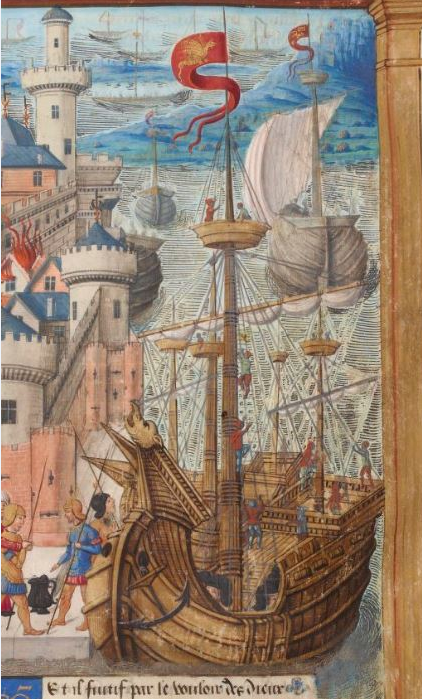
Oops. I didn't realise I'd left the word "unfortunately" in there when I did a previous edit. It's removed now. Yes, that's my opinion too. I believe the triangular forecastle developed as carracks grew bigger. All that weight cantilevered over the bow wouldn't have been good - for stability and for structural integrity - so they turned the rectangle into a triangle. The picture you posted above says 30+ metres (= approx 100 feet). Can you let me know know where the 200 feet figure for overall length comes from? I doubt very much that the mast was twice as high as the length of the ship, particularly in the days of no topmasts. I'm still of the opinion that the guy just meant "very high". He's unlikely to have measured it. And I think the same applies to the height of the forecastle - reconstructions that try to fit such a high forecastle onto a ship the size of the Grace Dieu just look weird and (more to the point, considering we're talking about carracks which do look weird to the modern eye) out of proportion for a carrack - though I suppose it's possible that maybe she was experimental, and she really did have an oversize forecastle to be higher than the Genoese carracks, I just think the guy didn't expect his figures to be taken too seriously. Exaggeration for effect was pretty common at the time - numbers of people in a battle, sizes of things, you name it. Unfortunately I can't find the original eyewitness report about her size. It would help to have that quote and see what he actually said. [Edit - his name was Albizzi, and he was a "Florentine captain of galleys".] Steven
- 740 replies
-
- 3
-
-
- Tudor
- restoration
- (and 4 more)
-
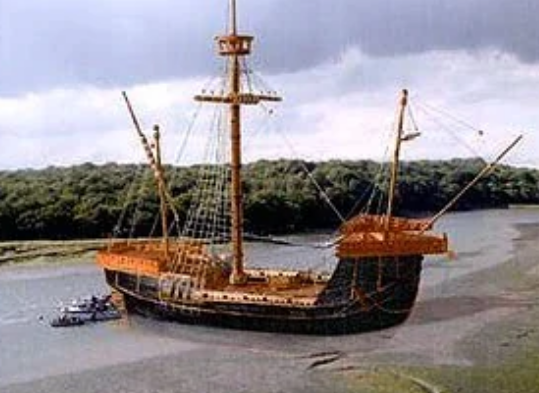
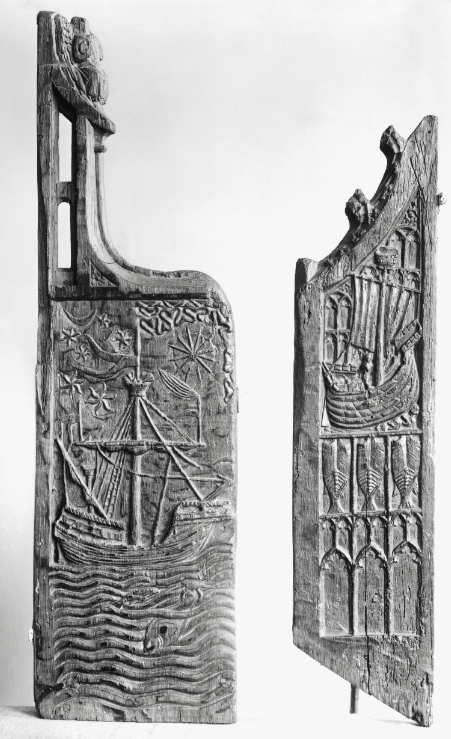
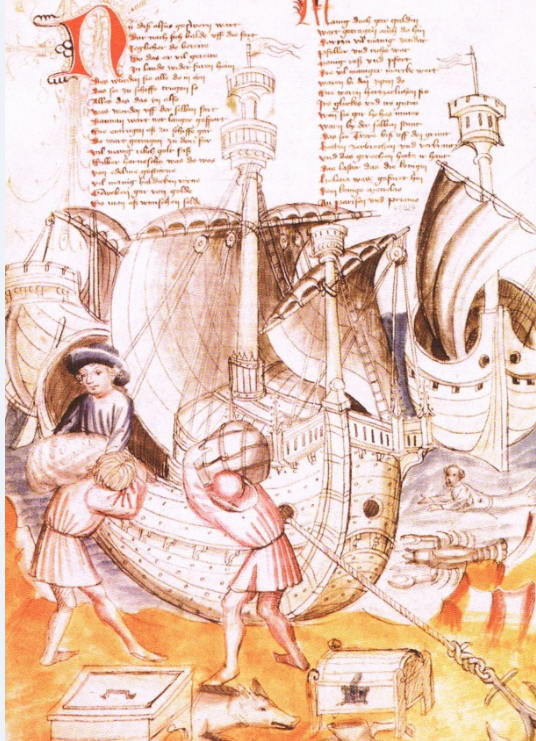
Me too. I've seen the Time Team episode, and somewhere on the internet there is a 3D diagram of her lines (those that survive) - I just tried to find it again, without success, but ther's something on her, anyway - https://www.academia.edu/3113962/HIGH_RESOLUTION_ACOUSTIC_IMAGERY_FROM_A_SHALLOW_ARCHAEOLOGICAL_SITE_THE_GRACE_DIEU_A_CASE_STUDY . There's a fascinating blog about the River Hamble wrecks at https://ianfrielhistorian.wordpress.com/tag/grace-dieu/ - well worth a read! Oh, and he's published a book about Henry V's navy - see https://www.amazon.com.au/Henry-Vs-Navy-Agincourt-1413-1422-ebook/dp/B01491XDEU. There is a contemporary account by a Venetian(?) mariner who visited her when she was new. He claimed the mast was 200 feet tall. I don't believe him - more likely that's shorthand for "Very tall", and I think they get the height of the forecastle (which I also find hard to believe) from the same source. But if you like early carracks, you'll probably like this one. It's from a pair of pew -ends from St Nicholas' church in Kings Lynn, England (now in the Victoria and Albert Museum, London). It dates to 1419, contemporary with Grace Dieu. Note the rectangular forecastle! Steven
- 740 replies
-
- 4
-
-
- Tudor
- restoration
- (and 4 more)
-
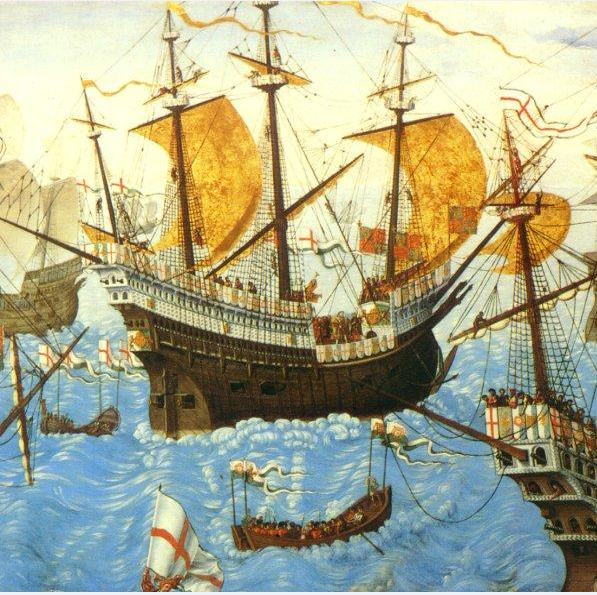
Oh, yes. I'm very familiar with that one - just never heard it called by that name. Yes, it's wonderful - and it's been pointed out that all the 'round ships' in the pic are smaller versions of the main one. I keep going back to it for information because it's so full of detail and interest. I had at one time thought of building a model of her, but there's too many other ships I also want to build. Yes, Henry V's "super-ship". Some of her still exists below the mud in the river Hamble, along with another they think is the Holigost. Steven
- 740 replies
-
- 6
-
-
- Tudor
- restoration
- (and 4 more)
-
Thanks everyone for the likes and comments. Druxey, thanks. I've also changed the colour of his jacket, as they were all looking a bit same-ish. Ferrus Manus - exactly. The outrigger is made, but won't be put in place until right near the end -too much chance of breaking it. Steven
- 740 replies
-
- 8
-
-
- Tudor
- restoration
- (and 4 more)
-
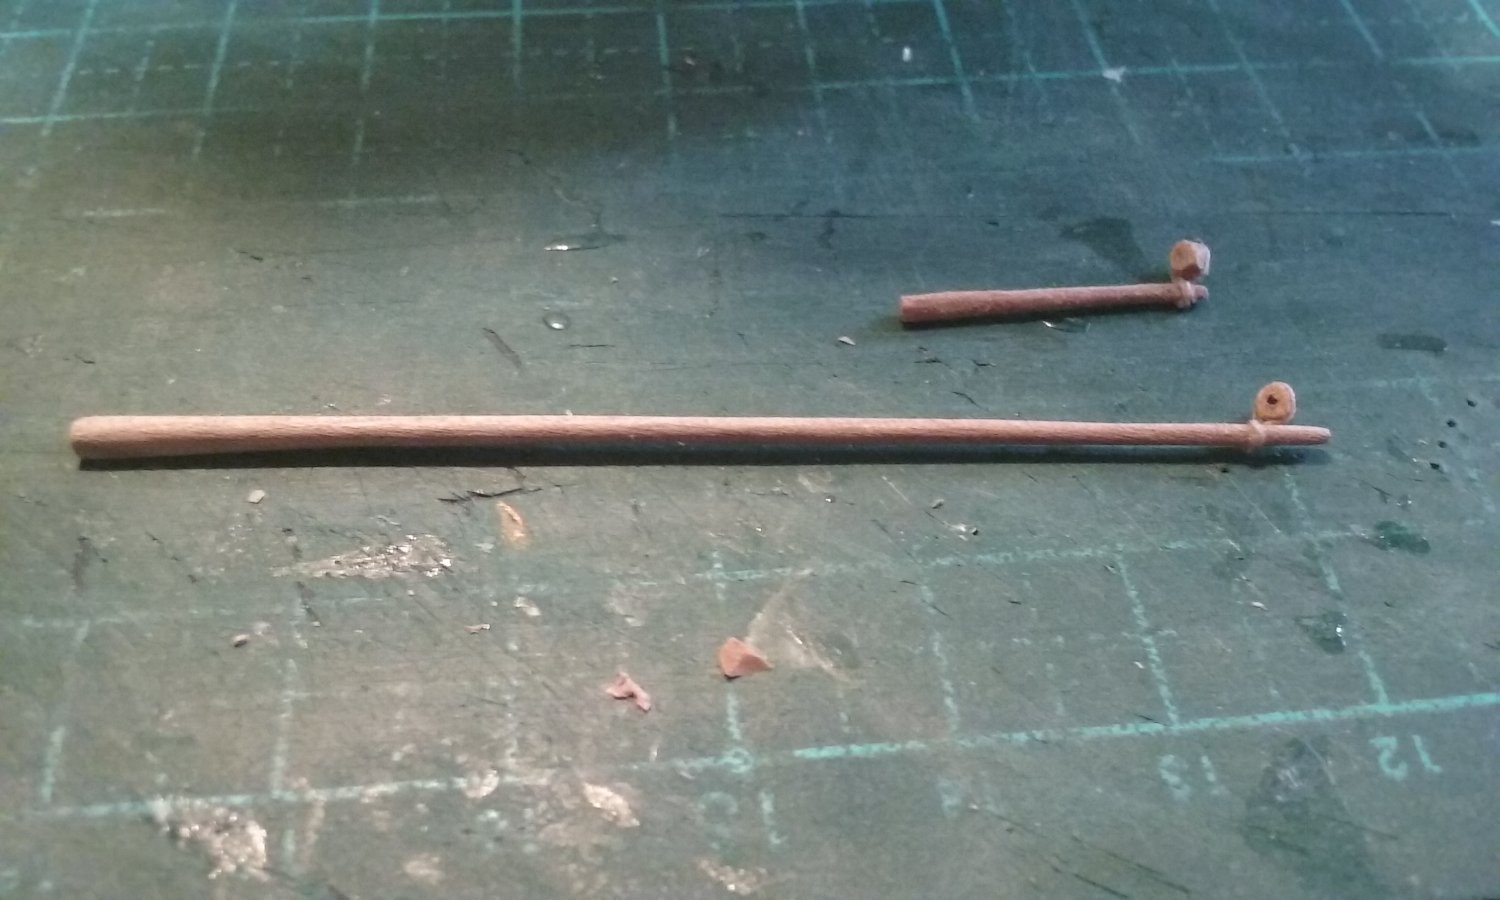
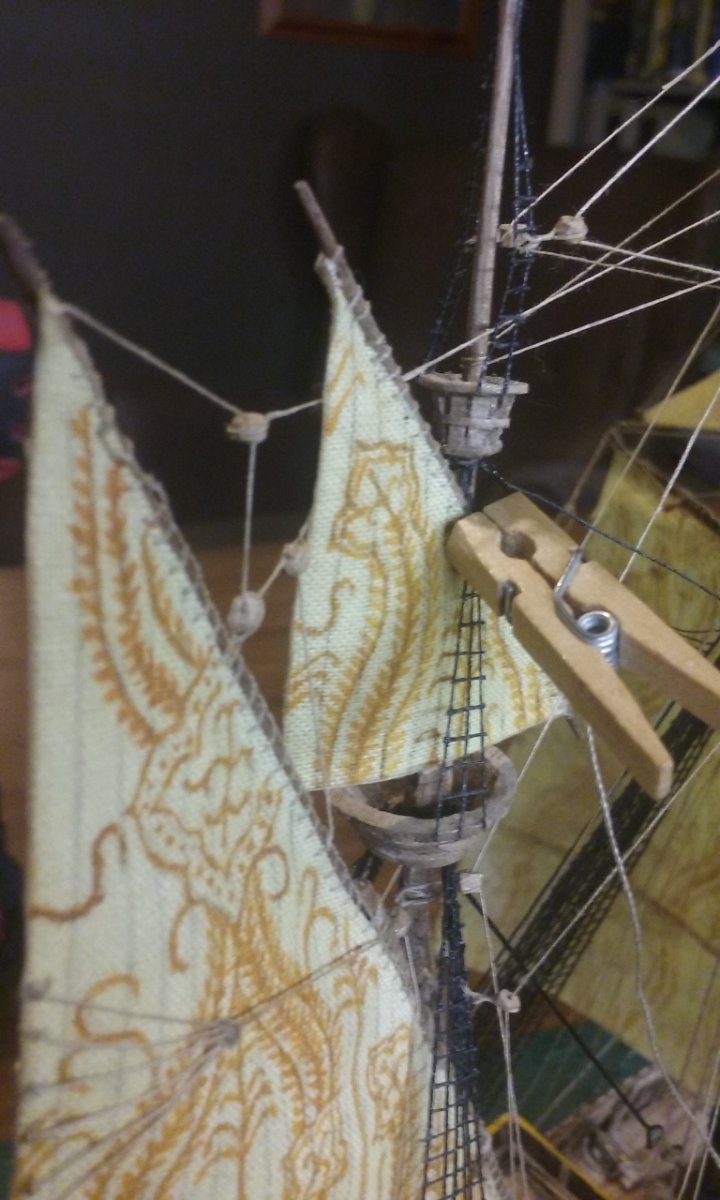
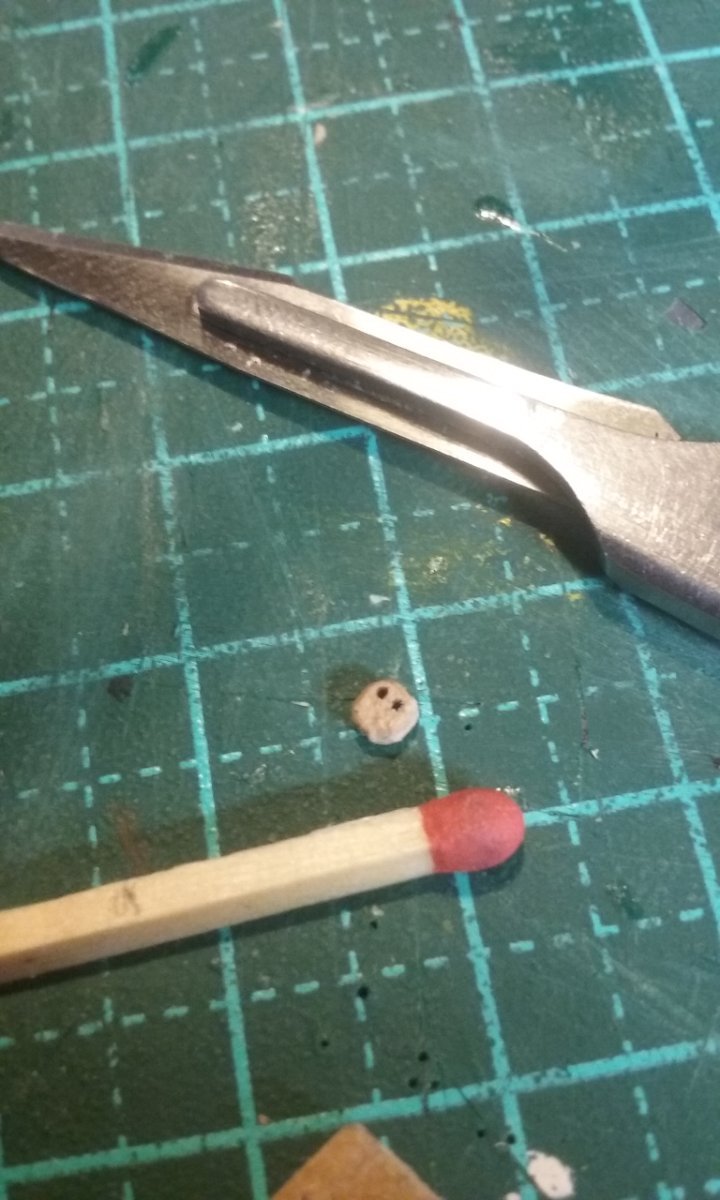
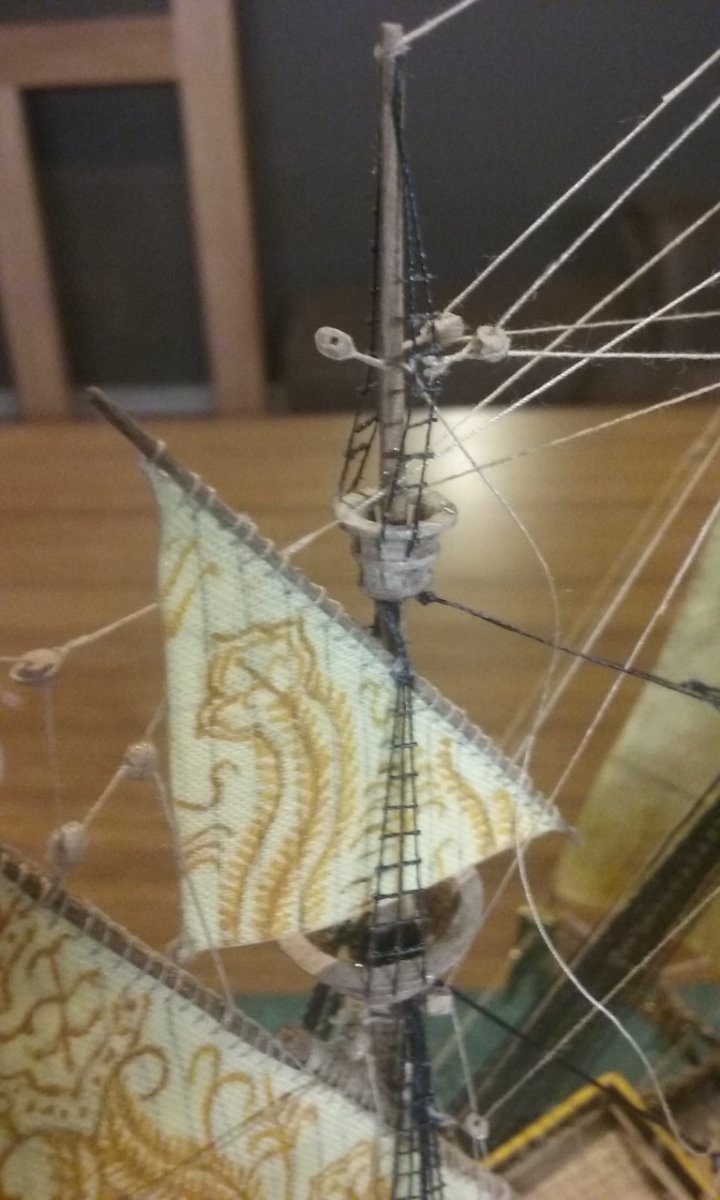
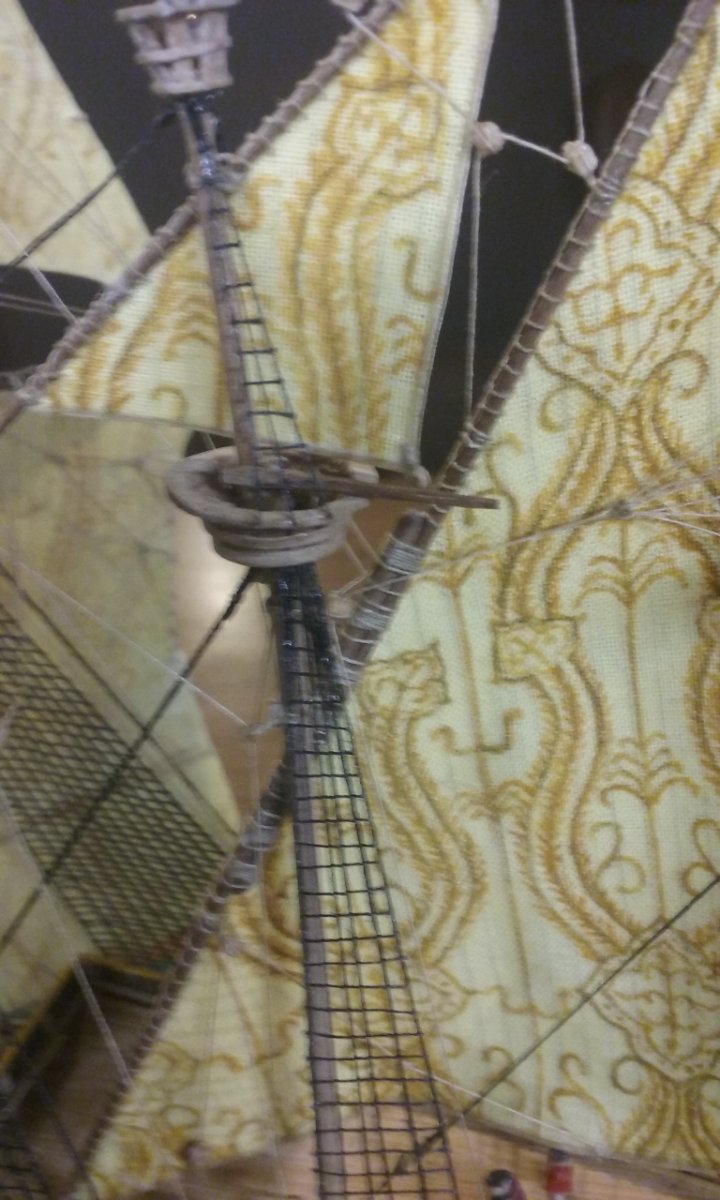
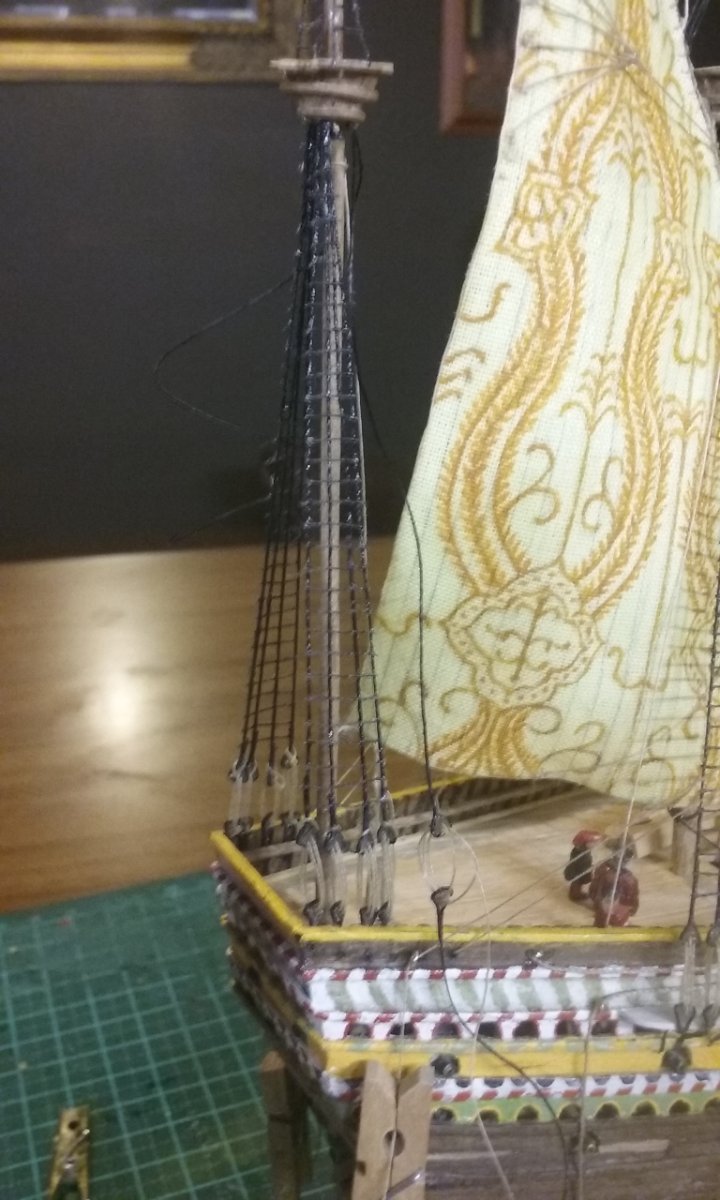
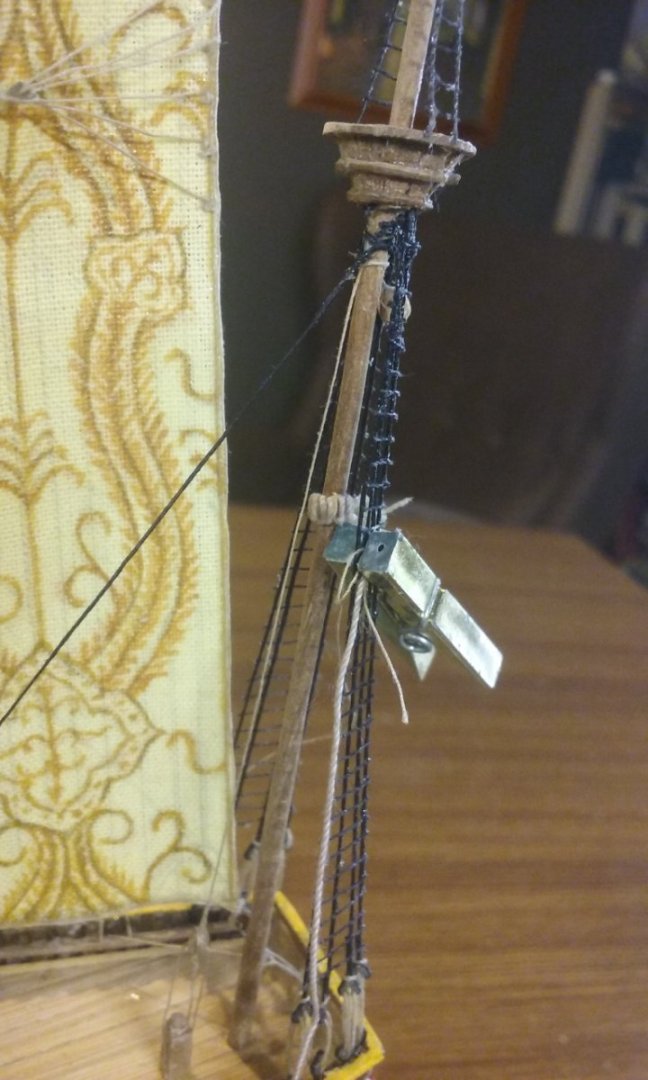
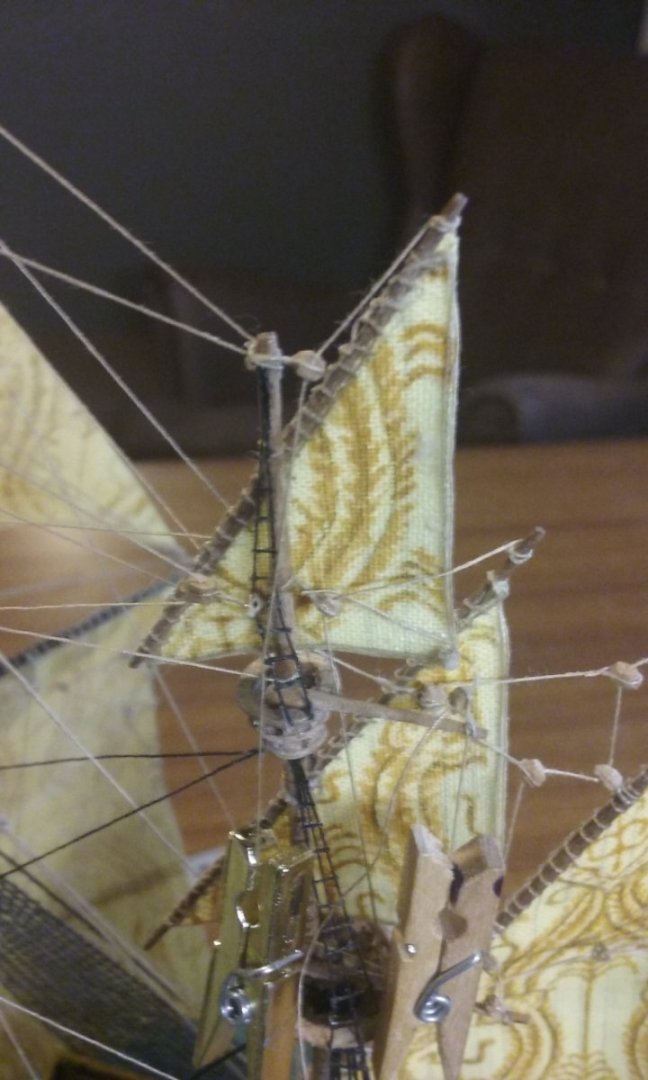
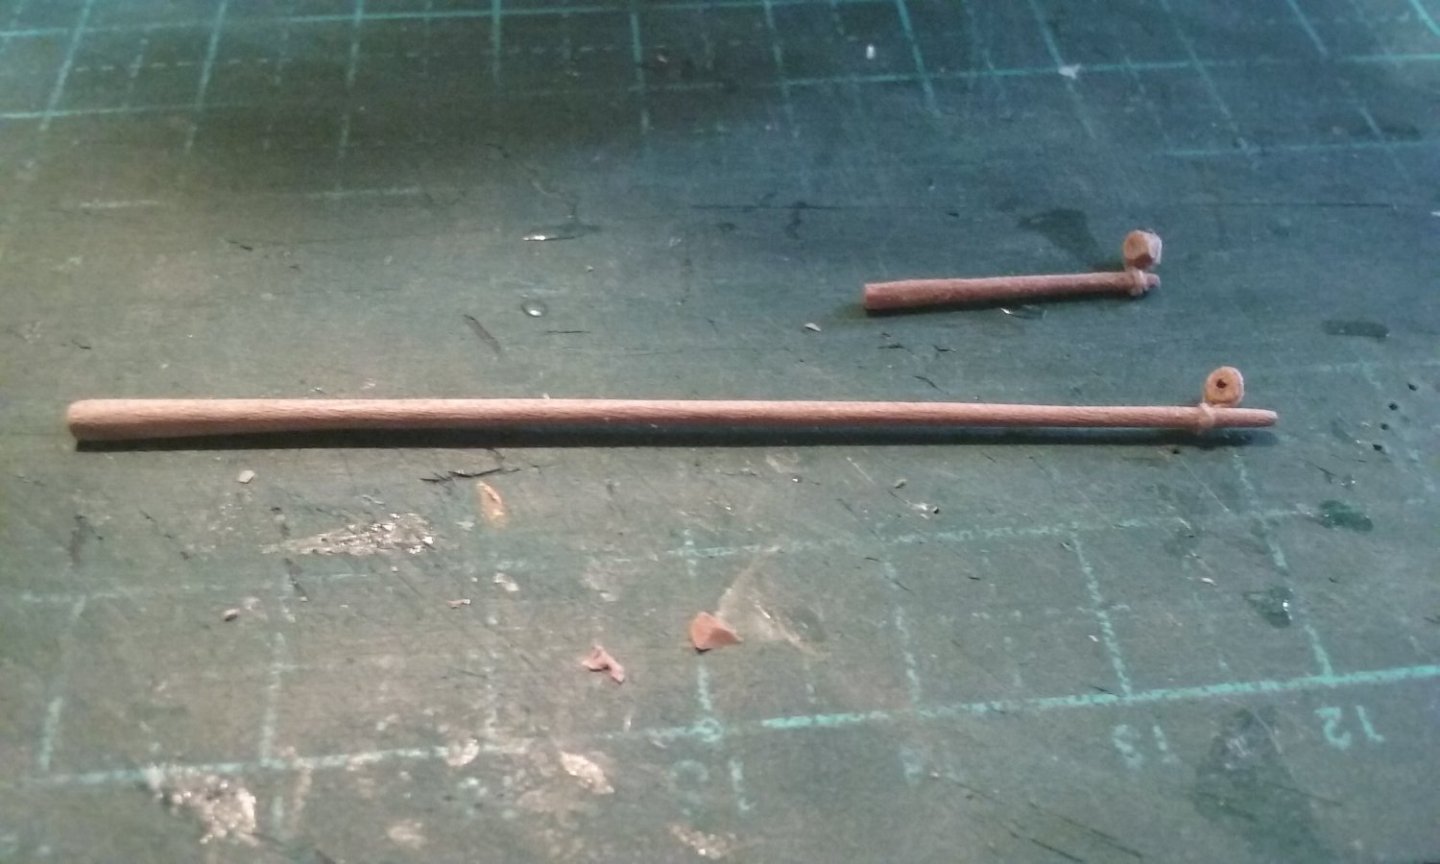
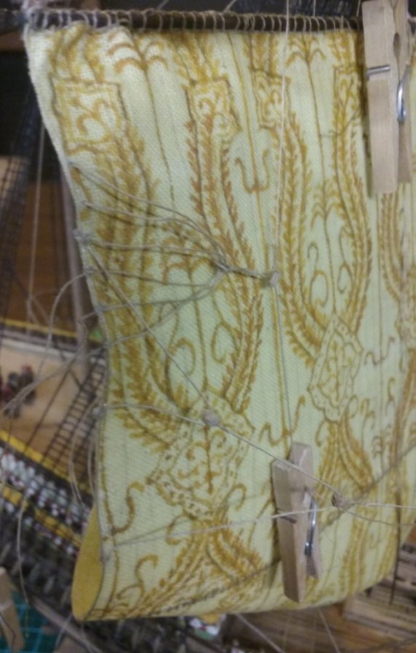
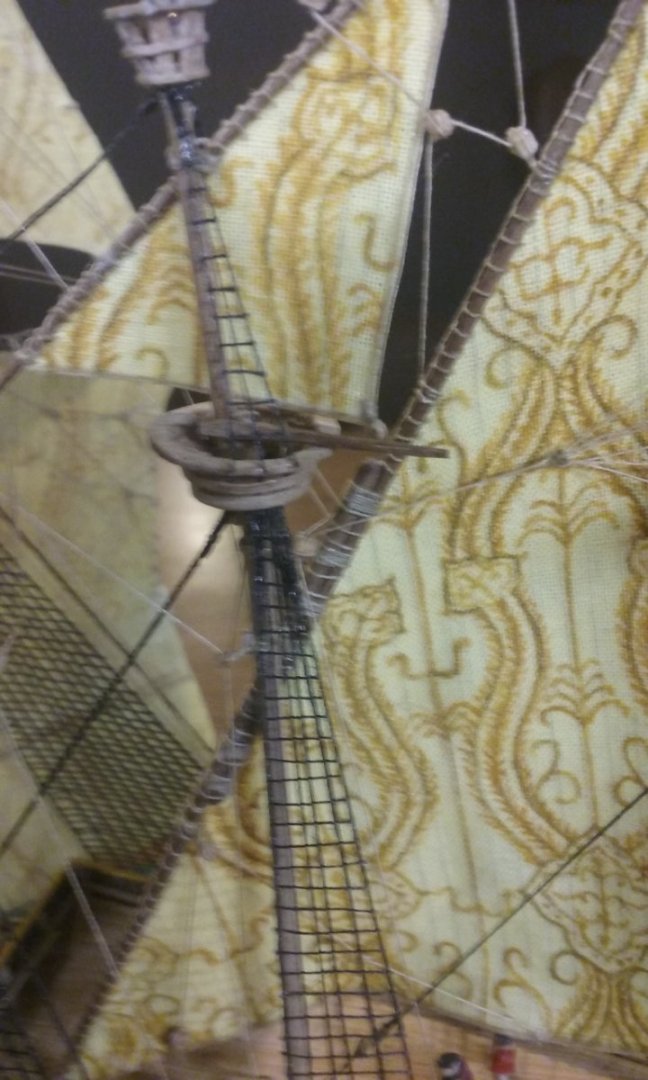
Johnny, I think the pre 1536 GH (my abbreviation) would have been rigged as you suggest, and perhaps the post-1536 would have been similarly rigged, though it's possible she had topgallants as shown on the Anthony Roll. You're probably right about the forecastle and aftercastle being reduced in height in the rebuild. Yes, I've read that GH was built as a reply to the Great Michael (which never really got used, and ended up getting sold to France IIRC. I've read that GH was 1500 tons burthen, (while the Mary Rose was 1000) but I don't know what date that relates to. I certainly don't think she'd have had lateen topsails or topgallants in everyday use (though the Embarkation shows topsails on both mizzen and bonaventure, it also shows them as square rigged!) I've been told that the Embarkation was probably painted about 1545, despite showing an event of 1520. Can you refer me to the painting of the marriage party of 1521? I don't know this one. I've taken most of my interpretation from Landström's reconstruction, which based on both the Embarkation and the Anthony Roll depiction, also of 1545. I included the cloth-of-gold sails because - well, they're way cool. Now, here are the latest additions. Parrel truck for the bonaventure lateen "course" Mizzen topgallant with sheet, lift etc. "Outriggers" for the bonaventure lateen sail and topsail. More work on the bonaventure parrel truck. A bit fiddly, but I got there eventually. Note also the matchstick being used to form the "belly" of the mizzen lateen - I'd had the buntlines too tight and the sail got a kink at the lower edge. So I dampened it and gradually smoothed out the curve. You might also notice that Henry now only has two courtiers with him - one of them got dislocated while I was trying to install some of the rigging. I've left him off until there's no more rigging to be done and then I'll put him back in place. Same thing happened to one of the grapnels at the ends of the mainyard. It'll go back when the model is complete enough so I don;t accidentally break it off again. The mizzen topgallant in place and rigged. And the match further along, forming the belly at the foot of the lateen. And jumping ahead, here's the ship with all the lateen sails on it and rigged. Only the spritsail to go! Steven

- 740 replies
-
- 16
-
-
-
- Tudor
- restoration
- (and 4 more)
-
Wonderful work, amazingly detailed! Steven
-
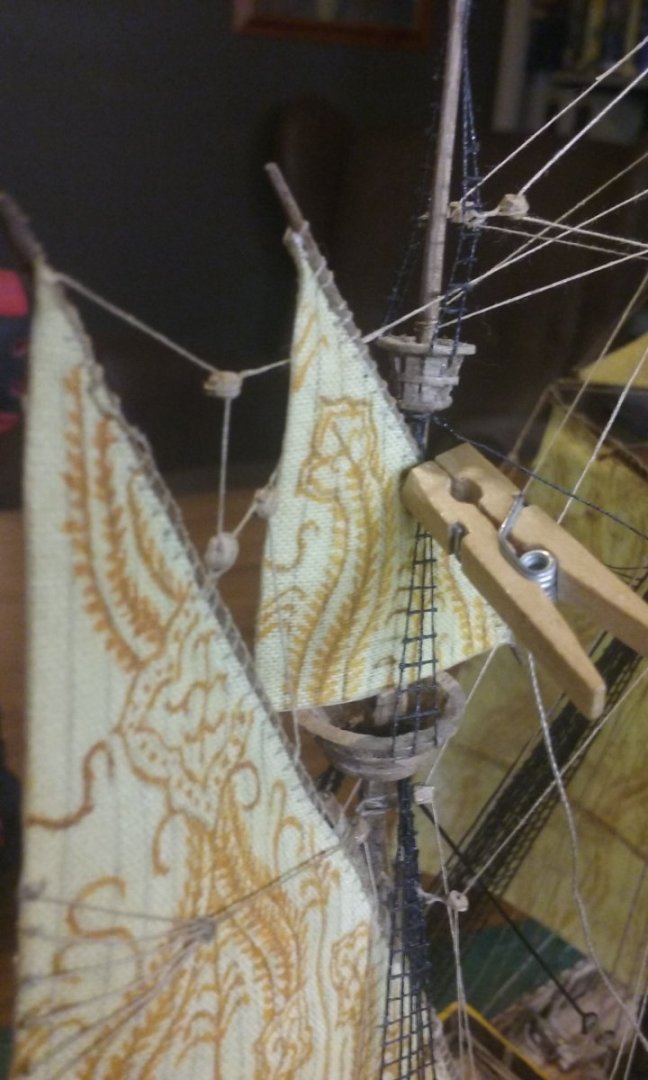
I use miniature clothes-pegs, available from craft/stationery stores. They work well, and don't have teeth. I've managed to buy them both in wood and in plastic, and I've trimmed off the business end of several of them to have a right angle at the point of contact with the rope (but not the ones in the picture! ). Steven
-
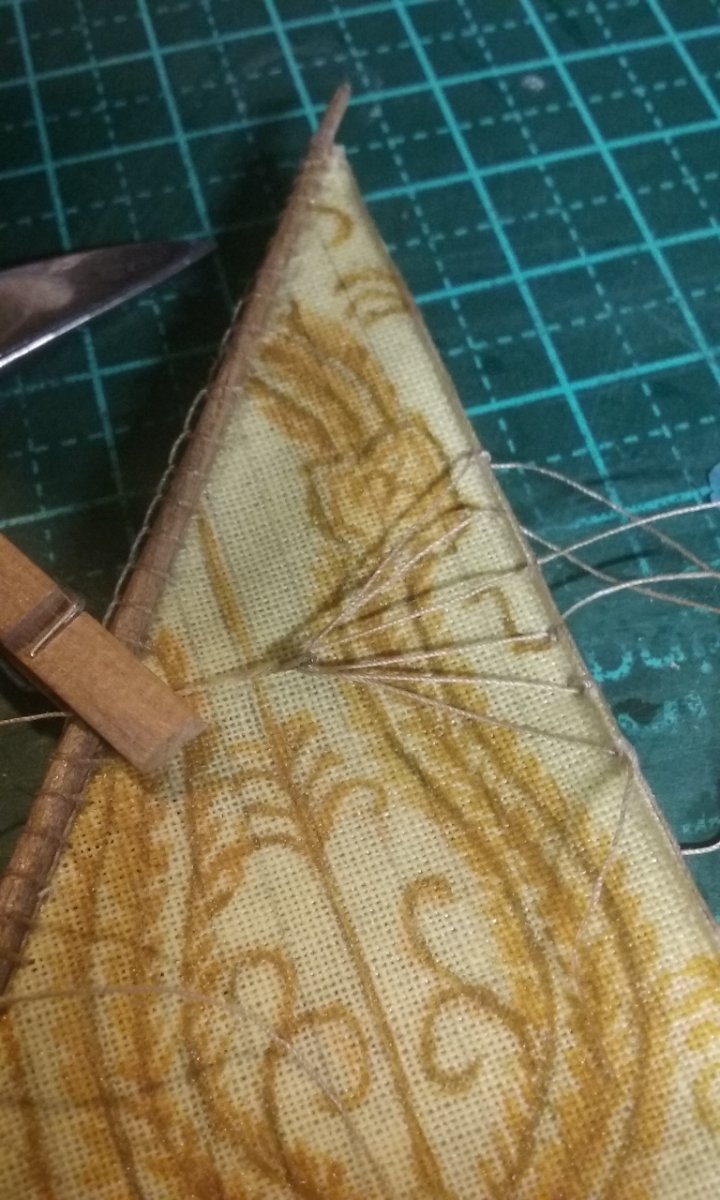
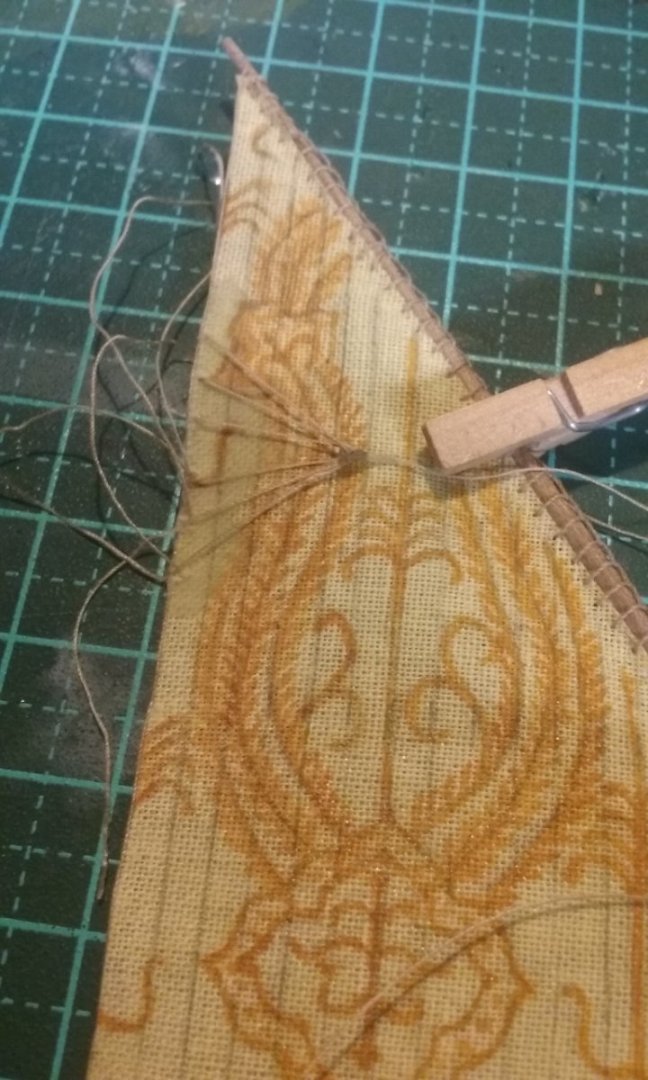
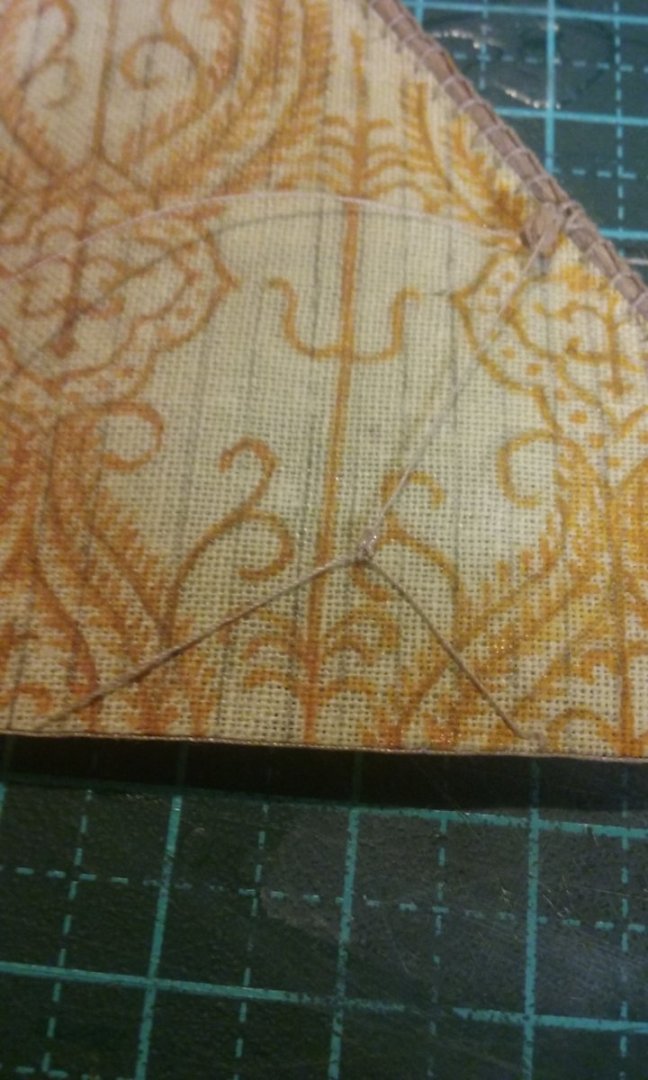
Mizzen lateen course [is that the right name?] rigged. Here's the sheet, starting from ringbolts at the taffrail, through a couple of blocks, and belayed off to one side. And here is the lateen topsail placed in position and the parrel (a simple loop of cotton) glued in place. Added a block for the topsail lift. Anderson proposed that the lateen topsail might be sheeted to the yard of the lower lateen, but there's not room for that in the model's configuration, so I've gone with Landström's version - of a spar sticking out aft from the mizzen top. Even then I've done it a bit differently, because I can't see how Landström's version would have any rigidity. And here is the mizzen topsail in place and fully rigged, with sheet and a simple lift. No tacks; Anderson thought they probably weren't needed. And the lateen topgallant in place but not yet rigged. But you can see the block for the lift at the very top of the mast. Landström was of the opinion that the upper lateen were only for show anyway, and would not have been used at sea. But they do look cool. While working on the mizzen sails, I was also getting the lower lateen ready for the bonaventure. Loose threads for the martnets and buntlines. Double sheaved block for the martnet tackle. Martnets. Getting better at these. Buntline And all installed, tied off and trimmed to length. This time I've kept the central rope on the buntline loose for the time being - I found it was too tight on the mizzen lateen and interfered with the 'billow' of the sail. I'm changing that on the mizzen, too, so it will have a nice smooth curve at the bottom. And that's as far as I've got today. Steven


- 740 replies
-
- 12
-
-
-
- Tudor
- restoration
- (and 4 more)
-
Did lateen masts have wedges?
Louie da fly replied to knightyo's topic in Masting, rigging and sails
Te trouble is that most artists don't bother to show details like wedges. This one is unusual in that. And there's the fact that most pictures of ships aren't from a viewpoint that shows the bottoms of the masts. The pic below is from Botticelli's Judgment of Paris - unfortunately it loses definition when you blow it up, but it might depict wedges around the mizzen. As might this one - 1500 approx. by Octavian de Saint Gelais, France. Probably from his translation of the Ovid. This one (source unknown) seems to show wedges, but that's on the main mast - unfortunately you can't see the base of the mizzen. Best I could do. On the other hand if you put wedges in nobody will be in a position to tell you that you're wrong! Steven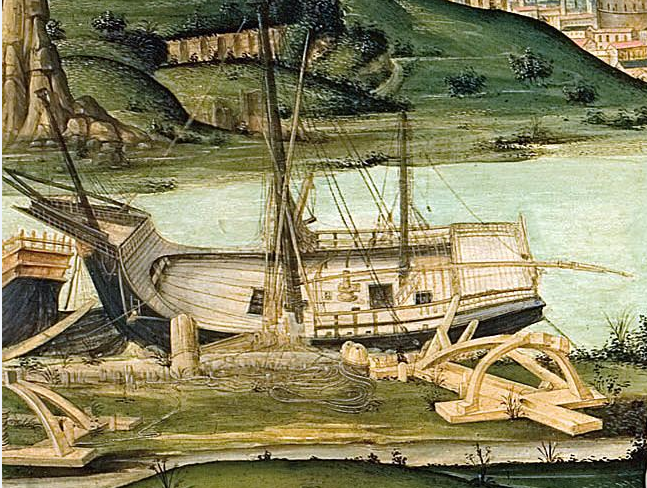
-
Did lateen masts have wedges?
Louie da fly replied to knightyo's topic in Masting, rigging and sails
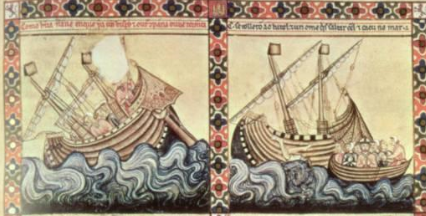
Yes, have a look at these pictures. I'm pretty certain these things around the masts are early wedges. From the Cantigas de Santa Maria - Spanish, late 12th century. And yes, these are lateeners. Steven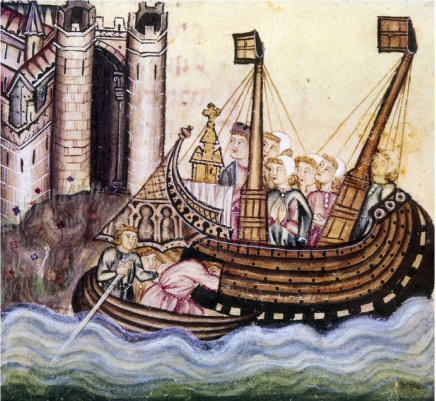
-
Sounds like a great idea. Maybe I'll try it too. PS: Looking really good. Steven
-
Well under way, mate! God to see another of these being built. I love the ancient and mediaeval ships, particularly the unusual ones - something that isn't a Viking longship or the Santa Maria. I'll pull up a pew and get the popcorn under way. Steven
- 56 replies
-
- 4
-
-
- Sea of Galilee Boat
- SE Miller
- (and 1 more)
-
Maybe I should have included that giant match stick in the photos . . .
- 740 replies
-
- 4
-

-
- Tudor
- restoration
- (and 4 more)
-
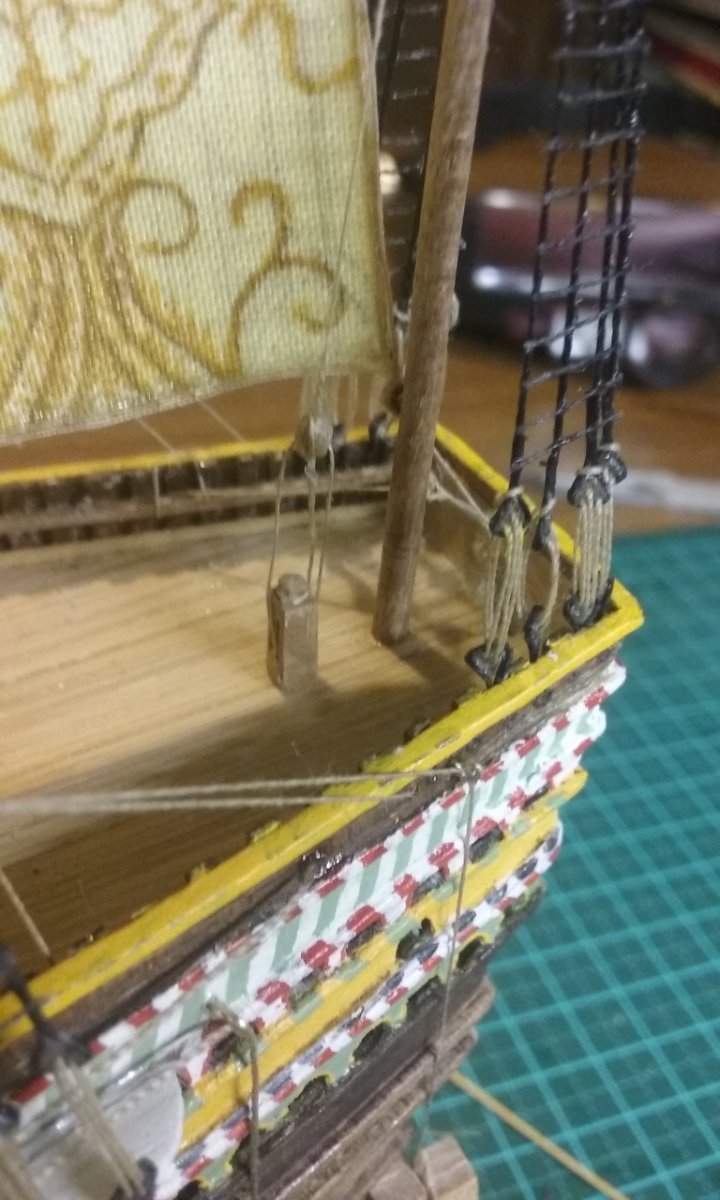
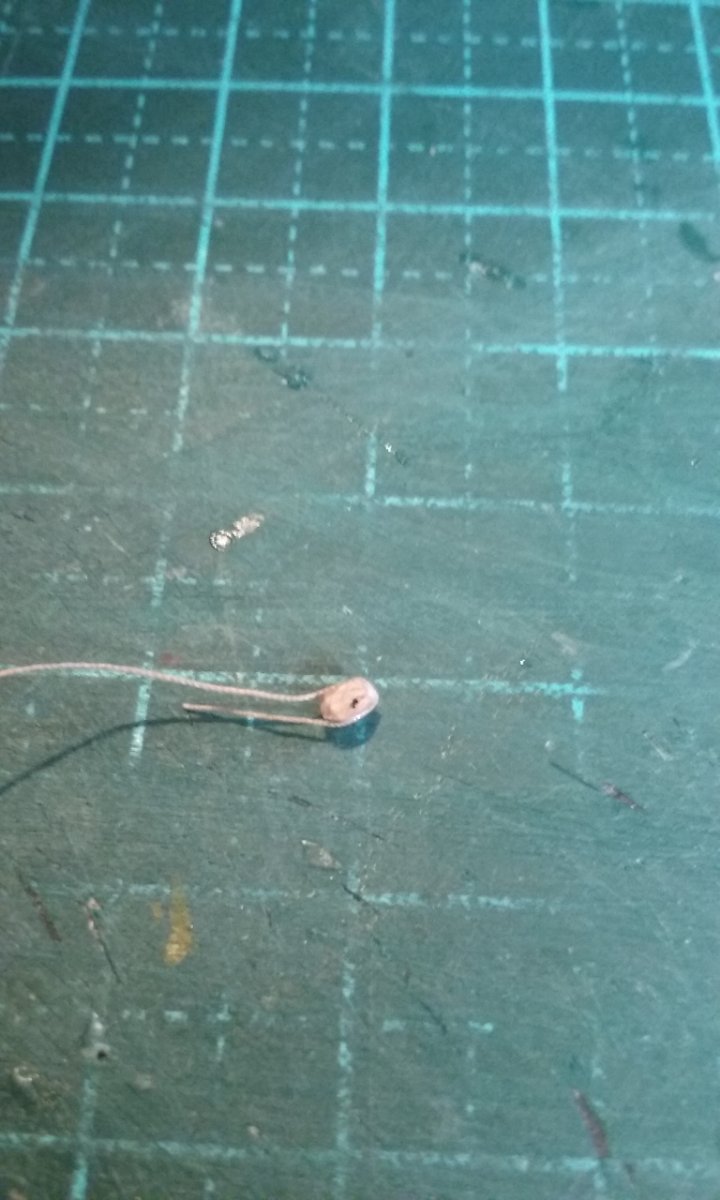
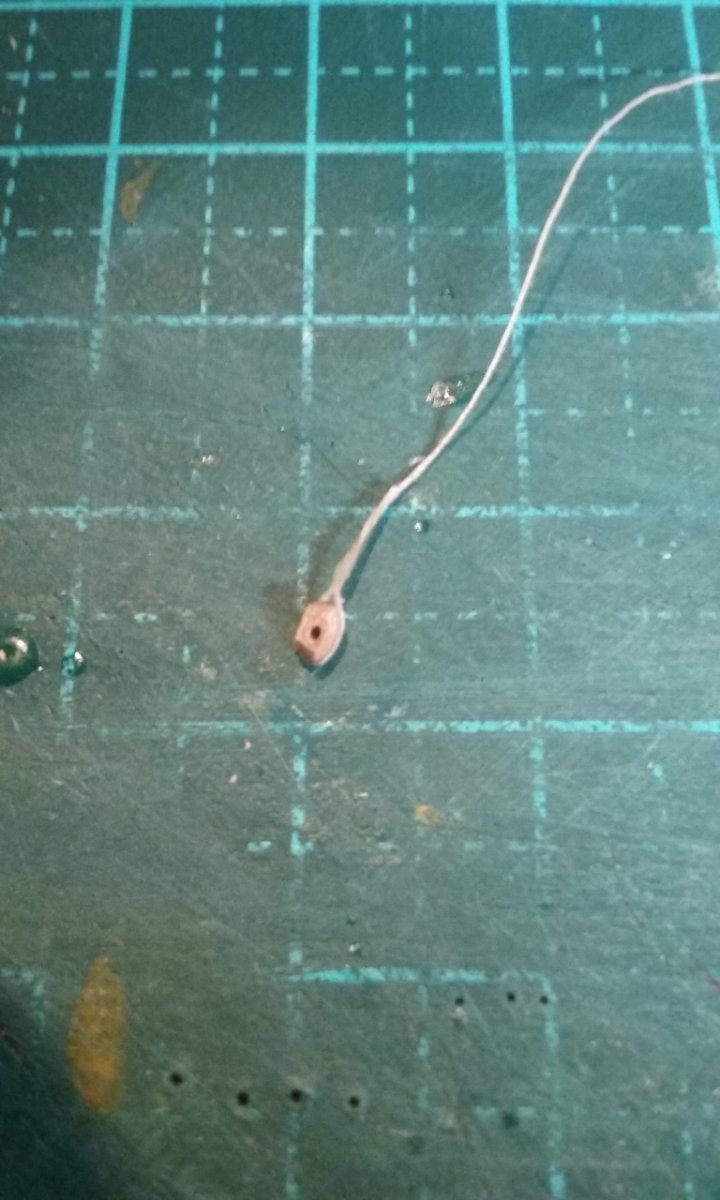
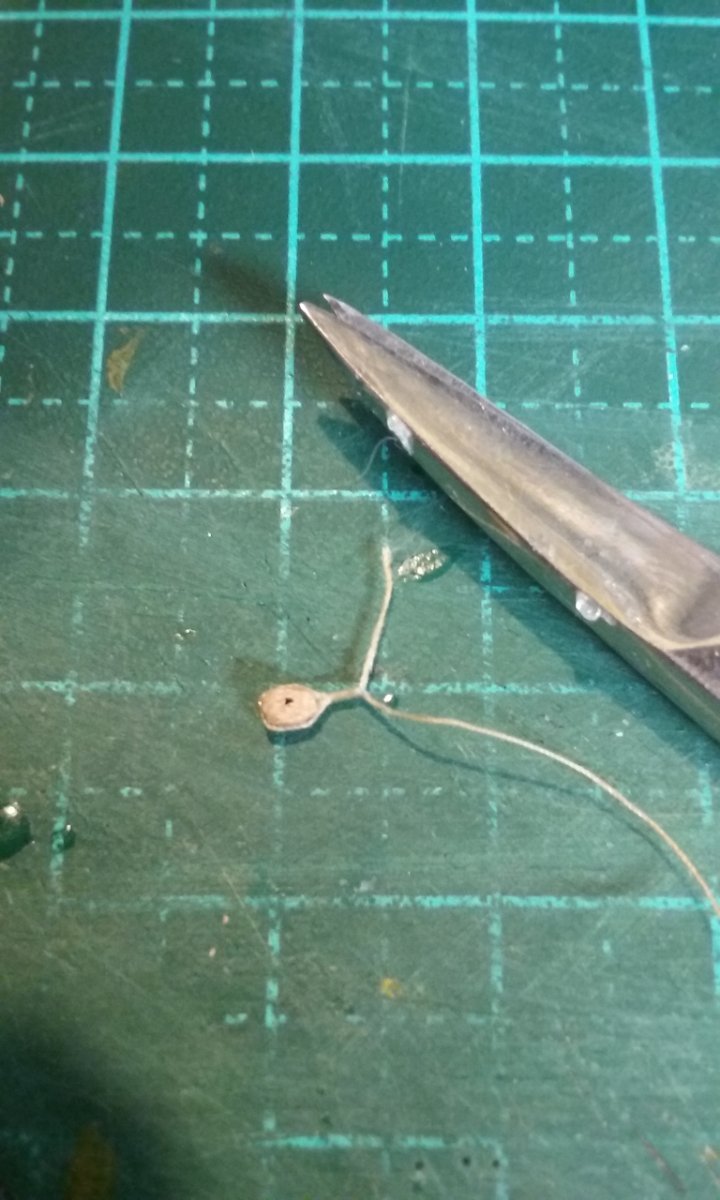
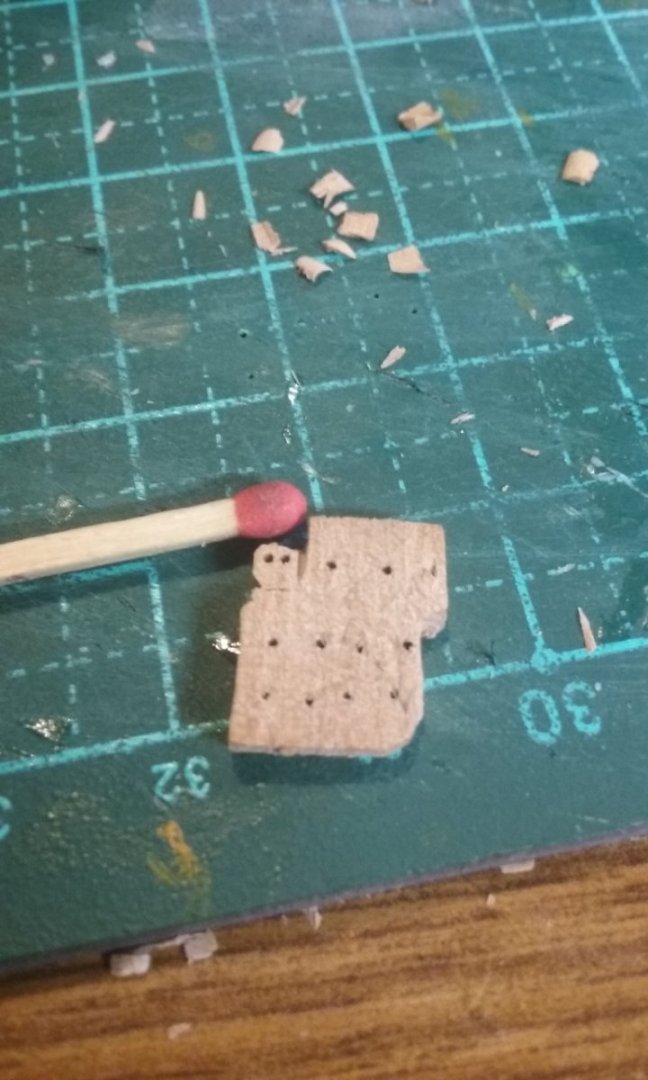
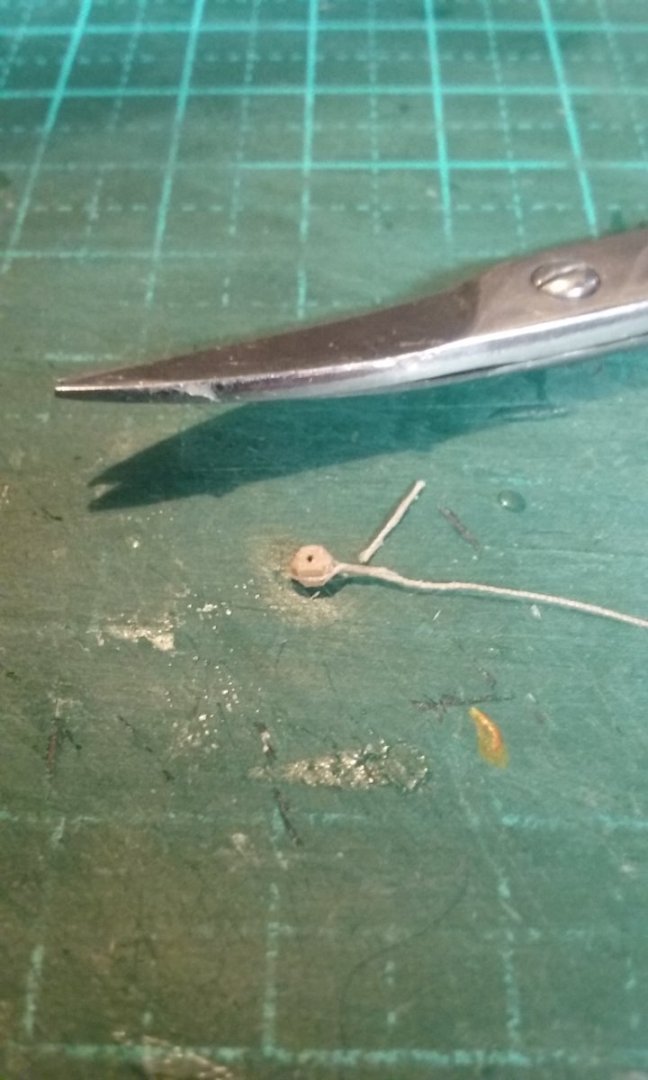
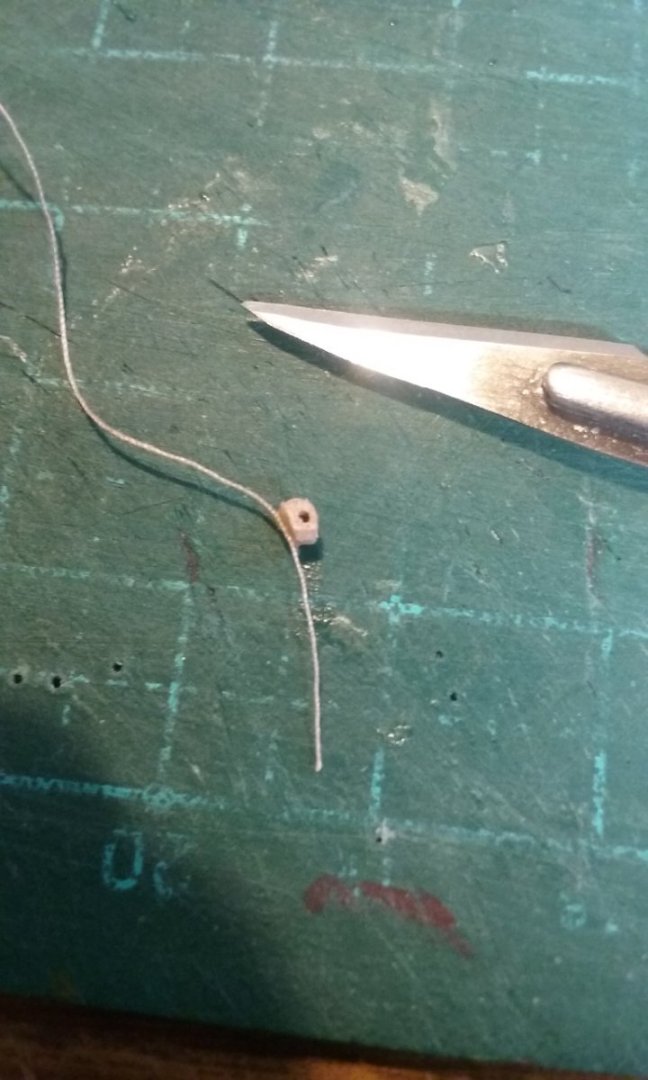
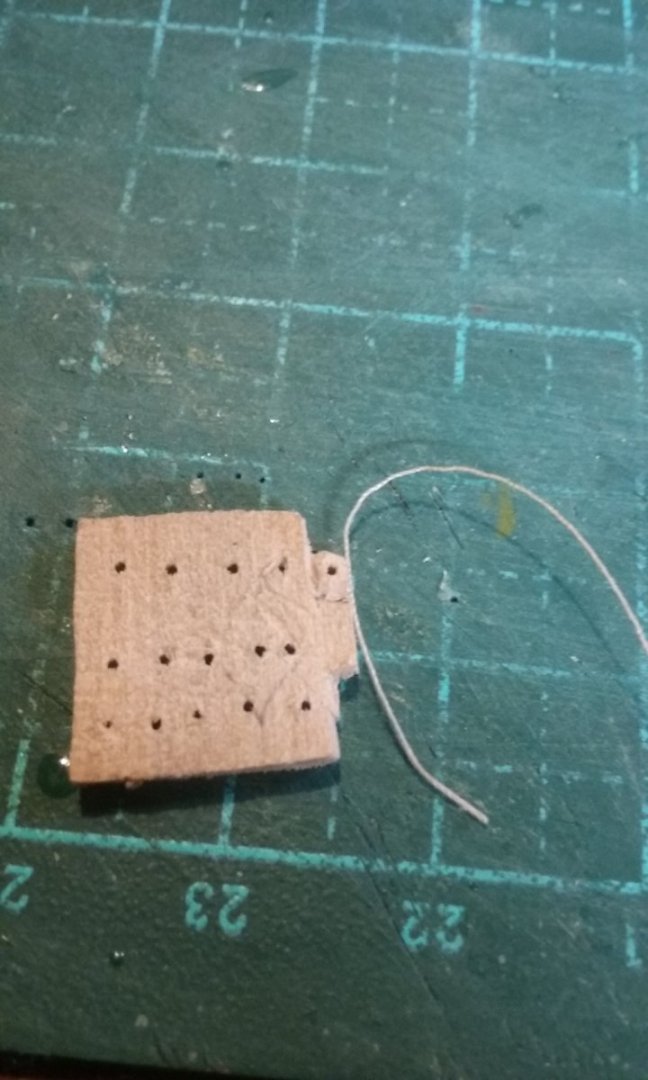
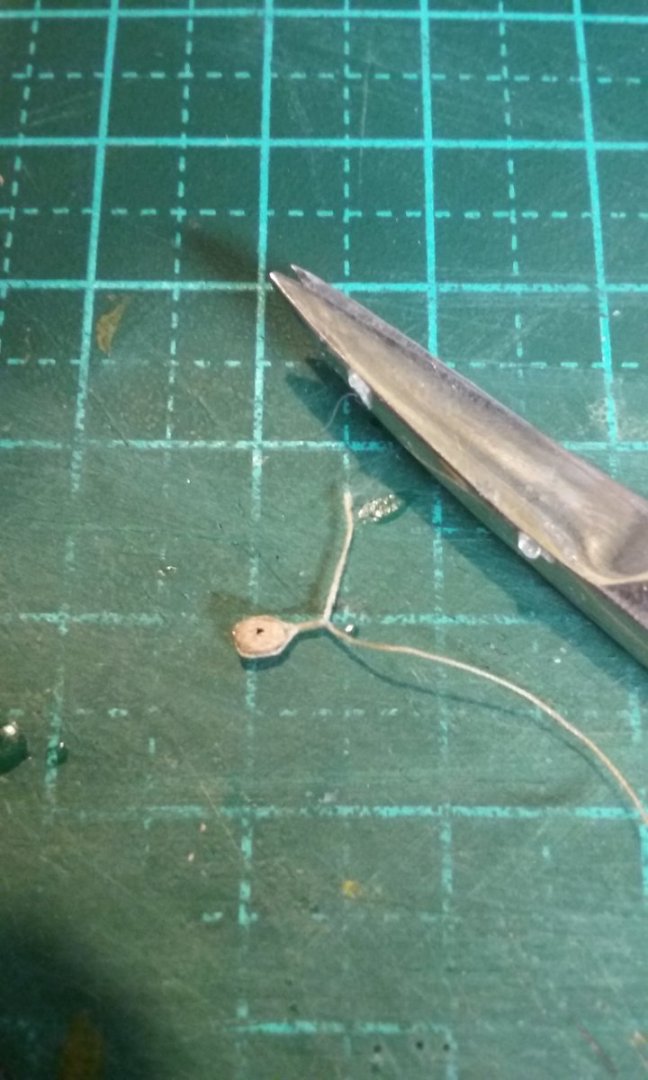
Bonaventure stay. I did the same thing with this (wet and glued the lanyards) as I did with the mizzen stay. Worked well. I wish I'd thought of this with the lanyards for all the shrouds - they would have been a lot tidier. Unfortunately this isn't a lesson I can use in future builds. If I do another ship with deadeyes on shrouds it will be at a bigger scale and I don't think I'll need to use this technique. Top end and bottom end of stay. Held taut while the glue dried using weights, pegs etc. A bit fiddly, but worked ok. And trimmed to length top and bottom. And for those who are interested, here's the whole procedure I use in making a block. No sheave of course - far too small. The timber is pear wood, the glue is PVA (white glue).


- 740 replies
-
- 13
-
-
-
- Tudor
- restoration
- (and 4 more)
-
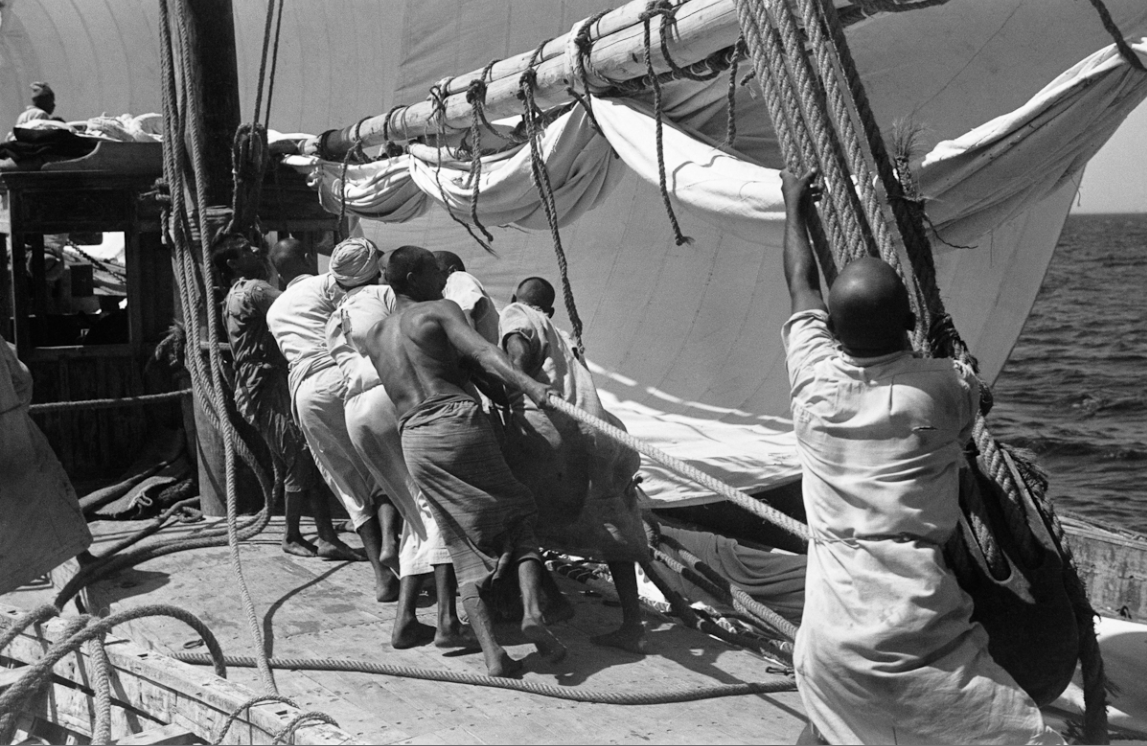
Not sure if this is appropriate to this discussion, but here is the halyard of a (yes, I know, lateen rigged) dhow being pulled horizontally, which I think illustrates Dr PR's point.. Steven
-
And more . . . Bonaventure stay being replaced. The collar on the mizzen mast under way. Note the small loop to take the lower section of the stay. The stay with its deadeyes glued to the bonaventure mast just below the top, hanging free till the glue dries - I'll do the same as I did with the mizzen stay.. And the mainbrace and main sheet loosely in place. Steven


- 740 replies
-
- 10
-
-
-
- Tudor
- restoration
- (and 4 more)
-
Yes, these main courses were enormous, at least on carrarcks, and the main mast was equally enormous - had to be to deal with the forces involved. Here's an example from a Venetian portoloan of 1482 by Grazioso Benincasa. Steven
- 740 replies
-
- 5
-
-
- Tudor
- restoration
- (and 4 more)
-
From the wreck of the Geonoan carrack La Lomellina (sunk 1513, probably built 1503), the estimated proportions were Length of keel 33.38 metres, width at master frame 14 metres, overall length 46.45 metres. IIRC they recovered the whole length of the keel and over half of the ship amidships, (she sank on her side, like the Mary Rose) so these estimates should be pretty reliable. That gives the ratios length of keel to width = 2.38 overall length to width = 3.32 You could also check out the Newport ship, though much less of the upper hull has been preserved because she sank upright, so you may not be able to determine the full width of the ship. Steven