MORE HANDBOOKS ARE ON THEIR WAY! We will let you know when they get here.
×


Louie da fly
-
Posts
7,985 -
Joined
-
Last visited
Content Type
Profiles
Forums
Gallery
Events
Everything posted by Louie da fly
-
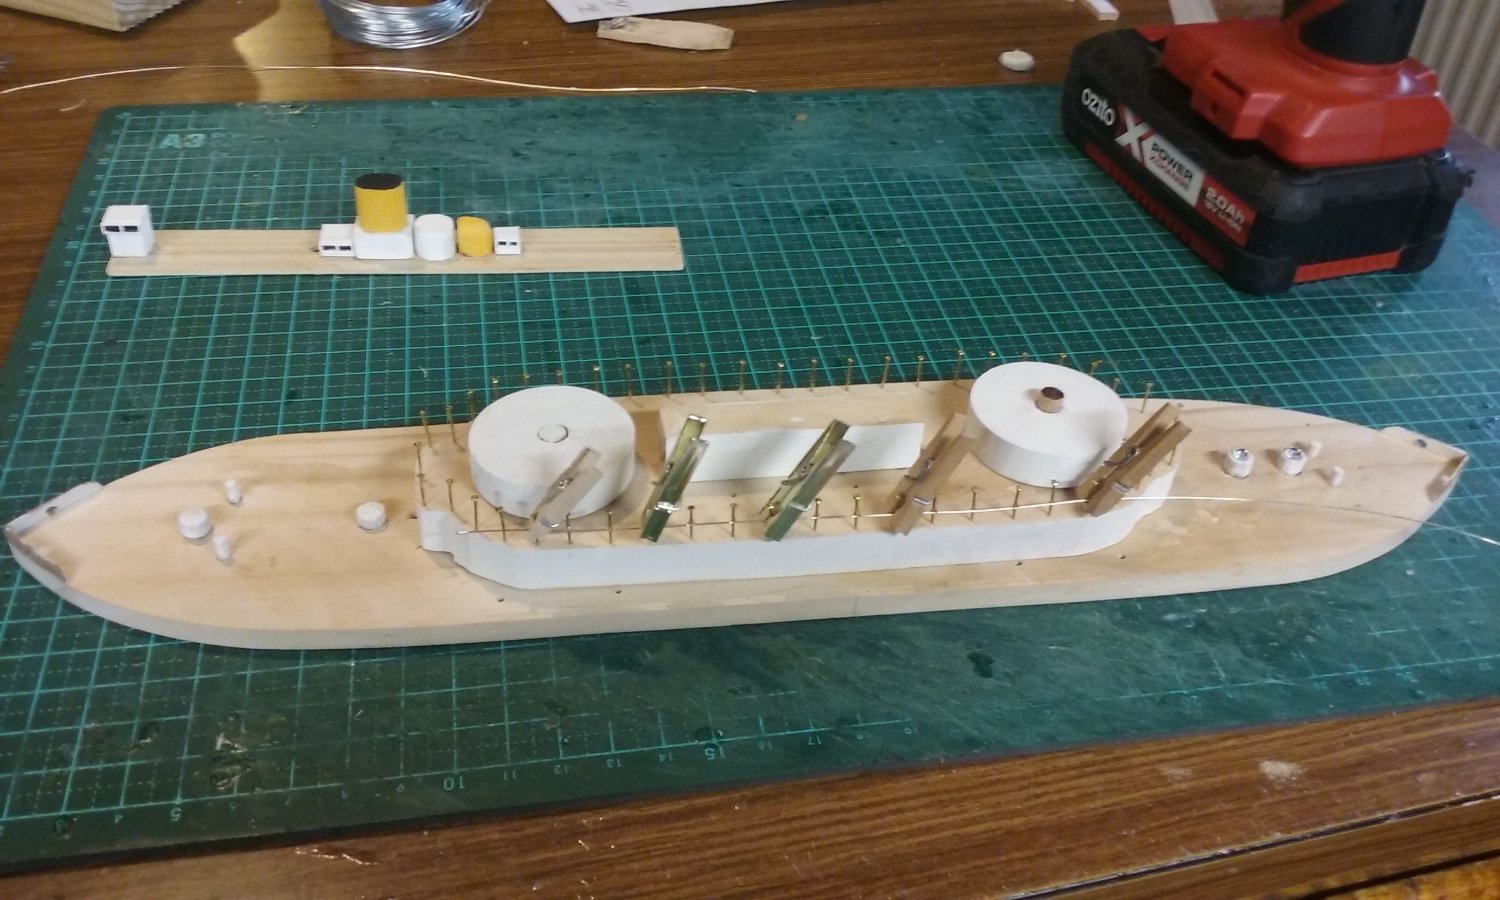
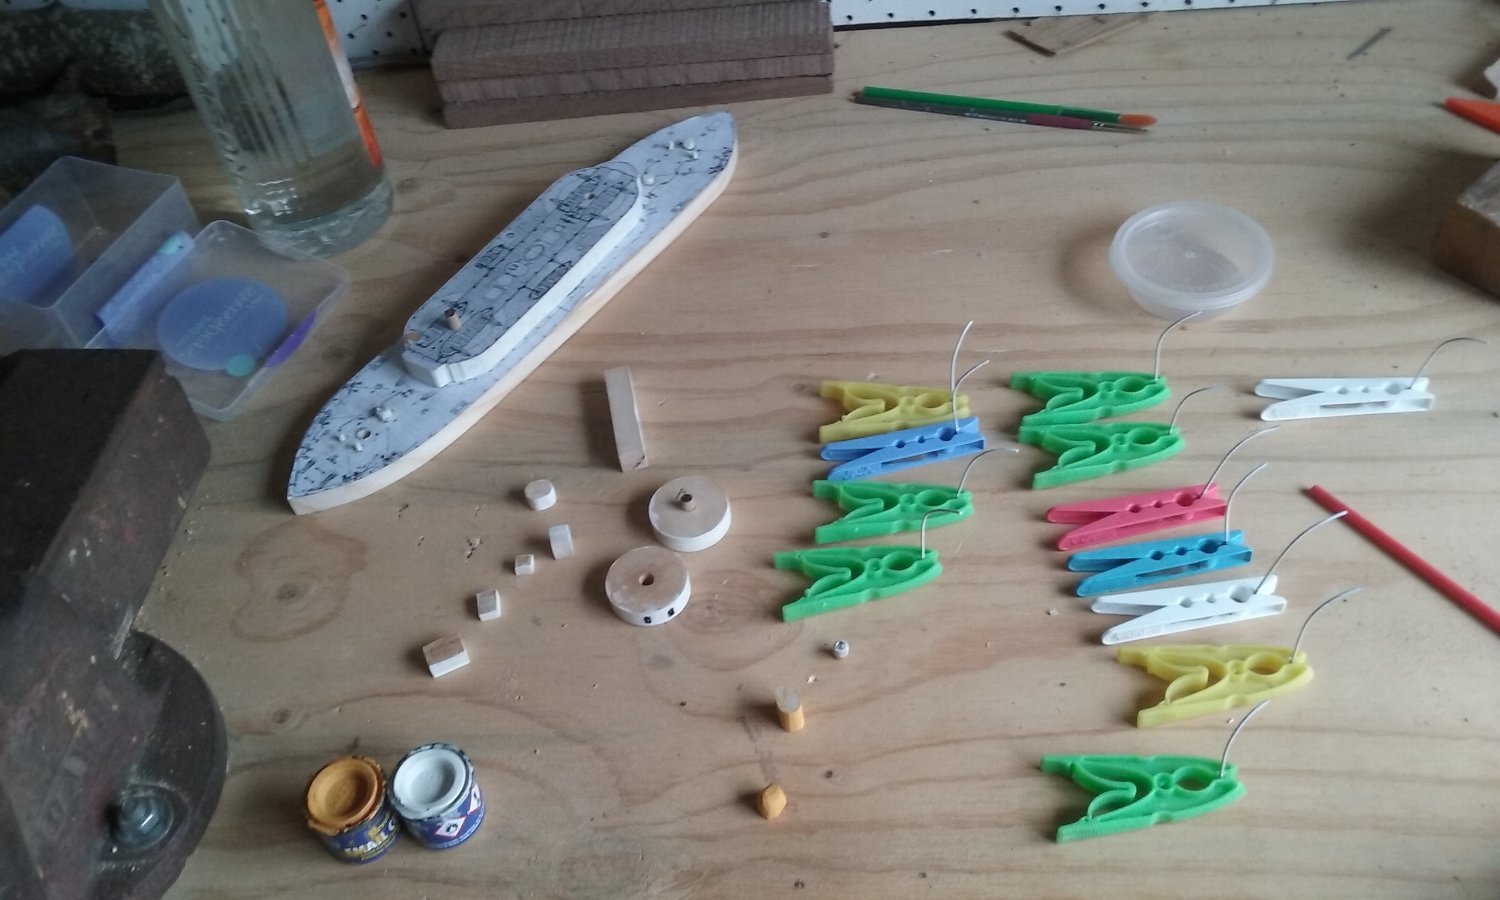
 Latest configuration. Here are all the bits so far - the superstructure bits and pieces have been glued to the upper deck, the gundeck is glued into place, along with the pivots for the turrets and the cabin(?) structure onto the gundeck. Also the skylights and smaller cylindrical things glued in place. The pyramidal "glazing" of the skylights turned out to be easier than I'd expected - in a junk shop (you know, they sell cheap knock-off tools, flower pots, potato chips, you name it) I found some craft stuff - letters of the alphabet intended to be sewn or stuck onto kids' clothes or pencil cases or whatever, made up of a whole lot of small plastic "diamonds". Ideal. Just cut two off and glue them in place on top of the skylight assembly. The davits have been painted and are ready to put in place except for trimming them all to the correct length. And all the above dry fitted. Positioning everything correctly once I'd removed the photocopied deck plans that had been glued to the decks could have been difficult, but fortunately there are masts immediately fore and aft of the gundeck structure, and the smaller vent goes right down through the upper deck and into the hull itself, giving me reliable reference points. Pulled apart again, and working on the railings. I'm using brass "sequin pins" (tiny little things) for the uprights, and for the rails I'm using wire from a set of tiny LED fairy lights left over from Christmas. Very fine, very soft. I'm just hoping it'll all stay together - some of the posts have rejected the CA I used to glue the rails to the posts. We'll see how it goes. If successful, I'll trim the posts to length when the glue's been dry for a while. Oh, and I've added the upward extensions (bulwarks?) at the bow and stern for the hawseholes. Still more to do, but getting fairly close to completion. Steven
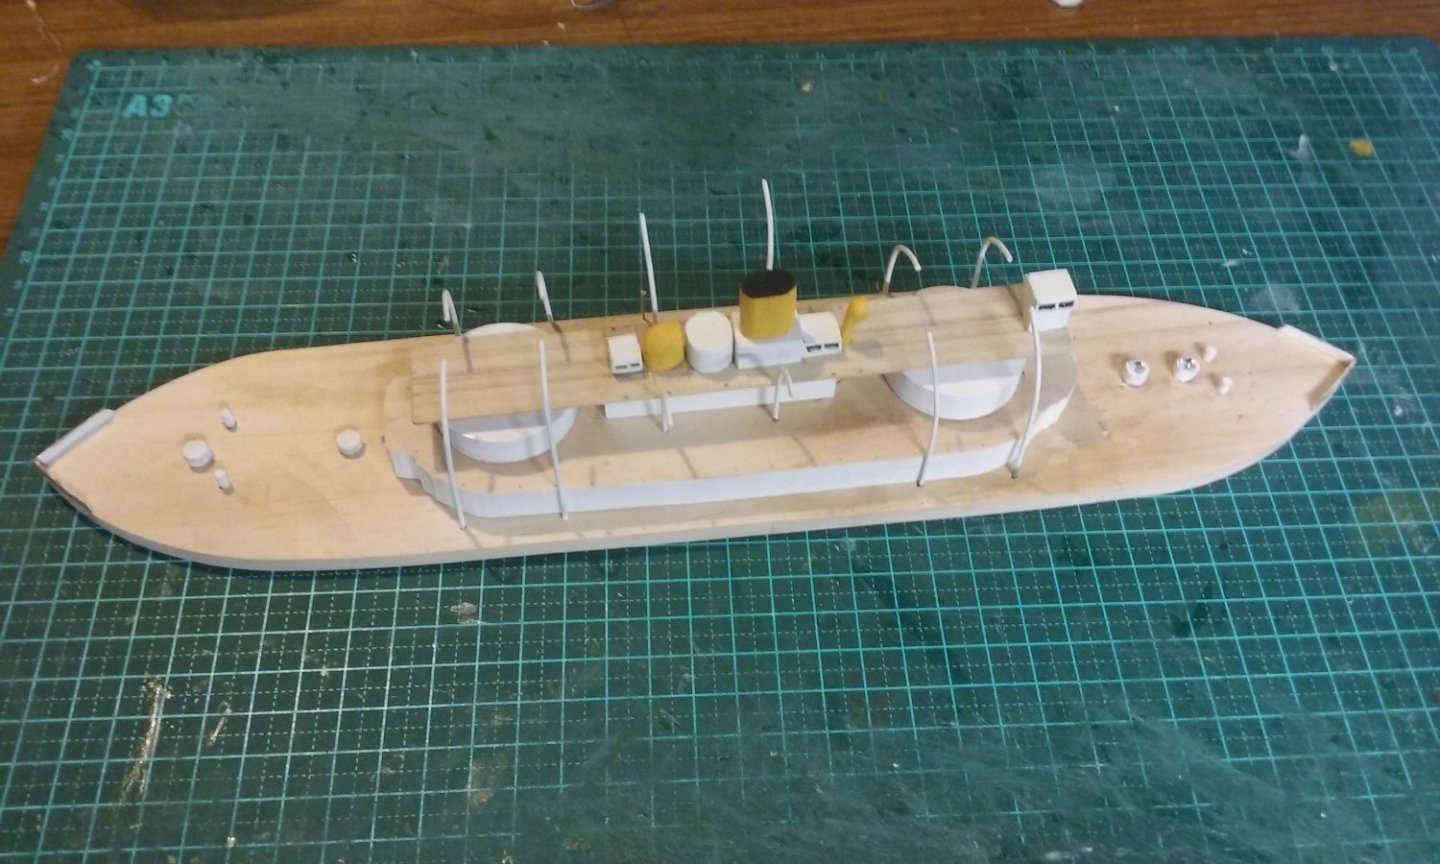


-
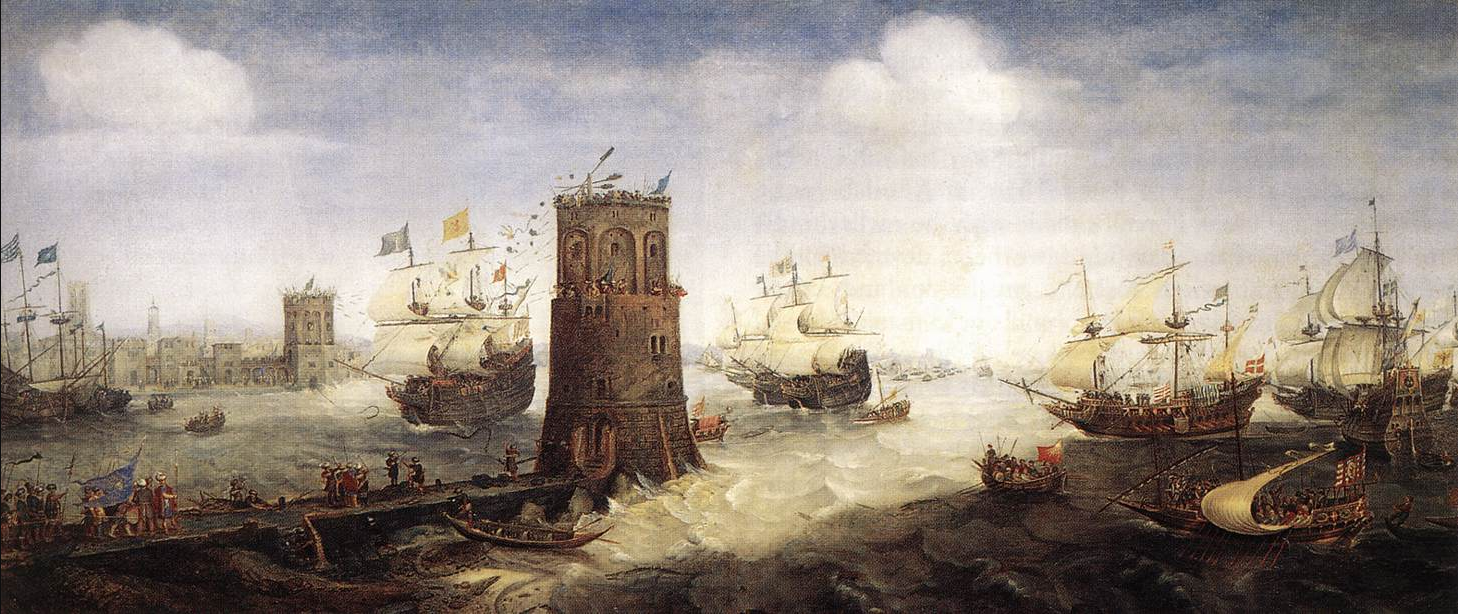
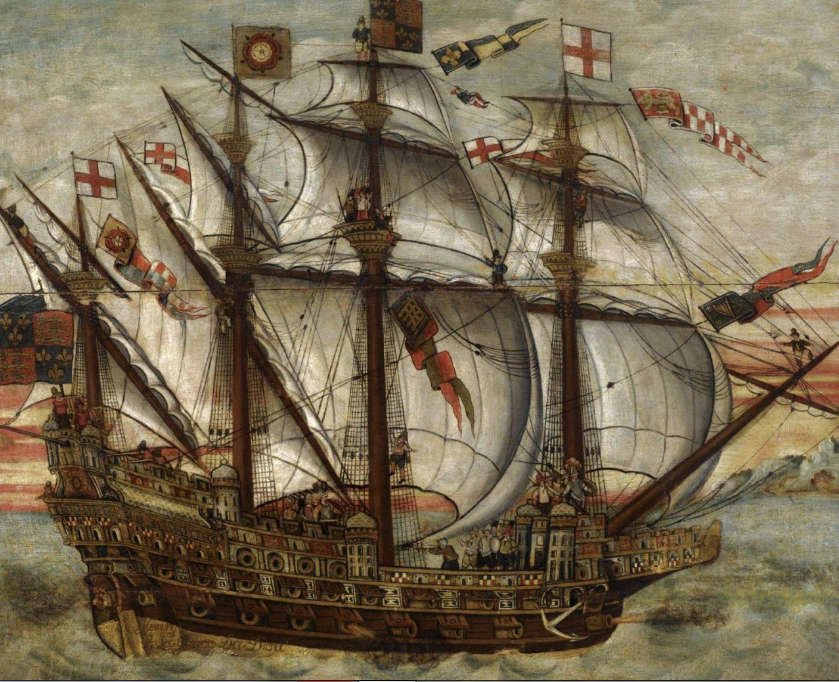
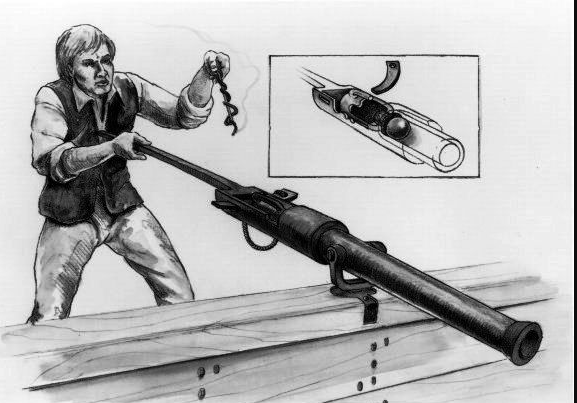
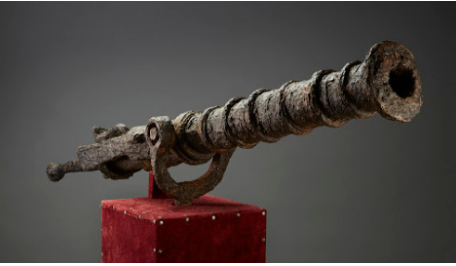
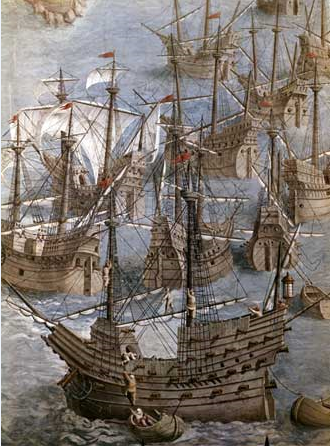
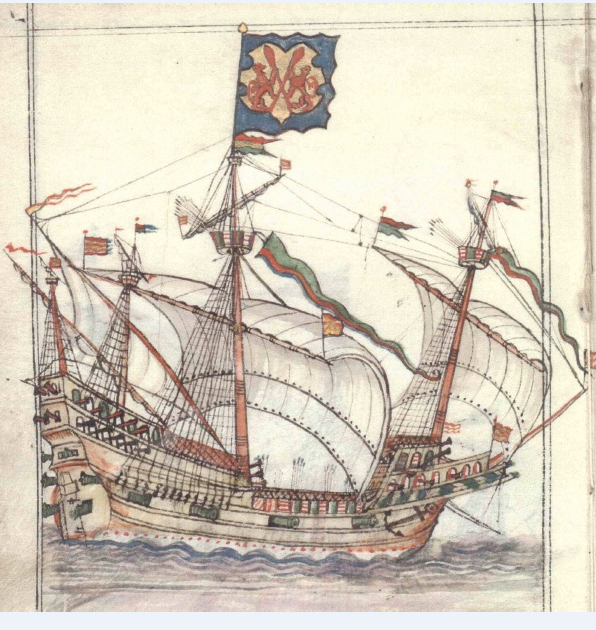
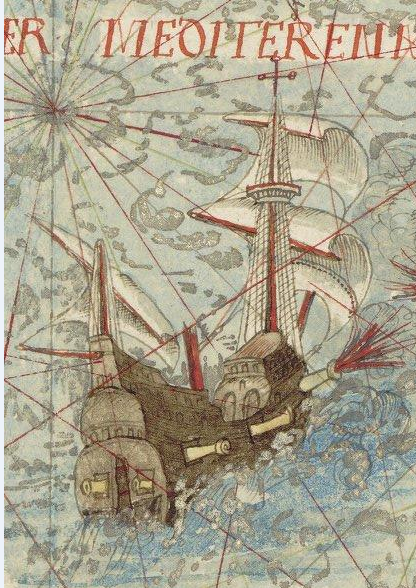
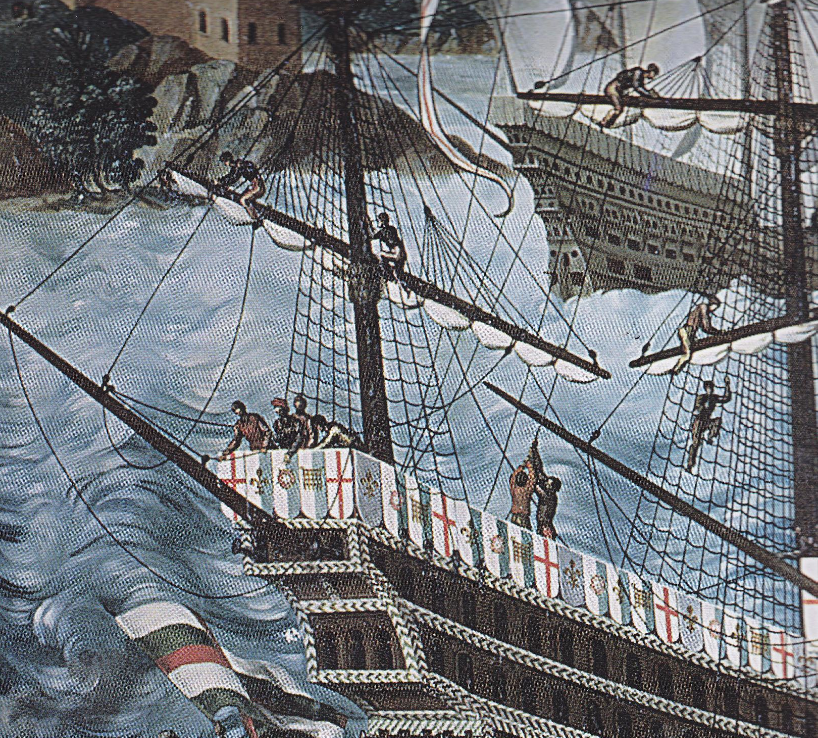
Looks like a bit of trial and error with scrap wood should enable you to work out the right shapes for your castle sides, but I think you're on the right track. Your swivel gun mounting sounds good (subject to experimentation, of course). Here's a modern diagram of a swivel mount, and the real thing in the next pic, Regarding that "Holbein" painting - I don't know how his name got attached to all these pictures of the Great Harry (oh, alright, Great Henry) - it's possible that someone thought "paintings - Henry VIII's time - must be Holbein". As far as I know there's no evidence of any sort that he did any painting of the Great Henry, except later speculative labelling. Here's another pic supposedly of the same ship, also ascribed to Holbein, even though its' obviously from considerably later (maybe as late as 1620). And that engraving above, as far as I'm concerned it's pretty obviously just taken directly from the "Embarkation" painting, with a few Victorian era alterations and additions. Steven
- 45 replies
-
- 3
-

-
- Great Henry
- Henry Grace a Dieu
- (and 1 more)
-
What kind of glue are you using? If it's PVA (white) glue it can be softened with isopropyl alcohol (isopropanol) commercially known as rubbing alcohol. In the last resort it can even be used to undo PVA glue joints, but it sounds like you just need to swivel it a little, which isopropanol will enable you to do (if you're careful). I've read somewhere that CA (superglue) can be dissolved with acetone, but I haven't tried it except with nail polish remover which didn't work (it has about 60% acetone IIRC). Might be worth a try. Steven
- 177 replies
-
- 1
-
-
- Perseverance
- Modellers Shipyard
- (and 1 more)
-
The shape of the hull is coming together nicely now. Looking good. Steven
-
One thing with the oar action is that some RC models I've seen have the oars rise right up in the air on the return-stroke, which can look unrealistic. The one below isn't too bad: But compare it with the action on the Olympias, where the oars are barely out of the water on the return stroke. Just thought I'd mention it. Steven
- 536 replies
-
- 4
-
-
- Quadrireme
- radio
- (and 1 more)
-
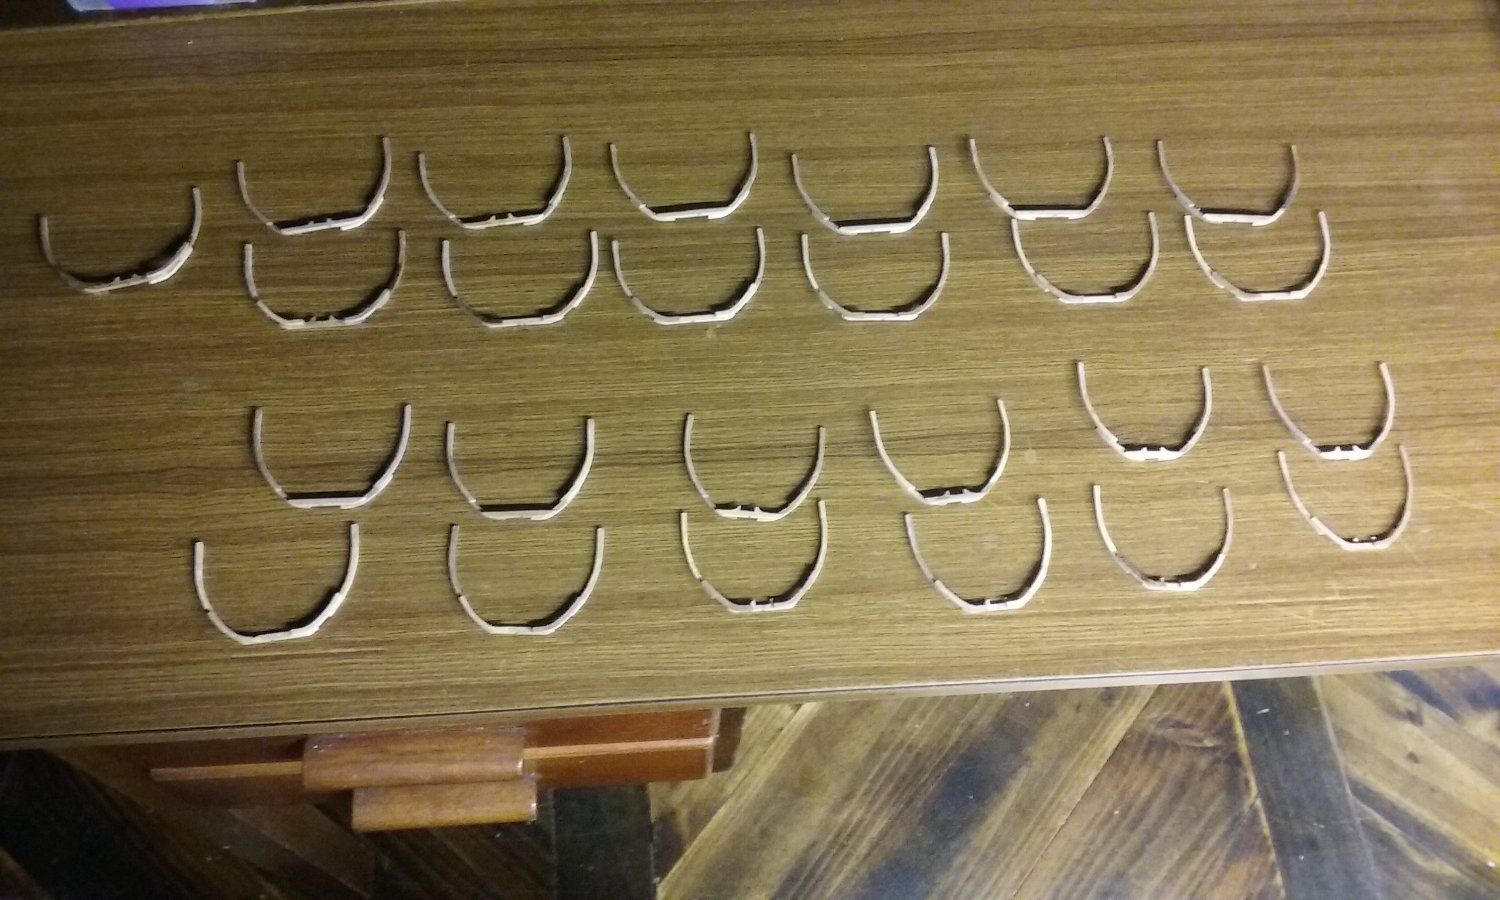
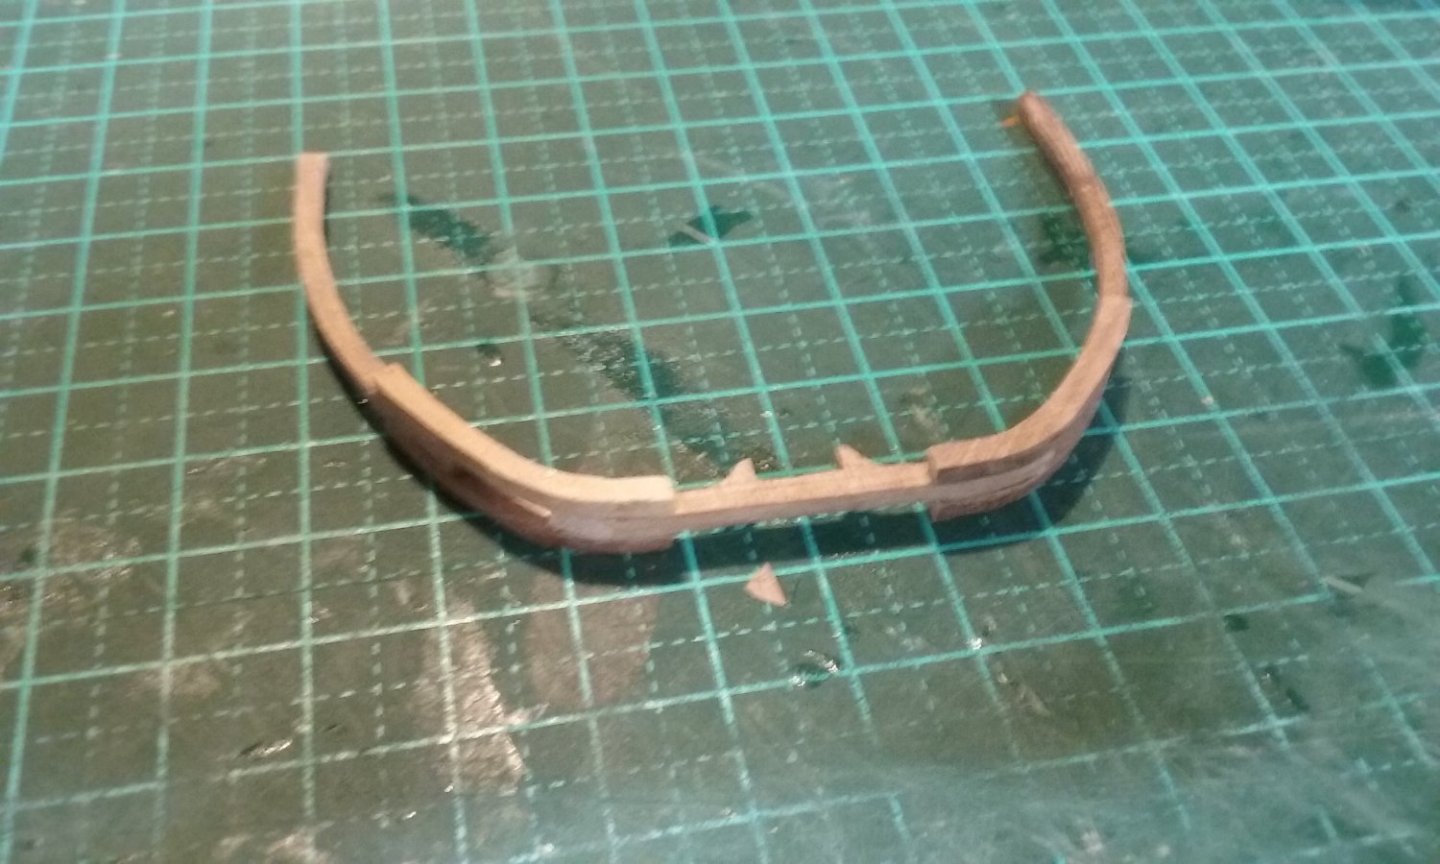
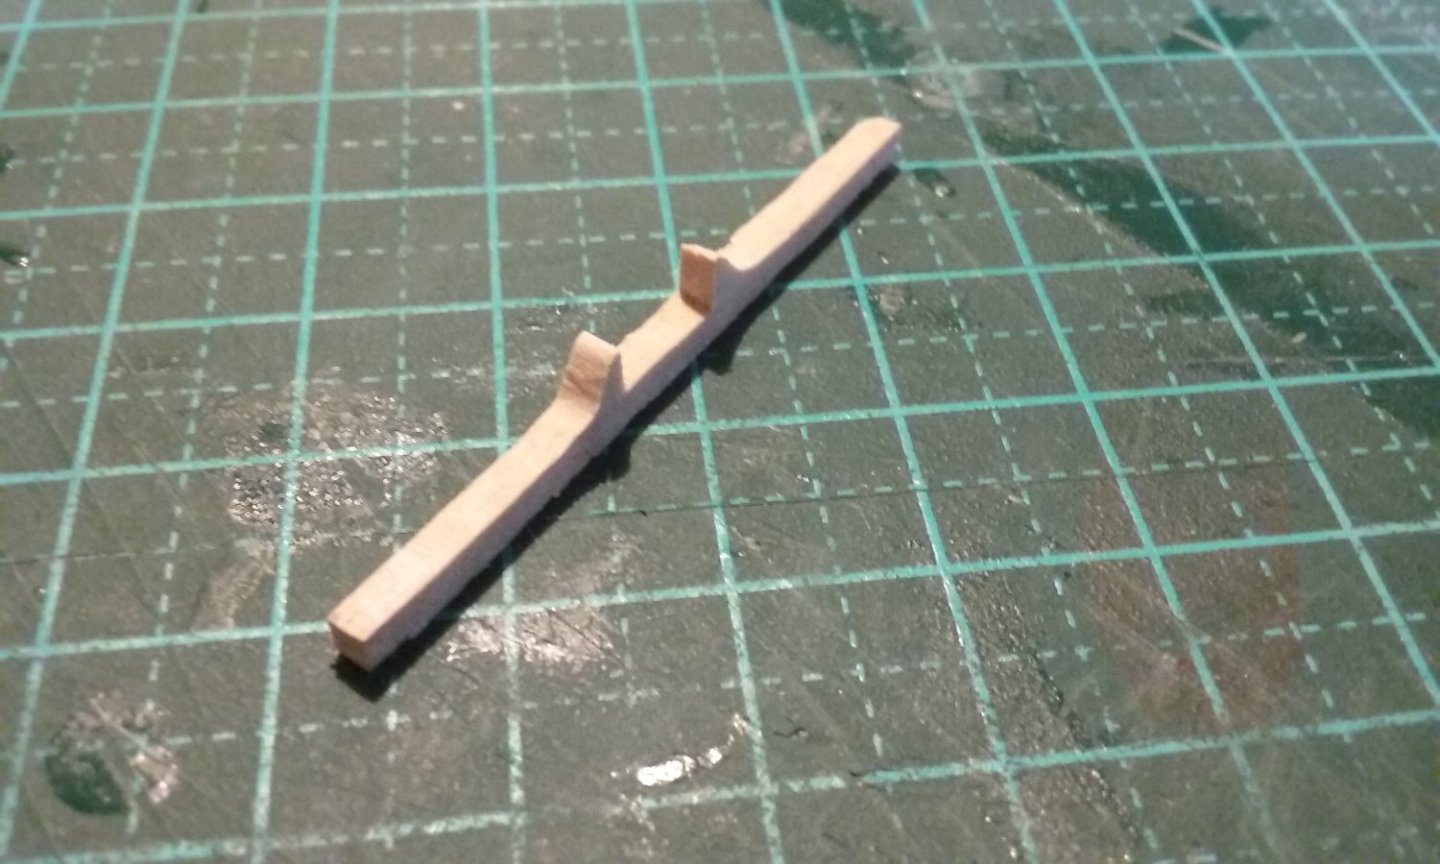
I'm sure you're right, but I think I'll give that a miss. I get confused enough already without adding to it. And here are all the frames that rest on the keel - all numbered, knightyo! This is how they'd be without numbering - 25 of them. And here they are in size sequence. Top row, from left master frame and two of every size steadily going towards bow and stern, continued in the second row. The frames at bow and stern still need to be made, but first they have to be designed. I've worked up some tentative shapes using my trusty t-square and setsquare and roughing the frames out in what I hope is a correct sequence of shapes (bottom left of the sheet, and cut-outs sitting on the T-square). I'll make up bulkheads in scrap to these shapes and see if they work. The last time I tried it (with the Great Harry, as the first iteration was completely wrong, so I'm not brimming with confidence at the moment. I've now retired my framing jig, but just putting it into storage, for I have a cunning plan for the future (which cannot possibly fail). Steven


- 508 replies
-
- 10
-
-
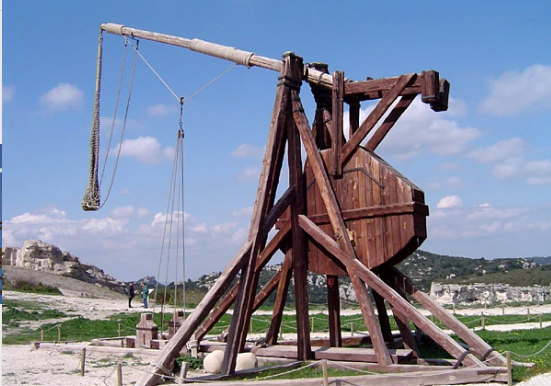
The reason I asked is that I came across a report of a (trireme?) galley built for (I think) Napoleon III) in the middle of the 19th century which had widely differing oar-lengths and they had terrible trouble because of the pendulum effect - different lengths of pendulum have different natural swing rates (thank you Galileo) and the different banks of oars would therefore get out of sync with each other and cause mayhem.* But I should think if they weren't too different it shouldn't be a problem. A guy I'm occasionally in contact with who sails a Viking ship replica told me that they don't worry too much about oar lengths (given that you'd think the ones at the ends would have to be longer due to the taper of the ship) - they seemed to be able to mix and match different lengths without causing any difficulty in rowing. Prof Pryor's (theoretical) reconstruction had different oar-lengths for the different banks, but of course it was never built so the effect was never tried out. But as I understand it, the Olympias had them the same length for all three banks, I think due to the Napoleon III factor. But it meant the angle from the horizontal of the top bank of oars was fairly extreme. Fascinating subject. Steven * He also had a gigantic trebuchet (catapult) built, apparently seriously intending to use it for siege warfare (remember, this is the mid 19th century). Its first shot went straight up and came straight down, demolishing the trebuchet.
-
Yes, it's ok to do fantasy models, but in this case I think something a little more historically accurate is appropriate. Take all the time you want to think it through. It's not a race. Steven
- 45 replies
-
- 1
-
-
- Great Henry
- Henry Grace a Dieu
- (and 1 more)
-
Fascinating, Dick. With each new detail she becomes more and more interesting. Are all the oars the same size? (i.e. are those in the lower bank the same length as those in the upper?) Steven
-
Interesting - this seems to have persisted until at least the 11th century C.E. as a means of attacking fortifications from the sea - these pictures are of (i) a battering ram supported by two ships and (ii) assault bridge supported by two ships - from an 11th century military treatise by Heron of Byzantium. Rome, Biblioteca Apostolica Vaticana MS Vat Gr 1605 (the second picture is from folio 40r. I didn't check what folio the other was from.) Rather than being built as catamarans, I think it's more likely they lashed two single-hulled vessels together. But you don't have to build two hulls if you don't want to - it's your model, you're the skipper. Steven PS: Nobody seems to know what those gigantic heads on the ships are, or what they're for.
- 290 replies
-
- 7
-
-

-
- Quinquereme
- Finished
- (and 1 more)
-
Fascinating. Beautiful work. Steven
-
Are you allowing extra width for spiling the planks? Steven
-
Thanks for that, mate. That captain's observatory - I would never have thought of that. But I think I'll still be oversimplifying the funnel assembly. It all just starts getting too much otherwise. Steven
-
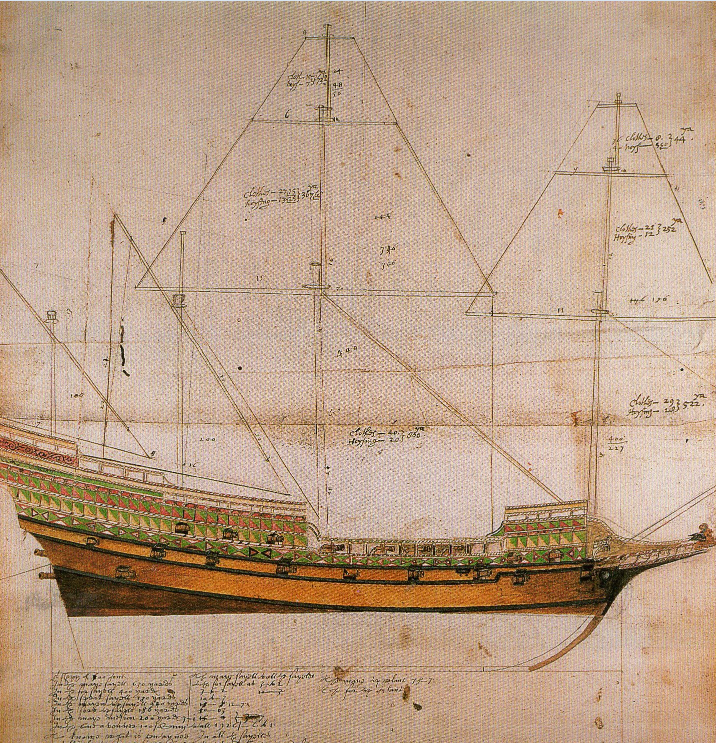
Colour schemes, specifically the colour of the unpainted timbers. Matthew Baker, England, late 16th century. The capture of Damietta, Dutch, c. 1629 Detail of the painting Expedition to the Third Islands 1583. Spanish - Royal Monastery of El Escorial. Work of Granello, Tavarón, Castello and Cambiasso. galleon from a pilot's manual. Guillaume Brouscon, Le Conquet, France 1548 From a portolan by le Testu, French 1555 c. 1630 Tyresö, Stockholm Sweden Quite a range, particularly the le Testu pics. Whether these can be relied upon is of course anybody's guess - the artist may have just wanted to make the picture pretty, the colours may have faded etc etc. I'd say Baker's pic is likely to be pretty reliable; he shows two shades of brown - the upper could be the natural colour of oak, the lower might have been treated in some way, but who knows? I don't know if this helps or just further confuses the issue. Steven


-
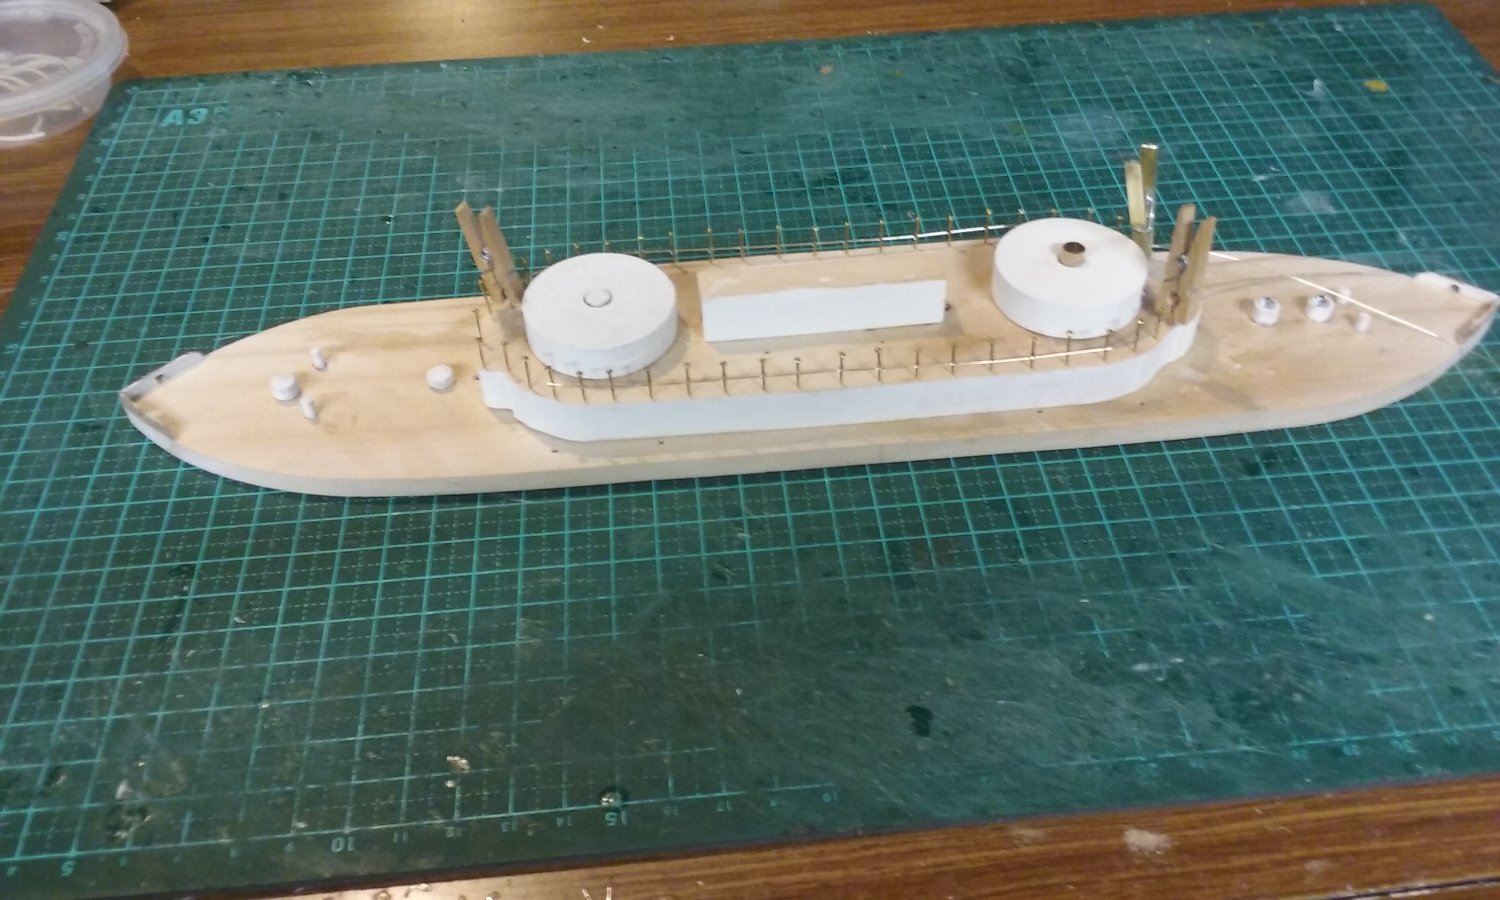
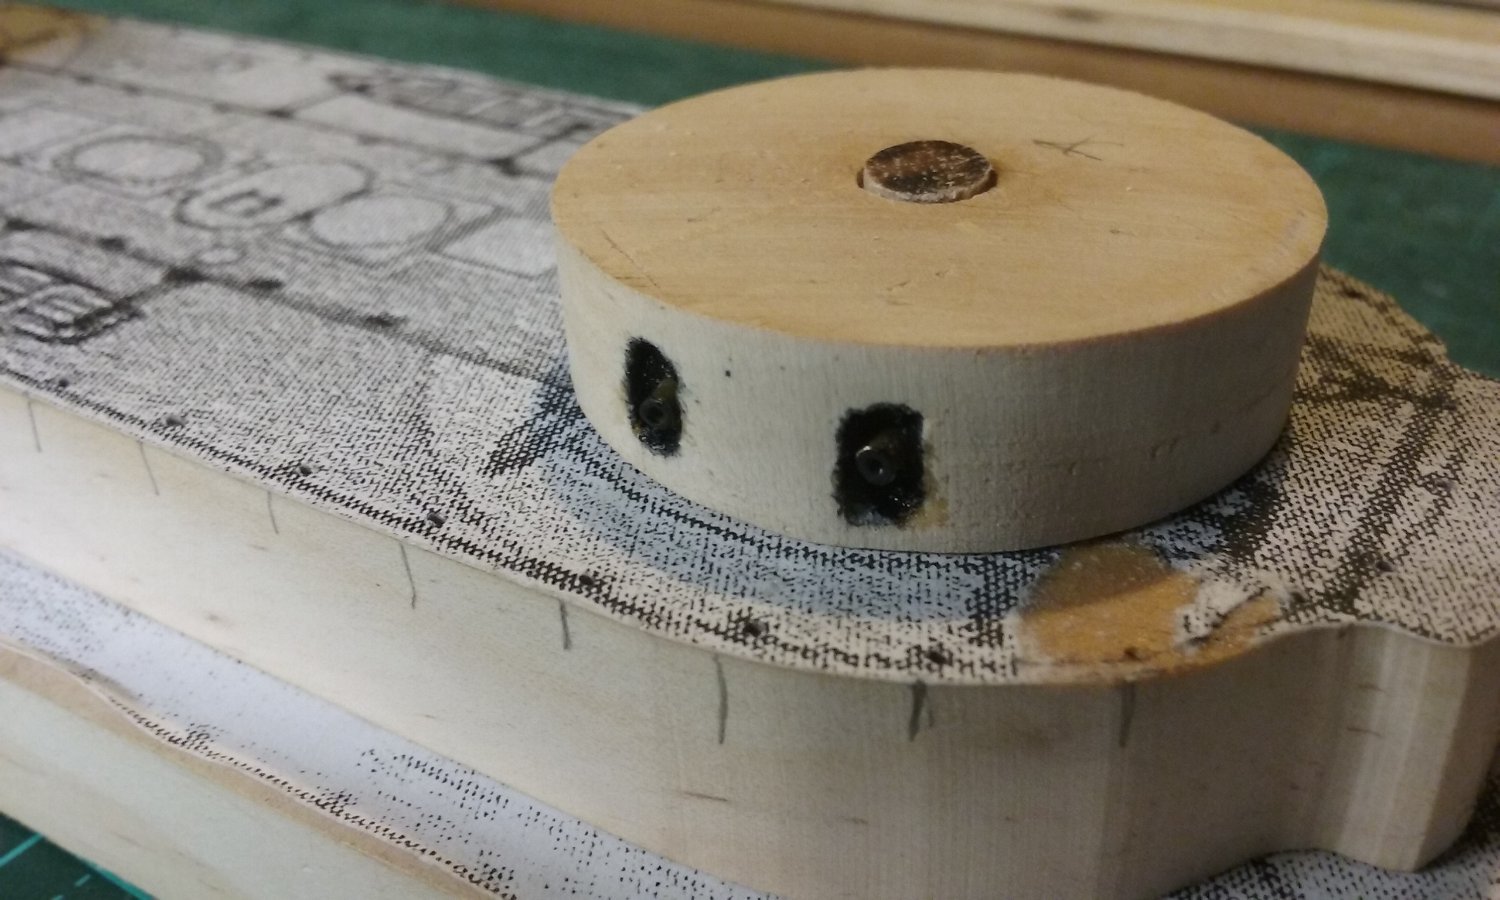
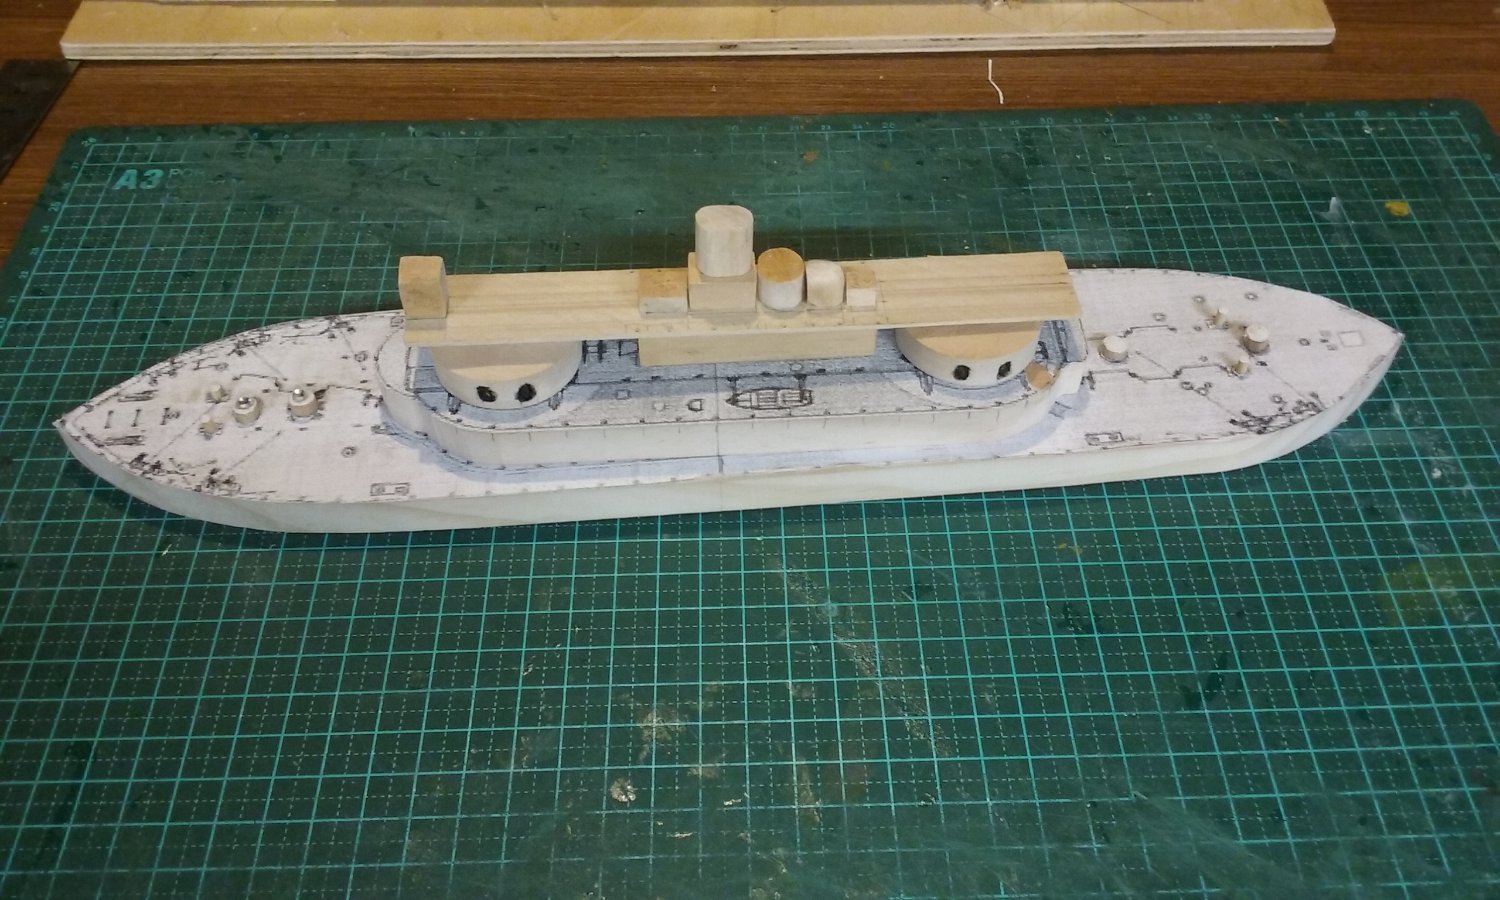
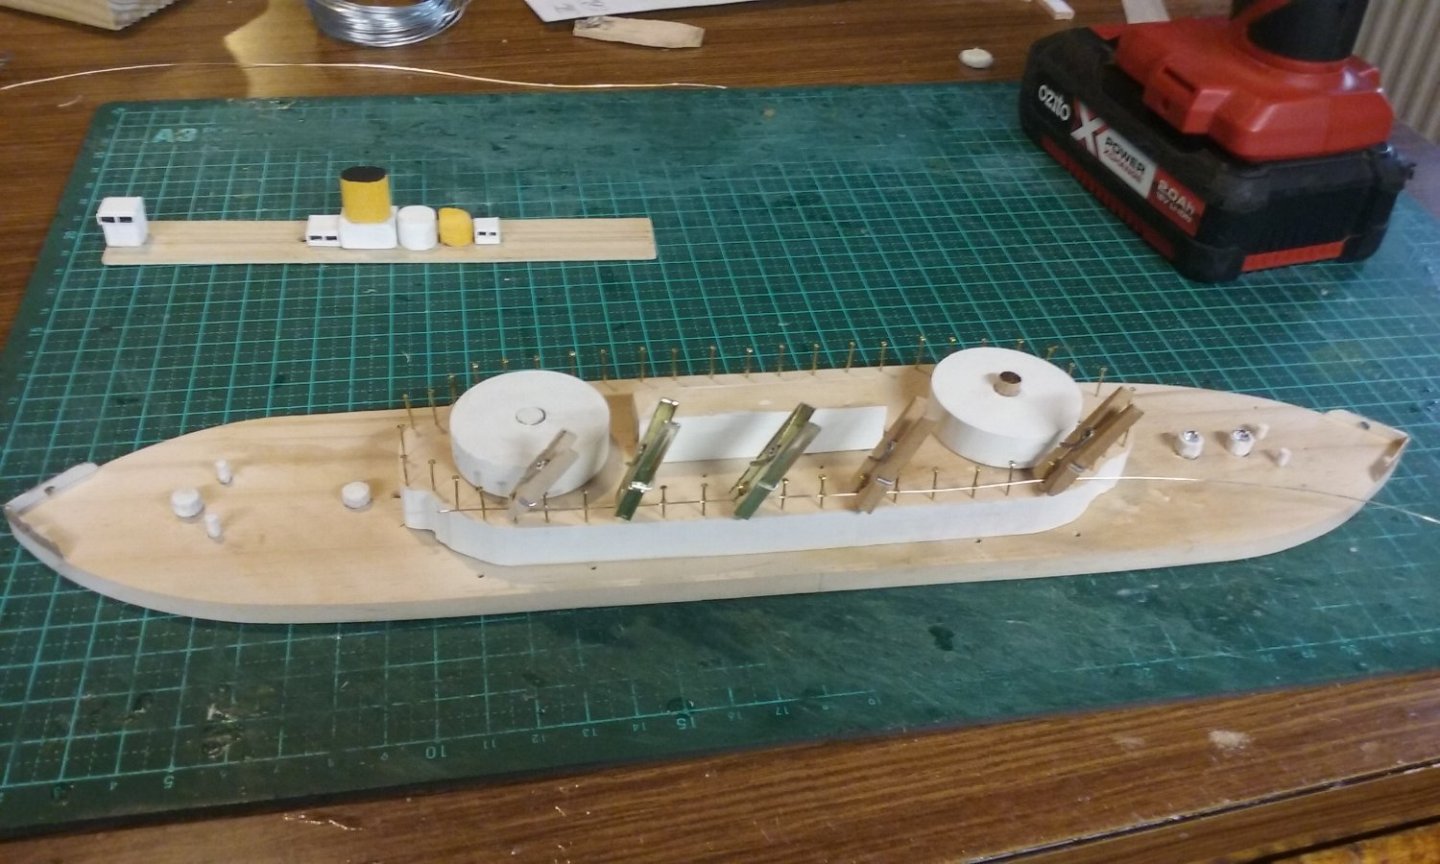
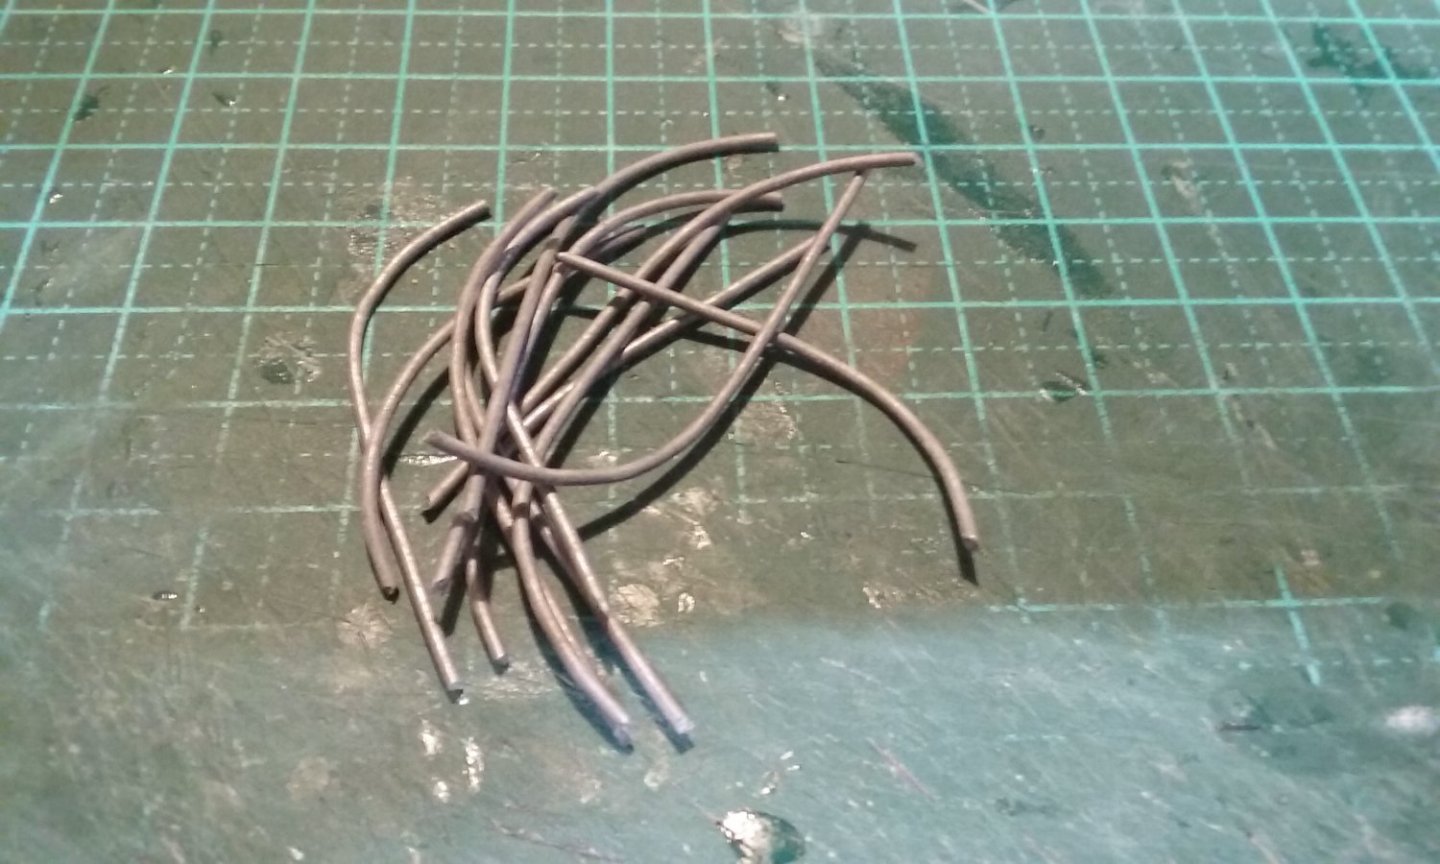
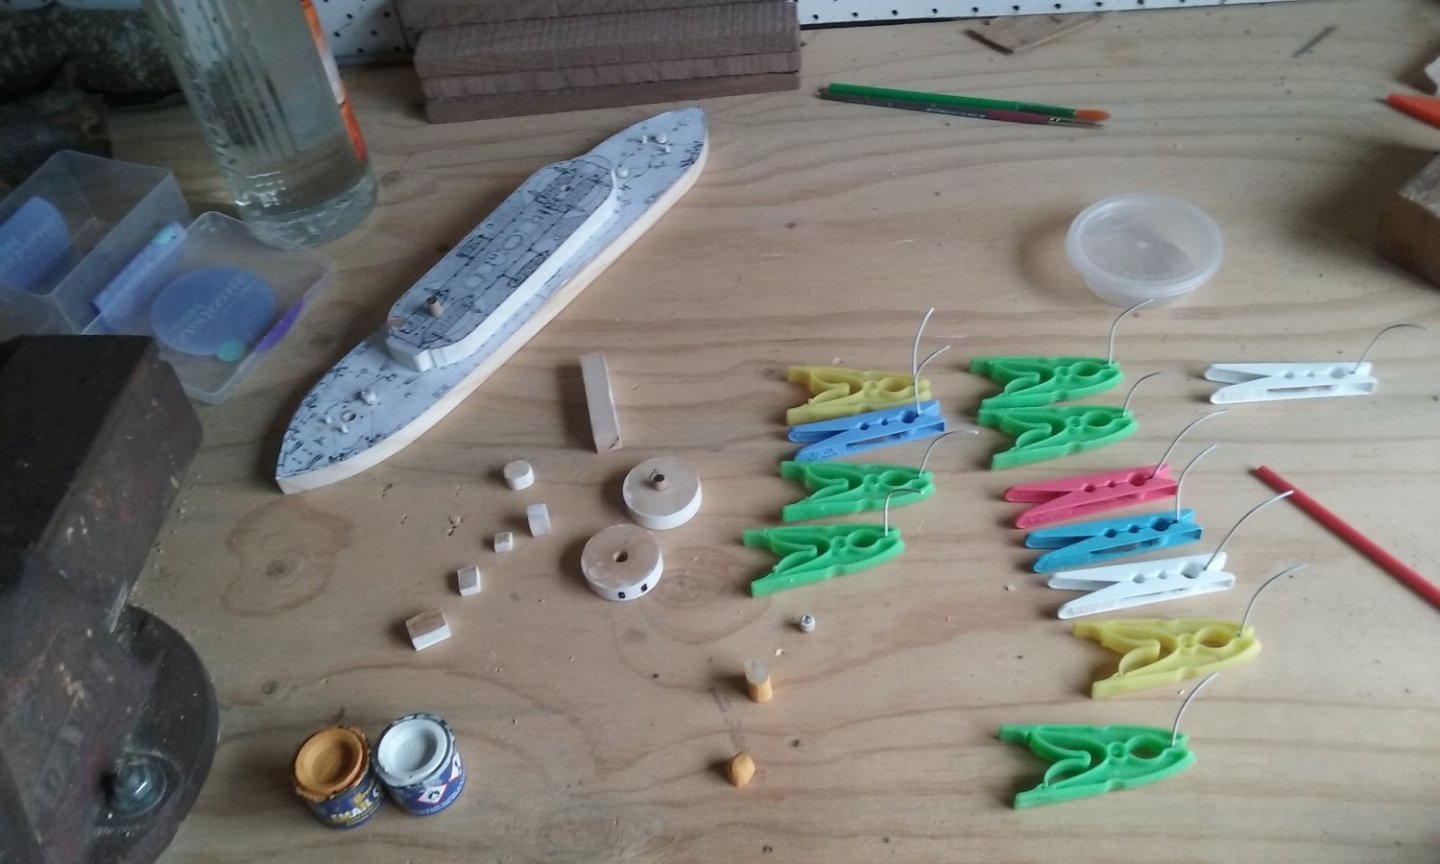
Latest activity. I've made most of the fiddly bits to go on the upper deck to give the vessel a bit of character (I have to admit, she's a bit on the bland side). But before that, I cut some thin brass tube to make the guns and inserted them in the turrets. Just black paint for colour, the muzzles are barely visible, so no need to get into the whole blackening thing. Then made all the fiddly bits and dry fitted them (actually just plonked them on the top). Wheelhouse on the far left, then companionway, funnel with base, some kind of oval thing (I dunno what it its), gigantic vent, and another companion. As I mentioned, I'm keeping this all very simple. And here are the davits, made out of galvanised tie-wire from the shed. And first coat of paint. There's another vent to make, and I think that'll be the lot. I'm not prepared to make the boats - too complicated to attach them to the davits, and there are photos of her without them, so I feel justified. Steven


-
The date is only an estimate, and yes, it does seem a little strange that it should be painted so long after the event. Make sure the shields are thin enough. A common mistake is to make them too thick. They were usually only 10-15 millimetres thick at the edges, a little thinner in the centre. You have to be able to carry the thing without your arm getting tired! Oh and ideally they should have a slight convex curve in the vertical direction. Hey, if I can do it at 1:200 . . . (mind you. I did make them too thick - tissue paper shields don't stand up well to wear and tear). And the Shakespeare (mis)quote - GROAN. Worthy of Dennis Norden and Frank Muir at their best. Steven
- 45 replies
-
- 2
-
-
- Great Henry
- Henry Grace a Dieu
- (and 1 more)
-
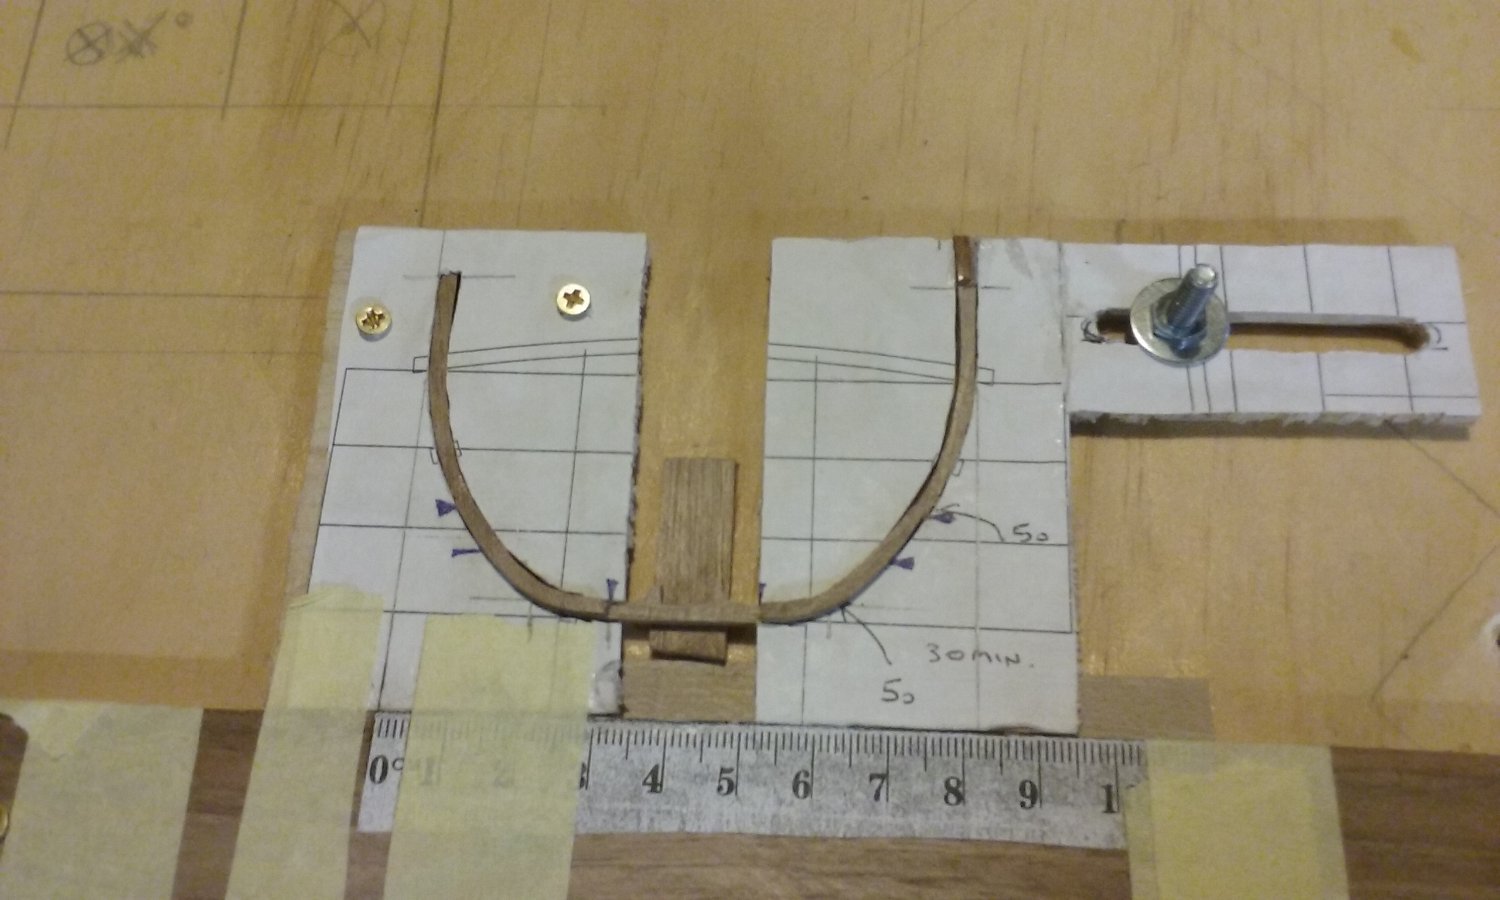
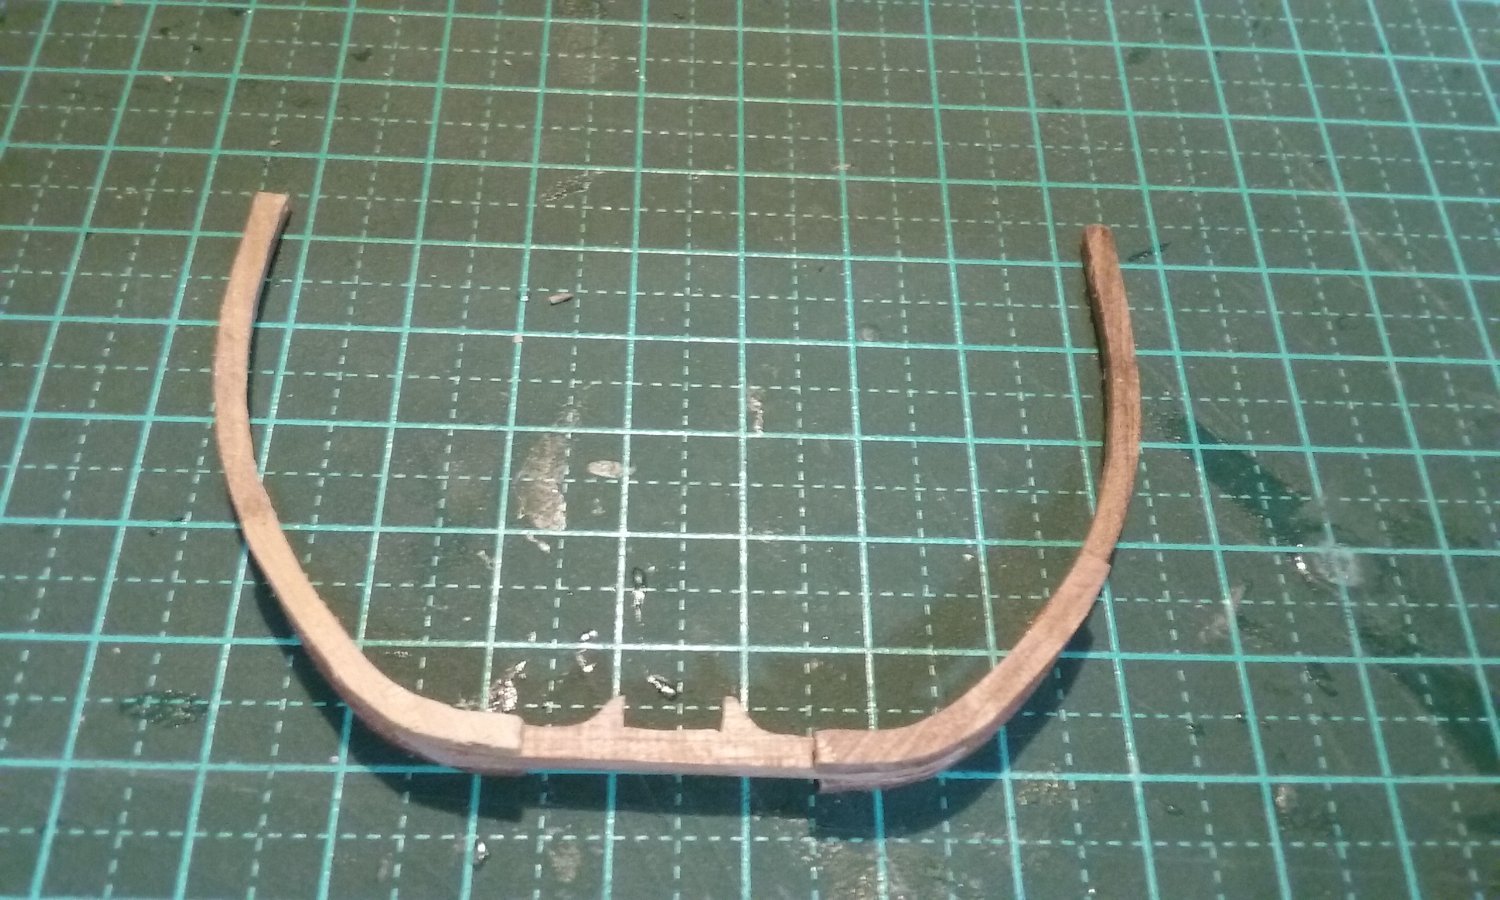
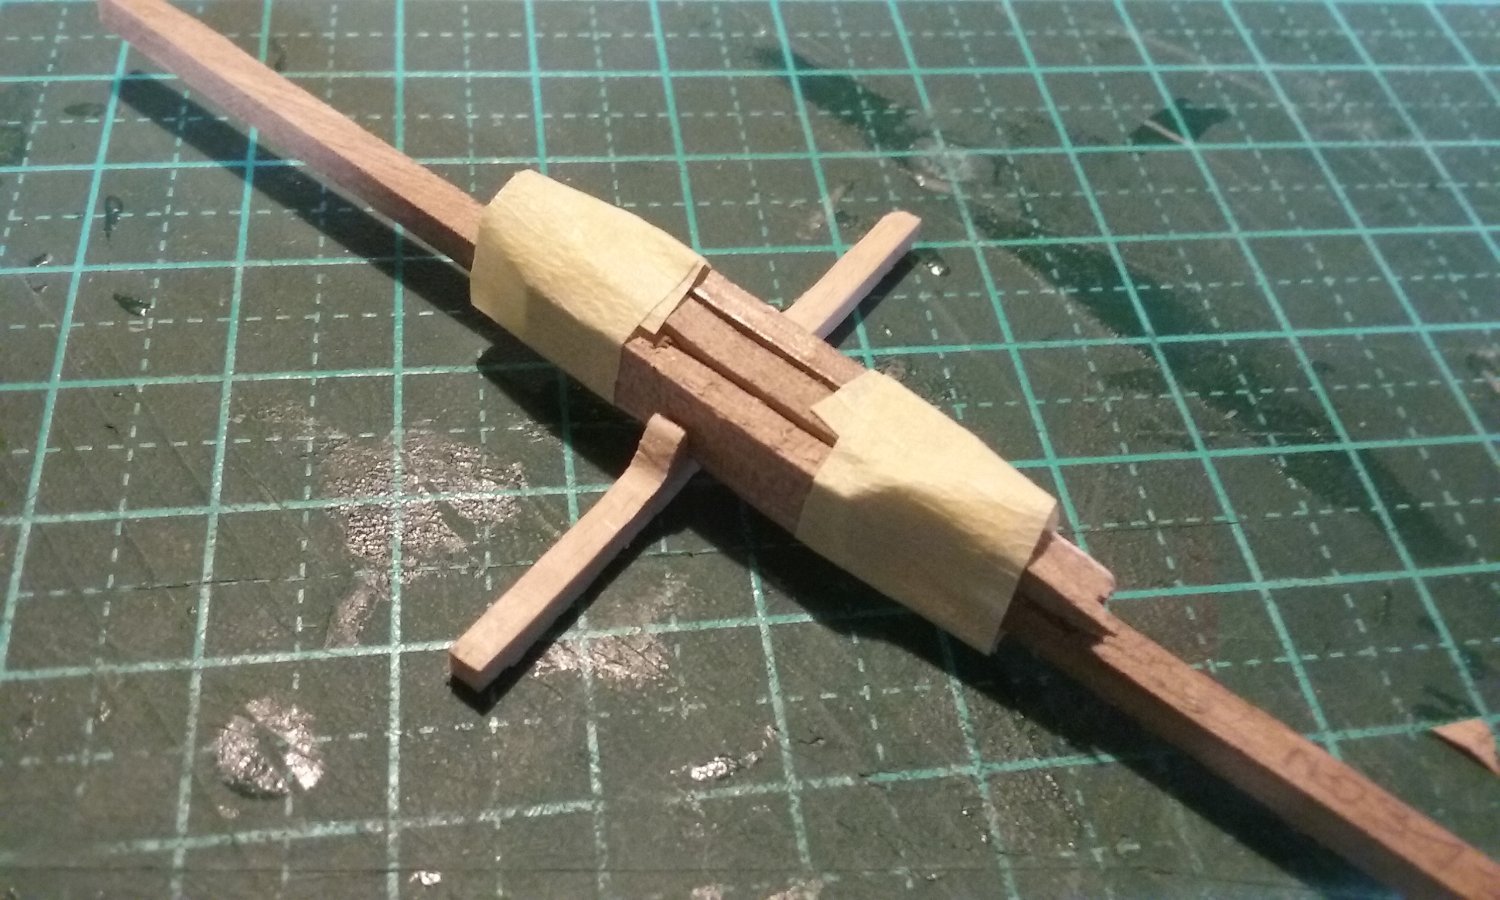
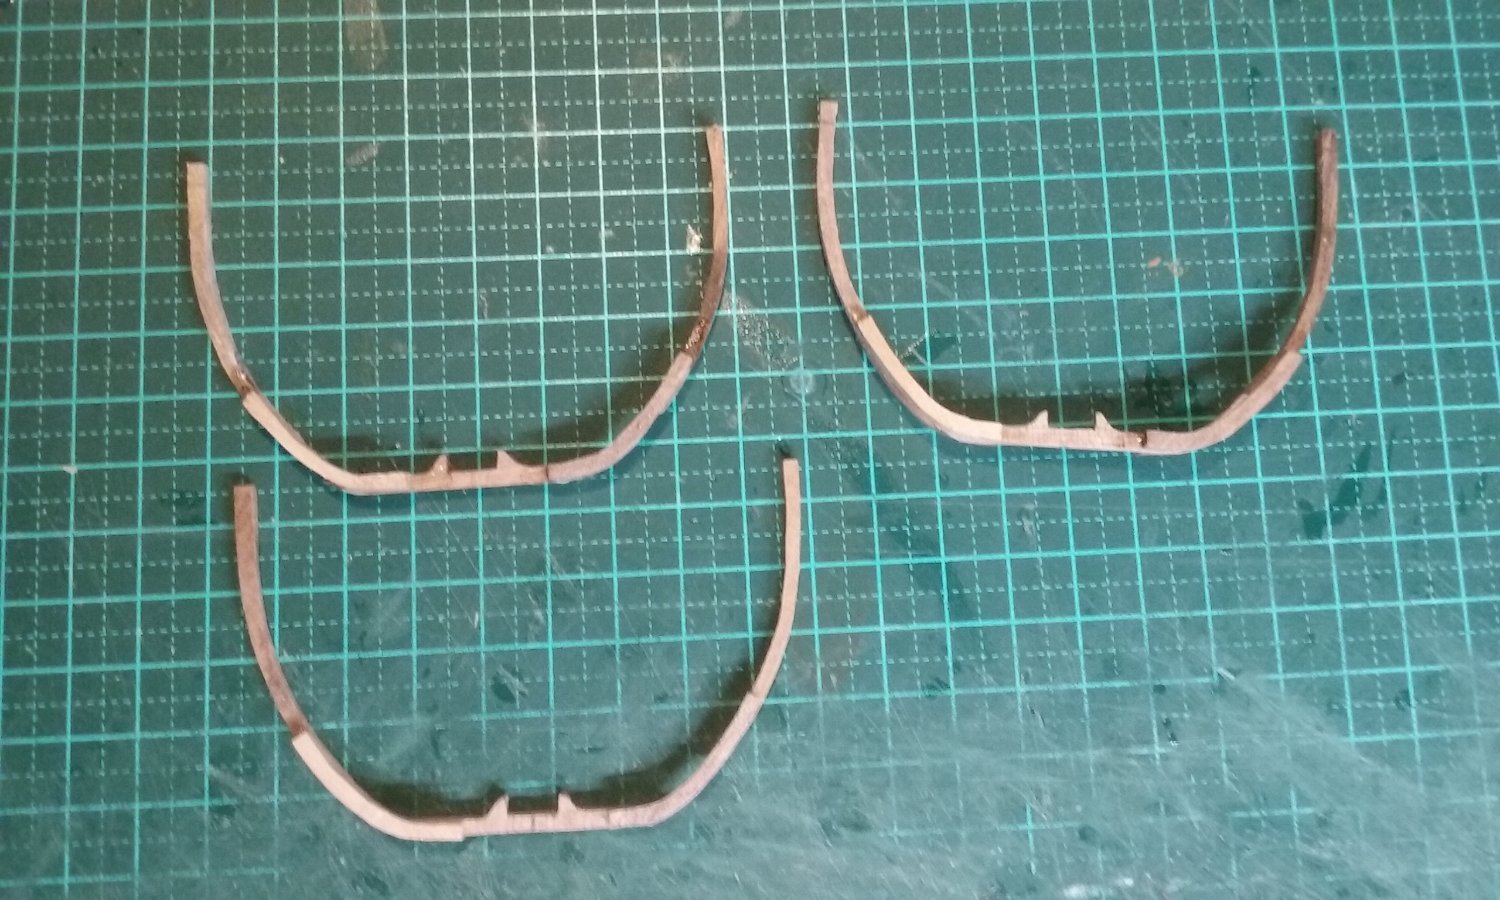
I've made all the floor timbers that incorporate the knees to take the mast steps. Twelve in all (plus one for luck!) Here's a typical one. To get the distance between the knees correct, I made a jig (made of the keelson plus a piece either side that will eventually form the sides of a mast step, plus a top spacer to duplicate the blocks fore and aft of the mast itself), and shaved away till the jig fitted in the gap. And I shamelessly copied Woodrat's jig for assembling the frames. Master frame: The first three frames. Of course I'm labelling each one so I don't get them mixed up. The tolerances are pretty tight to fit within the jig, and there was a certain amount of swearing when, despite all my care, one of the frames got glued to the jig. (I got it out eventually, but not a lot of fun). More to come soon. Steven


- 508 replies
-
- 13
-
-
And don't feel you have to rush into carving the pearwood. Wait till you feel you're good enough on scrap to embark on the better stuff. You should see my first carvings! (Or better still, maybe you shouldn't - too horrible). Steven
-
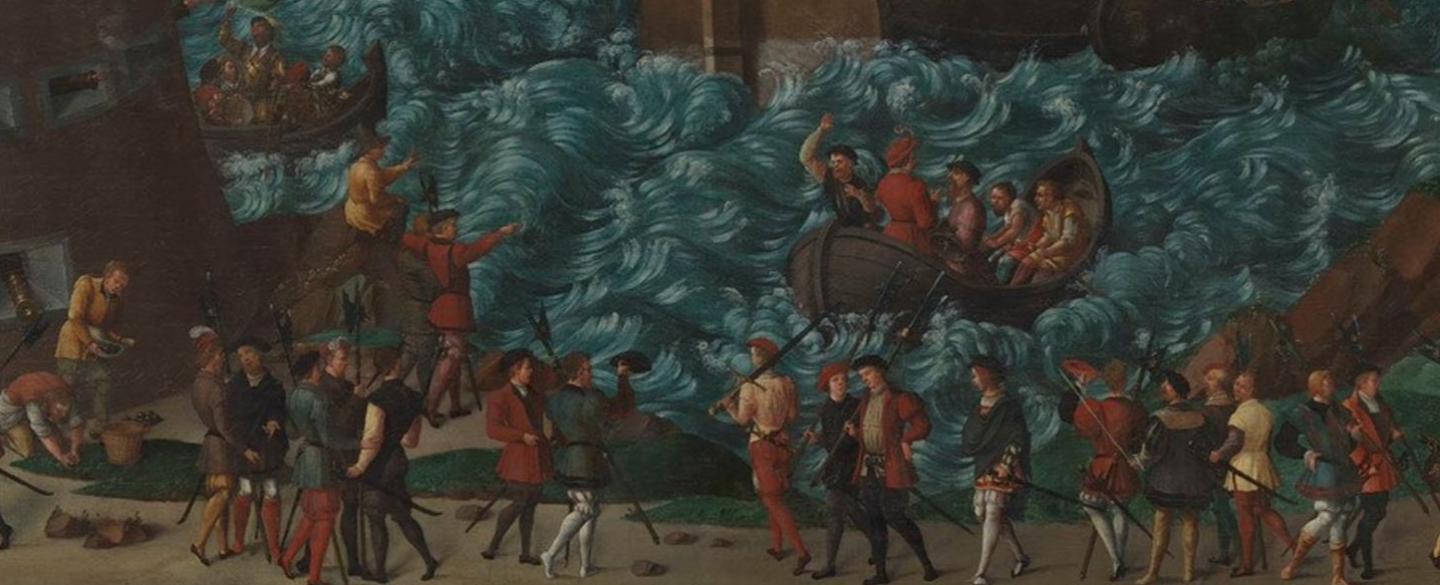
I see what you mean. But some could be converted I think - for example, you could remove the crossbows from the crossbowmen and they'd just be "men". The monks and the ladies I'm afraid don't seem to be right for the ship. But keep in mind also that what sailors wore at the time was very practical and therefore not all that different from modern dress, so modern figures could be used much of the time. Whereas here is the kind of thing worn by the "better sort" Both pictures from the painting "The Embarkation of Henry VIII at Dover for the Field of the Cloth of Gold" held in Hampton Court Palace, painted about 1545. Steven
- 45 replies
-
- 4
-
-
- Great Henry
- Henry Grace a Dieu
- (and 1 more)
-
Either way, I'd suggest you try doing it on a piece of scrap before you attempt carving your valuable and scarce pear-wood. I use a simple craft-knife and a scalpel, both with No. 11 blades. I tried using a dremel clone, but wasn't too happy with it - a little too dramatic and exciting for my tastes - so I went back to the scalpel. Steven
-
Yes, obviously the way the kit tells you to do it is much easier for a beginner to take on, so in some ways there's some sense in telling people to do it that way. Dropping a newbie in the deep end of spiling planks could be enough to make him/her decide it's all too difficult and give up in disgust. Though judging by your work so far I doubt that would apply to you Steven
- 177 replies
-
- 1
-
-
- Perseverance
- Modellers Shipyard
- (and 1 more)
-
I'm pretty sure I've previously found figures out there at that scale - though it might have been at 1:72, the other favourite modelling scale. Google search might be of use here. I'm afraid I can't remember what words I put into the search last time. That's true, and according to Brad Loewen's paper on the subject, the Basques in the 15th century actually trained trees to grow into the shapes they wanted. Anyhow, I'm enjoying following the build. Looking forward to the next instalment. Steven
- 45 replies
-
- 1
-
-
- Great Henry
- Henry Grace a Dieu
- (and 1 more)
-
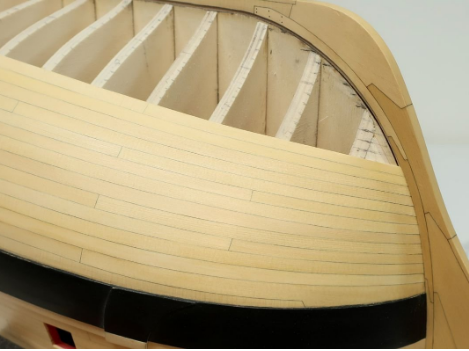
Hi Isaiah, I find it's a fine line between pointing out areas needing improvement and blunting someone's enthusiasm, something I'm very loath to do. I've seen savage critiques on other forums which just seem to be for point-scoring rather than helping someone improve, and I want very much to avoid that. The problem is that a ship's hull, particularly below the water-line, is a very complex 3-dimensional shape - narrower at the bow and stern and wider amidships (plus curving in the other dimension as the hull is rounded). Because of this, planks are usually tapered towards bow and stern (this process is called spiling), as in the picture below (I think this is one of Chuck's) Kits usually provide you with parallel-sided planks, which just can't follow that shape properly. This is obviously easier (= cheaper) for them than to provide spiled planks. And sometimes it's necessary to "drop" planks as the curves get tighter, so there are fewer planks side by side, at the bow in particular. There are clever ways to do this, which are outlined in the planking tutorials. If you look carefully at the picture above, you can see that the plank at the bottom (nearest the black part) comes to an end before it reaches the bow, and the next plank widens to make up for this, so there is one plank where there had been two. The other thing is that planks never come to a sharp point - it would be too hard to nail the ends in place on the frames. So where the plank is "dropped" in the picture above, there's a slight angle at the end of the plank, but not a sharp point. As I mentioned above, I'd highly recommend you check out the planking tutorials - they're a real eye opener. I don't regard myself as an expert in planking by any means, still just blundering along trying to get my head around it all. But I'm getting better. No, I think what you've done and what you're doing are very good indeed. Keep learning, keep asking questions. You'll improve as you go along, but to be honest I'm quite amazed that this is a first build. Steven
- 177 replies
-
- 2
-
-

-
- Perseverance
- Modellers Shipyard
- (and 1 more)
-
Isaiah, I was just looking at your planking. You've done a beautiful job of it, and getting that tight curve at the stern is particularly impressive. However, (and I really hate to tell you this, considering what a great job you're doing) in the interests of your future models I feel you should know that the kit manufacturer's planking instructions don't duplicate the way ship planking was done in the real world. They are designed more for ease of construction (and their own convenience) than for historical accuracy. Your planking is excellent, particularly the second layer, and followed the instructions really well, but unfortunately those instructions are misleading. I'm not saying to change anything on this model - it's excellent just as it is. But before you start your next one I'd recommend strongly that you look at the planking tutorials at https://modelshipworld.com/forum/98-planking-downloads-and-tutorials-and-videos/. Historically accurate planking is more difficult and takes more work, but I believe it's worth the extra time and effort. This is just a heads-up for future reference, not a criticism of your work. Steven
- 177 replies
-
- 2
-
-
- Perseverance
- Modellers Shipyard
- (and 1 more)