


Louie da fly
-
Posts
7,990 -
Joined
-
Last visited
Content Type
Profiles
Forums
Gallery
Events
Everything posted by Louie da fly
-
 Nice work, Dick. That would have to be very precisely shaped and the mortises and tenons exactly placed for it all to work. Nicely done. Steven
 -
Harriet McGregor by Boccherini
Louie da fly replied to Boccherini's topic in - Build logs for subjects built 1851 - 1900
You've done a nice job on this, Grant. Steven -
Interesting rigging details. Do you have The Rigging of Ships in the Age of the Spritsail Topmast by R. C. Anderson? Though some decades later it's the nearest in time to your period of any reliable book I know of. Steven
- 137 replies
-
- 1
-

-
- Golden Hinde
- Revell
- (and 2 more)
-
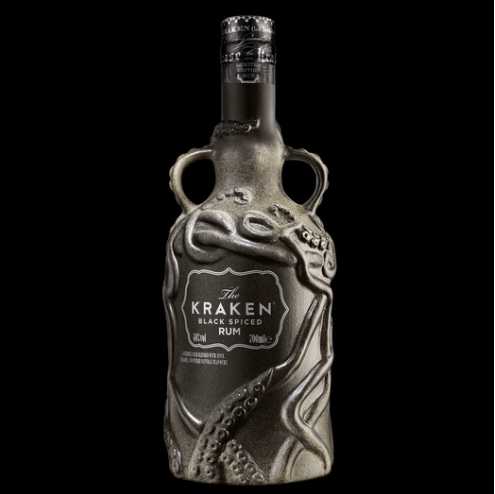
Perhaps this? Not advertising here, I just stumbled upon it on-line, but if you really want to get it, here's the link . . . https://www.freakcraft.store/products/kraken-rum-limited-edition-ceramic-bottle
-
Nice work, mate! Welcome to MSW and yes, start a build log - it's a great way to meet the folks here and get help and advice from those who've been there before. Steven
-
Yes! Best commercially available ginger beer on the market. Unlike most of them which taste like fizzy water with a bit of ginger added, this stuff actually tastes like the real thing, home-made ginger beer (at least to me!). I think it must actually be brewed the traditional way. They have quite a range of drinks, but the straight ginger beer is the original and best. Steven PS: Bundaberg is a town in Queensland.
-
It was my privilege to go on board 'Duyfken' while she was being built in Fremantle. She's so beautiful and she's part of our history as Australians. Have fun with it. Steven
-
Me too, when I was a kid. It actually worked, but I lost it somewhere along the way. It was a clipper, with just sails, no rigging. Steven
-
After watching your video I've decided I'm NEVER going to build a ship in a bottle! It was actually painful to watch - I was sure it was going to be a disaster. I takes me hat off to you sir! PS: Bundy is rum, not beer. A suitable drink for a shipbuilder, I feel. Steven
-
Drawings of ship flags of different states. XVIII c.
Louie da fly replied to greenstone's topic in Nautical/Naval History
Judging by the language of the index, and the fact that apart from that of the Czar the first several flags are Dutch, this volume of flags appears to have been compiled in the Netherlands, or at least by somebody from the Netherlands, but presumably to be presented to the Czar (or commissioned by him?) Which makes me wonder if they have the word "Protestans" correctly spelled, or just taken straight from the Dutch (not that I have any idea if that's the Dutch version of the word). Certainly all the rest is English (I'm prepared to accept that "Liberte" might have been a current spelling of "Liberty") If it was prepared for Peter the Great, the Cromwellian Commonwealth was long gone, and Martes is probably right that it had to do with William III. Steven -
It was probably the same price compared with earning capacity of the time . . . On the other hand, my generation were being sent to Vietnam without any choice in the matter, and we were just waiting for World War III which would wipe out all life on Earth . . . In some ways life is better now. But they didn't have auto-tune . . . we actually relied on people singing in tune . . . Steven
- 137 replies
-
- 2
-
-
- Golden Hinde
- Revell
- (and 2 more)
-
73, mate. I remember the Beatles first becoming famous (I bought all their records as they came out), saw Bob Dylan live just as he was going 'electric', the moon landings, the sixties (old joke - if you can remember the sixties you weren't there). But I was making ship models from about the age of 10, so I don't know whether it's really an old man's hobby. Steven
- 137 replies
-
- 1
-
-
- Golden Hinde
- Revell
- (and 2 more)
-
Just checked your profile - WOW! Born in 2004! Make the most of the hobby while you can. You've probably got more available time now than you'll ever have again. Steven
- 137 replies
-
- 2
-
-
- Golden Hinde
- Revell
- (and 2 more)
-
Wish I could answer this one for you, but it's always had me stumped as well. Strictly, a flag is a separate piece of fabric that is (I think) attached to the hoist (i.e. the rope) at top and bottom corners and hauled up with the hoist going through a block. But that's in the real world. Depending on the scale of your model that may be completely impractical. And the fact that it's a decal, not a piece of cloth or paper makes it even further outside my experience. All I can do is wish you good luck with it. Steven
-
Hold your horses! Nobody's lost interest, just because there haven't been any responses in the last couple of days. Maybe it's just because it's the weekend. Steven
-
It is summer where I live. Current temperature in Ballarat 15 degrees C (= 59 F). Unfortunately, Ballarat gets cold, even in summer, sometimes. Steven
-
Welcome to ship modelling! There'll be plenty more duhs along the way, but don't let it get you down. Even the best of us (and I certainly don't include myself among them!) still make mistakes. They just make more interesting ones (and perhaps not quite so many as us mere mortals). Oh, yeah 40 degrees F. That's 4 degrees in our money . . . Steven
-
Speaking of accidental fires, I love this story from Bob Mortimer on "Would I lie to You?". This man has done things nobody would believe, so it became a saying on WILTY I don't believe it, but if Bob says it, it's probably true."
-
Hi Scotty and welcome to MSW. That's a very nice start you've made, particularly for a first-timer! Steven
-
Dammit! I should have thought of the generated heat bubbling the paint - it's happened to me in the past. But very glad you found a good solution (which I believe is better than the original). And I like your idea of pre-painting the wood before punching the shields out. Amazingly, you seem to have positioned the punch exactly right to have the pattern centred properly - not an easy thing to do at all . Steven
-
Hold them temporarily to a horizontal surface with adhesive putty/mounting putty/Power tack? (we call it blue tack here in Oz, but it has many proprietary names) Steven


