Louie da fly
-
Posts
7,989 -
Joined
-
Last visited
Content Type
Profiles
Forums
Gallery
Events
Everything posted by Louie da fly
-
 I love your moulding (is that the same thing as a waterway? I had a similar problem with my two most recent builds - if you have decking and exposed frames, unless you put in something like this moulding, water will get through the gaps between the decking and the frames and end up in the bilges. At the scale I was using I couldn't even get the decking to meet the external planking perfectly, let alone do this moulding. Even a moulding running along the inner edges of the frames would help, as it would be a barrier to water running off the decking and into the bilges. Steven
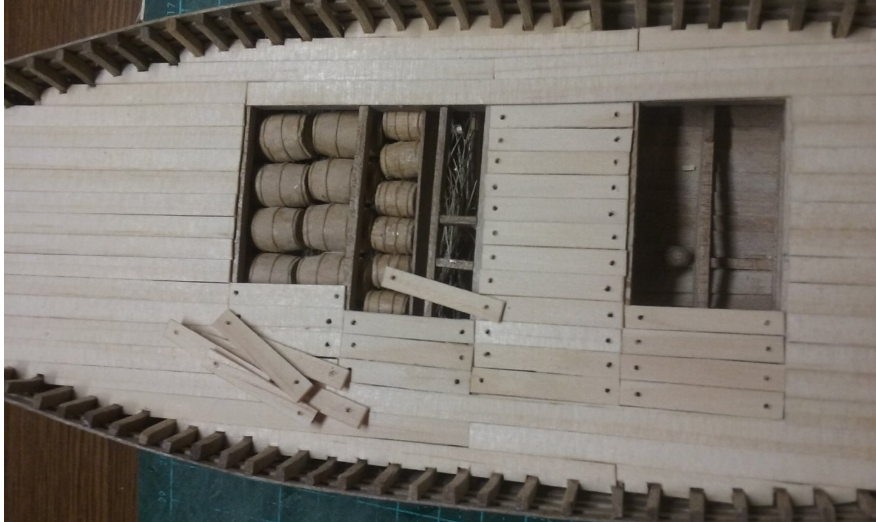
-
PHOTOS! We need PHOTOS!!! Steven
-
I'm coming back to this build after quite a gap. You've done an amazing job, Ekis. It really feels like you're there. Steven
-
HMCSS Victoria 1855 by BANYAN - 1:72
Louie da fly replied to BANYAN's topic in - Build logs for subjects built 1851 - 1900
Box gutters are a b*gger. Having spent my life designing houses, I try to steer very clear of them - they collect leaves and clog up, water doesn't have anywhere to go if they overflow. But the great majority of (Victorian) houses in Ballarat have them . . . including my own. Fortunately in our case, they haven't overflowed (yet - cross fingers). Steven- 1,013 replies
-
- 2
-

-
- gun dispatch vessel
- victoria
- (and 2 more)
-
HMCSS Victoria 1855 by BANYAN - 1:72
Louie da fly replied to BANYAN's topic in - Build logs for subjects built 1851 - 1900
Yep, we had that bad weather up here in Ballarat, too. It was a bewdy. We got considerable flooding here - fortunately we live on top of a hill, so it didn't affect us personally. But it was all pretty dramatic - thunder, lightning, heavy downpour, big old trees blown over. I was glad I'd cleaned out the roof gutters about a week prior, thinking, "Well, it's summer, not likely to get much rain from now on. Good time to clean the gutters . . ." Keith's right, though. Victoria will be waiting for you when you're ready to get back to her. Steven- 1,013 replies
-
- 3
-
-
- gun dispatch vessel
- victoria
- (and 2 more)
-
Great to have you back, mate! The ship is looking very good. Steven
-
Beautiful work, mate! Steven
-
My feeling entirely. It's not supposed to be a competition. I was going to put it on hold anyway, until I'd done a lot on Great Harry, or preferably finished it. In the meantime, there's plenty of research needed before anybody can even think of making sawdust. Steven
-
Yep - one of the issues I'm still trying to get my head around. But don't hold your breath. I don't expect to start on it until I've done a LOT more on the Great Harry - possibly even finish it. Maybe we could do parallel builds at the same time? Steven
-
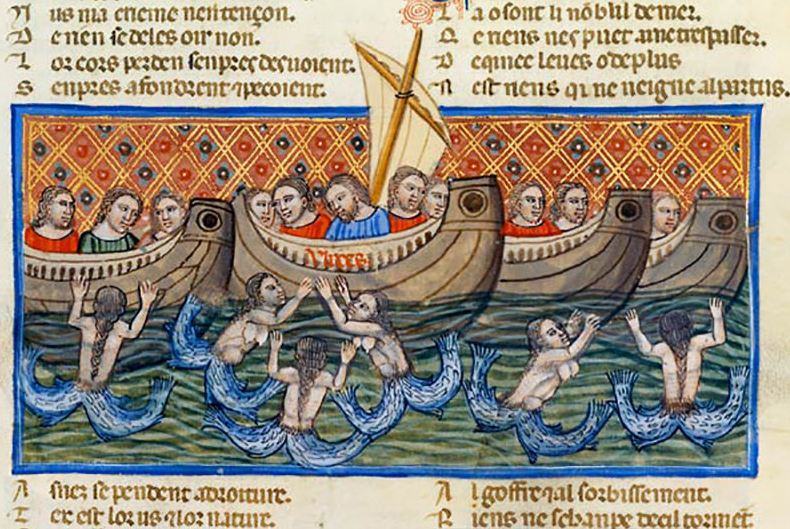
Ok, first decision. The bow. Though Woodrat's similar ship has a bow like this: . . . which explains so many contemporary pictures where it looks mysteriously like this: . . . on my own it is pretty obvious the bow is different. For example, see the above post and this detail: The stempost in all examples curves back dramatically (there are slight variations in its configuration but whenever the stempost is visible the reverse curve is always there) and the bow seems to be fairly sharp. This bow shape is reinforced by the so-called Cocharelli Codex (Genoese, 1330-1340) which unusually shows several ships as seen from the front. This plus the fact that they look remarkably similar to the San Marco ships despite them being almost 200 years apart, leads me to think that this shape co-existed with that shown on Woodrat's ship, and that this is how the bow should be configured. Steven
- 508 replies
-
- 10
-
-
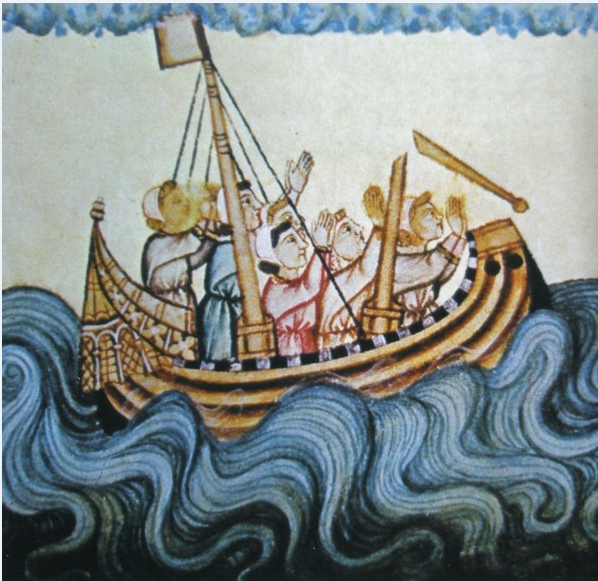
Very good question, Richard. This very question has been discussed in post #165 (dated December 18, 2021) on Woodrat's Incredible Hulc thread at https://modelshipworld.com/topic/25641-the-incredible-hulc-by-woodrat-a-frumious-reconstruction/page/6/ Though this is somewhat later than the Viking period, it's the best we've got. There seems to be no evidence from the Vikings' time of how they reduced sail, though the way they controlled the sail looks very interesting! Here are another couple of pics of reef points from about 1200-1300; Steven
-
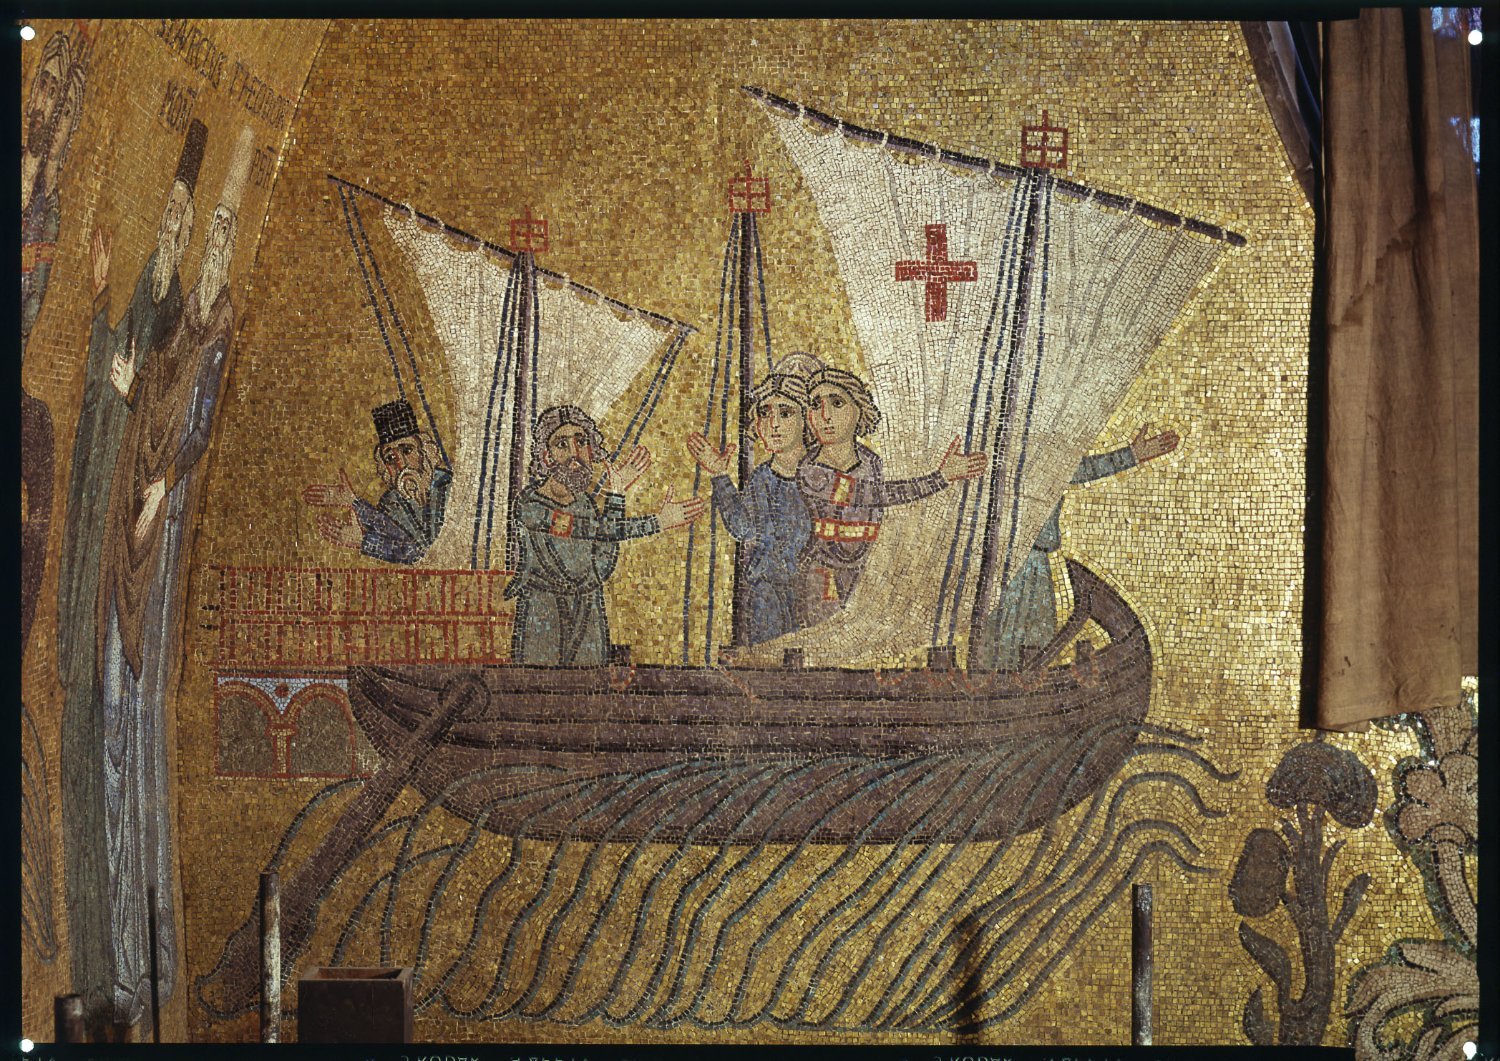
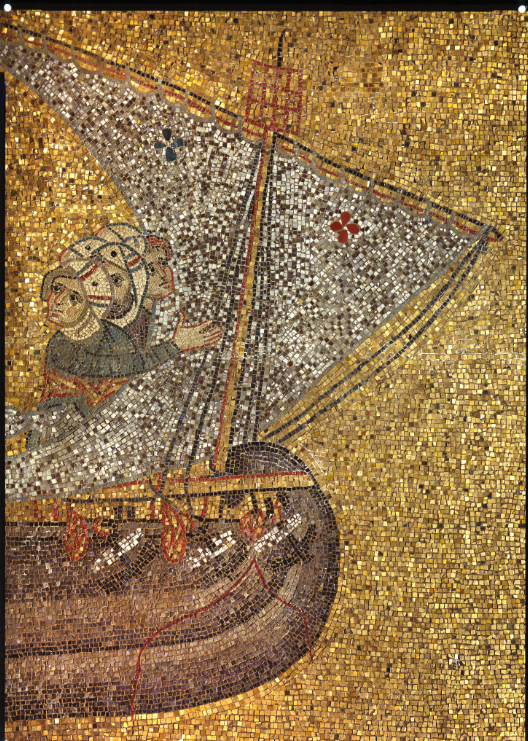
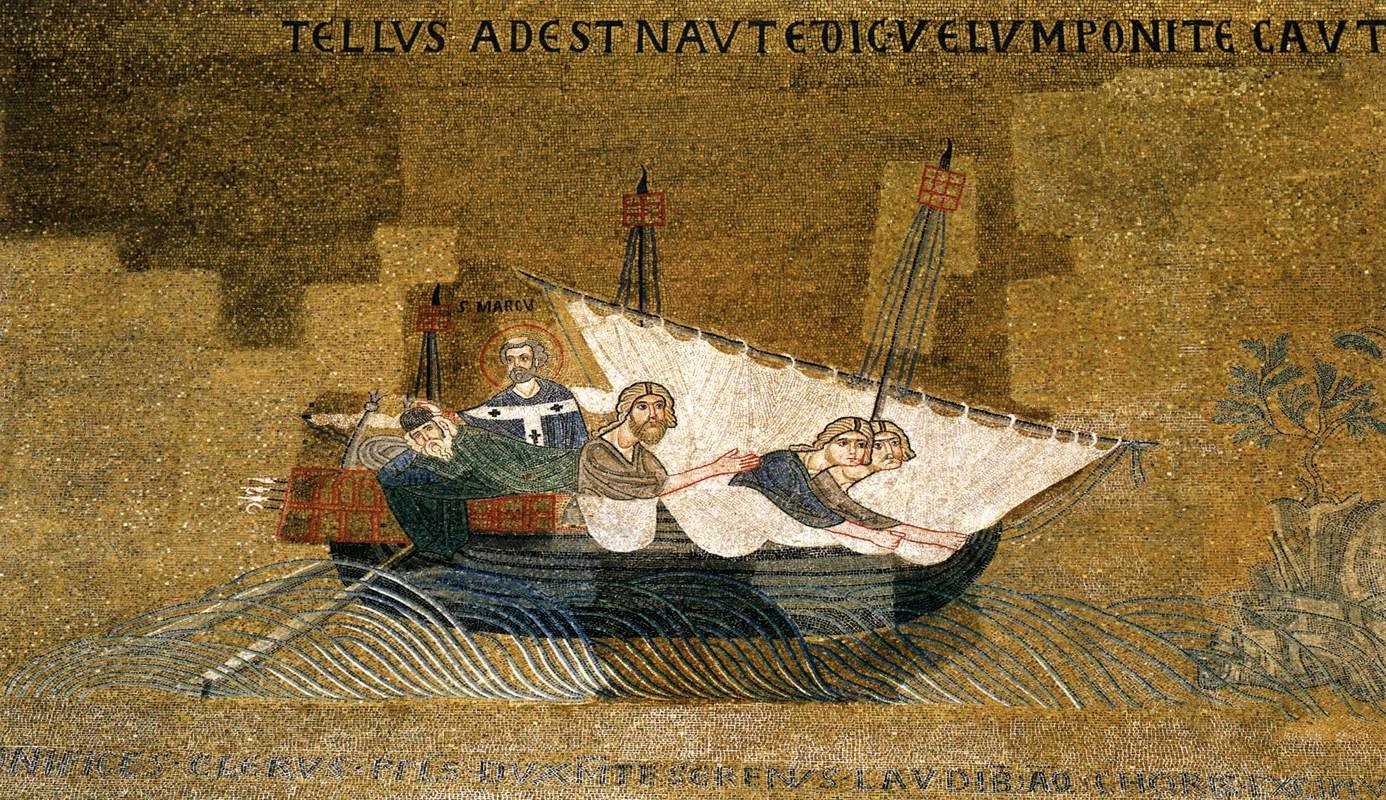
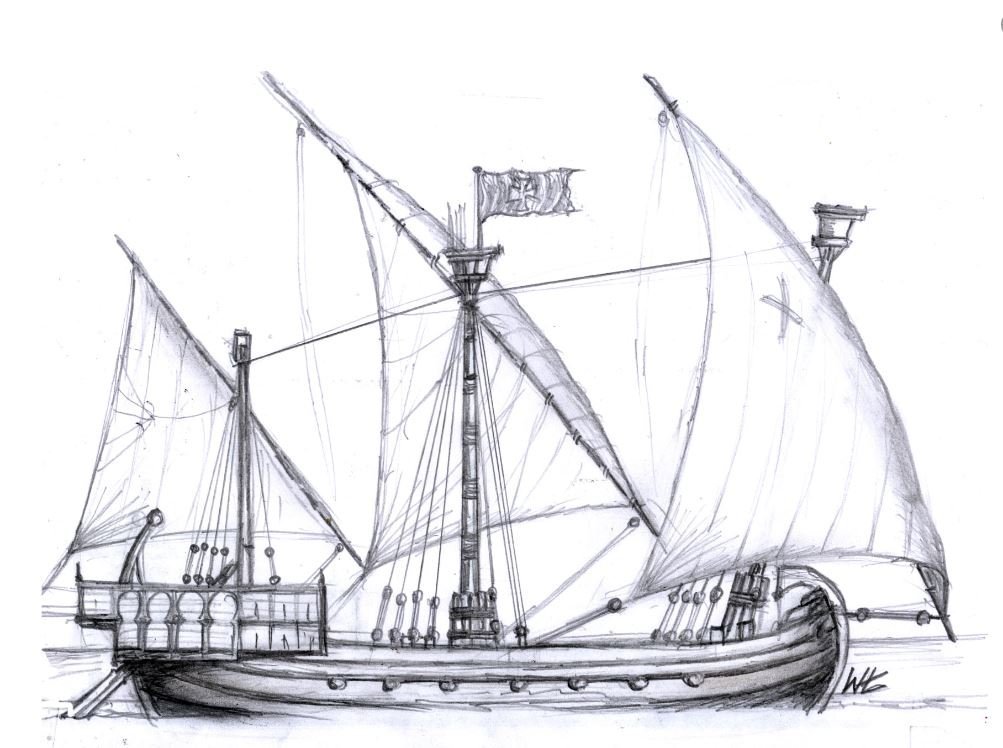
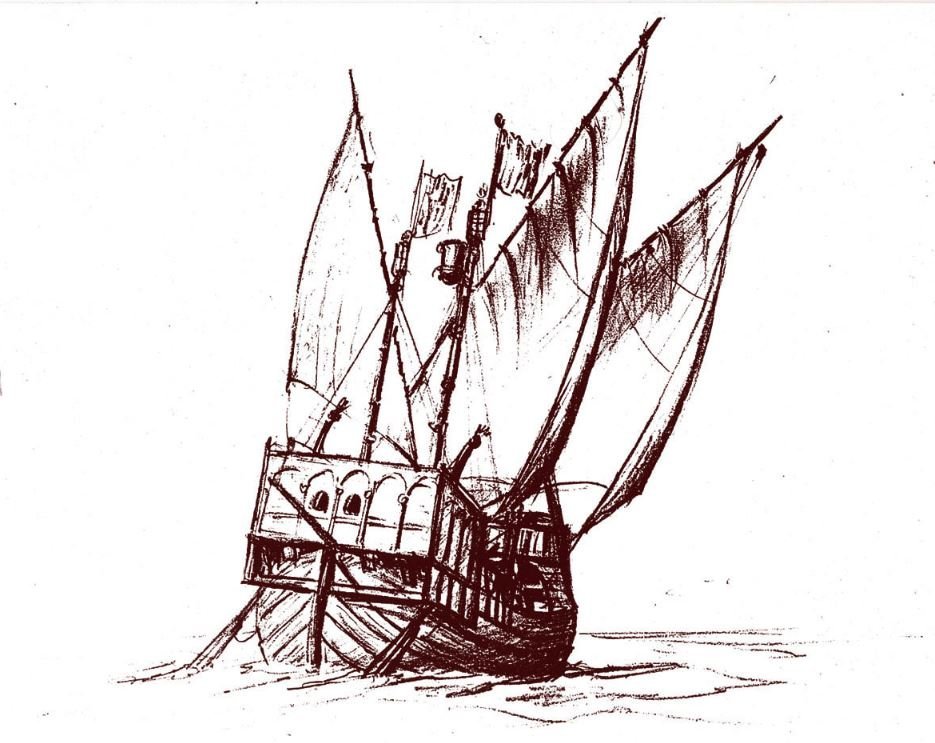
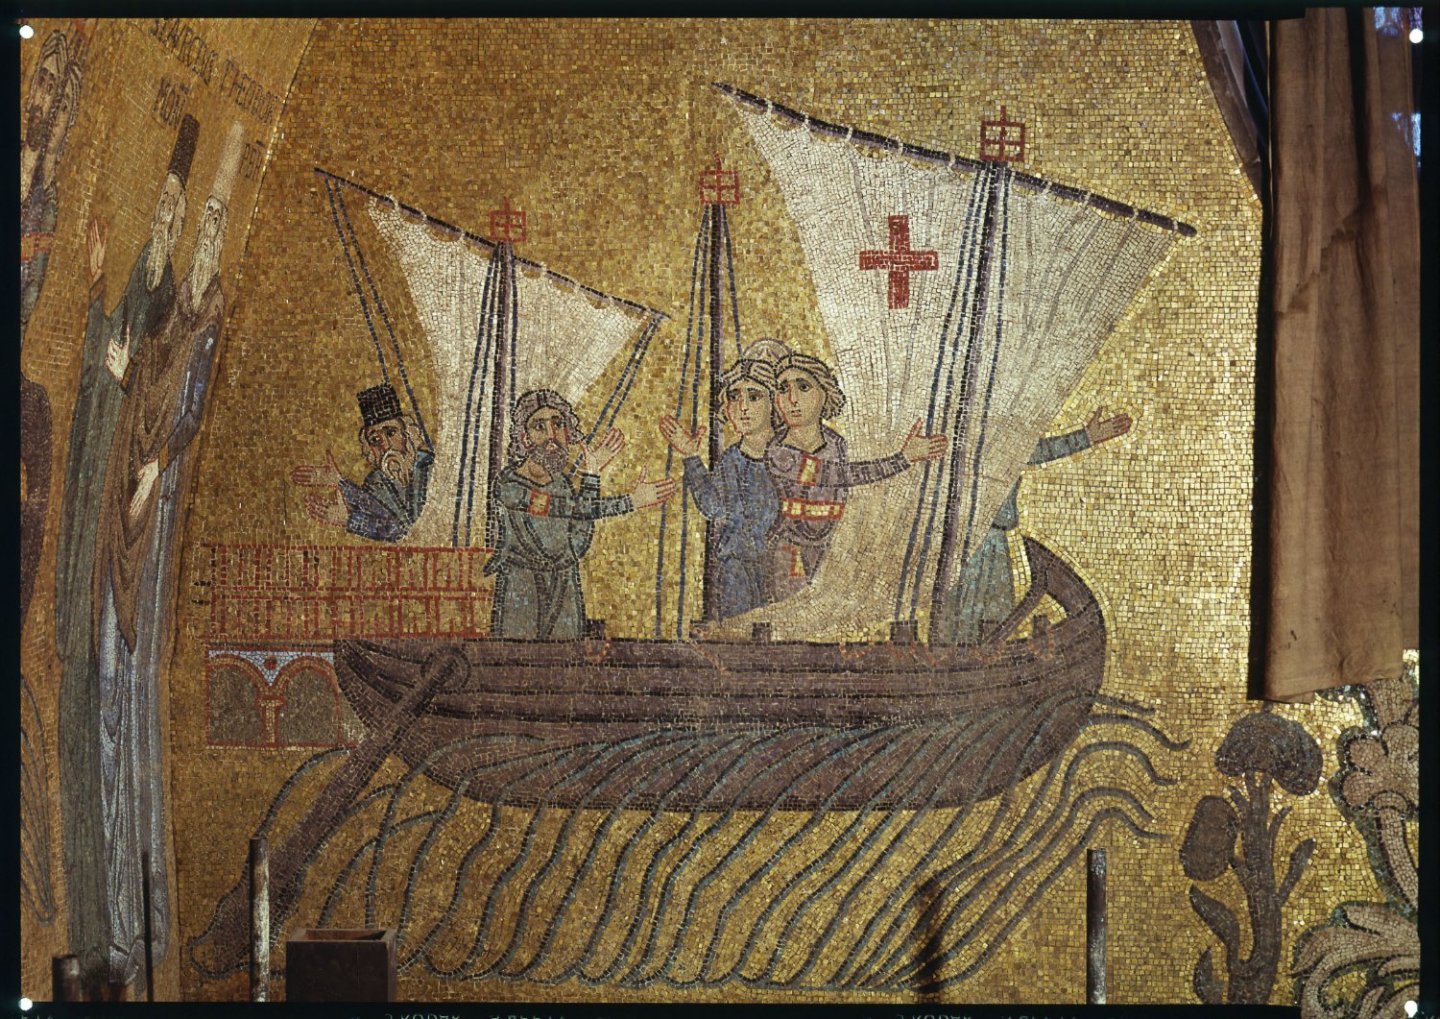
In the church of San Marco (Saint Mark's) in Venice is a series of mosaics celebrating the so-called "translation" of the body of Saint Mark from Alexandria to Venice, where he became the city's Patron Saint. "According to legend, Saint Mark’s body was taken from Alexandria, Egypt, in 828. Two Venetian merchants travelling in Alexandria, obtained the relics of Saint Mark from Priests at the church of Saint Mark, where the saint’s body was interred. The Priests feared Saint Mark’s relics might be damaged or destroyed by the Saracens during the persecution of the Catholic community in Alexandria. Promising to safeguard the Saint’s relics, the merchants convinced the Priests to allow them to return to Venice with the body of Saint Mark. The body of Saint Mark was taken out of the sarcophagus and unwrapped from its silk shroud, the relic being substituted by another and less eminent Saint. It was then placed in a chest and taken on board the Venetian ship, the merchants first ensuring, that the Saint’s remains were covered by a layer of pork and cabbage. When the Muslim officials asked to inspect the chest, they cried out ‘Kanzir, kanzir’ (Oh horror) at the sight and smell of the pork. . . . Thus the Evangelist was safely conveyed to Venice but not before a number of miracles eased his passage across the Mediterranean.” There are five mosaic panels showing the ship itself at various stages of the voyage. They are all very much the same - three masted, lateen rigged, with two side-rudders - but with minor variations in the shape of the aftercastle, the stempost, the line of the gunwale etc. Some of these variations don't make a lot of sense and I am going to have to reconcile them and come up with a version that I'm happy with. This is a rather difficult ship to get a good concept of, but I was inspired by a couple of sketches on a Facebook forum by Wagdemar Lookomsky (I hope he doesn't mind me posting them here) which finally suggested a configuration for this ship that made sense. I'll be using these as a basis for my own reconstruction, but I won't be copying them exactly. I will be basing the hull shape mainly on that of the 14th century Contarina ship which Woodrat has already used for his 14th century Venetian Round Ship (see https://modelshipworld.com/topic/17991-venetian-round-ship-13th-century-by-woodrat-132-scale-fully-framed-completed/ ) and I will be shamelessly copying much of his technique in building my own (though at a smaller scale). However, this is at the research stage at the moment. First I want to get a lot more done on my Great Harry restoration, which as languished while I built my nef. But this is a bit of a heads-up for those who are interested. Steven
- 508 replies
-
- 18
-
-
Oh, yes! Just out of interest, you might find this amusing: "the leading genuine fake Russian choir in Southern Hemisphere" By the way, even the name is a joke. An Esky is the Australian name for what might be called a chilly bin or a cooler (for keeping your beer in). So the band is named for a dusty esky . . . . And the Australian town of Mullumbimby ("Mullum" to the locals) becomes Mullumgrad. Steven
-
Hi Greg and welcome to MSW from the Land Down Under. You'll find quite a number of 3D printed models and accessories on MSW - it's becoming more and more popular. Mke sure you start a build log when you begin. The best way to get help and advice. Steven
-
Welcome to MSW, mate! Love Kurt Weil - "Mack the Knife", "Surabaya Johnny" . . . Though I have to say my great love is classical (currently sitting with the earphones on, listening to Butterfly's aria - sublime!) Looking forward to your first ship model. Steven
-
And another welcome from The Land Down Under, this time from sunny Ballarat. I've had a look at your build log. VERY impressed. Steven
-
And this is your FIRST ship???? Steven
-
Hi Brian, and welcome to MSW from the far antipodes. You'll find a wooden model involves a lot more - at least making the hull - than plastic. But persevere and you'll get there in the end. What time/place is your railroad? And what model ship are you planning to go with it? Make sure you start a build log when you begin your model - definitely the best way to get help and advice, and meet the (slightly crazy) members of this amazing forum. Steven
-
Hi Pirate, and welcome to MSW from sunny Ballarat in Oz. You'll find a wooden model is very different from plastic - a lot more to do than just glue two halves of a hull together, though the masts and rigging are very much the same. But with your woodworking skills I'm sure you'll do fine. Steven
-
Happy New Year (and new hobby)
Louie da fly replied to MarcusWebb's topic in New member Introductions
Hi Marcus, and welcome from Oz. I'd second MTaylor's advice to start a build log when you begin your model. Great opportunity for help and advice - and we get to see another model in progress. Steven -
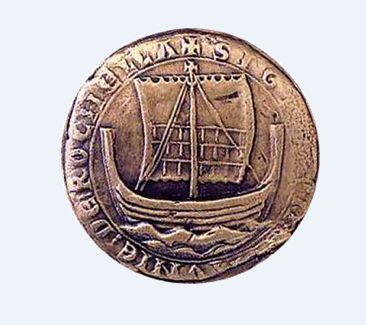
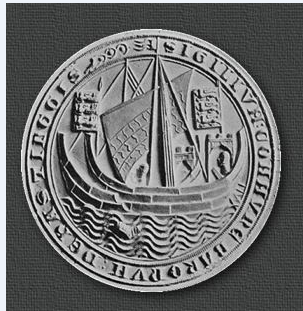
Thanks, people. Silverman, I hadn't really decided to have this bloke hidden from view to still fit with the town seal, it just turned out that way. Once I'd decided to show the cargo, I had to somehow come up with a scenario to fit it in with the ship being about to leave port. So I came up with someone just doing the final touches in closing up the hold, which fitted both requirements. Marcus, I'd love to see the Viking ships, and particularly observe people in the process of building replicas with the original tools and methods. As an old mediaeval re-enactor that's right up my alley. Something I'd been hoping to do (before Covid hit) was to travel to France and visit the castle they're building in Guedelon using only traditional methods, and volunteer my services for a week or two, even if only as a labourer. In the meantime, I'm going to be working on the Great Harry, while researching my next build - I'm looking at something mediaeval (surprise, surprise!) Steven
-
How many kits do you have on the go at the moment?
Louie da fly replied to CaptnBirdseye's topic in Wood ship model kits
I usually have two scratch builds on the go at once. Currently I'm restoring my Great Harry model I built when I was a teenager, having just finished my Winchelsea nef. I'm currently researching two mediaeval ships with the idea of starting one of them in the near future. But as I put the Great Harry on hold while I built the nef, I think I'd be wise to get a fair bit of it done before I start on a new one. Steven -
Interesting. That's what my kids called him, too. Steven
- 186 replies
-
- 3
-
-
- keelless
- reverse clinker
- (and 4 more)