Louie da fly
-
Posts
7,989 -
Joined
-
Last visited
Content Type
Profiles
Forums
Gallery
Events
Everything posted by Louie da fly
-

Furphy
Louie da fly replied to henrythestaffy's topic in CAD and 3D Modelling/Drafting Plans with Software
Nice. For those overseas, Furphy was the brand name of water carts. They were used by Australian troops used them in World War I, and just like the "scuttlebutt", gatherings around the Furphy were the way rumours spread among the troops. So in Australian parlance, a furphy became the name for an unfounded rumour. It's not all that common nowadays, but I still use it. Steven -

-
I thought afterwards that maybe I could have got the euphroes 3D printed - but then again maybe not - possibly still too small to be practicable. Steven
- 740 replies
-
- 3
-

-
- Tudor
- restoration
- (and 4 more)
-
But you do have wonderful buildings such as the High Court and (new) Parliament House. Steven
-
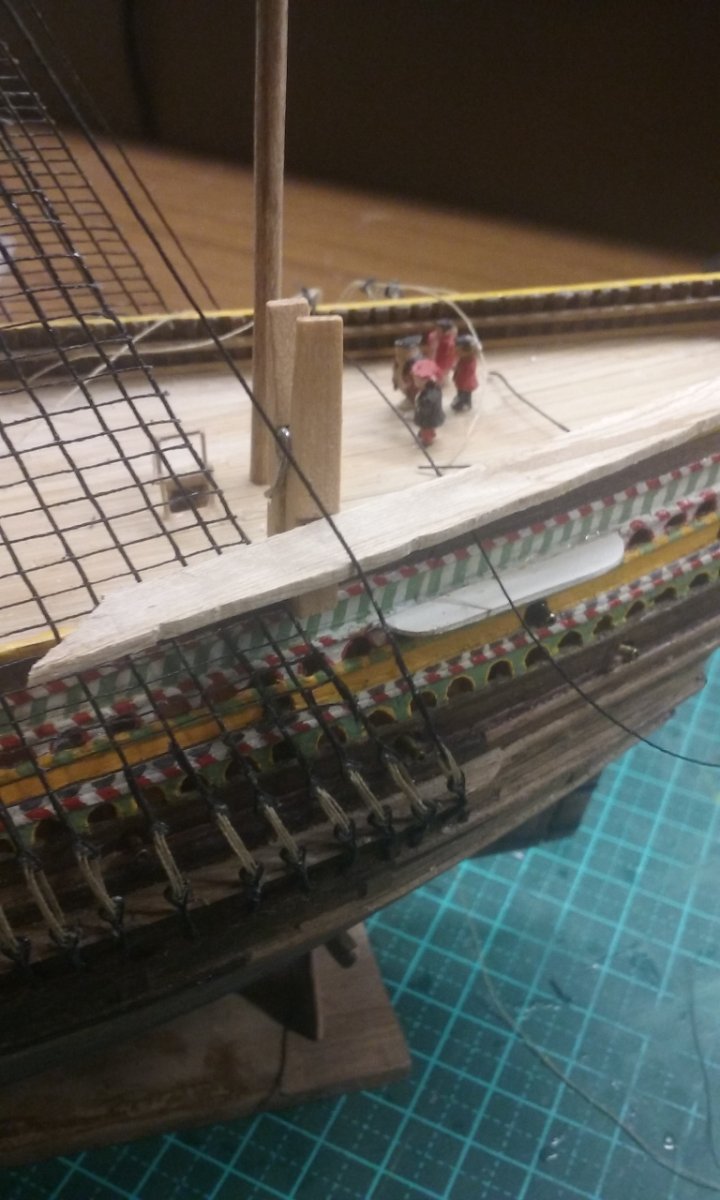
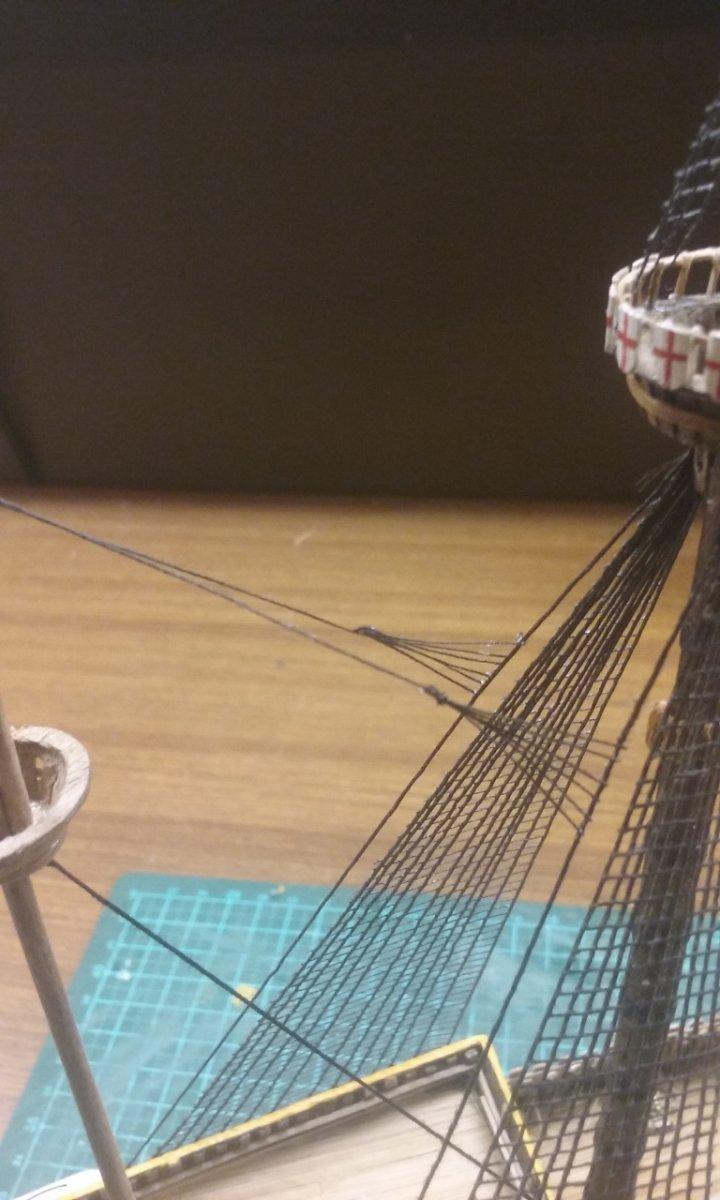
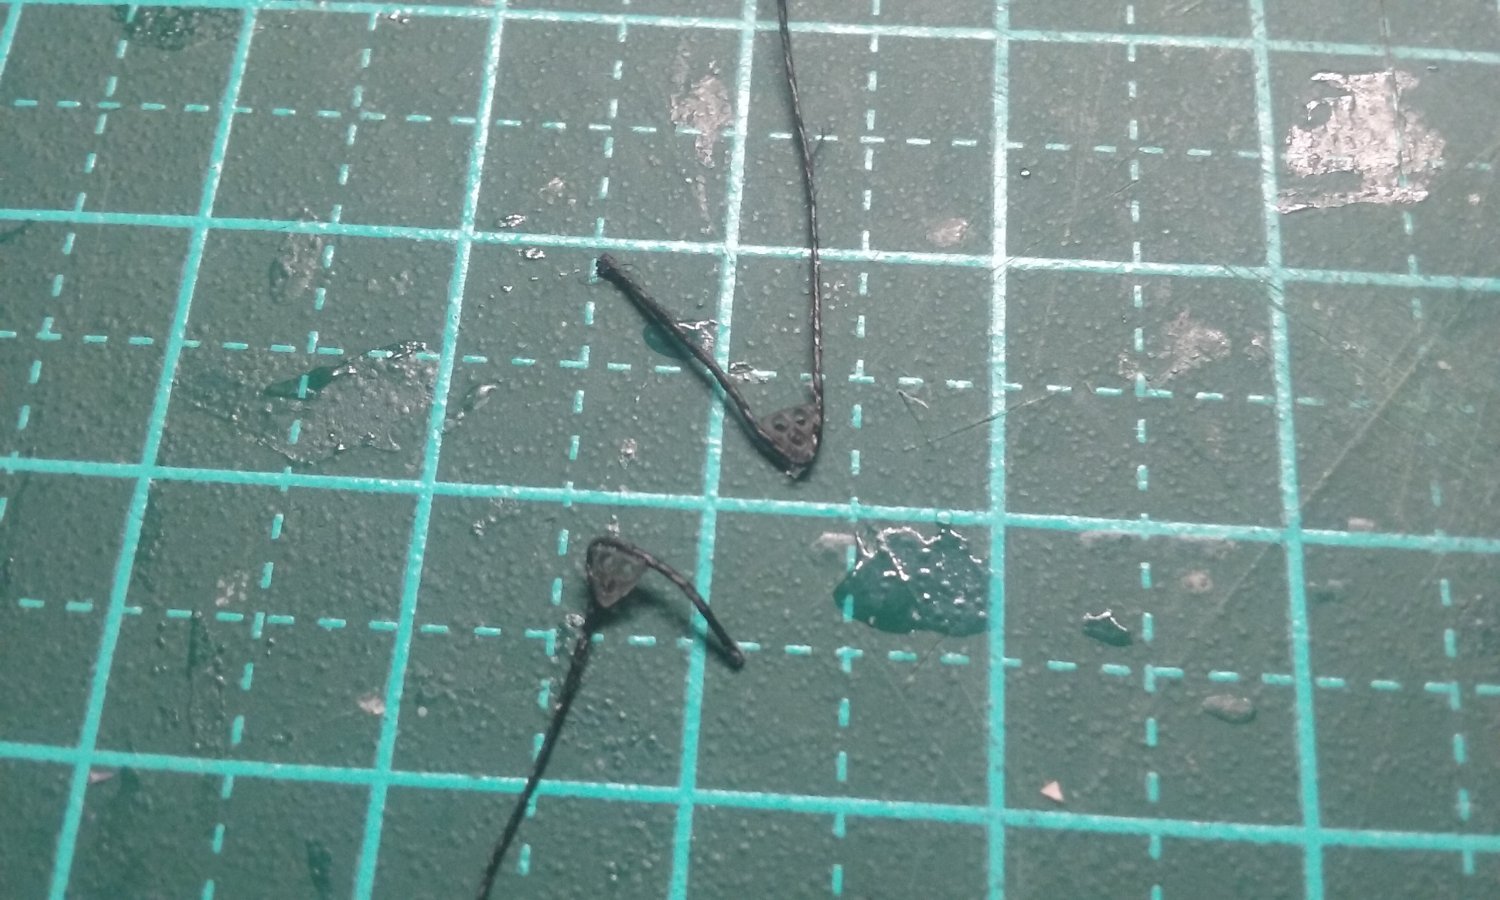
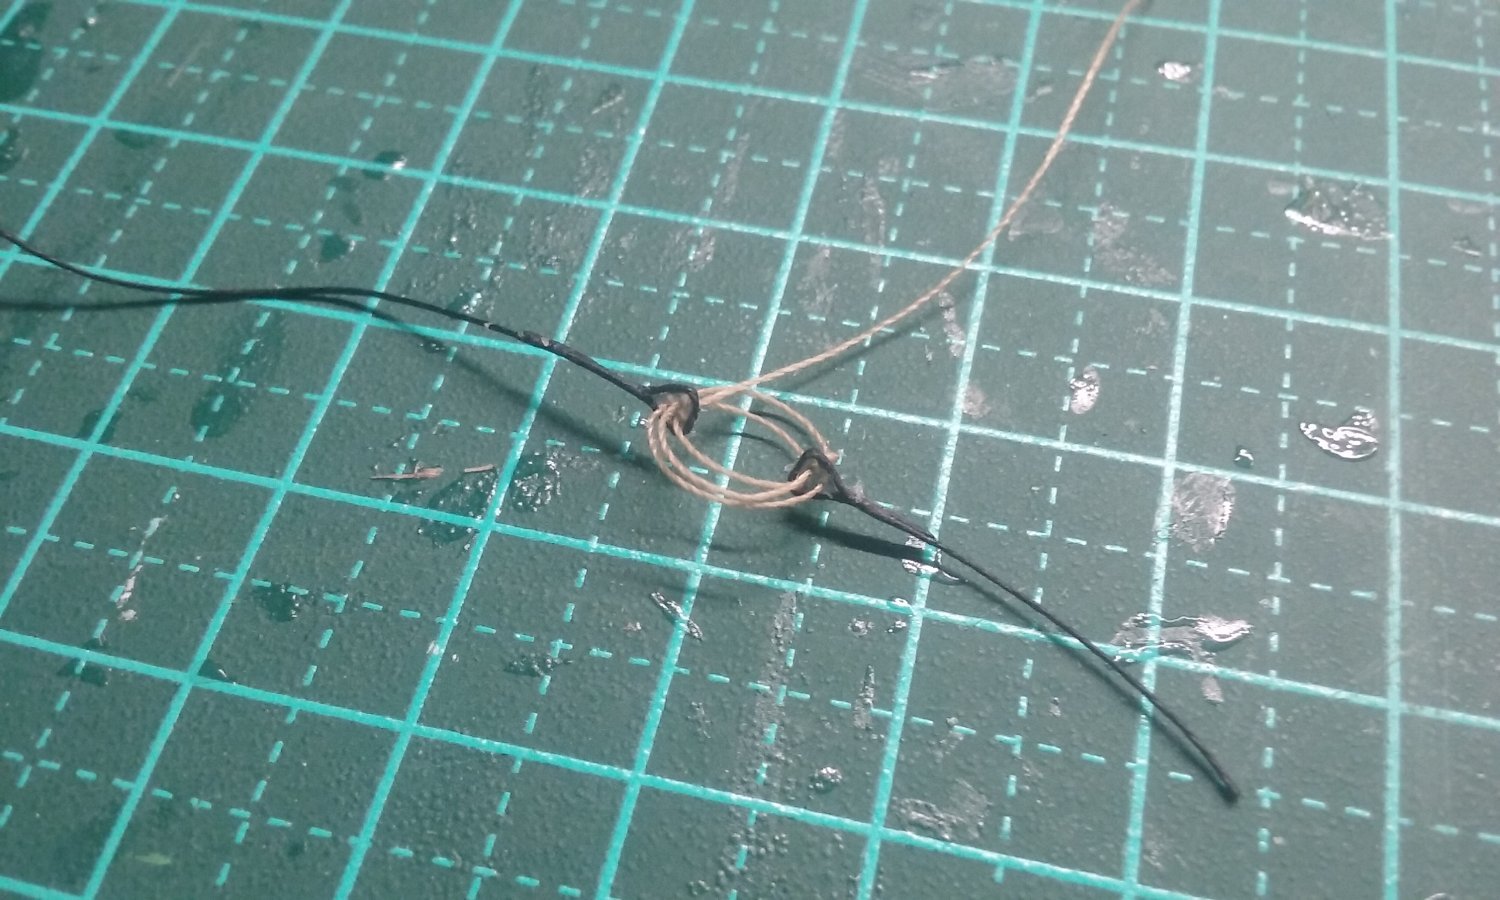
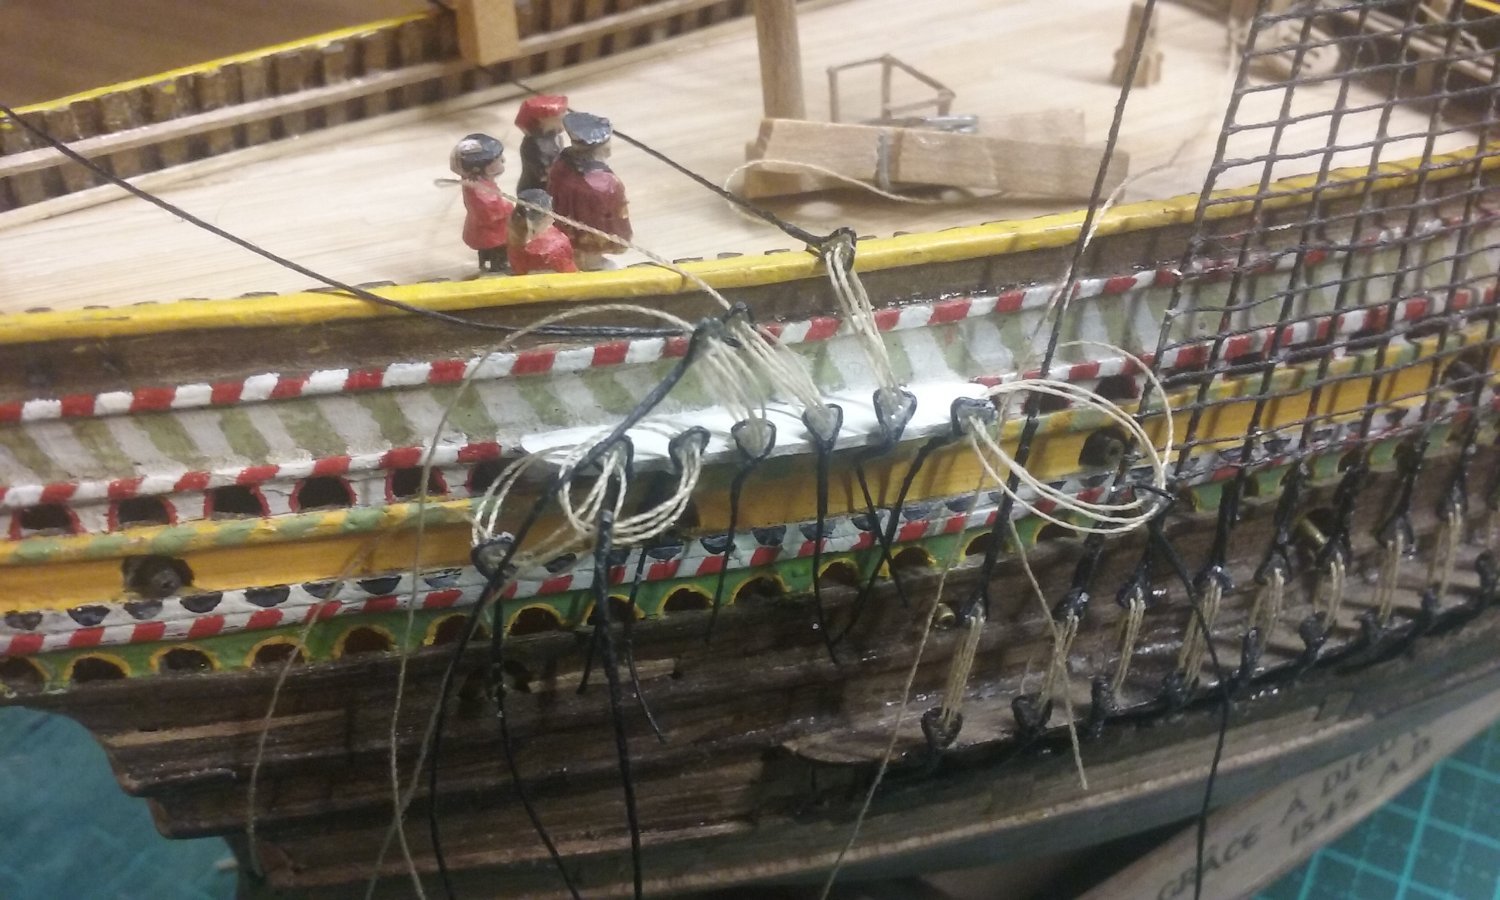
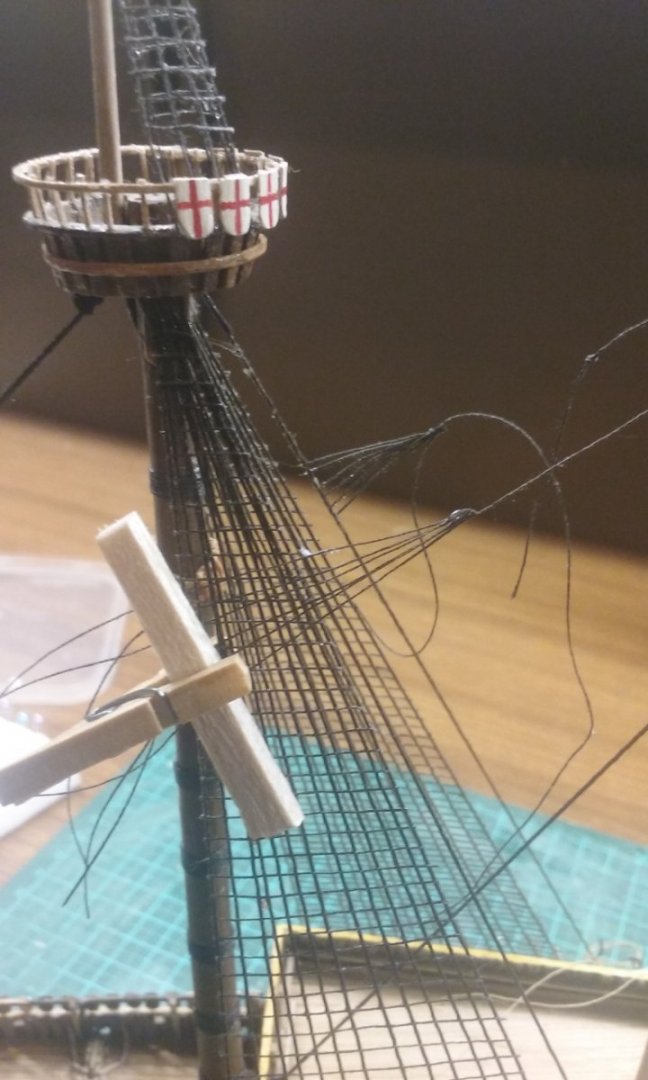
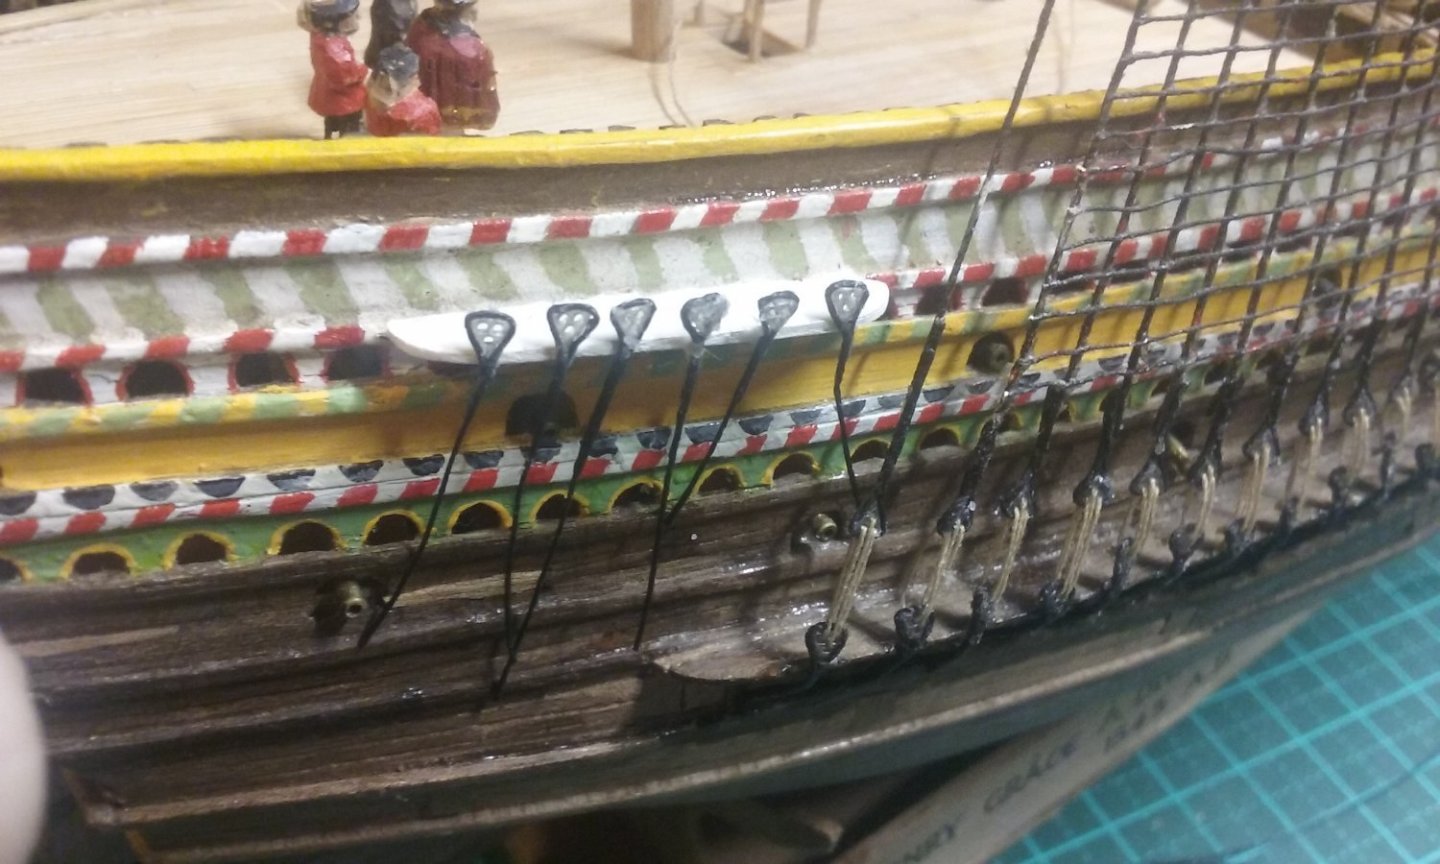
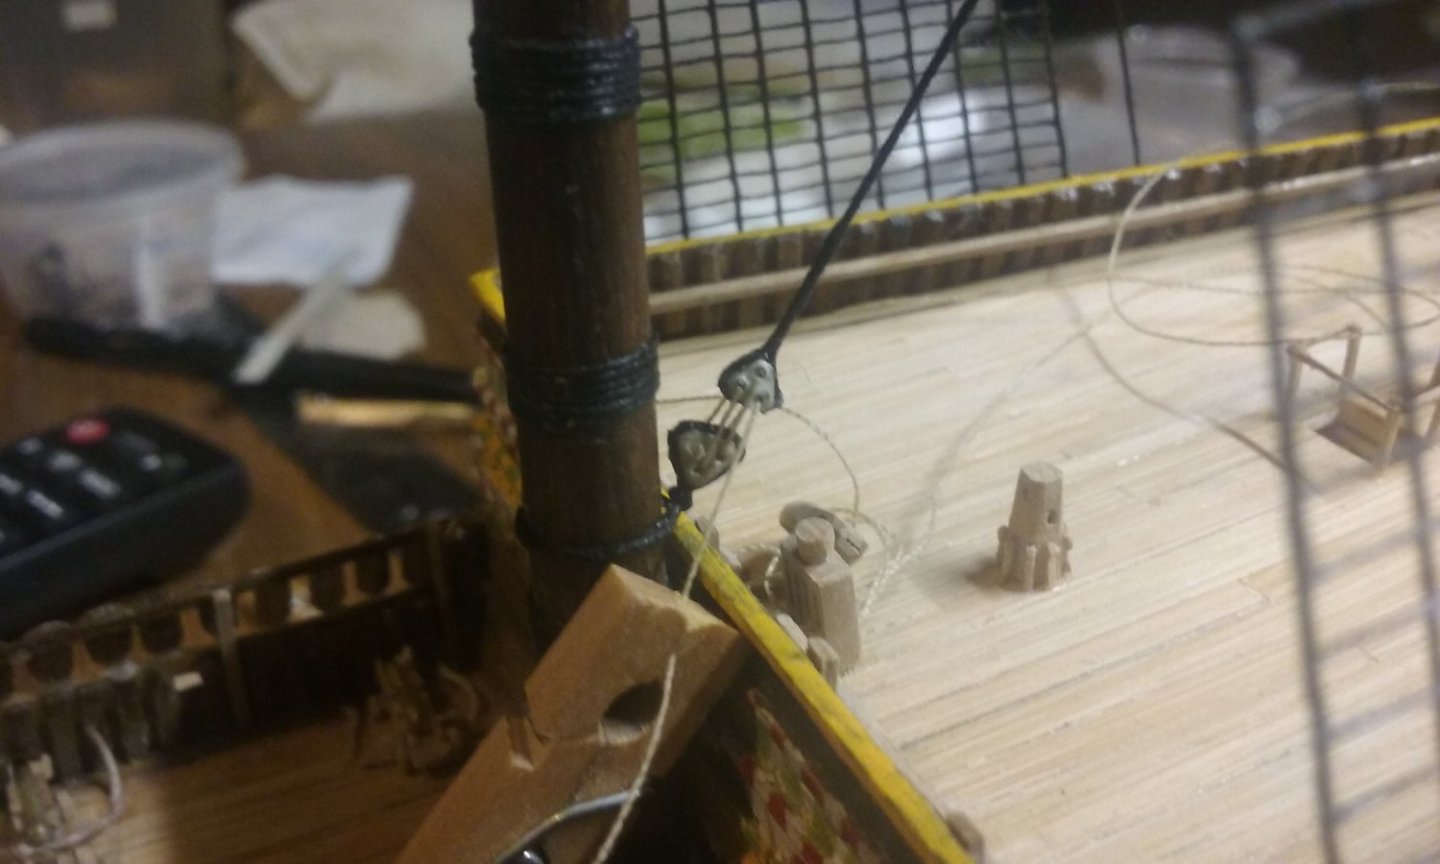
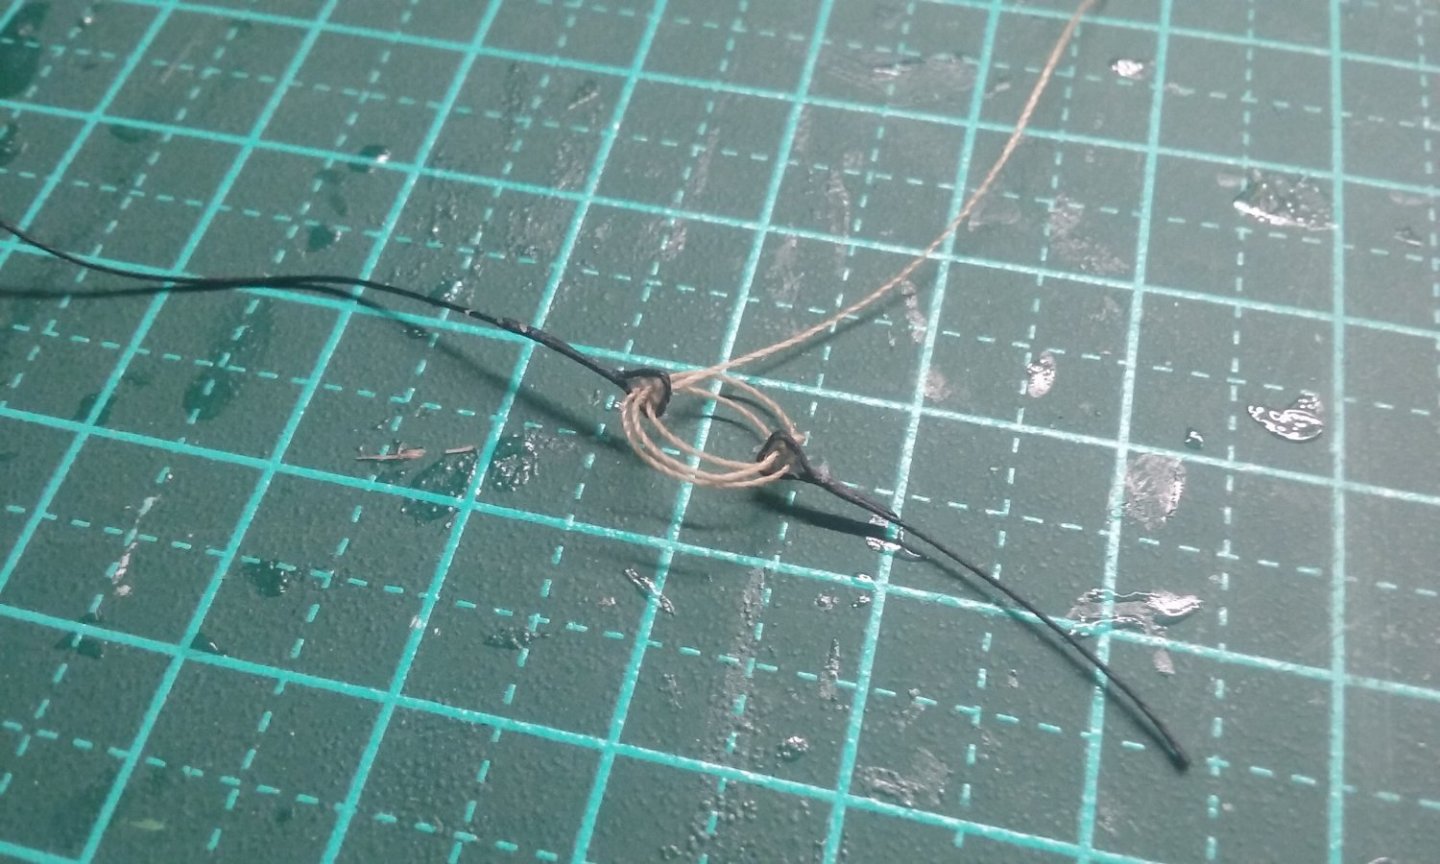
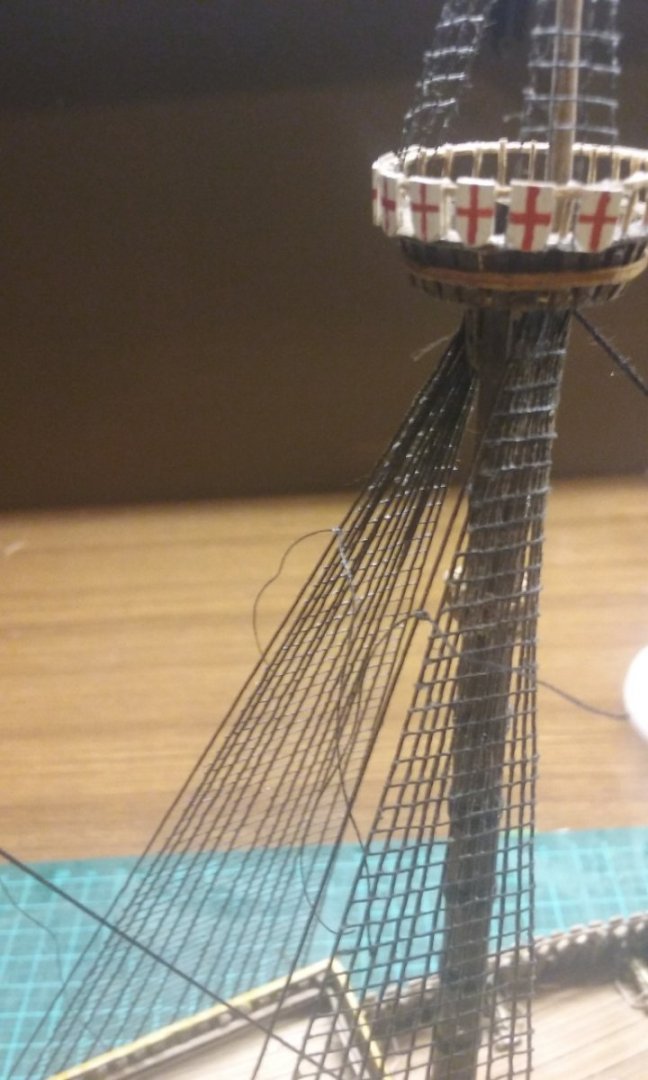
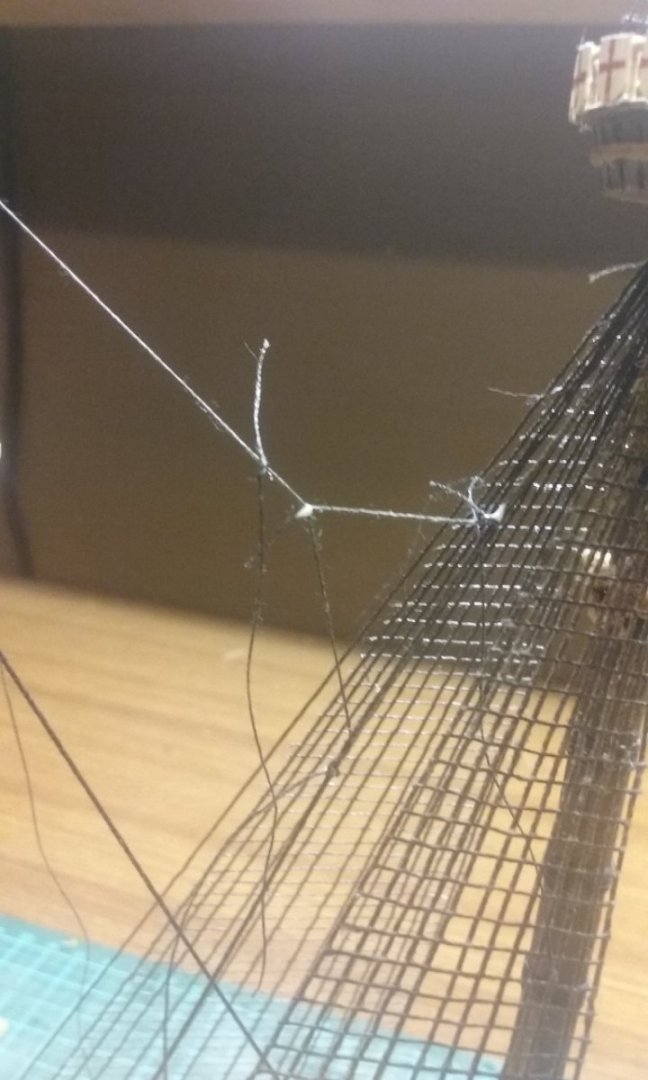
Well, not perfect, but not too bad, either. Here are the crowsfeet for the mizzen topmast stays, connected to the main backstays. In progress: I had to push the larboard backstay out from the hull before it would meet the crowsfeet so I could glue them onto it. And, complete. Euphroes would have been more elegant, but not really possible at this scale. There's a sort of "blob" made of the collected cotton threads which looks sort of like a euphroe, and that'll have to do. I'm pretty happy with the result. And here are the larboard shrouds and "chains" with deadeyes attached. Steven


- 740 replies
-
- 12
-
-
- Tudor
- restoration
- (and 4 more)
-
I think that should be gold rush. Don't you just love the way spellcheck "corrects" what you've written! Took me awhile to work out what you'd meant. Glad you enjoyed yourselves. Sovereign Hill is very good value, particularly as your ticket entitles you to two days exploring the site (just as well, it really takes two days to fully do it justice), though I suppose you only got the one day there. We live close enough to hear the muskets going off each day. Dd you get to see Ballarat's main road, Sturt Street? Wonderful Victorian era (and later) architecture. And the lake? Steven
-
I've seen quite a few model galleys with working oars, but very few of them have an action which ties in with what is observable from the Olympias sea trials video (link on the first page of this thread). From the accuracy of your build so far, I'm hoping yours will be more like the real thing. Steven
-
Don't get us started, mate. You don't realise your danger - Waltzing Matilda, The Man From Snowy River, Clancy of the Overflow, Click Go the Shears . . . . Steven
-
Beautiful place, Canberra. I've been there quite a few times. Hey, if you're in Melbourne over Easter, maybe you should come up to see Ballarat (only about an hour's drive away). Beautiful, historic city. Well worth the visit. Steven
-
Welcome to MSW, KJ! Where in Oz are you? Steven
-
Here's an example of using Lego to make things square - - but I have to say if you want something rather more stable, make something like Kikatinalong's jig - - by no means the only possible configuration, but it might give you some ideas. Steven
-
Agreed. But making a euphroe at this size is also very difficult.
- 740 replies
-
- 4
-
-
- Tudor
- restoration
- (and 4 more)
-
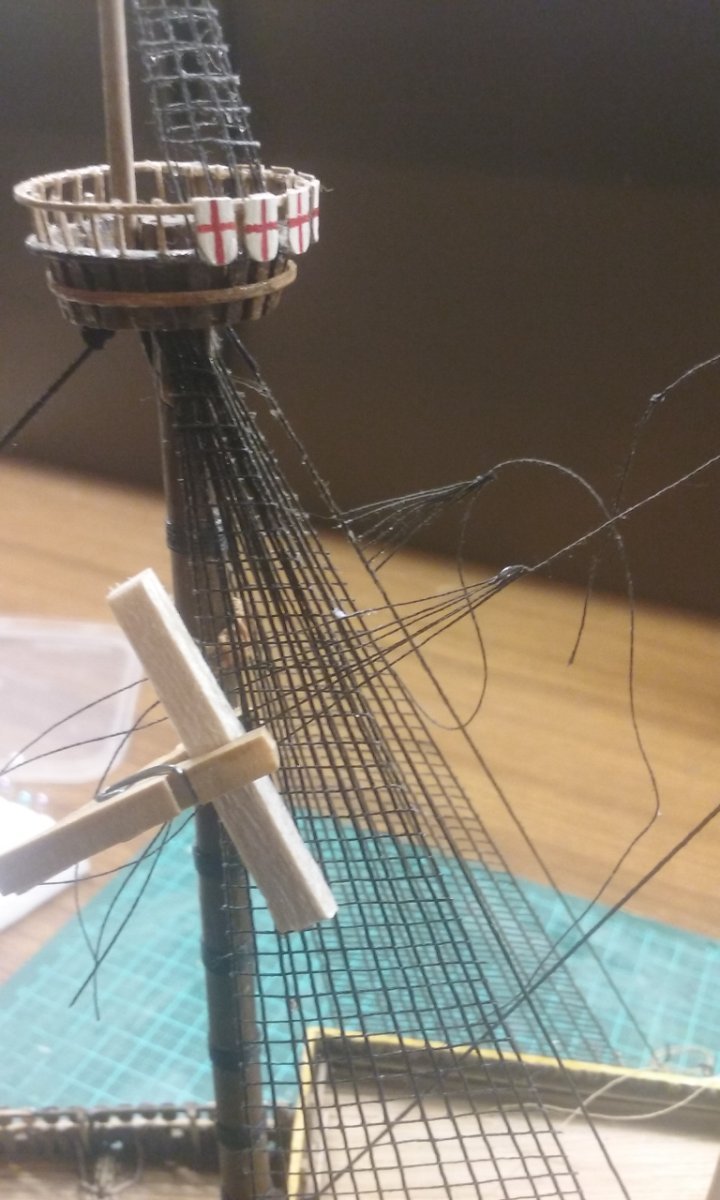
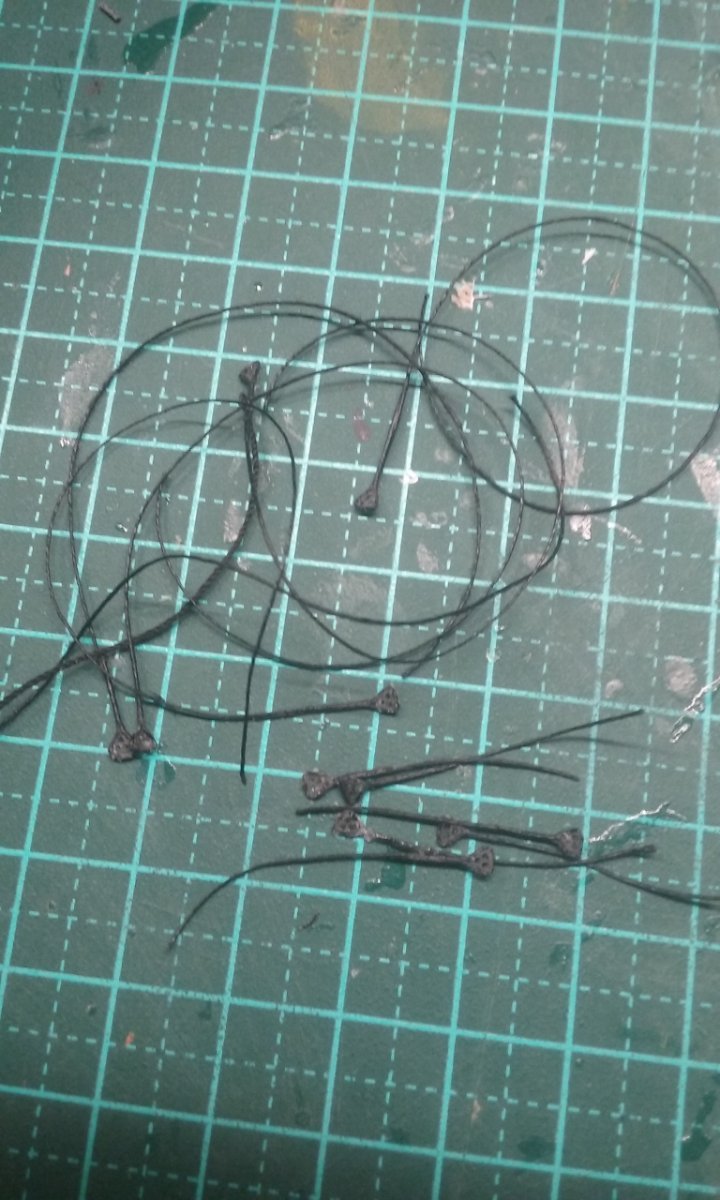
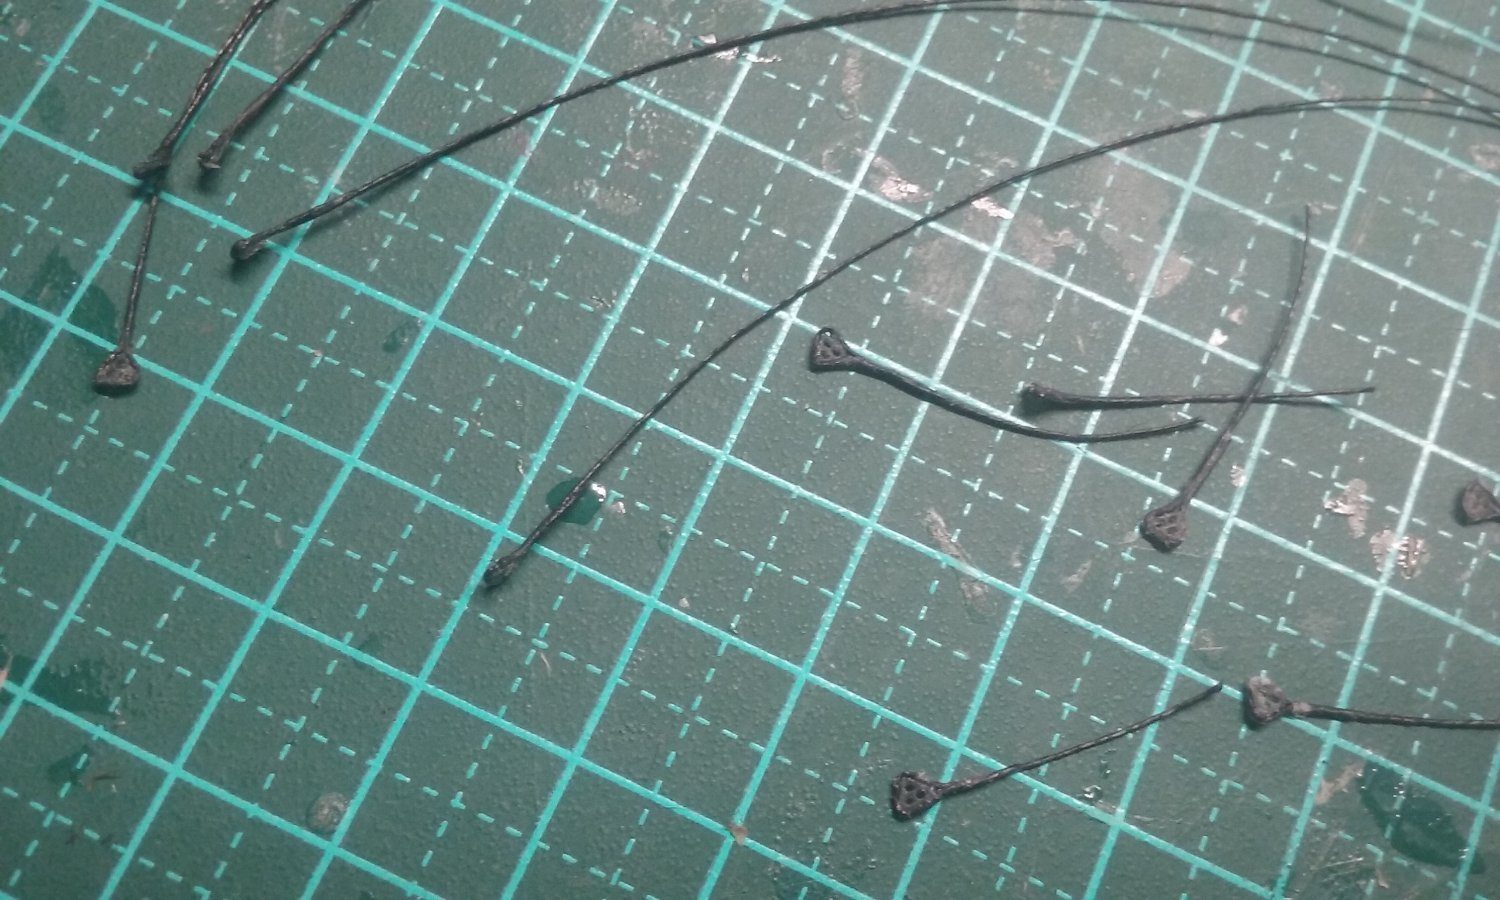
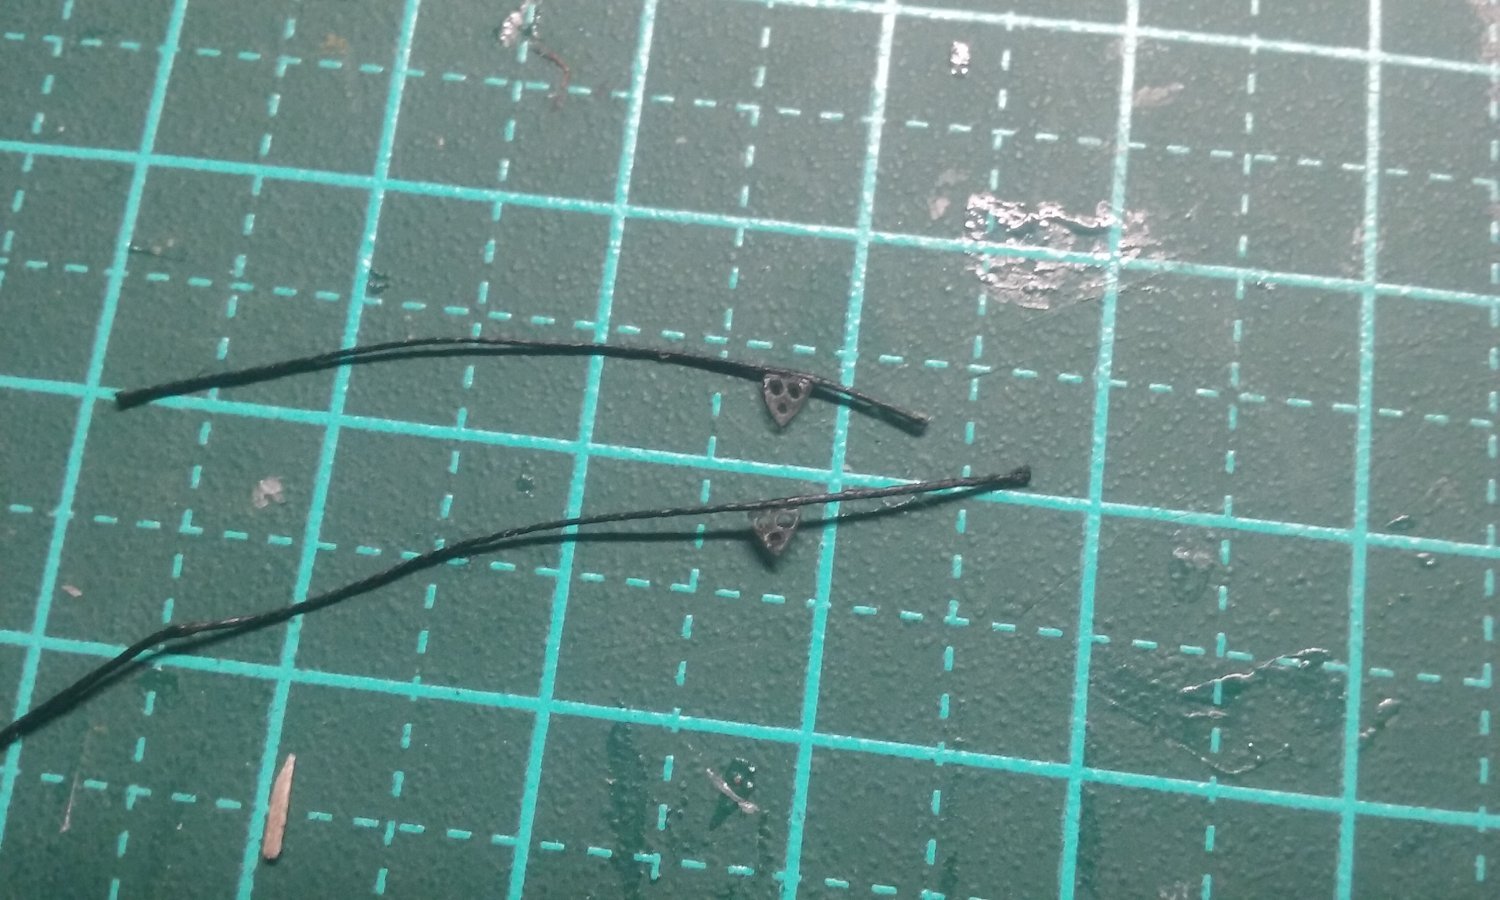
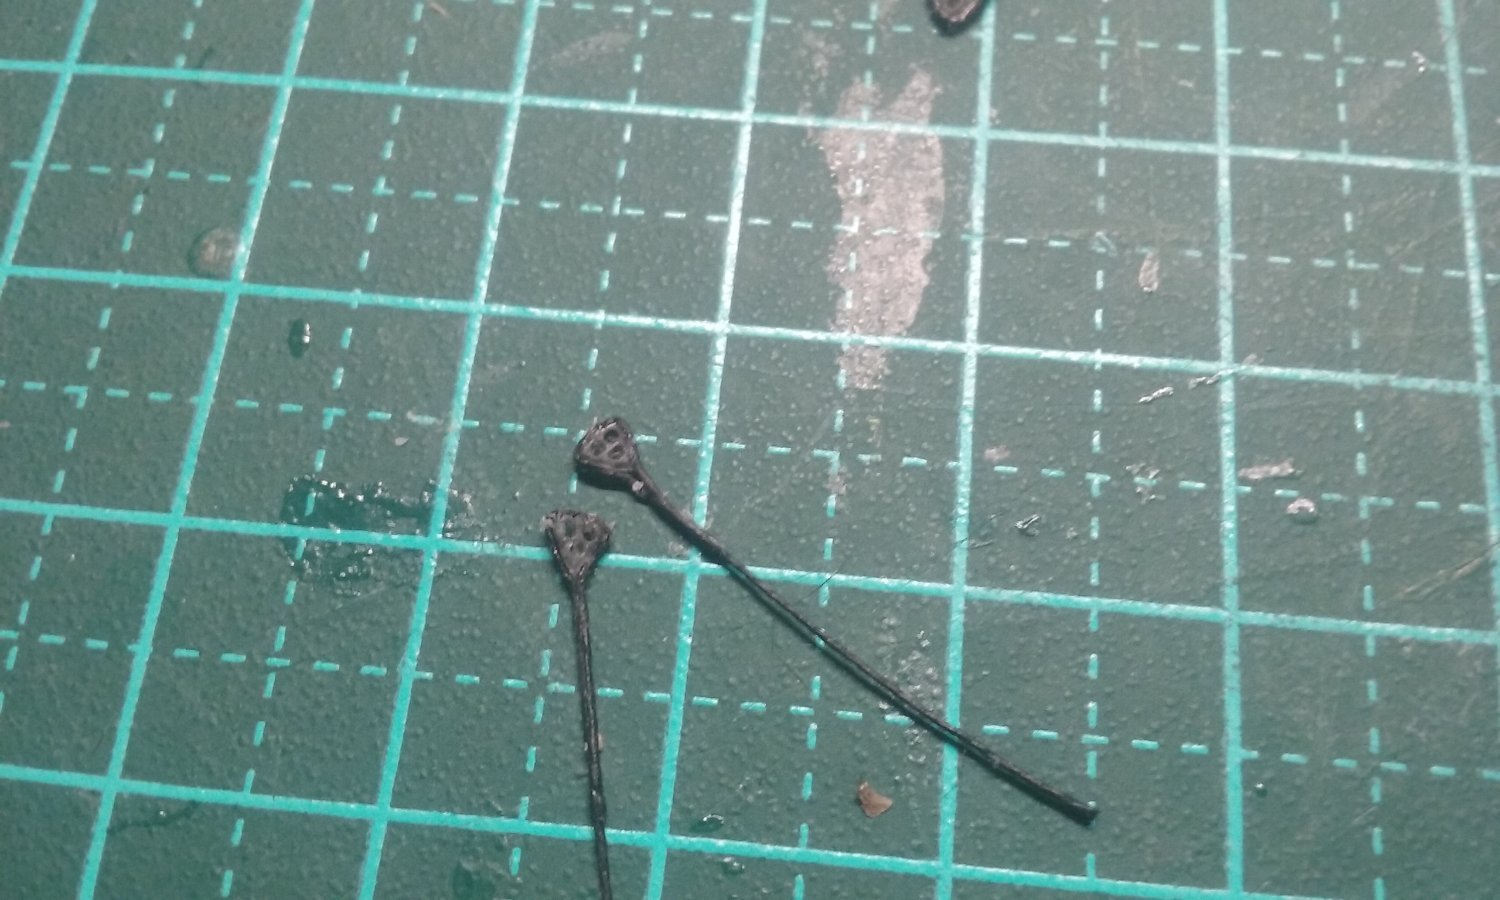
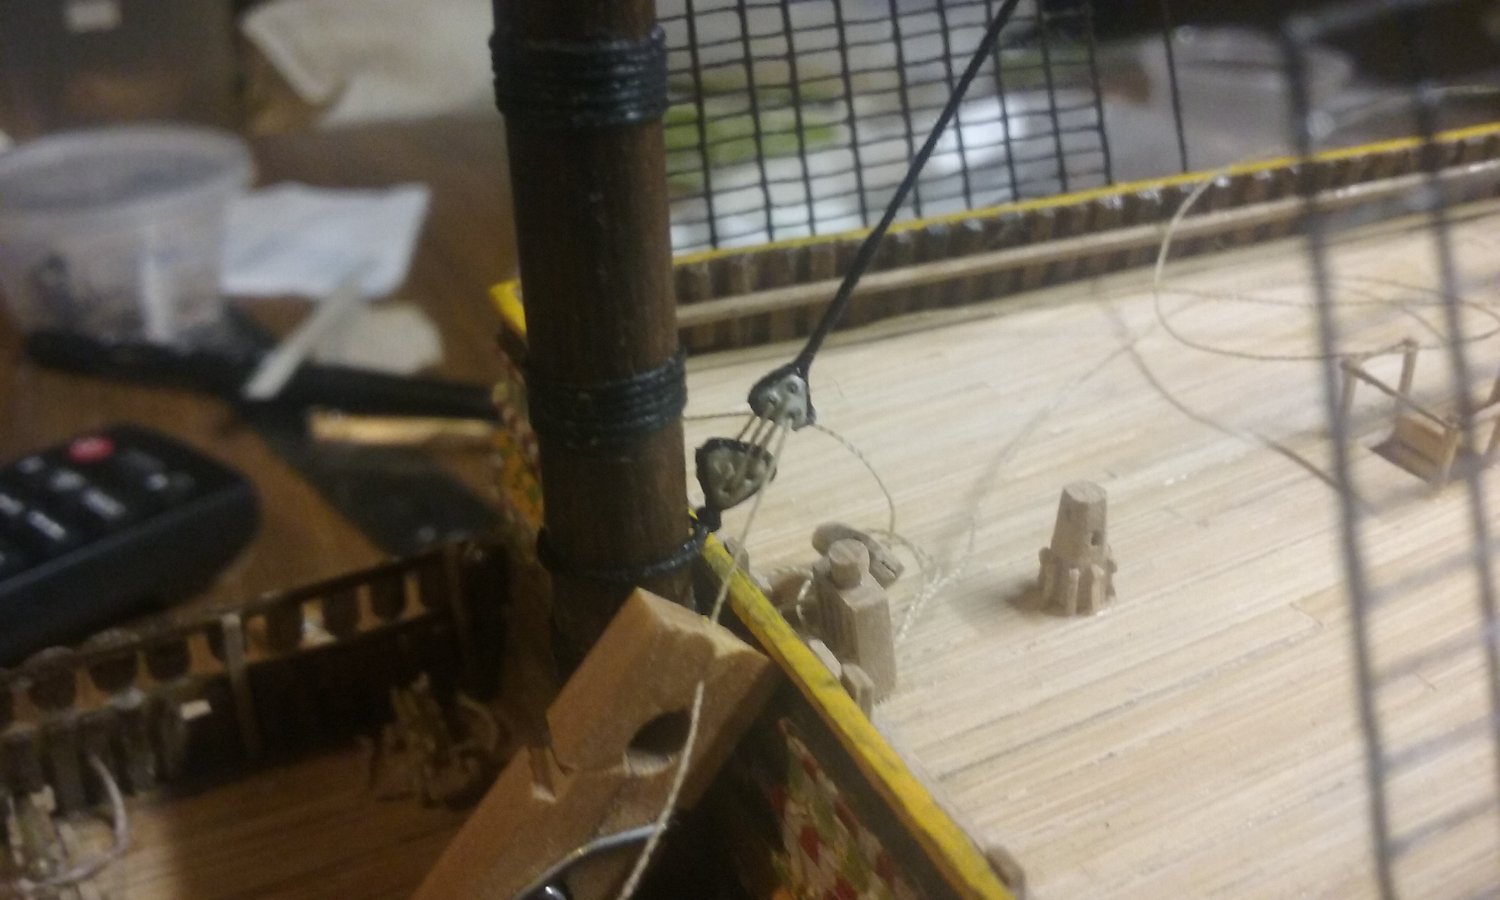
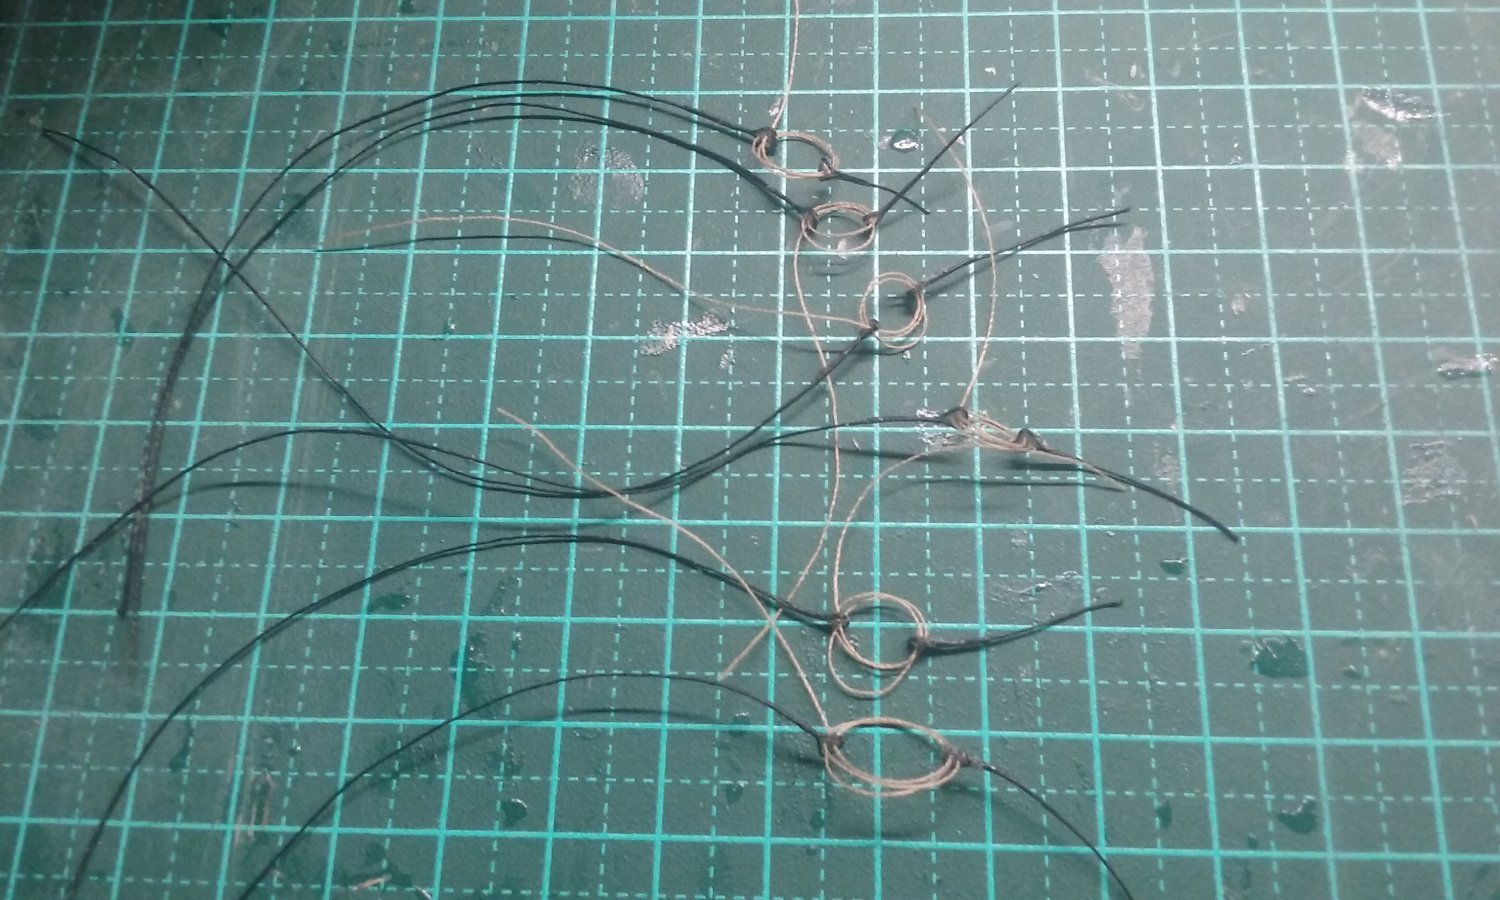
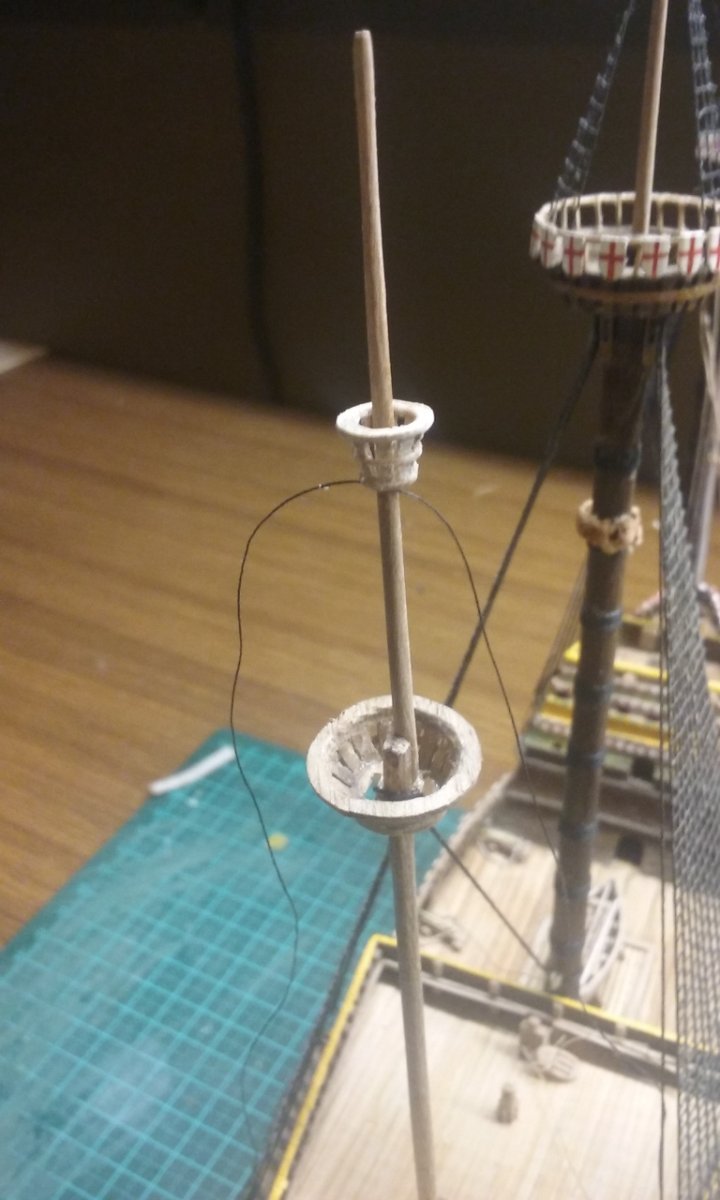
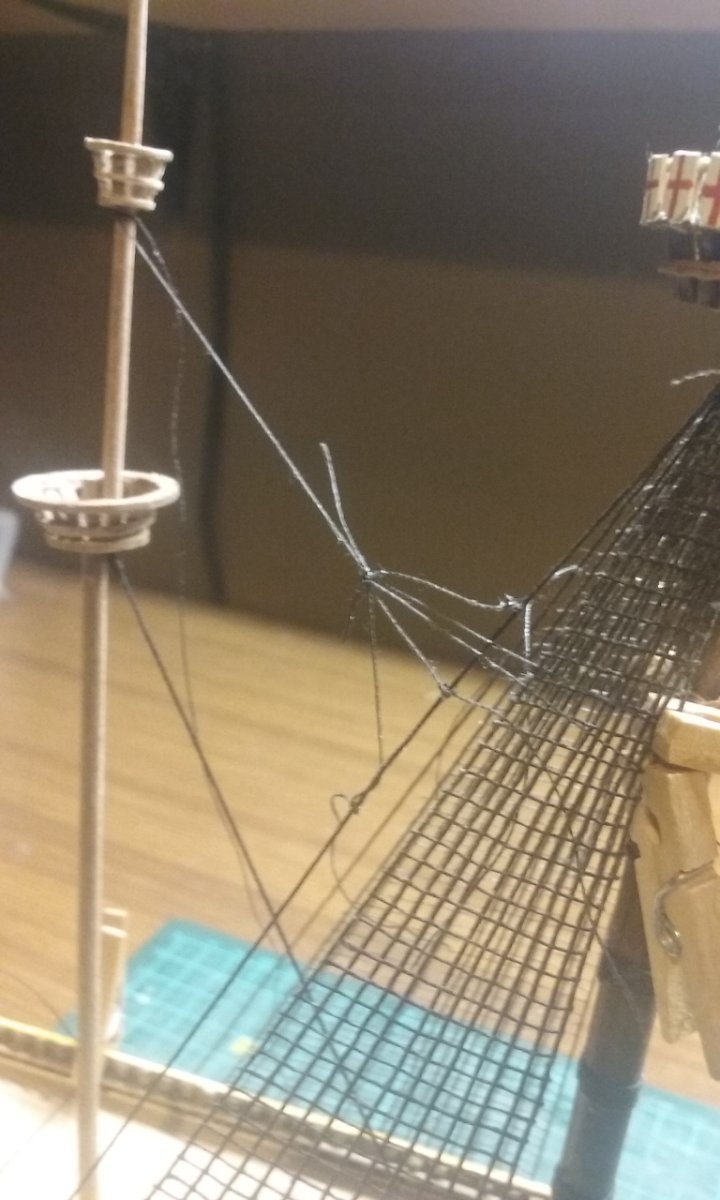
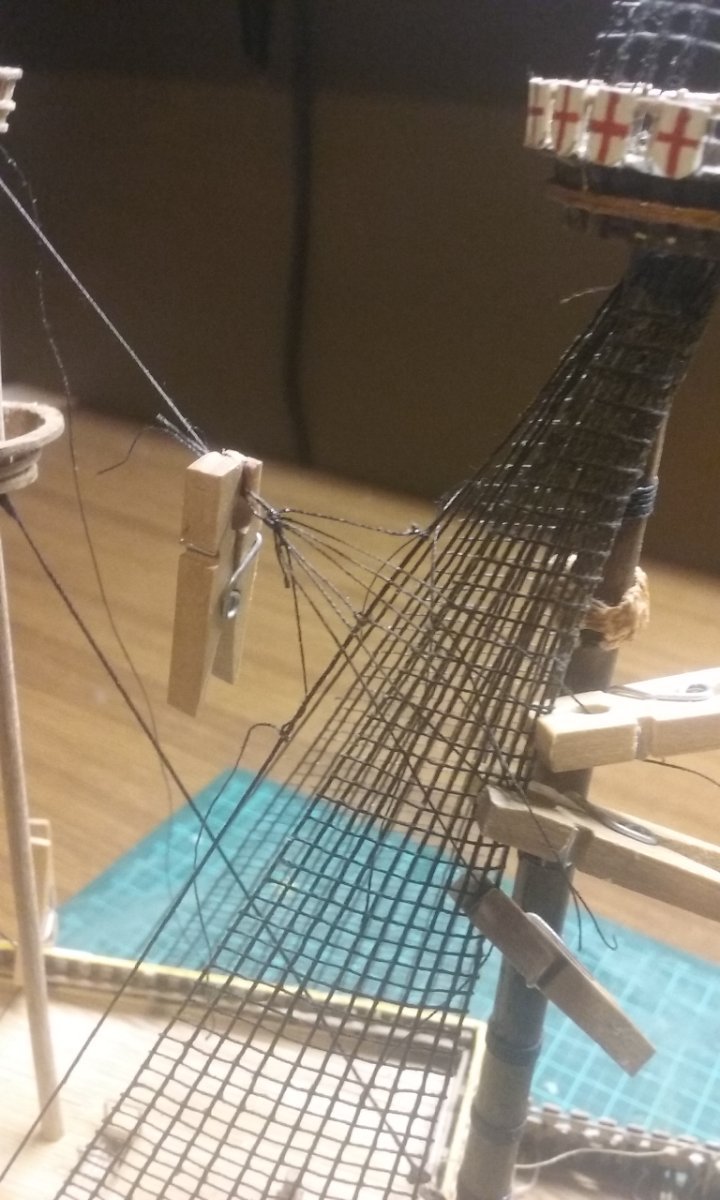
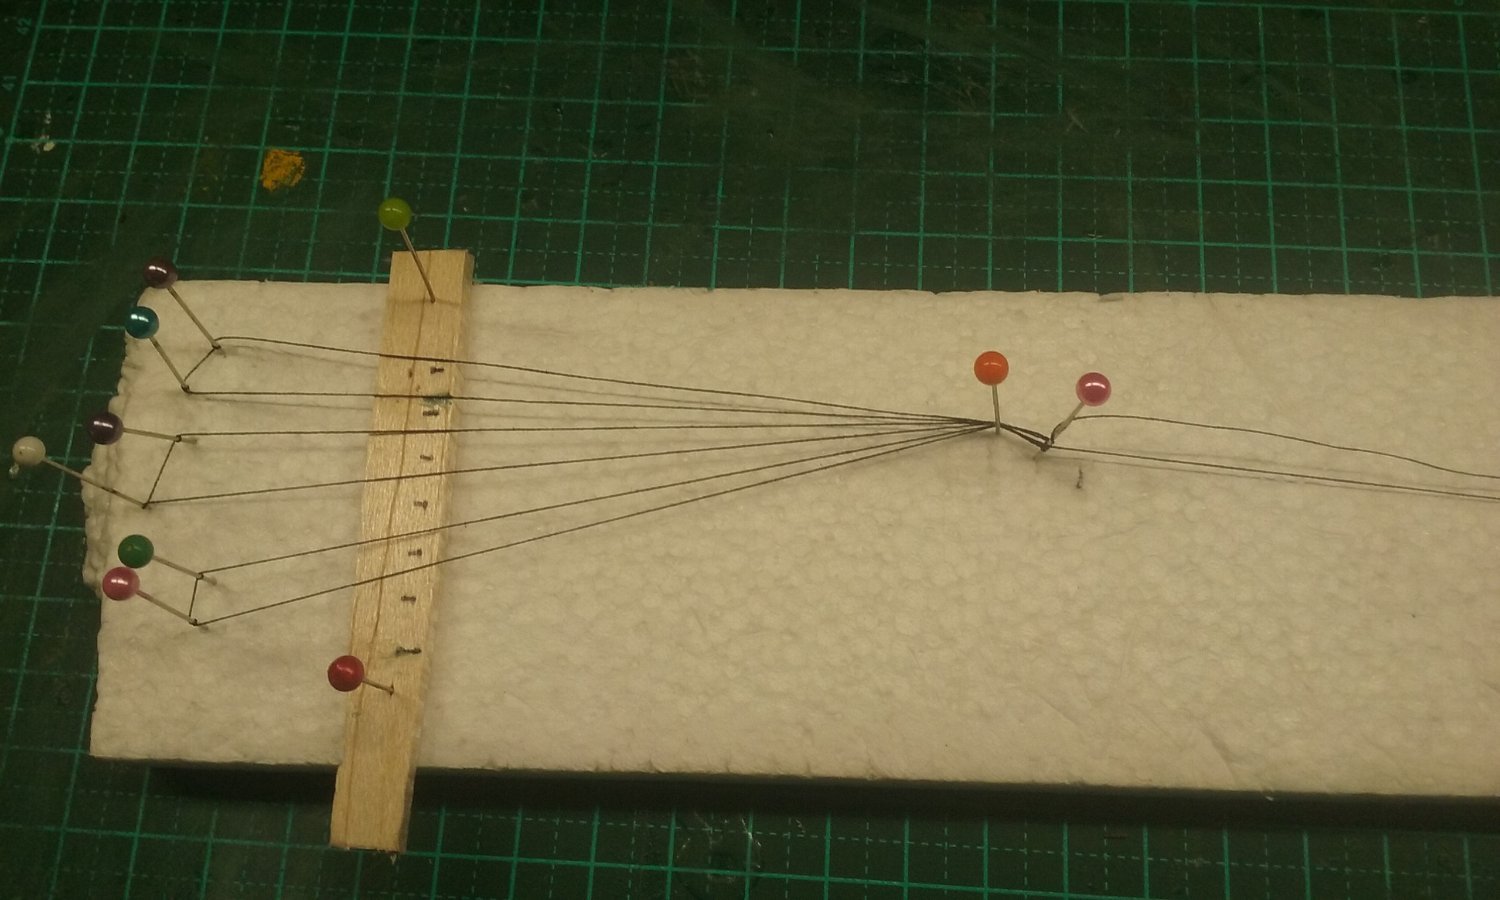
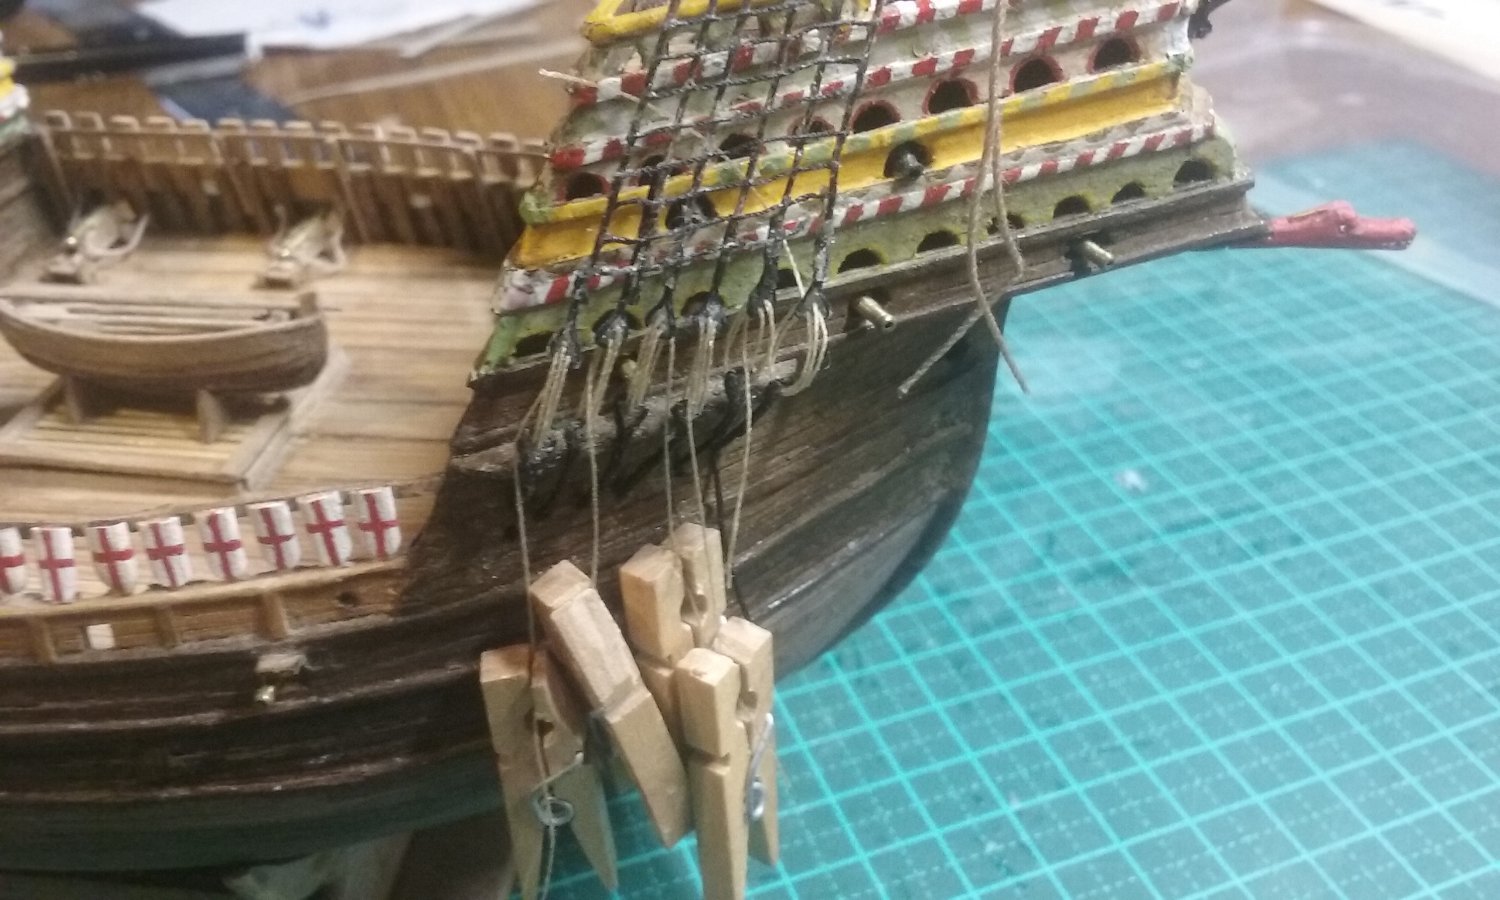
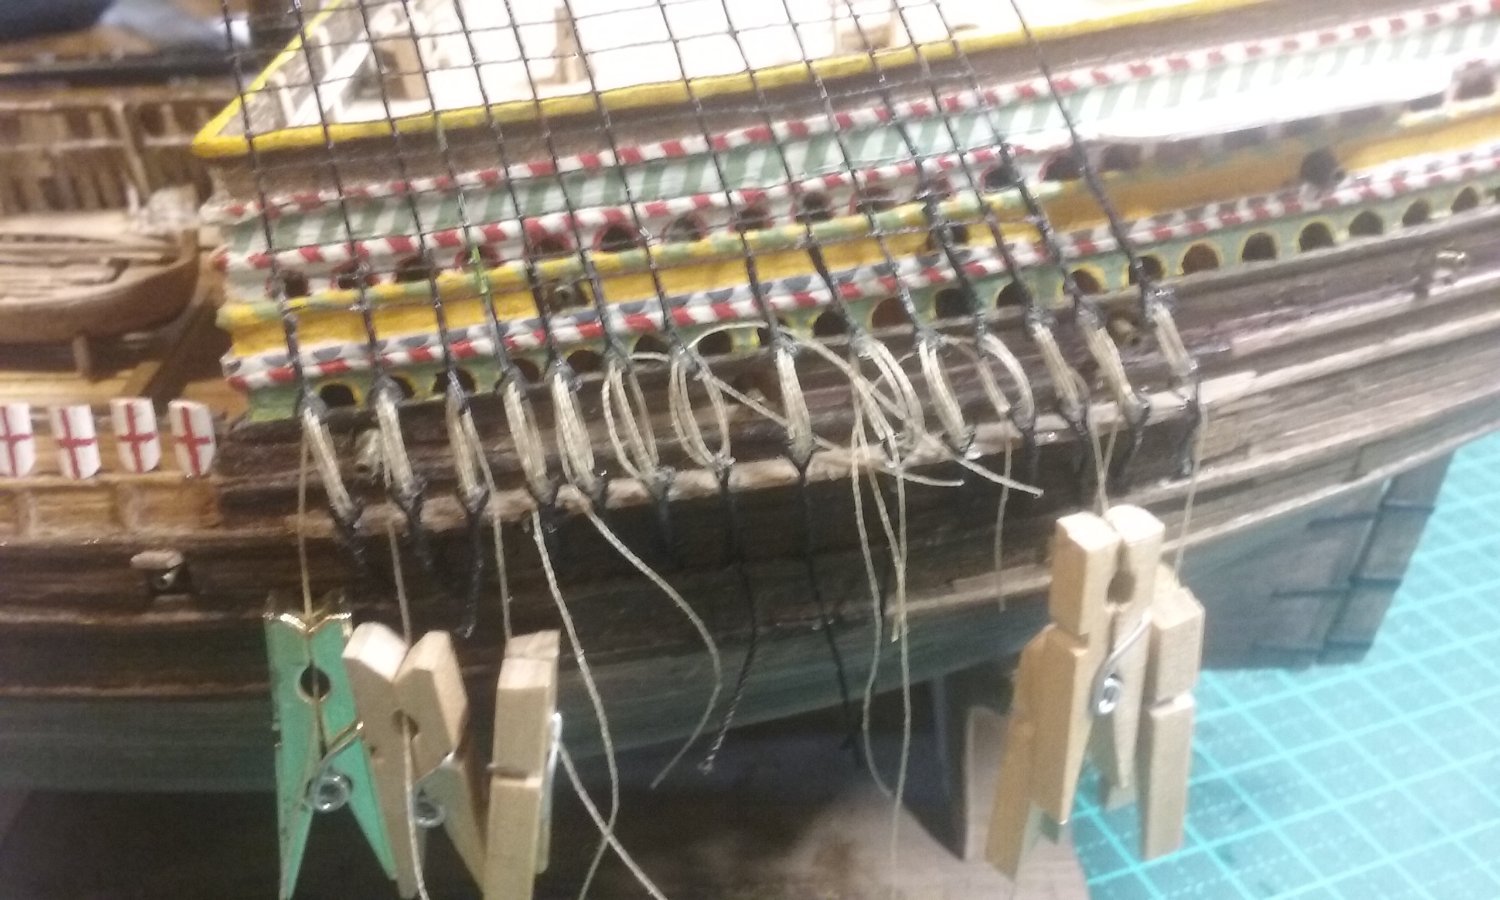
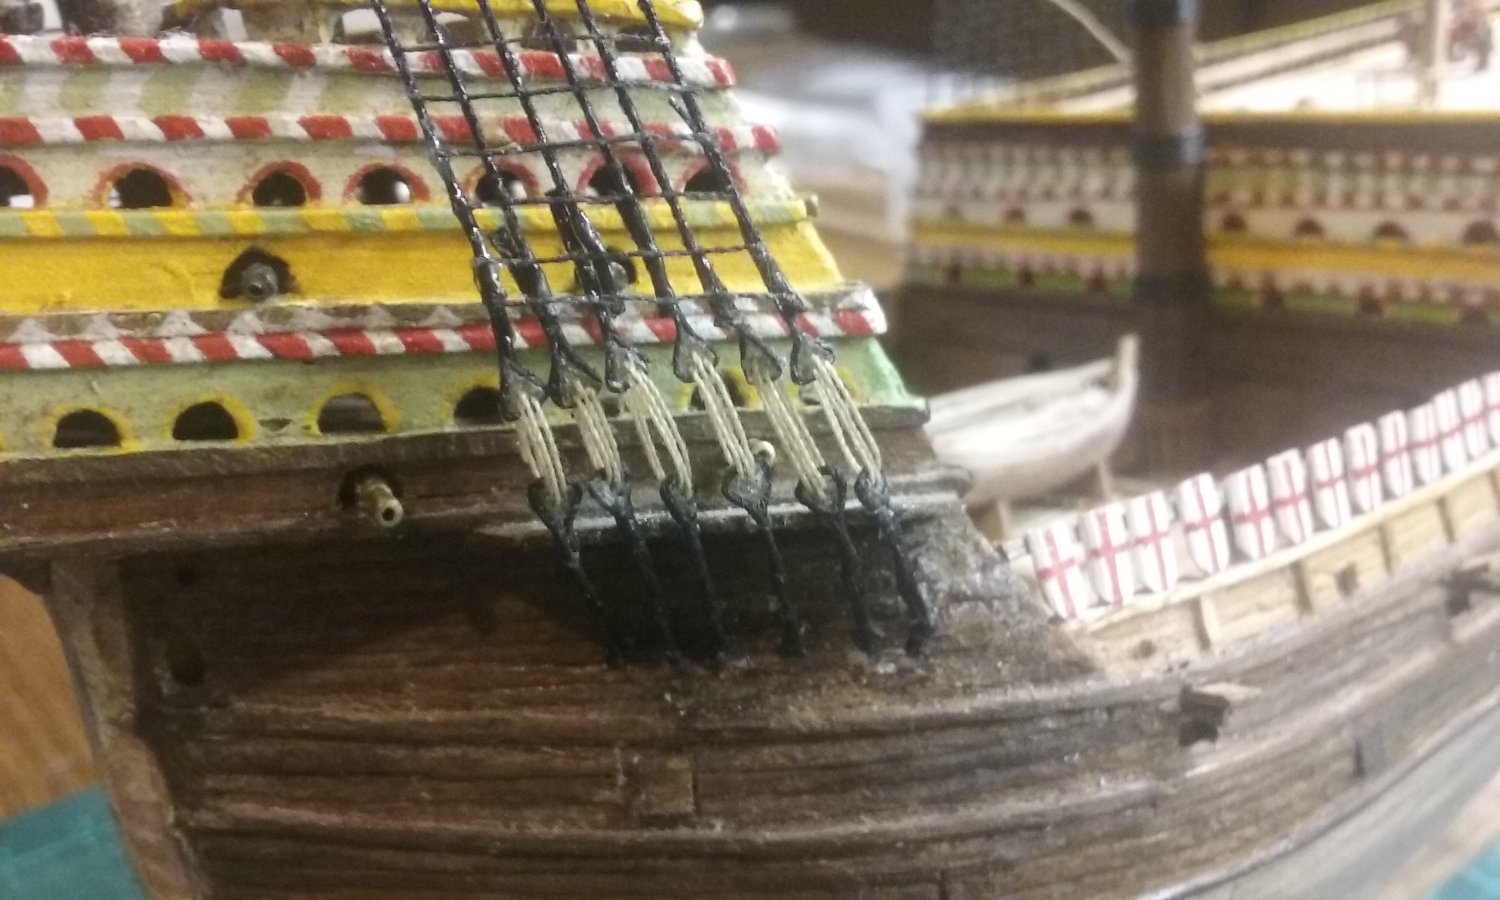
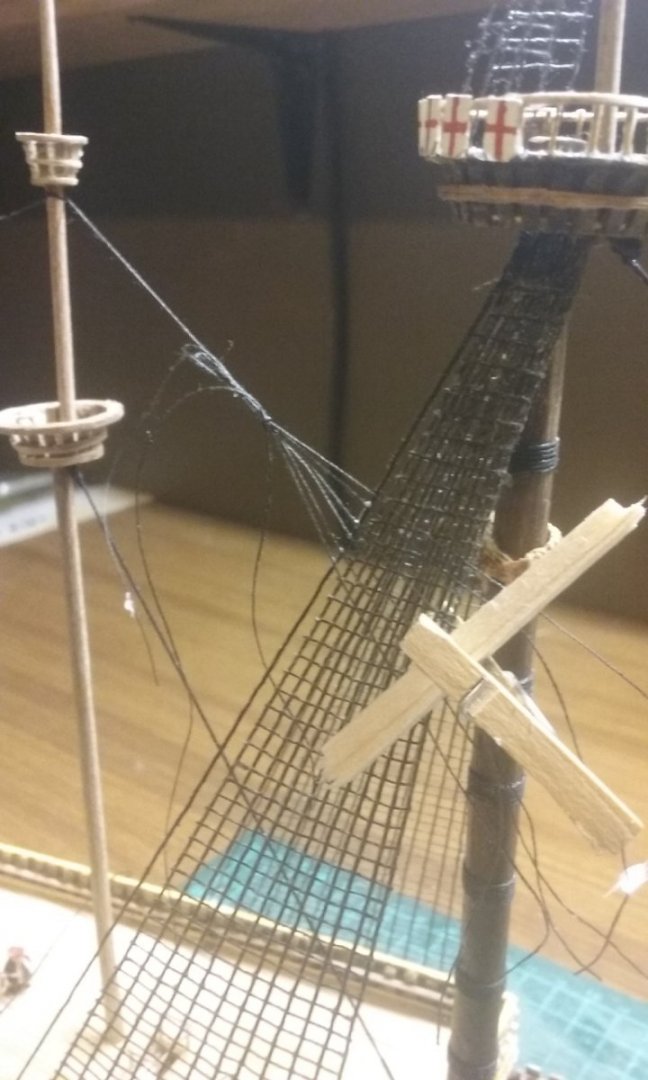
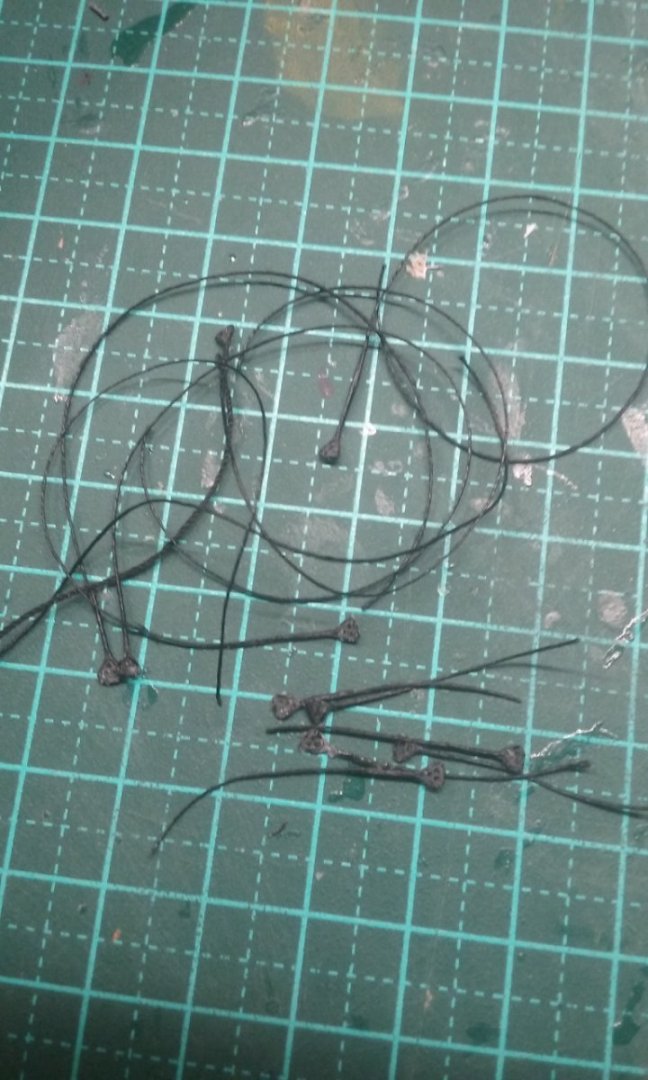
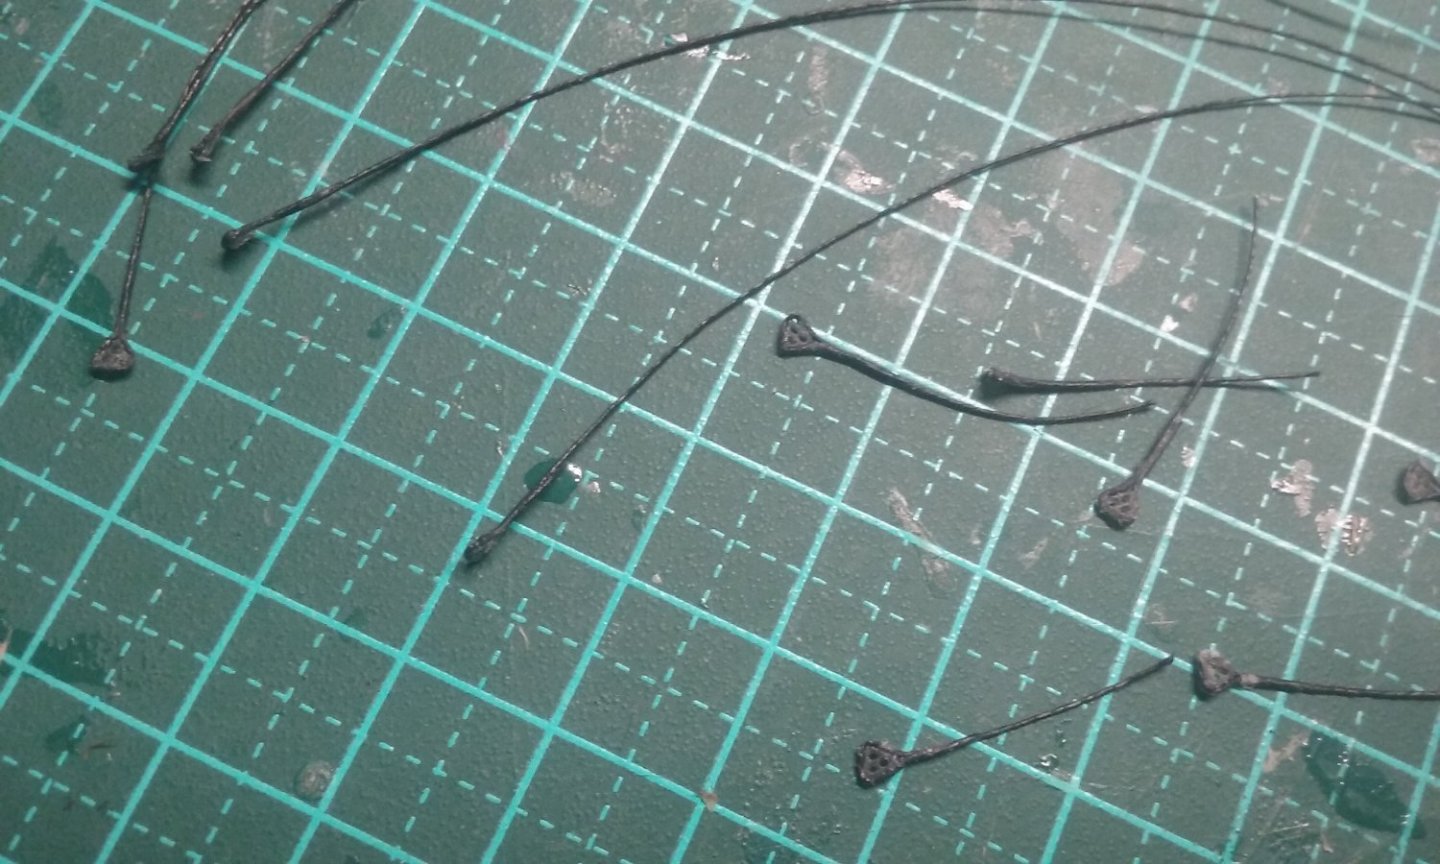
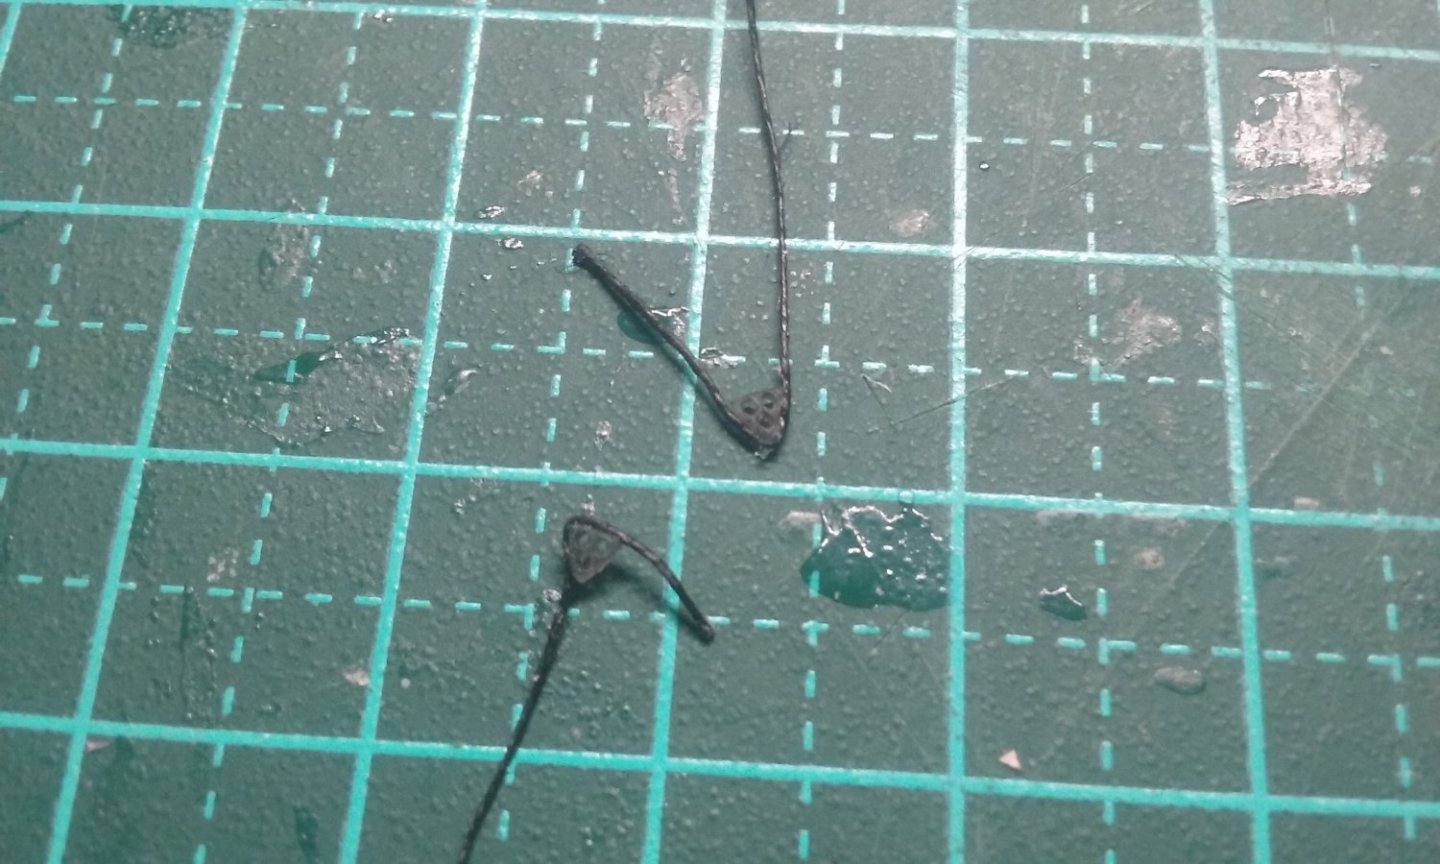
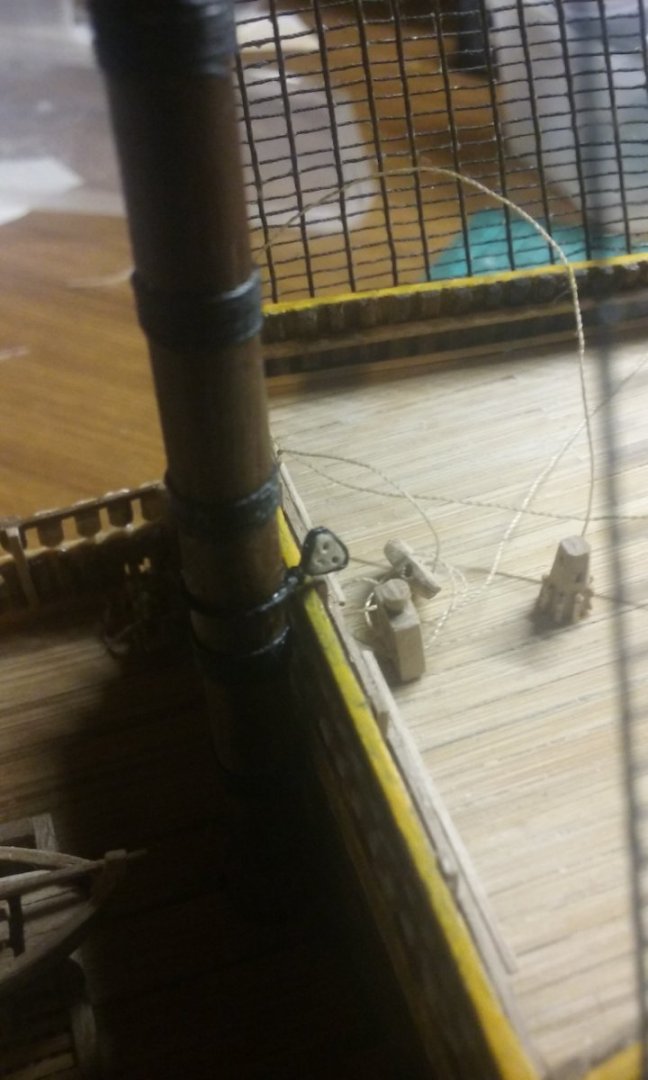
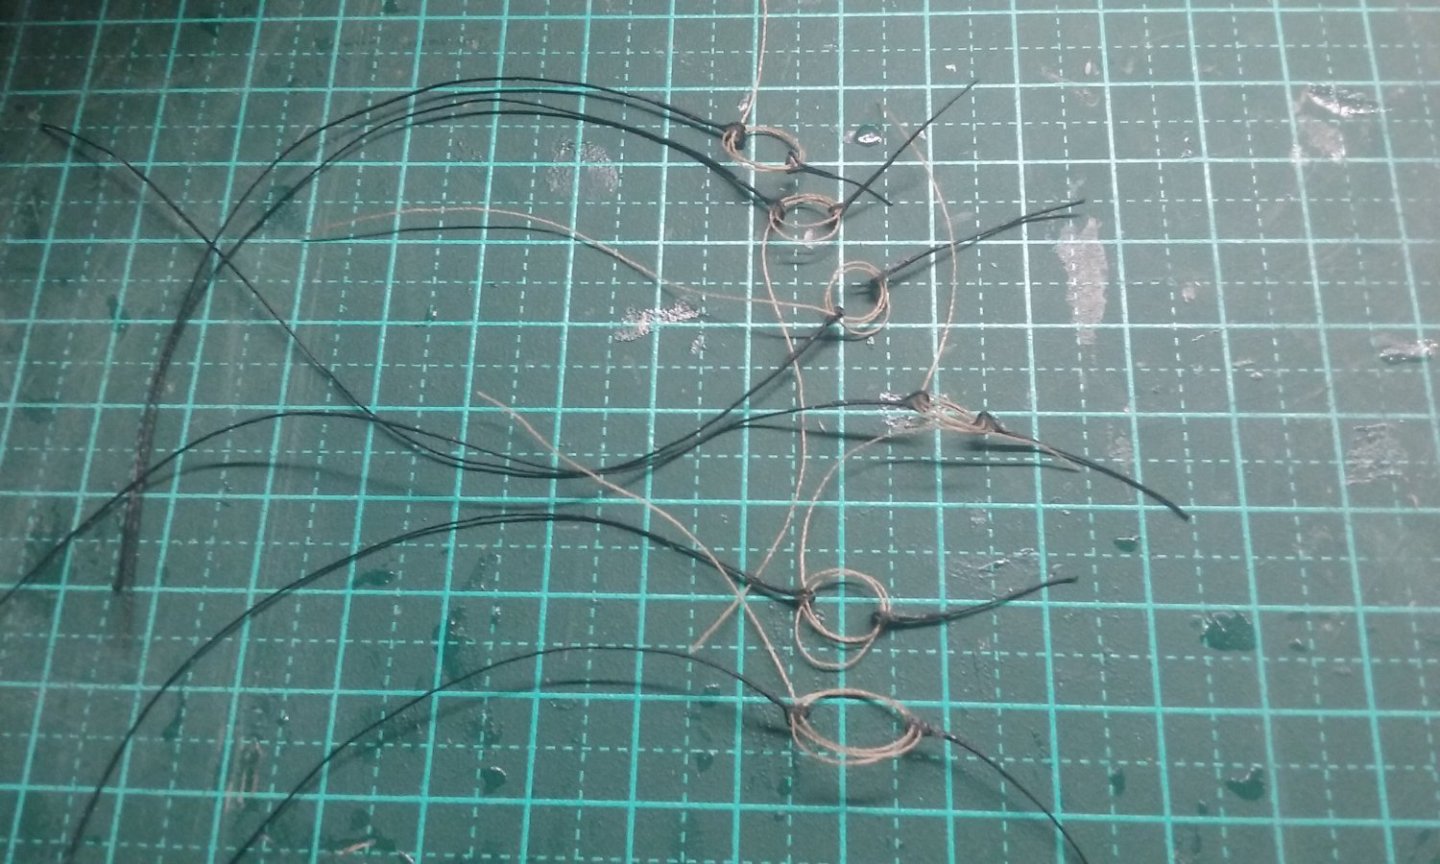
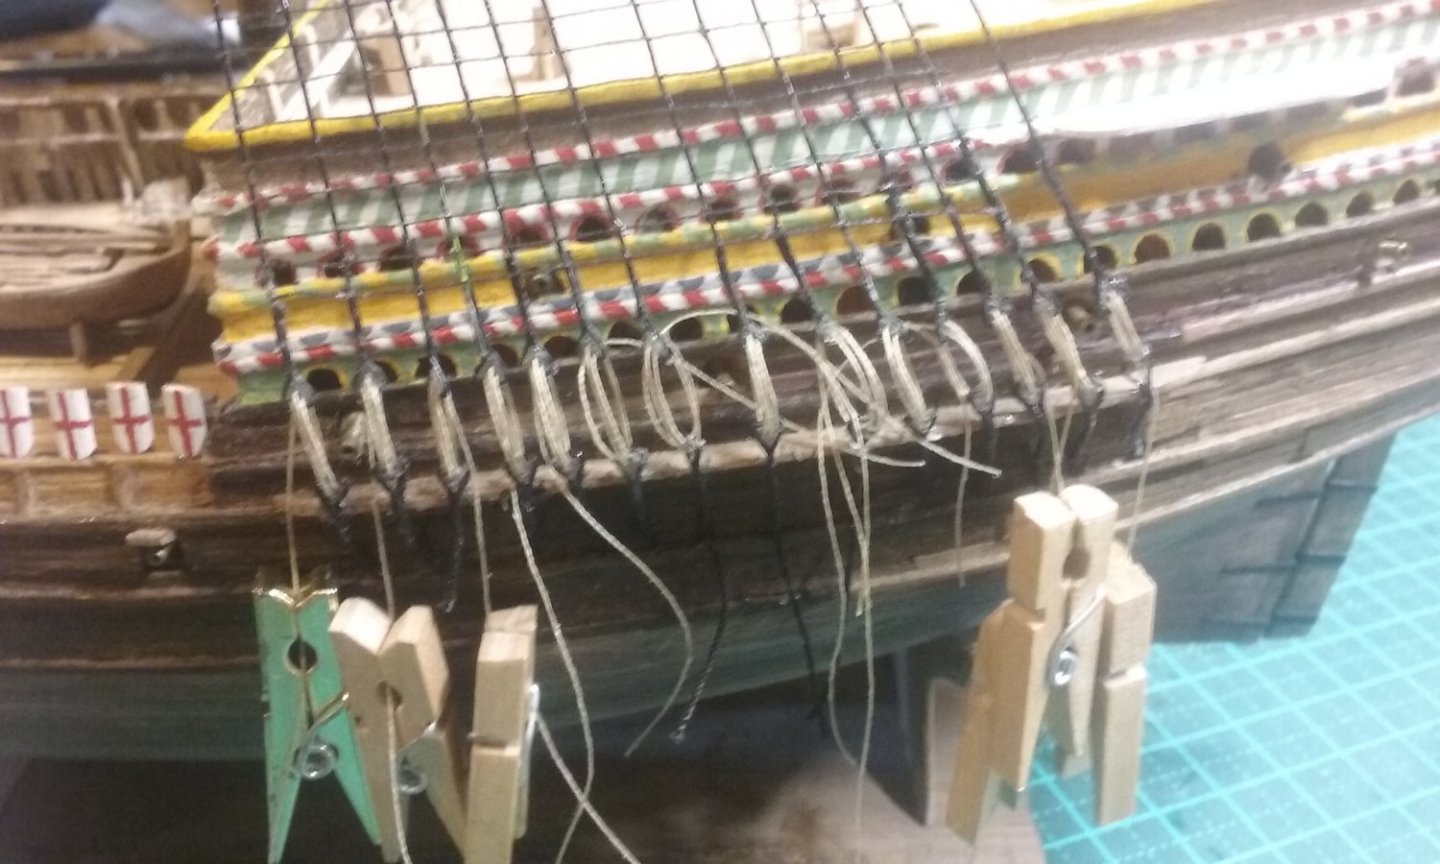
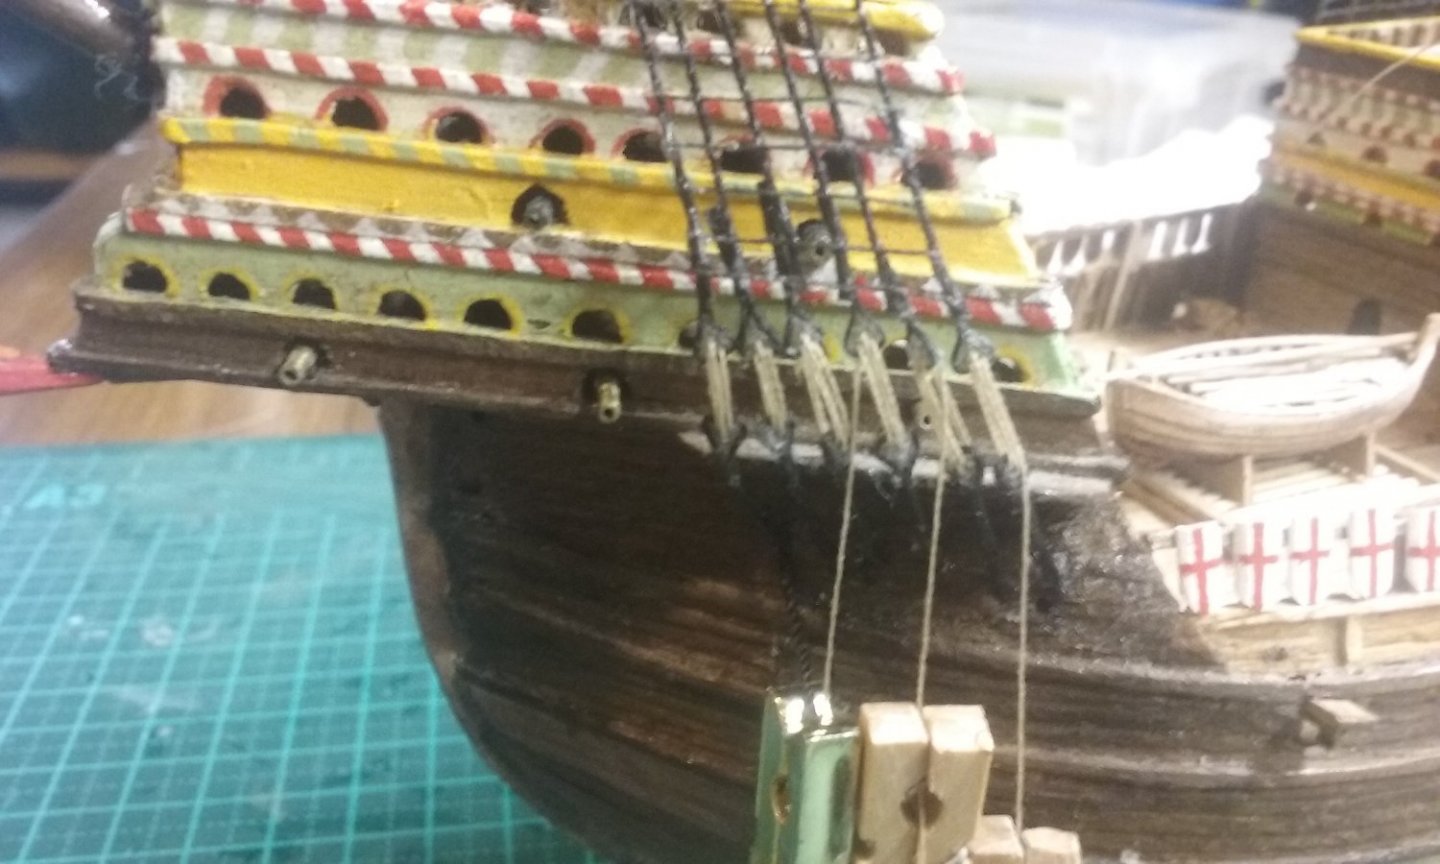
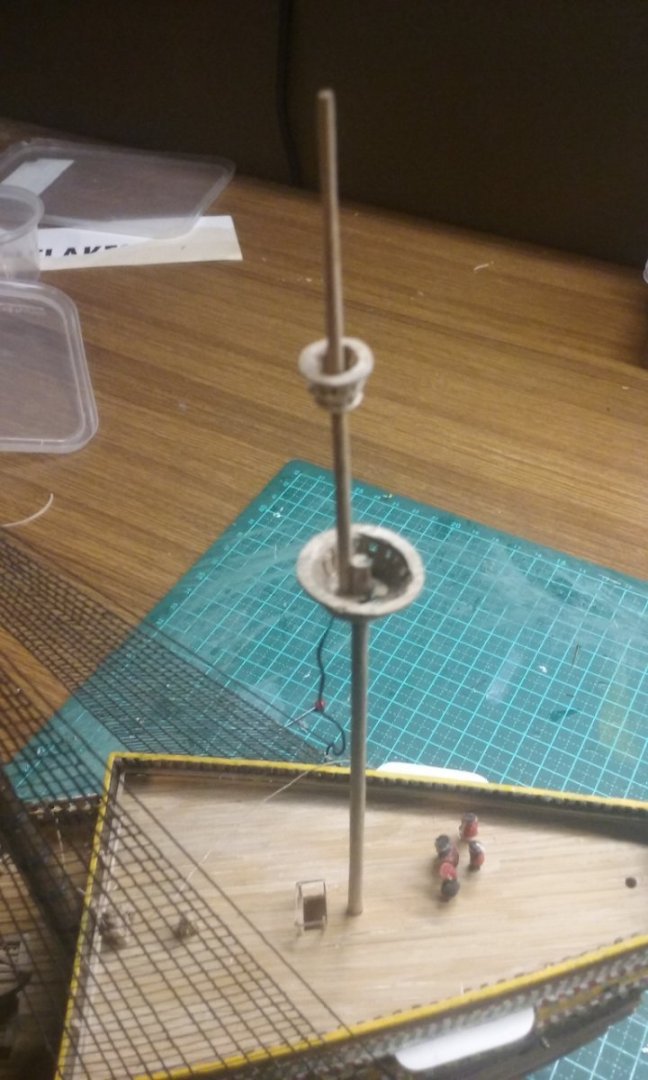
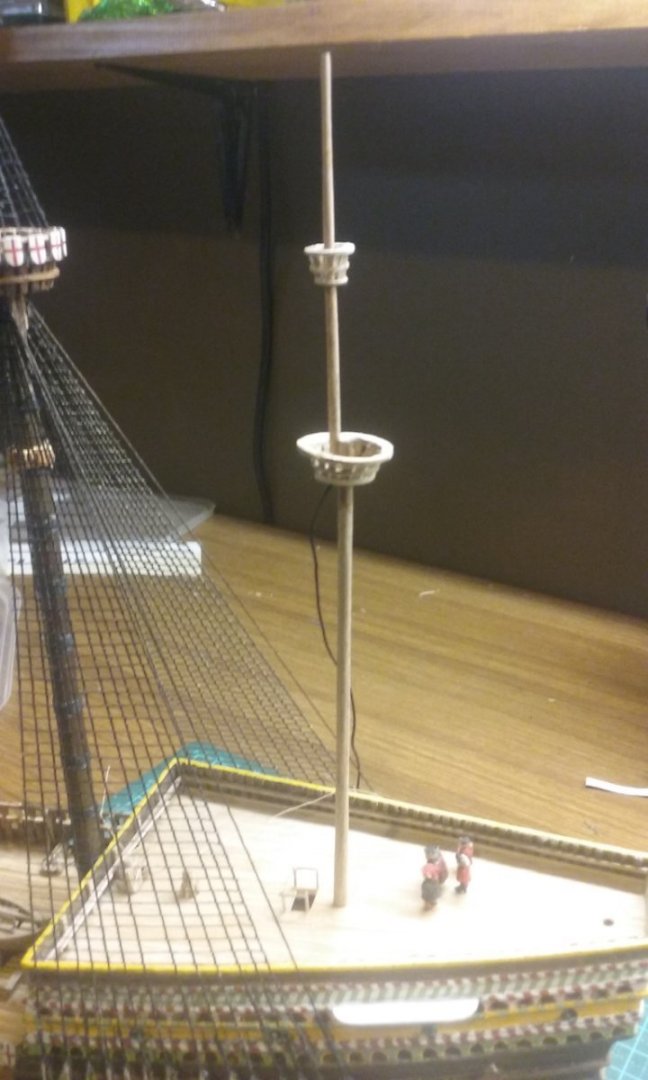
I've now moved onto the mizzen mast (that's the main mizzen -the one directly aft of the main mast - not the bonaventure mizzen - the one at the stern). At the scale I'm working at, and with my 17 year old self looking over my shoulder, I'm not using the traditional method of adding the shrouds - just too difficult. Instead, I start by gluing the shroud or "chains" in a triangular loop around the deadeye. As follows: Shrouds and "chains" with deadeyes attached. The next step was to fix the chain deadeyes to the channel. However, I realised that this was the method I'd used before which didn't work all that well, because I had to push the deadeye around to get the lanyard through the holes, and it usually was too much for the glue and the deadeye would come off. So I tried another way. What I did instead is set up the two deadeyes with the lanyard joining them before I added it to the hull. Shroud and "chain" deadeyes connected with lanyard. All done for one side. And adding the deadeyes: The idea is to glue the tops of the shrouds individually to the mast just below the top, but first I have to work on the stays - I should have done them before I started on the shrouds. Lower mizzen stay - deadeyes: These deadeyes are made of card impregnated with PVA (white) glue, and are about as small as I can make them by hand using natural materials. According to Landström's reconstruction drawing, the upper stays are belayed to the main backstay each side with crowsfeet, not to the mainmast. I checked with R.C. Anderson's "The Rigging of Ships in the Days of the Spritsail topmast 1600-1720" - the best book I've been able to find for anything even vaguely like the Great Harry's period (even if it's at least 55 years too late) and he agrees. Unfortunately, the pictures of the Great Harry in the Anthony Roll and the painting of the Embarkation at Dover are of no help, and Great Harry seems to be just about the only example of a ship of this time that has a mizzen topmast at all, and no other representations show how this stay works. So either I cheat (tempting!) or I try making the crowsfeet. My first attempt at the upper mizzen stay with crowsfeet: A bit messy Hmmm, not looking all that good - can't keep all the ropes tensioned at the same time URK! So, I developed a cunning plan. I made a jig to make the crowsfeet separately, using styrene foam, a bit of balsa and dressmakers' pins: Not bad, but you can see at the sharp end the threads don't converge evenly. New version, which I hope will work properly. We'll see . . . Steven


- 740 replies
-
- 9
-
-
- Tudor
- restoration
- (and 4 more)
-
Yours is somewhat smaller scale than mine, which is 1:75, but there shouldn't be too much problem making framing close to the real proportions at your scale. And you'll find that despite the lightness of the framing, your hull will be very strong and sturdy. (well, ok, don't drop it on the floor and tread on it or run over it with a truck, but ueah, I think you'll be surprised how strong the structure ends up.) There are several builds on MSW that have worthwhile jigs for squaring your build. I did a search using "lego jig" but didn't find any examples, but I do like Kikatinalong's jig (and he was a total newbie who just came up with a brilliant jig). Steven
-
Greetings from Colorful Colorado
Louie da fly replied to Prowler901's topic in New member Introductions
Hi Todd, and welcome to MSW. I'd recommend you start a build log for your model. It's a great opportunity for help and advice from the friendly and helpful members here. And also do a search (top right of this page) for your model, to see what other people who've built the same model did and how they overcame the problems you may come across in your own build. Steven -
As I understand it this is dry fitted, and you won't glue it till you've made and used your jig to get everything square? And am I correct in thinking that this is a sort of "dry run" to work out and solve problems before you do another with lighter timber for your frames? Looking good, mate. Steven
-
If you need to clean off old dirt and grime, what museums do is wipe gently with a Q-tip dipped in saliva (I kid you not!) . I've used this very successfully on a model which had been neglected for 50 years or so. The only thing is - spit into a small bowl and use it as a reservoir. Don't (as I did at first) put the dirty Q-tip back in your mouth to refresh the saliva (YUK!) Steven
-
Hi Ian, and welcome. If you put "Bon Retour" in the search window (top right of this page), you'll be able to see the build logs of others who've made the same model, which I think should help you avoid mistakes and see solutions to problems you'd otherwise not be aware of. And have fun with it - that's what the hobby is all about. Steven
-
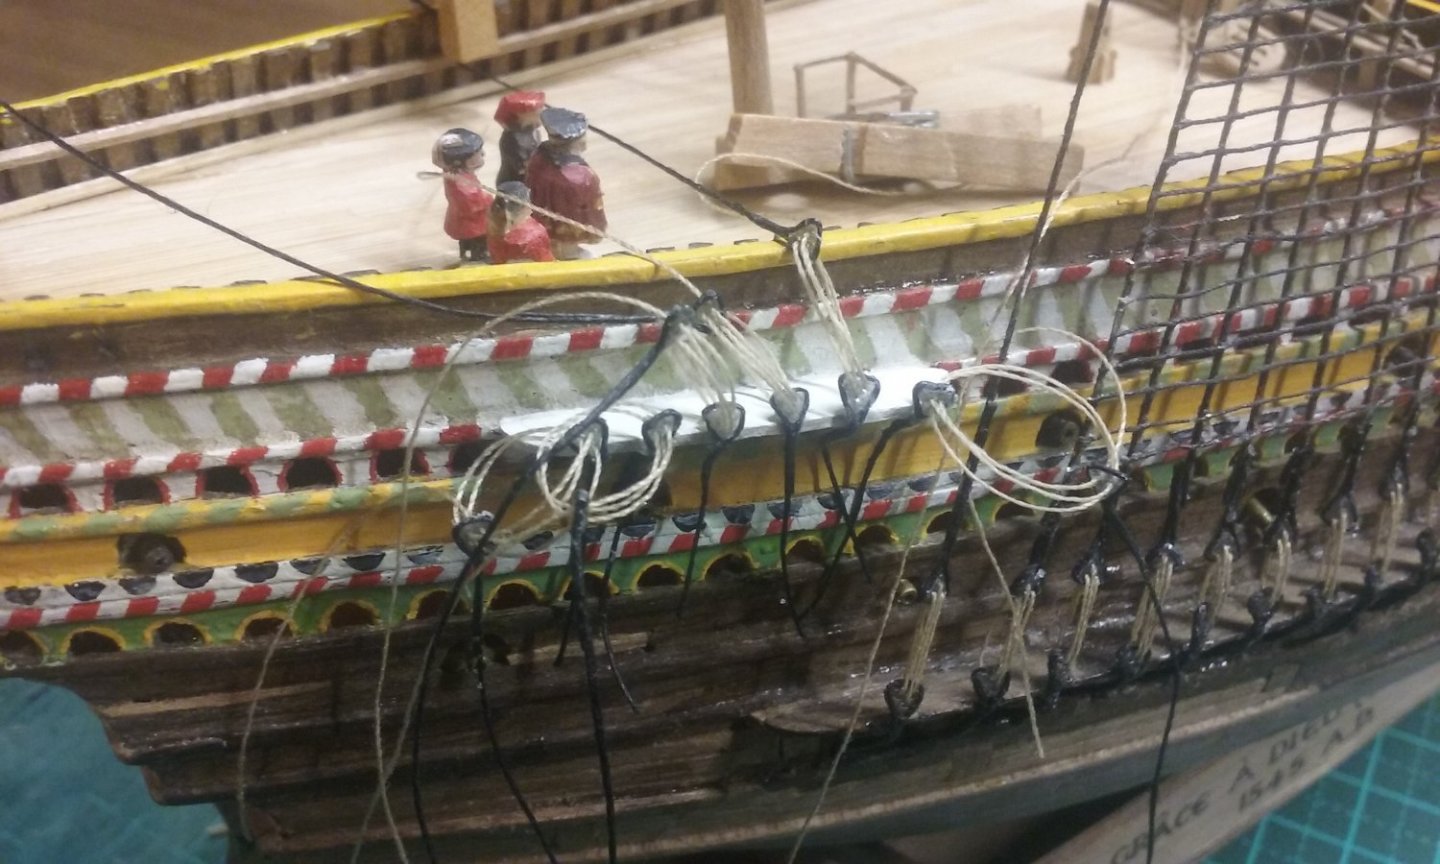
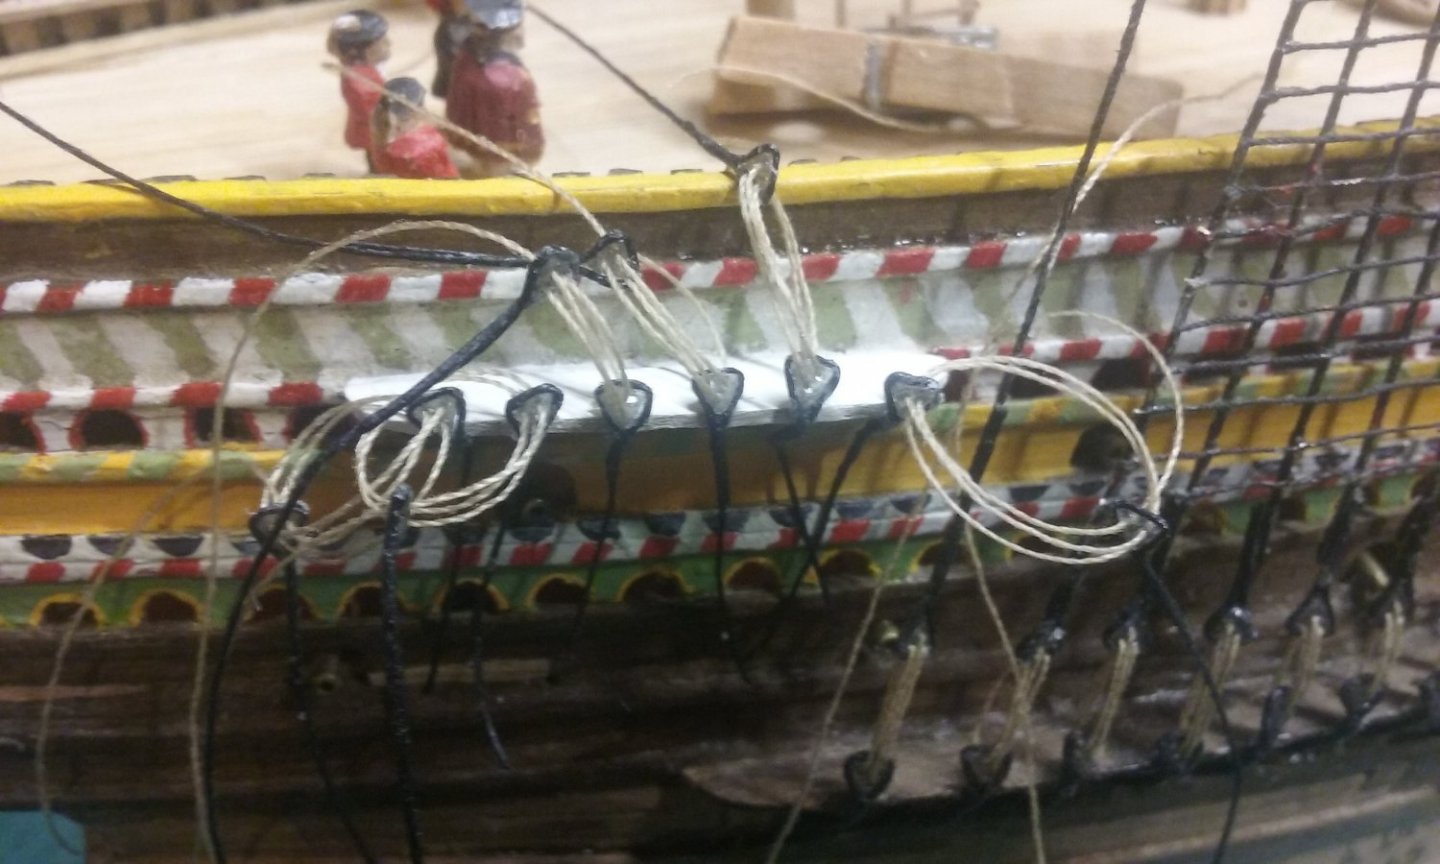
Thanks for the likes and comments, everybody. Mark, I had to get a new, bigger swear jar. Maybe no enough for a new car, but possibly a tricycle . . . Pat, pretty happy. The join between the shrouds and the "loops" isn't as good as it might be, but sometimes you just have to accept that it's as good as it's likely to get, and move on. Druxey; yes he's promised it won't happen again. Interestingly, thinking about the projects I've got planned for myself for the foreseeable future, (and I'm looking at three or four scratch builds, which should keep me going for a good while), though all will have shrouds, none of them will have deadeyes Steven
- 740 replies
-
- 3
-
-
- Tudor
- restoration
- (and 4 more)
-
Edit your post, and you'll find that at the bottom of your post - not in the text but in the section at the bottom, from which you click on photos to put them in the text, there are three photos that you didn't click on for inserting into the text - i.e. unused photos. Delete those from there, and they'll vanish from the post. I had trouble with this time and time again till I found the solution. Steven
-
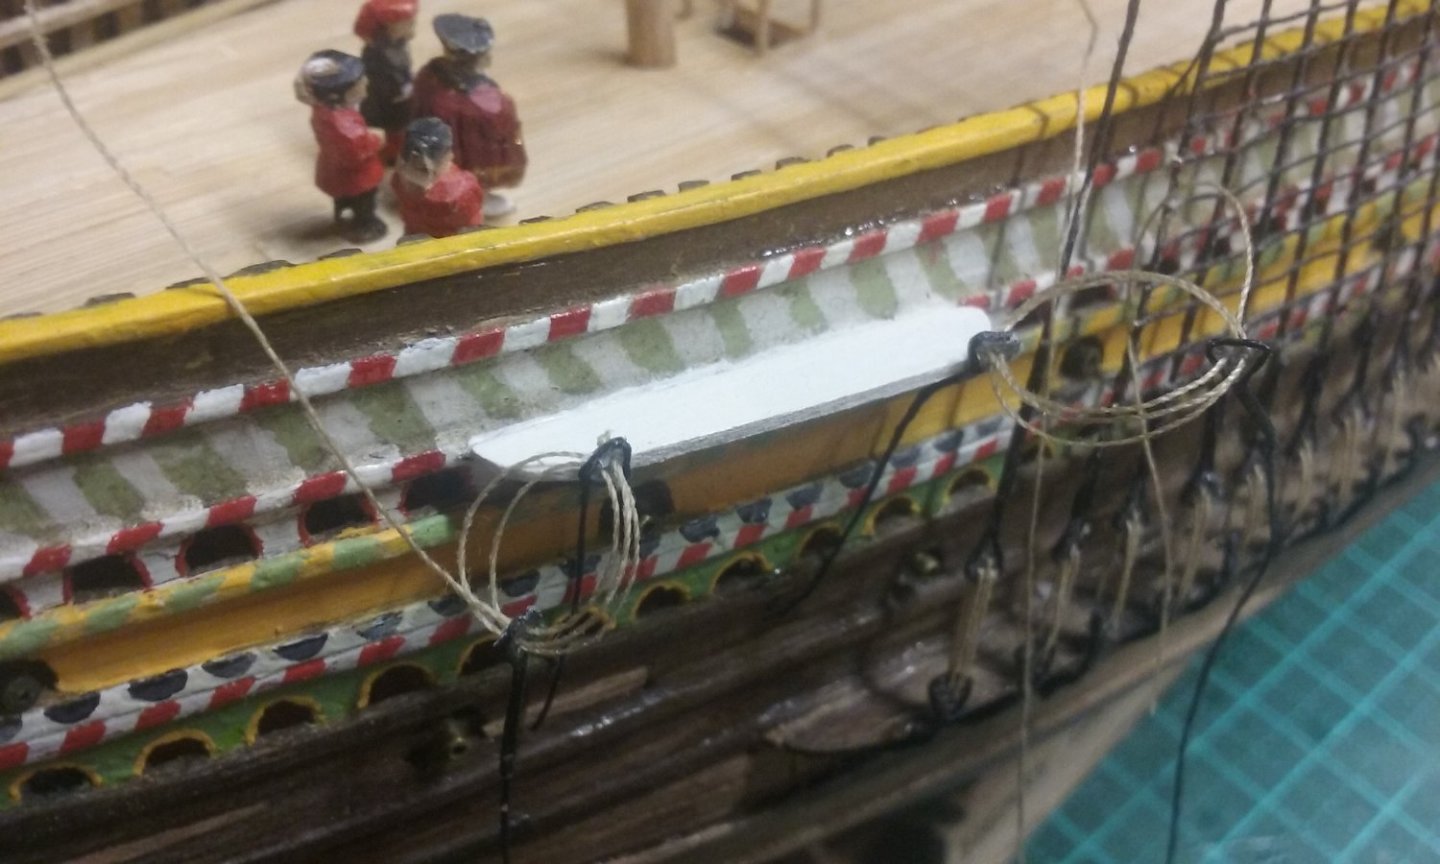
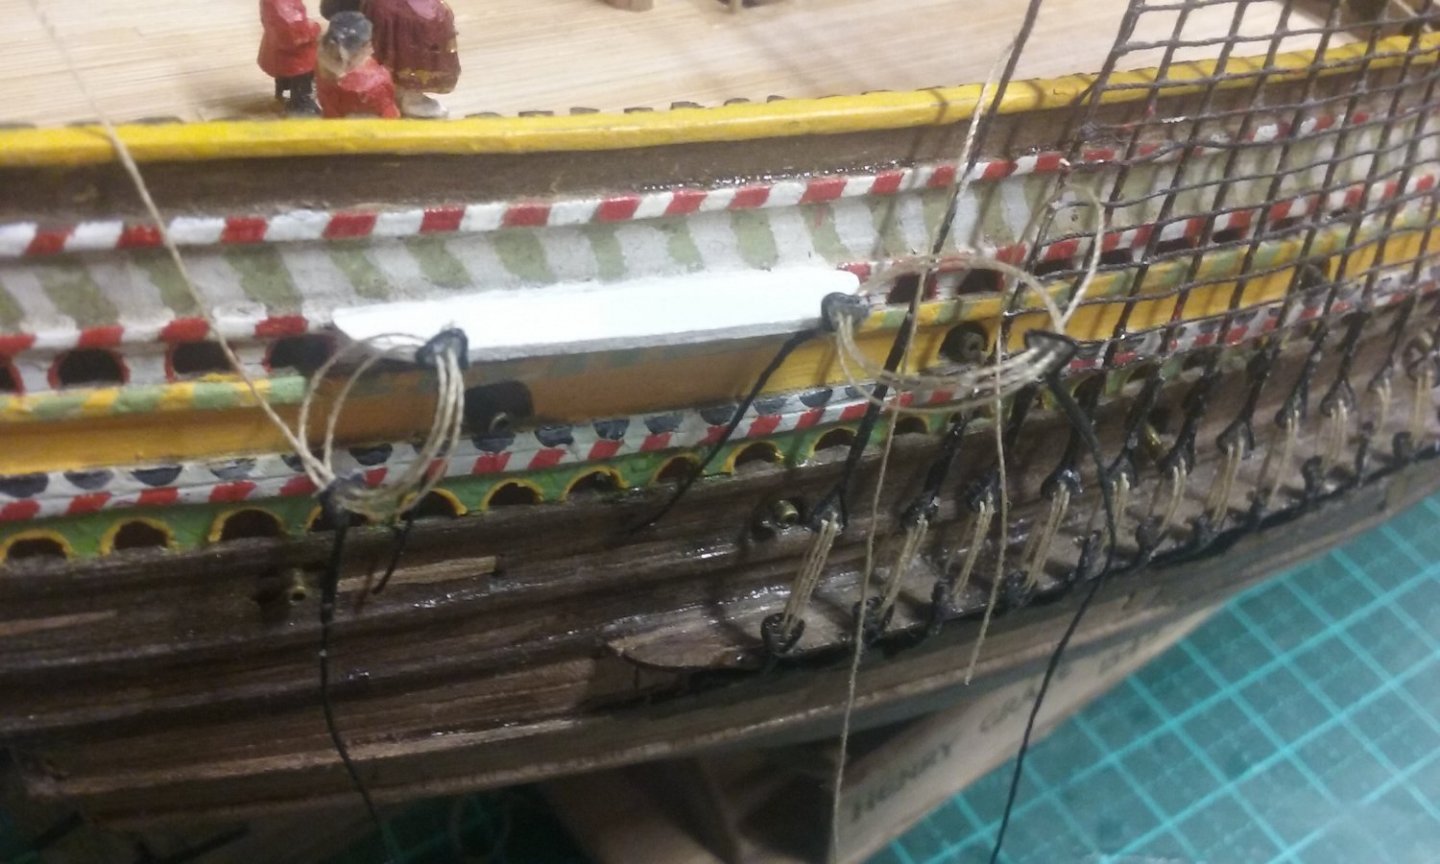
After a lot of waffle and fiddle, I'm just finishing the last pair of deadeyes for the fore and main masts, which had the shrouds already in place but without the deadeyes. (Warning - kiddies, don't try this at home; much more difficult than doing it the standard way. Lots more swearing, too.) This was all caused by my lack of foresight when I was 17 - I glued the shrouds in place and added ratlines without thinking forward enough to decide what to do about the deadeyes, and by the time I got around to thinking about it I was trapped into working around a less than optimum situation. I discovered the least problematic way was to make separate loops around individual deadeyes and then glue the free end of each loop to the corresponding shroud. Doesn't look all that good close-up, but sort of merges into the shroud if you're more than 6 inches away. Not the way I'm ever planning to do it again. Fore shrouds and deadeyes - lanyards held tight by weights (tiny clothes pegs) attached to the ends, with a dab of glue at the back of the top deadeye to keep them in place. And complete . . . Larboards main shrouds ditto (the starboard ones were completed earlier - see previous posts). Last pair of deadeyes - lanyards weighed down to keep them tight. Once the glue is dry I just have to trim off the excess thread from the lanyard, glue down the free end of the "chain" (really just thick black thread) and trim it off when the glue dries. I have to say this procedure was complicated over and over again by such things as deadeyes coming away from the channels after I thought I'd glued them securely, "chains" coming away from the hull ditto, glue plugging up the holes in the deadeyes so I had to pull the assembly apart and start again, mis-threading lanyards ditto, you name it. After this, the swear jar should not be getting full so fast (I hope!). Now I just have to a little adjustment - a couple of ratlines have come unstuck at the end shroud or two, and a few other little bts and pieces. Then I'm ready to move onto the next step. In fact, I've already done so. Greatly daring, I've glued the mizzen mast into position. Once I've put the stays in place, I'll be starting all over again with shrouds and deadeyes. But this time I hope I'll have taken the lessons of the previous debacle on board and do it a bit more cleverly. Steven


- 740 replies
-
- 15
-
-
- Tudor
- restoration
- (and 4 more)
-
Some people use Lego blocks, which have the advantage that all their angles are right angles. Steven
-
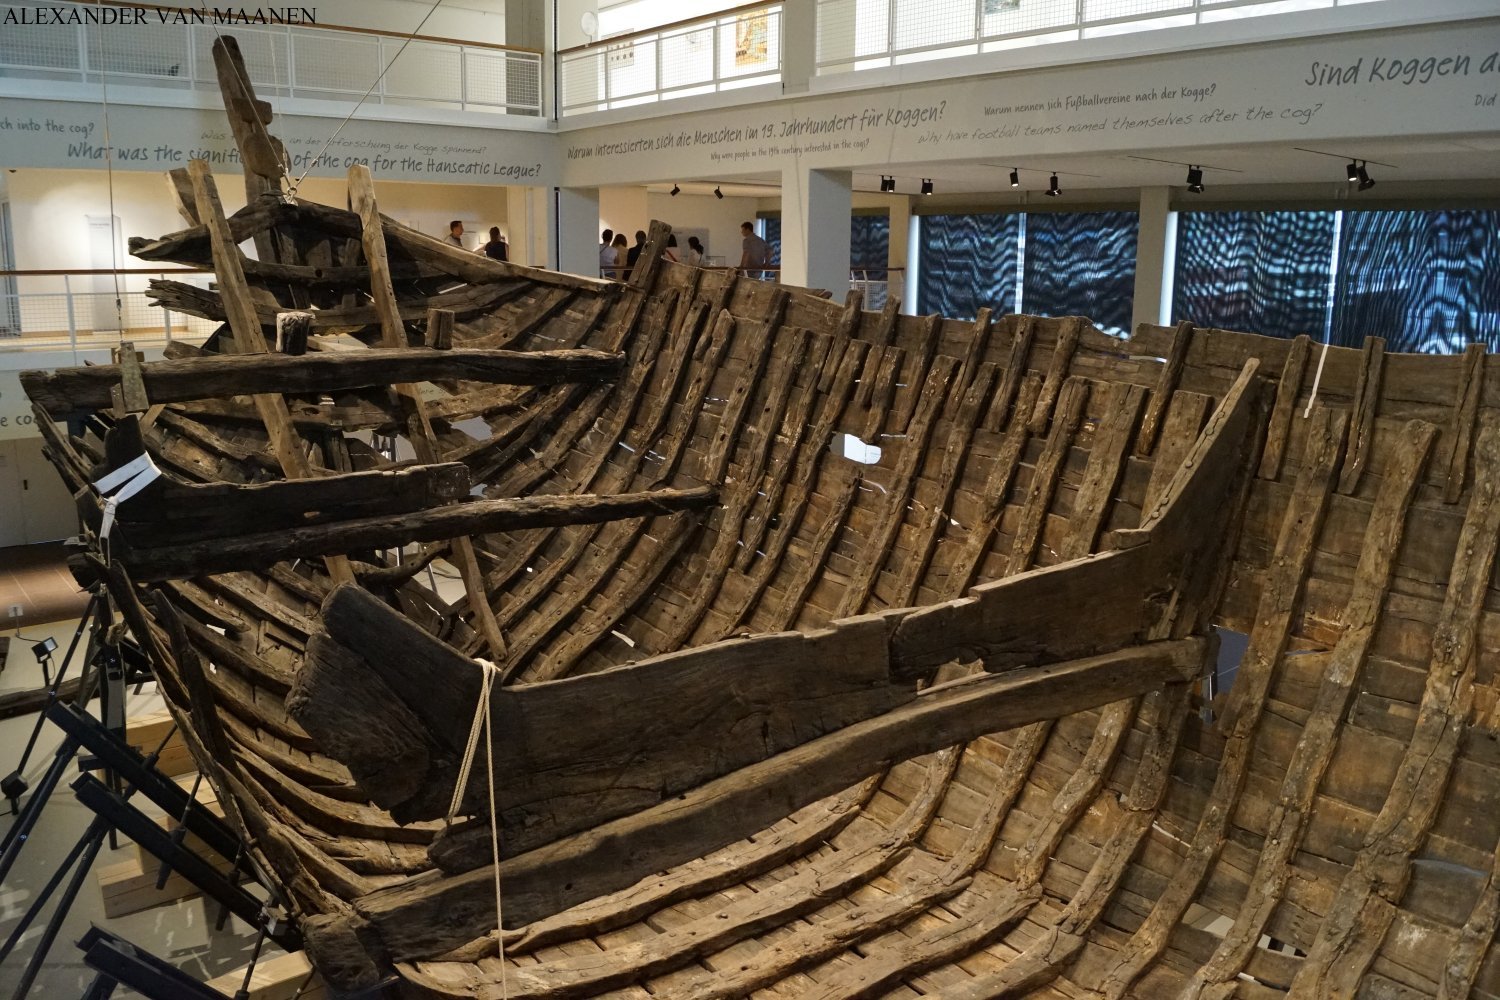
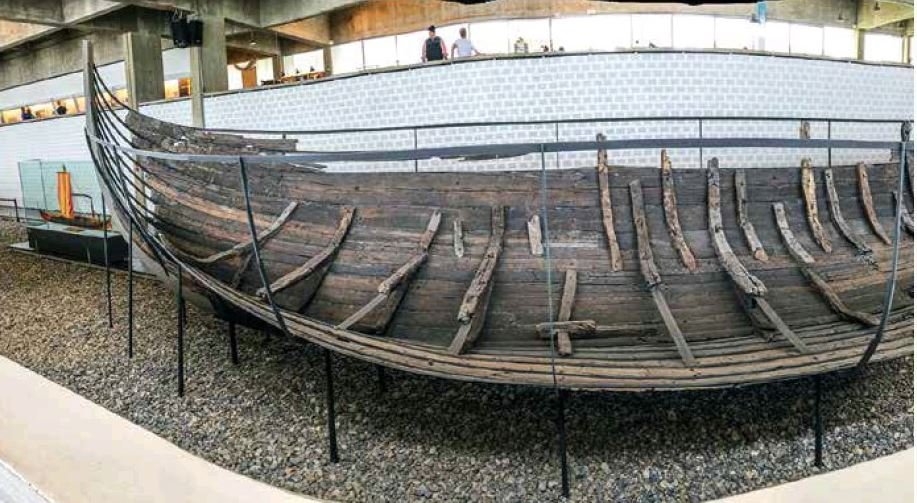
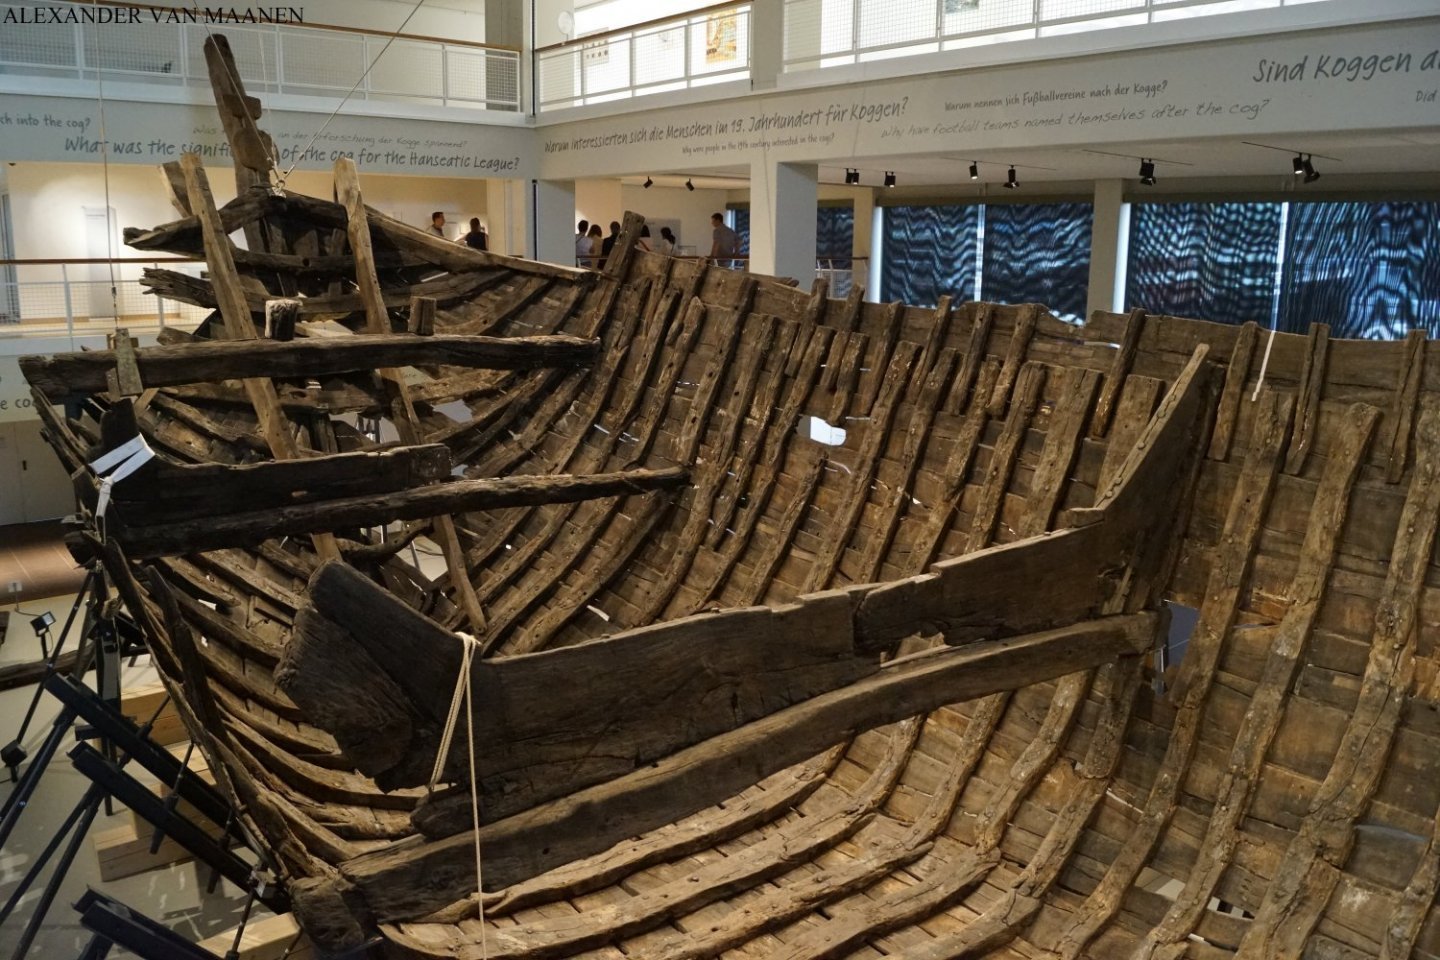
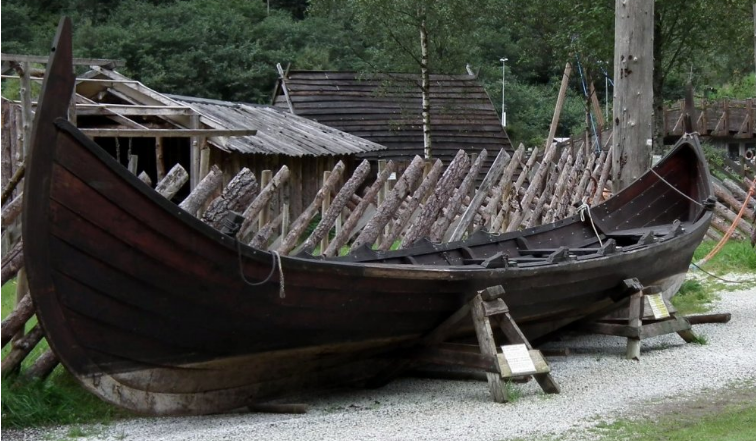
Looking good, but can I suggest the frames don't need to be anything like so heavy - check out the frames on surviving ships of this period. The first is a Viking knarr (Skuldelev 1) , the second is the Bremen cog (with through-beams for strength). The timbers of your frames can be considerably lighter - both thinner and narrower - and still produce a strong sturdy hull. The deck-beams, and particularly the through-beams, provide rigidity to the frames and help the hull keep its shape. And here's a modern reproduction to show just how light a construction you can get away with, particularly when you build in clinker. And it's even better in a model, which is not subjected to the same kinds of forces a full-size vessel has to contend with. Best wishes, Steven
-
Very nice work. I was lucky enough to see the Krait in Darling Harbour on a visit to Sydney pre-Covid. A real privilege. You might be interested in this: https://www.sea.museum/2018/09/26/restoring-krait Steven