HOLIDAY DONATION DRIVE - SUPPORT MSW - DO YOUR PART TO KEEP THIS GREAT FORUM GOING! (Only 53 donations so far out of 49,000 members - C'mon guys!)
×


captain_hook
-
Posts
685 -
Joined
-
Last visited
Content Type
Profiles
Forums
Gallery
Events
Everything posted by captain_hook
-
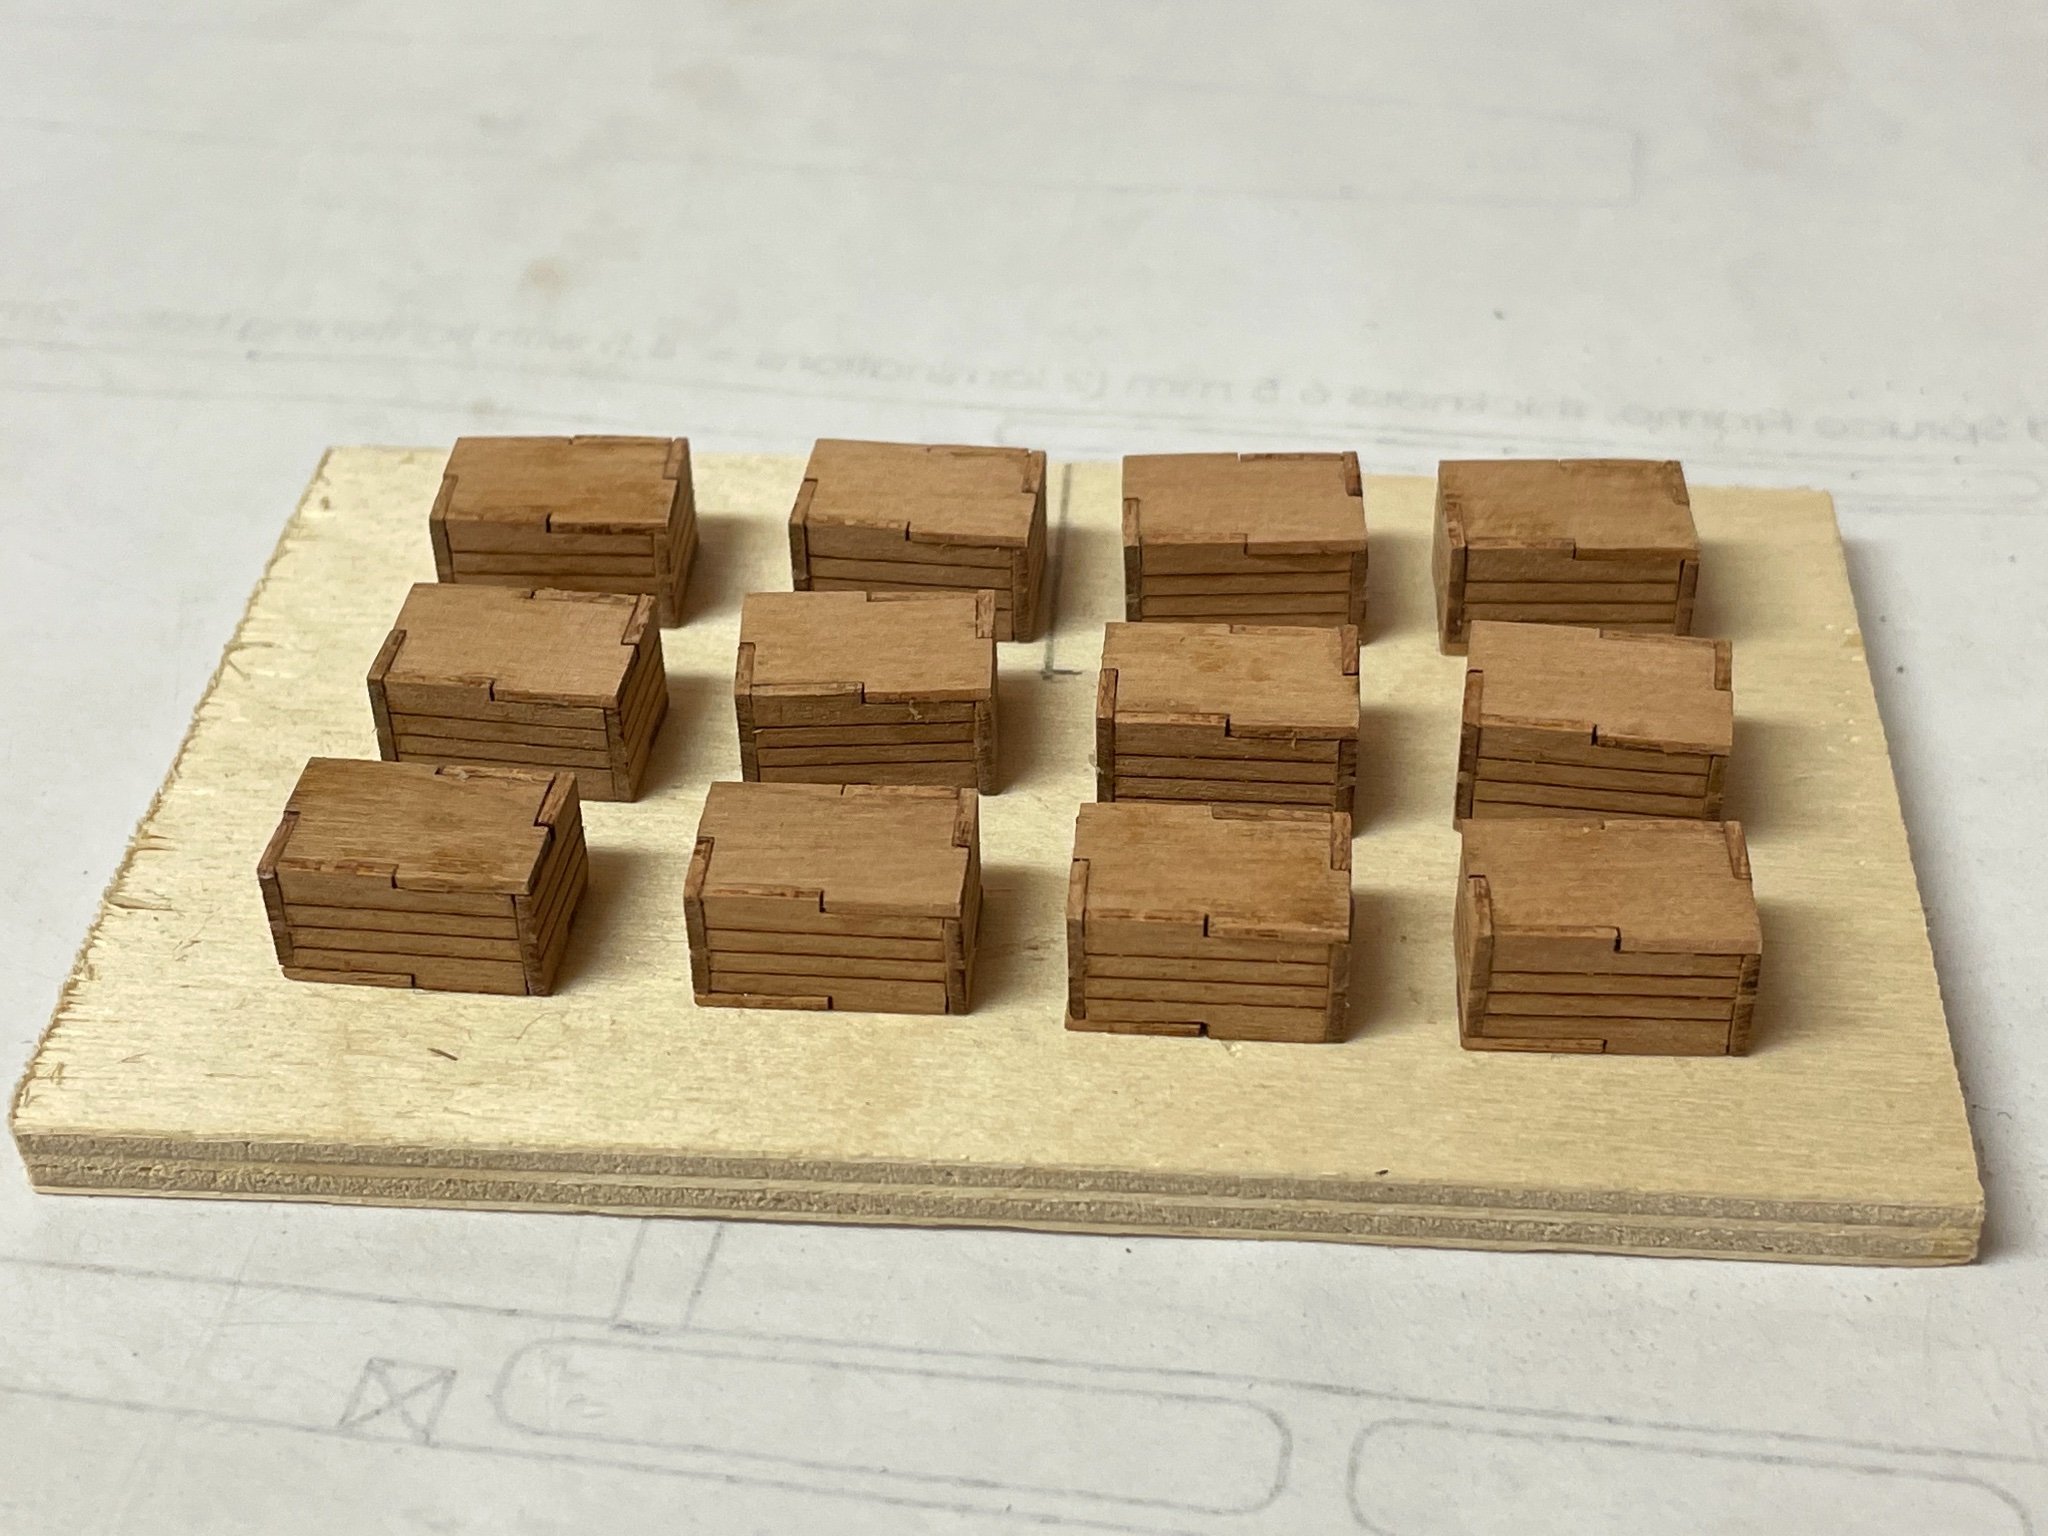
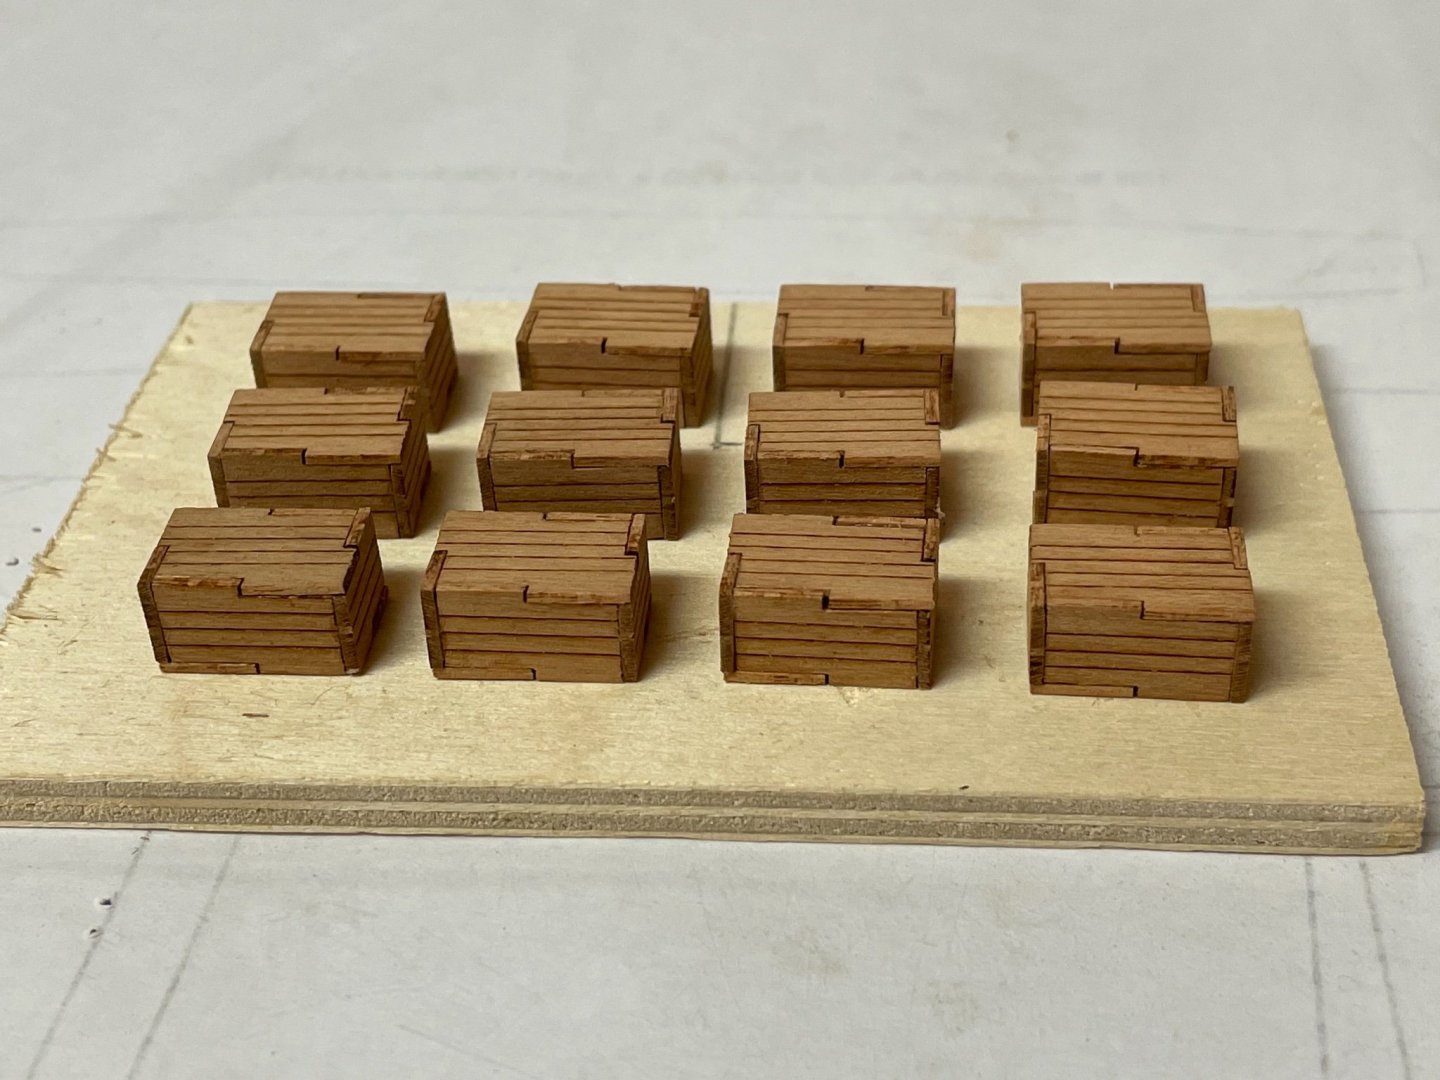
 BTW I solved the little box problem. I removed the downsides from the already build-up boxes and used them as upper panels for the remaining six boxes. Now all small boxes have upper sides with engraved laser pattern but downsides without one (but who cares about the bottom?). So if you ordered the barrels and boxes add-on, please check the parts first and if you encounter mirrored parts this might be a solution. Stay save. Andreas
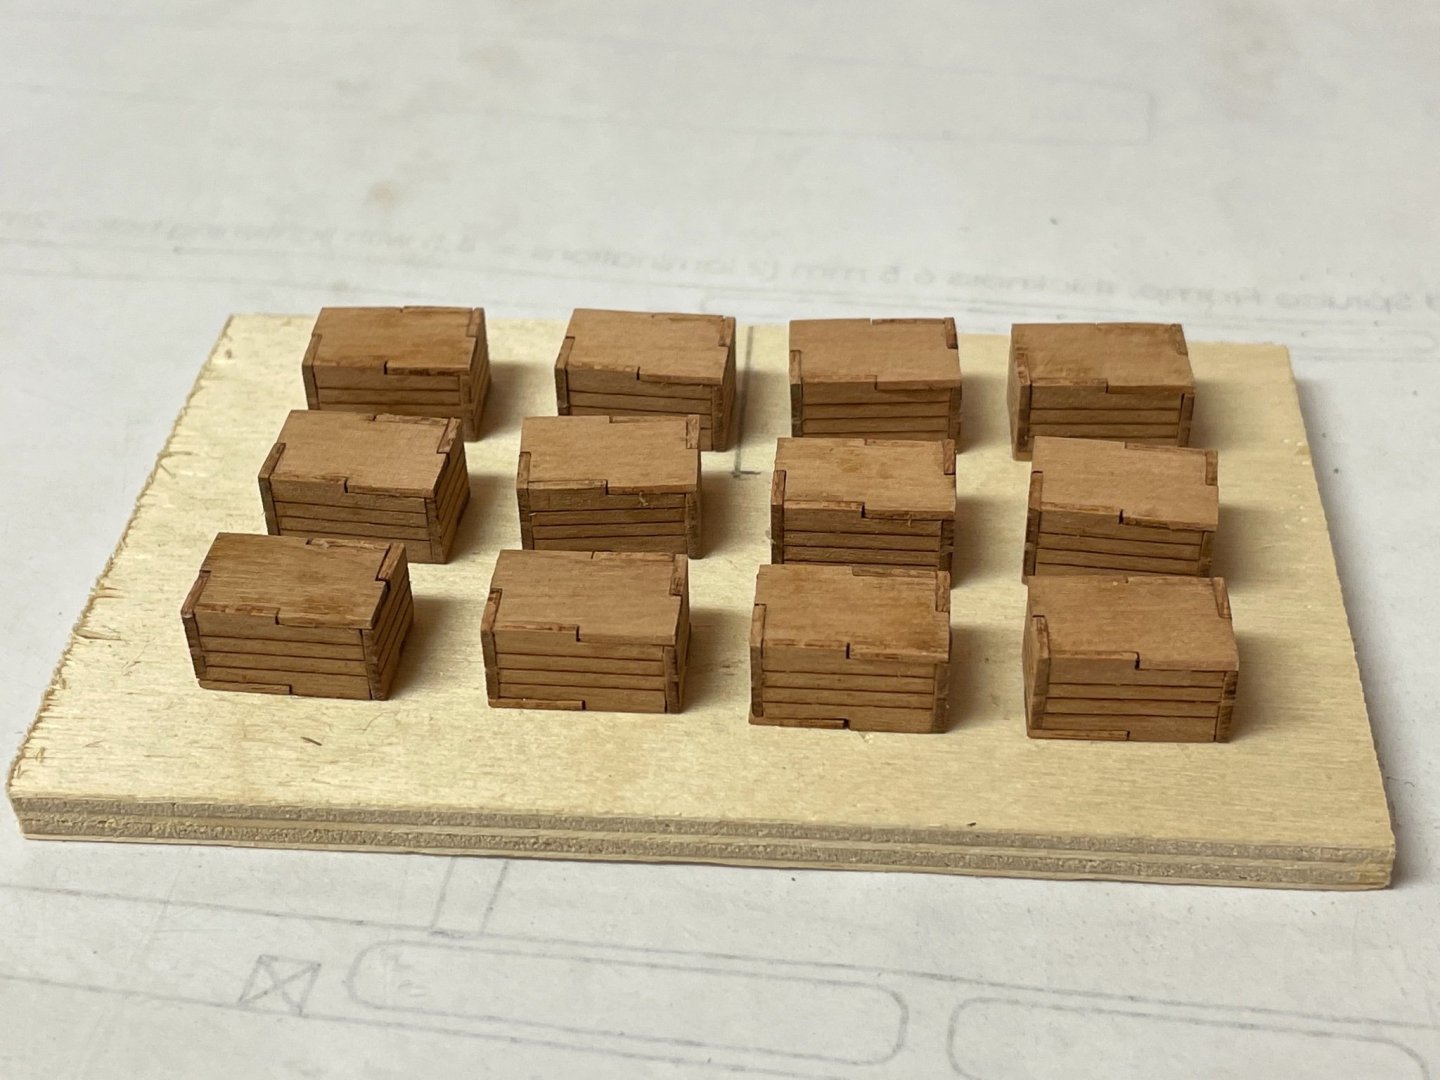
-
Very nice. Are these the supplied woodstrips you are using? Is it basswood?
-
Wow, you have done a very nice paining job. Like the scheme of the Snowberry as well.
- 321 replies
-
- 6
-

-
- Finished
- Flower-class
- (and 1 more)
-
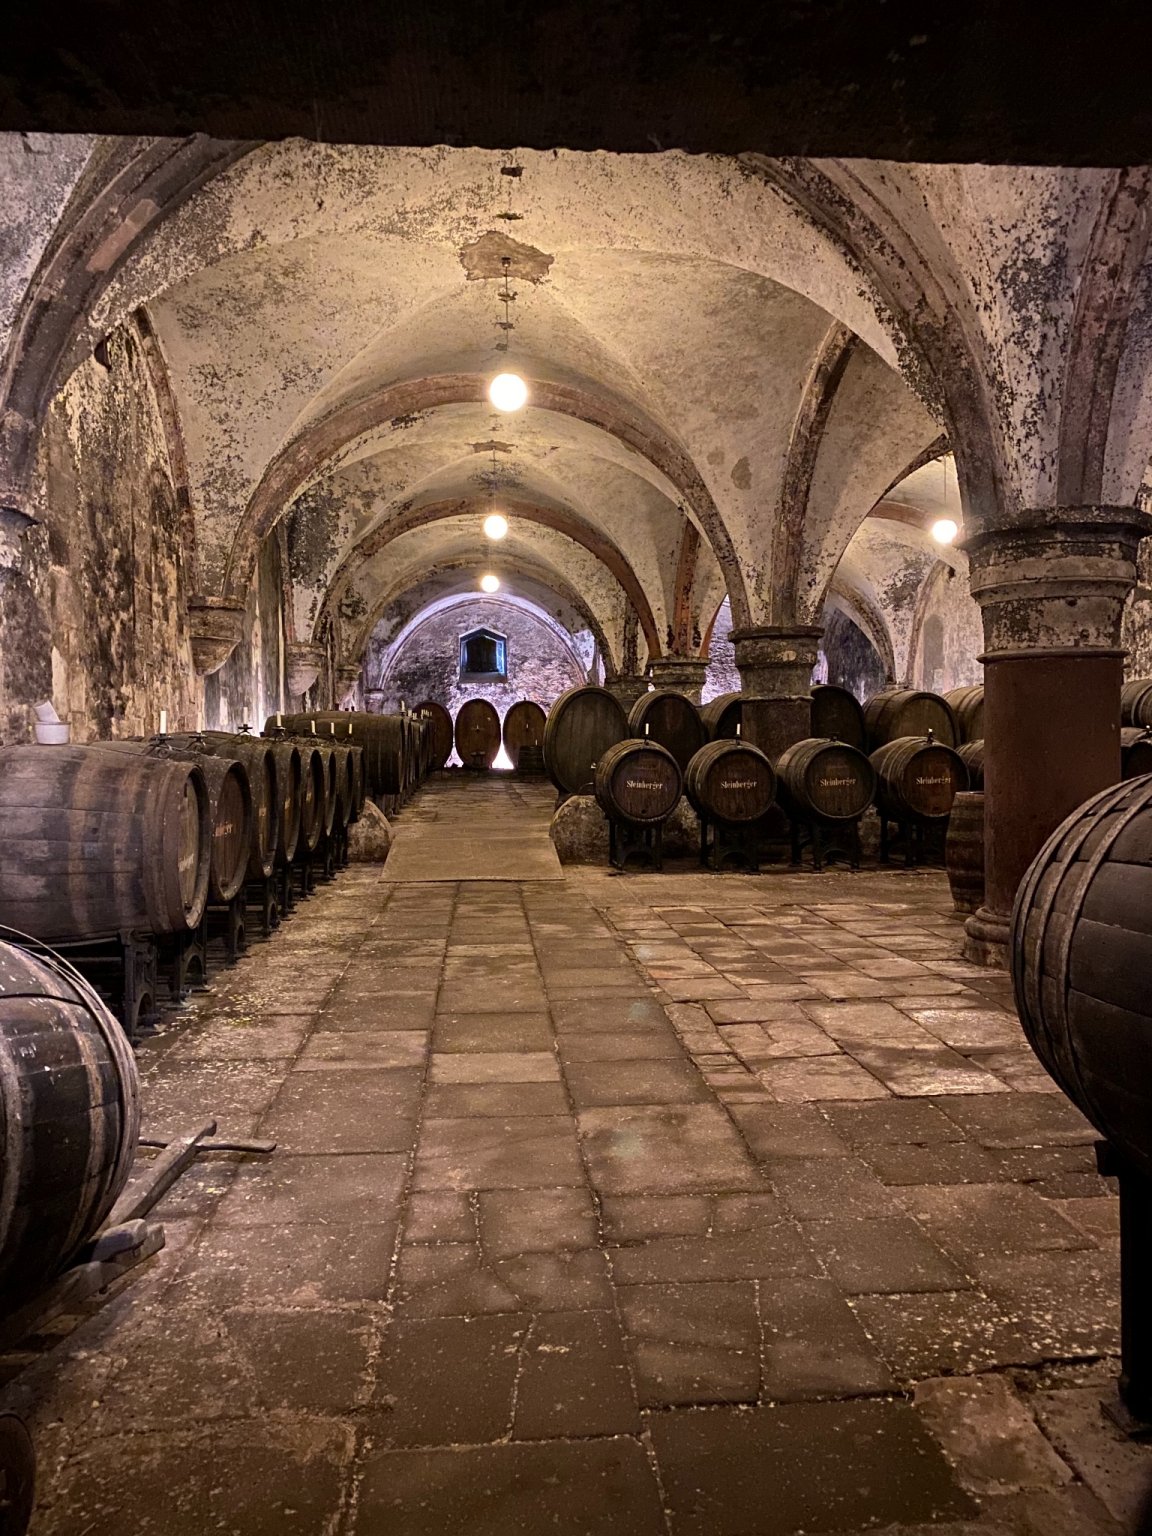
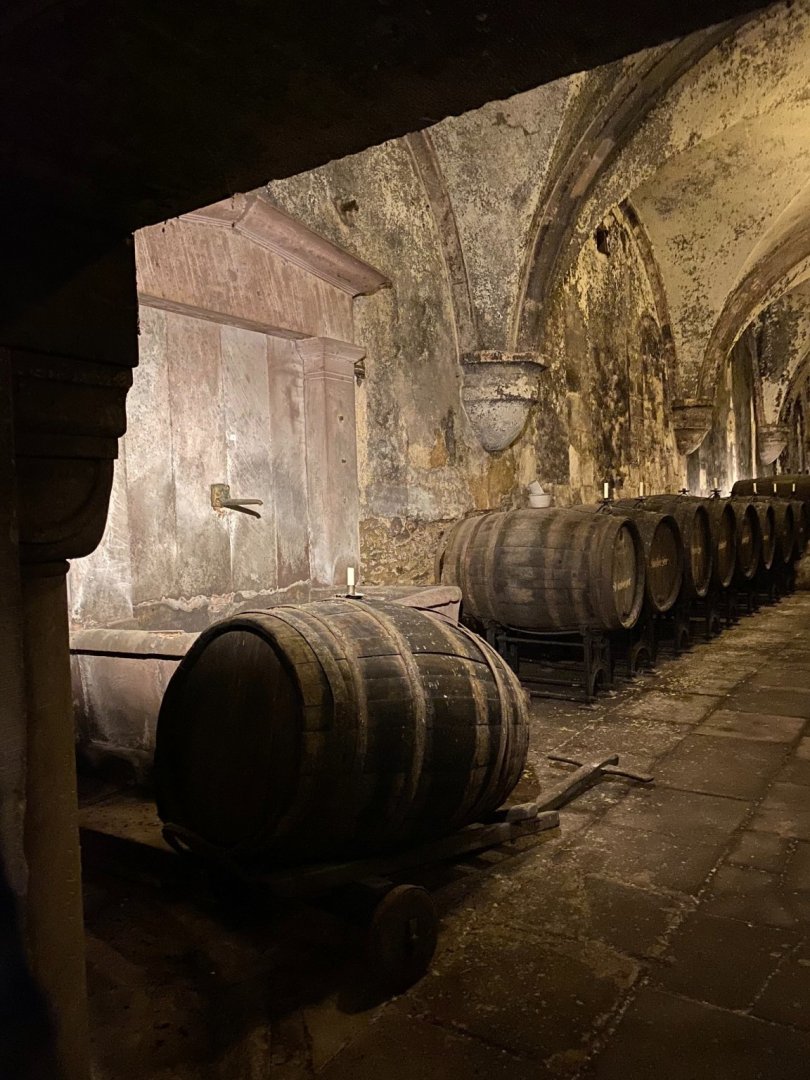
Marcus, you‘re right. In fact, most barrels hat either 4 or 6 iron bands to fix all wooden parts in place. I visited an old medieval church some day ago and the wine barrels show either 4 or 6 band, none had 5 bands attached. But if I question all construction details and try to correct all mistakes (and there are several ones in the kit), I will end up better building one from scratch. I think I have to accept that it is a kit-build model with simplified construction methods and details shown that are rather aesthetically pleasing than historically correct, although I try to make it as accurate as possible. But the barrels will barely be seen and nothing is fixed or glued yet - I may remove the enter one or leave it as it is. And the bands have a snug fit, you need some force now to move the bands out of position.

-
Thank you Bob. They are all time-consuming little mini-kits.
-
Thank you Yves, that is a nice idea. Bordeaux would keep the captain and crew pretty much unimpressed when the Alert is coming for them.
-
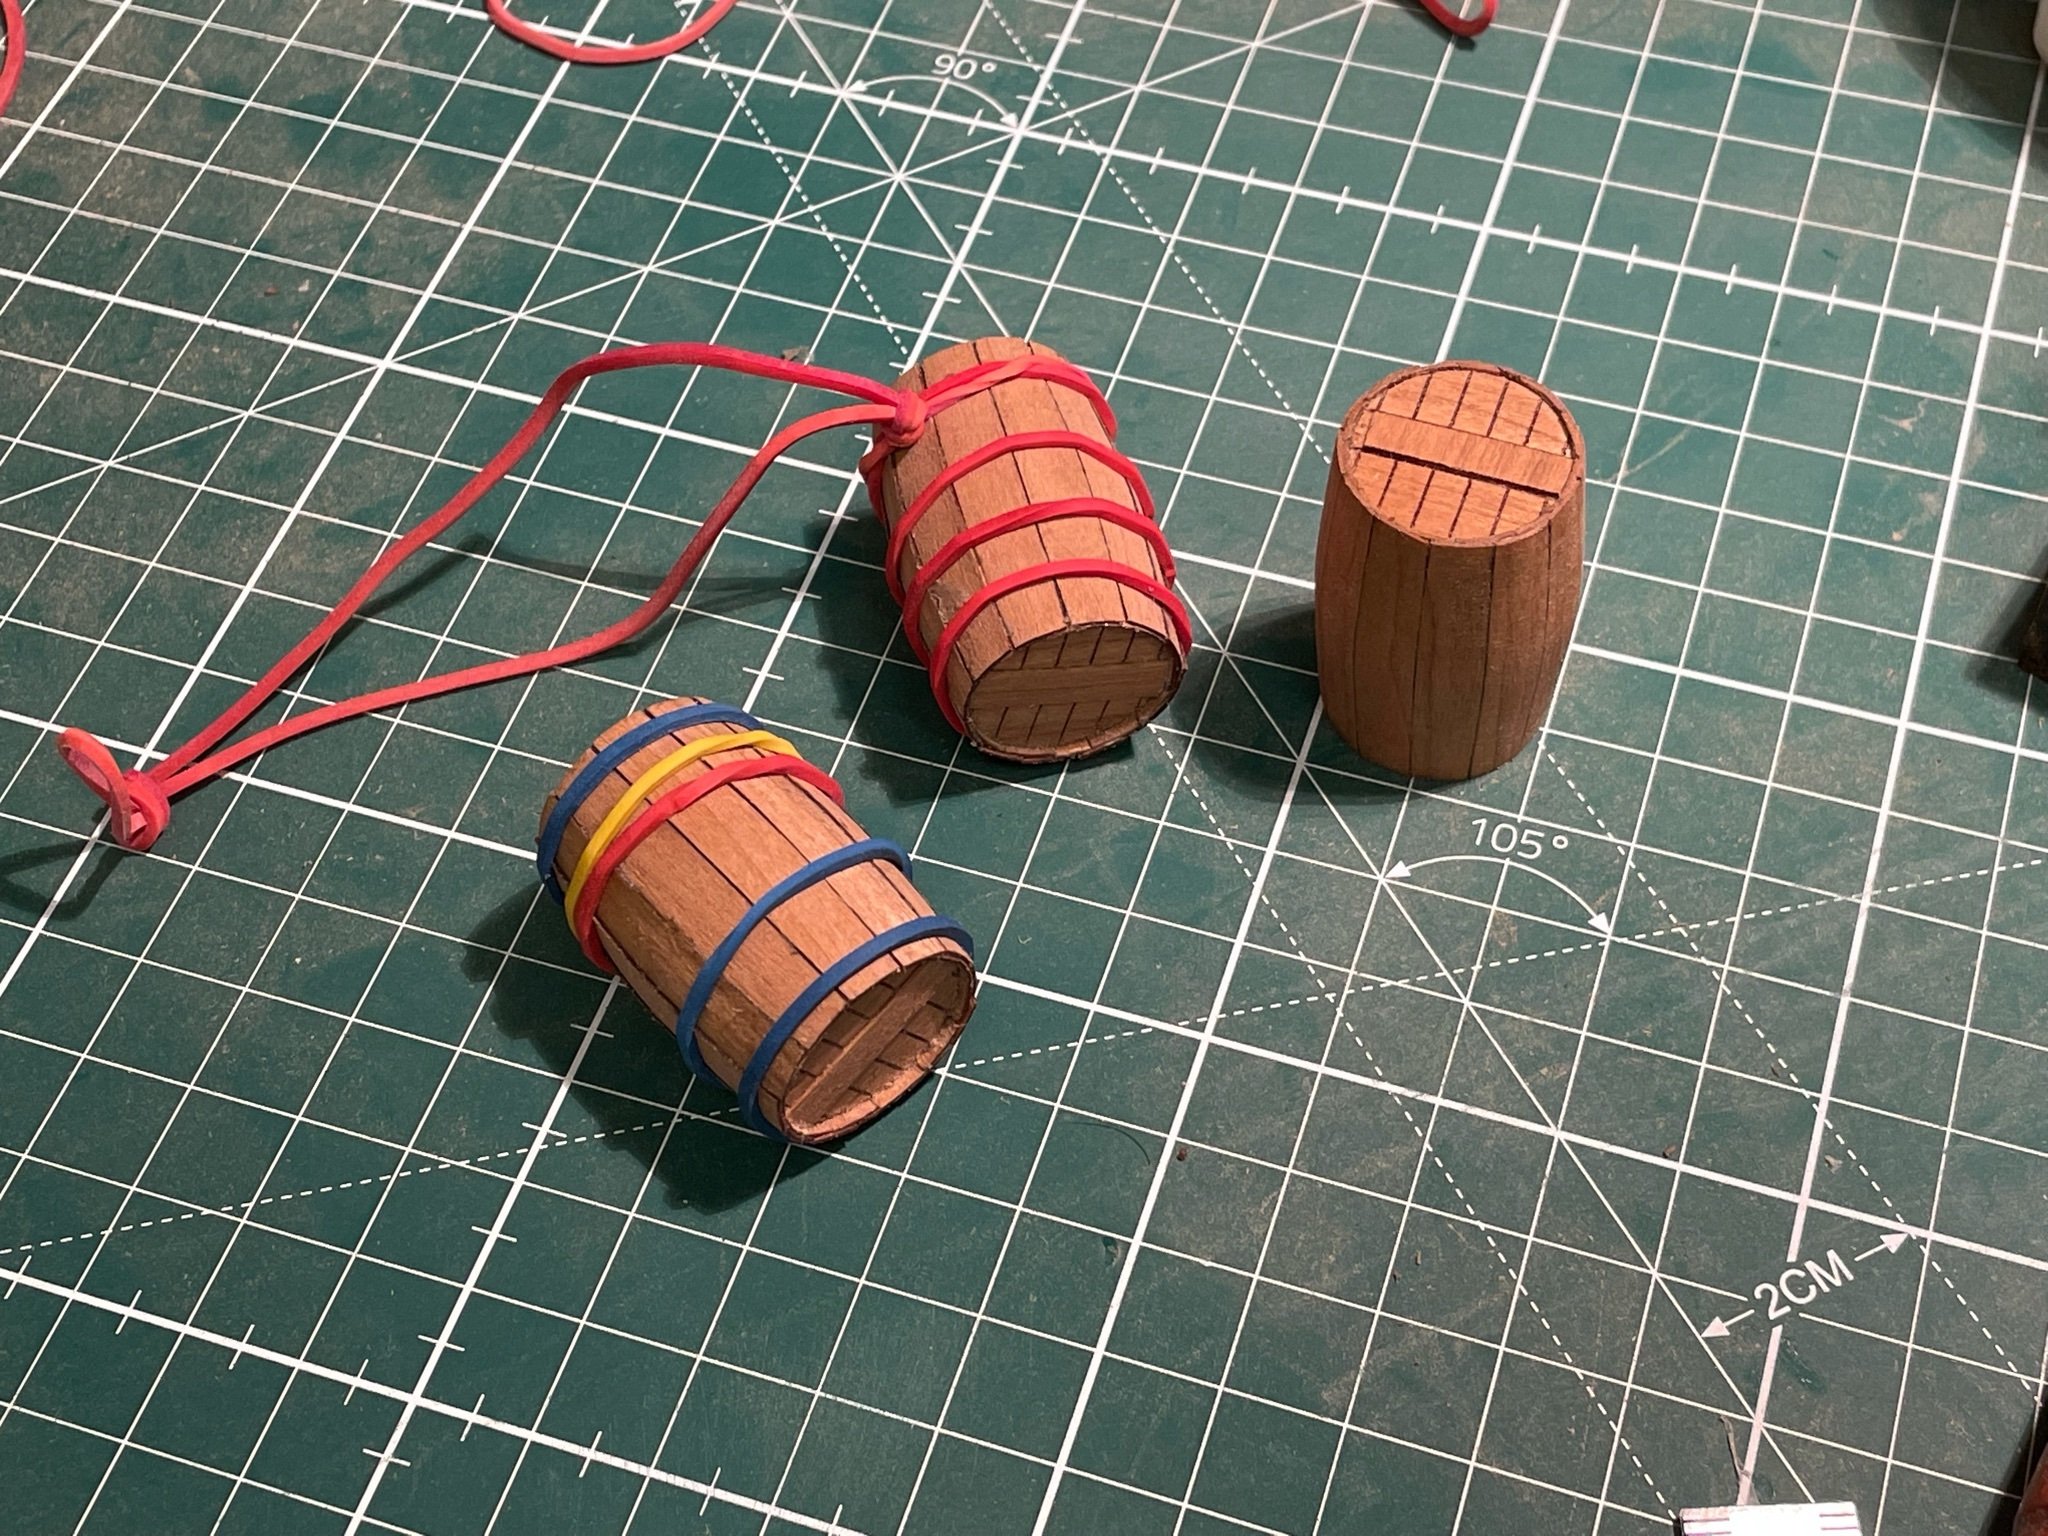
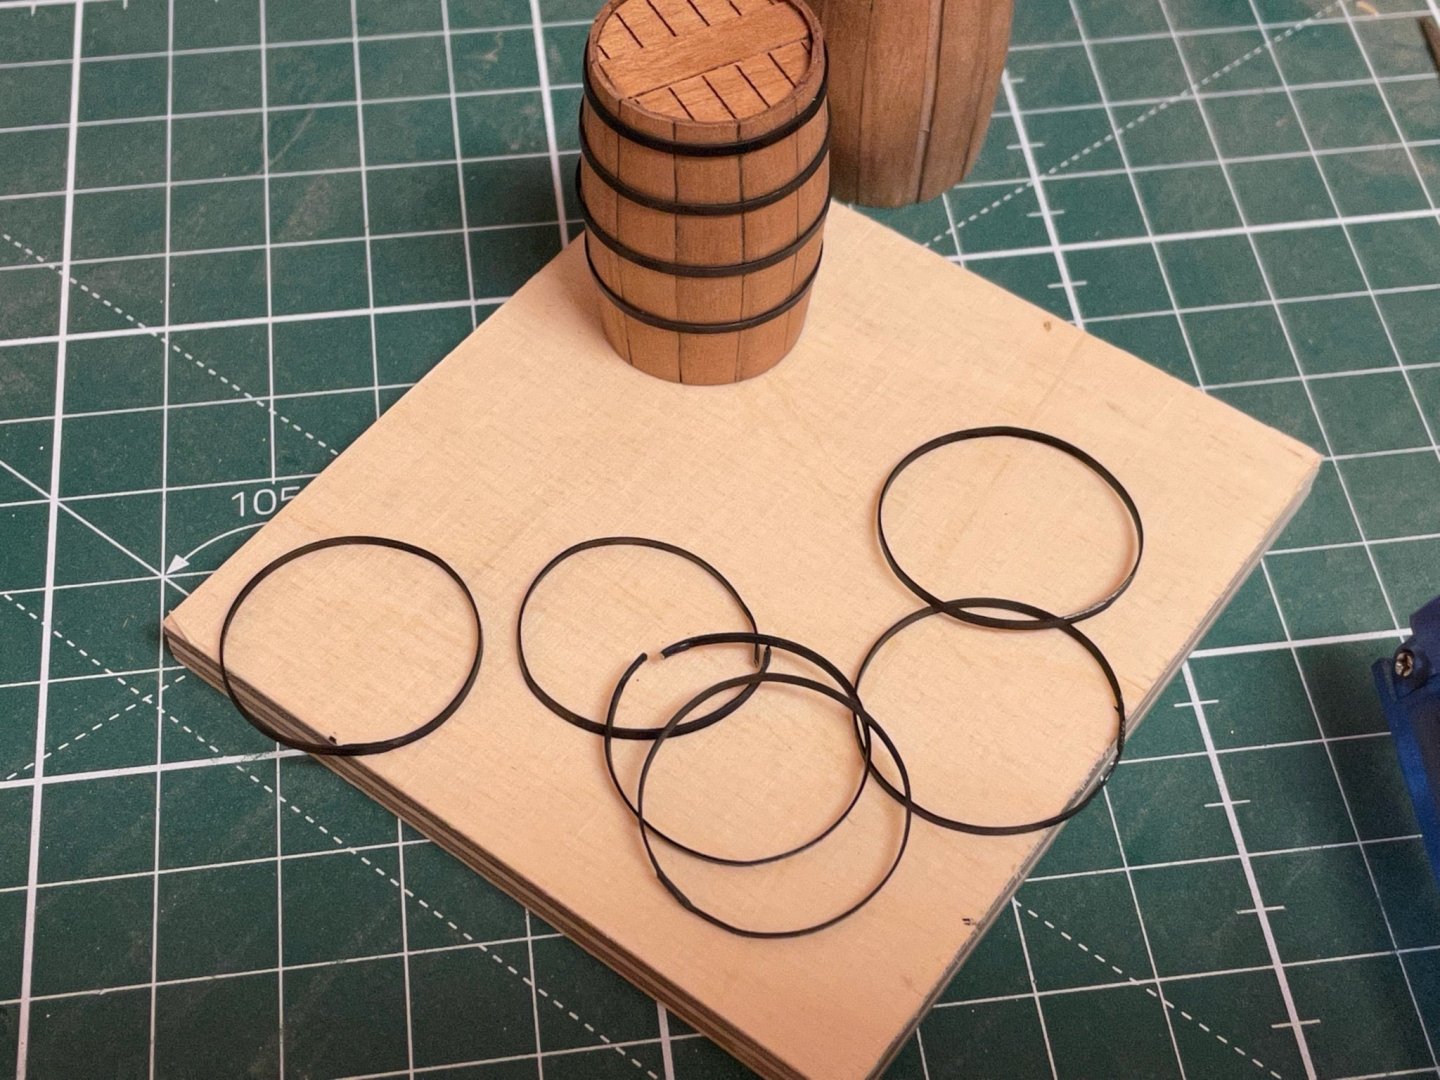
Sorry Marcus, just kidding. These iron bands were more time consuming than the barrels itself. There are 5 bands per barrel supplied as photoetched parts. Each band has an overlap of about 2-3 mm, so I used a needle file to reduce the thickness of these overlap about 50% (and also on the other end - opposing side) and soldered these ends together with soft solder - over 50 pieces. Blackened all parts with my favorite blackening chemical (from Krick) and painted the little soldering spots with some black acrylic (they won‘t be seen anyway because all soldering spots are at the bottom of the barrel). The bands are slightly smaller than the diameter needed, so pushed the bands about 1 mm into their final position. I made 10 barrels altogether but not sure if I will use all of them because they might block your view while viewing into the side of the ship. Now I can‘t go further because I have to wait for the ordered wood first. Stay save. Andreas

-
Iron bands? No, not needed. My barrels are held together by cosmic energy.
-
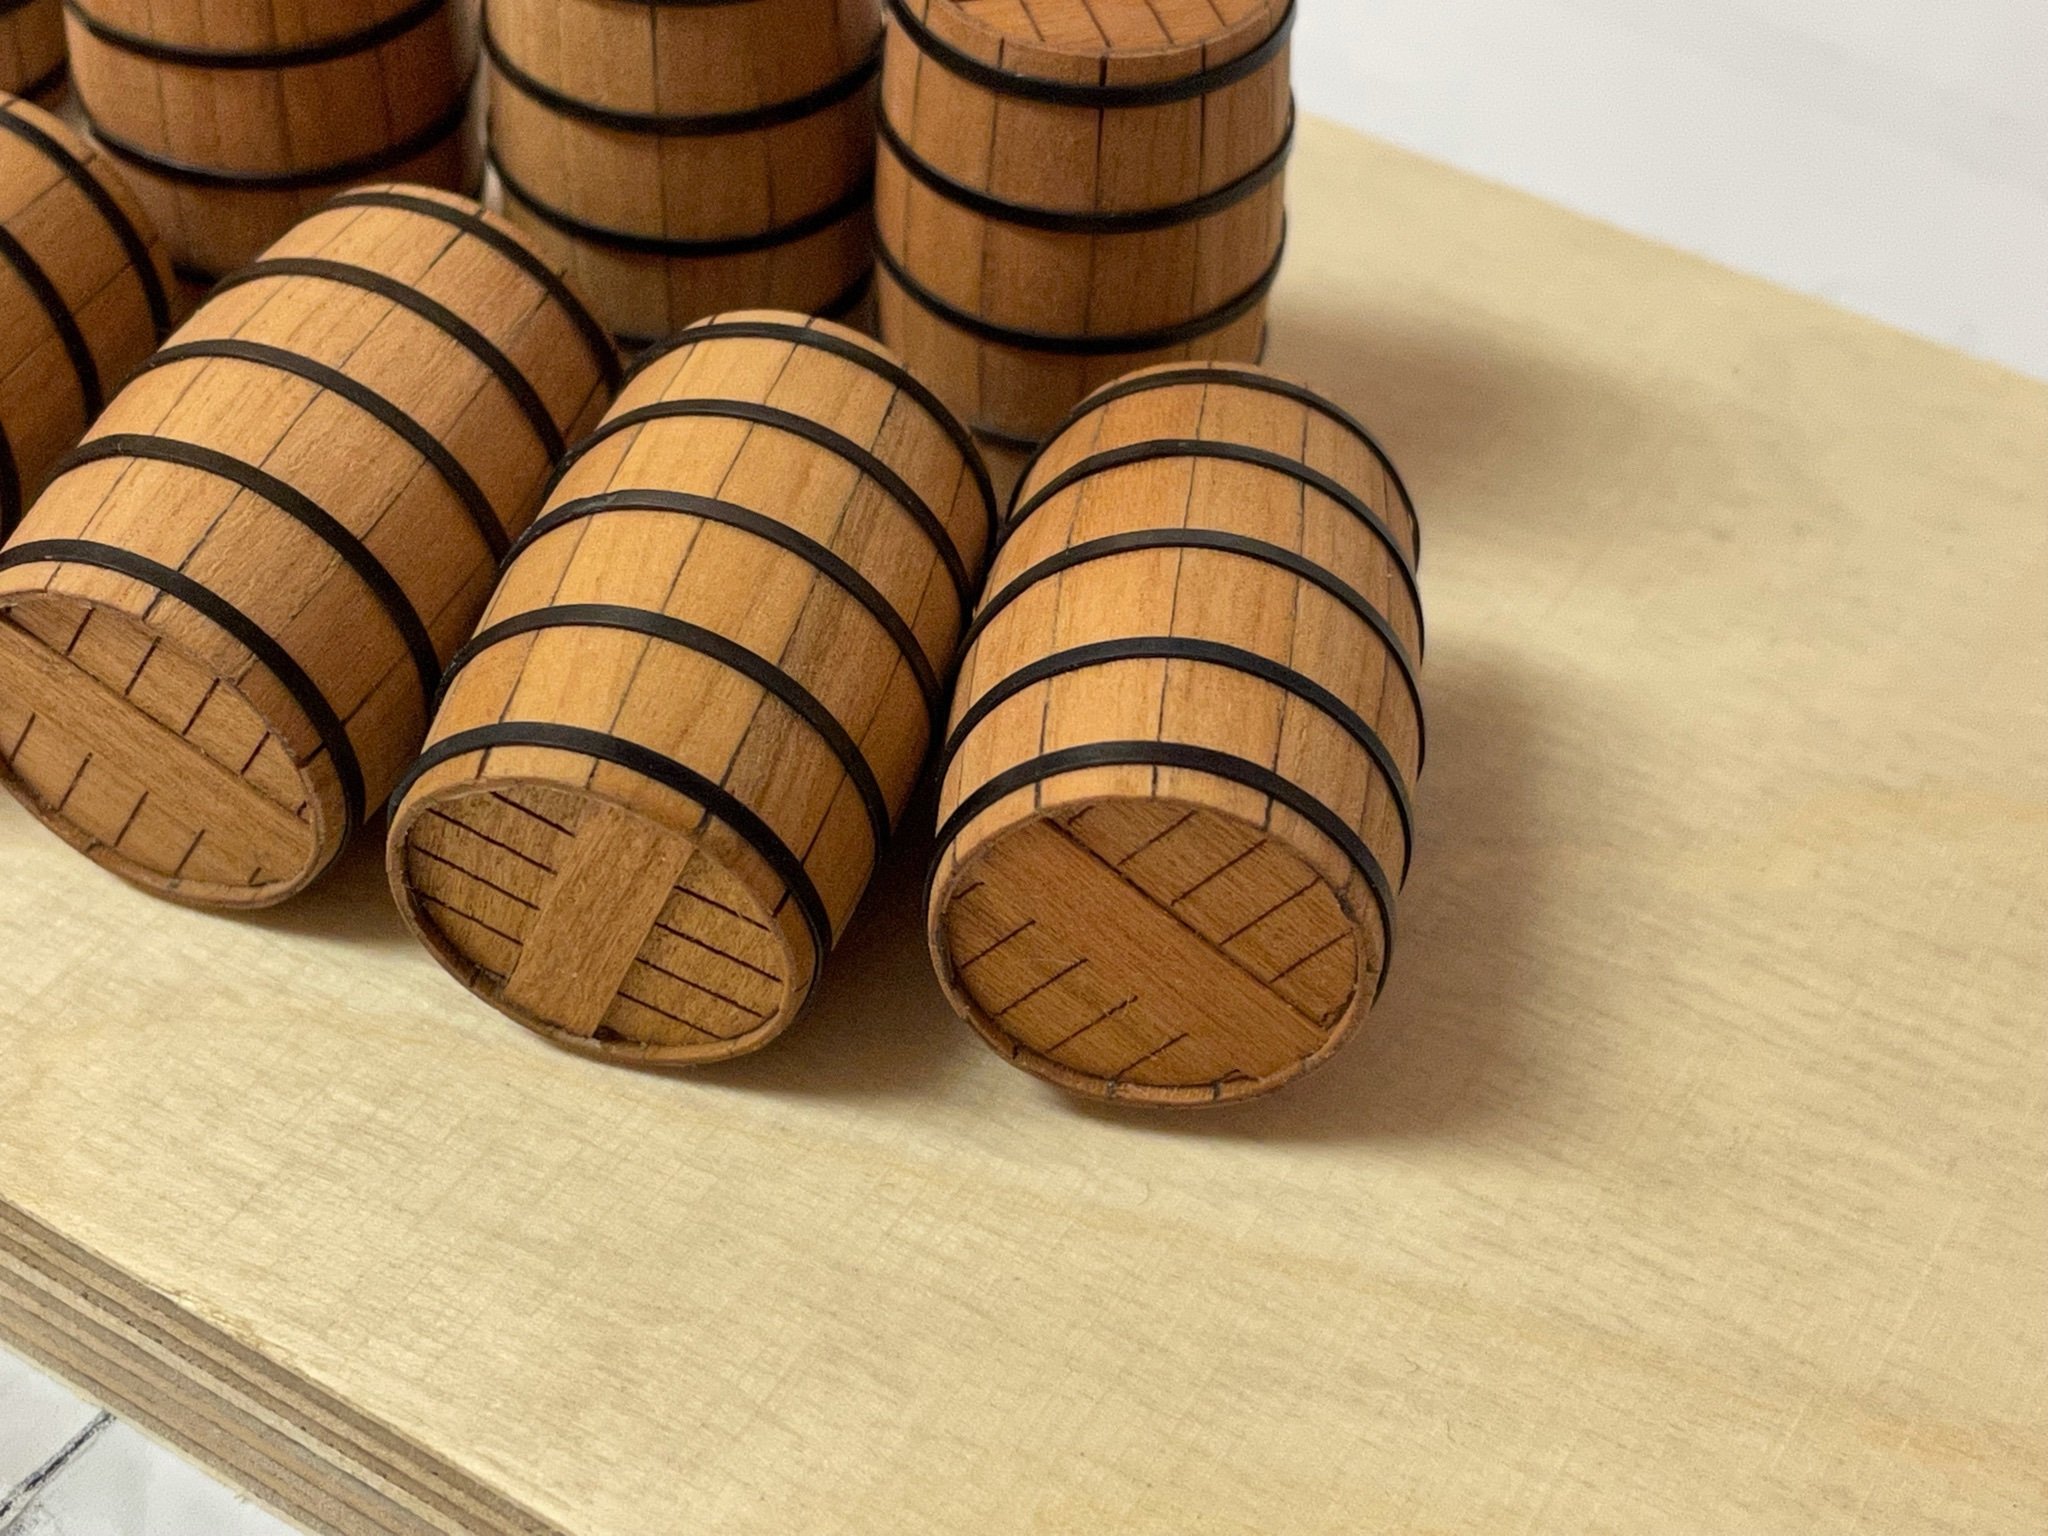
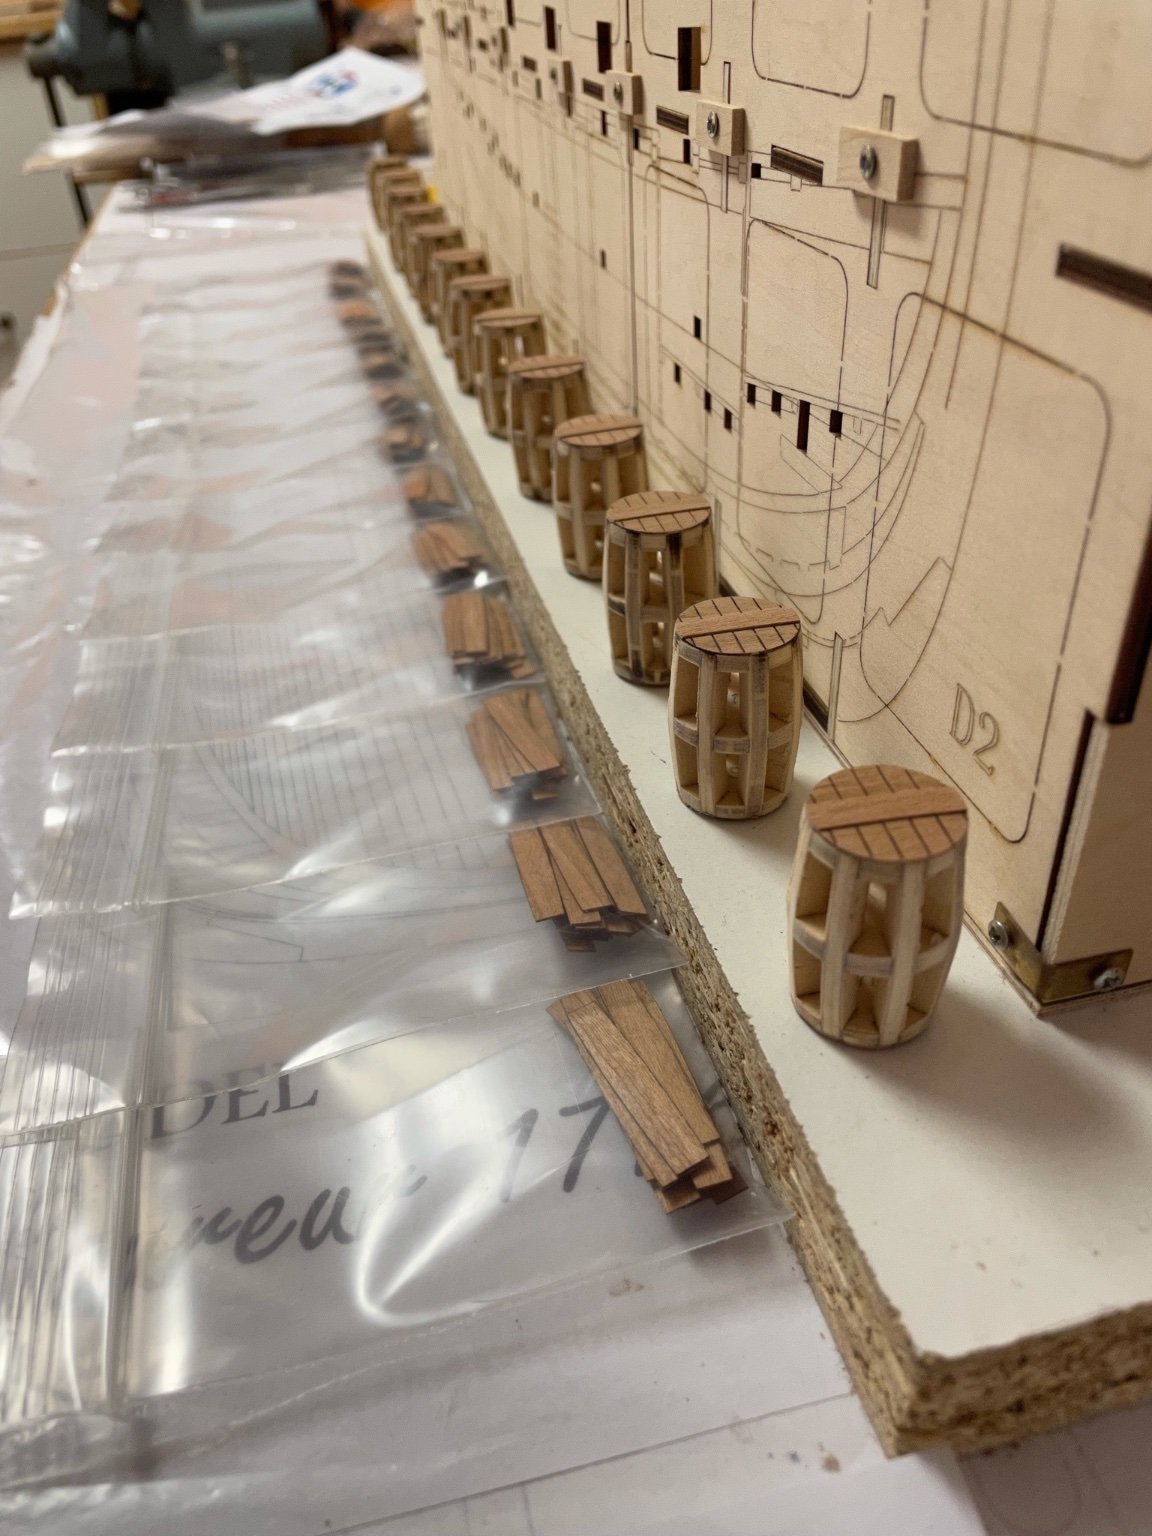
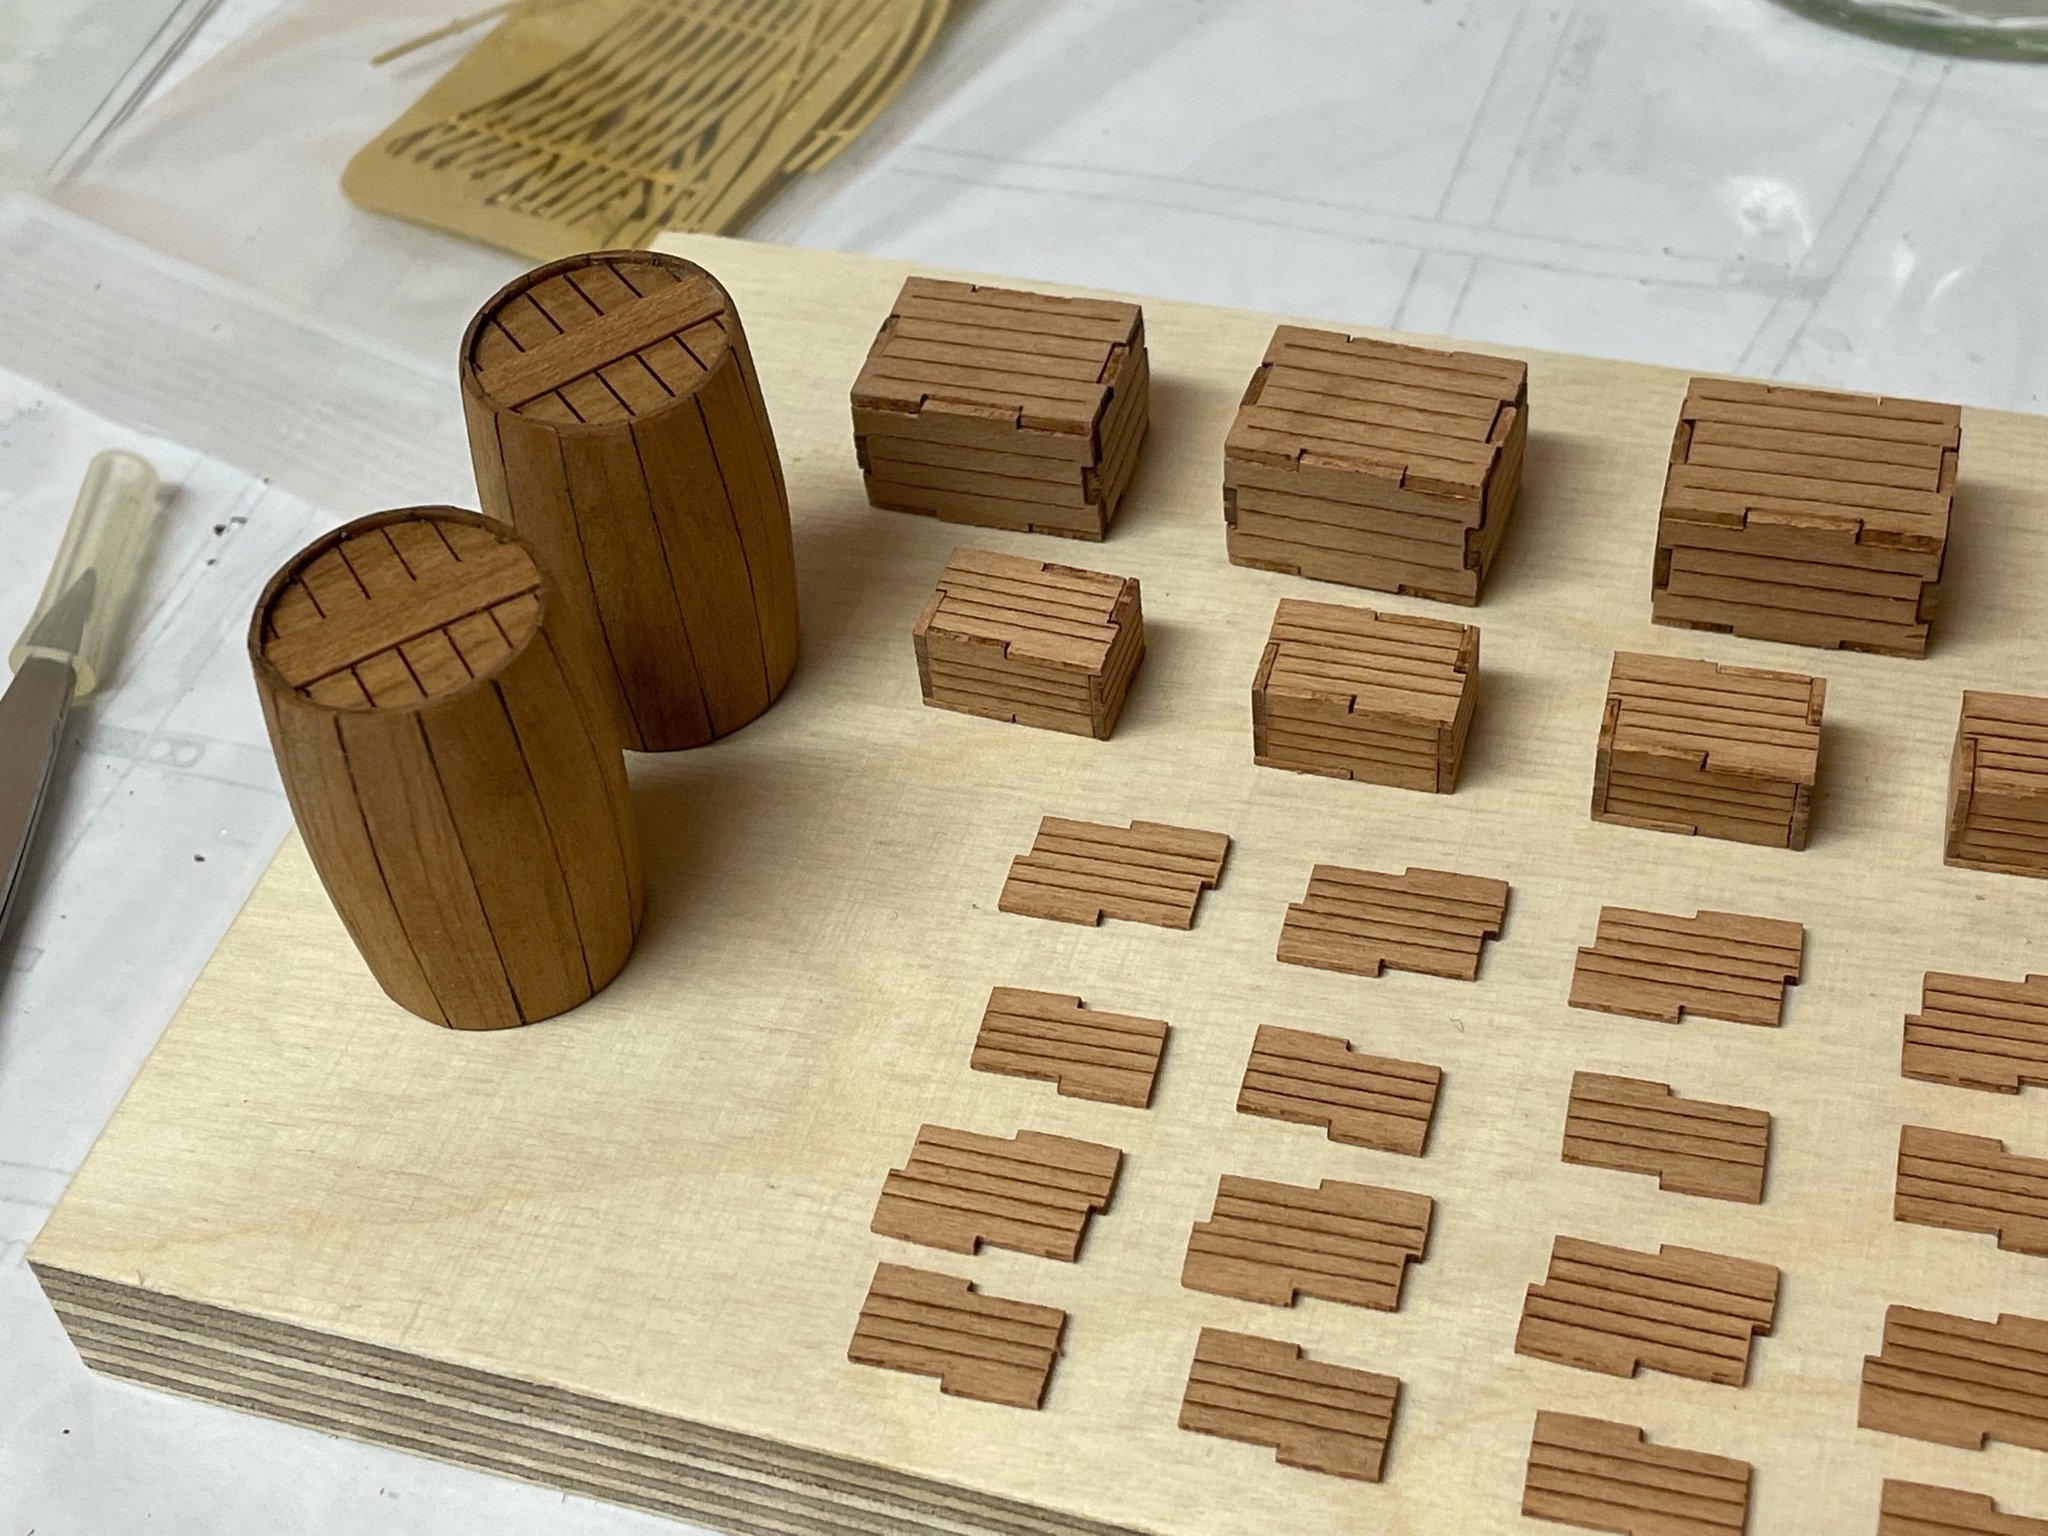
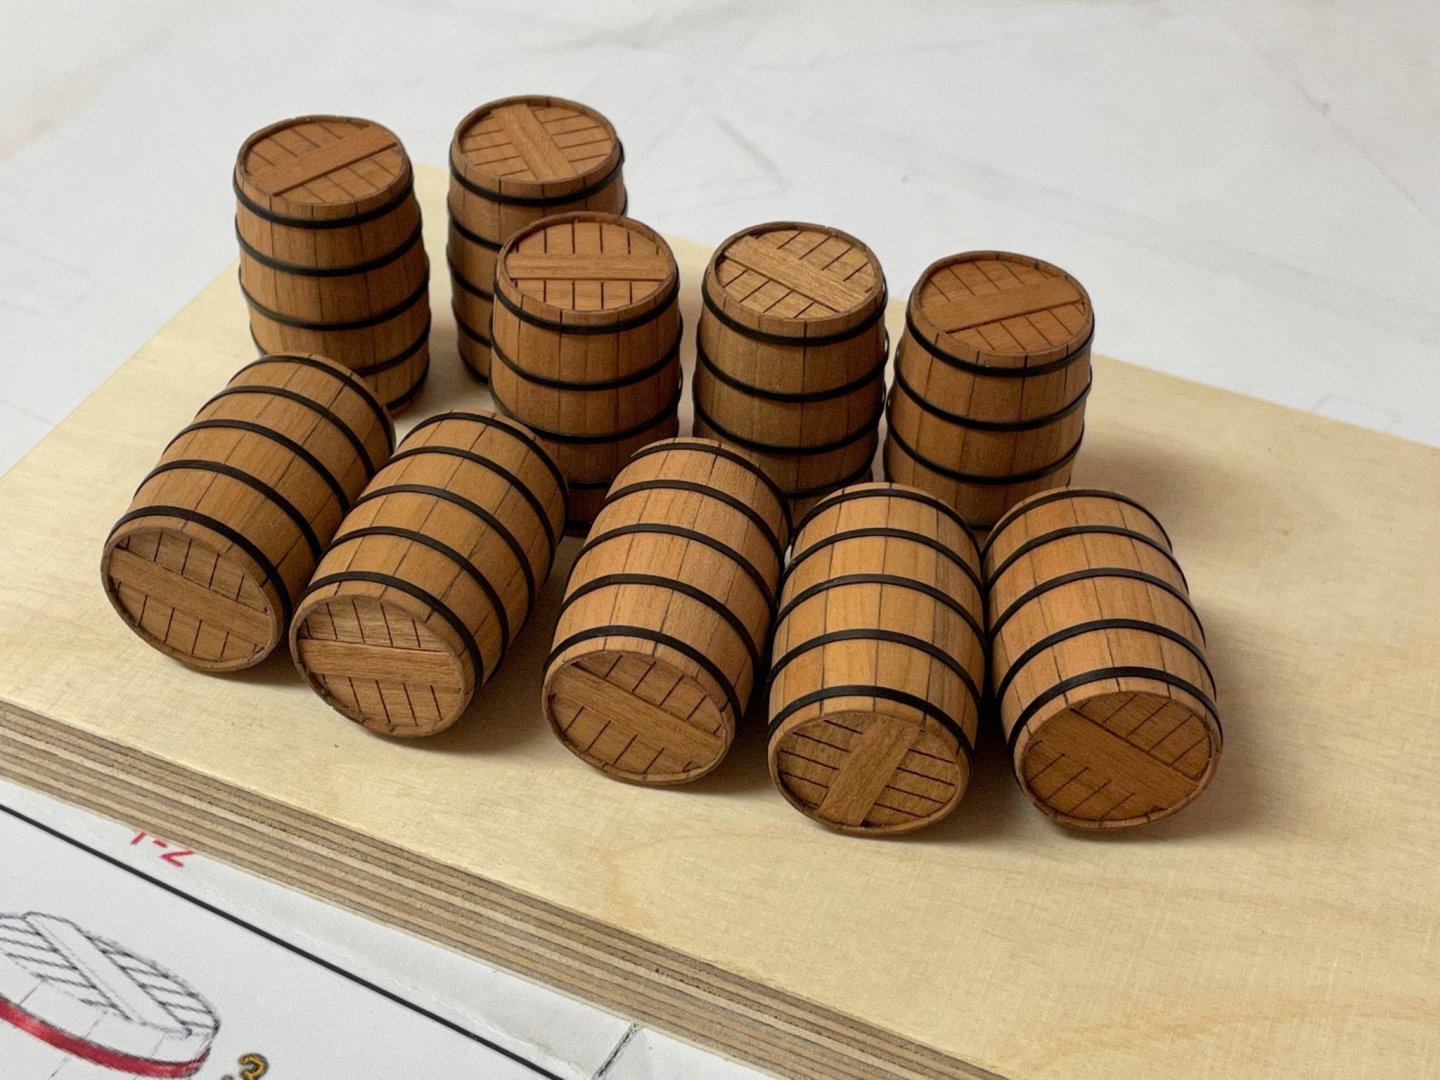
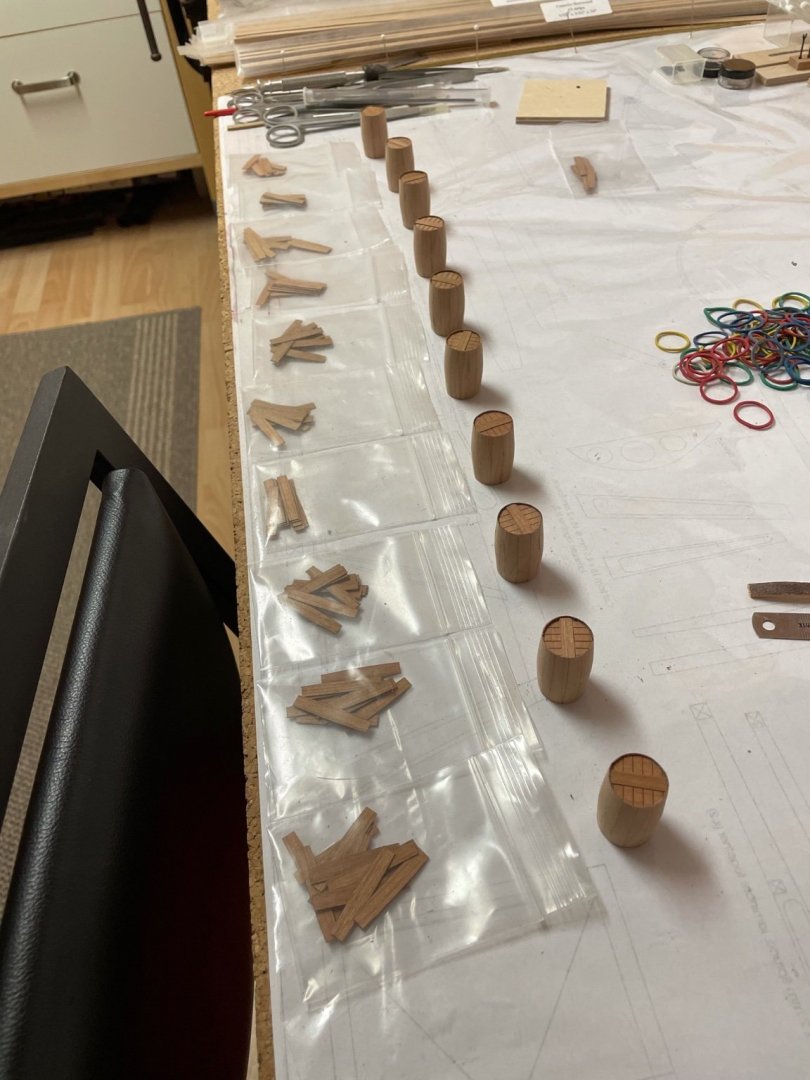
The barrels are mini-kits sold separately. They are made of a center plywood piece planked with two layers of cherry veneer. These barrels take quite a long time to build because every barrel needs 24 veneer parts to complete. The center plywood piece is assembled first and a piece of cherry veneer with some laser engraving is glued at top and bottom. Then the first layer of planking is glued on the center piece. There are only 24 pieces supplied so be careful while you bend them. I selected the best ones for the outer layer and used the rest for the inner layer. Then I gave the first layer a good sanding. Be careful - these layers are only .5 mm thick and are easily damaged. After that I glued the second layer - one part at once - and used several rubber bands to fix the part until glue had dried. As I made all barrels at once this took several hours to complete. I gave the second layer another good sanding and applied some WOP, now they have to dry first. I will attach the iron belts in the next day, these are made of photoetched brass parts that have to be soldered to shape. A snapshot of all barrels - my crew prefer old bordeaux, keeps good mood. Stay save.


-
Just one note: Until now I have used only kit-supplied parts and stuff. Well, I tried but as mentioned before I got into heavy trouble while using the kit supplied precut-planking. So from here on I‘ll do some kit-bashing where needed. I will comment all changes and show the kit-supplied parts but might use different wood and fittings as substitute.
-
Sorry Yves, I can’t say anything about the quality of other asian ship kits, the Coureur is my first (and last). And I even can’t tell if later batches of Coureur kits were updated or any design changes have been applied so far.I got mine in late 2020. But I also won‘t buy any kit made of cherry. It is a nice wood for making furniture but caused too many problems during my build.
-
Thank you guys, that is a lot of social support. Much appreciated! During the last weeks building the Coureur didn‘t bring much joy but if I put this ship aside, then I certainly won‘t pick it up again. I haven’t decided yet. When I receive the cherry stripes I will at least try to substitute the kit-supplied planks and plank the inside. If that works well, I will start planking the outside. And if that also works well I will continue building. But I will take my time and not update the log very often during the next weeks. Stay save and thank you all again for support.
-
Sorry for the longer absence, I was busy building another project which turned out not as satisfying as expected and I will continue to work on the Badger soon. Just have to think about the next steps and think myself into the project again. The guns have to be finished first so the carriages have to be done next. I will use some modified schematics for that to fit the 4-pounder gun barrels. When a test-gun has been build I can determine the height of the gunports and then start planking the outside. Stay tuned ..
- 64 replies
-
- 6
-
-
- badger
- caldercraft
- (and 1 more)
-
Thank you for the nice words. Yes, you‘re right, Greg. In fact, the precut-parts with zero possibilities to adjust them to your need makes it very difficult in the end to get a proper and clean result and therefore making spare parts from scratch took most of the time. I never thought this would be an easy build - like just putting all precut-parts together and then you have a museum quality model. I have studied MSW builds for over 6 years now and got a good idea how much effort and joinery is needed to build a nice POF model. And a POF model wasn‘t supposed for me to build soon, just liked the lines and the look of the Coureur. But I didn‘t expect these kind of difficulties - maybe because I expect all kit designers to offer only a proved design (like Chris Watton letting all folks on MSW part on each stage of the developement of his kits). Meanwhile I searched the web for other Coureur builds but failed to find a single building log which shows clean results. Well looking at some precut part-sheets in a review doesn’t help anticipating all future problems that might occur. In the end it is a simple time or effort / outcome - ratio, that makes me put this thing aside and considering the large amount of time I put into a project I don‘t want a kit just come together - but come together properly. It is not the money but more the time spend and the fact that I almost lost my interest in ship modeling that hurts most. I started enthusiastic with some work every day, in the end I had to force myself into the workshop every second or third weekend. Tom at CAF is surely a talented CAD-designer, but most problems are related to the quality of the supplied materials, the parts and some design changements, mostly planking. So the list of improvement for this kit for me would be as following: - use pear instead of cherry (more expensive but less ugly grain, less wood defects and colour differences and especially veneer parts would be more solid and laser-char easier to be removed) or at least more quality cherry wood sheets - means minor tolerances in thickness of sheets, use of clean wood instead of sheets affected by obvious defects that act as weak spots for parts to break exactly there - use of supplied spare parts where very thin parts are supplied (for example barrels, boxes etc.) because it is very difficult to get spare wood that matches the colour and structure - get rid of all precut-planking and supply regular stripes for planking - make a more detailed manual with clear instructions and building sequences in right order - update the kit and remove reported design mistakes in future production circles - prove the design by at least one builder to build it properly without any major modifications made to the kit to name a few. But most of all make a definite statement about the target group of this kit. It pretends to be an intermediate kit (with almost all parts and planks precut) but the lack of clear instructions and the need for adjustments puts it rather in the advanced / expert level category. On the other hand an expert will think twice about building this kit but rather build one from scratch using quality wood like pear or boxwood selected by himself and true-to-scale construction methods and planking techniques. Well, enough said - don‘t want to bore anyone. Just a little frustration, but it won‘t last. And I don‘t want anyone to scare off buying this kit, it just didn’t work for me. Stay save. Andreas
-
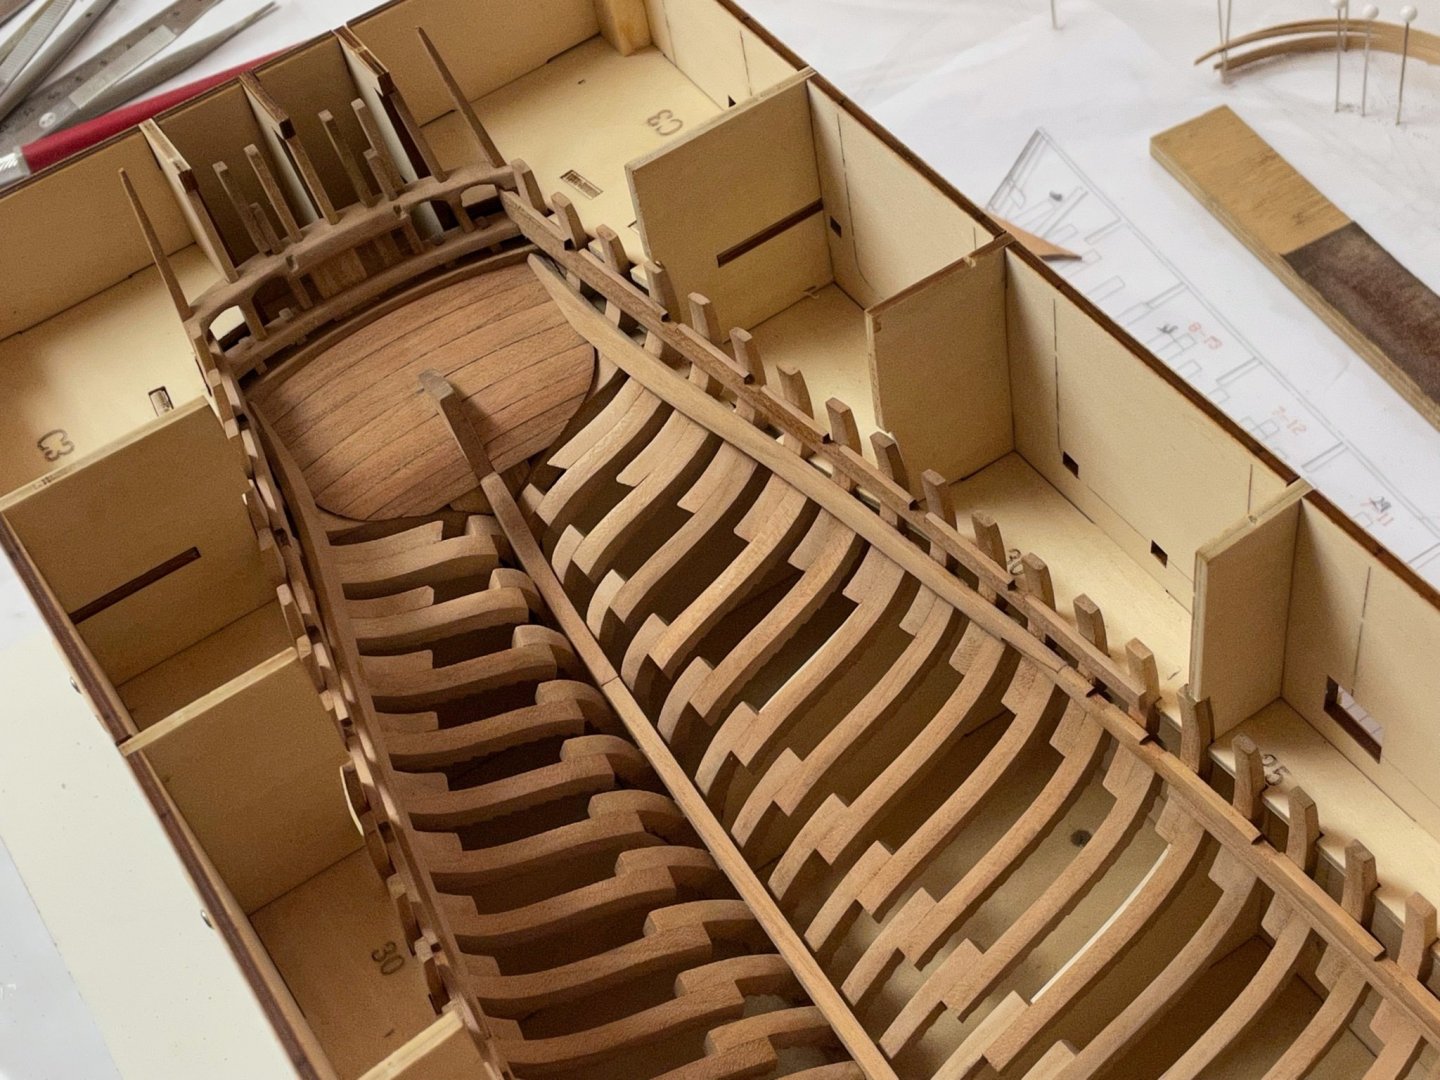
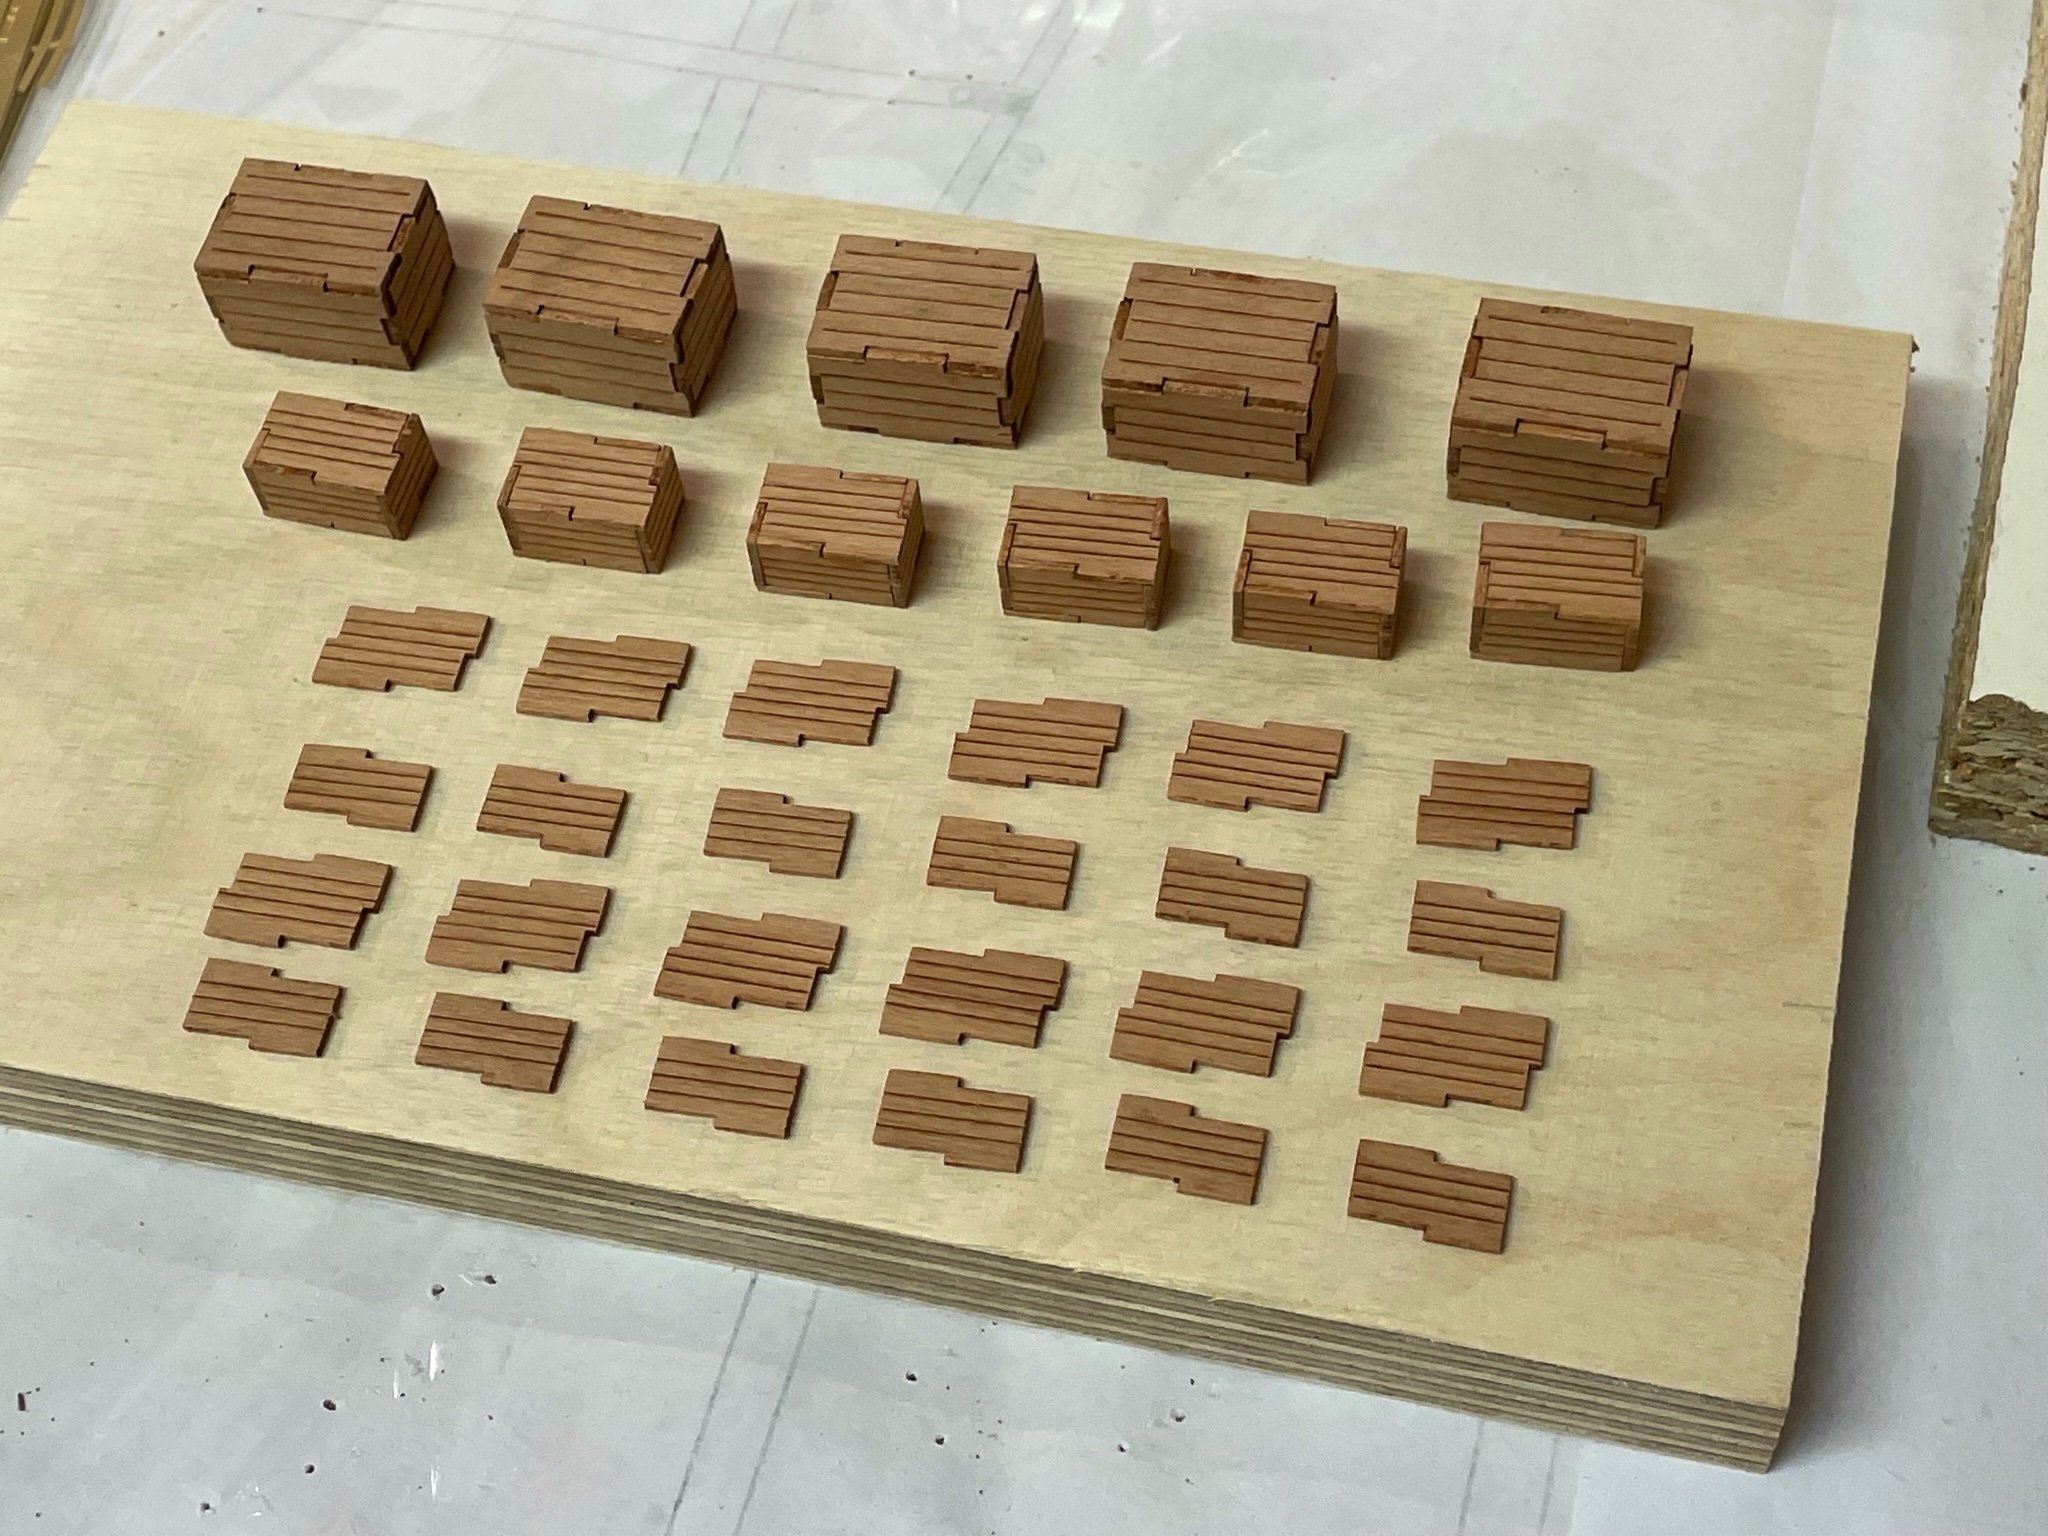
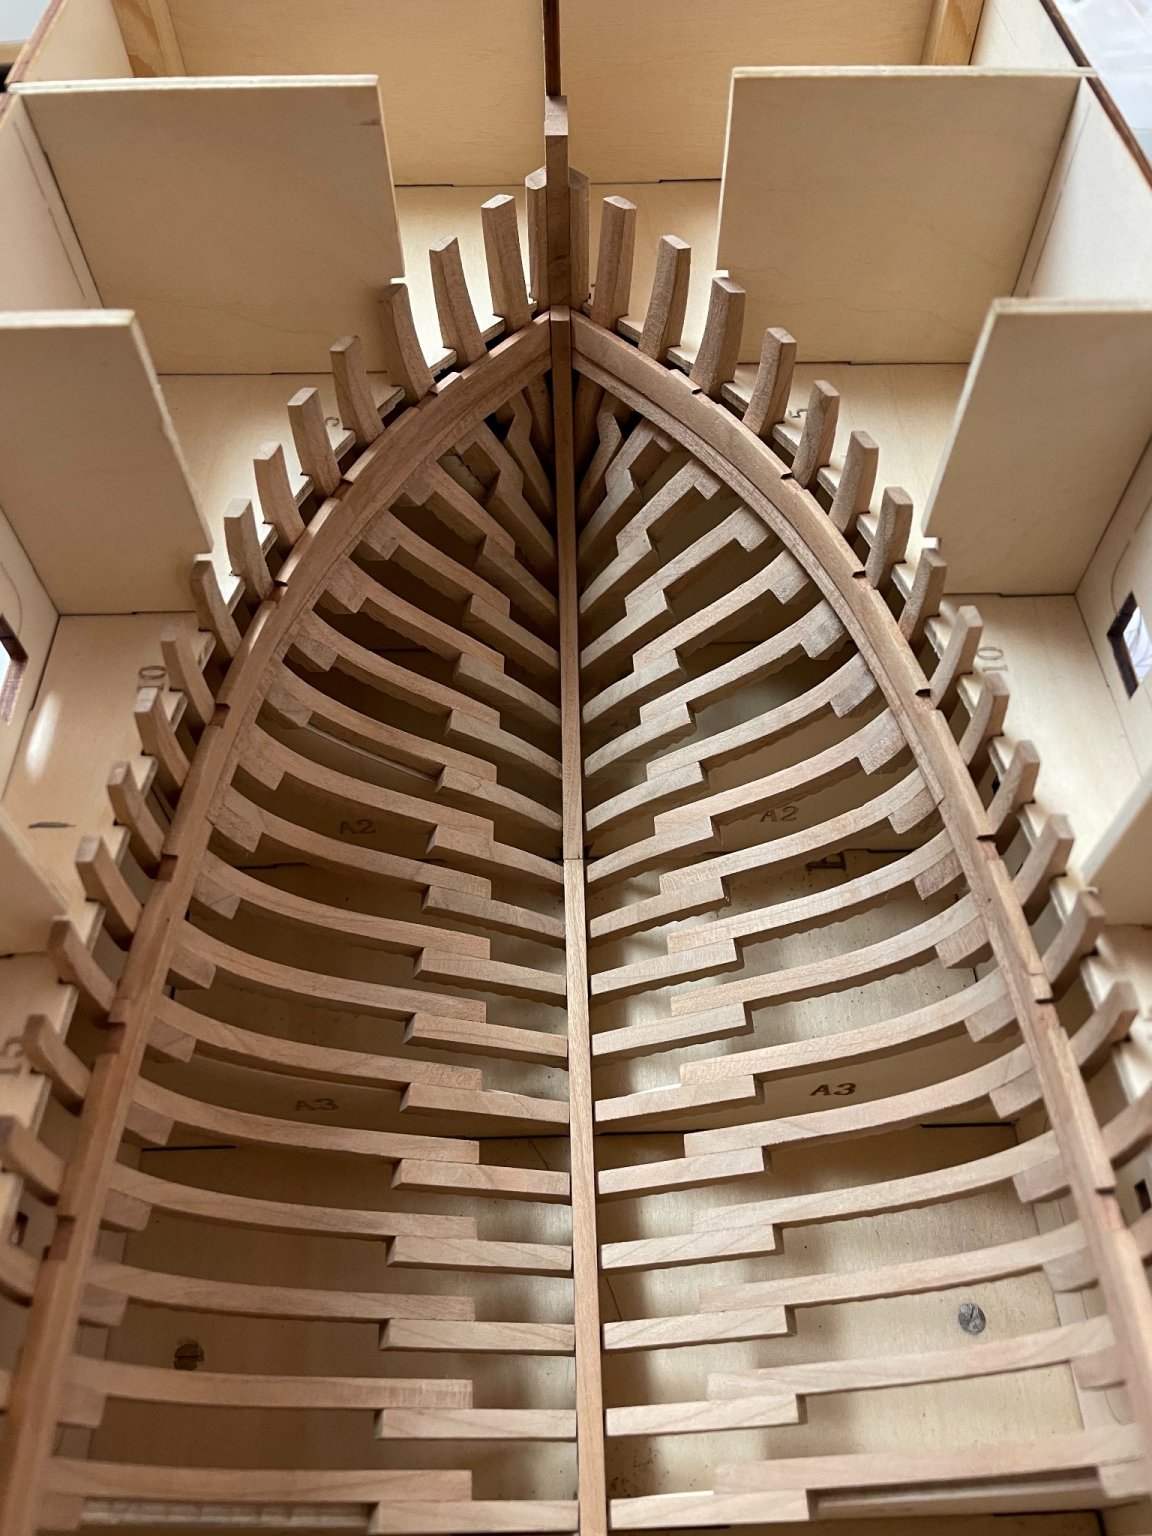
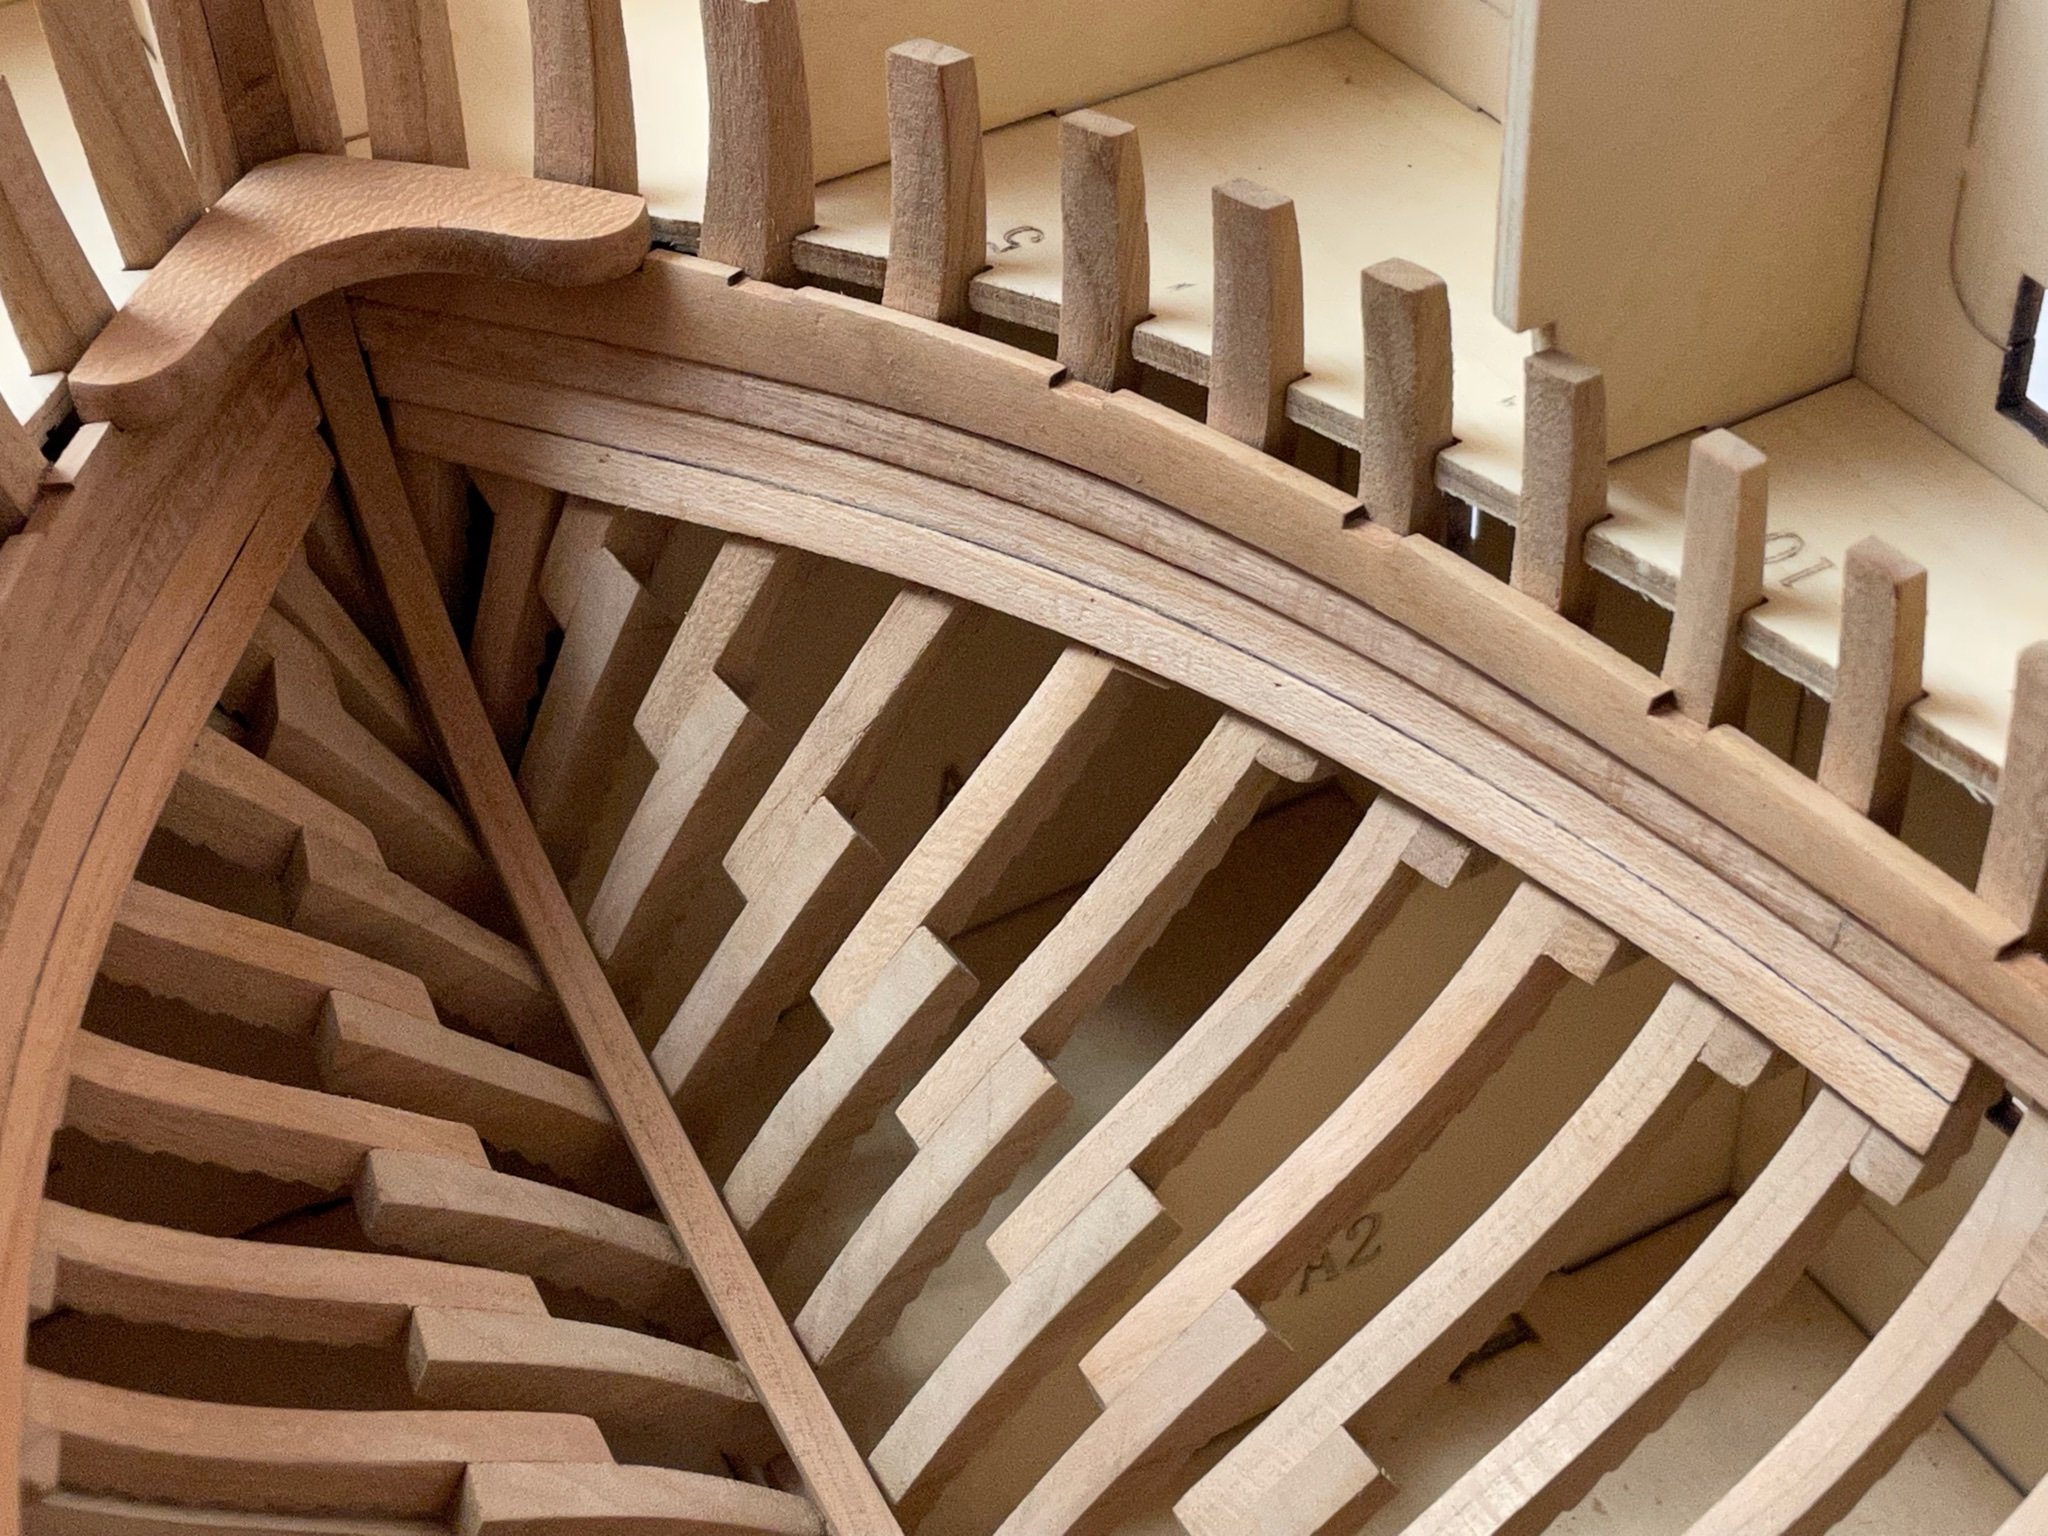
I will put this build on hold as my enthusiasm has almost completely disappeared. I started this build almost 9 month ago with the idea to build my first POF and I thought this kit would make a nice introduction to plank-on-frame. But meanwhile I have realized that this kit would require much more effort to complete that just building it from scratch. The part-fit is often weak and required a lot of post-processing, wood quality is bad too - almost made a quarter of all ribs from scratch because of wood defects - and the instructions are not more that a picture with a single sentence for every step. Even the building sequence is not always reliable. While I was waiting for the cherry stripes I thought it would be best to make a little side project to rise motivation. So I decided to assemble some barrels and boxes that are supposed to be stored in the cargo area later. But even these parts were full of mistakes. Half of the smaller boxes can’t be assembled properly because the upper and lower parts are mirrored - so they don‘t match the side covers. And the veneer that is supposed to cover the sides is so thin - it is almost impossible to release it from the trays without breaking it. To make things even worse, when you finally release them the laser-cut veneer parts don‘t fit the bigger boxes, they are just too small. Well I managed to build two barrels at least. I will finish the remaining 8 barrels and then put the ship aside for undefined time. I won‘t give it up completely, but I fear if I continue this frustration build now I will question my interest in ship modeling soon - and I do not want this thing to happen. And … you won‘t find me buying any chinese kit in the future, have learned my lesson well. Well I do not blame CAF (except for quality control), maybe I just don‘t have the skill yet to build this properly or my standard how I would like to build it is just not compatible with the supplied kit. I will keep some weeks away from ship modeling and will return to the Badger after that. Thank you all for following this build so far. Andreas


-
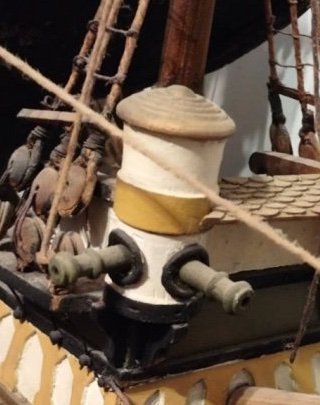
Well, this is the coolest part of the ship.
-
That looks fantastic. And the detail level that can be achieved with this little printer is amazing. The designer did also a good job. Are all parts of this kit supposed to be printed or is any aftermarket stuff necessary to finish the model?
- 321 replies
-
- 7
-
-
- Finished
- Flower-class
- (and 1 more)
-
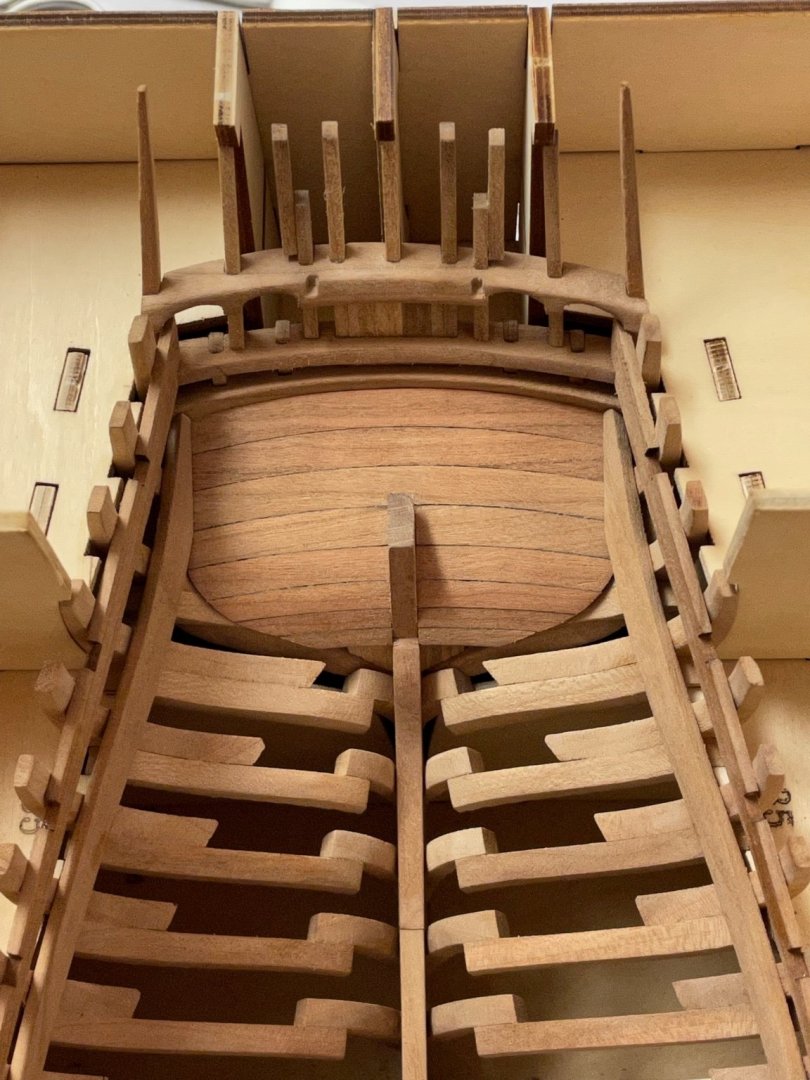
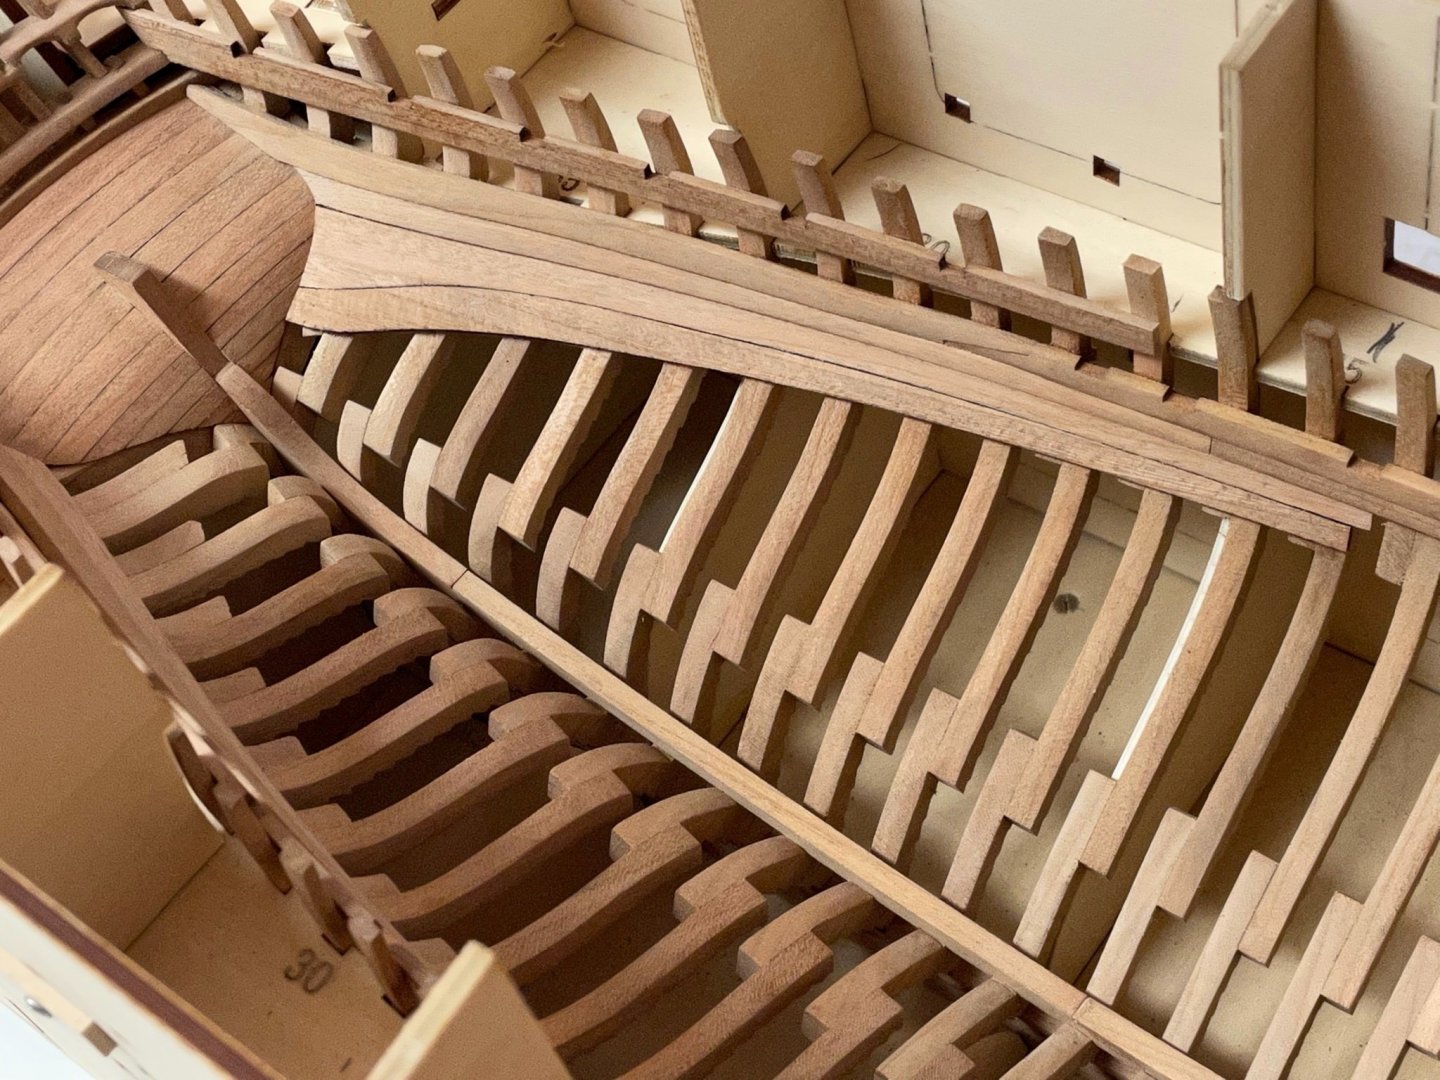
Thank you Brian. I‘ll try. Well, challenge accepted. I was able to remove all planking without doing any damage to the structure. The provided precut-planks might still do the trick - but I failed somehow to install them properly and won‘t give them another try. Feels like turning back the clock - every step backwards hurts somehow but on the other hand I surely need more planking practice for all the projects still to come. I studied the plans in the Boudriot / Berti book and also the pictures of the POF model build by Etienne Riette and now have an idea how to change the inner planking in a more authentic and easier way. But first I will have to give the frames another good sanding to enable a smooth planking run. Studying Chuck’s planking guide again might also prove useful. I‘ve just ordered several cherry stripes but now have to wait for delivery. So meanwhile I might build some barrels / boxes or just take a break from modeling for the next weeks. Stay save .. and thanks for all the feedback. Andreas

-
You're right Yves, the frames look much better without planking. Well I think about removing the installed planks, get rid of the pre-cut-planking and use some regular cherry wood 5mm planks (or better pear) as a substitute instead. But the question for me is: Is it worth the effort? Well, it may at least be good practice for future projects. Most of the inner planking will be barely visible after the interior will be installed. Even if I would leave the planking off, the frames and skeleton would be barely visible as well. And the planking add stability to the fragile construction, don't know what happens if I leave the frames completely unplanked.
-
Planking the inner front of the bow turned out as difficult as the stern planking and the result is not my best job. I don‘t know if it is my lack of skill or misshaped pre-cut planks. I spend some time carefully sanding all of them to shape so they fit into each other. I watered them only for minutes and used head to bend them to shape. But when time to install had come I had to force all of them into position knowing something went wrong. Sanding didn’t help very much. Not a good sign for further progress and motivation .. Stay safe.

-
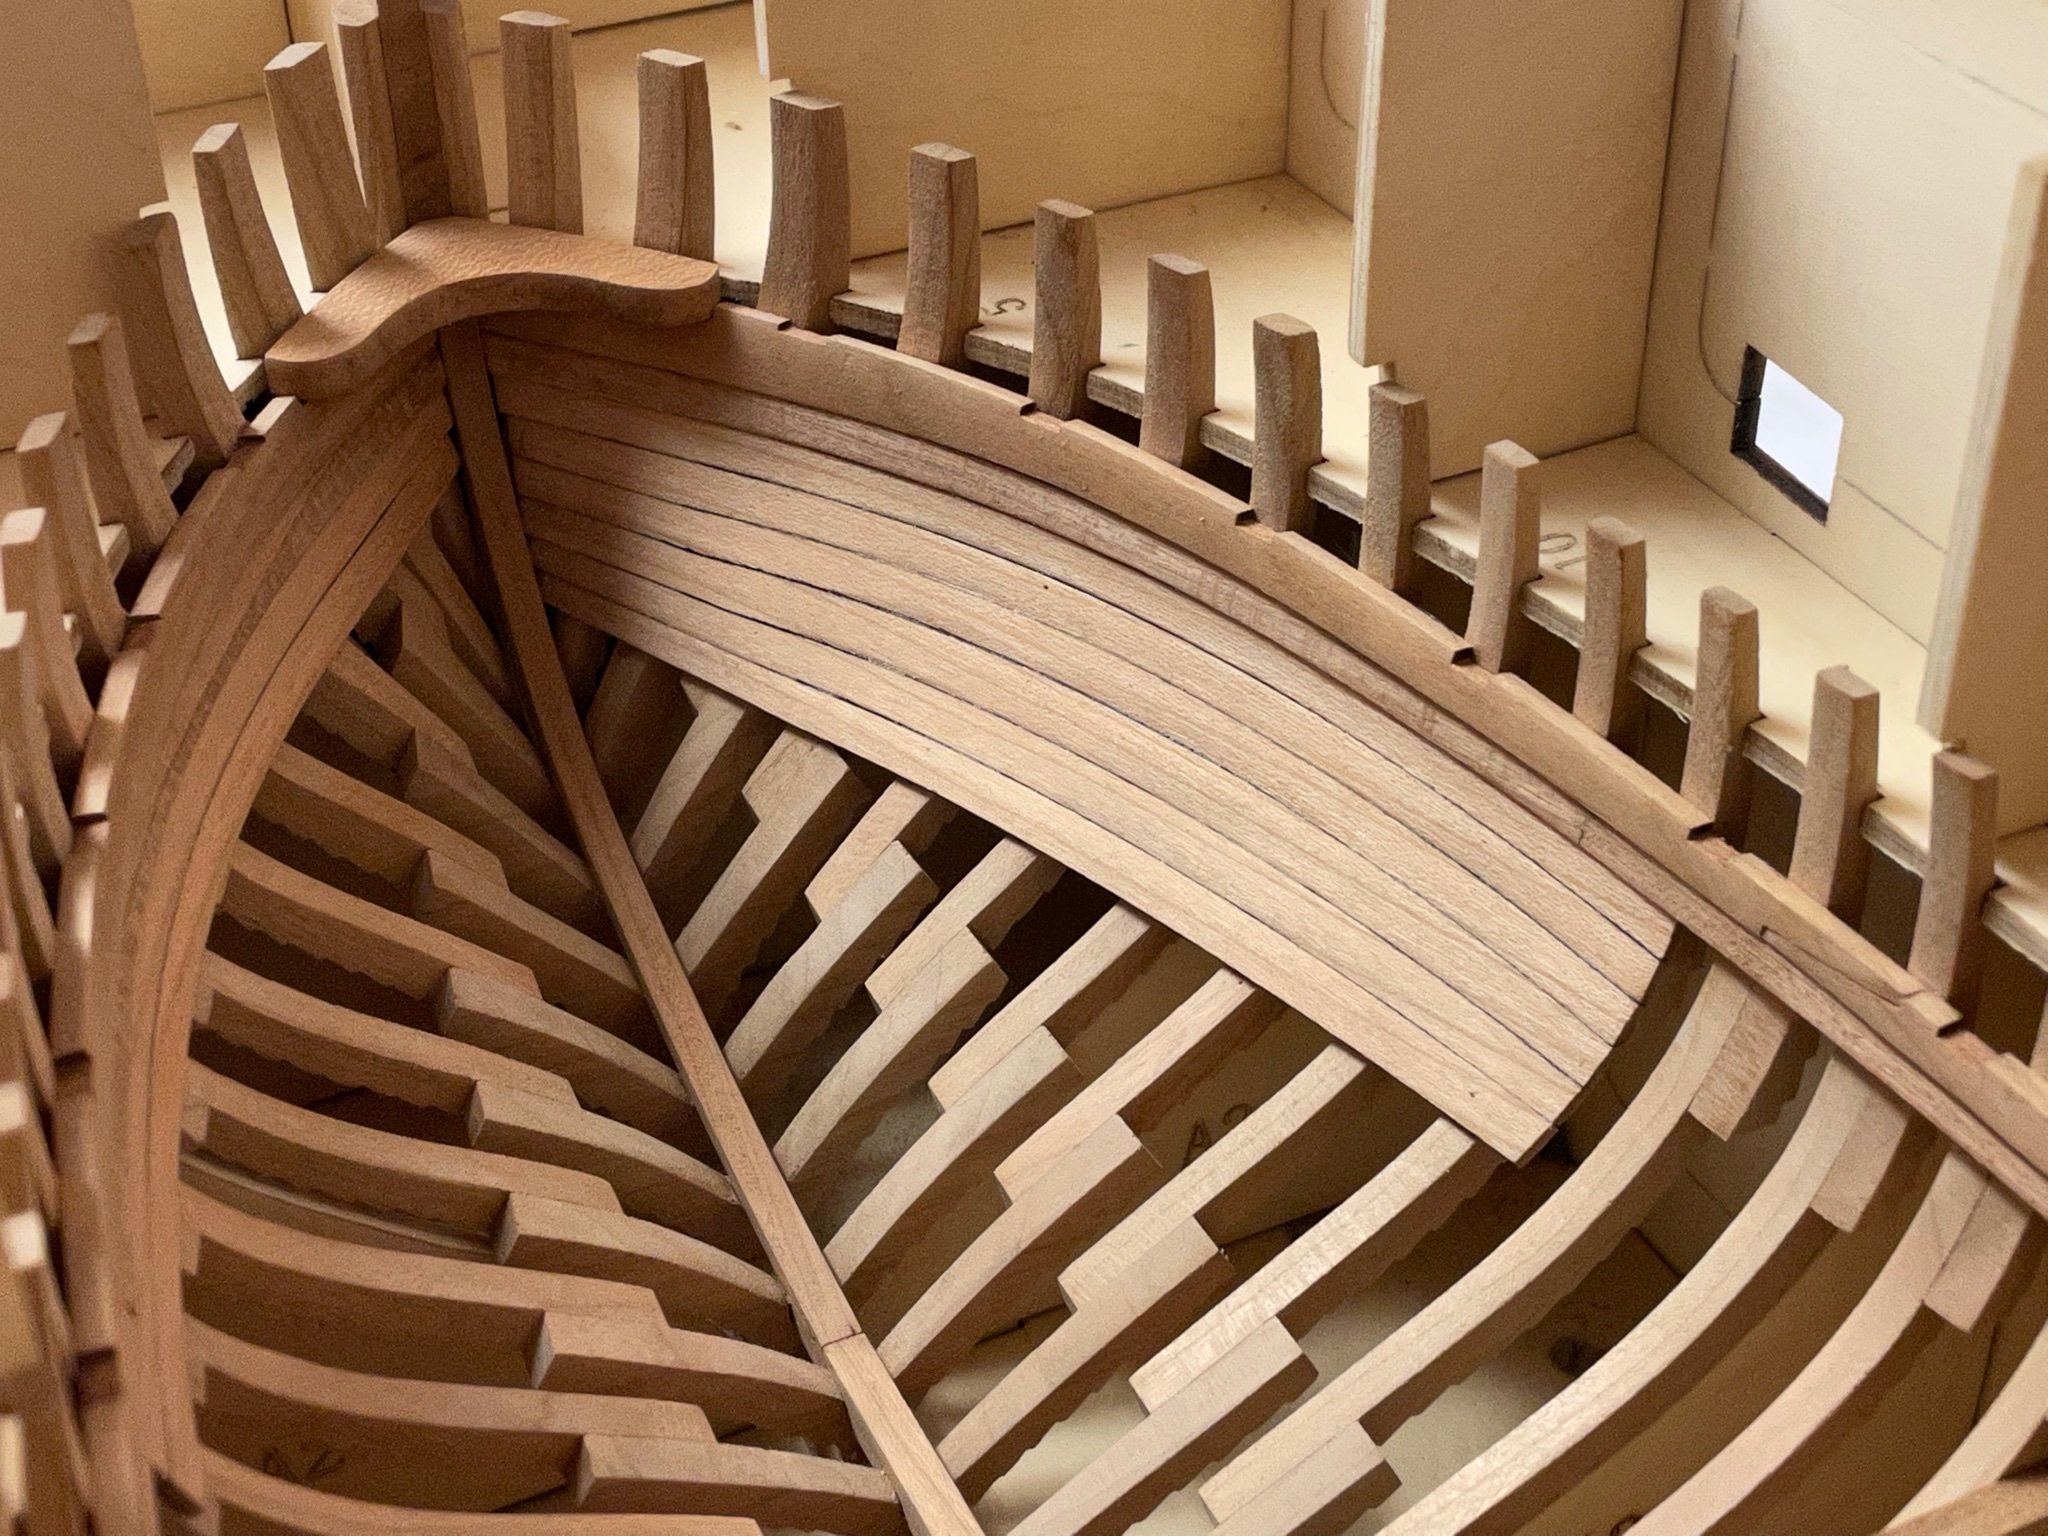
Well I is also a pity to cover all that nice frame structure. I thought some time about different options to leave areas unplanked to show the structure. But I discarded most of them because these options would leave the finished ship look very much unfinished. This would have been an option if I was to build a dockyard model without masting. So I decided to leave only a small center area unplanked located at the port side to light the inner structure and to show some frames (like done on the MS Confederacy) To enable looking into the ship I will leave some deck planking off.
-
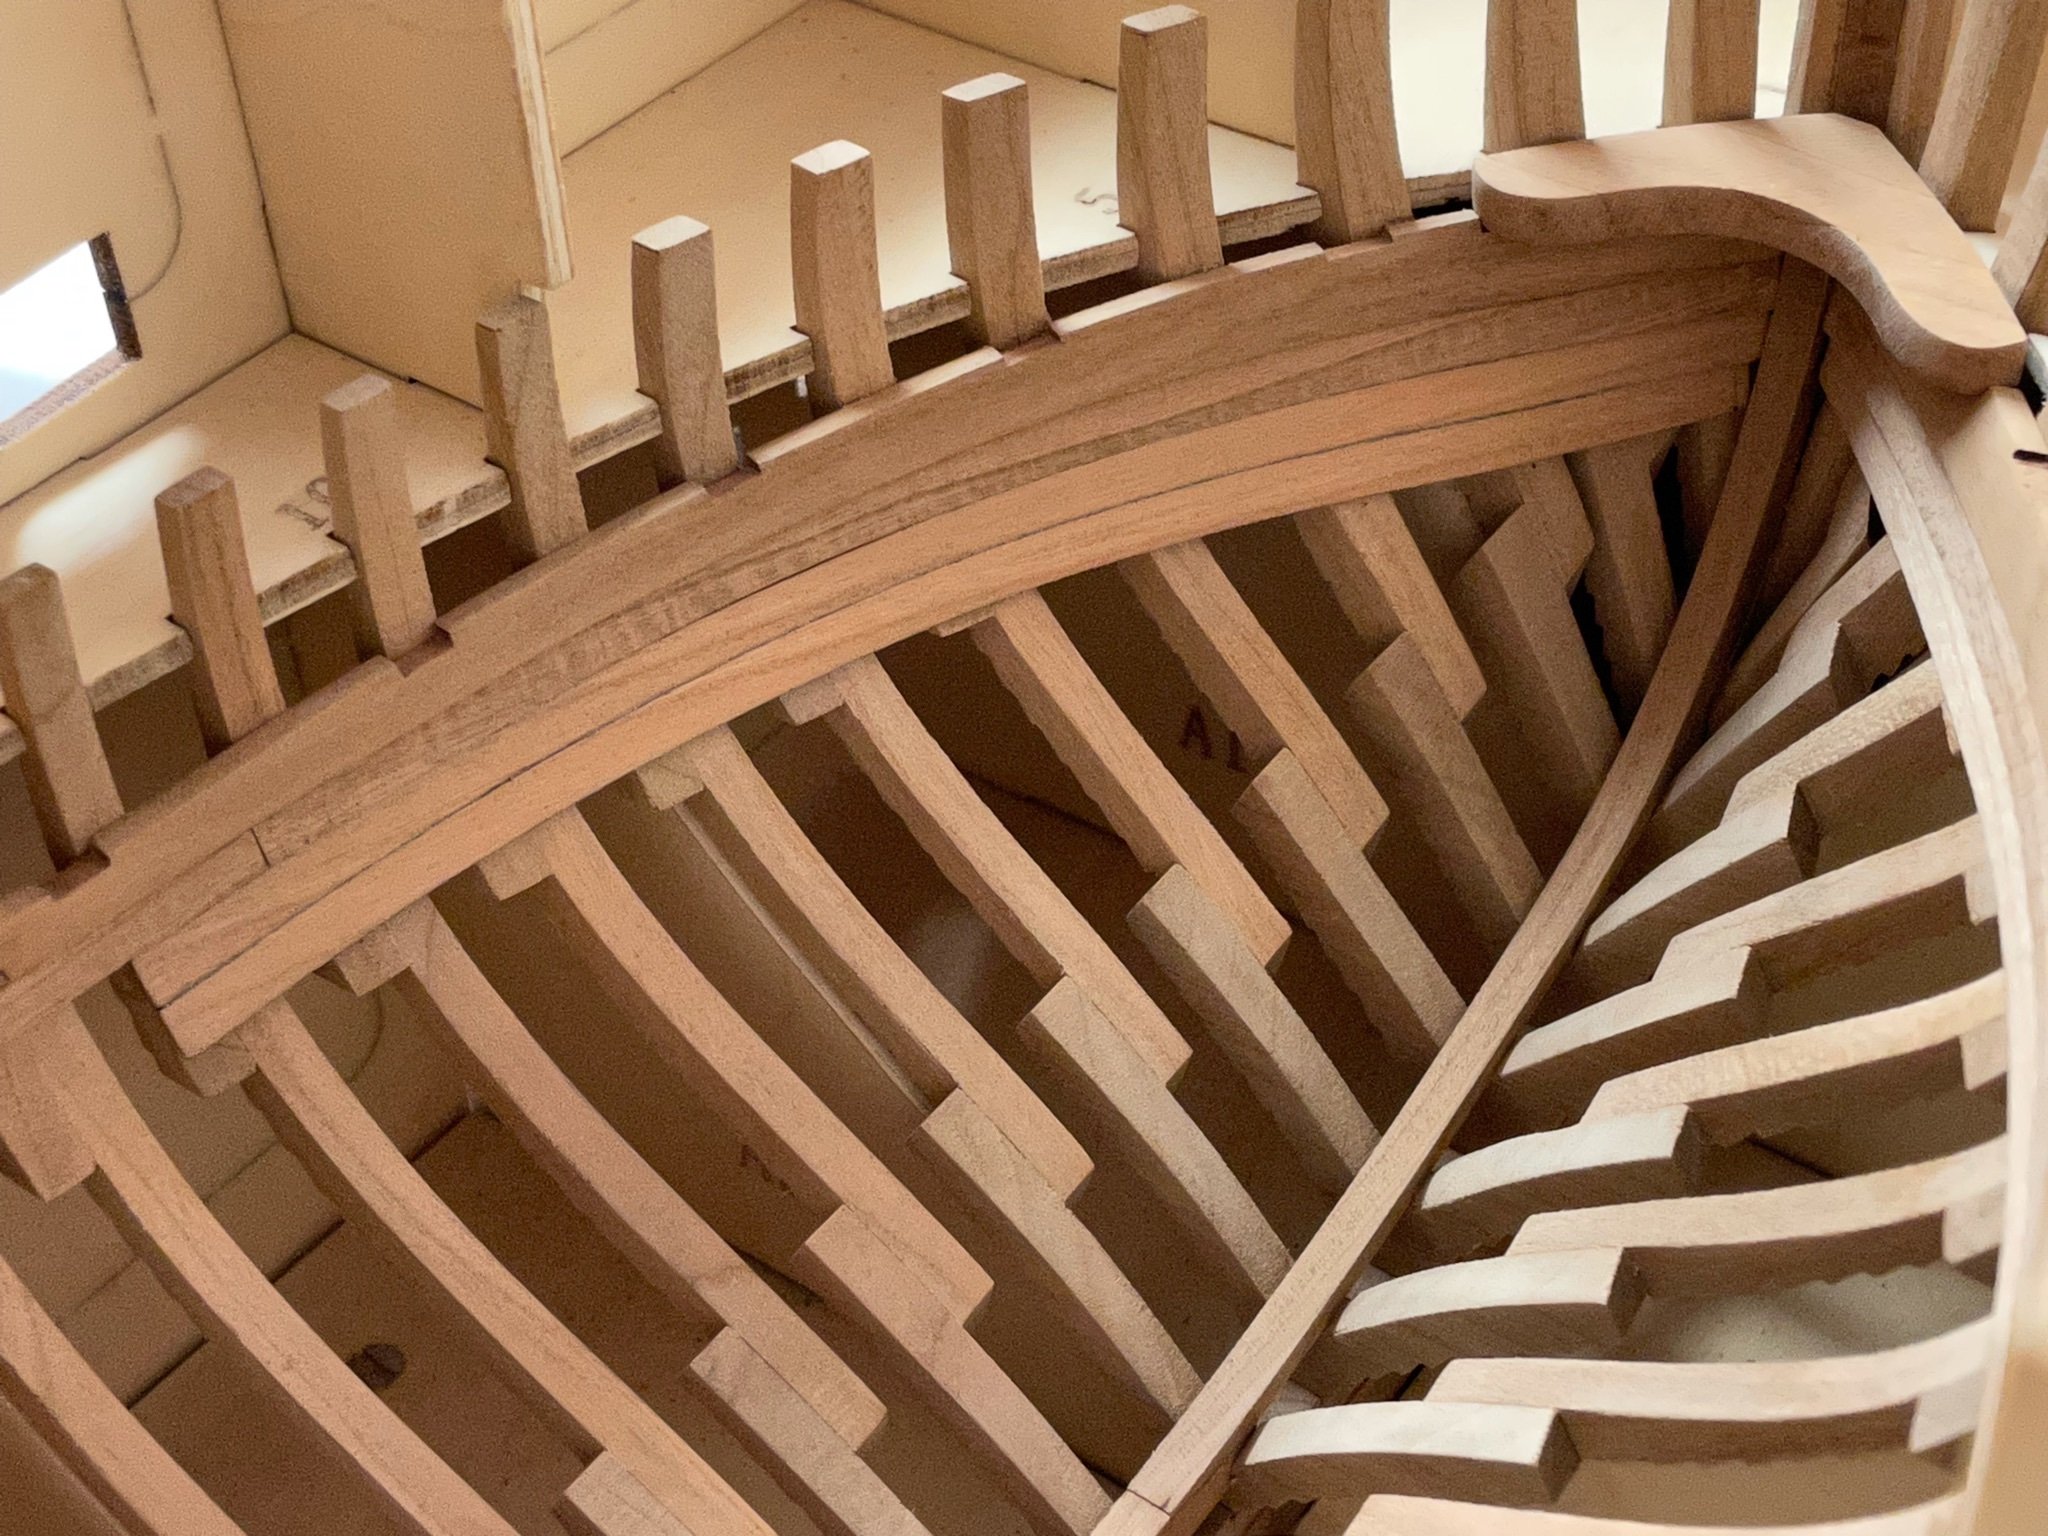
Thank you all for the likes, you give me much credit. Better don’t bring up high expectations until the planking is finished. To check the upper bow planking I started to plank the upper front frames. These pre-cut planks fit much better - but some of them are too short. About 3 mm missing to fit them into the brackets between the keel and the first two frames. Well I did my best to fix them anyway. This area won‘t be seen later but it is still a pity (my OCD keep telling me that). The sides are painted with black acrylic paint to simulate chaulking as done on the gallery. I consider finishing the bow area first, then starting with the lower planks and finish the stern area at last, So I will be able to make a custom plank to fit the unplanked area between lower planking and upper stern. Stay tuned .. Andreas


-
Thank you Steve, much appreciated. After installing the strake below the clamps I started to do the inner planking of the frames. As mentioned before the planks are laser-cut but they simply don‘t fit the corresponding upper and lower planks. I don‘t get it - all of them are individually designed with complex shapes but in the end they don‘t fit each other, so more post-processing is needed and because of the reshaping I might need a custom drop plank to close the area left. It might have been easier - and more true to scale - to use regular planking with some use of fishing at bow and stern, because these provided planks are very wide which makes them difficult to attach properly to the frames. The planking is also simplified - maybe because most of it will be covered with interieur later but it looks even more weird in comparison to the stern gallery planking. I only managed to do two strakes - as every new step becomes more and more time consuming my motivation is limited these days. Stay save ..
-
You‘re doing a wonderful job, caring about every step. Keep up the good work. Hope you don‘t mind me following your build.
-
Thank you there much. I have started to plank the stern gallery. The planks are already laser-cut, but they differ from the plan and most of them doesn‘t fit onto the gallery at first so more post-processing was needed. The planking still look weird but I guess it is simplified to speed up the building process. The top and bottom edges of all planks were tapered to fit the corresponding planks as the surface to be planked is a curved one. I painted the edges with clear acrylic vanish first (to prevent the black colour from soaking into the wood) and then applied one layer of black acrylic paint to simulate chaulking. The cherry wood is too dark to use a pencil for that. No finish applied yet. Hm, not sure if I‘m satisfied with the result but most of the inner planking won‘t be seen later. Stay tuned…