HOLIDAY DONATION DRIVE - SUPPORT MSW - DO YOUR PART TO KEEP THIS GREAT FORUM GOING! (Only 36 donations so far out of 49,000 members - C'mon guys!)
×


captain_hook
-
Posts
685 -
Joined
-
Last visited
Content Type
Profiles
Forums
Gallery
Events
Everything posted by captain_hook
-
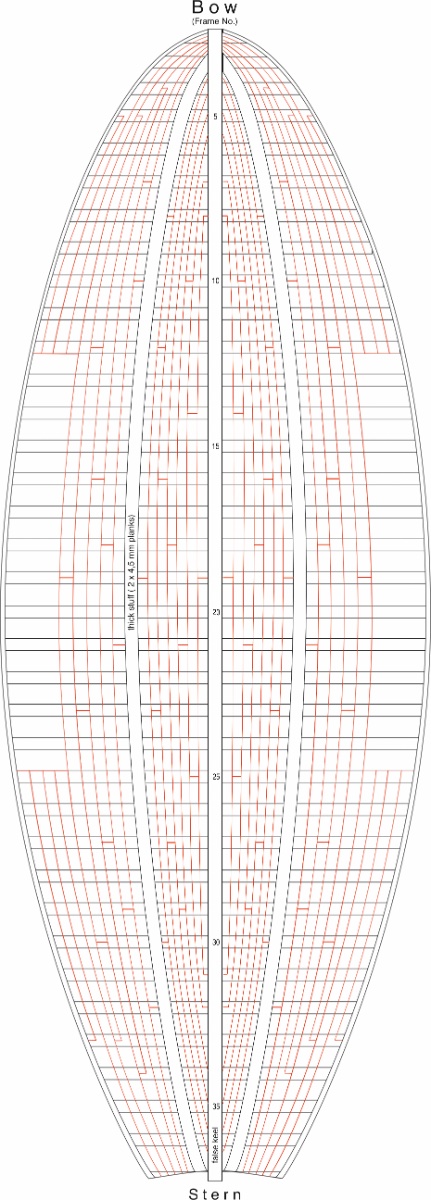
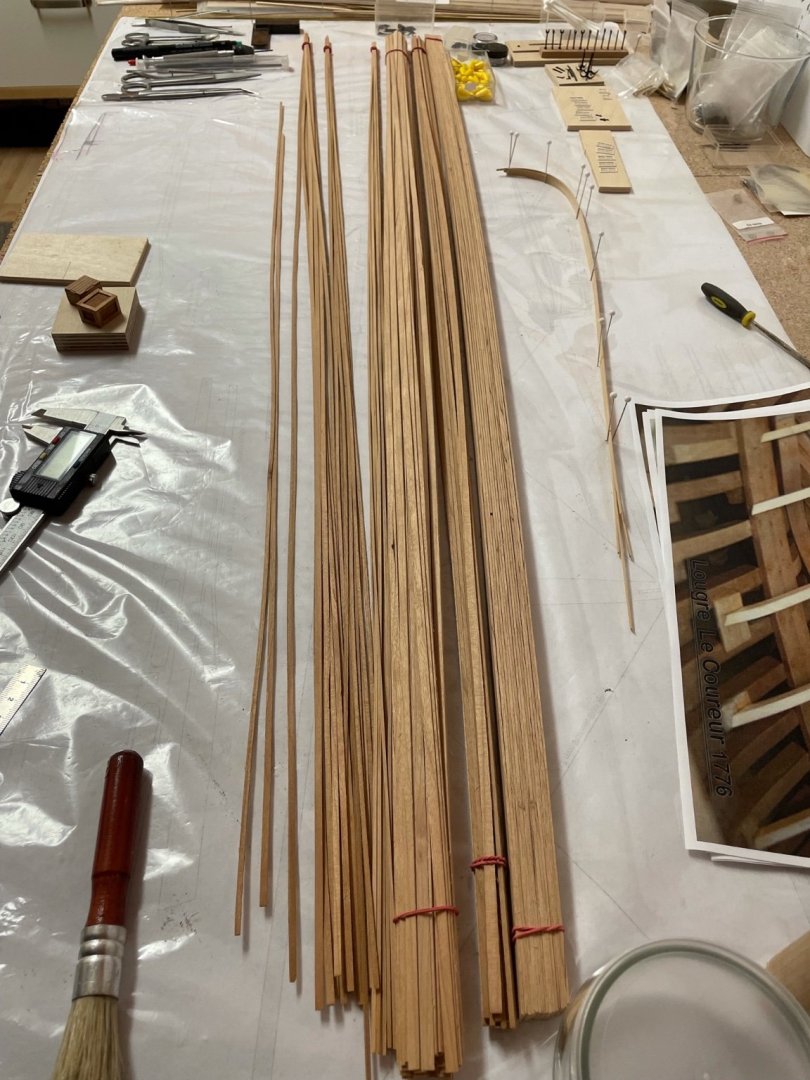
 I made a planking plan for the Le Coureur with Corel Draw. It is based on the same planking pattern I used for the area below the thick stuff (found in Mondfelds "Historic ship models). Just in case anyone is interested to plank the inner ship like I did in this extra time-consuming, complicated and expensive way .... then there is a PDF for download with my layout (V1.00) and a preview picture. I will use 4,5 mm x 1,2 mm cherry wood stripes for all planking above the thick stuff. To match the curves of bow and stern tapering and fishing is used. You will still have to measure up the distance from the thick stuff to the bottom of the deck clamps on every frame to determine the wide of each plank there. If you have questions feel free to ask. I will prove the layout and update the plan if necessary. I will start with planking the upper areas on weekend. Maybe I finish both areas first before I post more pictures so it might take some time until my next update. Stay tuned .. Le Coureur Planking Plan.pdf
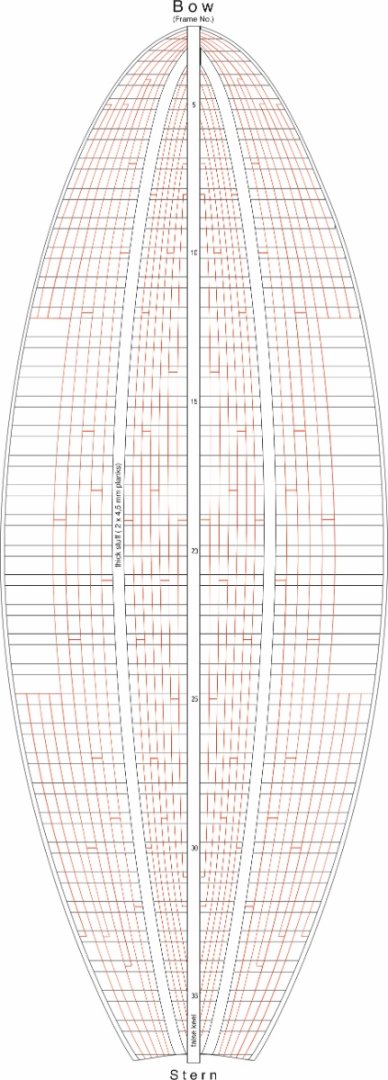
-
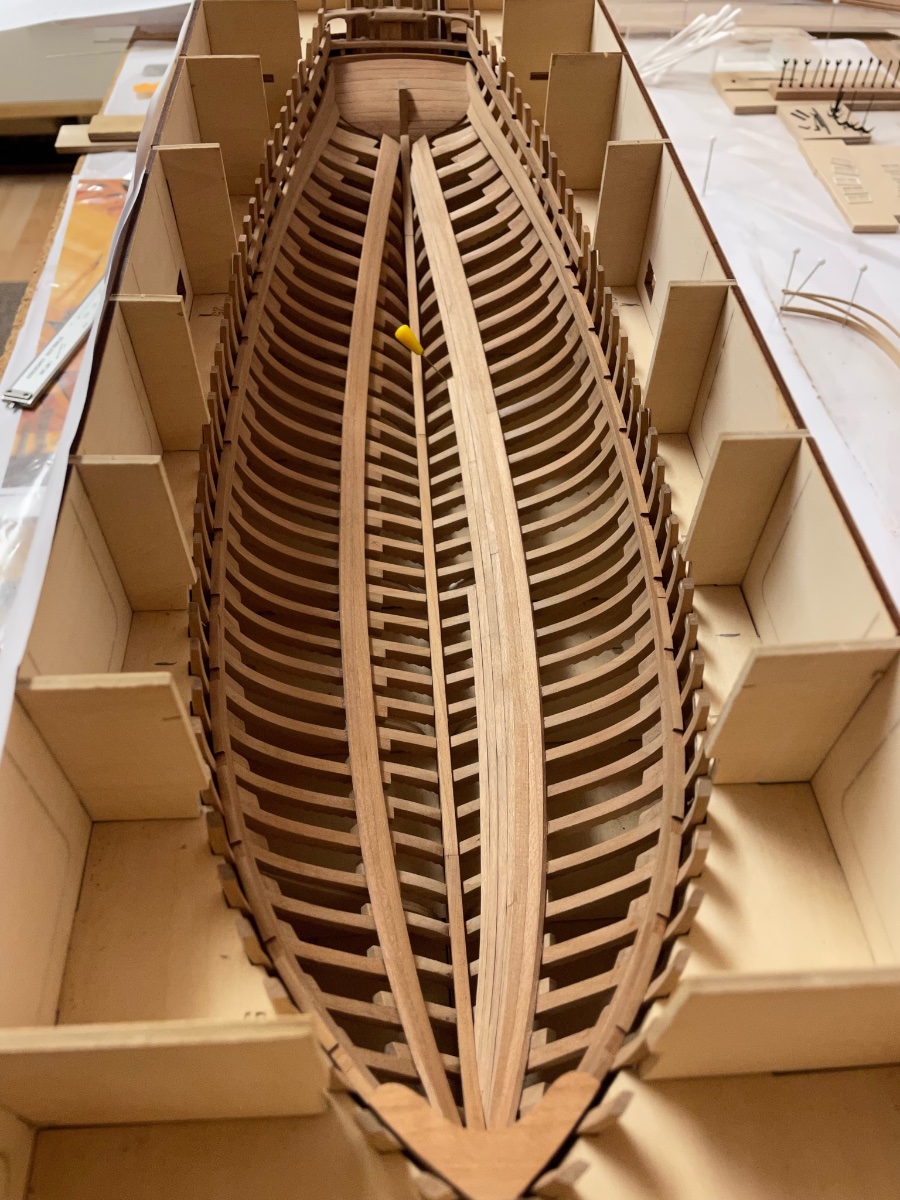
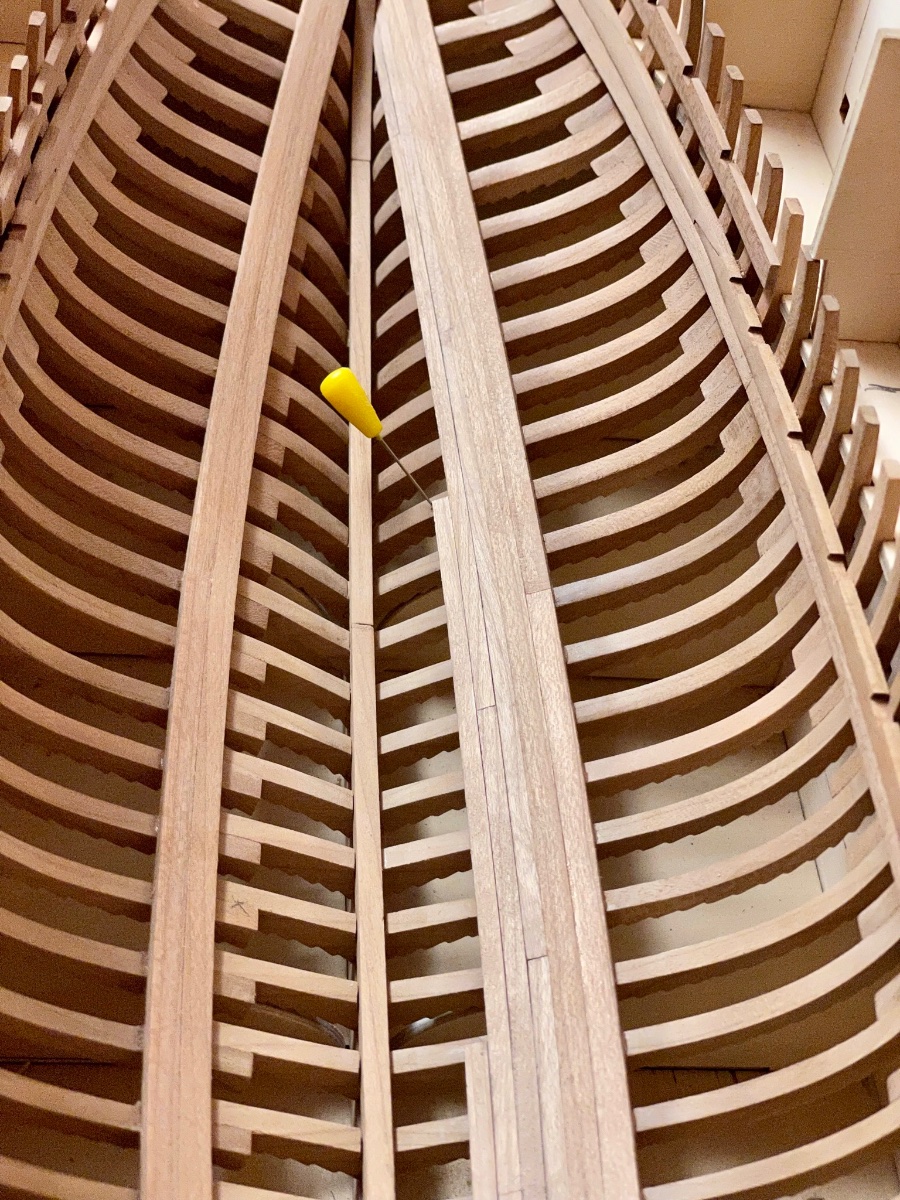
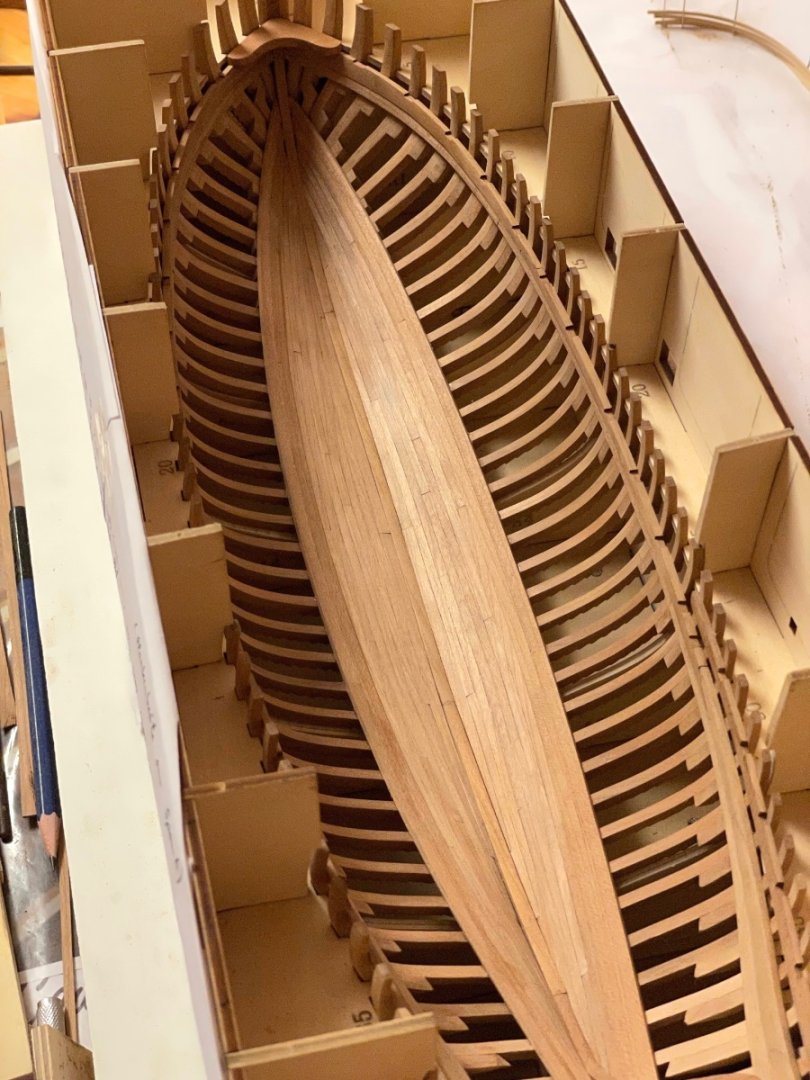
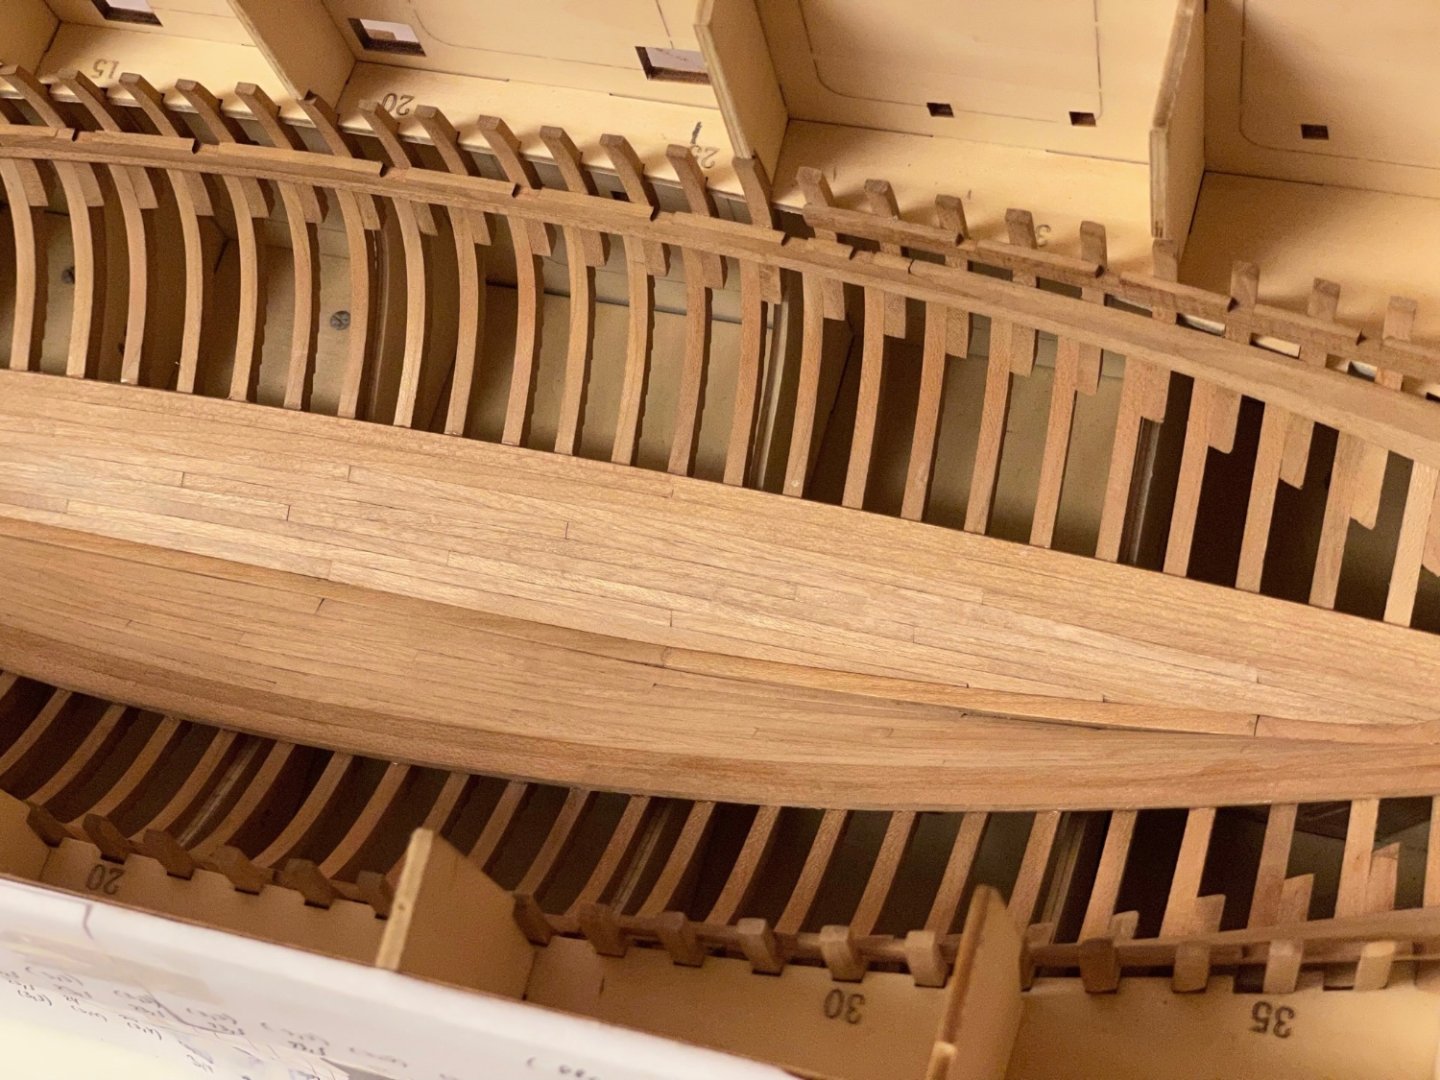
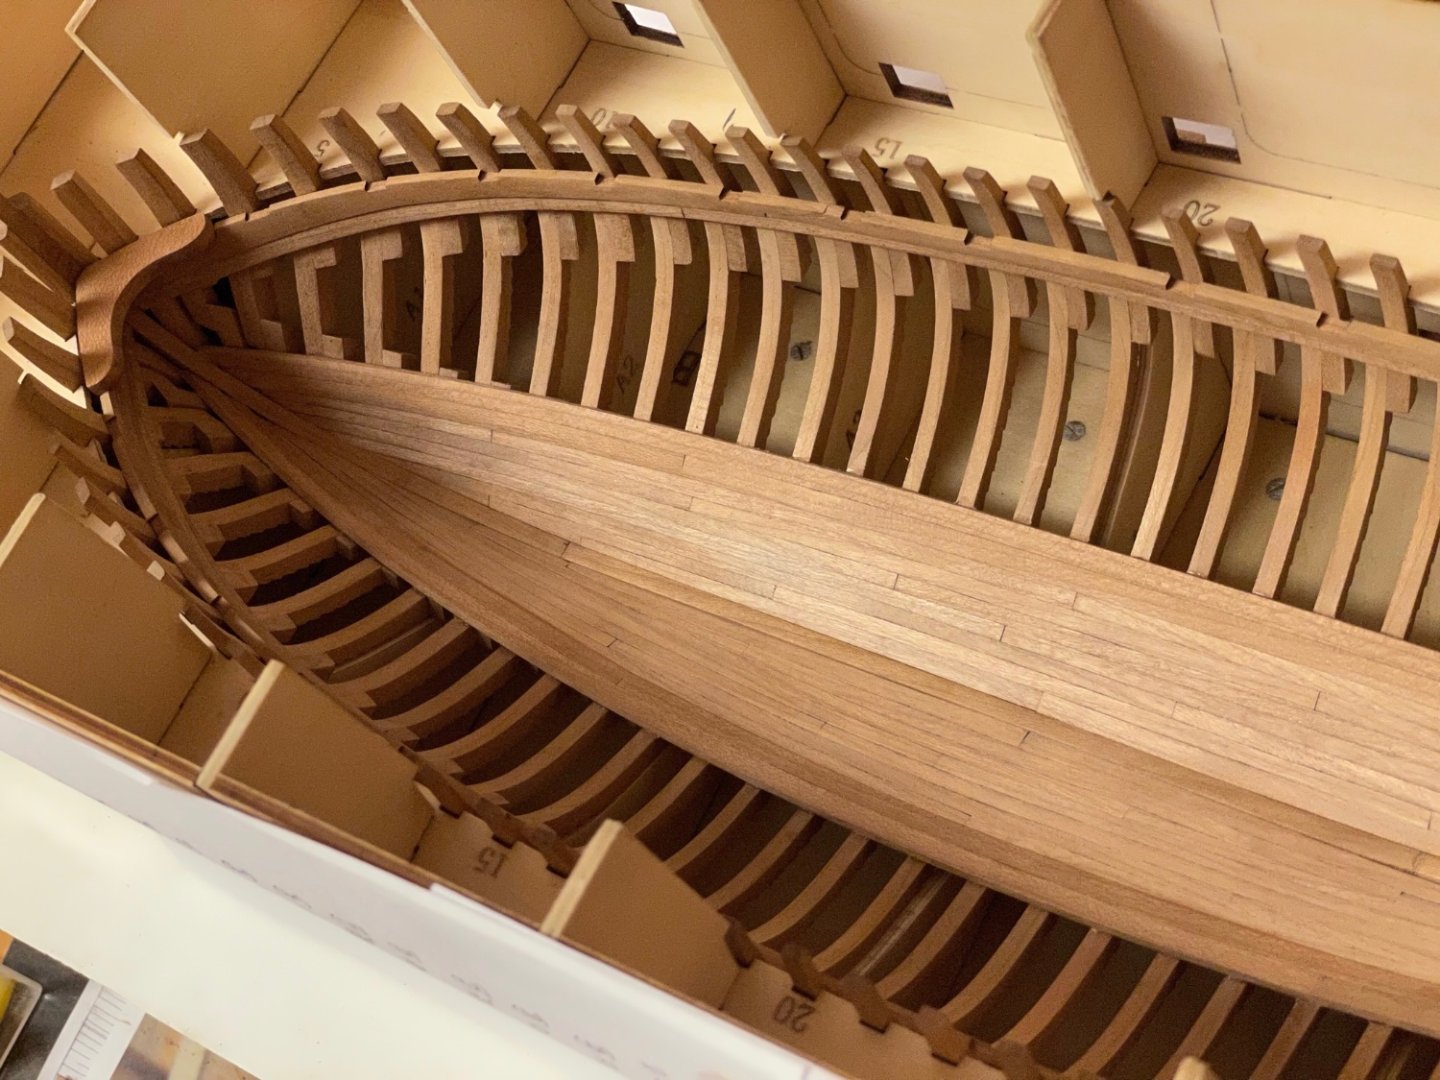
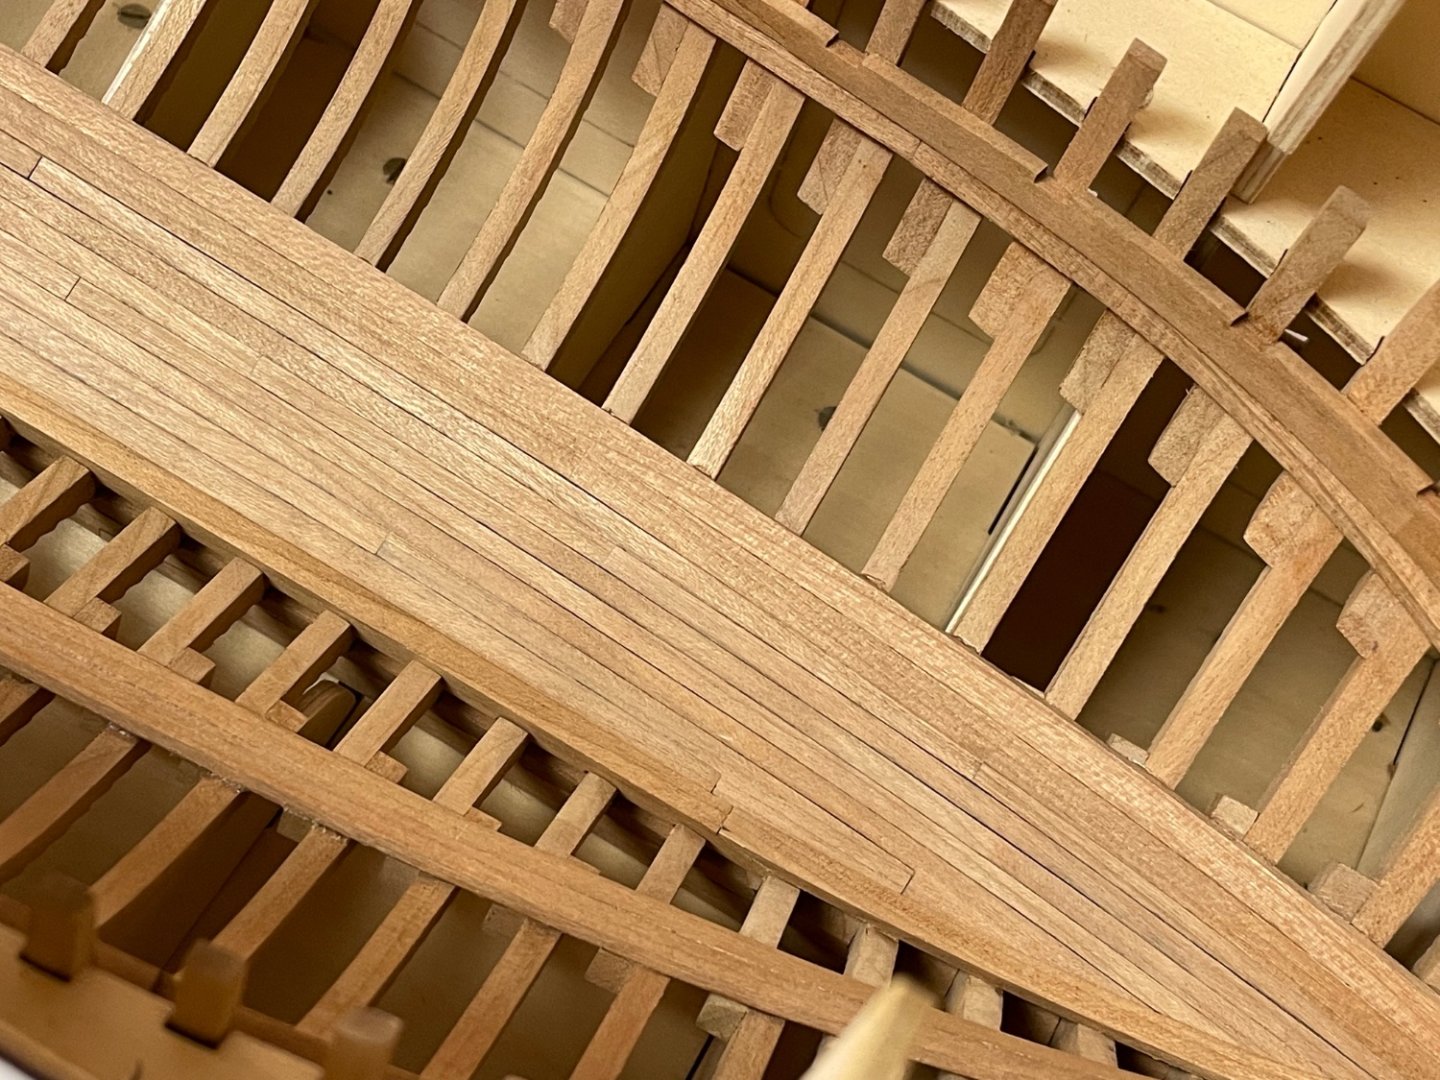
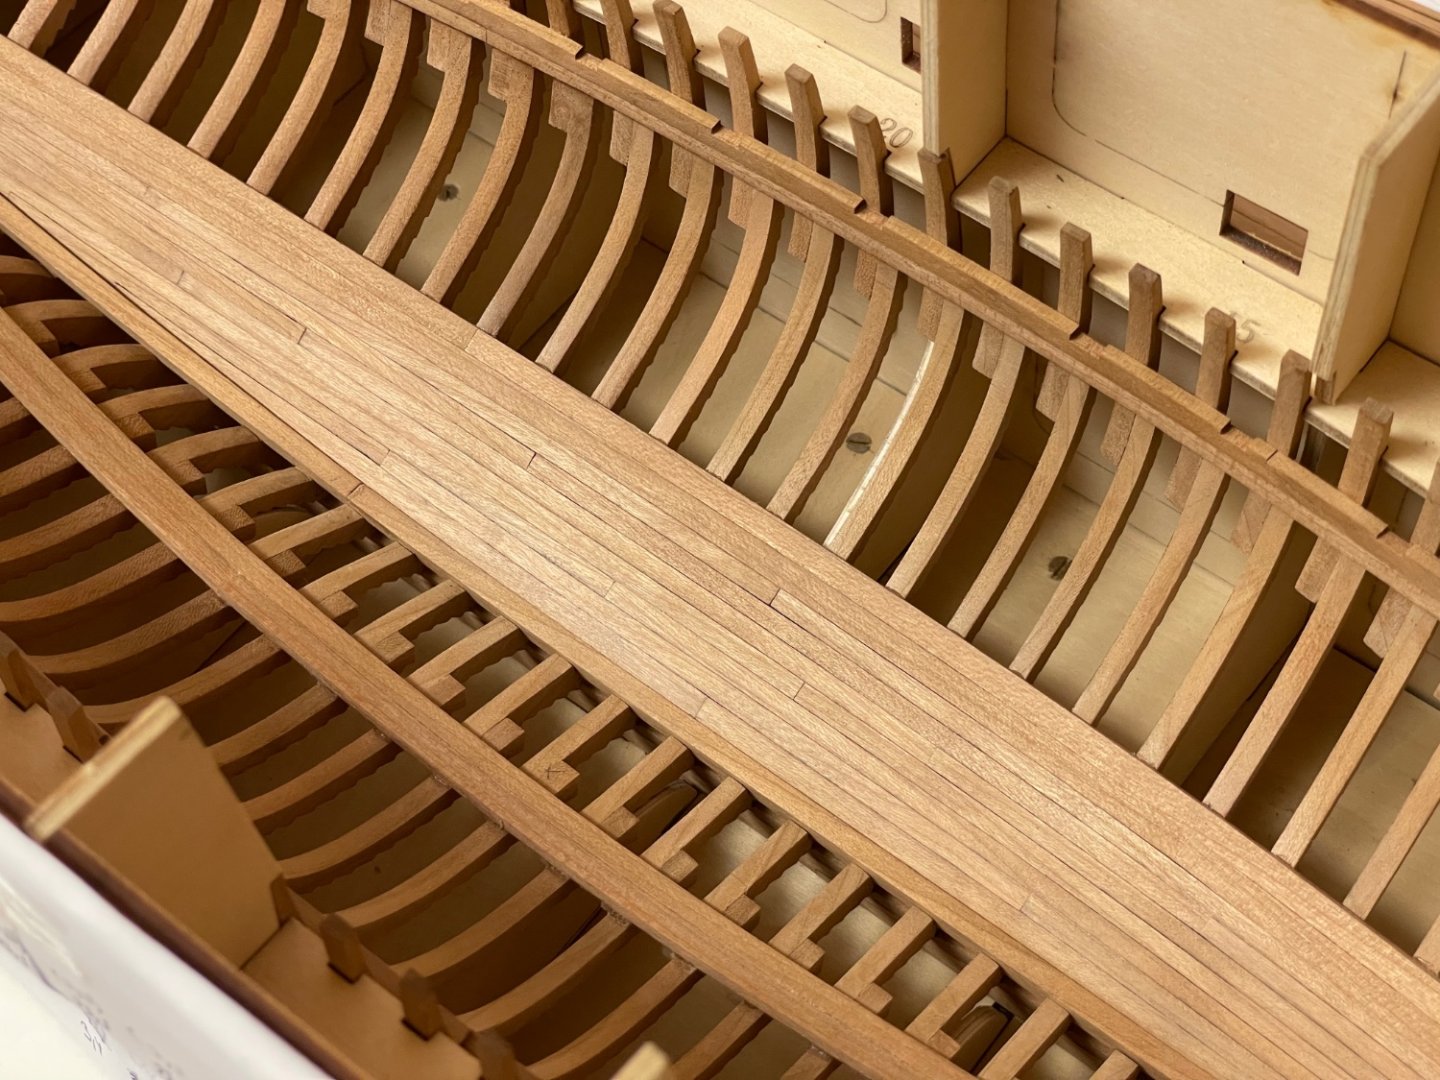
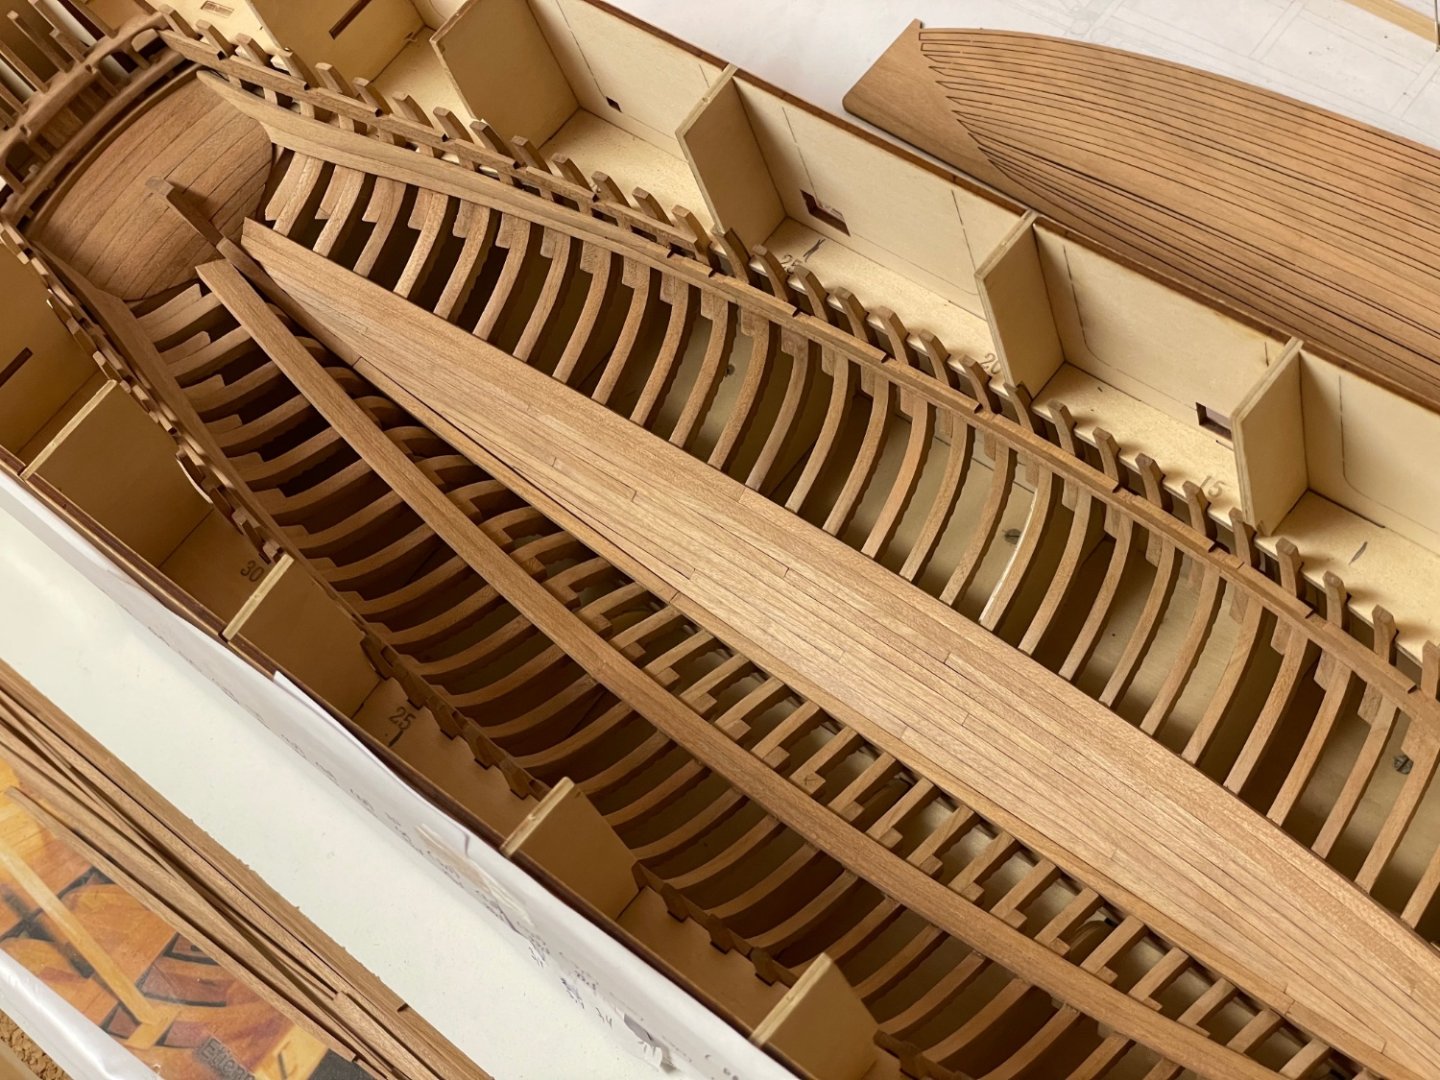
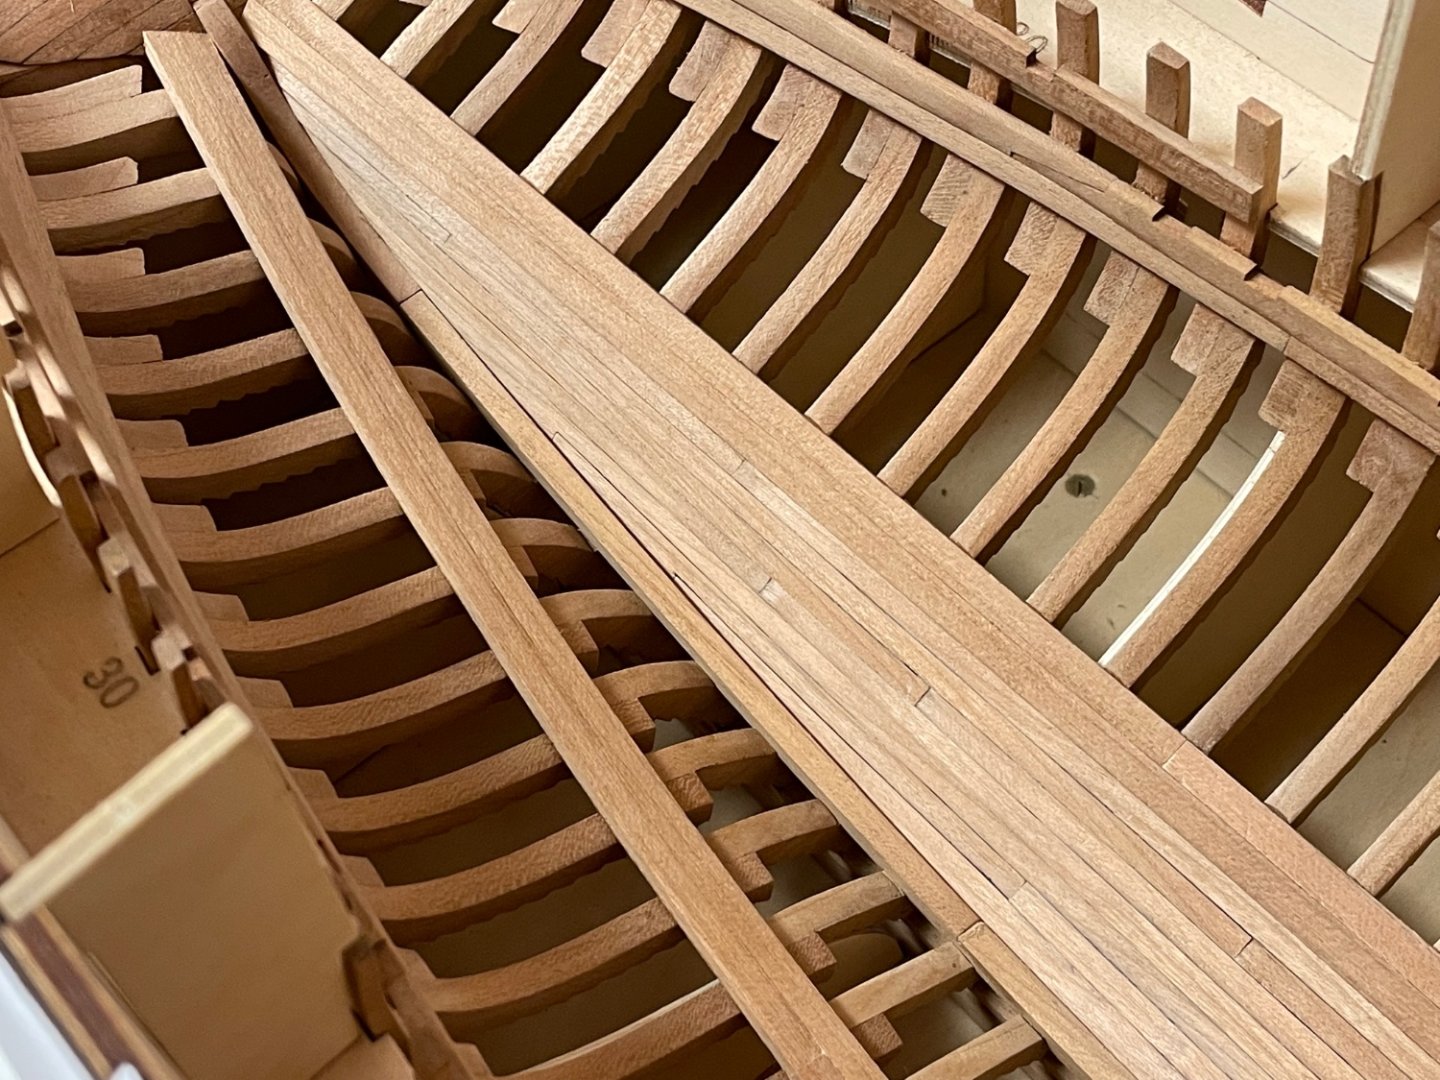
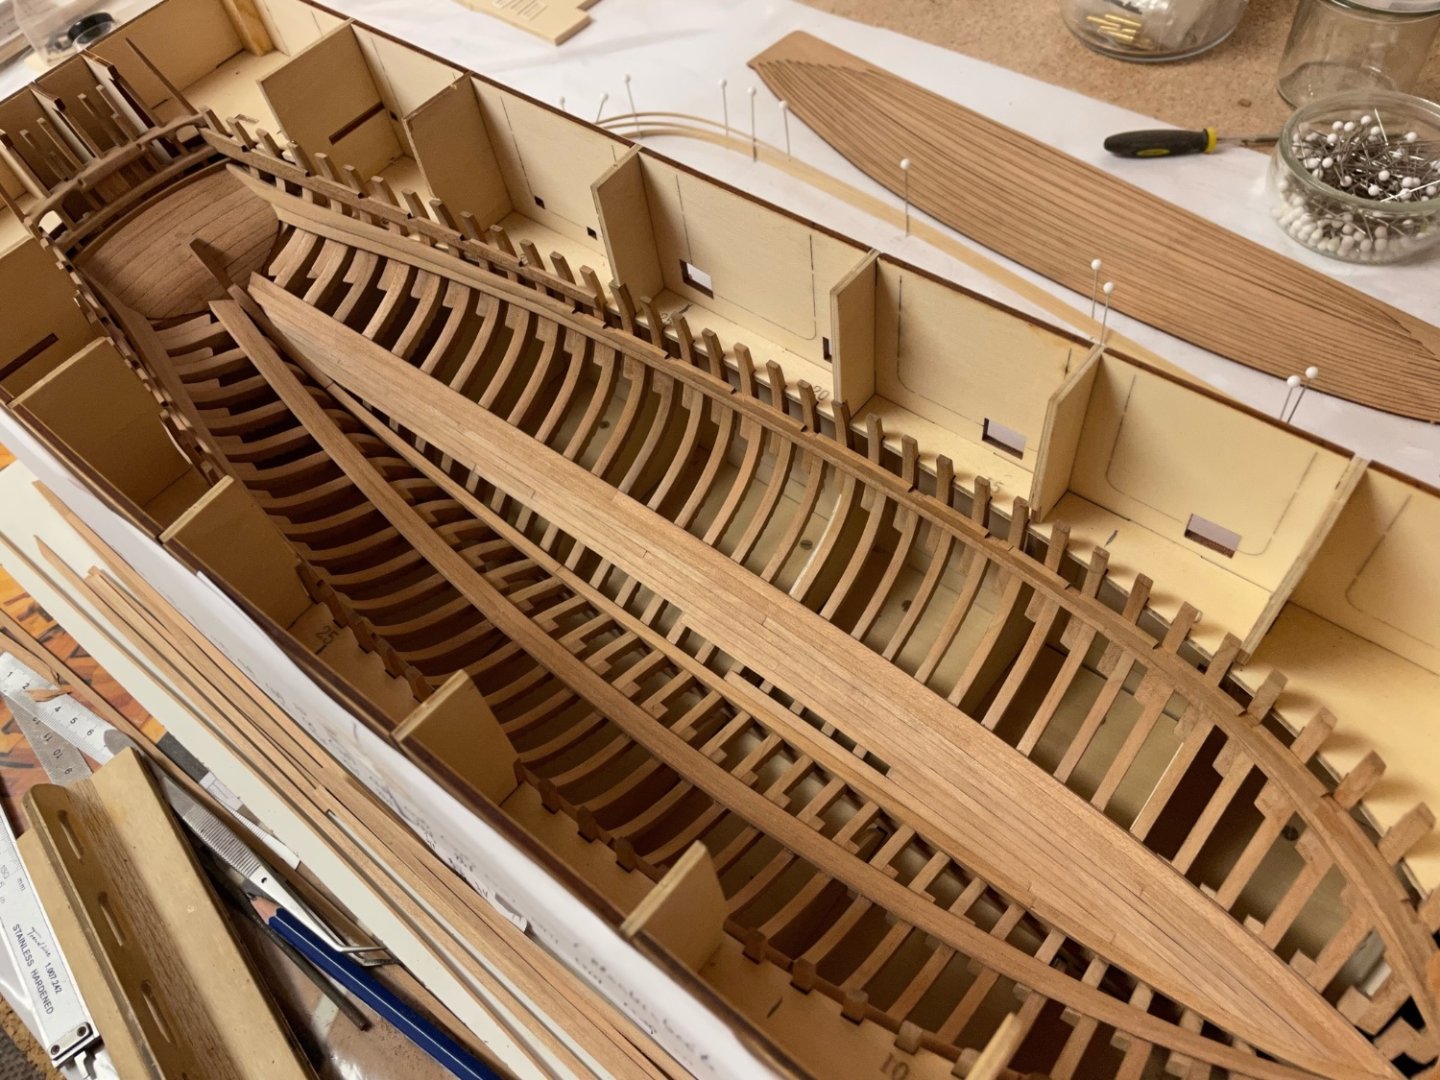
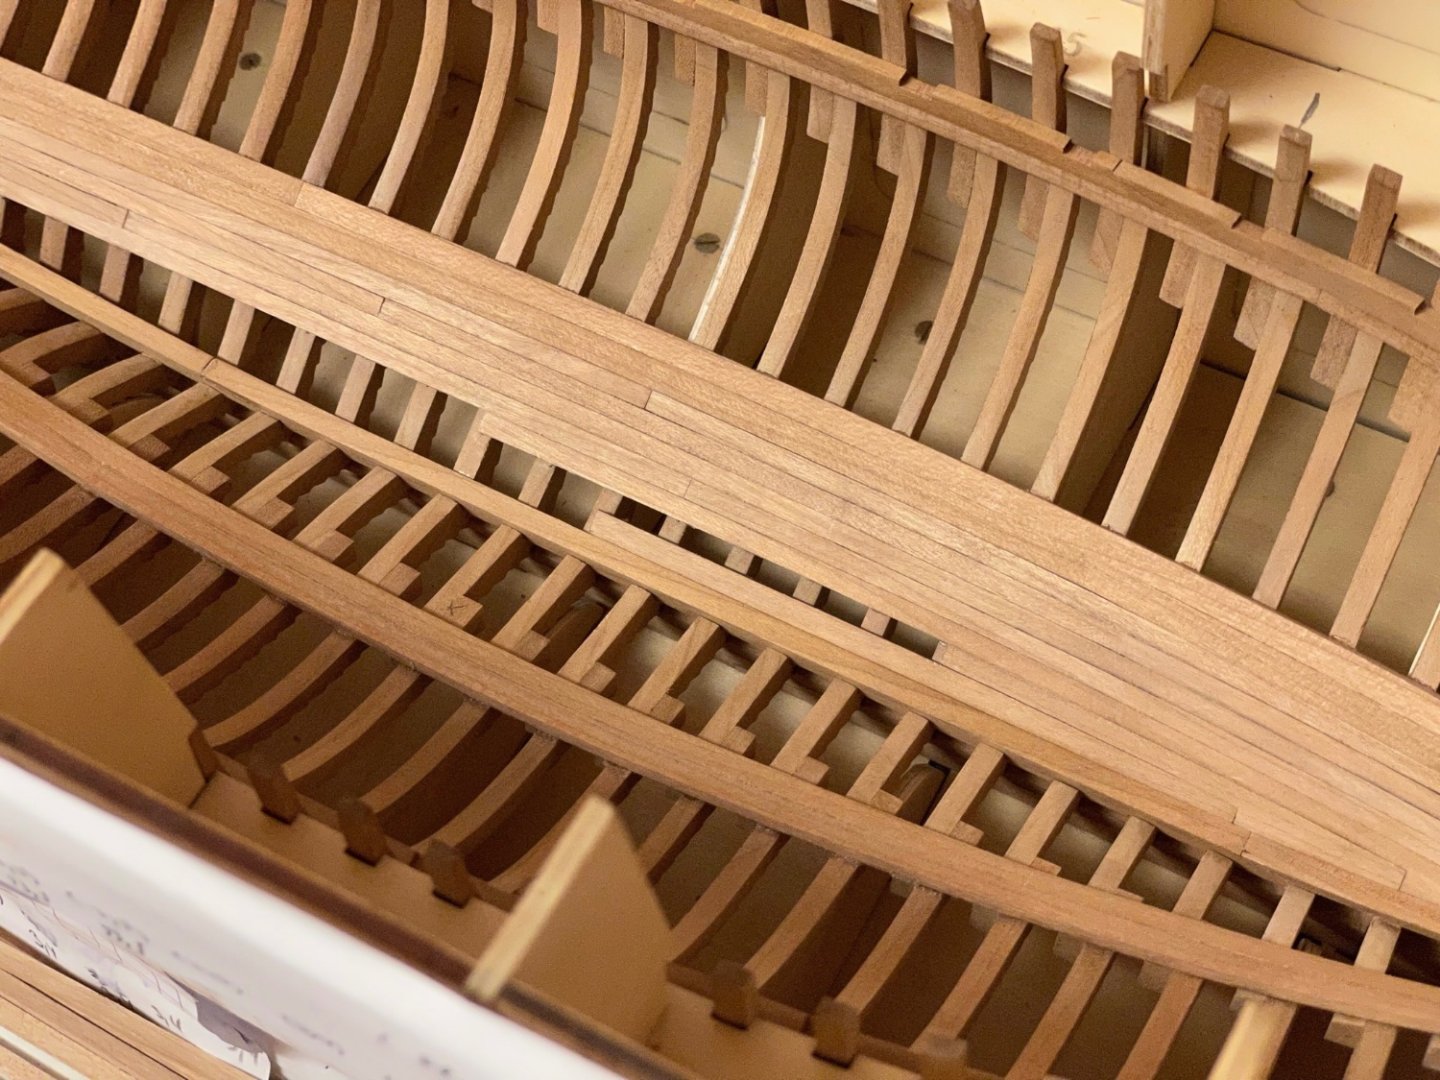
Finally finished planking both areas below the thick stuff. The plans by Boudriot & Berti show another thick planks beside the false keel but I decided to use regular planks instead to ensure good fit for the mast heel. Too much change of the intended kit’s design in this early stage will probably cause the need for more adjustments in future building steps - no kit bashing, just small adjustments where needed. I will now draw my layout for the planking above the thick stuff with Corel Draw. Stay tuned ..
-
Almost done with the second side. Most of this area will be covered later, so I rushed through this a little. The area above the thick stuff will be planked after that and I have to figure out first how to do this to match the plans from CAF. And there are two large open areas without inner planking on port and starboard, this will enable the viewer to look inside the ship later if I decide to leave the outer planking off in that area as well. Hope to finish that task tomorrow. Stay tuned ..

-
Congratulations, she is truely a masterpiece!
- 1,784 replies
-
- 6
-

-
- winchelsea
- Syren Ship Model Company
- (and 1 more)
-
Very nice work! I remember you starting the kit when I last visited your build log - and now you‘re close to the last building stages ..
-
Nice work so far, I remember my own build very well. It is a very good kit for beginner and intermediate builders to develope and try new skills with a detailed manual that covers all knowledge necessary to build the AVS. Beside the practicum and the manual the book „Modeling an Armed Virginia Sloop“ by Clayton Feldman is also a good addition - the kit is probably based on his model. Keep up the good work and good luck with your next steps.
-
Nice progress and clean work. Did you use the supplied basswood for planking?
-
Unfortunately I have completely forgotten how time-consuming it is to plank a ship, took me far more time than expected (it always does!). If I tell my wife that I will be finished in two hours, it will take four in the end. Anyway I finished the port side, will start with starboard on Saturday. Here are some snapshots. To simulate chaulking a soft pencil was used on all sides of the planks but I guess it is barely noticeable until some WOP will be applied. You can see the kit-supplied precut planking strips on the upper right corner in the first picture for reference. Closeup at the bow .. at the middle .. and the stern as well. The starboard side will have a mirrored port-side layout. I won’t bother anyone with partially planked update photos, instead I will post some new pictures when the other side is done. For today‘s work I have earned a reward - which will be watching yesterday’s episode of SW: Andor 🙂 Stay tuned ..
-
Thank you guys for the likes. I‘m making slow progress towards the false keel and have already reached it on the bow. Some fishing was used there to get a smooth planking run. Will try to complete the port section tomorrow. The starboard side will be a mirrored version of the port side and I hope this will speed up the planking. Stay tuned .. .
-
Anyway, planking the inner ship is where I stopped the build. I use 2mm x 4,5mm cherry stripes for the thick stuff that runs along the joints of the lower and middle futtocks. The planking is then done with 1,2mm x 3,5mm cherry stripes. Not as clean and nicely grained as boxwood or pear but will do. For that I use just an usual planking pattern I found in my „Historical Ship Models“ book by Mondfeld as it won‘t be seen later because the area below the thick stuff will be covered with interior. It is just for practice and recovering my knowledge, might take about the next week to finish this task …


-
Sorry guys, I took a break from ship-modeling - much longer than expected. I was and I am still a little concerned about the things going on in Eastern Europe and all the things that might happen in the future so I thought it would be best to spend more time with my family. And my self-employment kept me busy as well. Although I passed my model about a hundred times continuing the build was not on my mind all the time. Guess I had to wait for my mojo to return ..
-
Thank you very much. It was a pleasure to build and has a very fine manual. Good luck for your build!
-
Well I’m afraid in the end daddy has to fix all mistakes and to secure wood and paint stock ..
-
A fantastic build and a beautiful finished model! And a nice printing and weathering job as well. These 3D-printing technology may still be in the beginning stage but the modeling possibilities today are quite impressive.
- 321 replies
-
- 5
-
-
- Finished
- Flower-class
- (and 1 more)
-
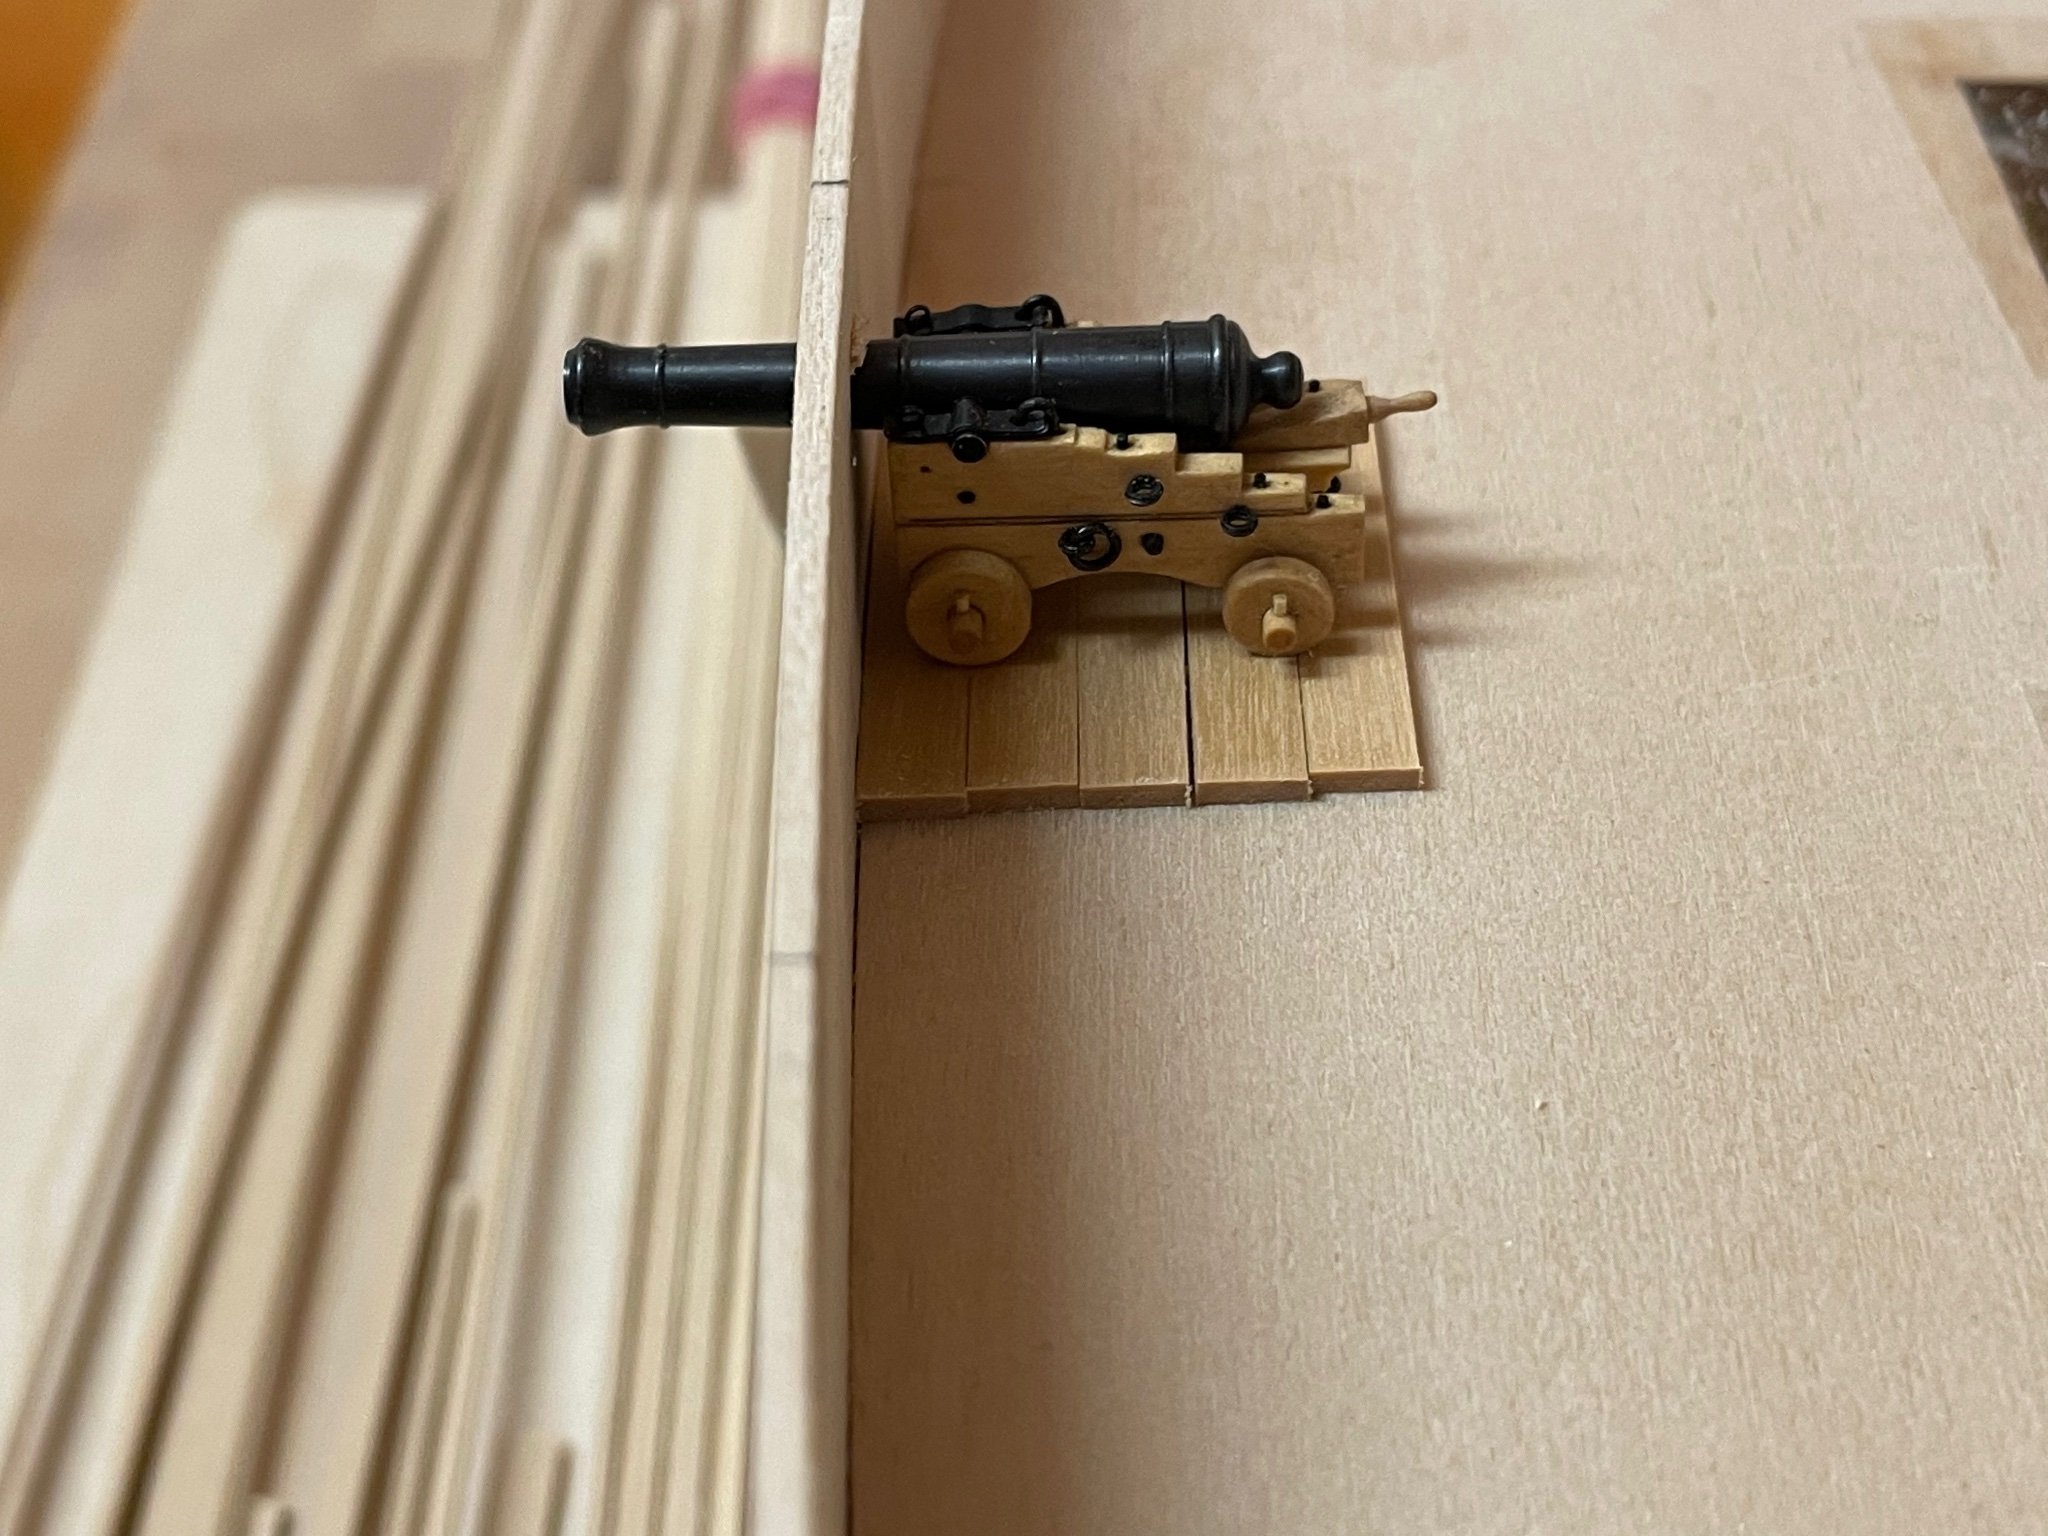
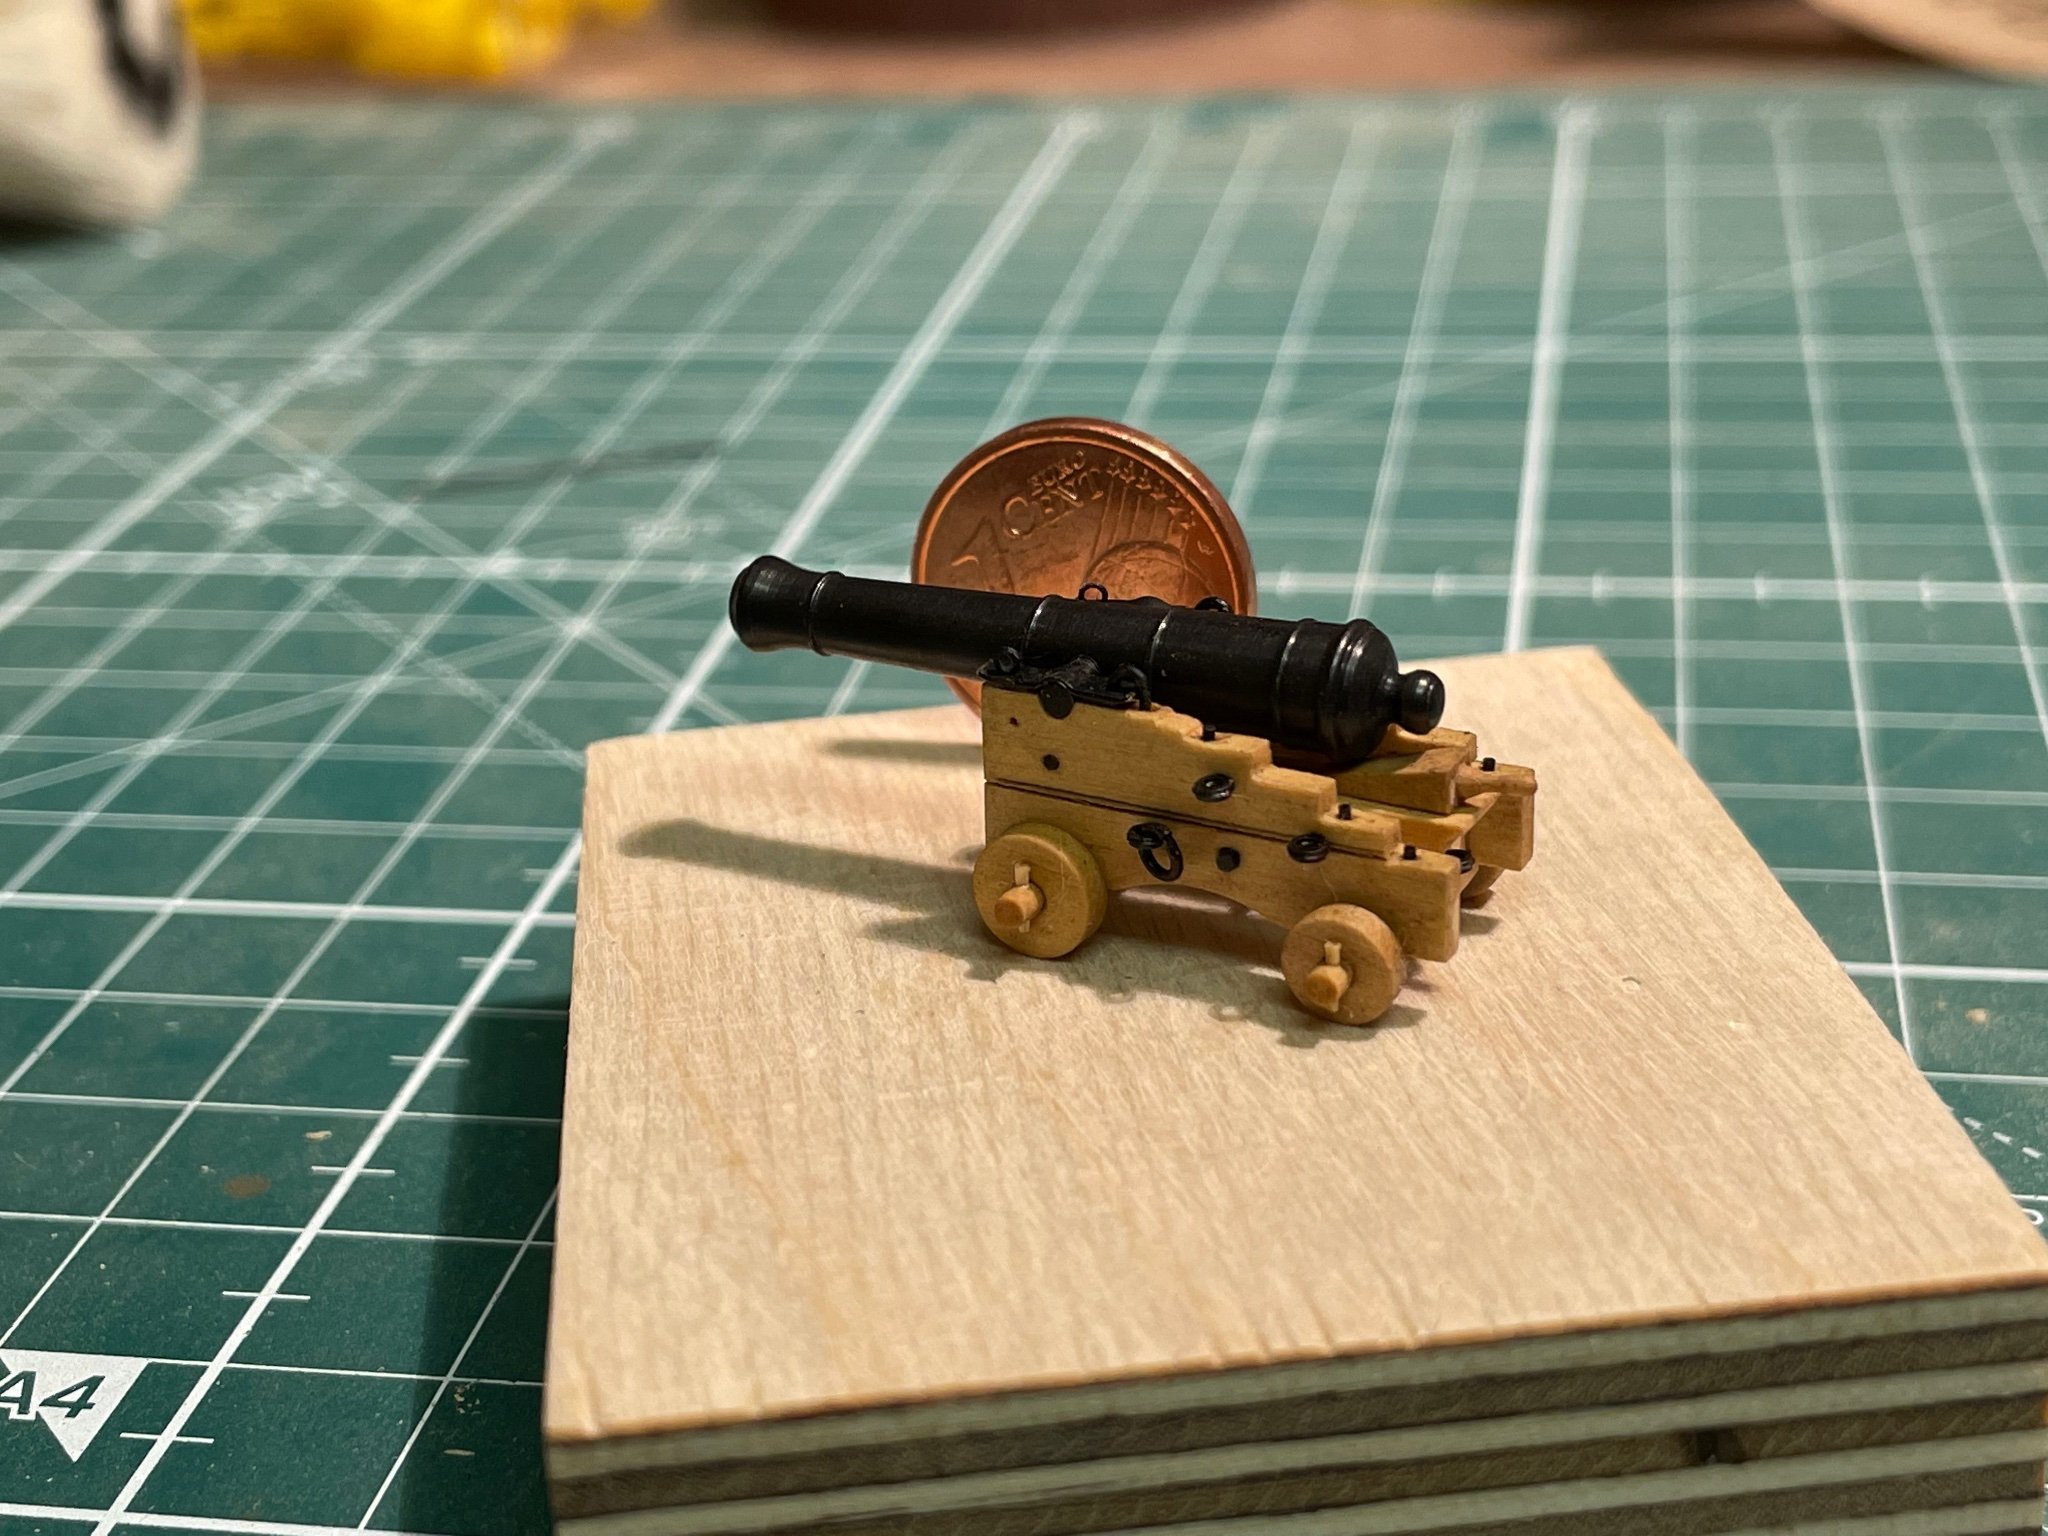
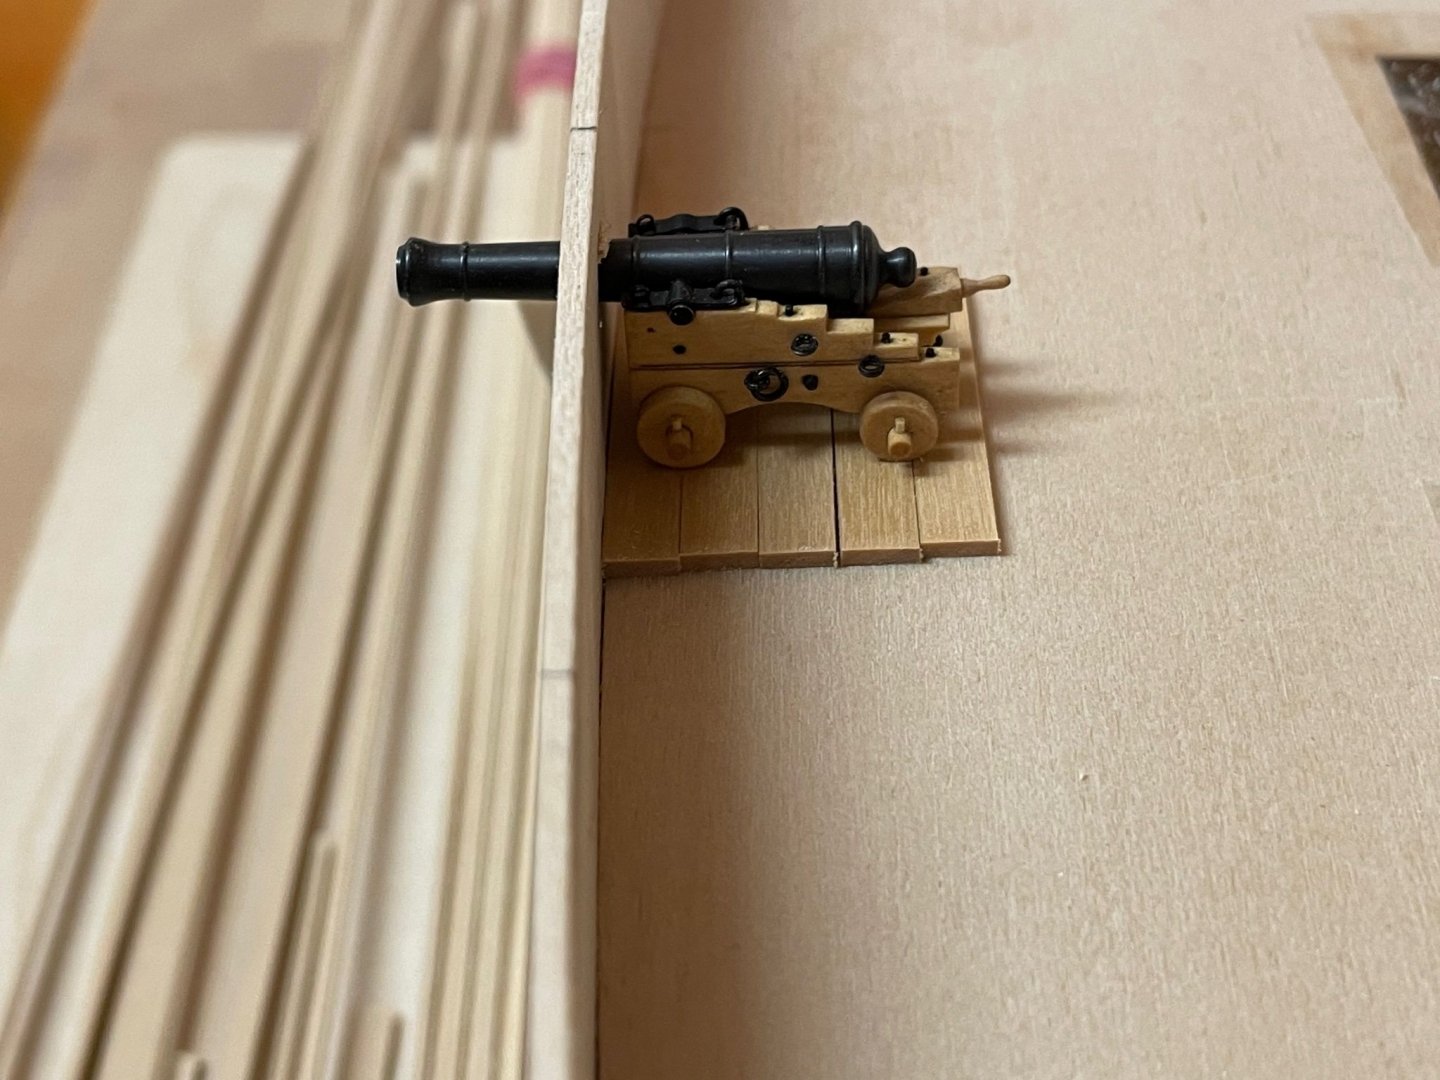
I have finished a prototype 4-pounder gun today - my first scratch-build carriage. It is not very accurate yet (I misaligned the etched line at first time so my gun has two lines and the just applied WOP give it a quite dirty look) but the goal was to prove the correct dimensions of the gun / the height of the gunports and to try some new techniques that will be used when all the guns are build later. The final carriages will be painted red but I decided to leave this one natural. The chain for securing the iron bands is still missing and it will be added for the final design. If any company had sold 4-pounder gun carriages in quarter scale it would have saved me a lot of work. But I understand what scratch building is about. At least I have done all parts for the carriages, so building them won’t hopefully take too much time. The good thing is that the test-gun fits the gunport - the barrel almost centers it. Now I can continue to work on the hull. Stay tuned and save. Andreas


- 64 replies
-
- 11
-
-
- badger
- caldercraft
- (and 1 more)
-
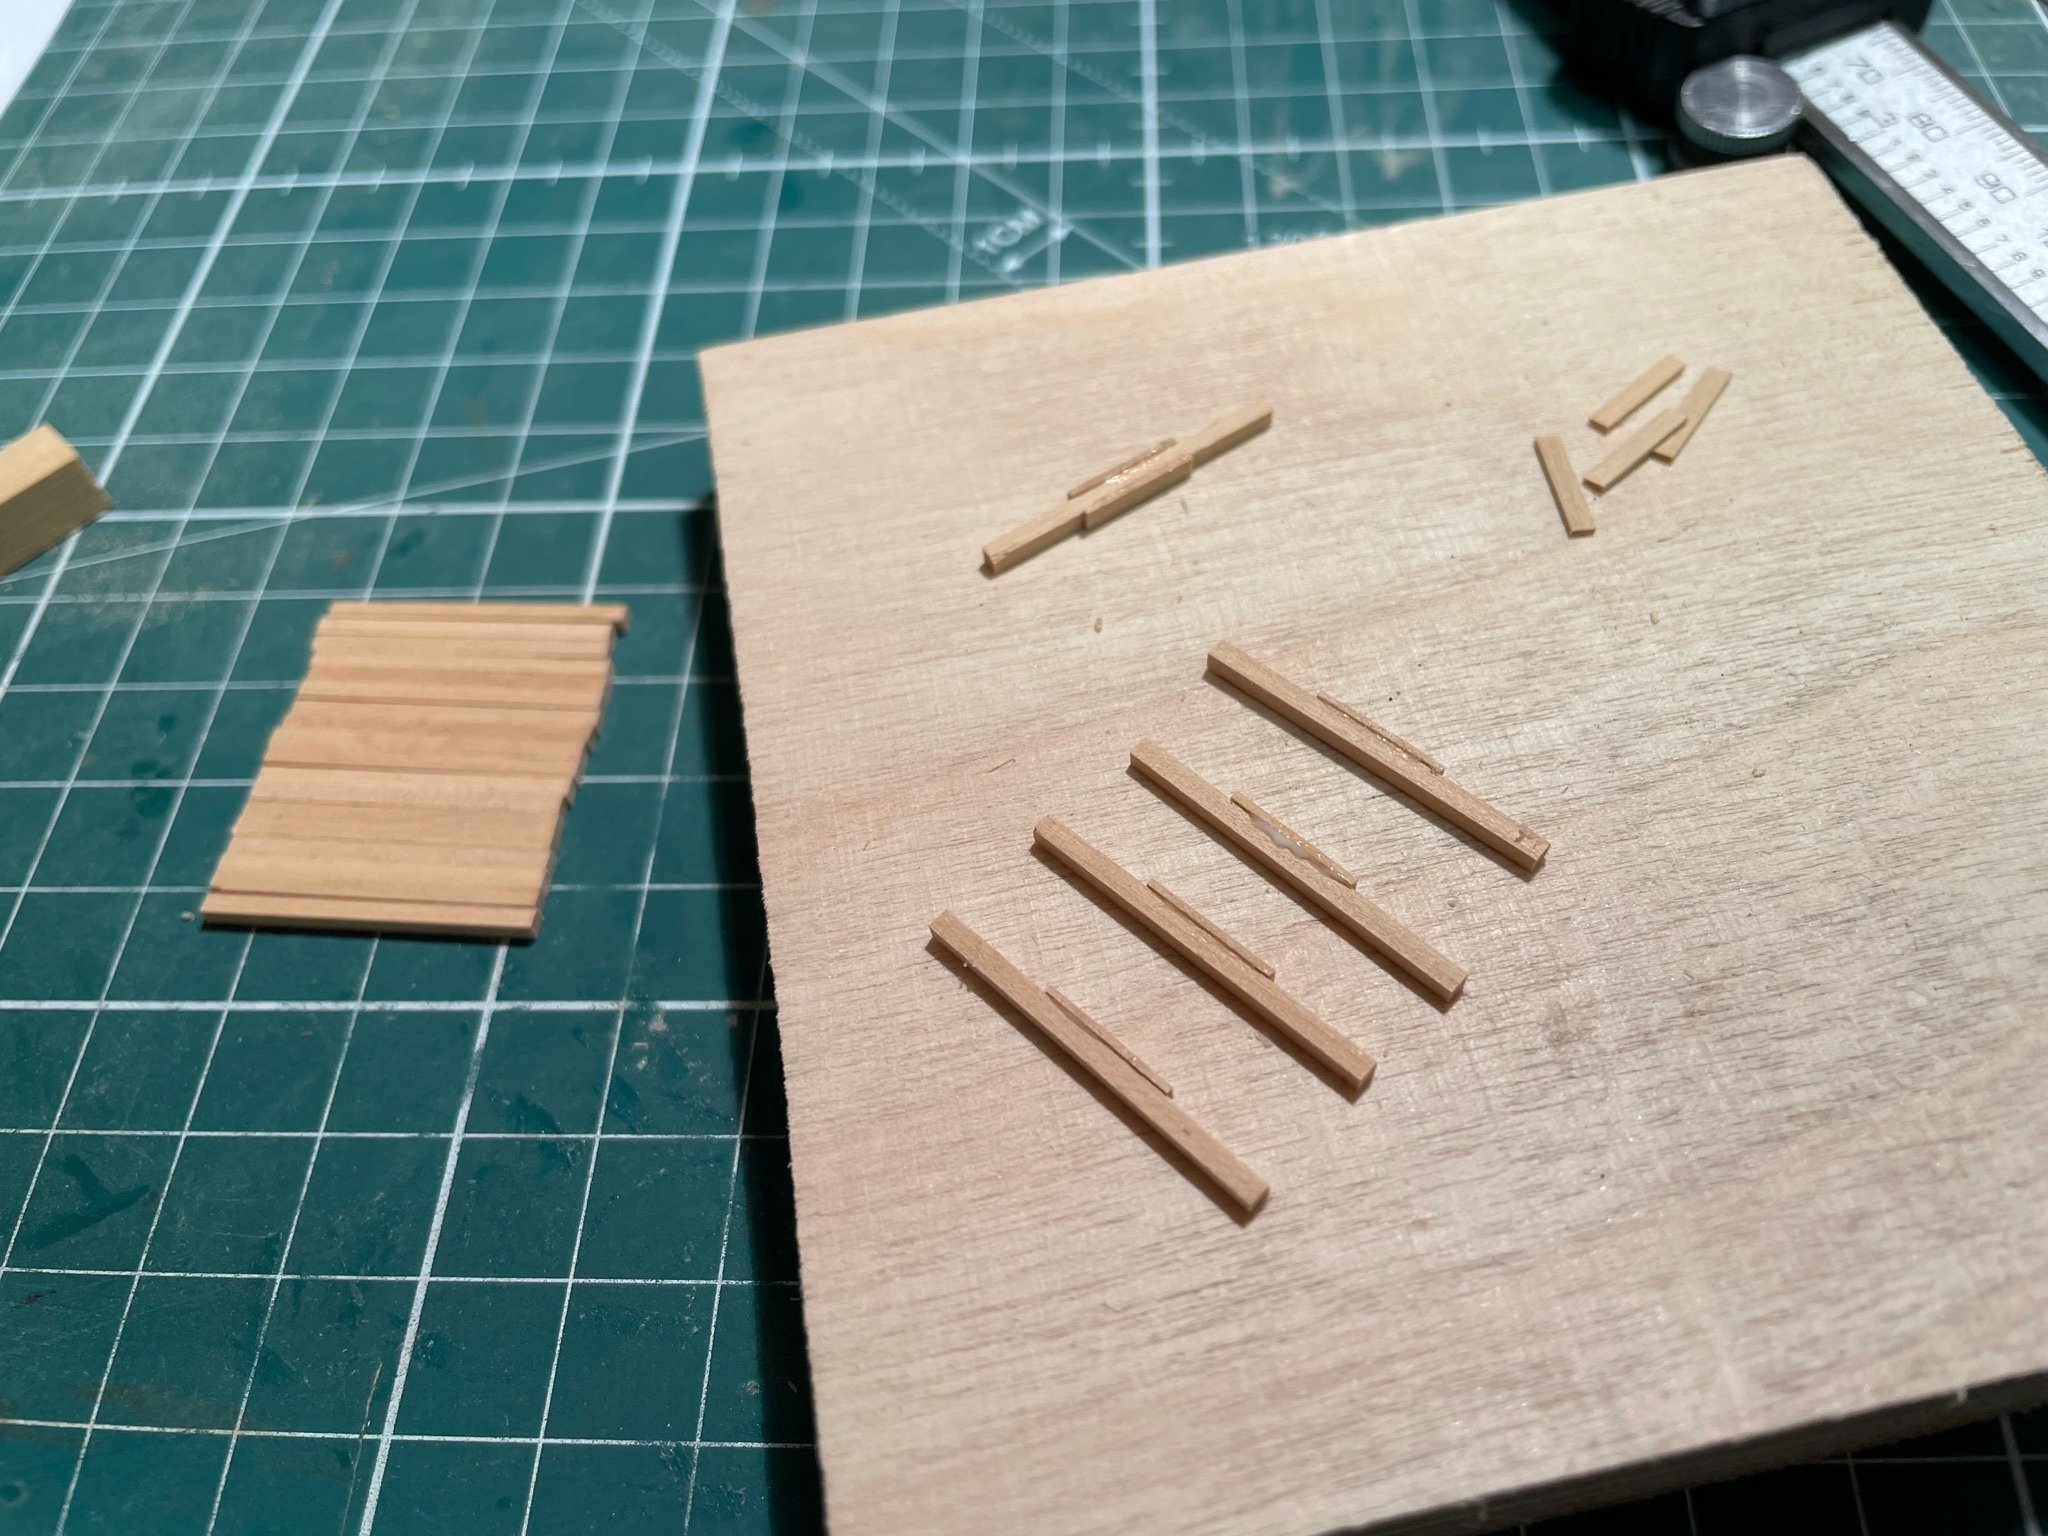
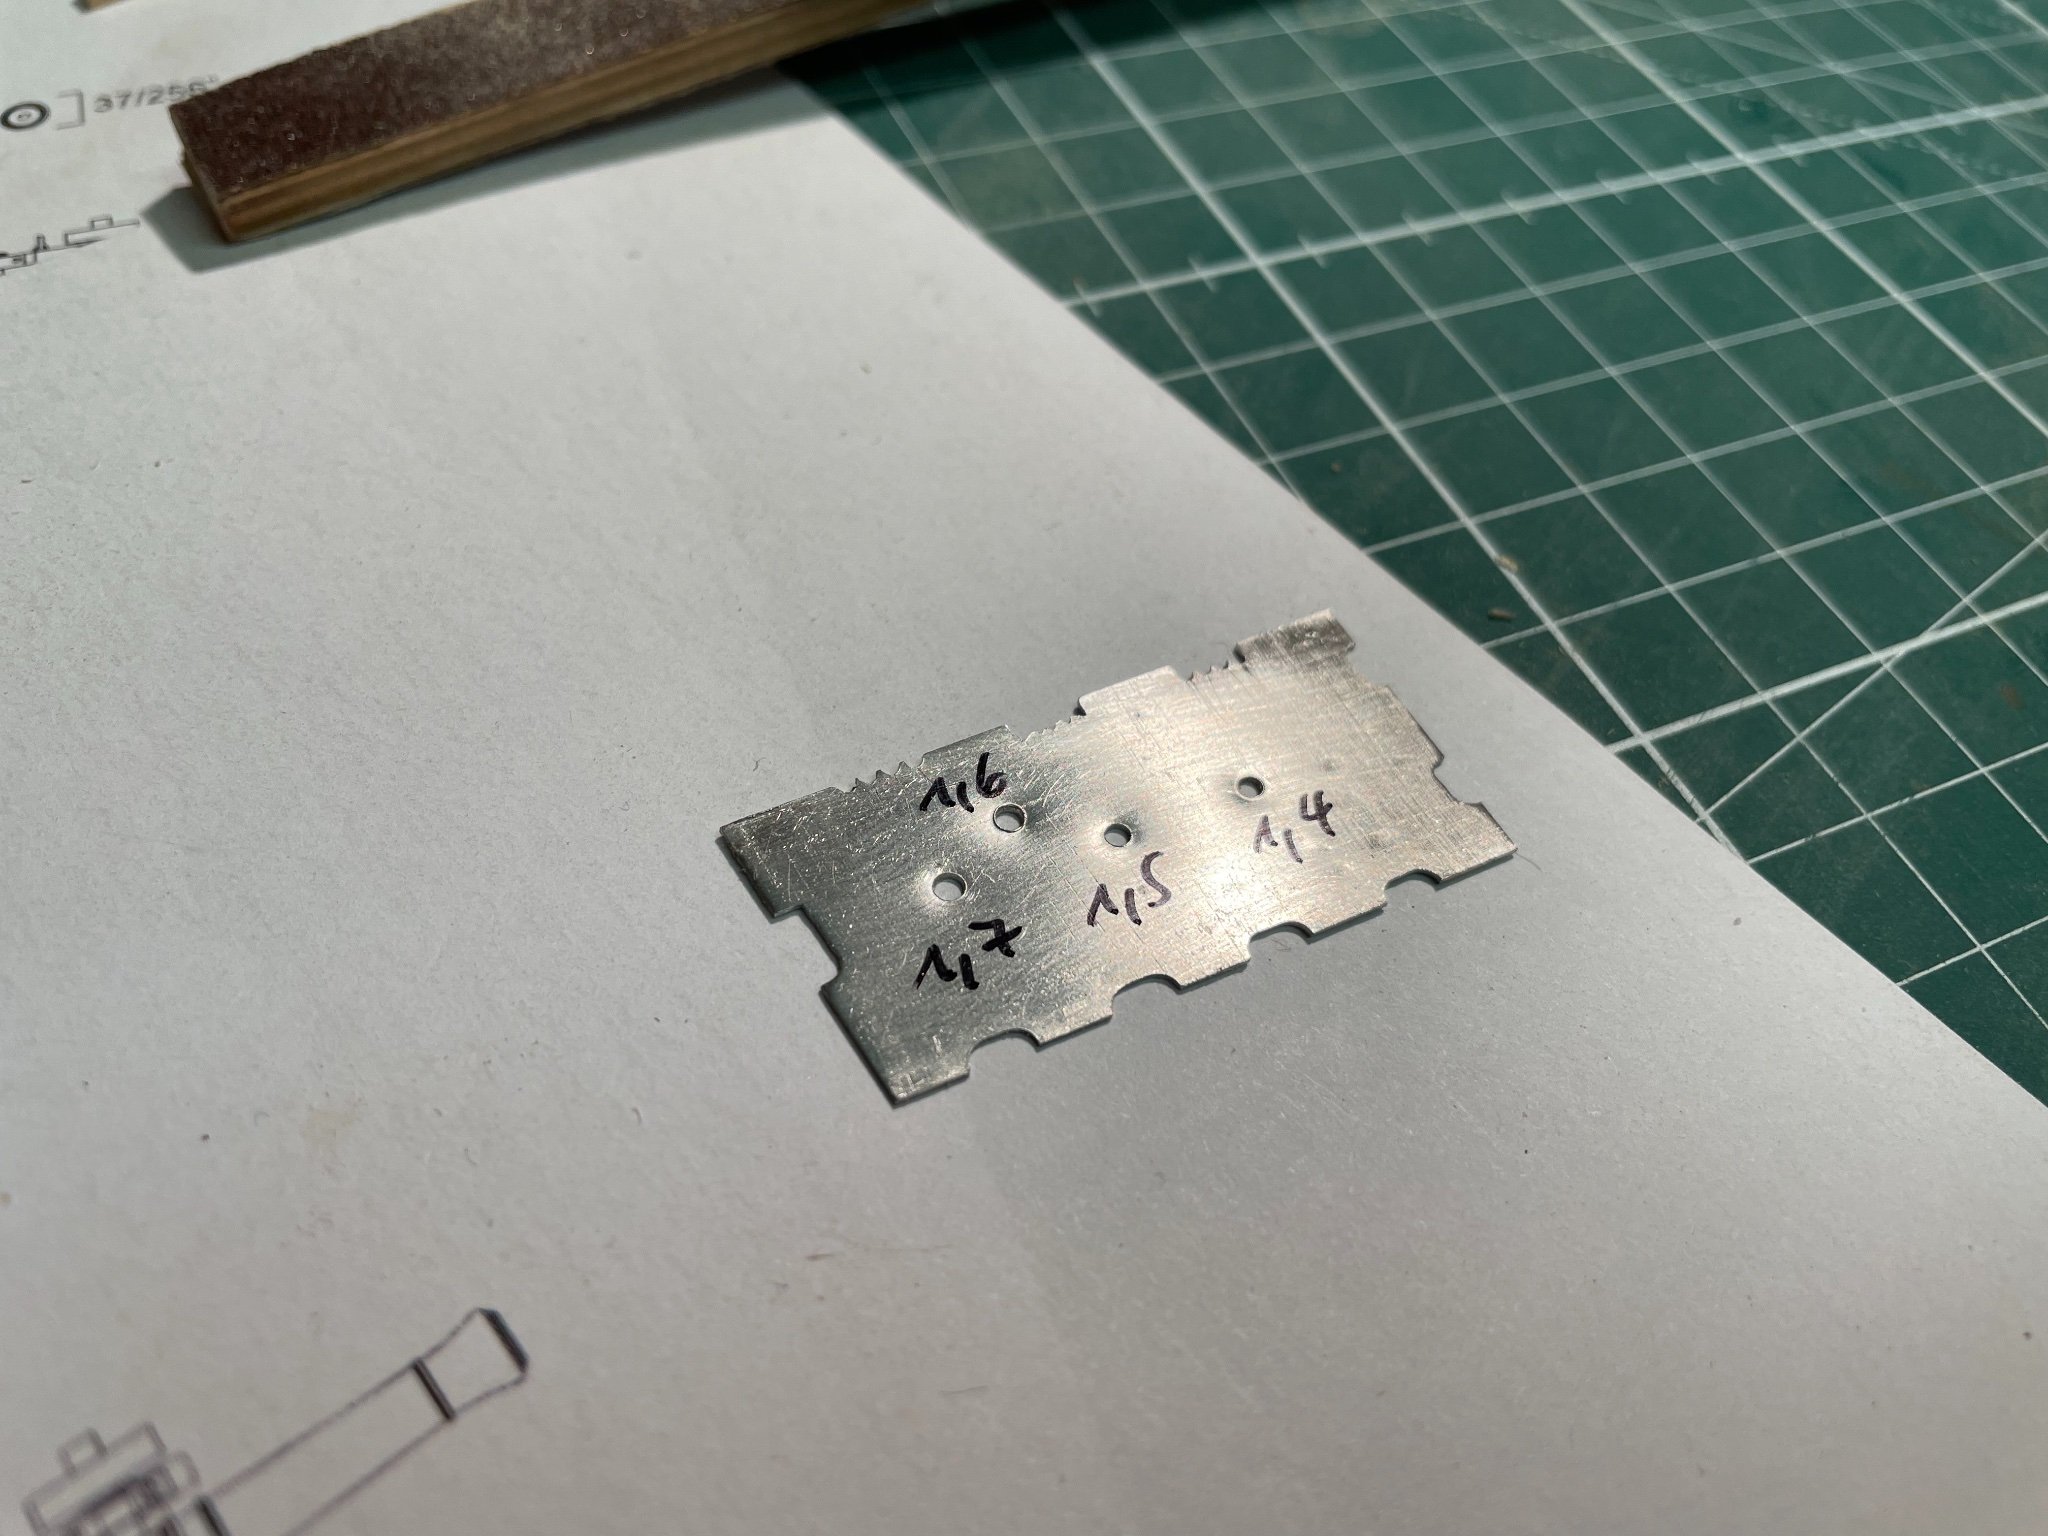
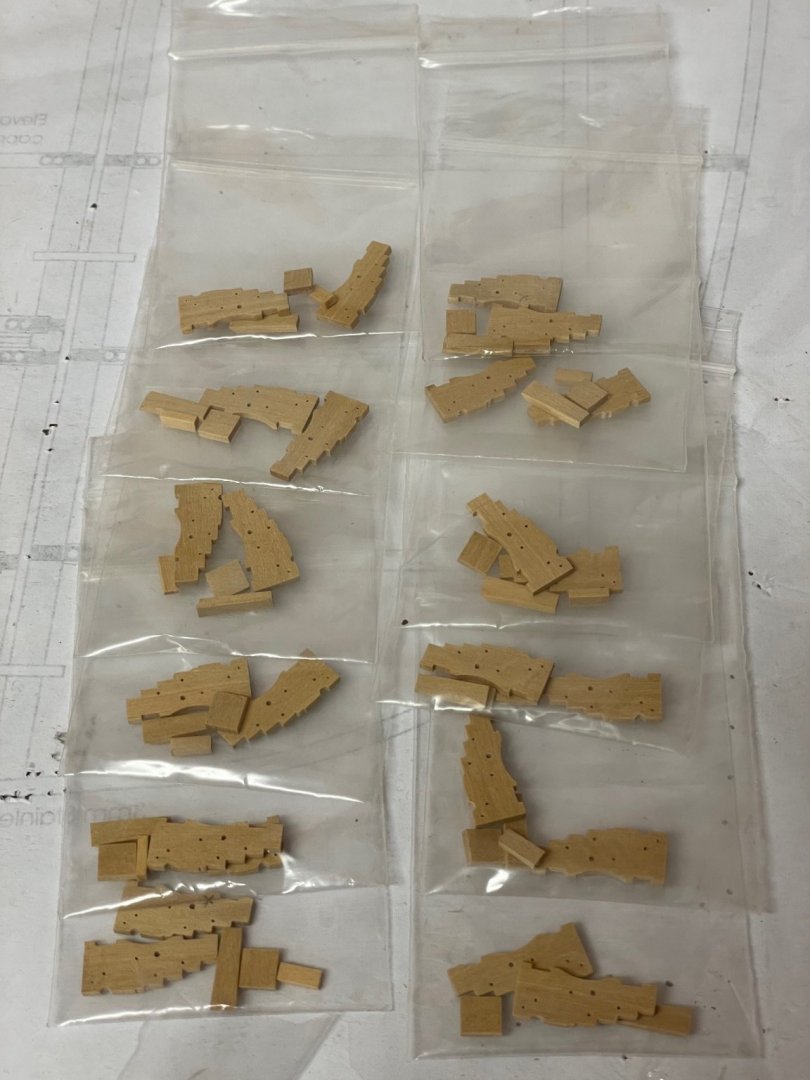
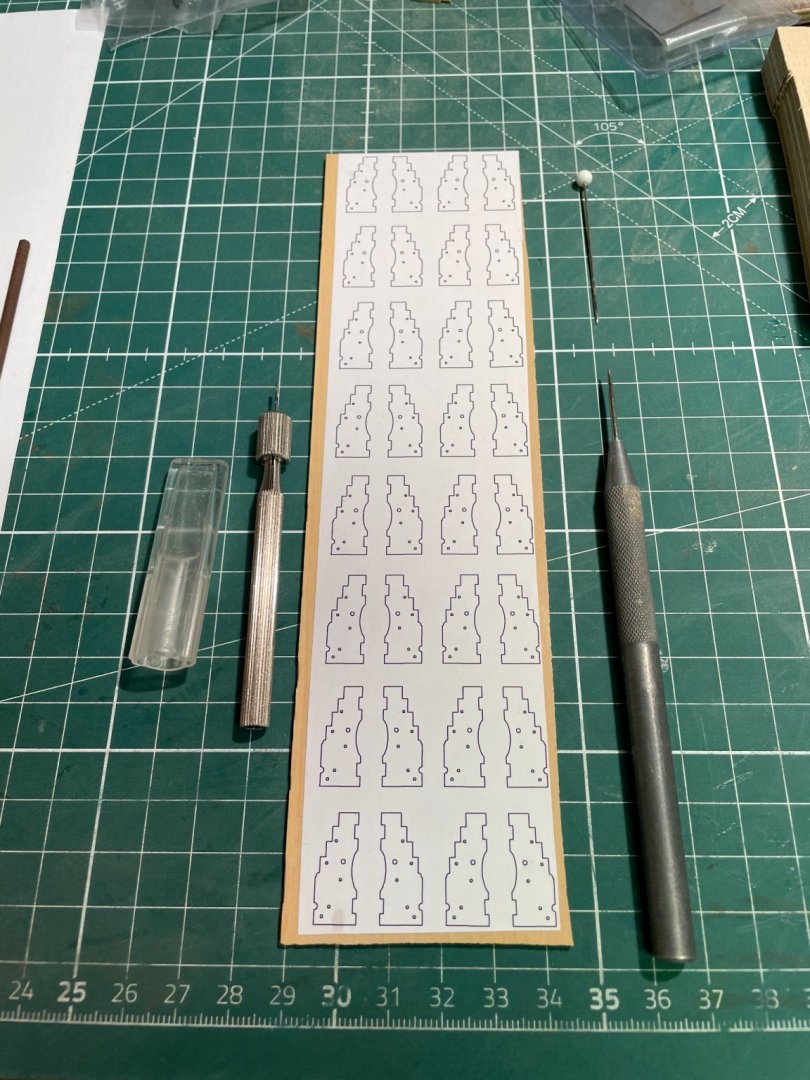
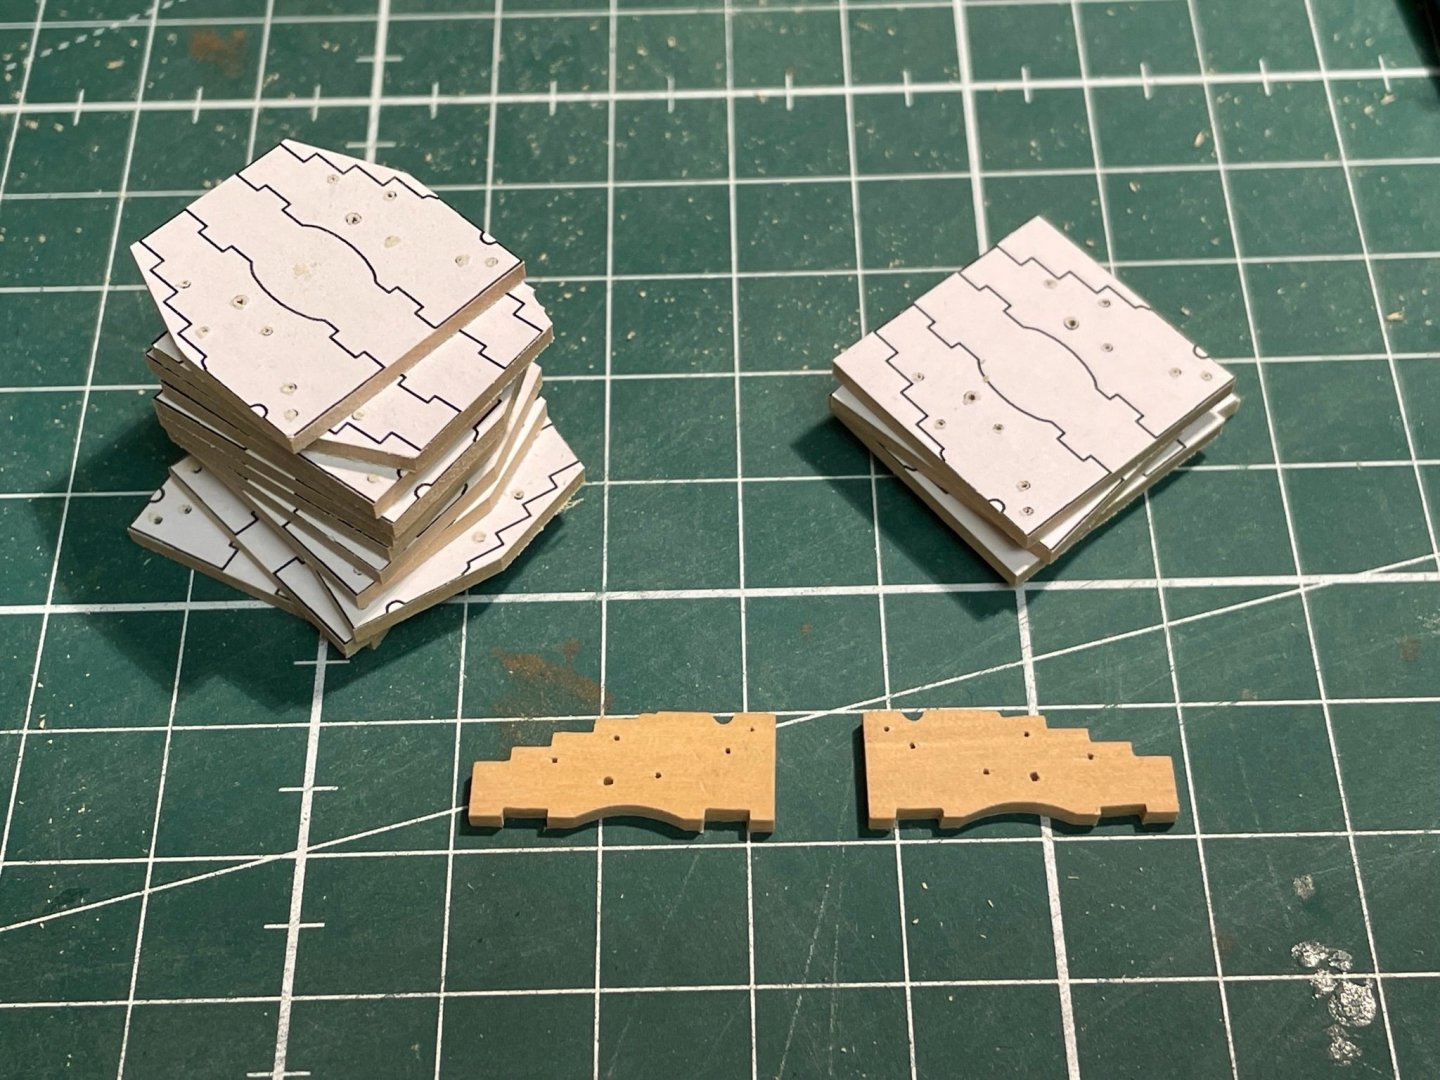
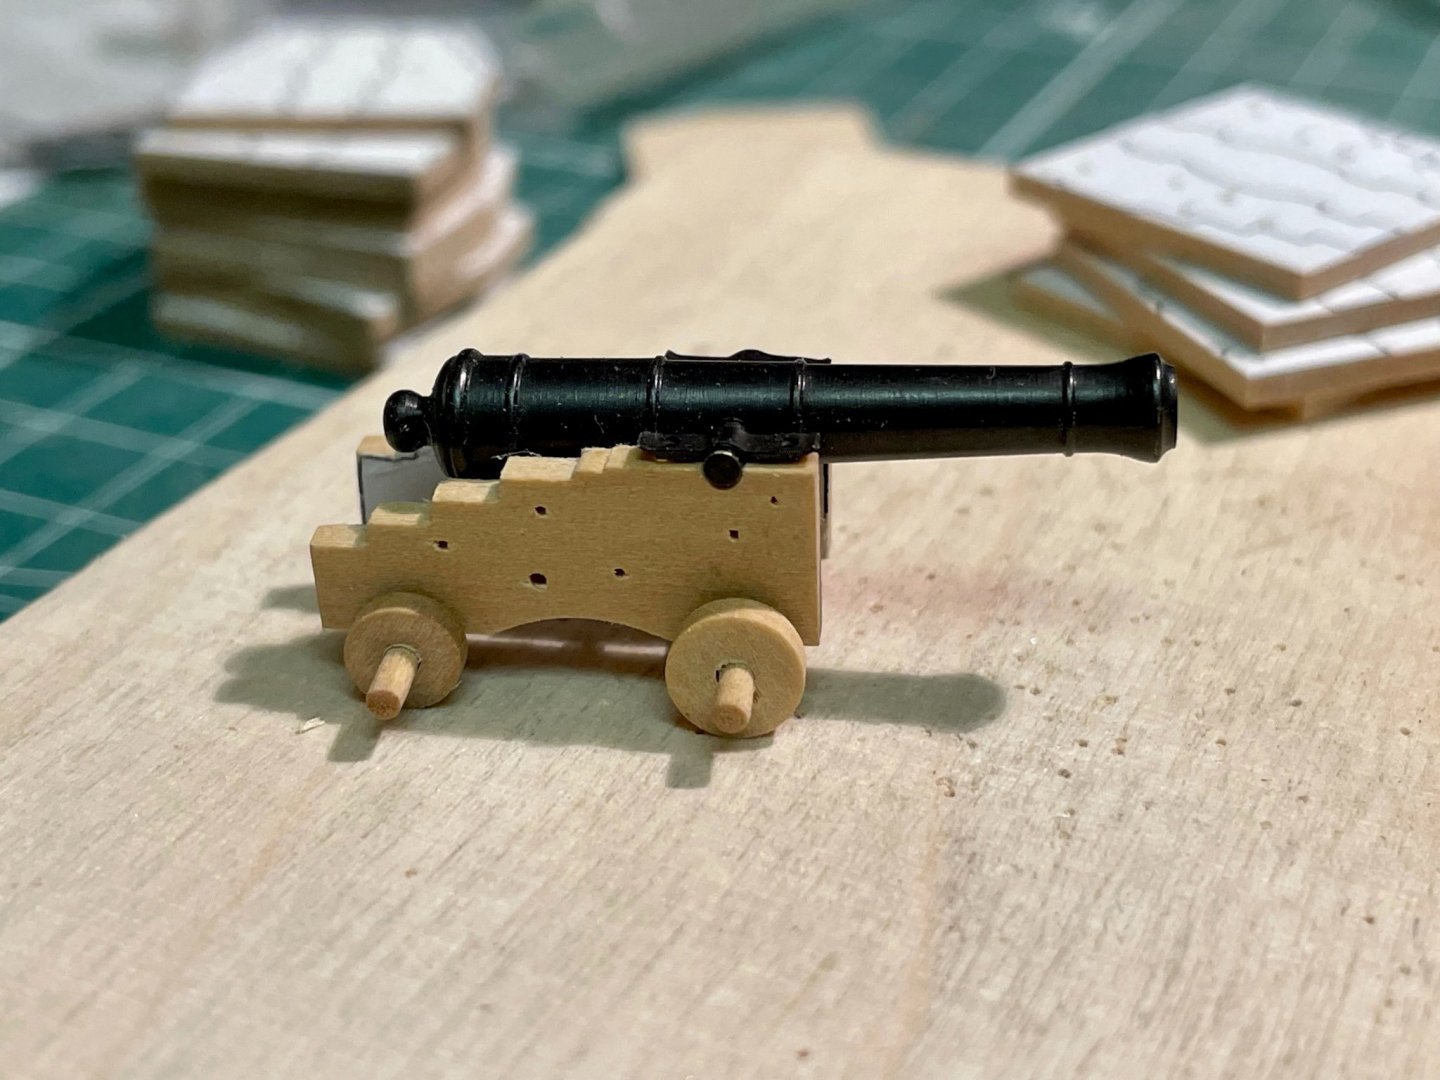
Thank you all for the likes, The side covers have a complex shape and lot of holes for eyebolts and other stuff. I first made a template for both sides with Corel Draw and printed it on adhesive paper. The template was then glued onto a 1/16 inch boxwood sheet. Then I carefully pinned all template marks for holes with a prick and drilled the holes with a small hand drill. The sides were then cut out with a bandsaw and a disc sander was used to sand the pieces to shape. At last the final shape was done with needle files. I try to finalize a test cannon by the end of the week but there are still some parts missing. But here is a sneak preview .. Stay tuned and save. Andreas
- 64 replies
-
- 6
-
-
- badger
- caldercraft
- (and 1 more)
-
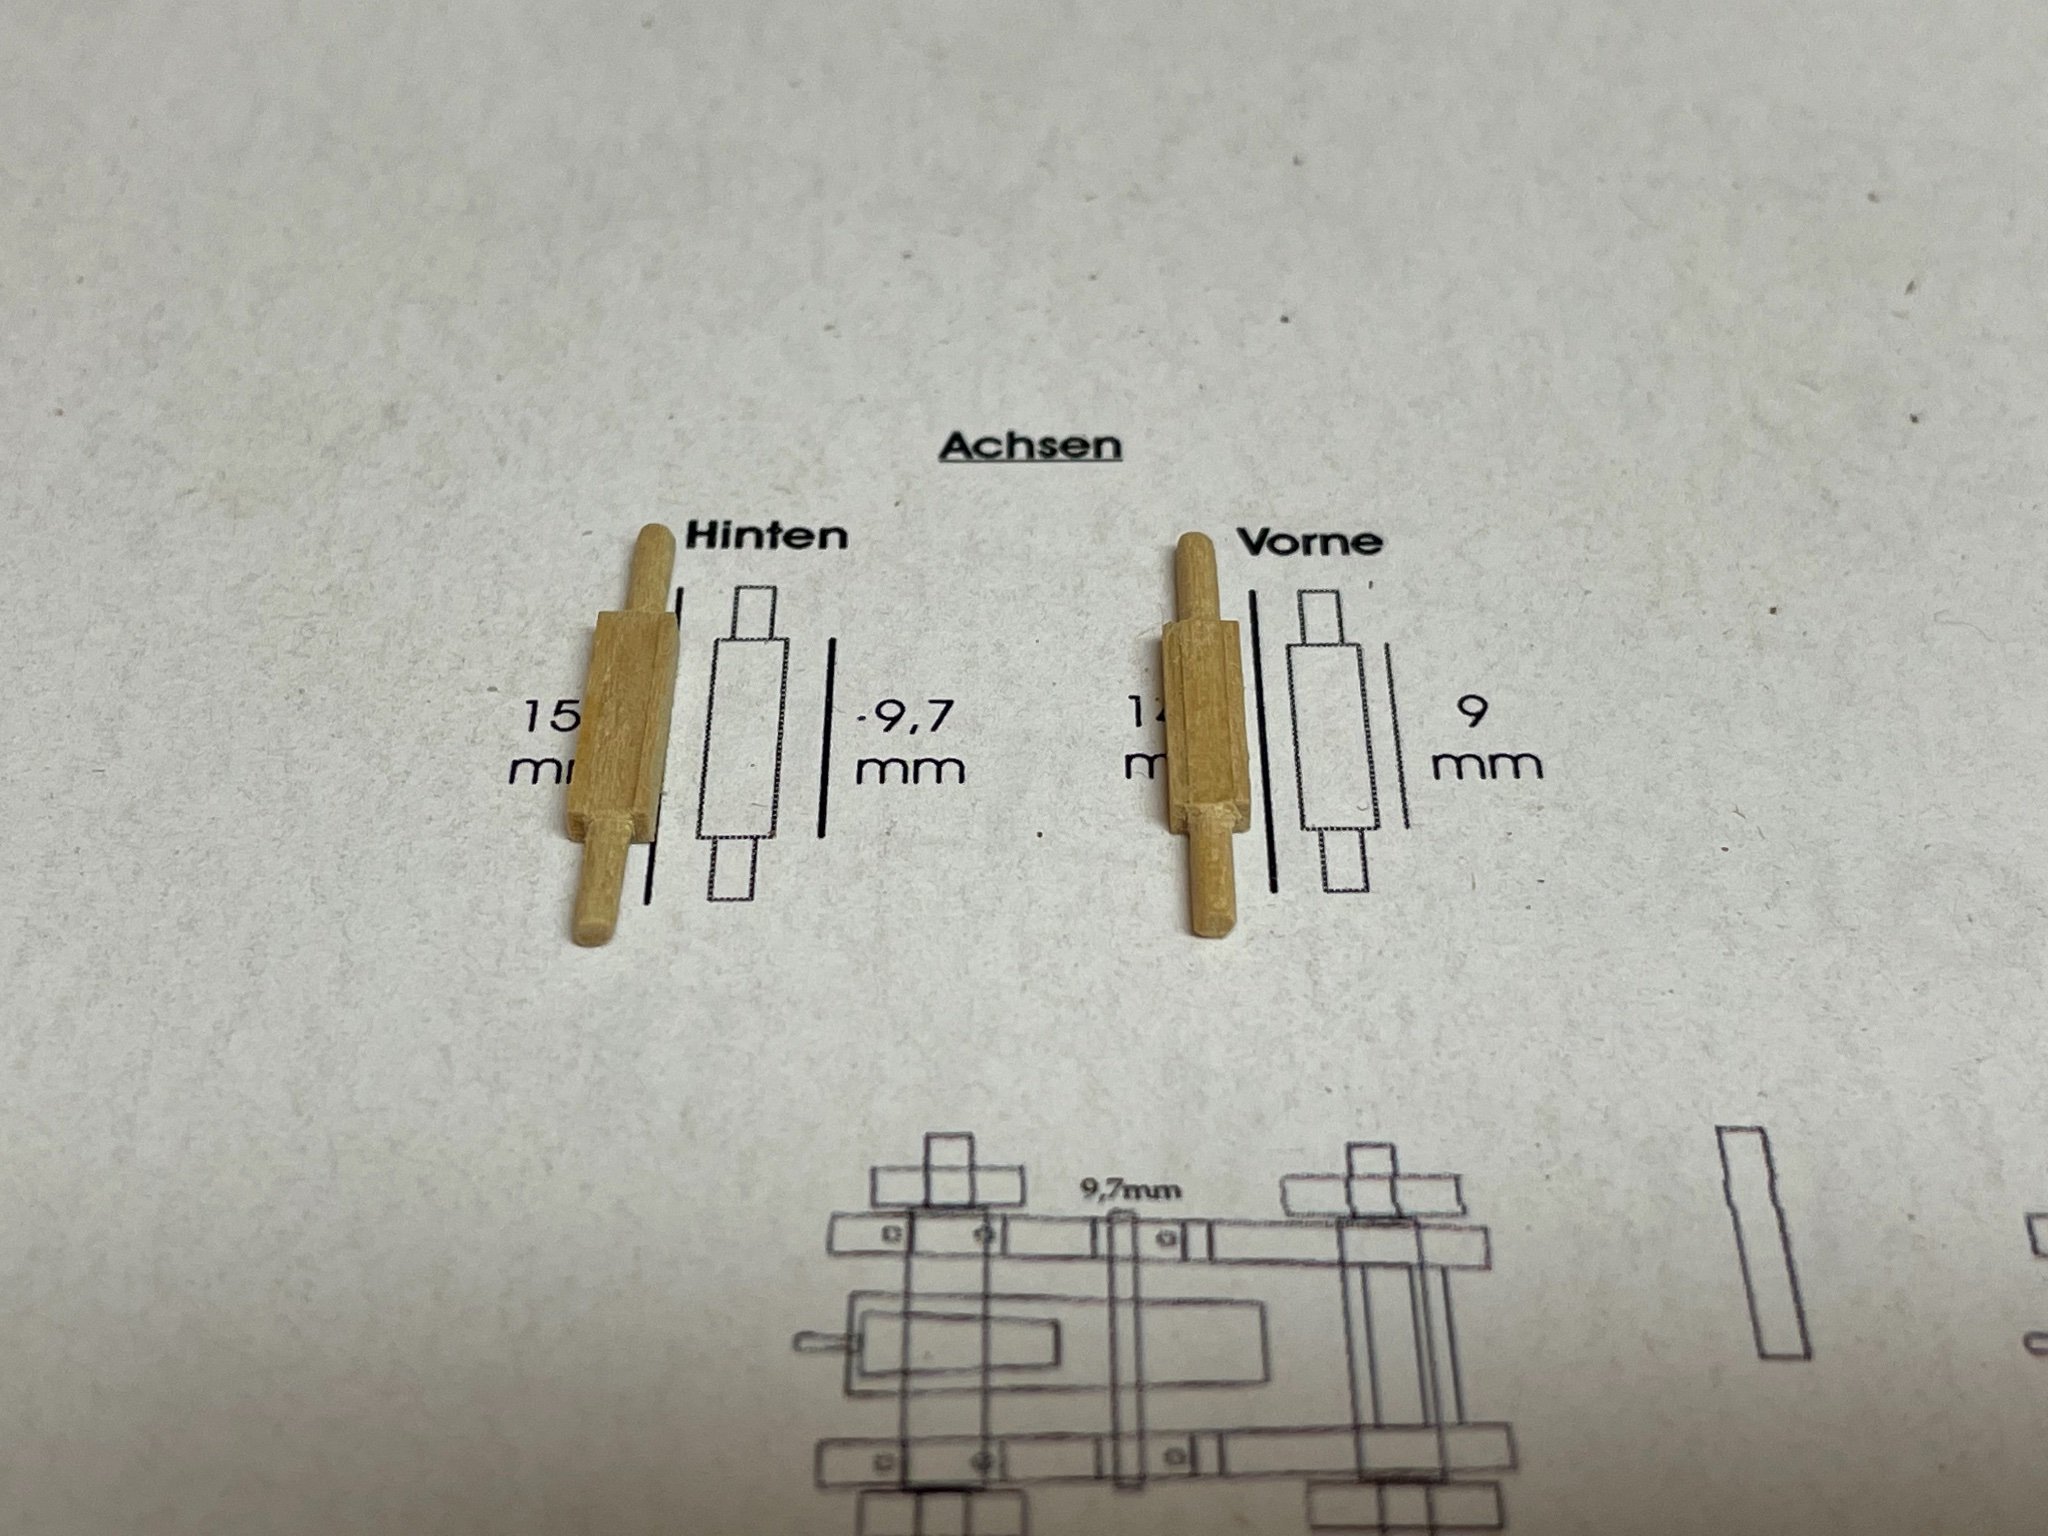
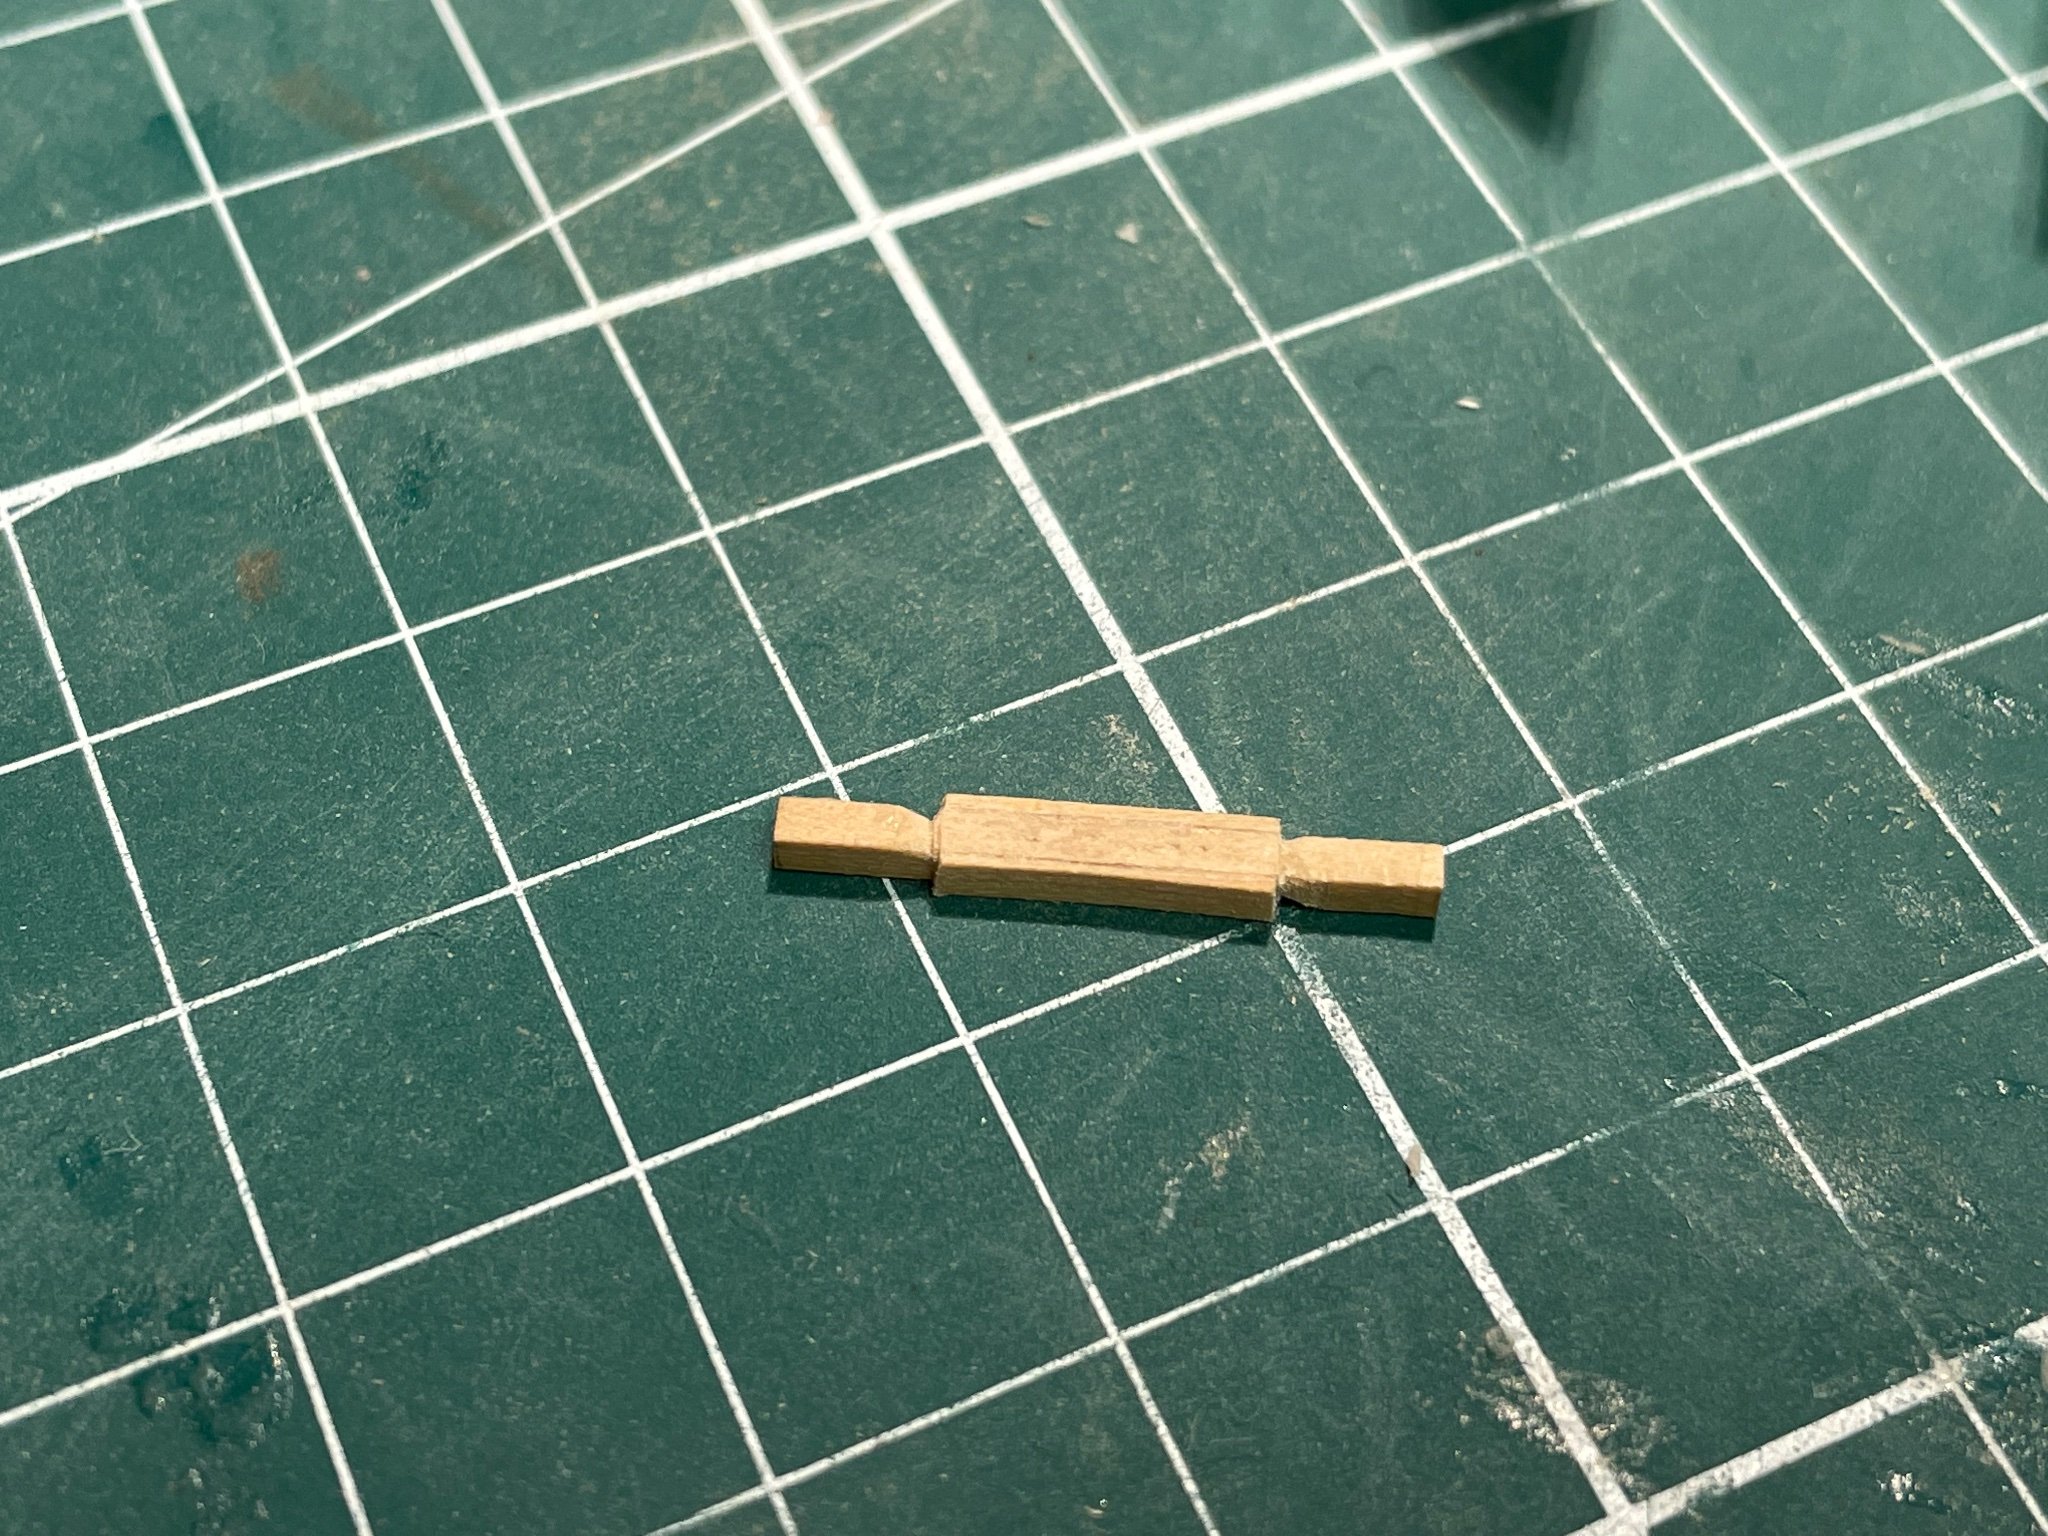
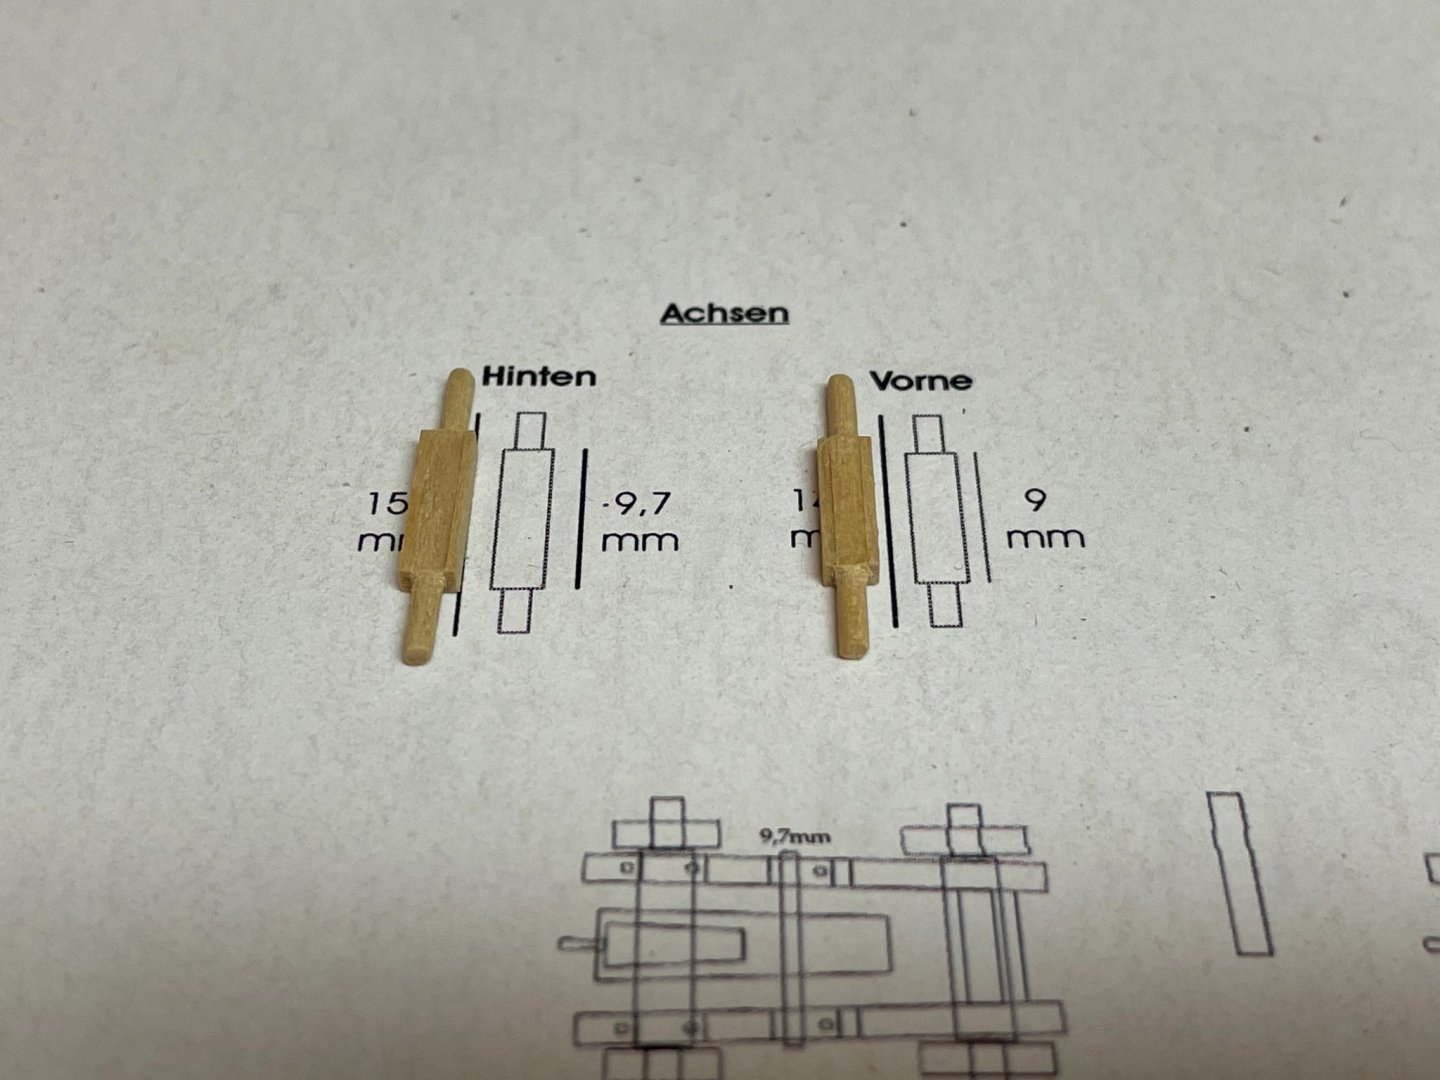
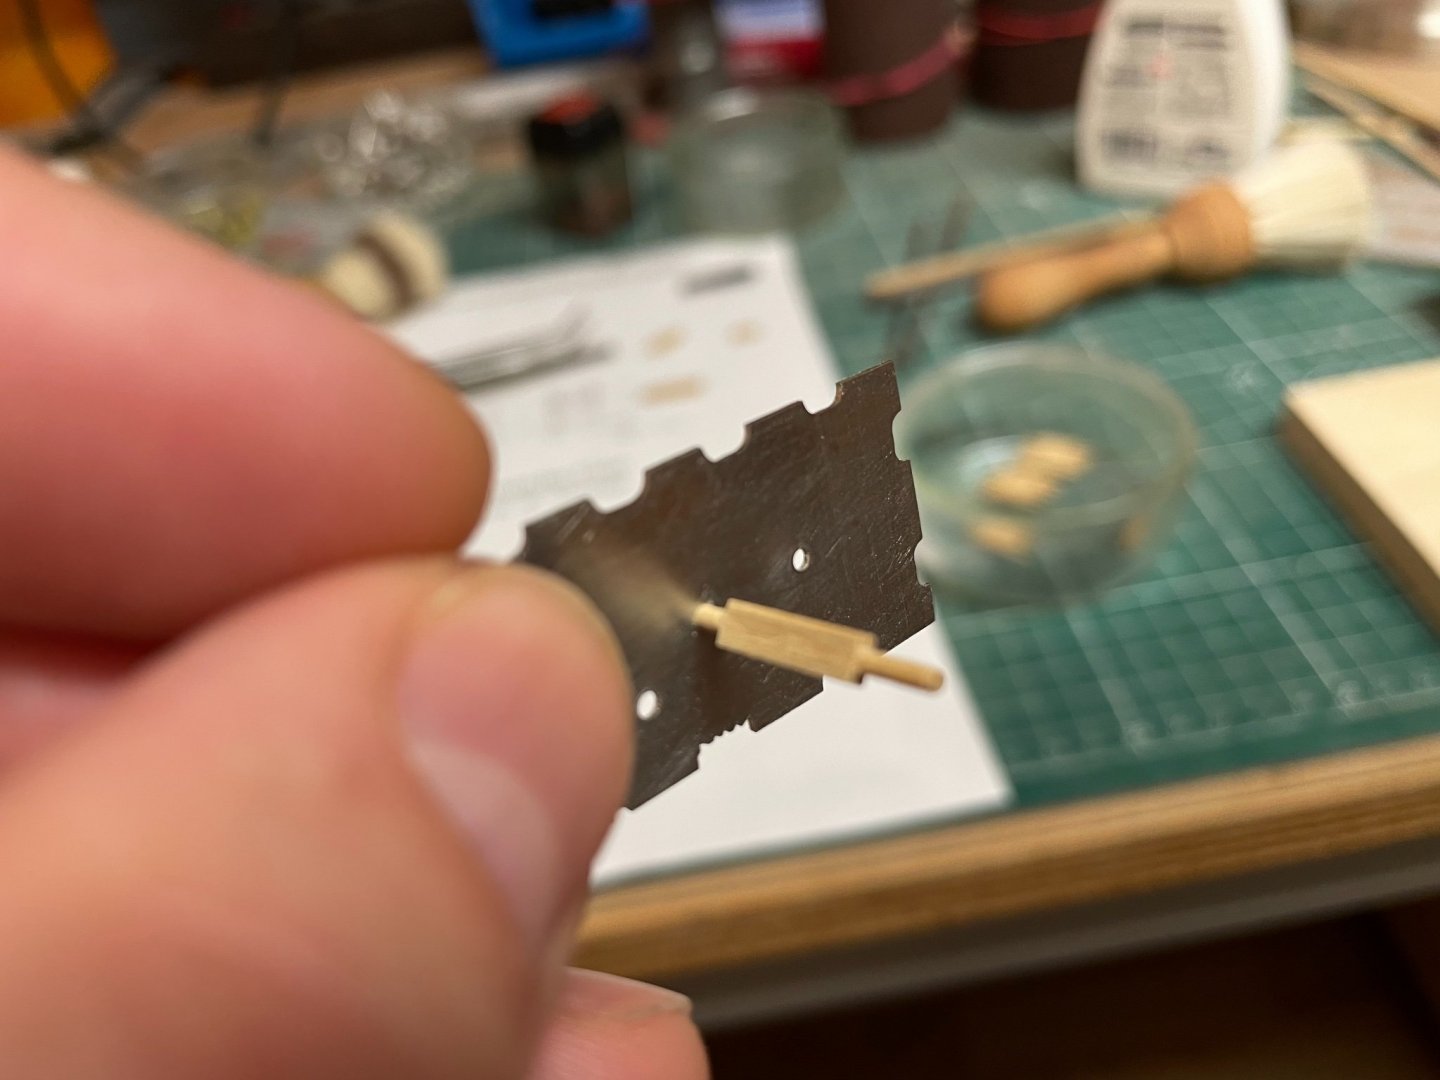
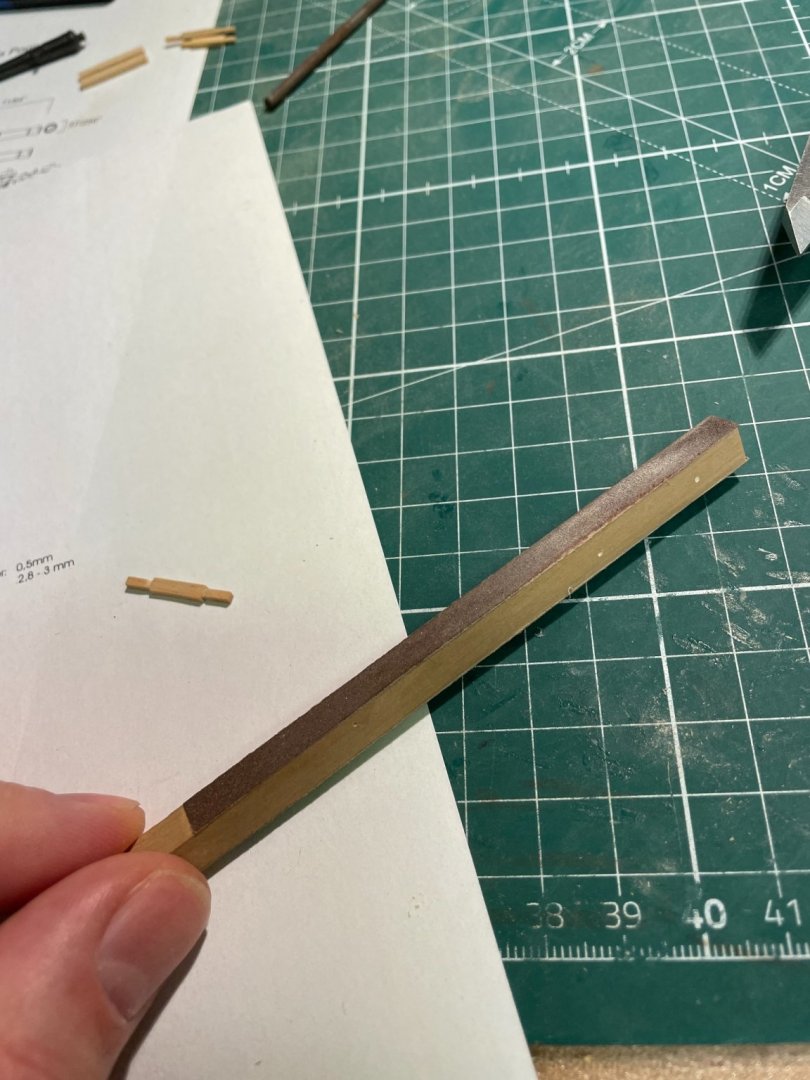
After a longer break I have resumed the build. Next thing is to build front and rear axis of the cannons. I used a rather complicated and time-consuming method but it gave good results in the end. First I determined the diameter of the central axis the wheels will be attached on later, it is about 1,5 mm. So I cut a 1/16 square boxwood stripe segment (rather large for better handling) and glued two .5 mm thick segments on either side that will form the basic shape of the axis - 9 mm for the front axis and 9.8 mm for the rear one. The parts are then cleaned and the length is reduced. With a needle file (triangular shape) a tiny groove is made just along the outside of the center pieces. This is to use the drawplate later without getting stuck. Then the axis are rounded up, just a little sanding for the basic shape. I made myself a sanding stick with sandpaper (120 and 240 on the opposing side) attached by double-adhesive tape close to the sides. At last a selfmade drawplate from scrap is used to give the axis the round shape. Just sand a little and then use each step on the drawplate to finalize the shape. The groove will enable to use the drawplate close to the center pieces without getting stuck. Some final cleaning and you‘re done. Complicated but give nice results. Now only the side covers are missing. After that I can finally build up all guns. Stay tuned and save. Andreas


- 64 replies
-
- 10
-
-
- badger
- caldercraft
- (and 1 more)
-
Absolutely amazing and nicely executed. The gun platform looks very realistic.
- 321 replies
-
- 5
-
-
- Finished
- Flower-class
- (and 1 more)
-
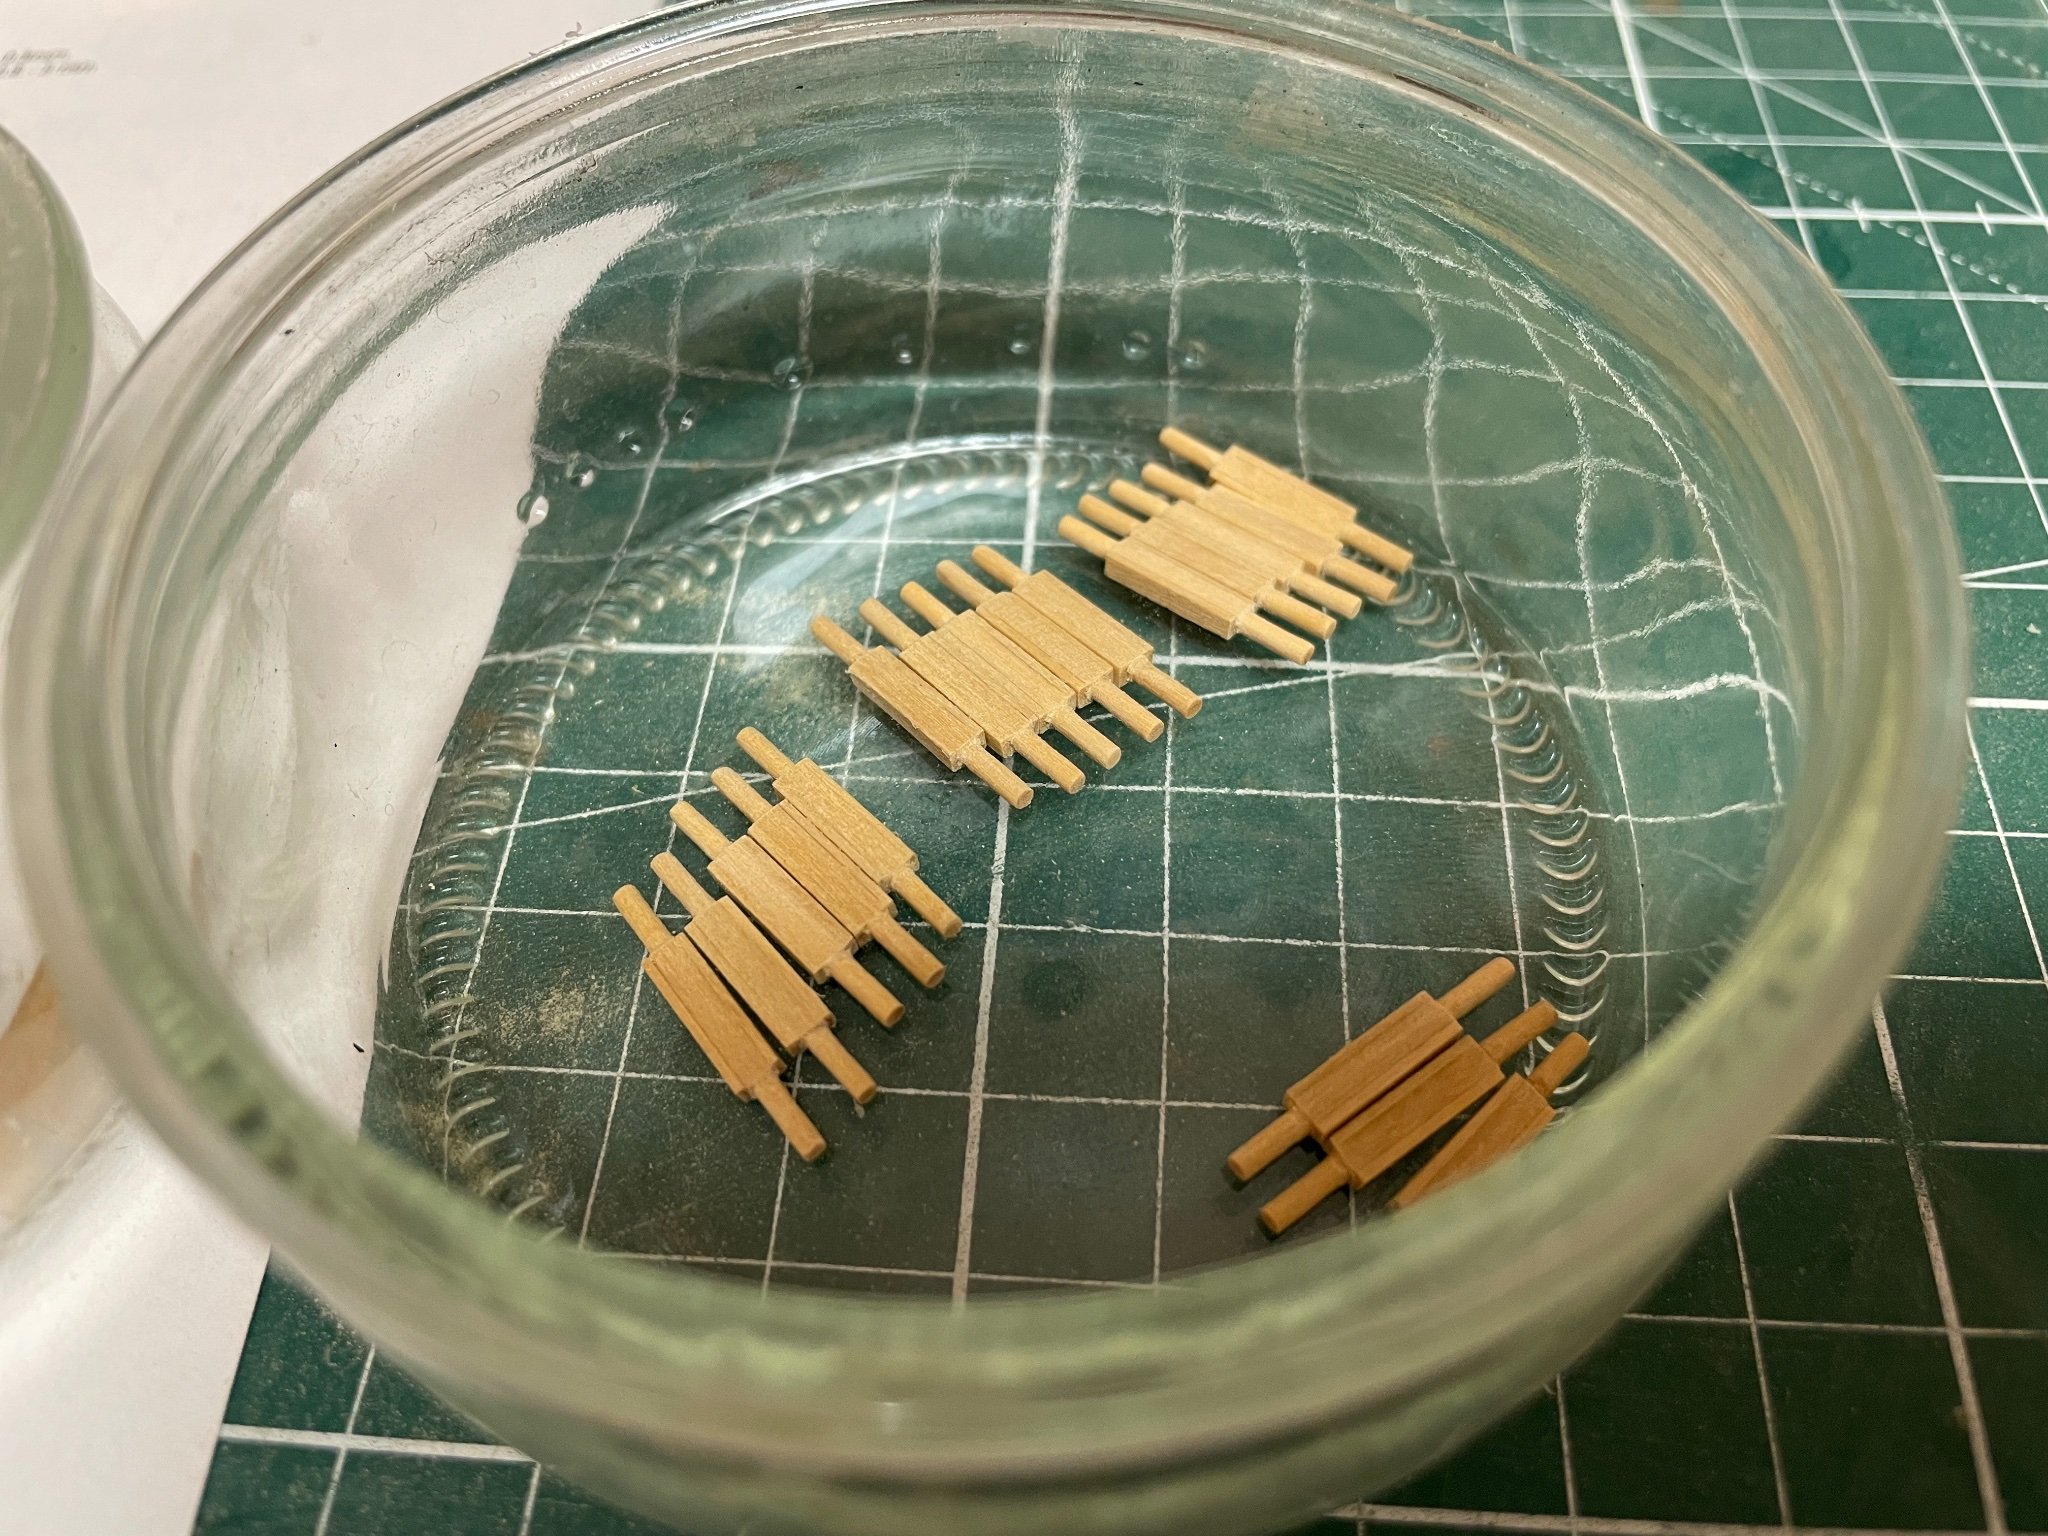
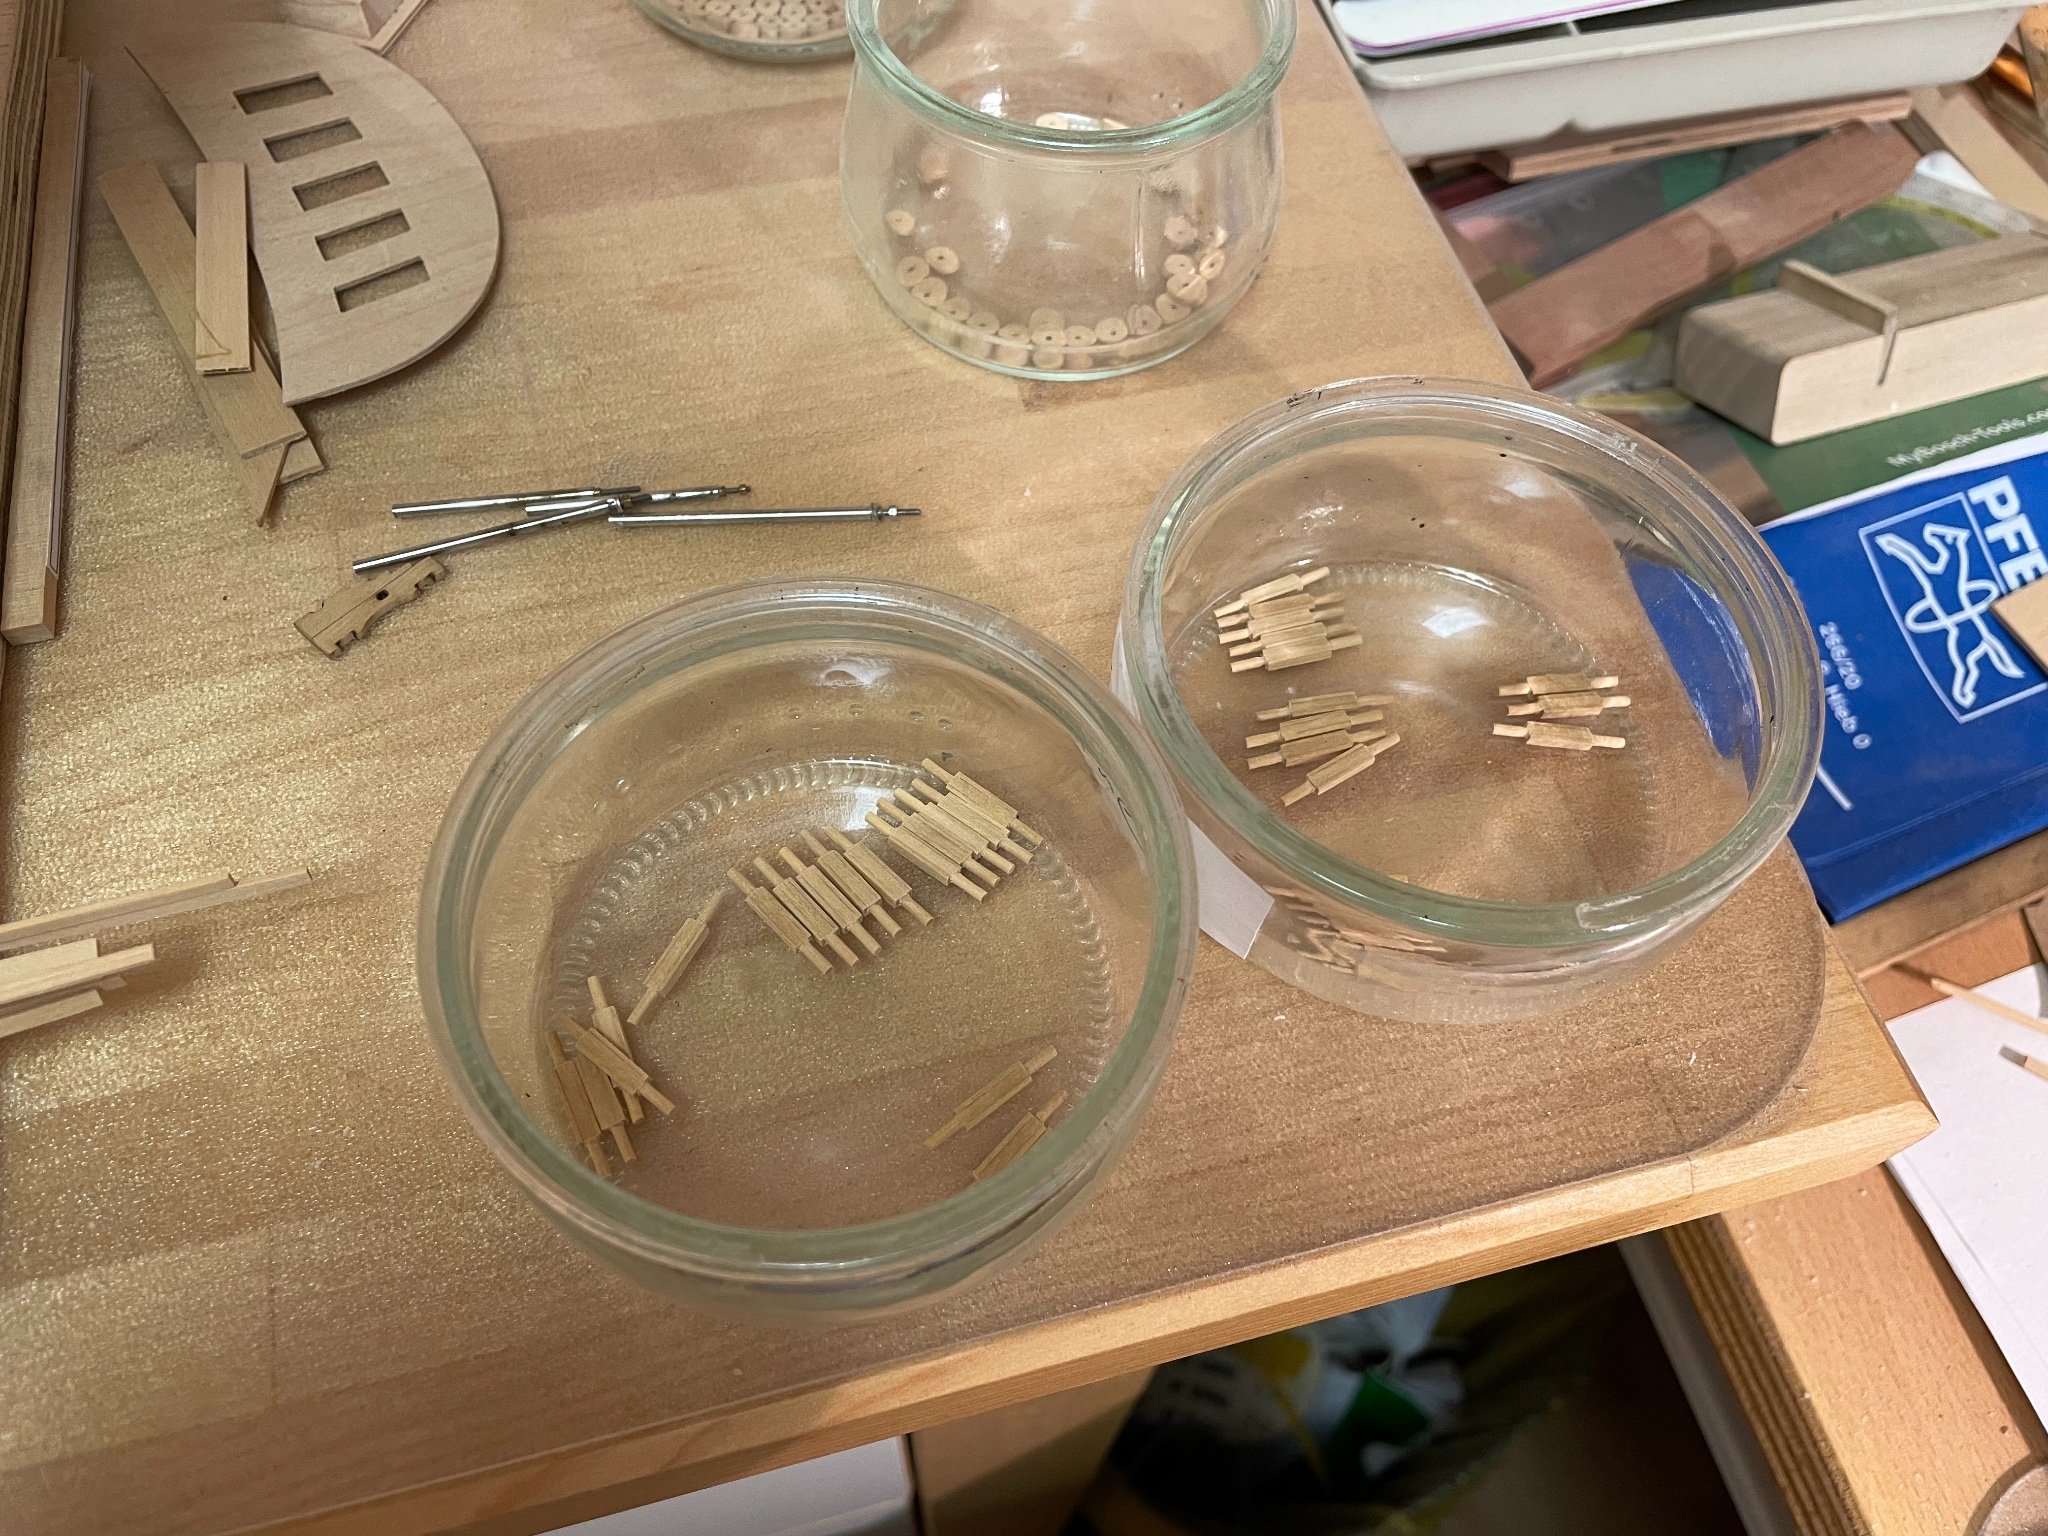
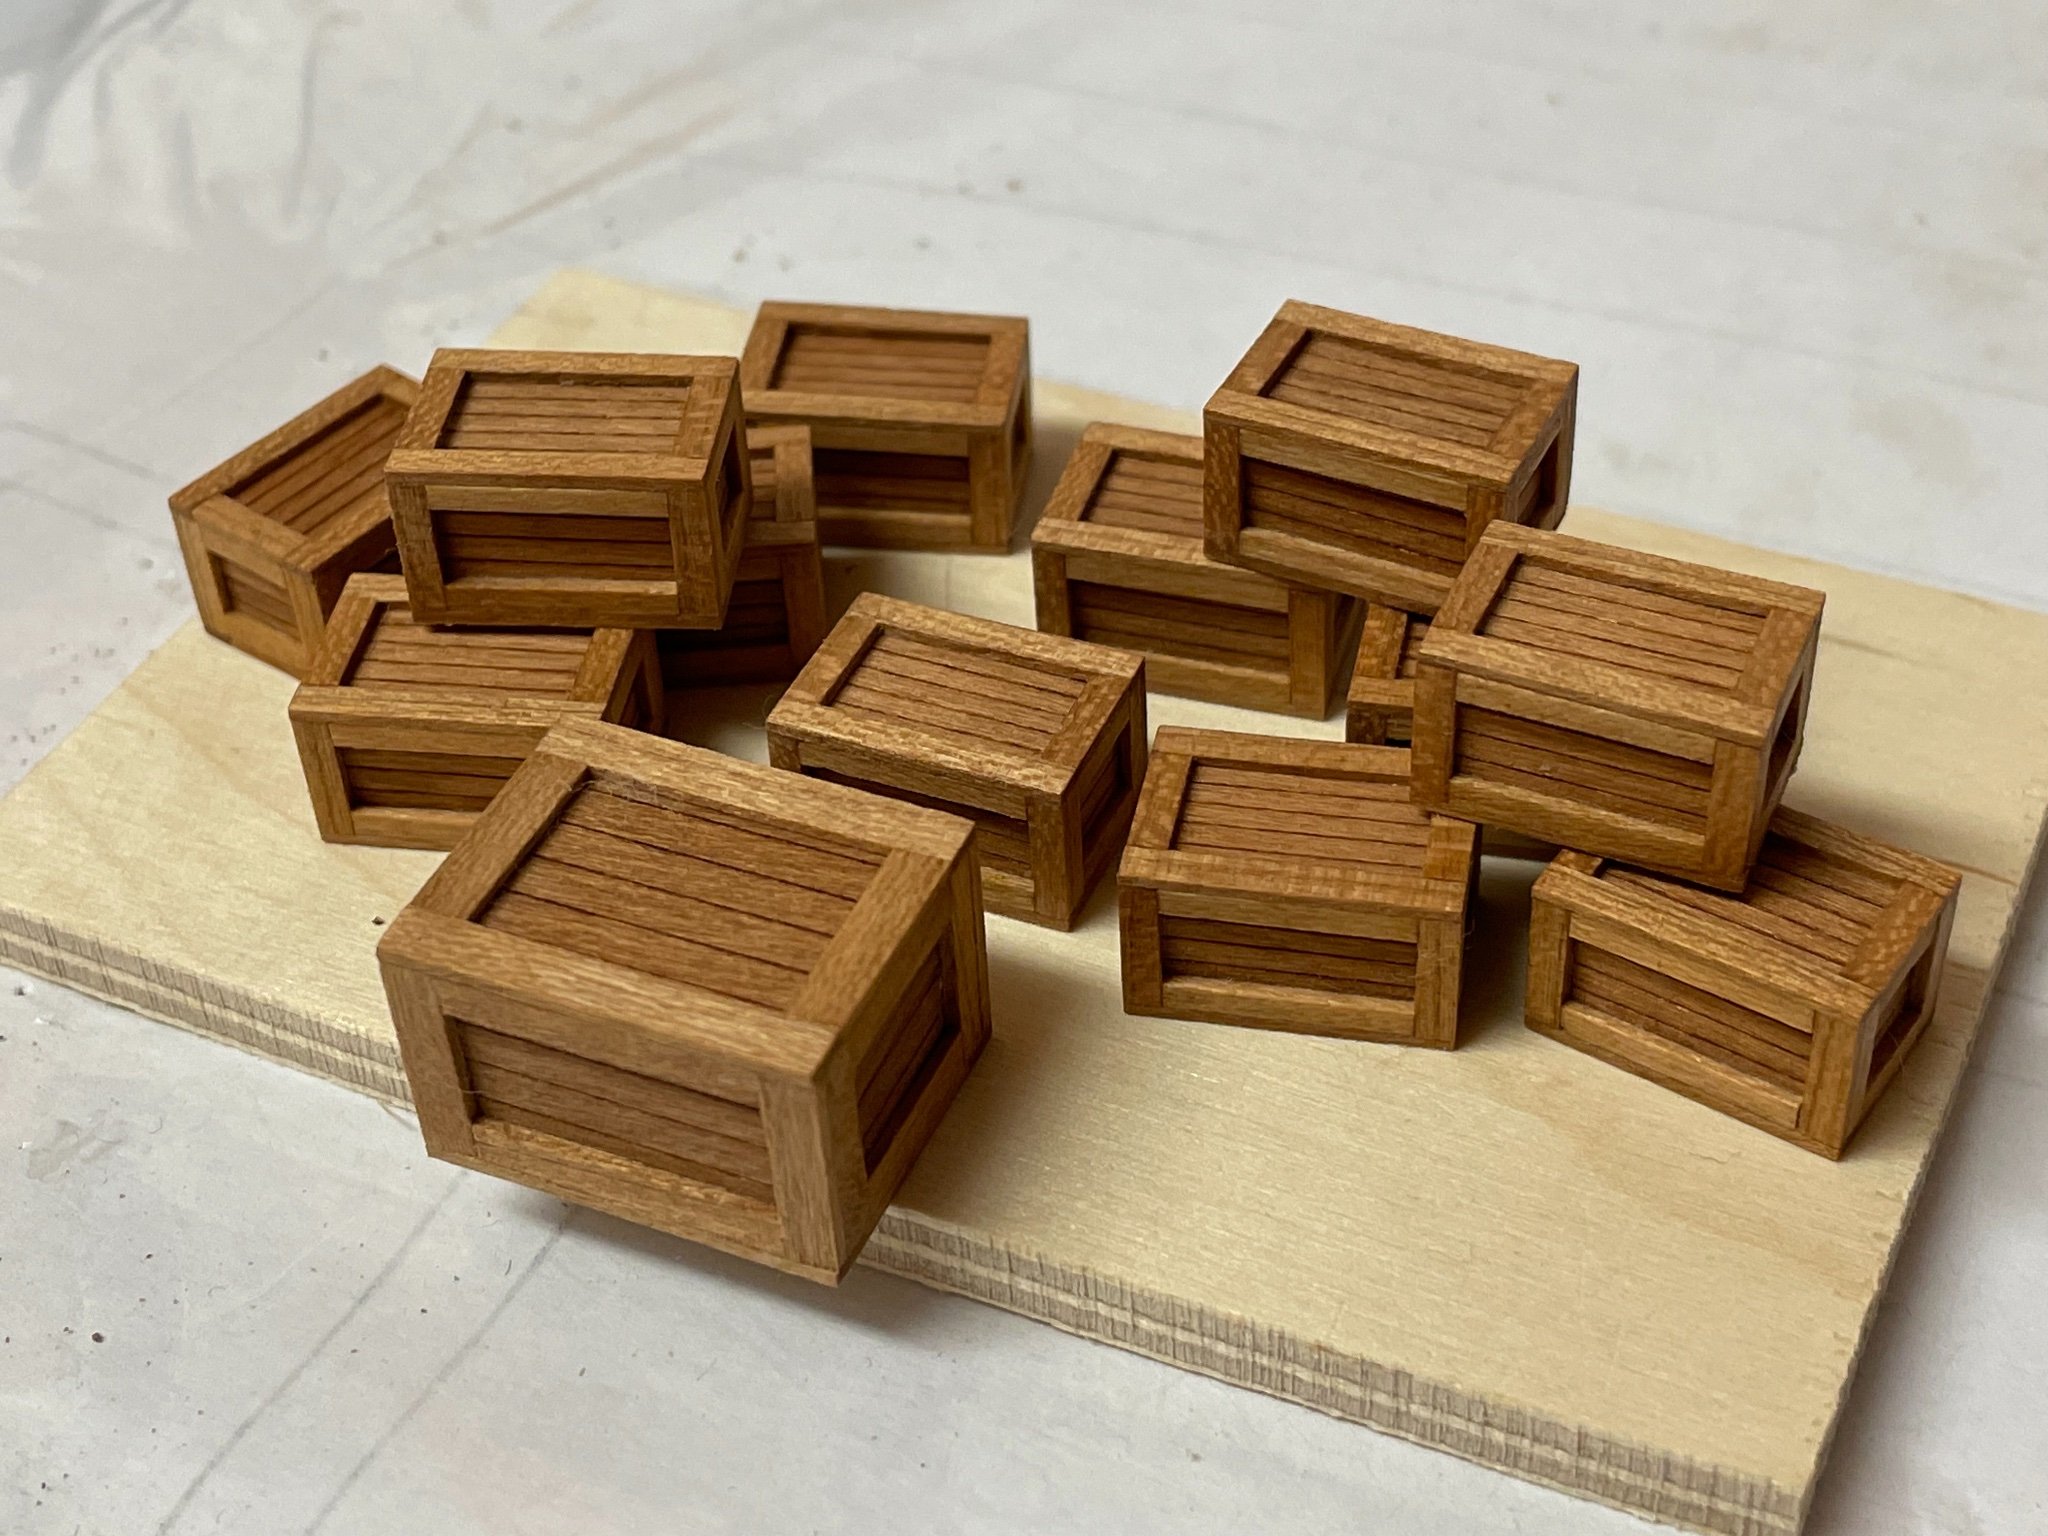
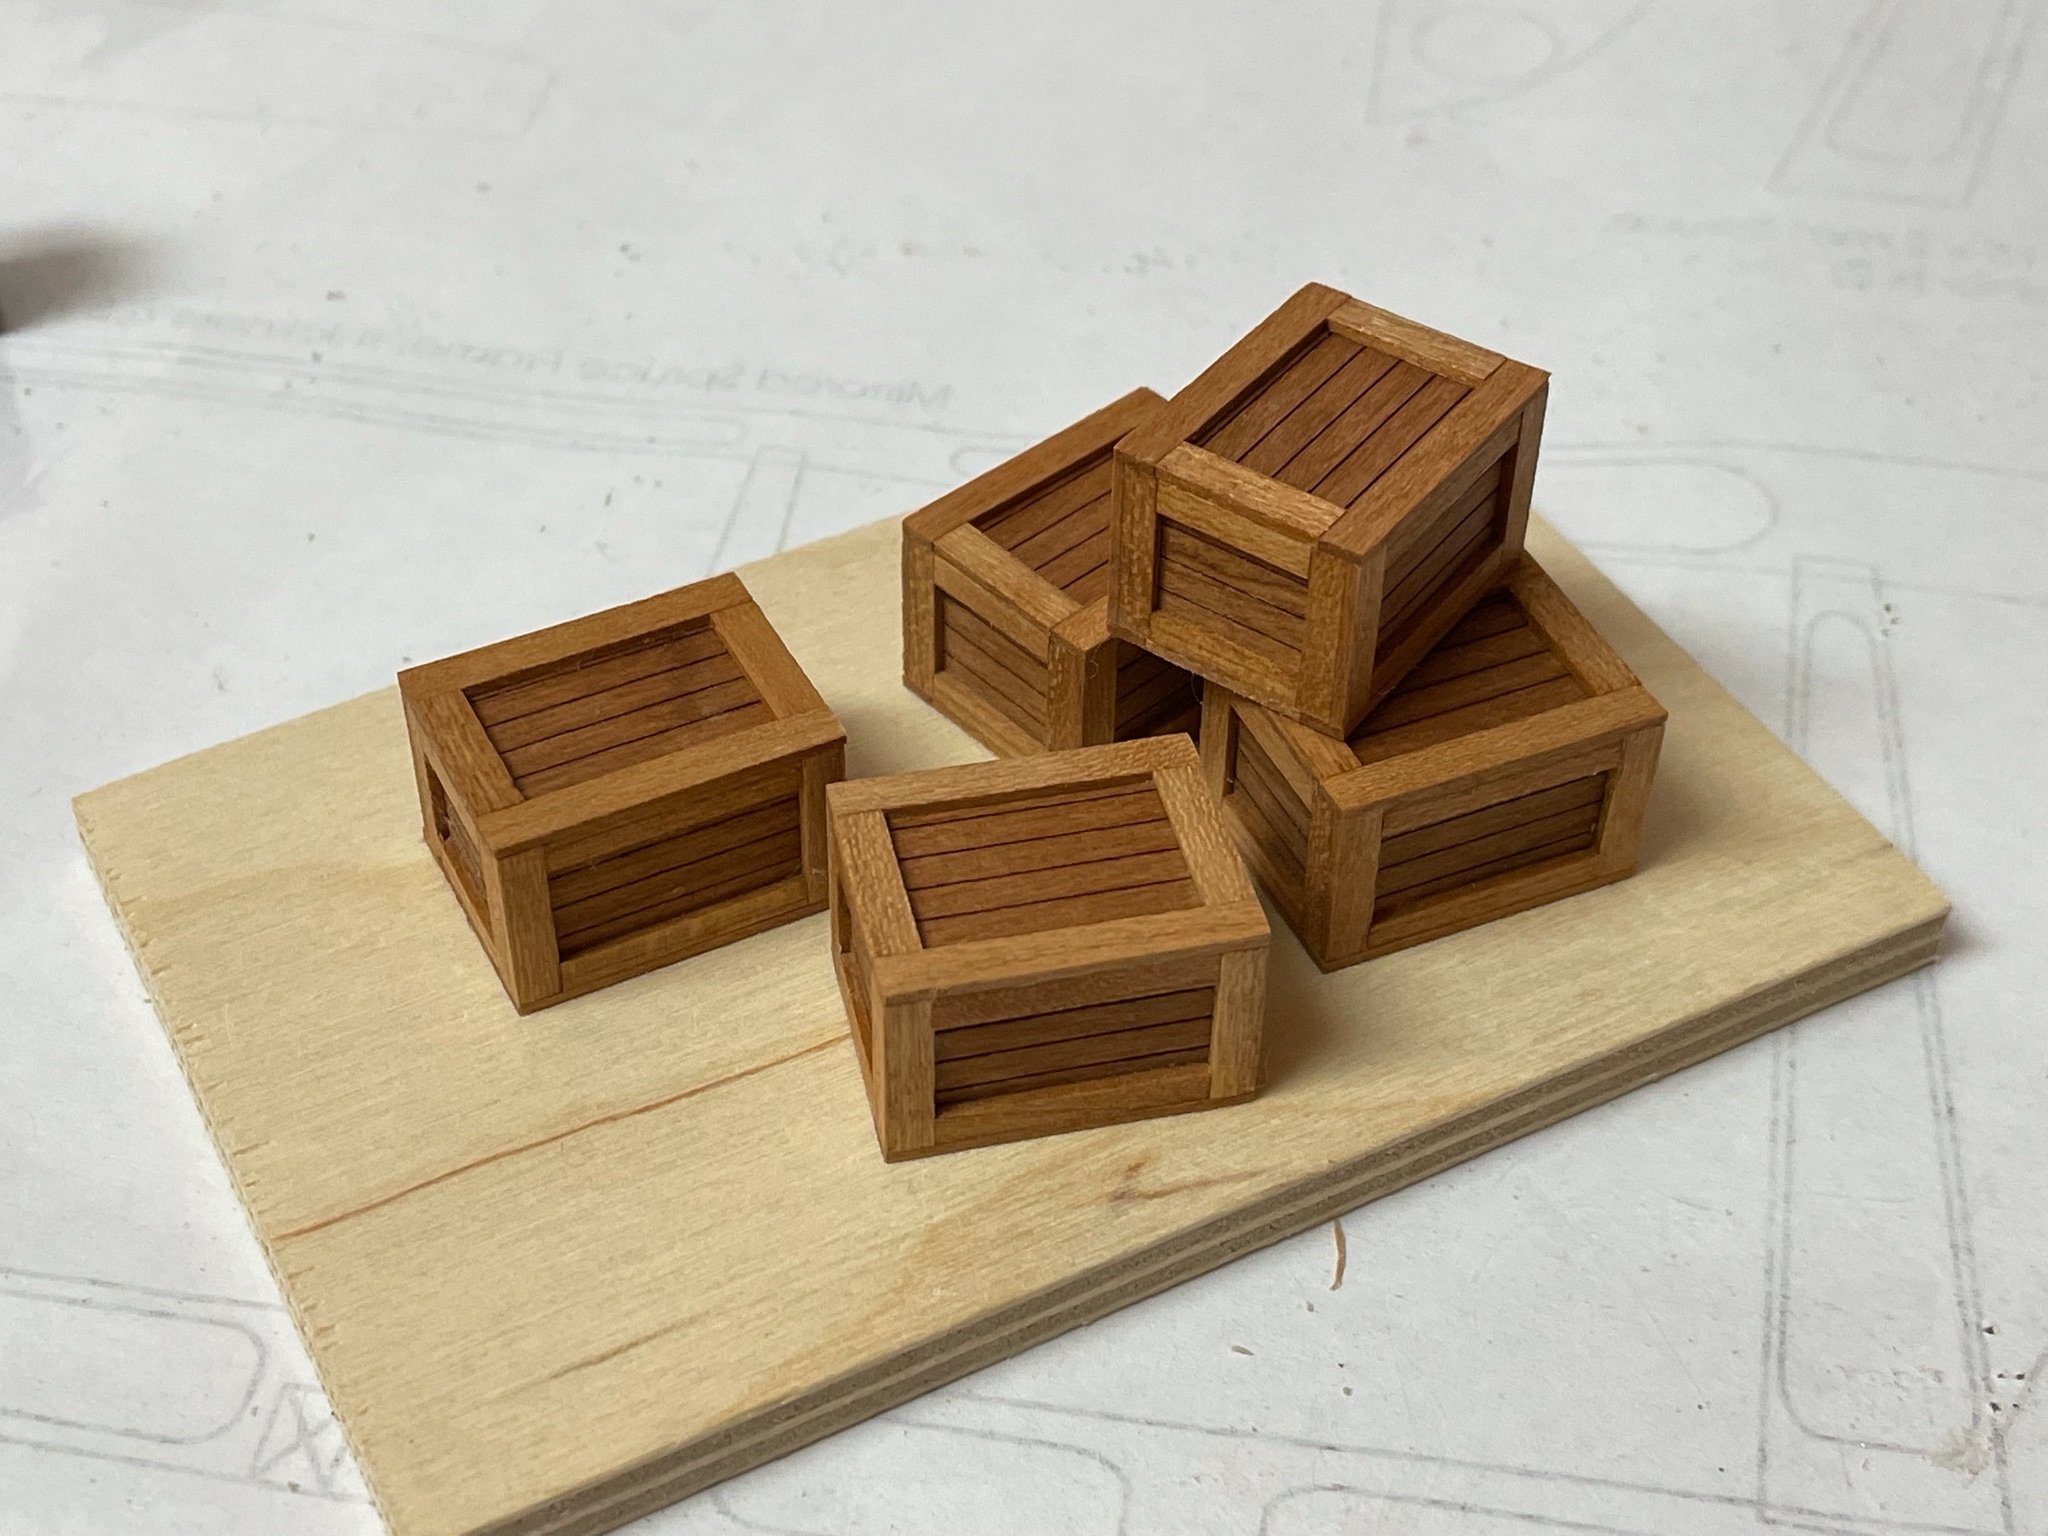
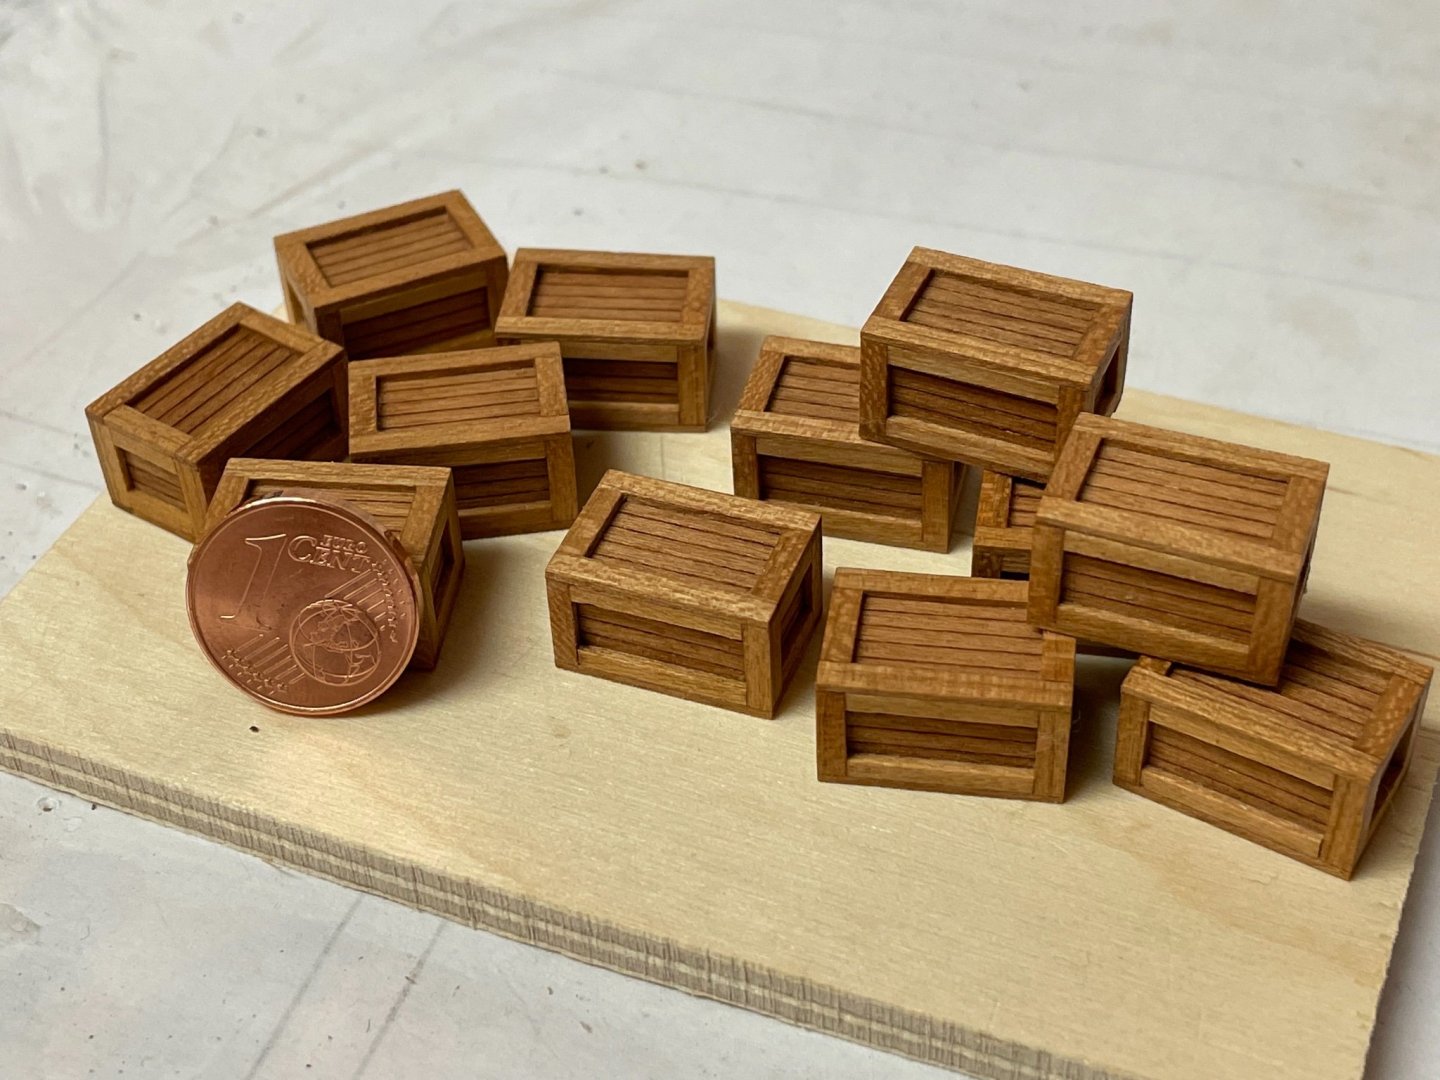
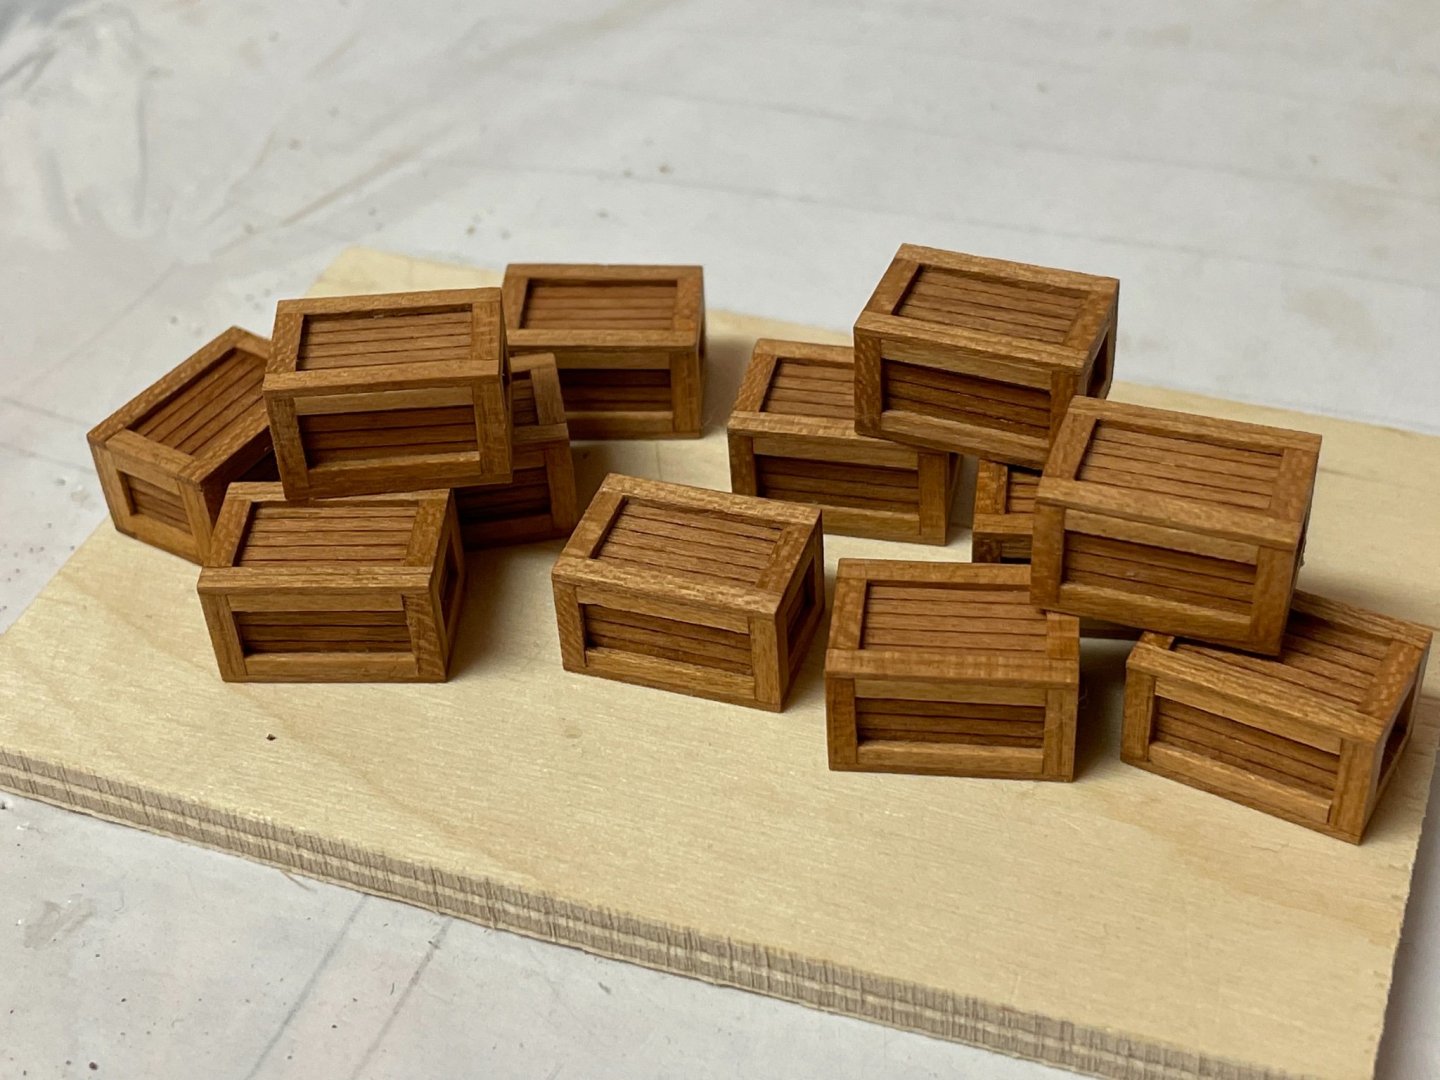
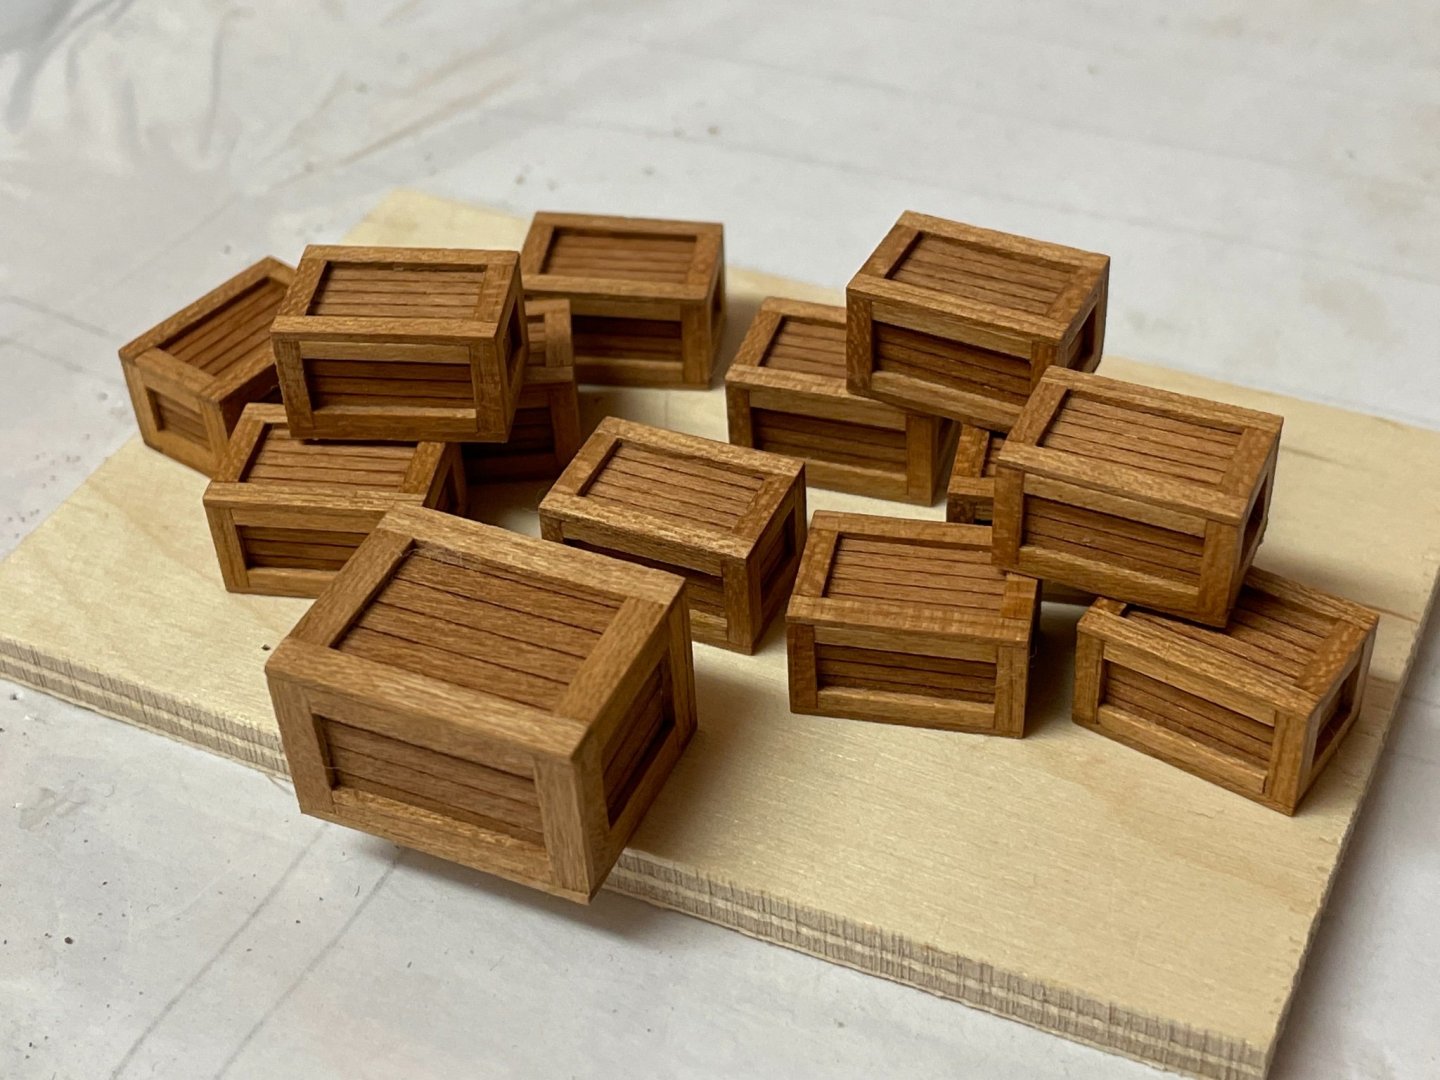
And the twelve smaller ones as well. They are covered with 1,5 x 0.8 mm and 2,0 x 0.8 mm cherry stripes as substitute for the supplied laser-cut parts. The applied WOP still has to dry. For a size comparison there is also a picture with a larger box and another with a 1-cent coin. After finishing these side projects I can now continue to work on the hull. Stay tuned and save. Andreas
-
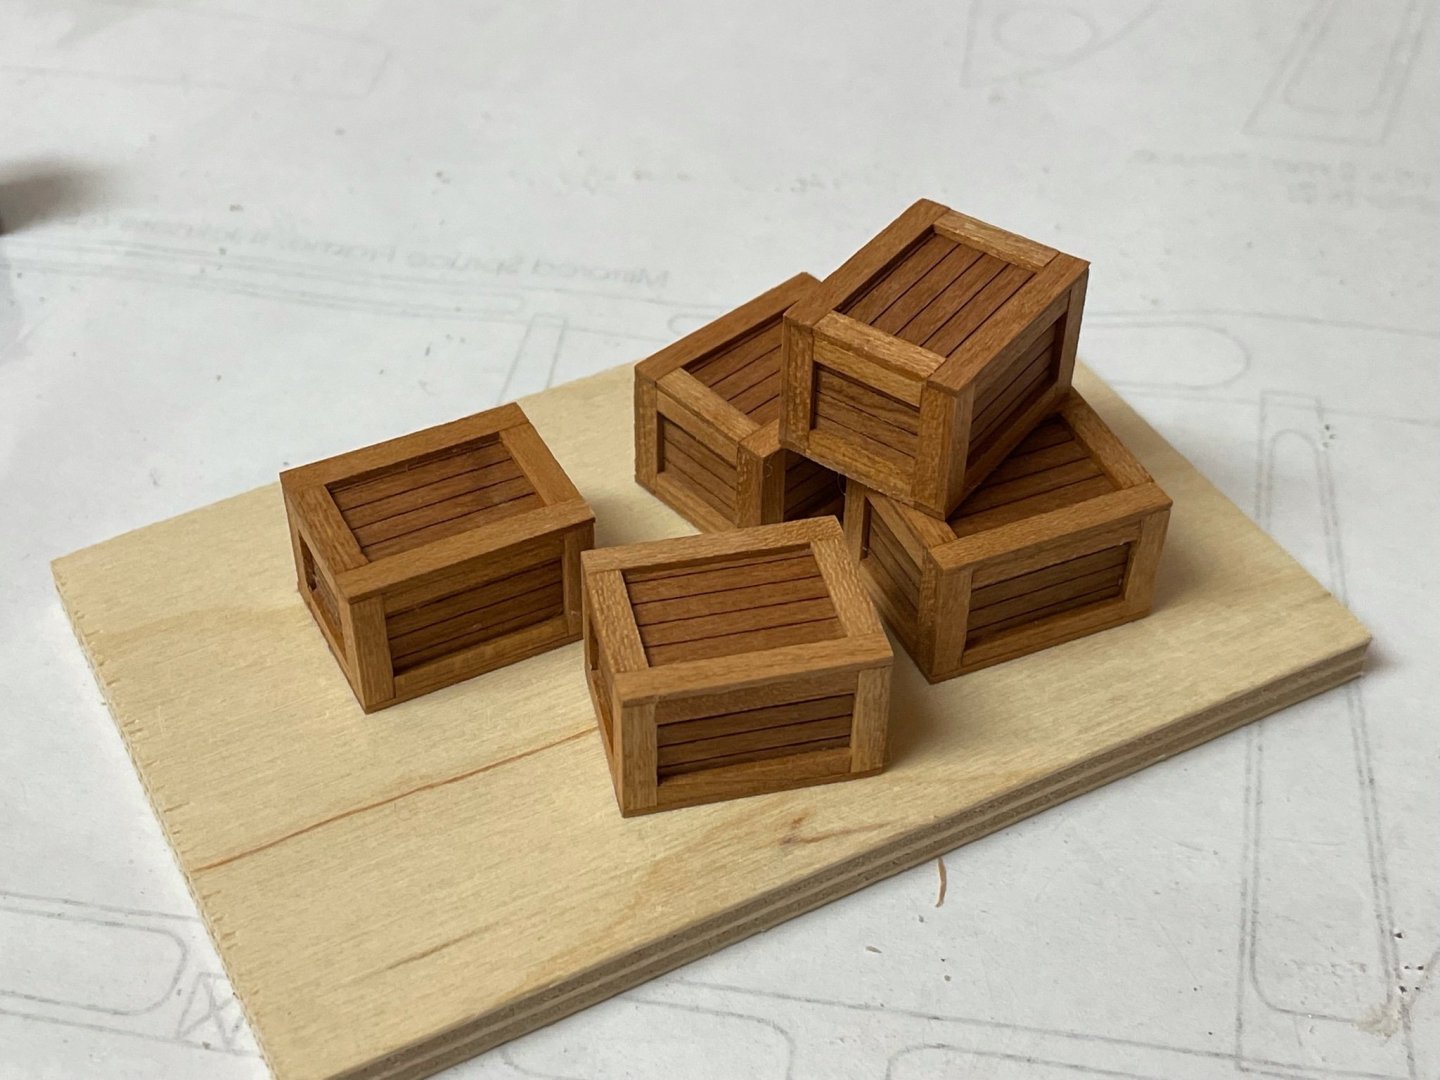
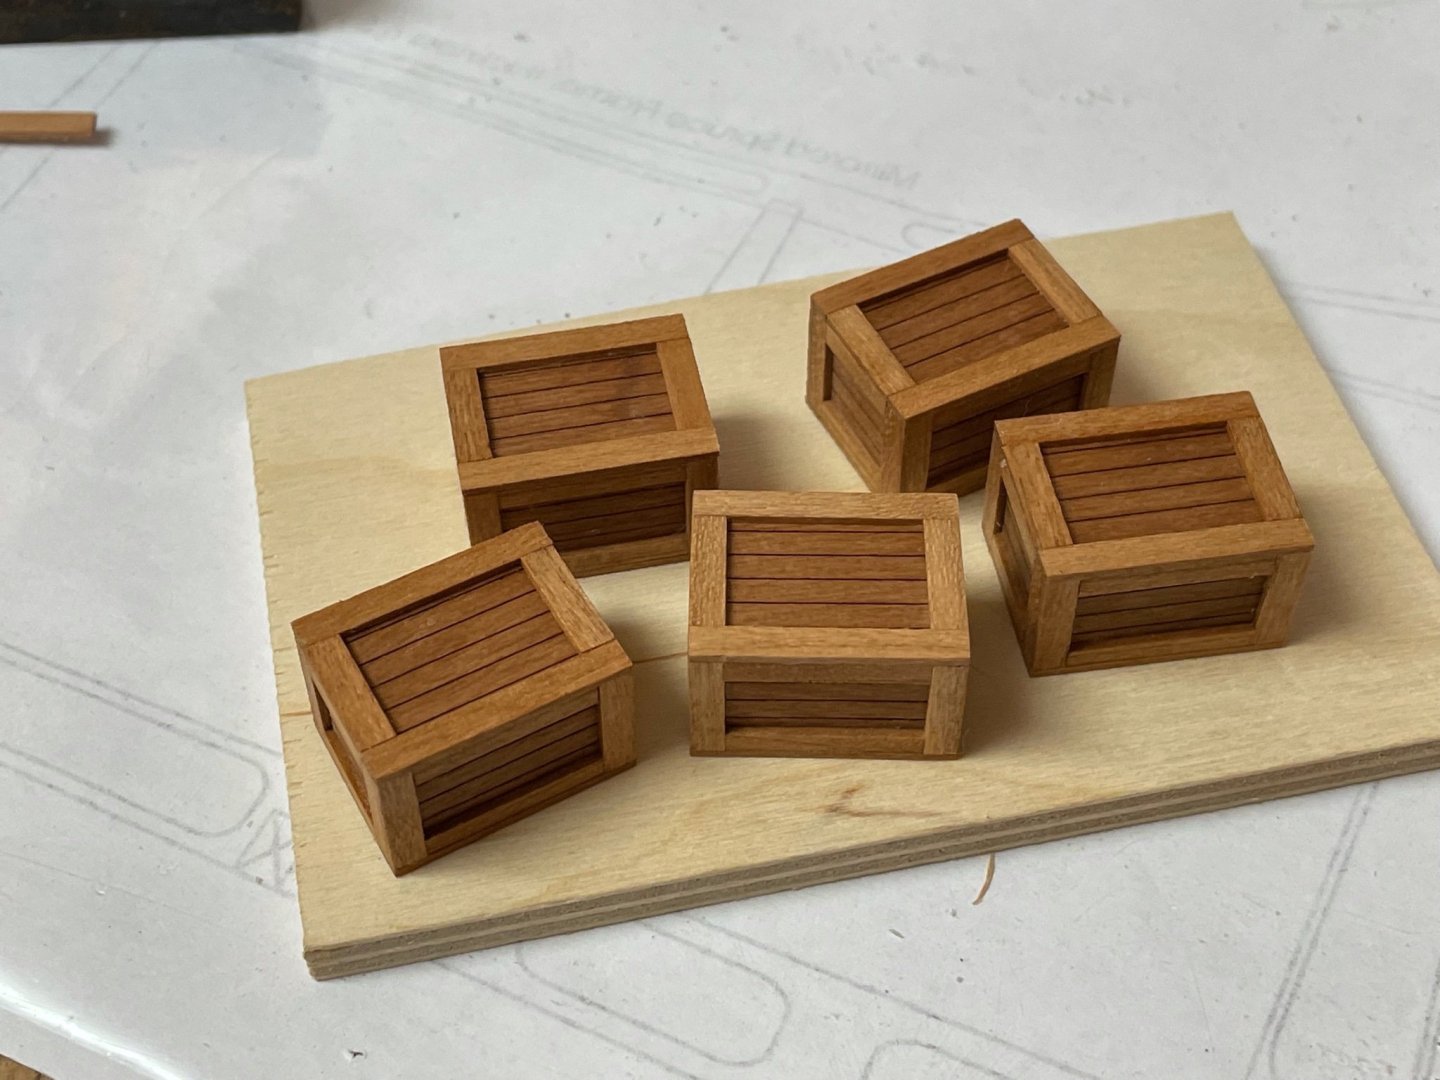
I have done all the bigger boxes, the smaller ones comes next. The WOP gives the wood a deep red / brownish colour. Stay save. Andreas
-
My replacement cherry wood has finally arrived, now I can start planking the inside. But before I do that I will replace the supplied lasercut box covers with stripewood as they don’t fit the boxes. For the bigger boxes I use 3mm x 0.8 mm and 2mm x 0.8mm cherry stripes. Finishing just one of them needs 24 pieces and I have 4 bigger ones and 12 smaller ones left to do … ahhwww, why do all these side projects have to be so time-consuming? Well, here is a picture of the finished one with WOP just applied. Stay save, Andreas

-
The Interieur build-out it a nice idea and turned out beautiful.