captain_hook
-
Posts
685 -
Joined
-
Last visited
Content Type
Profiles
Forums
Gallery
Events
Everything posted by captain_hook
-
 Very nice work! Lots of patience and skill necessary to build the frames but when completed successfully it definitely shows. And the yellow cedar has such an nice warm yellow color.
 -
Incredible work! Fits the model perfectly.
-
Very nice and clean work. If the gap keep worrying you and it isn‘t too deep you may try to fill it with paint. Apply several layers (let them dry between each layer) and then sand after each layer with 600er grit or smoother until the gap has disappered. This method is suitable for smooth painting jobs as well. For deeper gaps a wood filler might be the better choice.
-
That will surely be an awesome project and the scale is just perfect to show some great detail - and you don‘t have to deal with too many tiny parts as well.
-
Looking forward to see your progress. She looks beautiful. Are you going to build some Interieur for the cabin? My Badger is placed aside as I‘m busy with the Coureur but I hope to build up her cabin as well when I resume the build next year. But I fear that there won‘t be enough light coming trough the tiny windows to see anything of the Interieur later.
-
Hello Werner, that is some impressive custom-modeling you did for your model. Especially like the cabin-Interieur.
-
Very nice and interesting. When I had first heard of card modeling I thought of something kids build in kindergarten like a car or a small cubic house. But I was surprised about the complex paper and card models that are available today - churches, planes, ships, trains etc. Some of the even don‘t look like paper models when they are finished. BTW are card models endangered to warp by high air humidity?
-
Very beautiful and well done. It is such a lot of work to rig a big ship like the Victory but it will be surely as satisfying to see her finished.
- 527 replies
-
- 1
-

-
- caldercraft
- victory
- (and 1 more)
-
Well, that sounds like a real challenge then. I promise to not complain about limited instructions again. 🙂
-
Thank you Matthias, really appreciated!
-
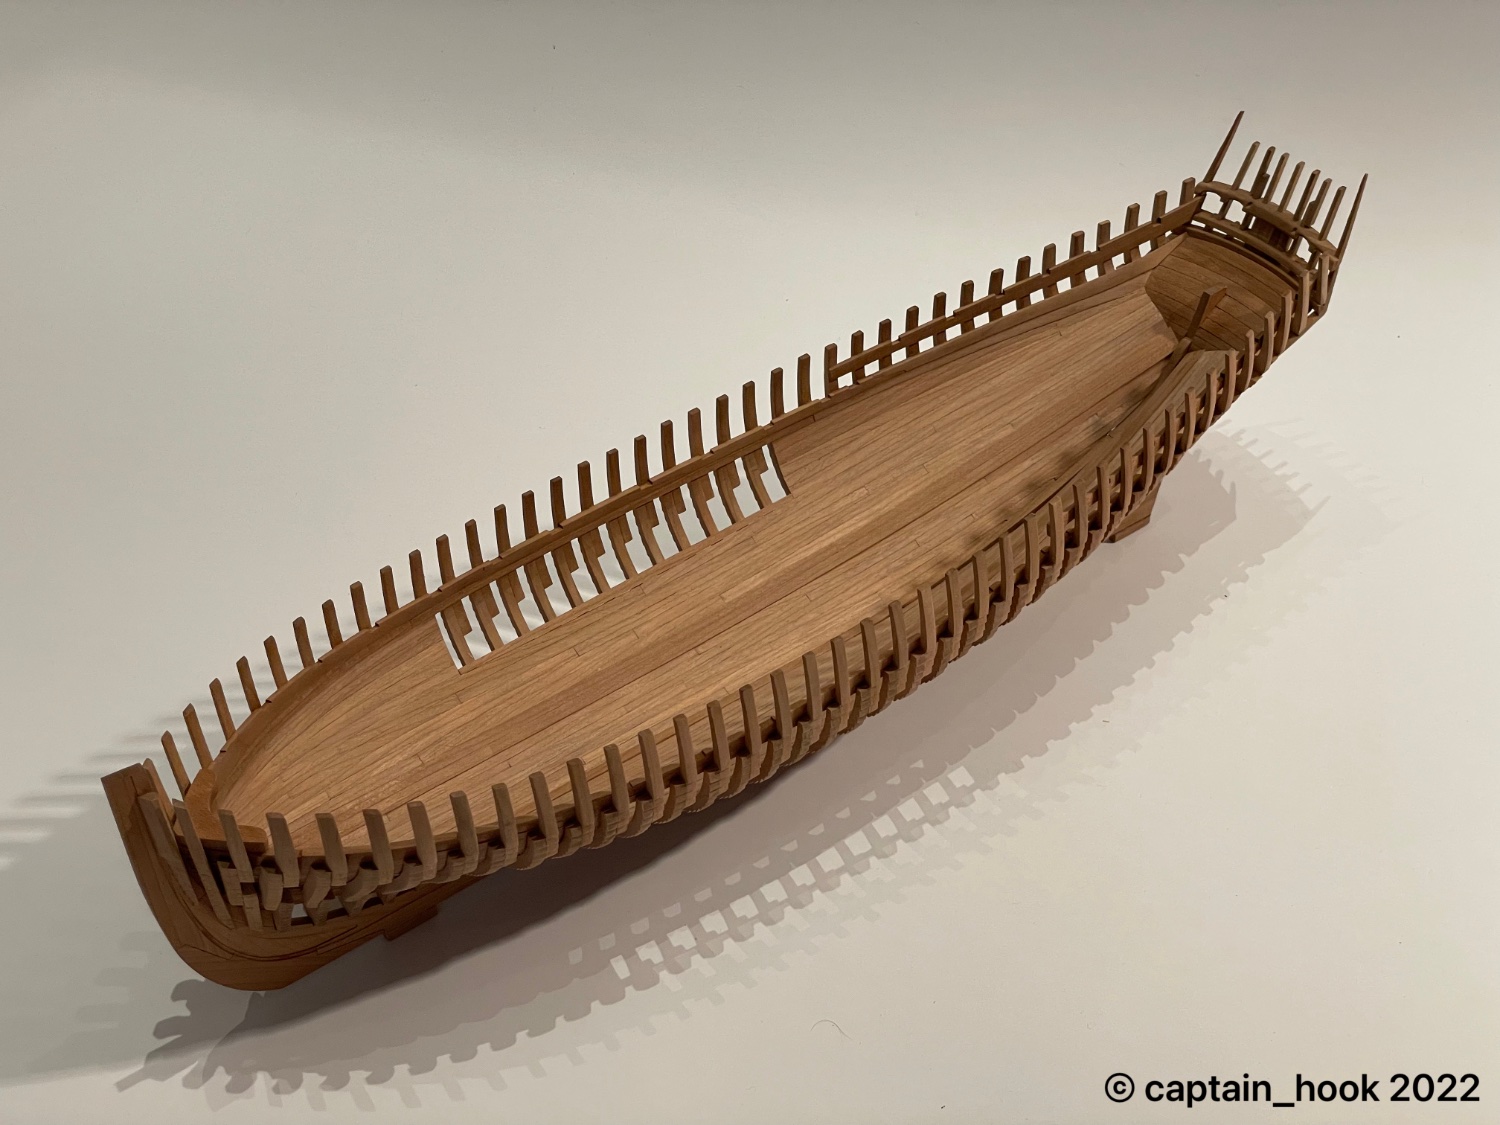
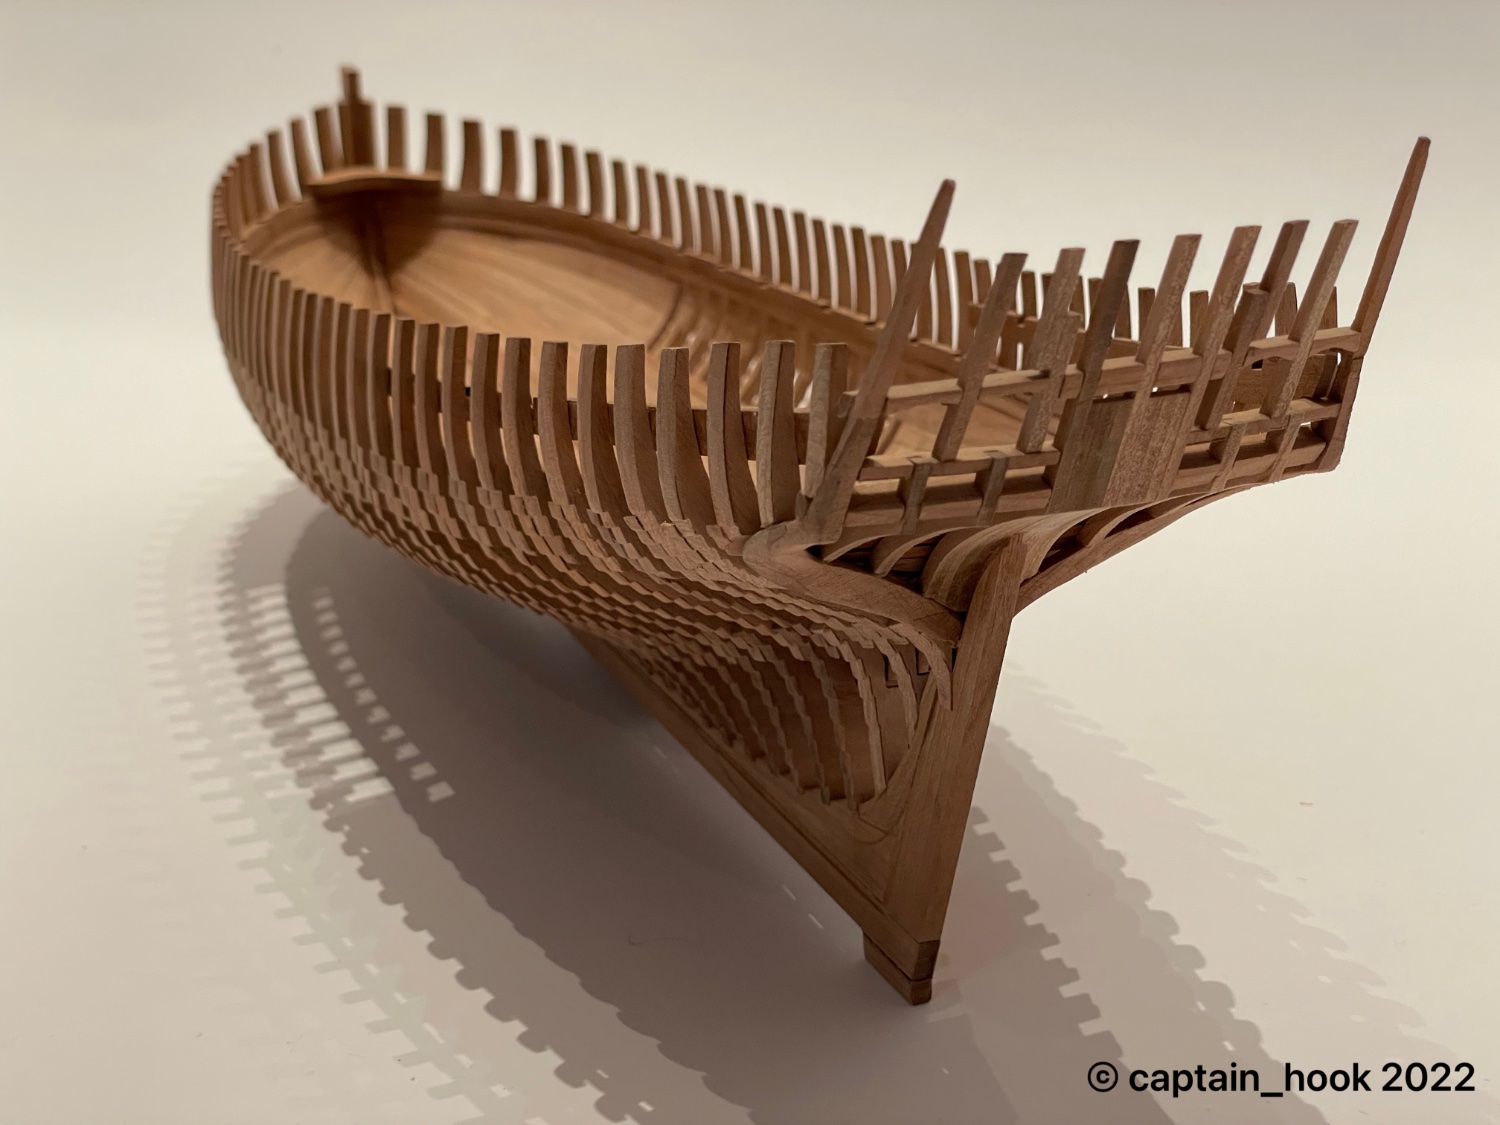
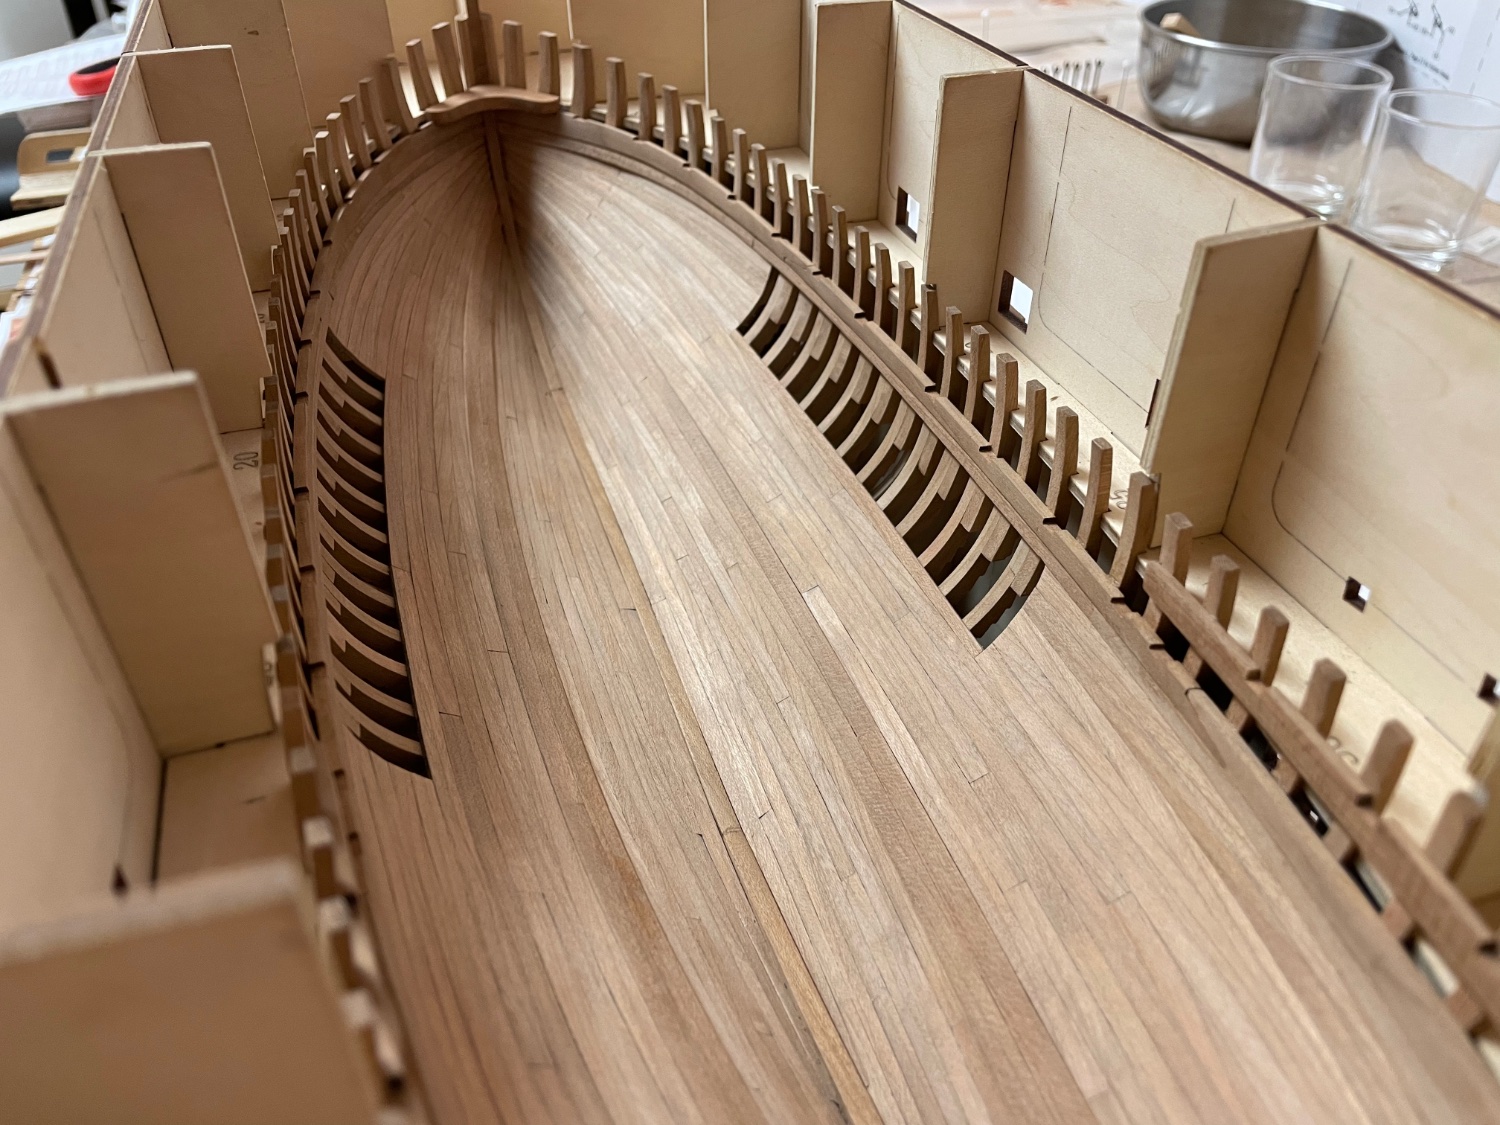
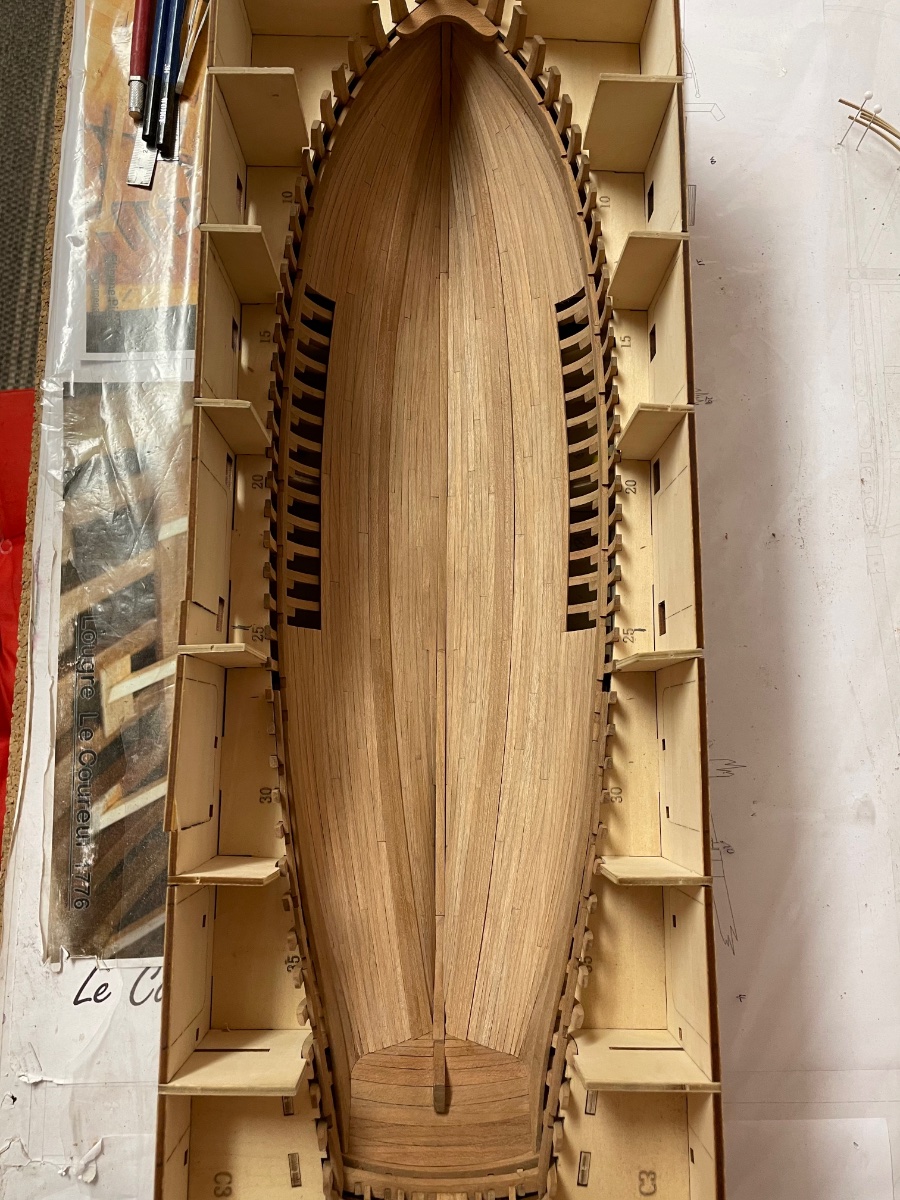
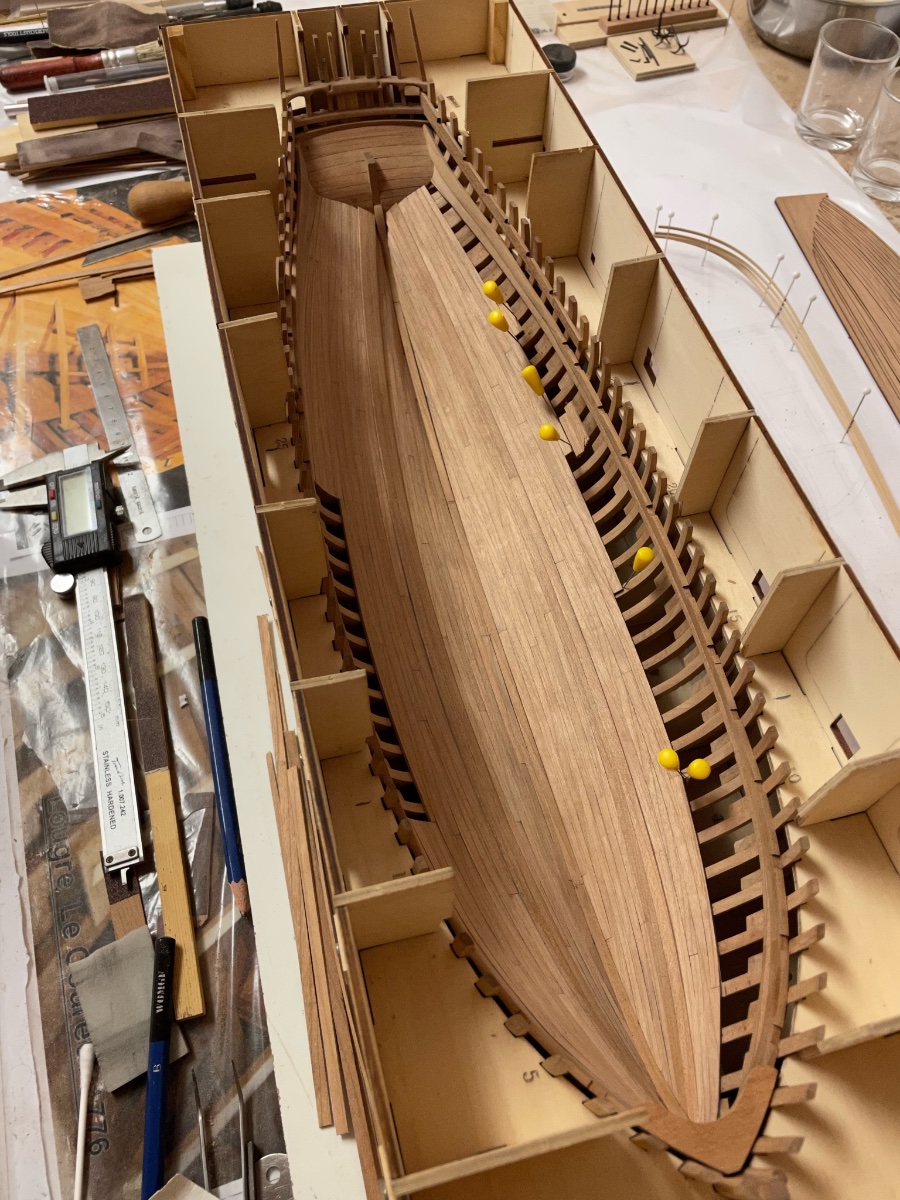
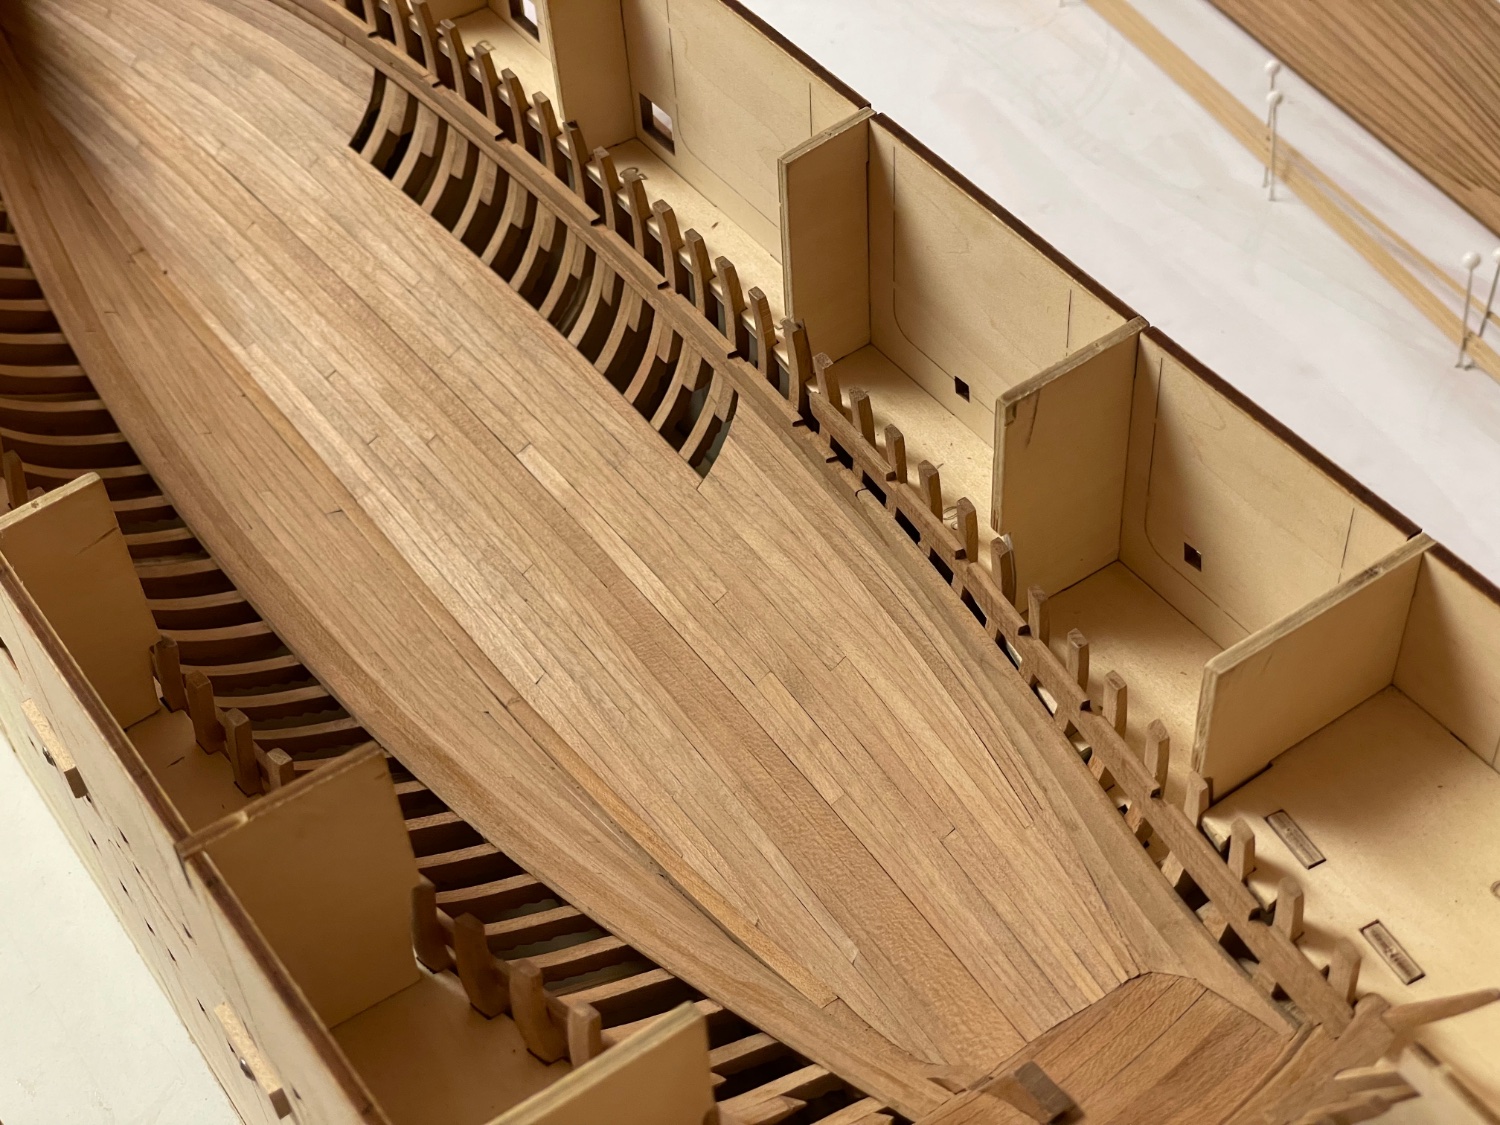
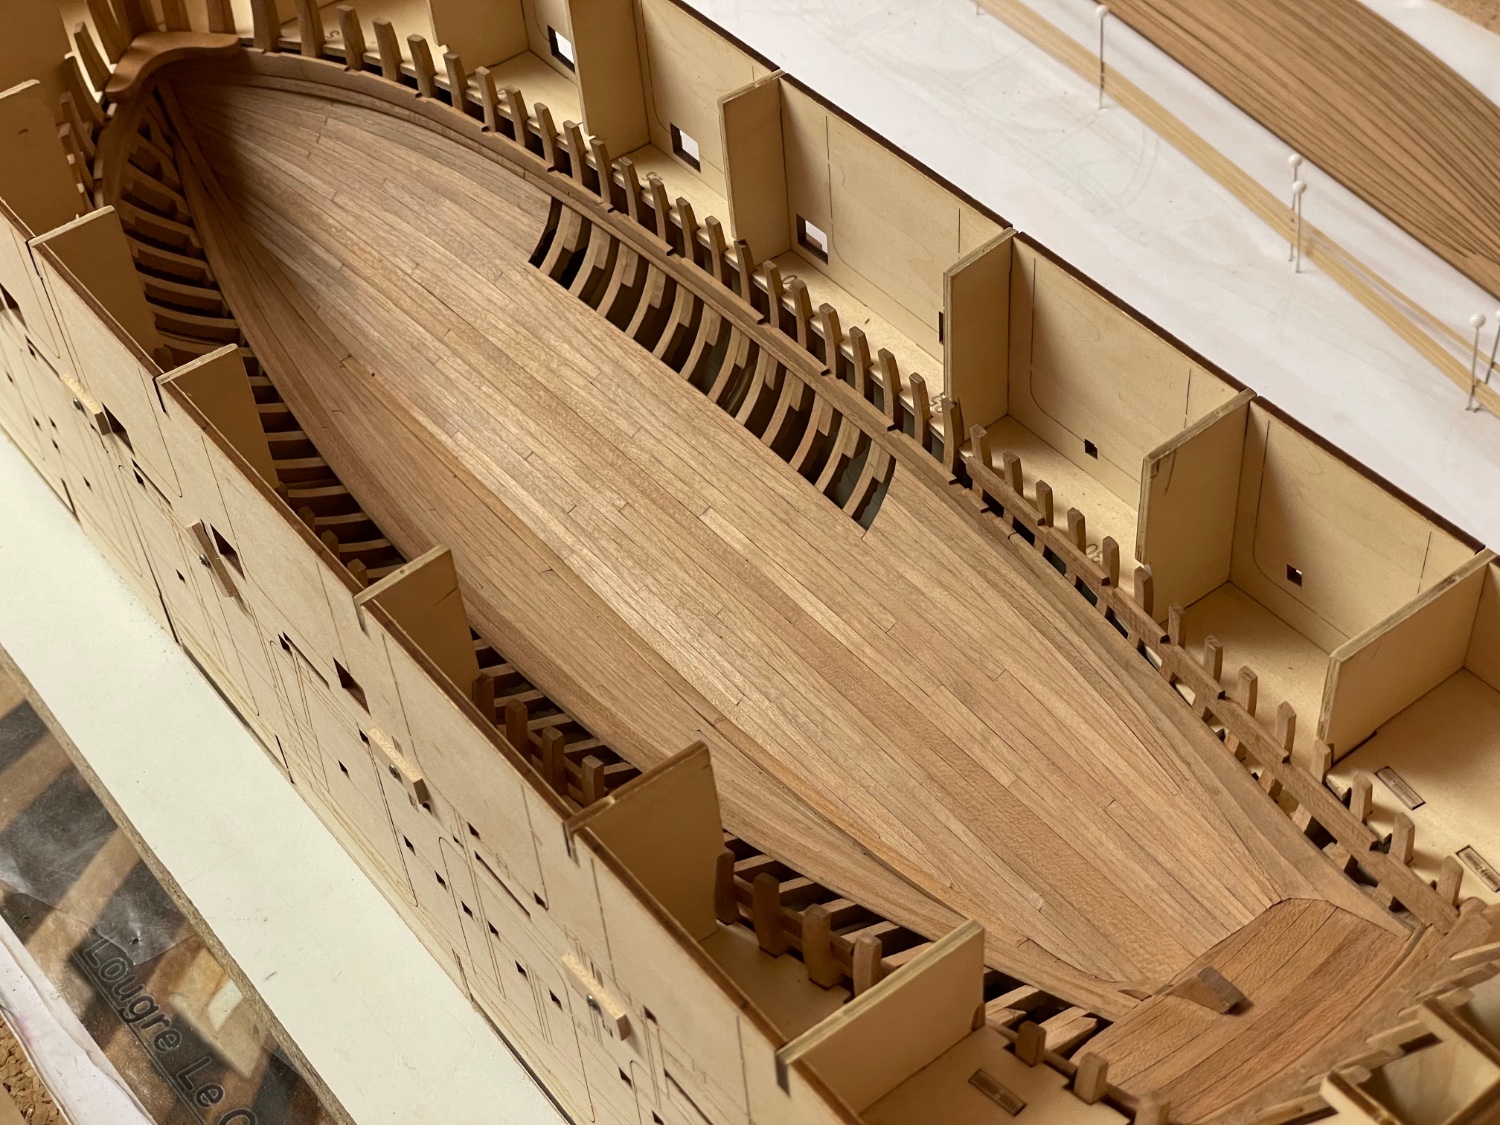
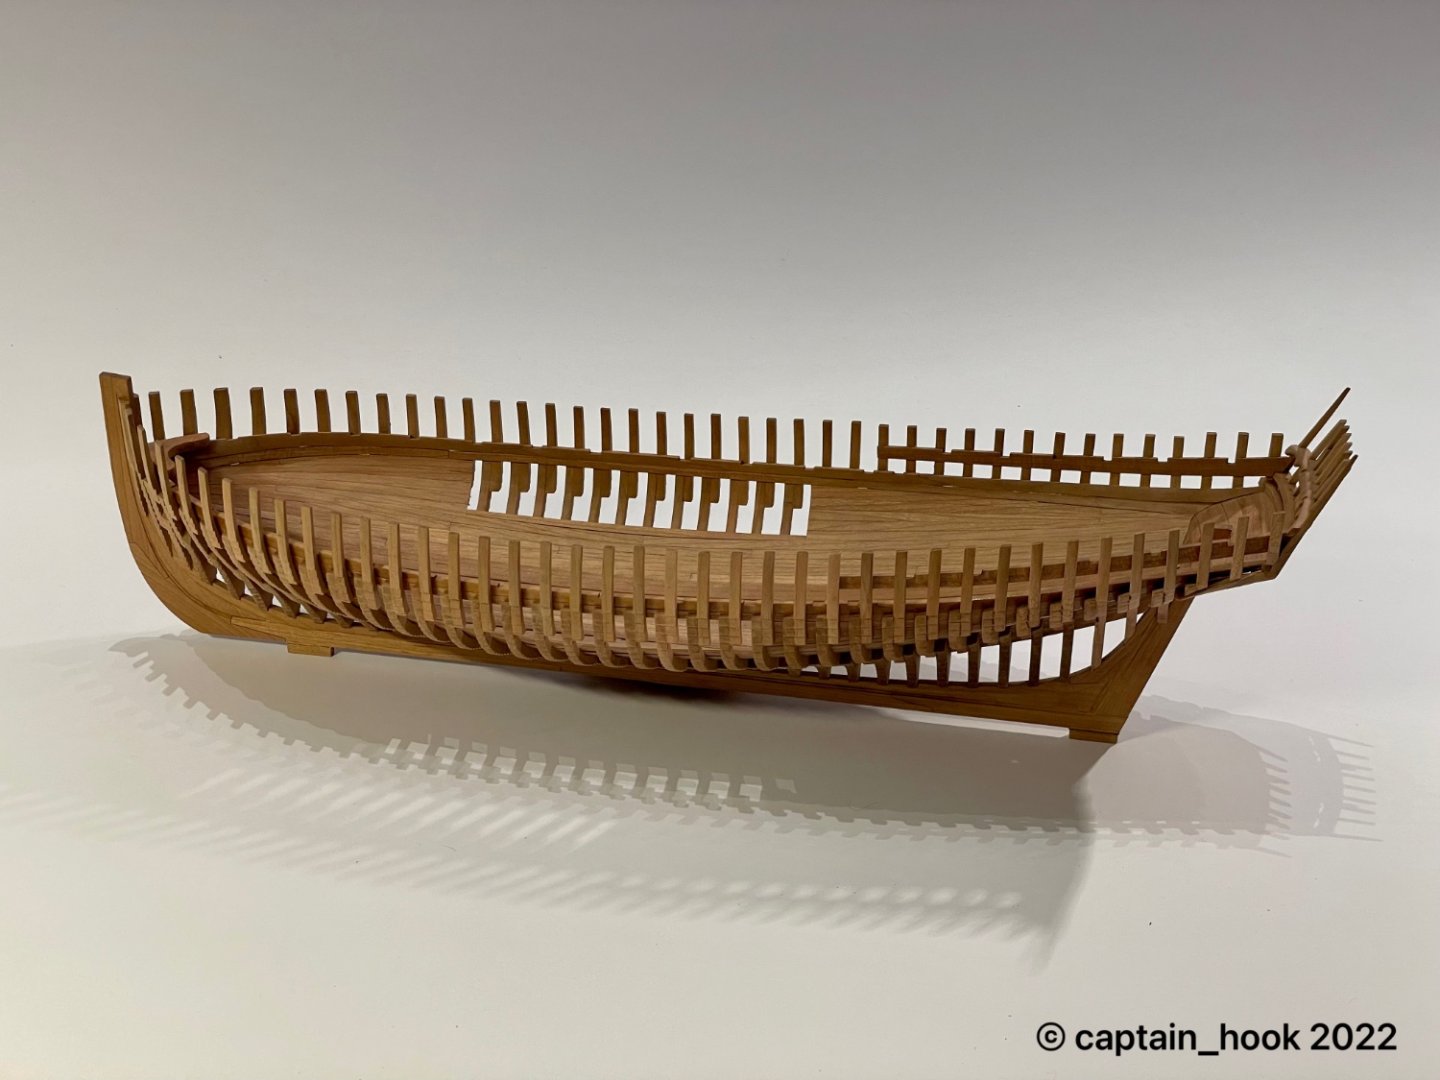
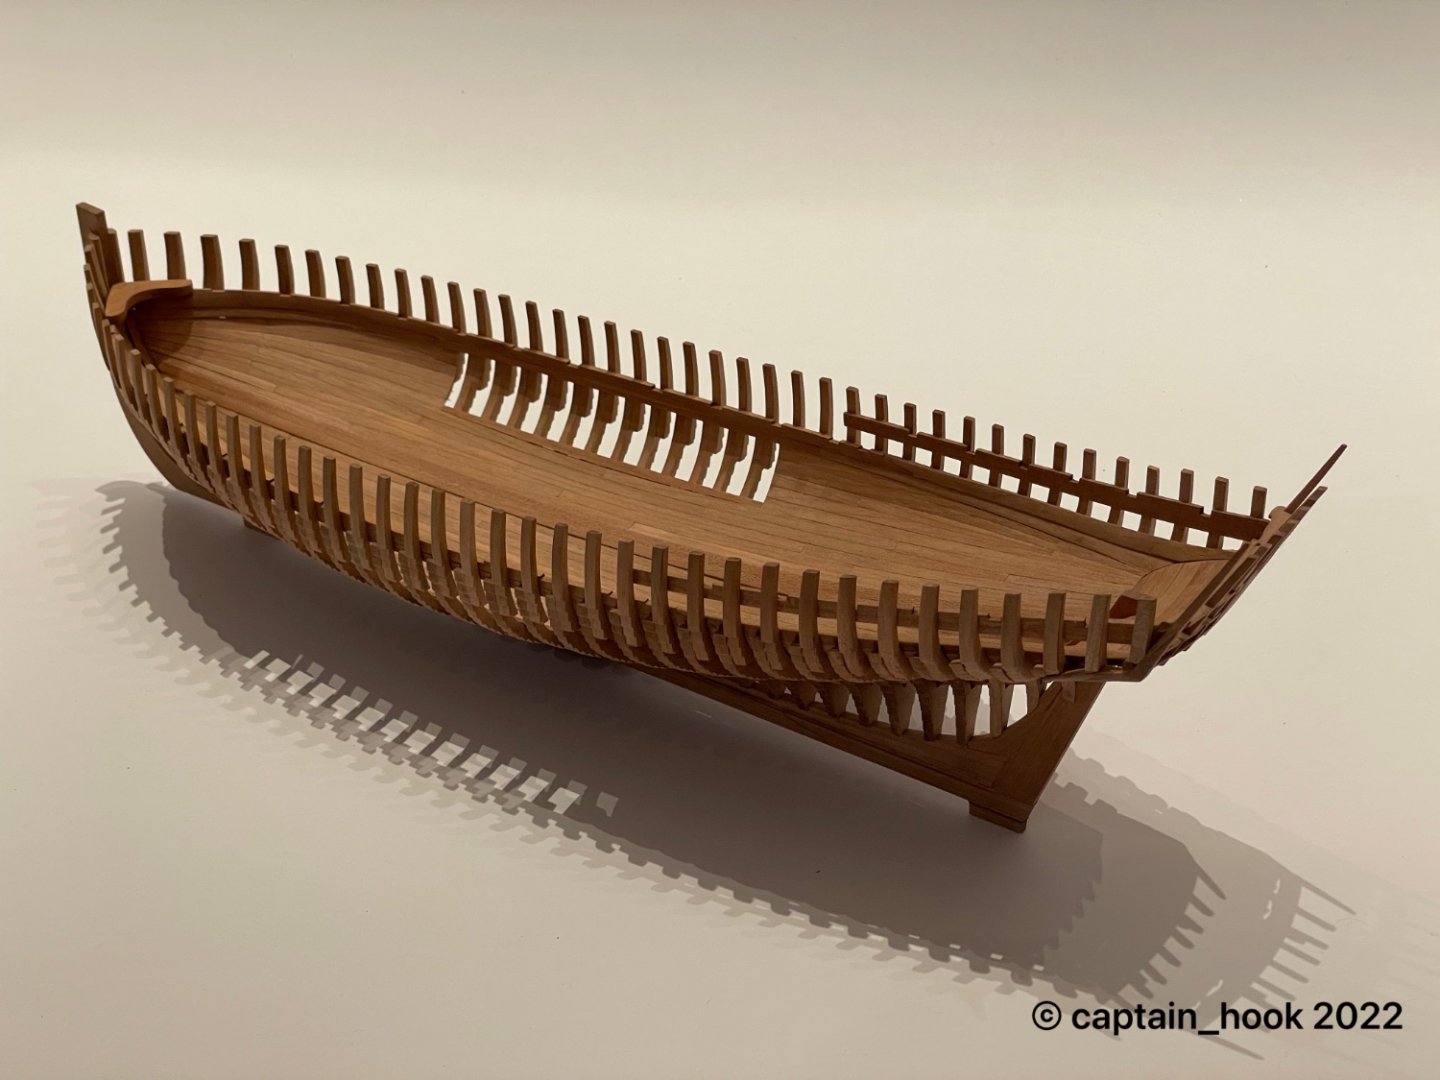
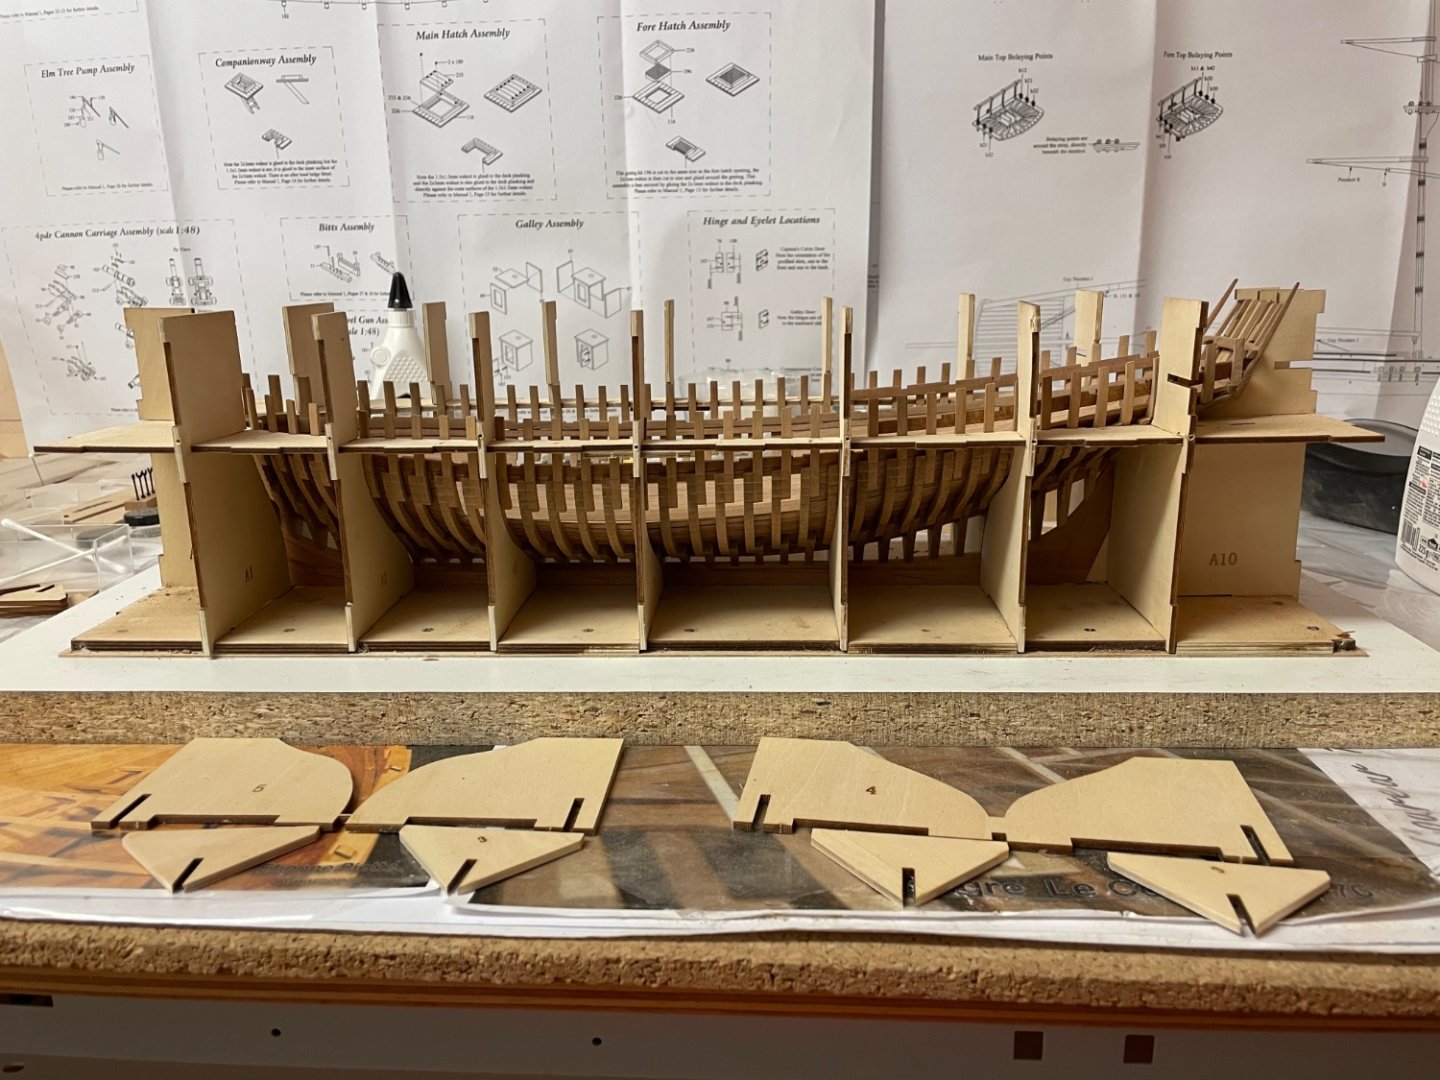
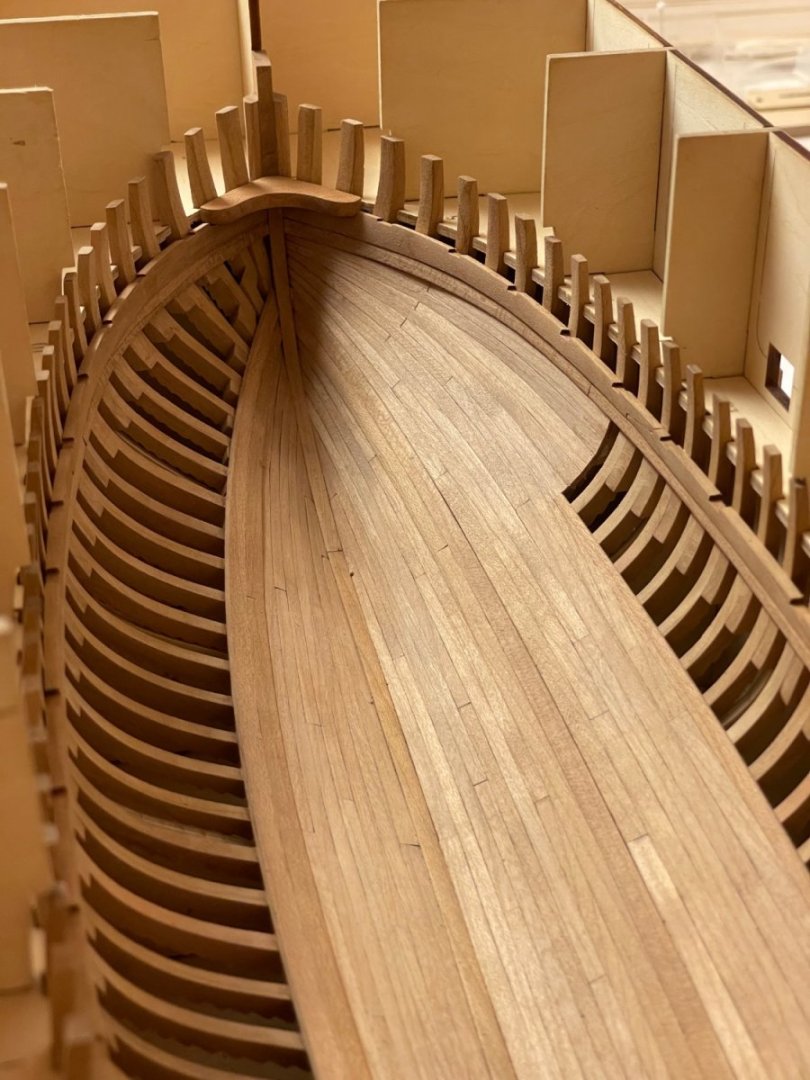
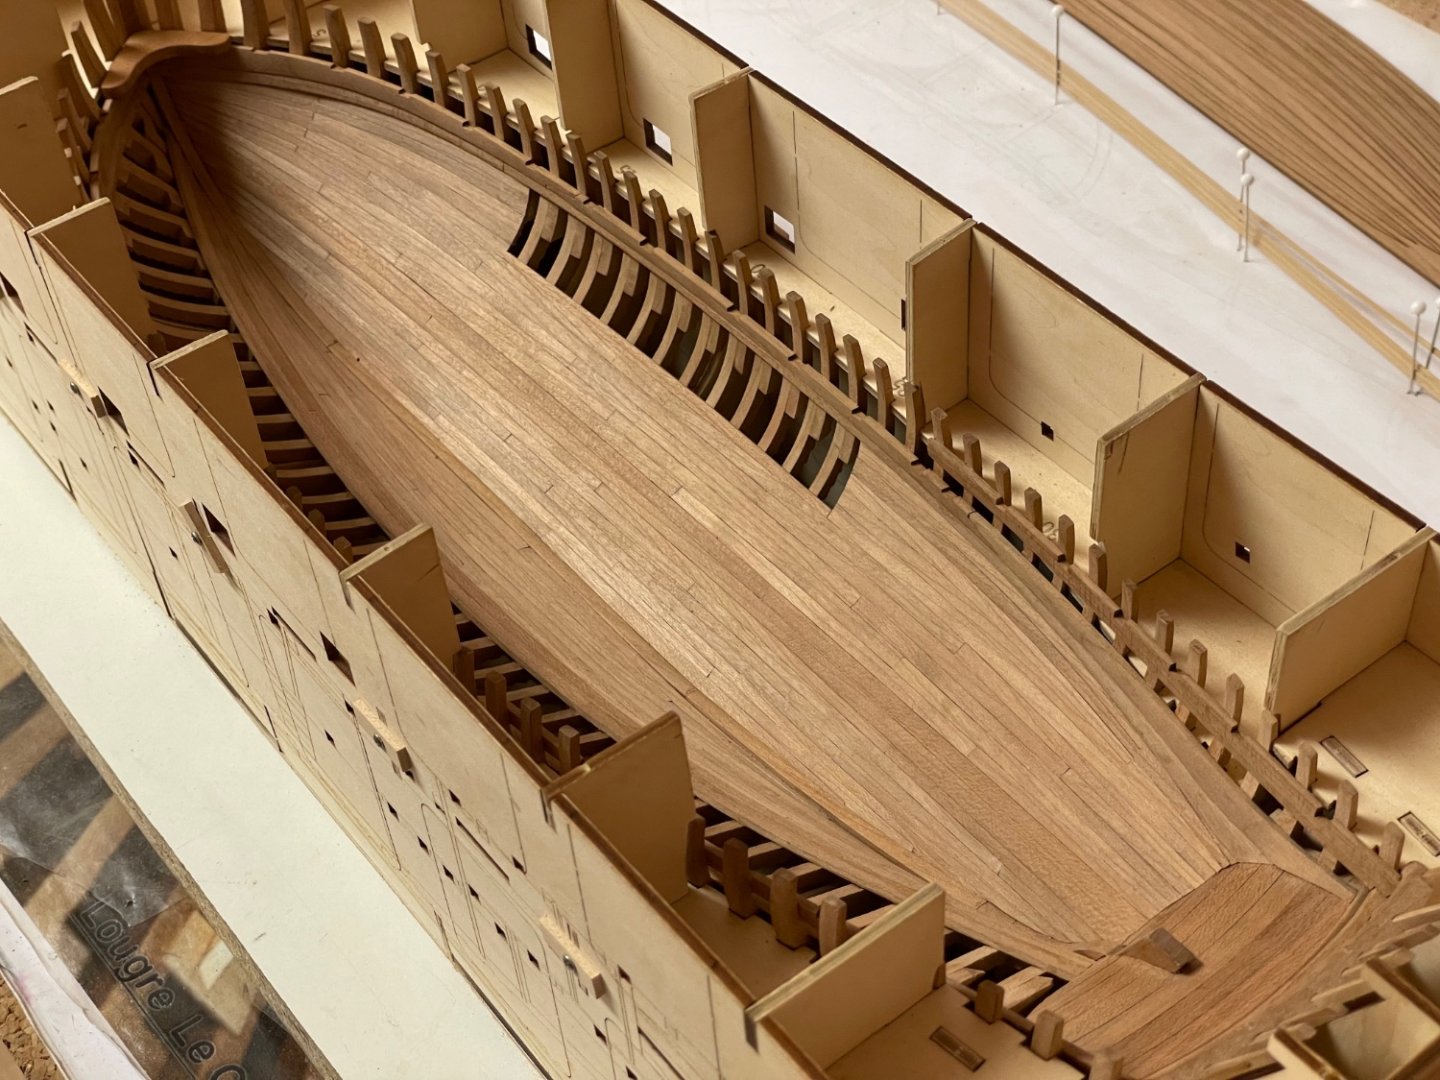
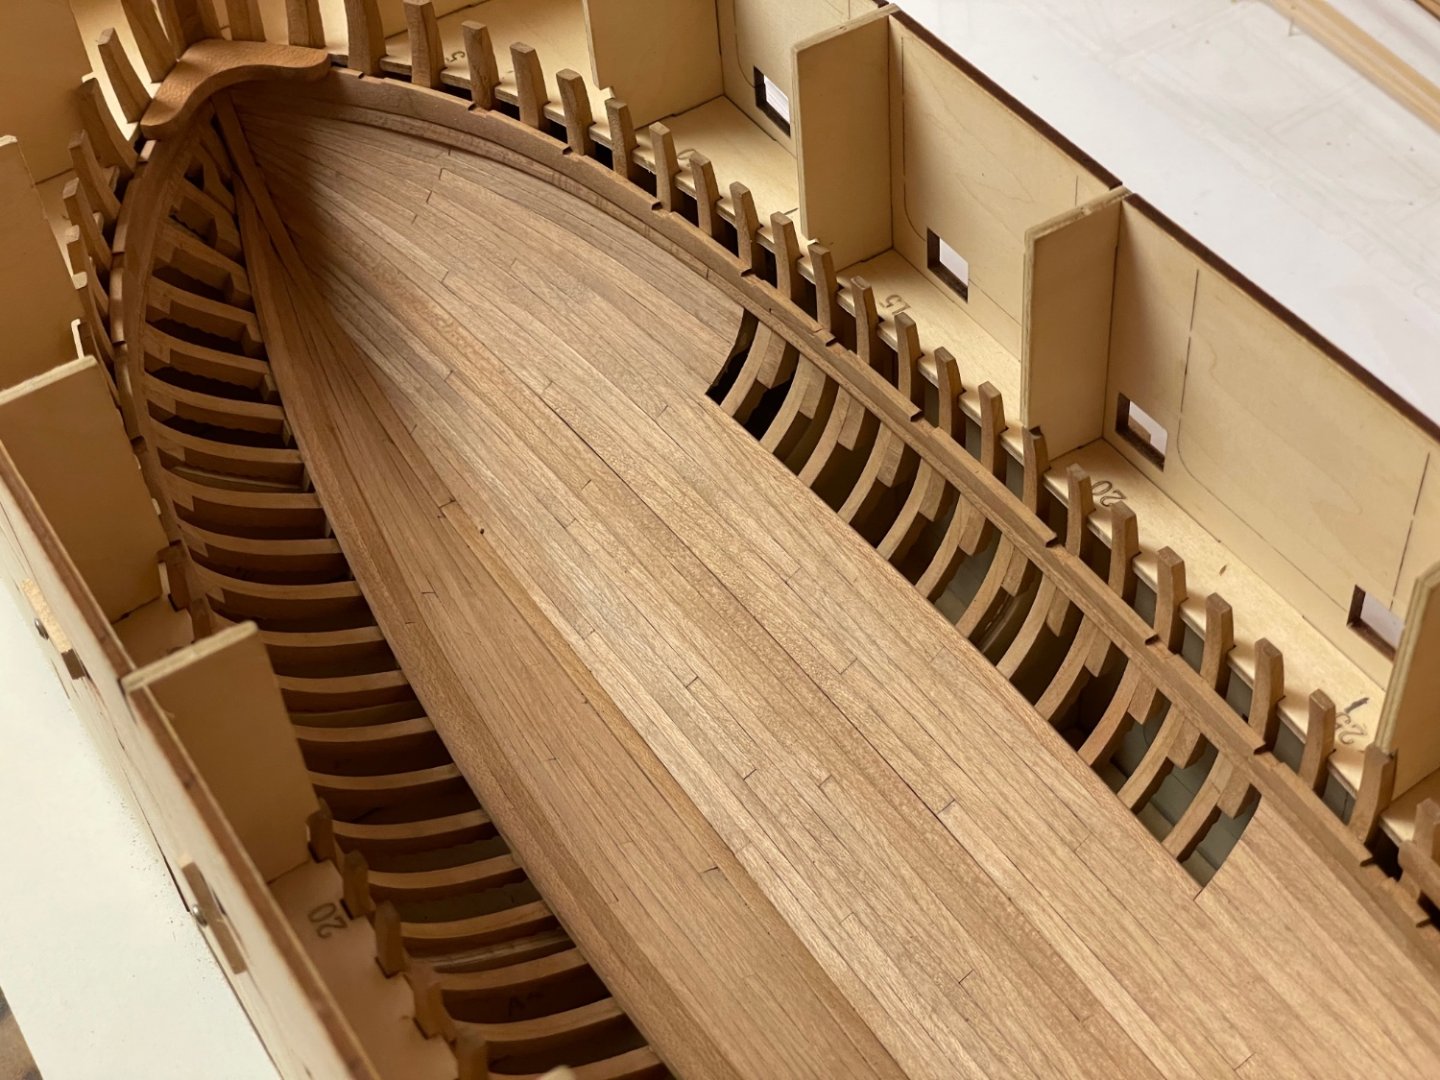
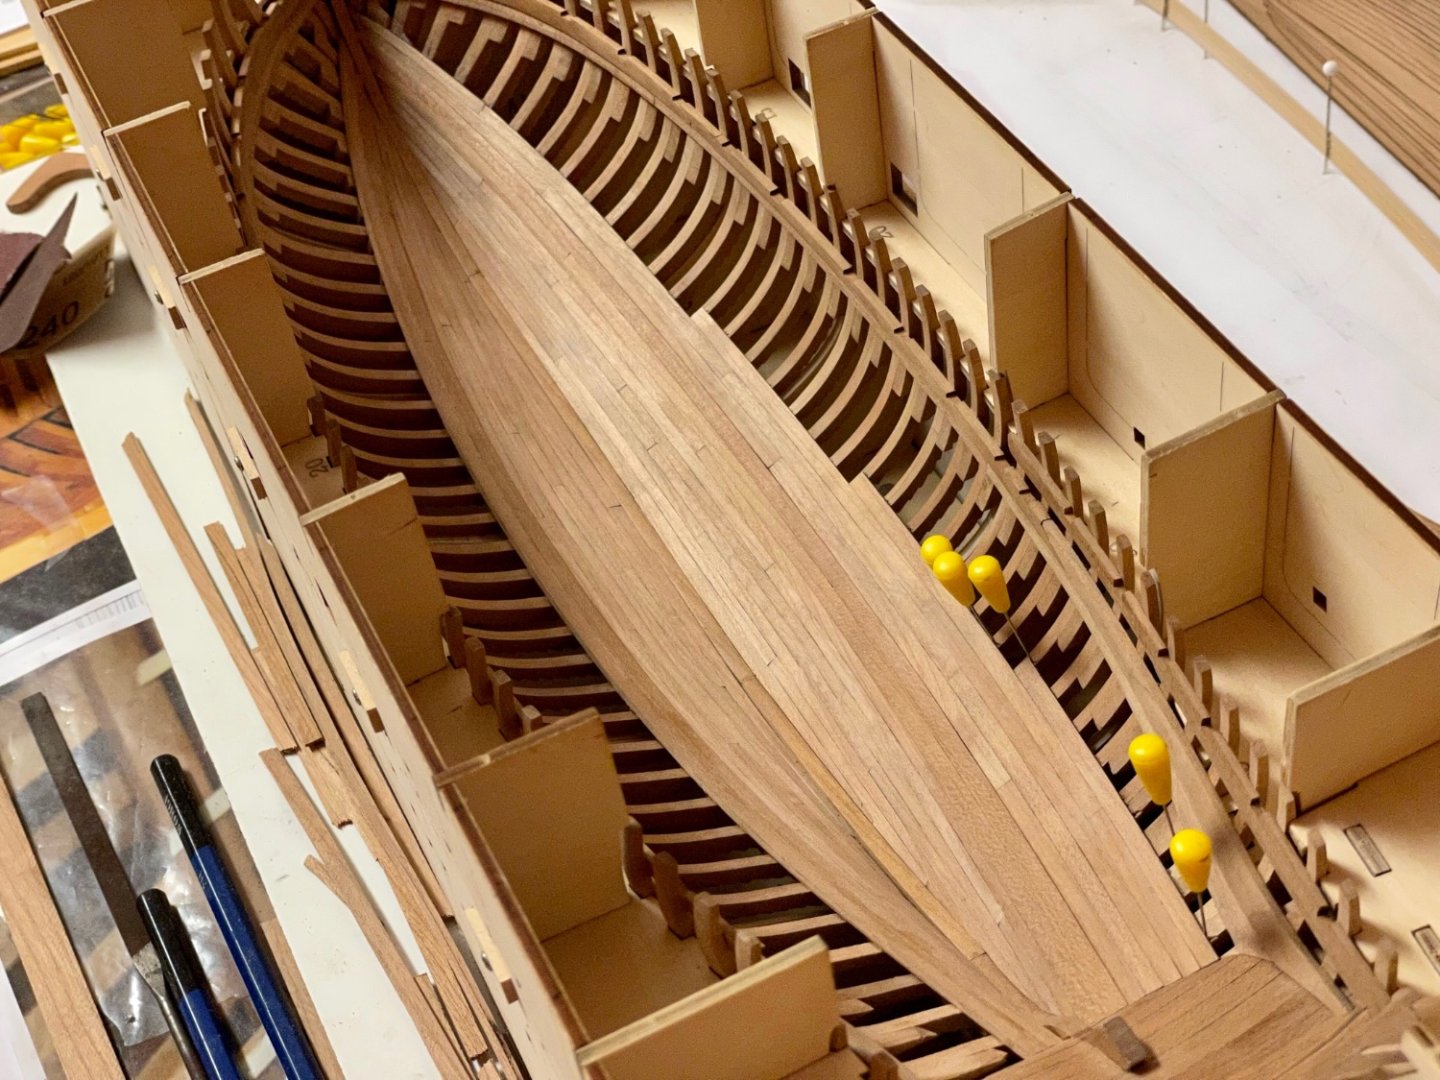
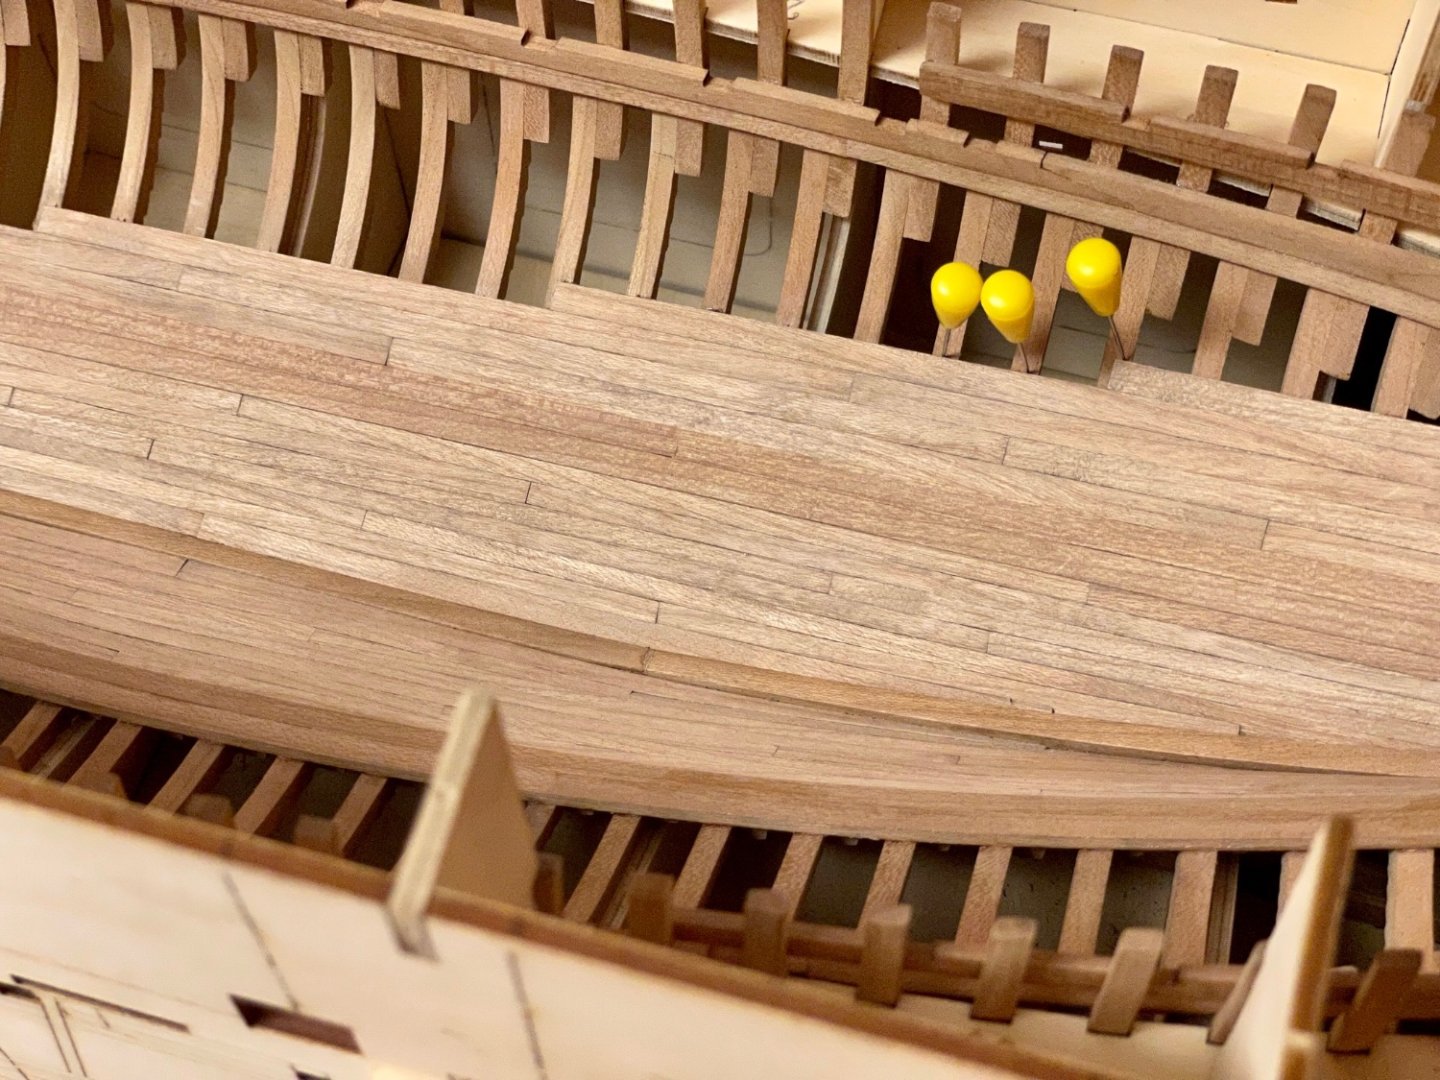
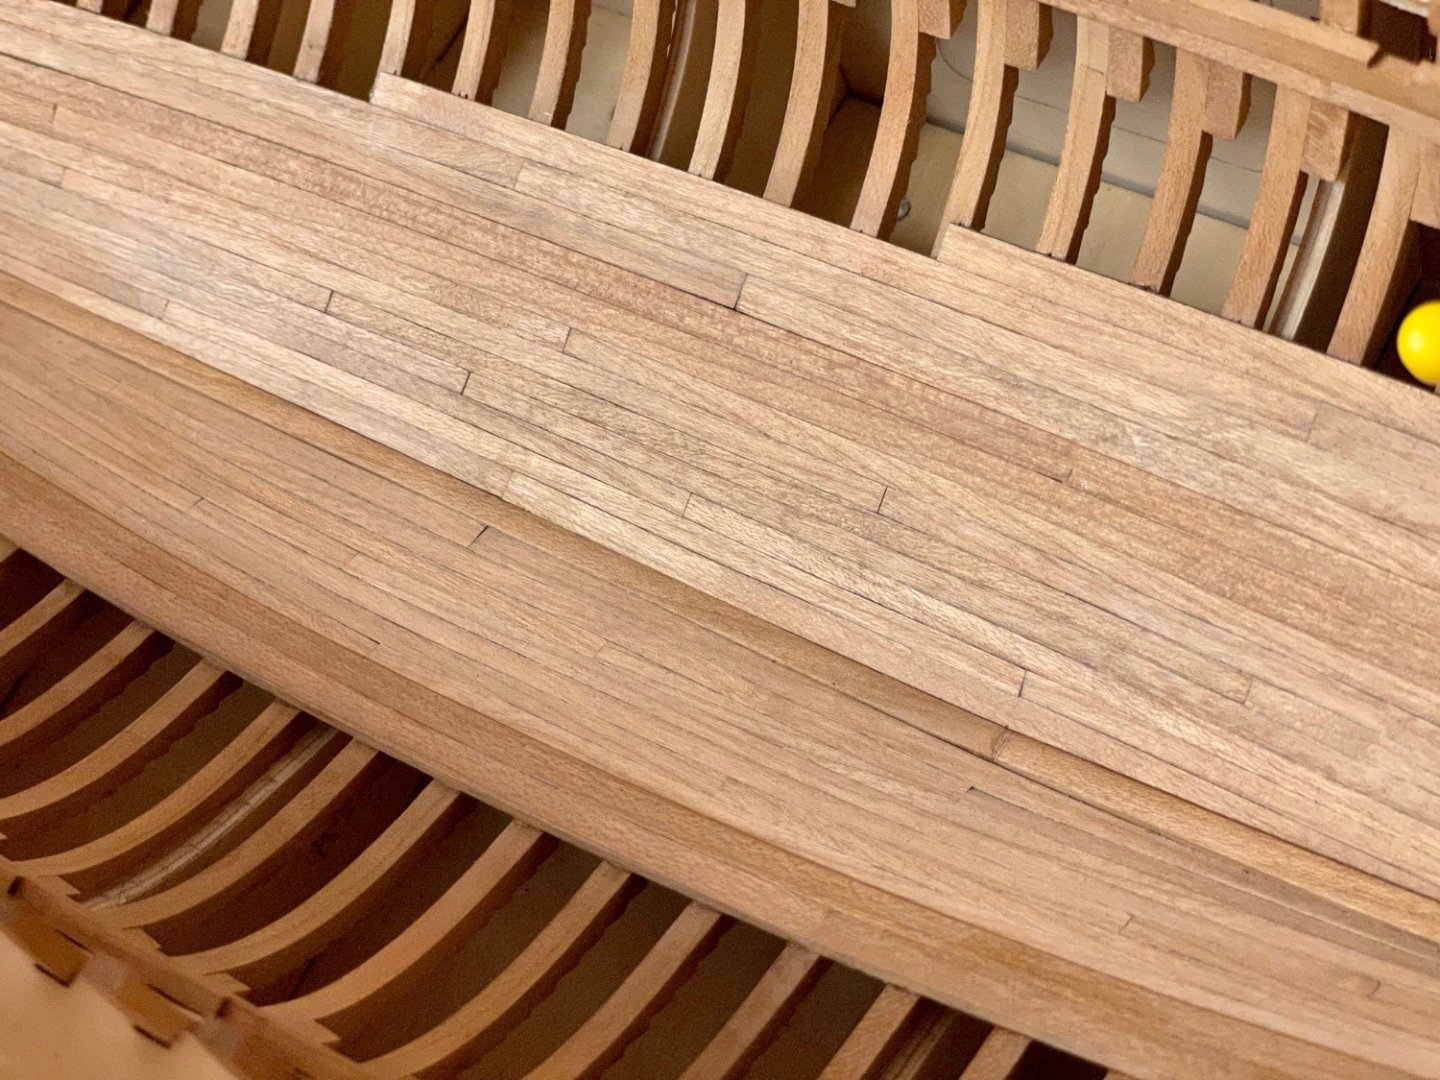
Before I continue the build (and might mess it up completely) I thought it would be a good thing to make some photos at this point as later only a few (partial) frames will be seen on the finished model. And I did the best I can to compensate the poor light-condition in my living room. Unfortunately I cannot skip the copyright mark anymore as I have seen photos of my completed AVS promoting Model Shipways kits on eBay and Amazon marketplace (these sellers simply use my pictures of a completely custom-build AVS for the standard model kit). Anyway I tried to catch the model from different angles .. I will start with the next steps in the following week. Stay tuned ..


-
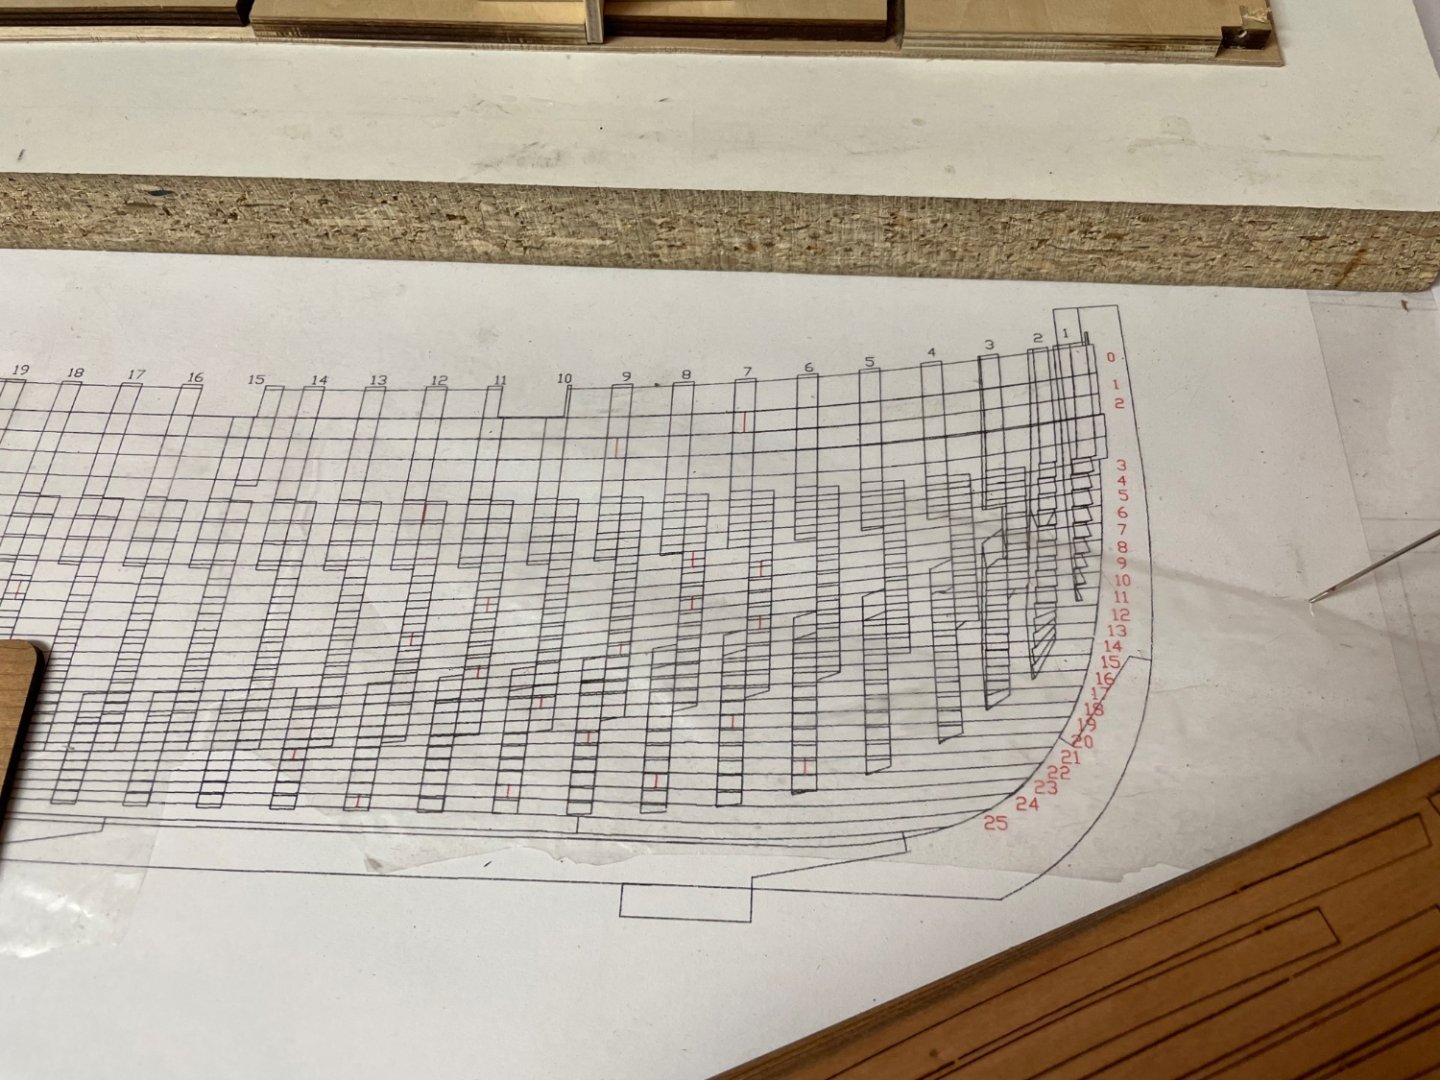
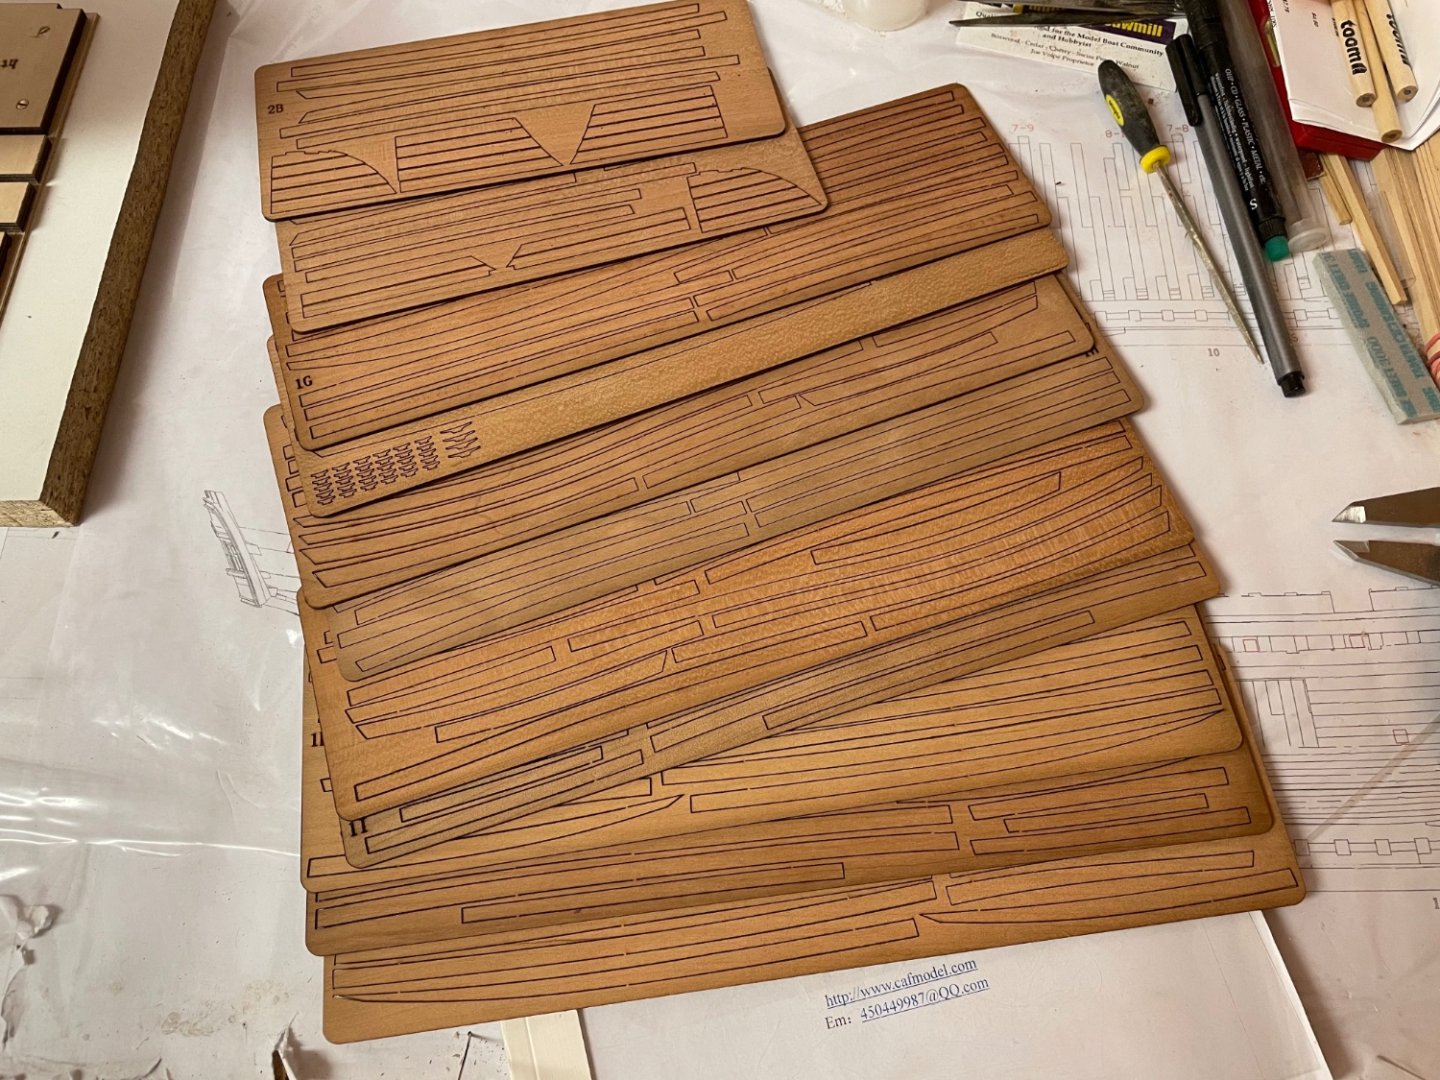
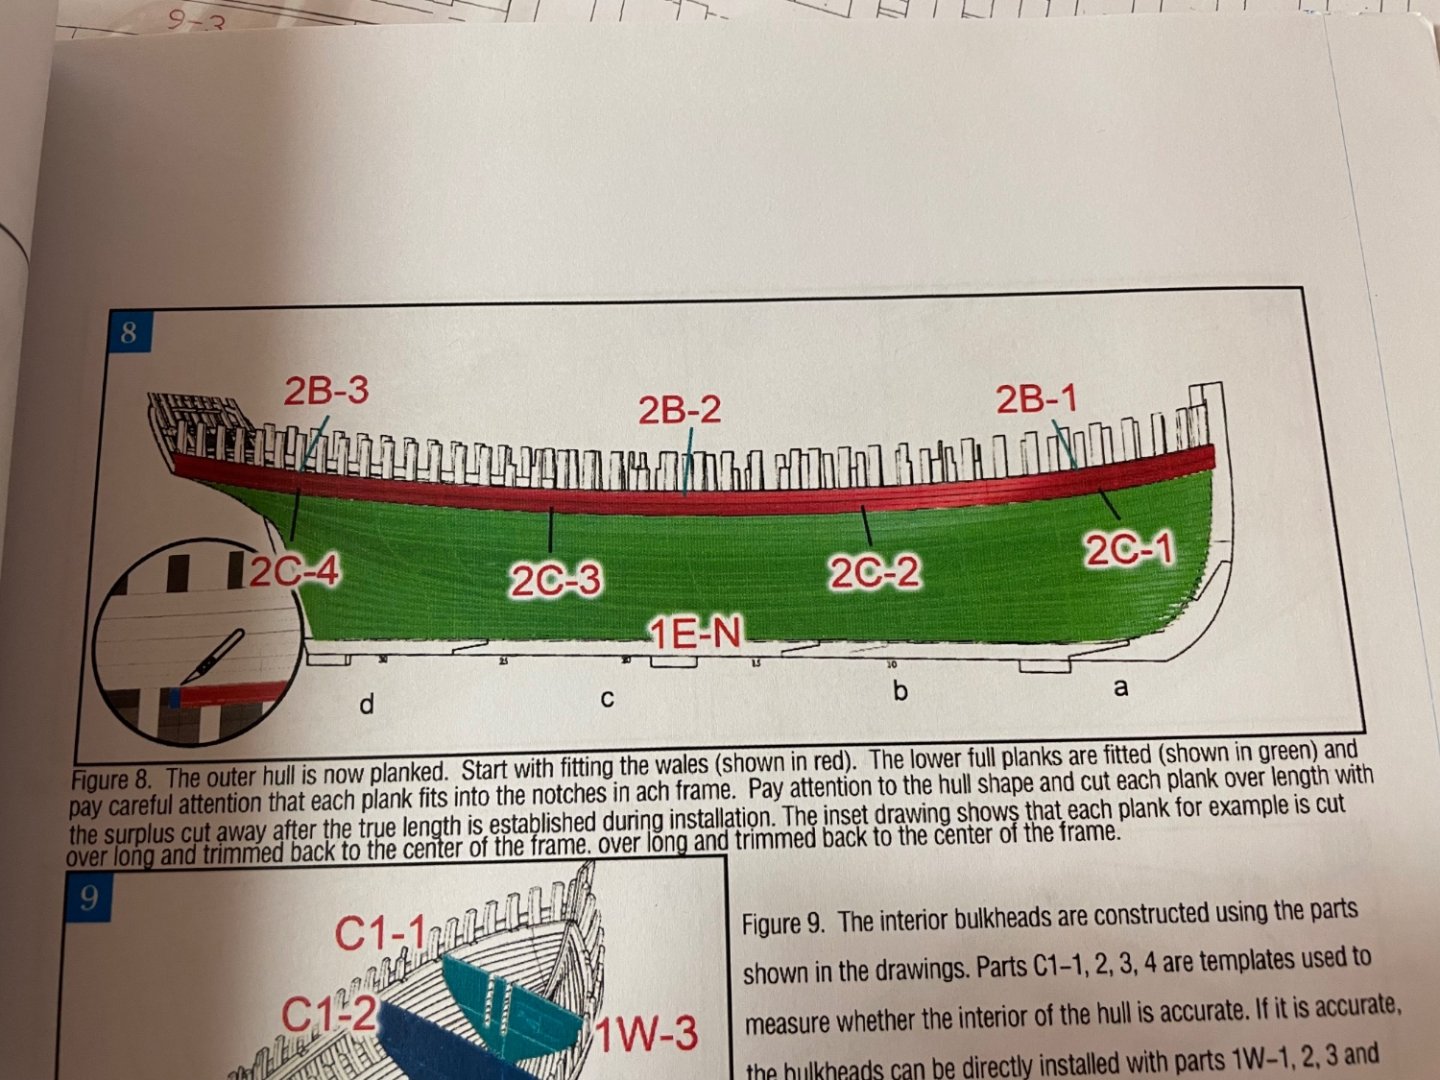
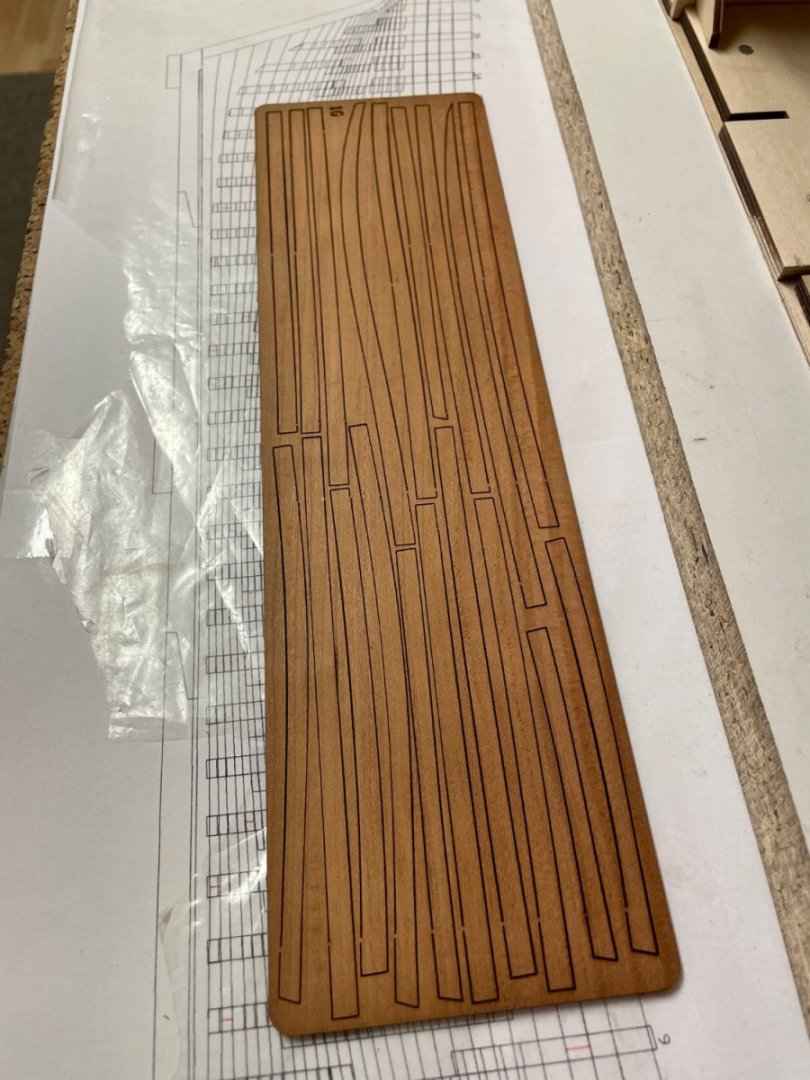
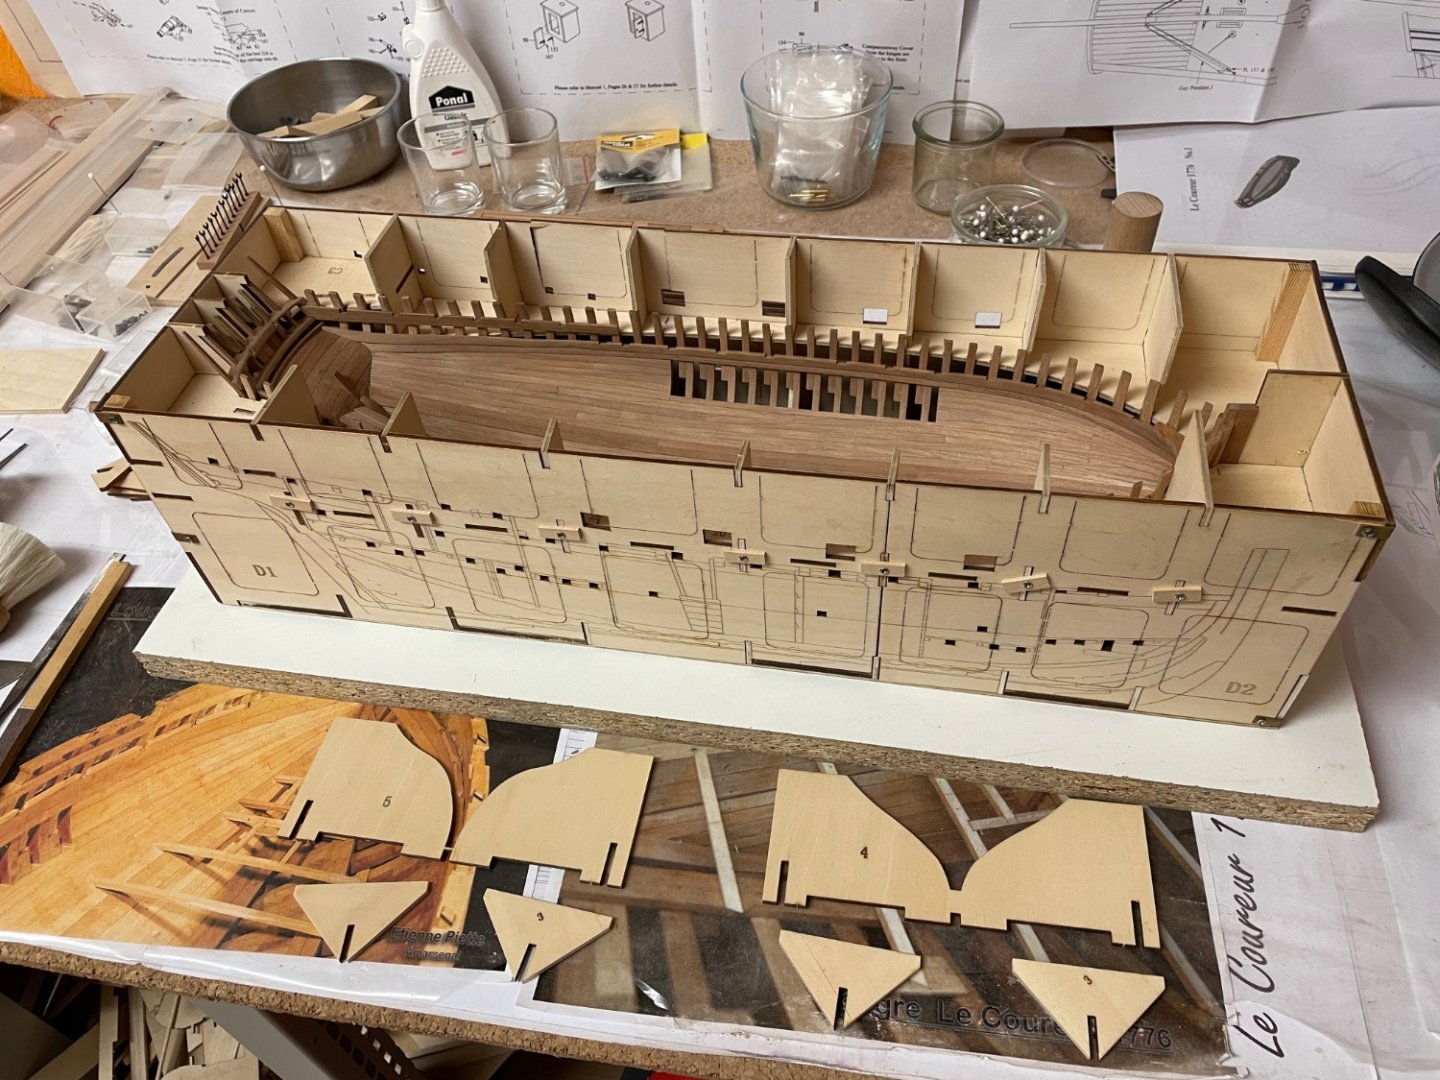
The next step will be planking the stern and then planking the outside. BTW when I started the hobby in 2015 I was more than glad I found MSW - such a tremendous source of information. I was a little scared of starting my own build-log because I had only learned a few German nautical terms as they were difficult for me to learn - and Google translation often doesn’t make sense if you look for special terms. But by reading buildlogs I meanwhile know more Englisch nautical terms than German ones (but if I use them in a wrong way please tell me). So hopefully I don’t have to say „I will next start planking this part and then start planking that part“ anymore. Anyway, this will be my first clinker-planked ship and I hope not to mess it up. The planking rows are divided into four segments each and all planks are precut. Some precut-stripes have a weird shape (?) and the sheets differ in colour a little but overall they look fine at this point. Lots of laser-char removal ahead! The CAF instructions for this whole step are very .. short, just one picture. And there is one of the plan-sheets showing the different parts numbers and planking joints. But you have to look for each part in the manual first as the number is indicated only there .. hours of playing look & find. Stay tuned ..
-
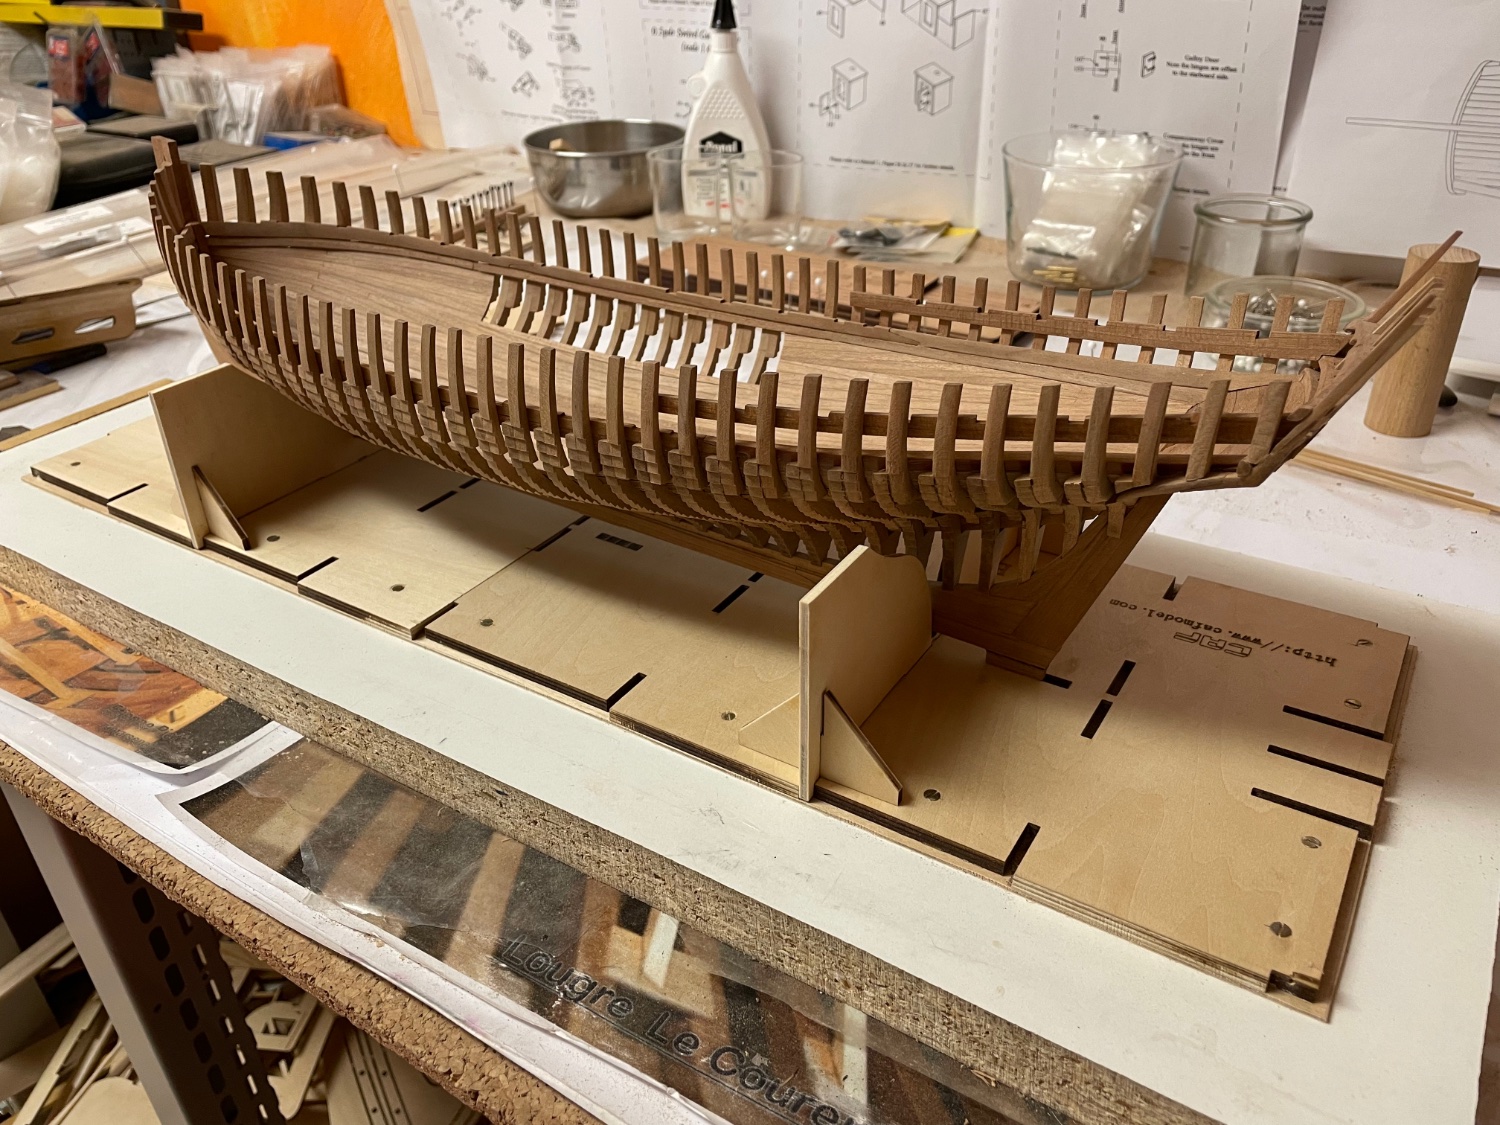
After completing the inner planking I can now move on to the next step which is removing the jig that has supported the ship during construction of the frames and the inner planking. Instead of the whole jig from now on the ship is supposed to sit on two plywood panels that are just put into pre-cut slots of the building board. I initially fixed the side doors with wood-screws so they could easily be removed when necessary for example to check the fit of the frames during installation. Just some unscrewing needed .. .. as well as on the other side. The center section is glued together using one small plywood part on each side. Unfortunately it cannot be removed easily as it holds the construction tight inside the jig. So I had to lift the whole assembly up and cut twice into the plywood center section - and even then I had to use slight force to remove it completely. The last step was to put the new plywood support panels inside the building board and the ship onto it.


-
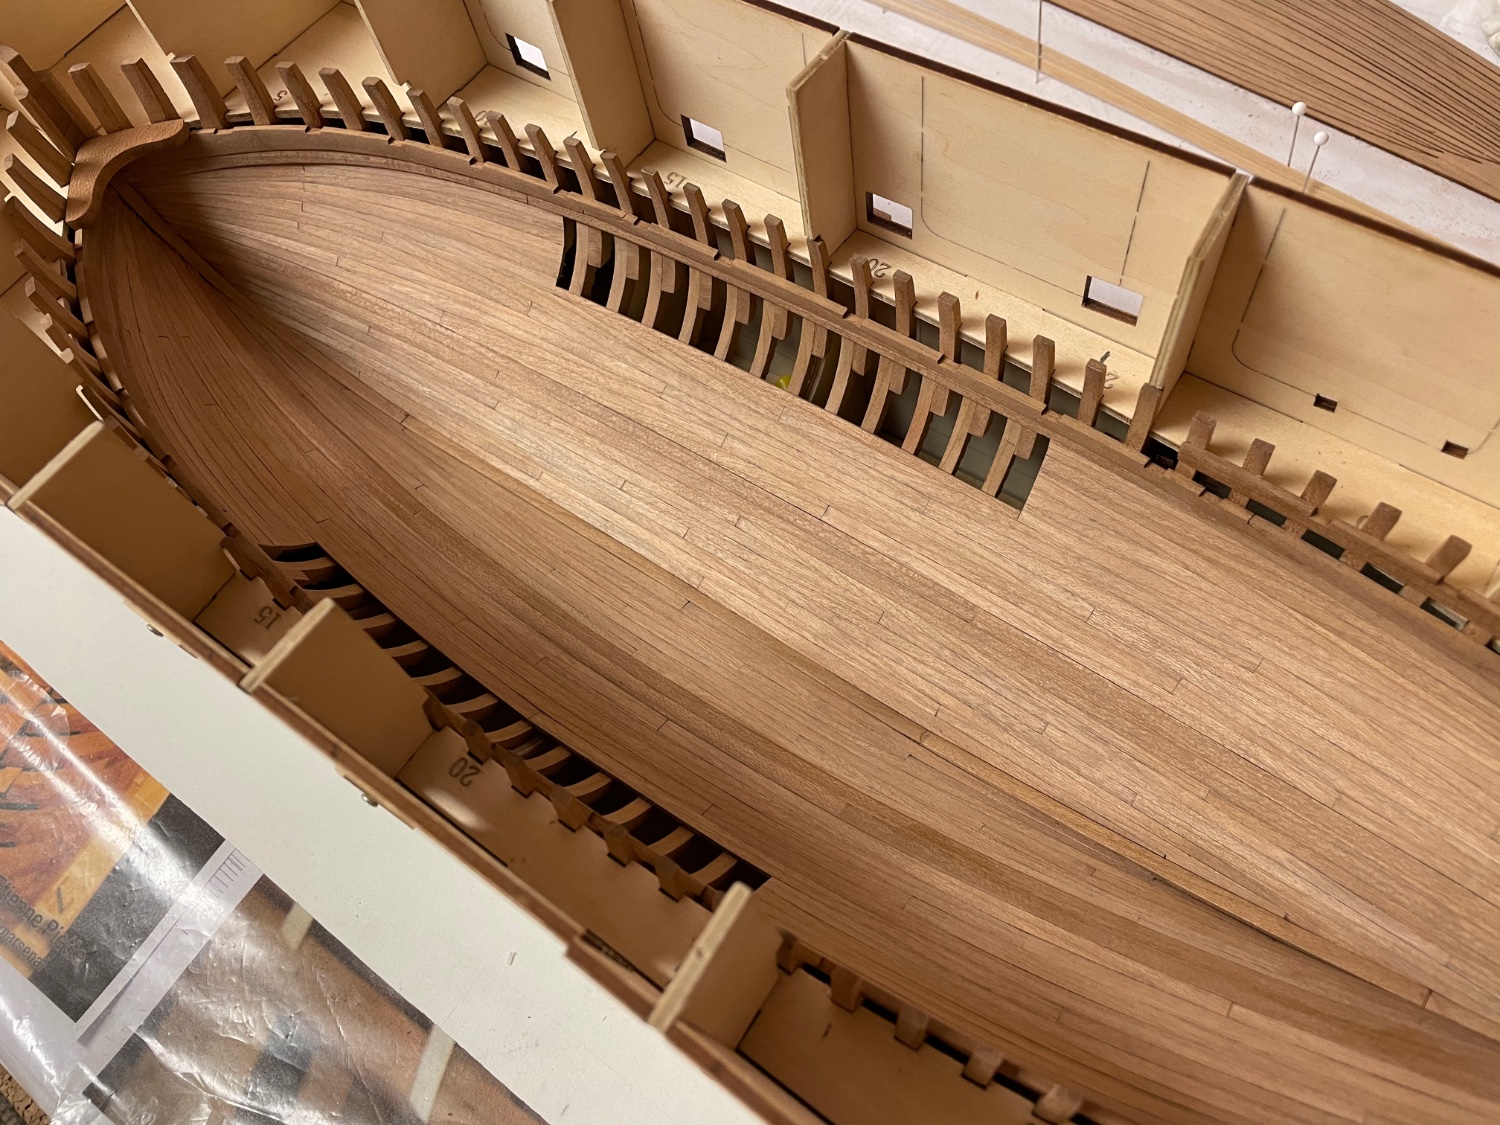
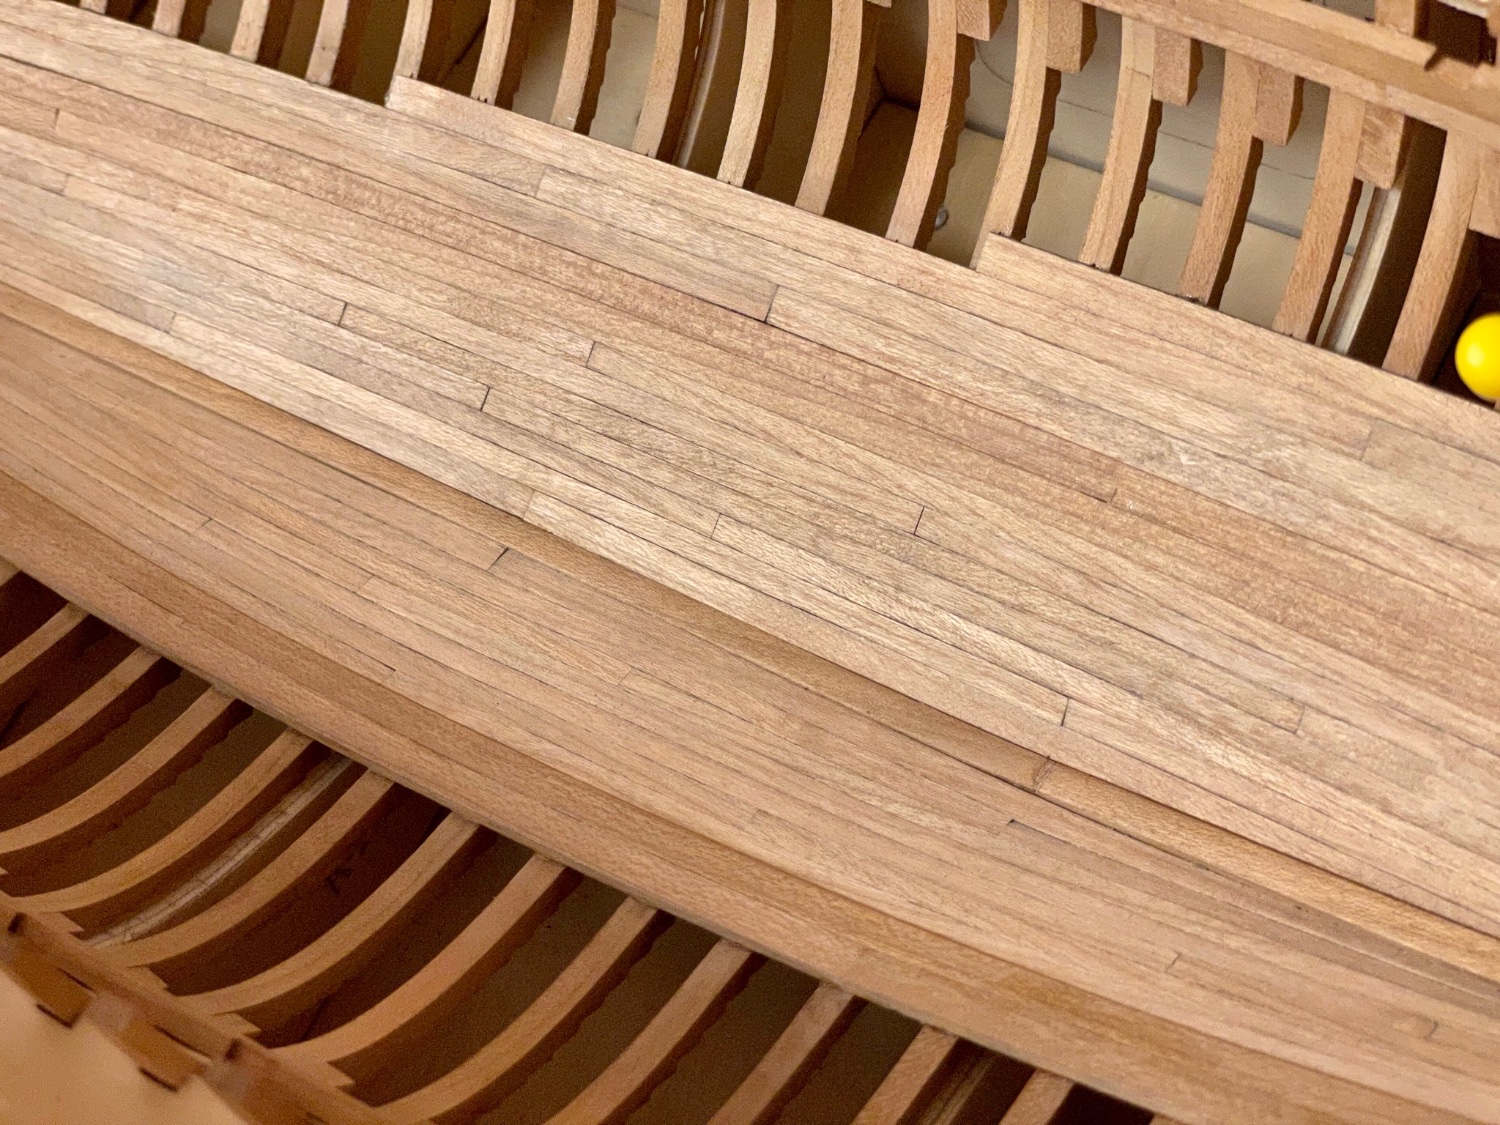
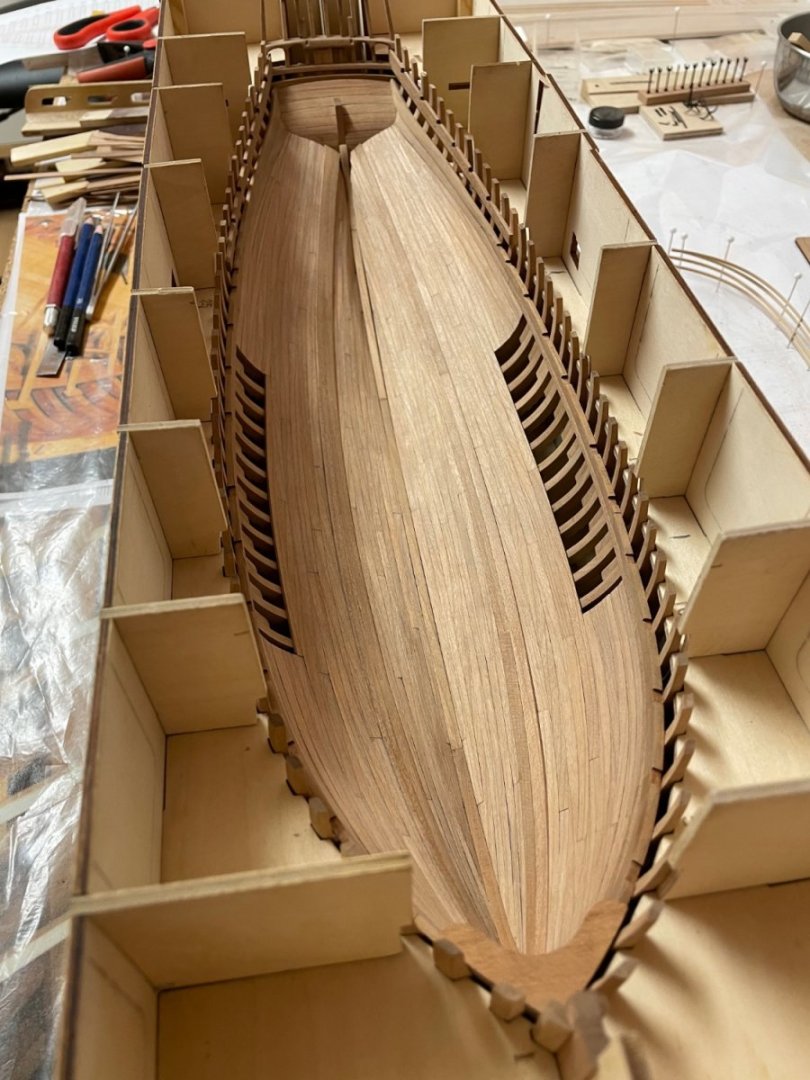
I have just finished the planking job. The port side has a mirrored starboard planking layout, turned out not bad - but after this build I won‘t use cherry wood again for ship-modeling. Here are some pictures .. I still need more planking experience but every step I pass makes it a little easier. Just a little sanding where needed and then the Coureur is ready to be released from the jig to start the outside planking job. Stay tuned and a nice weekend ..


-
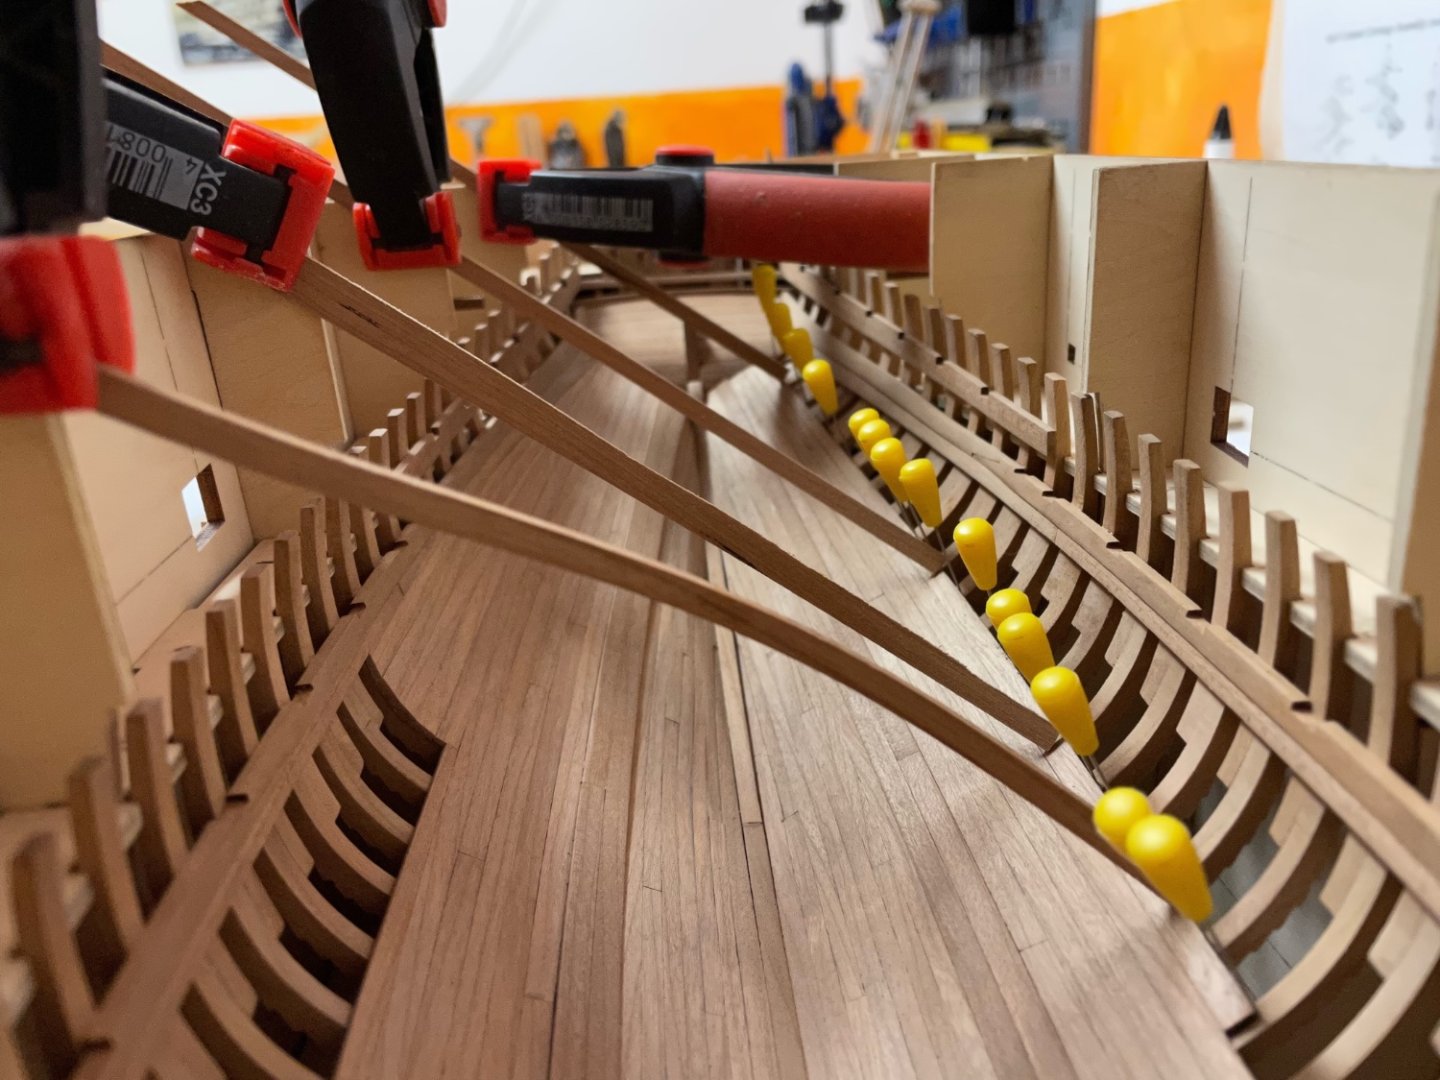
Hm, I think I wouldn‘t be able to build a single step of that kit without instructions using only the plans. I hope I will get used to that colored-single-picture-oneliner-instructions while I continue the build. Anyway, here are two snapshots of my actual work in progess. The jig can be used to clamp the planking in place wile the glue cures. I hope to finish the inner planking step in the next two day - and lucky me next step will be more planking (the outside of the ship) .. Music (background): Pink Floyd - Atom Head Mother / Animals (don‘t know why I have spent hundreds of hours in a silent workshop before) Stay tuned ..

-
Those seamen look very realistic, they will surely add some realism to the beautiful model.
- 542 replies
-
- 1
-
-
- Sphinx
- Vanguard Models
- (and 3 more)
-
That is a beautiful little ship you have build. Nicely done!
- 180 replies
-
- 1
-
-
- pilot boat
- Elbe 5
- (and 3 more)
-
I can‘t speak for other CAF kits but find the Le Coureur rather difficult to build. Especially the instructions with a single picture and one-liner for large building steps made me have a hard time figuring out what to do next. I think at some point I got used to explicit manuals like ones from Model Shipways or Syren. Tom from CAF is surely a talented designer but he might spent more time writing clearer instructions and better manuals in the future. It is one thing to know how to do things but another to teach this to others .. Just my POV. Yes, you should do this. For my own part, if I leave models undone on the shelf for a longer period I probably won‘t continue the build any more. Took me a lot of overcoming to continue the build after a one year break but now it is like I have never stopped the build. It might be the fading of knowledge, the „I can‘t remember how to do certain things any more“ that occurs after a longer break and prevents people from resuming their builds - but for me it took only a short time until I‘m into the build again. Good luck with your project.
-
Thank you Kevin. I‘ll try to keep it more CAF than.scratch .. 🙂
-
Yes, Yves - you‘re right. To help myself remember that there are actually frames hidden under the planking I‘ll leave a small area of the outer port planking off to show some frames and to enable a look inside the ship.
-
Thank you for all the likes. I have finished the starboard side, used more or less the pattern shown on the plan in post #151 with only minor modifications. The port side will have a mirrored pattern layout but I have to wait until my fingers have recovered. It is a pity that most of the frame structure is now hidden behind the planking but you won‘t even see much of the planking later because it will be covered by the deck and cabin structures. Took some hours to get here but Pink Floyd did a fabulous job playing in the background the whole afternoon. The lunatic is in … well, stay tuned.

-
I made some progress but it takes a lot of time because every segment has to be tapered somehow to fit. And I changed the layout because the new one might prove easier to achieve. I will update the planking plan when I have finished this task. This cherry-strips are quite difficult to bring to shape and I use a head gun most of the time to edge-bend the planks where needed especially at the bow. BTW I have the impression that the cherry wood does not accept and stick to white wood-glue as well as other kind of wood. Here are some snapshots, I find it quite difficult to catch the planking on a photo .. Stay tuned ..
-
Thank you Tobias, that is a nice model you are building there. It seems like the kit is simplified in some ways to help even less experienced builders to get good results. I haven't previewed the next steps so I don't know if I have to substitute some parts or to modificative the design again. But I like the idea of building it more or less out of the box. If I was to build it from scratch I would have chosen very different kinds of wood ...