HOLIDAY DONATION DRIVE - SUPPORT MSW - DO YOUR PART TO KEEP THIS GREAT FORUM GOING! (Only 36 donations so far out of 49,000 members - C'mon guys!)
×


captain_hook
-
Posts
685 -
Joined
-
Last visited
Content Type
Profiles
Forums
Gallery
Events
Everything posted by captain_hook
-
 Very nice! You‘re approaching the finish line. Keep up the good work!
- 950 replies
-
- 1
-

-
- syren
- model shipways
- (and 1 more)
-
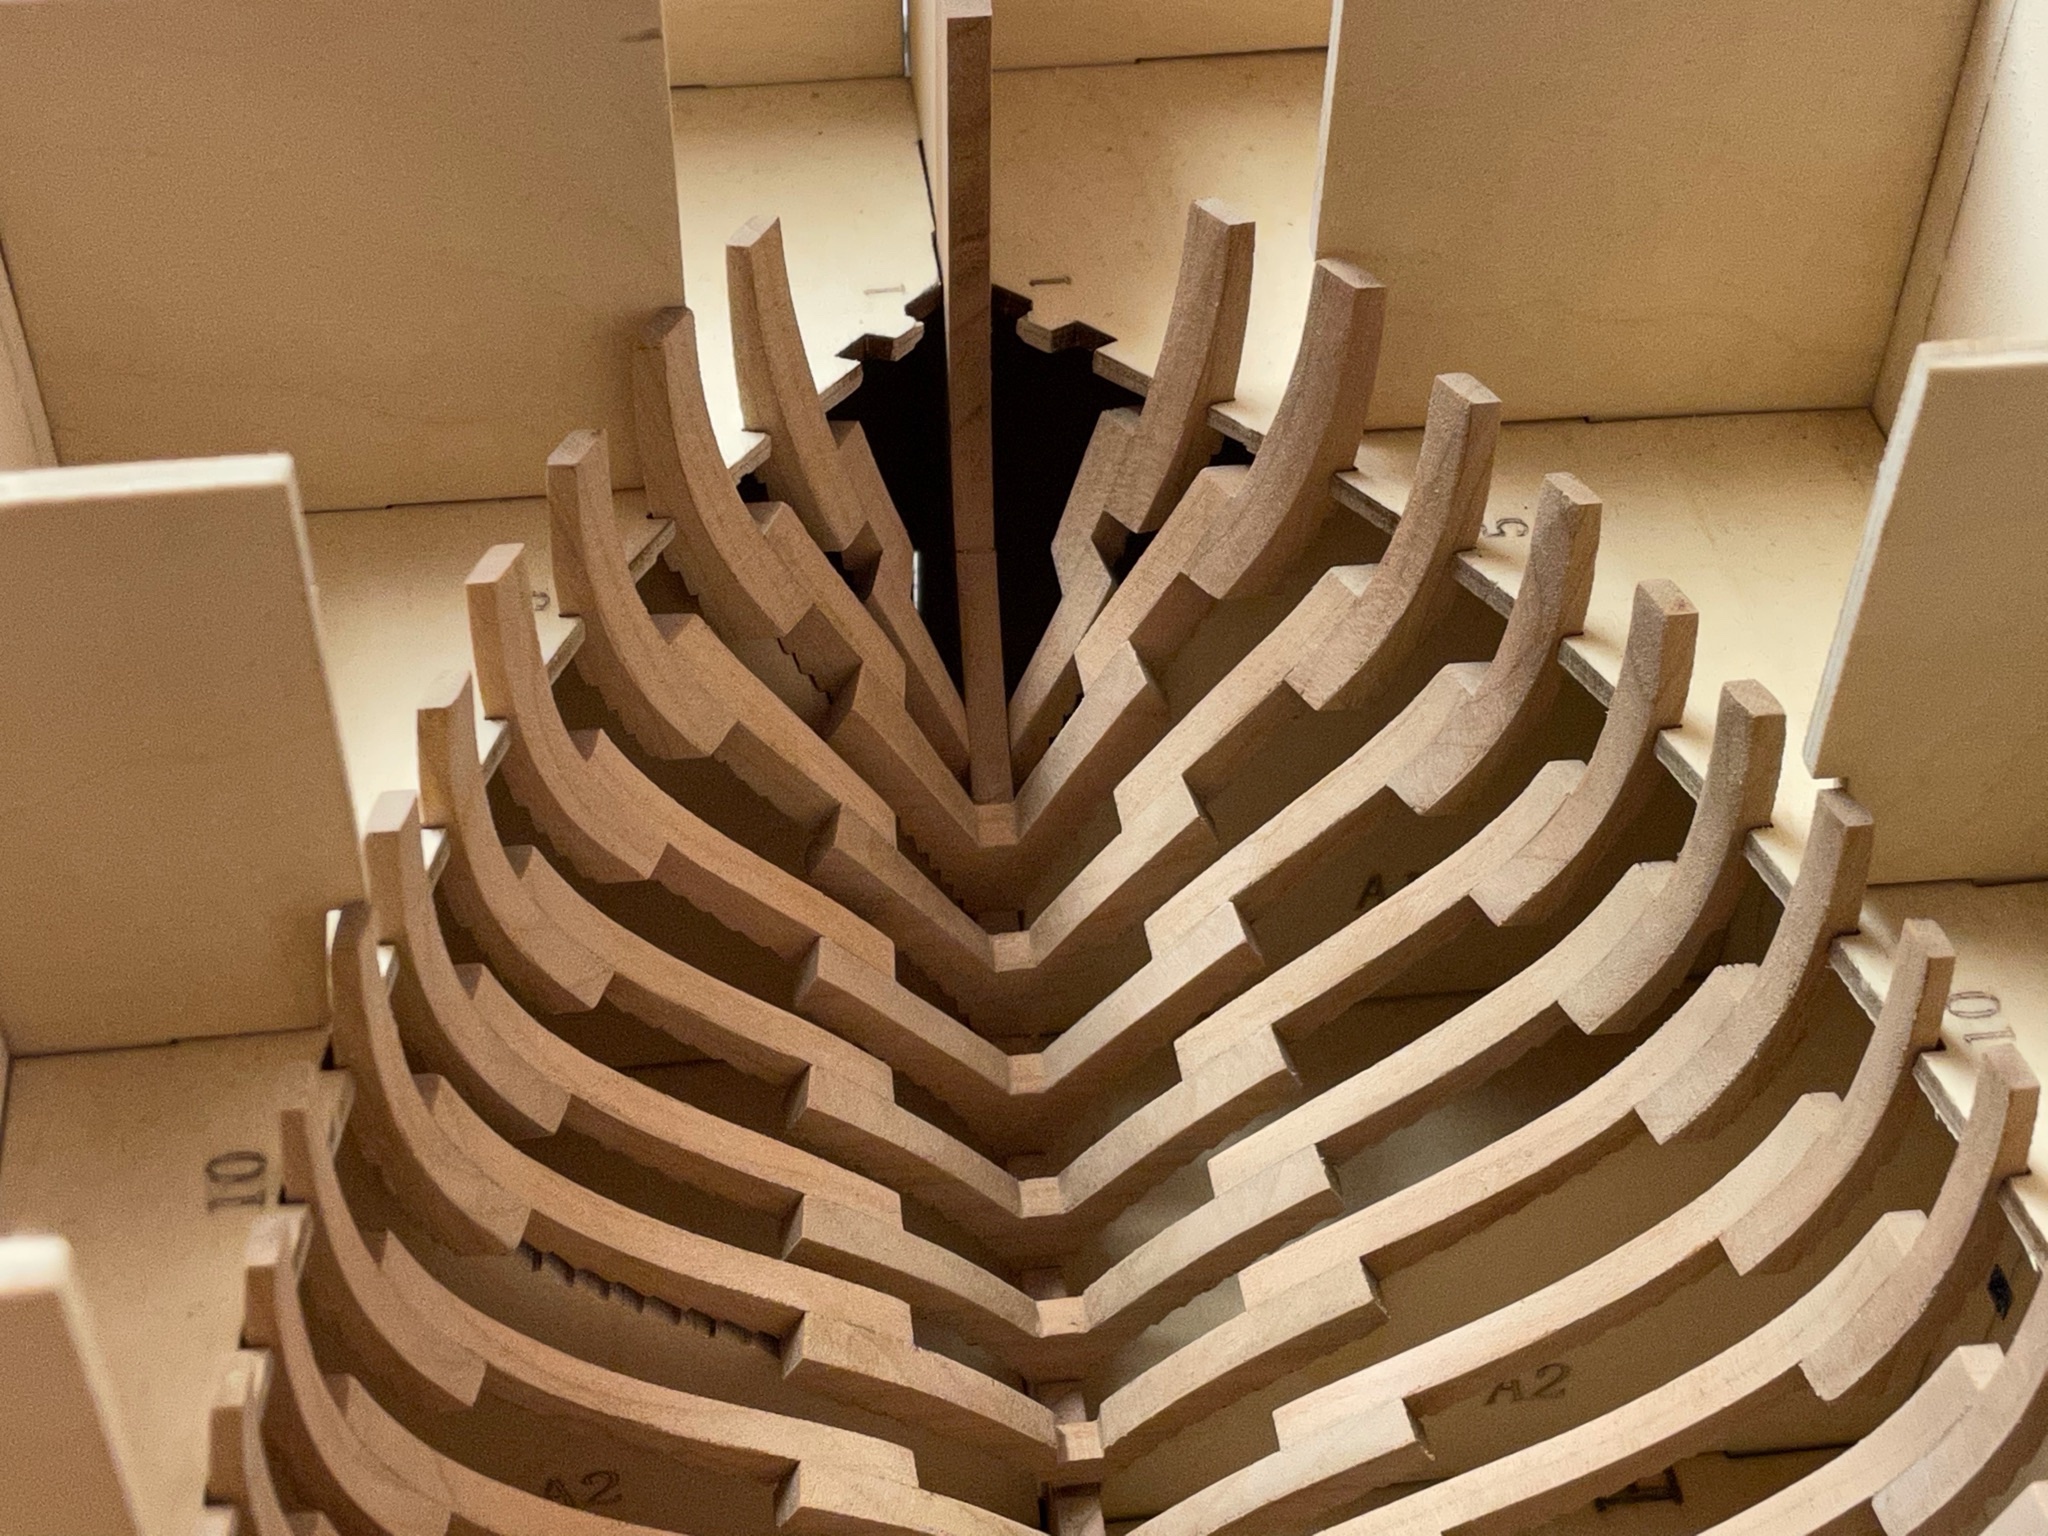
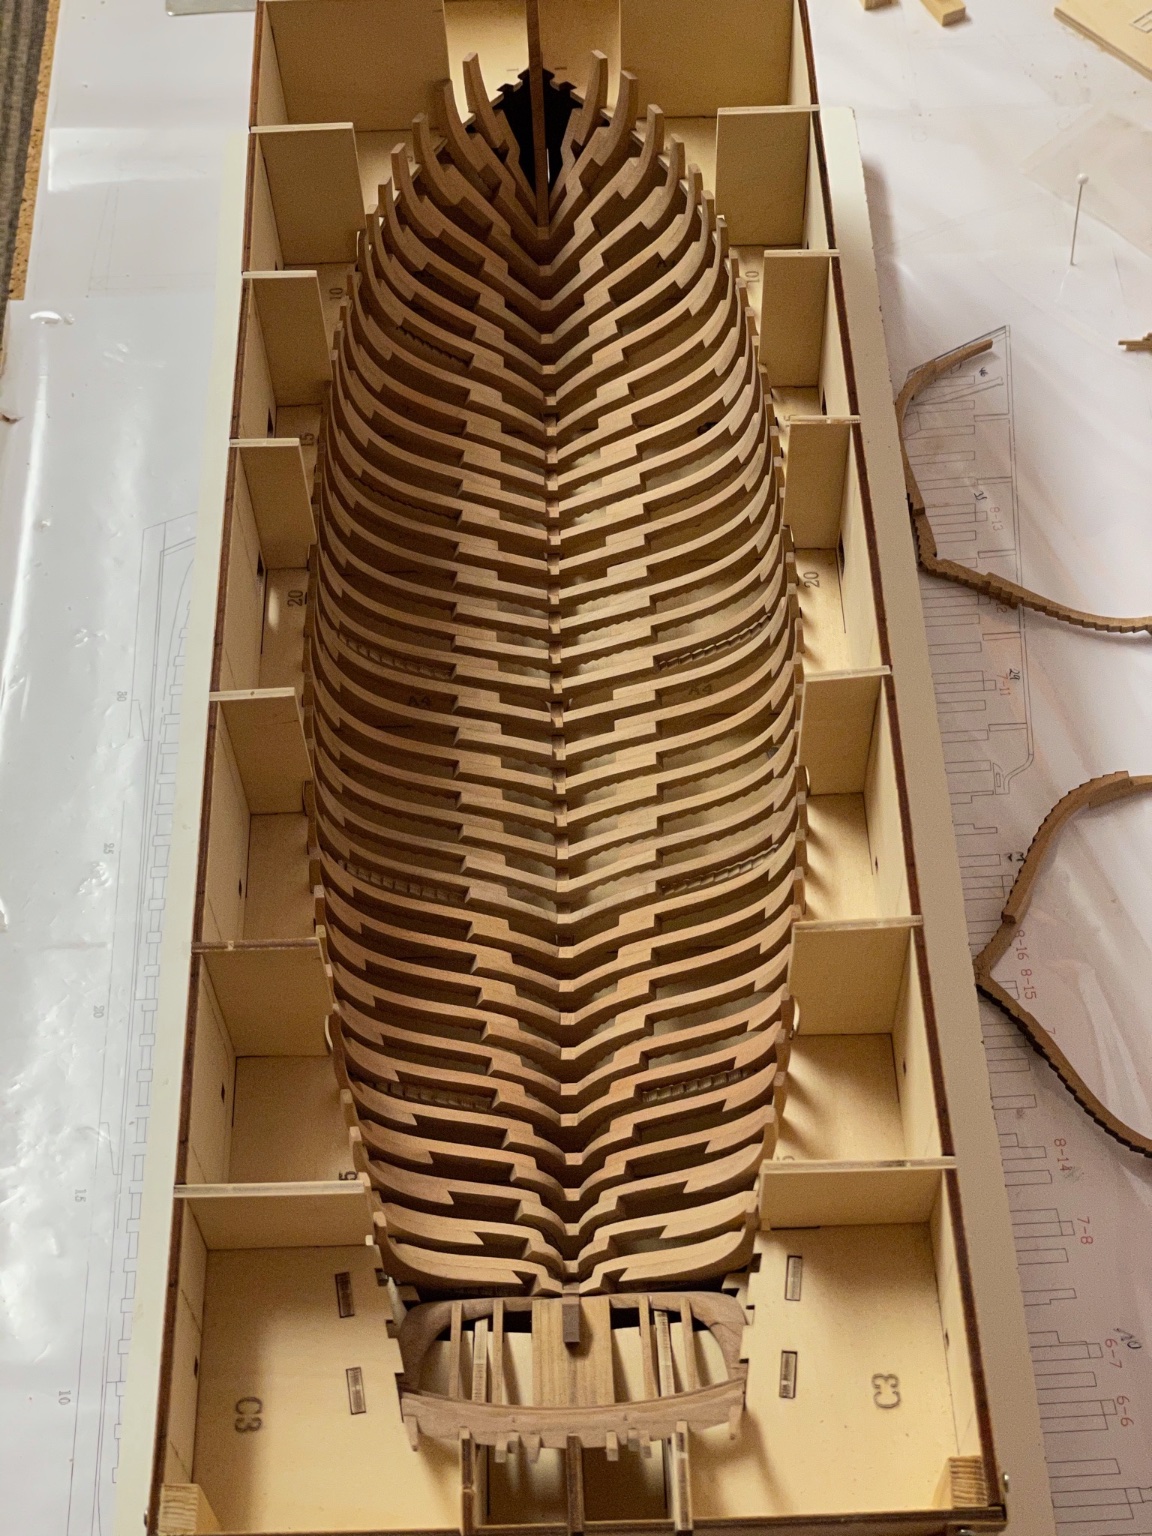
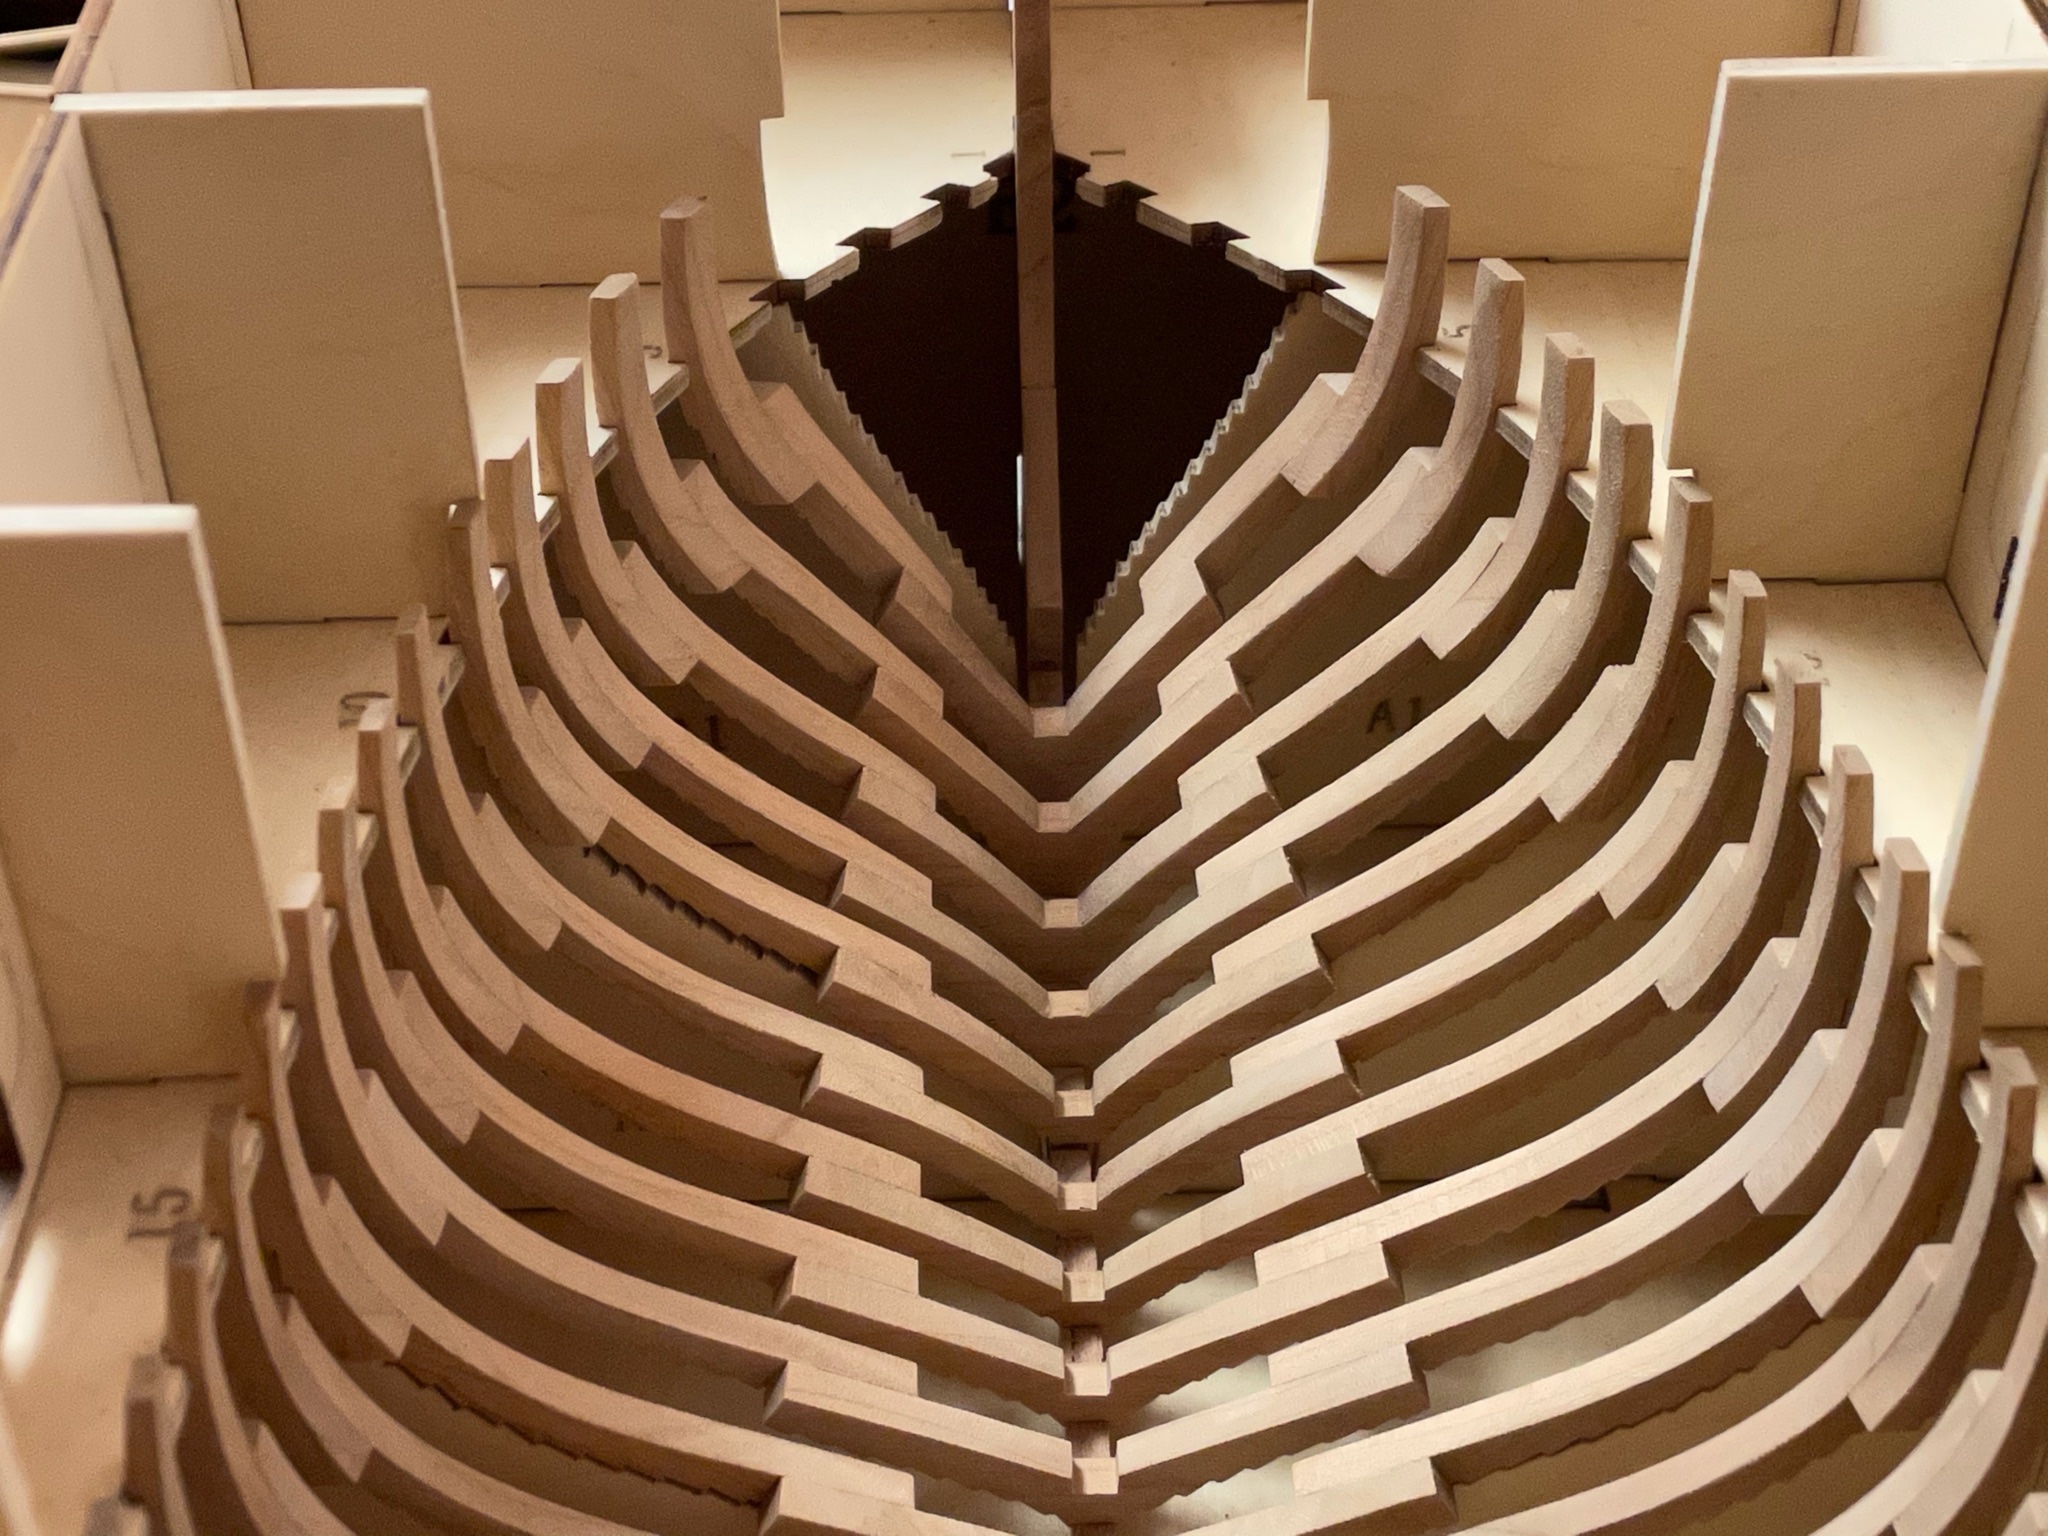
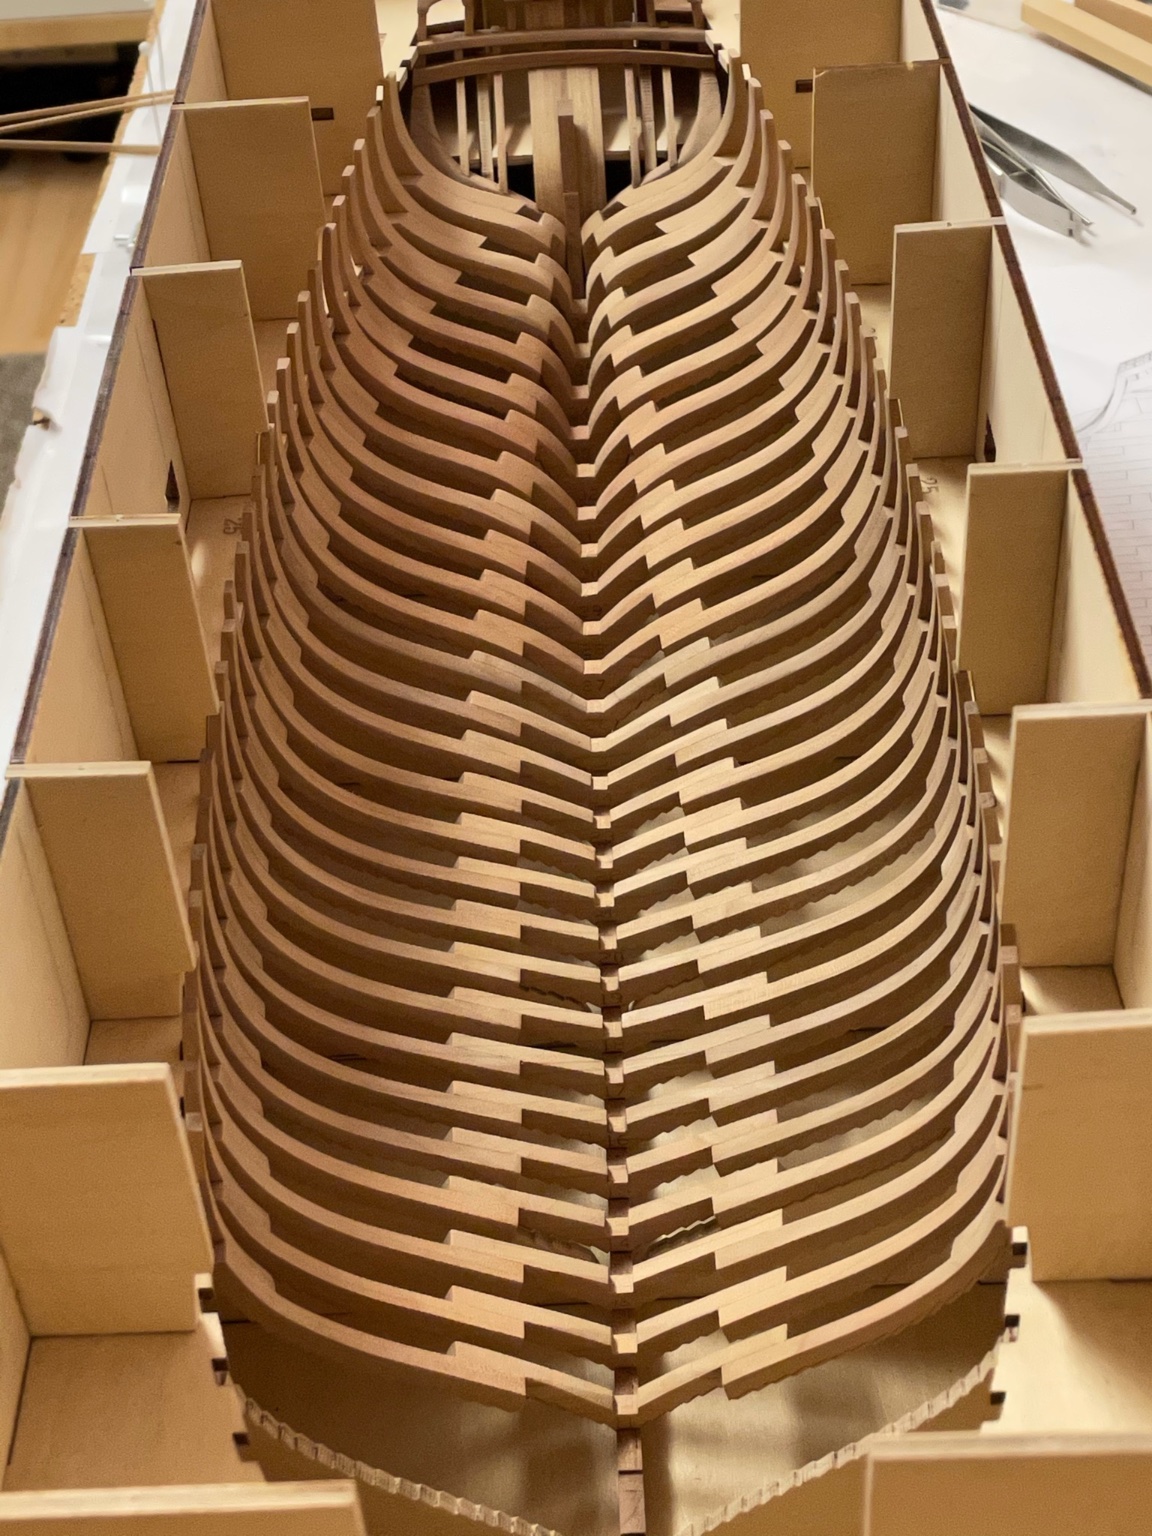
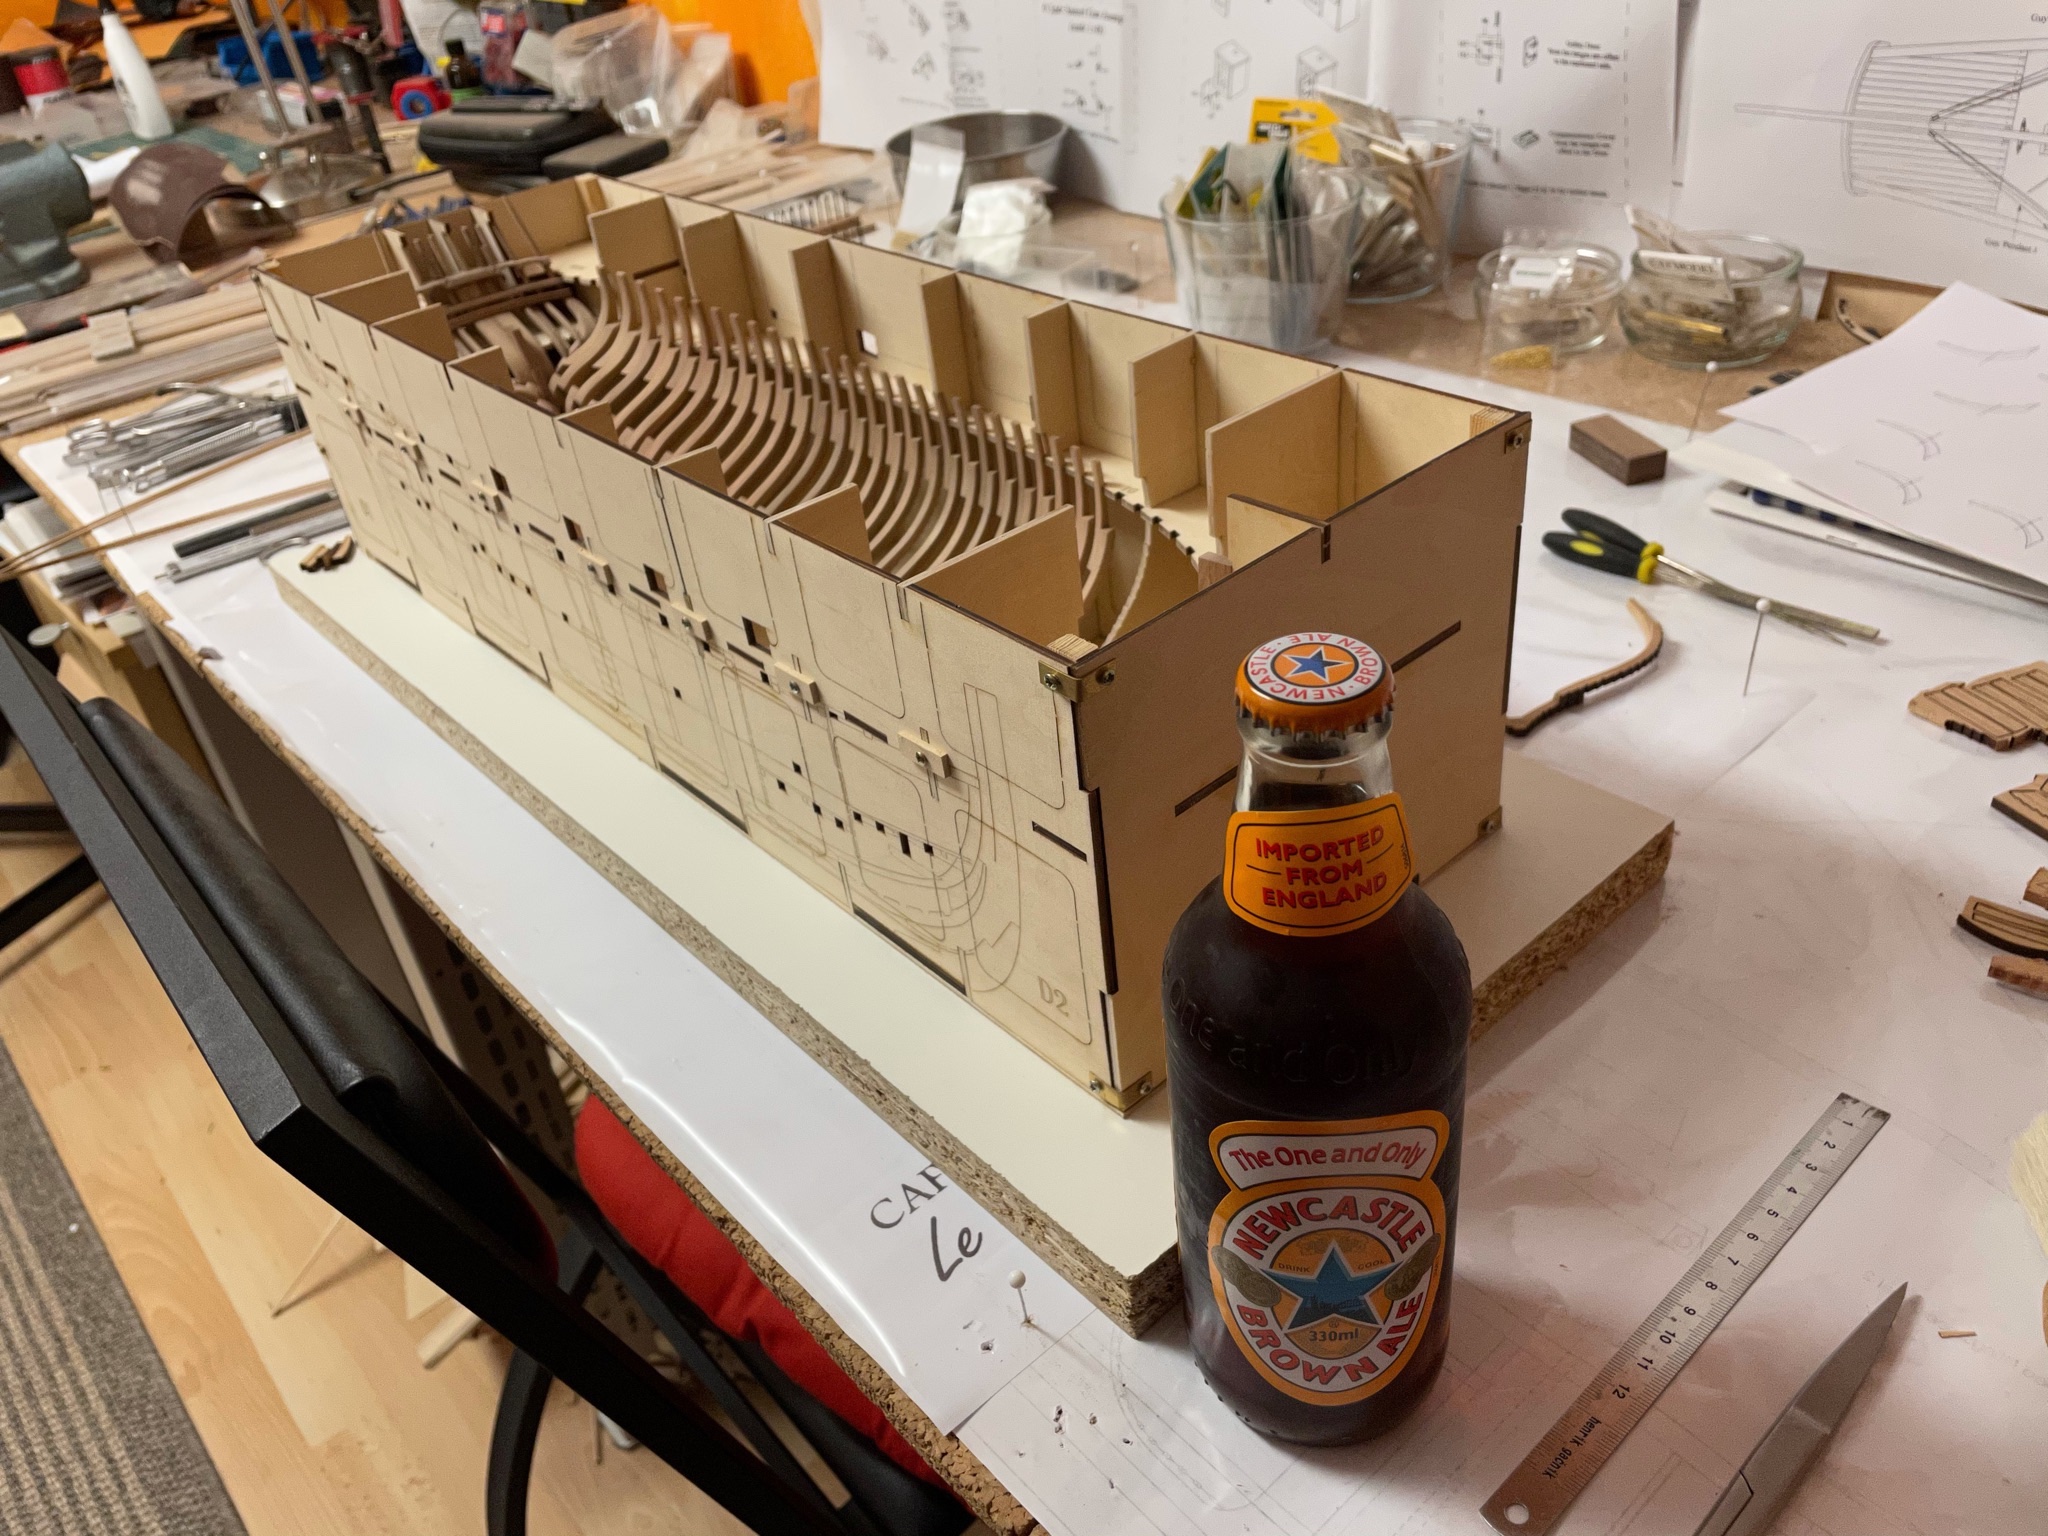
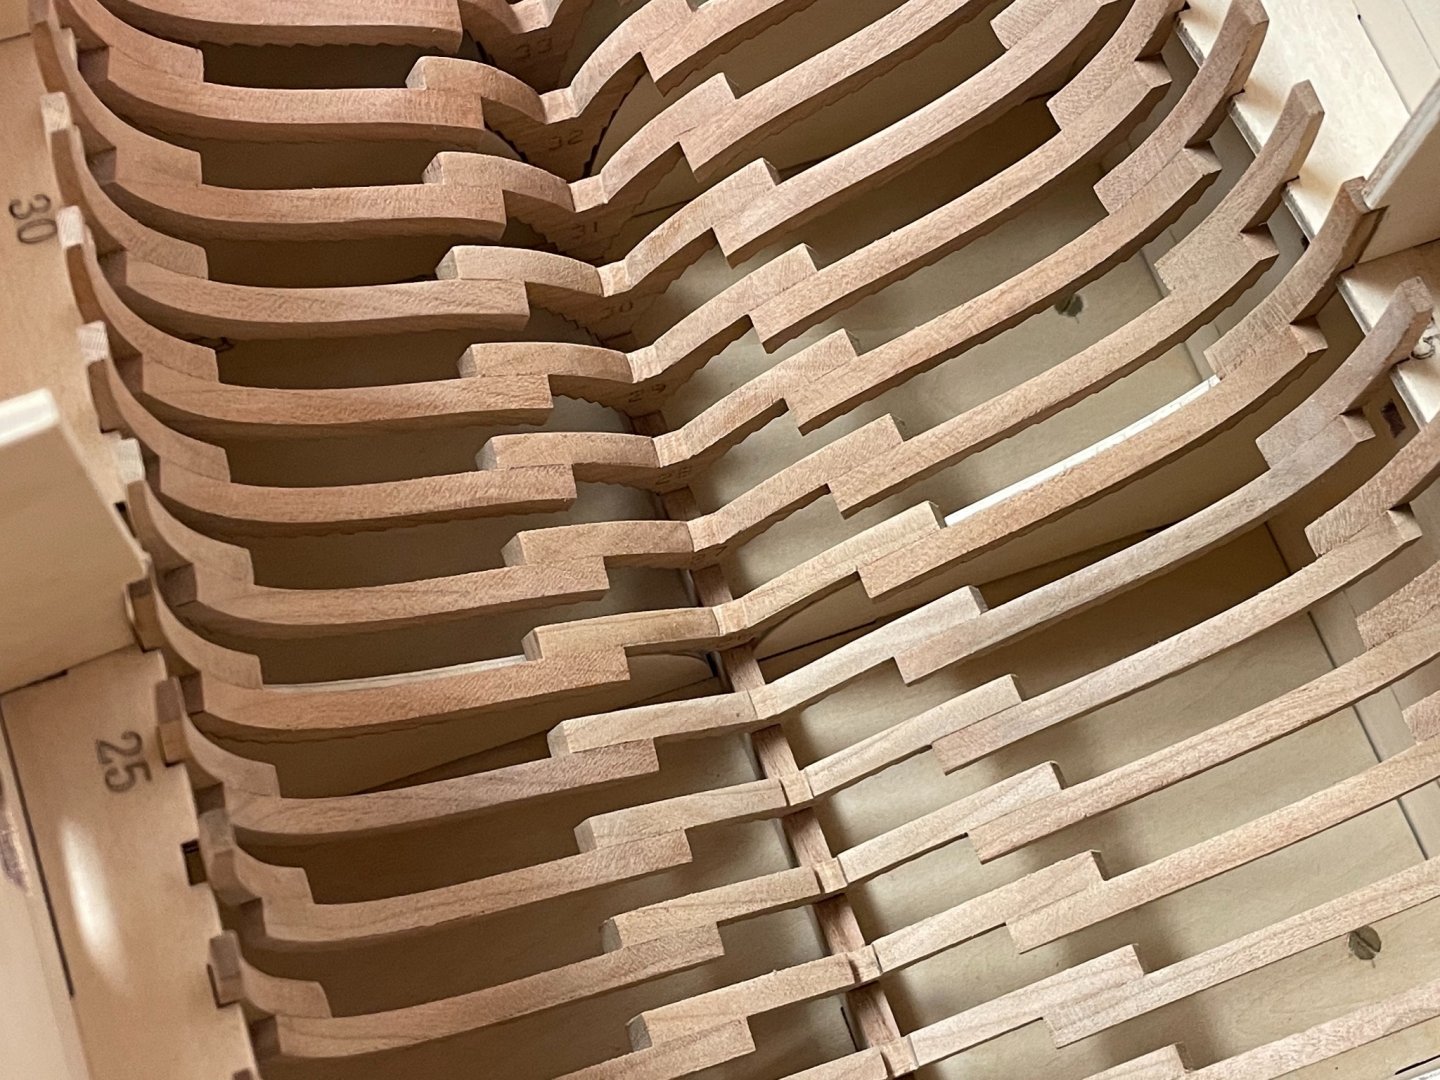
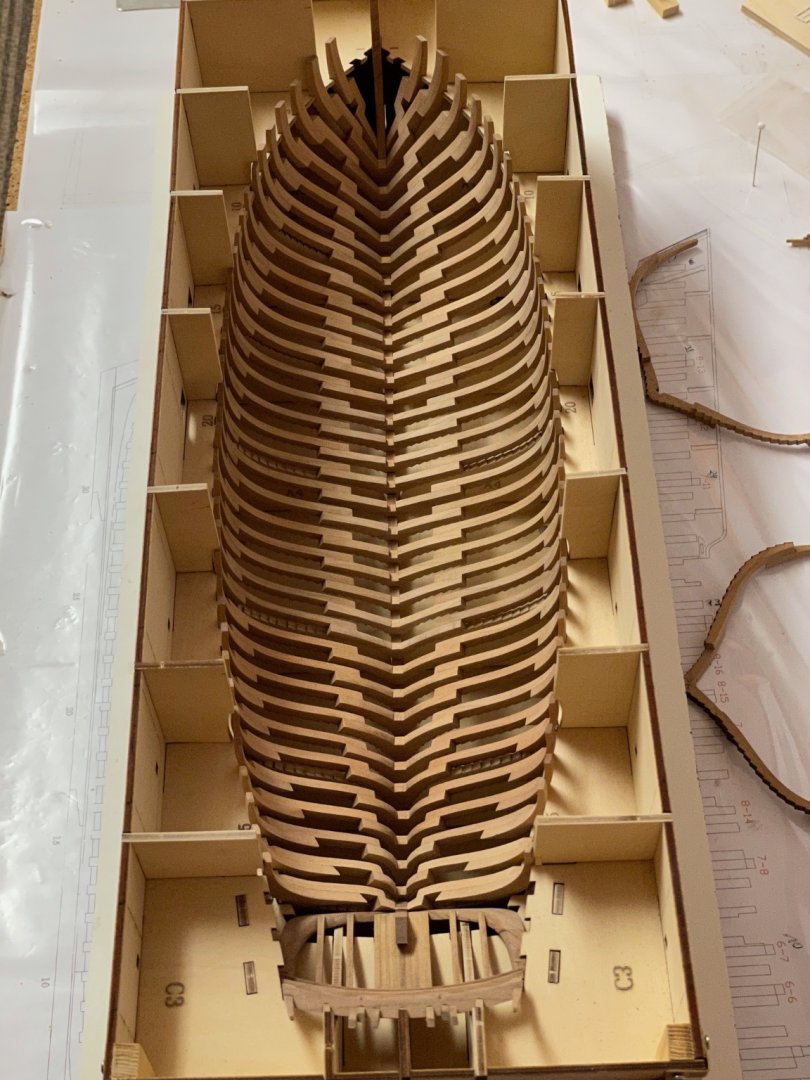
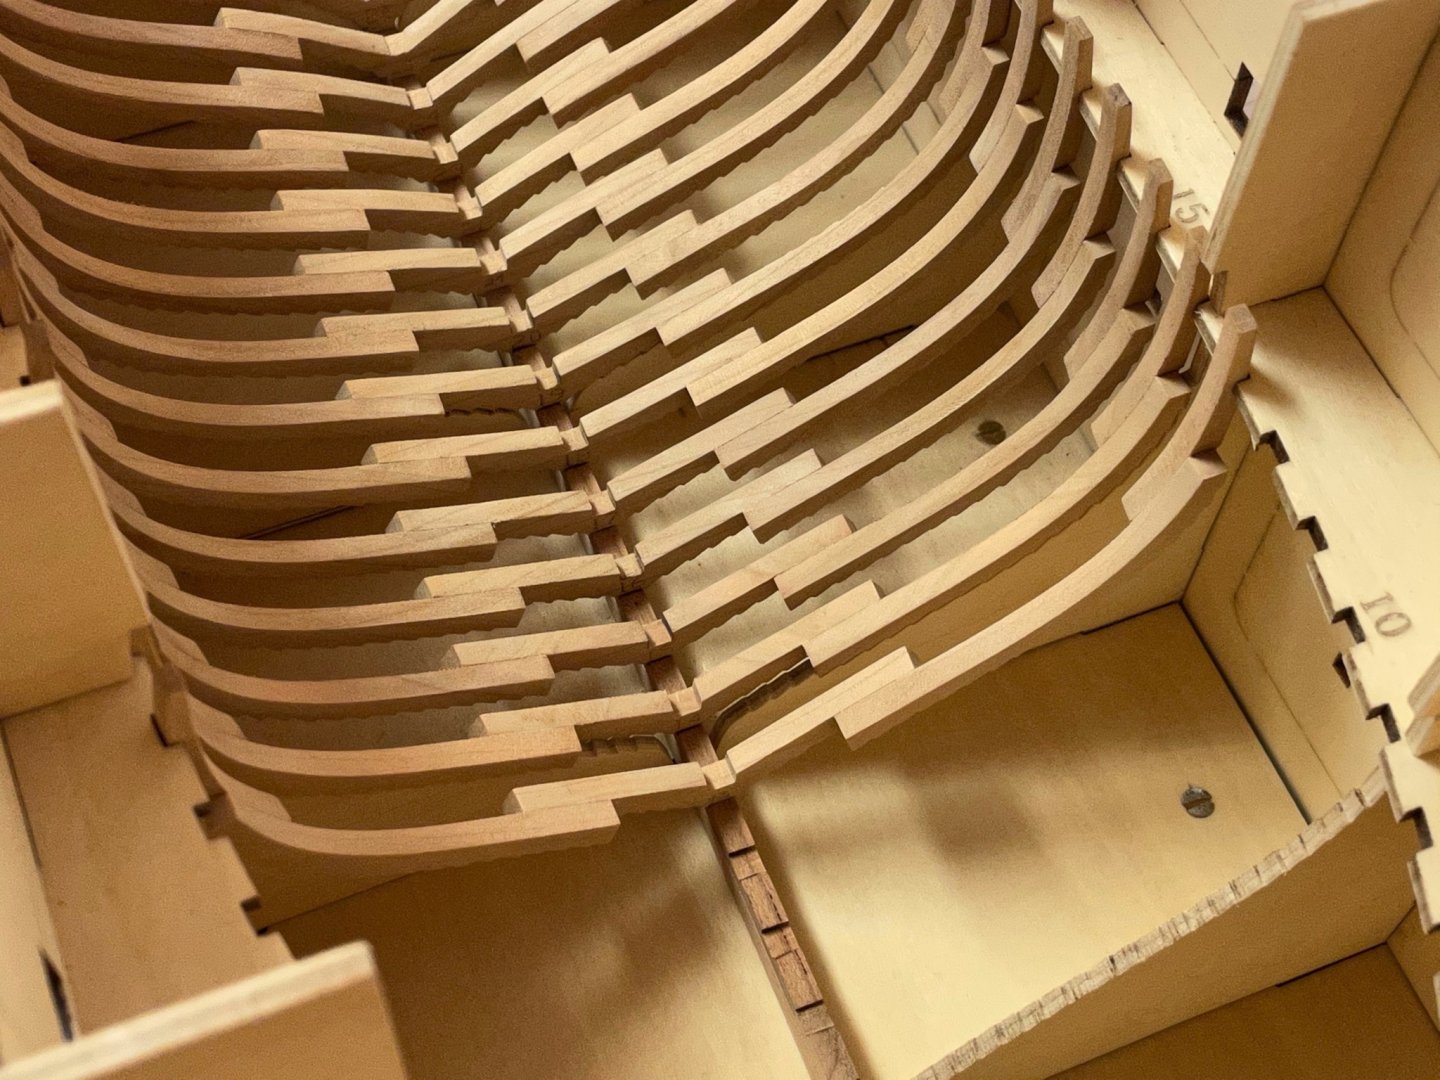
Finally found the time to correct the jig. The side-parts A1 - 7 have sawtooth pattern cut out to match the related frames but I had some difficulties to fit the frames in. So I deconstructed the jig (it wasn’t glued) and corrected all side parts basically by sanding off about 2 millimeters of substance. As the position of the frames is determined by the horizontal jig and the keel anyway changing the side-parts doesn‘t affect the geometry of the hull. Now all frames are aligned properly but still only dry-fitted. I have to enlarge some frame-slots to fit in the keelson next. Then I will be able to show something new instead of frames all the time. Stay tuned .. and save. Andreas

-
Wow, that is indeed a big ship and a nice subject to model. Good luck for your project and I‘m looking forward to watch your progress.
-
Nice, is this boxwood? Where did you buy the strips (if I may ask?)?
-
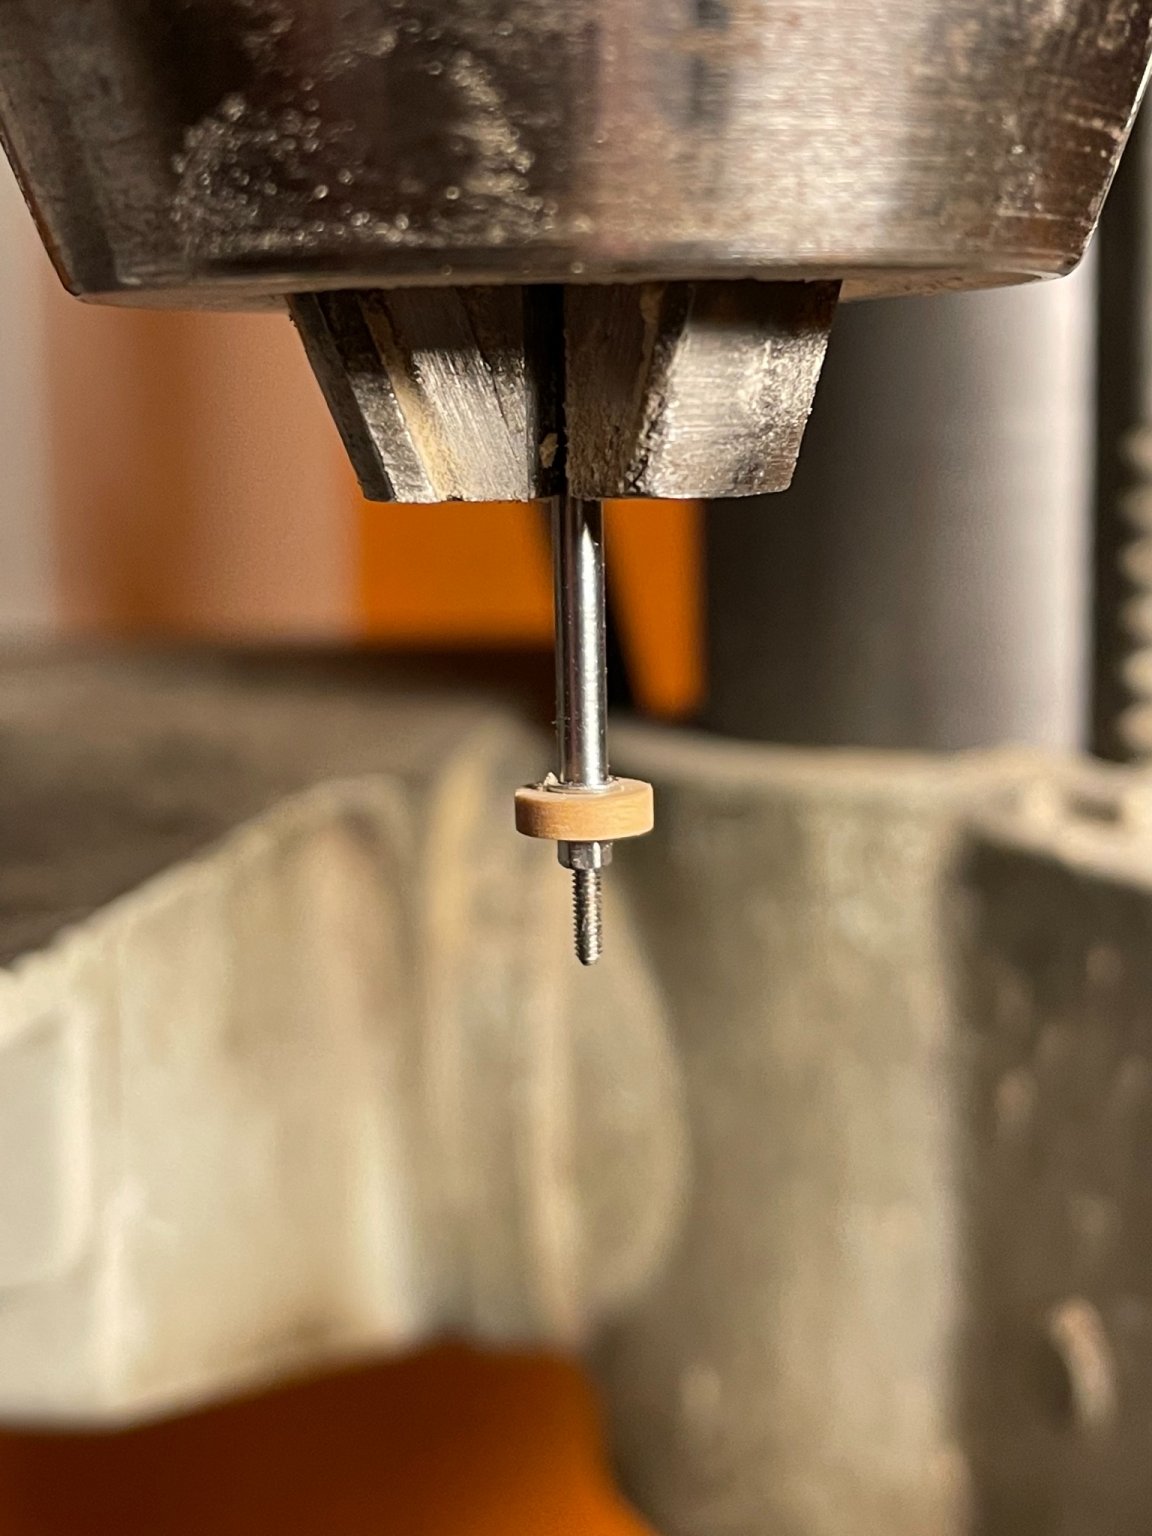
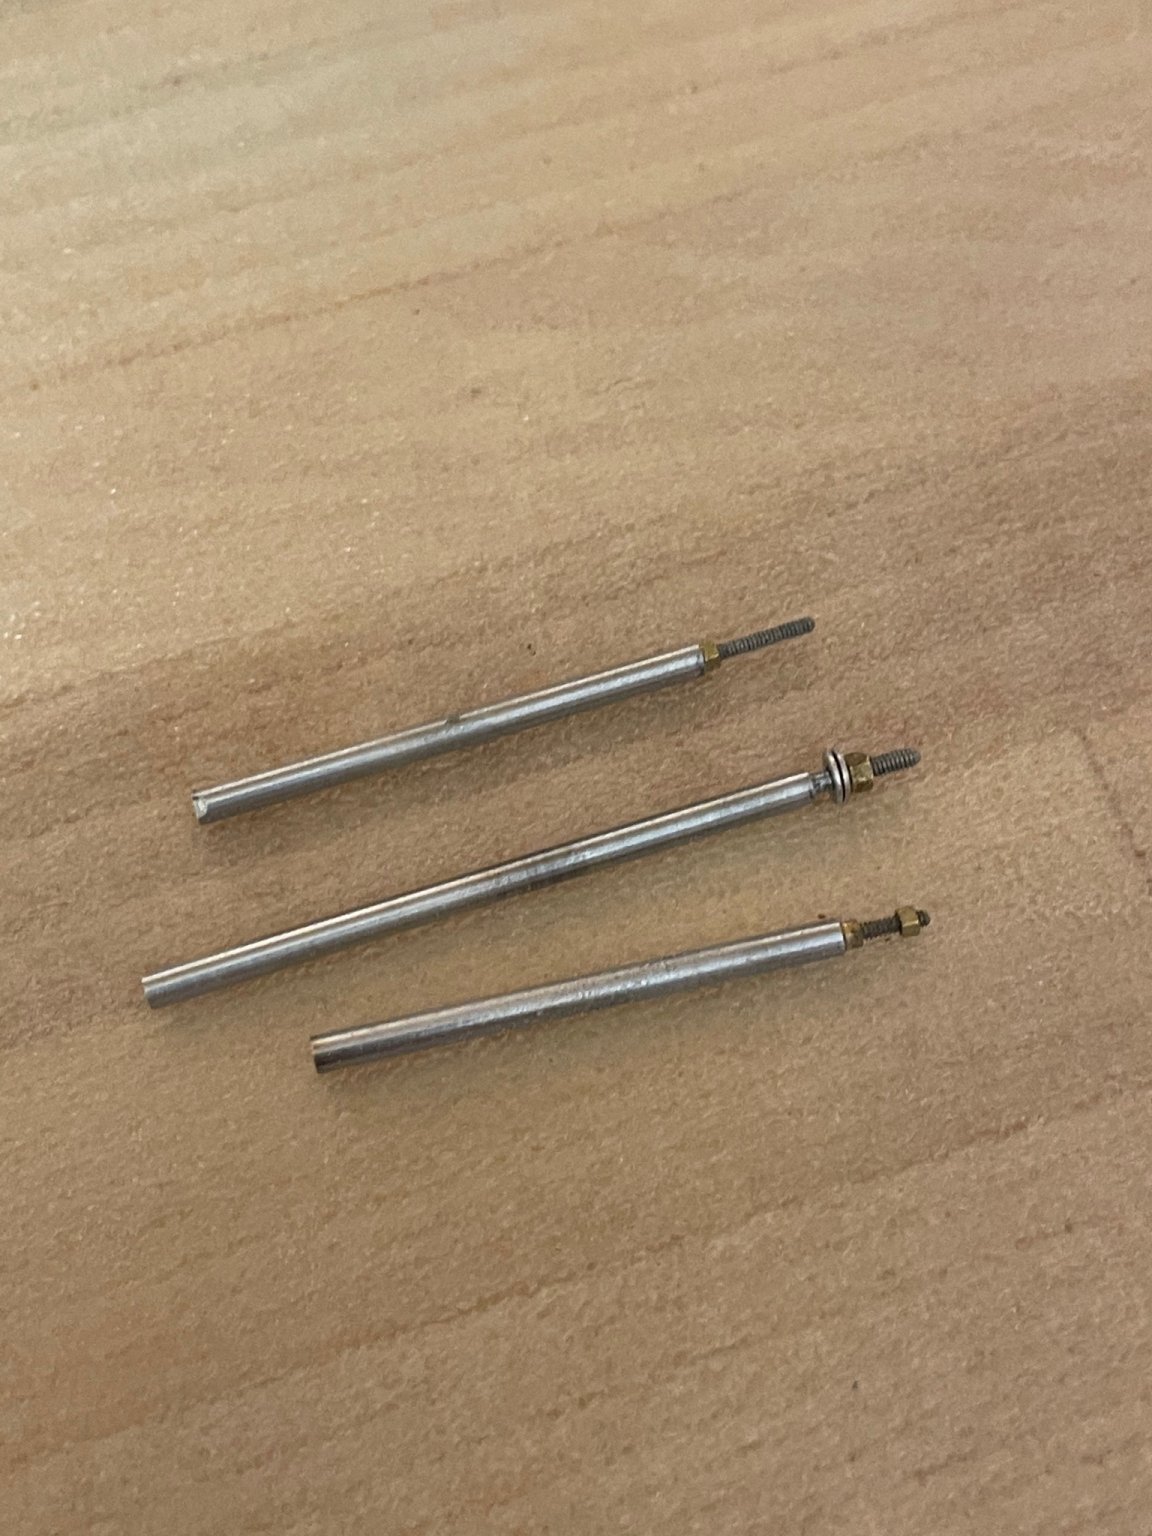
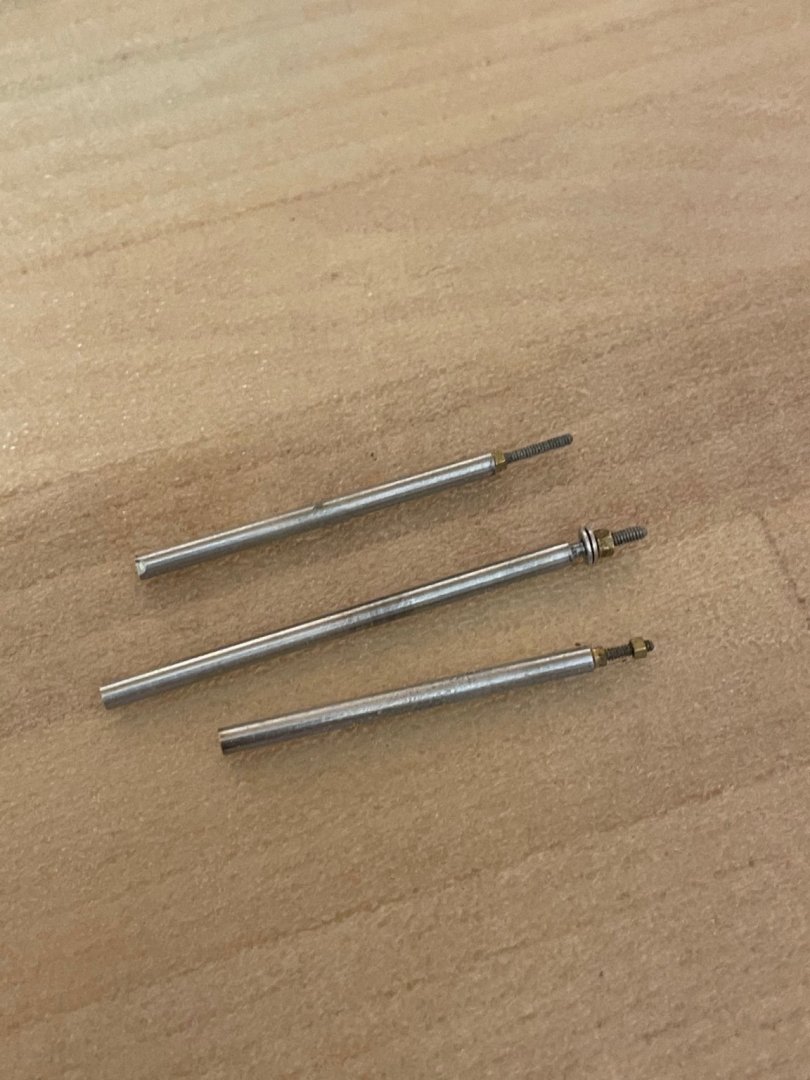
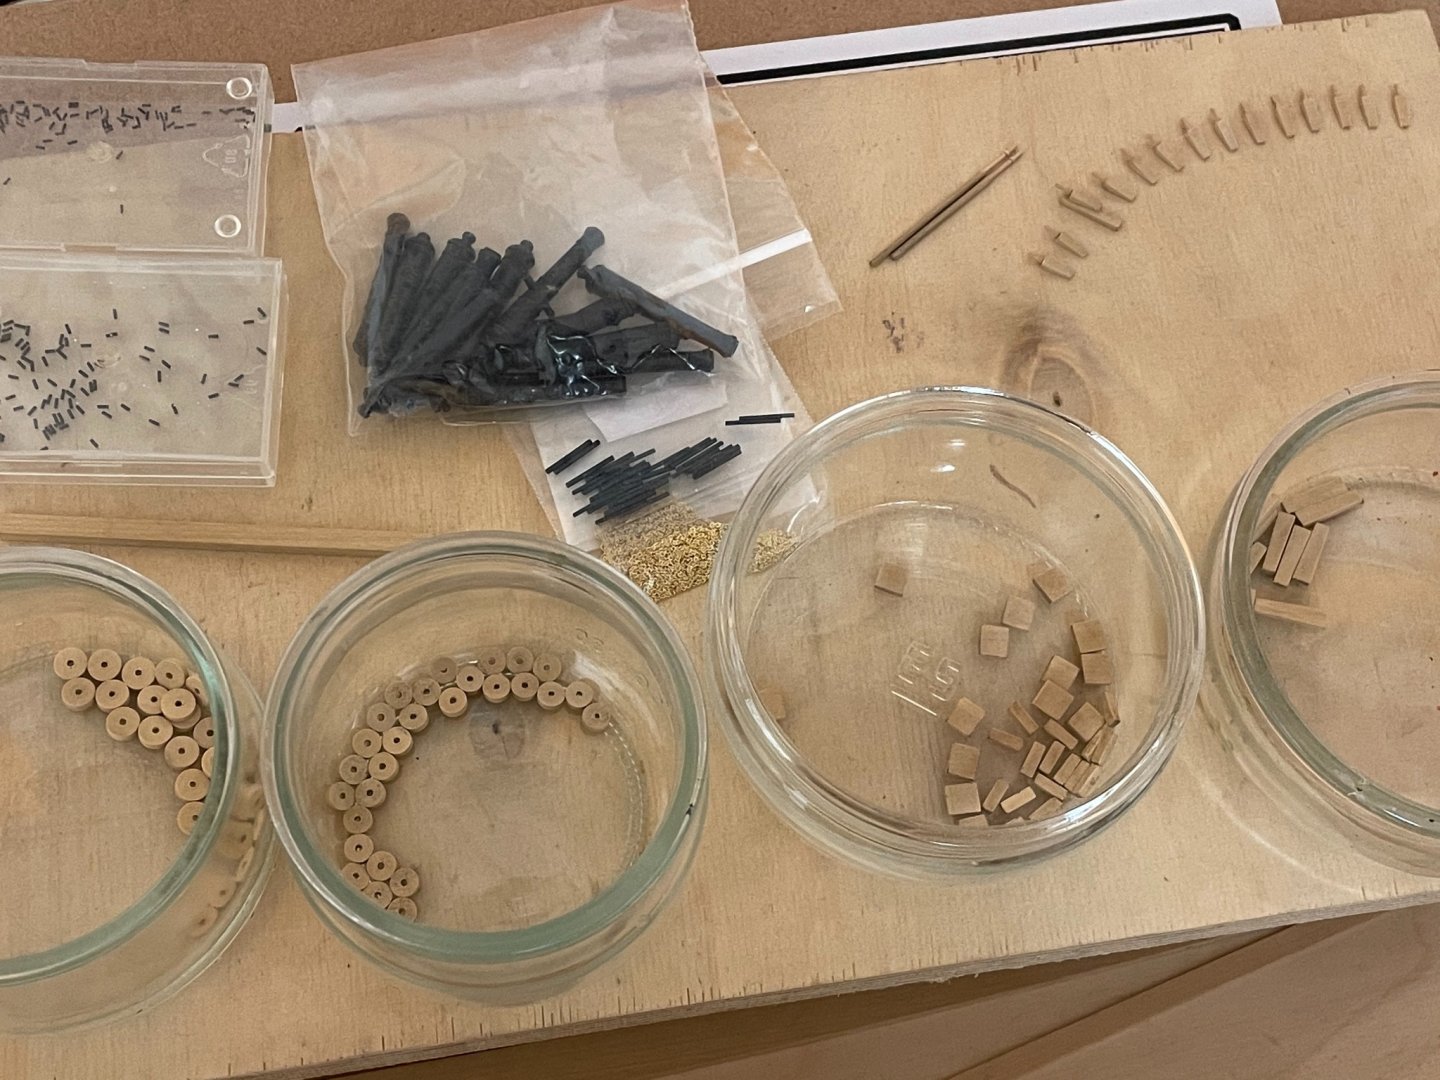
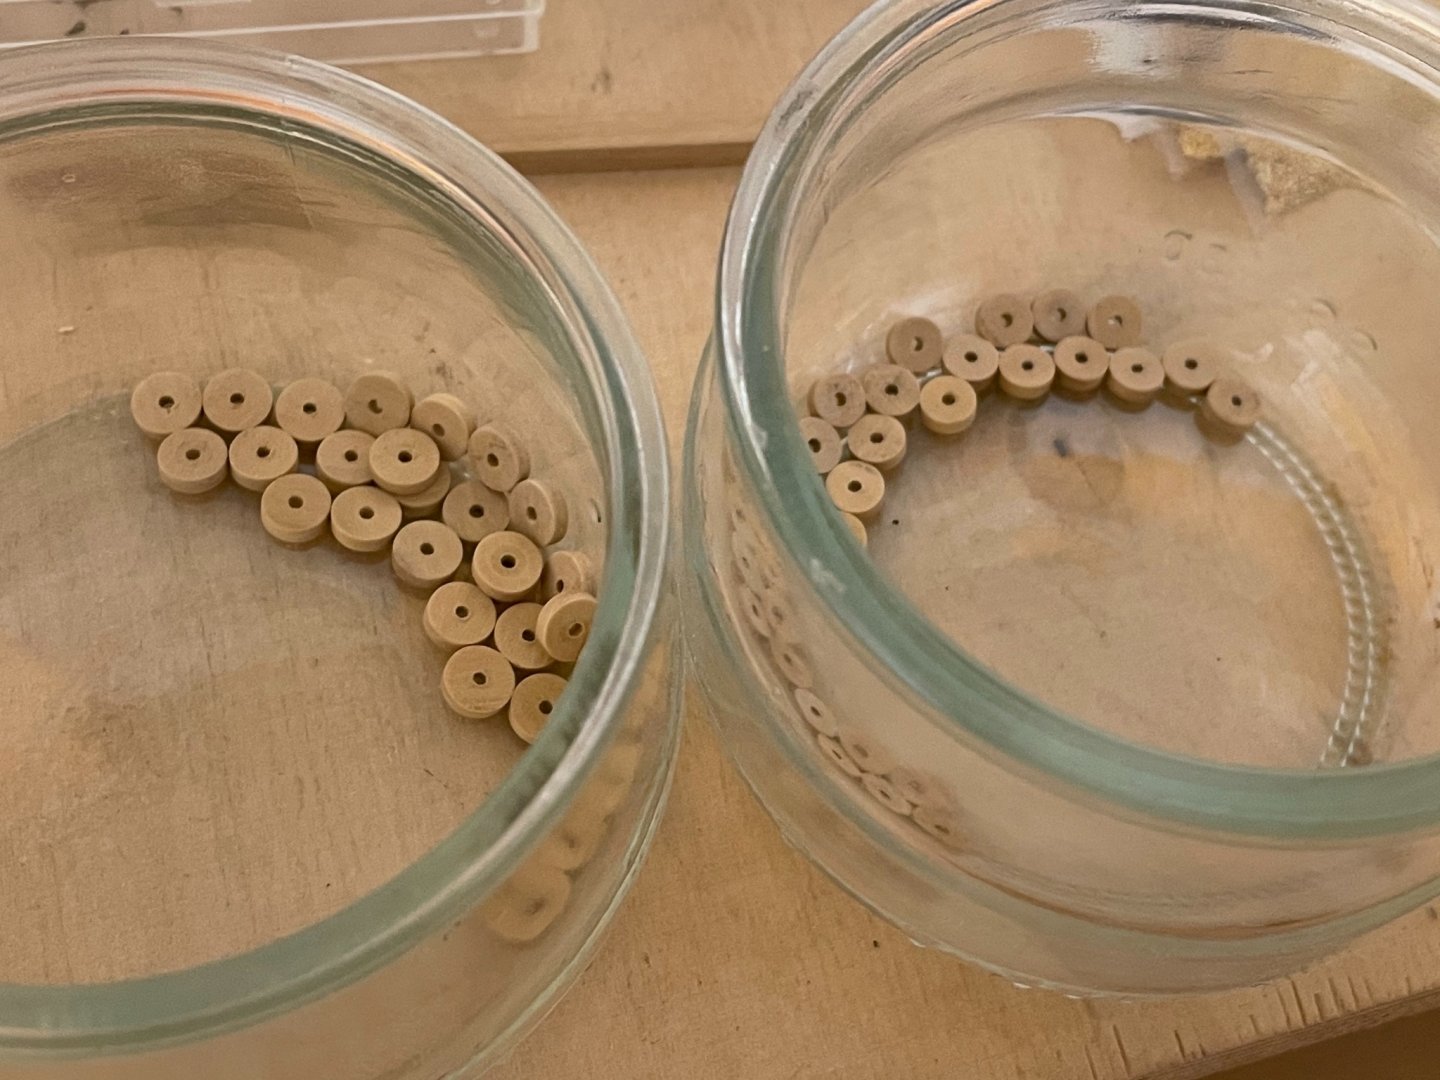
The Coureur is having my full attention, so I have to switch between both projects for a while. But I found some time to make more cannon parts. As I don’t own a lathe, I made myself some little tools to make the wheels by using a regular bench drill. They‘re made of stainless steel tube with a thread (cut off from of a 1,2mm diameter screw) soldered into it. The wheels are drawn with a pencil using a template, a 1,2mm central hole is drilled and then they are roughly cut off from 1/16‘‘ sheet boxwood. The tool can be used to turn the wheels in my bench drill using spacers and a micro nut to lock the boxwood part. I use these tools for turning small parts like wheels. The wheel is made by using sanding paper and a file, two wheels can be made at one. The diameter is checked by an electronic measuring stick several times until the desired diameter is reached. And I managed to do all front and rear wheels at once, 48 pieces. Now only the axles and the side parts are missing. Stay tuned .. and save. Andreas


- 64 replies
-
- 11
-

-
-
- badger
- caldercraft
- (and 1 more)
-
Fantastic work! It is difficult to recognize whether it is a model or a real ship.
-
Absolutely beautiful!
-
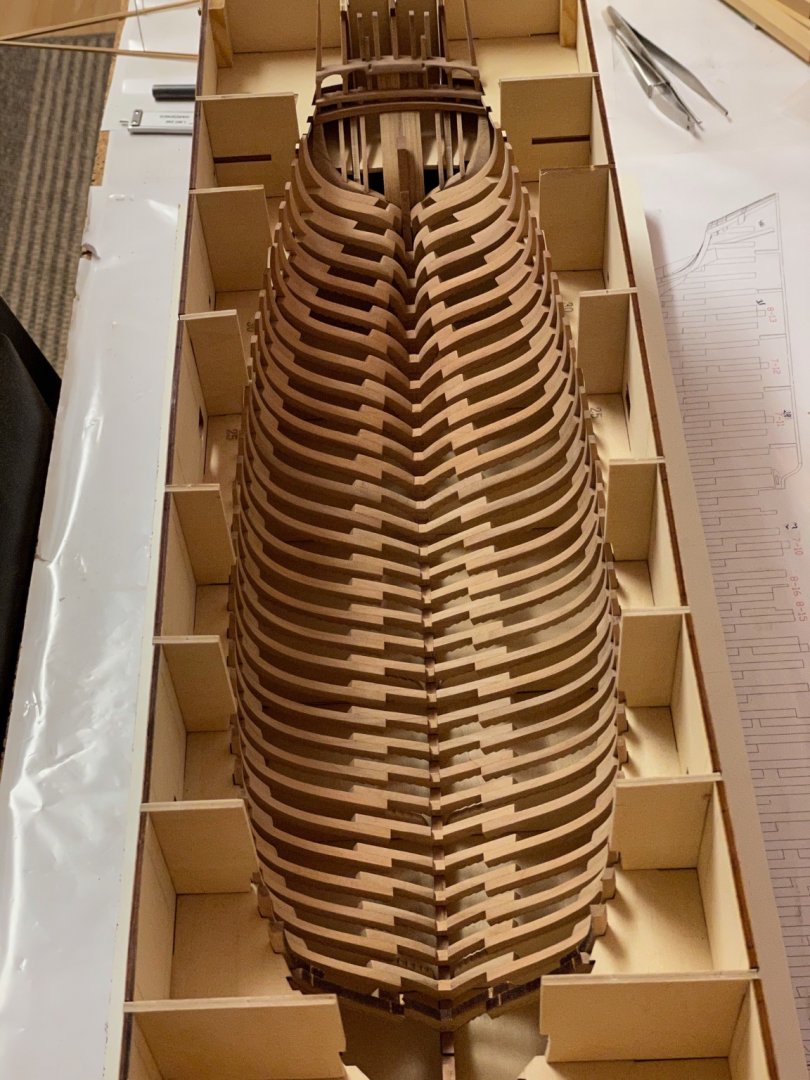
Thank you all for the nice words and the likes. I have discussed all problems with Tom. But beside some misplaced tapering lines and the rather tight fit into the building jig no more building issues have been occurred so far.
-
Nice work so far.
-
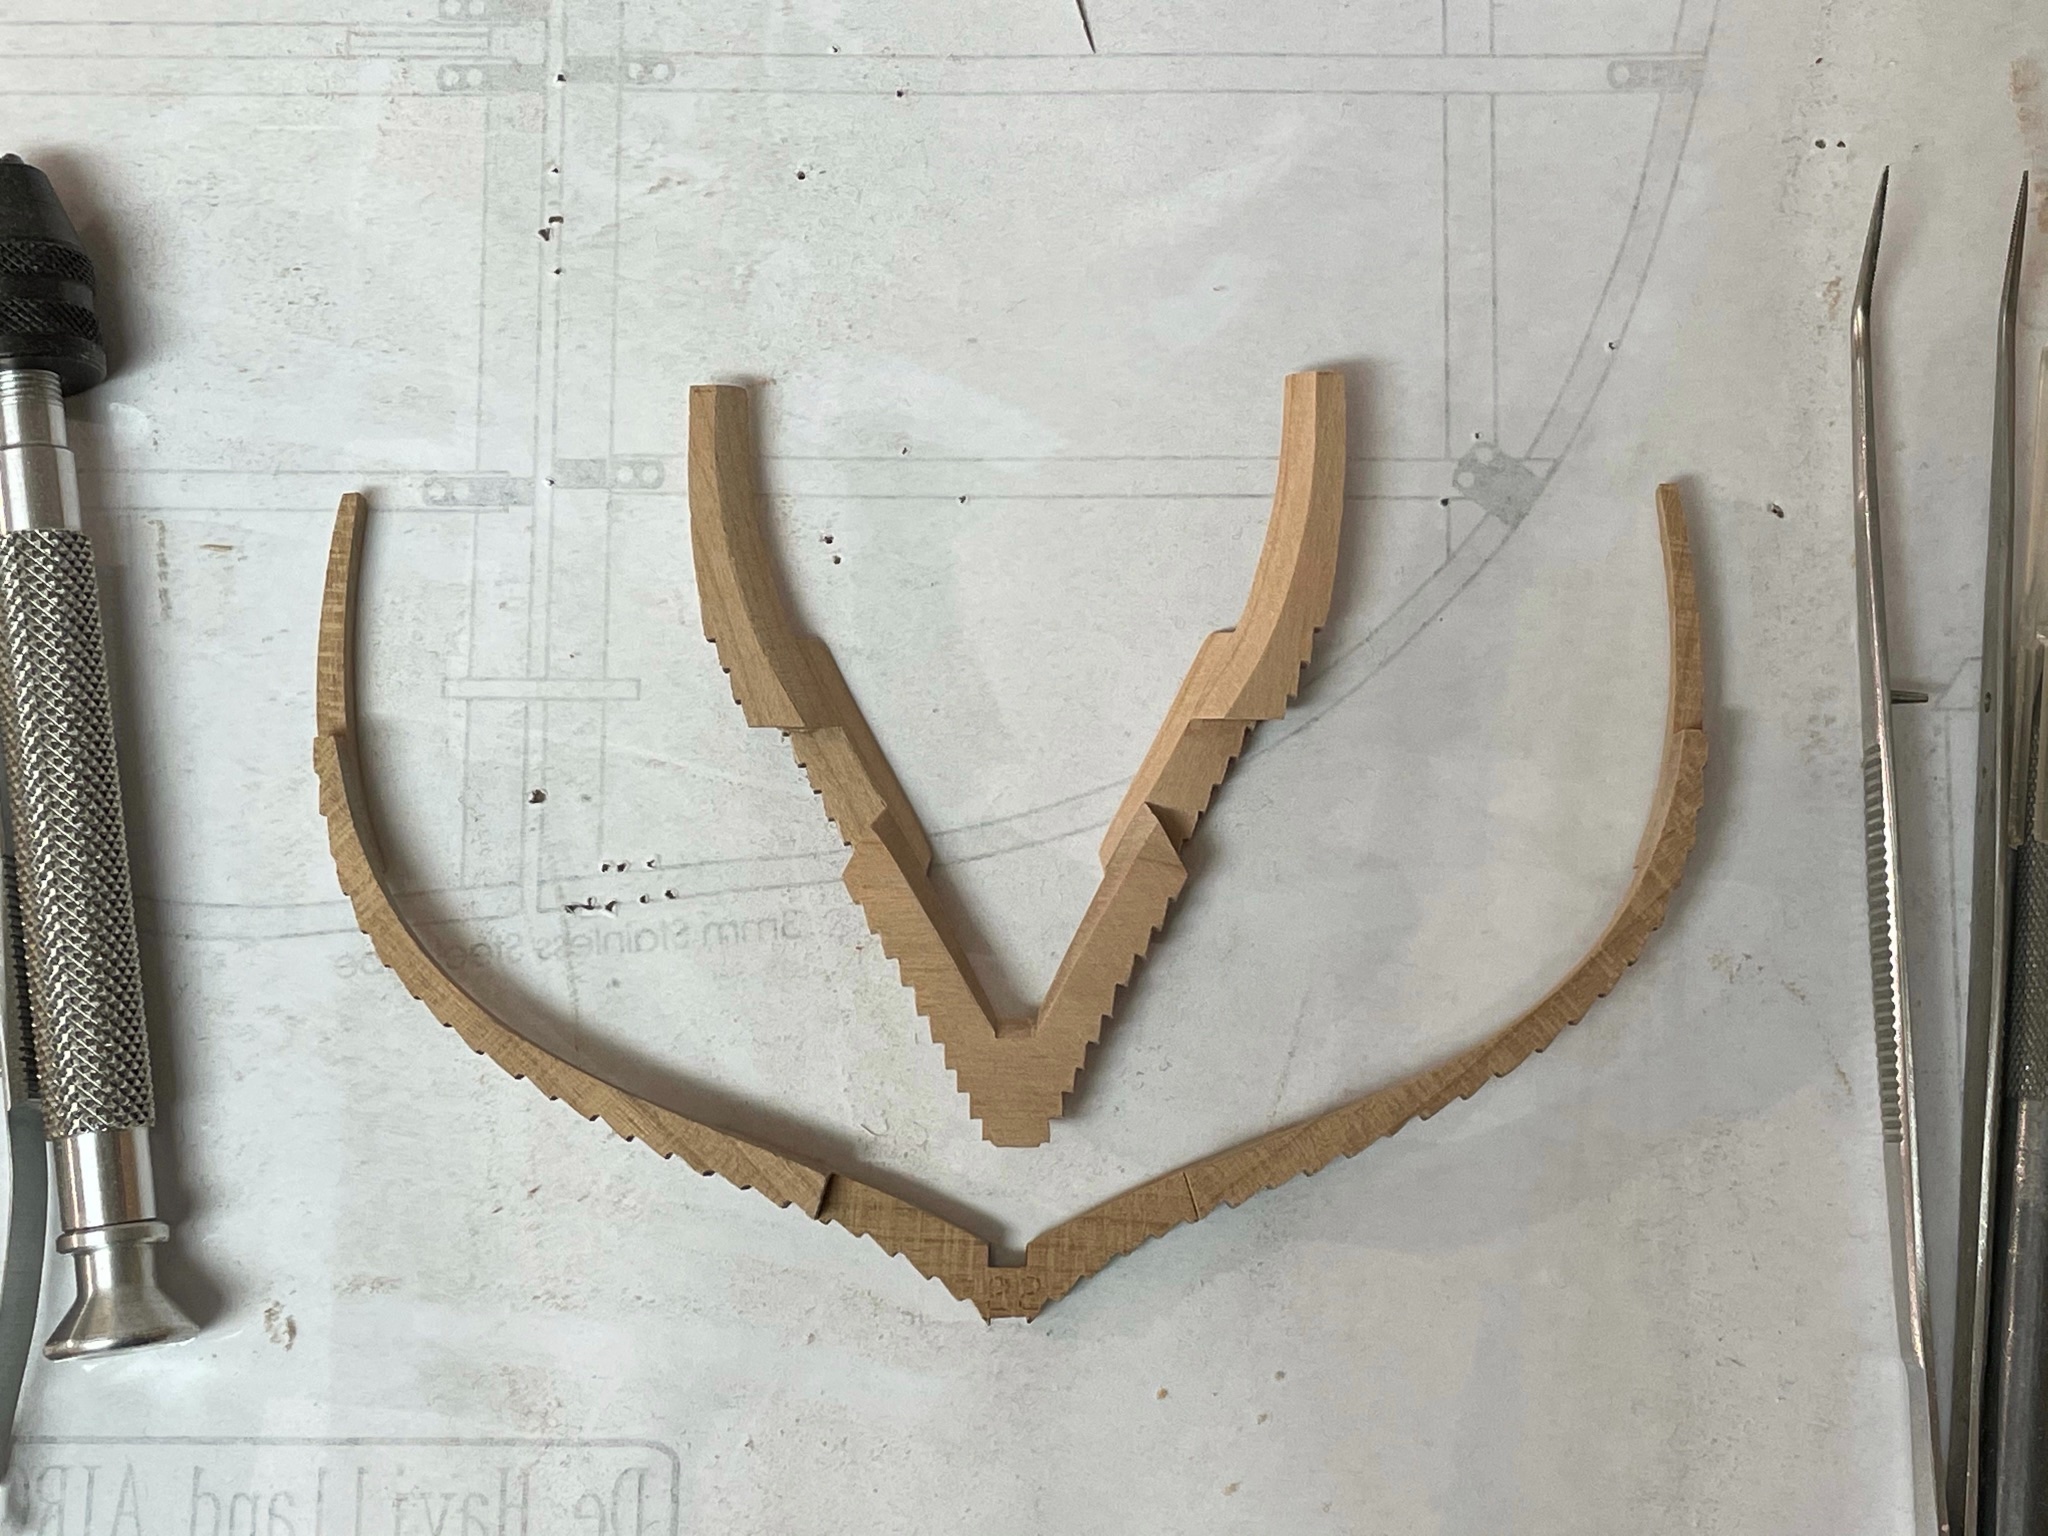
I did the last multi-part frame today, No. 3. It is actually tapered on almost all heads, so I checked the plan multiple times to get it into the correct shape. As all the other frames it is just dry-fitted into the jig. Next thing will be to disassemble the jig and correct all vertical plywood parts so all frames that interfere with the jig can be aligned properly on the keel. As the cant frames are to be attached after installing the keelson I will do them later. Stepstone reached .. jippie. Stay tuned .. and save. Andreas

-
Very beautiful finish!
-
Very nice, especially with the deck beams exposed. I wish you would suggest doing one of those kits in quarter scale.
-
Very nice. I like your idea of substituting the supplied wood with pear - it has a beautiful colour.
-
Today frame no. 4 has been assembled. It is the smallest full frame and required a lot of tapering. It looks like a baby-frame compared to a midship frame. So there is only one multi-part frame left. But I have to repair a frame after that because I did slightly too much tapering 🤔. And some jig-parts have to be modified so all frames fit nicely into the keel. Anyway only 3 frames until I reach the bow. Stay tuned .. and save. Andreas


-
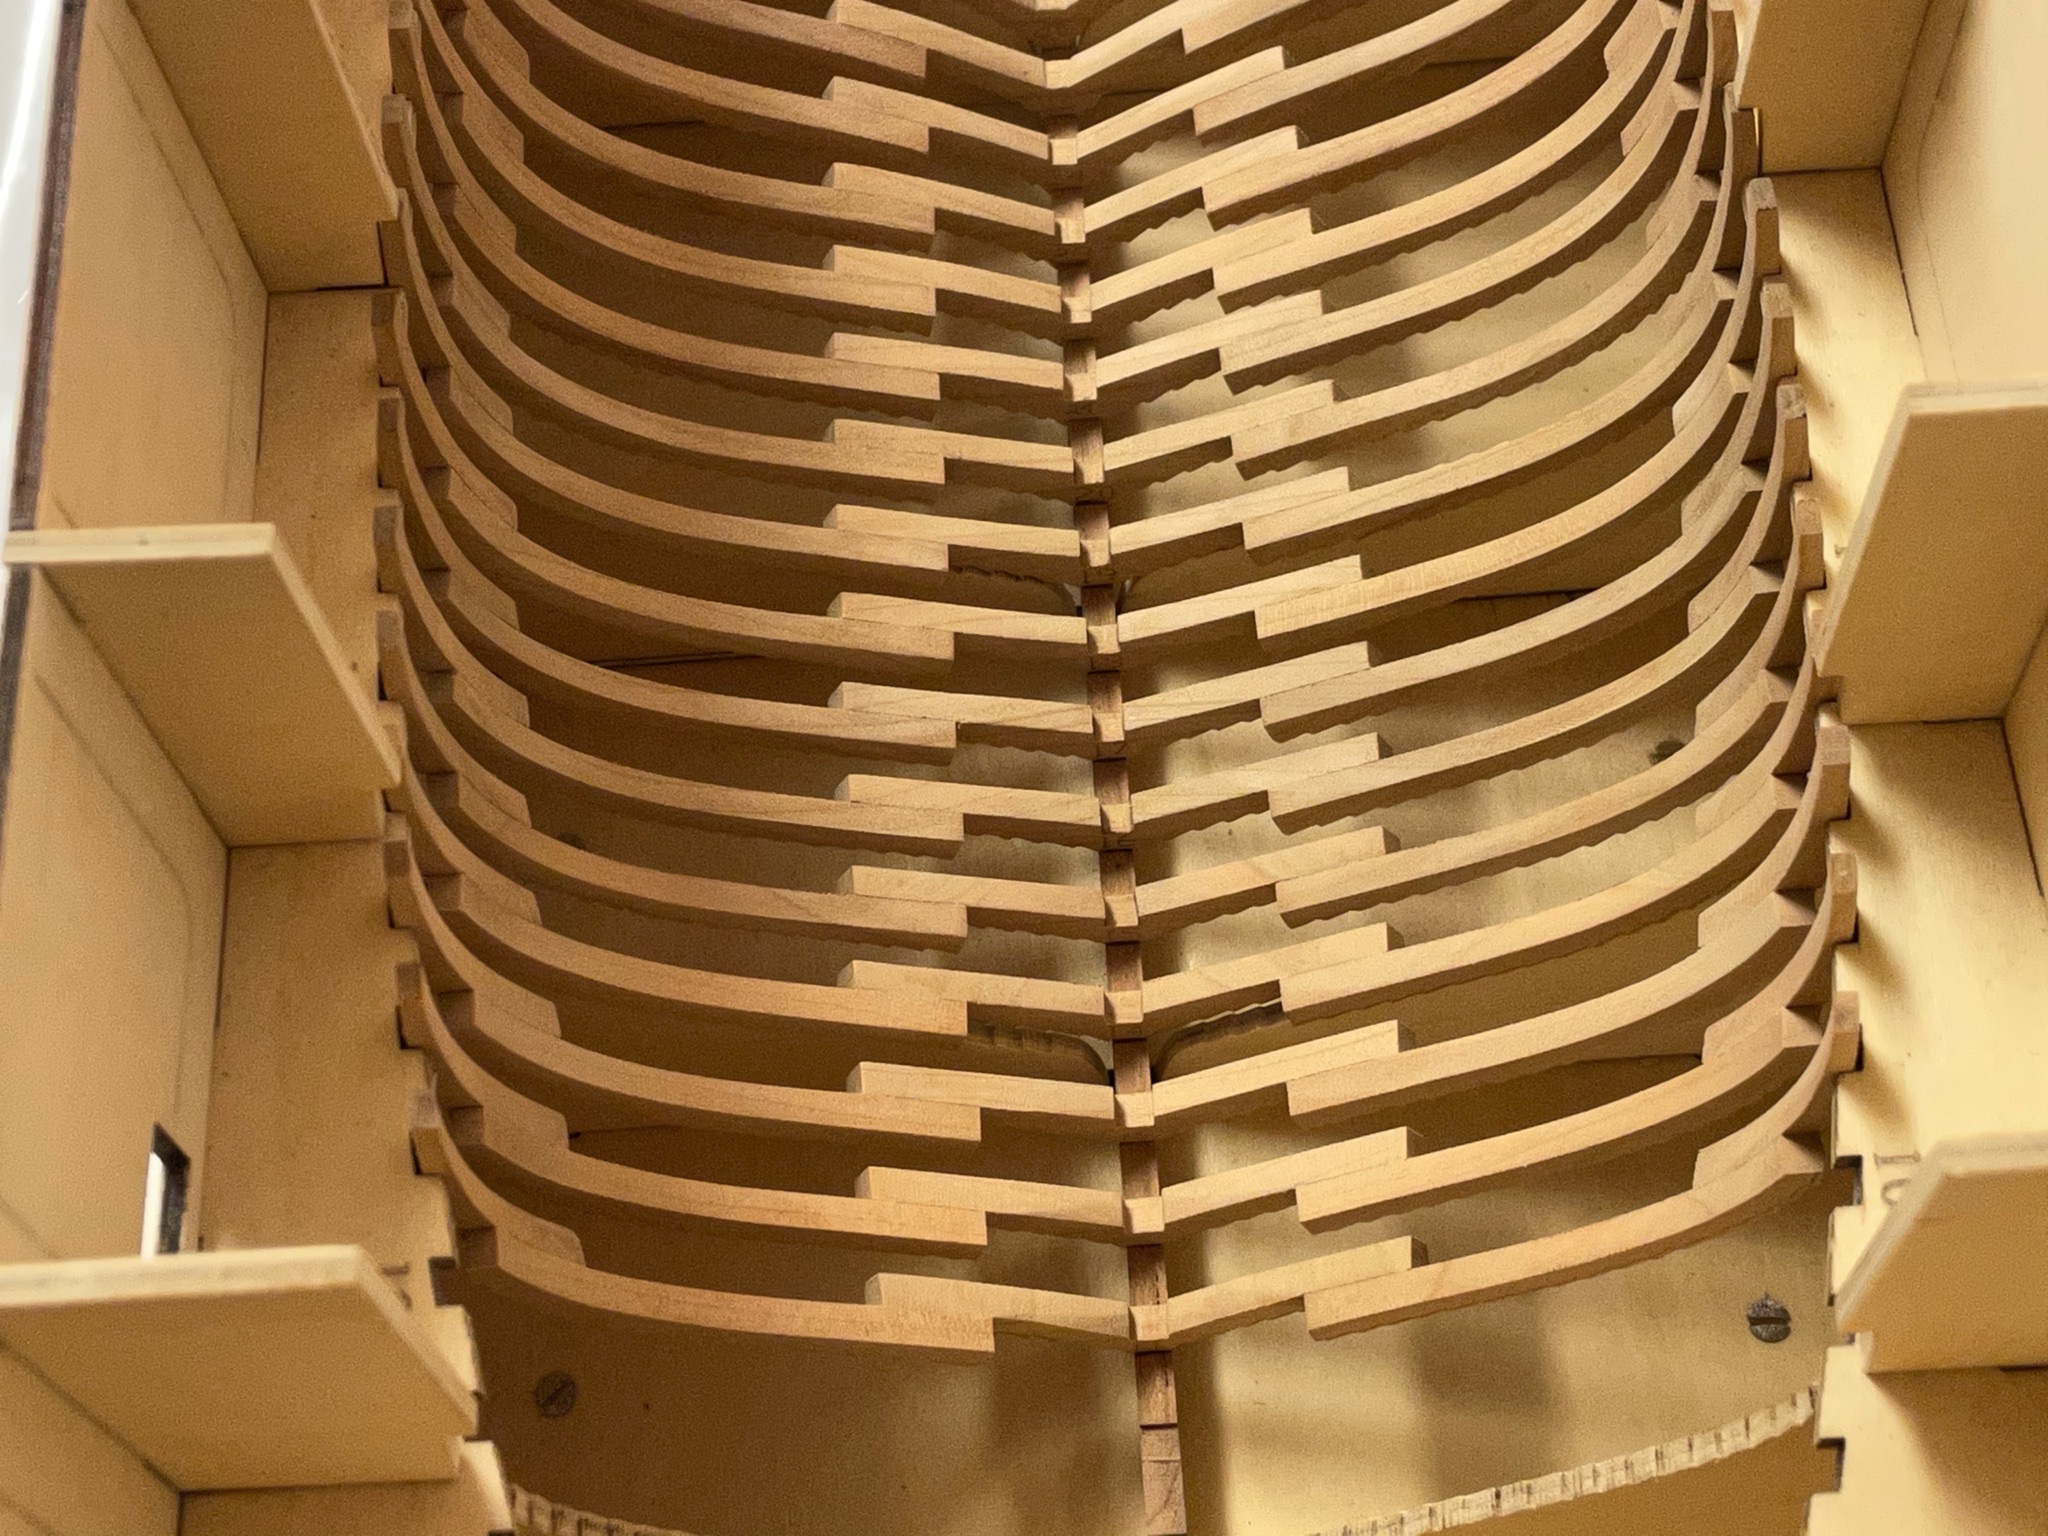
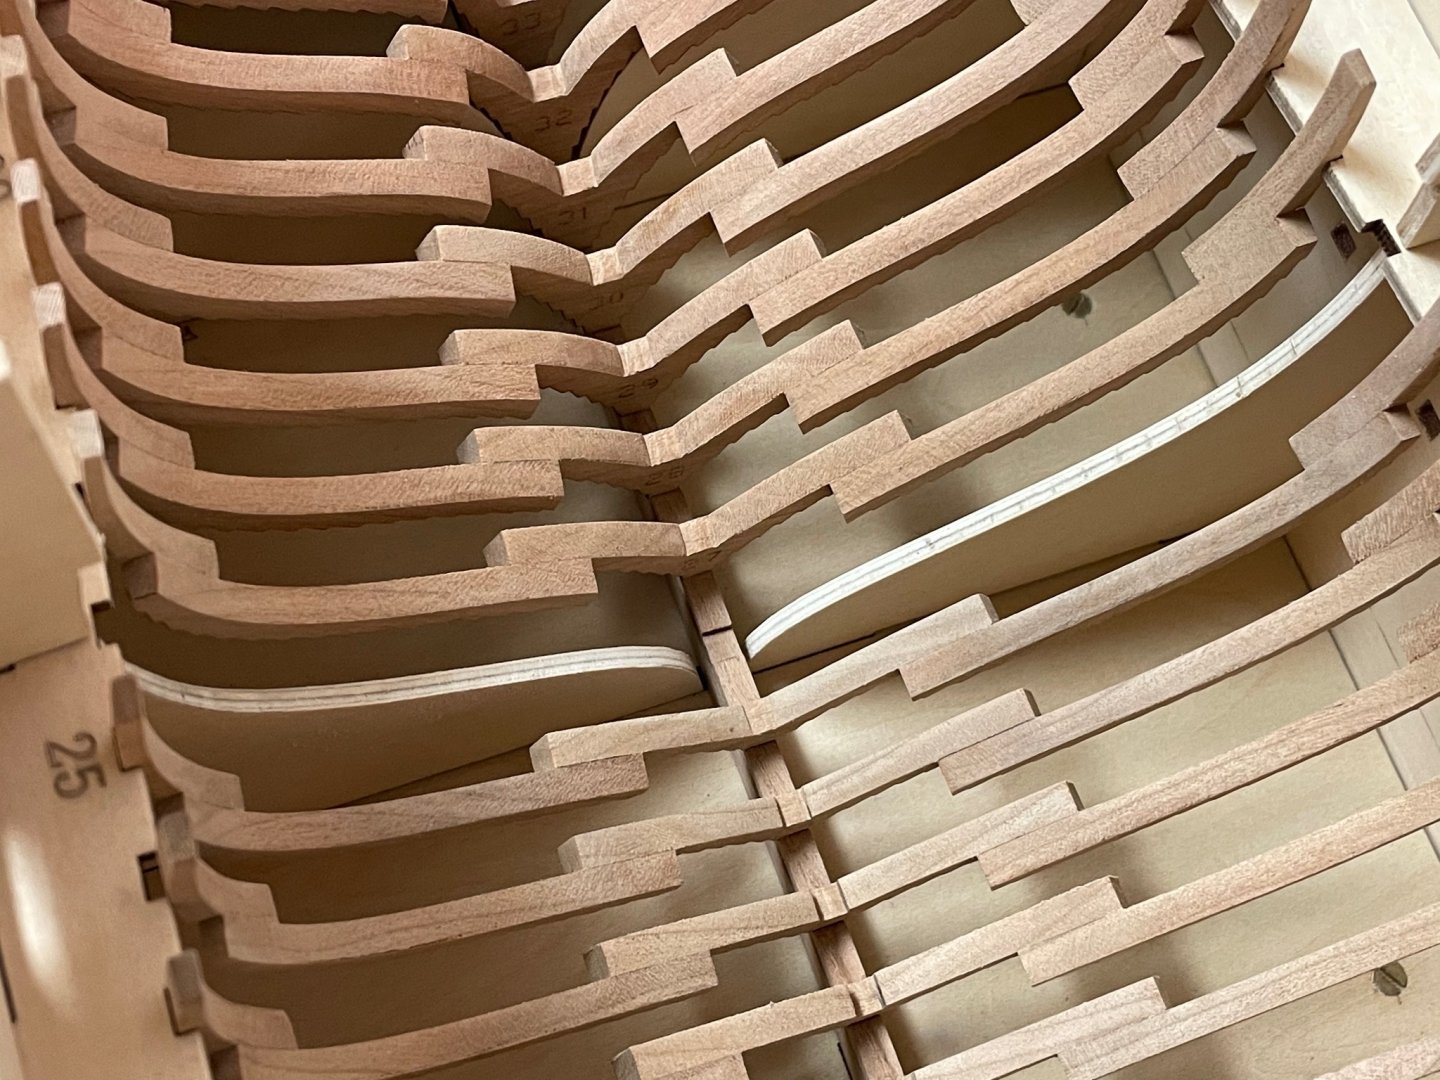
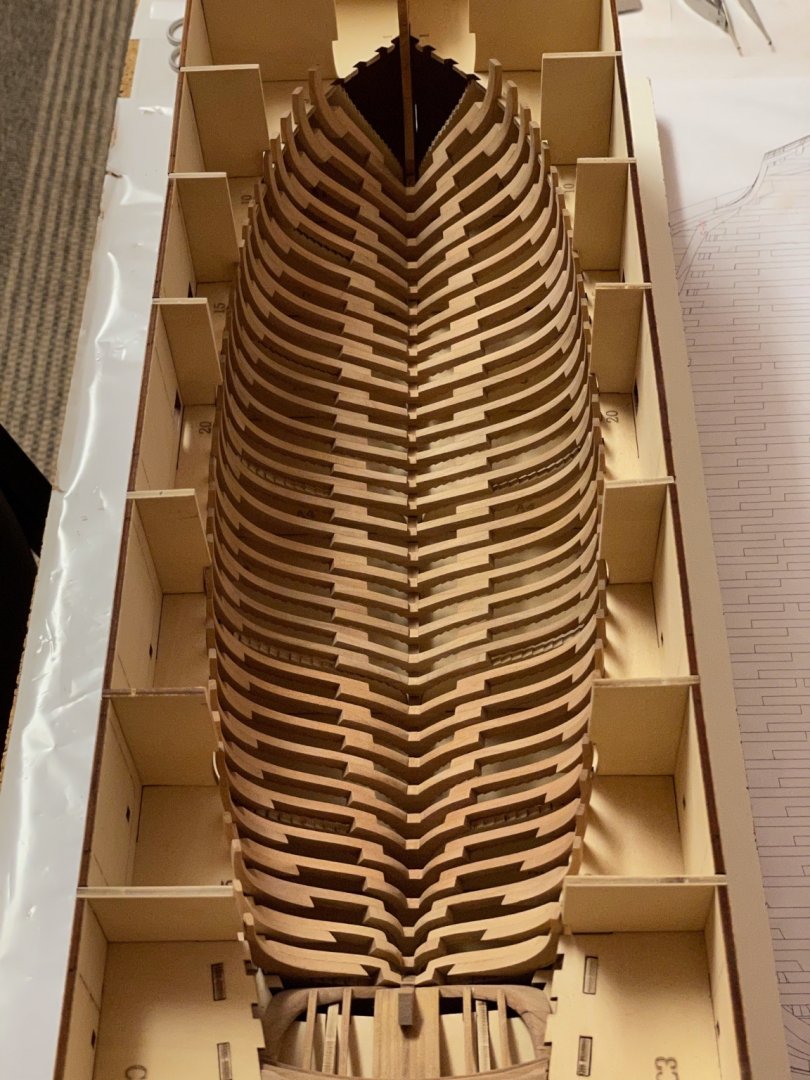
Almost there. One concern about the kit: Almost every cherry sheet that contain the frame parts seems to be from a different wood source. So the completed frames vary in colour, grain pattern and hardness. Most sheets were very clean and of good quality while a few had some very ugly black wood defects that were to be seen after removing the laser char. So I had to make several replacements. But the cherry wood will eventually darken over time and that might compensate the colour differences. The last frames require quite a lot of tapering and I will do them tomorrow. The frames 1 and 2 are just single futtocks but they have to be tapered from several angles to fit the keel and planking run. I will eventually show them in detail later. Stay tuned and save. Andreas

-
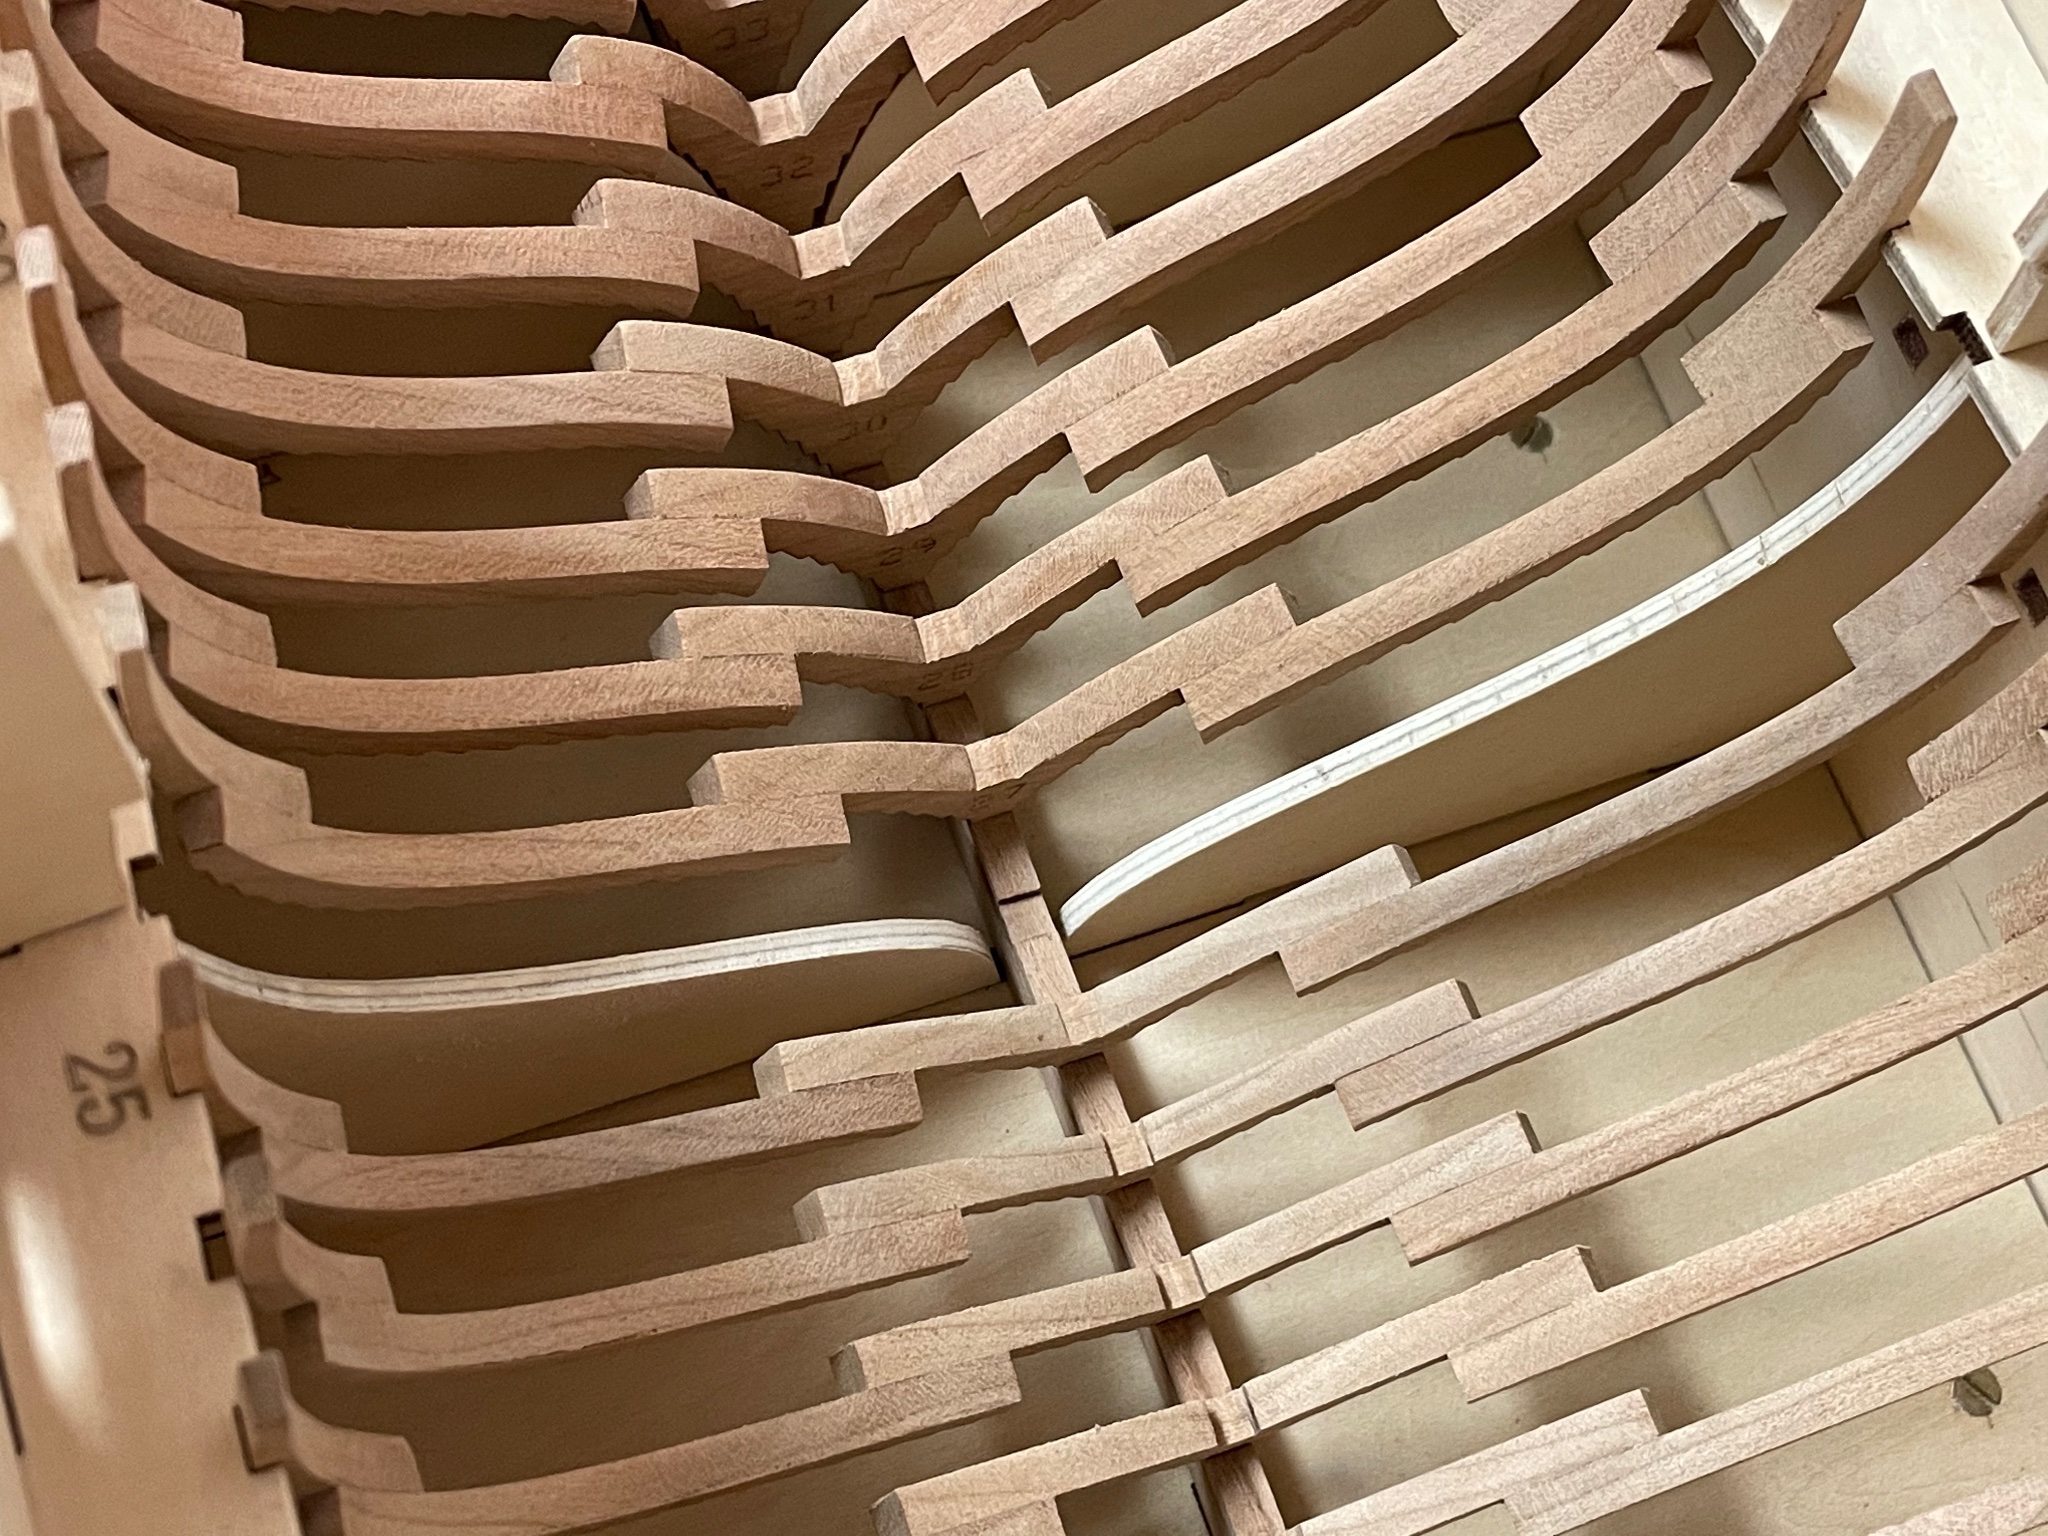
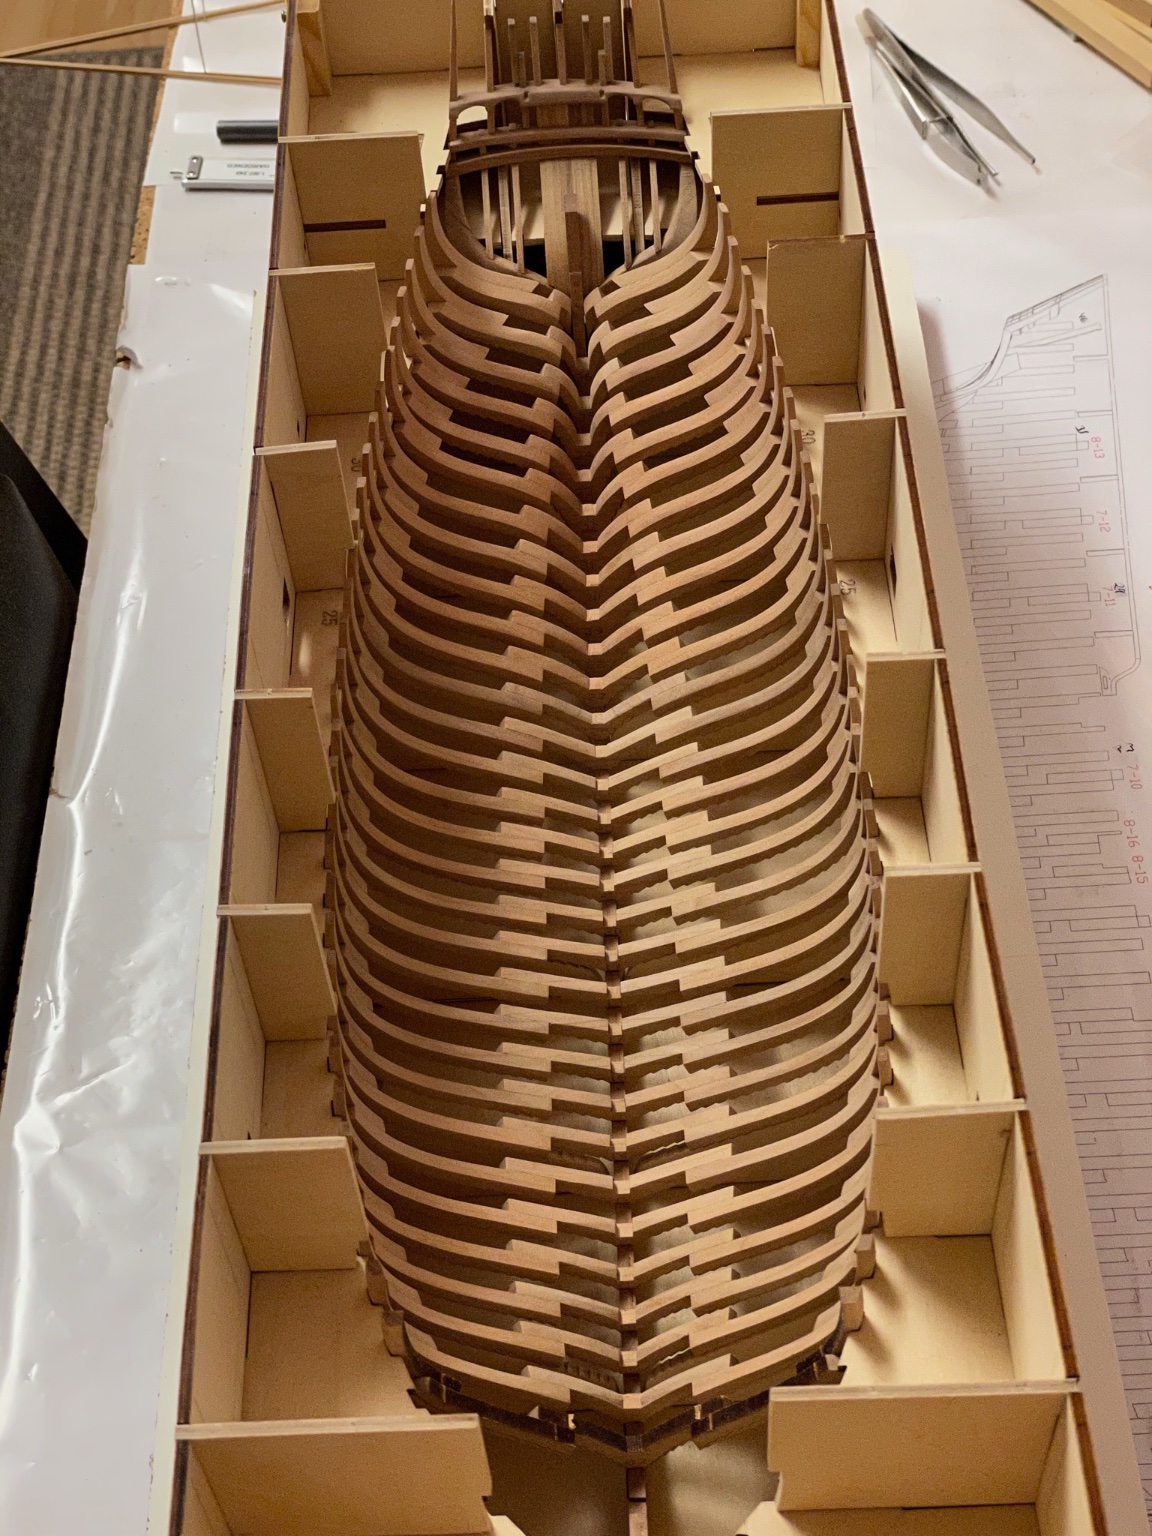
Thank you for all the likes. Still nothing more to show than frames but I‘m approaching the bow. There are only 5 frames left to assemble, frame 1 and 2 are just single pieces. As I come closer to the bow every new frame needs more tapering than the one before. But the laser-engraved lines makes tapering rather easy. There is another assembled frame waiting for me to be cleaned and tapered. Another view from opposite direction. So maybe I am able to finish the last ones next weekend. Stay tuned and save.
-
Absolutely beautiful. She is gorgeous!
-
Thank you, Brian. Some more replacements have slowed me down but I managed to complete more frames ... frames, just frames. Have the impression that I have done nothing else for months. But there are only 10 ones left.. Time to see a man about a dog .. wait, we‘re locked down. Ok, let‘s bring the dog to the man 🤗. Stay tuned and save. Andreas


-
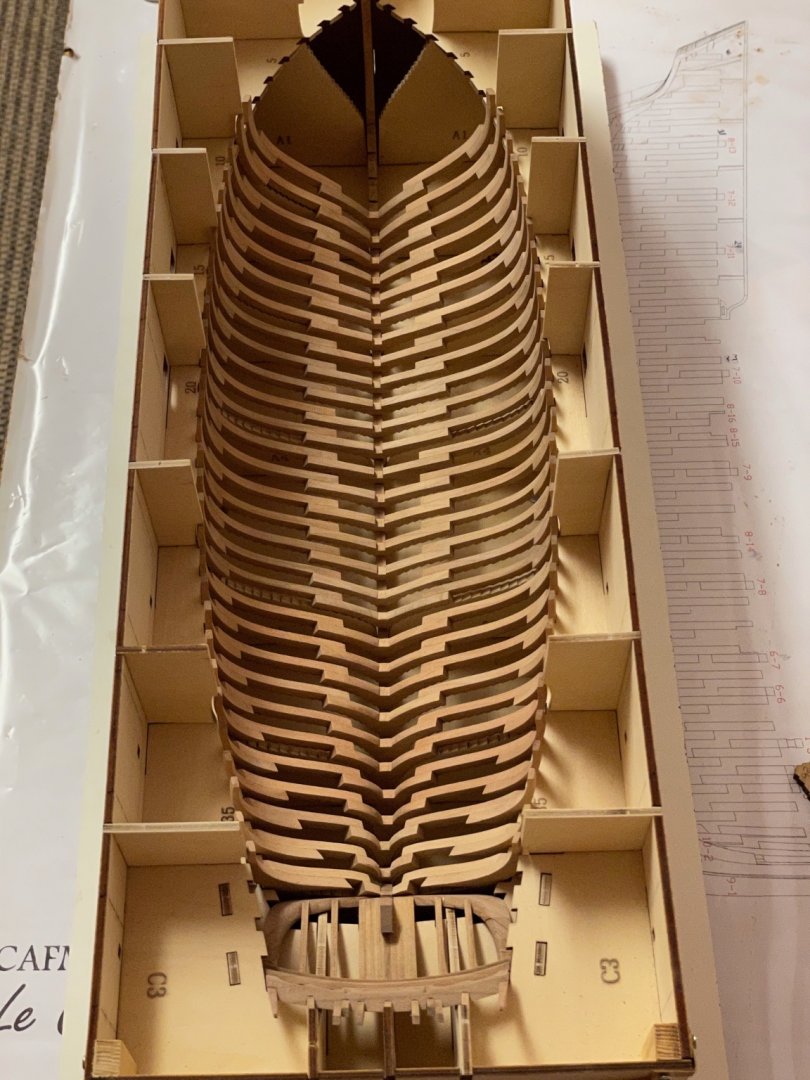
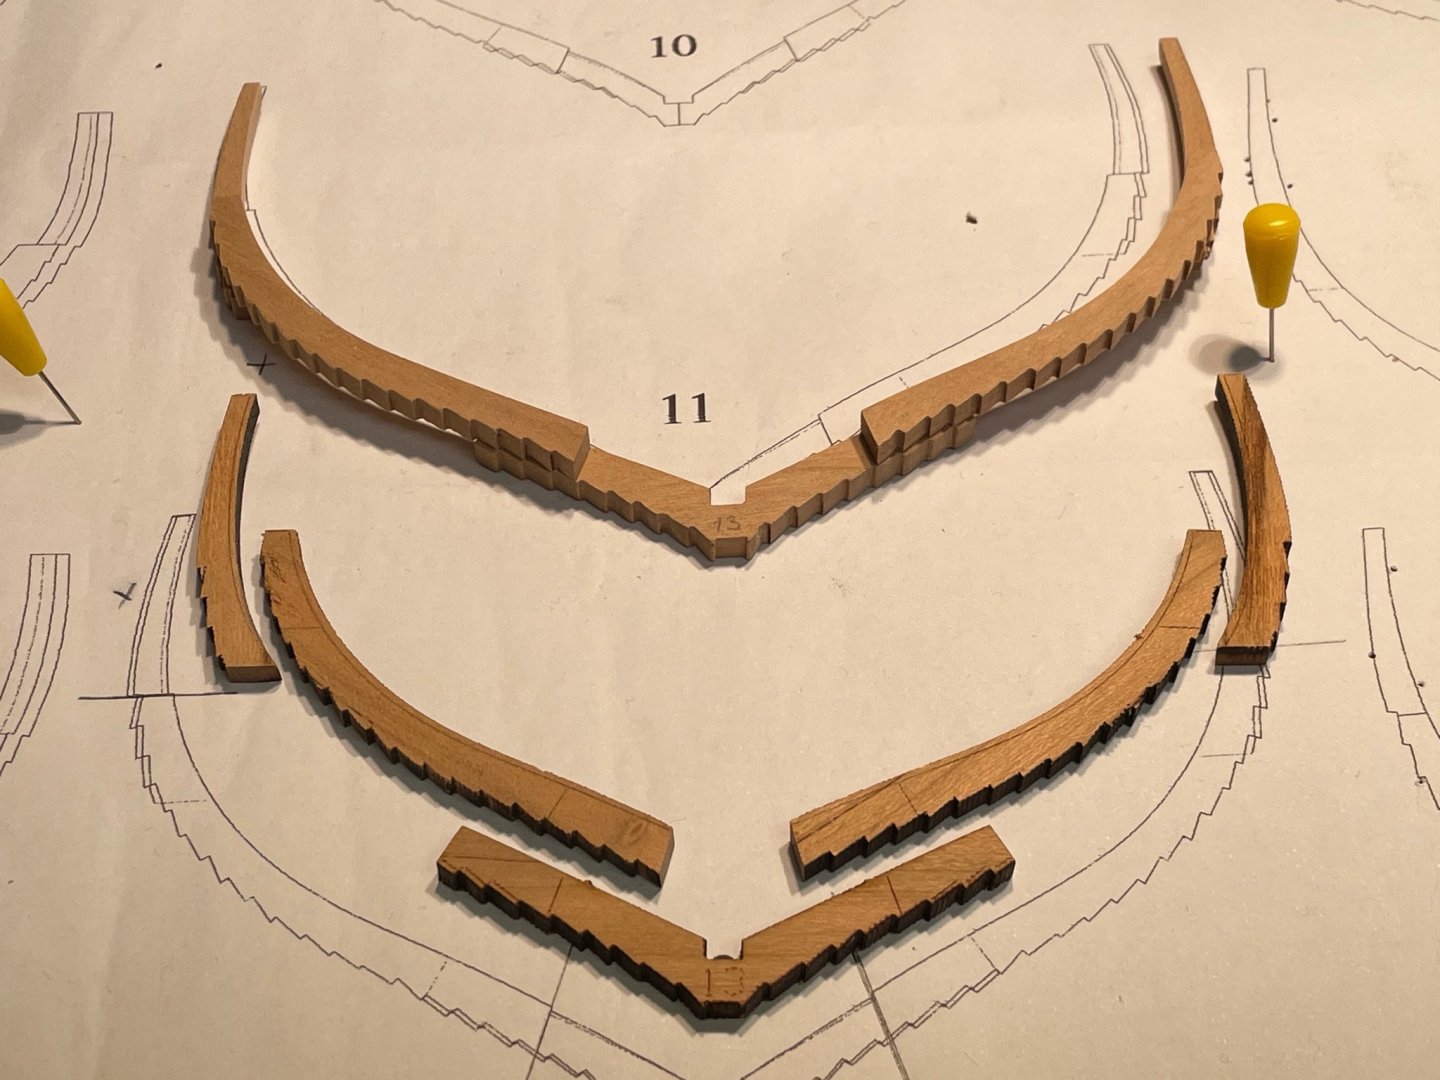
Thank you very much, Yves. Thirteen is an unlucky number and indeed - frame no. 13 was kind of a mess. All parts have defects all over and a small edge broke off while releasing it from the sheet. After calming down I decided to replace all the parts. I scanned the plan, redraw all lines with Corel and printed the templates on adhesive paper. Cut all segments with templates on and used the existing parts for reference. Used the plan to complete the frame. Test-fit into the jig - passed. If I will do POF again, it definitely won‘t be a clinker-planked ship. Stay tuned and save. Andreas
-
That is an interesting project. I like the selfmade-jig, looks very professional. And the ribs looks very clean and neat. Keep up the good work..
-
Very beautiful work! I especially like the mix of painted structure with natural wooden accents.
- 140 replies
-
- 1
-
-
- benjamin w latham
- model shipways
- (and 1 more)