Rick01
-
Posts
652 -
Joined
-
Last visited
Content Type
Profiles
Forums
Gallery
Events
Everything posted by Rick01
-
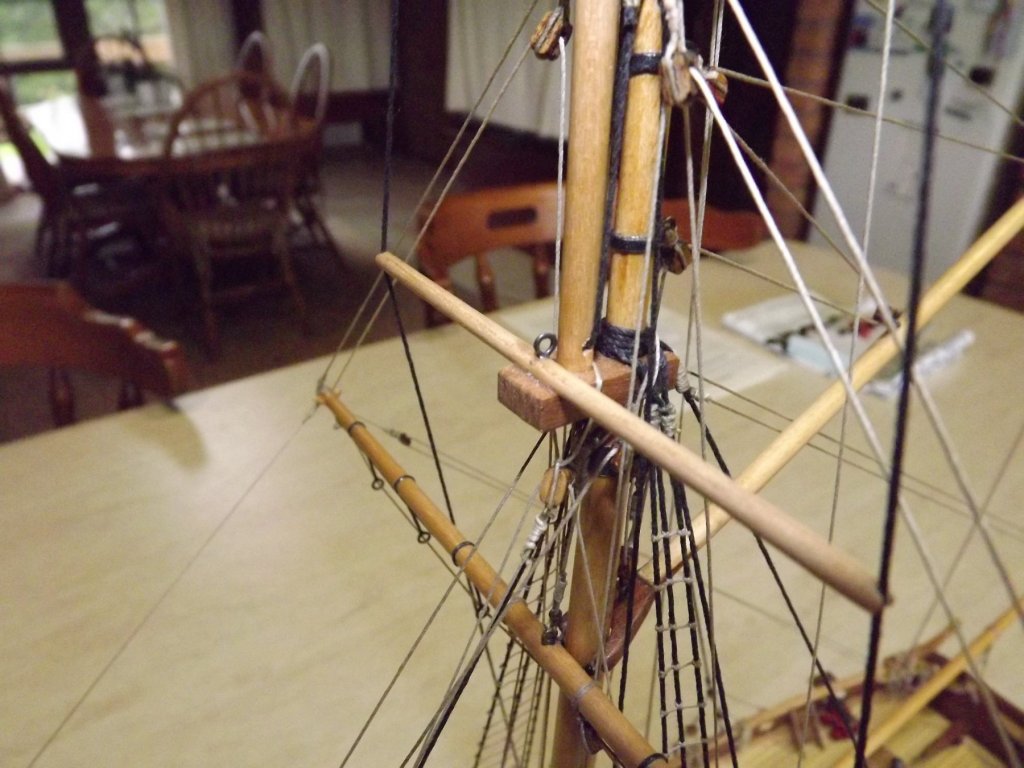
Slight optical illusion, at worst when on full recoil there's still around 65 cm clearance either side of the centre line as angled they'll run back into the area covered by the binnacle (which would have been struck below when clearing for action). As they are going to be exchanged for carronades there will be extra room there anyway. 🙂 Even with the additional pinrail I still only have around 12 belaying pins unused - this will just about allow for sails and those other odds and ends needing to be temporarily tied down. We've working topsail schooner at Melbourne modelled on an 1817 ship and she carries 22 belaying pins for a single mast controlling a similar sail layout to the cutter. I'm in agreement over the main hold but I have seen this system used and it was likely to destroy the decking if I tried to rebuild it so I've decided to stay with it (the guy who designed this has a lot to answer for). Once my carronades arrive I'll mount them and make a couple more alterations to the rigging mainly in securing points - if you like I can post them here and explain what/why it's been done. Rick
-
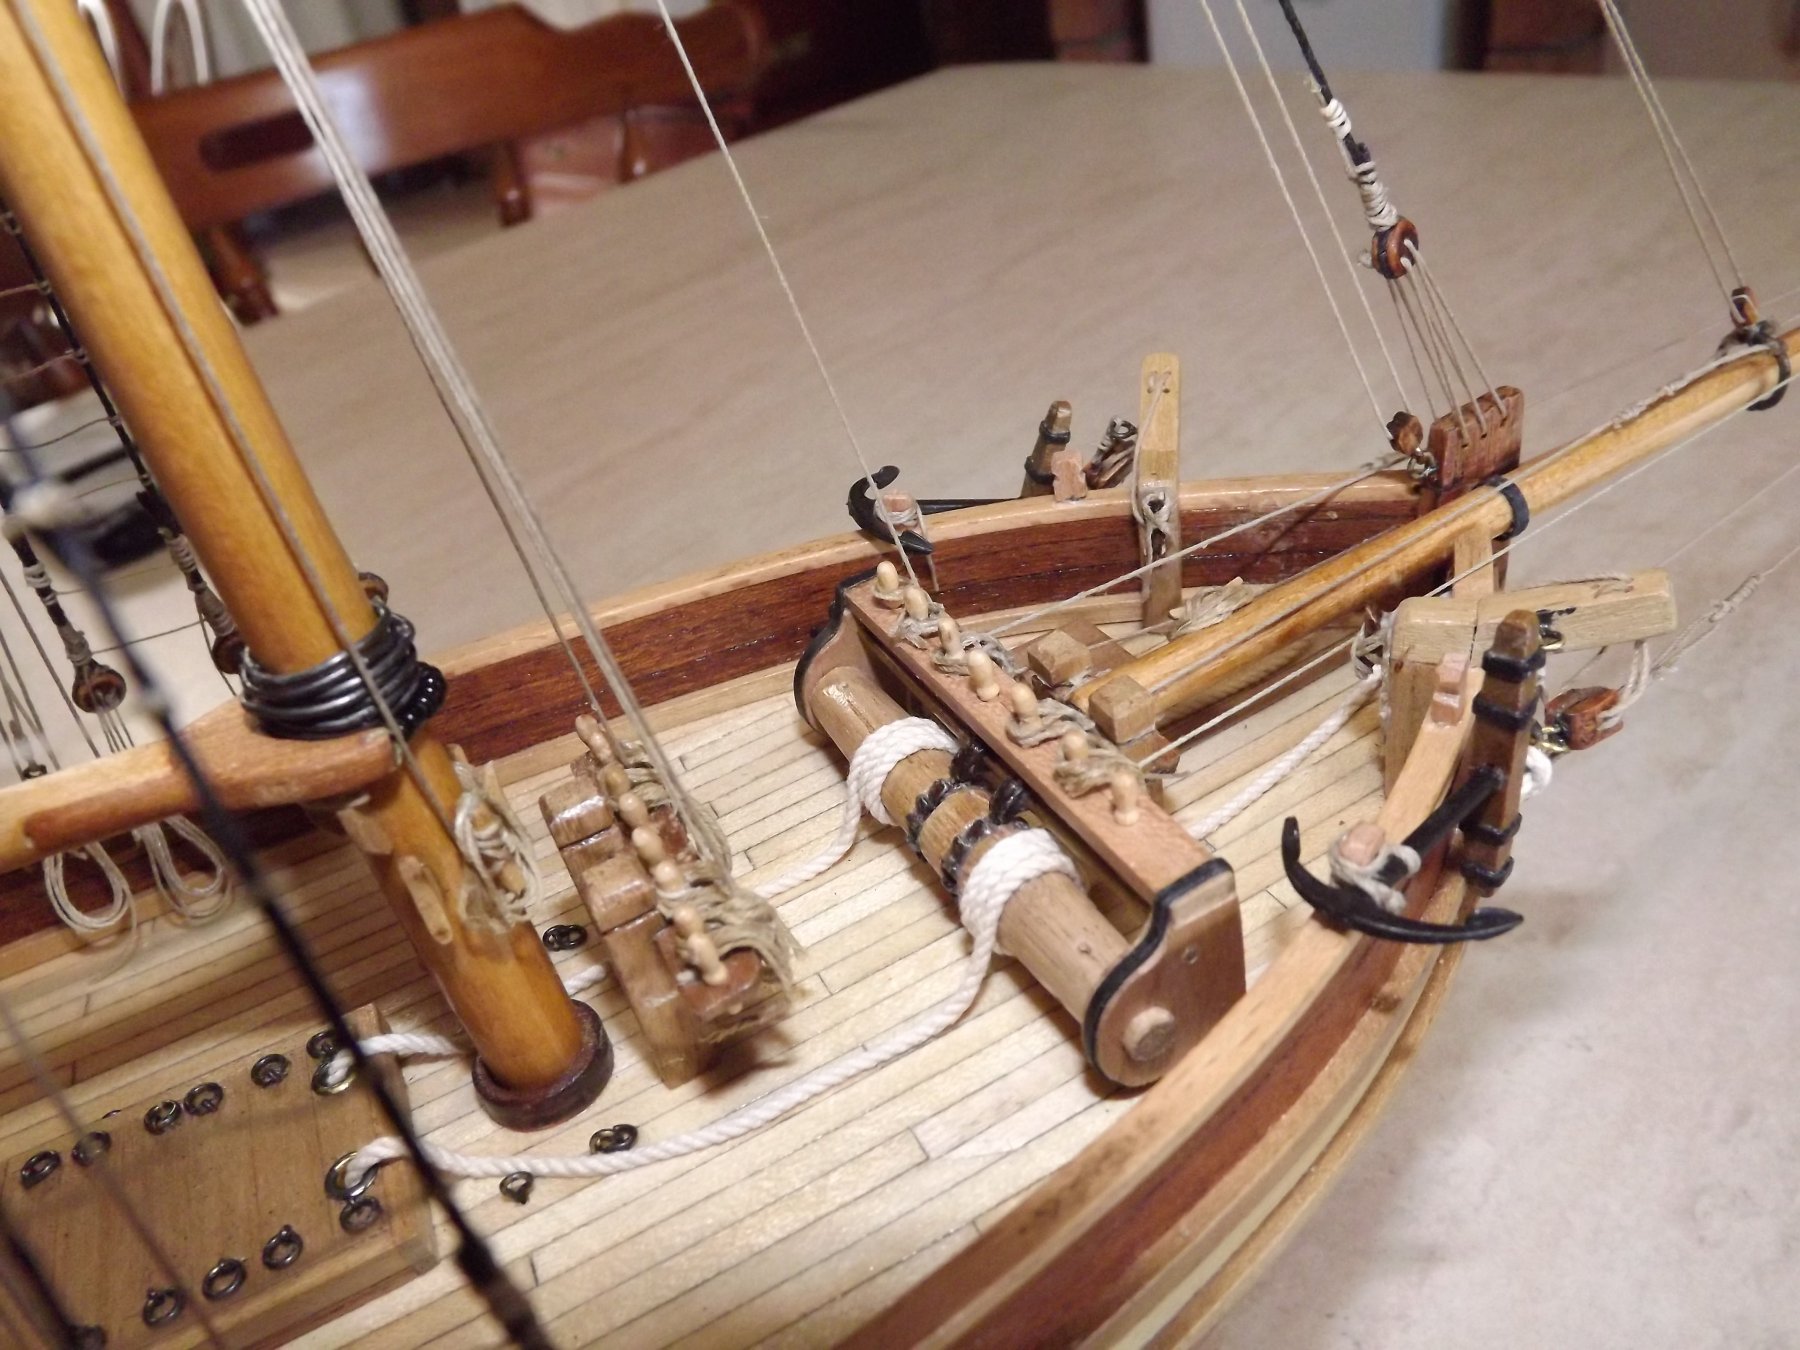
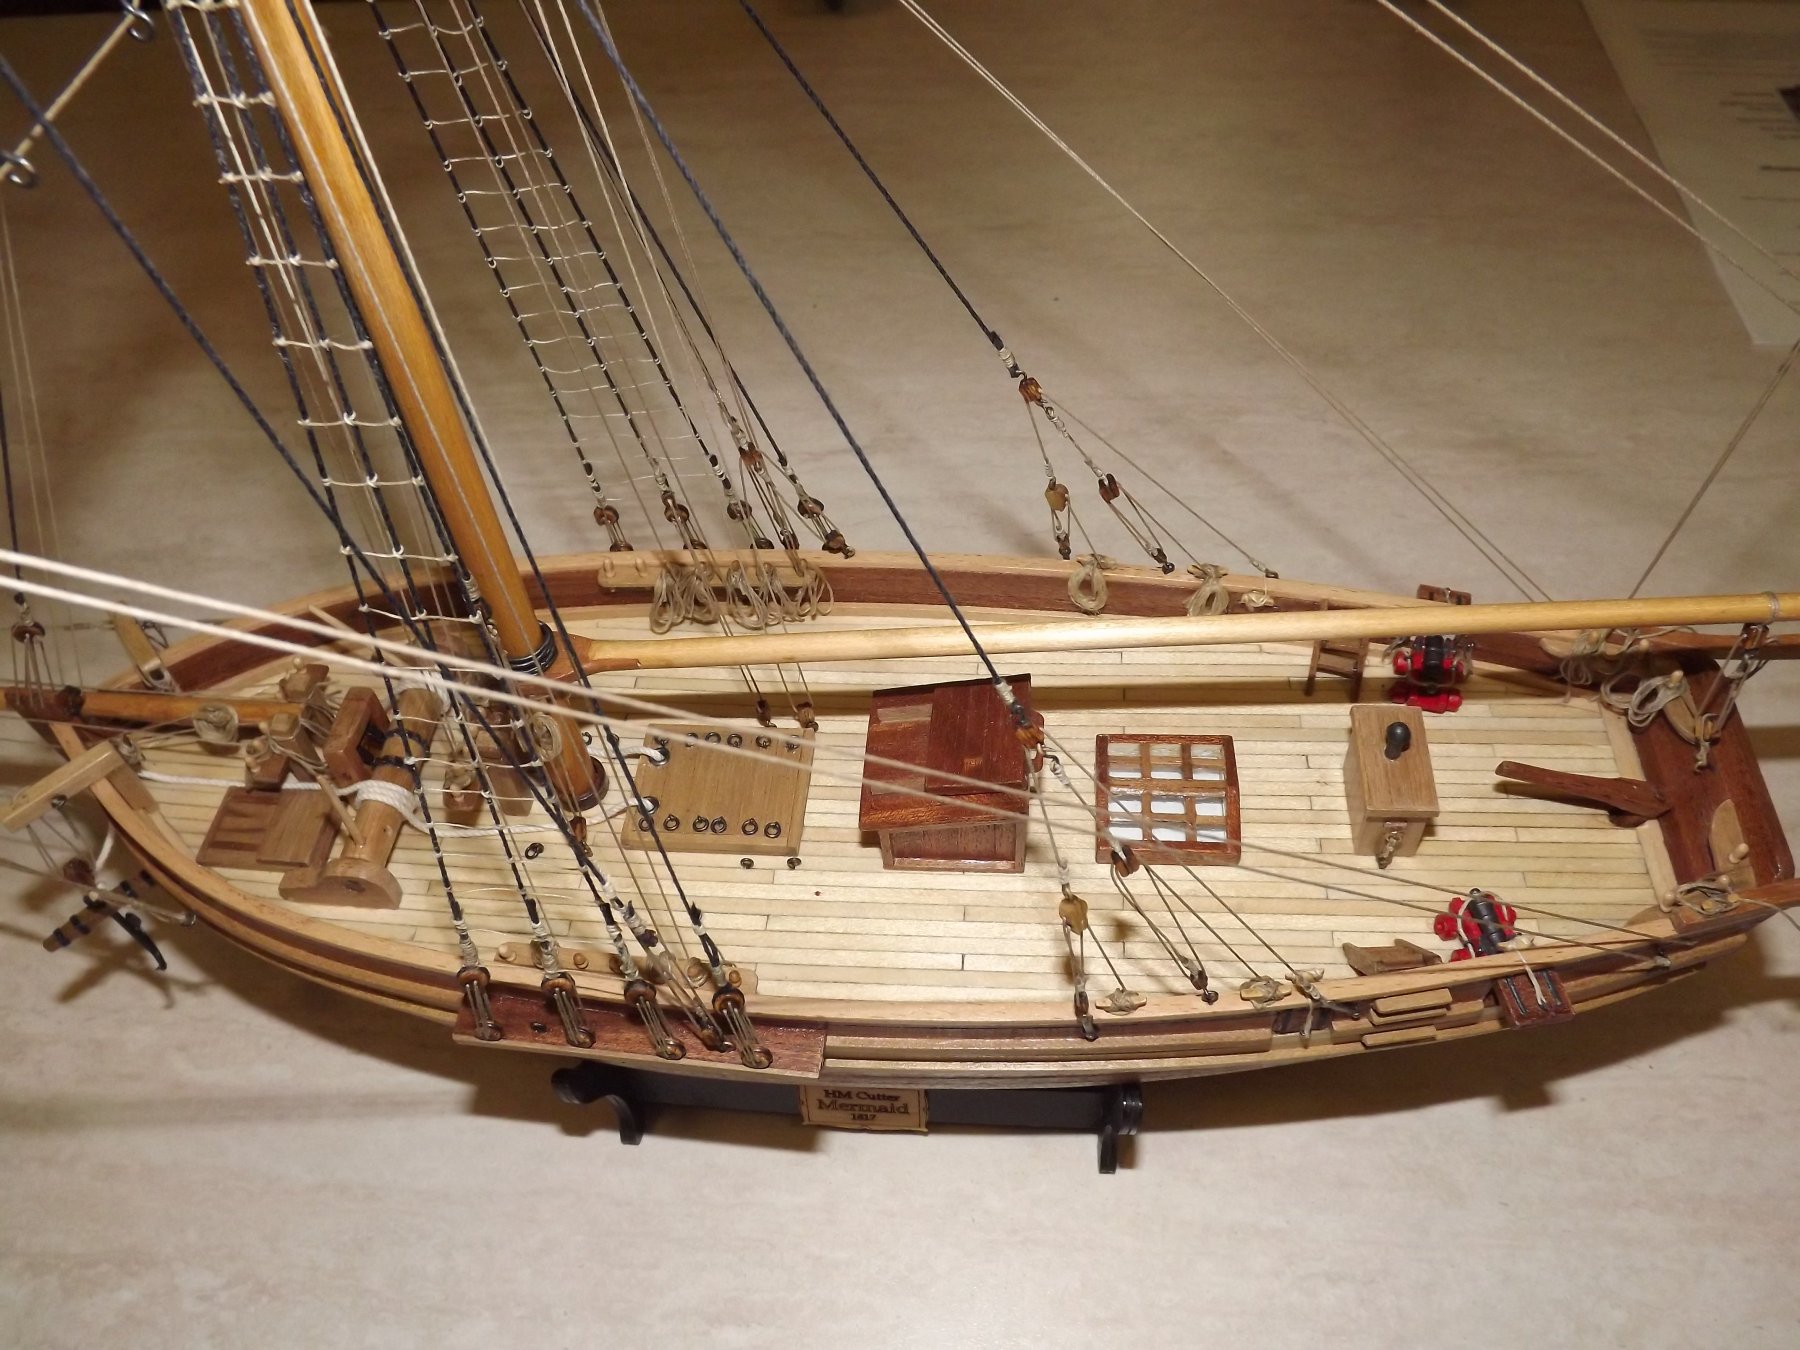
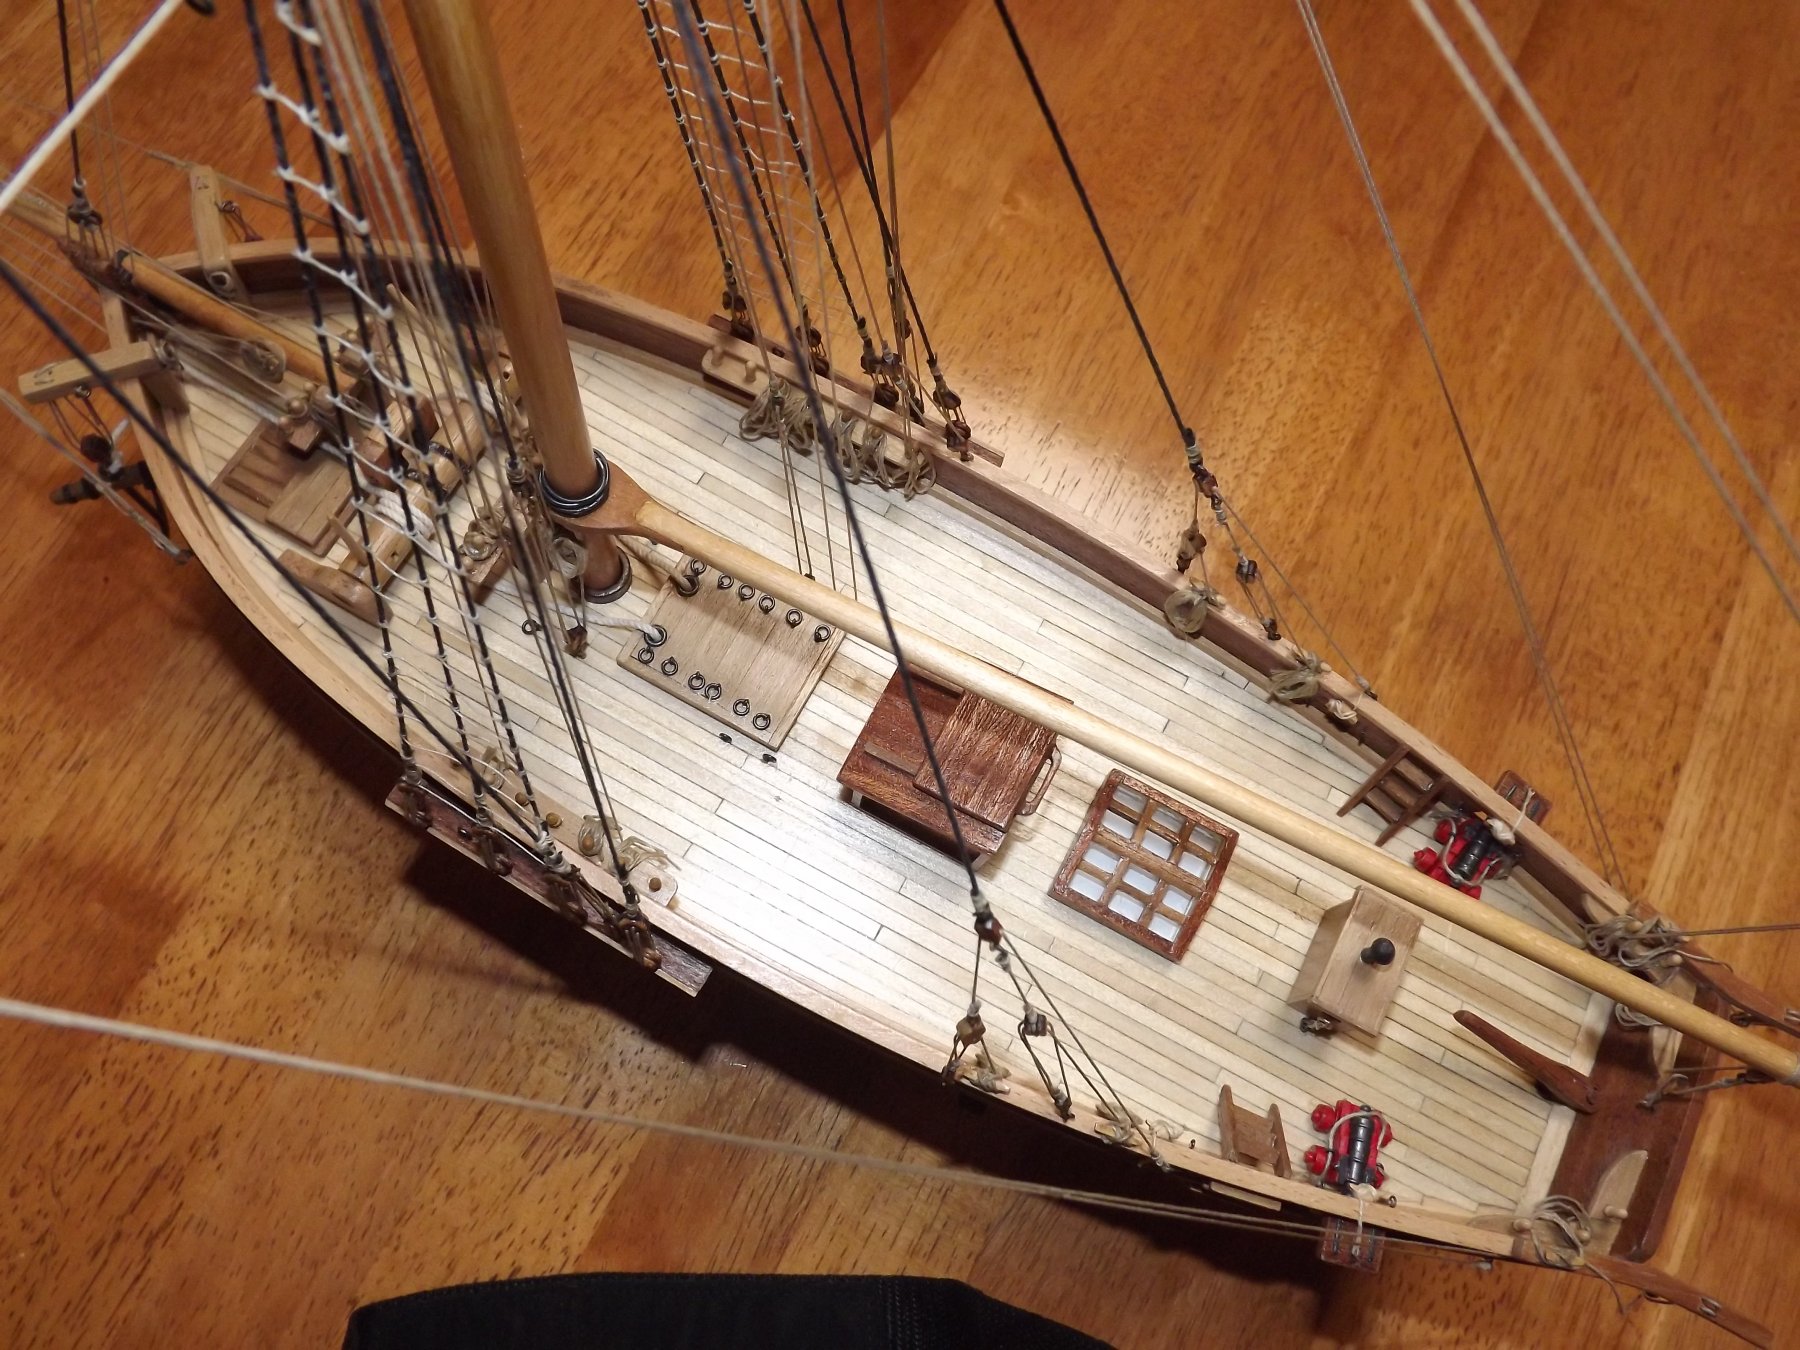
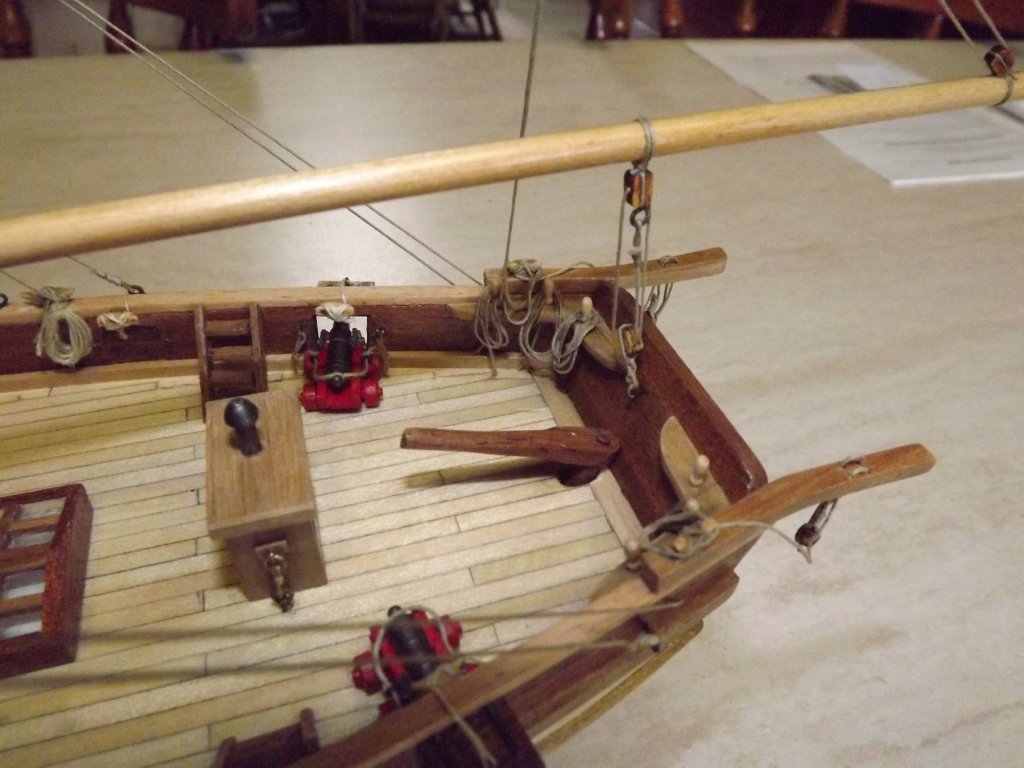
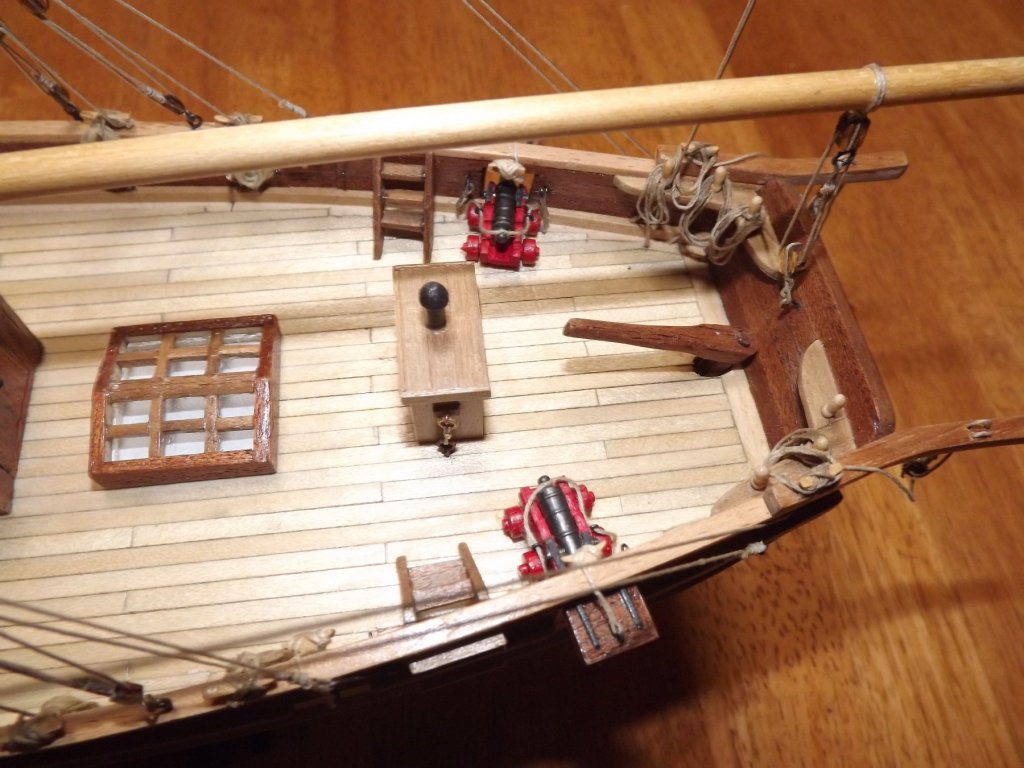
Hi James - I've remodelled my decking layout up at the bows having spent a little more time studying the cut-away sketch. Complete re-build of the windlass as the cut-away seems to show it having it's "support" as a beam dropping down through the crew quarters and a number of period windlass' have the extra belaying pins mounted as I have. In addition I reversed the sliding hatch cover for the crew access as it didn't seem to work the way it was originally. I also had to move both the cat-head and bowsprit stays so that the anchors could in fact be hoist properly (unlike the model plans). Waiting on stuff from Cornwall Model Boats to finish the carronades and one or two other items towards the stern. Apologies if I have hijacked your thread but I thought this may save you some head scratching down the line. 😞 Rick

- 241 replies
-
- 2
-

-
- mermaid
- modellers shipyard
- (and 1 more)
-
Thanks - that confirms pretty much how I thought it would all run. Rick
-
Can't go past "Float-a-boat" for help and supplies. I use them quite frequently but, depending on how urgent my need is, I also use https://www.cornwallmodelboats.co.uk/index.html stock there is brilliant, prices great (ex-20% GST) UK postal rates cheap and delivery is fast. Yesterday I ordered 2 x 20mm carronade barrels plus a packet of 10mm wooden cleats from them at a total cost including postage of $10.00. This is what the barrels alone would have cost over here before I paid petrol or postage and I'm only 25 km from Float-a-boat. Rick
-
Yes - The commander has shown this fairly clearly in a number of sketches of her under sail. With the help here I can now envisage how it's rigged but there's one last question. I understand the sheet and it's use but when the sail is not hoist what is done with the end that would be attached to the sail. It has to come back to deck level so does it come down to a belaying pin/cleat on the bulwarks or back to a cleat on the mast below the boom jaws? I'd guess the latter so that it doesn't restrict the movement of the main sail. Thanks for the help so far everyone. Rick

-
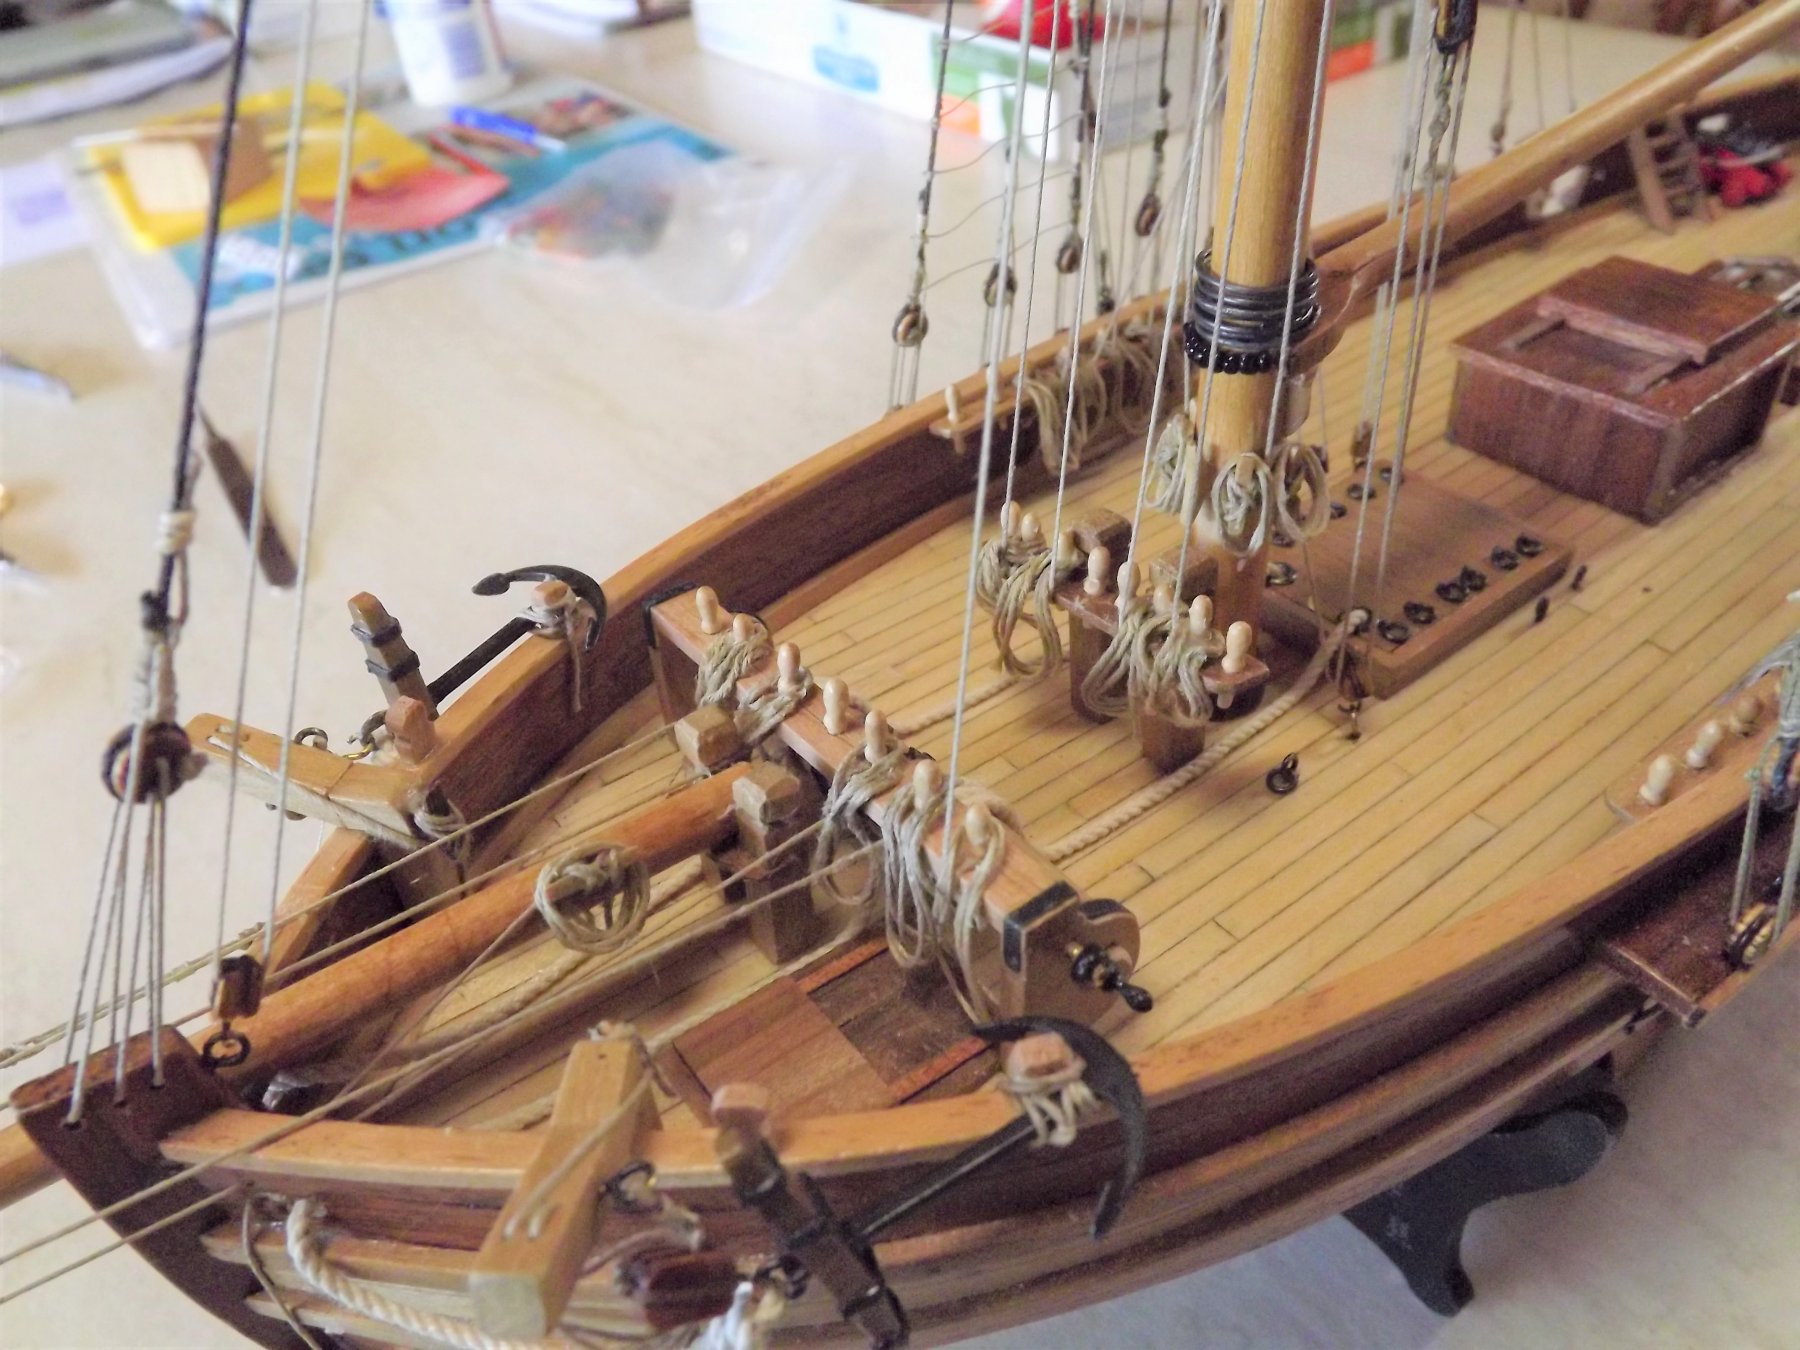
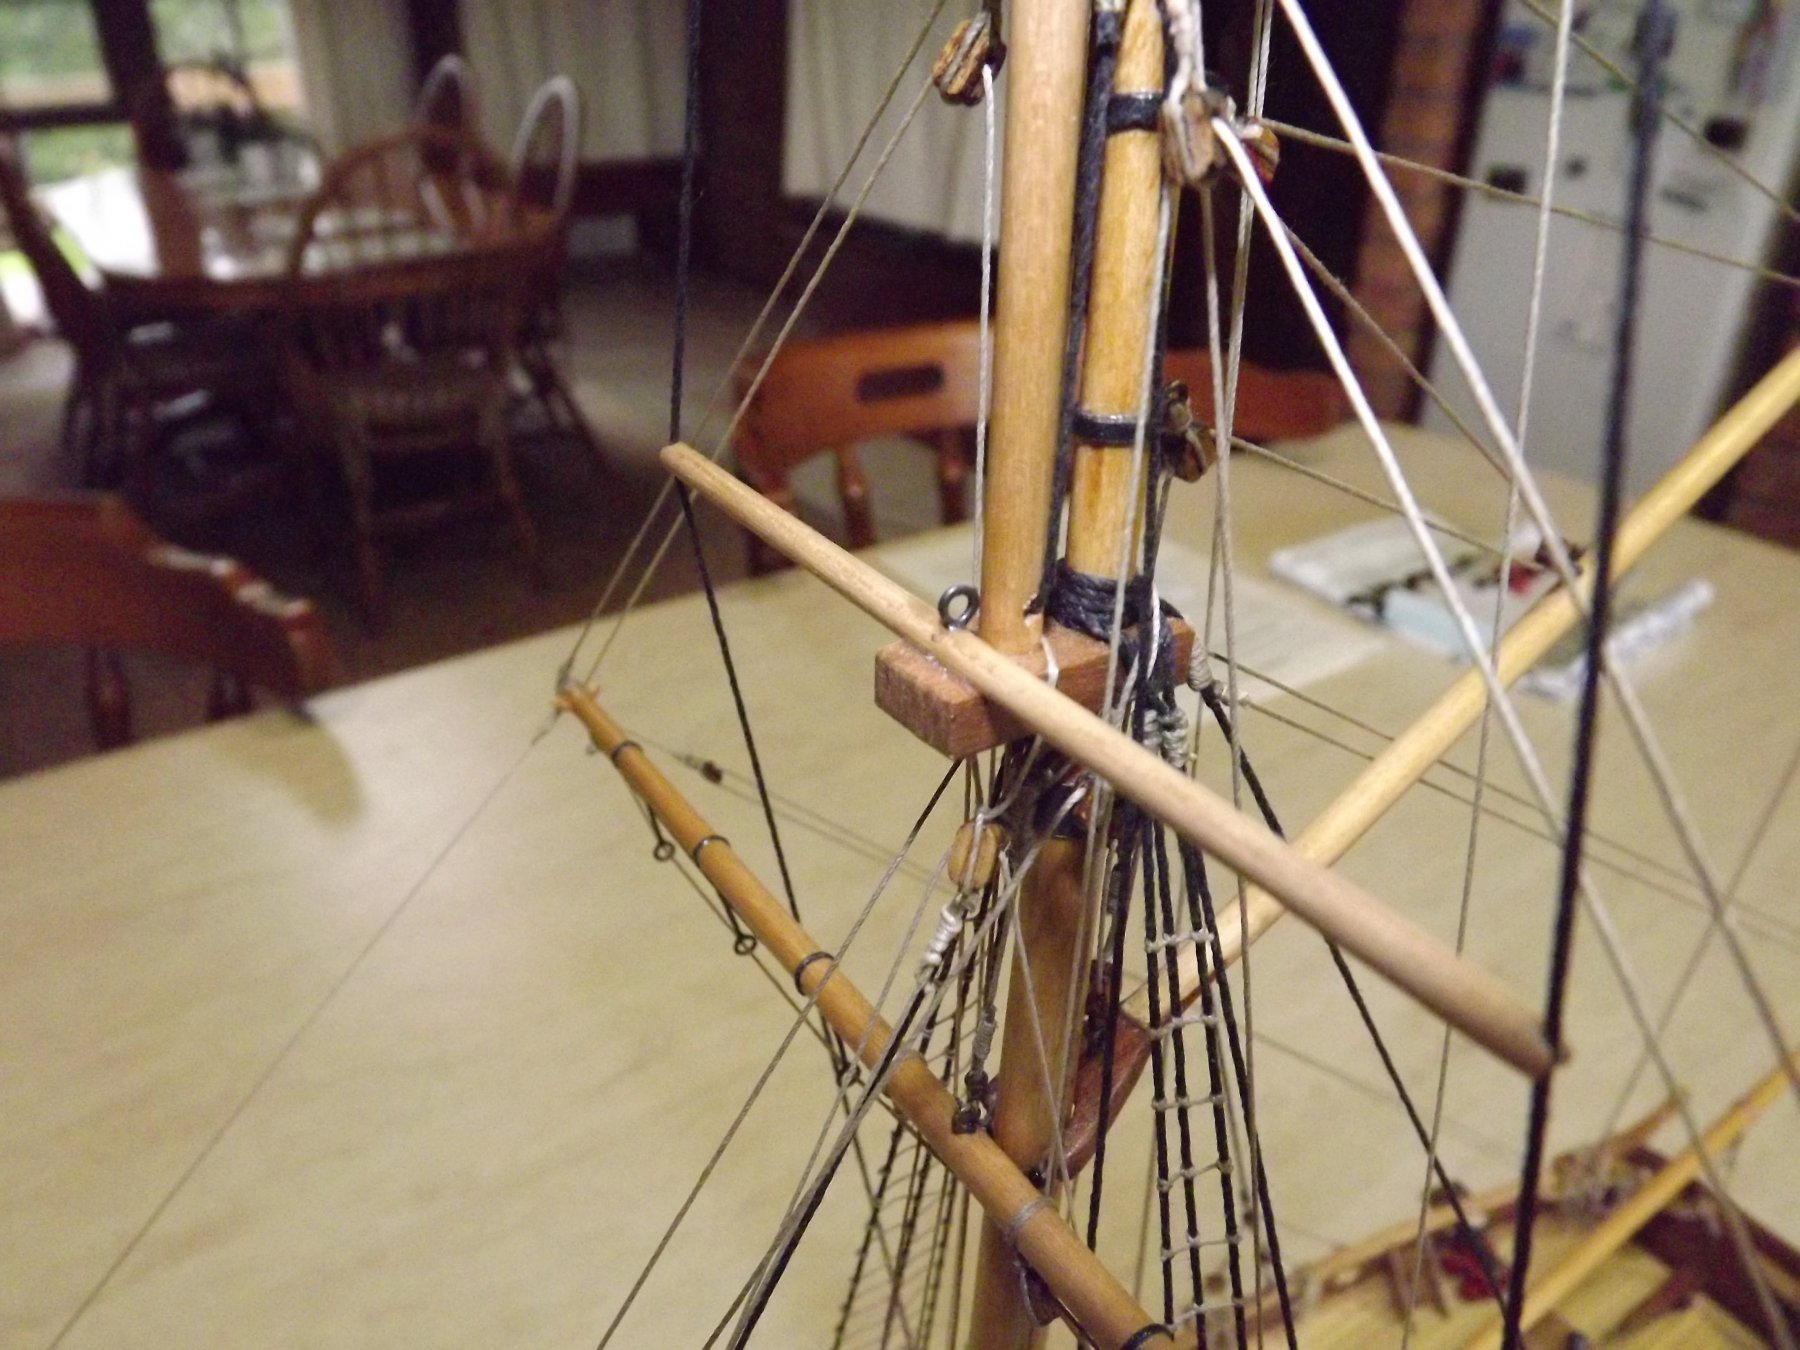
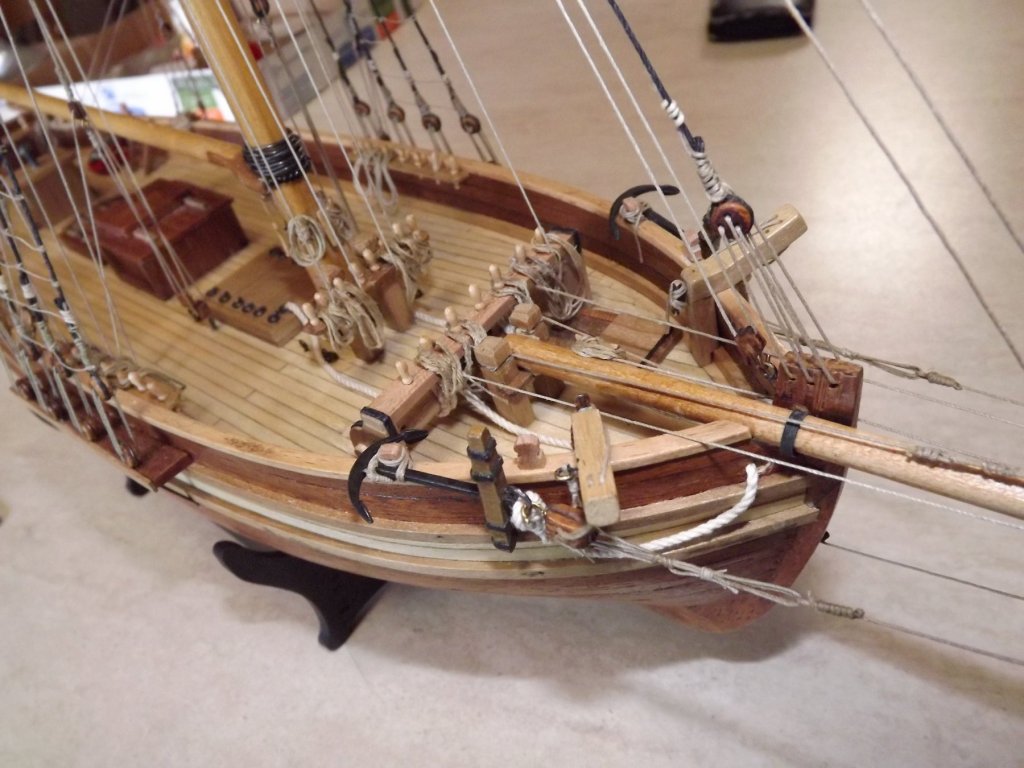
Here's the modified companionway. Lowered and flattened as per the sketches. ... and dropped in to place but not yet glued. I may have some more work to do here when I've clarified how a flying gaff is rigged, possibly more cleats for rigging. Rick


- 241 replies
-
- 3
-
-
- mermaid
- modellers shipyard
- (and 1 more)
-
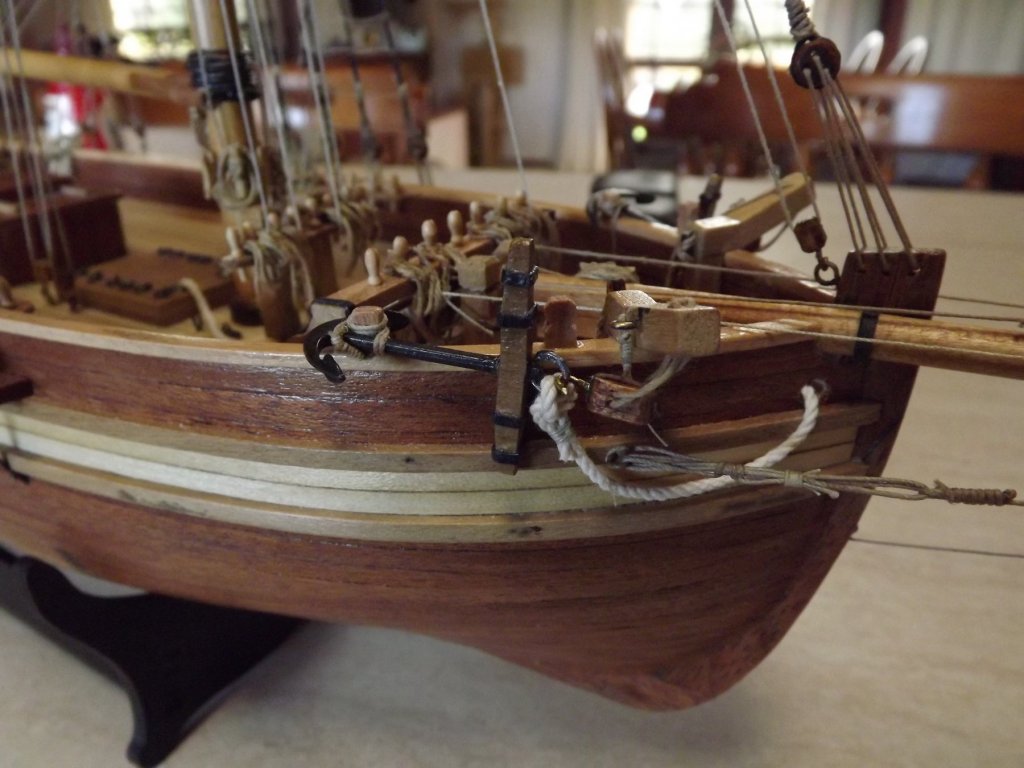
I missed the point about the ladder and think you're probably correct there. Looking at the original sketch I always felt there was a slight slope to the top towards the aft which would have made sense as you really don't need a flat surface for water to sit on. The height is going to need to be cut down by 3~4 mm ! There isn't any set convention on orientation, in fact with cutters it seems you get a basic hull then outfit it to you personal taste ! I like your rudder and will confess that I still have trouble mounting this particular item. Gunports are now open but I'm not doing anything about the others - I'm really not sure if they were painted on blanks as was sometimes done, or actual ports. there are a couple that really would have been impossible to fight, the one between the stays and the one at the bows with the windlass immediately behind it. Rick
-
Firstly excuse my lack of correct terminology. I'm re-working my first model H M Cutter Mermaid and where the kit has a top sail all original documents indicate a flying Gaff. However I'm unable to find anything which shows clearly what rigging I should have on the mast and gaff to support this. I assume a block at the mast head to hoist it and then one foot of the sail would be controlled by a line directly to point on the bulwarks, the other sail foot seems to be fixed in some manner to the tip of the gaff. Is this in fact through another block and again down to the bulwarks? I can't see that they'd lower the sail just to attach the gaff sail before flying it. Hope this makes some sort of sense. Rick
-
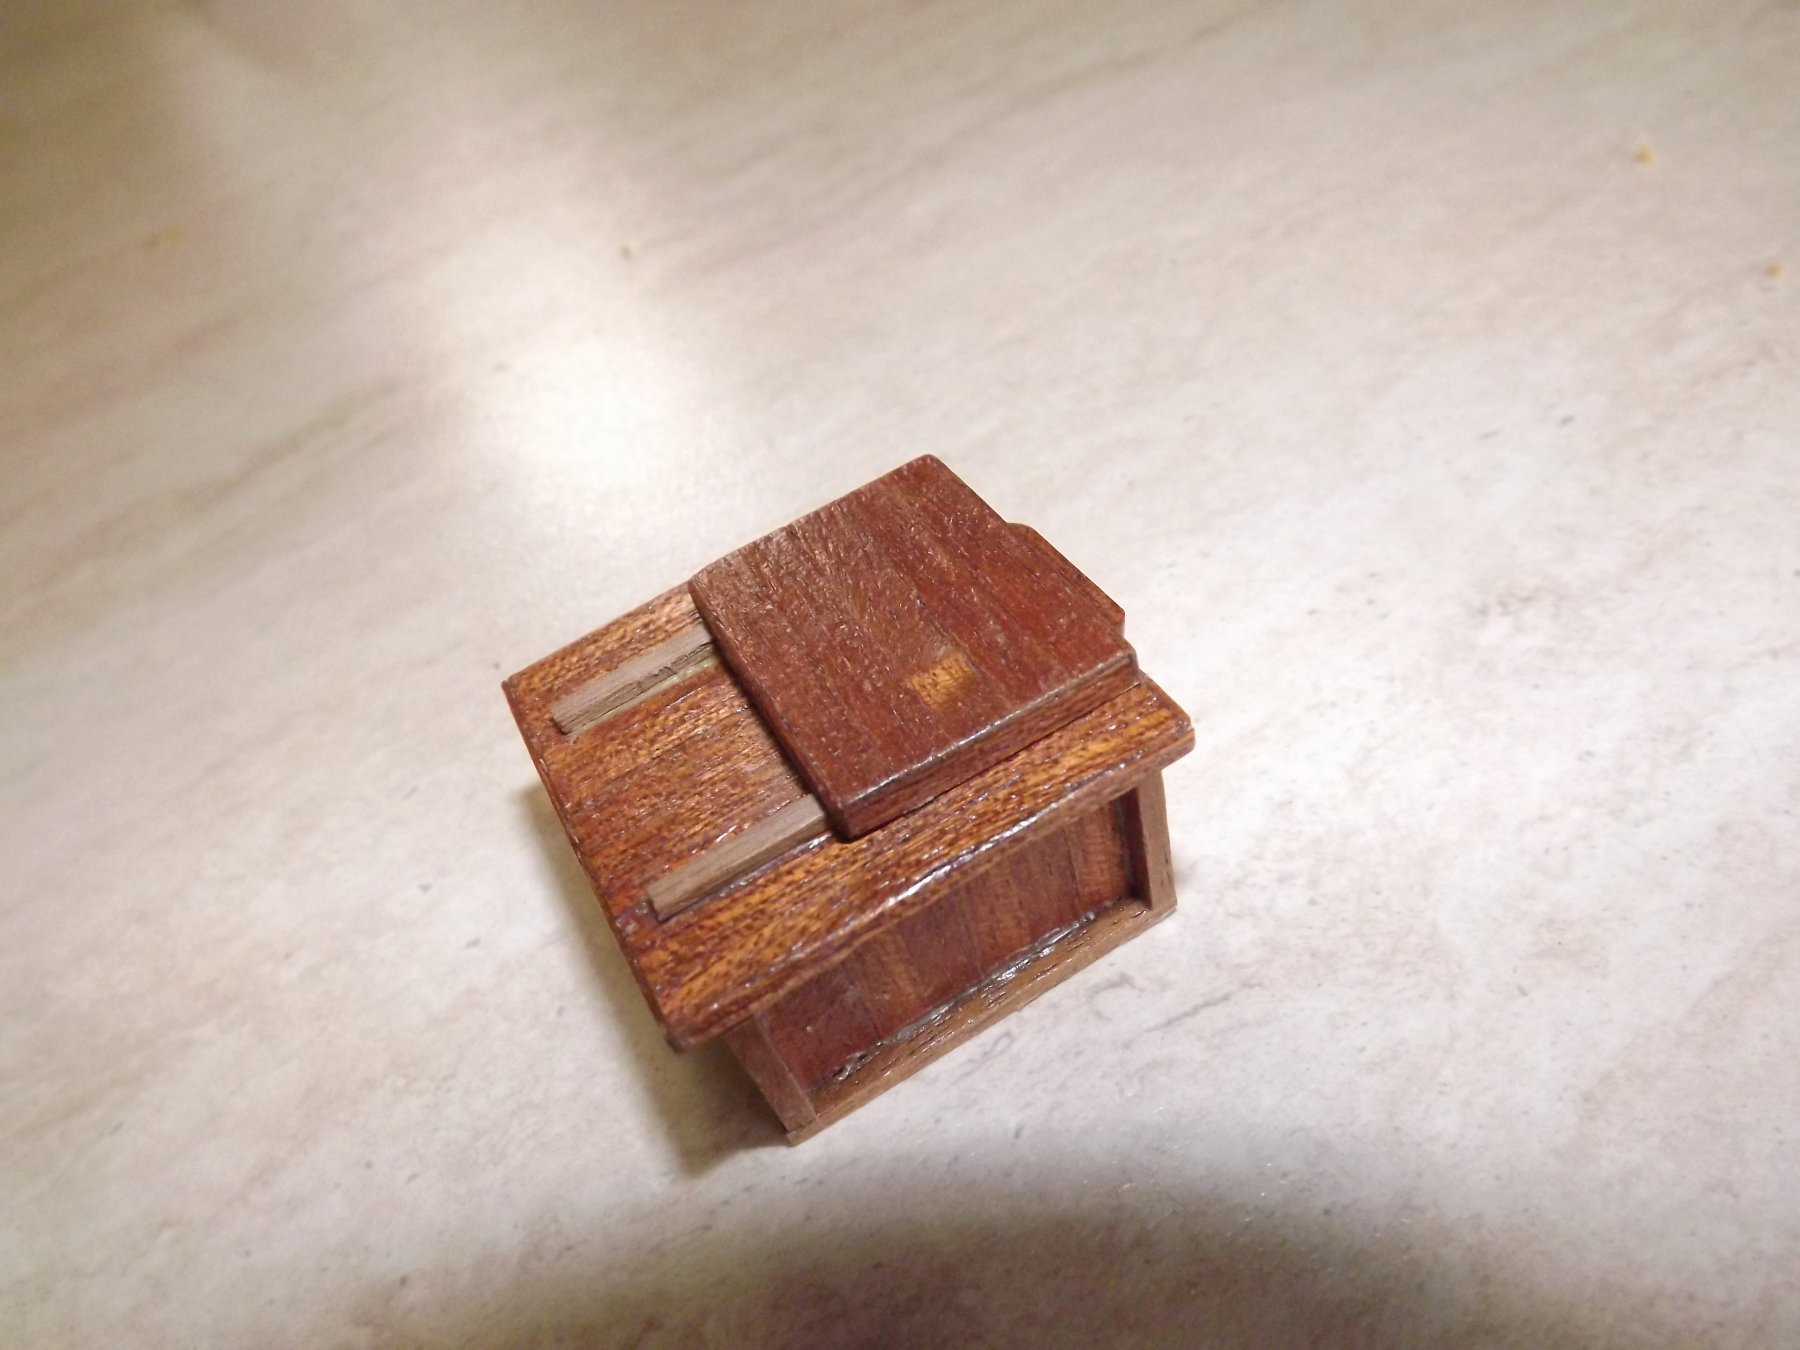
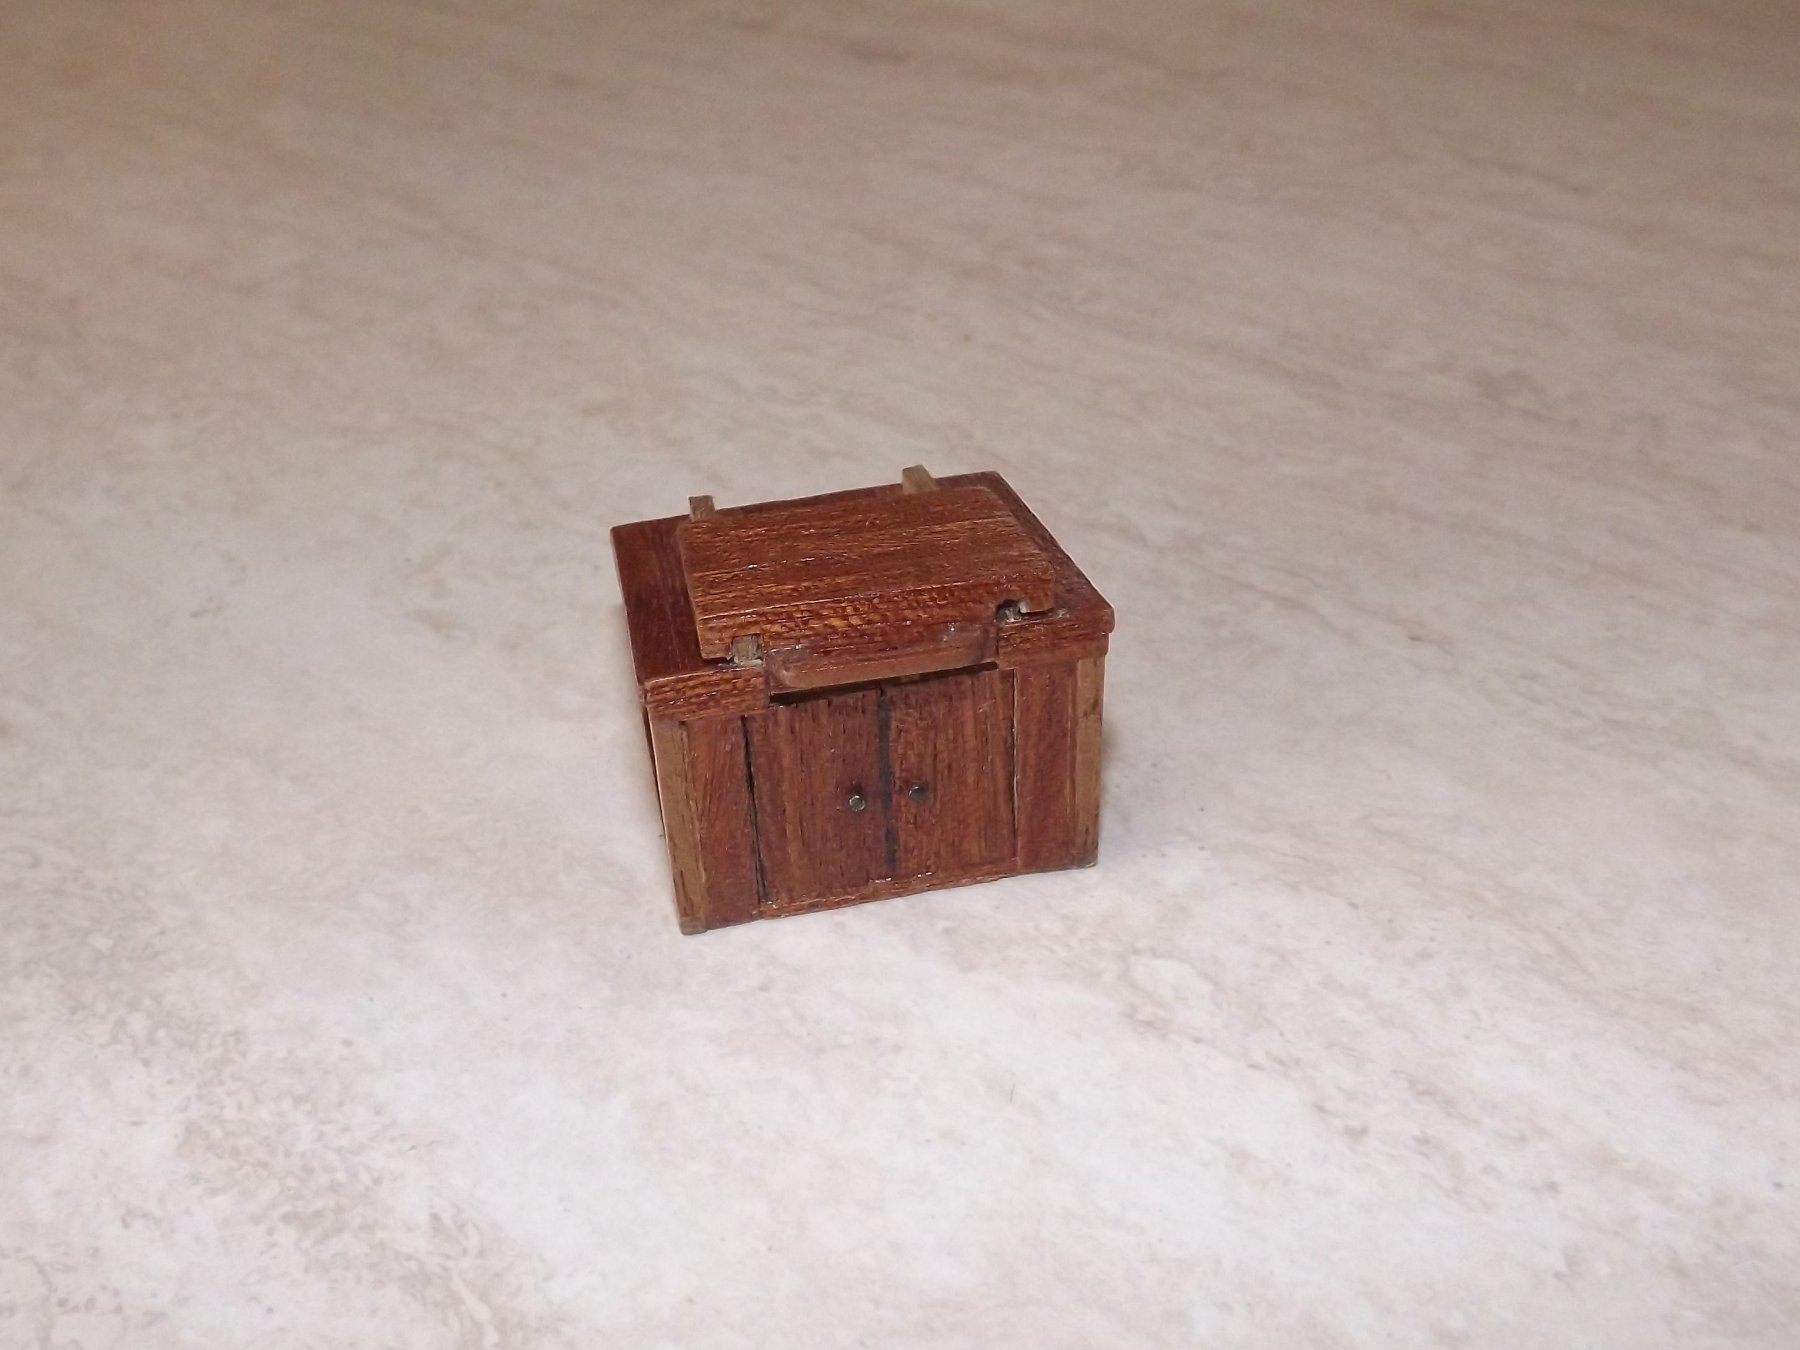
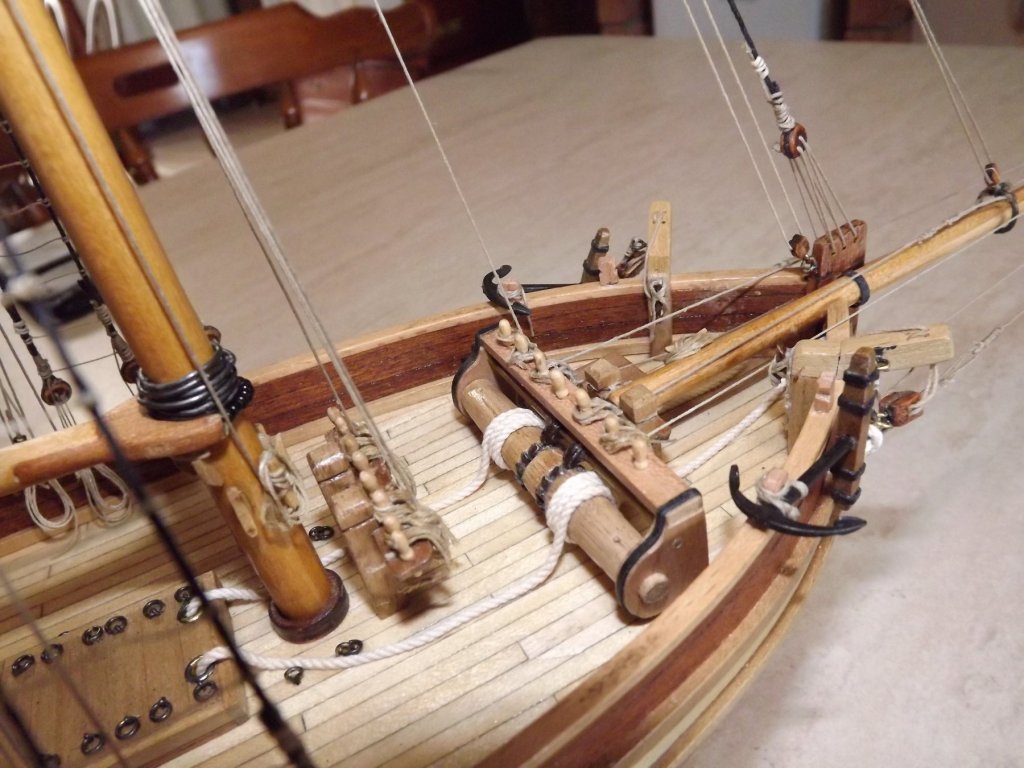
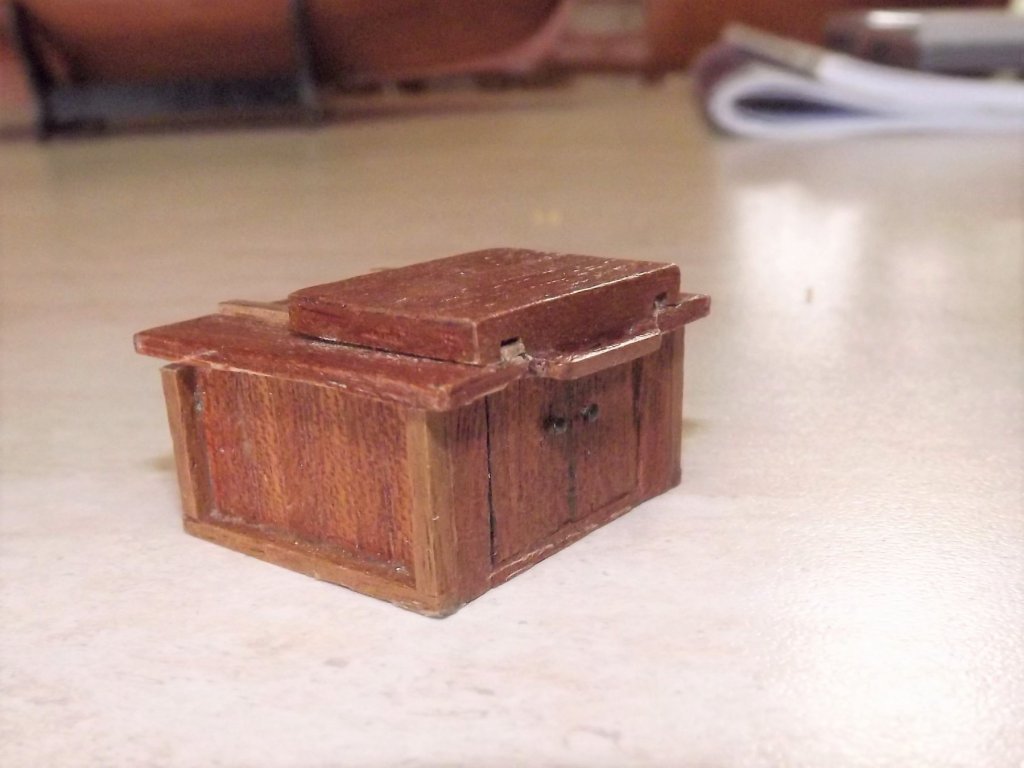
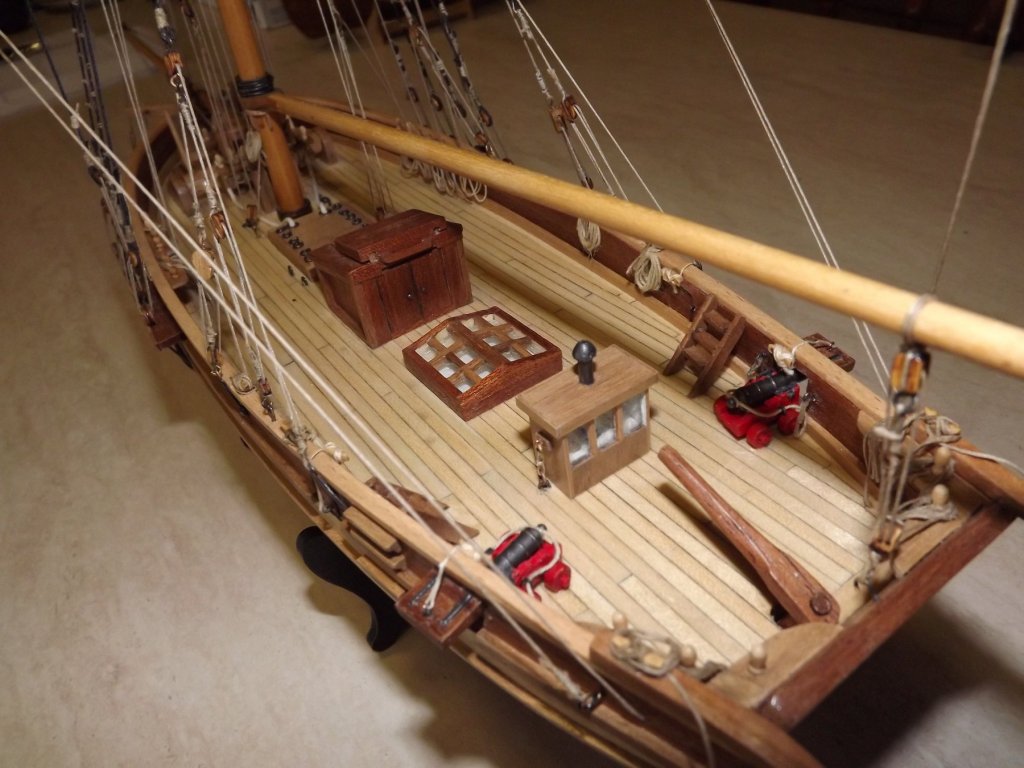
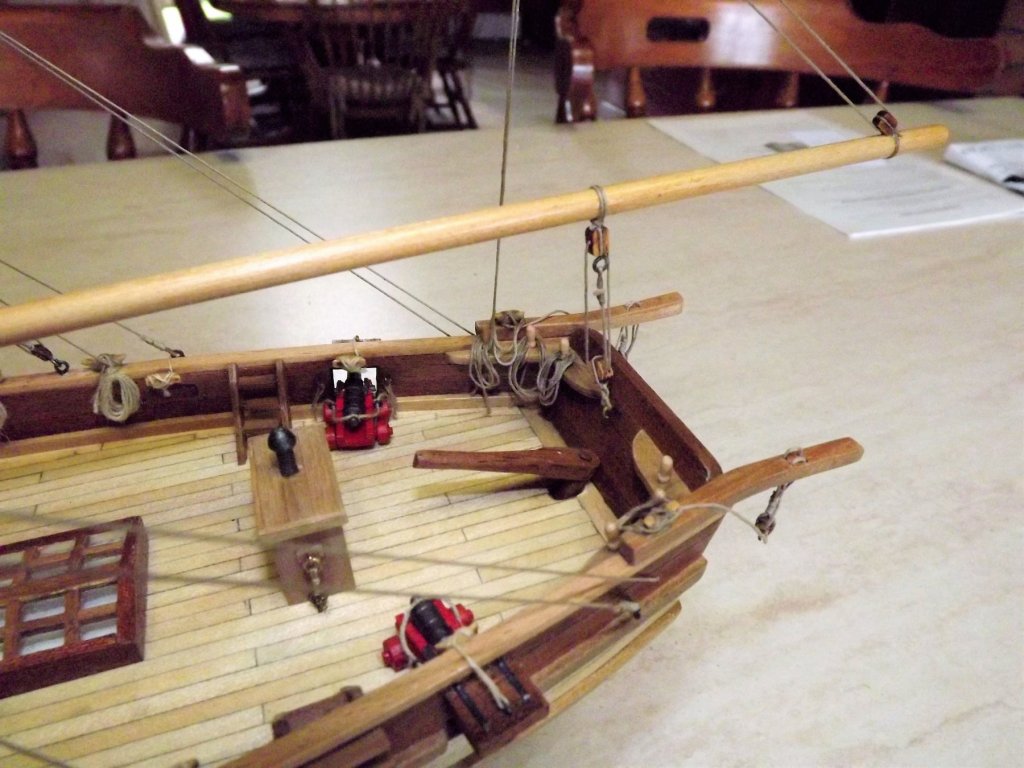
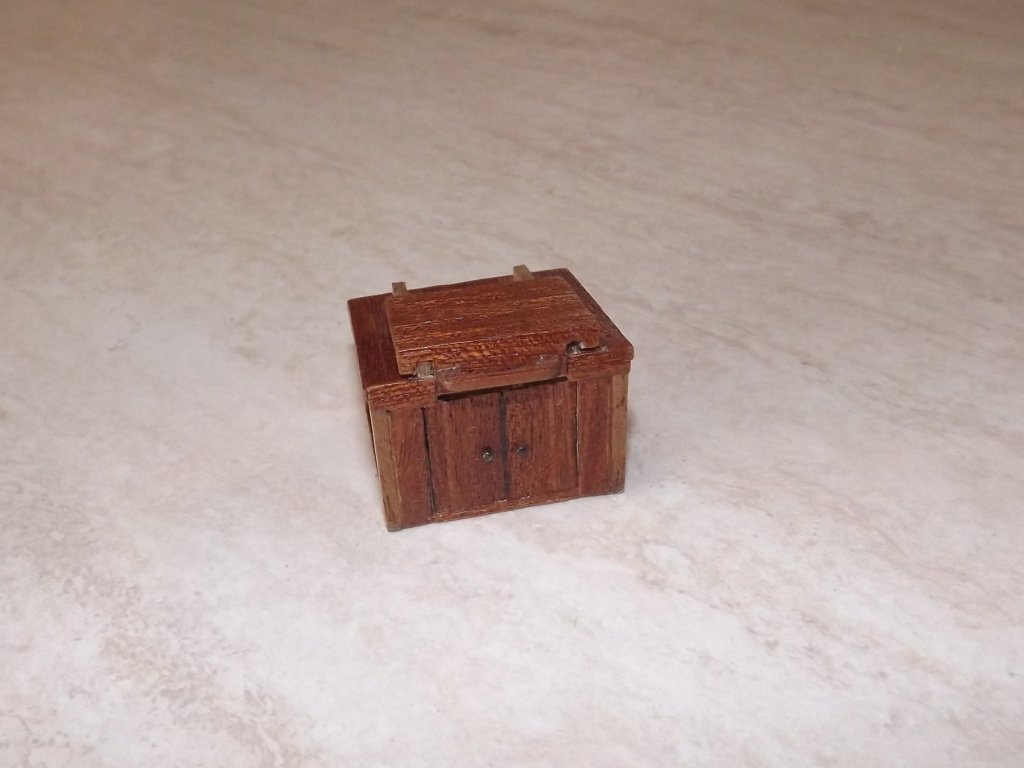
Here's a shot of my deck layout and companionway. I've got to remove mine (as I said) and reverse it and possibly lower it a little to match the cutaway sketch. Next shot is the spreader using a more sensible method than in the instructions, it does mean re-building the lower mast cap. Next some much needed extra belaying pins at the transom (that tiller has to be re-built). and some more detail on the companionway now it's been detached. Note that using the kitchen bench to work on isn't recommended except when the admiral happens to be some 10,500 miles away and hasn't got the password to this forum! Rick


- 241 replies
-
- 2
-
-
- mermaid
- modellers shipyard
- (and 1 more)
-
Just to add confusion to things this article https://www.arc.id.au/Cannon.html gives average barrel length for carronades as 32" so scaled to 1:48 this is 17mm. Smallest carronade barrel I can find is 20mm so I'm going to go with that and then build my own carriage. This looks to be around 2/3rds the length of the barrel on those not on slides so I'll work around that. Rick
- 241 replies
-
- 2
-
-
- mermaid
- modellers shipyard
- (and 1 more)
-
Just found this contemporary instruction on naval carronades. Looks as if the 6lb carronade will probably only measure around 24". The previous length I got was taken from a carronade (supposedly 6lb) on a field carriage on the Isle of Wight. https://books.google.com.au/books?id=bWRHAAAAYAAJ&pg=PA36&lpg=PA36&dq=carronade+length&source=bl&ots=9YHTlde_Kg&sig=ACfU3U0S-dMkpQUvFtt_8jEzRWyFgsNIHA&hl=en&sa=X&ved=2ahUKEwjuk9yXvKnjAhV-7XMBHfQvCQU4ChDoATADegQICBAB#v=onepage&q=carronade length&f=false Scroll back to page 33. Rick
-
No worries - just concerned that the ship may have foundered! Rick
-
Hey Chris - how's your build coming on? Haven't seen you for a little while. Rick
-
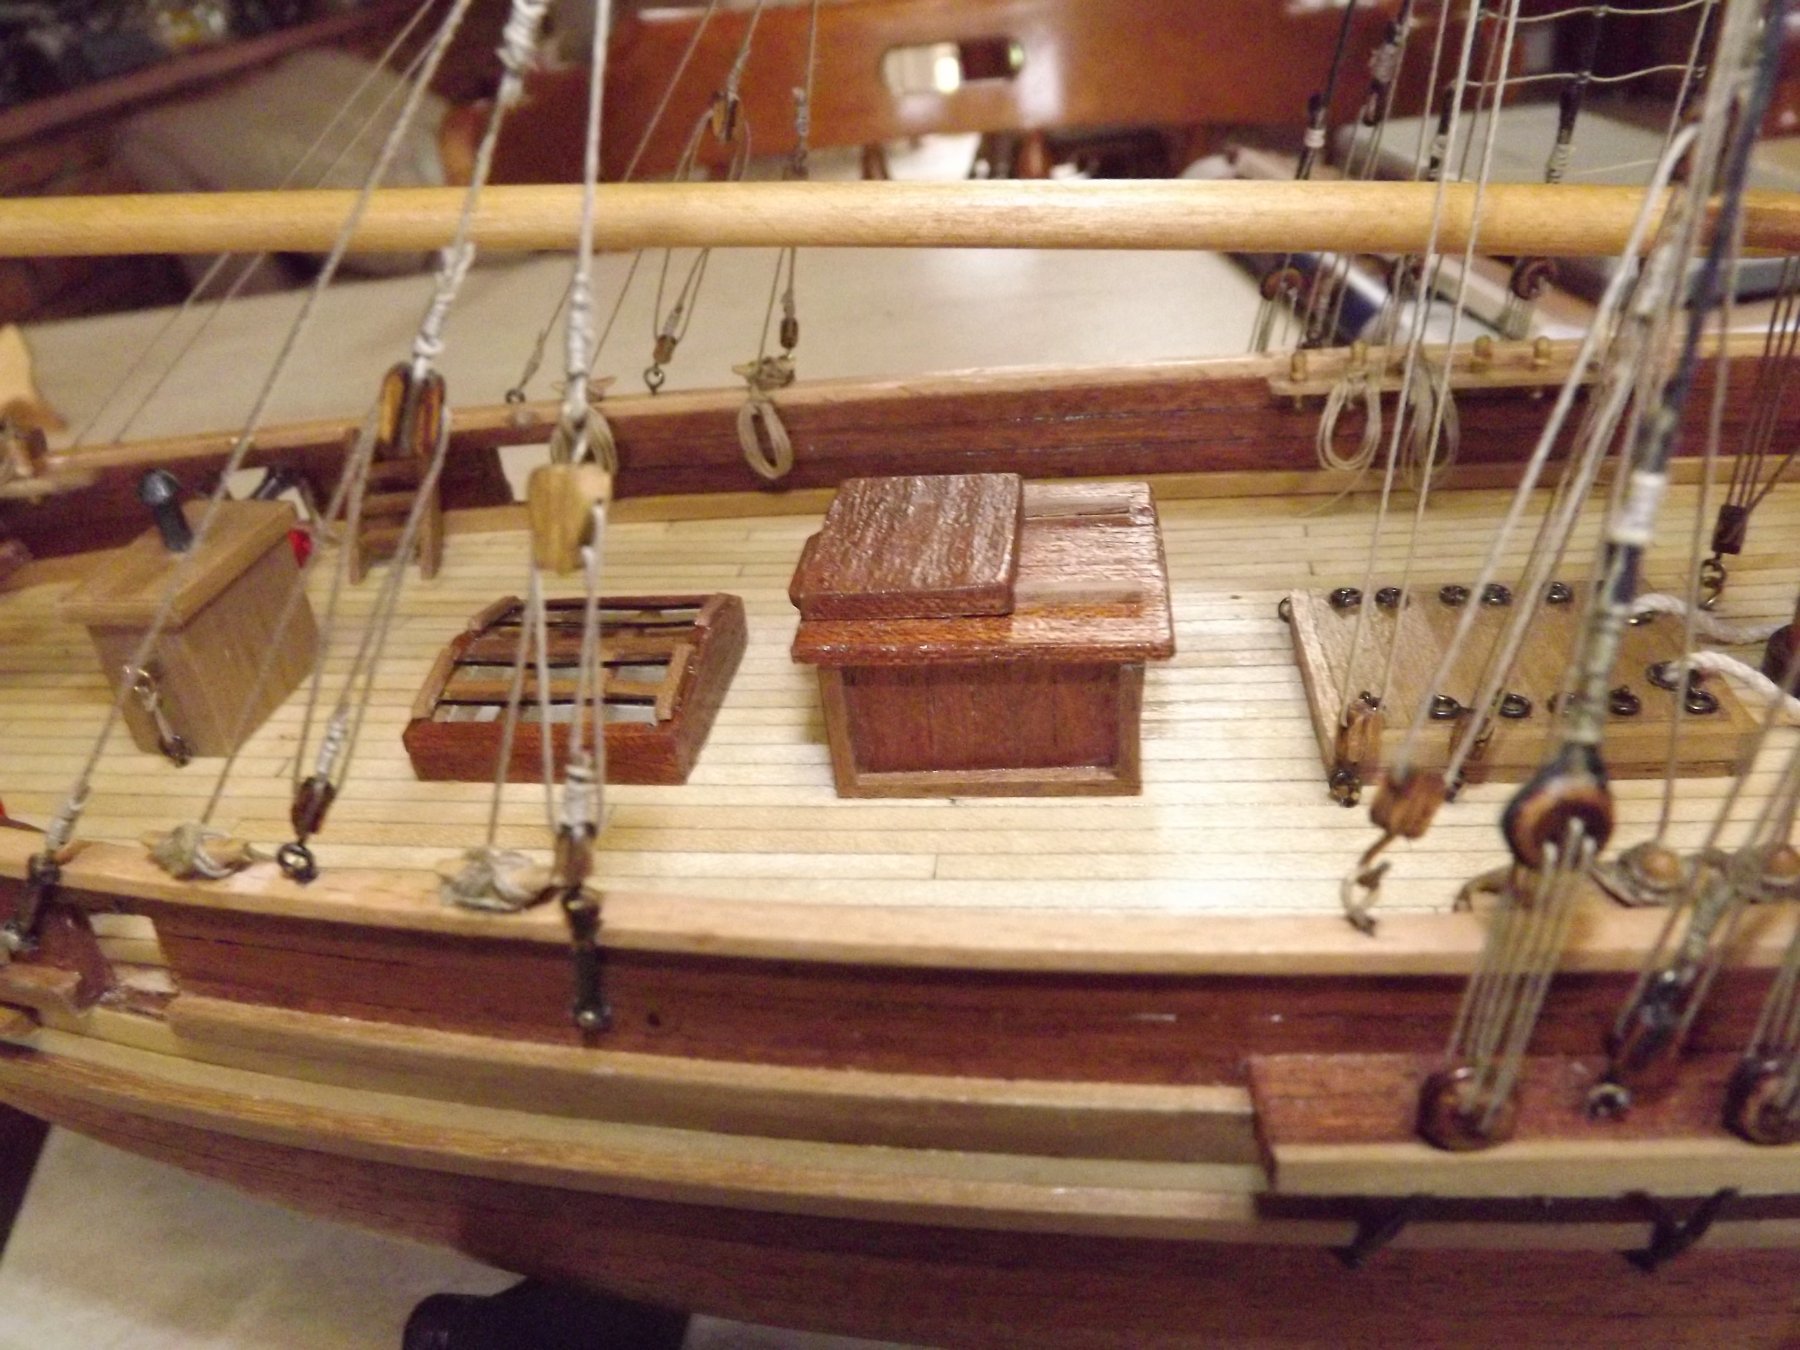
Thanks for the tip on the carriage rather than slide and for the Careening Bay note also. The deck furniture really needs some time playing with as the kit is so far from King's own sketch, as soon as I've peeled my model out of it's case (takes two people to lift it off the ship) I'll photo the deck as is for you and show the companionway before I turn it round. Rick
-
I've had a bit of a hunt around the internet and it seems a 6lb carronade barrel is around 43" in length, scaled down this would be about 22mm, nearest I can find in model fittings is Caldercraft's 18lb carronade in 1:64 scale at 22.6 mm with a full base and fittings. Looks like I'll have to order these in. At least buying in the UK I avoid GST 😉 Rick
- 241 replies
-
- 1
-
-
- mermaid
- modellers shipyard
- (and 1 more)
-
If you're feeling brave you can cheat with these type of fittings and use a heavy black paper impregnated with PVA glue. Give the appearance of iron fittings and is a hell of a lot easier to fit/fix. By the way I'm looking at getting mie out of it's case and doing some re-modelling. I did a quick scan through King's log and it seems that she was fitted with 6lb carronades so out with the 4lb cannon. I also cannot find any cutters ever fitted with gun port lids so they're coming off. Companionway needs to be turned around and I'll be fitting bars to my skylight. Probably do another check of the rigging as well, although I'm pretty happy with it (at the moment). Rick
- 241 replies
-
- 1
-
-
- mermaid
- modellers shipyard
- (and 1 more)
-
Have a look at the cutters in https://modelshipworld.com/gallery/category/4-gallery-of-contemporary-models-from-museums-and-private-collections/ page 2 . You'll notice that the boom at the mast is sitting there purely due to weight. If you've a problem with the kit not sitting down properly then maybe a touch of glue where the yoke sits on the mast will solve your problem. Rick
-
Middle one - it wouldn't hurt to put a couple of "iron" bars lengthways across the frame as well. Have them fine and if possible raised slightly then you don't get the appearance of multiple small panes like your third option. Rick
- 241 replies
-
- 2
-
-
- mermaid
- modellers shipyard
- (and 1 more)
-
Hi Eric - welcome (and a quick Heads up). It sounds as if you're going from a good basic starter (as I did) straight to one of the more complex kits available. Hopefully you'll build a couple of others between as the skills learnt in the first build will realistically only be of minimal use on the Victory. Obviously I don't know your skill level but just wanted to give you a warning in case you suddenly find you've bitten off more than you can chew. 😉 Rick
-
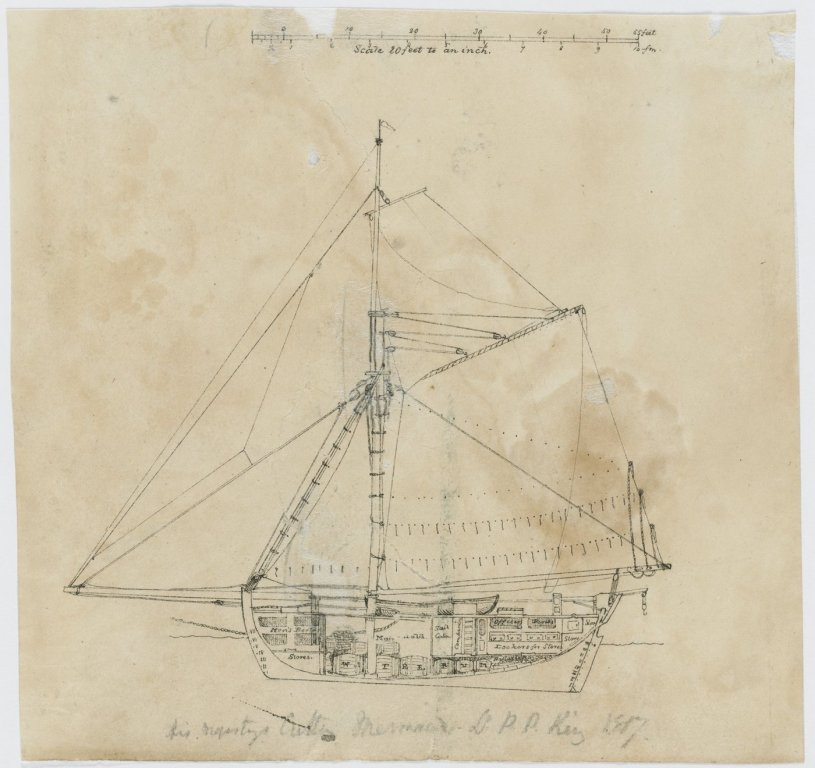
If you look closely at King's cut-away sketch you'll see that he has shown a similar companionway (I've just noticed that I faced mine in the opposite direction to the one Ollie installed need to revisit the model for some amendments!). I used a similar construction to his for my skylight. 2mm glass with frames glues to the glass to give the appearance of separate panes. Rick

-
They all seem to have a vent on top - dispels the heat from the oil lamp inside. Rick
- 241 replies
-
- 1
-
-
- mermaid
- modellers shipyard
- (and 1 more)
-
Have you tried the UK National Maritime Museum? I've a permanent short-cut there for cutters in general https://collections.rmg.co.uk/collections.html#!csearch;authority=subject-90254;collectionReference=subject-90254;innerSearchTerm=cutter;start=0 . Should be worth checking out. Rick
-
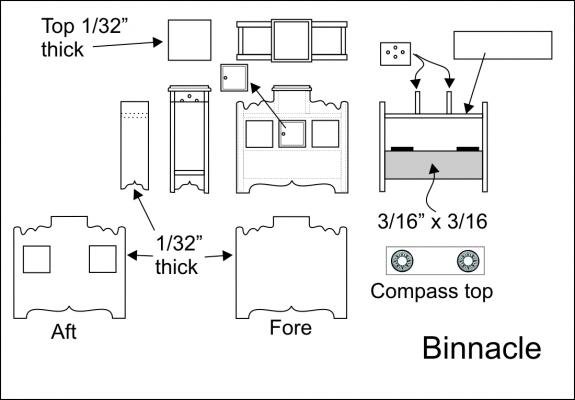
On the kit plans there's a topsail yard fig. 31 Doesn't exist on any of Kings sketches that I've seen but a flying jib does. It shows pretty well here and this modern representation of the Mermaid also illustrates it. It's a free flying spar with sail attached hoist(I'm guessing) via block at the masthead. By the way, here's a three section binnacle which can be scaled down if needed. Sorry to hijack your thread James but I hope these do help. Rick

- 241 replies
-
- 2
-
-
- mermaid
- modellers shipyard
- (and 1 more)
-
Don't know if you James or Chris have got a hi res version of this cut-away. If not here it is, blows up very well and really helps with positioning deck furnishings, rigging and flying jib etc. I've a couple more somewhere showing flying jibs a bit better. Just ask and I'll post them if needed. Rick
- 241 replies
-
- 3
-
-
- mermaid
- modellers shipyard
- (and 1 more)
-
Think I may nick over to your place tonight Chris and check it out. If I bring my version of "Mermaid" with me we can compare notes!! 😉 Rick