davec
-
Posts
382 -
Joined
-
Last visited
Content Type
Profiles
Forums
Gallery
Events
Everything posted by davec
-
 I’m planning on making a gantry style building board for an upcoming fully framed model project and wanted some advice on minimum dimensions. I’d like the board to be big enough to do all the necessary work and take full advantage of the t-tracks and gantry, but no larger as I’m hoping to be able to carry it to club meetings reasonably easily. I see a lot of people here have used these types of building boards and was hoping to get some advice about 3 measurements: · Minimum distance between widest part of hull and center of t-track. · Minimum distance between center of t-track and edge of building board · Minimum distance between highest point of hull and lowest point of gantry cross piece Thanks! Dave
 -
Congratulations on finishing. The model came out beautifully. I really like the weathering.
-
Beautiful work - I agree that the OD looks great. I'm following carefully - I have the new Eduard Bloody 100th 1/48 kit, and hope to start when I finish some of my current projects.
-
Not sure how I missed this - beautiful models and diorama!!
-
Dan - Beautiful model - congratulations on finishing! Dave
- 146 replies
-
- 2
-

-
- Adder
- Vanguard Models
- (and 1 more)
-
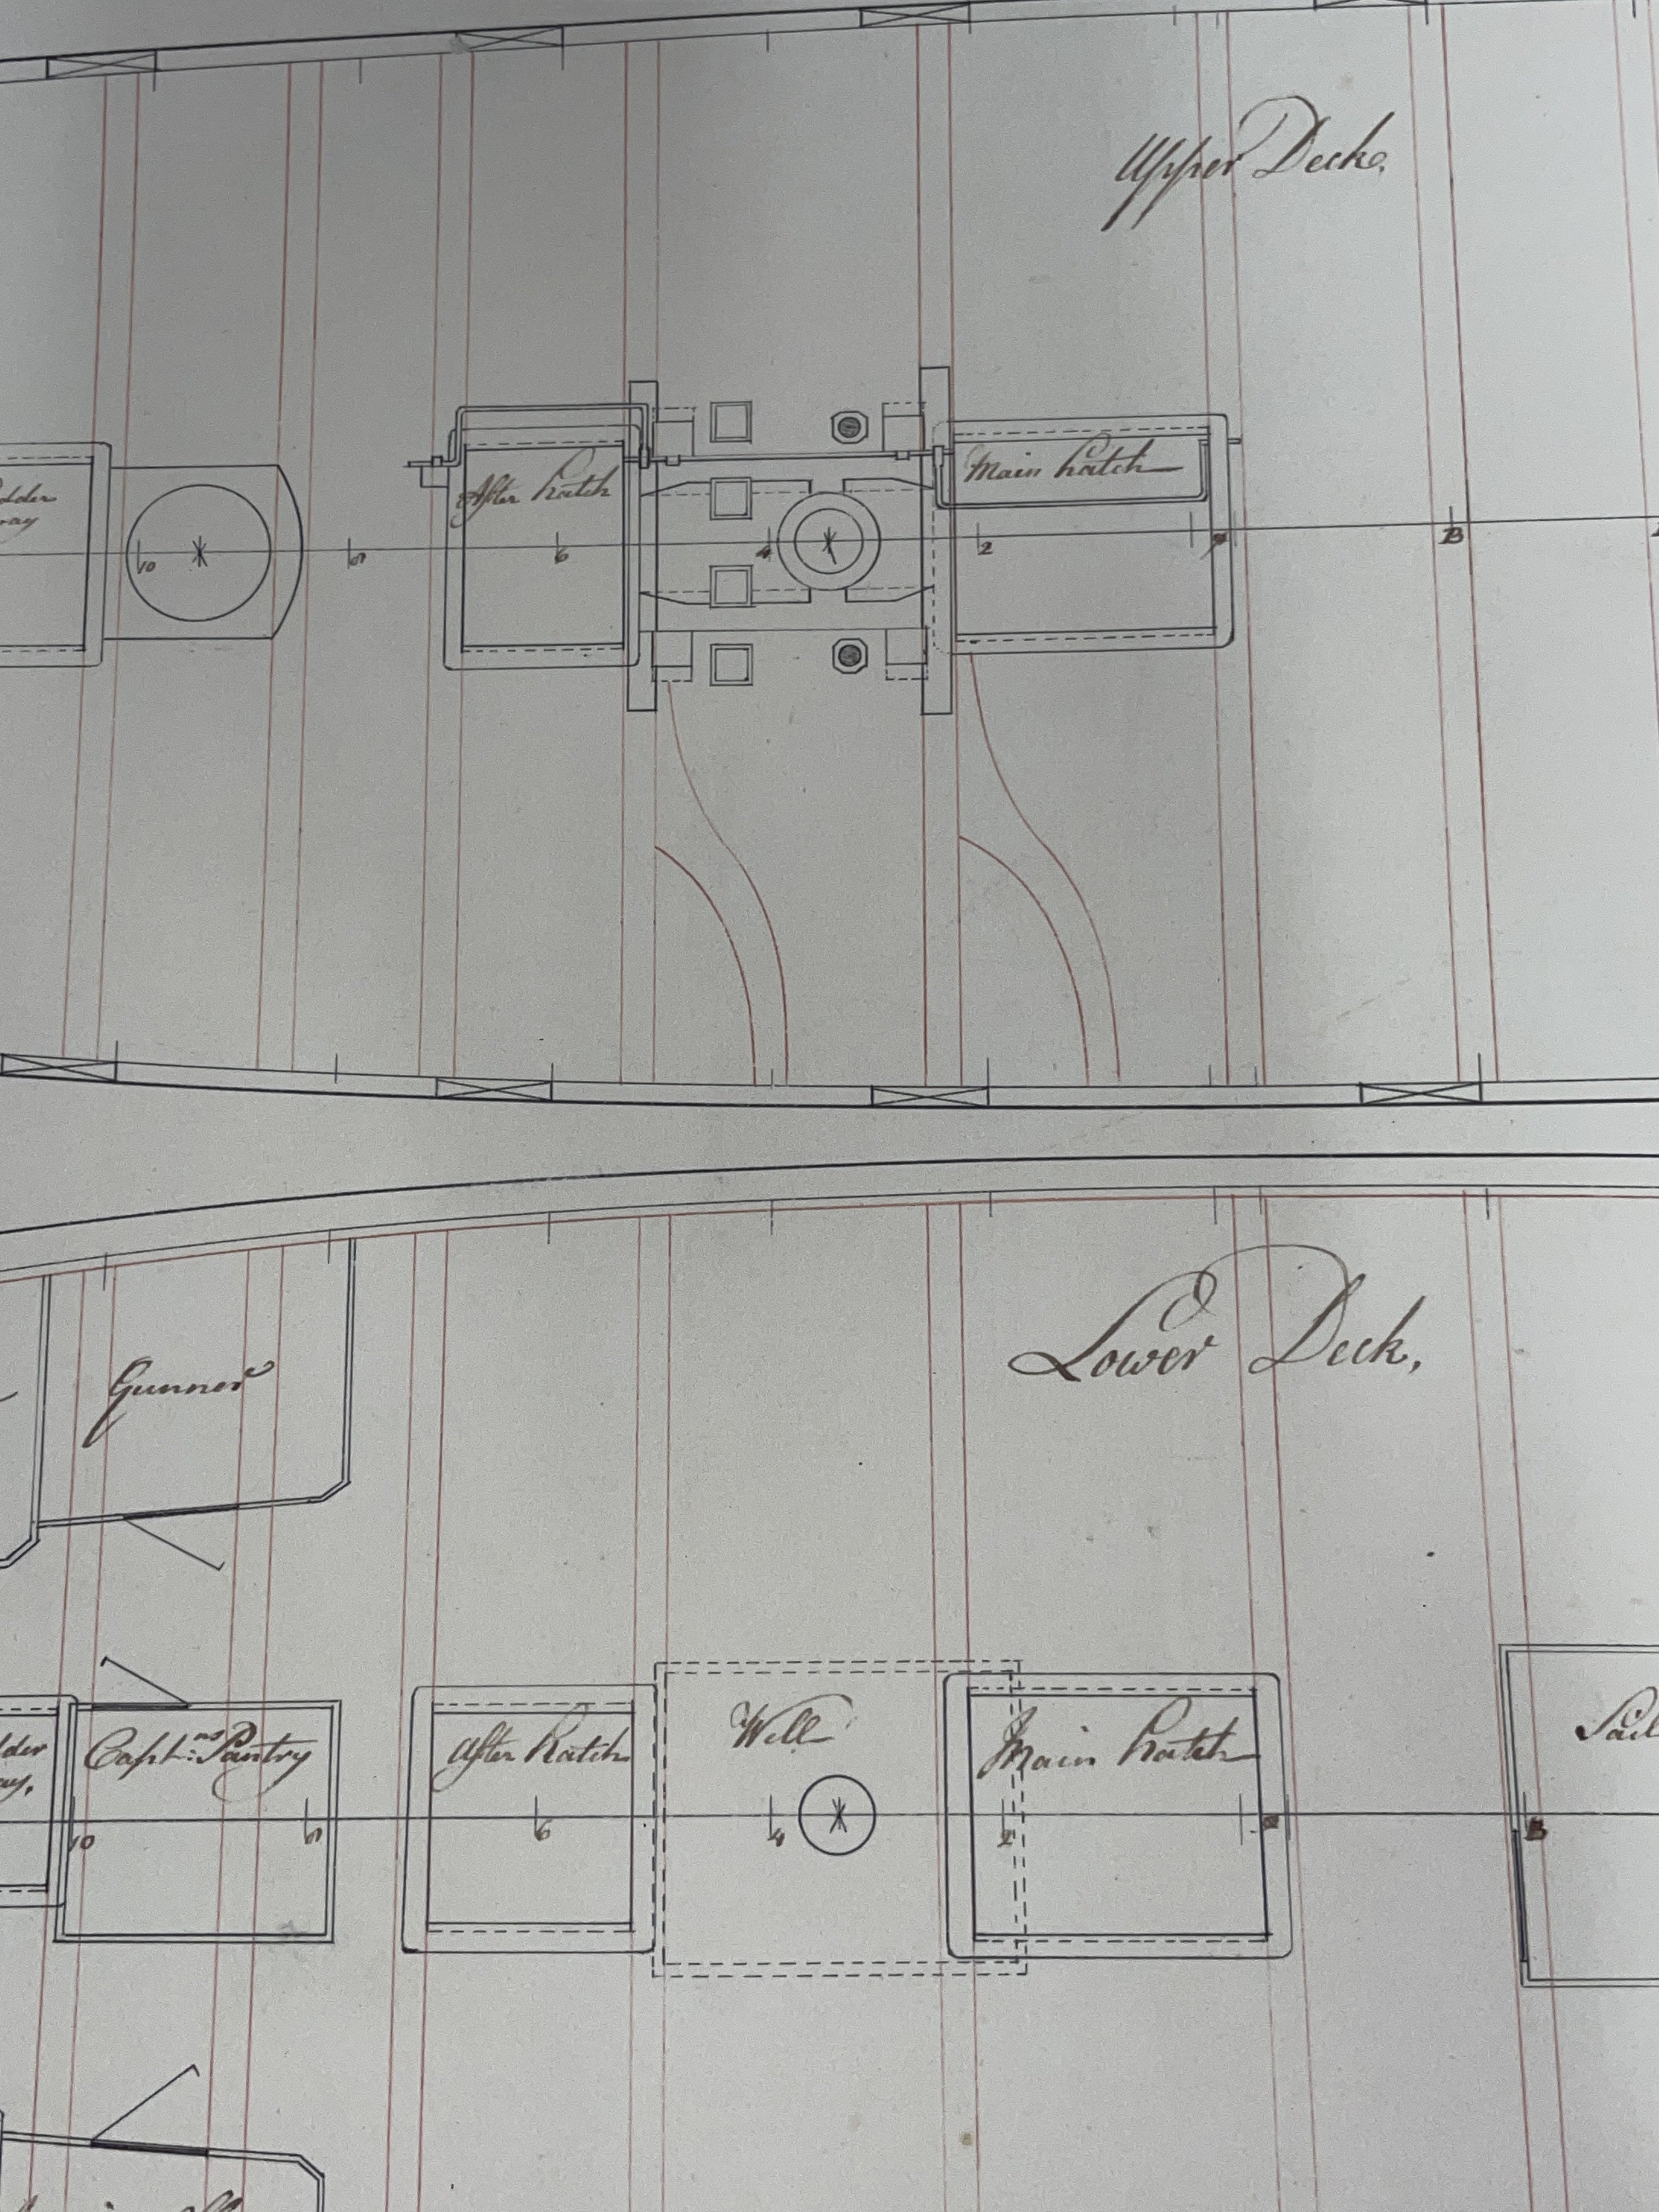
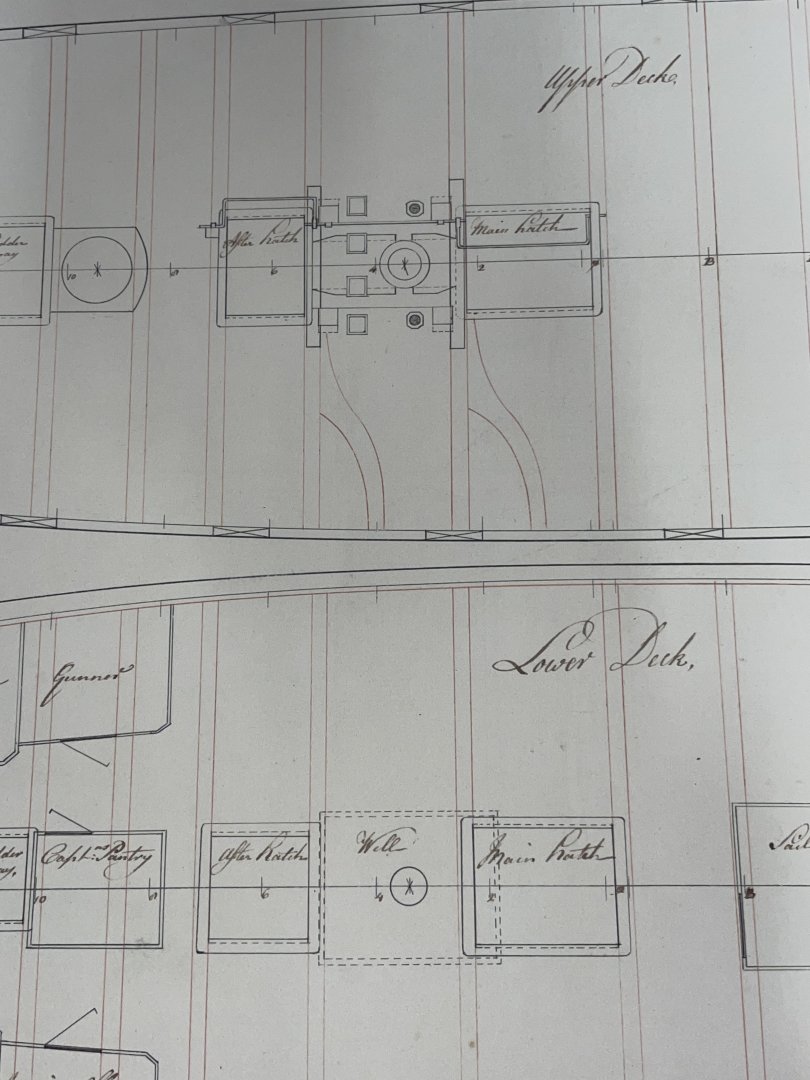
Hi Hamilton - I have the Echo plans from NMM. I've taken a picture of the decking plan, which does not include the location of the carlings. Not sure what usual practice was at the time, but you aren't constrained by actual documentation of the ship regarding carling location.
-
Hi Hamilton - If I was doing this over, I would align the inner side of the outer carling with the inner edge of the well planking. I would locate the inner carling the thickness of the pump tube away towards the center of the ship. The inner carling should be no wider than the distance between the ascending and descending pump tubes. I don't think this affects the width of the mast partners, only where the holes for the shafts are located. Please check that with your plan of widening the well that the pump will end up located on the upper deck where you want it to. Dave
-
Spitfire Mk.Ia by davec - FINISHED - Kotare - 1/32 - PLASTIC
davec replied to davec's topic in Non-ship/categorised builds
Thanks everyone - I really appreciate the likes and comments. Dave -
Fantastic work - congratulations on finishing! I love the colors and all the additional detail, especially the landing gear. Dave
- 112 replies
-
- 11
-
-

-
Mike - I'm looking forward to watching, especially seeing how you integrate all that aftermarket. I always learn a lot. Dave
-
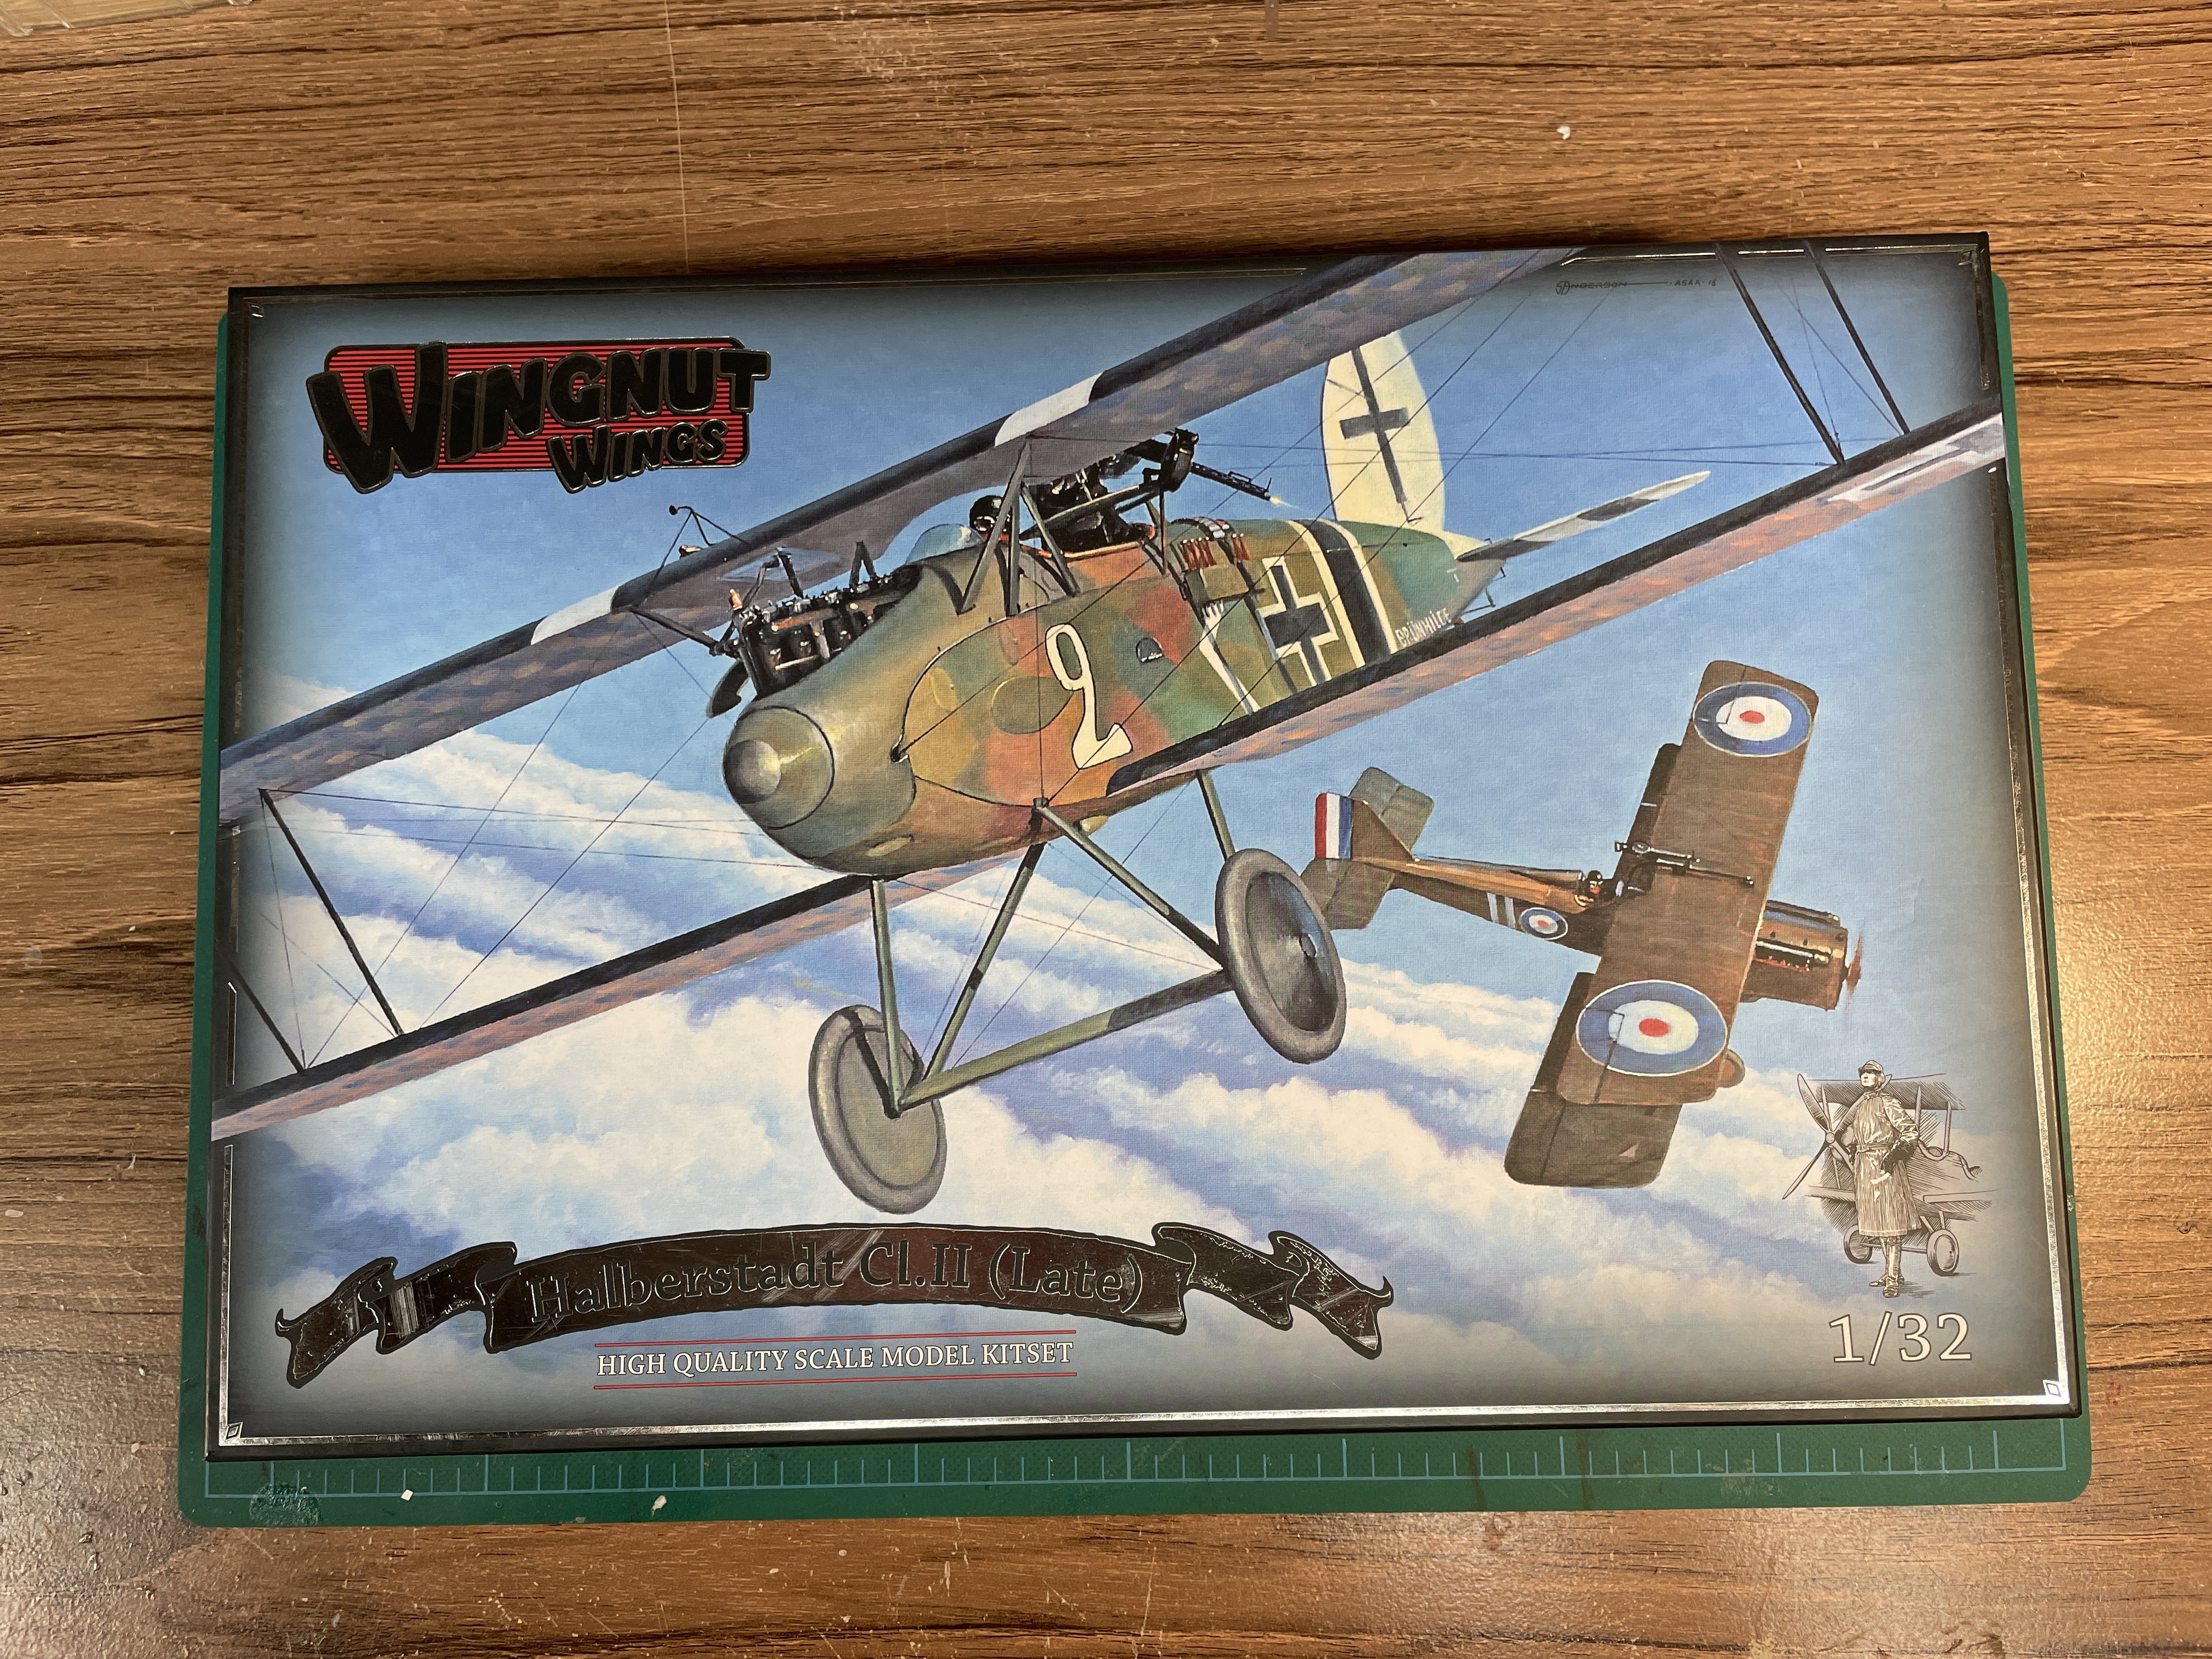
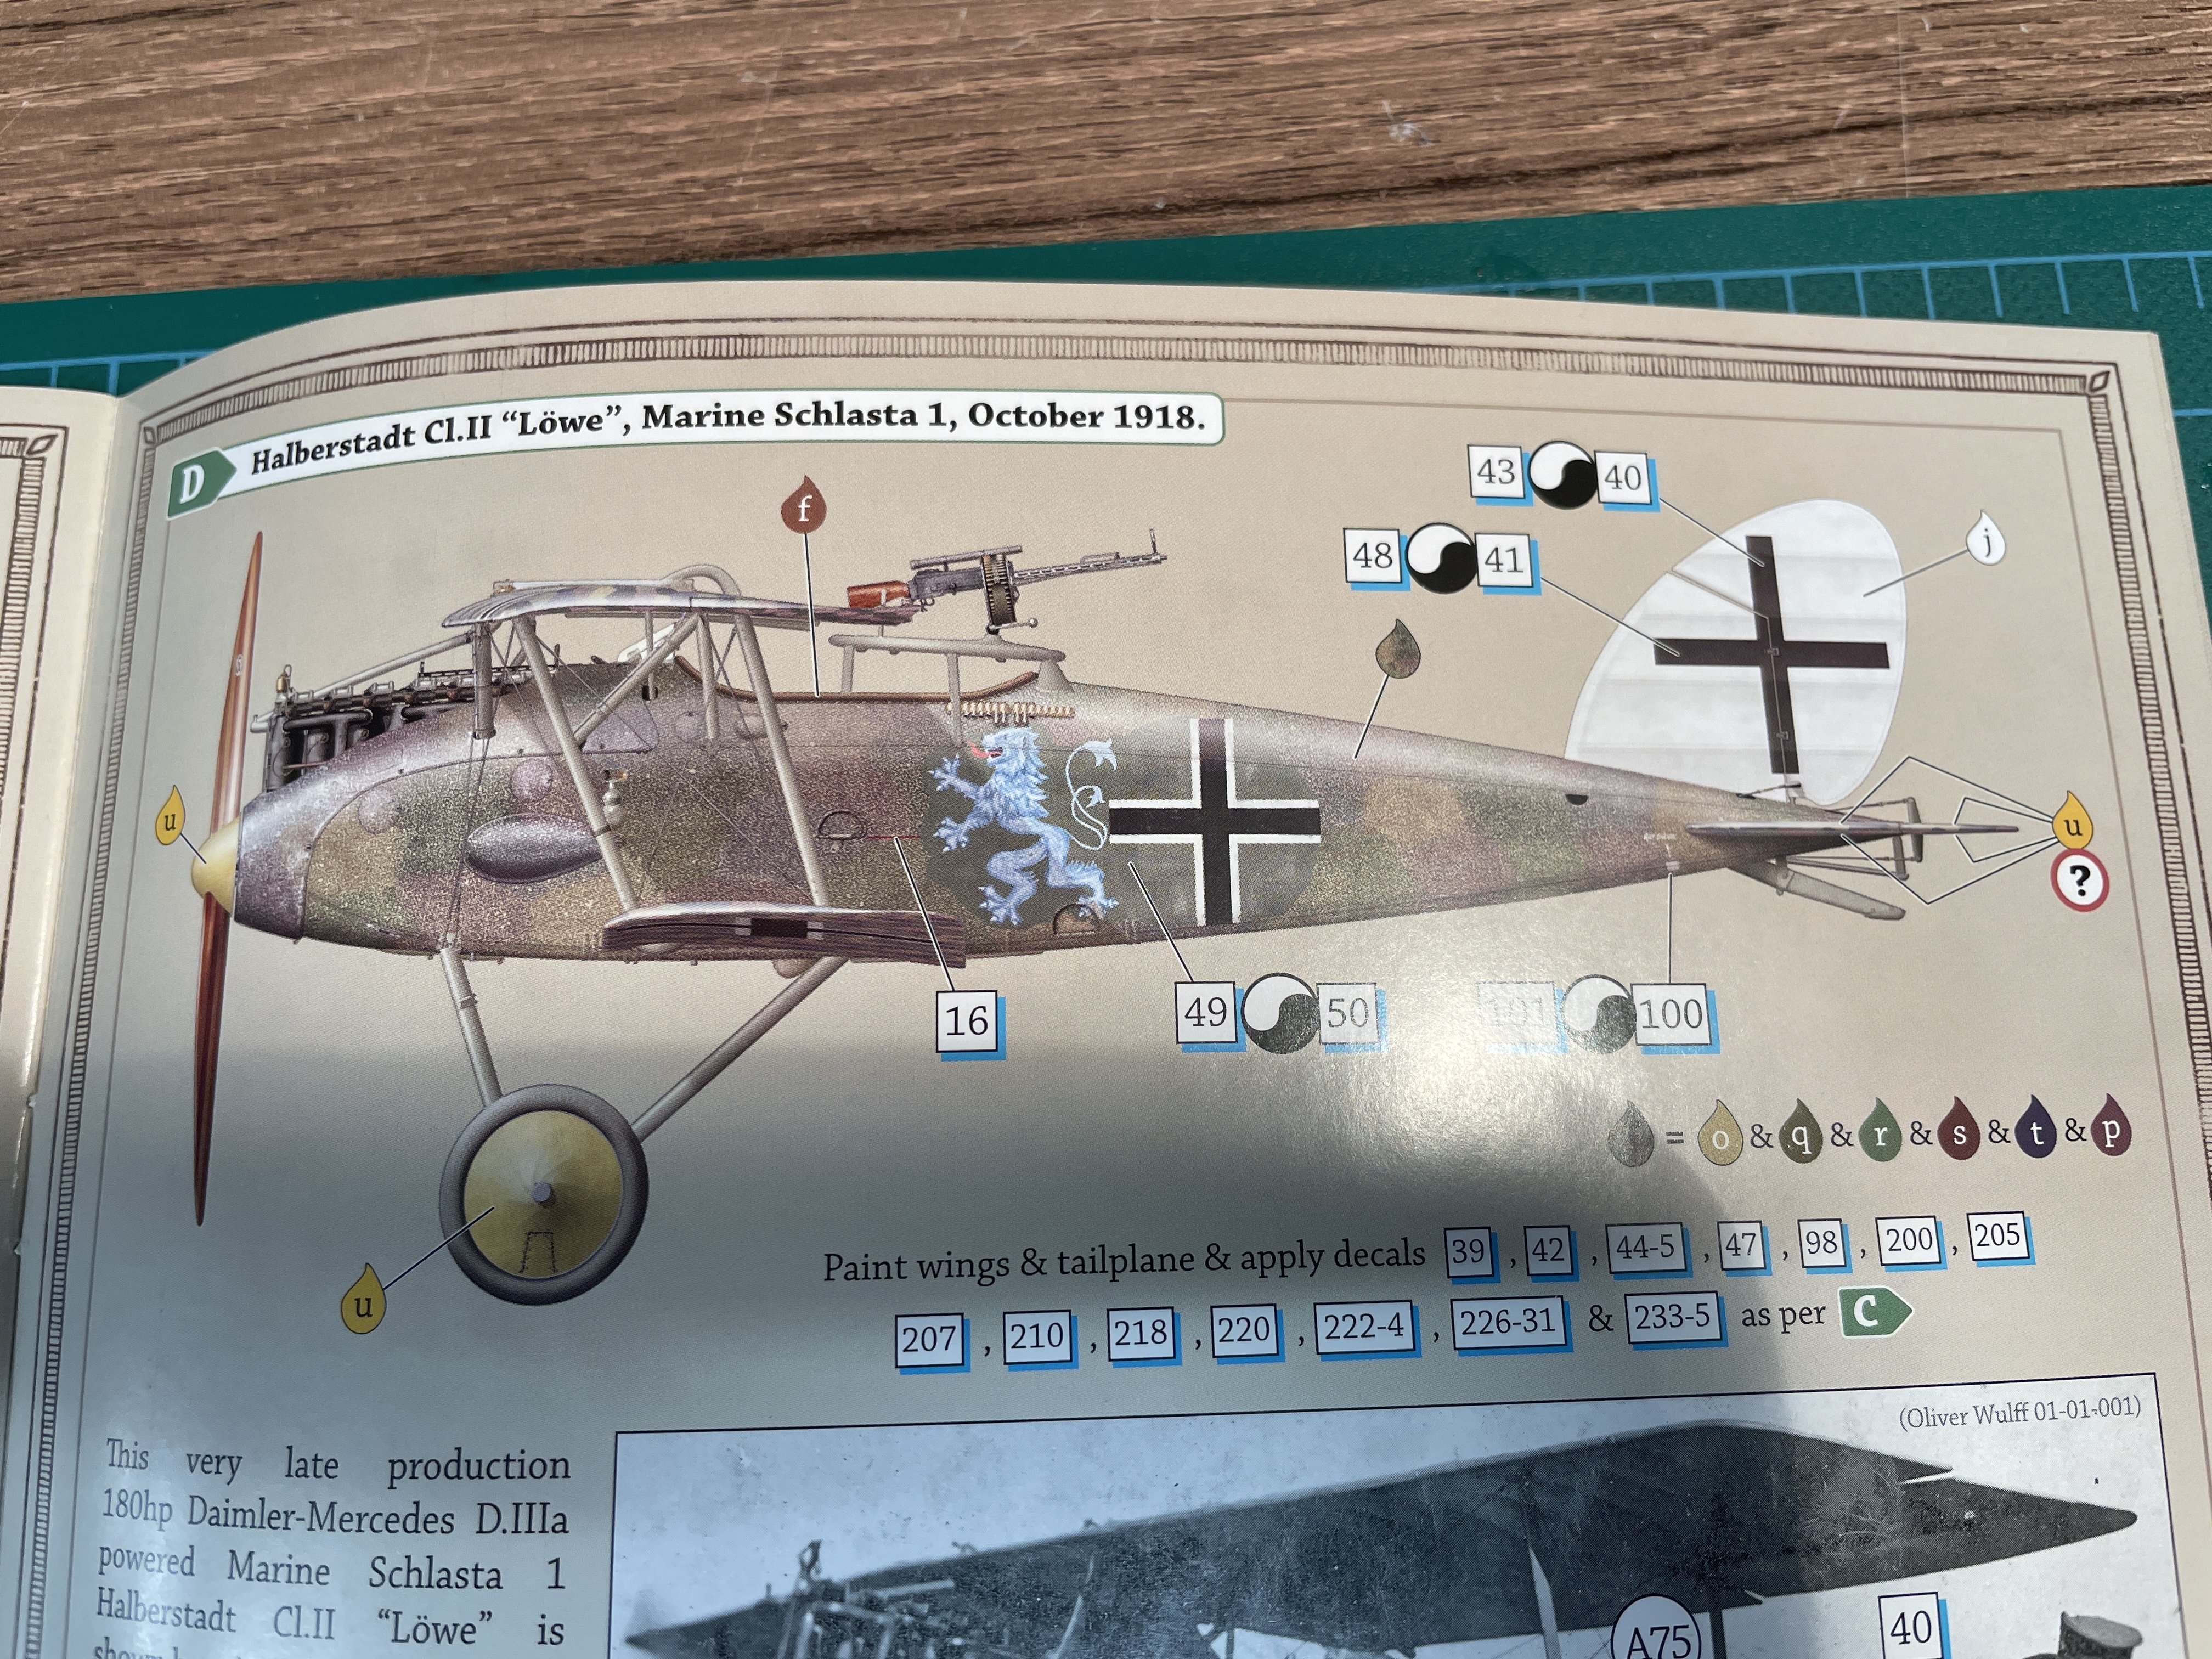
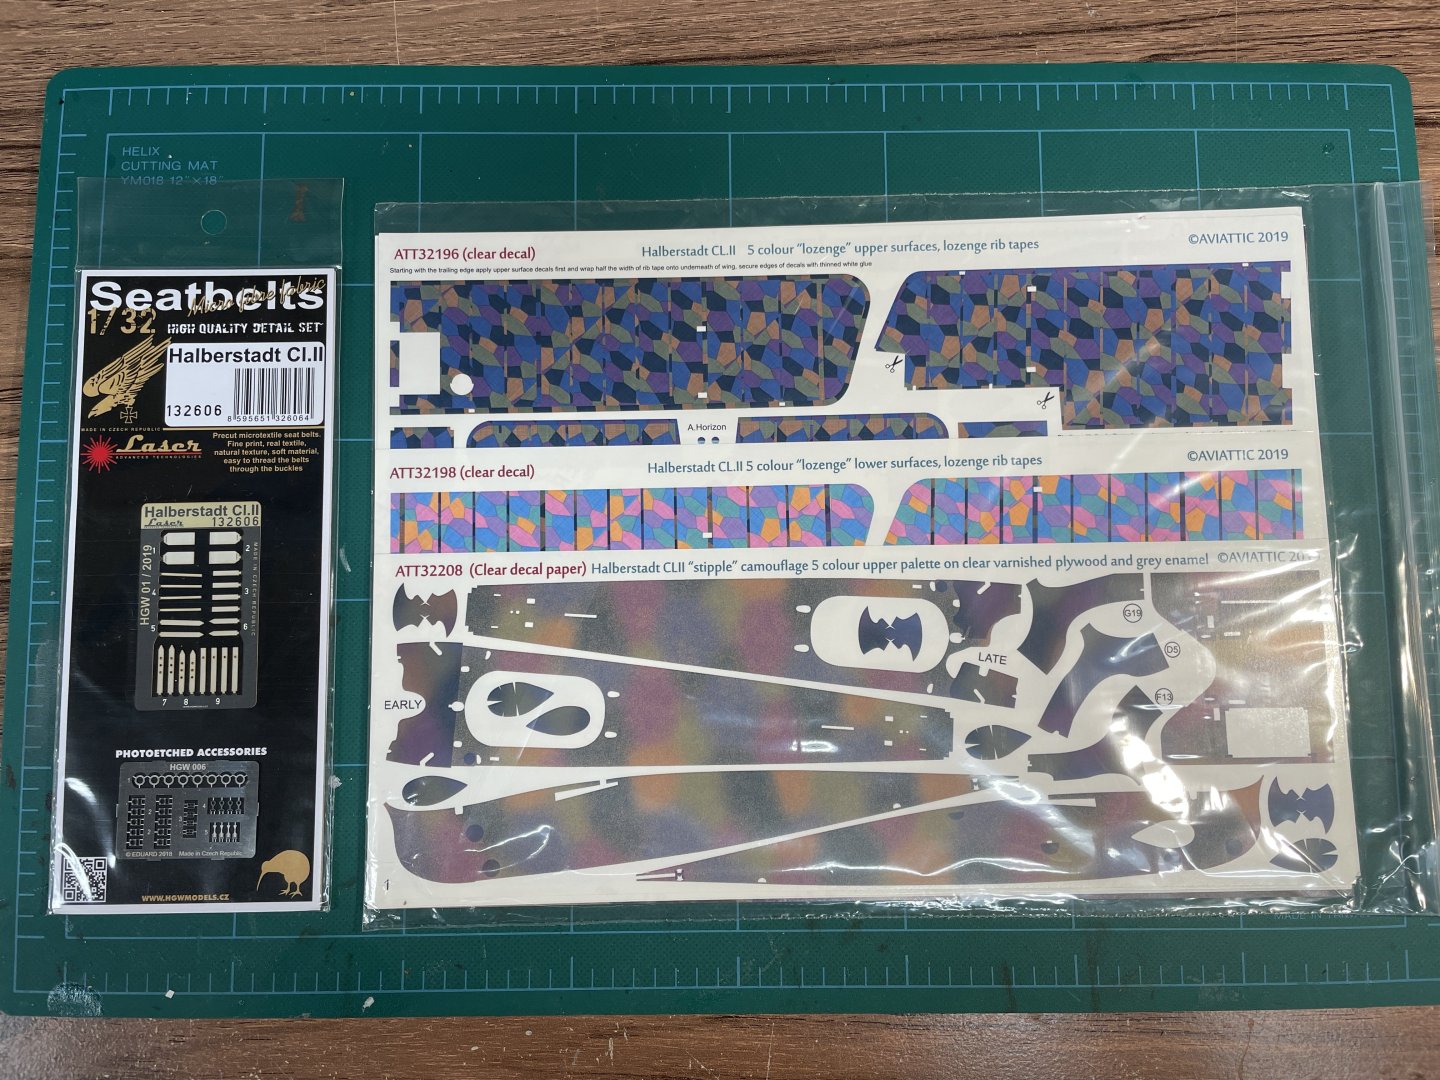
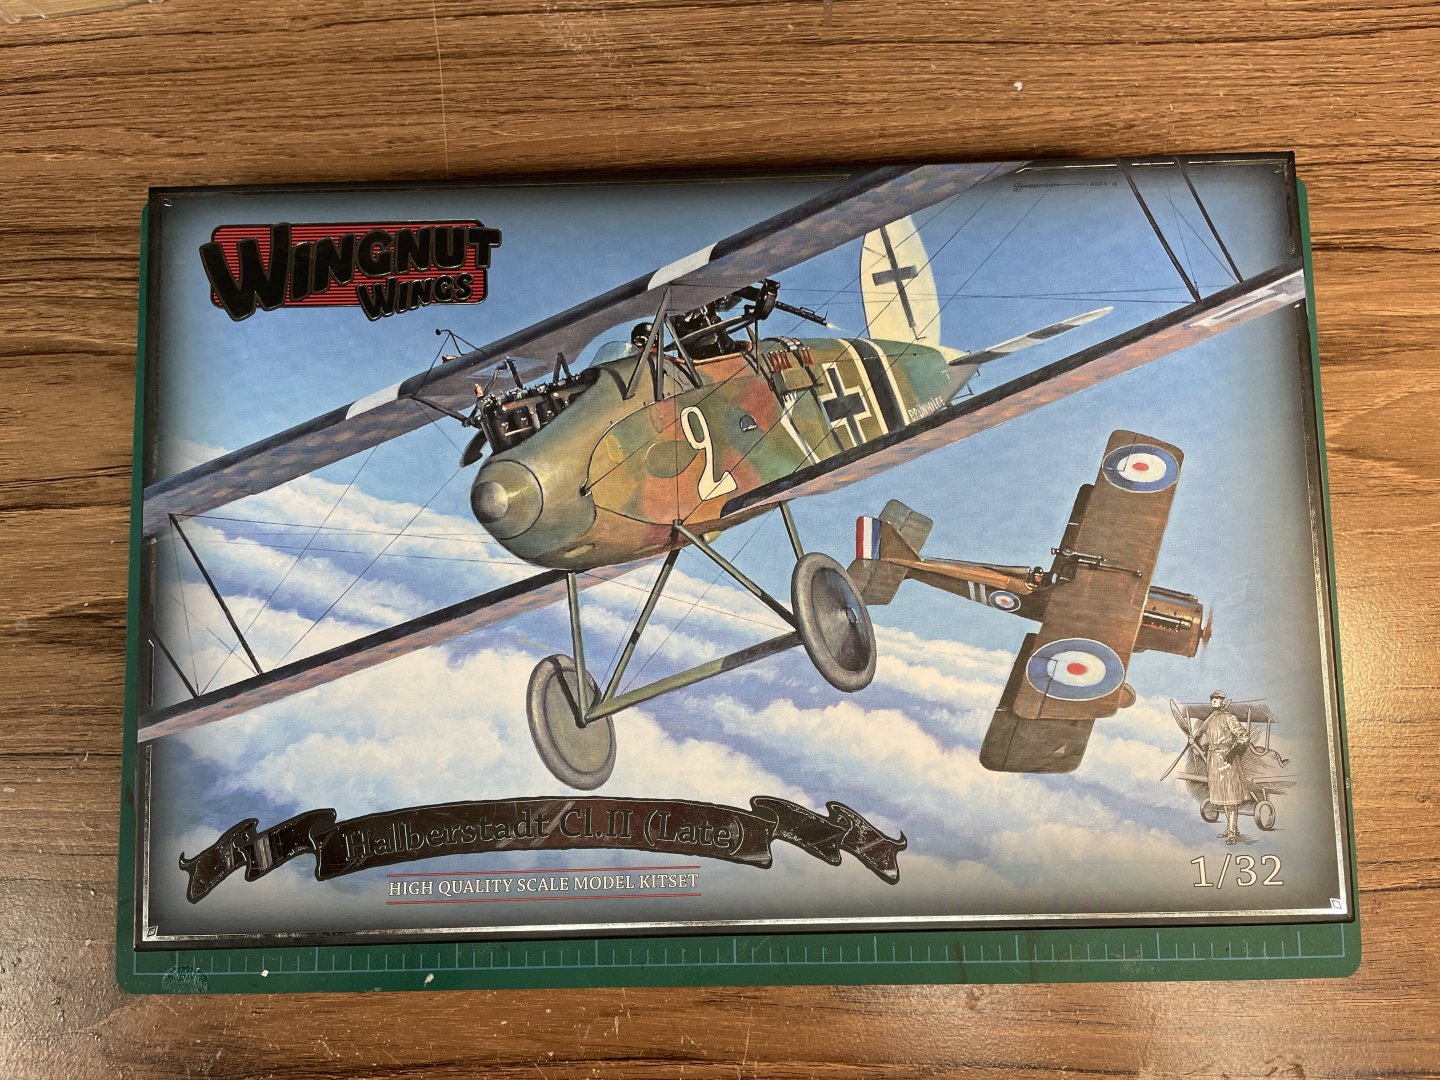
Now that the Spitfire is done, I plan to build the Wingnut Wings Halberstadt Cl.II (late) next. This is one of the many WNW kits I inherited from my Dad. I plan to build scheme D, Lowe. I plan to use Aviattic decals for the stippled camouglage (painting the 5 color camo then stippling over it by spraying under low enough pressure that the airbrush spits the stippling is way beyond my skills). Richard at Aviattic was very helpful in helping me get the right decals for this as well as a second Cl.II that I have on the shelf. I had bought the duelist kit (RE8 and Halberstadt Cl.II) to get the RE8 and will eventually build the second with the extra decals from this kit. I will also use HGW fabric seatbelts in place of the photo etch ones. I have some vacation coming up and plan to get finish the two boat kits I have on the other bench, so this may be a little slow at first.

- 40 replies
-
- 14
-
-
Spitfire Mk.Ia by davec - FINISHED - Kotare - 1/32 - PLASTIC
davec replied to davec's topic in Non-ship/categorised builds
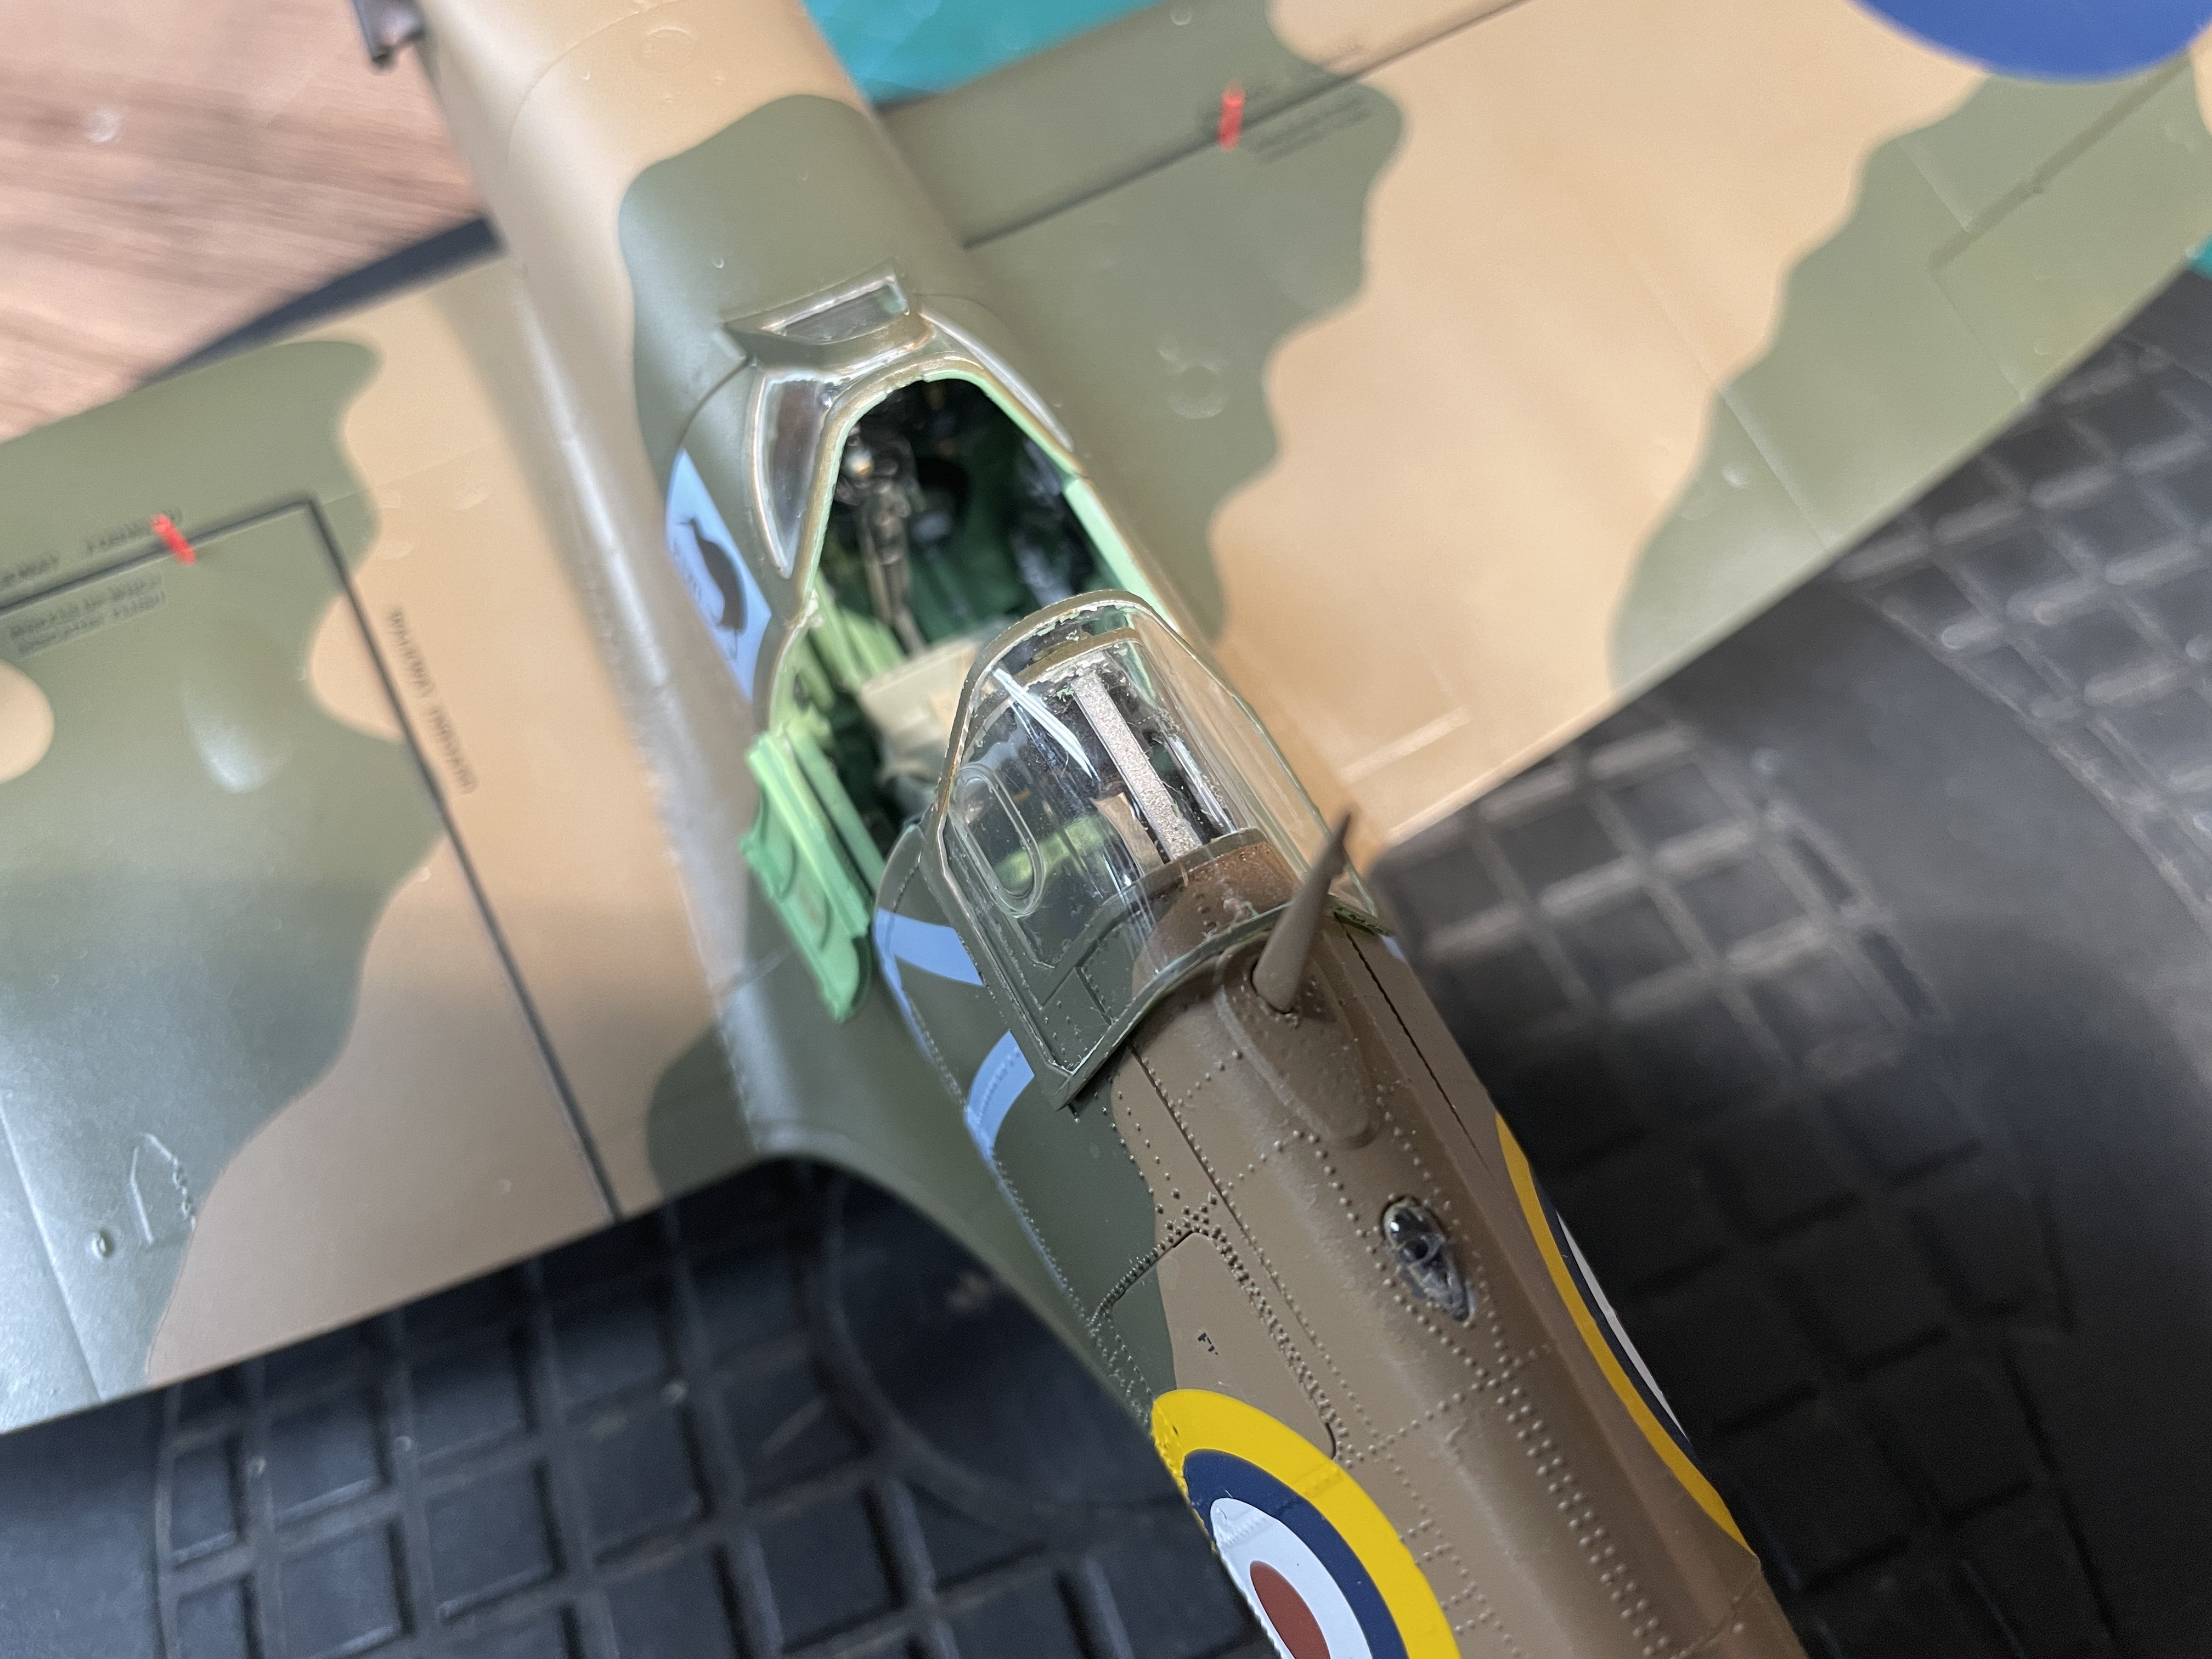
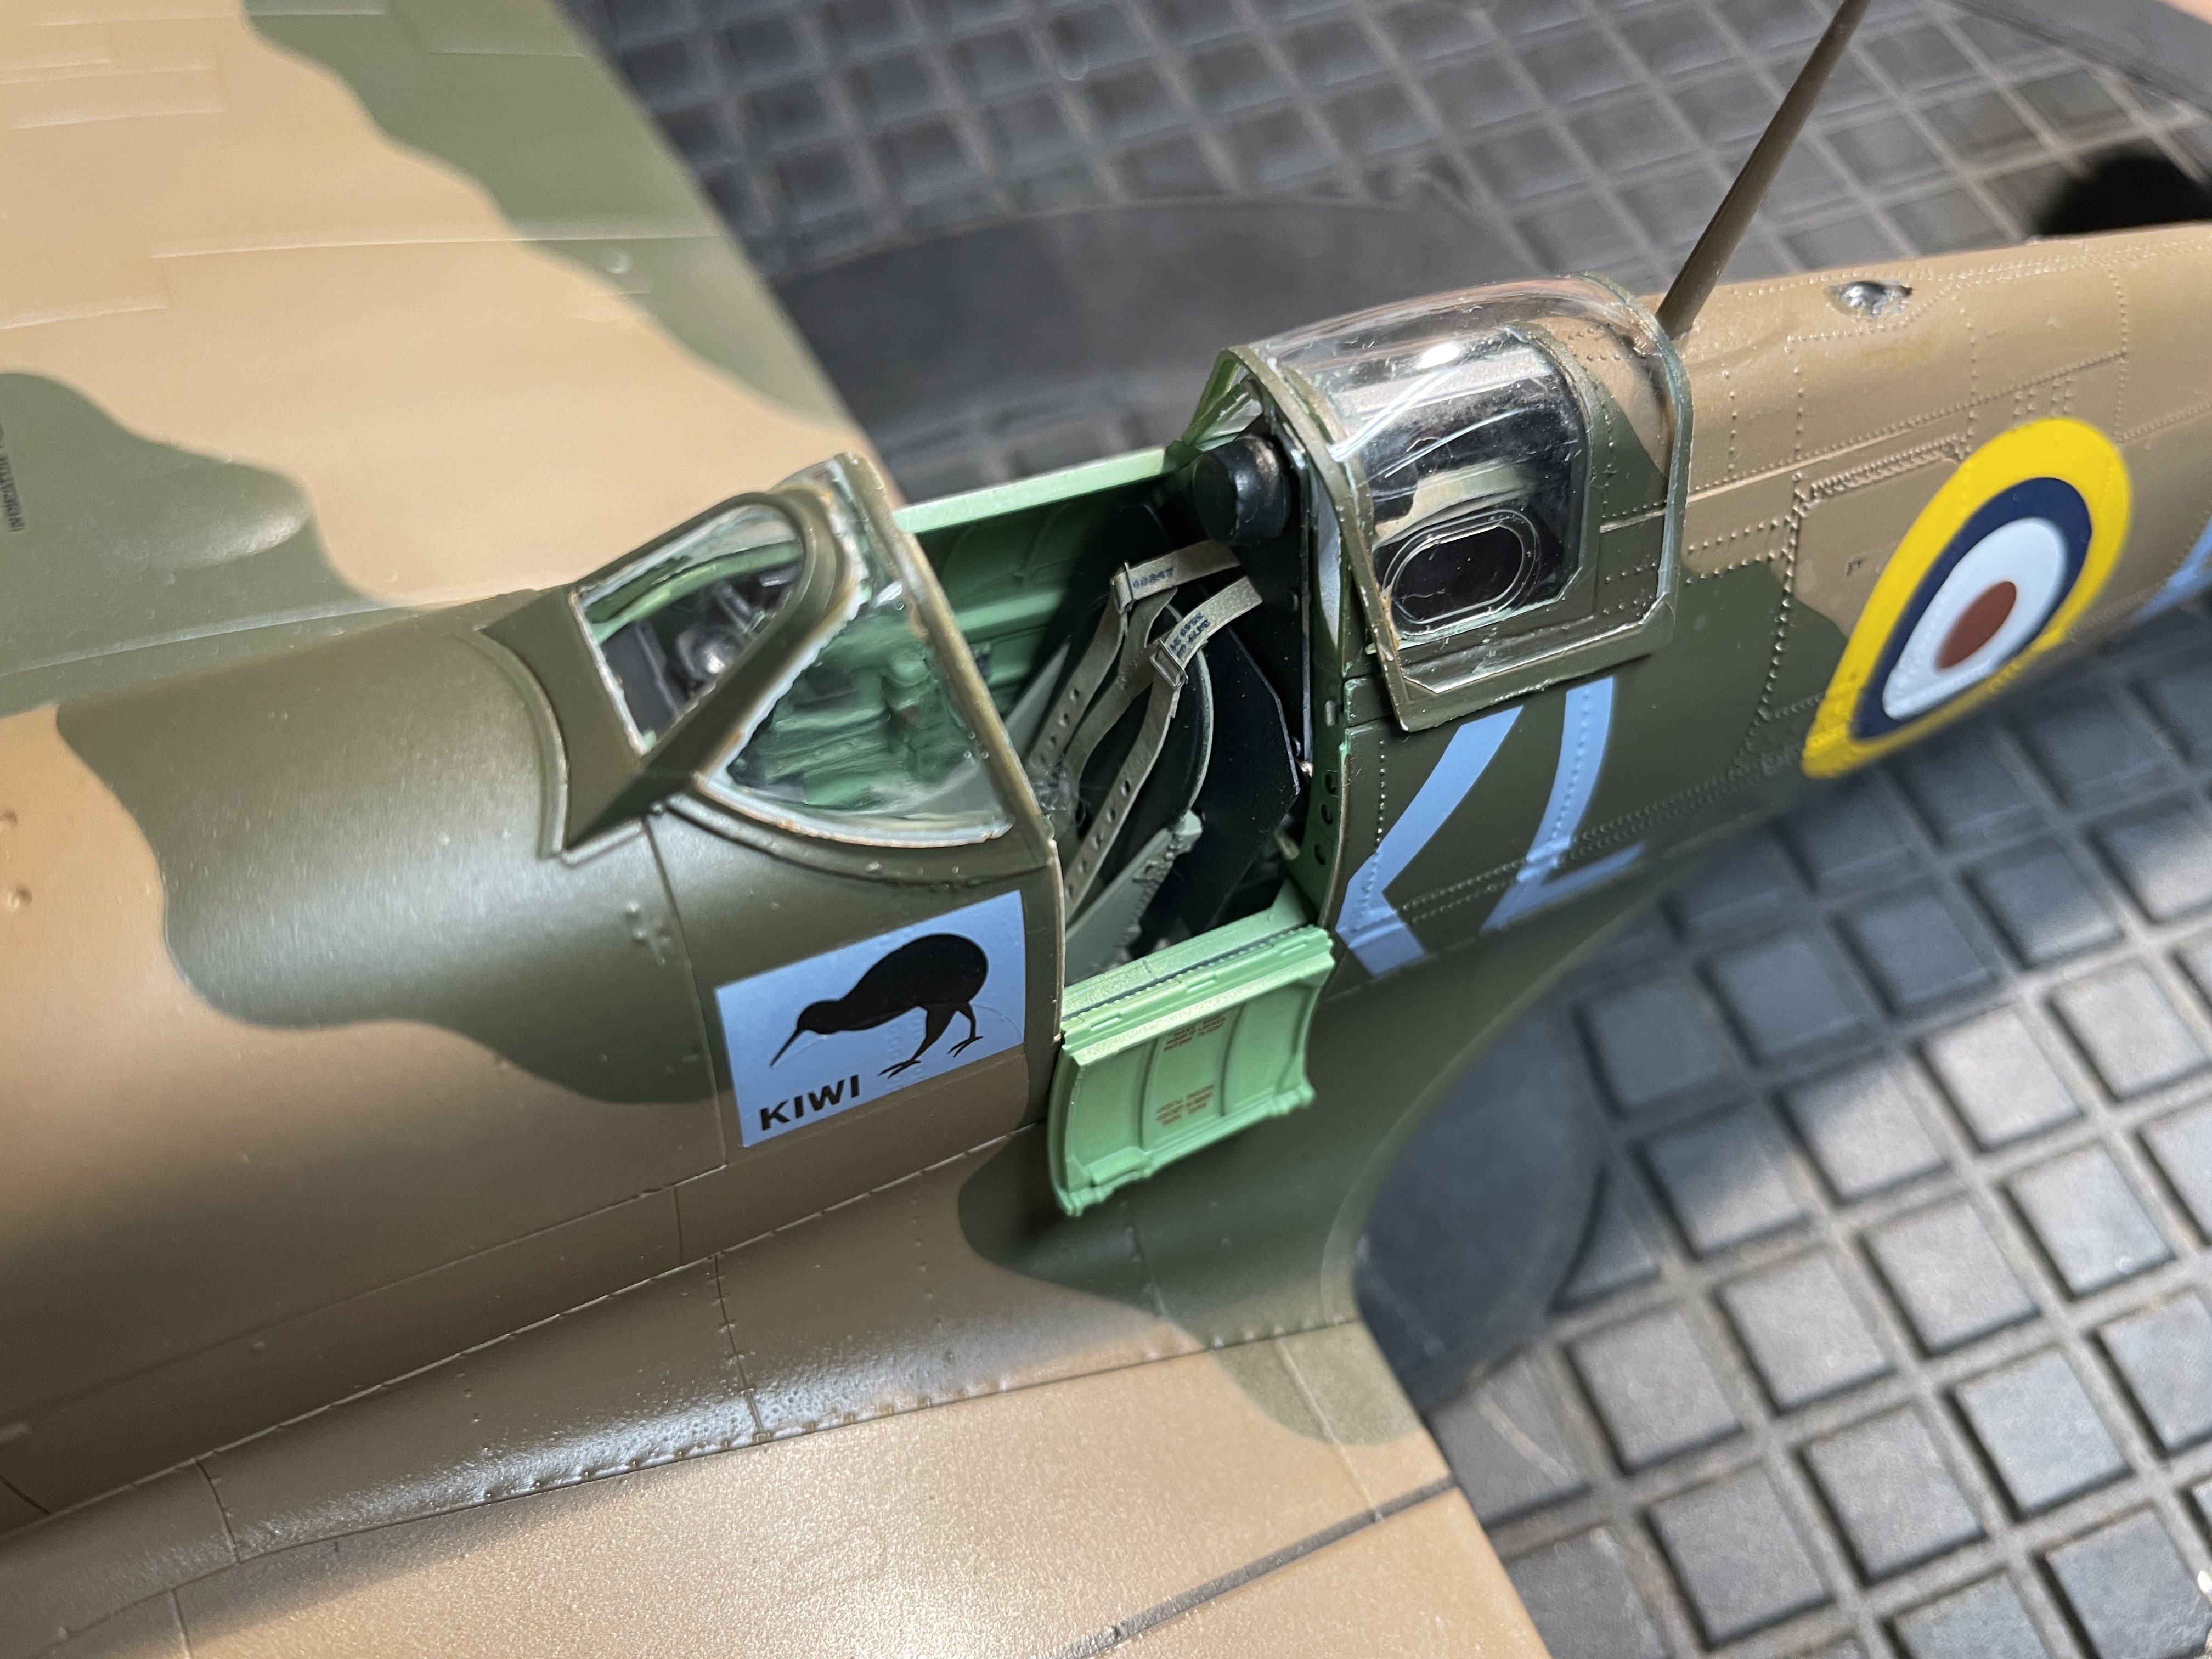
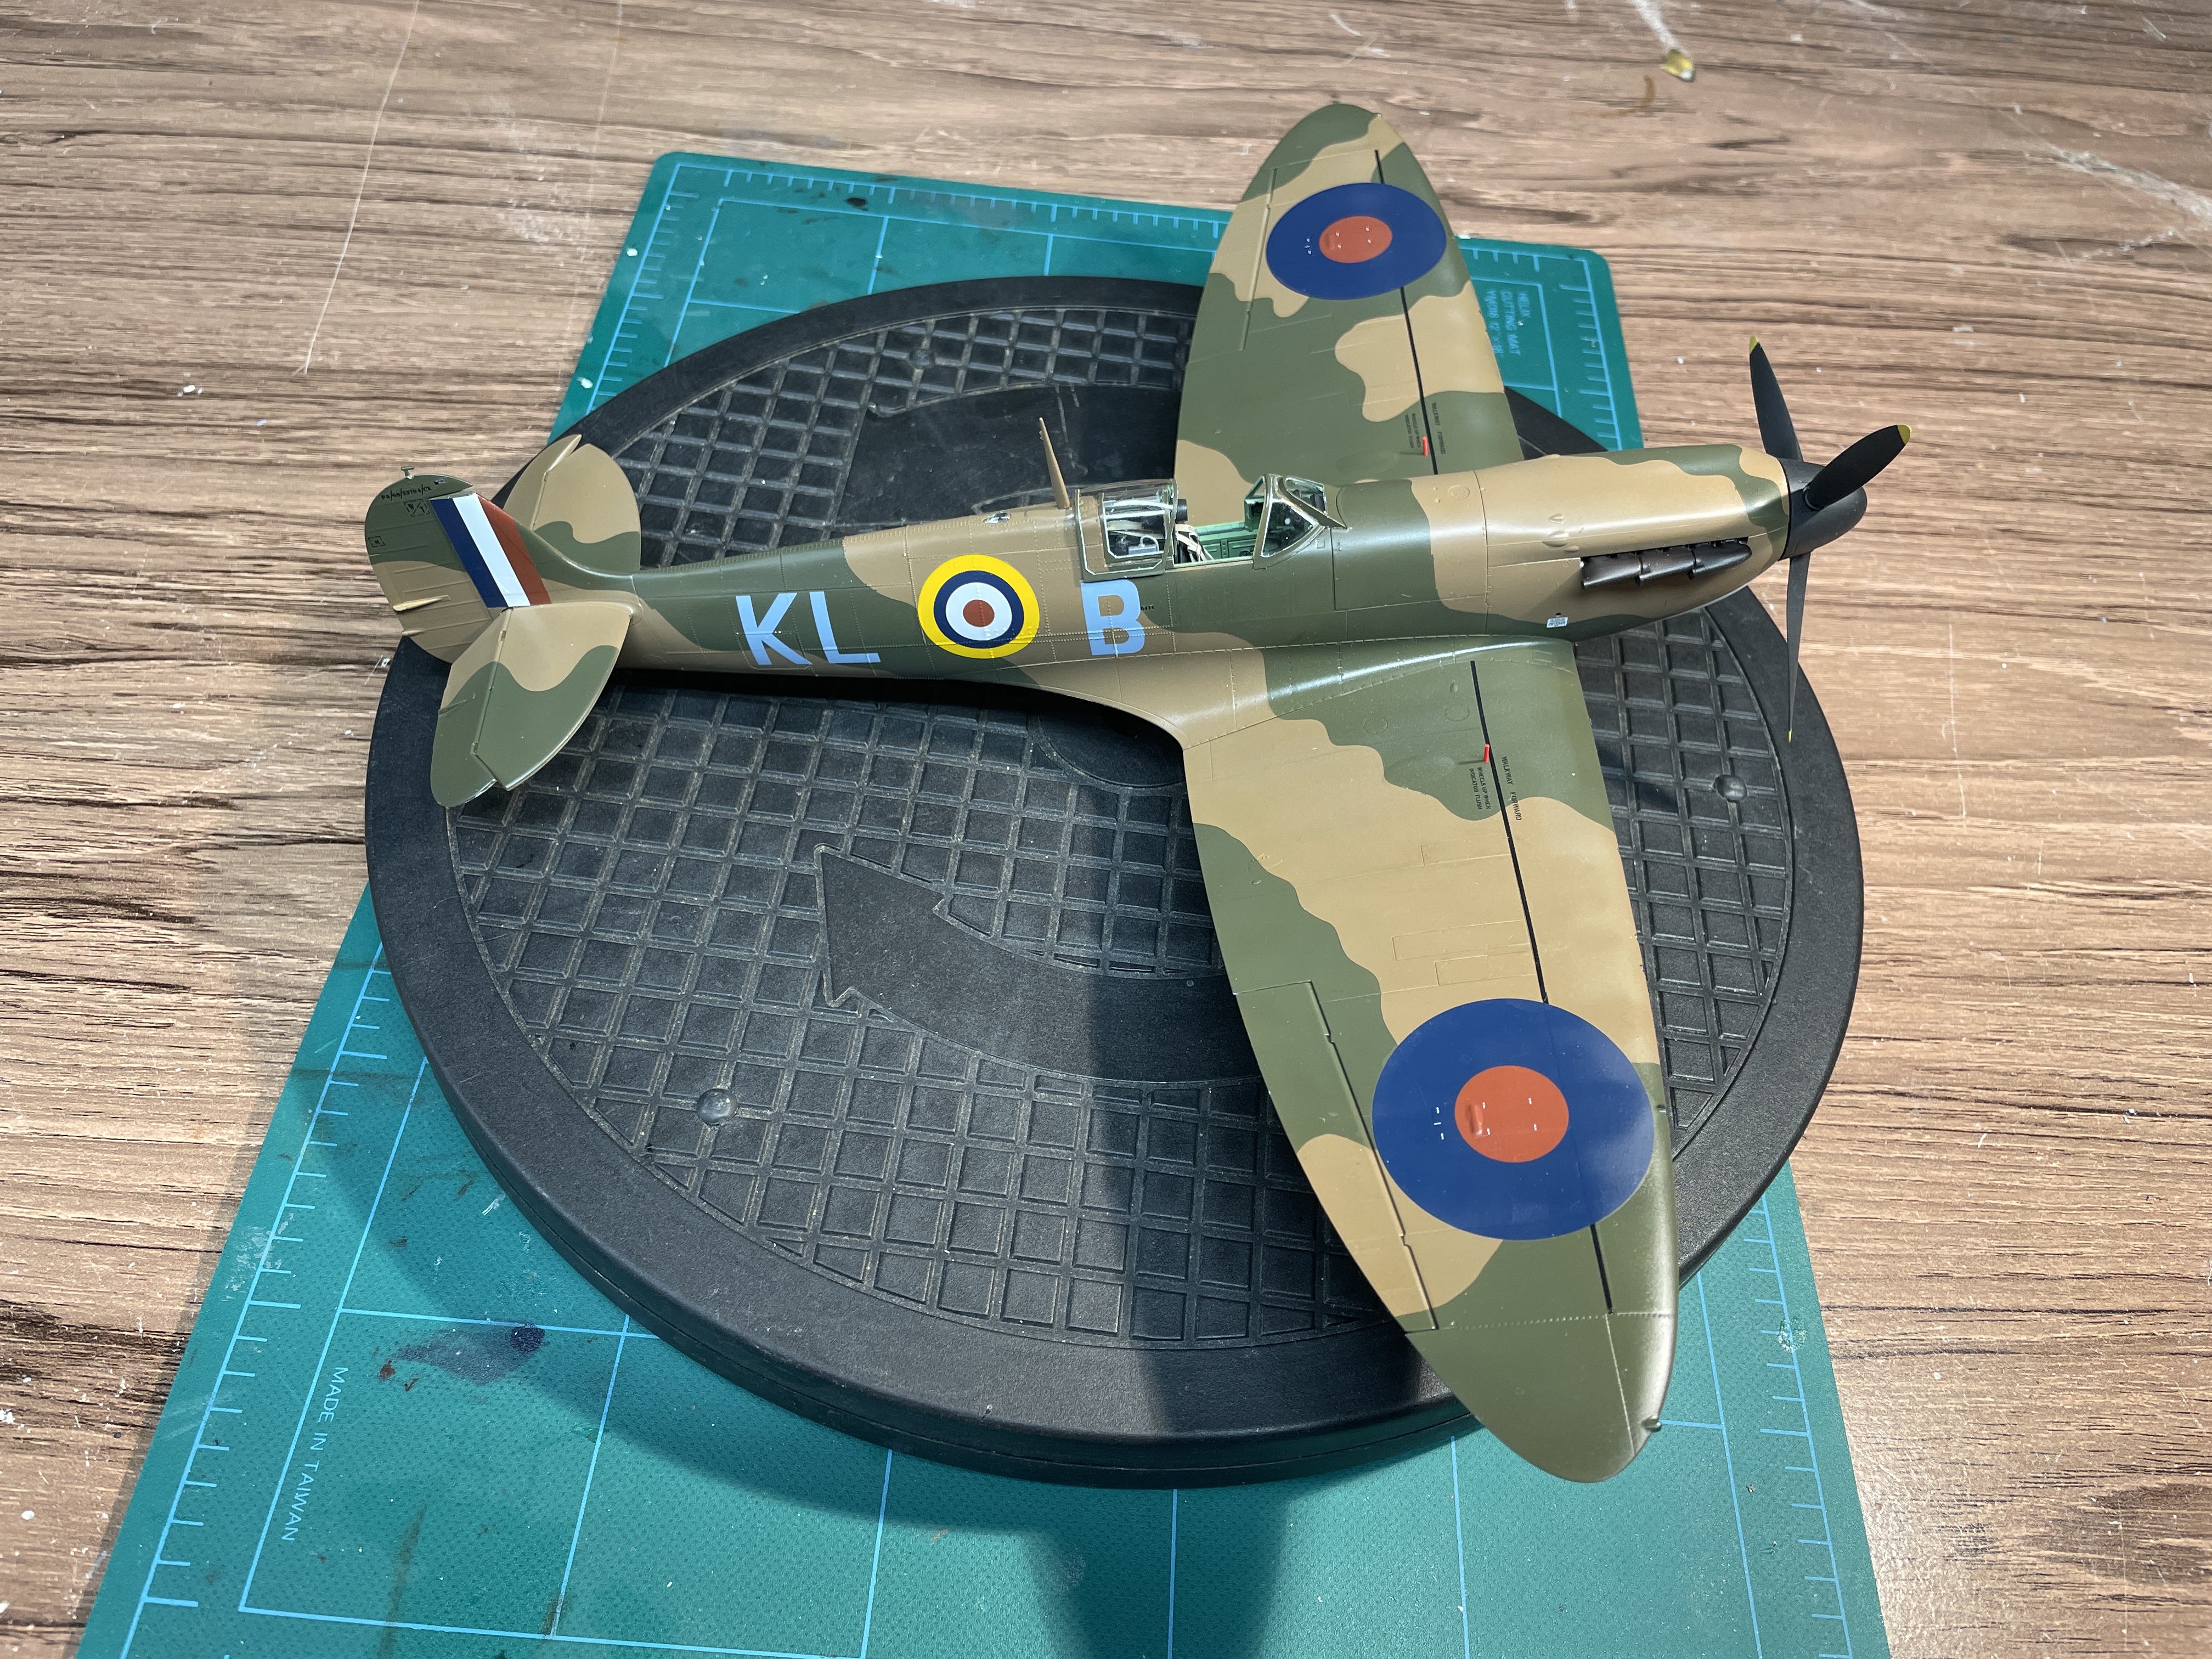
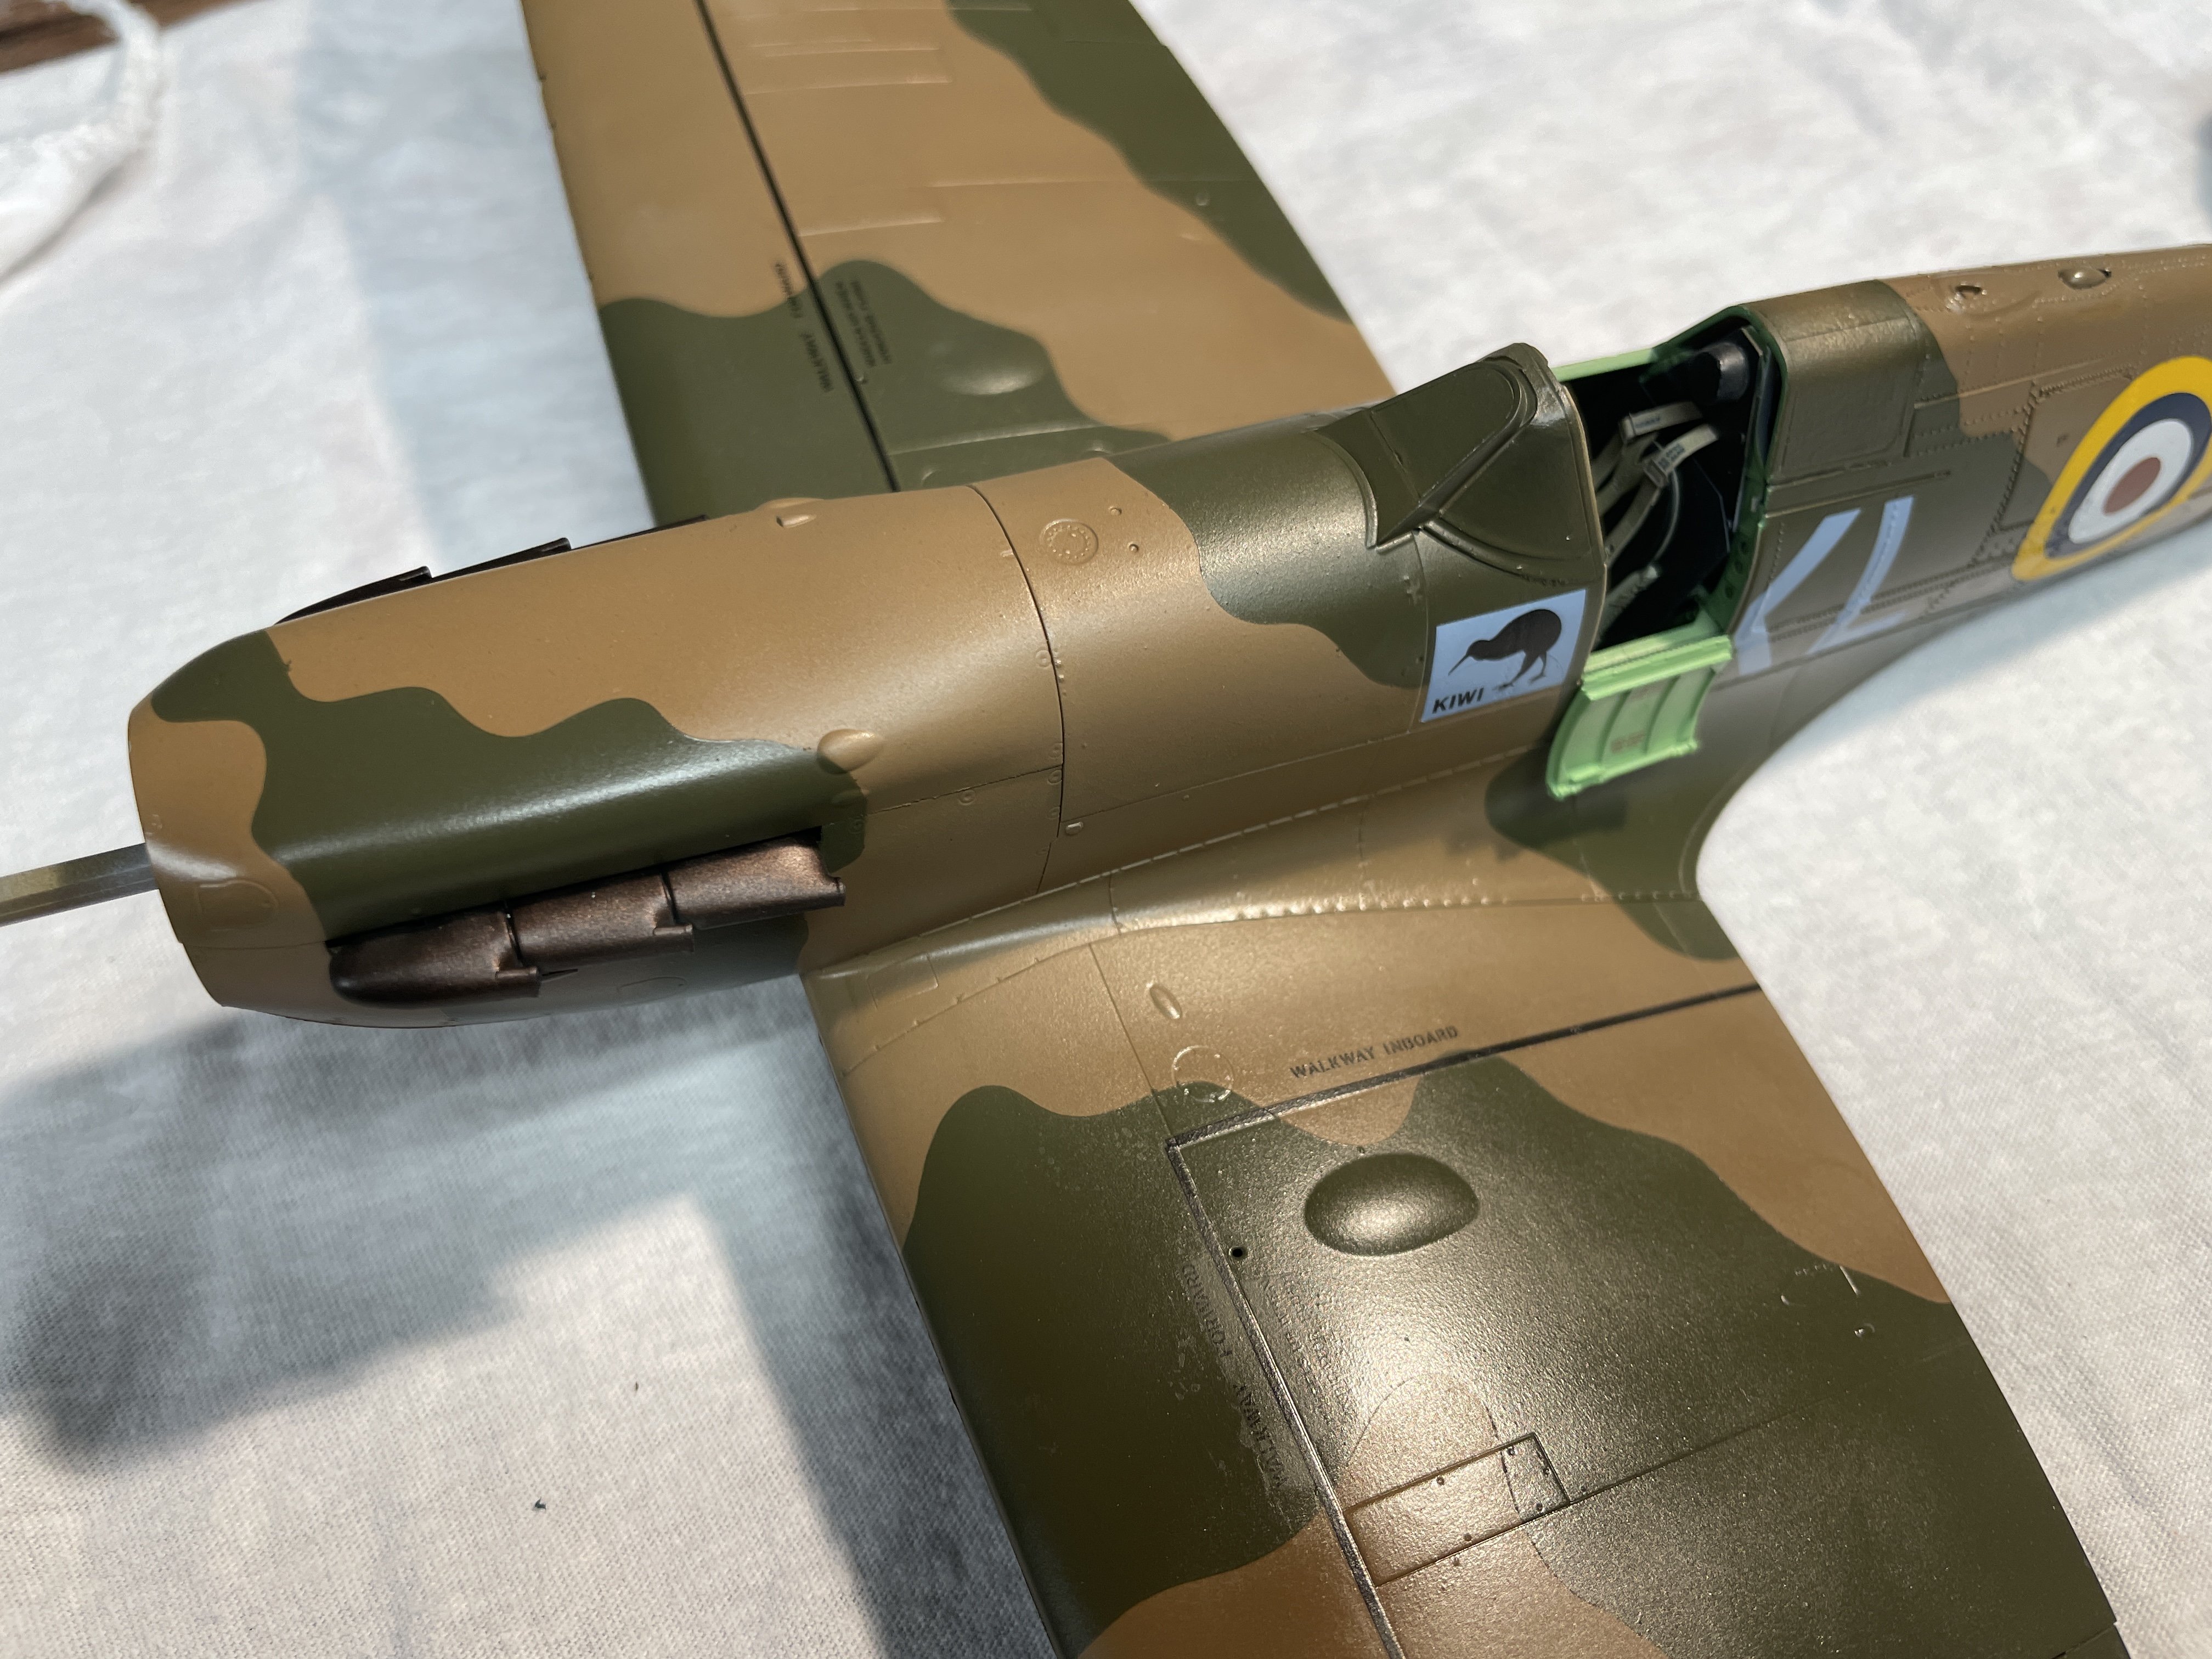
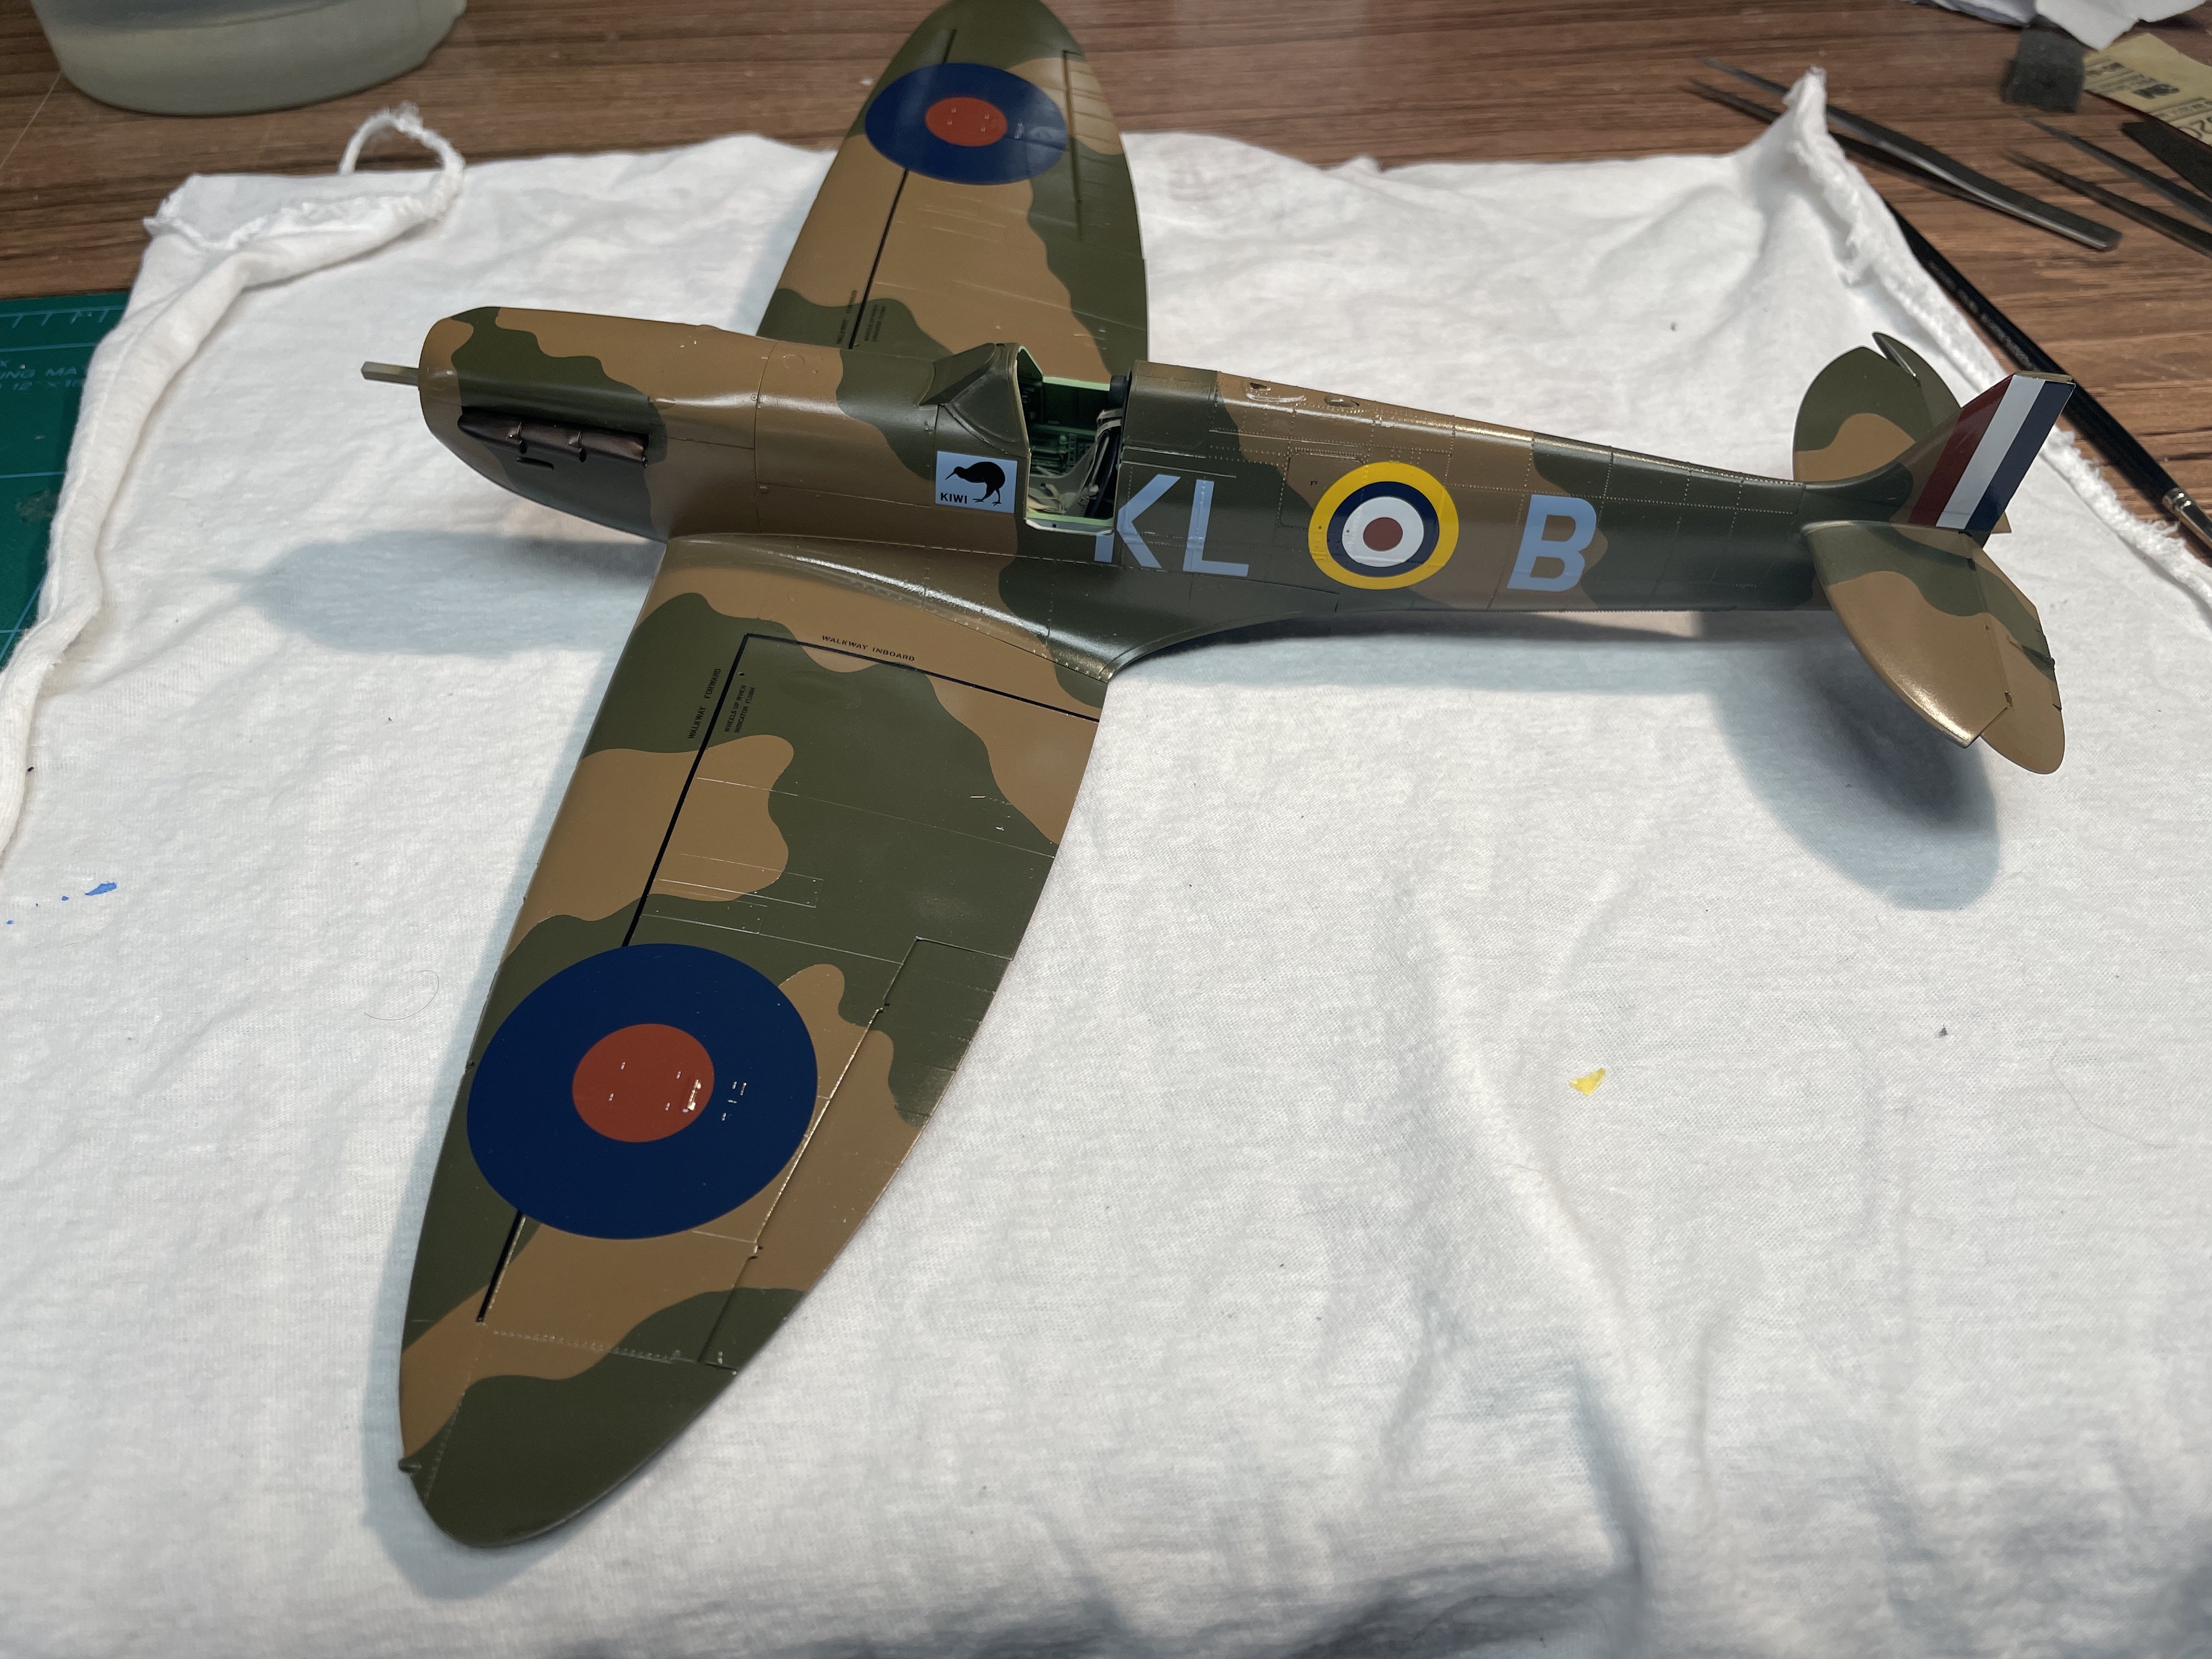
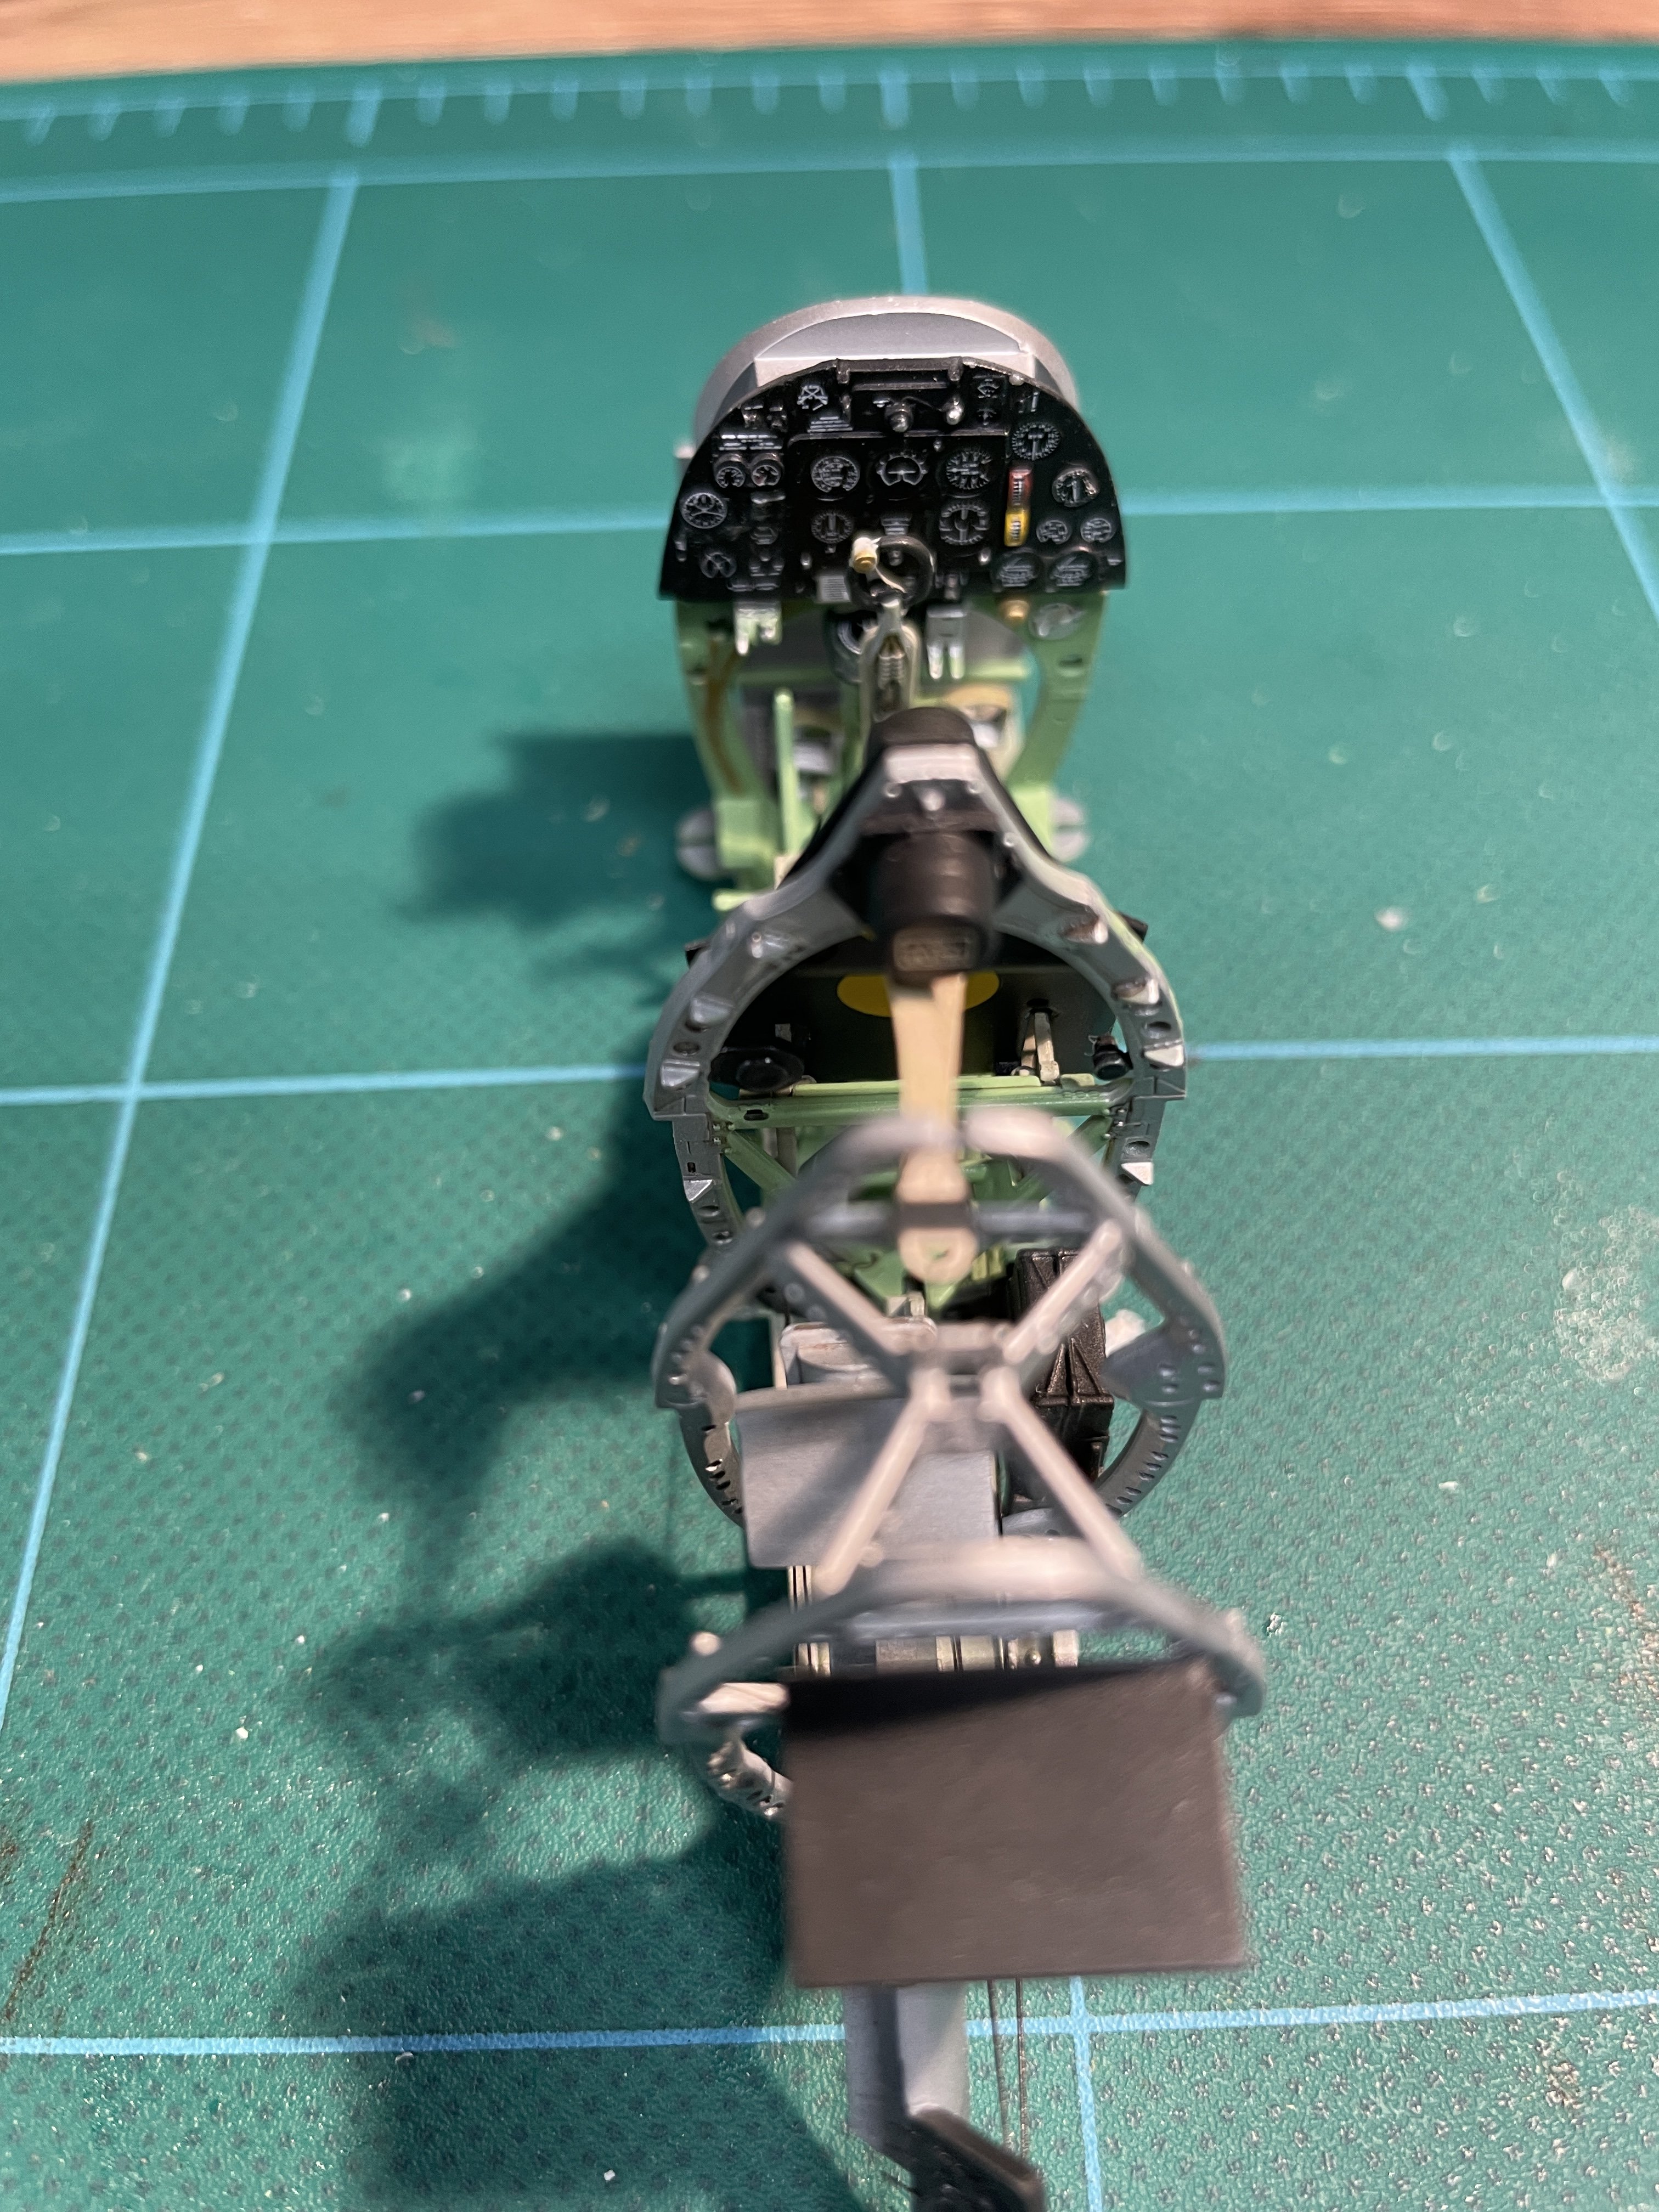
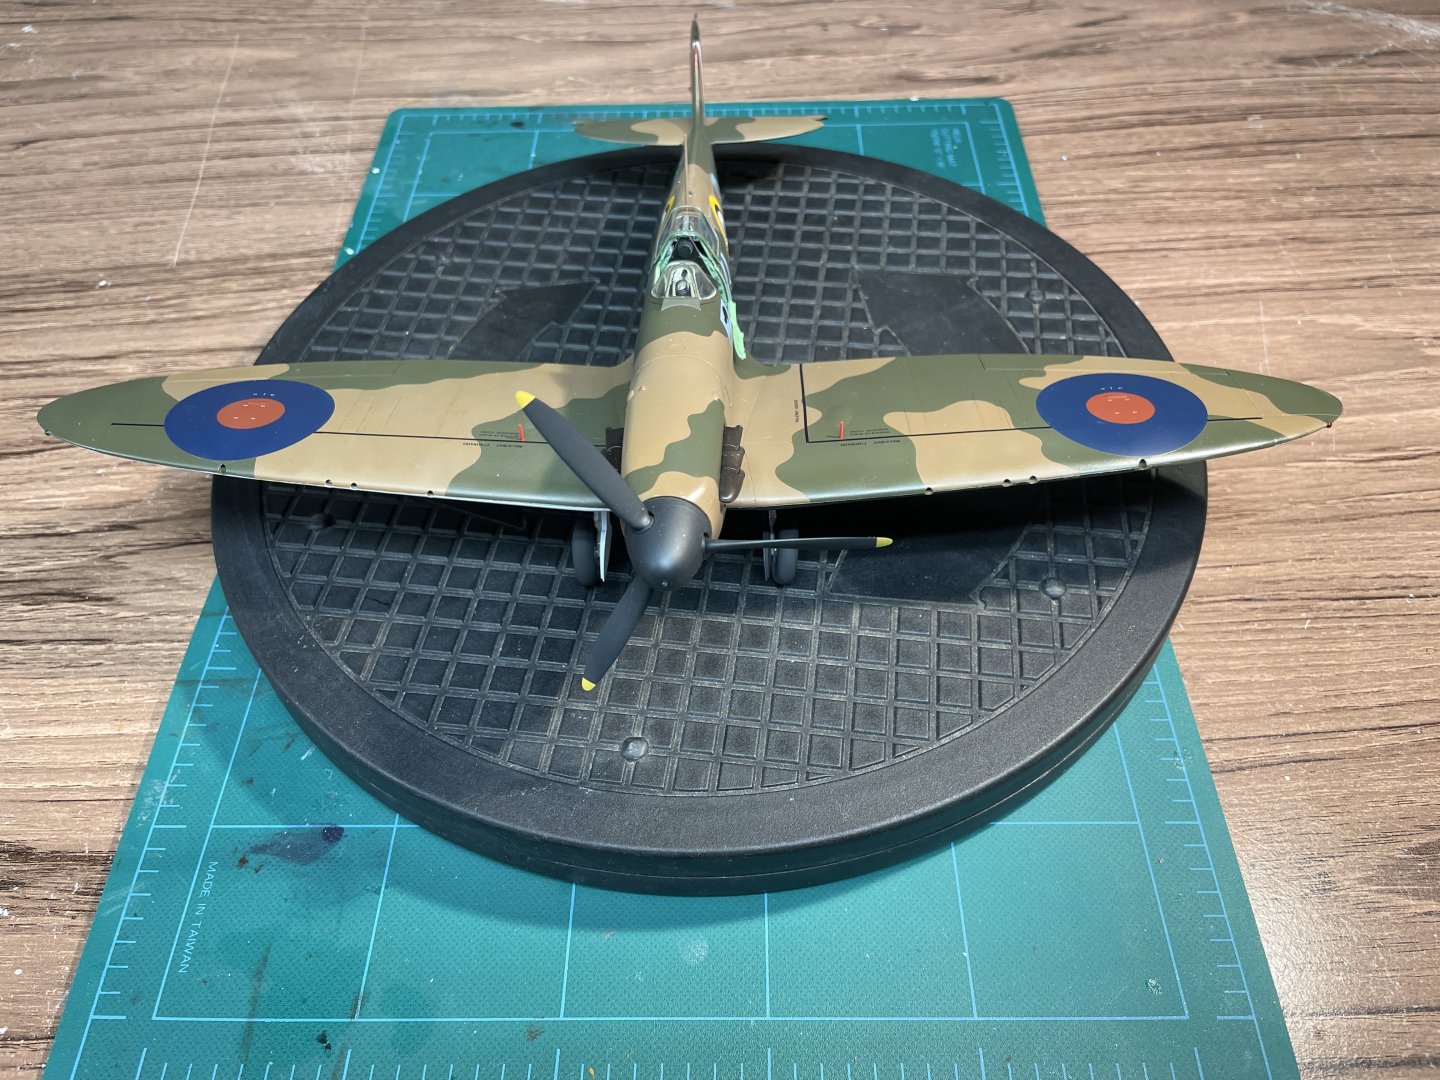
The Spitfire is done! Thanks to everyone for the likes, suggestions, and kind comments. Kotare makes an amazing kit. This was the best engineered kit in terms of fit that I have ever built, and I love the thought they put into hiding seams. I’m overall very happy. I learned a lot. Only significant final problem was from my first experience with two-sided canopy masks. The inner side according to the instructions was brown, but was painted interior green on all of the restored Mk.I pictures I could find. Because the interior green paint I was using was a little translucent and I did not want a heavy layer of paint, I put down a coat of white primer first. I did not expect this would be visible given I was painting the outside separately, but it turns out the canopy frame is thicker on the inside than the outside (or at least the mask was smaller) so it turned out that this is visible. I think the recommendation for brown may have been for some sort of sealer or grommet between the glass and frame, and it would have looked right if there was a rim of brown visible. There was also a little residue on the inner surface probably from the masking tape. It came off really easily with novus polish and a q-tip, so I was able to fix the front, but not the back where I could not reach. I also forgot to remove one inner mask, which was a real challenge to get out with the canopy glued in place. I also have a little bump at the junction of the two camouflage colors – I wasn’t sure how the seal would work, so had sprayed clear flat at the junction of the mask prior to spraying the color. I think I can leave that out next time. I think the problem I had with the Vallejo paint bleeding under the vinyl tape was the tape, not the paint. It didn’t bleed under the cockpit masks or regular Tamiya tape. Anyways – I really recommend the kit. It was a really fun build, and I am very pleased with how it came out.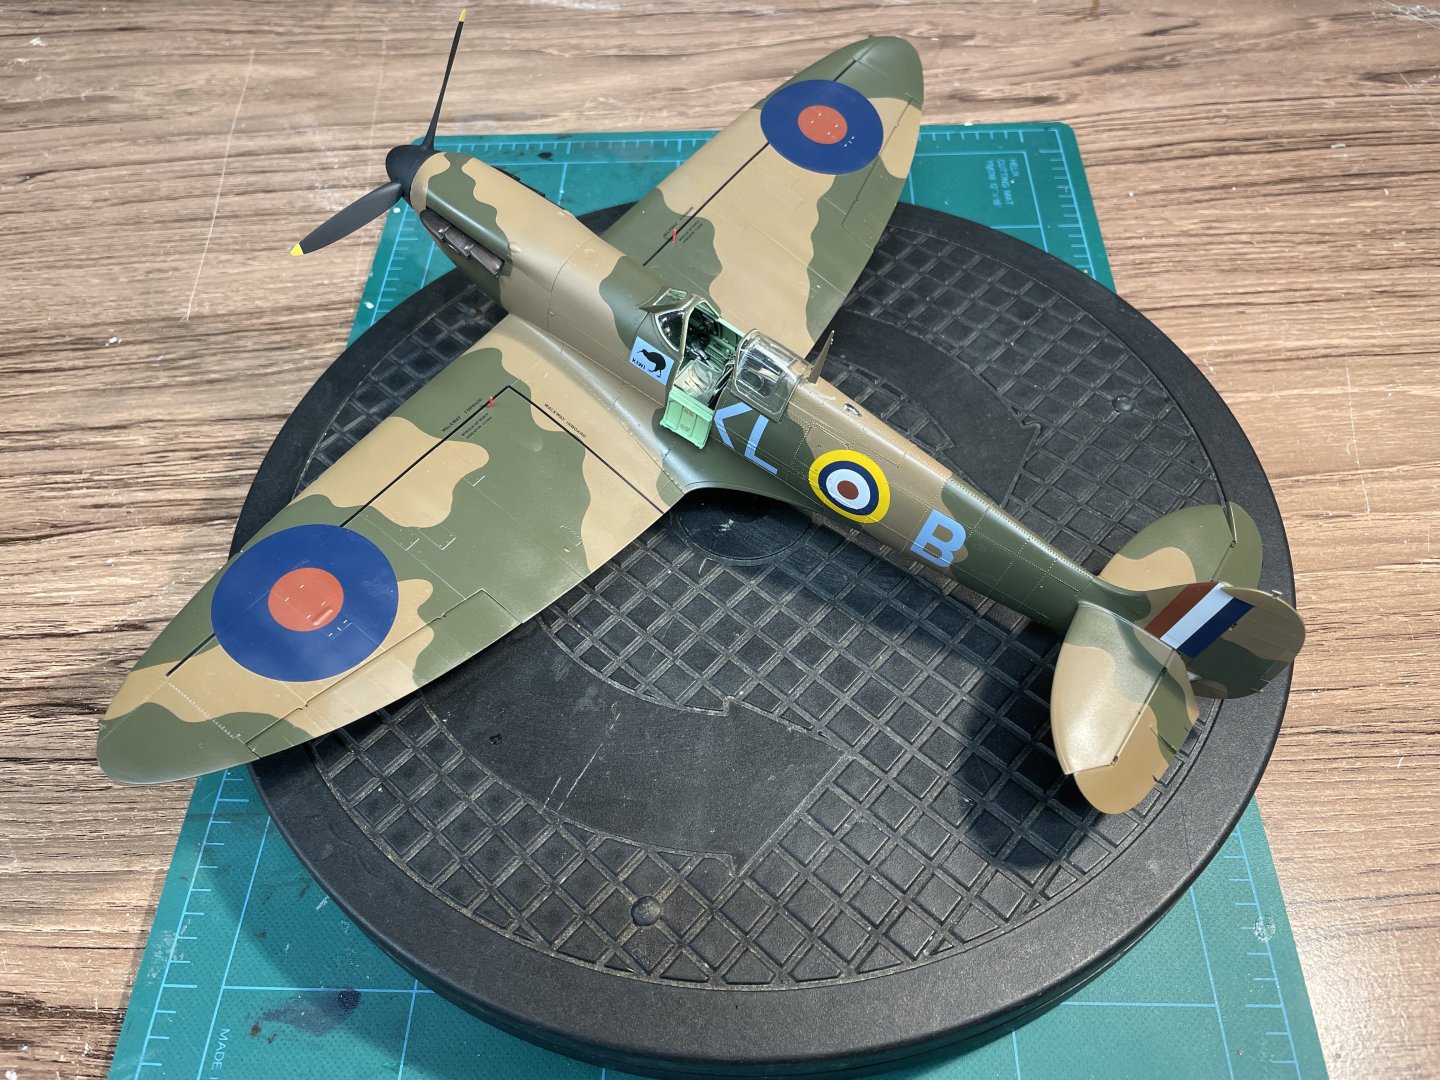


- 35 replies
-
- 21
-
-

-
Hi Hamilton – I had some difficulty here as well. Help from some of the other builders can be found in posts 69-83 in my log (link below). The pump tubes angle in multiple directions, making sorting out their pathway complex and there were some clearance issues. I did not want to redo the well – those dimensions were defined in the contract and in the as built plans, so were likely to be correct. I ended up shifting/modifying or maybe omitting the inner carlings. I unfortunately did not take a picture, and they are not visible once the lower deck partners are in place, but know that worked as a solution. Your cross section is coming along great!! Dave
-
Spitfire Mk.Ia by davec - FINISHED - Kotare - 1/32 - PLASTIC
davec replied to davec's topic in Non-ship/categorised builds
CDW, Egilman, and Shipman - many, many thanks for the very kind comments. I've done a little more work. I've sprayed with clear flat and installed the rudder and canopy door. I agree she is a beautiful airplane, although I also really like the p-38 lightning and the corsair. I'm in the home stretch and think I can finish this weekend. I just need to paint the green and red wing lights, install the landing gear, and a few other pieces. The moment of truth will be pulling off the canopy masks and seeing whether I had the same bleed through that I had under some of the vinyl tape.
- 35 replies
-
- 16
-
-
Spitfire Mk.Ia by davec - FINISHED - Kotare - 1/32 - PLASTIC
davec replied to davec's topic in Non-ship/categorised builds
Decals done. I've sprayed clear gloss over them. Not in the pictures, but I experimented a little with panel line wash. I was going for subtle, so I tried Tamiya brown. I didn't have any problem wiping off the excess over the Tamiya gloss - using same brand worked well and I didn't have the same problem as with the cockpit. Unfortunately, the brown is very close to the camouflage brown and doesn't show up well against the green. It ended up so subtle that it isn't really visible. I don't plan to weather - I like the models looking like the ones in museums. Plan is some flat clear tonight and completion soon.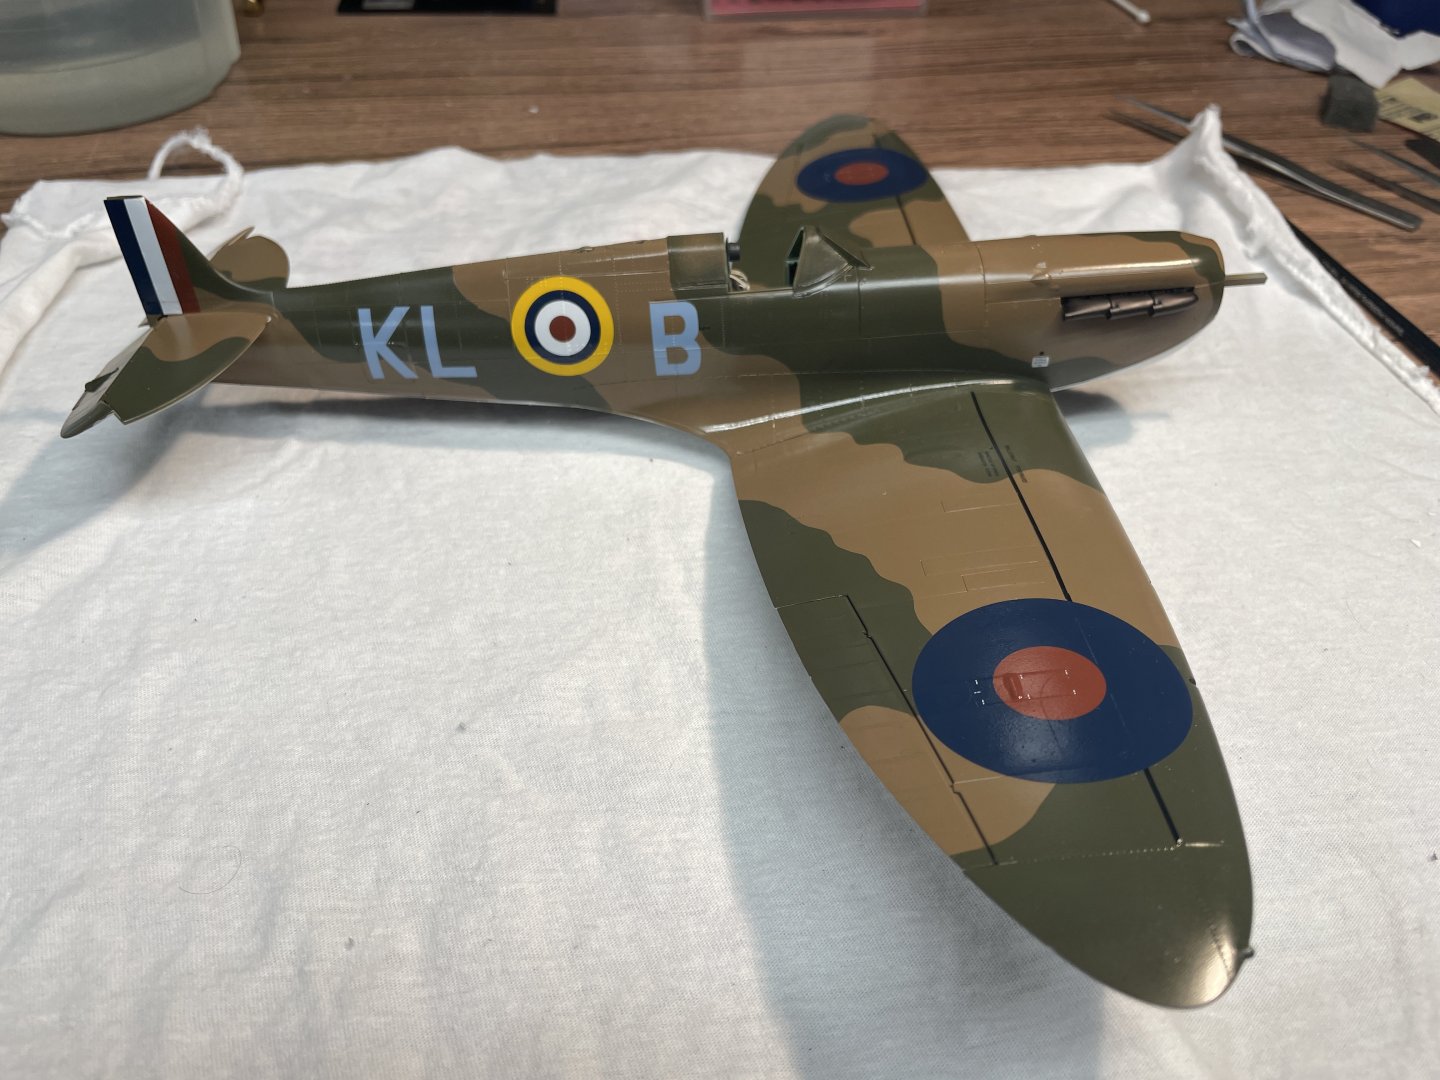

- 35 replies
-
- 20
-
-
-
Spitfire Mk.Ia by davec - FINISHED - Kotare - 1/32 - PLASTIC
davec replied to davec's topic in Non-ship/categorised builds
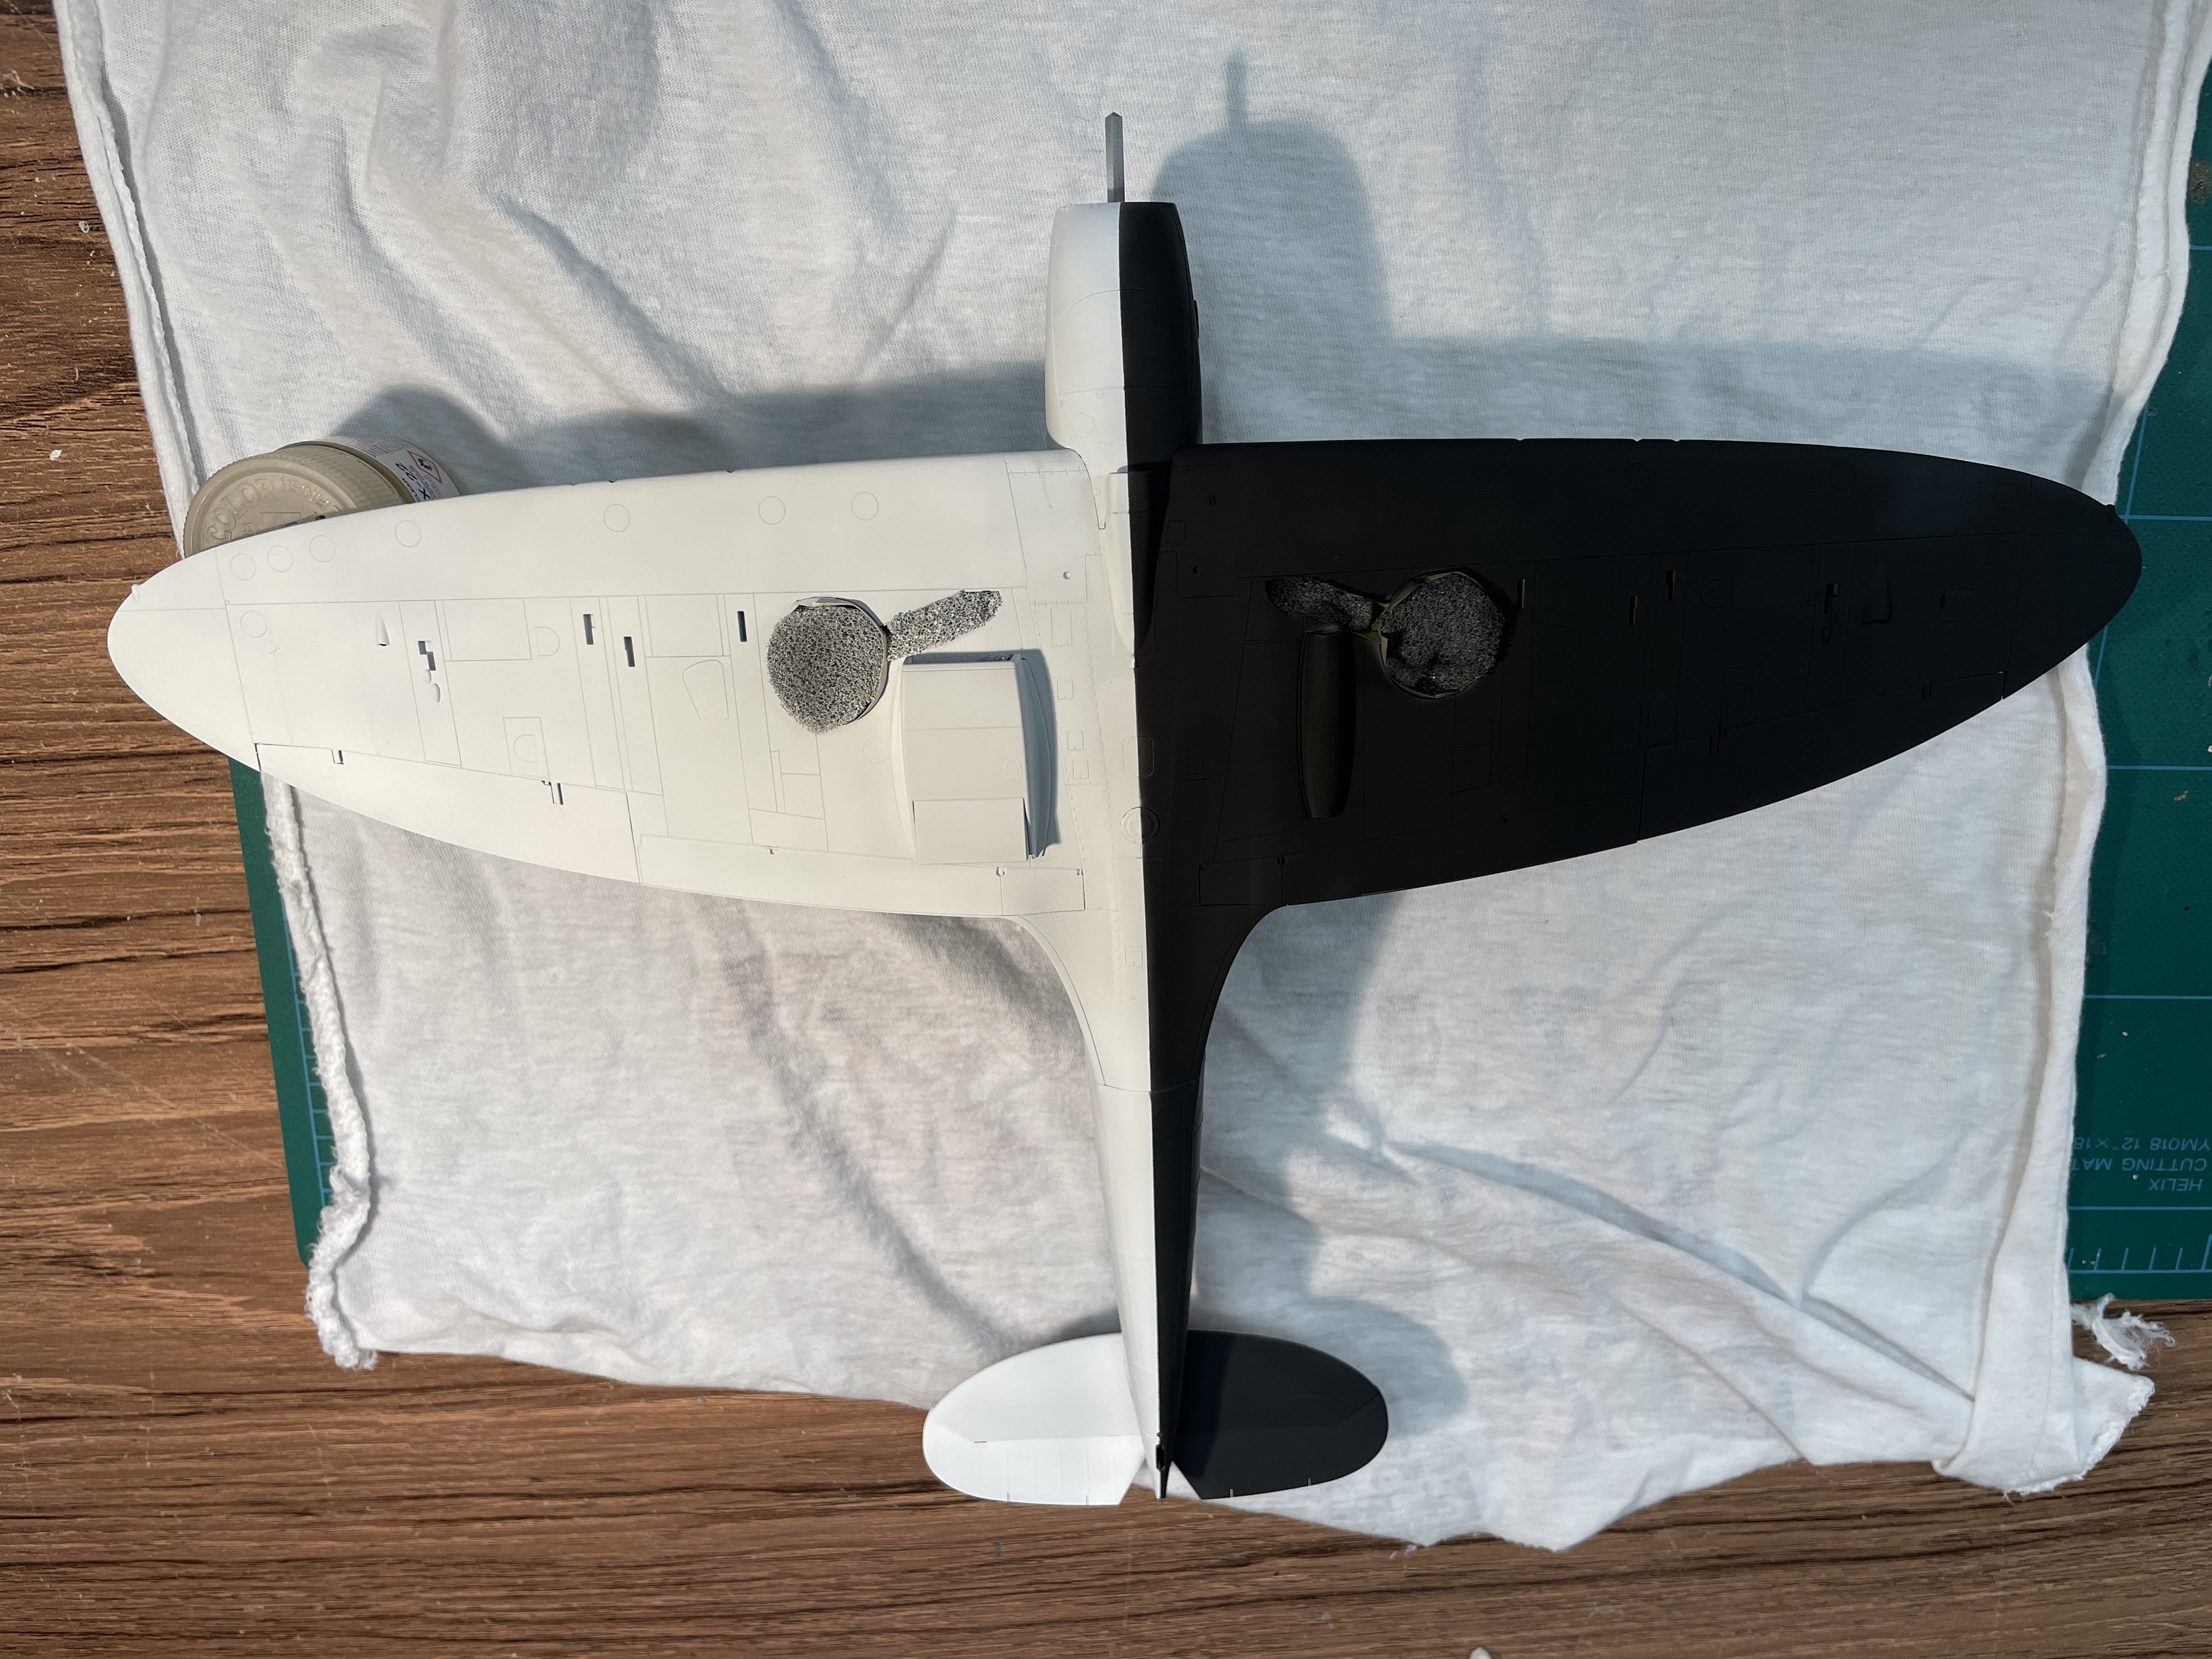
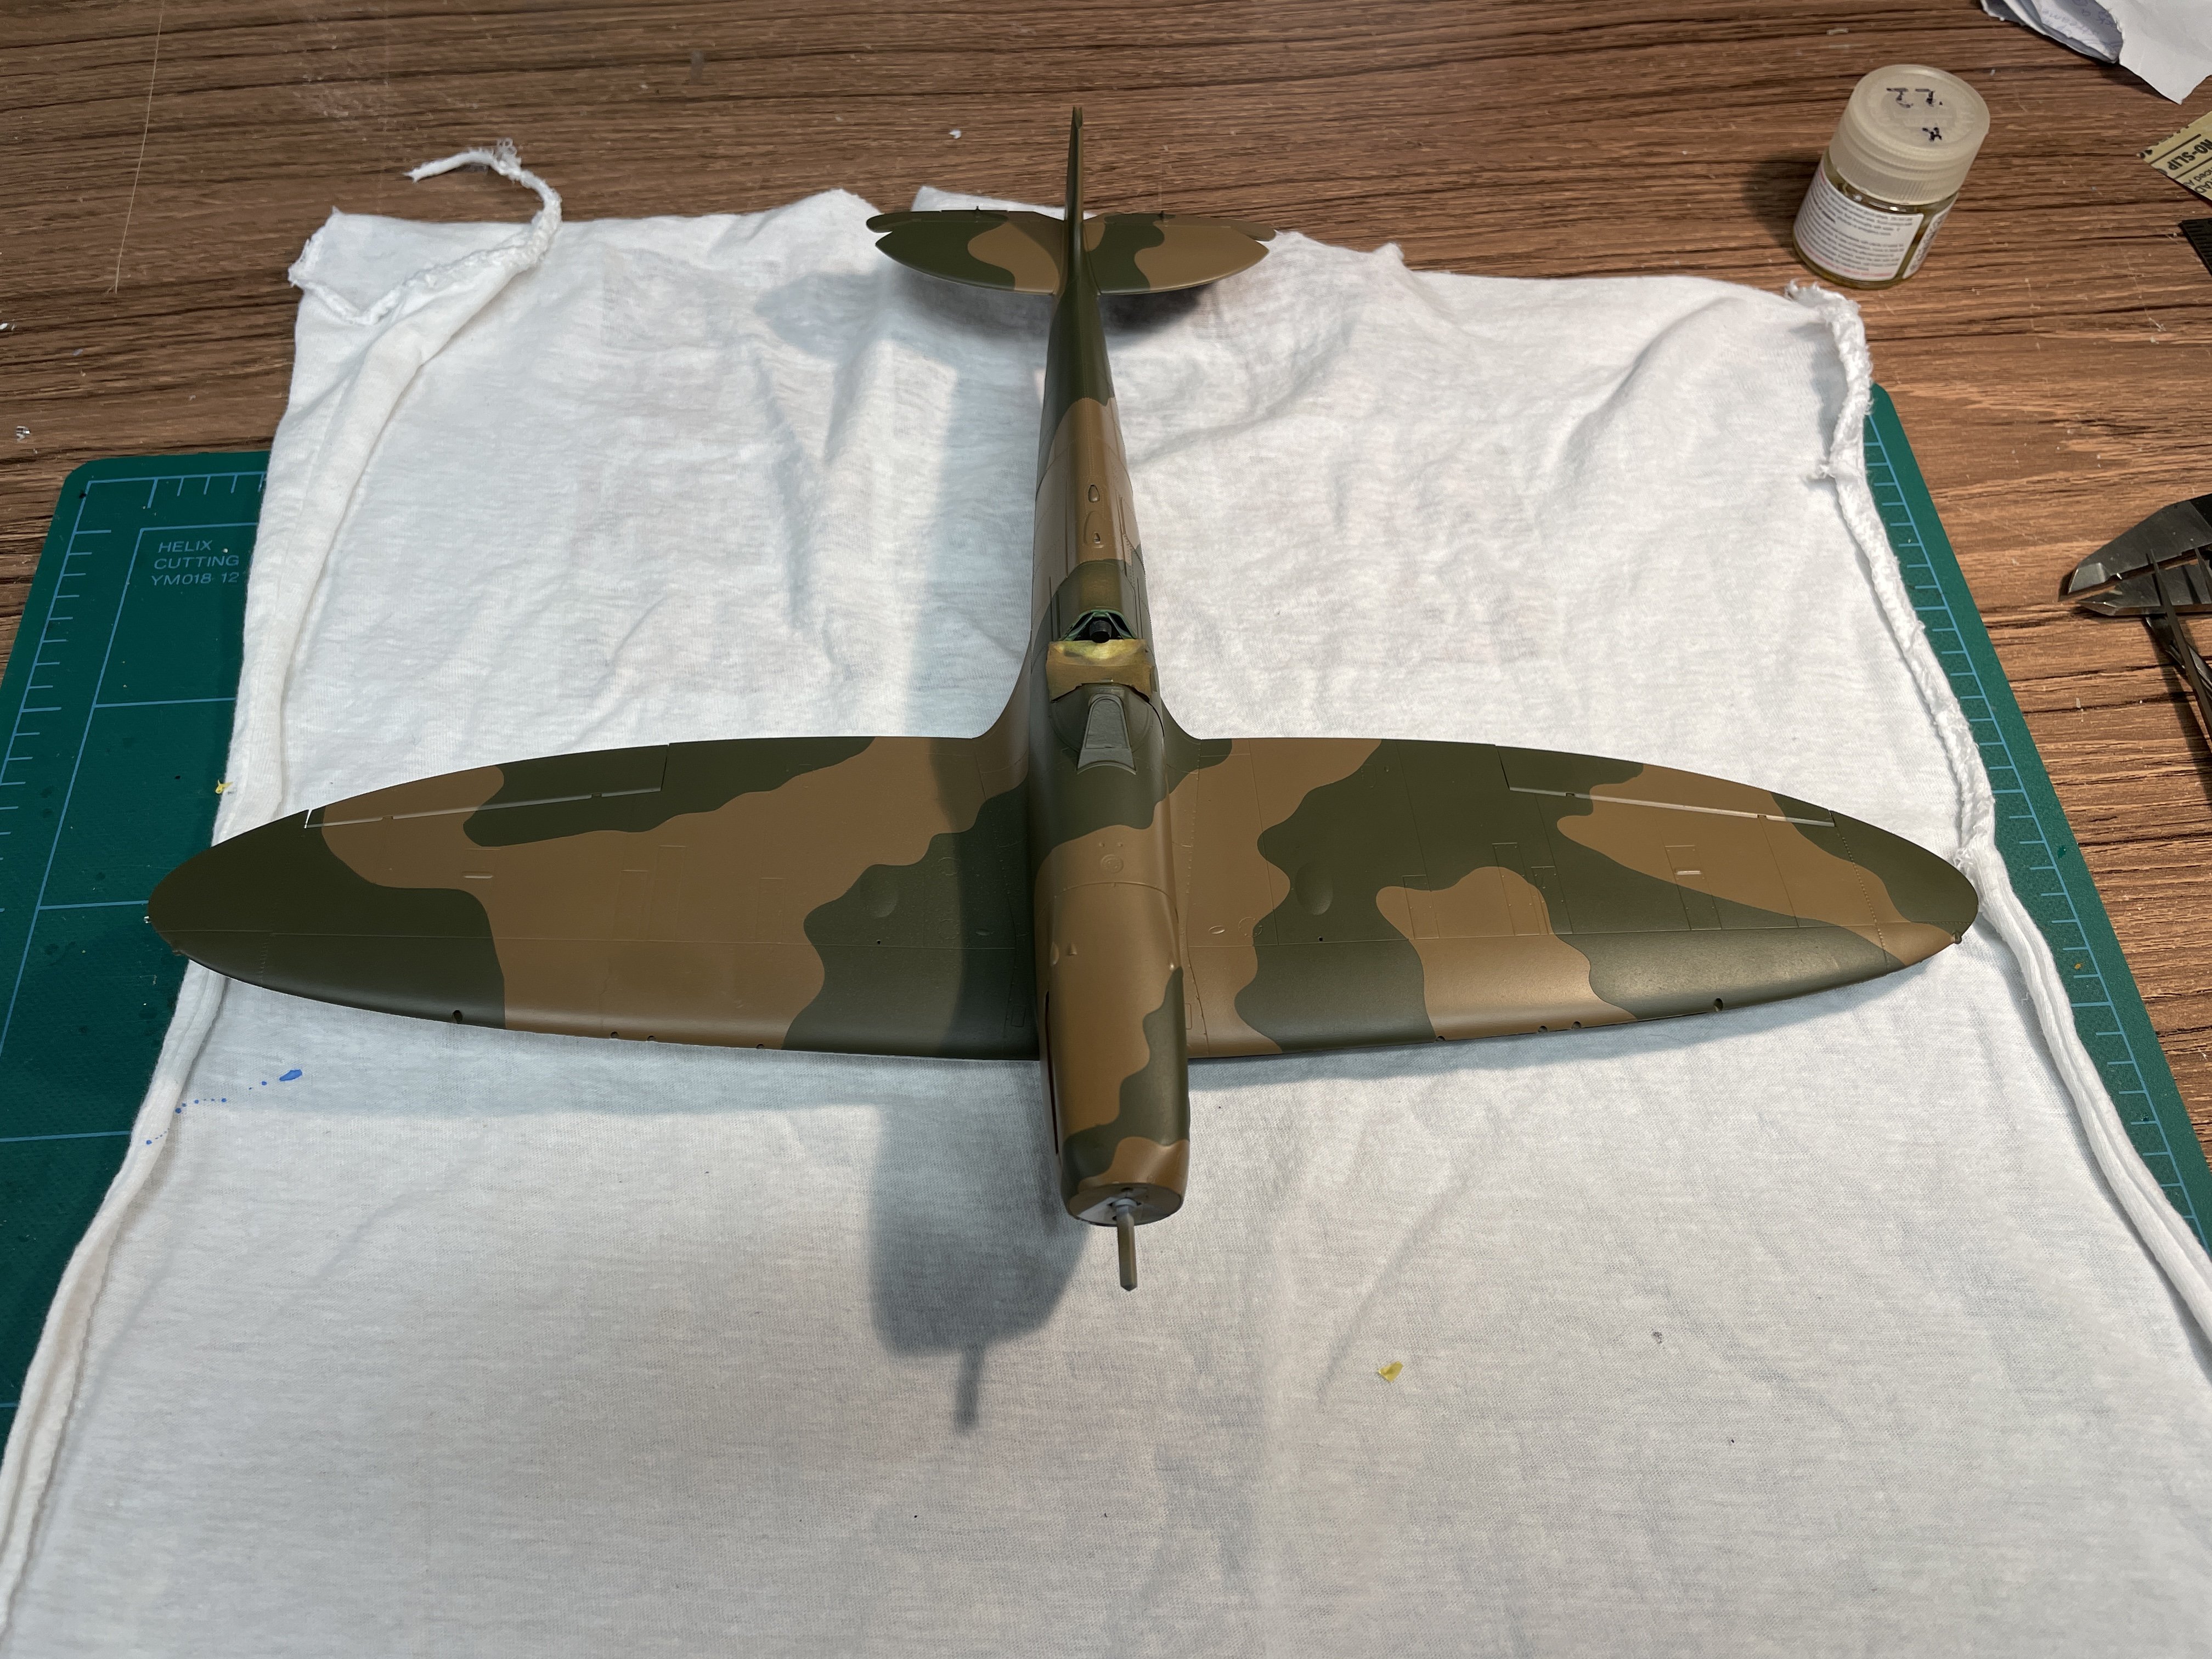
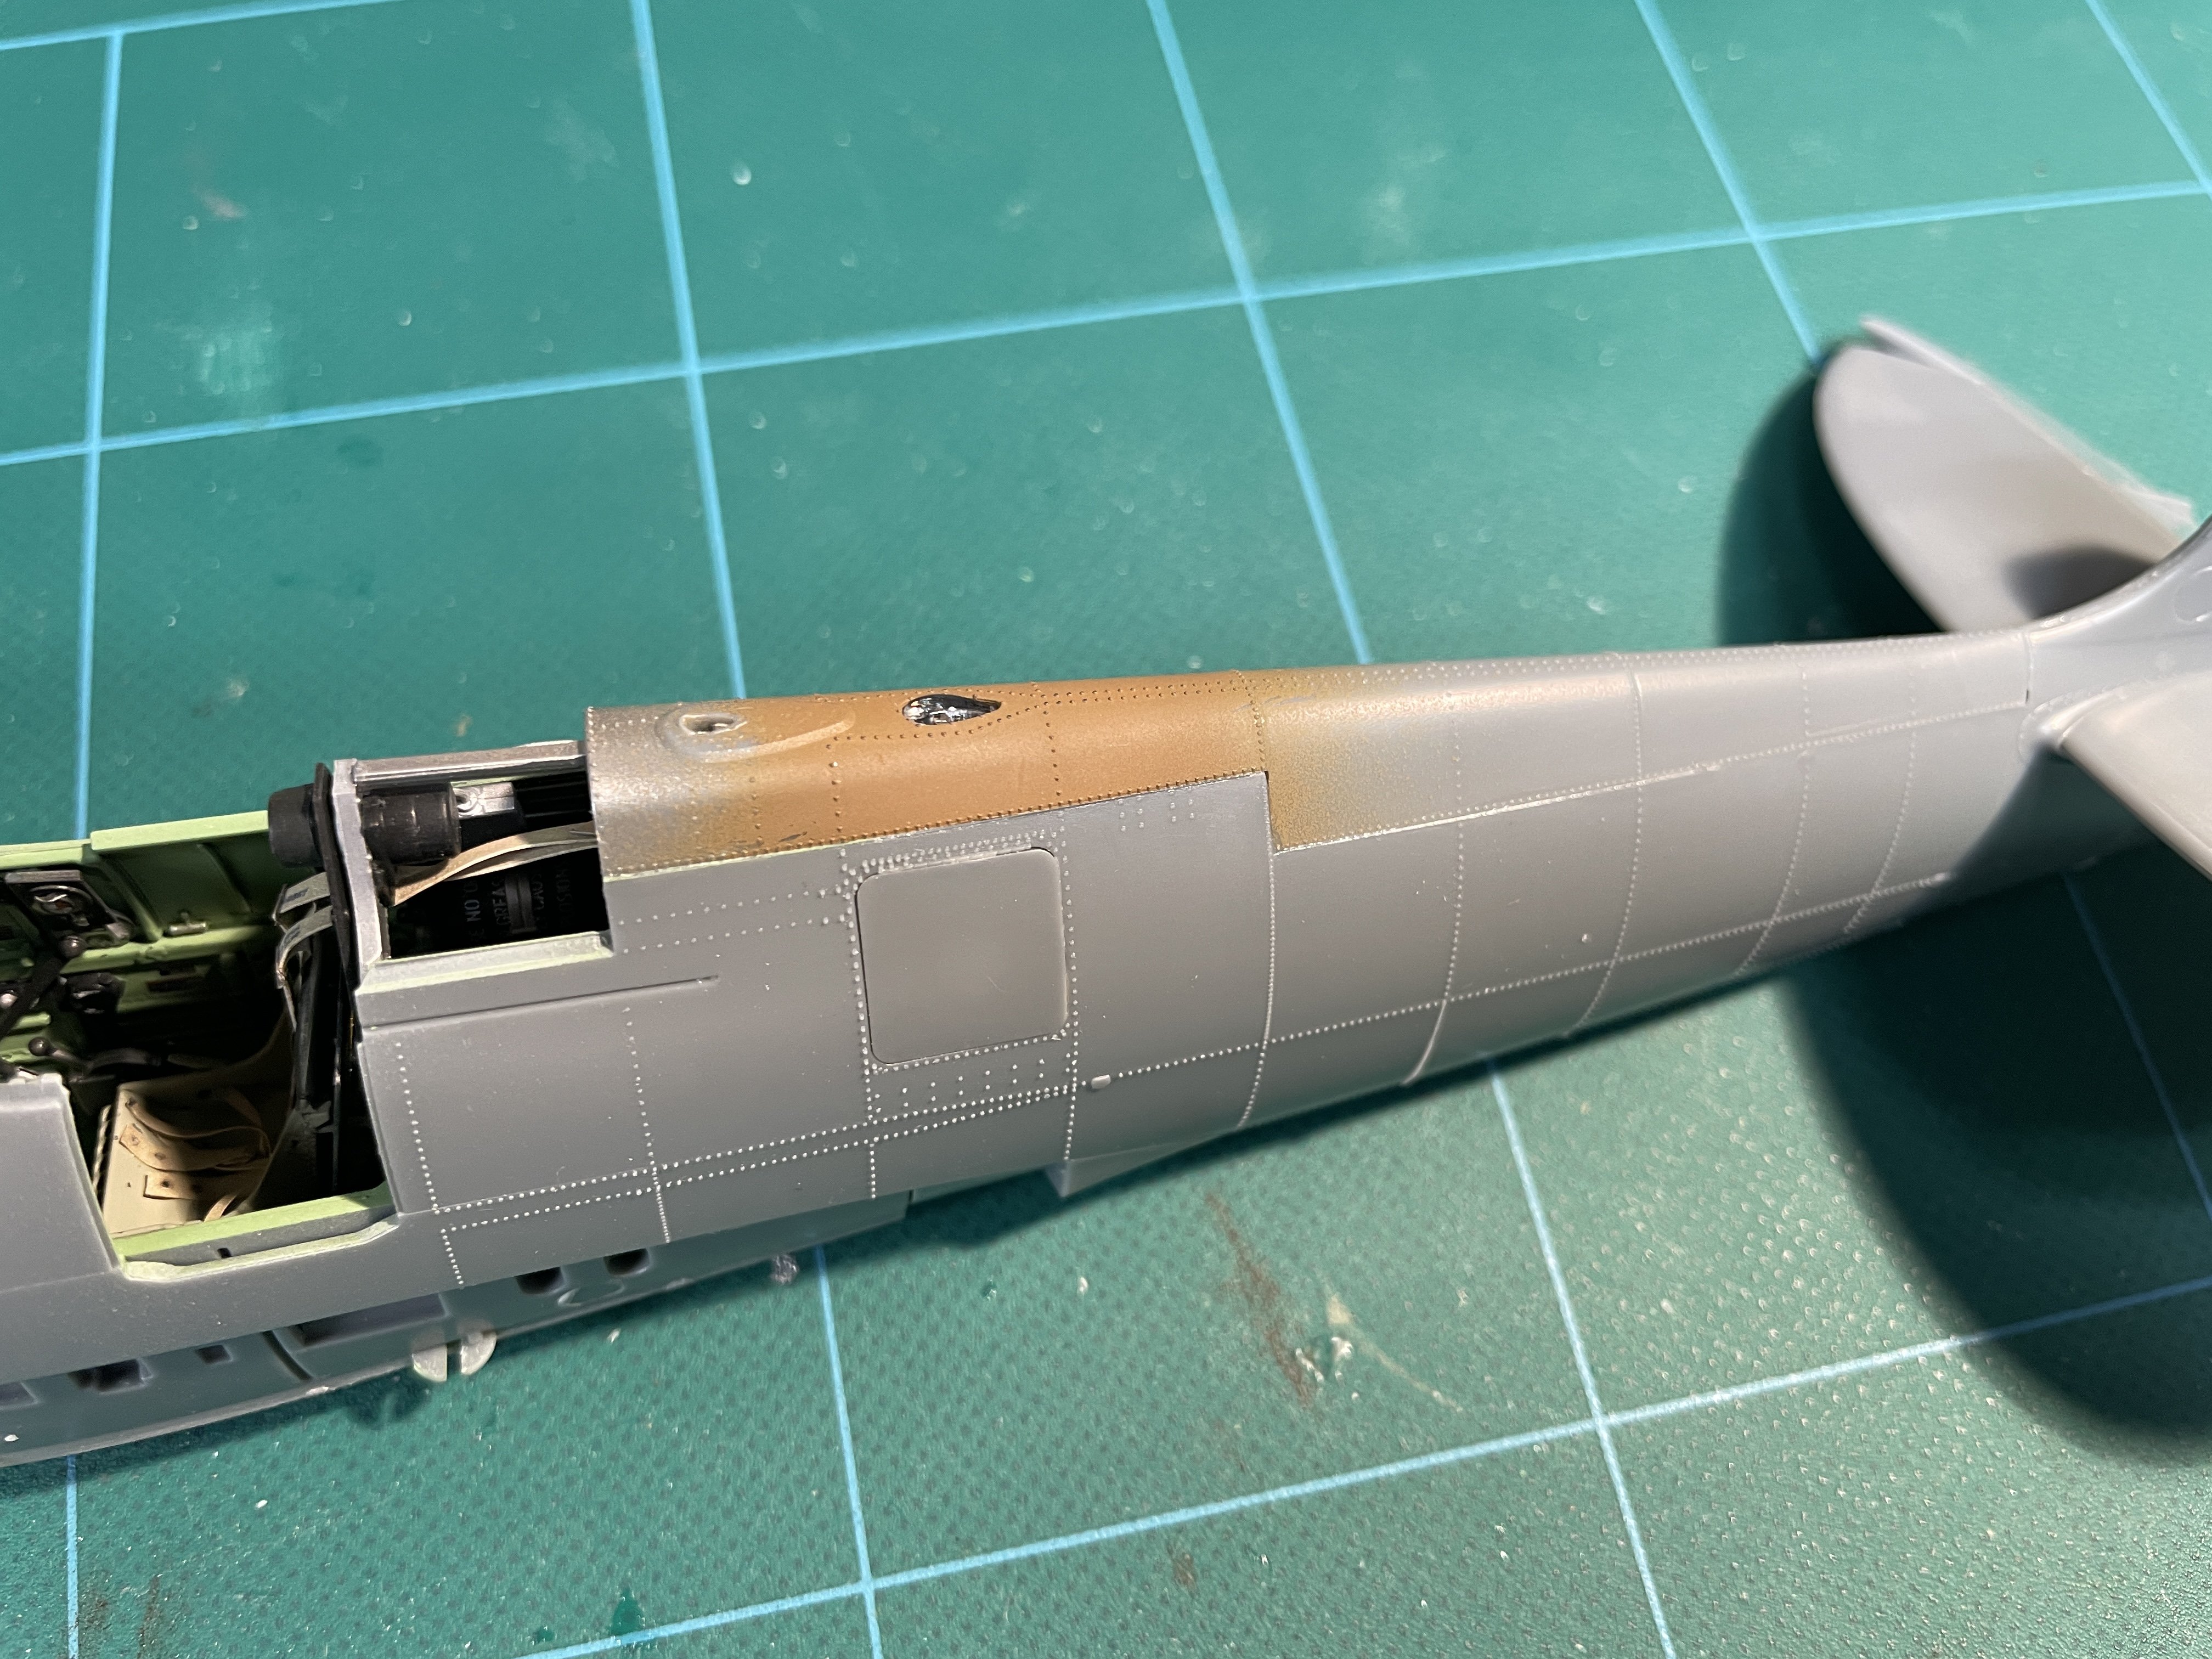
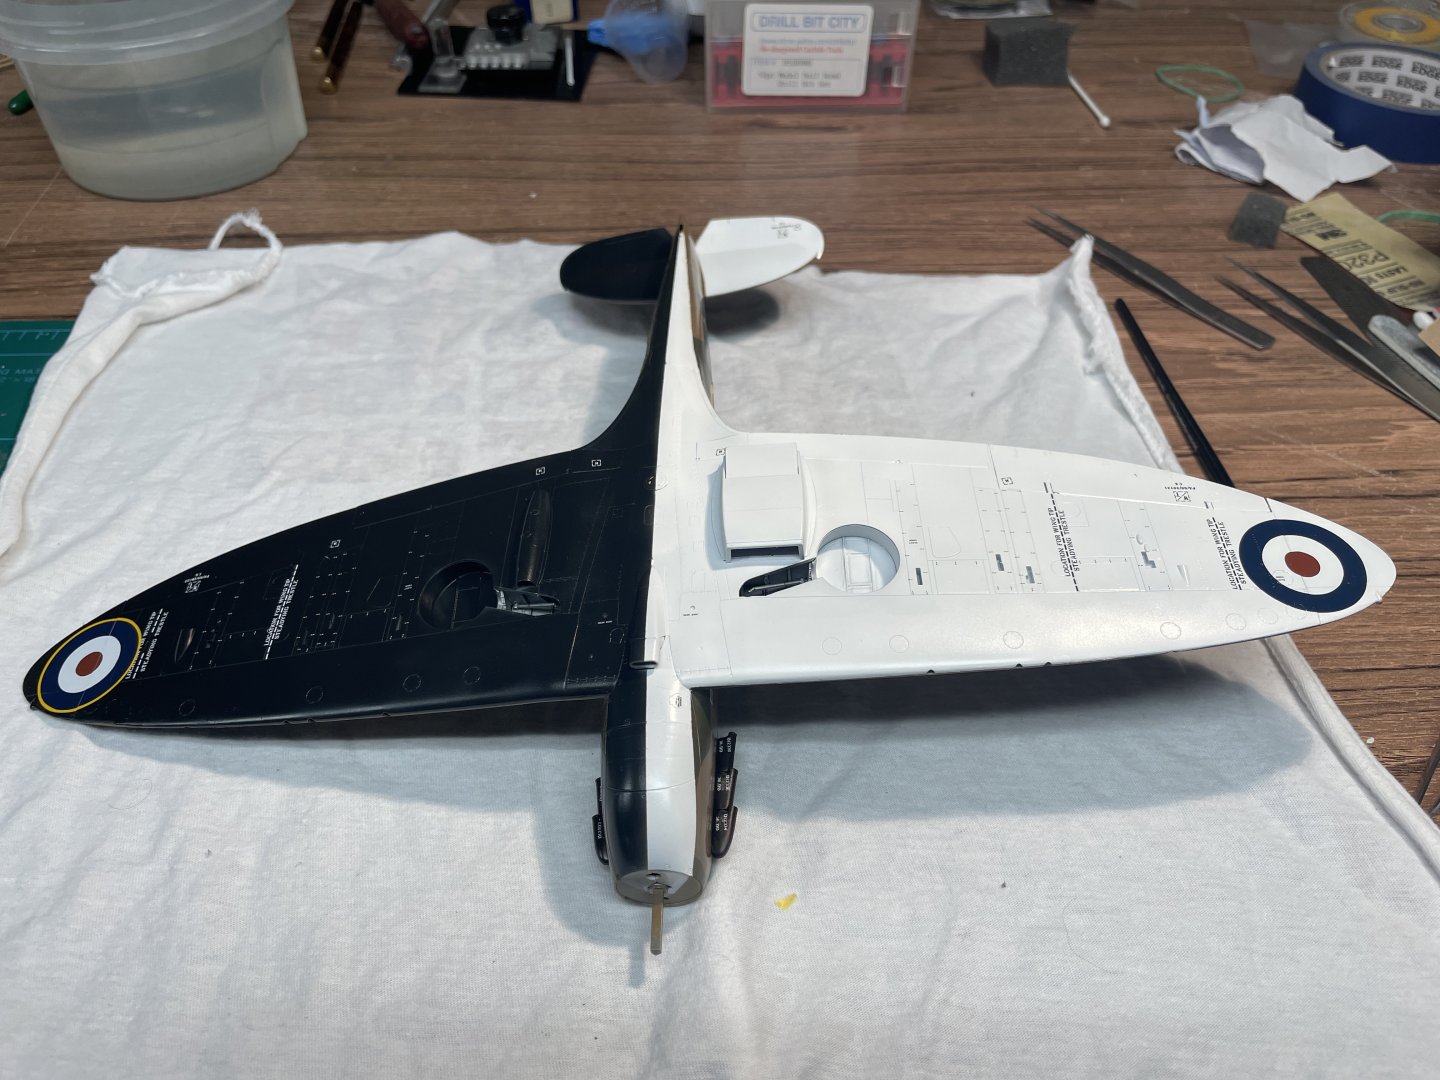
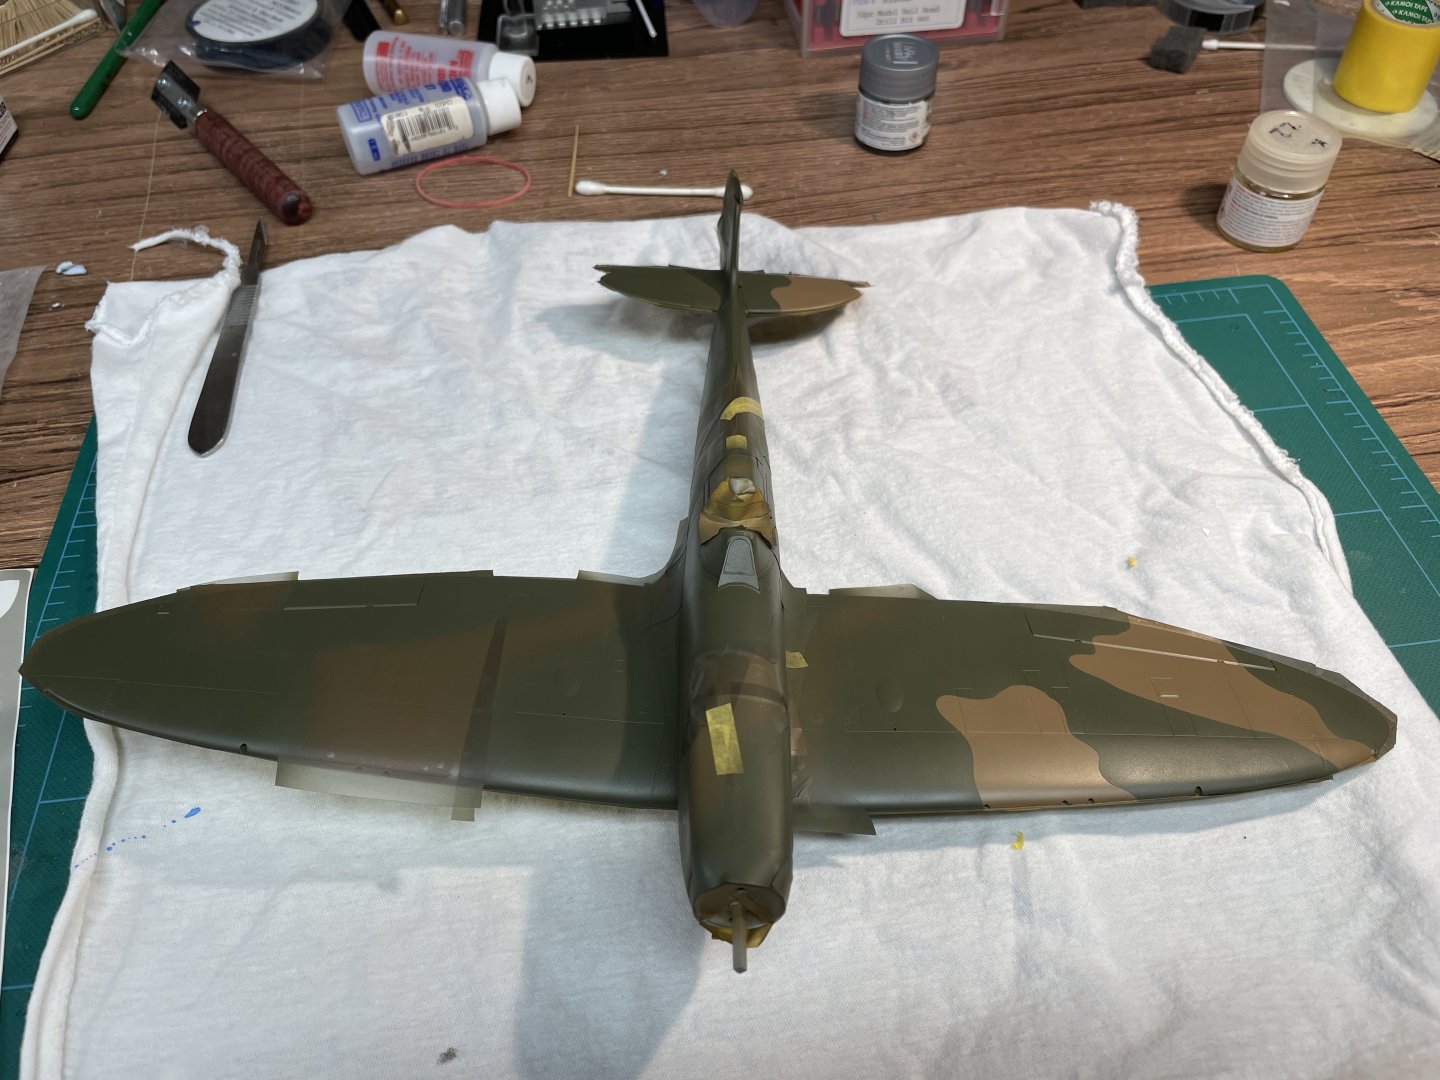
Dan - many thanks! Almost a month since last post. I had a bunch of work things, then got COVID. I’m bouncing back and got a few hours of work in this week. Even with the great fit, I needed to do a little filling to fully hide seams. Given how small the seams were, I tried Mr Surfacer 500. I brushed it over the seam and it was really easy to sand off and fully hid the seams. I primed the whole model, then painted the white and black undersurface which went well. I masked this whole area before painting the camouflage. I used Tamiya masking tape for curves around the edges, then filled in with regular Tamiya paper masking tape. I had my first problem when I tried painting the brown camouflage color. To get the right color, I used Vallejo Model Color, thinned with Vallejo airbrush thinner. I haven't really used this paint brand before. Not sure what happened. It seemed to go down OK, but as it dried, some of the pigment seemed to come out of solution and I got weird streaking. I had mixed really well (I think). It dried flat, so rather than stripping, I found I had some Mr Paint of the same color on the shelf, and I painted over the whole area, which worked fine. The Mr Paint fully covered and there was no reaction between the different paints. I used AML masks for the camouflage pattern which were amazing. They seemed to capture the right shape, were easy to apply, and whatever frisket material they are made out of was great – no bleeding under. I used Tamiya paint for the green color and it went down fine. I was really disappointed when I pulled the masking off. The brown color (I’m presuming the Vallejo paint) bled under the vinyl masking tape in a lot of areas. Thbere wasn't any bleeding under any of the paper tape. I thought I had burnished the vinyl tape down pretty carefully before painting. I spent a while masking and respraying of the white and black undersides along where the camouflage met the undersurface, and overall am mostly OK with the results. I've sprayed gloss clear (tried the Tamiya X22 instead of the alclad gloss clear I had been using - it was much easier to get a good gloss coat. Hopefully decals will go on after work tomorrow.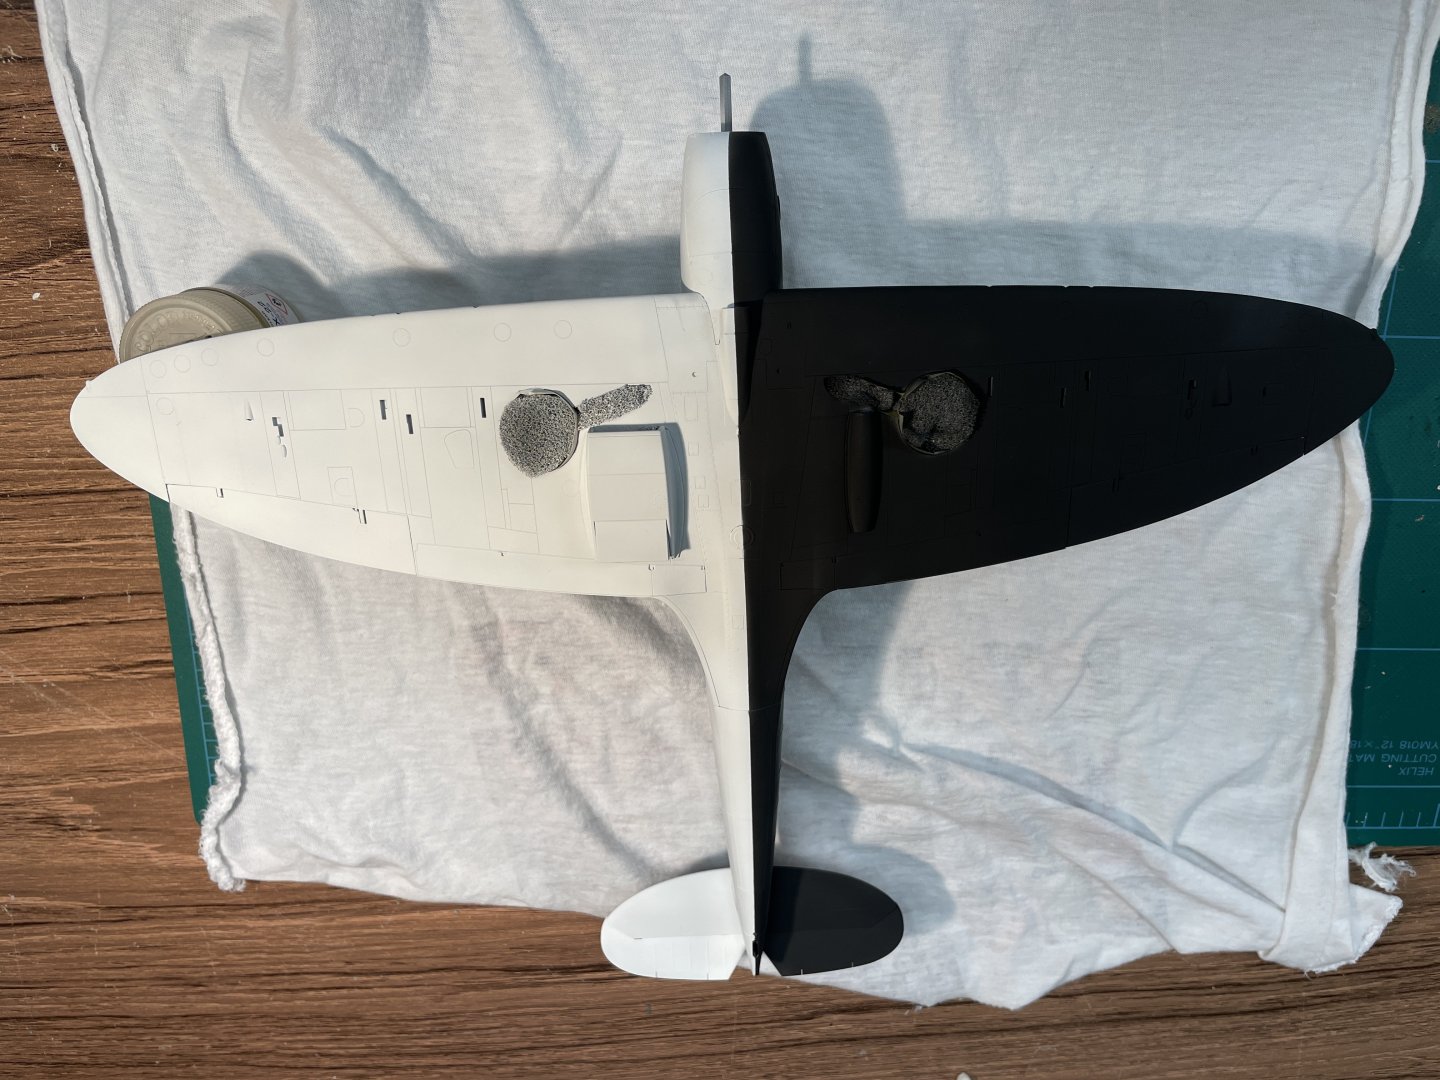

- 35 replies
-
- 20
-
-
Hamilton- Beautiful work so far! I milled my own wood for the fitting out practicum. It is very doable and lets you mix different colored woods. Please be careful using the full size table saw to cut the billets. I started that way but eventually switched to a band saw to avoid kick back and needing to work close to the blade. Dave
-
Looks awesome! Congratulations on finishing another beautiful model.
-
Spitfire Mk.Ia by davec - FINISHED - Kotare - 1/32 - PLASTIC
davec replied to davec's topic in Non-ship/categorised builds
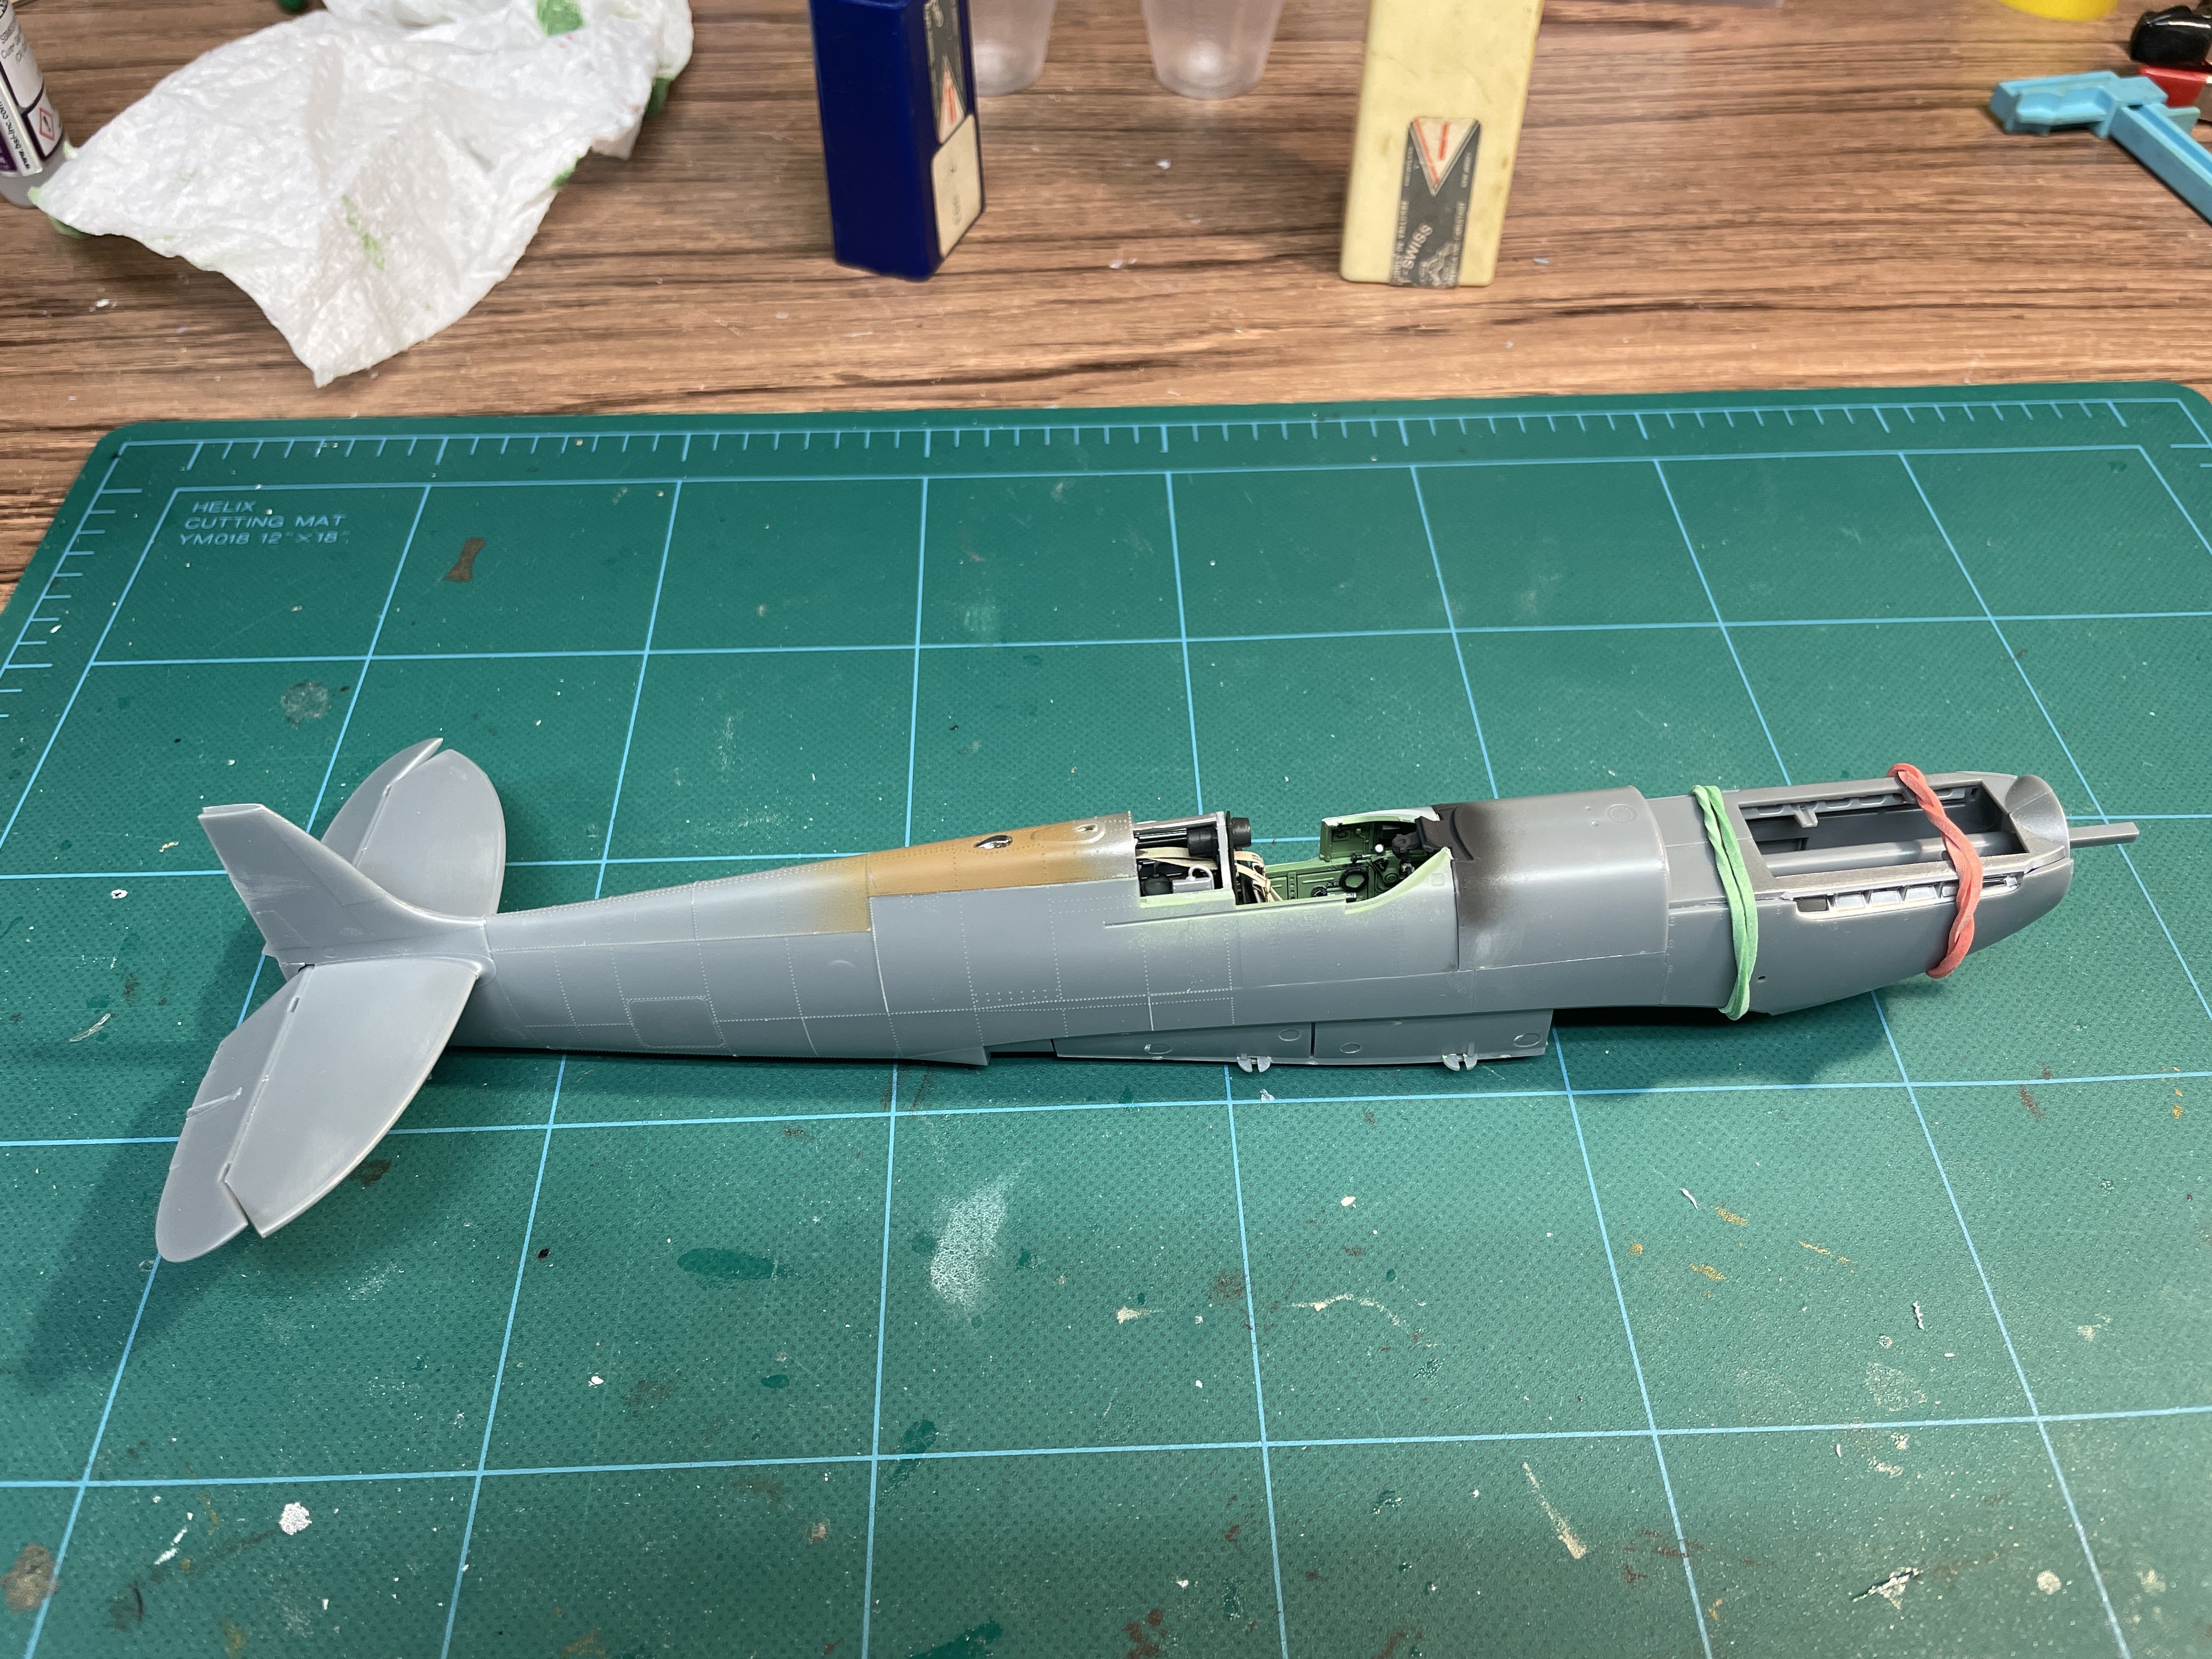
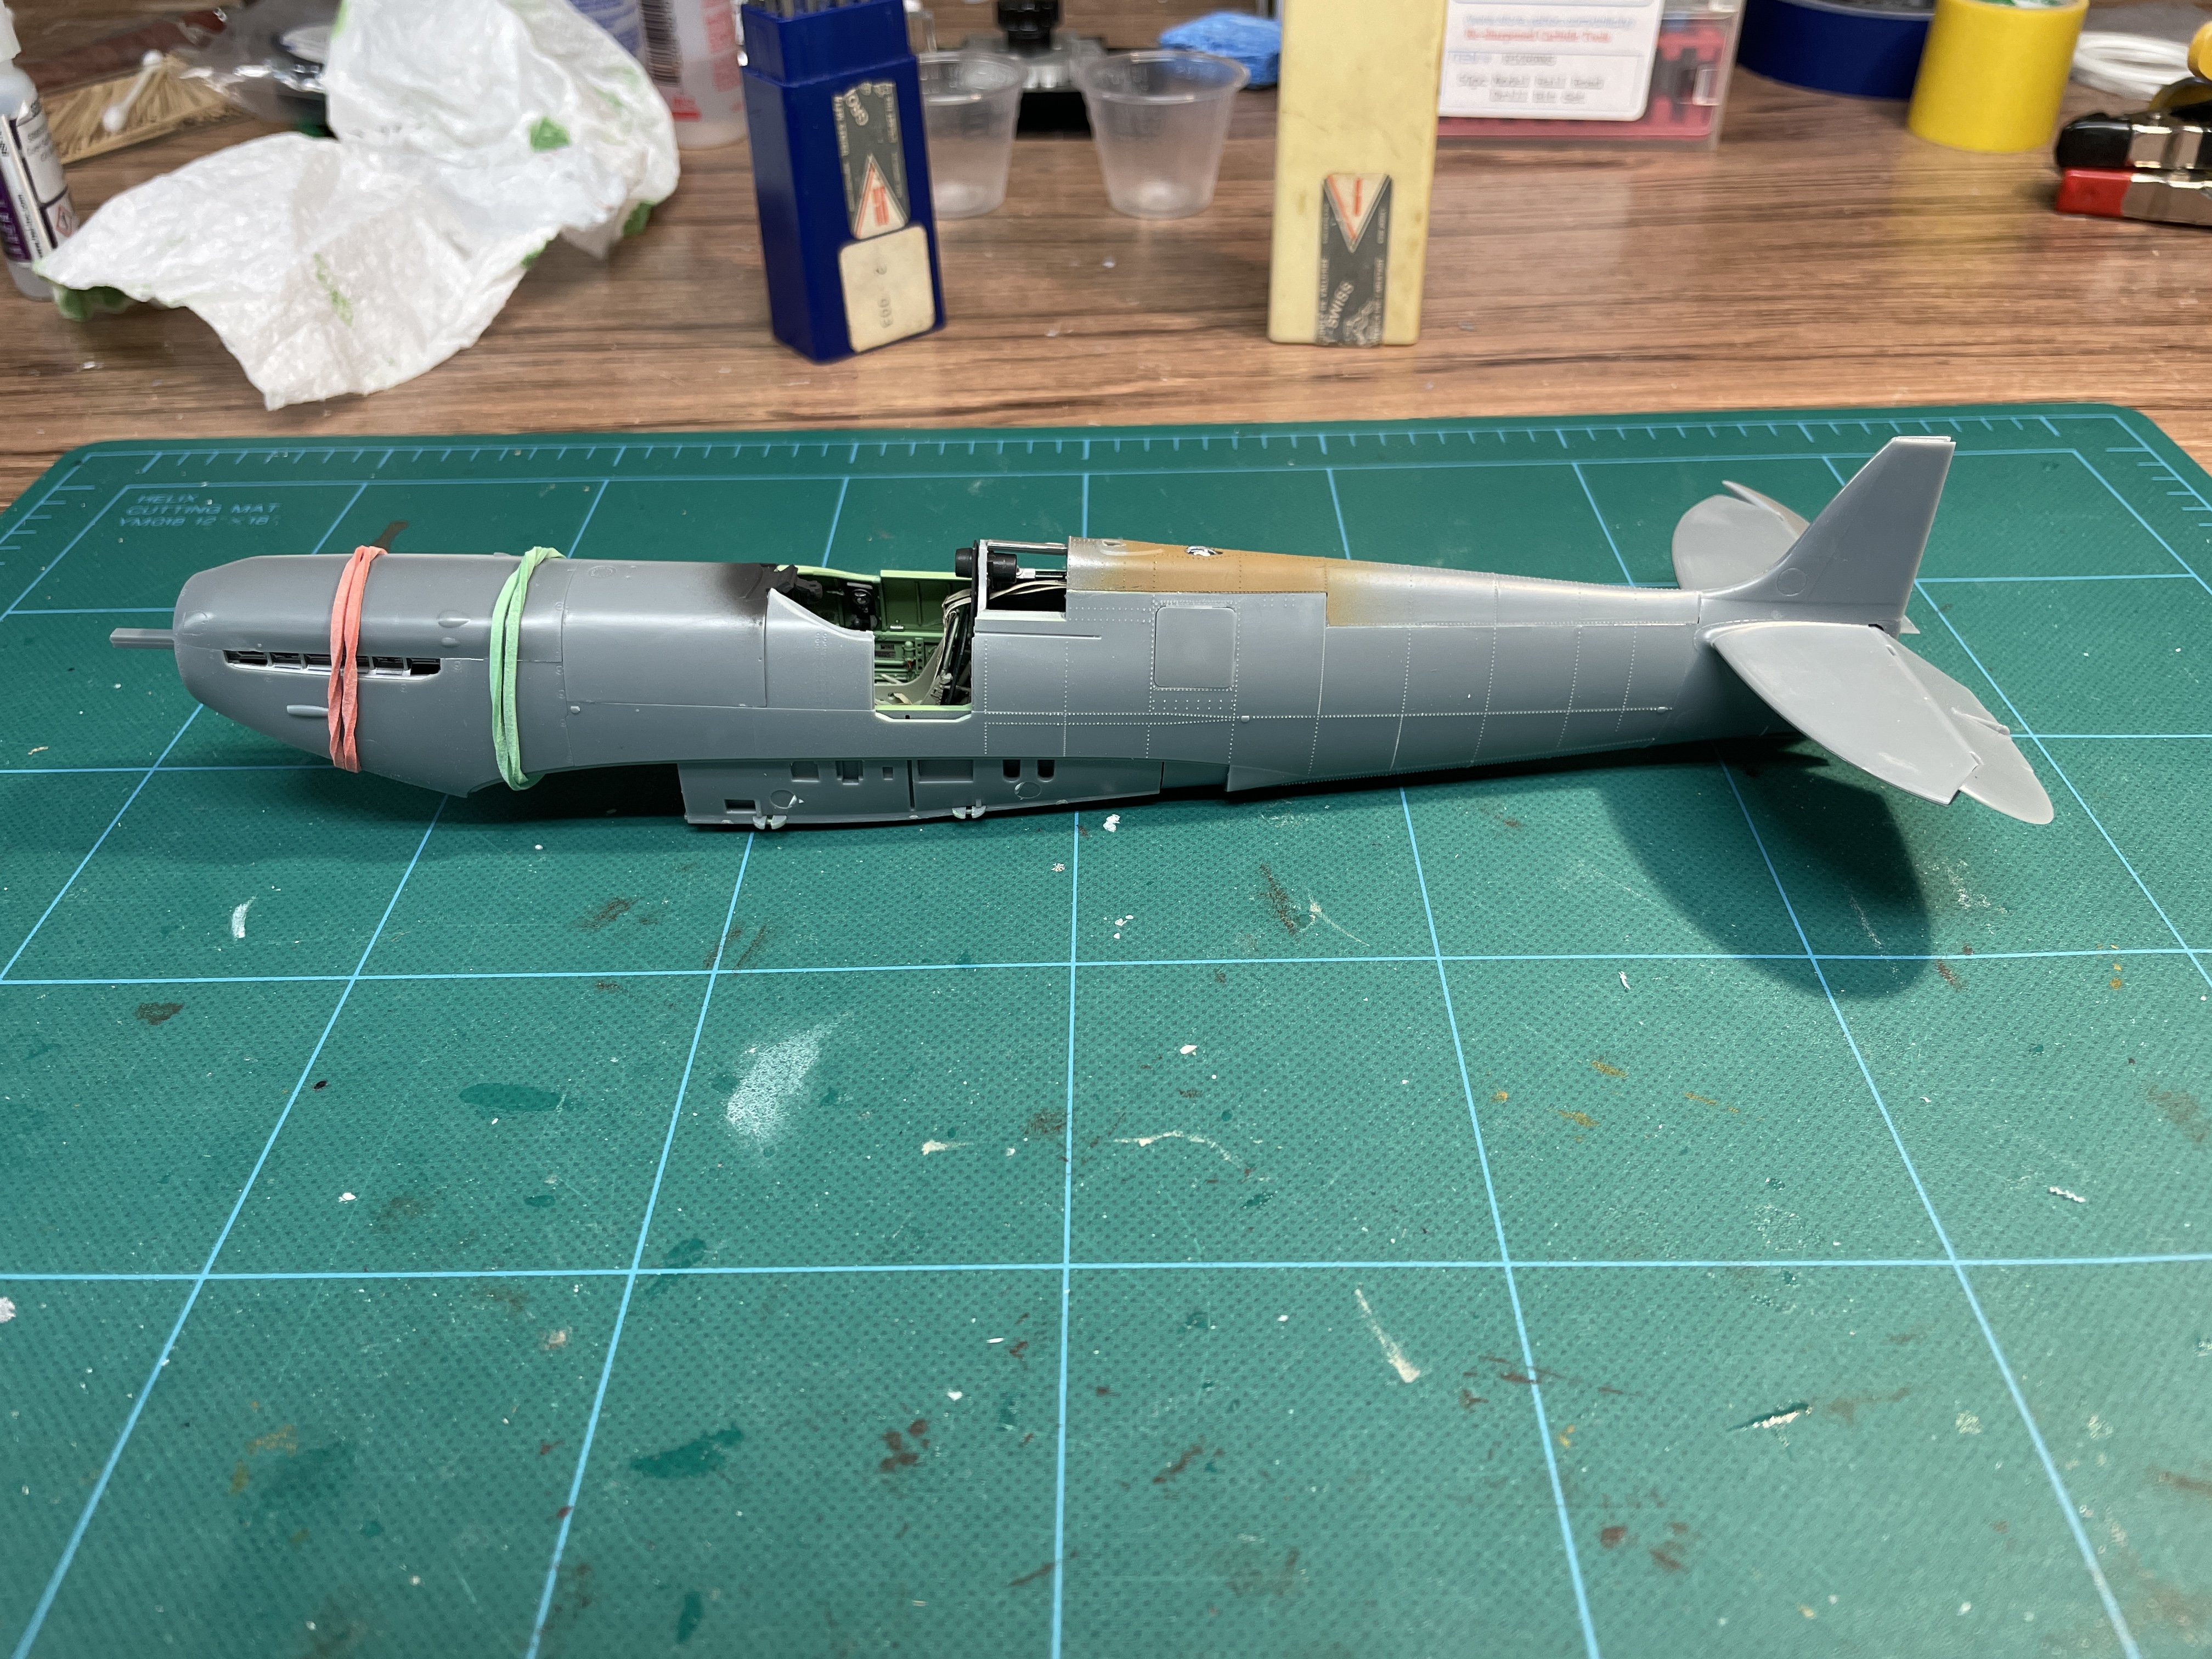
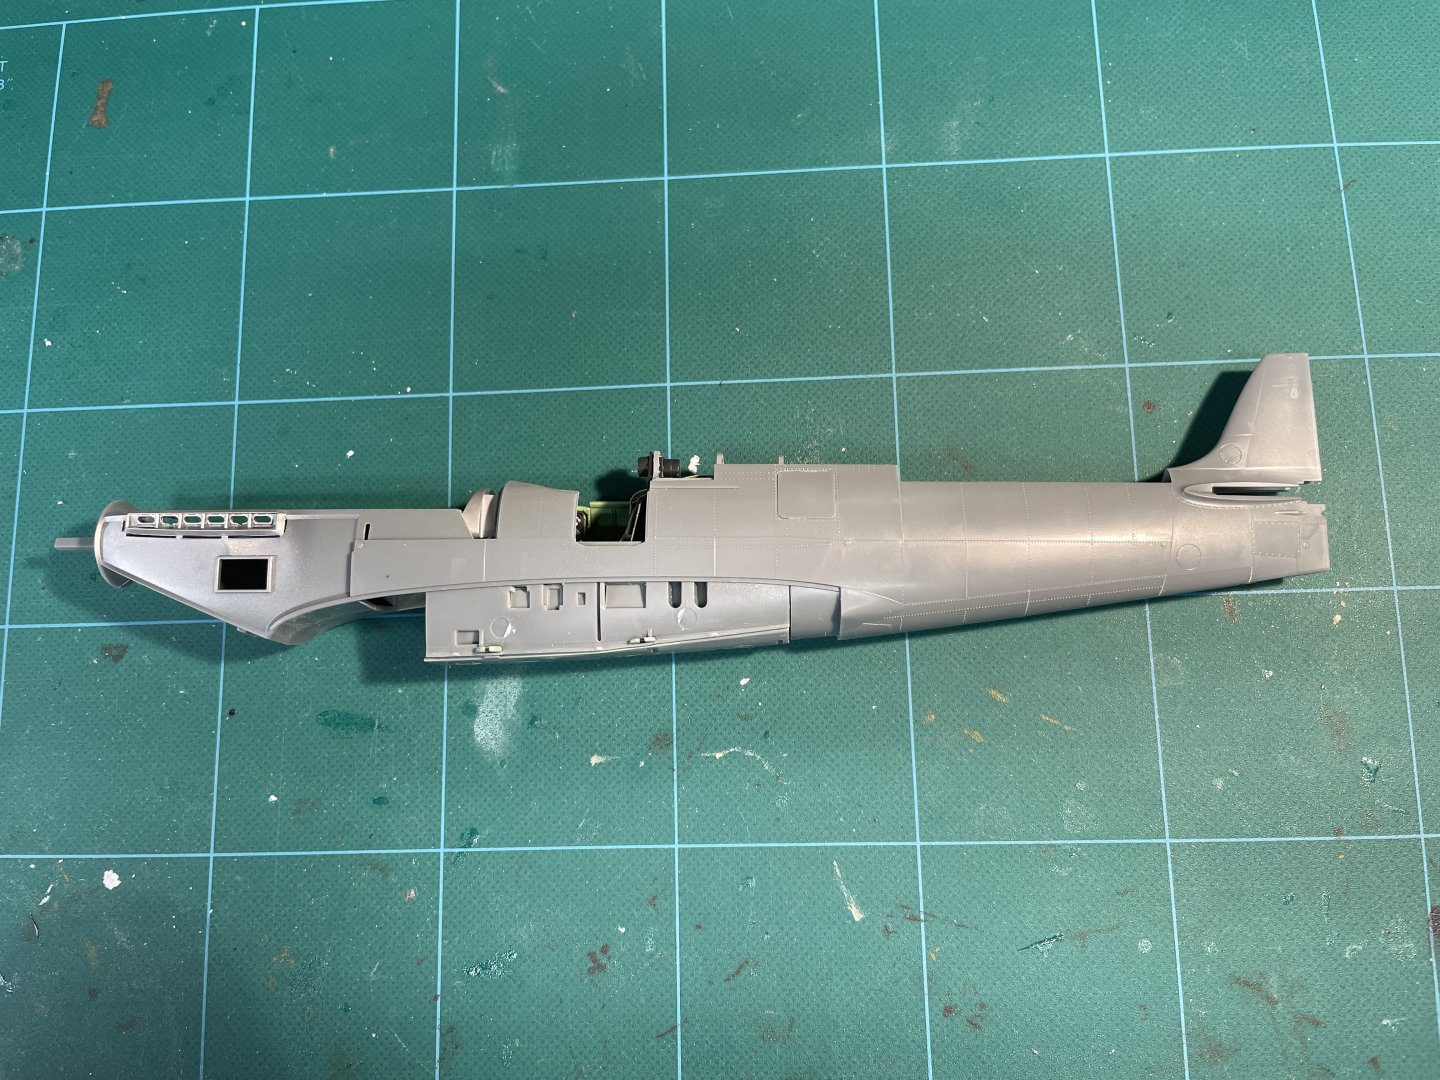
I've been gluing the rest of the fuselage pieces on. After the slow pace of painting and assembling the cockpit, the rest of the model is going together quickly. The fit is great, including the wing root. I need to mask, paint the inside of the canopy (I got the eduard two sided mask set), and attach the canopy and I will be on to priming. Looking at all the joints, there will be minimal filler involved, and maybe even none.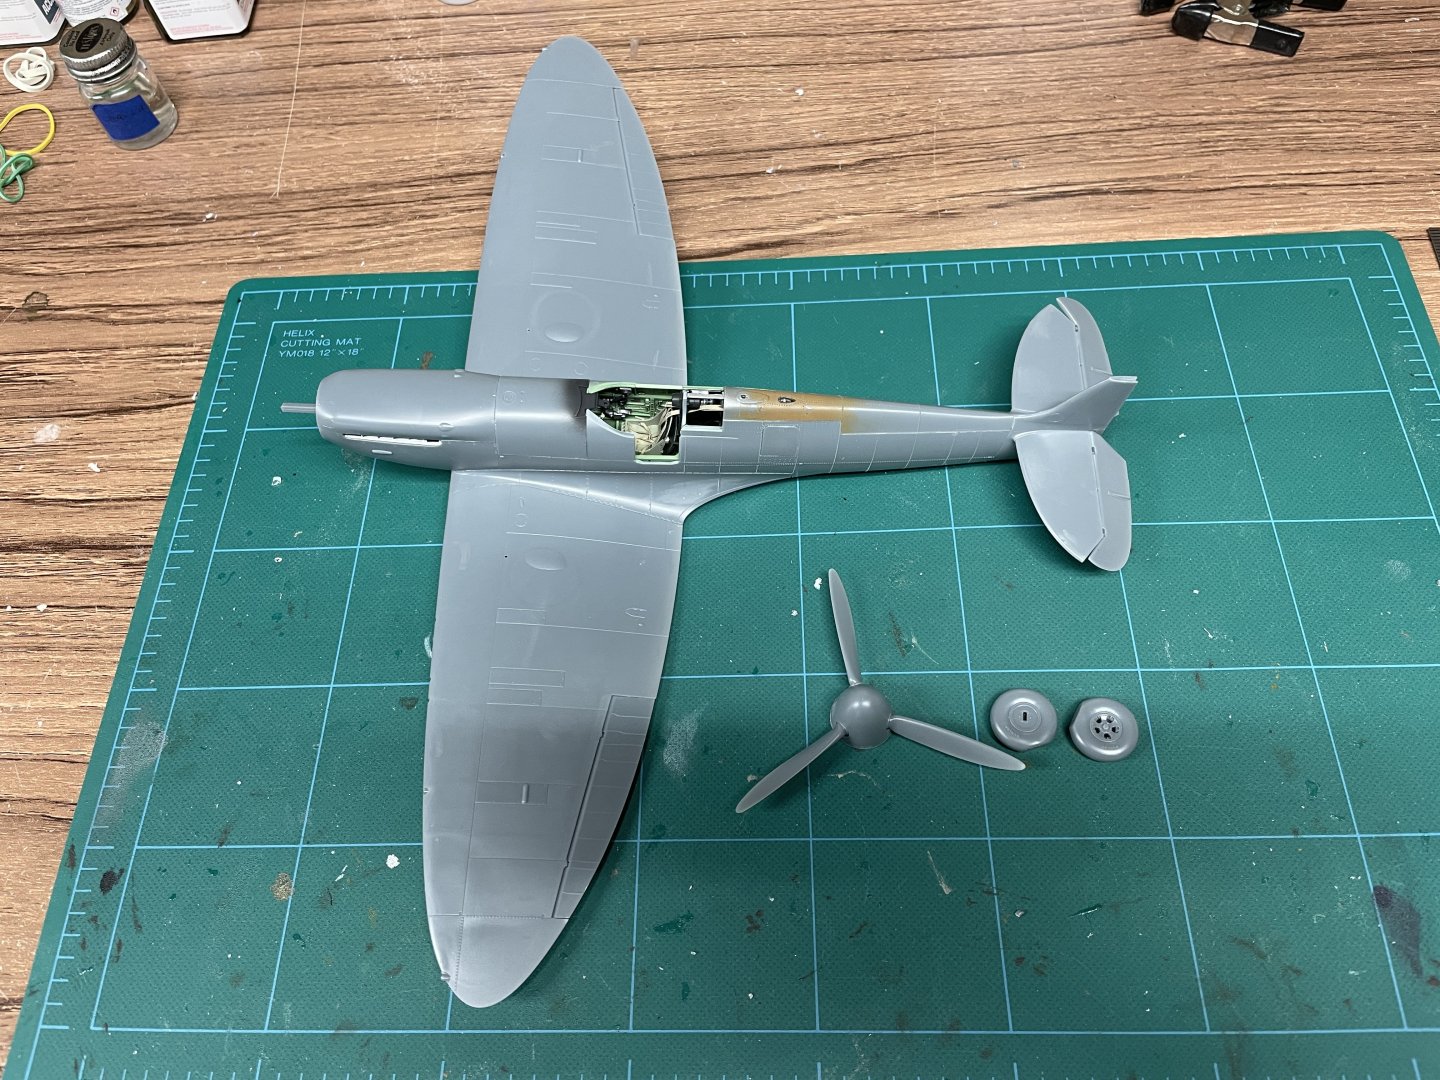
- 35 replies
-
- 21
-
-
-
I'm doing a restart on this. I finished the planking and when I took the hull out of the building board realized I had a little asymmetry. I could probably have debonded and reattached the planks, but cumulatively between the waterstains on the bottom, a couple of pieces that were a lot different color than the other planks, and a few other things I wasn't happy with, it was time for a redo. The beauty of scratchbuilding is that it doesn't feel like a big deal. Over the weekend I milled the wood and cut the parts to shape. I'm travelling, but next weekend will sand everything and begin assembling. Having done this once, I don't think the redo will take anywhere near as long, and the end result will be a lot better. Will start posting pictures again when I get back to where I left off.
- 32 replies
-
- 3
-
-
- Grand Banks Dory
- Model Shipways
- (and 2 more)
-
Spitfire Mk.Ia by davec - FINISHED - Kotare - 1/32 - PLASTIC
davec replied to davec's topic in Non-ship/categorised builds
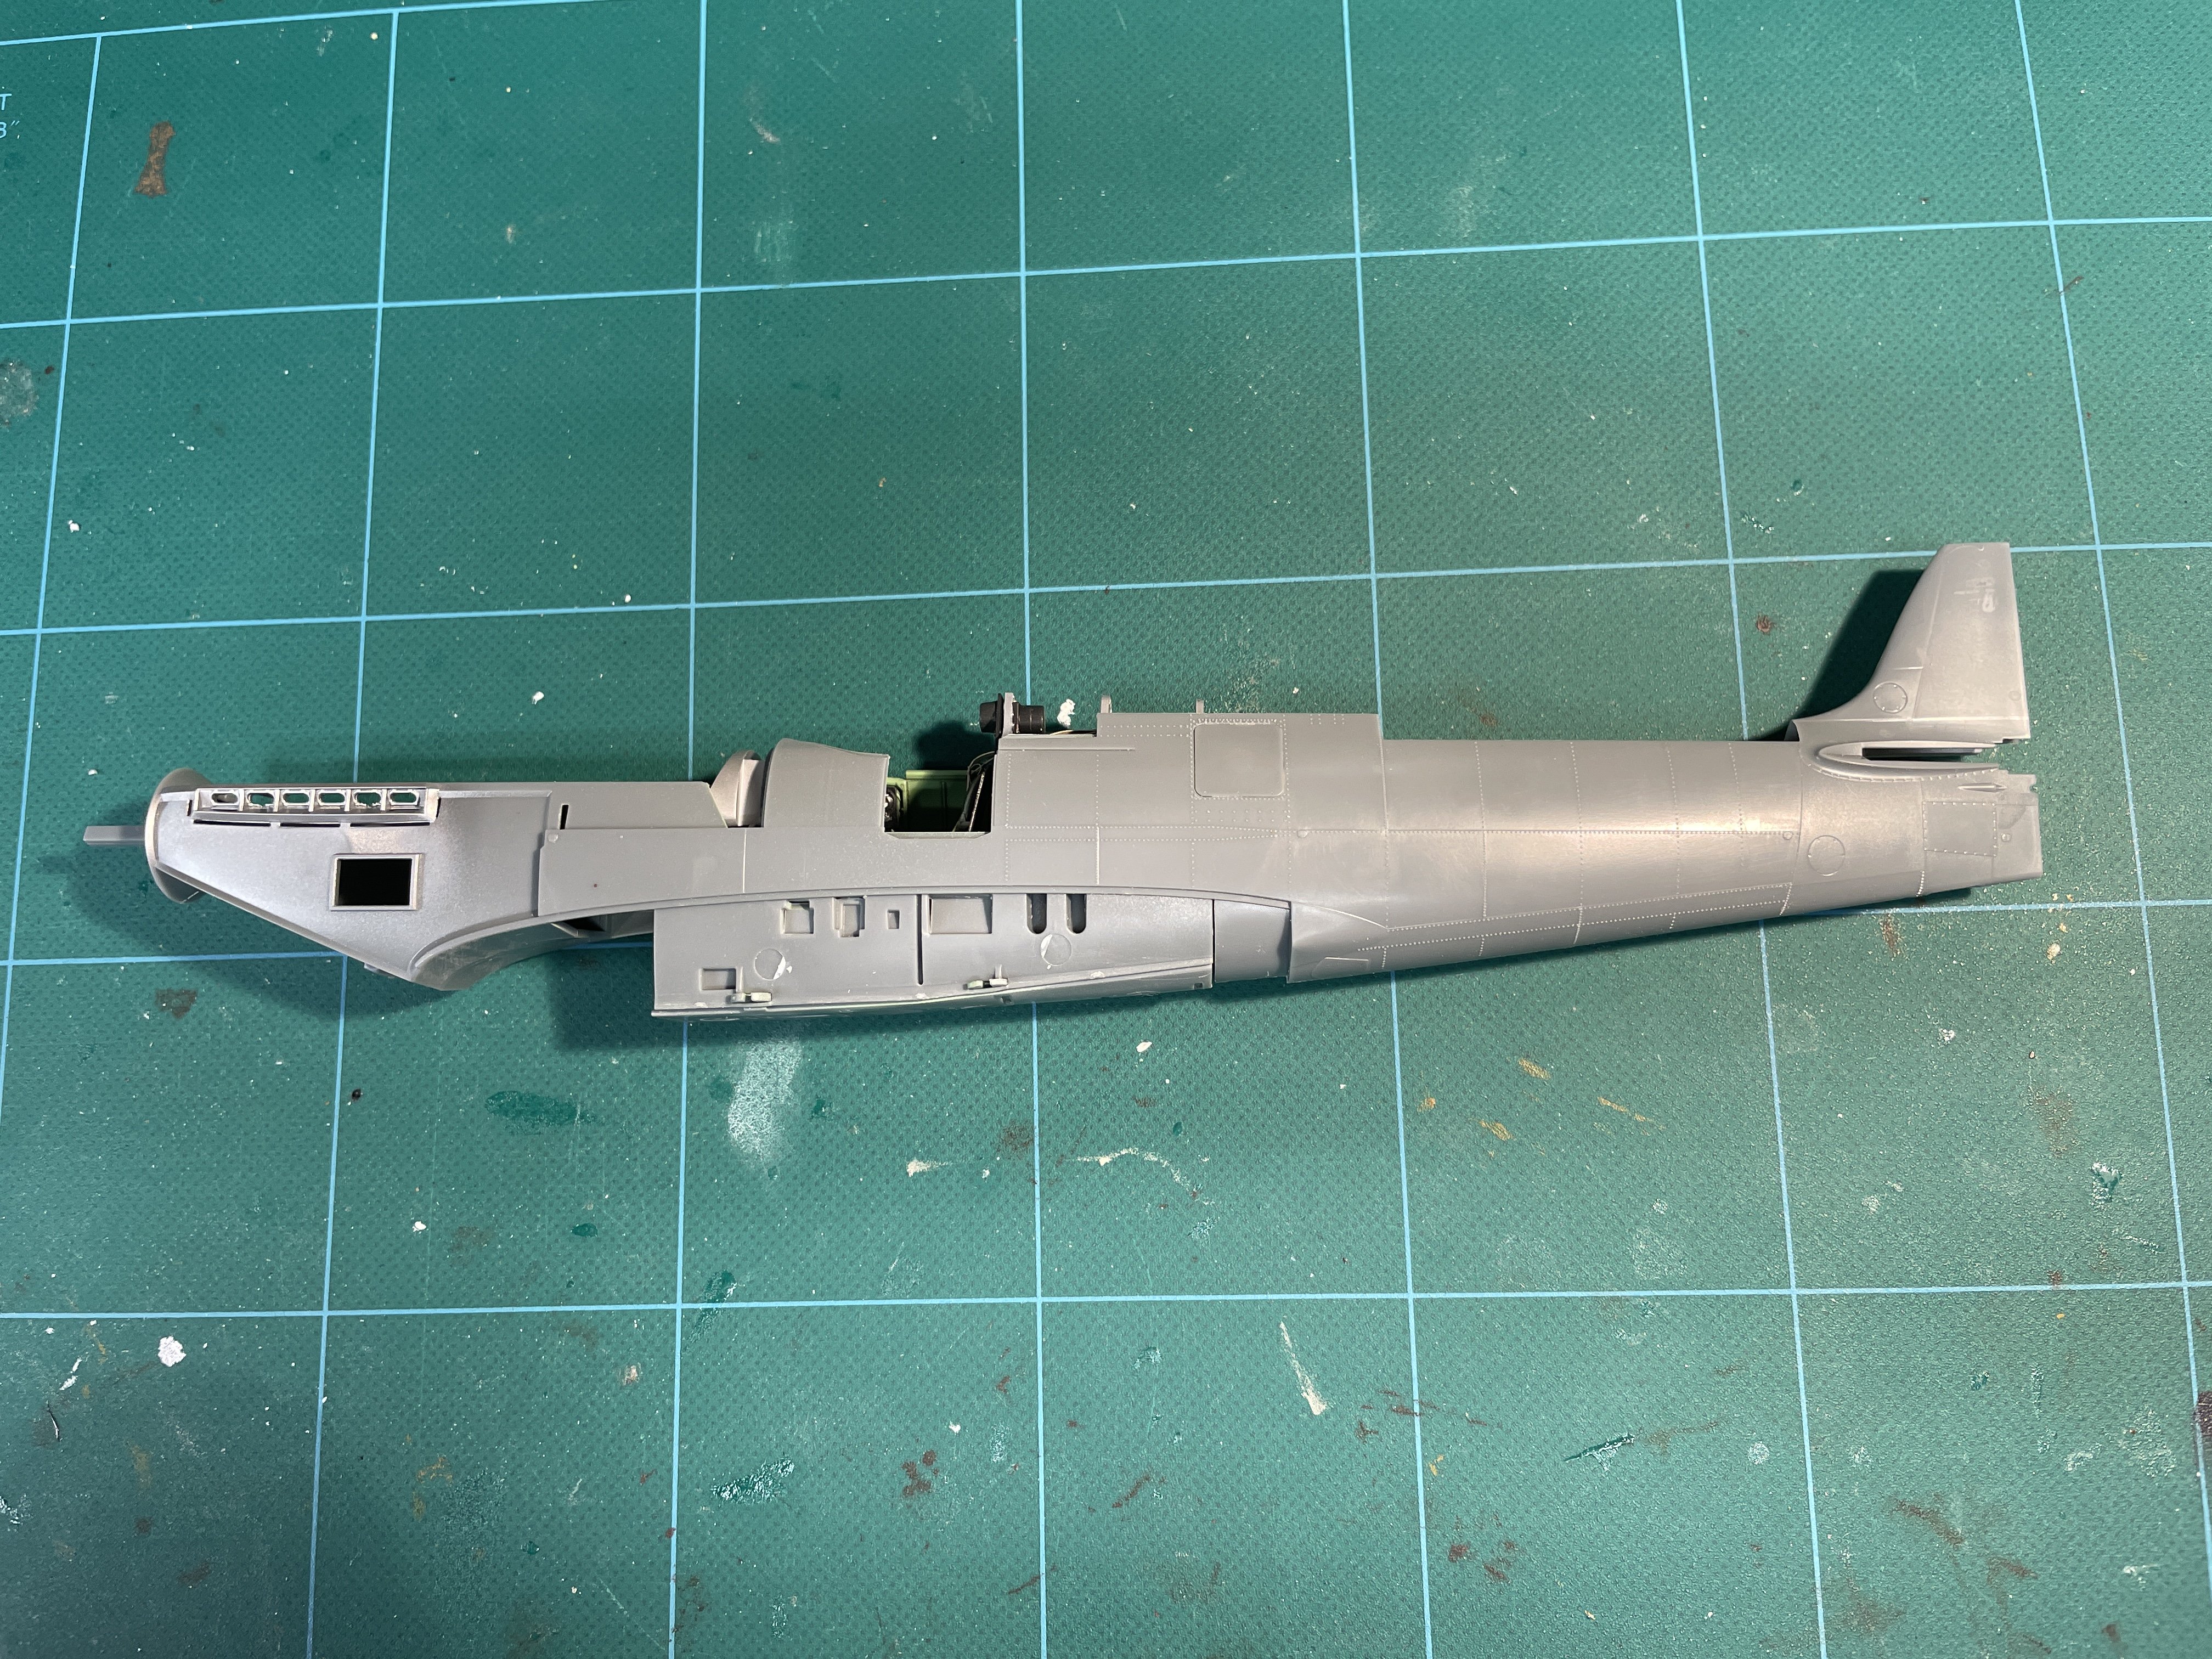
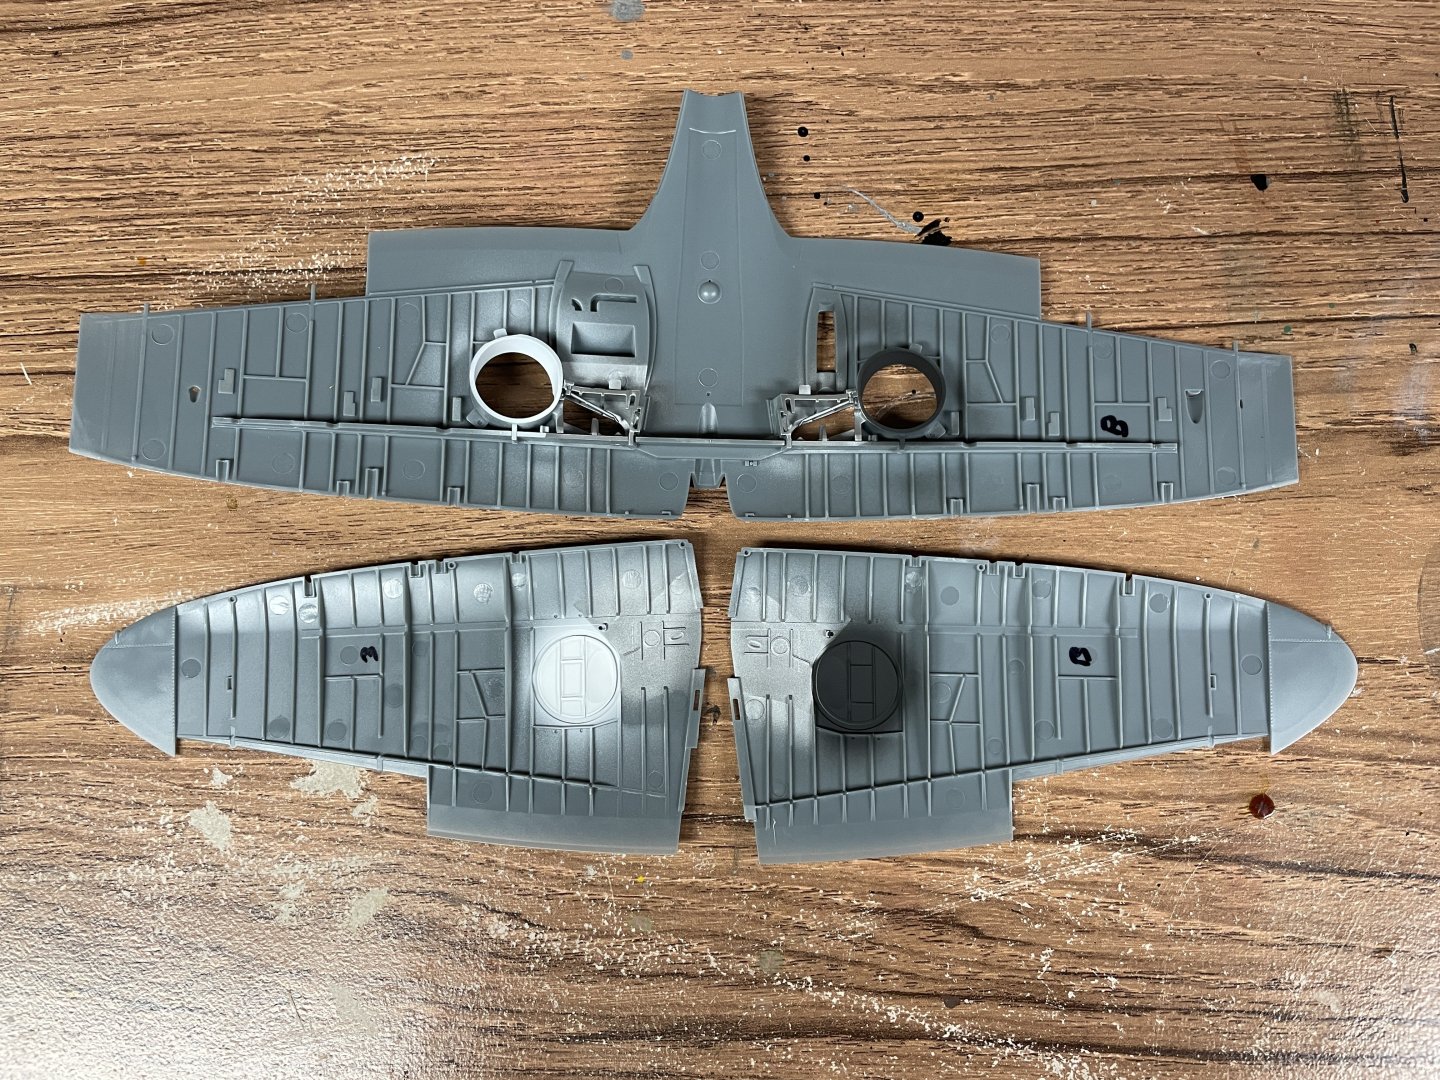
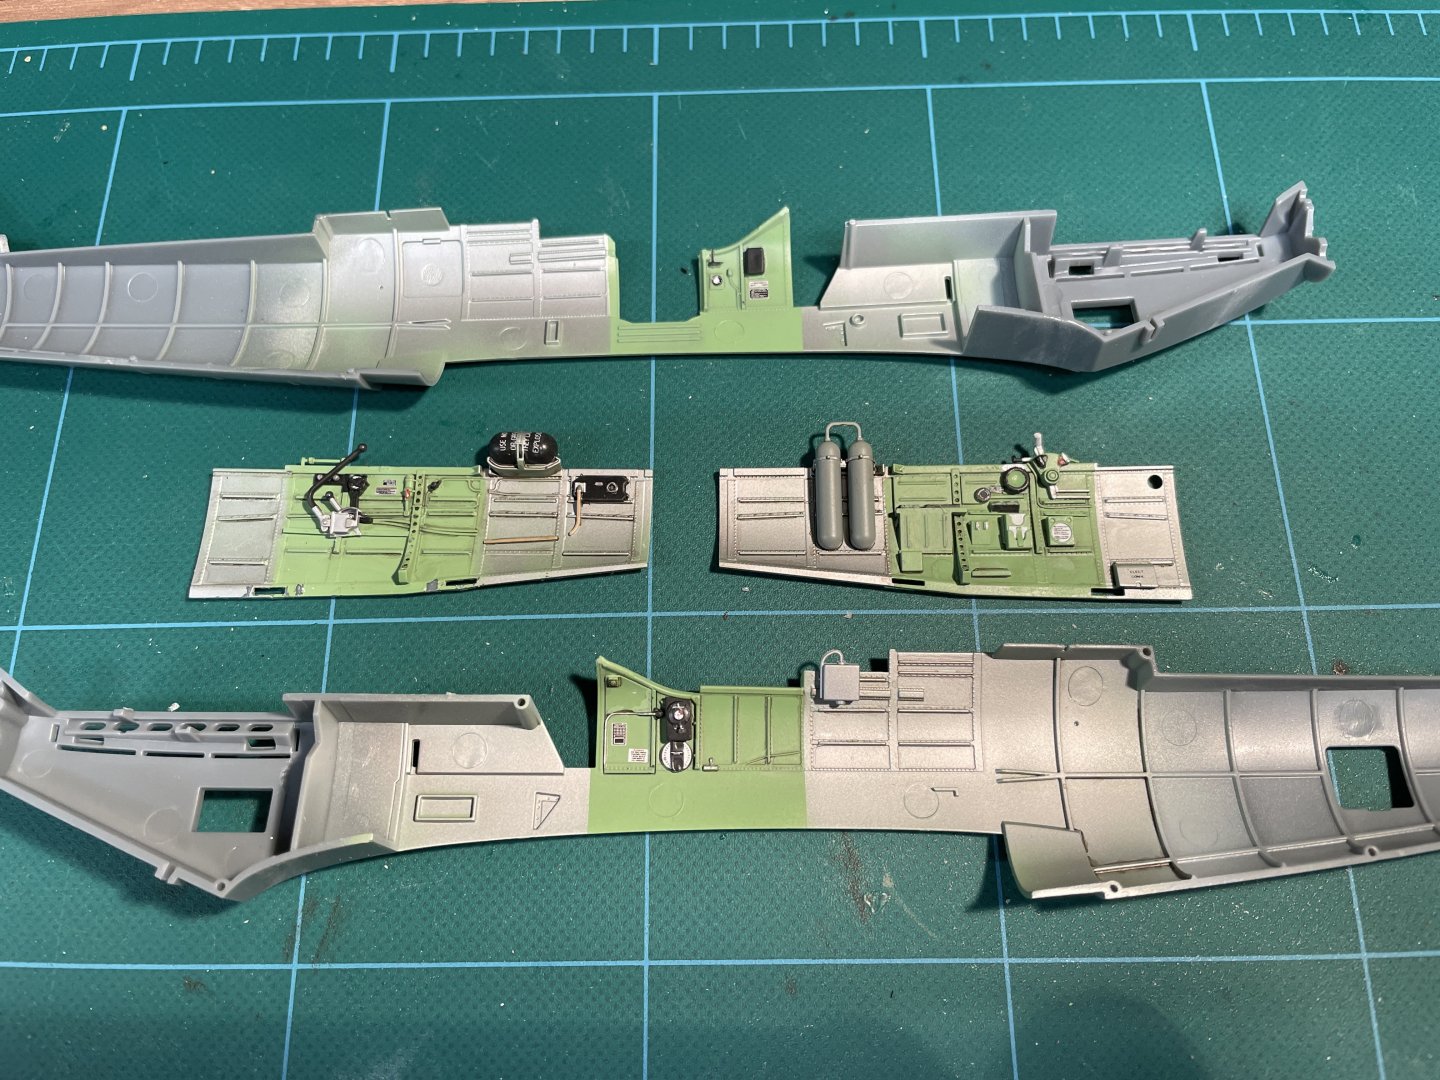
I continue to be really impressed with the kit. I've been adding the additional fuselage pieces. I've included pictures at each step - the engineers really gave a lot of thought to the design to avoid seams in difficult to fill places. My favorite is the separate piece for the top, which avoids filling the usual midline seam and having to rescribe panel lines and rivets. The only place where there is a midline seam is in the rear along the bottom. Most joints are at panel lines and the fit is great enough that there are no gaps.

- 35 replies
-
- 19
-
-
Spitfire Mk.Ia by davec - FINISHED - Kotare - 1/32 - PLASTIC
davec replied to davec's topic in Non-ship/categorised builds
Rob - thanks! I just ordered a bottle. Will let you know about how it works with other manufacturer's oils. I have some abteilung and can compare. -
Spitfire Mk.Ia by davec - FINISHED - Kotare - 1/32 - PLASTIC
davec replied to davec's topic in Non-ship/categorised builds
Hi Rob - I'm looking forward to seeing your build - it will be amazing with your skills. I searched "matte thinner" and just came up with the AK interactive matte thinner (Buy Matt Effect Thinner online for 3,13€ | AK-Interactive). Is this what you are talking about? If it is, does it work better than regular mineral spirits, and will it work with windsor-newton artist oils (I've accumulated a fair amount) or just the AK abteilung oils? Thanks! Dave -
Spitfire Mk.Ia by davec - FINISHED - Kotare - 1/32 - PLASTIC
davec replied to davec's topic in Non-ship/categorised builds
I really appreciate the likes and especially Dave's very kind comments. I've attached the cockpit sides and started on the fuselage. I'm glad I took pictures because as things start to get closed up, much of the detail gets hard to see. The fuselage engineering is awesome. It is built in multiple pieces with joins along panel lines. Looks like the only tough seam will be the underside back part of the plane. I'm really impressed. With the early WNW kits, the fit was so precise that even tiny amounts of paint in a joint, even ones not requiring gluing, threw off the fuselage going together. Even though the unpainted dry fit was perfect, it was hard to get the fuselage together without extreme care in building. Kotare has the right balance between precision and buildability here. The fit was perfect after reasonable clean-up of joints. I've got a few pieces drying, but should have the rest of the fuselage together this weekend. I've dry fit the rest of the parts, and don't see there will be any substantial gaps needing filling.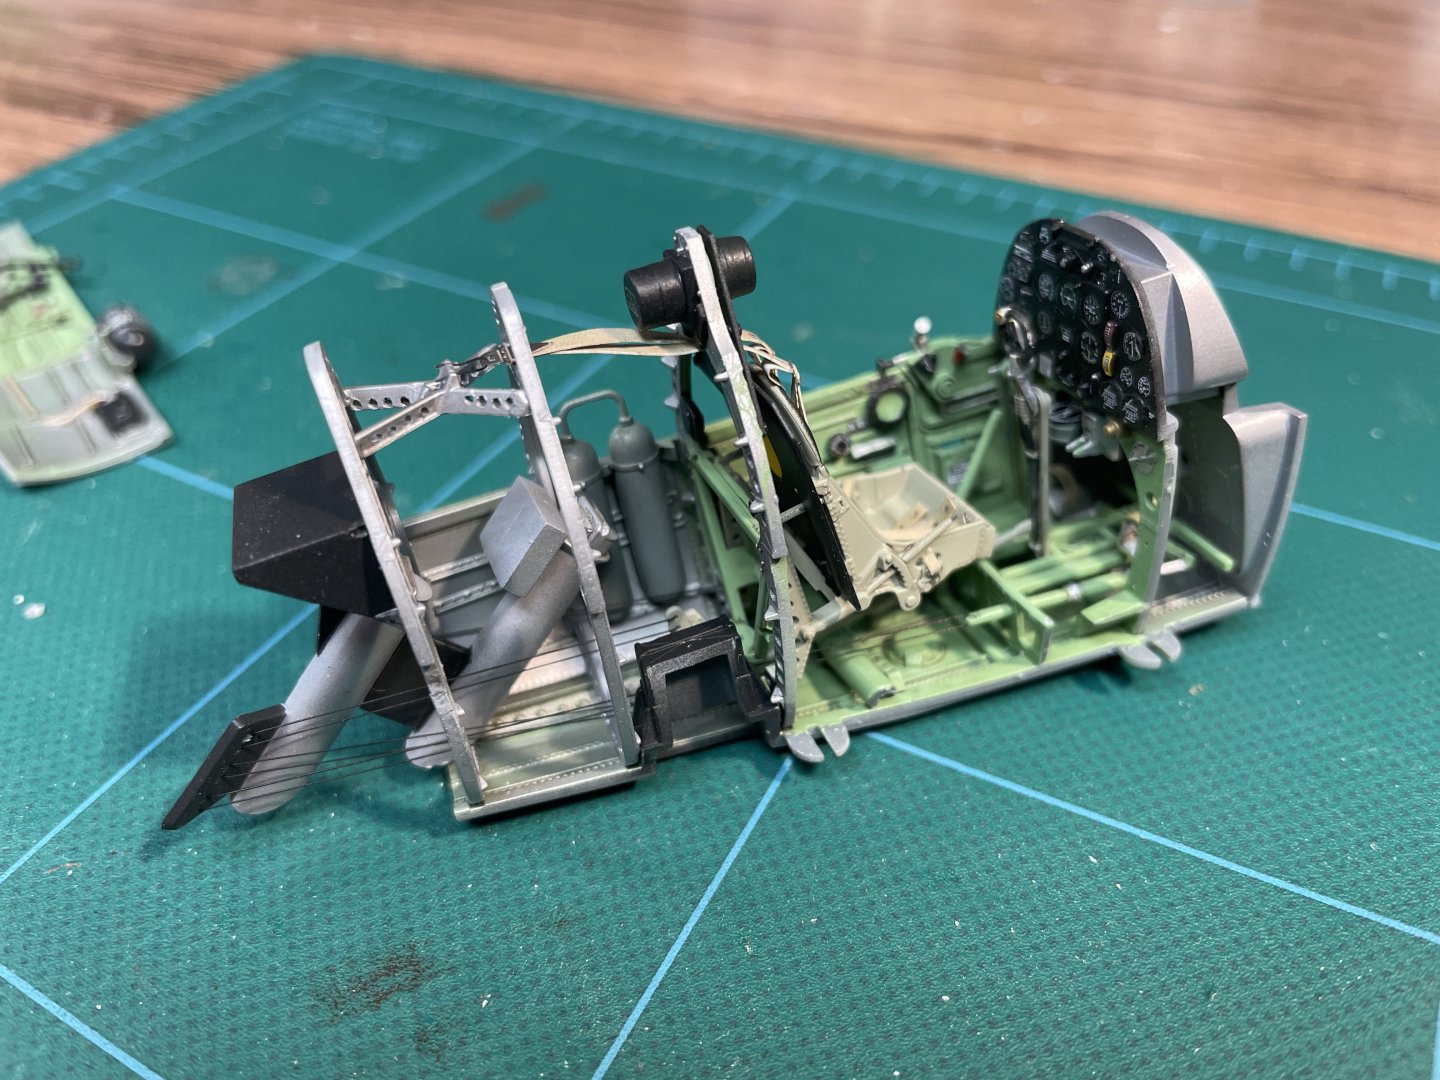

- 35 replies
-
- 20
-
-
Spitfire Mk.Ia by davec - FINISHED - Kotare - 1/32 - PLASTIC
davec replied to davec's topic in Non-ship/categorised builds
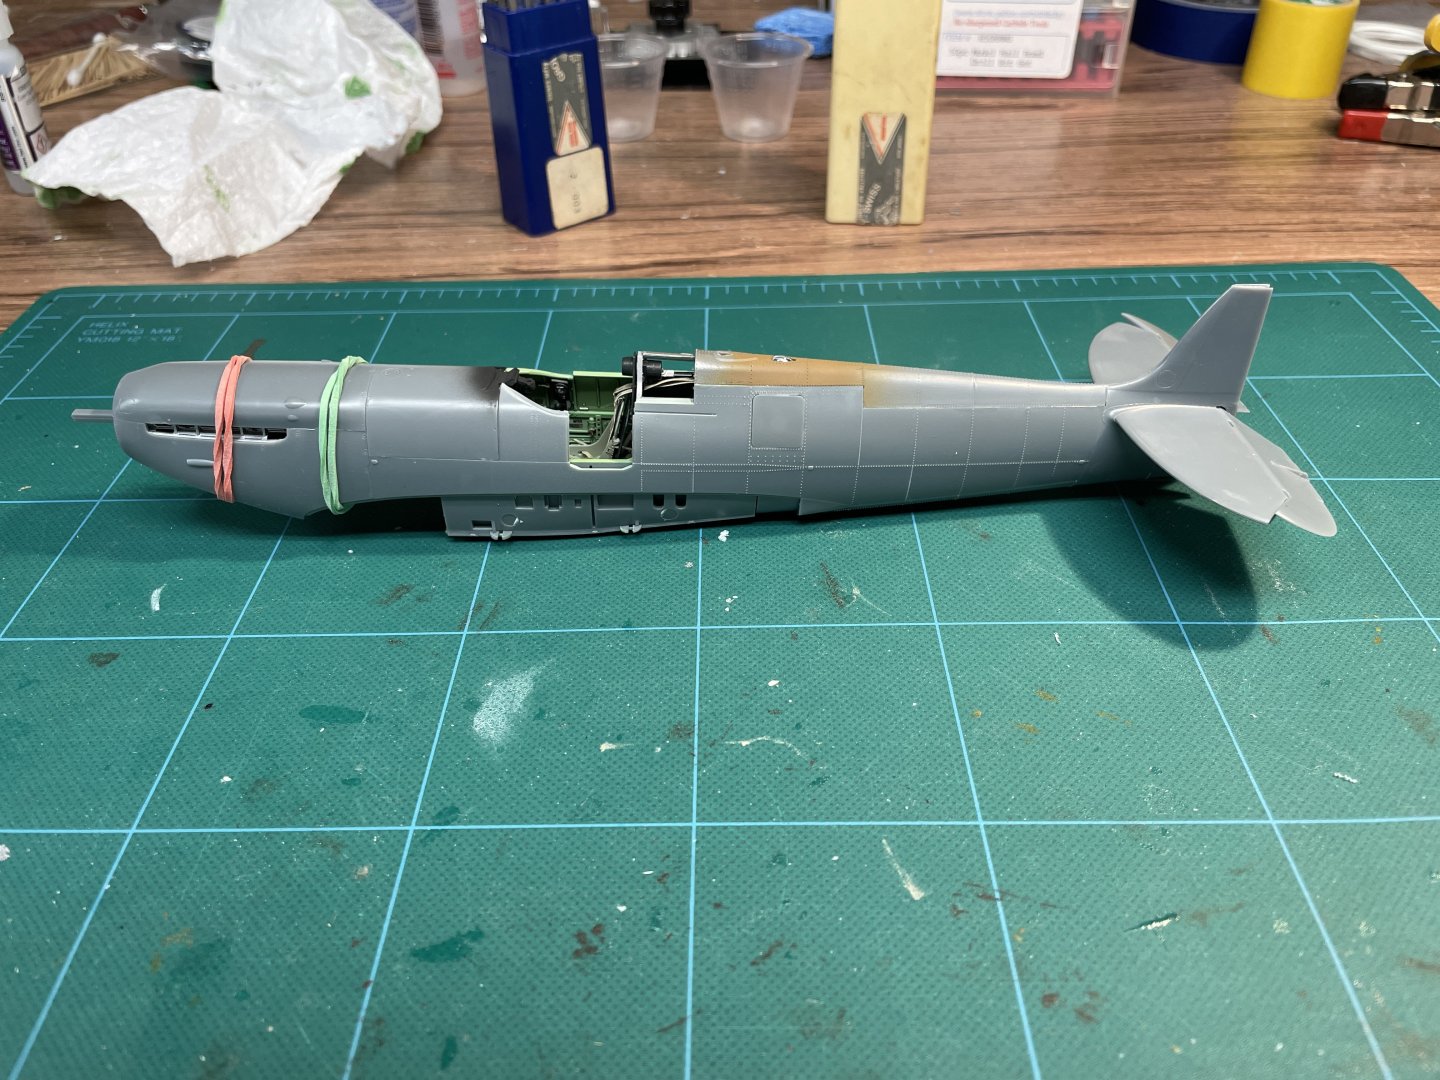
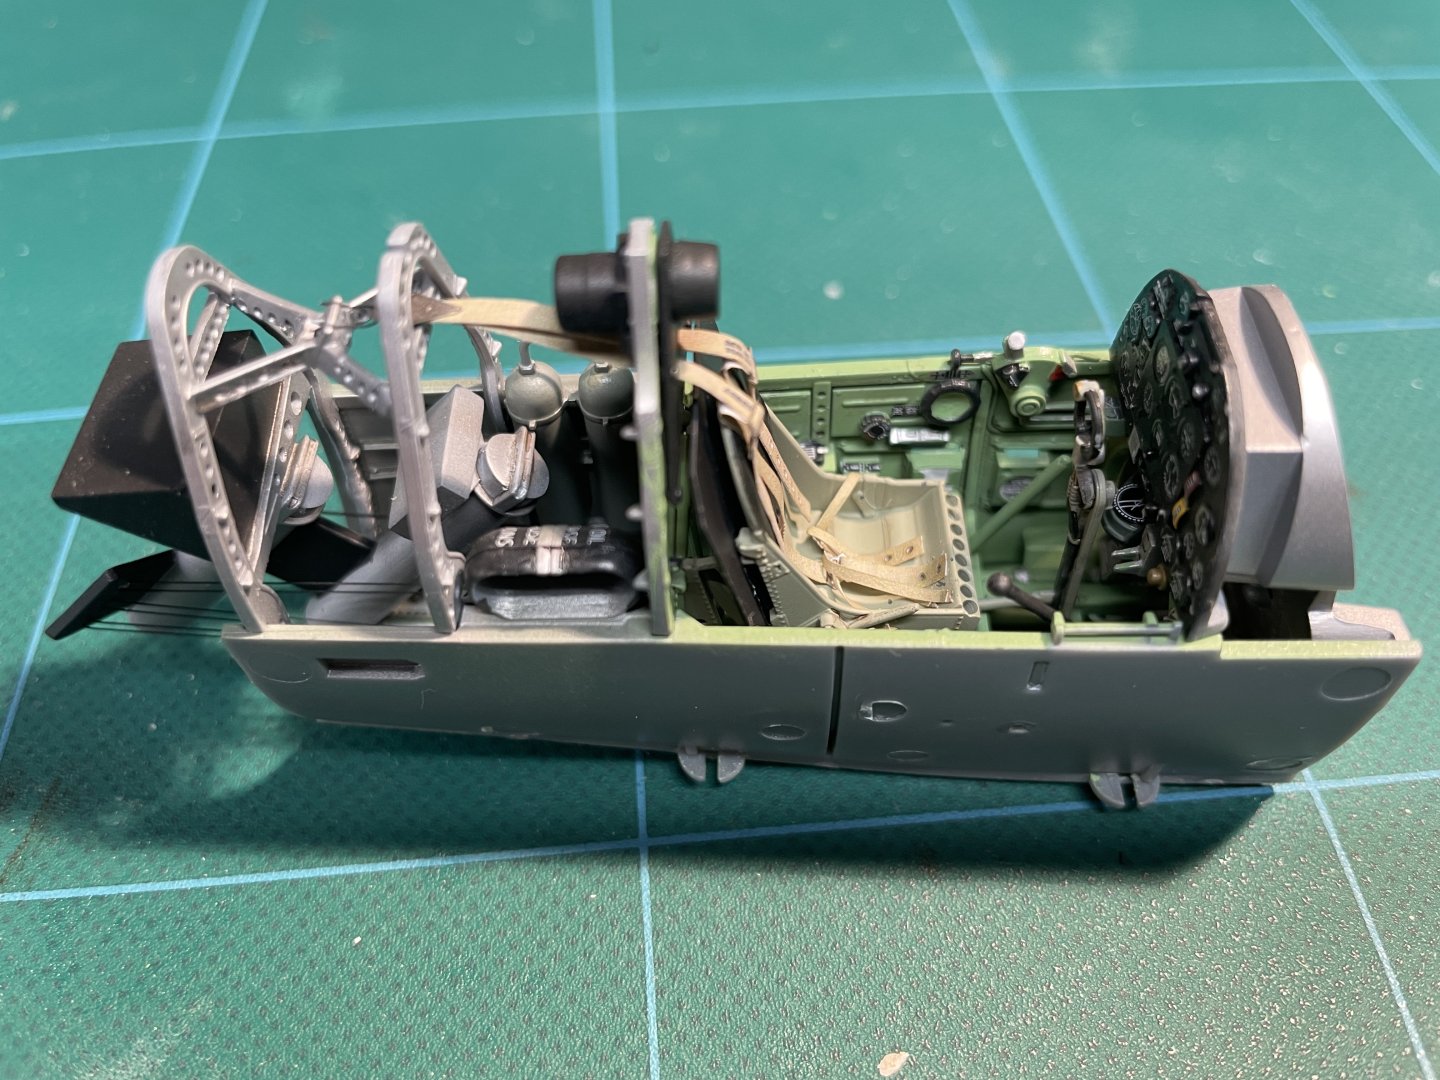
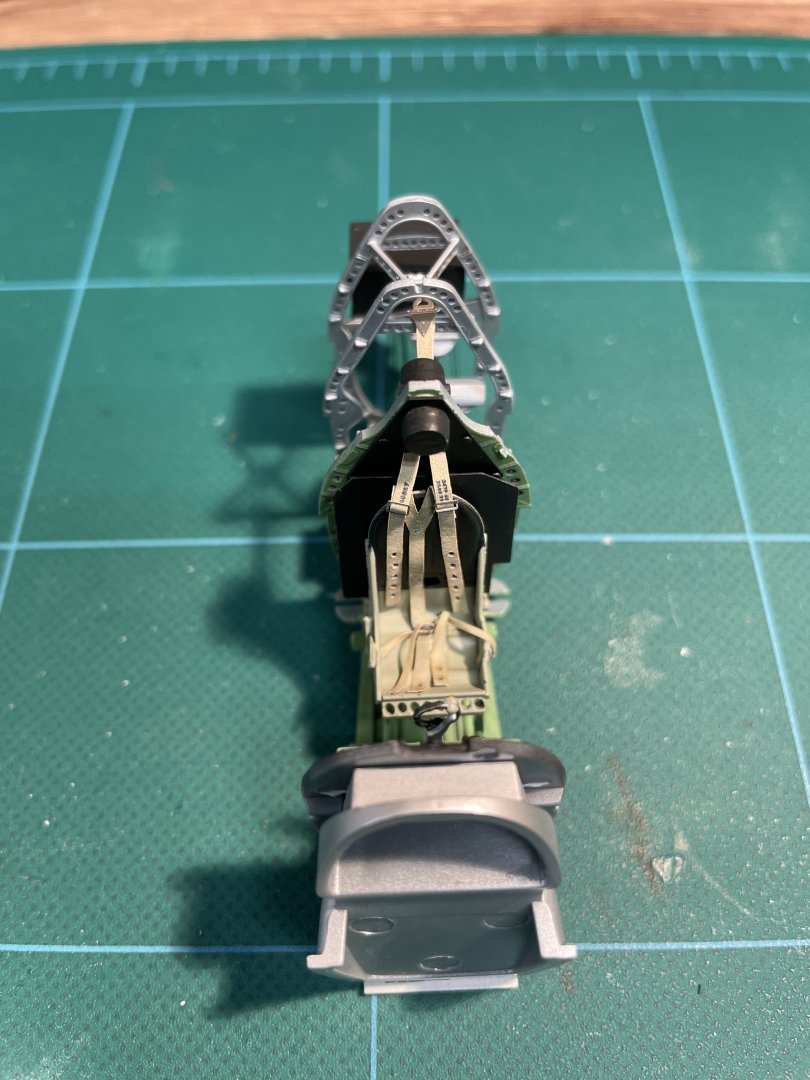
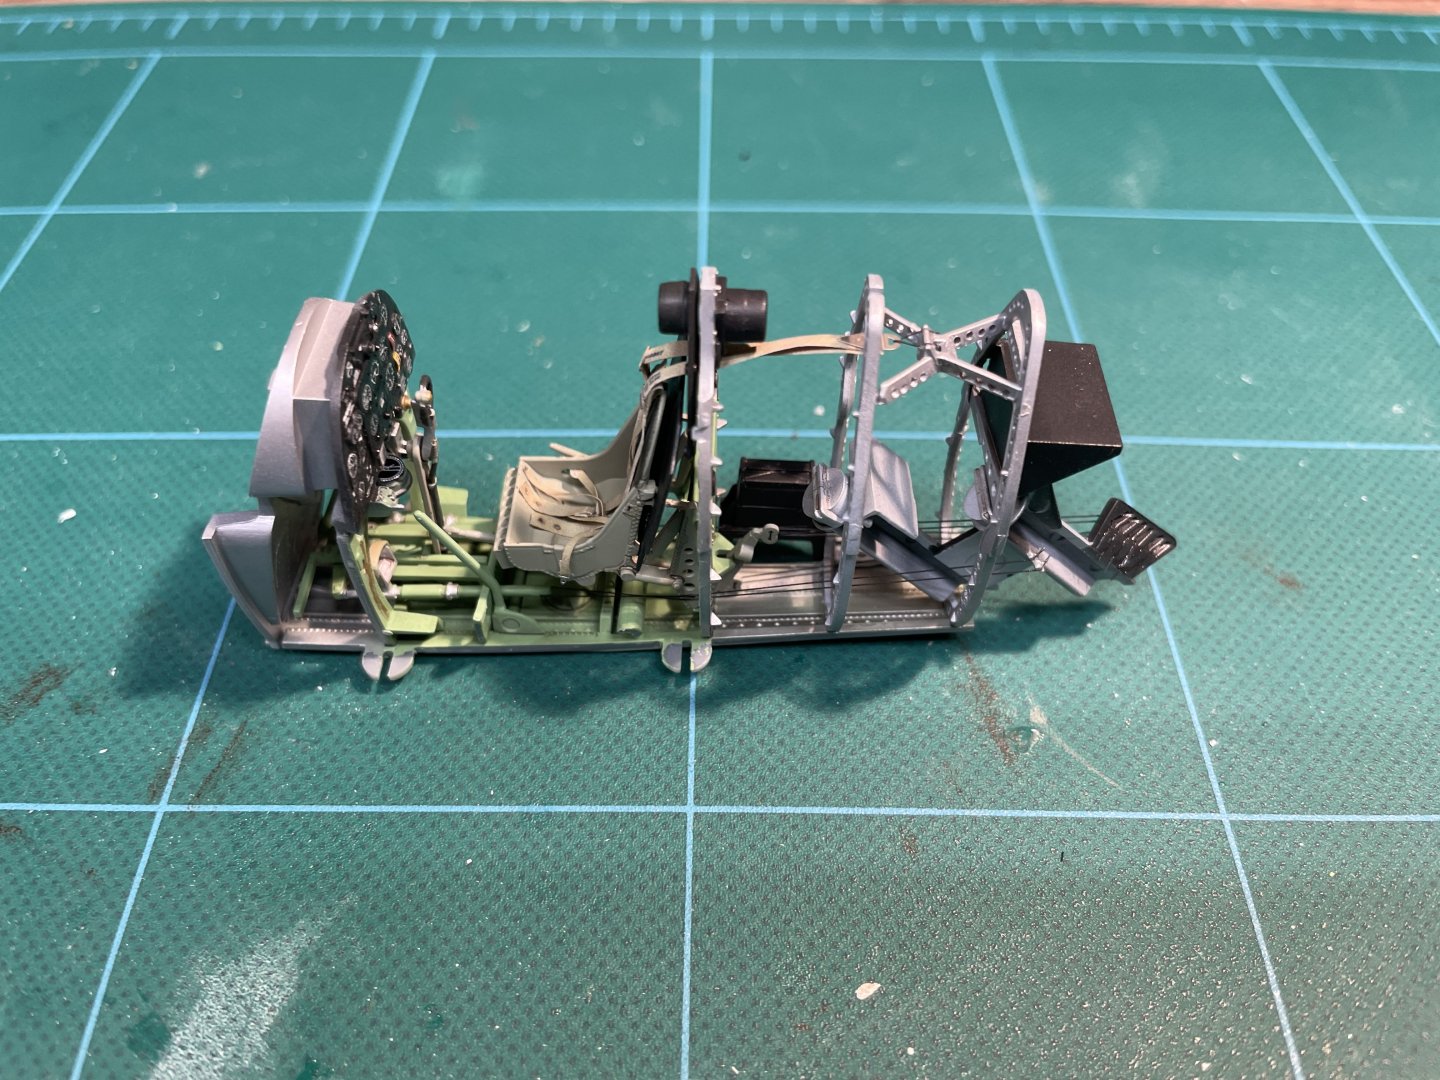
Thanks everyone for their kind comments and interest and apologies for the giant gap in posting. I've had lots of life and work stuff since the last post almost two months ago. I’ve been getting to the workshop for 15 or 30 minutes a few times each week and haven't been good about taking pictures or posting. It is a beautiful kit, and except for a single non-kit related frustrating setback, has been going together really well. I had tried to use Tamiya panel line wash as a pin wash, and when rubbing off excess with mineral spirits took off some paint. I had gloss coated with alclad clear, which I think is lacquer based (at least I thinned it with lacquer thinner when I sprayed it) and should have been OK. Not sure what happened. Next time I try it, I will use Tamiya x-20 clear gloss. Should work fine over a gloss from the same brand. I was able to touch up the areas with a brush in a way that came out OK. That was the major victory. For me Tamiya paints airbrush beautifully, but I never have been able to brush them well. I tried Tamiya retarder instead of thinner, and with it the paints flow beautifully with a brush. The air tank on the right sidewall was hand brushed and to me looks almost airbrushed, and 10x better than any of my previous hand brushing efforts. The rigging is modelkasten .6 elastic line (not sure what it is .6 of, but it is .13mm, which is about right for the model). I had previously used Uschi line. The modelkasten is stiffer, which makes it much easier to work with – very happy with it as well. Seatbelts are HGW fabric belts. From reading some of the other build logs, getting the cockpit done is a significant part of the total build. There is a lot going on in it. Mike - it does look like the WNW quality transferred to Kotare. The instrument panel is amazing. ~30 separate decals. The true test will be when I button up the fuselage, which will hopefully happen later today. The test fit was excellent. Dave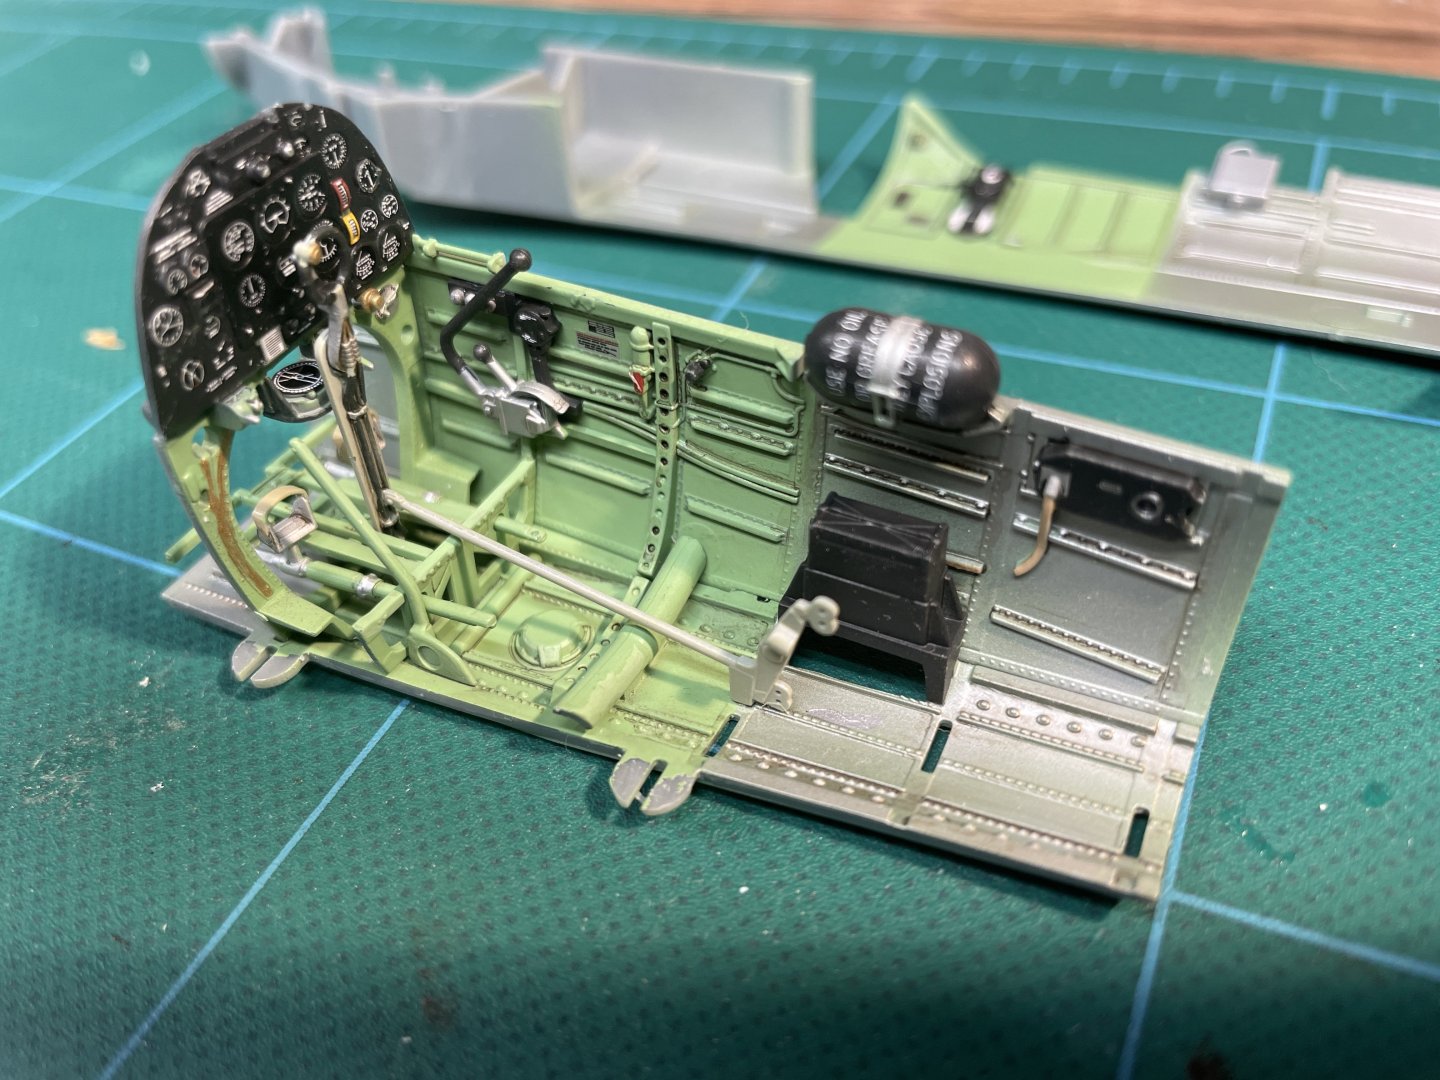

- 35 replies
-
- 24
-
-